
You also want an ePaper? Increase the reach of your titles
YUMPU automatically turns print PDFs into web optimized ePapers that Google loves.
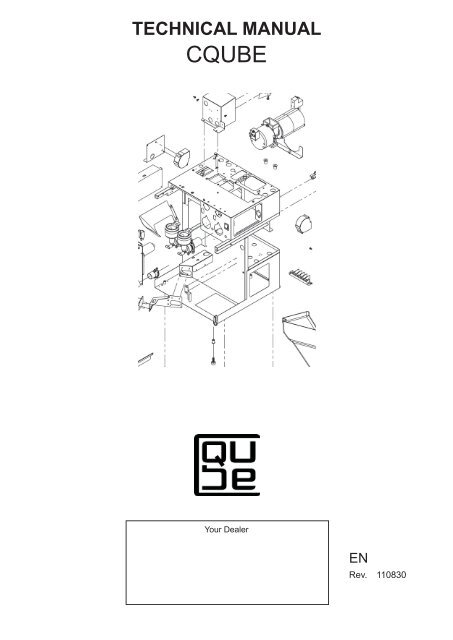
<strong>TECHNICAL</strong> <strong>MANUAL</strong><br />
CQUBE<br />
Your Dealer<br />
EN<br />
Rev. 110830
1. Contents. Technical manual. CQUBE<br />
1. Contents page. 2<br />
2. Overview Technical service card 3<br />
3. Maintenance and care of grinder 4 - 8<br />
4. Cleaning with GRINDZ 9<br />
5. Warning message shown in display 10 - 12<br />
6. Error code description 13 -14<br />
7. Brewing cycle settings 15 - 17<br />
8. Electrical sheme 18<br />
8. Electrical sheme UC and IO Pay card 19<br />
8. Electrical sheme High current 20<br />
9. Exploded view 21-42<br />
10. Spare parts list 22-43<br />
11. Dimension sketch 44<br />
12. Overview of components, cold water 45<br />
12. Overview of components,cold water + CO2 46<br />
13. Service intervals 47<br />
2.
2. Overview: Technical Service Card CQUBE<br />
<strong>TECHNICAL</strong> SERVICE CARD.<br />
Insert the card with the chip upwards, according to the illustration.<br />
The display will show the Service Menu, Jug Beverage and you can now browse<br />
forwards through the menu.<br />
Service Menu<br />
Jug Beverage<br />
<strong>TECHNICAL</strong> SERVICE CARD Item number: 1602693.<br />
Is used for cleaning and setting jug beverages.<br />
The user card is supplied by your dealer.<br />
For complete menus<br />
See Programming manual.<br />
To use the machine again. Remove the card and keep it in a safe place.<br />
3.
3. Maintenance and care of grinder EK21 CQUBE<br />
bean<br />
container<br />
Grinder<br />
Grinder<br />
dispenser<br />
4.<br />
Bean valve
3. Maintenance and care of grinder EK21 CQUBE<br />
1. Periodic maintenance. grinder EK21<br />
- Each month: Clean silicon outlet, grinding house and grinding discs.<br />
- Monthly cleaning of grinder using GRINDZ cleaning tablets (item no. E1001001).<br />
- In case of blockage: cleaning, if necessary detaching of rotating carrier.<br />
2. Safety<br />
Please read and observe the following service instructions carefully. Non-observance<br />
can result in damage to the grinder as well as in healththreatening risks for the user.<br />
All installations shall been done by an qualifi ed personnel.<br />
2.1 Symbols<br />
Safety instruction:<br />
In case of non-observance, extreme risk of accidents exists.<br />
General instruction<br />
In case of non-observance, the device can become<br />
damaged or optimum operation not be guaranteed.<br />
2.2 Safety instructions<br />
The grinder is only allowed to be used to grind whole coffee beans.<br />
Ground coffee is never allowed to be fi lled into the input-shaft.<br />
Do not carry out any modifi cations or changes on the grinder. In case for<br />
non-observance, the manufacturer shall be liable for resulting damain no<br />
case whatsoever.<br />
Never put your fi ngers or objects into the rotating grinding mechanism<br />
inside the input-shaft.The grinder must not be operated when turning<br />
parts are accessible!<br />
Make sure, that the power cannot be turned on when working on the<br />
built-in grinder!<br />
In order to avoid damages, do not use power tools or cordless electric<br />
screwdrivers for any work on the grinder.<br />
5.
3. Maintenance and care of grinder EK21 CQUBE<br />
3. Every month.<br />
Approximately every month the grinder housing and spout should be inspected for<br />
coffee residues and obvious damages. In case of too much coffee residues around the<br />
spout, check if the silicone fl apper inside the spout is in place.<br />
Proceed as follows:<br />
3.1 Remove bean container. Remove all coffee residues from the spout and the<br />
grinder housing by grinding through all coffee beans and using a vacuum<br />
cleaner to remove all residues.<br />
3.2 Remove the three Allen screws (A) in the<br />
grinder housing lid.<br />
3.3 Carefully detach the grinding housing. Fig.1.<br />
Note its position for correct reassembly.<br />
Do not alter the adjustment of the grinding<br />
discs.<br />
A<br />
B<br />
6.<br />
B<br />
A<br />
Fig.1.<br />
3.4 Clean the inside of the grinder housing and the outside of the disc carrier with a<br />
soft brush. Check the correct position of the silicon fl apper and the spout.<br />
(see chapter 6 and 6.5)<br />
3.5 When reassembling the grinder housing, again check for the correct position<br />
and do not alter the grind adjustment of the discs. Fasten the three Allen screws.<br />
4. Removing the rotating carrier.<br />
Each third year or after 50000 cups the grinding discs should be exchanged<br />
to guarantee constant grinding capacity and accurate dosing.<br />
Proceed as follows:<br />
4.1 Remove the grinder casing and the rotating carrier. Loosen the left threaded nut by<br />
turning it clockwise (A ) Fig. 2.<br />
4.2 Remove the worn-out grinding discs by detaching the slotted screws. (B) Fig.2.<br />
Fig.2.
3. Maintenance and care of grinder EK21 CQUBE<br />
4. Removing the rotating carrier. (continuation).<br />
4.3 Clean the surfaces of the seats and the new discs.<br />
In case of coffee residues left between disc carrier and new disc, the<br />
discs will not run parallel and the grinding performance will deteriorate.<br />
4.4 Mount the new rotating grinding disc.NOTE! The grind adjustment has to be modifi ed<br />
after changing the discs. See chapter 5 for new basic adjustment.<br />
5. Basic adjustment of the grinding fi ness.<br />
5.1 Loosen grinder housing.<br />
5.2 Press the adjustment screw while turning it clockwise until the milling blades touch.<br />
Check that they are touching by turning the container manually. The blades are touching<br />
when you hear a scratching sound.<br />
C<br />
C<br />
C<br />
Fig.3.<br />
5.3 Press and turn the adjustment screw counterclockwise 20 notches for the basic setting<br />
(approx. 0.5 mm).<br />
5.4 Reassemble grinder house.<br />
6. Exchange of the silicone fl apper in the spout.<br />
If the silicon fl apper is damaged or out of place it has to be replaced respectively refi<br />
tted to the housing.<br />
Proceed as follows:<br />
C Fig.3.<br />
6.1 If possible: remove coffee residues (close bean container, grind empty, vacuum cleaner).<br />
6.2 Loosen the set screw at the front of the grinder housing. Fig.4.<br />
7.
3. Maintenance and care of grinder EK21 CQUBE<br />
6. Exchange of the silicone fl apper in the spout. (continuation).<br />
Fig.4. Fig.5.<br />
6.3 Carefully pull out the spout. (D).Fig.5.<br />
6.4 Take out silicone fl apper (E) which is placed in a groove inside the spout bore, put in the<br />
new silicone fl apper<br />
6.5 Reassembling the spout (D) and silicone fl apper (E) by bringing pressure on the spout<br />
tube to make sure that the silicone fl apper (E) will be fi xed correctly. See Fig.4.<br />
7. Correction of the adjustment.<br />
In case that the fi neness of the ground coffee should be changed, the adjustment<br />
shaft is accessible through a bore from the front of the grinder housing.<br />
7.1 Press and simultaneously turn the adjustment bolt anticlockwise one or two notches for<br />
coarser coffee grounds<br />
7.2 Press and simultaneously turn the adjustment bolt clockwise one or two notches<br />
for fi ner coffee grounds.<br />
7.3 After performing the grind adjustment, run 2 -3 cups of coffee through in order to<br />
achieve the current settings.<br />
1<br />
1 = Screw driver<br />
2 = Adjustment bolt<br />
3 = Adjustment pinion<br />
4 = Locking pin<br />
8.<br />
1<br />
2<br />
E<br />
D<br />
F<br />
3 4
4. Cleaning with GRINDZ cleaning tablets. Every month<br />
3. Cleaning with GRINDZ cleaning tablets, Every month<br />
(Product no. E1001001)<br />
Do the following:<br />
Open the door.<br />
Remove the brewer (in connection with rinsing) and close the lid on the bean canister.<br />
Insert card in the card reader, scroll to HARDWARE TEST and press enter, then<br />
scroll to canister 1.<br />
1. Start the grinder by pressing Enter.<br />
2. Run until no more coffee grinds come out of the grinder.<br />
3. Remove the bean canister and fi ll with one cap full of GRINDZ tablets.<br />
4. Re-place the bean canister.<br />
5. Start the grinder by press the Enter button. (To stop grinder press Enter button.)<br />
6. Run until no more cleaning powder come out of the grinder.<br />
7. Open the lid of the bean canister and press the Enter button for coffee.<br />
8. Reassemble the brewing mechanism.<br />
Tips: Keep a cup under the grinder outlet during the cleaning process.<br />
9.
5. Warning message shown on display CQUBE<br />
Message on display:<br />
Display shows<br />
Hardware Error: Hardware error<br />
Not available Drink cannot be selected as pot.<br />
Heating Water Low temperature in the water tank, the machine is<br />
heating up (blocked)<br />
Please Wait...<br />
Low Water Level Low water level in water tank.<br />
Press Enter Key<br />
Filling Water The machine is fi lling water.<br />
Please wait<br />
Select Product<br />
Temp:<br />
Strength:<br />
Jug Beverage<br />
Jug Mode<br />
Cups:<br />
Energy save mode Energy-saving mode<br />
Can Empty Concentrate is empty<br />
Warning The temperature is low, it is still possible to dispense drink.<br />
Low Temperature<br />
Low Temperature The temperature is low, the machine is blocked.<br />
Blocked<br />
Empty Drip Tray The drip tray is full of water<br />
Overcurrent<br />
Water Level<br />
10.
5. Warning message shown on display CQUBE<br />
Message on display:<br />
Display shows<br />
Unknown Error Unknown error<br />
Low Water Level The water level in the water tank is low, it is not possible to dispense drink.<br />
Blocked<br />
Can Empty Out of concentrate, Blocked<br />
Blocked<br />
Heating Water Temperature low<br />
Open Brewer Open brewing mechanism<br />
Check The water has not reached the correct level in the water tank.<br />
Water Supply Check the water tap, restart the machine.<br />
Empty Wastebox The waste box is full, open the door and empty out the grounds.<br />
When you close the door, press E to reset the counter. Selectable<br />
in main programme.<br />
ERROR Check, Level sensor.<br />
Level Pins<br />
Change Brewer Filter The brewing fi lter is clogged. The fi lter needs replacing or<br />
cleaning.<br />
Place Cup If the cup sensor has been activated, this is shown if no cup<br />
has been placed on the drip tray.<br />
Bev. Disabled The drink has been disabled.<br />
Please Wait... Please wait<br />
Clean Filter Clean fi lter<br />
Cleaning Hot Key Clean. panel active<br />
Door Open<br />
11.
5. Warning message shown on display CQUBE<br />
Message on display:<br />
Display shows<br />
Change The water fi lter needs replacing; press the E button to<br />
Water fi lter reset the counter.<br />
Open Door Open door Fill clean. agent<br />
Load Detergent<br />
Load Detergent Load clean. agent Close door<br />
Close Door<br />
Place Jug Place pot Press Enter<br />
Enter To Start<br />
Cleaning Brewer Clean brewer mech Time remaining<br />
Time Left<br />
Rinsing Brewer Rinsing brewing mech Cycles left:<br />
Cycles Left<br />
Cleaning Paused Cleaning paused Close door<br />
Close Door<br />
Please Wait... Please wait<br />
12.
6. Error code description. CQUBE<br />
Error code description:<br />
Overcurrent<br />
Group 1:1 = Brewing unit (0,95A limit)<br />
Group 1:2 = Other components (Fan, Valves, Relays Etc..) (1,5A limit)<br />
Group 1:3 = Mixer 1 (3,5A limit)<br />
Group 1:5 = Mixer 2 (3,5A limit)<br />
Message is shown if one of the software fuses have been trigged. Caused by a<br />
component using too much current (A). You can run each component in the<br />
“Hardware Test” menu and the message will show when you turn on the component<br />
that is using too much current.<br />
ERROR: Water Supply<br />
Message will show if the inlet valve has been open for more than 3 minutes and the<br />
machine still have not acquired correct water level<br />
Action: Check that the water to the machine is turned on, Check the levelsensor, test<br />
function of the inlet valve in “Hardware Test”<br />
ERROR: Tempsensor<br />
Message will show if the NTC sensor is broken or is out of range of its resistance curve,<br />
also if cables have loosened from its connectors.<br />
Action: Replace NTC sensor, check cable connection on the NTC and PCB board.<br />
ERROR: Levelpins<br />
Message will show if the cables to the water level high & low have been connected to the wrong<br />
levelpin.<br />
Action: Swap cables to the levelsensor<br />
ERROR: Check Heater<br />
Message will show if the machine have not reached working temperature within 14 minutes from<br />
startup.<br />
Action: Check Overheating protection, cables to the element, solid state relay, signal from<br />
IO-board to solid state when you know the machine should heat, you can also force the<br />
element to run in “Hardware Test”.<br />
ERROR: BREWER C.Door press E<br />
Message will show when you interrupt a brewing cycle, eg. open the door when the machine<br />
is producing coffee. The machine needs to reach home-position before producing new drink.<br />
Action: Press E, check door sensor, brewmec sensor<br />
Clean brewfi lter<br />
Message will show if the brewer motor uses more than 0,95A<br />
Action: Check brewfi lter if clogged, brew chamber is mounted in wrong position, brewer motor<br />
is broken.<br />
13.
6. Error code description. CQUBE<br />
Error code description:<br />
Peripheral Hardware Error<br />
This message will appear if you have loaded a faulty recipe into the machine, the<br />
IO-Board is broken and does not get connection with the UcMerisc board.<br />
Usually this message appears if you eg. have loaded a standard recipe into a machine<br />
using pay system.<br />
Make sure you are using the right recipe and reload.<br />
Memory Error: Reload Recipes<br />
There is no recipe loaded on the UcMersic board. Transfer of the recipes have been<br />
interrupted and not completed in UcLoader. memory on the UcMersic board is broken.<br />
Fatal Error Contact Service<br />
Multiple Overcurrent messages at the same time, or shortcut on the IO-Board,<br />
try to run components in “Hardware Test” and locate faulty components, replace the<br />
IO-Board if no one is found.<br />
Smartcard Error: Unknown Card<br />
The smartcard is not programmed, chip on the smartcard is damaged, card reader is broken<br />
or broken cable between card reader and UcMerisc board.<br />
Action: Insert and remove the card repeatedly, if the message is shown every time, try another<br />
card. If the error remains replace the card reader.<br />
Smartcard Error: Wrong Pincode<br />
Chip on the smart card have been damaged, replace card<br />
Pay Error Type XXX<br />
IO-Pay board is reporting error from the payment device, check coinchanger or cashfl ow device.<br />
14.
7. Brewing cycle settings CQUBE<br />
Brewing cycle settings:<br />
Aeration<br />
- Sum of sections from position 1 to 3 = 100%<br />
- Adjustment in % (0-100%), applies to sections from position 2 to 3<br />
- Affects stirring in coffee bed > Taste: Acidity<br />
Pre brew<br />
- Pause at section between positions 1 and 3<br />
- Adjustment (0-10 sec) at step in 0.1 sec<br />
- Affects the amount of acid from stirring> Taste: Acidity<br />
Extraction<br />
- Pause between positions 2 and 4<br />
- Adjustment (0-20 sec) at step in 0.1 sec<br />
- Affects total contact time > Taste: Body<br />
Press time<br />
- Sum of sections from position 3 to 5 = 100%<br />
- Adjustment in % (0-100%), applies to sections from position 3 to 4<br />
- Affects the consistency of the grounds > Cleanliness<br />
- Affects the strain on plunger and cylinder > Operating reliability: Vacuum pressure in cylinder<br />
Decompress time<br />
- Pause between positions 3 and 5<br />
- Adjustment (0-10 sec) at step in 0.1 sec<br />
- Affects the consistency of the grounds > Cleanliness<br />
- Affects the strain on plunger and cylinder > Operating reliability: Vacuum pressure in cylinder<br />
Empty time<br />
- Pause between positions 5 and Home position<br />
- Adjustment (0-10 sec) at step in 0.1 sec<br />
- Affects the amount of fi nished coffee that comes out of the cylinder<br />
> Cleanliness / Operating reliability<br />
After Empty time the brewing continues until the micro switch is activated - Home position<br />
1<br />
Home Position<br />
4<br />
Decompress<br />
2<br />
Pre brew<br />
15.<br />
3<br />
Extraction<br />
5<br />
Emptytime
7. Brewing cycle settings CQUBE<br />
REMEMBER<br />
For fresh brew machines, the coffee should have the coarsenessautomatic grinding.<br />
Grinder settings for automatic grinding are: grinding blades together and set 8 steps back.<br />
The optimal total contact time between water and coffee for automatic grinding is 30 sec.<br />
The basic settings for coffee were defi ned in cooperation with ECBC in Oslo, to ensure<br />
quality in the cup.<br />
Water amount 170 ml (before contact with coffee)<br />
Coffee amount 11 g (requires above grinder settings)<br />
Aeration 70%<br />
Pre brew 3.8 sec<br />
Extraction time 11.5 sec<br />
Press time 50%<br />
Decompress time 2.0 sec<br />
Empty time 6.0 sec<br />
TIPS<br />
To compensate for lower Aeration (higher %) Pre brew can be increased to a certain degree.<br />
Increased Pre brew time means that more water and coffee are added before the plunger<br />
reaches the top position.<br />
This produces a better blend.<br />
Adjust Pre brew in steps of 0.1 - 0.2 sec at a time; this quickly provides results in terms of taste.¤<br />
Varies for different coffee types, however.<br />
Increased Extraction time produces more body, but only to a certain degree. Too much time<br />
makes the coffee over-extracted, which produces a very bitter taste.<br />
To little Extraction time means the coffee is under-extracted, leaving little aftertaste.<br />
If you wish to cut down on the total brewing cycle time, you want the taste<br />
to undergo minimal change. If you shorten the Extraction time, you can compensate somewhat<br />
by either putting the grinder on a fi ner coarseness setting or increasing the coffee dose.<br />
You then have to test the coffee carefully, to make sure it is not too strong.<br />
When you have tasted several cups of coffee, it is very easy to misjudge the taste.<br />
For increased dose, the taste is very accurate when you swallow, but the aftertaste disappears<br />
and instead it is harsh on the throat.<br />
If you increase the volume too much, the grounds can become soaked. To<br />
fi x this, you must increase the Press time. This causes the plunger to lower more before<br />
the pause (position 3-4); the result is a higher vacuum effect in the cylinder and more fi nished<br />
coffee is sucked out through grounds. At the same time, you should increase<br />
the Decompress time, to allow the coffee to penetrate the fi lter before<br />
empty position is reached and the vacuum pressure in the cylinder is released.<br />
Remember to increase the Empty time so all the coffee can drain out of the cylinder.<br />
16.
SYMPTOM CAUSE SOLUTION<br />
7. Brewing cycle settings CQUBE<br />
- Run the cleaning programme and<br />
replace the fi lter if necessary.<br />
- Lower the Aeration %. Test a cup.<br />
Increase the Pre brew to compensate if<br />
- Hard water. A high surface tension makes<br />
it diffi cult for the coffee to absorb water.<br />
- Very fresh coffee often takes a little longer<br />
to absorb water<br />
The water and coffee splash out<br />
of the brewing chamber during<br />
the aeration process.<br />
SYMPTOM - CAUSE - SOLUTION<br />
necessary.<br />
- Run the cleaning programme and<br />
replace the fi lter if necessary.<br />
- Increase the Pre brew setting if the<br />
coffee lacks character/acidity. 0.1 - 0.2<br />
sec makes a very big difference.<br />
- Lower the Pre brew setting for the opposite<br />
effect.<br />
- Empty the canister and grinder, clean<br />
- The acidity setting is too low/high.<br />
- The coffee is too old.<br />
The coffee either lacks or has<br />
too much character.<br />
and refi ll coffee.<br />
- Run the cleaning programme and<br />
replace the fi lter if necessary.<br />
- Increase the extraction time if necessary.<br />
- Increase the Press time and/or Decompress<br />
time if necessary.<br />
- Check grinder setting /clean.<br />
- Check the Strength setting.<br />
- Check the Volume setting.<br />
- Inspect the brewing chamber for<br />
cracks.<br />
- The fi lter is clogged.<br />
- The water is hard. A high surface tension<br />
makes it diffi cult for the coffee to absorb<br />
water and for the water to pass through the<br />
fi lter.<br />
- Very fresh coffee often takes a little longer<br />
to absorb water<br />
- The coarseness setting is too fi ne.<br />
- Coffee dose is too high.<br />
- The volume setting is too high.<br />
- The brewing chamber may be cracked.<br />
- The cylinder may be cracked.<br />
The grounds are very soggy or<br />
almost watery when the brewer<br />
opens.<br />
17.<br />
- Inspect the cylinder for cracks.<br />
- Run the cleaning programme and<br />
replace the fi lter if necessary.<br />
- Check grinder setting /clean.<br />
- Check the Strength setting.<br />
- Remove the brewing mechanism,<br />
rotate, adjust according to the manual<br />
instructions.<br />
- The fi lter is clogged<br />
- The coarseness setting is too fi ne.<br />
- The coffee dose is too high.<br />
- The brewing mechanism setting needs<br />
adjustment.<br />
The brewing mechanism sounds<br />
very strained.<br />
- Remove the brewing mechanism,<br />
rotate, adjust according to the manual<br />
instructions.<br />
- The brewing mechanism setting needs<br />
adjustment.<br />
- The grounds scraper is damaged.<br />
The grounds scraper cannot<br />
remove all the grounds.<br />
- Replace the grounds scraper.<br />
- Remove the brewing mechanism, rotate<br />
until it opens, pull out and insert the<br />
brewing chamber. Check that it follows<br />
the cycle.<br />
- The brewing chamber is incorrectly installed.<br />
The grounds scraper is still on<br />
one side of the brewing chamber<br />
during the brewing cycle.
8. Electrical diagram. CQUBE<br />
18.
8. Electrical diagram. UC Pay<br />
19.
8. Electrical diagram. High Power Connection<br />
20.
9. Exploded view. Door / Front CQUBE<br />
1<br />
2<br />
7<br />
8<br />
9<br />
3 4<br />
10<br />
5<br />
21<br />
22<br />
6<br />
21.<br />
11<br />
20<br />
19<br />
18<br />
17<br />
16<br />
15<br />
14<br />
13<br />
12
10. Spare parts list. CQUBE<br />
Description; Art. no. Pos. no. Amount/unit<br />
Valid for page 21 Door / Front<br />
Bean container window (high) 1105530 1 1<br />
Bean container window (low) 1105531 2 1<br />
Top Lid 1105533 3 1<br />
Frame for card reader 1505035 4 1<br />
Card Reader 1602697 5 1<br />
Slide latch 1202495 6 3<br />
Chrome ring 1105532 7 2<br />
Outlet drip tray 1105534 8 2<br />
Drip tray 1105528 9 1<br />
Drip tray insert 1102035 10 1<br />
Drip tray extension 1105529 11 1<br />
Spiral 120229 12 2<br />
Cup stand 1102036 13 1<br />
Light emitting diode white 1608708 14 1<br />
Light emitting diode red 1608710 15 1<br />
Cup sensor 7140011 16 1<br />
Outlet angled 1201415 17 1<br />
Display 1604122 18 1<br />
Lock with nut 120253 19 1<br />
Fastener for circuit board 1203416 20 4<br />
User Card (green 1602692 21 1<br />
Technical Service 1602693 22 1<br />
22.
9. Exploded view. Machine CQUBE<br />
26<br />
25<br />
21<br />
18<br />
20<br />
1<br />
2<br />
Säkring<br />
5 AT<br />
3<br />
5<br />
4<br />
6<br />
23.<br />
14<br />
17<br />
12<br />
19<br />
7<br />
23<br />
22<br />
8<br />
24<br />
11<br />
13<br />
15<br />
16
10. Spare parts list. CQUBE<br />
Description; Art. no. Pos. no. Amount/unit<br />
Valid for page 23 Machine<br />
Brew mechanism 710075 1 1<br />
Electronic card IO - TE 1604111 2 1<br />
Fuse 5A T 1604384 -- 3<br />
Power supply 150W 1031652 3 1<br />
Front, bean container high 1105498 4 1<br />
Front, bean container low 1105499 5 1<br />
Centrifugal Fan, 24V 0,24A 1604151 6 1<br />
Lid bean container 1105497 7 1<br />
Frame for lid, bean container 1105496 8 1<br />
Grinder 1604752 11 1<br />
Relay 1pol 160243 12 1<br />
Socket 160246 12 1<br />
Capacitor 12 μF 832392 12 1<br />
Main socket 160570 13 1<br />
Power cord Europe 160565 14 1<br />
Valve double 2,5L/min. 1206281 15 1<br />
Centrifugal Fan, 24V 0,18A 1604152 16 1<br />
Connector 160549 17 1<br />
Waste box 1105359 18 1<br />
Switch 2 pol. 160801-04 19 1<br />
Inlet hose 150541 20 1<br />
Micro switch 710070 21 1<br />
Waste funnel 1105357 22 1<br />
Waste box base cabinet 1105317 23 1<br />
Solid state 1604201 24 1<br />
Lock complete (door) 120253 25 1<br />
Key, (door) 1202531 26 2<br />
Options:<br />
Water fi lter + patron complete. 1505360 - 1<br />
Filter head 1505362 - 1<br />
Filter cartridge 1505361 - 1<br />
24.
9. Exploded view. Tank CQUBE<br />
6<br />
5<br />
20<br />
1<br />
8<br />
19<br />
7<br />
18 17<br />
25.<br />
4<br />
15<br />
9<br />
3<br />
10<br />
11<br />
2<br />
12<br />
13<br />
14<br />
16
10. Spare parts list. CQUBE<br />
Description; Art. no. Pos. no. Amount/unit<br />
Valid for page 25 Tank<br />
Tank complete 7140019 1 1<br />
Water tank 5L + lid 260141 2 1<br />
Insulation for refrigeration unit 1201292 3 1<br />
Insulation bottom 120131 4 1<br />
Outlet valve 24V 1206289 5 1<br />
Seal for outlet valve 1561010 6 1<br />
Element 2200W 1601311 7 1<br />
Gasket water tank 1561012 8 1<br />
Double seal level sensor 1605362 9 1<br />
Sensor pin, short 1205302 10 1<br />
Sensor pin, long 1205301 11 1<br />
Steam hose 1561015 12 1<br />
NTC compl. belong 711000 13 1<br />
Seal for NTC thermistor 1605361 14 1<br />
Drainage tube 1561007 15 1<br />
Inlet hose 1561014 16 1<br />
Motoraxle for motor gear 1604614 17 3<br />
Motor gear, without axle 1604612 18 3<br />
High limit control 220220 19 1<br />
Silicone hose (sales by metre) 150501 20 -<br />
26.
9. Exploded view. Mixing system CQUBE<br />
2<br />
4<br />
3<br />
1<br />
1<br />
13<br />
14<br />
5 6 7<br />
9<br />
8<br />
27.<br />
silicone hose sales<br />
by metre<br />
14<br />
10 11 12<br />
1
10. Spare parts list. CQUBE<br />
Description; Art. no. Pos. no. Amount/unit<br />
Valid for page 27 Mixing system<br />
Hose adaptor, mixing system 1604836 1 5<br />
Outlet brew mechanism 1201416 2 1<br />
Outlet brew mechanism, extension 1201417 3 1<br />
Outlet angled 1201415 4 3<br />
Hose brew mechanism - fan 1505034 5 1<br />
Hose mixing bowl - fan 1505033 6 1<br />
Valve double outlet, CO2 1104525 7 1<br />
Valve double outlet, cold water 1104534 8 1<br />
Brewing motor complete 1201432 9 1<br />
Brewer dock white 120144 10 1<br />
Pin 3,5x36 1201453 11 1<br />
Pin 2,0x36 1201454 12 1<br />
Micro switch V5J (FB brew engine) 160829 13 1<br />
Silicone hose (sales by metre) 150501 14 -<br />
28.
9. Exploded view. Mixing bowl CQUBE<br />
2<br />
1<br />
3<br />
4 5<br />
11<br />
29.<br />
silicone hose sales<br />
by metre<br />
12<br />
10 9 8<br />
6<br />
7
10. Spare parts list. CQUBE<br />
Description; Art. no. Pos. no. Amount/unit<br />
Valid for page 29 Mixing bowl<br />
Angle for mixing bowl 1206705 1 2<br />
Mixing bowl 1206704 2 2<br />
Steam trap 1206707 3 2<br />
Bulkhead adaptor 1206706 4 2<br />
O-ring 120638 5 2<br />
Motor whipper plate 1604592 6 2<br />
Whipper motor 24V Complete 7001111 7 2<br />
(incl. slinger disc, motor whipper plate)<br />
Slinger disc 1604804 8 2<br />
Mounting plate 1206702 9 2<br />
Grommet for whipper pin 120655-02 10 2<br />
Whipper 1206703 11 2<br />
Silicone hose (sales by metre) 150501 12 -<br />
30.
9. Exploded view. Water + CO2 CQUBE<br />
water + CO2<br />
6<br />
9<br />
8<br />
10<br />
15<br />
4<br />
2<br />
3<br />
1<br />
17<br />
8<br />
31.<br />
6<br />
7<br />
16<br />
19<br />
12<br />
13<br />
14<br />
11<br />
5<br />
18
10. Spare parts list. Chiller unit water + CO2 CQUBE<br />
Description; Art. no. Pos. no. Amount/unit<br />
Valid for page 31<br />
P 146 Chiller unit 1104801 - 1<br />
Compressor ELECTROLUX GD 40 MB 1104580 1 1<br />
Clixon for GD40MB 1104581 2 1<br />
Start capacitor for GD40MB 1104582 3 1<br />
Startrelay for GD40MB 1104583 4 1<br />
Condenser 101150 1104584 5 1<br />
JG PM060806E 1104585 6 3<br />
Non return valve 1104586 7 1<br />
JG PM090612E 1104587 8 2<br />
JG PM0208E 1104588 9 1<br />
JG SM030808S 1104589 10 1<br />
Filter dryer 1104590 11 1<br />
Fan motor ALEXMAR 5W 1104591 12 1<br />
Fan blade 1104592 13 1<br />
Fan holder 1104593 14 1<br />
Thermostat RANCO K50 L1319 1104594 15 1<br />
Motorpump 1104605 16 1<br />
Solenoid valve 1104598 17 1<br />
JG PM4508F4S 1104599 18 1<br />
Electronic box 1104601 19 1<br />
32.
9. Exploded view. Chiller unit in machine CQUBE<br />
Chiller unit, water<br />
4<br />
3<br />
9<br />
2<br />
5<br />
33.<br />
1<br />
10<br />
6<br />
7<br />
8
10. Spare parts list. Chiller unit water CQUBE<br />
Description; Art. no. Pos. no. Amount/unit<br />
Valid for page 33<br />
Chiller unit, cold water 1104802 - 1<br />
Start capacitor for GD 40 MB 1104582 1 1<br />
Thermostat K-50 L3019 1104594 2 1<br />
Filter dryer 10g 6,2-2,5 1104590 3 1<br />
Condenser STFT 10215 MINI 1104609 4 1<br />
Clixon 1104581 5 1<br />
Fan SUNON MBT 1104611 6 1<br />
Cooling block 1104612 7 1<br />
JG corner 8x8 (1037) 1104613 8 1<br />
Relay 1104583 9 1<br />
Compressor GD 40 MB 1104580 10 1<br />
34.
9. Exploded view. Grinder EK21 CQUBE<br />
9 10<br />
18 13 14 12 11 8 1<br />
19<br />
35.<br />
23<br />
20<br />
24<br />
7 3 6 4 5 2<br />
17 16 15<br />
21<br />
22
10. Spare parts list. Grinder EK21 CQUBE<br />
Description; Art. no. Pos. no. Amount/unit<br />
Valid for page 35 Grinder<br />
Inlet housing 838916 1 1<br />
Slotted pan head screw - M4x12 838753 2 1<br />
Adjustment shaft 837992 3 1<br />
Adjustment pinion 837991 4 1<br />
Pressure spring 838709 5 1<br />
Allen set screw - M5x10 839230 6 1<br />
Slotted cylinder head screw M4x50 838704 7 3<br />
O-ring 839252 8 1<br />
Worm shaft 837863 9 1<br />
Allen screw M4x4 - stainless steel 838869 10 1<br />
Grinding disc carrier 837985 11 1<br />
Fixed grinding disc 837247 12 1<br />
Grinding disc carrier - rotating 838141 13 1<br />
Rotating grinding disc 837248 14 1<br />
Pan head screw DIN 85 M5x8 835579 15 4<br />
Washer DIN 433 - 10,5 stainless steel 839261 16 1<br />
Hexagon nut left-hand thread 838642 17 1<br />
Grinding housing 839259 18 1<br />
Allen screw DIN 912 - M4x45 838876 19 3<br />
Outlet tube, metal 839260 20 1<br />
Allen set screw DIN 916 - M4x10 836503 21 1<br />
Outlet hose, grinder FB + hose clamb 710083 22 1<br />
Silicone disc 839471 23 1<br />
Motor 837932 24 1<br />
36.
9. Exploded view. Brewing mechanism CQUBE<br />
16<br />
15<br />
14<br />
13<br />
12<br />
11<br />
10<br />
9<br />
8<br />
7<br />
6<br />
5<br />
4<br />
3<br />
17 18 19<br />
2<br />
37.<br />
20<br />
1
9. Exploded view. Brewing mechanism CQUBE<br />
29 30<br />
28<br />
27<br />
26<br />
31<br />
32<br />
25<br />
33 34<br />
24<br />
38.<br />
23<br />
22<br />
35<br />
36<br />
21<br />
37<br />
38<br />
39<br />
40<br />
41<br />
42<br />
43
10. Spare parts list. Brewing mechanism CQUBE<br />
Description; Art. no. Pos. no. Amount/unit<br />
Valid for page 37 brew mechanism<br />
Defl ector, Cylinder 4720008 1<br />
Pin, Crank Arm 4720010 2<br />
O-ring piston 4720012 3<br />
Rubber ring piston 4720013 4<br />
Tefl on seal 4720014 5<br />
Plate, Top 4720015 6<br />
Screw, 8 x 1/2, Truss 4720016 7<br />
Cylinder 4720017 8<br />
Plug, vent, Cylinder 4720018 9<br />
Screw, 4-40 x ¼, 4720019 10<br />
Screw, 8-32 x ½, 4720020 11<br />
Assembly Filter 47200213 12<br />
Seal, Brew Chamber 4720022 13<br />
Bar, Latch 4720023 14<br />
Carriage, Wiper 4720024 15<br />
Rod, Carriage, Wiper 4720025 16<br />
Retaining Ring, .250 4720026 17<br />
Wiper, Complete 4720027 18<br />
Brew Chamber 4720028 19<br />
Spring Clip, Latch Bar 4720029 20<br />
Valid for page 38 brew mechanism<br />
Housing, Vertical Rod 4720001 21<br />
Cam, Triple 4720002 22<br />
Unwipe Arm Assembly 4720003 23<br />
Spacer, Wipe Arm 4720004 24<br />
Spring, Wipe Arm 4720005 25<br />
Retaining Ring,TRU ARC 4720006 26<br />
Vevarm 4720007 27<br />
Plate, Ret., Cycle 4720030 28<br />
Plate, Ret., Support 4720031 29<br />
Latch, Block, LHS 4720032 30<br />
Latch, Block, RHS 4720033 31<br />
Retaining Ring 4720034 32<br />
Tube, Outlet, Water 4720035 33<br />
Wrap, Brew Chamber 4720036 34<br />
Shim 0,2 1303501 35<br />
Shim 0,5 1303502 36<br />
Spacer, Sil., 3/16 x .350 x 1.5 4720038 37<br />
Spring, H-Frame 4720039 38<br />
H-Frame 4720040 39<br />
Screw, 8-32 x 3/4, PAN 4720041 40<br />
Pin, Grooved, 3/16 x 1.25 4720046 41<br />
Wipe Arm, Assembly 4720048 42<br />
Vertical Rod, Welded 4720049 43<br />
39.
9. Exploded view. Canisters high/low CQUBE<br />
3 4 4 4<br />
1 2<br />
5<br />
5 5 6<br />
40.
10. Spare parts list. high/low CQUBE<br />
Description; Art. no. Pos. no. Amount/unit<br />
Valid for page 40<br />
Canister high 160 x 400 1204964 1 1<br />
Canister high 67 x 400 1204965 2 3<br />
Lid for 160 canister 1204952 3 1<br />
Lid for 67 canister 1204953 4 3<br />
Concentrate pipe left 120489 5 3<br />
Concentrate pipe right 120493 6 1<br />
Canister low 160 x 400 1204887 1 1<br />
Canister low 67 x 250 1204962 2 3<br />
Lid for 160 canister 1204952 3 1<br />
Lid for 67 canister 1204953 4 3<br />
Concentrate pipe left 120489 5 3<br />
Concentrate pipe right 120493 6 1<br />
41.
9. Exploded view. Bean container/ canisters high/low CQUBE<br />
1 2 2 2<br />
4 4 5<br />
42.<br />
3
10. Spare parts list Bean container/ canisters high/low CQUBE<br />
Description; Art. no. Pos. no. Amount/unit<br />
Valid for page 42<br />
Bean container high 1105494 1 1<br />
Canister high 67 x 400 1204965 2 3<br />
Lid for 67 canister 1204953 3 3<br />
Concentrate pipe left 120489 4 2<br />
Concentrate pipe right 120493 5 1<br />
Bean container low 1105495 1 1<br />
Canister low 67 x 250 1204962 2 3<br />
Lid for 67 canister 1204953 3 3<br />
Concentrate pipe left 120489 4 2<br />
Concentrate pipe right 120493 5 1<br />
43.
11. Dimension sketch. CQUBE<br />
Model CQUBE M CQUBE L<br />
A 879 mm 995 mm<br />
B 420 mm 420 mm<br />
C 565 mm 565 mm<br />
44.
12. Overview of components Cold Water CQUBE<br />
Water IN Water OUT Thermostat<br />
Fan Compressor Cooling block<br />
Condenser Dryer<br />
45.
12. Overview of components Water + CO2 CQUBE<br />
Water IN<br />
Cooling<br />
block<br />
Carbonated<br />
water OUT<br />
Carbon acid IN<br />
Water OUT<br />
Solenoid valve<br />
Thermostat<br />
Gas holder<br />
Carbon dioxide<br />
tube<br />
46.<br />
Pump pressure increase<br />
Electronic box<br />
Fan<br />
Condenser<br />
Compressor<br />
Dryer
13. Service intervals. CQUBE<br />
47.
FOR SERVICE<br />
Please contact<br />
Your dealer<br />
...............................................................................<br />
...............................................................................<br />
...............................................................................<br />
CREM <strong>International</strong> AB<br />
Box 10, Viksgränd 2, SE-670 40 Åmotfors, Sweden<br />
Tel: +46 (0)570-477 00, Fax: +46 (0)570-47719<br />
E-mail: info.se@creminternational.com www.creminternational.com<br />
Art. nr/Art. no. 1740067