Loren Nancarrow and Janet Hogan Taylor - library.uniteddiversity ...
Loren Nancarrow and Janet Hogan Taylor - library.uniteddiversity ...
Loren Nancarrow and Janet Hogan Taylor - library.uniteddiversity ...

Create successful ePaper yourself
Turn your PDF publications into a flip-book with our unique Google optimized e-Paper software.
The<br />
The<br />
Complete Guide<br />
to Gardening<br />
<strong>and</strong> Composting<br />
with Worms<br />
Worm<br />
Book<br />
<strong>Loren</strong> <strong>Nancarrow</strong><br />
<strong>and</strong> <strong>Janet</strong> <strong>Hogan</strong> <strong>Taylor</strong>
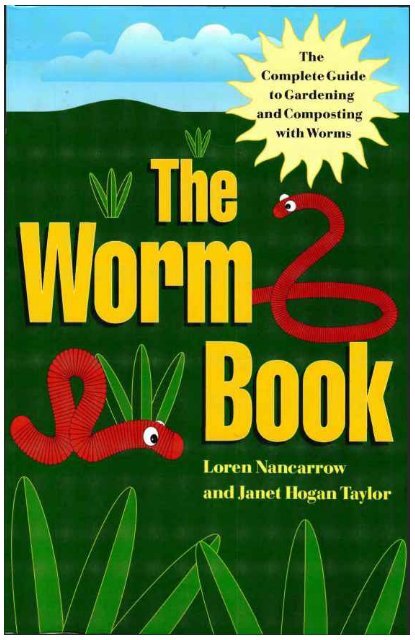
The Worm Book
THE WORM BOOK<br />
The Complete Quide<br />
to Worms in Your Garden<br />
LOREN NANCARROW<br />
AND JANET HOGAN TAYLOR<br />
10<br />
Ten Speed Press<br />
Berkeley, California
© 1998 by <strong>Loren</strong> <strong>Nancarrow</strong> <strong>and</strong> <strong>Janet</strong> <strong>Hogan</strong> <strong>Taylor</strong><br />
All rights reserved. No part of this book may be reproduced in any form, except<br />
brief excerpts for the purpose of review, without written permission of the publisher.<br />
10<br />
Ten Speed Press<br />
P.O. Box 7123<br />
Berkeley, CA 94707<br />
www.tenspeed.com<br />
A Kirsty Melville Book<br />
Distributed in Australia by Simon & Schuster Australia; in Canada by Ten Speed<br />
Press Canada; in New Zeal<strong>and</strong> by Southern Publishers Group; in South Africa by<br />
Real Books; <strong>and</strong> in the United Kingdom <strong>and</strong> Europe by Publishers Group UK.<br />
Text design by Lisa Patrizio<br />
Cover design by Gary Bernal<br />
Illustrations by <strong>Janet</strong> <strong>Hogan</strong> <strong>Taylor</strong><br />
Library of Congress Cataloging-in-Pub|ication Data<br />
<strong>Nancarrow</strong>, <strong>Loren</strong><br />
The worm book: the complete guide to worms in your garden<br />
/ by <strong>Loren</strong> <strong>Nancarrow</strong> <strong>and</strong> <strong>Janet</strong> <strong>Hogan</strong> <strong>Taylor</strong><br />
p. cm.<br />
"A Kirsty Melville book."<br />
Includes index.<br />
ISBN-10: 0-89815-994-6 (pbk.)<br />
ISBN-13: 978-0-89815-994-3 (pbk.)<br />
1. Earthworms. 2. Earthworm culture.<br />
3. Gardening. I. <strong>Taylor</strong>, <strong>Janet</strong> <strong>Hogan</strong>, 1954- . II. Title.<br />
SB998-E4N35 1998 97-48841<br />
639'.75—dc21 CIP<br />
Printed in Canada<br />
14 15 16 17 18 - 13 12 11 10 09
Acknowledgments<br />
The authors wish to acknowledge their gratitude to the following<br />
people (<strong>and</strong> others): Julie Castiglia, our agent <strong>and</strong> friend,<br />
who believed in us <strong>and</strong> made our books possible; Don Trotter (alias<br />
Dr. Curly), for his love of things that grow <strong>and</strong> his willingness to<br />
share his great knowledge when we really need it; our families—<br />
Brian, Evan, Leah, <strong>and</strong> Sue, <strong>and</strong> Susie, Graham, Hannah, <strong>and</strong><br />
Britta—who have learned more about earthworms than any two<br />
families should have to know; the television viewers of San Diego,<br />
who have eagerly field-tested our data <strong>and</strong> ideas; <strong>and</strong> finally, to<br />
earthworms everywhere, who surely do work harder than us.<br />
Thank you all!
CONTENTS<br />
CHAPTER I. WHY Do WE NEED WORMS? I<br />
The soil 2<br />
C:N ratio <strong>and</strong> worms 5.<br />
Recycling 5<br />
CHAPTER 2. WHAT IS A WORM? BASIC WORM BIOLOGY 7<br />
Earthworm history 7<br />
Five hearts <strong>and</strong> no legs:<br />
The body structure of an earthworm 8<br />
Sexing a worm: Are they male or female? 13<br />
Where are worms found? 15<br />
A worm by any other name 16<br />
Worms in general 17<br />
Earthworms 17<br />
CHAPTER 3. How Do You GET STARTED? 25<br />
What is a worm bin? 25<br />
Types of bins 28<br />
How many worms do you need? 39<br />
Where to get worms 39<br />
Where should you put your worm bin? 41<br />
What type of bedding should you use? 43<br />
Bedding the bin 51<br />
CHAPTER 4. MAINTAINING A WORM BIN 53<br />
What to feed the worms: Do's <strong>and</strong> don'ts 53<br />
How to feed your worms 58<br />
Temperature, moisture, pH, <strong>and</strong><br />
aeration requirements 61<br />
Harvesting 63<br />
What should you do with extra worms? 67<br />
CHAPTER 5. PROBLEMS IN TME WORM BIN 69<br />
An unpleasant odor is coming from my worm bin. 70<br />
The worms are leaving the bin. 71<br />
The worms are dying. 72
How do I get rid of the flies around my bin? 73<br />
Why is it taking so long for the worms to produce<br />
enough castings to use in my garden? 74<br />
The worms aren't eating. 74<br />
The bin is too alkaline. What can be done? 74<br />
The worms are gone. 75<br />
Large grubs are in. my bin. How can I<br />
get rid of them easily? 76<br />
How can I tell if my worms are healthy? 76<br />
Mushrooms came up in my bin today. Is this bad? 77<br />
Mold is growing on food I put in the worm bin.<br />
Is this OK? 77<br />
CHAPTER 6. OTHER ANIMALS FOUND IN A WORM BIN, OR<br />
WORM BIN VISITORS: GOOD Guys AND BAD Guys<br />
Ants 78<br />
Centipedes 81<br />
Enchytraeid worms 82<br />
Flies 83<br />
Grubs 87<br />
Millipedes 88<br />
Mites 89<br />
Nematodes 91<br />
Slugs 92<br />
Sow bugs 93<br />
Springtails 93<br />
CHAPTER 7. USING WORMS, CASTINGS, AND<br />
VERMICOMPOST IN THE GARDEN 95<br />
Earthworms in the garden soil 96<br />
Vermicompost, castings, <strong>and</strong> worm tea<br />
in the garden 97<br />
Unwanted houseguests in your potting' soil 100<br />
Windrows 101<br />
CHAPTER 8. EARTHWORMS IN AGRICULTURE 104<br />
Crop management impact on earthworms 106<br />
Encouraging earthworms in crop management 107<br />
Should farmers "seed" their fields? 108<br />
vii
VIII<br />
CHAPTER 9. COMMERCIAL WORM GROWING: CAN YOU DO IT? 109<br />
Selling worms themselyes 109<br />
Selling castings 110<br />
Recycling green wastes with worms 111<br />
Maintaining vermicomtoosting systems<br />
for someone else 111<br />
Market <strong>and</strong> distribute vermicomposting products 112<br />
Start a vermicompost Delivery business<br />
for l<strong>and</strong>scapers 112<br />
Conduct vermicompost workshops 112<br />
Selling worm tea 112<br />
Starting your own worm business 113<br />
Maintaining your worm business 114<br />
Things you can do to guarantee your success 114<br />
Scams 116<br />
CHAPTER 10 THE WHOLE WORM AND<br />
NOTHING BUT THE WORM 118<br />
Poetry . 118<br />
Songs 120<br />
Television 121<br />
Art 121<br />
"Calling all worms" or worm grunting 122<br />
CHAPTER II COOKING WITH EARTHWORMS 124<br />
Initial preparation 124<br />
Earthworm recipes 125<br />
BUYING GUIDE TO WORMS, WORM PRODUCTS,<br />
AND ORGANIC PRODUCTS 133<br />
GUIDE TO ADDITIONAL INFORMATION 135<br />
GLOSSARY 137<br />
BIBLIOGRAPHY 144<br />
INDEX 147
I<br />
WHY DO WE NEED WORMS?<br />
On the small farm we tend in San Diego, California, earthworms<br />
do most of the work. The farm has a 3,000-square-foot<br />
vegetable garden. We don't use rototillers because they compact<br />
the soil. Instead, earthworms do the tilling. They also help fertilize<br />
our crops, condition the soil, <strong>and</strong> eat our leftovers. In our<br />
orchard,, they keep the soil near the fruit trees loose <strong>and</strong> rich.'<br />
Earthworms are at work twenty-four hours a day helping to<br />
keep the farm a showplace.<br />
Beyond the horticultural advantages, earthworms provide a<br />
diversion for children in the garden. Kids will happily dig <strong>and</strong><br />
collect earthworms long enough to get some weeding done.<br />
Simply put, earthworms are the hardest working creatures on<br />
(or under) the earth. They are worthy of our respect <strong>and</strong> admiration,<br />
<strong>and</strong> yet historically they've evoked fear <strong>and</strong> loathing. After<br />
all, it's worms that crawl in <strong>and</strong> out <strong>and</strong> eat our snout, <strong>and</strong><br />
worms that we have to eat if nobody likes us. It's a shame that<br />
a couple of unfortunate children's songs lead us to think poorly<br />
of such magnificent organisms. These remarkable workers have<br />
many important roles in nature, including mixing <strong>and</strong> aerating<br />
the soil, improving soil structure <strong>and</strong> water infiltration, helping<br />
moderate soil pH, bringing up minerals in the soil, making nutrients<br />
more available to plants, breaking down plant <strong>and</strong> animal<br />
material into compost, <strong>and</strong> increasing beneficial microbial action<br />
in the soil. These are no small tasks, but the earthworm accomplishes<br />
them easily through its daily feeding habits.
Do you want to get rich? T lere are many people who will<br />
tell you that earthworms can hel ? you do it beyond your wildest<br />
dreams. Don't believe it! Do be ieve this: there are not enough<br />
earthworms in the soil today. Re ;ular plowing <strong>and</strong> spraying, disturbing<br />
the soil, <strong>and</strong> soaking it \ •ith chemical fertilizers <strong>and</strong> pes-<br />
ticides all take their toll on eart iworms. Society is beginning to<br />
learn what damage these substar ces do to the soil <strong>and</strong> its inhab-<br />
itants; now we can begin the lo ig task of rejuvenating the soil.<br />
Perhaps the best thing you can do to help is to grow some earthworms<br />
in a garden bed outside or in a bin under your kitchen<br />
sink. Sell some if you'd like, or sell their castings instead, or just<br />
grow them to return to the soil, which is so in need of your<br />
earthworms' labor. Along the way you'll learn a bit of husb<strong>and</strong>ry<br />
<strong>and</strong> biology. You'll be amazed ait an earthworm's ability to convert<br />
what we think of as garbage into gold, <strong>and</strong> you'll be doing<br />
your part to put the natural order back in place. Read on to<br />
learn how earthworms work th£ir magic—<strong>and</strong> how you can be<br />
a part of it.<br />
THE SOIL<br />
There are many different tyf>es of soil all around the world.<br />
Soils can be loamy, s<strong>and</strong>y, or clay/adobe, just to name a few, but<br />
soil itself is made up of two main parts. One part is made up<br />
of rock particles that at one time or another were part of a larger<br />
rock or stone. Over time, erosion of rocks <strong>and</strong> stones by wind<br />
<strong>and</strong> water produces soil particles. (An example of this kind of<br />
soil particle is s<strong>and</strong>. If you locjk closely at s<strong>and</strong>, each particle<br />
looks like—<strong>and</strong> is—a miniature] rock.)<br />
The other part of soil is decaying organic material. As plants<br />
<strong>and</strong> animals die <strong>and</strong> decompose, they are broken up into smaller<br />
particles called humus. It's the humus part of soil that holds<br />
water, feeds plants, <strong>and</strong> keeps trie soil from becoming too hard<br />
for plants to grow in. By eating; <strong>and</strong> breaking down large pieces<br />
of decaying matter, earthwormsiplay a key role in increasing the<br />
humus in soil.<br />
The United States Department of Agriculture decided to test<br />
fertilizer versus earthworms over forty years ago. To do this, the<br />
department started with two containers of poor soil. To one container<br />
they added dead worms,, fertilizer, <strong>and</strong> grass seed. To the<br />
The Worm Book
other container they added live worms <strong>and</strong><br />
grass seed—no fertilizer. To their amazement,<br />
the grass seed in the container with<br />
the live worms grew four times faster than<br />
the grass seed in the container with dead<br />
worms <strong>and</strong> fertilizer.<br />
It is estimated that in an area with large<br />
numbers of earthworms, the worms can<br />
cover an acre of l<strong>and</strong> with as much as eighteen<br />
tons of new soil each year; but it is<br />
also estimated that we are using seventeen<br />
times more topsoil than is being produced.<br />
Earthworms are essential in good soil<br />
composition. As they burrow through the<br />
soil, they open it up <strong>and</strong> help keep it loose.<br />
A nightcrawler is<br />
very strong for<br />
its size. A nightcrawler<br />
that weighs<br />
only '/13 of an<br />
ounce, has been<br />
shown to move<br />
a stone that weighs<br />
2 ounces. That is<br />
equivalent to a<br />
200-pound man<br />
moving over 272<br />
tons.<br />
This tilling action allows oxygen <strong>and</strong> water to get down into the<br />
soil where they can be taken up by plants; these elements in turn<br />
improve soil conditions for beneficial bacteria <strong>and</strong> other microorganisms<br />
that contribute to healthy soils. Earthworms also bring<br />
up soil from deeper soil levels to the top <strong>and</strong> then bring topsoil<br />
back down again. Over time, soil that is brought up by worms<br />
will cover seeds <strong>and</strong> allow them to germinate. This process can<br />
bury rocks <strong>and</strong> other objects.<br />
Plant roots have an easier time getting down into the soil<br />
when they follow earthworm burrows. Nitrogen-fixing bacteria,<br />
needed by plants for growth <strong>and</strong> vigor, have been found in large<br />
numbers along the sides of earthworm burrows.<br />
When earthworms feed, they take in bits of rock <strong>and</strong> organic<br />
matter (humus), digest what they can, <strong>and</strong> deposit the rest as<br />
excrement (castings). Earthworm castings improve the soil in<br />
several ways:<br />
• Castings are -close to neutral in pH—around 7 on<br />
the pH scale—no matter what kind of soil the worm<br />
ate. For example, even if a worm fed in a very acidic<br />
soil, its castings would be neutral, not acidic.<br />
Earthworm castings also contribute to neutralizing<br />
soil pH by adding calcium carbonate to the soil.<br />
• Castings are rich in minerals <strong>and</strong> nutrients needed by<br />
plants. A study at Cornell University showed that the<br />
Why Do We Need Worms? 3
nutrient level of castings is usually much higher than<br />
that of the surrounding soil. Castings were found to<br />
be high in nitrogen, potassium, phosphorus, magnesium,<br />
<strong>and</strong> trace minerals. Castings were also shown<br />
to supply needed micronutrients to plants. Another<br />
study estimated that castings contain five times the<br />
available nitrogen, seven times the available potash,<br />
<strong>and</strong> one <strong>and</strong> a half times :he calcium found in good<br />
topsoil. So castings are excellent plant fertilizers <strong>and</strong><br />
provide nutrients in a form immediately available for<br />
plant use.<br />
• Castings are food for other beneficial microorganisms.<br />
They will contain thous<strong>and</strong>s of bacteria, enzymes,<br />
<strong>and</strong> remnants of plant <strong>and</strong> animal material that were<br />
not digested by the earthworm. The composting<br />
process then continues long after the casting is excreted,<br />
adding beneficial microorganisms back to the soil<br />
<strong>and</strong> providing a source of food for the ones already<br />
there. Some of these soil organisms release potassium,<br />
phosphorus, calcium, magnesium, iron, <strong>and</strong> sulfur<br />
into the soil ready for plant use.<br />
• Castings increase the humus content of the soil. An<br />
excreted casting is 65 to 70 percent organic matter,<br />
or humus. Soil rich in humus soaks up <strong>and</strong> holds<br />
water better. The soil is loose <strong>and</strong> is less likely to<br />
become hard <strong>and</strong> compacted. Humus can also<br />
buffer soil by binding with <strong>and</strong> holding the heavy<br />
metals from materials such as manure, sewage<br />
sludge, <strong>and</strong> vegetable waste matter (stems <strong>and</strong> roots)<br />
left over from crops.<br />
• Castings hold their nutrients in mucus membranes<br />
that are secreted by the earthworm. This allows the<br />
nutrients to be slowly released so they are available<br />
to the plants over a period of time as needed.<br />
The Worm Book
C:N RATIO AND WORMS<br />
Plants must have a way to take in the minerals they need<br />
from their soil environment. Scientists have discovered that for<br />
this assimilation to occur, a certain ratio of carbon to nitrogen<br />
(C:N) must exist. Looking at fallen leaves provides an interesting<br />
example. Several studies have measured the carbon to nitrogen<br />
ratio of many common tree species, <strong>and</strong> in no case does a<br />
tree's leaf litter come close to the optimum 20:1 ratio needed by<br />
plants. Most trees have too high a carbon content. A few examples<br />
are: 24.9:1 for elms, 42:1 for oaks, <strong>and</strong> a whopping 90.6:1<br />
for Scotch pines. So how can the dead leaves be converted into<br />
decomposed organic matter that has the correct ratio for plants<br />
to use?<br />
When plant litter breaks down <strong>and</strong> decomposition has started,<br />
nitrogen <strong>and</strong> carbon levels decrease with each decomposer<br />
that feeds on it. Carbon is a food source <strong>and</strong> therefore decreases<br />
more quickly than nitrogen.<br />
Earthworms play a big role in this breakdown. When an<br />
earthworm feeds on leaf litter <strong>and</strong> breaks the litter down during<br />
metabolism, the carbon level falls. The earthworm castings may<br />
still have a C:N ratio too high for plants to directly use the nitrogen,<br />
but then other decomposing organisms can use the castings<br />
for food. The castings are further broken down, <strong>and</strong>, when the<br />
resulting organic matter has a 20:1 ratio, plants will be able to<br />
directly use the nitrogen the leaves contained.<br />
RECYCLING<br />
Earthworms are excellent composters. They can compost<br />
organic material faster than any composting system. Some earthworm<br />
species will eat half their body weight in food per day. The<br />
nightcrawler will come out at night <strong>and</strong> search for plant matter<br />
it can pull back into its burrow. Once the food is pulled in <strong>and</strong><br />
eaten, the nightcrawler will deposit its castings back on the surface<br />
of the soil. The castings in turn become fertilizer for plants.<br />
So, for example, if you mow your lawn with a mulching mower—<br />
one that returns the clippings to the lawn—earthworms can find<br />
Why Do We Need Worms? 5
<strong>and</strong> eat the clippings <strong>and</strong> spread their castings through the top<br />
of the soil. This is a simple example of recycling the clippings'<br />
nutrients back to the lawn—but the benefits of recycling with<br />
earthworms don't stop there.<br />
Earthworms can be maintained in a controlled situation to<br />
compost household, yard, <strong>and</strong> animal wastes. The homeowner<br />
can easily maintain a household worm bin to take care of<br />
kitchen wastes. A gardener can use earthworms directly in his<br />
garden soil or in an outdoor worm bin to help compost plant<br />
material. Finally, animal wastes can also be composted into rich<br />
vermicompost that can be used on garden plants. Approximately<br />
70 percent of the material we send to l<strong>and</strong>fills, including kitchen<br />
wastes, farmyard manures, <strong>and</strong> yard wastes, can be used to feed<br />
worms. If we did feed this material to the worms, the worms<br />
could give us 60 percent of the volume back as vermicompost<br />
fertilizer. This fertilizer would be a safe, natural soil enhancer<br />
<strong>and</strong> plant food that would be a benefit to the environment.<br />
The Worm Book
2<br />
WHAT IS A WORM? BASIC<br />
WORM BIOLOGY<br />
When describing an earthworm to someone who has never<br />
seen one, it sounds like you are describing a creature that is too<br />
good to be true <strong>and</strong> can't possibly exist. They don't have any<br />
ears, eyes, or a nose, but they do have senses. They have a<br />
mouth, but they don't have jaws or teeth. Each earthworm is<br />
both male <strong>and</strong> female— ;but it still takes two earthworms to make<br />
little earthworms. Earthworms are truly specialized creatures,<br />
perfectly adapted to subterranean life, <strong>and</strong> they excel at turning<br />
the stuff we would consider waste into a useful product.<br />
EARTHWORM HISTORY<br />
Charles Darwin, father of evolutionary theory, said of the<br />
earthworm, "It may be doubted whether there are many other animals<br />
in the world which have played so important a part in the<br />
history of the world." Darwin was fascinated by earthworms <strong>and</strong><br />
studied them for thirty-nine years. He even wrote a book about<br />
earthworms, called The Formation of Vegetable Mould Through<br />
the Action of Worms With Observations on Their Habits.<br />
Earthworms are members of the phylum Annelida, or segmented<br />
worms. This phylum has three classes, with earthworms<br />
belonging to the class Oligochaeta, of which there are around<br />
six thous<strong>and</strong> known species. It is thought that earthworms arose<br />
during the Cretaceous era, when dicotyledonous plants<br />
appeared, but some evidence suggests they arose in the much<br />
7
earlier Jurassic period. Most scientists agree that earthworms<br />
have been on Earth for at least 120 million years.<br />
Earthworms have been well recorded in history, <strong>and</strong> not just<br />
by Darwin. The Greek philosopher Aristotle called earthworms<br />
"the intestines of the soil." He vasn't far off with this observa-<br />
tion. Even in the time of Egypt ian pharaohs, Cleopatra herself<br />
said, "earthworms are sacred." With a history like this, why<br />
don't earthworms get more respect?<br />
In North America earthworms have had their ups <strong>and</strong> downs.<br />
Scientists believe that most of the earthworm species were killed<br />
here in the last ice age, about ten to fifty million years ago, by<br />
glaciers that dipped down from the Arctic into the temperate<br />
regions. But, you may be thinking, you have seen earthworms<br />
in your very own yards. That's because earthworms were reintroduced<br />
to North'America by early European settlers in the seventeenth<br />
<strong>and</strong> eighteenth centuries. Most worms arrived in the<br />
soil clinging to the roots of favorite plants brought to settle the<br />
new l<strong>and</strong>. The settler's ships also used soil as ballast, <strong>and</strong> this<br />
was off-loaded at ports once it was no longer needed. The soil<br />
contained many earthworms, which gradually spread out from<br />
the many ports. Some farmers, after seeing plants in the port<br />
cities do better with the earthworms, deliberately introduced the<br />
earthworms to their l<strong>and</strong>.<br />
In many localities throughput the world, <strong>and</strong> in particular<br />
the southern hemisphere, man has played an important part in<br />
the introduction of earthworm species. A study of earthworm<br />
species in several large cities in Chile found that all the earthworm<br />
species there originated from Europe. Of the nineteen<br />
earthworm species presently found in Canada, only two of them<br />
are thought to be indigenous. The rest are imports.<br />
The endemic Lumbricus, tjhe genus of nightcrawlers <strong>and</strong><br />
some redworms, have been found to form a belt around the temperate<br />
regions of Europe, Asia, <strong>and</strong> eastern North America.<br />
FIVE HEARTS AND NO LEGS:<br />
THE BODY STRUCTURE QLJ AN EARTHWORM<br />
Earthworms are cold-blooded invertebrates <strong>and</strong> hence have<br />
no backbones. Instead their bodies are broken down into segments<br />
that vary in width, with the largest being in the front<br />
The Worm Book
egion of the worm. The segments are numbered <strong>and</strong> scientists<br />
use the numbers to differentiate among earthworm species.<br />
Mature worms have a structure called a clitellum. This structure<br />
is the gl<strong>and</strong>ular portion of the epidermis, or skin, which is<br />
associated with cocoon formation. The clitellum can differ widely<br />
among different species. Sometimes it appears as a swollen<br />
area, <strong>and</strong> in others as a well-defined constriction in the worm.<br />
The clitellum can be a different color than the rest of the<br />
worm—usually darker or lighter in tone, but sometimes a completely<br />
different color. The position of the clitellum on the body<br />
of the worm differs in each species as we'll. In Lumbricus, the<br />
clitellum is positioned between segments twenty-six <strong>and</strong> thirtytwo<br />
on the anterior or top part of the body.<br />
OUTER WORM ANATOMY<br />
On every segment except the first segment, earthworms have<br />
bristles (setae). There are four pairs of setae per segment for the<br />
earthworm, Lumbricus, but this number varies with species. The<br />
setae, which appear in a variety of shapes <strong>and</strong> lengths, come from<br />
exterior follicles on the body wall. Most of the setae on Lumbricus<br />
are curved in shape <strong>and</strong> approximately one millimeter in length.<br />
What Is a Worm?
The primary function of setae is locomotion, but they also play a<br />
role in reproduction.<br />
To move, the earthworm extends its body, anchors it with its<br />
setae, <strong>and</strong> then contracts its body<br />
using its longitudinal muscle. Each<br />
Earthworms' bodies extension, anchorage, <strong>and</strong> contraction<br />
consist of 75 to 90 is called a step. During this process,<br />
percent water, but are each segment can move forward two<br />
high in protein, making to thiree centimeters; the worm can<br />
them a favorite food of take seven to ten steps per minute.<br />
moles, shrews, <strong>and</strong> birds<br />
Ther^ are several different kinds of<br />
pores located on a worm's body.<br />
Usually earthworms have two kinds of pores for reproduction:<br />
spermathecal <strong>and</strong> female. In addition, worms have dorsal pores,<br />
which are small openings in the segmental grooves of the worm.<br />
These pores are excretory structures for secreting coelemic fluid<br />
(what we know as worm slims). Some worm species have a<br />
defense mechanism where, when the worm is threatened, it can<br />
shoot a stream of mucus several! centimeters in the air! I know<br />
that would get my attention!<br />
Finally, small nephridiopores located on the ventrolateral<br />
surfaces of each segment are the openings of the nephridia (the<br />
excretory organs of the worm); these remove liquid wastes from<br />
the body.<br />
The Worm Book<br />
INTERNAL STRUCTURE OF A W O R M
The body wall itself consists of an outer cuticle called the<br />
epidermis, which is very thin <strong>and</strong> helps to prevent water loss. In<br />
this layer the mucus or goblet cells can be found. They secrete<br />
the mucus that covers the body of the worm. Underneath the<br />
epidermis is a layer of nervous tissue containing large numbers<br />
of sensory cells that respond to stimuli such as touch, heat, <strong>and</strong><br />
light. The epidermis <strong>and</strong> the nervous tissue are bound together<br />
by a basal membrane. Inside the membrane there are two muscle<br />
layers: One is a circular layer that goes around the worm's<br />
body <strong>and</strong> the other is a longitudinal muscle layer that is thicker<br />
<strong>and</strong> runs the length of the worm's body. Finally, the peritoneum,<br />
a layer of coelomic epithelial cells, separates the body<br />
wall from the body cavity.<br />
DIGESTIVE SYSTEM OF AN EARTHWORM<br />
Worms don't have a defined head, but we consider the end<br />
with the mouth to be the head <strong>and</strong> the end with the anus to be<br />
the tail. We call the head the anterior <strong>and</strong> the tail the posterior.<br />
Food—consisting of bits of organic matter mixed with soil—<br />
is taken in as the worm moves in the soil. Many worms prefer<br />
to feed where soils are rich with dead plant roots, dead leaves,<br />
decomposing plant matter, animal feces, or soil microorganisms.<br />
The food is picked up by the mouth, a small fleshy pad called<br />
a prostomium contracts over the mouth, <strong>and</strong> the food gets pulled<br />
into the alimentary canal. This canal is nothing more than a tube<br />
that extends from the mouth to the anus. Along the way, the<br />
What Is a Worm? I I
food passes different sections of the tube, which help to break<br />
the food down. These sections are the buccal cavity, pharynx,<br />
esophagus, crop, gizzard, <strong>and</strong> intestine.<br />
The buccal cavity is a small<br />
cavity (like the inside of an<br />
So does an earthworm "hear,"<br />
animal's mouth between the<br />
"see," or "smell"? Yes <strong>and</strong> no.<br />
mouth opening <strong>and</strong> the phar-<br />
Like a snake, the earthworm<br />
ynx) that has neither jaws nor<br />
uses its setae to sense vibrations<br />
teeth. The pharynx is thick<br />
<strong>and</strong> "hear." The body wall<br />
<strong>and</strong> muscular <strong>and</strong> acts as a<br />
contains many nerve receptors<br />
suction pump, drawing in<br />
that taste chemical changes<br />
food <strong>and</strong> pushing it down the<br />
(or "smell") <strong>and</strong> other nerve<br />
canal. The esophagus starts<br />
receptors that detect light<br />
out as a tube leading from the<br />
changes (or "see") in their<br />
pharynx <strong>and</strong> becomes the crop<br />
environment. One interesting<br />
<strong>and</strong> gizzard. The crop <strong>and</strong> giz-<br />
fact is, earthworms can't "see"<br />
zard may sound familiar to<br />
the color red.<br />
you because both of these are<br />
also found in birds. These<br />
structures basically have the same function in the earthworm as<br />
they do in the birds. The crop stores food <strong>and</strong> the gizzard grinds<br />
the food up. The rest of the a imentary canal is the intestine,<br />
where digestion <strong>and</strong> absorption of food nutrients take place.<br />
Finally, food <strong>and</strong> soil that are not digested are excreted through<br />
the anus as a worm manure called castings.<br />
Lying alongside the intestine are narrow blood vessels that<br />
absorb the nutrients from the alimentary canal <strong>and</strong> feed the rest<br />
of the body. They extend almost the entire length of the worm's<br />
body. Between the blood vessels in the upper quadrant of the<br />
worm's body can be found anterior loops of vessels. These vessels<br />
("hearts") are enlarged, have the ability to contract, <strong>and</strong><br />
contain valves. Lumbricus has five pairs of such "hearts," but<br />
the number varies between worm species. Worms also have red<br />
blood that contains hemoglobin. Small blood vessels (capillaries)<br />
connect the different body parts to the main vascular network<br />
<strong>and</strong> not only bring nutrients <strong>and</strong> oxygen to the worm's body,<br />
but also remove wastes.<br />
In earthworms there really isn't a brain, just a mass of neurons<br />
called a ganglion. This cerebral ganglion is connected to a<br />
pair of longitudinal nerve cords running the length of the worm's<br />
12 The Worm Book
ody. In each segment there is another pair of ganglia that are<br />
connected to the longitudinal nerve cords. Nerve fibers run from<br />
the ganglia <strong>and</strong> extend to the rest of each segment. On the ends<br />
of these nerve fibers on the skin, the sensory organs <strong>and</strong> cells<br />
can be found. These sensory organs tell the earthworm about its<br />
environment. The photoreceptor organs can sense changes in<br />
light intensity, <strong>and</strong> the epithelial sense organs can tell the worm<br />
if it's being touched.<br />
Worms do not have lungs (though some of the aquatic<br />
species of annelid worms do have gills). They bring oxygen into<br />
their bodies by dissolving the oxygen through the body surface,<br />
which is kept moist by the mucus gl<strong>and</strong>s. There is a network of<br />
small blood vessels in the body wall that picks up this dissolved<br />
oxygen <strong>and</strong> carries it throughout the worm's body.<br />
Earthworms need a lot of water in their environment. Not<br />
only do they need it to help keep them moist, so they can take<br />
in oxygen, but to replace large quantities lost through urination.<br />
One earthworm can produce 60 percent of its body weight per<br />
day in urine.<br />
SEXING A WORM'. ARE THEY MALE OR FEMALE?<br />
Actually, they are both! Our friend the earthworm has both<br />
male <strong>and</strong> female reproductive organs, making them hermaphroditic.<br />
In Lumbricus, there are.two male segments <strong>and</strong> one female<br />
segment.<br />
When an earthworm matures in three to six weeks after<br />
hatching, the clitellum is formed to produce mucus for copulation,<br />
to secrete the wall of the cocoon, <strong>and</strong> to secrete albumin,<br />
in which the eggs are deposited in the cocoon. In the clitellum<br />
there are three layers of gl<strong>and</strong>s that perform these three different<br />
functions.<br />
To mate, one earthworm will position itself pointing one<br />
direction while another will position itself pointing the opposite<br />
direction, so the head of one lies next to the tail of the other.<br />
The worms will lie close together <strong>and</strong> anchor themselves together<br />
by the longer setae on their reproductive segments. The clitellum<br />
of each worm secretes a mucus coat around the two worms,<br />
like a collar, further holding them in place.<br />
In some worms, the male <strong>and</strong> female pores will line up, but<br />
What Is a Worm?
MATING WORMS' SPERM EXCHANGE<br />
in Lumbricus the reproductive pores do not line up. Instead, the<br />
semen must travel a considerable distance from the male pore to<br />
the female pore. To accomplish his, muscles in the body wall of<br />
the segments contract <strong>and</strong> fornii a pair of sperm grooves. The<br />
groove is covered by the enveloping mucus layer secreted by the<br />
clitellum <strong>and</strong> thus becomes an enclosed channel.<br />
The semen moves down the channel, carried by contractions<br />
of the muscles that produce the channel. When the semen reaches<br />
the seminal receptacles, the semen is passed to the other worm<br />
<strong>and</strong> taken into the receptacles. This process may or may not happen<br />
simultaneously in both members of the mating pair. Usually<br />
copulation or mating takes place over two to three hours <strong>and</strong><br />
then the worms break apart.<br />
A few days after mating, the worm secretes a cocoon in<br />
which the eggs will be deposited. To produce a cocoon, a mucus<br />
tube is secreted around the anterior segments, including the<br />
clitellum. The clitellum will then secrete a tough chitin-like material<br />
that encircles the clitellum. This will become the cocoon. The<br />
clitellum's gl<strong>and</strong>ular cells then secrete albumin for the eggs in the<br />
space between the clitellum <strong>and</strong> the tubular cocoon.<br />
When all of this has been accomplished, the tubular cocoon<br />
will slip forward toward the front part of the worm. The eggs<br />
are discharged from the female gonopores, <strong>and</strong> then the sperm<br />
are deposited in the cocoon as it passes over the seminal receptacles.<br />
As the cocoon slips over the head of the worm, the mucus<br />
tube quickly disintegrates <strong>and</strong> the ends seal themselves, forming<br />
a completed cocoon. Cocoons can contain various numbers of<br />
eggs, from one to twenty, depending on the species; but, in<br />
Lumbricus, usually only one or two eggs per cocoon hatch.<br />
Adult worms may mate <strong>and</strong> produce cocoons continually every<br />
three to four days, throughout the spring <strong>and</strong> again in the fall<br />
The Worm Book
months, depending on outside conditions. Worms kept inside in<br />
constant warm temperatures can reproduce throughout the year.<br />
Fresh cocoons are yellowish in color <strong>and</strong> look like tiny<br />
lemons. The cocoons gradually<br />
W O R M COCOON OR<br />
become darker as the embryo grows,<br />
feeding on the albumin deposited in<br />
the cocoon. Finally the young worms<br />
hatch from the ends of the cocoons.<br />
The length of time for cocoons to<br />
hatch varies greatly among species<br />
<strong>and</strong> depending on climatic conditions.<br />
Experienced worm growers can<br />
double a population of Eisenia fetida,<br />
a popular composting worm, in just<br />
sixty to ninety days, so, as you can<br />
see, the reproductive potential of this<br />
worm can be quite high.<br />
EGG CAPSULE<br />
WHERE ARE WORMS FOUND?<br />
Earthworms are found in all regions of the world now,<br />
except in deserts <strong>and</strong> frozen Arctic areas. They can be found in<br />
almost all soil types, provided adequate moisture <strong>and</strong> food are<br />
available.<br />
As we discussed earlier, earthworms need moisture in the soil<br />
in order to breathe. The moisture in the soil, along with the<br />
mucus layer of the worm, allows oxygen to dissolve <strong>and</strong> pass<br />
into the worm. Earthworms can be found in soils containing as<br />
much as 70 percent water, but most consider a soil moisture content<br />
of 35 to 45 percent to be ideal. A common worm myth is<br />
that when it rains earthworms come out of their burrows to keep<br />
from drowning. Well, there are several possible reasons for this<br />
behavior—<strong>and</strong> none of them deal with drowning. One reason is<br />
that worms come out of their burrows when it rains so they can<br />
find a mate. Another one is that CO2 levels in the burrow build<br />
up due to respiration, forming a weak acid solution that the<br />
worms do not like. Whatever the reason, studies have shown<br />
that worms can remain alive in aerated water. Fish breeders who<br />
feed worms to their fish report that worms can live for many<br />
What Is a Worm? 15
months under the filter trays in aquariums. A bigger danger to<br />
worms is drying out.<br />
The preferred diet of the earthworm consists of decomposing<br />
plant or animal matter, bacteria, fungi, <strong>and</strong> nematodes.<br />
Earthworms will even eat the dead <strong>and</strong> decaying parts of live<br />
plants, leaving the healthy parts alone. In many countries, part<br />
of the accepted agricultural practice is to leave cut plant material<br />
on the soil for earthworms to eat. This allows the earthworms<br />
to naturally fertilize the soil before the next planting.<br />
A WORM BY ANY OTHER NAME<br />
In this chapter we will be taking a closer look at individual<br />
earthworm species <strong>and</strong> earthworms in general. The study of<br />
worms is called oligochaetelogy. The "oligochaete" part comes<br />
from the Latin scientific name for earthworms, meaning "few<br />
setae" (bristles), <strong>and</strong> the "logy" part is from the Latin for "to<br />
study." You will notice that we will use the scientific name of a<br />
worm along with its common name. Most people resist using a<br />
scientific name, but when discussing individual worm species it<br />
becomes necessary. For example, the name "redworm" can refer<br />
to many different worms. You may think you underst<strong>and</strong> which<br />
redworm you are ordering, only to find out when it arrives that<br />
it wasn't the worm you thought you were ordering at all. So, to<br />
avoid confusion, we will also use the unique scientific name of<br />
each worm species.<br />
How does a species get a scientific name?<br />
In 1758 a Swedish biologist named Carolus Linnaeus published<br />
a book on animal classification called Systema Naturae.<br />
Included in this book were more than four thous<strong>and</strong> animals,<br />
including man. Linnaeus was th|e first to give the scientific name<br />
Homo sapiens to man.<br />
Linnaeus's system works like this: All animals <strong>and</strong> plants<br />
belong to groups that are similar. The first group, known as kingdom,<br />
includes all animals or all plants together <strong>and</strong> is the most<br />
general of all the groups. As the groups progress down from kingdom<br />
through phylum, class, order, family, genus, <strong>and</strong> species, the<br />
animals become more <strong>and</strong> more similar in appearance <strong>and</strong> behavior.<br />
The final two groups in the Linnaean system are genus <strong>and</strong><br />
I 6 The Worm Book
species. A genus contains organisms of similar characteristics <strong>and</strong><br />
a species contains organisms that can interbreed.<br />
In giving a scientific name to an organism, the genus <strong>and</strong><br />
species names are used together. Our example of the redworm<br />
then becomes: Lumbricus rubellus. Lumbricus is the genus name,<br />
which is always capitalized, <strong>and</strong> rubellus is the species name,<br />
which is not capitalized.<br />
WORMS IN GENERAL<br />
There are thous<strong>and</strong>s <strong>and</strong> thous<strong>and</strong>s of different species of<br />
what we would call a worm. Anything that is long <strong>and</strong> legless,<br />
we term a worm or wormlike (for example, the worm lizard).<br />
There are nematodes, flatworms, leeches, tubifex, maggots<br />
(which are insect larvae), polychaetes or bristle worms, lugworms,<br />
fanworms, bamboo worms,<br />
horsehair worms, <strong>and</strong> the list goes on<br />
<strong>and</strong> on. Worms can be found in<br />
marine, freshwater, or terrestrial environments.<br />
They can be free-living or<br />
sedentary. Some construct elaborate<br />
tubes <strong>and</strong> burrows. Others are parasitic<br />
<strong>and</strong> harmful to man.<br />
In the phylum Annelida, or segmented worms, to which the<br />
earthworms belong, there are approximately nine thous<strong>and</strong><br />
species. A vast majority of these worm species are aquatic,<br />
though we often think of the segmented worms as just the terrestrial<br />
earthworms we are familiar with. However, when we<br />
look at all the different worms in the soil, it is good to remember<br />
that earthworms <strong>and</strong> their relatives make up only a small<br />
number of the total worms present.<br />
EARTHWORMS<br />
Aristotle called earthworms<br />
nature's plows<br />
<strong>and</strong> the intestines of<br />
the earth.<br />
The earthworm family of Lumbricidae, which includes the<br />
genera of Lumbricus, Eisenia, Dendrobaena, <strong>and</strong> Allolobophora,<br />
has hundreds of species of earthworms, but less than a dozen of<br />
these are important to cultivation. There are an additional twelve<br />
families besides Lumbricidae, in the class Oligochaeta, which are<br />
classified as earthworm cousins, <strong>and</strong> all together they total about<br />
What is a Worm? 17
six thous<strong>and</strong> species. There are two other classes of segmented<br />
worms, the polychaetes <strong>and</strong> the leeches, which make up the rest<br />
of the phylum. The worms can range in size from a few millimeters<br />
to the giant Australian earthworm, which can reach<br />
three meters. It would be impossible to outline the life histories<br />
of all earthworm species, so we will take a closer look at the<br />
few earthworms commonly used for vermicomposting <strong>and</strong> l<strong>and</strong><br />
improvement.<br />
Terrestrial earthworms can generally be classified into one of<br />
three groups: the litter-dwellers[ the shallow-soil dwellers, <strong>and</strong><br />
the deep-burrowers.<br />
The litter-dwellers live in the thin litter layer on the soil. In<br />
a forest, for example, you would find them just under fallen<br />
leaves or needles.<br />
Shallow-dwelling worms, such as redworms, live primarily in<br />
the top twelve inches of soil. These worms do not build permanent<br />
burrows, but prefer to r<strong>and</strong>omly burrow throughout the<br />
topsoil. When the weather gets colder in the winter, or the soil<br />
heats up <strong>and</strong> dries out in the s ummer, these worms will move<br />
deeper into the soil. Often you will find them down in the soil<br />
at about eighteen inches or so, rolled up into a mucus-covered<br />
ball. Shallow-dwelling worms may spend long summers <strong>and</strong> winters<br />
in this state of hibernation.<br />
Deep-burrowing worms, like nightcrawlers, build permanent,<br />
vertical burrows that extend down into the soil six feet or so.<br />
Nightcrawlers are excellent soil aerators. Their burrows bring<br />
oxygen deep into the soil's top layer. Nightcrawlers are large<br />
worms reaching lengths of four to eight inches, <strong>and</strong> a few species<br />
can even reach twelve inches. A deep-burrowing worm will pull<br />
plant material down into the burrow, instead of burrowing<br />
through soil to find food. Sometimes the material is left just<br />
below the opening of the burrow to soften, <strong>and</strong> will be eaten<br />
later. Nightcrawlers are nocturnal, as their name suggests, <strong>and</strong><br />
feed at night. Their feeding provides good soil mixing as well.<br />
When they pull decaying plant matter into their burrows, they<br />
mix it with soils from deep in the burrows. Finally, these soils<br />
will be deposited back on the surface with the worm's castings.<br />
In areas where the l<strong>and</strong> is constantly being turned over or<br />
18 The Worm Book
cultivated, you will not find very many nightcrawlers. These<br />
worms are more active in the spring <strong>and</strong> fall but do not go into<br />
hibernation like the shallow-dwelling worms in summer <strong>and</strong><br />
winter. Instead they can retreat to the bottom of their burrows<br />
during temperature extremes.<br />
NIGHTCRAWLERS<br />
(Lumbricus terrestris)<br />
COMMON NAMES: Nightcrawler, Dew worm, Night walker, Rain<br />
worm, Angle worm, Orchard worm, <strong>and</strong> Night lion.<br />
COLOR: Red, brown, or a combination of these colors.<br />
Some have been known to be greenish.<br />
ADULT LENGTH: Up to 12 inches<br />
LIFE SPAN: Up to 10 years but generally only a year or two in<br />
the garden<br />
HABITAT: Vertical tunnels that can be up to 6 feet deep<br />
(deep-dwellers)<br />
DISPERSION: Widespread throughout Europe <strong>and</strong> North<br />
America. Some also found in New Zeal<strong>and</strong>.<br />
FOOD PREFERENCES: Leaf litter <strong>and</strong> mulch<br />
TEMPERATURE: They like temperatures around 50°F (I0°C).<br />
COCOON INCUBATION TIME: 14 to 21 days<br />
Nightcrawlers can regenerate lost parts of themselves, an<br />
ability that varies widely among worm species. Nightcrawlers<br />
have a relatively poor regenerative ability, but they have been<br />
known to do it. The closer to the middle the worm is cut, the<br />
more likely a successful regeneration will occur. However, sometimes<br />
a worm gets confused <strong>and</strong> regenerates a worm with two<br />
tails or two heads.<br />
Nightcrawlers are not good for indoor vermicomposting systems.<br />
They like their burrows undisturbed <strong>and</strong> prefer to eat<br />
things that are found on the top of the soil. This can cause some<br />
problems with composting systems. However, they are a very<br />
important organism in nature for l<strong>and</strong> improvement.<br />
What s a Worm? 19
AFRICAN NIGHTCRAWLERS<br />
(Eudrilus engeniae)<br />
COMMON NAMES: African nightcrawler, Giant nightcrawler<br />
COLOR: Reddish with cream striping<br />
ADULT LENGTH: Large-up to 12 inches<br />
HABITAT: Top Tew inches, under litter <strong>and</strong> mulch<br />
(shallow dweller)<br />
FOOD PREFERENCES: Rich compost<br />
TEMPERATURES: 59 to 77°F (15 tp 25°C)<br />
The African nightcrawler can be a good worm for vermicomposting<br />
but tends to be restless. One day they are doing<br />
fine in the bin, <strong>and</strong> the next they are moving out. They require<br />
warm temperatures <strong>and</strong> are not recommended in areas that dip<br />
below 50°F unless kept inside More work is being done to<br />
determine just how good a composting worm the African<br />
nightcrawler can be.<br />
REDWORMS<br />
(Lumbricus rubellus)<br />
COMMON NAMES: Red worm, BIood worm, Red wiggler<br />
COLOR: Somewhat iridescent of top, dark red to maroon.<br />
Lacks striping between segments <strong>and</strong> has a light yellow<br />
underside.<br />
ADULT LENGTH: Up to 3 inches Snd has 95 to 120 segments<br />
CLITELLUM: Covering segments,27 to 32, usually raised on top<br />
FIRST DORSAL PORE LOCATION: Between segments 7 <strong>and</strong> 8<br />
HABITAT: Prefers the top 6 to 12 inches of soil<br />
FOOD PREFERENCES: Rich comport <strong>and</strong> decaying plant <strong>and</strong><br />
animal material<br />
TEMPERATURES: 64 to 72°F (18 to 23°C)<br />
COCOON HATCHING: 12 to 16 weeks<br />
20 The Worm Book
Lumbricus rubellus is a very active wiggler in the presence<br />
of light. It is said that this worm is irresistible to fish <strong>and</strong> makes<br />
great bait because the worms exude amino acids that fish lack.<br />
Lumbricus rubellus makes a good compost worm. Like<br />
nightcrawlers, they will aerate <strong>and</strong> mix the soil. They can be<br />
found in soils that have a rich organic component, such as animal<br />
pastures <strong>and</strong> compost piles.<br />
RED WIGGLERS<br />
(Eisenia felida)<br />
COMMON NAMES: Tiger worm, Garlic worm, Manure worm,<br />
Br<strong>and</strong>ling worm<br />
COLOR: Rust brown. There is a membrane between each<br />
segment with no pigment, <strong>and</strong> on each segment there are<br />
alternating b<strong>and</strong>s of yellow <strong>and</strong> maroon down the length<br />
of the body.<br />
ADULT LENGTH: Up to 3 inches<br />
CLITELLUM: Covering segments 26 to 32 <strong>and</strong> raised all around<br />
the worm<br />
FIRST DORSAL PORE LOCATION: Between segments 4 <strong>and</strong> 5<br />
HABITAT: First few inches of soil (shallow-dweller)<br />
FOOD PREFERENCES: Very rich compost, manure piles, <strong>and</strong><br />
decaying plant <strong>and</strong> animal material<br />
TEMPERATURES: 59 to 77° F (15 to 25°C)<br />
COCOON HATCHING: Between 35 <strong>and</strong> 70 days depending on<br />
conditions<br />
The red wiggler is an excellent vermicomposting worm. It<br />
can process large amounts of organic matter <strong>and</strong> in perfect conditions<br />
can eat its body weight in food each day. It also has a<br />
high reproductive ability <strong>and</strong> can double its numbers in sixty to<br />
ninety days. Eisema fetida isn't too fussy about living conditions<br />
in the bin. It can tolerate fluctuations in temperature, acidity,<br />
<strong>and</strong> moisture levels that many worm species cannot. This worm<br />
also has some regenerative ability.<br />
What is a Worm? 21
Eisenia fetida is used as a fishing worm, <strong>and</strong>, like Eisenia<br />
<strong>and</strong>rei, it exudes foul smelling coelomic fluid. (The Latin word<br />
fetida actually means stinky or smelly.) Some fishermen say that<br />
certain species of fish are attracted by this fluid, while others say<br />
the fish are attracted by the worms' wiggling.<br />
In nature, these worms need soils that are extremely high in<br />
organic matter; they just cannot live in common garden or lawn<br />
soils. Of course there are exceptions to every rule, <strong>and</strong> some soils<br />
are very rich in organic matter But think twice about adding<br />
extra Eisenia fetida worms to your garden without adding extra<br />
organic matter, because chances are they won't survive.<br />
RED TIGER<br />
(Eisenia <strong>and</strong>rei)<br />
COMMON NAMES: Tiger worm, Red tiger worm, Red tiger hybrids<br />
COLOR: Dark red or purple. There is some disagreement over<br />
whether these worms are b<strong>and</strong>ed or not. Some worms have<br />
been identified with yellow b<strong>and</strong>s between the segments,<br />
whereas others have been identified without b<strong>and</strong>ing.<br />
ADULT LENGTH: Up to 3 inches<br />
CLITELLUM: Covering segments 26 to 32 <strong>and</strong> raised all around<br />
the worm<br />
HABITAT: First few inches of the soil <strong>and</strong> under mulch<br />
FOOD PREFERENCES: Manure, rich compost, <strong>and</strong> decaying plant<br />
<strong>and</strong> animal material<br />
TEMPERATURES: 64 to 72°F (18 to 23°C)<br />
Eisenia <strong>and</strong>rei is a good worm for vermicomposting. It is a<br />
close relative of Eisenia fetida <strong>and</strong> also has the ability to process<br />
large amounts of organic matter.<br />
These worms, like Eisenia fetida, are used for bait <strong>and</strong><br />
exude coelomic fluid. They are very active wigglers in sunlight.<br />
22 The Worm Book
BLUE WORMS<br />
(Perionyx excavitus)<br />
COMMON NAMES: Blue worm, Indian blue, <strong>and</strong> Malaysian blue<br />
COLOR: Anterior is a deep purple, while posterior is a dark red<br />
to brown. The clitellum <strong>and</strong> underside are light yellow.<br />
ADULT LENGTH: Up to 6 inches<br />
CLITELLUM: Covers segments 7 to 10 <strong>and</strong> is not raised. Some are<br />
even depressed.<br />
HABITAT: Lives just under mulch (litter dweller)<br />
FOOD PREFERENCES: Compost, decaying plant or animal material<br />
TEMPERATURE: 68 to 77°F (20 to 25°C)<br />
Blue worms are very active wigglers <strong>and</strong> make good fishing<br />
worms. It is a good vermicomposting worm in warm climates. It<br />
does not like cold weather <strong>and</strong> would not do well outside in cold<br />
regions. When this worm is used in indoor vermicompost, sometimes<br />
it will leave the bin for no reason. Blue worms fluoresce<br />
when exposed to sunlight.<br />
Perionyx excavitus also has an excellent regenerative capacity<br />
<strong>and</strong> can regenerate any part it has lost.<br />
SPENCERIELLA SPECIES<br />
COMMON NAMES: Blue Worm, Indian blue, <strong>and</strong> Malaysian blue<br />
COLOR: Deep purple on top with a dark red to brown<br />
underside. Clitellum is usually a light yellow.<br />
ADULT LENGTH: Up to 6 inches<br />
CLITELLUM: Covering segments 7 to 10, not raised<br />
HABITAT: Top few inches of soil <strong>and</strong> under mulch<br />
(shallowrdweller). Australian native.<br />
FOOD PREFERENCES: Compost <strong>and</strong> decaying plant <strong>and</strong><br />
animal material<br />
TEMPERATURE: 68 to 80°F (20 to 27°C)<br />
What is a Worm? 23
This worm looks identical to Perionyx excavitus <strong>and</strong> is often<br />
confused with it. A very active Wiggler that fluoresces under sunlight,<br />
they make good fishing worms <strong>and</strong>, unlike Eisenia fetida,<br />
reproduce by self-fertilization (parthenogenesis). They are prolific<br />
breeders <strong>and</strong> increase their numbers quickly.<br />
24 The Worm Book
3<br />
How Do You GET STARTED?<br />
Worms can be grown almost anywhere, from small Styrofoam<br />
ice chests to old refrigerators to large bins in outdoor<br />
buildings. In this chapter we will deal with small, home wormbin<br />
composting systems that you can use to recycle kitchen<br />
wastes. We will take a look at larger, commercial worm composting<br />
systems in chapter 9, "Earthworms in Agriculture," <strong>and</strong><br />
in chapter 11, "Commercial Worm Growing." Backyard worm<br />
beds for composting will be discussed in chapter 7, "Using<br />
Worms, Castings, <strong>and</strong> Vermicompost in the Garden."<br />
WHAT IS A WORM BIN?<br />
A worm bin is basically nothing more than a contained compost<br />
pile to which you have added earthworms. A worm bin can<br />
be made from wood, plastic, metal, or Styrofoam. As long as it<br />
conserves moisture <strong>and</strong> provides darkness for the worms, it can<br />
work as a worm bin.<br />
In this chapter we will look at many worm bin designs. One<br />
is bound to fit your requirements <strong>and</strong> style.<br />
What goes on in a worm bin?<br />
Your goal for your worm bin is to put waste in <strong>and</strong> get<br />
(vermi)compost out, thereby recycling the nutrients. To do this,<br />
a complex series of events must take place.<br />
25
1. When organic material is<br />
organisms to move in are the psychrophilic bacteria.<br />
These bacteria, which prefer temperatures below 70°F,<br />
start eating the fresh material. Over 70°F the mesophilic<br />
bacteria, which like to live in temperatures between 70<br />
<strong>and</strong> 113°F, start taking over. Unfortunately for the<br />
mesophilic bacteria, their feeding <strong>and</strong> respiration causes<br />
carbon dioxide (CO2) to be released <strong>and</strong> energy in the<br />
form of heat to warm up the pile. These conditions soon<br />
start killing the mesophilic bacteria.<br />
2. The next organisms, the thermophilic microorganisms<br />
that love temperatures of 113 to 170°F, now move in <strong>and</strong><br />
start consuming the organic matter <strong>and</strong> the dead<br />
mesophilic bacteria. This feeding continues until the food<br />
supply gets low, reducing the numbers of thermophilic<br />
microorganisms. The pile starts to cool down.<br />
3. When the pile cools enough (70 to 75°F is ideal), the<br />
actinomycetes <strong>and</strong> fungi are ready to take over <strong>and</strong> eat<br />
whatever is left, including the thermophilic microorganisms.<br />
The actinomycetes are higher forms of bacteria that<br />
contribute to the formation of humus. They also improve<br />
the soil by releasing various nutrients, such as nitrogen<br />
<strong>and</strong> carbon. Actinomycetes are the organisms you smell<br />
in finished, earthy compost. The fungi are there too, eating<br />
their part. Fungi are primitive plants that do not contain<br />
chlorophyll <strong>and</strong> cannot produce their own<br />
carbohydrates. They must get their energy from the<br />
organic material by breaking it down into its constituent<br />
building-block compounds.<br />
Now, if this was a simple compost pile, you could at this<br />
point add new organic matter <strong>and</strong> start the whole process again.<br />
However, in a vermicompost system, we add earthworms to our<br />
system <strong>and</strong> it changes the series of events a bit.<br />
First we will consider the events <strong>and</strong> organisms we have just<br />
mentioned as first-level consumers. They are the first ones at the<br />
dinner table, so to speak.<br />
26 The Worm Book
In a bin system, we add earthworms as the first-level consumers,<br />
<strong>and</strong> try to discourage the rapid buildup of mesophilic<br />
microorganisms that produce high temperatures, which are<br />
harmful to earthworms. We try to keep a balance of food <strong>and</strong><br />
worms by placing in the bins just the quantity of food the worms<br />
can eat. In most worm bins, the potential for heating does still<br />
exist, however, which is why certain foods that can result in the<br />
production of extreme heat are cautioned against.<br />
In nature, earthworms will not move into a compost pile until<br />
after the thermophilic microorganisms have finished. Then the<br />
microorganisms in the pile, as well as the organic debris, become<br />
food for the earthworm. Of course, other organisms, such as<br />
mold, mites, springtails, grubs, <strong>and</strong> other bacteria, also join in to<br />
eat this large supply of food. These can found in vermicomposting<br />
systems, too. Some of these organisms worm growers consider<br />
pests, but many are microscopic <strong>and</strong> go unnoticed.<br />
In a closed worm bin system, we keep repeating this process<br />
until we get the rich vermicompost we can use in our gardens.<br />
In an outdoor compost pile, something always eats something<br />
else <strong>and</strong> the pile will have many more levels of consumers.<br />
FIRST-LEVEL CONSUMERS SECOND-LEVEL CONSUMERS THIRD-LEVEL CONSUMERS<br />
BACTERIA<br />
ENCHyTRAEIDS<br />
FLY LARVAE<br />
FUNGI<br />
ACTINOMyCETES<br />
EARTHWORMS<br />
SOW BUGS<br />
MOLD MITES<br />
SPRINGTAILS<br />
EARTHWORMS*<br />
GRUBS<br />
CENTIPEDES<br />
PREDACEOUS BEETLES<br />
ANTS<br />
PREDATORy MITES<br />
'Earthworms <strong>and</strong> some other organisms can change consumer levels depend-<br />
ing on what they are eating. When an earthworm eats food directly, it .is a<br />
first-level consumer, but when it eats the bacteria in a compost pile after the<br />
initial heating process, it becomes a second-level consumer. For this reason, the<br />
old idea of a food chain was replaced by a more realistic food web.<br />
How Do You Get Started? 27
What size bin do you need?<br />
In order to decide how big a worm bin you need, you first<br />
need to determine how much <strong>and</strong> what kind of wastes you want<br />
to compost. Do you just want to compost your kitchen scraps, or<br />
do you intend to add yard wastes as well?<br />
First, collect <strong>and</strong> weigh the wastes that you want to recycle<br />
for one week. The basic rule of thumb is: for every pound of<br />
waste per week, you need one square foot of surface area for<br />
your worm bin. So if your family only produces one pound of<br />
waste in an entire week, a worm bin to take care of this waste<br />
would need to be one foot hign by one foot long by one foot<br />
wide. You could have a very successful vermicomposting bin for<br />
your family in a small Styrofoa n ice chest if you don't produce<br />
much waste. Of course, no family produces exactly the same<br />
amount of waste every week, so taking an average over several<br />
weeks is even better.<br />
Think of worm bins as these 1 x 1 x 1-foot cubes. If your<br />
family needs two square feet of worm bin area, place the cubes<br />
side by side, not one on top of the other. Remember, it is the surface<br />
area that is important. Cubes stacked on top of one another<br />
still only have one square foot of surface area instead of two.<br />
Some people who want to recycle their kitchen wastes have<br />
their hearts set on one of those new manufactured worm bins.<br />
However, they don't produce enough kitchen wastes for that large<br />
a bin <strong>and</strong> the worms that come with it. In such a case they must<br />
feed their worms additional food. This could be in the form of<br />
yard wastes that have been partially composted first, purchased<br />
commercial worm food, or food purchased from the grocery store.<br />
TYPES OF BINS<br />
Commercial worm bins<br />
Several different worm bins are now available for those<br />
people who are not interested in building one themselves. Most<br />
are made out of plastic <strong>and</strong> are lightweight <strong>and</strong> easily moved.<br />
Several come with bedding material <strong>and</strong> worms—all you add is<br />
food. This makes starting a vermicomposting system very easy.<br />
Some beginning worm growers find these complete systems<br />
28 The Worm Book
easiest because everything is spelled out for them. However,<br />
some can be quite expensive. So before you buy one, do your<br />
homework <strong>and</strong> decide which one is best in your situation.<br />
Tray system bins are becoming popular. These bins use vertically<br />
stacked trays for the composting system. You feed the bottom<br />
tray, <strong>and</strong>, when it is half-full of compost, you start feeding<br />
the second tray. This process continues until the top tray is full<br />
of compost. Then the first tray is ready for harvesting. This tray<br />
then goes on top to start feeding, <strong>and</strong> the process continues.<br />
There are several plastic-container-type commercial bins,<br />
some of which come complete with worms, bedding, <strong>and</strong> instructions.<br />
They are light <strong>and</strong> portable <strong>and</strong> usually can h<strong>and</strong>le about<br />
two to three pounds of waste per week.<br />
In areas with severe rodent problems, metal bins might be<br />
the answer. They are made with twenty-six-gauge galvanized<br />
steel, <strong>and</strong> are extremely strong <strong>and</strong> rodent resistant.<br />
Another option is to buy bin inserts. Inserts fit into namebr<strong>and</strong><br />
plastic storage bins of the type that can be purchased at<br />
home centers <strong>and</strong> department stores. The inserts convert the inexpensive<br />
plastic container into an effective worm bin. The inserts<br />
cost less than a commercial worm bin, fit various sized containers,<br />
<strong>and</strong> are easy to install.<br />
If a large-scale operation is what you have in mind, then you<br />
should look for a commercial, automated vermicomposting<br />
machine. This is a fairly large piece of equipment, not meant for<br />
household use.<br />
In the buying guide at the end of this book, you'll find a<br />
small list of distributors of all kinds of commercial worm bins<br />
<strong>and</strong> inserts. Most retailers will be happy to send you a price list<br />
<strong>and</strong> more information concerning their products. Check with<br />
your local recycler or home center to see if they carry worm bins.<br />
Many nurseries <strong>and</strong> garden centers give demonstrations on how<br />
to set up a worm bin.<br />
Making your own worm bin<br />
Any container can be turned into a worm bin. Successful<br />
worm bins have been made from picnic coolers, Styrofoam ice<br />
chests, <strong>and</strong> even old refrigerators. All three of these containers<br />
have excellent insulation <strong>and</strong> can keep worms quite comfortable.<br />
How Do You Get Started? 29
PLASTIC WORM BINS<br />
A plastic storage bin purchased at a home center can be<br />
made into an excellent worm bin. Plastic does not breathe, so<br />
extra holes must be added to the sides <strong>and</strong> bottom for aeration<br />
<strong>and</strong> drainage. One type of bin provides extra space in the bottom<br />
of the bin for liquids to collect, so holes don't have to be<br />
drilled for drainage. Also, plastic is not a good insulator. Plastic<br />
bins are most often used indoors where temperatures remain<br />
fairly constant.<br />
EXAMPLE #1:<br />
MATERIALS NEEDED<br />
'One medium (14 to 18-gallon) plastic bin with lid<br />
L<strong>and</strong>scape shade cloth to fit bottom <strong>and</strong> sides<br />
INSTRUCTIONS<br />
Drill six 1-inch holes in various locations in the long sides of the<br />
bin <strong>and</strong> four holes in the short sides. Next, drill four holes in<br />
the bottom of the bin. These holes will be used for drainage <strong>and</strong><br />
aeration. If the bin becomes tot) wet, you can drill a few more<br />
holes later. Bins in dry climates may need fewer holes than bins<br />
in humid regions.<br />
Clean bin with soap <strong>and</strong> water., Dry.<br />
NOTE: Old plastic container^ can also be used for worm<br />
bins. These should be free of chemicals <strong>and</strong> dirt that can<br />
harm your worms.<br />
Add the l<strong>and</strong>scape cloth. Cut alpiece that will fit on the bottom<br />
<strong>and</strong> a long piece for around the sides. The cloth will prevent<br />
bedding <strong>and</strong> casting from falling out of the holes. You can also<br />
cut squares of l<strong>and</strong>scape cloth a'nd hot-glue them over the holes.<br />
That's about it! Use the lid as al bottom tray to catch worm tea,<br />
<strong>and</strong> use leftover l<strong>and</strong>scape clot l as a lid (or buy an extra lid if<br />
you can). Add bedding <strong>and</strong> worms.<br />
The Worm Book
EXAMPLE #2:<br />
MATERIALS NEEDED<br />
•One 18-gallon plastic bin with lid<br />
• One 4 1 /2 foot-long I" x 4" piece of board lumber<br />
(not pressure treated)<br />
•One 12" x 18" piece of window screening<br />
• Staples<br />
•Sphagnum peat moss<br />
I 6 ]H INCHES<br />
FRAME DIAGRAM: EXAMPLE #2<br />
INSTRUCTIONS<br />
Cut the board into two pieces that are IOV2 inches long <strong>and</strong> two<br />
pieces that are I6V2 inches long. Use these pieces to construct a<br />
frame. The 10V2-inch pieces are the ends <strong>and</strong> the 16V2-inch<br />
pieces are the sides. Make a brace across the middle from leftover<br />
pieces of board.<br />
Place the screen over the frame <strong>and</strong> staple it on securely, then<br />
place the frame with screen-side up in the plastic bin. Add dry<br />
sphagnum moss until the top of the frame is covered with about<br />
two inches of moss. There will be an empty space on the bottom<br />
now, under the frame <strong>and</strong> screen.<br />
Now add about eight more inches of moist bedding on top of<br />
the dry moss. This can be more moss or whatever bedding you<br />
prefer. Cut a two-inch hole in the lid for ventilation <strong>and</strong> coverit<br />
with screen. Use a hot glue gun or tape to attach the screen.<br />
How Do You Get Started? 3 I
This plastic bin does not require drilling any holes. The liquid,<br />
if any, will collect at the bottom in the empty space <strong>and</strong> can<br />
be poured off when it is time to harvest the worms. Since there<br />
is a lot of dry material in this bin, the moisture levels should be<br />
checked to prevent the bin from becoming too dry Generally, in<br />
plastic bins that won't be a problem.<br />
EXAMPLE #3:<br />
There are some people who are iconverting old nursery flats into<br />
worm bins. The bin is made like this:<br />
MATERIALS NEEDED<br />
• Four plastic nursery flats or tjrays with holes in the bottom<br />
• A piece of heavy plastic bigg;er than the width of the tray<br />
• Fifteen small wood blocks or a I '^-inch-wide dowel,<br />
cut into pieces lh inch shorter than the depth of the<br />
nursery trays. These will support the corners <strong>and</strong> centers<br />
of the trays.<br />
32 The Worm Book<br />
NURSERY TRAY SYSTEM: EXPANDED VIEW<br />
- NURSERY TRAY<br />
- SUPPORT BLOCKS
INSTRUCTIONS<br />
Line one Cray with heavy plastic. The plastic should come up the<br />
sides <strong>and</strong> over the top of the tray. This will be the bottom liquid<br />
collection tray. If you can get a nursery flat without holes,<br />
use it for this layer.<br />
Lay the solid or plastic-lined tray down first. Place blocks in the<br />
corners <strong>and</strong> one in the center. Add the next tray (Tray #2). Place<br />
blocks in the corners <strong>and</strong> center. Bed this layer with an inch or<br />
two of bedding <strong>and</strong> add food <strong>and</strong> worms. This bin is small—<br />
use about V2 pound of worms to start. Every time you feed the<br />
worms, add about one inch of damp newspaper, leaves, coir, or<br />
your favorite bedding to the tray. When the worms are about to<br />
the top of this first tray, add the next tray (Tray #3).<br />
Tray #3 now should be bedded <strong>and</strong> the worms fed there. Do not<br />
feed Tray #2 any more. The worms will move up through the<br />
holes to the fresh bedding <strong>and</strong> food, leaving the lower tray.<br />
Continue this process right up to the last <strong>and</strong> top tray (Tray #4).<br />
Then take the bottom tray with holes, Tray #2, <strong>and</strong> empty the<br />
vermicompost <strong>and</strong> place it on top. This becomes a continual<br />
cycle of trays.<br />
Empty the bottom tray, Tray #1, of liquid when needed.<br />
NOTE: If you prefer stronger trays, try building the trays<br />
out of 1" x 4" lumber <strong>and</strong> using V4-inch hardware cloth,<br />
stapled to the bottoms. Make the bottom tray solid.<br />
WOODEN WORM BINS<br />
Wood is an excellent material to use for worms. It breathes<br />
better than plastic <strong>and</strong> has better insulating qualities. Wood does<br />
have some drawbacks: it is heavy <strong>and</strong> it rots. So, wherever a<br />
wood worm bin goes, that's pretty much where it stays.<br />
When purchasing wood to build a worm bin, do not buy<br />
pressure-treated lumber. Many organic gardeners do not put pressure-treated<br />
lumber in their gardens because the toxic chemicals<br />
used as preservatives can leach out of the wood. These chemicals<br />
(copper, chromium, <strong>and</strong> arsenic) can also be toxic to your worms.<br />
Cedar is also not recommended for bin construction.<br />
Untreated wood unfortunately will last only two to three<br />
years with continuous use. Worm bins are damp environments<br />
<strong>and</strong> the moisture helps to break down the wood fibers faster.<br />
How Do You Get Started?
Some worm growers use two wooden worm bins <strong>and</strong> rotate the<br />
worms between the bins to alipw the wood to dry out a bit,<br />
making it last longer. Another idea is to coat the inside of the<br />
bin with cooking oil.<br />
A simple wooden box, like a dresser drawer, can also be used<br />
as a worm bin. Actually, worm bins should be pretty shallow.<br />
Redworms are by nature shallojw feeders <strong>and</strong> you don't need a<br />
deep box. It's the surface area that is really important.<br />
Note: When dealing with finished lumber, keep in mind that<br />
when you ask for a 2" x 2" |piece of lumber, you will get<br />
a IV2" x IV2" piece of lumber. (Measure your pieces.before<br />
EXAMPLE #1:<br />
or<br />
1 One 10-foot length of 1 /2" x Il2" board lumber<br />
(for a bin with a lid)<br />
•Thirty-five to forty 'h" screws<br />
34 The Worm Book
BIN DIAGRAM # I<br />
INSTRUCTIONS<br />
Gut 2" x 2" into: Four 1-foot lengths (inside corner supports)<br />
Three 1-foot.lengths (bottom support)<br />
Cut the V2" x 12" board into: Two 11-inch-long pieces (short<br />
sides)<br />
Three 2-foot-long pieces (long sides <strong>and</strong> bottom)<br />
Assemble the box frame as shown in diagram #2.<br />
DIAGRAM #2: EXPANDED TOP VIEW OF BIN AND CORNER SUPPORTS<br />
How Do You Get Started? 35
Screw all the pieces together. Place the last 2-foot piece on the<br />
top of the box.. This piece will form the bottom later. Now place<br />
the remaining three, 1-foot 2" >[ 2"s, one on each end <strong>and</strong> one<br />
in the middle. Screw together, attaching the bottom to the sides.<br />
Finally, drill 1-inch holes in th£ box, four holes in the bottom<br />
<strong>and</strong> six holes (three at the topi <strong>and</strong> three near the bottom) on<br />
the two long sides.<br />
Add bedding <strong>and</strong> worms.<br />
DIAGRAM #4<br />
To add a lid to this box, simpjly cut another piece of board 2<br />
feet long <strong>and</strong> attach it with hiriges. You can add a frame of 2"<br />
x 2" to the inside of the lid to stabilize it.<br />
Remember, this box will drairt. Place two shallow pans under<br />
the holes to catch the worm tela. Empty as needed.<br />
36 The Worm Book
This worm bin is a small one with only two square feet of surface<br />
area. It would be great for a single person or couple or a<br />
family that only produces a small amount of waste per week.<br />
Worm bins can be exp<strong>and</strong>ed depending on your needs. Using the<br />
same idea, a bin measuring 2 inch wide by 3inches long by 1<br />
inch high could be constructed. For this you would need:<br />
EXAMPLE #2:<br />
•Two 8-foot lengths of 1 /2" x 12" board lumber<br />
(<strong>and</strong> another 6 feet, if you want a lid)<br />
• 13 feet of 2" x 2" lumber (Buy two or three pieces of this<br />
to equal 13 feet, if needed. These pieces can be pieced<br />
together easily.)<br />
• I '/2-inch screws<br />
MATERIALS NEEDED<br />
I NSTRUCTIONS<br />
Make the sides of the box just like for the bin in Example #1,<br />
except the short side pieces should be 1 foot, 11 inches <strong>and</strong> the<br />
long side pieces should measure 3 feet. For the bottom, cut two<br />
pieces of lumber 3 feet long.<br />
DIAGRAM #5<br />
How Do You Get Started? 37
Attach the bottom to the sides, ike in Example #1. Drill holes.<br />
Make lid, if desired, by using two 3-foot-long board pieces. Place<br />
them side by side <strong>and</strong> join them together with brackets or extra<br />
boards. Attach to the bin with hinges.<br />
This bin could also be made from 1/2" to 5/8" exterior grade<br />
plywood. The nice thing about plywood is it is stronger than<br />
regular board lumber <strong>and</strong> there are no seams to piece together.<br />
But the drawback is that it comes in large sheets—usually 4x8<br />
feet sheets—<strong>and</strong> requires cutting with a circular saw.<br />
NOTE: Use the same principle to make an even larger bin<br />
if needed. Maybe 3 feet wide by 4 feet long by 1 foot deep?<br />
Sometimes it is easier to make several smaller bins, to make<br />
it easier to harvest <strong>and</strong> clean them. Also, small bins have<br />
an advantage when it comes to moving them, as they are<br />
not impossible to move. An
the bin will help keep the worms warm. If the bin rests on the<br />
ground, the open mesh will allow microorganisms that assist in<br />
the breaking down of organic material easy access to your bin.<br />
HOW MANY WORMS DO YOU NEED?<br />
Worms typically eat an amount equivalent to approximately<br />
half of their body weight per day in good conditions. Once you<br />
have decided how much total waste you have to feed your<br />
worms in an average week, divide that number by seven to get<br />
the average amount of food you have for worms each day.<br />
A simple example using this formula is:<br />
1. A family produces seven pounds of total waste in an average<br />
week.<br />
2. Divide the seven pounds of waste by seven days in a week.<br />
3. The answer is one pound of waste produced each day to<br />
feed the worms.<br />
So, knowing this, our example family needs two pounds of<br />
worms to eat the one pound of waste they produce each day. Of<br />
course, this is an average; when conditions in this bin are good,<br />
worms will eat more, <strong>and</strong> when conditions aren't so good,<br />
worms will eat less. In chapter 4, "Maintaining A Worm Bin,"<br />
we will go into a more detailed explanation of conditions <strong>and</strong><br />
feeding worms in a worm bin.<br />
Now, your next question is: How many worms are there in<br />
a pound? Well, it really doesn't matter, because commercial<br />
worm growers sell their worms by the pound. However, most<br />
worm growers estimate there are approximately 1,000 adult redworms<br />
in a pound.<br />
WHERETOGETWORMS '<br />
After you have figured out how many worms you need, it's<br />
time to buy the worms. If you purchase commercial bins, the<br />
correct number of worms comes with them, <strong>and</strong> you won't have<br />
to worry about this. However, for those who are building their<br />
own bins or those who have had a major problem <strong>and</strong> need to<br />
start over, you need to know where to buy <strong>and</strong> what you are<br />
buying.<br />
How Do You Get Started? 39
Worms can be purchased in some garden centers <strong>and</strong> bait<br />
shops. The only problem with some of these outlets is that you<br />
usually have no idea what worrti you are getting, beyond "redworms"<br />
or "nightcrawlers." Nightcrawlers are not used in worm<br />
bins because they construct permanent burrows, but you can use<br />
bait shop redworms. We recently went to many of the bait shops<br />
in our area <strong>and</strong> the only thing written on the containers was<br />
"redworms." We asked the baijt store operators what kind of<br />
redworms we were buying, but they didn't know. These<br />
unknown redworms would work in a worm bin, but it would<br />
be nice to know exactly which v^orm you are using so you could<br />
adjust conditions in the bin to pheir liking. Another problem is<br />
the cost. Bait shop worms are very expensive.<br />
There are commercial worm growers that will be happy to<br />
ship you all the worms you nee,d, usually at a better price than<br />
retail outlets. Ask for the worms' scientific name, so you know<br />
exactly which worms you are ordering. Many commercial worm<br />
growers will ship worms in a few days, depending on the weather.<br />
It is best to order worms when they can be shipped in moderate<br />
weather; extremely hot or cold conditions are not the best<br />
for shipping worms. You can find many commercial worm growers<br />
that advertise in gardening publications or on the World<br />
Wide Web.<br />
When you order worms, the grower may ask you if you prefer<br />
breeders or bed-run. Breeder,s are all mature worms that will<br />
generally cost you more than bed -run, which are mature <strong>and</strong><br />
immature worms mixed together Some people think breeders are<br />
best to start with because they will produce cocoons more quickly,<br />
but it won't take long for the immature worms to grow up,<br />
either. An advantage to having young worms is that they will<br />
adjust to their new home much faster than adults. If you are<br />
looking to receive higher numbers of worms, then buy a bedrun<br />
shipment by weight. The| average estimate is 2,000 per<br />
pound for bed-run <strong>and</strong> 1,000 pter pound for adult worms. Your<br />
can decide which is best in your situation.<br />
If you are lucky enough to live close to ranch l<strong>and</strong>s or people<br />
who have horses or livestock, you might try finding redworms<br />
yourself. Of course, get permission to do this first—a person with<br />
a shovel <strong>and</strong> bucket out in a field might get into some trouble.<br />
40 The Worm Book
Try turning over a few piles of decomposing manure. You might<br />
get lucky <strong>and</strong> find a jackpot of worms.<br />
WHERE SHOULD YOU PUT<br />
YOUR WORM BIN?<br />
When deciding on a place to put a worm bin, do your homework<br />
concerning the living requirements of the worm species you<br />
will be raising. This is especially critical if you decide the worm<br />
bin must remain outdoors. In colder climates, outdoor worm<br />
bins may need to be insulated in the winter, <strong>and</strong> in hotter climates,<br />
the bin may need to be insulated in the summer. Your<br />
weather will dictate where your worm bin should go: in a shed,<br />
in a basement, or on a patio. Most composting worms work best<br />
at temperatures between 59 <strong>and</strong> 77°F (15 to 25°C). Worm growers<br />
agree that temperatures under 50°F or above 86°F can be<br />
harmful to worms.<br />
Besides finding the right temperature for your worm bin,<br />
choose a place that is convenient for you to tend. Worm bins<br />
need water, so locating larger bins next to a hose outlet would<br />
be a good idea. Small bins may only need sprinkling from a<br />
watering can.<br />
If you choose a large worm bin that cannot be moved easily,<br />
remember that changing the bedding <strong>and</strong> doing maintenance<br />
can at times be messy. An outdoor worm bin keeps the<br />
dirt <strong>and</strong> mess outside. Small bins can be cleaned <strong>and</strong> changed<br />
at a utility sink.<br />
Many worm growers who grow worms outdoors or in sheds<br />
find that it is necessary to keep a light on over their worm bins<br />
to discourage worm migration. So it's good to have an electric<br />
outlet nearby, just in case.<br />
Remember to have a place for storage of tools <strong>and</strong> items you<br />
need to take care of your worm bin.<br />
Finally, locate the bin in a place that will be aesthetically<br />
pleasing for you. There are people who have worm bins as decorative<br />
coffee tables, but many people tend to keep their worms<br />
in the garage or basement, or on a patio. Some with very small<br />
bins can keep them under the sink.<br />
Do not place a worm bin next to a working refrigerator or<br />
How Do You Get Started? 41
anything that vibrates. Worms do not like a lot of moving<br />
around <strong>and</strong> will not do well in those circumstances.<br />
Extra insulation<br />
Worm bins that are kept outdoors may need extra insulation<br />
in the winter or summer months, depending on where you live.<br />
Some bins that are not too heavy can simply be moved inside a<br />
shed, barn, or basement, but many are too heavy to move.<br />
There are just about as many ways to insulate a worm bin<br />
as people have ideas. The following is a list of insulation ideas<br />
that people are using today to keep, their worms comfortable<br />
<strong>and</strong> happy.<br />
• Cover the worm bin with Styrofoam or thermal insulation.<br />
It comes in large s leets <strong>and</strong> can easily be cut<br />
to desired lengths <strong>and</strong> widths. It can be added right<br />
on the existing box. So, when finished, the worm<br />
bin is completely covered. The insulation can be<br />
nailed or glued directly to the box. Styrofoam or<br />
thermal insulation does not breathe, so make sure<br />
the worms have some ventilation.<br />
• Stack hay bales around the box. This can be as simple<br />
as stacking the hay around <strong>and</strong> over the box.<br />
When you need to tend the box, you will have to<br />
remove some of the bales. We have also seen whole<br />
hay bale sheds constructed just for worm bins. There<br />
is a lot of information about hay bale construction,<br />
so it is best to check out ill the hay bale designs <strong>and</strong><br />
decide which one is best for your worm bin.<br />
• Locate the bin in a shady area. This is a simple <strong>and</strong><br />
sometimes forgotten idei that can help when the<br />
weather is hot. Locate the bin under a large tree or<br />
porch or on the north s de of a shed or building.<br />
Try placing bushes around your bin.<br />
• Place a low-wattage night-light inside the box to bring<br />
up the temperature. Be sure to place several layers of<br />
thick newspaper between I the light <strong>and</strong> the worms.<br />
• Add a bit of fresh green waste to the bin. The thermogenic<br />
bacteria in the early composting process<br />
42 The Worm Book
will really heat things up. You don't have to use<br />
much. Experiment with amounts <strong>and</strong> check occasionally<br />
with a thermometer. Place the waste on one<br />
side of the bin, so the worms can escape to the other<br />
side of the bin if it gets too hot.<br />
• Place wet towels over the bin on really hot days. The<br />
evaporation will help cool the bin. Add a fan if<br />
needed for more air flow.<br />
• Heaters made for reptiles <strong>and</strong> bird baths can also be<br />
used. Check local pet stores for ones that can be kept<br />
in a moist environment <strong>and</strong> can be adapted. Some<br />
come with thermostats that can also be adjusted.<br />
Many of these ideas can be used in conjunction with each<br />
other. If you live in an area that is extremely cold or hot, you<br />
may need to use several of the ideas together.<br />
Good luck!<br />
WHAT TYPE OF BEDDING SHOULD YOU USE?<br />
Among all the ingredients <strong>and</strong> materials necessary for a vermicomposting<br />
worm bin, bedding is one of the most important.<br />
Bedding usually refers to the loose, moisture-retaining organic<br />
material used to fill the worm bin or windrow. Bedding provides<br />
carbon for bacteria, which constitute the bulk of the nutrients<br />
in the worms' diet <strong>and</strong> also break down the organic material fed<br />
to worms so it can be ingested by worms <strong>and</strong> other organisms.<br />
The importance of good bedding material is one of the least<br />
understood aspects of vermicomposting, <strong>and</strong> improper maintenance<br />
of this bedding is one of the main reasons for the failures<br />
encountered by those who are new to the process.<br />
When starting a worm bin, you must first consider what a<br />
worm needs to survive. First it needs food to eat, environmental<br />
conditions that do not change too rapidly, shelter from light,<br />
access to other worms for mating purposes, <strong>and</strong> delicate h<strong>and</strong>ling.<br />
But most worm growers first think of what they need:<br />
healthy <strong>and</strong> productive worms, an odor-'free <strong>and</strong> pest-free bin,<br />
<strong>and</strong> cheap, easy to obtain materials.<br />
Bedding has to be one of the biggest variables in any worm<br />
bin system. Worms can be placed in bedding that is too dry, too<br />
How Do You Get Started? 43
wet, too dense, <strong>and</strong> even too coarse, <strong>and</strong> all of these can lead<br />
to problems. Some worms end up living in their food, with no<br />
bedding at all. These situations can certainly make caring for<br />
your worms a lot more difficult.<br />
All bedding materials should conform to certain requirements.<br />
Bedding should:<br />
• retain moisture in a form that is accessible to worms;<br />
• stay loose <strong>and</strong> allow for air passage between the individual<br />
pieces of bedding;<br />
• allow for drainage of excess moisture;<br />
• not be too coarse;<br />
• not be a food source that is high in protein;<br />
• be aged past the heating stage, for manures <strong>and</strong> green<br />
wastes; <strong>and</strong><br />
• be a carbon source for batteria.<br />
Even when a type of bedding meets all of these requirements,<br />
you should always test a small group of worms on the new bedding<br />
first. If the test group survives <strong>and</strong> is doing fine after twenty-four<br />
hours, there's a good chance that the rest of your worms<br />
will be fine, too. So, with all of these points in mind, let's look<br />
at several bedding options <strong>and</strong> the various pros <strong>and</strong> cons associated<br />
with each.<br />
Peat moss<br />
Peat moss, or sphagnum moss, has been one of the most<br />
widely used of all the worm beddings for commercial worm<br />
growers. Many people have preferred to use "Canadian" peat<br />
moss, because it is believed to be a much more sterile medium;<br />
whereas, American peat moss ils more likely to contain impurities<br />
<strong>and</strong> be tough <strong>and</strong> stringy, w|hich might prove harmful to the<br />
worms. However, some worm growers use American sphagnum<br />
moss <strong>and</strong> thoroughly "leach" it before using it as worm bedding.<br />
To leach the moss, it must be soaked in water for several<br />
hours <strong>and</strong> then squeezed of excess water. This is done several<br />
times until only clear water runs from the moss. Many breeders<br />
still prefer to ship worms in Canadian sphagnum moss.<br />
44 The Worm Book
Peat moss has advantages <strong>and</strong> disadvantages. However,<br />
many worm growers believe that, despite the advantages, the<br />
moss should not be used because it is a nonrenewable resource.<br />
ADVANTAGES:<br />
• Moisture retention. Because it retains moisture so<br />
well, peat moss can keep moisture levels up, so that<br />
even in dry climates the bin doesn't have to be<br />
watered as often.<br />
• Cleanliness. This is one of those characteristics you<br />
can only appreciate if you have had prior experiences<br />
with bedding materials that are not so easily<br />
h<strong>and</strong>led (such as manure). Properly moistened moss<br />
is easy to h<strong>and</strong>le, <strong>and</strong>, if you should drop a little,<br />
just let it dry, <strong>and</strong> vacuum or sweep it up.<br />
• It has no odor. Though worms will convert bedding<br />
<strong>and</strong> food to earthy-smelling vermicompost, sometimes<br />
a bedding can take on an odor that some people<br />
may find unpleasant. Peat moss will not do that.<br />
• Availability. Most garden-supply shops or nurseries<br />
will have this material on h<strong>and</strong>. A medium-sized bag<br />
can usually be purchased for just a few dollars, but<br />
larger quantities can get quite expensive.<br />
• Consistency. A large bag of moss can last several<br />
months for the average indoor worm system. This<br />
can prevent the worms from being subjected to the<br />
rapid changes that can occur when the bedding is<br />
changed.<br />
• As an enhancer to other bedding. Sometimes a bedding<br />
will become dense <strong>and</strong> need loosening up, or<br />
sometimes the bedding will dry out too quickly. Peat<br />
moss is perfect for correcting these problems. By<br />
adding a 30 to 50 percent mixture of moss to the<br />
bin, the necessary moisture level can be retained. In<br />
beddings that are too dense, peat moss will open it<br />
up <strong>and</strong> allow more air into the bin. Peat moss is<br />
acidic, <strong>and</strong> when mixed with bedding materials that<br />
are on the alkaline side, the peat moss can serve to<br />
bring things into a better pH balance.<br />
How Do You Get Started? 45
DISADVANTAGES:<br />
• The cost. Many types of worm bedding are free, <strong>and</strong><br />
since most people must b|uy peat moss, this can be<br />
a disadvantage.<br />
• It is acidic. Peat moss is ilightly acidic, <strong>and</strong> worms<br />
sometimes will not like moss as a bedding if they<br />
were kept in an alkaline bedding before. You may<br />
need to gradually acclimate the worms to the new<br />
conditions. To do this, simply transfer some of the<br />
old bedding material, worms <strong>and</strong> all, to one side of<br />
the new bed, opposite the moss bedding. The worms<br />
will then move into their new bedding at their own<br />
pace. This procedure should be used whenever you<br />
place newly received worms into a bed that contains<br />
material other than that im which they were shipped.<br />
• It's a nonrenewable resource. This means it cannot<br />
be reproduced, <strong>and</strong> is therefore recognized as environmentally<br />
<strong>and</strong> commercially unsustainable. This is<br />
peat moss's biggest disadvantage, <strong>and</strong> one reason<br />
many commercial worm growers no longer use or<br />
recommend it.<br />
All in all, peat moss is truly a remarkable substance, <strong>and</strong> a<br />
bedding material once widely used by vermiculturists around<br />
the world.<br />
Newspaper<br />
Newspaper is a good bedding material, especially when<br />
mixed with dry leaves or strawj, which prevents the paper from<br />
compacting. Black inks that are now used in newsprint are nontoxic<br />
to the worms, too.<br />
ADVANTAGES:<br />
• Generally cost-free. Instead of recycling the morning<br />
paper at the recycling center, use it in the bin.<br />
• Readily available. You c^n obtain newspaper anywhere.<br />
• Odorless.<br />
46 The Worm Book
• Easy to prepare. Just tear it into thin strips.<br />
• Recycles the paper. Worms can turn the newspaper<br />
into a Wonderful product.<br />
DISADVANTAGES:<br />
• Torn newspaper tends to compact in the bin.<br />
• Ink can rub off on your h<strong>and</strong>s.<br />
It should be mentioned that we are talking about regular<br />
newsprint, not the glossy, multicolored advertisements found in<br />
the newspaper. There is still some debate about how safe the colored<br />
inks are for worms, so these should probably be avoided.<br />
If you have a paper shredder, then use it to shred your<br />
newsprint. The smaller pieces of paper will hold moisture better<br />
than larger h<strong>and</strong>-torn paper.<br />
Many offices now shred documents for disposal, <strong>and</strong> there<br />
has been quite an argument about using these papers from computers<br />
<strong>and</strong> copiers in worm systems. There has been no research<br />
about whether using such paper will cause soil <strong>and</strong> compost contamination,<br />
so some would say it is better not to use them. But<br />
some worm growers say that the levels of toxins associated with<br />
these inks are so small they should not be a problem. So, the<br />
debate goes on. There are several worm growers using shredded<br />
computer paper <strong>and</strong> having no problems. If you have access to<br />
these papers, you might want to try a small test bin <strong>and</strong> see for<br />
yourself.<br />
Compost from plant material<br />
This type of bedding can be any plant material that has been<br />
broken down past the heating stage. Some worm growers like<br />
leaf mold (partially decomposed leaves), while others use only<br />
composted grass clippings.<br />
ADVANTAGES:<br />
• No cost. Many people are happy to find a place that<br />
will take this stuff so that it doesn't go to l<strong>and</strong>fills.<br />
• Compost is a worm's natural environment.<br />
How Do You Get Started? 47
DISADVANTAGES:<br />
• Time. You must wait for the decomposition process<br />
to be far enough along (past the heating process) or<br />
you could cook your worms.<br />
• Compost, especially leaf mold, can compact in the bin.<br />
• It can bring in uninvited guests to your bin. Since<br />
you must compost outdoors, other composting organisms<br />
can be present in the compost.<br />
Animal manures<br />
Manure that has been partially composted is a perfect habitat<br />
for worms. It is high in organic compounds that composting<br />
worms love.<br />
ADVANTAGES:<br />
• In some areas it is free for the hauling. If you're<br />
lucky enough to live where livestock is kept, many<br />
ranchers would love to have you haul off as much<br />
as you want.<br />
• Worms really love it. For some, it's their natural<br />
habitat.<br />
• Manure contains high levels of nutrients. It can be<br />
a food stock, too.<br />
• The castings that come from worms living in composted<br />
manure bedding are extra nutrient rich.<br />
• Small amounts of uncomposted manure can be<br />
added to outside beds or bins. This manure can<br />
warm up a cool bed a bit <strong>and</strong> worms will nibble at<br />
the edges.<br />
DISADVANTAGES:<br />
• May not be available to everyone for free.<br />
• The odor of composting manure can be very objectionable<br />
for the first few days.<br />
• Many other organisms, like mites, centipedes, <strong>and</strong><br />
flies, also like composted manure <strong>and</strong> can be brought<br />
into your worm system.<br />
48 The Worm Book
• Time. You must compost the manure past the heating<br />
stage. This can take from a few weeks to several<br />
months, depending on weather, conditions.<br />
• Some manures should be leached (washed) to rid the<br />
manure of de-worming medications, urine, <strong>and</strong><br />
salts.<br />
• Manure can compact easily in the bin. Other animal<br />
manures also need to be washed, for various reasons.<br />
Horse manure needs to be washed to remove<br />
the de-worming medications that are routinely given<br />
to the animals. This medication will be harmful to<br />
your worms.<br />
Rabbit manure usually contains a very high content of urine.<br />
Repeated washings are necessary to clean it thoroughly. It can<br />
also be very acidic; some worms growers who use rabbit manure<br />
will add calcium carbonate (limestone flour) to neutralize the<br />
acidity. Be sure to check with your pH meter to be sure.<br />
Sheep, goat, <strong>and</strong> pig manures can also be used, but they have<br />
"•Washing manure:<br />
Where dairy cows <strong>and</strong> steers are kept in close quarters, their manure has been<br />
shown to be high in urine <strong>and</strong> salts, so washing these chemicals out of the<br />
manure, becomes necessary.<br />
To wash the manure, you may need to soak it, so that water is able to com-<br />
pletely pass through <strong>and</strong> dilute away any harmful chemicals. Some worm grow-<br />
ers will wash their hauls of manure right in the truck bed. Just add water to<br />
the truck bed until full <strong>and</strong> then allow the water to drain out. Another way<br />
to do this is to add manure to a garbage can that has holes in the bottom. Fill<br />
the can halfway full of manure <strong>and</strong> then fill the can up with water. Allow the<br />
can to drain. Some worm growers recommend filling the can three to five times<br />
to be sure the manure is thoroughly washed <strong>and</strong> free of harmful chemicals.<br />
Next, place the washed manure in piles to dry <strong>and</strong> compost. This process can<br />
take from two weeks to several months, depending on weather conditions.<br />
When the composted manure is ready after the heating process (always wait<br />
at least two more days after the heating has stopped before introducing<br />
worms), many growers will test the manure with a small group of worms. If<br />
the worms aren't adversely affected after twenty-four hours^that is, you don't<br />
see them dying or trying to escape—then the manure is probably safe for the<br />
rest of your worms.<br />
How Do you Get Started? 49
a higher nitrogen <strong>and</strong> protein percentage than steer, horse, <strong>and</strong><br />
rabbit manures. They should bs completely composted, which<br />
will take a bit longer; they can be more acidic as well. Calcium<br />
carbonate may have to be added to these manures as well. Check<br />
pH carefully.<br />
Poultry manures from chickens <strong>and</strong> turkeys have special<br />
problems. Heavy metals are associated with these manures, so<br />
they must be thoroughly washea. Most worm growers use only<br />
small quantities of poultry manures in feed stock <strong>and</strong> not in bedding,<br />
because of the very "hot" nature of this manure. It has a<br />
very high content of nitrogen <strong>and</strong> protein<br />
Coir (coconut fiber)<br />
Coir, also known as coia, is the shredded fiber of coconut<br />
husks. It has the consistency pf peat moss <strong>and</strong> some of peat<br />
moss's great moisture-retaining properties. It is becoming more<br />
<strong>and</strong> more popular, since it is a renewable resource, unlike peat<br />
moss. For the areas that produce coconuts, the discovery of a<br />
use for coir is very beneficial economically.<br />
ADVANTAGES:<br />
• Retains moisture very well.<br />
• Mixes well with other bedding material to help<br />
retain more moisture <strong>and</strong> to fluff up dense beddings.<br />
• Odor-free.<br />
• Very clean to use. Like pdat moss, if you spill some,<br />
it's no big deal—just let jt dry <strong>and</strong> sweep it up.<br />
• Has a good pH of about 6 to 6.5.<br />
• Doesn't compact in the bin.<br />
DISADVANTAGES:<br />
• Cost. It can be expensivq, considering that a lot of<br />
bedding materials are fre'e.<br />
Wood chips<br />
Wood chips can make an excellent bedding. Most worm<br />
growers mix wood chips with other bedding materials because<br />
they can dry out easily.<br />
50 the Worm Book
ADVANTAGES:<br />
• Very clean.<br />
• Odorless.<br />
• Mixed with other bedding, they keep bedding open<br />
<strong>and</strong> loose <strong>and</strong> allow air to get in readily.<br />
• They can be reused. In bedding, the wood chips<br />
aren't broken down quickly, <strong>and</strong> usually, when the<br />
worms are harvested, the wood chips can be picked<br />
or screened out <strong>and</strong> used again in another bin.<br />
• Cost. Many people can obtain wood chips from<br />
l<strong>and</strong>scapers for free.<br />
DISADVANTAGES:<br />
• Cost. Many people cannot get wood chips for free<br />
<strong>and</strong> must purchase them in bags.<br />
• They dry out quickly.<br />
• They are large <strong>and</strong> must be mixed with some other<br />
bedding.<br />
Sawdust can also be used as a bedding, much like wood<br />
chips. People who do woodworking have a large supply of sawdust.<br />
BEDDING THE BIN<br />
There are various ways to do this, depending on the kind of<br />
bin you have <strong>and</strong> what type of bedding you choose, but we will<br />
explain a simple type of bed. If you have purchased a commercial<br />
worm bin, follow the instructions that came with the bin.<br />
Once you have decided on the type of bedding, prepare it if<br />
necessary. Many of the most successful worm bins are a mixture<br />
of several beddings. Don't feel you have to use only one type of<br />
bedding.<br />
Fill your bin three-quarters full with the bedding. Make sure<br />
the bedding is just damp; when you tightly squeeze the bedding,<br />
no more than a few drops of water should come out.<br />
Add one to two h<strong>and</strong>fuls of garden soil to provide grit for<br />
the worms <strong>and</strong> the necessary microorganisms for composting.<br />
How Do You Get Started? 51
This is generally done for br<strong>and</strong>-new worm bins. For rebedding<br />
a worm bin, a h<strong>and</strong>ful or two of vermicompost will add the necessary<br />
composting microorganisms. Then you can add one of the<br />
additives below for grit. Mix a bit.<br />
Add the worms, <strong>and</strong> you are off to the races.<br />
Don't forget to feed the worms, too!<br />
Bedding Additives<br />
As we just mentioned, soil should be added to the bedding<br />
to provide composting bacteria <strong>and</strong> microorganisms that will<br />
help the worms turning wastes into vermicompost. There are<br />
other additives to neutralize the pH in the bedding (improving<br />
conditions for the worms) <strong>and</strong> to provide extra minerals for the<br />
worms, microorganisms, <strong>and</strong> finally for the plants.<br />
Dried eggshells are perfect for neutralizing the pH of acidic<br />
beddings <strong>and</strong> for providing grit| for the worms.<br />
Calcium carbonate will do the same thing, but eggshells are<br />
free. If you do decide to purchase calcium carbonate (powdered<br />
limestone) remember that a little goes a long way. A word of<br />
caution: Hydrated lime is not the same thing as powdered limestone.<br />
Store clerks have gotten 'the two confused, but hydrated<br />
lime will make your worms very unhappy <strong>and</strong> in many cases kill<br />
them.<br />
Rock dust is another product many worm growers use <strong>and</strong><br />
recommend. It provides grit <strong>and</strong> minerals for the worms <strong>and</strong><br />
microorganisms. The vermicompost produced with rock dust is<br />
full of trace minerals needed for good plant growth.<br />
52 The Worm Book
4<br />
MAINTAINING A WORM BIN<br />
WHAT TO FEED THE WORMS: DO'S AND DONTS<br />
Most organisms need a balanced diet, <strong>and</strong> earthworms are<br />
no exception. They prefer a balanced diet of cellulose (carbohydrates),<br />
fat, protein, <strong>and</strong> minerals. This diet sounds much like<br />
our own—<strong>and</strong> it is. The organic material that is fed to worms<br />
is usually referred to by worm growers as "feed stock." It is usually<br />
a nitrogen-rich material that also provides energy to the bacteria<br />
in the bin. In some cases the feed stock <strong>and</strong> the bedding<br />
material are the same, but this isn't always the case. Most feed<br />
stocks are very high in moisture <strong>and</strong> lacking in bulk. These foods<br />
soften quickly <strong>and</strong> don't provide enough space for oxygen to get<br />
down into the bedding material.<br />
Most people start a home vermicomposting system so they<br />
can recycle the kitchen wastes they produce. Vegetable wastes<br />
provide a basic vegetarian diet that is perfect for worms in a<br />
home vermicomposting system. However, commercial. worm<br />
food is also available. One advantage to commercial food is you<br />
know it is balanced <strong>and</strong> worms will eat it. Some worm growers<br />
say it is good to use commercial food when starting a new bin,<br />
so, if your worms are unhappy with their new home, you will<br />
know it is not the food they are objecting to. This sounds great,<br />
but commercial worm food isn't available everywhere; it is manufactured<br />
in Australia <strong>and</strong> sometimes the cost can be prohibitive.<br />
So what do you feed your worms?<br />
53
FOOD EXAMPLES<br />
Vegetables (including peels <strong>and</strong> tops)<br />
Fruit (peels <strong>and</strong> flesh)<br />
Coffee grounds, including filter<br />
Tea leaves <strong>and</strong> tea bags<br />
Kelp meal<br />
Plain breads<br />
Rice<br />
Cornmeal<br />
Pasta<br />
Cakes, muffins, biscuits<br />
Melons (a worm favorite)<br />
Brown sugar<br />
Floral arrangements<br />
(be sure the plants areinot poisonous, like ole<strong>and</strong>er)<br />
Crushed eggshells<br />
Cereal<br />
Pizza crusts<br />
Cheese (small amounts)<br />
Macaroni salad<br />
*Composted or aged greenl waste <strong>and</strong> manure from plant-<br />
eating animals like horses, cows, rabbits, <strong>and</strong> sheep<br />
And many more!<br />
,fWe must emphasize here that green waste <strong>and</strong> manures must first be com-<br />
posted. The main reason for this is that green wastes can produce high tem-<br />
peratures <strong>and</strong> nitrogen-based gases that can be lethal to worms. Also, manure<br />
may contain high levels of salts <strong>and</strong> ammonia, which must first be leached out.<br />
For detailed instructions, see chapter 3.<br />
54 The Worm Book
Citrus<br />
Meats <strong>and</strong> bones<br />
Garlic<br />
FOODS TO AVOID OR LIMIT<br />
Heavily spiced foods such as many Asian <strong>and</strong><br />
Mexican dishes<br />
Hair<br />
Dairy products: milk, yogurt, or butter<br />
Eggs<br />
Fresh green wastes <strong>and</strong> fresh manures<br />
Poisonous plants .<br />
Oils<br />
Salt<br />
Wood ashes<br />
Pet feces<br />
Absolutely no metals, foils, plastics, chemicals<br />
(including solvents <strong>and</strong> insecticides), or soaps<br />
should be placed in the worm bin at any time.<br />
Many of the foods listed in "Foods to avoid or limit" are not<br />
necessarily bad for worms. Foods such as meat <strong>and</strong> eggs are not<br />
recommended for home vermicomposting bins because they have<br />
some unpleasant side effects in the bin. The biggest problem is<br />
odor. Meat <strong>and</strong> dairy foods can produce very strong odors when<br />
the proteins in them break down. Most worms won't at all mind<br />
chewing on a nice chicken bone once in a while, but, for bins<br />
kept inside, care must be taken when feeding these foods.<br />
Another problem associated with the decomposition of proteins<br />
is that it will attract other animals that can become pests.<br />
The smell of a nice rotting piece of meat is something a fly just<br />
can't resist. Ants, mice, <strong>and</strong> rats are also attracted to the smell.<br />
Most people with indoor worm bins would rather not put out<br />
the "come <strong>and</strong> get it" sign for pests by using high protein foods<br />
in the worm bin. However, some worm growers do occasionally<br />
use protein foods, like bits of chopped egg, to provide the worms<br />
<strong>and</strong> other organisms in the bin with extra nitrogen <strong>and</strong> protein.<br />
Finally, some foods, such as citrus, with a high level of acidity<br />
can be toxic to worms <strong>and</strong> other organisms. These foods<br />
Maintaining a Worm Bin 55
should be used sparingly, if at all. Citrus peels contain a chemical<br />
called D'limonene, which is one ingredient used in pet shampoos<br />
to kill fleas <strong>and</strong> ticks. If you would like to try feeding citrus<br />
peels to your worms, run the rinds through the blender to make<br />
a slurry. As more surface area of the material is exposed, bacteria<br />
are able to break it down faster <strong>and</strong> it spends less time in<br />
the bin. Always be certain to bury the citrus down in the bedding<br />
<strong>and</strong> keep several thicknesses of wet newspaper sheets on<br />
top of the bedding to insulate it. It also should be noted that<br />
pesticide residues on plants can be toxic to worms, so all food<br />
entering the worm bin should first be washed.<br />
Grit<br />
Worms grind up their food in their gizzards. Just like birds,<br />
worms need grit in their diets to help the gizzard grind the food<br />
into smaller particles. In nature, when a worm feeds, bits of soil<br />
are taken in with the organic material <strong>and</strong> the gizzard can use<br />
these bits of soil to help the digestion process. However, in worm<br />
bins that use primarily kitchen wastes, it becomes necessary to<br />
add grit. It's a good idea to sprinkle some fine soil, rock dust,<br />
or eggshells over your worm bin every few weeks to make sure<br />
there is enough grit for the worms. Some worm growers even<br />
use fine s<strong>and</strong> (but not beach L<strong>and</strong>). Beach s<strong>and</strong> can be very<br />
coarse <strong>and</strong> may contain high levels of salt.<br />
Pathogens<br />
Whenever wastes are recycled, safety questions arise: Can<br />
pathogens such as E. coli or salmonella be found in my worm<br />
bin, <strong>and</strong> if so, are they a problem? The latest scientific answer is<br />
that, even though these <strong>and</strong> other bacteria can live quite nicely<br />
in a worm bin, they are rarely if ever a problem—<strong>and</strong> scientists<br />
don't yet know the reason why. What follows is the current state<br />
of research.<br />
If you are using a vegetable waste system, then most<br />
pathogens should not be a problem. Bacteria such as<br />
E. coli are generally associated with undercooked meat, <strong>and</strong> salmonella<br />
bacteria is introduced by contaminated fecal matter.<br />
There is ongoing research concerning pathogens in industrial<br />
wastes, <strong>and</strong> so far the preliminary results are excellent. Initial<br />
56 The Worm Book
esearch is pointing to the capability of the worm's digestive system<br />
to destroy the pathogens it ingests. So far, worms have been<br />
shown to destroy salmonella, E. coli, <strong>and</strong> other fecal pathogens<br />
in contaminated food to levels below health department guidelines.<br />
One county in Florida added worms to its sewer sludge at<br />
a waste treatment plant <strong>and</strong> found pathogens were indeed<br />
reduced to meet Environmental Protection Agency (EPA)<br />
pathogen st<strong>and</strong>ards. Again, these are preliminary findings, <strong>and</strong><br />
more research needs to be done to figure out just what is going<br />
on inside the worm's digestive tract to kill the pathogens.<br />
The EPA recommends composting possibly contaminated<br />
material at high temperatures—170°F (55°C)—for three days to<br />
greatly reduce the number of pathogens. Obviously, allowing a<br />
worm bin to reach this temperature would kill your worms, but<br />
pre-composting the materials you suspect might contain<br />
pathogens in an outside bin or pile for the recommended time<br />
<strong>and</strong> temperature before using them in your bin would be a good<br />
idea.<br />
As far as catching anything from your worm bin, good<br />
hygiene should always be practiced when h<strong>and</strong>ling any soil product.<br />
Washing your h<strong>and</strong>s <strong>and</strong> tools is always a good idea. Tell<br />
children who have worm composting systems in their classrooms<br />
to wash their h<strong>and</strong>s after working in the bin, <strong>and</strong> for very small<br />
children, tell them not to eat it!<br />
Pet Feces<br />
Pet feces of any kind should never be placed in the worm<br />
bin. As we just discussed in the previous section, a worm bin<br />
cannot reach temperatures high enough to kill pathogens. Also,<br />
fresh pet wastes come under the category of green manure <strong>and</strong><br />
can heat up your worm bin quickly, hurting your worms.<br />
Cats can harbor the protozoa for a disease called toxoplasmosis.<br />
The protozoa are passed in infected cats' feces, <strong>and</strong> when<br />
humans come in contact with the feces they have a chance of<br />
catching this disease. Pregnant women are usually warned about<br />
this problem by their doctor <strong>and</strong> are advised to let someone else<br />
clean the litter box if they have cats. Fetuses that come in contact<br />
with this protozoa before birth can be born with serious<br />
brain damage.<br />
Maintaining a Worm Bin 57
Unfortunately, if you put cat feces in a worm bin, the toxoplasmosis<br />
protozoa will pass intact through the earthworm.<br />
Then, when you are cleaning or changing bedding, the protozoa<br />
can accidentally be inhaled or eiiiter through a break in the skin.<br />
So do keep pet feces out—<strong>and</strong> don't let your cat use your worm<br />
bin as a litter box.<br />
HOW TO FEED YOUR WORMS ' '<br />
I<br />
• Saving the food wastes. First, you must collect the kitchen<br />
wastes to feed your worms. Many people put a plastic bucket<br />
under the sink or keep an extia small trash can next to their<br />
regular trash container. One gocd idea for a container is to recycle<br />
a one-gallon plastic milk jug. Cut the top off so it's wide<br />
enough to get food wastes in easily, but leave the h<strong>and</strong>le intact.<br />
When this container starts to get grimy, toss it out in the recycling<br />
bin <strong>and</strong> cut another one. Actually, any container is fine as<br />
long as you don't use a lid on it. Placing a tight lid on the container<br />
keeps fresh air out, thereby promoting the growth of<br />
anaerobic bacteria.<br />
Anaerobic bacteria grow ini environments that lack oxygen.<br />
These bacteria do a far less complete job of breaking down nutrients<br />
than aerobic bacteria <strong>and</strong> usually leave lactic acid or ethyl<br />
alcohol as their end products. These end products increase acidity,<br />
which can be harmful to w0rms, so it is important to try to<br />
limit the growth of anaerobic bacteria in your bin.<br />
If you are bothered by flies or other insects buzzing around<br />
your waste container, make a fine screen lid. Use a piece of<br />
screening from an old screen door or window <strong>and</strong> tape it to a<br />
piece of thick cardboard that has a hole cut out of the center.<br />
Of course you can get fancier With your lid project, but this will<br />
work.<br />
• Preparing the food. Most kitchen wastes can be placed in<br />
the bin without any preparation. However, the outer leaves of<br />
some vegetables have been sprayed with pesticides; these should<br />
be washed before they are fed to the worms. Washing everything<br />
is a good habit to get into, so you don't have a toxic problem<br />
later. Some of the vegetables <strong>and</strong> fruit that are known to have<br />
pesticide residues are strawberries, cucumbers, peppers, cabbage,<br />
<strong>and</strong> apples.<br />
58 The Worm Book
Many worm growers recommend chopping or grinding food<br />
in a food processor or blender to make the food easier for the<br />
worms to eat. This is up to you: Larger pieces need to decompose<br />
a bit before the worms can eat them <strong>and</strong> will thus take<br />
longer to recycle—but they will be recycled.<br />
Worm food or feed stock needs to be moist before going into<br />
the worm bin. This is generally not a problem with vegetable<br />
wastes—if anything, vegetable wastes can sometimes be too wet.<br />
If you have dry kitchen waste, such as dry bread, soak it <strong>and</strong><br />
wring it out to a damp consistency. You can mix dry food with<br />
vegetable foods that have a large moisture content to produce a<br />
moist diet. Some growers who feed a dry commercial food will<br />
sprinkle the food in the bin <strong>and</strong> then sprinkle water over it. This<br />
is easier for them.<br />
One word here about water: A number of worm growers<br />
caution against using chlorinated water in your worm bins. The<br />
chlorine, they say, will eventually harm your worms. If you live<br />
in an area with chlorinated water, you can buy dechlorination<br />
drops at any fish store or use distilled water. However, if you<br />
are feeding fairly wet vegetable food to your worms, you may<br />
not need to add additional water.<br />
• Where to put the food in the bin. If you have purchased<br />
a commercial worm bin, then follow the directions given with<br />
the bin. One commercial worm bin has you spread the food<br />
evenly over the bottom worm tray. If you have constructed your<br />
own worm bin or built one of the bins described in this book,<br />
then you should feed your worms using an area method.<br />
Divide your box in sections or areas of feeding. For small<br />
boxes, these areas can be very simple. Try numbering each corner<br />
<strong>and</strong> start feeding first in area one, then area two, <strong>and</strong> so on,<br />
until you are back to one again. If you are feeding once a week,<br />
it will take you four weeks before you get back to one again.<br />
Hopefully, by the time you get back to the first area, the food<br />
will have been eaten by the worms <strong>and</strong> will no longer be recognizable.<br />
It's a good idea to make a note of where you fed the<br />
worms last, so you don't put the food in the same area again.<br />
A simple record sheet or piece of colored tape that you can move<br />
from corner to corner will work. Record sheets can also include<br />
information on what kind of food <strong>and</strong> how much was fed to the<br />
worms at each feeding. This can help you find out what kinds<br />
Maintaining a Worm Bin 59
of foods your worms like <strong>and</strong> how much is enough to feed them.<br />
Larger bins have more areas in which to place the worm food.<br />
Make a map of your feeding areas <strong>and</strong> keep it by the bin. One<br />
way to do this is to divide the surface area of your bin like a<br />
tic-tac-toe board. Slip the map into a plastic sleeve <strong>and</strong> use an<br />
erasable marker, grease pencil, or reusable sticker to mark the<br />
area last used. When it's time to feed the worms again, move<br />
the sticker or re-mark the map. These sleeves can be mounted<br />
to the side of the box or on the lid for convenience.<br />
• How often should you fee;d the worms? There are no special<br />
hard-<strong>and</strong>-fast rules about when you should feed your<br />
worms. Some people like feeding them twice a week because they<br />
don't like the smell of their kitchen waste container if they don't<br />
empty it often. Others will wait <strong>and</strong> feed the worms once a<br />
week. It really doesn't matter when you feed the worms as long<br />
as they are getting enough food. If you're not sure, check the<br />
bin daily at first <strong>and</strong> watch the food gradually disappear. This<br />
is an especially good idea when baby worms begin to hatch <strong>and</strong><br />
feed, to make sure they are getting enough food. When the food<br />
is almost gone, add food to the next area. As you gain experience<br />
caring for the worms, you will know approximately how<br />
much food they need.<br />
If you are worried that opening your bin to look at the<br />
worms is disturbing them too much, remember that they can't<br />
see red light. So, if you check your worms at night using a flashlight<br />
with red cellophane over it, they will never know you have<br />
been there.<br />
• How to put the food in the bin. When you have determined<br />
where to put the food, pull back the top layer of bedding<br />
using a small h<strong>and</strong> trowel <strong>and</strong> bury the food about two inches<br />
deep. Replace the top bedding. Covering the food controls odors<br />
<strong>and</strong> makes the bin less attractive for flies <strong>and</strong> other pests. Some<br />
worm growers prefer to scatter the food on the top of the bedding<br />
<strong>and</strong> then add more bedding on top. Experiment <strong>and</strong> determine<br />
what works best for you.<br />
A note about adding fruit juice to your bin: Sometimes when<br />
fruit juice is added to a bin <strong>and</strong> dry bedding is placed on top,<br />
the juice will wick its way up. You end up with juice-soaked top<br />
bedding <strong>and</strong> every fruit fly in town coming to your house for<br />
60 The Worm Book
dinner. If you have leftover juice to feed to worms, go ahead <strong>and</strong><br />
pour it in, but place a couple of sheets of wet newspaper on top<br />
of the juice. The juice is less likely to wick through wet paper.<br />
Replace your bedding on top of the newspapers.<br />
• How much food waste can a worm eat? As we calculated<br />
in chapter 3, generally speaking, two pounds of earthworms will<br />
eat one pound of organic material or kitchen wastes in twentyfour<br />
hours. Under perfect conditions, this amount could rise to<br />
two pounds of earthworms eating two pounds of kitchen wastes;<br />
<strong>and</strong> under poor conditions the amount will fall to less then One<br />
pound in twenty-four hours. Watching the amount of food consumed<br />
by the worms is one way to tell how well they are doing.<br />
TEMPERATURE, MOISTURE, PH,<br />
AND AERATION REQUIREMENTS<br />
The environmental conditions in worm bins are quite important.<br />
In nature, if the soil gets too hot or cold, the worms can<br />
regulate their body temperature by moving down deeper in the<br />
soil. If the soil gets too acidic, the worms can simply move to<br />
another area. In keeping a worm bin, we are responsible for<br />
making sure our worms have tolerable living conditions. Drastic<br />
changes can send worms into shock <strong>and</strong> they can stop eating or<br />
breeding. Worms that have gone into shock may take some time<br />
to recover, <strong>and</strong> some may never recover <strong>and</strong> will die. Monitoring<br />
your worm bin is essential in keeping track of living conditions.<br />
You'll know when a problem is occurring, so you can take corrective<br />
measures.<br />
• Temperature Worm bin bedding should be kept at temperatures<br />
from 55 to 77°F (15 to 25°C). The optimum temperature<br />
for worms is between 72 <strong>and</strong> 74°F (around 23 to 24°C).<br />
Use a thermometer to check temperatures in the winter <strong>and</strong> summer.<br />
Special compost thermometers are also available—these<br />
have stems that are two feet long. Temperatures over 80°F or<br />
under 55°F in the worms' environment will greatly slow down<br />
their activity. Redworms will be severely stressed when temperatures<br />
fall under 50°F (10°C). If you live in an area where it<br />
becomes very cold in the winter, consider moving outdoor worm<br />
bins inside or adding extra insulation to the bin for the winter.<br />
Maintaining a Worm Bin 61
Freezing temperatures can kill your worms.<br />
Bedding temperatures above 86°F (30°C) can also be harmful<br />
to your worms, <strong>and</strong> anything above 90°F can be lethal. If<br />
your bedding is starting to get too hot, check the location of your<br />
worm bin. Is it in the sun or in a poorly ventilated area, or are<br />
the air holes in the bin blocked ? Consider moving your bin to a<br />
basement or back closet of you : house. Add extra bedding <strong>and</strong><br />
keep air flowing in the system. The moisture in the bedding will<br />
evaporate with good airflow <strong>and</strong> keep the temperatures down.<br />
Watch moisture levels carefully <strong>and</strong> keep the levels up with extra<br />
water if needed.<br />
• Moisture levels Moisture levels are very important to<br />
worms. Their bodies contain approximately 75 to 90 percent<br />
water. Worms breathe by taking in dissolved oxygen through<br />
their skin, which must be kept moist. If worms dry out, they can<br />
no longer breathe, <strong>and</strong> they will die. Studies have shown that<br />
worms can live completely submerged for over an hour in oxygen-rich<br />
water, but, as soon as the oxygen is removed, they die.<br />
Moisture levels in bins should be kept between 70 <strong>and</strong> 80<br />
percent. This is the optimum moisture for worms. In very dry<br />
climates, bins may be a bit drier) Try not to let the moisture level<br />
dip below 60 percent. In summer months, consider placing a<br />
piece of plastic over the top of the bedding to help keep moisture<br />
in. If you use plastic, make sure there are enough air holes<br />
in the sides of your bin.<br />
In an outside worm bed or windrow, worm growers report a<br />
good top moisture level is between 35 <strong>and</strong> 45 percent moisture.<br />
This ensures adequate fresh air in the soil. However, some worm<br />
growers recommend an average moisture level of 55 percent.<br />
Check your worms at different moisture levels <strong>and</strong> chart<br />
their activity: Are they eating well, reproducing? Decide what<br />
moisture content your worms like best. Moisture meters or a<br />
moisture probe can be purchased at nurseries or electronic<br />
stores to check moisture levels, <strong>and</strong> are a good investment for<br />
the worm grower.<br />
• pH levels pH is a chemistry term for "potential hydrogen."<br />
pH measures acidity to alkalinity, on a forteen-point scale. On<br />
the pH scale, the number one indicates the most acidic, the number<br />
fourteen the most alkaline, <strong>and</strong> the number seven is neutral.<br />
62 The Worm Book
So, if you measured a sample of soil to be six <strong>and</strong> a half on the<br />
pH scale, you would say it is slightly acidic. IT you have a swimming<br />
pool, most likely you have checked its pH levels yourself<br />
or seen someone else do it.<br />
Most plants <strong>and</strong> animals do well in the pH range of six to<br />
eight. This is also true of worms. If you could keep your worm<br />
bin at a pH of seven (neutral), you would have happy worms.<br />
However, depending on living conditions <strong>and</strong> which foods your<br />
have fed the worms, the pH will fluctuate. A pH meter can be<br />
purchased to check the pH of your worm bin easily. Chemical<br />
test kits are also available, but these are messier, <strong>and</strong> one mistake<br />
voids the whole test.<br />
• Aeration In chapter 3, we talk about the breakdown of<br />
organic material <strong>and</strong> how this takes place in a composting system.<br />
In a worm bin, we strive to keep oxygen levels high to keep<br />
the aerobic bacteria happy <strong>and</strong> eating the organic material.<br />
Oxygen is also necessary for the survival of our worms. For a<br />
worm to breathe, oxygen must dissolve in the mucus on the<br />
worm's skin. Without oxygen, our worms die <strong>and</strong> the aerobic<br />
bacteria die, setting the stage for a takeover of the worm bin by<br />
anaerobic bacteria. A good indication of anaerobic activity is the<br />
presence of odors. Keeping bedding loose <strong>and</strong> providing air <strong>and</strong><br />
drainage holes in the bin are all good ways to ensure enough<br />
oxygen is getting into the bin. Some worm growers will actually<br />
turn their beds over every now <strong>and</strong> then to get added oxygen<br />
deep into the beds if they feel the bedding is getting compacted.<br />
HARVESTING<br />
Finally, you have the worm bin set up <strong>and</strong> going. Your<br />
worms are eating your organic wastes <strong>and</strong> now there is little or<br />
no original bedding visible in your bin. The original bedding has<br />
changed to brown <strong>and</strong> earthy-looking vermicompost.<br />
Vermicompost is a mixture of worm castings <strong>and</strong> decomposed<br />
organic matter. This process can take anywhere from six weeks<br />
to four months, depending on the size of the bin <strong>and</strong> the number<br />
of worms in it. The volume of the bedding will decrease over<br />
this time, making the environment more <strong>and</strong> more hostile for<br />
the worms. It's time to harvest. What a great day! Now what<br />
do you do?<br />
Maintaining a Worm Bin 63
"Worm growers who have purchased commercial worm bins<br />
usually don't have to worry about harvesting too much. These<br />
worm bins come with specific instructions, which work quite<br />
well, about when <strong>and</strong> how to harvest the worms <strong>and</strong> castings.<br />
For those who have made their own box-type bin system from<br />
either plastic or wooden boxes, there are several different ways<br />
to harvest the castings <strong>and</strong> the worms.<br />
NOTE: "When harvesting worms <strong>and</strong> vermicompost, some<br />
harvesting methods involve moving the worms from one bin to<br />
another. If you are planning to move your worms, you should<br />
always have the new bin bedded <strong>and</strong> ready to receive the sorted<br />
worms before you start harvesting, to reduce the stress on<br />
the worms.<br />
• Sorting method: Many worm growers who have small bins<br />
feel separating the vermicompost <strong>and</strong> worms in the bin is an easy<br />
method. One benefit of this method is that it doesn't disturb the<br />
worms too much, <strong>and</strong> it allows you to remove as little or as<br />
much of the vermicompost as you want.<br />
Begin by carefully separating the vermicompost from the<br />
uneaten food <strong>and</strong> the worms. Use a paintbrush to move the vermicompost<br />
to one side. Scoop the compost out. Wait a few minutes<br />
for the worms to move deeper into the bin <strong>and</strong> repeat the<br />
process until all the vermicompost is removed. The last layer will<br />
be thick with worms. If you need to remove some worms, do so<br />
now, or place new bedding on top <strong>and</strong> start composting again.<br />
• Screening method: This method involves separating the<br />
worms from the vermicompost using a screen. One way to do<br />
this is to dump your worm bin's contents, a bit at a time, on a<br />
framed, or 3/i6-inch screen. The vermicompost will drop<br />
through, leaving worms <strong>and</strong> larger particles of food <strong>and</strong> bedding<br />
behind. Return the worms back to a clean <strong>and</strong> freshly bedded<br />
bin or bins. Keep in mind that this method does stress the<br />
worms, <strong>and</strong> it may take them a few days to recover.<br />
Another method involves using a screen inside the bin. This<br />
method works great for small bins. Place a piece of flexible<br />
screen ( 3/i6-inch or so) on top of your worm bin when it is time<br />
to harvest. Use a big enough piece of screen so the screen will<br />
go up the sides of your bin. You will use this extra screening to<br />
64 The Worm Book
lift the top section out later. Now, rebed the worm bin right on<br />
top of the screen. This now becomes the top part of the bin. The<br />
worms will now move up through the screen to feed on the new<br />
food <strong>and</strong> bedding. When the worms are established in the top<br />
bedding, lift the top part out of the bin by the screen. Dump out<br />
the fine vermicompost in the bottom <strong>and</strong> pour the top part back<br />
into the bin. Repeat this process again when the bottom part of<br />
the bin is ready to harvest.<br />
• Light method: Worms are photophobic, which means they<br />
do not like light. To use light to help you, dump your worm bin<br />
in a tall pile on a piece of plastic. (Larger bins can be dumped<br />
a bit at a time.) Shine a light directly overhead—or do this outside<br />
on a sunny day—<strong>and</strong> the worms will burrow back down<br />
into the pile to get away from the light. Now brush off the vermicompost<br />
or castings off the top <strong>and</strong> sides of the pile <strong>and</strong> place<br />
them to one side. When the worms are exposed, wait until they<br />
burrow back down into the pile. Do this until the worms are<br />
completely separated from the compost. Now you have a pile of<br />
worms to separate into new bins or sell. Be sure to have new<br />
bins ready to receive the worms right after sorting, because<br />
worms exposed to light for too long will die.<br />
• Moving method: This method, which works well for larger<br />
bins that are too heavy to lift, involves moving the worms in<br />
your bin from one area to another. When the bin is ready to be<br />
harvested, move the contents of the bin over to one side. Now<br />
rebed the empty side with the same kind of bedding you used<br />
initially. Start feeding the worms on the new side only. The<br />
worms will start moving to the new side for food <strong>and</strong> clean bedding.<br />
This will take several days. When the worms have moved<br />
over, harvest the old side. Add new bedding to the old side <strong>and</strong><br />
repeat when necessary.<br />
•Water method: Some worm growers prefer to use their<br />
worm castings in liquid form. One way to do this is to harvest<br />
the castings by dissolving them in water. Spray your worm bin<br />
with water <strong>and</strong> collect the casting water that comes out, being<br />
careful not to waterlog your worms for too long. Rebed the<br />
worms as quickly as possible.<br />
Maintaining a Worm Bin 65
Another way this can be accomplished is to use the moving<br />
method described earlier. When the contents of the bin are<br />
moved over, add a screen partition to the bin. Now rebed the<br />
other side <strong>and</strong> feed the worms there. When the worms have<br />
moved over, slide a solid piece of wood next to the screen partition.<br />
This partition should be tight fitting <strong>and</strong> should not allow<br />
much water to pass between the two sides. Tilt the bin <strong>and</strong> spray<br />
water on the finished compost s|de. Be sure to have a drain outlet<br />
on each side of the worm bin. The collected liquid fertilizer<br />
can then be poured through a fine strainer to retrieve any worms<br />
or egg capsules.<br />
• Death method: Some worm growers do not want to sort,<br />
separate, or do anything but get) high-quality vermicompost that<br />
is almost completely vermicast pr castings. Vermicast is material<br />
that has been worked <strong>and</strong> re-worked until it has very little<br />
decomposed organic matter left in it. It is not considered to have<br />
more nutrients than vermicompost, since the material has been<br />
worked so much by the worms, but it has a very smooth texture<br />
that is quite desirable. To use this method, set up the worm<br />
bin <strong>and</strong> feed it over a period qf time. Get the worms off to a<br />
good start for a couple of months, <strong>and</strong> then don't feed them for<br />
three or four months. By that time, most of the worms will be<br />
dead <strong>and</strong> only castings will remain. Worm growers who prefer<br />
this method must buy new worms every time they set up a bin.<br />
• Modified death method: This method improves on the<br />
death method by allowing some worms to live. To use this<br />
method, you will need two worm bins. Start one bin, <strong>and</strong> when<br />
it is almost time to harvest it, place some food that is very attractive<br />
to the worms, like a cantaloupe rind, on top of the bin.<br />
Draw as many of the worms as you can to the food. Now dig<br />
down <strong>and</strong> transfer these worms to the new bin <strong>and</strong> start feeding<br />
them. The old bin, which will still have some worms left in<br />
it, is now not fed, <strong>and</strong> the worms are allowed to work <strong>and</strong> rework<br />
the bin until they eventually die. This process will take a<br />
bit longer than the death method because there aren't as many<br />
worms working in the bin that is not being fed. The benefit is<br />
that you still have a working bin eating your wastes <strong>and</strong> another<br />
bin producing well-processed castings.<br />
66 The Worm Book
• The garden method: If you are raising worms for use in<br />
your garden, then this method couldn't be easier. When your bin<br />
is ready to be harvested, simply remove one-half to two-thirds<br />
of your bin <strong>and</strong> take it to the garden. Your garden needs will<br />
dictate where you put the worms <strong>and</strong> compost. Make sure there<br />
is enough organic material for your worms to survive. Now<br />
rebed the rest of the worm bin <strong>and</strong> continue.<br />
Worm egg capsules or cocoons<br />
A word here about worm egg capsules. They are very small<br />
<strong>and</strong> will easily fit through a 1/4-inch screen. When you separate<br />
the vermicompost from the worms, it is very hard <strong>and</strong> timeconsuming<br />
to pick out the egg capsules from the compost. One<br />
way to get around this is to place the separated vermicompost<br />
that contains capsules in another bin. In the center of the bin,<br />
place some blended kitchen wastes. Wait about two months,<br />
checking it from time to time, <strong>and</strong> then go back <strong>and</strong> screen it<br />
again. By then the baby worms will have hatched <strong>and</strong> can be<br />
easily separated.<br />
There are several references that say you should not touch egg<br />
capsules with your bare h<strong>and</strong>s. One states, "oils from touching<br />
the capsules may cause mold <strong>and</strong> infertility," <strong>and</strong> another says,<br />
"natural skin oils will break the surface seal of the egg capsule."<br />
So, it is a good idea to wear gloves if you plan to h<strong>and</strong>-sort<br />
worms. (Besides, some people do not like the slimy feel of the<br />
worms themselves!)<br />
WHAT SHOULD YOU DO WITH EXTRA WORMS?<br />
This is a wonderful problem to have because it means you<br />
are definitely doing something right with your worm bin. If you<br />
only want to maintain one worm bin for home waste disposal,<br />
<strong>and</strong> you live in an apartment or don't have a garden, then the<br />
problem of extra worms may come into play.<br />
Maintaining a Worm Bin 67
HERE IS A LIST OF JUST A FEW OF THE PLACES<br />
AND PEOPLE WHO WOULD WANT YOUR WORMS:<br />
. Gardeners<br />
Garden centers, nurseries<br />
Dairies <strong>and</strong> horse ranches<br />
(to vermicompost their manures)<br />
Fishermen, bait shlops<br />
Fish hatcheries<br />
Game bird farms<br />
Pet stores<br />
Scientific researches<br />
(who need them for experiments*)<br />
Commercial worm growers<br />
People wanting to start their<br />
own worm bin<br />
Schools, 4-H club, Boy <strong>and</strong> Girl Scouts<br />
Waste treatment plants, l<strong>and</strong>fills<br />
"Experiments are underway using earthworms to dispose of the vast quantities<br />
of garbage <strong>and</strong> sewage sludge produced by cities <strong>and</strong> turn it into safe <strong>and</strong> use-<br />
ful fertilizer.<br />
Worms, which are high in protein <strong>and</strong> low in fat, are being studied as a<br />
future food source for developing countries. Check chapter 13 for recipes fea-<br />
turing earthworms.<br />
68 The Worm Book
5<br />
PROBLEMS IN THE WORM BIN<br />
New worm growers think that if they follow all the instructions<br />
that come with their new bin, they won't have any problems<br />
with their worms. Well, new worm growers will soon learn<br />
that growing worms requires special techniques, <strong>and</strong> problems<br />
sometimes arise. It's the ability to recognize<br />
these problems <strong>and</strong> act quick-<br />
ly that separates the successful worm<br />
grower <strong>and</strong> the not-so-successful<br />
worm grower.<br />
Every worm bin or bed is unique,<br />
so your bin will probably act a bit<br />
differently than everyone else's.<br />
Factors that will be unique to you<br />
It is estimated that only<br />
7 percent of the people<br />
who own worm bins will<br />
experience no problems<br />
with their bins.<br />
might be, for example, the temperature <strong>and</strong> humidity of your<br />
local climate <strong>and</strong> your worm bin's location. Factors that worm<br />
growers have in common may be moisture levels in the bins,<br />
types of foods being given, <strong>and</strong> the type of worm bin being used<br />
to grow the worms.<br />
69
The following is a list of common problems that worm growers<br />
face <strong>and</strong> practical solutions [that worm growers can use:<br />
AN UNPLEASANT ODOR IS COMING<br />
FROM MY WORM BIN.<br />
Odors can be caused by several factors:<br />
1. Your worm bin is over-full with food wastes. The worms<br />
simply have too much food to eat <strong>and</strong> the leftover food<br />
is rotting, causing the odor. To correct, break up any<br />
clumps of food <strong>and</strong> stop adding food until the worms<br />
have had a chance to eat what you have already provided.<br />
You also should try covering the food well with bedding<br />
material or sheets of damp newspaper if you are not<br />
already doing so.<br />
2. Your worm bin isn't getting enough air. Gently stir up the<br />
entire bin (if your bin isn't) too large) to get more oxygen<br />
into the system. Anaerobic bacteria, which grow in<br />
the absence of oxygen, are usually quite smelly. You may<br />
need to repeat the stirring every so often for several days.<br />
Also try mixing in some fresh loose bedding to get more<br />
air into the system. Check to see that you have enough<br />
air holes in your bin <strong>and</strong> that they are not blocked.<br />
3. Your bin is too wet. Check the drainage holes to see if<br />
they are blocked. Blocked air holes can also cause moisture<br />
levels to rise <strong>and</strong> the oxygen levels to fall. If the<br />
drainage holes are not blocked, you might be adding too<br />
much wet food to the bin. Each time you put food in the<br />
bin, place a layer of damp shredded newspaper over the<br />
food. This helps to absorb excess moisture in wet food.<br />
Also, avoid adding any extra water or foods with a high<br />
moisture level for a while. (Foods such as pureed fruit<br />
are very wet; use dryer foods instead.) Adding some dry<br />
bedding could also help. If your bin is really wet <strong>and</strong> the<br />
worms are in danger of drowning, soak up as much<br />
water as you can with a turkey baster <strong>and</strong> push sphagnum<br />
moss or paper toweling down the sides of the bin<br />
to absorb more. Change the moss <strong>and</strong> paper often until<br />
the moisture level comes down.<br />
70 The Worm Book
4. Your bin is too acidic. Acidic conditions may cause an<br />
odor. Test your bin with a pH meter available at many<br />
local nurseries, home centers, <strong>and</strong> swimming pool supply<br />
centers. Cut down on the amount of acidic foods you<br />
give the worms. Try adding smashed eggshells to lower<br />
the pH. (Adding eggshells a couple of times a month will<br />
go a long way toward balancing the pH.) Other safe<br />
products that can neutralize acidic bedding are rock dust<br />
<strong>and</strong> calcium carbonate. Both of these products will also<br />
provide grit to the worms. Some people like to use garden<br />
lime to lower pH, but you should be very careful, as<br />
it can lower the pH dramatically if you use too much.<br />
Hydrated lime should never be used because it can<br />
severely shock the worms.<br />
5. Some foods just stink. Foods in the broccoli family just<br />
plain stink <strong>and</strong> you may wish to avoid using them. Try<br />
one food at a time, <strong>and</strong>, if the smell bothers you, don't<br />
use that food again.<br />
6. You are using the wrong food. Meat products, dairy<br />
foods, <strong>and</strong> very oily foods should not be fed to worms.<br />
They usually go rancid while they are decomposing <strong>and</strong><br />
cause a terrible odor.<br />
THE WORMS ARE LEAVING THE BIN.<br />
Worms used for worm composting systems prefer<br />
specific conditions <strong>and</strong> some worm species are choosier than<br />
others.<br />
1. Do you know what kind of worms you have? When you<br />
order worms, be sure to ask for the scientific name<br />
because many worms have several common names<br />
depending on whom you ask. Find out for sure by asking<br />
for the scientific name <strong>and</strong> then looking up the specific<br />
conditions for that worm species in chapter 4 of<br />
this book. Now that you know which worm you have,<br />
check the moisture levels, temperature, <strong>and</strong> acidic conditions<br />
specific to your worms.<br />
2. Use light to keep them in the bin. When worms are<br />
shipped or sorted, they become stressed. When these<br />
Problems in the Worm Bin 71
stressed worms are placed im the new bins, they will sometimes<br />
stage a walkout for no apparent reason. Conditions<br />
could be right, but they mi^ht leave just the same. Leave<br />
a bright light on over the nejw bin for a few days to force<br />
the worms into the bedding until they get used to their<br />
new home.<br />
THE WORMS ARE DYING.<br />
You notice the number of wprms seems to be dropping, <strong>and</strong><br />
you have found some dead woijms. This is an emergency situation,<br />
so act quickly.<br />
1. Move your worms to another bin now! It is always good<br />
to have an emergency bin ready in case of emergencies<br />
like this, but if you don't halve one, don't panic. Use anything<br />
on h<strong>and</strong> <strong>and</strong> don't worry about the size: an old ice<br />
chest, wooden box, or garbage can can work in a pinch<br />
as long as it is clean. Fill the bin with a neutral bedding<br />
like clean leached peat or shredded newspaper. If your<br />
worms were once happy in! a specific bedding, use that.<br />
Once you have the worms hioved to the new bin, check<br />
your bin for these possible problems:<br />
a. The bin is too wet <strong>and</strong> the worms are drowning. Soak<br />
up as much water as yoi] can <strong>and</strong> insert small rolls of<br />
newspaper throughout the bin.<br />
b. The bin is too dry. Give the bin a good soaking in dechlorinated<br />
water. Make sure the drain holes are open.<br />
c. The worms are not getting enough food. "When worms<br />
eat everything there is to eat in the bin, they will begin<br />
to eat their own castings. This can be fatal to the<br />
worms; in a case like this iyo.u should harvest the worms<br />
as soon as possible.<br />
d. The temperature is wrorlg in the bin. "Worms usually<br />
like temperatures from 55 to 77°F. Use a probe thermometer<br />
to determine t]he internal temperature, <strong>and</strong><br />
move the bin if necessary.<br />
e. Check light levels. Too rpuch light can kill worms or<br />
make them uncomfortable. A nice dark basement is an<br />
excellent place to keep your worm bin.<br />
The Worm Book
f. Are you using chlorinated water? Some communities<br />
have a chlorinated drinking water system; this can<br />
sometimes be harmful to worms. Switch to unchlorinated<br />
water.<br />
g. The pH is wrong. The bin can be too acidic or too alkaline.<br />
Check with a pH probe. A pH of 7 is ideal.<br />
Finally, if you can't find anything wrong with your bin, it<br />
might be easier just to dump out the old bedding <strong>and</strong> food <strong>and</strong><br />
start again. This time, monitor the bin closely for any changes.<br />
If you are not doing so already, try keeping records to pinpoint<br />
the problem.<br />
HOW DO I GET RID OF THE FLIES AROUND MY BIN?<br />
When most people complain about flies, they are talking<br />
about small fruit flies (Drosophila). These we will address in<br />
more detail in chapter 8, but, to keep them away from your bin,<br />
try these helpful suggestions.<br />
1. Put a lid on your bin. If you can't do that, then lay newspaper,<br />
old carpeting, plastic sheeting, or a fine screen on<br />
top of the bin. (Make sure the bin gets plenty of air if<br />
you use plastic sheeting.)<br />
2. Make a trap for the flies. A small bowl half-full of apple<br />
cider vinegar mixed with a drop of liquid dishwashing<br />
detergent makes a good trap. Drawn to the smell of the<br />
vinegar, the flies fall in the liquid <strong>and</strong> drown.<br />
3. Bury the food. Just like their name implies, fruit flies love<br />
the smell of rotting fruit. Bury the food completely so the<br />
flies won't be so attracted to your bin.<br />
4. Vacuum the bin. This may sound strange, but a small<br />
h<strong>and</strong>-held vacuum will eliminate the flies with one pass.<br />
Problems in the Worm Bin 73
WHY IS IT TAKING SO LONG FOR THE WORMS<br />
TO PRODUCE ENOUGH CASTINGS TO USE<br />
IN MY GARDEN?<br />
Most people don't recognize that worm bins are miniecosystems<br />
in which everything must go along at its own pace.<br />
You don't just get a new worm bin <strong>and</strong> throw in bedding,<br />
worms, <strong>and</strong> food <strong>and</strong> have the worms eating all of your household<br />
vegetable wastes <strong>and</strong> producing enough usable castings in<br />
one day. But you will—just give it time! Most worm bins need<br />
to be harvested every two to four months, depending on the<br />
size <strong>and</strong> type of the bin. Wornis need attention <strong>and</strong> time, <strong>and</strong><br />
if you set things up right you will have great castings soon<br />
enough.<br />
THE WORMS AREN T EATINjG.<br />
Worms definitely like conditions to be just right, but some<br />
things to consider are:<br />
1. Is it a new bin system? Sdmetimes when you first put<br />
worms in a new system they are slow to eat. They need<br />
to get used to their new home. It is best just to wait a<br />
while <strong>and</strong> avoid feeding any more food (or you take the<br />
risk of adding too much fo[od). The worms should start<br />
eating in a few days.<br />
2. Check conditions. Go through your checklist of requirements<br />
for the species of worm you have. Are the temperature,<br />
acidity, <strong>and</strong> moisture levels within limits? Is the bin<br />
getting enough air? Check everything.<br />
THE BIN IS TOO ALKALINE. WHAT CAN BE DONE?<br />
1. Move the worms to a neutrhl bin. If the bin is very alkaline,<br />
that would be the easjest <strong>and</strong> quickest way to correct<br />
the problem. Then start your main bin over with<br />
fresh bedding.<br />
The Worm Book
2. Feed an acidic food. When the bin is only slightly alkaline,<br />
feeding the worms an acidic food for a while will<br />
help bring down the bin's pH level. Try feeding the<br />
worms some citrus (without the peels), but again, not too<br />
much at a time. Test the bin's pH level regularly until it<br />
gets back to normal.<br />
3. Add fresh neutral bedding to the bin. Adding some shredded<br />
paper or leached peat moss to the bin will also help<br />
lower the pH level.<br />
4. Add sulfur. Worms like very gradual changes in their<br />
bins. This might be tried as a last resort <strong>and</strong> then used<br />
very sparingly.<br />
THE WORMS ARE GONE.<br />
This is a horrible discovery. Many things could have happened<br />
in an enclosed indoor worm bin.<br />
1. The worms died. Yes, this could happen. Since worms<br />
decompose very quickly, you might miss seeing this if you<br />
weren't watching your worms closely.<br />
2. They are hiding. Sometimes when conditions are right<br />
you will find the worms all bunched up together in a corner<br />
or bottom of the bin. Look carefully again to make<br />
sure they are really gone.<br />
If your bin is kept outdoors or your worms are in an outside<br />
bed, then other possibilities come into play.<br />
1. The bed was too hot. If you put grass clippings or other<br />
green waste into your worm bed, the temperature of the<br />
composting waste may have raised the temperature of the<br />
bed <strong>and</strong> forced the worms to leave. Most of the time,<br />
when the temperature goes down the worms will return.<br />
2. They escaped. If your bin is on the ground, then the<br />
worms may have simply left the bin through the drainage<br />
holes. This has happened to more than one new worm<br />
grower.<br />
Problems in the Worm Bin 75
LARGE GRUBS ARE IN MY BIN.<br />
HOW CAN I GET RID OF Till EM EASILY?<br />
Many people who use grass clippings as a food may run into<br />
this problem at one time or another. The grubs are not hurting<br />
the worms, but instead are competing for the food in the bin.<br />
In an outdoor bed, many people don't mind the grubs, especially<br />
if they are trying to compost l'arge quantities of green wastes.<br />
But if you don't want them, try placing a melon rind, skin side<br />
up, in your bin. The grubs love this food <strong>and</strong> will come up to<br />
feed on it. Then you can simply remove the rind, along with the<br />
grubs. Melon rinds will help dpw worms up also.<br />
HOW CAN I TELL IF MY W(pRMS ARE HEALTHY?<br />
New worm growers ask this question all the time. A few<br />
ways are:<br />
1. Get to know your wormsJ As any good zookeeper or<br />
rancher will tell you, you need to get to know your animals.<br />
By observing healthy worms, you will soon be able<br />
to spot unhealthy ones.<br />
2. Shine a light on the worms\ When you open your worm<br />
bin, shine a flashlight insidfe. The worms should quickly<br />
bury themselves. If they don't, they could be sick.<br />
3. Check slime levels. All woifms have slime on their bodies.<br />
If your worms are lookihg dry, then you have a problem.<br />
4. Are the worms eating their<br />
not, then the worms may<br />
conditions in the bin.<br />
5. Smell. Foul odors can indicate a problem.<br />
The Worm Book<br />
normal amounts? If they are<br />
be having a problem. Check
MUSHROOMS CAME UP IN MY BIN TODAY.<br />
IS THIS BAD? -<br />
Mushrooms strongly indicate that fungi are present; they will<br />
do no harm to your worm bin. Fungi are part of the decomposition<br />
web <strong>and</strong>, since they are microscopic, most people do not<br />
realize they are even there until a mushroom comes up.<br />
Mushrooms have one bonus: their appearance is a good indicator<br />
that the temperature of your bin is between 70 <strong>and</strong> 75°F,<br />
which is a great temperature for redworms. Of course, it should<br />
go without saying, you should not eat these mushrooms. Simply<br />
pick them out <strong>and</strong> throw them away.<br />
MOLD IS GROWING ON FOOD I PUT<br />
IN THE WORM BIN. IS THIS OK?<br />
Mold is another organism in the composting process. Most<br />
people who bury their worm food do not see the mold doing its<br />
part for decomposition. The mold becomes noticeable when you<br />
don't bury the food. Usually this is no big deal <strong>and</strong> nothing to<br />
worry about, unless you are sensitive to mold spores. If you are<br />
allergic to molds, then vermicomposting indoors may not be for<br />
you. Keeping your bin outdoors <strong>and</strong> burying the food well will<br />
help.<br />
Problems in the Worm Bin 77
ANTS<br />
6<br />
OTHER ANIMALS FOUND IN A<br />
WORM BIN,<br />
QR<br />
WORM BIN VISITORS: GOOD<br />
GUYS AND BAD GUYS<br />
You go to tend your worms as usual <strong>and</strong> what should<br />
> ?=;.; v you see but a stream of ants going into your prized<br />
\J ^ worm bin. Your first thought is to grab the ant spray<br />
<strong>and</strong> spray the life out of the creatures. Don't! Insecticide sprays<br />
are toxic <strong>and</strong> dangerous to your worms.<br />
7\nt eradication <strong>and</strong> prevention ideas<br />
Ants are always searching for food or a home, <strong>and</strong> your<br />
worm bin looks like a good place for both. They probably won't<br />
do any real harm to your worrrjs, but they are a great nuisance.<br />
To get rid of the ants you see, spray a commercial window cleaner<br />
containing ammonia or lemon extract on a paper towel or rag<br />
<strong>and</strong> wipe the ants off the bin. Wipe only the outside, so the<br />
cleaner does not get into the binl. The cleaner will break the scent<br />
trail of the ants. Spray the cleaner on the trail away from the<br />
bin to kill the ants <strong>and</strong> removel the scent trail. When the cleaner<br />
dries, you can easily sweep or vacuum up the dead ants.<br />
Follow the trail to find out \ ow the ants are getting into your<br />
house <strong>and</strong> to your bin. Are they coming in through a hole or a<br />
crack in a window, or just walking in the back door? Prevention<br />
is the key. Plug any holes or cracks <strong>and</strong> repair screens. Discourage<br />
ants from coming in by using a barrier. There are many substances<br />
ants will not cross, <strong>and</strong> you can use one of these to block<br />
them from entering:<br />
78
• cayenne pepper<br />
• cleanser<br />
• eucalyptus oil<br />
• lemon juice<br />
• lemon-scented oil<br />
• mentholated rub<br />
• talcum powder<br />
• tanglefoot or any sticky substance<br />
• water<br />
Experiment with these; maybe you know of some others.<br />
Unfortunately, they will not last forever <strong>and</strong> must be reapplied<br />
periodically. Bins that are on legs can be made ant-proof by placing<br />
the legs in containers of water, like coffee cans or cut-down<br />
plastic milk jugs. Place water about one-half to three-quarters<br />
full. Keep the containers <strong>and</strong> water clean of debris. You don't<br />
want a bridge for the ants to cross.<br />
Control ants by sending poison bait back to their nest. The<br />
ants will find the bait <strong>and</strong> return with it to the nest. There they<br />
will feed the bait to the rest of the ants, killing all of them.<br />
A simple bait that can be used for ants inside <strong>and</strong> out is:<br />
'/< cup granulated sugar<br />
'/< cup boric acid or borax<br />
ANT DEATH BAIT<br />
a h<strong>and</strong>ful of dry dog or cat kibble<br />
old spice jars with shaker tops,<br />
or small plastic containers with lids<br />
Mix the sugar <strong>and</strong> boric acid or borax together. Clean <strong>and</strong><br />
dry an old spice jar. If you don't have an old spice jar, use<br />
a small, clean plastic tub, like the ones margarine comes<br />
in. If you are using the plastic tub, poke at least four holes:<br />
one in each direction, about 1/4 inch up from the bottom<br />
of the container. Label containers "Ant Bait."<br />
Place about 1 heaping tablespoon of the boric acid/sugar<br />
mixture in the jar or tub. Add 2 or 3 pieces of the kibble.<br />
With smaller kibble use more. Snap on the plastic<br />
Other Animals... 79
shaker top or the Jid of the plastic tub. Recipe makes several<br />
ant bait stations, or store unused bait in a sealed container<br />
for later use. Make sure to carefully label all<br />
containers "Ant Bait"!<br />
Place the jars or tubs where ants will find them (turn the<br />
spice jars on their sides so that ants can easily crawl in).<br />
Keep them away from pets <strong>and</strong> children.<br />
Some ants like liquid baits better then dry baits. To prepare<br />
a liquid bait, mix nine parts corh syrup with one part boric acid<br />
or borax. To use this liquid bait, prepare the plastic container<br />
as in the recipe above, making the holes in the container high<br />
enough so the syrup does not pjour out. Put a quarter-sized dollop<br />
of the bait in the center of the container, <strong>and</strong> place it where<br />
you see ants. When the bait drip out, replace it with fresh bait.<br />
If you can, follow the ant Brail back to the nest. Here, you<br />
have several options to kill the nest, all of which are nontoxic<br />
to the environment.<br />
1. Pour boiling water on the niest. This won't kill all of the<br />
little creatures at one time, but it will certainly put a dent<br />
in their population.<br />
2. A strong hot chile solution will not only kill the ants, but<br />
will make the nest unlivable.<br />
3. Sprinkle dry cornmeal arounjd the entrance to the ant nest.<br />
This old remedy is said to Work by exp<strong>and</strong>ing in the ant<br />
after it is eaten, killing the ant. (It's the same reason why<br />
we don't throw rice at weqdings anymore. The rice will<br />
do the same thing to birds.)l<br />
HOT PEPPER SOLUTION<br />
Suntea jar or any large jar, at leSst I-quart size<br />
2 to 4 sliced hot peppers<br />
(serrano, habanero, or the hottest available in your area)<br />
I quart water<br />
Put the sliced peppers in the jar <strong>and</strong> fill it with hot water.<br />
Let the mixture steep for at l^ast 24 hours. Remove the peppers<br />
<strong>and</strong> pour the solution ihto the nest.<br />
Finally, ants can get into your worm bin if you use fresh gar-<br />
The Worm Book
den wastes in your bin. These little creatures will come right in<br />
with that h<strong>and</strong>ful of grass clippings. If you do use garden wastes<br />
that are not composted first in your indoor bin, it is best to kill<br />
the ants. To do this, either soak or heat the greens prior to<br />
adding them to the bin. Soaking works great for leaf material,<br />
but it's hard for grass. One way to heat grass easily is to place<br />
it in an old aluminum roasting pan (the level of the grass shouldn't<br />
be higher than the top of the pan) <strong>and</strong> pop it into a warm<br />
oven. Thirty minutes in a 180 to 200°F oven should do the trick.<br />
7\ word about ants<br />
Ants are members of the wasp order of insects called<br />
Hymenoptera. There are more than 3,500 different species of<br />
ants that live in nearly every l<strong>and</strong> habitat in the world. All ants<br />
are social in nature <strong>and</strong> live in colonies called nests or mounds.<br />
Colonies consists of a queen (or queens) <strong>and</strong> female workers.<br />
Males are only produced by the queen when the nest is getting<br />
crowded. Then she will produce winged males <strong>and</strong> females that<br />
go out <strong>and</strong> establish new colonies. Female worker ants have<br />
many jobs in the nest. Some workers tend the queen <strong>and</strong> others<br />
tend the young; still others are scouts.<br />
Scout ants are workers that forage for food. When a scout<br />
ant finds food, such as in your worm bin, she will lay down a<br />
scent trail that the rest of the worker ants can follow back. These<br />
scent trails, only last for a few minutes, but that is usually long<br />
enough for the ants to get from the nest to the food.<br />
Ants are the geniuses of the insect world. Scientists have<br />
shown that ants are capable of individual learning <strong>and</strong> passing<br />
on what they have learned to other ants. They can display memory,<br />
correct their mistakes, <strong>and</strong> communicate among themselves.<br />
Ants communicate by exchanging chemicals in their mouths<br />
when they meet.<br />
CENTIPEDES<br />
While tending your worm bin, chances are you will come<br />
into contact with this prehistoric-looking creature.<br />
Centipedes are fast moving <strong>and</strong> they are looking for a<br />
meal. Unfortunately, it's your worms they are hoping to<br />
eat. It's like having a wolf in the hen house.<br />
Other Animals... 81
What are they?<br />
Centipedes are arthropods <strong>and</strong> members of the class<br />
Chilopoda, which has 3,000 described species. They can be found<br />
throughout the world in both the temperate <strong>and</strong> tropical regions.<br />
They live in soil <strong>and</strong> humus <strong>and</strong> can be found under stones, bark,<br />
<strong>and</strong> logs. Centipedes can range from one inch to one foot in<br />
length <strong>and</strong> come in various colors. They can be recognized by<br />
their flattened shape <strong>and</strong> their single pair of long legs per segment.<br />
(The name centipede means "hundred legs.")<br />
The whole class is believed to be predators of living animals.<br />
They use a set of poison claws to capture, stun, or kill their prey.<br />
The venom that centipedes possess is not sufficiently toxic to be<br />
lethal to humans, but a centipede's bite can be quite painful.<br />
People who have been bitten say it is like a severe yellow jacket<br />
or hornet sting.<br />
(jetting rid of centipedes<br />
Any centipedes you find n your worm bin should be<br />
destroyed. They are definitely pests, <strong>and</strong> they are out to eat your<br />
worms. There is no magic here pbout getting rid of them: When<br />
you see a centipede, chase it dovyn <strong>and</strong> kill it with a garden trowel.<br />
Some worm growers say you can pour a bit of soda water<br />
on the centipede to stun it, but they are fast runners,<br />
One good thing is that ceni ipedes, like most predators, are<br />
territorial. This means there wojr't be too many in any one spot.<br />
ENCHYTRAEID WORMS<br />
Enchytraeid worms, sometipes called pot worms or white<br />
worms, are relatives of the ear! hworm <strong>and</strong> belong to the family<br />
Enchytraeidae. They are sma 1 worms, reaching only 1/4 inch<br />
long when full grown, <strong>and</strong> are often mistaken for insect larvae<br />
or newly hatched redworms. Newly hatched redworms are transparent;<br />
within hours of their hatching they show a visible red<br />
vein running the length of their body <strong>and</strong> appear reddish. In contrast,<br />
an enchytraeid's blood contains no hemoglobin <strong>and</strong> so they<br />
remain white throughout their lives.<br />
The Worm Book
Enchytraeids can be found anywhere<br />
earthworms are found. One<br />
scientific study showed that in one<br />
square meter of meadow soil there<br />
were 700 earthworms <strong>and</strong> 8,000<br />
enchytraeids.<br />
Enchytraeid worms, like earthworms,<br />
eat decomposing plant material<br />
<strong>and</strong> burrow through the soil.<br />
Their castings become food for other<br />
microorganisms needed for decomposition.<br />
Many people feel they are<br />
quite beneficial in changing organic<br />
waste into compost, while others feel<br />
Scientists have calculated<br />
that if two houseflies<br />
met <strong>and</strong> mated<br />
<strong>and</strong> no predators ate<br />
them or their offspring,<br />
the fly pair <strong>and</strong> their<br />
offspring could produce<br />
enough flies to cover<br />
the entire earth 47 feet<br />
deep with flies—in just<br />
I year.<br />
they are competing with redworms for food <strong>and</strong> space <strong>and</strong><br />
should be eliminated in the worm bin. If you have enchytraeids<br />
in your worm bin <strong>and</strong> they are doing a great job producing<br />
vermicompost <strong>and</strong> eliminating your kitchen wastes, then<br />
don't sweat them being there.<br />
FLIES<br />
We are all quite familiar with the irritating buzzing of<br />
flies. There are thous<strong>and</strong>s of different species of flies<br />
A<br />
<strong>and</strong> there could be several different species hovering<br />
around your worm bin right now. Some of the more<br />
common ones are: house, vinegar, minute, <strong>and</strong> fruit<br />
flies, just to name a few. All of these are capable of making a<br />
nice home in your worm bin. What can you do?<br />
Keep flies out!<br />
Preventing the flies from taking up residency in the first place<br />
is your first line of defense. It is much easier to keep them out<br />
than it is to get rid of them once they are there. Some things<br />
you can do are:<br />
1. Place a screen cover over your kitchen waste container.<br />
Keep the flies out of your worm food before you feed<br />
your worms. Do not allow flies to get to the food waste<br />
Other Animals... 83
<strong>and</strong> lay eggs in it. If you feel that flies have already gotten<br />
to your kitchen wastes, ill is not lost. Place the waste<br />
in an old baking pan <strong>and</strong> cover it with foil. Heat the<br />
waste in a 200°F oven for SO to 45 minutes, depending<br />
on how much waste you haye. If you have a lot of waste,<br />
heat it for 45 minutes.<br />
2. Bury all food. Burying the wporm food in the bin, at least<br />
two inches down, helps prevent the flies from getting to<br />
the food <strong>and</strong> laying eggs ini it. It also prevents attractive<br />
food odors from escaping ajnd calling the flies to dinner.<br />
3. Do not bury the food in thi same place twice. This way<br />
you'll prevent piles of uneatien food that can attract flies.<br />
4. Feed worms a varied diet, a! balanced diet will help keep<br />
the conditions of the bed from becoming attractive to<br />
flies. Citrus is one food iterrl that can make the bed more<br />
acidic <strong>and</strong> appealing for flies.<br />
5. Don't overfeed. Uneaten focf>d attracts flies.<br />
6. Cut food into small pieces. This will help the worms eat<br />
the food faster <strong>and</strong> make it| less attractive to flies.<br />
7. Place a thick layer of new$paper, carpet, or cloth over<br />
the surface of the bin. This will keep the flies from coming<br />
in contact with the worm bedding. Wetting the<br />
newspaper will make a better seal. A piece of plastic<br />
used to keep moisture in will work, too. In outdoor<br />
windrows, a layer of dry Ifeaves or grass can keep flies<br />
from coming in contact w^th the bed.<br />
8. Keep the bedding material from becoming too wet. Wet<br />
conditions encourage fruit flies <strong>and</strong> anaerobic bacteria.<br />
9. Never place food that has maggots in it in your worm<br />
bin. (This may sound silly to mention, but it has happened.)<br />
Getting rid of the flies in the bin<br />
Once flies have established' themselves in your bin, getting<br />
rid of them is much tougher. Mtan.y species of fly <strong>and</strong> gnat spend<br />
the first part of their lives living in compost as maggots. In this<br />
The Worm Book
Form, they are doing just what your worms are doing: eating<br />
organic matter. In nature many animals live <strong>and</strong> eat together in<br />
the soil, but, in your worm bin, maggots are competing with<br />
your worms for food. So, it's time to take action. What can you<br />
do besides changing all the bedding in your bin?<br />
1. Check conditions ip the bin. Are they too wet or acidic?<br />
If they are, take corrective actions. See chapter 7.<br />
2. Remove rotting food from the bin <strong>and</strong> as many of the<br />
maggots feeding on it as possible.<br />
3. Stop feeding the worms for several weeks to allow the fly<br />
maggots to pupate, become adults, <strong>and</strong> fly away.<br />
4. Bury food deeper in the bin. The food may have been<br />
buried too close to the surface of the bin where the flies<br />
could find it. Flies cannot dig, but, if they detect an odor<br />
of food, they will lay their eggs on the bedding.<br />
5. Make a trap for the adults. There are many commercially<br />
available fly traps—or you can make one yourself. A<br />
few examples are:<br />
FLY TRAP #1. A solution of one cup apple cider vinegar<br />
with a drop or two of liquid dish washing detergent<br />
mixed into it makes an excellent bait for fruit flies <strong>and</strong><br />
can be added to several different traps.<br />
a. Pour it into the bottom of an old two-liter soda bottle.<br />
The bottle should contain at least two or three inches<br />
of the mixture. Attracted by the vinegar, the flies will go<br />
into the bottle, get caught in the liquid, <strong>and</strong> drown.<br />
b. Place one cup of the mixture in a resealable s<strong>and</strong>wichsize<br />
plastic storage bag. Cut a hole about the size of a<br />
quarter two inches down from the zipper. Attach the<br />
sealed bag with clothespins to an old coat hanger <strong>and</strong><br />
hang the bag over or near the bin. Again, the flies go<br />
in, but they don't come out. Discard when full.<br />
c. Construct the bag as directed in "method b." Mix onehalf<br />
cup vinegar with an equal part of water <strong>and</strong> then<br />
add a drop of soap. Next, add a piece of ground meat<br />
(the size of a quarter) to the liquid. The meat draws<br />
adult houseflies <strong>and</strong> wasps quite well.<br />
Other Animals... 85
d. Just set out a plain bowl with the vinegar/soap mixture<br />
<strong>and</strong> you will catch flies. Acid to the attractiveness of the<br />
vinegar by using a yellow bowl. Fruit flies are attracted<br />
to yellow.<br />
FLY TRAP #2. This trap is for pesky gnats. Place a glass<br />
with two inches of mint mouthwash in it next to the bin.<br />
Attracted to the peppermint extract, the gnats will fall<br />
into the glass <strong>and</strong> drown.<br />
FLY TRAP #3. Cut a plastic (two-liter soda bottle in half.<br />
In the bottom half place a cup of beer or a mixture of<br />
brewer's yeast <strong>and</strong> water. Tike the top half, throw away<br />
the cap, <strong>and</strong> place the top half on the bottom half so the<br />
spout is pointing down toward the beer. The spout<br />
should not touch the beer, tjut clear it by at least an inch<br />
or two. The two halves should fit snugly. (Place a piece<br />
of tape around the bottle if they don't.) The flies will<br />
smell a yummy dinner <strong>and</strong> fly in, never to return.<br />
6. The addition of beneficial Nematodes to a worm bin will<br />
produce good results. Thqse nematodes are selected to<br />
attack mostly insect larvae 1 <strong>and</strong> won't harm your worms<br />
or the beneficial organisms living in your bin. Nematodes<br />
are usually only available in the spring <strong>and</strong> summer<br />
months, which is the exact same time when flies are usually<br />
at their worst. Ask nurseries or home centers for<br />
beneficial nematodes <strong>and</strong> you will get a small box with<br />
nematodes mixed in a clay'base. Simply follow the package<br />
directions for applying. They are not cheap, but a<br />
few nematodes is all you reed in the worm bin. Use the<br />
rest on lawns, gardens, or arge outdoor soil worm beds.<br />
For more information concerning nematodes, check<br />
chapter 4.<br />
7. Have the maggots identified. This will tell you exactly<br />
which fly is becoming a problem. Maggots all look pretty<br />
much alike, so you will need to take a few maggots<br />
to the county entomologist!, agricultural-extension office,<br />
or local university to help with identification of the fly<br />
species.<br />
8. Get a toad. If you live in an area where there are plenty<br />
of toads, have one spend the night in your worm bin.<br />
The Worm Book
Place wet newspapers down over your bedding. By<br />
morning most of the flies hovering in the bin should be<br />
gone. But toads will eat worms too, so take the toad<br />
back outside the next day.<br />
9. Get out the h<strong>and</strong>-held vacuum cleaner. It works great to<br />
suck up the little flies that are hovering around. (It will<br />
also take care of those pesky little fruit flies hovering<br />
around the fruit bowl.)<br />
10. When all else fails <strong>and</strong> the maggots are taking over,<br />
changing the bedding is probably the only option left.<br />
7\ little about flies<br />
Flies are members of the Diptera class of insects. Diptera<br />
means "two wings"; all other flying insects possess four wings.<br />
All flies have spongy mouth parts <strong>and</strong> cannot eat anything solid.<br />
In order for the fly to eat, it first must dissolve the solid food<br />
into liquid form. To do this, the fly deposits saliva, or sometimes<br />
its whole stomach contents, onto the solid food it wants<br />
to eat. The saliva partially digests the solid food, dissolving it,<br />
<strong>and</strong> then the fly sucks up the dissolved food. This is how a<br />
house fly passes germs.<br />
. Some flies are looking for the right medium, usually decaying<br />
fruit or meat, in which to lay their eggs. This means that the baby<br />
flies (maggots) will have a plentiful food source when they hatch.<br />
GRUBS<br />
Grubs have been described as looking like "cocktail<br />
////>•! shrimp" living in compost piles. Sometimes they can<br />
k '' also be found in worm bins. Although these beetle<br />
\ ' larvae are not pretty, they really aren't all that bad<br />
for your bin.<br />
Grubbing around<br />
Grubs are the larval or infant form of various beetles. They<br />
are C-shaped <strong>and</strong> can range in size from a half inch to two inches.<br />
In this stage, the grubs are feeding on fresh plant material.<br />
They help to break down larger pieces of material into smaller<br />
ones that can be eaten by worms <strong>and</strong> other organisms. In an<br />
Other Animals... 87
outdoor worm bed or compost pile, many worm growers do not<br />
mind the presence of a few grups.<br />
Grubs can be accidentally introduced into the worm bin if<br />
you feed your worms fresh grass clippings. June beetles <strong>and</strong><br />
green fig beetles are two beetles associated with grass or sod.<br />
Pre-heating the grass, as described in the ant section of this chapter,<br />
can prevent grubs from entering the bin. It is also easy to<br />
place a melon rind on top of the bin <strong>and</strong> wait for the grubs to<br />
go to it, then toss out the rind <strong>and</strong> the grubs. For just a few<br />
grubs, it works well to h<strong>and</strong>-pjck the grubs out when you see<br />
them. Give the unwanted grubs to neighbors with birds or chickens;<br />
they also make a great treat for ducks at the neighborhood<br />
pond. Your own backyard bir Js, like jays, small hawks, <strong>and</strong><br />
road-runners, would also enjoy a nice grub meal.<br />
MILLIPEDES<br />
A big, fatj, round, segmented, wormlike<br />
H, creature with lots of tiny legs has just<br />
appeared in your worm bin. It looks like<br />
no other worm you have ever seen. Could this creature be harming<br />
your worms? Never fear—it is harmless.<br />
/} thous<strong>and</strong> legs<br />
Even though the millipede's name means "thous<strong>and</strong> legs," it<br />
actually has only about 400. Millipedes, which are arthropods,<br />
are cousins of the centipede <strong>and</strong> belong to the class Diplopoda.<br />
Each of their segments has twp pairs of legs. Most millipedes<br />
range in length from a half inclji to two inches, but the smallest<br />
is only two millimeters, while tihe largest tropical millipede can<br />
be up to twenty-eight centimeters long. Of the approximately<br />
8,000 described species, most mliilipedes are harmless, slow-moving<br />
animals that are found in mpist soils <strong>and</strong> plant debris. While<br />
only a few species are true garden pests, the majority are beneficial,<br />
eating dead <strong>and</strong> decaying plant material.<br />
Millipedes in your worm bin are looking to eat the organic<br />
plant wastes, just like your worms. Like grubs, millipedes break<br />
down large pieces of plant material for other decomposers. They<br />
The Worm Book
can usually be found in your worm bin if you use manure or<br />
composted plant material for bedding. They aren't true diggers,<br />
but will push their way through soft loose soils or bedding. Even<br />
though millipedes are harmless, some people do not like the<br />
looks of them. They are easily removed from your worm bin by<br />
h<strong>and</strong>-picking.<br />
MITES<br />
One day you'll open your worm bin <strong>and</strong> notice thous<strong>and</strong>s<br />
of tiny dots moving on the surface of the bedding.<br />
What are these dots <strong>and</strong> how did there get to<br />
be so many of them? You're sure they weren't there<br />
\ : 1 yesterday.<br />
The small but mighty mite<br />
Mites are very small (about one-fiftieth of an inch) <strong>and</strong> usually<br />
go unnoticed until their populations are in the millions.<br />
Close cousins to spiders, mites are arthropods that belong to the<br />
order Acarina, the same order to which ticks belong. All mites<br />
have eight legs <strong>and</strong> thus are not insects. (Insects have six legs.)<br />
They can be found in almost every habitat in the world, including<br />
polar regions, deserts, <strong>and</strong> hot springs.<br />
There are many different kinds of mites <strong>and</strong> they eat many<br />
different things. Some mites, like white <strong>and</strong> brown mites, eat<br />
only decaying plant material or injured worms, while others eat<br />
manure <strong>and</strong> other mites. Still others are parasites; people in the<br />
Midwest <strong>and</strong> South are familiar with certain mites called chiggers.<br />
The red mite you might find in your worm bin is parasitic<br />
on earthworms <strong>and</strong> is definitely a bad guy.<br />
Most people don't realize that mites reside in all worm beds.<br />
In well-maintained bins, mite numbers can be kept in control<br />
with conditions that are good for the worms but not so good<br />
for the mites (see below). When wet <strong>and</strong> acidic conditions build<br />
up in your worm bin, so will the numbers of mites. When mite<br />
populations are high, worms will not come to the surface to feed.<br />
This deprives the worms of needed food <strong>and</strong> causes them stress.<br />
Other Animals... 89
Preventing a mite takeover<br />
• Keep conditions good in jthe worm bin—a pH of 7<br />
is ideal.<br />
Don't overfeed. Overfeeding is one cause of acidic<br />
conditions. Worms eat less in colder months; modify<br />
feeding amounts if necessary.<br />
Mites love wet conditiohs, so keep the bin from<br />
becoming too wet. Keep drainage holes open, feed<br />
a drier food, <strong>and</strong> turn th£ bed if necessary.<br />
Qetting rid of mites<br />
There are several things you( can do to reduce the number of<br />
mites in your bin. You won't remove them all, but the number<br />
of mites will be under control. 0f course, if conditions are right<br />
for mites, you'll have another obtbreak. Mites can be rather difficult<br />
to control. Try one or mqre of the following methods for<br />
removing mites.<br />
1. Expose the bin to sunlight. If your bin is small <strong>and</strong> portable<br />
or outside, open the lid to the sun for several hours.<br />
2. Reduce the amount of watej: <strong>and</strong> food. This reduction of<br />
moisture <strong>and</strong> food will make the bin environment unfavorable<br />
to mites.<br />
3. Place moist newspaper or heavy cloth on top of the worm<br />
bedding. Mites will accumulate on the paper or cloth.<br />
Remove the paper or clojth the next day <strong>and</strong> you'll<br />
remove a lot of the mites. Repeat as necessary to control<br />
mite populations.<br />
4. Place melon rinds or potatp slices on top of the worm<br />
bedding to attract the mites'. Mites will flock to the food,<br />
which can then be removed <strong>and</strong> discarded. Remember,<br />
worms like melon rinds, to!o.<br />
5. Water your bin heavily, but do not flood it. The water<br />
will cause the mites to move to the surface of your bin.<br />
Now you have several options: Use a h<strong>and</strong>-held torch to<br />
burn off the mites or a strong vacuum to suck them up.<br />
If you use the vacuum, plate a couple of tablespoons of<br />
The Worm Book
oric acid or borax in the bag or holding container. This<br />
will kill the mites in the bag. Another option is to sprinkle<br />
sulfur on the surface of the bedding to kill the mites.<br />
Apply a rate of one-sixteenth of an ounce per square foot<br />
of bed surface. This will work well at killing the mites,<br />
but sulfur may increase acidity—the exact condition you<br />
are trying to avoid.<br />
6. Change the bedding. In extreme cases this may be your<br />
only answer.<br />
NEMATODES<br />
Nematodes are unsegmented worms. They are roundworms<br />
that belong to one of the largest phyla, Nematoda, which<br />
includes more than 10,000 species. This phylum contains some<br />
of the most widespread <strong>and</strong> numerous of all multicellular animals.<br />
Nematodes can be found in every environment, in every<br />
region of the world. They also can occur in tremendously high<br />
numbers. For example, one decomposing apple found on the<br />
ground of an orchard contained 90,000 nematodes.<br />
Nematodes have slender, elongated bodies that taper at both<br />
ends. They do not have segments like earthworms but instead<br />
are smooth-bodied. Nematodes can range in length from less<br />
that one millimeter for terrestrial <strong>and</strong> freshwater forms to over<br />
five centimeters for marine species.<br />
Nematodes can be free-living or parasitic. Many parasitic<br />
species cause severe crop damage. Some of the nematodes that<br />
cause damage are: the stem eelworm, the stinging nematode, <strong>and</strong><br />
the burrowing nematode. They infect underground bulbs of<br />
onions <strong>and</strong> other root crops. They can survive freezing temperatures,<br />
extreme heat, <strong>and</strong> drying out, making them difficult to<br />
control. Crop rotation <strong>and</strong> organic fertilizers can lead to a reduction<br />
in nematodes. Some studies have shown that earthworms<br />
can reduce the number of harmful nematodes in the soil.<br />
Nematodes also infest domesticated animals <strong>and</strong> even man.<br />
Diseases <strong>and</strong>. conditions caused by nematodes can range from<br />
mild to very severe. Virtually all groups of animals <strong>and</strong> plants<br />
are vulnerable to parasitic nematode attack. For example, the<br />
condition elephantiasis is caused by nematodes in the lymph system.<br />
It causes swelling in the arms <strong>and</strong> legs by blocking the<br />
Other Animals... 91
lymph vessels. The nematode phylum is one of the most important<br />
of the parasitic animal gropps.<br />
Nematode species can also b^ beneficial, especially some of the<br />
carnivorous species, which feed on small organisms <strong>and</strong> even other<br />
nematodes. Some nematodes canjbe applied to a yard to help control<br />
the population of insect grubs in the lawn. Others parasitize<br />
flea larvae <strong>and</strong> reduce flea populations. Over two hundred pest<br />
species of insects can be controlled by applying nematodes.<br />
The two common species rif nematodes commercially sold<br />
for garden application, Sc (Stefnernema carpocapsae) <strong>and</strong> Hb<br />
(Hererorhabditis bacteriophora), are available in the spring.<br />
Some people use these nematodes to control grubs in their compost<br />
bins with good success.<br />
Several nematode species feed primarily on dead organic<br />
material <strong>and</strong> associated bacteria] <strong>and</strong> fungi. These nematodes are<br />
an important part of a decomposition cycle <strong>and</strong> will be found<br />
in large numbers in any composting system.<br />
SLUGS<br />
They climb into your worm<br />
time you open your bin. What<br />
bins <strong>and</strong> there they are the next<br />
are they doing?<br />
Looking for a home<br />
Most of the time, slugs clijnb into worm bins to look for<br />
shade, shelter, or food. Slugs, lijke worms, need protection from<br />
the heat of the day <strong>and</strong> comi out at night to feed on your<br />
favorite plants. Most slugs prefpr a living plant meal but would<br />
not turn down some of the tasty vegetable kitchen wastes you<br />
place in the bin.<br />
If slugs are a problem or a r}uisance, try one of the following:<br />
1. H<strong>and</strong>-pick them out of your bin <strong>and</strong> drop them into a<br />
bucket of soapy water.<br />
2. You can also place shallow pans of beer out under their<br />
favorite plants—this will c^tch quite a few. Check these<br />
traps often.<br />
3. Sprinkle diatomaceous earth around the legs of your<br />
worm bin. Slugs <strong>and</strong> snails 1 that cross it will die.<br />
4. Make sure food is well buried.<br />
The Worm Book
SOW BUGS<br />
Most people can recognize sow bugs right away. These<br />
creatures are not bugs at all; they're l<strong>and</strong>-dwelling crus-<br />
/ taceans that think your worm bin is the perfect home.<br />
A vegetarian isopod<br />
Sow bugs are members of the Isopoda order of crustaceans.<br />
They are also called pill bugs, roly-polys, <strong>and</strong> wood lice.<br />
Most people haven't thought too much about sow bugs,<br />
unless they have tried to grow strawberries. Sow bugs can<br />
cause a lot of damage to the developing fruit. But, for the most<br />
part, sow bugs, are beneficial, eating dead <strong>and</strong> decaying plant<br />
material.<br />
Sow bugs also need a moist environment in which to live. Like<br />
their lobster cousins, sow bugs have gills, <strong>and</strong>, without an environment<br />
that keeps the gills moist, sow bugs will die. The conditions<br />
that are right for your worms are also right for sow bugs.<br />
Indoor worm growers who feed kitchen vegetable wastes<br />
probably won't ever find a sow bug in their worm bin, but, if<br />
you feed composted manure, you surely will. They generally stay<br />
on top or squeeze into cracks <strong>and</strong> feed on the organic material.<br />
Sow bugs won't harm your worms, but if you want them out of<br />
your bin, try:<br />
•Sprinkling a little diatomaceous earth on the top of<br />
your bedding. (Be sure to use food grade earth.)<br />
The diatoms cut the exoskeleton of the sow bug,<br />
killing it.<br />
•H<strong>and</strong>-pick them out. Don't worry—they won't bite.<br />
SPRINGTAILS<br />
JM i<br />
You see some tiny creatures (one to three millimeters<br />
long) that look like white dots. Maybe<br />
mites? Maybe not. If you try to touch these creatures<br />
<strong>and</strong> they jump away, then they are probably<br />
springtails.<br />
Other Animals... 93
Primitive insects<br />
Springtails get their name from their jumping ability: most<br />
of them have a forked structure that folds under them, <strong>and</strong> when<br />
they are alarmed they straighten this structure out, which propels<br />
their jump. They belong to the insect order Collumbola,<br />
with over 1,200 described speci es worldwide.<br />
Springtails are usually found living in<br />
the soil, under leaf litter, in decaying<br />
A large springtail that wood, <strong>and</strong> in fungi. However, they<br />
is five or six millimeters are not limited to soil situations.<br />
in length, can jump Some species can be found living on<br />
up to three to four the surface of ponds, <strong>and</strong> a few even<br />
inches. That would be live in termite mounds. Most soil-<br />
like a person jumping inhabiting springtails feed on dead<br />
seventy-five to one <strong>and</strong> decaying plant matter, fungi, <strong>and</strong><br />
hundred feet.<br />
bacteria. Others feed on arthropod<br />
feces (like millipede <strong>and</strong> centipede<br />
dung), pollen, <strong>and</strong> algae.<br />
Springtails are very beneficial in the production of soil<br />
humus <strong>and</strong> are considered an Extremely important soil organ-<br />
ism. Conditions in a well-maintained worm bin are perfect for<br />
springtails. They like the nice<br />
don't do any harm to your bin<br />
think they look unsightly in an<br />
moist environment <strong>and</strong> really<br />
However, some worm growers<br />
indoor bin. If you are bothered<br />
by the springtails, use your h<strong>and</strong>-held vacuum to suck up a<br />
bunch of them.<br />
The Worm Book
7<br />
USING WORMS, CASTINGS,<br />
AND VERMICOMPOST IN<br />
THE GARDEN<br />
Vermicompost, which is what you get when food scraps <strong>and</strong><br />
bedding are processed by worms, is one of the main reasons people<br />
start keeping worms. To some gardeners,<br />
using castings or vermicompost<br />
to fertilize the vegetable garden com- It can take a gardener<br />
pletes the cycle. The gardener has up to 240 days to<br />
planted the seed <strong>and</strong> watched it grow. make a fine grade of<br />
Then the vegetable is harvested <strong>and</strong> compost. But worms<br />
eaten. The trimmings of the vegetable can make vermicompost<br />
are fed to the worms <strong>and</strong> the vermi- in just thirty days,<br />
compost that is produced is then<br />
replaced in the earth, to wait for the<br />
next seed. Gardeners also don't mind at all that vermicompost<br />
will outperform commercial fertilizers! Castings are biologically<br />
active, <strong>and</strong> using castings will replenish many of the soil microorganisms<br />
needed for healthy soil <strong>and</strong> plants. Commercial fertilizers<br />
can't do that.<br />
There are several ways to use worms <strong>and</strong> worm products in<br />
the garden. Worms can be placed or encouraged directly in the<br />
soil, where they can build the soil. Worms can also be kept in<br />
bins <strong>and</strong> their castings used to improve the soil. Water that<br />
drains from worm bins can also be used in the garden <strong>and</strong> on<br />
houseplants as fertilizer.<br />
Using Worms...in the Garden 95
EARTHWORMS IN THE GARDEN SOIL<br />
Earthworms are excellent st>il builders. They are generally<br />
found in the top twelve to eighteen inches of the soil, where food<br />
is most abundant. Worms can enrich a poor soil in many ways:<br />
mixing it with their castings, aerating<br />
the soil by tunneling, encouraging water<br />
Worm mucus has<br />
retention, <strong>and</strong> providing microbes <strong>and</strong><br />
pheromones in it. These<br />
nutrientl plants need. Earthworm activ-<br />
pheromones call more<br />
ity depends directly on soil moisture <strong>and</strong><br />
worms to join them.<br />
temperature. Most worms are active<br />
when the temperatures are mild. They<br />
move deeper into the soil <strong>and</strong> become less active in the summer<br />
<strong>and</strong> winter months. By enhancinjg conditions in your garden, you<br />
are putting out the "Welcome Sign" to earthworms.<br />
How to invite earthworms to your garden:<br />
• Mulch it. Mulching adds prganic material to the soil, just<br />
like manures <strong>and</strong> crop residues do. This creates plenty of worm<br />
food <strong>and</strong> helps regulate soil temperature. These are ideal conditions<br />
for worms, so the worms will migrate to your garden. This<br />
method takes time, but the benefits are worth it.<br />
• Leave the catcher off youir mower. Like mulch, grass clippings<br />
provide food for worms. In a year you could have worm<br />
densities of up to 5,000 worm? per cubic meter. Clippings can<br />
raise the pH of your soil, but faith the addition of a little garden<br />
lime or calcium carbonate (if needed), the worms <strong>and</strong> you<br />
can have a beautiful lawn.<br />
• Add worms to a comppst pile. Worms will generally<br />
migrate to a compost pile after the initial heating process of the<br />
compost. By adding extra worms after heating, you will improve<br />
the quality of the compost <strong>and</strong> Speed up the composting process.<br />
When it is time to use the compost in the garden, some of the<br />
worms will be transported to j new area along with the compost.<br />
Soon, worms will be thriving throughout your garden, performing<br />
their tasks <strong>and</strong> building your soil.<br />
• Add worms directly to your garden. This usually involves<br />
larger numbers of worms than the compost method. Here you<br />
add worms directly from your pin to the garden soil. On top of<br />
The Worm Book
the worms, add at least two inches of good compost. Keep the<br />
soil moist so the worms do not dry out. You will need to continue<br />
to feed the worms in the soil. Apply another two inches<br />
of compost every six months to ensure a good food supply for<br />
the worms. Some compost worms, such as Eisenia fetida, are not<br />
happy unless the soil is rich in organic material. Extra composted<br />
manure <strong>and</strong> organic material like leaves <strong>and</strong> mulches will be necessary<br />
to make them happy. Keep in mind that not all of the<br />
worms you place in the garden will survive, but the ones that<br />
do will add castings to the soil, <strong>and</strong> the ones that die will become<br />
nitrogen-rich fertilizer.<br />
• Fertilize it. It has been shown that organic fertilizers added<br />
to the soil result in increased plant production <strong>and</strong> a simultaneous<br />
increase in the earthworm population. The fertilizer increases<br />
the soil's organic material by increasing plant production <strong>and</strong><br />
providing food for the worms.<br />
• Don't over-till the soil. Research shows that soils that have<br />
been tilled frequently don't have as many worms as soils that<br />
have never been tilled. Nightcrawlers, which have permanent<br />
tunnels, especially don't like soils that are tilled. Instead of tilling,<br />
let the worms do the work. Worms have the capacity to mix<br />
the soil <strong>and</strong> bring up nutrients from lower soil levels. In soils<br />
where there are known worm populations, aerating the soil by<br />
lifting it with a garden fork may be a better idea.<br />
• Add garden lime. Earthworms prefer a slightly alkaline<br />
soil, so the addition of a little garden lime to acidic soils will<br />
encourage them.<br />
• Keep soils moist. Earthworms need moist soils to breathe,<br />
so they will leave soil that is too dry. Keeping the. soil moist <strong>and</strong><br />
providing enough food encourages earthworms to stay.<br />
VERMICOMPOST, CASTINGS,<br />
AND WORM TEA IN THE GARDEN<br />
The humus that is produced in vermicomposting not only<br />
improves the soil, but stimulates plant growth <strong>and</strong> helps control<br />
diseases that attack plants. This humus can be added to the<br />
garden in the form of castings or vermicompost. (Vermicompost<br />
Using Worms...in the Garden 97
is a mixture of castings <strong>and</strong> badterially composted bedding <strong>and</strong><br />
food.) One study found that replacing basic plant compost with<br />
vermicompost resulted in a 36i percent greater crop yield the<br />
first year!<br />
THE NUTRIENT CONTENT OF EARTHWORM CASTINGS IN THE STUDY<br />
! .<br />
!<br />
1.5-2.2 percent nitrogen<br />
•1.8-2.2 perceht phosphorous<br />
1.0-1.5 perceriit potassium<br />
65-70 percent organic matter<br />
The nutrient content of castijngs varies depending on the type<br />
of food eaten by the worms. However, castings have a timerelease<br />
quality that makes them superior over ordinary compost.<br />
When castings were used in the study, the level of nutrients in<br />
the soil available to plants wa3 stable over five years! So, let's<br />
get some of this stable nutrient material in our gardens.<br />
Adding uermicompost in the garden<br />
• Work it directly into the soil. This is easy: just sprinkle it<br />
on, rake it in, <strong>and</strong> forget it. Vermicompost will not burn your<br />
plants, so it is worry free.<br />
• Add some to transplants. ^jVhen setting out those small garden<br />
seedlings or transplanting mature plants, place some vermicompost<br />
or castings directly in] the hole the plant is going in.<br />
This will give the roots a souroe of nutrients for growth.<br />
• Use it as a top dressing fertilizer after the plants have been<br />
established. During the growing season, your plants may need<br />
some extra fertilizer. Place one-rourth to one-half inch of vermicompost<br />
around the root area or drip line of plants, shrubs, <strong>and</strong><br />
trees, to give them the benefits of vermicompost.<br />
Using castings in the garden<br />
Castings differ from vermifiompost in that they don't have<br />
the bacterially composted bedding <strong>and</strong> food present. In vermicompost,<br />
the worms work <strong>and</strong> rework the material until it<br />
becomes dark <strong>and</strong> earthy-smell ng <strong>and</strong> looks like topsoil.<br />
Pure worm castings still have many nutrients for plants, but<br />
The Worm Book
the organic material has been broken down further. This can cause<br />
the production of salts to occur, which can harm some plants. For<br />
this reason, castings shouldn't be used as a sole potting medium.<br />
When mixed into soil or potting mixes, castings provide the necessary<br />
nutrients while diluting the salt concentrations. Pure castings<br />
can also have a higher pH, so some acid-loving plants may<br />
not tolerate a higher concentration of castings well.<br />
Many gardeners prefer to work with pure castings, so they<br />
know exactly how much casting material to add to plants.<br />
Adding as little as 5 percent castings to potting soil can increase<br />
the growth <strong>and</strong> vigor of plants. Castings are nitrogen rich,, <strong>and</strong><br />
the carbolic acid in them also oxidizes with calcium to provide<br />
many plant nutrients. Castings may also work as hormones to<br />
promote better plant growth.<br />
Castings have been shown to transmit to plants <strong>and</strong> animals<br />
certain resistances to diseases as well. This is called an "acquired<br />
resistance system." Two examples of acquired resistance systems<br />
are: Chicks were shown to be more resistant to salmonella infections<br />
when they were fed castings as part of their diet. Avocado<br />
trees have also been shown to resist avocado root rot when castings<br />
were used around the tree.<br />
Several potting soil <strong>and</strong> seed-raising recipes suggest a casting<br />
ratio of 25 percent castings to 75 percent potting soil or aged<br />
compost. One commercial potting mix includes two parts aged<br />
compost, one part castings, <strong>and</strong> one-half part vermiculite. This<br />
is .where experimenting a bit can help. Try adding different<br />
amounts of castings, say 5 percent, 15 percent, <strong>and</strong> 25 percent,<br />
to potting soils <strong>and</strong> grow some plants. See which ones do better.<br />
If your plants do just as well in the 5 percent casting soil as<br />
they do in the 25 percent casting soil, then you can use fewer<br />
castings <strong>and</strong> achieve the same results. This saves more castings<br />
to use on other plants. Castings can be used in much the same<br />
way as vermicompost—just remember that they are more concentrated.<br />
• Use castings as a top dressing fertilizer. In this situation,<br />
the castings can become overly dry <strong>and</strong> form a crust on the surface<br />
of the soil. This could slow water penetration. So, castings<br />
should be watered well <strong>and</strong> kept a bit moist to prevent them<br />
from drying out. Castings can be used in place of many fertilizers<br />
for houseplants. Simply sprinkle a small layer of castings on<br />
Using Worms. in the Garden 99
top of the soil of the potted plant <strong>and</strong> water well. Repeat the<br />
addition of castings every two months or so during the growing<br />
season.<br />
• Sprinkle over lawns <strong>and</strong> garden soil. Use castings as a soil<br />
amendment for added plant nutifients. Sprinkle evenly on the soil<br />
surface, about Vi-inch thick.<br />
• Add to transplants. Place 1 some castings in seed rows or<br />
transplant holes. The combination of deep watering <strong>and</strong> the soil<br />
added to the transplant hole will dilute any salt concentrations.<br />
Mix equal parts of potting soil <strong>and</strong> castings <strong>and</strong> use this when<br />
transplanting houseplants into bigger pots.<br />
• Use as a mulch. Spread fastings about two inches thick<br />
within a tree's drip line, staying away from the trunk.<br />
Worm tea<br />
Worm tea is water that has diluted castings in it. This tea<br />
can come from the worm bin as drainage or from harvesting<br />
castings with water.<br />
To use on potted houseplarits, dilute the tea with an equal<br />
part water before using. Worm tea can really bring old potting<br />
soils to life. For use on plants planted directly in the ground, it<br />
is fine to use full strength. Worm tea is especially good for weak<br />
or diseased plants. Roots of stressed plants have shown increased<br />
vigor when exposed to worm tea. Drench stressed plants with<br />
worm tea or use it in a st<strong>and</strong>ard feeding program.<br />
UNWANTED HOUSEGUESTS IN<br />
YOUR POTTING SOIL<br />
When you use vermicompost <strong>and</strong> castings in your potting<br />
mixes, sometimes the associated organisms also get transported<br />
to your houseplants. Potting soil mixed with vermicompost is<br />
alive with soil-building microorganisms that are beneficial to the<br />
soil of any living plant. However, some people draw the line<br />
when it comes to knowing these organisms are in their homes.<br />
Springtails <strong>and</strong> mites are just two examples of unwanted guests.<br />
Since most people associate mites with harming their plants, they<br />
want them gone.<br />
The Worm Book
If you really need to know they are gone, try heating your<br />
potting soil in the oven. Put the soil in an old roasting pan <strong>and</strong><br />
heat it at 200°F for thirty minutes. This should kill most of the<br />
offending creatures.<br />
Remember, though: Most creatures in the worm bin feed on<br />
dead organic matter, <strong>and</strong> if there is no dead organic matter to<br />
feed on in your houseplants, the organisms will die. So don't<br />
worry if you see a few going into the pot. For more information<br />
concerning pests, associated with worm bins, check chapter 8.<br />
WINDROWS<br />
Windrows are worm beds in the ground. Many worm growers<br />
use this method because they feel the beds produce a better<br />
quality of worm. The beds usually have good drainage <strong>and</strong> aeration,<br />
<strong>and</strong> food is always available for the worms. If conditions<br />
aren't just right, the worms have someplace to escape to until<br />
the conditions are favorable again.<br />
ONE EASY WINDROW SYSTEM WORKS LIKE THIS:<br />
Spread about six inches of aged composted manure in a<br />
row. The row can be as long as you like, but the width<br />
should be no more than two to three feet wide. This way<br />
you can tend across the row as the windrow gets bigger<br />
<strong>and</strong> bigger. Some large commercial windrows are wider<br />
across, but you should do what is comfortable for your<br />
back. Now, seed the row with worms, using one pound of<br />
worms per linear foot as a guide. Use a sprinkler system to<br />
keep the windrow moist. Every one to two weeks (depending<br />
how much compost is left), add another four to six<br />
inches of aged composted manure on top of the row. When<br />
the windrow gets to be three to four feet high <strong>and</strong> three<br />
feet wide, it is time to harvest. Take off the top layers (most<br />
of the worms will be found in the top anyway) <strong>and</strong> leave<br />
one foot of vermicompost as the base. Re-seed <strong>and</strong> add<br />
more composted manure. Repeat.<br />
Using Worms...in the Garden 101
We have heard of worm growers using layers of straw <strong>and</strong><br />
fresh manure as food as well. Irhe idea is that the straw separates<br />
the fresh manure from the worms until the manure composts<br />
<strong>and</strong> decomposes the stjraw, too. You may want to<br />
experiment with this idea.<br />
Shrews <strong>and</strong> moles<br />
In areas that have shrews moles, many worm growers<br />
complain that the little pests will move in <strong>and</strong> eat the worms in<br />
their windrows. Moles can eat three times their weight in just<br />
one day, <strong>and</strong> they love worms Shrews eat every hour to keep<br />
up their metabolism. So, what are you going to do?<br />
First, determine which tunnels are active <strong>and</strong> which ones are<br />
just for foraging. Stomp on nd press down all the tunnels<br />
around the worm beds <strong>and</strong> in yqi ur yard. But beware—moles will<br />
repair the main tunnels. Moles can dig about two hundred feet<br />
per day if necessary.<br />
Now that you have figured out which tunnels the mole is<br />
using, you can try several methods:<br />
Wet the tunnels down thoroughly. Moles do not like<br />
very wet soils.<br />
Place dog or cat feces in the tunnels. The mole will<br />
think a predator is nearby <strong>and</strong> leave. The feces will<br />
not remain effective for long, so alternate cat <strong>and</strong><br />
dog feces if you can.<br />
• Like worms, moles are sensitive to vibrations, so<br />
place whirligigs at the qdges of your property to<br />
deter the moles from coming back. Place the<br />
whirligigs well away from your beds.<br />
Bury fine wire mesh or hajrdware cloth in the ground<br />
before establishing your worm bed. You will need<br />
to go down at least eighteen inches to keep the critters<br />
out. Carefully secure wire sections that meet to<br />
prevent the moles from fjnding an entrance. A very<br />
determined mole may still find a way in, but this<br />
will definitely slow him down.<br />
I 02 The Worm Book
• Moles dislike castor-oil plants, which are very poisonous.<br />
They should only be planted with extreme<br />
caution, away from children, pets, <strong>and</strong> worm beds.<br />
A little life history about moles: Moles are not rodents; they<br />
are not related to gophers. They are members of the mammal<br />
order Insectovora, <strong>and</strong> eat only insects, grubs, <strong>and</strong> worms, not<br />
plants. They range in size from two <strong>and</strong> a half to six inches in<br />
length, are usually brown to black in color, <strong>and</strong> have very broad<br />
front feet <strong>and</strong> short tails. Their eyes are very small (about the<br />
size of a pinhead) <strong>and</strong> they have no external ears.<br />
Moles are very territorial <strong>and</strong> are active both day <strong>and</strong> night.<br />
They are in constant search of food <strong>and</strong> prefer living in soft soils,<br />
like your worm beds. They do not like rocky soils, <strong>and</strong> you can<br />
sometimes deter them by burying a layer of gravel around your<br />
bed. A little good news about moles: Because of their need for<br />
large quantities of food, it is estimated that only two to three<br />
moles can survive per acre.<br />
2 tablespoons castor oil<br />
MAKE A MOLE REPELLENT.<br />
I tablespoon liquid dishwashing detergent<br />
I gallon water<br />
Mix all ingredients together <strong>and</strong> wet down the mole's tunnels<br />
with the solution. Keep-solution away from worm beds.<br />
Using Worms...in the Garden 103
EARTHWORMS IN AGRICULTURE<br />
Earthworms play an integral part in agriculture. Where once<br />
earthworms built up the soil najturally, the use of modern farming<br />
practices has greatly reduced their numbers. Some will say<br />
that through chemical means, like<br />
If we used all of nature's<br />
resources except earthworms<br />
to produce<br />
topsoil, it would take<br />
us about 100 to 150 years<br />
to produce one single<br />
inch! Bring back the<br />
earthworms, <strong>and</strong> it only<br />
takes one year to produce<br />
that inch.<br />
fertilizers <strong>and</strong> pesticides, we have<br />
increased crop production. This is<br />
true,, but each year our soil is becoming<br />
tinore <strong>and</strong> more barren. It takes<br />
more <strong>and</strong> more chemicals to grow<br />
the s,ame crops. The soil microorganisms:<br />
that help produce humus <strong>and</strong><br />
give soils their growing capacity are<br />
dwindling. Things need to change,<br />
<strong>and</strong> an example of forced change is<br />
the qmall country of Cuba.<br />
In 1986, the Cuban government<br />
started a vermicomposting program<br />
to design safe <strong>and</strong> effective soil management tactics. Cuba was<br />
caught in a vise of economic sanctions, political pressures, <strong>and</strong><br />
lowered crop production. Cuba|was faced with no choice but to<br />
find alternatives to its past dependency on imported fossil fuels,<br />
fertilizers, pesticides, <strong>and</strong> animjl feed.<br />
Cuban scientists developed a full technological package for<br />
the production of humus from earthworms, a process known as<br />
vermicomposting or vermiculture. They found the best application<br />
rate was four tons per hectare of earthworm humus for most<br />
104
crops. Since the implementation of this program, imported agricultural<br />
products have been cut by as much as 80 percent.<br />
Cuba's vermicomposting program started with two small<br />
boxes of redworms, Eisenia fetida <strong>and</strong> Lumbricus rubellus. Today<br />
there are 172 vermicompost centers throughout the country. In<br />
1992, these centers produced 93,000 tons of worm vermicompost.<br />
Several different institutions <strong>and</strong> companies are involved in<br />
vermiculture operations, but most of the research is conducted by<br />
the Institute of Soils <strong>and</strong> Fertilizers <strong>and</strong> by the National Institute<br />
of Agricultural Sciences.<br />
Cuba's vermicompost program is simple <strong>and</strong> effective. First,<br />
manure is composted for approximately thirty days aerobically,<br />
<strong>and</strong> then transferred to open vermicompost beds. At some sites,<br />
like the Pinar del Rio Vermiculture Center, these vermicompost<br />
beds serve two functions. The beds are located between the rows<br />
<strong>and</strong> in the shade of large mango trees. The trees are fertilized<br />
from nutrients leached from the beds, <strong>and</strong> worms <strong>and</strong> vermicompost<br />
can be harvested as well.<br />
The beds are approximately one <strong>and</strong> a half meters wide <strong>and</strong><br />
are of various lengths. The composted manure, which is mainly<br />
from cows, is mixed with soil <strong>and</strong> "seeded" with earthworms.<br />
Most vermicomposting operations in Cuba use cow manure as<br />
the primary source of organic material. Some other sources of<br />
organic material for the beds are: pig <strong>and</strong> sheep manure, filter<br />
press cake from sugarcane, coffee pulp, plantains, <strong>and</strong> municipal<br />
garbage. After set up, the vermicompost beds are monitored<br />
to maintain proper moisture <strong>and</strong> temperature requirements.<br />
The worms are fed the composted material, which is placed<br />
on top of the beds. The worms then deposit their castings in the<br />
lower levels. Compost is continually added until the beds reach<br />
a height of approximately one meter. This usually takes about<br />
ninety days <strong>and</strong> then the worms <strong>and</strong> castings are harvested. The<br />
worms are concentrated in the top ten centimeters of the pile<br />
<strong>and</strong> are scraped off or separated from the vermicompost in a<br />
screening process. The vermicompost is either dried <strong>and</strong> bagged<br />
or used on-site as a soil amendment <strong>and</strong> fertilizer.<br />
In Cuba, even animal feed depends on worm production.<br />
Worms that are not placed back in the vermicomposting beds<br />
are dried <strong>and</strong> chopped <strong>and</strong> added to animal feed as a protein<br />
source. Earthworms are made up of 75 percent protein, with<br />
Earthworms in Agriculture 105
little fat, <strong>and</strong> they require verjy little processing. This makes<br />
them an excellent protein additive for animal feed.<br />
In other countries, including the United States, fish by-products<br />
are often added to animal feed to provide additional protein.<br />
During years when the fish catch was poor, the commodities<br />
market sees higher prices for animal food, due to the higher cost<br />
of fish. This in turn raises priced for the consumer. Maybe Cuba<br />
is leading the way for a new alternative protein source: earthworms.<br />
Cuba isn't the only country looking to worms to improve<br />
soil conditions. The Ecology Institute of Mexico, Peru's<br />
INIAA/NCSU Yurimaguas Experimental Station, the University<br />
of Rw<strong>and</strong>a, <strong>and</strong> Spain's Universidad Complutense have all completed<br />
the first stage of earthworm projects. India, France, <strong>and</strong><br />
Australia have been studying tihe benefits of worms for quite<br />
some time <strong>and</strong> have vermicomposting facilities. Most of the<br />
countries in the world are taking a serious look at the impact of<br />
earthworms. Vermiculture is deinitely in its infancy throughout<br />
the world, but it is growing rapidly.<br />
CROP MANAGEMENT IMPACT ON EARTHWORMS<br />
When we manage soils for crop production, we in turn are<br />
also managing the habitat of earthworms <strong>and</strong> soil organisms. By<br />
managing the crops with moc ern agricultural means, we are<br />
directly affecting the habitats where earthworms live. Farming<br />
practices impact a worm's food supply by removing much of the<br />
soil's organic material or by changing its quality so it's not suitable<br />
for the worms. A worm's mvironmental conditions can be<br />
altered by removing the mulch Drotection of the soil that allows<br />
fluctuations in moisture <strong>and</strong> temperature levels. The soil's chemical<br />
condition is greatly affected by the use of chemical fertilizers<br />
<strong>and</strong> pesticides, making the soil inhospitable for worms. By<br />
considering how these factors affect worms in different crop<br />
managing systems, we can start to predict the effects on worm<br />
populations.<br />
Studies have been conductejd on several different crop management<br />
systems over a ten-year time span. The studies indicated<br />
that management practice^ that included the addition of<br />
organic material to the soil, along with little tillage, produced<br />
I 0 The Worm Book
the highest numbers of earthworms. On the reverse side, management<br />
practices that included no addition of organic material<br />
<strong>and</strong> severe tillage showed the lowest numbers of earthworms.<br />
When farmers plow their fields, more <strong>and</strong> more earthworms that<br />
naturally till the soil die, so more <strong>and</strong> more plowing is necessary.<br />
This is a vicious cycle in our large mono-crop system. Every<br />
inch of soil a tractor travels on is compacted a bit more, so the<br />
farmer plows deeper <strong>and</strong> deeper.<br />
The impact of agricultural chemicals on earthworms varies<br />
with the chemical used. Inorganic fertilizers added to fields promote<br />
greater plant production than occurs in fields that are not<br />
fertilized. This in turn promotes higher earthworm populations.<br />
It has also been shown that most herbicides are only slightly<br />
toxic to worms—a surprising outcome. When other pesticides<br />
were tested, they usually fell into two categories: Harmless to<br />
moderately toxic, <strong>and</strong> highly toxic. Some highly toxic pesticides<br />
had milder effects when only spot treatments were done. In general,<br />
organophosphate <strong>and</strong> pyrethroid pesticides fell into the<br />
category of harmless to moderately toxic; while carbamate pesticides,<br />
fungicides, <strong>and</strong> nematicides were highly toxic to earthworms.<br />
ENCOURAGING EARTHWORMS IN<br />
CROP MANAGEMENT<br />
Now that we know how earthworms are affected by crop<br />
management, the problem is finding a way to reverse the decline<br />
of earthworm populations. Following are some possible solutions:<br />
1. Reduce tillage. This leaves more surface mulch for food,<br />
<strong>and</strong> provides cover to protect the worms from environmental<br />
conditions.<br />
2. Grow winter crops. These crops will add to the mulch<br />
' protection, in addition to providing additional food for<br />
the worms.<br />
3. Add organic material. Fertilizing with composted manures<br />
will greatly increase the organic portion of the soil <strong>and</strong><br />
encourage worms to stay.<br />
Earthworms in Agriculture 107
4. Rotate crops. Rotating cropsiwith hay or fallow fields will<br />
provide more food for the yvorms.<br />
5. Maintain a pH balance. Maintaining a soil's pH between<br />
six <strong>and</strong> seven provides optimum conditions for the<br />
worms. It should be noted that the proper pH isn't<br />
always a guarantee that earthworms will move in. For<br />
example, if the soil's texture is too coarse or there are<br />
drainage problems, earthworms might not want to live<br />
there.<br />
6. Use pesticides sparingly. Usjng spot treatments or a pesticide<br />
with very low toxicity will help keep worm populations<br />
up.<br />
SHOULD FARMERS "SEED" THEIR FIELDS? "<br />
This is an interesting question being asked by many farmers.<br />
If crop management practices haven't changed for quite some<br />
time, then a given field already holds as many earthworms as<br />
the soil can support, <strong>and</strong> adding additional earthworms isn't<br />
going to help. Most of the worms will die <strong>and</strong> their bodies will<br />
become a bit of fertilizer, but thlat's about all the benefit you are<br />
going to see.<br />
However, if a newly planned crop management system will<br />
include many features that encourage earthworms, then some<br />
"seeding" could be beneficial. As soon as conditions change in<br />
favor of earthworms, they will move in naturally, but this could<br />
take one to two years. Many farmers have claimed success at<br />
establishing earthworms after cqnditions become more favorable.<br />
One inexpensive way to establish earthworms is to collect<br />
native earthworms yourself fronji pastures <strong>and</strong> roadsides on rainy<br />
spring nights or early mornings. This way you will know that<br />
the worms are adapted to the native soils <strong>and</strong> climate. Once back<br />
at the field, place four to six earthworms together under a small<br />
pile of mulch. Do this every thirty or forty feet, on a cloudy,<br />
wet, or cool day. Record where you "seeded" the worms <strong>and</strong><br />
check periodically for worm acjtivity. Hopefully, the worms will<br />
survive <strong>and</strong> spread. Unfortunately, this can be a very labor intensive<br />
method <strong>and</strong> may therefor^ be impractical for people with<br />
large farms.<br />
The Worm Book
9<br />
COMMERCIAL<br />
WORM GROWING:<br />
CAN You Do IT?<br />
Worm farming is said to be the fastest growing agricultural<br />
industry in the country. Worms are making millionaires out of<br />
people overnight. Well, that may be an exaggeration, but there<br />
are some pretty big claims being made about the easy money to<br />
be made from worms.<br />
In this chapter, we will take a look at these claims <strong>and</strong> look<br />
at the many possible ways worms <strong>and</strong> worm products can be<br />
turned into a money-making business. We will look at various<br />
aspects of different businesses, so you can decide if starting a<br />
worm business is right, for you.<br />
SELLING WORMS THEMSELVES<br />
Producing worms for bait, vermiculture, agriculture, <strong>and</strong><br />
home composting are several ways that a business can revolve<br />
around worms. In these business ventures, the end product you<br />
are selling is the worms themselves.<br />
Most people are quite familiar with growing worms for bait.<br />
However, in Canada there is an industry for collecting worms in<br />
the wild. Worm pickers go out at night after a rain <strong>and</strong> pick up<br />
nightcrawlers. They strap cans to their legs, wear mining lights<br />
on their heads, <strong>and</strong> head out to their favorite hunting grounds,<br />
such as open fields <strong>and</strong> golf courses. It is estimated that a good<br />
worm picker can make up to $150 to $200 per night. The competition<br />
is fierce, <strong>and</strong> there have been several reported instances<br />
109
of fights between groups of worm pickers that have all arrived<br />
at the same spot. Most of these worms are exported to the<br />
United States. Nightcrawlers are very difficult to grow because<br />
of their permanent burrows, <strong>and</strong> attempts to raise them commercially<br />
have failed. Nightcravs lers are a large market of about<br />
$100 million annually at present. Many bait growers rely on<br />
growing redworms, but this is 9 much smaller market, totaling<br />
only a few million dollars. Bait! worm growers usually provide<br />
worms to local fishing areas.<br />
Supplying worms for vermicblture <strong>and</strong> home composting systems<br />
is a growing field. With thje price of worms at between $.8<br />
<strong>and</strong> $30 per pound in the retail market, this sounds pretty good.<br />
One problem with this is that tihere is no longer a need for the<br />
customer to buy more worms after the initial shipment, since<br />
worms can reproduce quicklyj This venture then becomes a<br />
search for more <strong>and</strong> more new customers, with very little repeat<br />
business.<br />
Growing worms for agriculture is new <strong>and</strong> basically just<br />
starting out. Cuba grows worms as its own protein source for<br />
livestock feed. This could be d 3ne here as well. Worm protein<br />
is comparable to fish meal protein, which is currently used for<br />
livestock feed. Fish meal prices vary with how much fish is<br />
caught in a season: Sometimesi the fishermen catch a lot, <strong>and</strong><br />
some years the catch is low, which drives prices higher. With<br />
worms you can count on a steady supply. The only preparation<br />
needed for shipment is that the worms need to be dried <strong>and</strong> sold<br />
in bulk tonnage. It is estimated that dried worms could find a<br />
very large market.<br />
Zoos,'pet stores, <strong>and</strong> hobbyists who own birds <strong>and</strong> reptiles<br />
all need a supply of worms. Becoming a distributor to these businesses<br />
<strong>and</strong> individuals can prove profitable.<br />
SELLING CASTINGS<br />
Scientific research has documented the benefits of castings<br />
as a soil amendment <strong>and</strong> as al benefit to plants. They can be<br />
sold in small bags or in bulk:i pure castings can sell for anywhere<br />
from $2.50 to $5.00 per pound retail. Many organic gardeners<br />
<strong>and</strong> farmers appreciate a vermiculture way of recycling<br />
I 0 The Worm Book
<strong>and</strong> fertilizing, so try contacting any organic growers associations<br />
in your area <strong>and</strong> talk to them about the idea.<br />
RECYCLING GREEN WASTES WITH WORMS<br />
The l<strong>and</strong>fills are almost full, <strong>and</strong> many counties <strong>and</strong> cities<br />
are looking for ways to reduce the amount of waste going to<br />
l<strong>and</strong>fills. Vancouver, Canada, <strong>and</strong> San Jose, California, are just<br />
two municipalities that are promoting waste reduction by<br />
encouraging vermicomposting at home. Several worm growers<br />
who have taken this idea <strong>and</strong> developed cooperative agreements<br />
with trash companies are now recycling green wastes into castings<br />
<strong>and</strong> vermicompost. The worm grower sometimes receives a<br />
collecting or processing fee for the service. Other worm growers<br />
are happy to receive the unlimited raw material <strong>and</strong> make their<br />
money in the sale of worms <strong>and</strong> castings.<br />
MAINTAINING VERMICOMPOSTING SYSTEMS<br />
FORSOMEONEELSE '<br />
With more people starting up vermicomposting systems, a<br />
need arises for a vermicomposting system troubleshooter or a<br />
person to do the harvesting for people who want a bin but not<br />
the work.<br />
The "vermicomposting expert" could be called upon to set<br />
up, maintain, harvest, or correct problems in a bin. With more<br />
<strong>and</strong> more schools <strong>and</strong> institutions opting to reduce their disposal<br />
costs, starting a vermicompost bin system on site becomes<br />
necessary <strong>and</strong> practical. Also look to other businesses that produce<br />
quantities of waste, like dairies <strong>and</strong> horse ranches. In all<br />
of these cases, both you <strong>and</strong> the business could greatly benefit<br />
from vermiculture.<br />
Commercial Worm Growing: Can You Do It? Ill
MARKET AND DISTRIBUTE<br />
VERMICOMPOSTING PRODUCTS<br />
As the idea of vermicomposting grows, so does the need for<br />
worm bins, sorters, gauges, anc) equipment of all kinds to take<br />
care of the systems. New automated systems <strong>and</strong> easy-to-use<br />
testing instruments need to be invented, marketed, <strong>and</strong> sold.<br />
Start a newsletter or get on the Internet <strong>and</strong> "shop" your<br />
products. Provide needed products to solve the vermiculturist's<br />
current problems.<br />
START A VERMICOMPOST<br />
BUSINESS FOR LANDSCAP<br />
V<br />
DELIVERY<br />
ERS<br />
As the benefits of vermicorripost <strong>and</strong> castings become better<br />
known to l<strong>and</strong>scapers <strong>and</strong> homeowners, the requests for these<br />
products will increase. Offer td deliver castings <strong>and</strong> vermicompost<br />
to work sites <strong>and</strong> home backyards. Provide information as<br />
to their uses <strong>and</strong> application rates. Provide the expertise or<br />
labor—or both.<br />
CONDUCT VERMICOMPOSiT WORKSHOPS<br />
Teach other people how to maintain a successful worm bin.<br />
Write educational pamphlets <strong>and</strong> conduct demonstrations at<br />
schools, garden clubs, fairs, <strong>and</strong> expos. Spread the word about<br />
vermicomposting. Make videos with step-by-step instructions or<br />
one for children. The ideas arb endless. If you don't want to<br />
write the material yourself, then publish or distribute material<br />
written by someone else.<br />
SELLING WORM TEA . - M<br />
Just like castings or vermicompost, worm tea is an excellent<br />
fertilizer. Bottle the tea <strong>and</strong> sell it with your castings as liquid<br />
casting fertilizer. Worm tea can! sell for $1 to $3 per gallon.<br />
The Worm Book
STARTING YOUR OWN WORM BUSINESS<br />
Once you have decided on what type of business you want<br />
<strong>and</strong> how to go about it, then comes the next step: What do you<br />
need to start? The following is a general list for most vermiculturists.<br />
Your worm business may or may not need all the following<br />
or may need more.<br />
1. Every book, magazine, <strong>and</strong> article you can find on the<br />
subject. Buy this book! Get a feel for what you are<br />
about to do.<br />
2. Determine the size of the operation you need. Do you<br />
want to start small <strong>and</strong> grow? Do you have the space for<br />
a large operation in your backyard? If your operation<br />
becomes large, is your property zoned correctly?<br />
3. Determine the location of your operation. Locate it near<br />
a water source, electricity, or maybe in a shed. Where<br />
would it function best in your climate <strong>and</strong> location?<br />
Where will it be easy for you to tend?<br />
4. Find suppliers of necessary quantities of bedding <strong>and</strong><br />
feedstock for your operation. Is there a horse ranch nearby?<br />
Paper mill?<br />
5. Obtain necessary tools. General tools include a pitchfork,<br />
pH meter, compost thermometer, moisture meter, h<strong>and</strong><br />
claw tool, <strong>and</strong> shovel. If you are going to use paper as<br />
your bedding source, a paper shredder would be h<strong>and</strong>y.<br />
6. Build or buy commercial bins or prepare a windrow.<br />
Depending on the size of operation you wish to have,<br />
you will need to build or buy worm bins, or prepare a<br />
windrow with the correct surface area for the worms.<br />
Remember that redworms need one square foot of surface<br />
area for every pound of worms.<br />
7. Obtain bedding <strong>and</strong> feedstock <strong>and</strong> do any preparations<br />
of that material if necessary. Are you shredding newspaper,<br />
or do you need to leach manure?<br />
8. Buy worms. Have everything ready before the worms<br />
arrive! What worms did you decide to grow? Get the scientific<br />
name.<br />
Commercial Worm Growing: Can You Do It?
Now you have started your worm business. You are. now on<br />
to the next step:<br />
MAINTAINING YOUR WOI^M BUSINESS ^<br />
1. Feed worms properly.<br />
2. Monitor conditions in the bin or bed. Check pH, moisture,<br />
<strong>and</strong> aeration. Soon yo.u will be able to tell just by<br />
looking if everything is going smoothly, but check anyway.<br />
3. Adjust feeding <strong>and</strong> moisture 1 during different climatic seasons.<br />
The bin or bed that is outdoors will be affected<br />
most by the weather. Use less water <strong>and</strong> feed in the winter<br />
<strong>and</strong> more water <strong>and</strong> fee'd in the spring, summer, <strong>and</strong><br />
fall seasons.<br />
4. Prepare more beds <strong>and</strong> bins for the first harvest. This may<br />
simply involve preparing more bedding to go back into<br />
the original bin, or you may decide to divide the worms<br />
into two bins.<br />
5. Prepare harvesting equipment. Are you going to h<strong>and</strong>screen<br />
everything or are you going to purchase a harvester?<br />
6. Package castings or vermicqmpost.<br />
7. Advertise.<br />
8. Sell castings <strong>and</strong> extra worms.<br />
9. Repeat process.<br />
Of course, this is an example of a simple vermicomposting<br />
procedure. You take it from here. You may decide to conduct<br />
experiments with your vermicompost <strong>and</strong> see how well it works.<br />
The only limit here is your own imagination. Good luck!<br />
THINGS YOU CAN DO TO GUARANTEE<br />
YOUR SUCCESS<br />
1. Plan, plan, plan. Think yoUr plan out thoroughly. What<br />
do you need in order to start? What are your strengths?<br />
Weaknesses? What are yop good at, <strong>and</strong> how can you<br />
I The Worm Book
use worms to start a business you will enjoy? Once you<br />
decide in which direction you want to go with your<br />
worm business, then look at the problems of money,<br />
underst<strong>and</strong>ing the market, <strong>and</strong> putting together a complete<br />
business plan. Making a well-thought-out business<br />
plan will send you in a clear direction, with few surprises.<br />
2. Keep good records. This is extremely important <strong>and</strong><br />
often overlooked. Keep a careful record of time, money,<br />
<strong>and</strong> receipts for your new business. Tax laws are complicated,<br />
<strong>and</strong> this thorough record keeping will benefit<br />
you in the Jong run.<br />
3. Make sure you get the proper licenses. A business<br />
license is generally required for all businesses, but check<br />
your state <strong>and</strong> county business administrations for<br />
additional permits or licenses you may need.<br />
4. Keep learning. You can never know everything, so keep<br />
learning every new aspect of vermiculture. What are<br />
other people in the field doing, <strong>and</strong> what is the latest<br />
bin design? Learn everything you can.<br />
5. Start your business with sound, proven ideas. Once you<br />
are up <strong>and</strong> running successfully, improve on them. Be<br />
creative <strong>and</strong> find the perfect worm bin. Use your experience<br />
with the proven <strong>and</strong> then be creative with the<br />
untried <strong>and</strong> develop something new.<br />
6. Work hard. No business is easy! Even if it becomes easy<br />
to you, do something every day to increase your business<br />
or make it better. Never lose sight that a business<br />
takes work to keep it growing <strong>and</strong> thriving.<br />
7. Advertise. Let people know what you are doing. Print<br />
flyers <strong>and</strong> business cards or advertise in the Yellow<br />
Pages or on the Internet—just let people know. You<br />
could have the customers right next door, but if they<br />
don't know you are there <strong>and</strong> what you have to sell,<br />
then you don't have customers.<br />
8. Look for opportunities. Let's say you produce the best<br />
castings around <strong>and</strong> your business is doing well. Would<br />
it be better if you sold the castings at a nursery or home<br />
Commercial Worm rowing: Can You Do It?
center? Is there an Earth Fair coming to your area that<br />
is looking for vendors? Thejse are opportunities to make<br />
your business grow, but you must look for them.<br />
Vermiculture is closely tied to horticulture <strong>and</strong> waste<br />
disposal, <strong>and</strong> there are marly avenues one can enter into<br />
with these industries to improve or exp<strong>and</strong> a business.<br />
9. Be a community expert. Vermiculture is a new field:<br />
Who do you turn to if ypu need help with a bin or<br />
worm problem? Well, you can become that person.<br />
Give talks to garden clubs,,nurseries, <strong>and</strong> schools. Your<br />
business can only benefit from the added exposure.<br />
10. Join professional groups. This gives you the opportunity<br />
to find out what is happening now in vermiculture.<br />
Professional associations usually have meetings <strong>and</strong><br />
newsletters to discuss cutting-edge technology <strong>and</strong><br />
recent studies.<br />
SCAMS<br />
THE INTERNATIONAL WORM GROWERS ASSOCIATION<br />
This new nonprofit organization is aimed at helping<br />
worm growers with information, meetings, a newsletter,<br />
<strong>and</strong> future projectsi to help vermiculturists.<br />
Membership information qan be obtained from:<br />
Rick Best, Chairman, IX^GA<br />
P.O. Box 900184<br />
Palmdale, CA 93543<br />
E-mail address: wormwise@aol.com<br />
Unfortunately, the worm business, like any other, has been<br />
the victim of scam artists. We mention it here to remind you to<br />
be on the alert for such scams. These business ventures often<br />
sound too good to be true, <strong>and</strong> they usually are.<br />
PYRAMID SCAM:<br />
This scam involves a person who starts a worm farm. Let's call<br />
him Con Worm.<br />
The Worm Book
Con Worm convinces other people that there is such a high<br />
dem<strong>and</strong> for his worms that he can't keep up with the dem<strong>and</strong>.<br />
The orders are coming in but he just can't fill them. Con Worm<br />
then sets people up with expensive worms <strong>and</strong> equipment <strong>and</strong><br />
promises to "buy back" all the worms they can produce so they<br />
will make lots of money. The people h<strong>and</strong> over their money<br />
(sometimes thous<strong>and</strong>s of dollars) to Con Worm, <strong>and</strong> they take<br />
their worms <strong>and</strong> equipment home. At this point the scam can<br />
go two ways:<br />
1. The new worm growers can't seem to get it right <strong>and</strong><br />
don't produce any worms for Con Worm to buy back.<br />
Remember, any business is hard work. They blame themselves<br />
because it didn't work <strong>and</strong> go back to Con Worm,<br />
who "feels sorry for them" <strong>and</strong> buys back the equipment<br />
for pennies. Con Worm then turns around <strong>and</strong> sells the<br />
equipment for full price to someone else.<br />
2. The new worm growers get it right <strong>and</strong> start producing<br />
worms for Con Worm to buy back. Con Worm buys the<br />
worms, all right, but sells them to new people he has convinced<br />
to supply worms for him. Now, when he can't<br />
convince any other people to be his worm suppliers, he<br />
stops buying the worms back <strong>and</strong> everyone goes out of<br />
business.<br />
ANOTHER SCAIM:<br />
A worm company offers to sell you worms at a big price <strong>and</strong><br />
KEEP THEM FOR YOU at their farm. They promise to double<br />
your money in a year by selling the baby worms. But, instead<br />
of selling the baby worms to valid markets, they sell the baby<br />
worms to other people like you, telling them they are going to<br />
double their money as well. Eventually, when they can't get any<br />
new investors in the scam, they declare bankruptcy <strong>and</strong> the people<br />
who invested lose their money.<br />
So, buyer beware—<strong>and</strong> do your homework before you invest.<br />
Commercial Worm rowing: Can You Do It?
10<br />
THE WHOLE WORM AND<br />
NOTHING BUT THE WORM<br />
While doing the research fo this book, we found many stories,<br />
poems, songs, <strong>and</strong> art thai: focused on worms. Some were<br />
funny, some wild, <strong>and</strong> others date back many years to native<br />
folklores. Because we thought no one would believe half the stuff<br />
in this chapter, we decided a parody of "the whole truth <strong>and</strong><br />
nothing but the truth" would be perfect.<br />
POETRY '<br />
Little did we know that worms had inspired the famous poet<br />
Walt Whitman, who wrote a poem called "This Compost" about<br />
worms recycling the dead <strong>and</strong> decaying.<br />
The following is a portion of the poem:<br />
Something startles me where I thought I was safest,<br />
I withdraw from the still woods I loved,<br />
I will not go now on the pastures to walk,<br />
I will not strip the clothes from my body to meet my lover<br />
the sea,<br />
I will not touch my flesh to the earth as to other flesh<br />
to renew me,<br />
•<br />
0 how can it be that the groilnd itself does not sicken?<br />
How can you be alive you growths of spring?<br />
How can you furnish health y
Are .they not continually putting distemper'd corpses<br />
within you?<br />
Is not every continent work'd over <strong>and</strong> over with<br />
sour dead?<br />
Where have you disposed of their carcasses?<br />
Those drunkards <strong>and</strong> gluttons of so many generations?<br />
Where have you drawn off all the foul liquid <strong>and</strong> meat?<br />
I do not see any of it upon you to-day, or perhaps<br />
I am deceived,<br />
I will run a furrow with my plough, I will press my spade<br />
through the sod <strong>and</strong> turn it up underneath,<br />
I am sure I shall expose some of the foul meat.<br />
Behold this compost! behold it well!<br />
Perhaps every mite has once form'd part of a sick person-<br />
yet behold!<br />
The grass of spring covers the prairies,<br />
The bean bursts noiselessly through the mould in<br />
the garden,<br />
The delicate spear of the onion pierces upward.<br />
The apple-buds cluster together on the apple-branches,<br />
The resurrection of the wheat appears with pale visage<br />
out of its graves,<br />
The tinge awakes over the willow-tree <strong>and</strong> the<br />
mulberry-tree,<br />
The he-birds carol mornings <strong>and</strong> evenings while the<br />
she-birds sit on their nests,<br />
The young of poultry break through the hatch'd eggs,<br />
The new-born of animals appear, the calf is dropt<br />
from the cow, the colt from the mare,<br />
Out of its little hill faithfully rise the potato's<br />
dark green leaves,<br />
Out of its hill rises the yellow maize-stalk, the lilacs bloom<br />
in the dooryards,<br />
The summer growth is innocent <strong>and</strong> disdainful above<br />
all those strata of sour dead.<br />
What chemistry!<br />
The Whole Worm... 119
Now worm poems are popping up everywhere: Several<br />
museums hold poetry contests with worm <strong>and</strong> gardening categories.<br />
And one of the authors of this book was inspired to pen<br />
a worm poem.<br />
SONGS<br />
WORMS IN MY HAIR<br />
by J. H. <strong>Taylor</strong><br />
The worms, worms they are everywhere!<br />
I worked in the bin, now they're in my hair.<br />
Sorting, screening from bin to" bin.<br />
Within their casting from rim to rim.<br />
They've turned my trash into heaps worth gold,<br />
With little help from me the old.<br />
My plants will thank them one <strong>and</strong> all,<br />
For providing nutrients when they call.<br />
You can do it, yes you can,<br />
Turn that trash into black fertile l<strong>and</strong>.<br />
Worms have been the inspiration for many songs, <strong>and</strong> not<br />
just the silly ones we all sang als children. Do you remember?<br />
Nobody likes me, everyone hates me, guess I'll eat some<br />
wor-r-r-rms,<br />
Chorus:<br />
Long, slim, slimy ones. Short'fat, juicy ones,<br />
Itsy bitsy, fuzzy, wuzzy worms.<br />
First you bite the head off.<br />
Then you suck the guts out.<br />
Oh how they wiggle <strong>and</strong> they squir-r-r-rm.<br />
Down goes the first one, do\yn goes the second one,<br />
Oh, how they wiggle <strong>and</strong> thdy squir-r-r-rm.<br />
(Chorus)<br />
Up comes the first one, up comes the second one,<br />
Oh, how they wiggle <strong>and</strong> th0y squir-r-r-rm<br />
(Chorus)<br />
The Worm Book
Nobody hates me, everyone likes me,<br />
Why did I eat those wor-r-r-rms?<br />
Long, slim, slimy ones. Short, fat, juicy ones,<br />
Itsy bitsy, fuzzy, wuzzy worms. .<br />
For those of you who had gross little brothers, you probably<br />
also remember:<br />
The worms crawl in, the worms crawl out,<br />
the worms play mumblety-peg on your snout.<br />
Well, many songwriters have also been inspired by the earthworm<br />
<strong>and</strong> several groups have included worm songs on their<br />
albums. For example:<br />
Pink Floyd, "Waiting for the Worms," on their album<br />
The Wall.<br />
Cathedral, "Enter the Worms," on their album The Ethereal Mirror.<br />
Comecon, "Worms," on their album Converging Conspiracies.<br />
Echobelly, "Worms <strong>and</strong> Angels," on their album On.<br />
Pogues, "Worms," on their album If I Should Fall From Qrace With<br />
Qod.<br />
Theatre of Ice, "Gone With the Worms," on their album Murder<br />
The Dawn.<br />
TELEVISION V-<br />
A lady <strong>and</strong> her worm bin were part of a story line on ER.<br />
The Emmy Award-winning, show featured worms that had been<br />
left out in the cold in a Chicago winter. Does this mean that<br />
even worms need to go the emergency room once in a while?<br />
ART<br />
Yes, earthworms have joined the art world as well. They create<br />
their own abstract art. Their bodies form the patterns <strong>and</strong><br />
we humans are the beholders of their creations. No, I didn't<br />
make this up! The process involves using worms as the brushes.<br />
The Whole Worm... 121
To do this yourself, you will need:<br />
Several different watercolors of water-based acrylic paints<br />
About a dozen worms of different shapes <strong>and</strong> sizes<br />
Canvas or watercolor paper<br />
Dip a worm completely in c ne color of paint. Drop the<br />
worm onto the paper <strong>and</strong> le t it wiggle around a bit. Do<br />
this with another worm <strong>and</strong> another color. You can<br />
remove the worms after each color <strong>and</strong> let that color dry<br />
a bit before dropping the nekt worm, or drop the worm<br />
with the next color onto the paper while the last color is<br />
still wet <strong>and</strong> allow them to mix. You decide. When you're<br />
finished with the worms, wa^h them off <strong>and</strong> return them<br />
to the bin.<br />
The final picture will be a definite conversation piece!<br />
CALLING ALL WORMS" QR WORM GRUNTING<br />
Yes, you can call worms right out of the ground. This practice<br />
has been traced back to prirpitive societies around the world.<br />
The art of worm calling has rhany important uses. Some animals,<br />
like kiwis, turtles, <strong>and</strong> gulls are<br />
known lo call worms. Maybe by observ-<br />
Every year the U.S. ing <strong>and</strong> copying these animals, the<br />
Forestry Service sells ancient peoples learned how to effective-<br />
about 700 worm calling ly call \yorms also.<br />
permits in the Florida It is pretty easy to call worms. The<br />
panh<strong>and</strong>le.<br />
object is to send vibrations down into<br />
the soil,] which will cause the worms to<br />
come up to the surface. No one really<br />
knows why worms will do this). Some say the vibrations mimic<br />
the digging sound of moles ancj shrews <strong>and</strong> the worms come to<br />
the surface to escape them. Others say the vibrations mimic<br />
falling rain <strong>and</strong> the worms com e to the surface to mate or keep<br />
from drowning (although we r ow know worms aren't in dan-<br />
ger of doing that). Finally, ano ger theory is that the vibrations<br />
mimic seismic disturbances arjd cause the worms to surface.<br />
Whichever it is, this would make a fun science experiment!<br />
There are many ways to call worms. One method the ancient<br />
people probably used is two sticks. One is smooth <strong>and</strong> the other<br />
The Worm Book
is notched like a saw. First, you pound the smooth stick at least<br />
six inches down into the ground, the further down the better.<br />
Now use the notched stick <strong>and</strong> rub it across the smooth stick in<br />
a sawing motion. Do this until the worms surface. (This could<br />
take from a couple of minutes to half an hour.) Practice in an<br />
area that you know has worms first, like your worm bin. This<br />
will help you perfect your technique, so when you are at that<br />
fishing hole, you will know your worm calling will work.<br />
Back in our gr<strong>and</strong>parents' time, anything that would send<br />
vibrations into the ground was tried, but some things worked better<br />
that others. Tapping a metal garden tool like a spade blade,<br />
rake, or hoe against the ground worked pretty well. Sometimes<br />
they got impatient, though, <strong>and</strong> the worms were just dug.<br />
Another way to call worms is to pound two metal rods into<br />
the ground about two feet apart <strong>and</strong> connect a car battery by<br />
jumper cables to each rod. Worms are said to just jump out of<br />
the ground.<br />
You can also try to call worms by driving a galvanized pipe<br />
several feet into the ground. Use a pipe that has a pretty large<br />
diameter, <strong>and</strong>, when you want some worms, just place a drain<br />
snake down the pipe <strong>and</strong> turn it on. The snake vibrates in the<br />
pipe <strong>and</strong> the worms pop right up.<br />
In the South, the slang name for worm calling is "worm<br />
grunting." But whatever you call it, it is a great skill for fishermen,<br />
Boy Scouts, or anyone who needs worms.<br />
The Whole Worm... 123
COOKING WITH<br />
EARTHWORMS<br />
Earthworms, by all accounts, are a nutritious addition to<br />
human diets. They contain sixty to seventy percent protein <strong>and</strong><br />
very little fat. Earthworms are entirely edible <strong>and</strong>, aside from the<br />
initial preparation, are very ea< y to use in recipes. Worms can<br />
be boiled <strong>and</strong> chopped <strong>and</strong> use J in casseroles, or they can provide<br />
the main protein source instead of chicken or beef. They<br />
can also be baked <strong>and</strong> used as a flour for baked goods.<br />
Several organizations <strong>and</strong> universities have sponsored earthworm<br />
<strong>and</strong> insect cooking contests, <strong>and</strong> everyone involved has<br />
enjoyed some wonderful dishes The earth's food supply has to<br />
feed more <strong>and</strong> more people, set) someday a dish called Souffle<br />
Ver de Terre may be one of youii favorites. [Ver de terre is French<br />
for earthworm.)<br />
INITIAL PREPARATION<br />
Just like snails, earthworms should be purged before you eat<br />
them. After reading this book, you know what the worms could<br />
be eating, so you'll underst<strong>and</strong> why purging is a good idea.<br />
If you ordered new worms t< d cook, it is best to transfer them<br />
to moistened corn meal for forty-eight hours as soon as you<br />
receive them. This gives the earthworms enough time to purge<br />
their systems. After that, the v^orms can be washed <strong>and</strong> frozen<br />
for later use. One cup of earth worms is equivalent to one-half<br />
pound.<br />
124
To wash worms, rinse them vigorously in cold water. Use a<br />
fine col<strong>and</strong>er for small worms. Transfer them to a paper towel<br />
<strong>and</strong> remove any dead worms. (They will be the ones that aren't<br />
moving.) Now it's time to cook the worms. The most popular<br />
methods of cooking are boiling <strong>and</strong> baking.<br />
To boil earthworms, start two pots of boiling water. Place<br />
the live worms in one pot of boiling water for 15 minutes.<br />
Remove the worms <strong>and</strong> place them in the second pot for another<br />
15 minutes. The object is to remove all the mucus covering<br />
the worms. After the second boiling, check the worms <strong>and</strong>, if<br />
any mucus remains, boil them again. Finally, rinse <strong>and</strong> pat dry.<br />
The worms now can be used in recipes or frozen for later use.<br />
To bake earthworms, first freeze them (so they are dead <strong>and</strong><br />
don't wriggle off the baking sheet), then defrost them. Preheat<br />
an oven to 200°F. Place clean, defrosted earthworms in a single<br />
layer on several sheets of paper toweling on a baking sheet, <strong>and</strong><br />
pop them into the oven. After 30 minutes, check the worms.<br />
Adjust the time you bake your worms to the recipe's requirements.<br />
Baking small worms for 30 minutes should result in very<br />
dry worms that can easily be ground into flour.<br />
EARTHWORM RECIPES<br />
Just about any favorite recipe can be protein-enhanced with<br />
a bit of earthworm flour. Add a tablespoon or two to cakes,<br />
muffins, or breads. Experiment with using chopped worms<br />
instead of raisins or nuts. The possibilities are endless!<br />
Cooking with Earthworms 125
WORM'N'APPLE CAKE<br />
3 eggsl, beaten<br />
I V4cups sugar<br />
I cup vegetable oil<br />
I teaspoon vanilla<br />
2 cups flour<br />
I teaspoon salt<br />
2 tablespoons earthworm flour<br />
I teaspobn nutmeg<br />
1 teaspoon cinnamon<br />
I teaspooii baking soda<br />
3 or 4 chojpped apples<br />
I cup chopped nuts<br />
Confectioners' sugar for dusting<br />
Preheat oven to 350°F. Beatl the eggs, sugar, oil, <strong>and</strong> vanilla.<br />
In a separate bowl, combine the flour, salt, earthworm flour, nutmeg,<br />
cinnamon, <strong>and</strong> baking soda. Combine wet <strong>and</strong> dry ingredients<br />
<strong>and</strong> beat well. Add the alpples <strong>and</strong> nuts.<br />
Bake in a tube pan for 50 tcp 55 minutes, or in a 9 x 13 pan<br />
for 30 to 35 minutes. Remove the cake from the oven <strong>and</strong> let it<br />
cool in the pan. Remove the cake the from the pan <strong>and</strong> sprinkle<br />
with confectioners' sugar. Enjoy.<br />
12 servings<br />
The Worm Book
VERMICELLI WITH EARTHWORM MEATBALLS<br />
Meatballs:<br />
I'/2 pounds ground beef<br />
'U cup earthworm flour<br />
'/2 cup dry bread crumbs<br />
I tablespoon parsley<br />
I teaspoon salt<br />
'Is teaspoon pepper<br />
I teaspoon Worcestershire sauce<br />
I egg<br />
'/z cup milk<br />
'U cup oil<br />
I pound packaged vermicelli<br />
2 (26-ounce) jars of your favorite spaghetti sauce (or your<br />
homemade sauce)<br />
Grated Parmesan cheese<br />
Mix all meatball ingredients except the oil. Shape the mixture<br />
into 1 to 2-inch meatballs. Place the oil in a large skillet <strong>and</strong> heat<br />
to medium hot. Cook the meatballs until done, about 15 to 20<br />
minutes.<br />
While the meatballs are cooking, heat the spaghetti sauce in<br />
a large saucepan. Boil the vermicelli according to package directions.<br />
Drain. Place cooked, hot vermicelli in a large bowl or platter.<br />
Top with meatballs <strong>and</strong> sauce. Sprinkle grated Parmesan<br />
cheese over all. Serve immediately.<br />
Serves 6 to 8<br />
Cooking with Earthworms127
APRICOT-EARTHWORM BALLS<br />
8 ounces dried apricots, finely minced<br />
272 cups flaked coconut<br />
3/4 cup sweetened condensed milk<br />
2 tablespoons finely chopped boiled earthworms<br />
'/4 cup finely thopped raisins<br />
Confectioners' sugar<br />
Combine all ingredients except the sugar. Shape into 1-inch<br />
balls. If the balls are a bit dry <strong>and</strong> won't hold together, add a<br />
bit more sweetened condensed milk. Roll balls in the confec-<br />
doners' sugar. Place in a container in the refrigerator until firm,<br />
1 to 2 hours. Enjoy. Keep leftov er c<strong>and</strong>y in the refrigerator in a<br />
sealed container.<br />
Makes about 4 dozen<br />
The Worm Book
OATMEAL EARTHWORM-RAISIN MUFFINS<br />
I egg<br />
I cup milk mixed with I tablespoon vinegar<br />
1 /2 cup packed brown sugar<br />
1 /3 cup shortening<br />
I cup quick-cooking oats<br />
1 cup flour<br />
I teaspoon baking powder<br />
I teaspoon salt<br />
1 /2 teaspoon baking soda<br />
'12 cup coarsely chopped boiled earthworms<br />
(orcup each of worms <strong>and</strong> raisins)<br />
Preheat Oven to 400°F. Beat the egg <strong>and</strong> add it to the milk<br />
<strong>and</strong> vinegar. Stir. Mix the brown sugar <strong>and</strong> shortening together.<br />
Combine the egg/milk mixture with the brown sugar <strong>and</strong> shortening.<br />
Stir in the remaining ingredients, except worms, until the<br />
flour is just moistened. Gently stir in the worms. The batter will<br />
be lumpy. Grease 12 muffin cups or line them with paper liners,<br />
then fill with batter. Bake for 20 minutes, or until light brown<br />
on top. Remove the muffins from the pan <strong>and</strong> let cool.<br />
Makes 12 muffins<br />
Cooking with Earthworms129
CHINESE WORM SKILLET DISH<br />
I pound grourid beef or turkey<br />
'/2 onion', chopped<br />
3 or 4 stalks ofl celery, chopped<br />
'12 cup milk<br />
I (8-ounce) package frozen Chinese pea pods,<br />
cooked apd drained<br />
I can (IOV2 ounces)icream of chicken soup<br />
'/2 cup boilejd earthworms<br />
I can (5 ounces) crisp chow mein noodles<br />
Add the ground meat, onion, <strong>and</strong> celery to a skillet <strong>and</strong><br />
cook until the meat is browned <strong>and</strong> the vegetables are crisptender.<br />
Add the milk, pea pods,i soup, <strong>and</strong> worms to the skillet.<br />
Mix <strong>and</strong> heat through. To serve, place some of the chow mein<br />
noodles on each plate. Top the noodles with some of the meat<br />
mixture.<br />
Serves 4<br />
The Worm Book
EARTHWORM SCRAMBLE<br />
6 eggs<br />
1 /3 cup milk<br />
Salt <strong>and</strong> pepper to taste<br />
'/« teaspoon garlic powder<br />
J tablespoon butter or margarine<br />
'/« cup chopped onion<br />
'/« cup green bell pepper<br />
1 /3 cup chopped tomato<br />
'12 cup sliced mushrooms<br />
'/< cup boiled, chopped earthworms<br />
1 /3 cup grated cheddar or American cheese<br />
Beat together the eggs, milk, salt, pepper, <strong>and</strong> garlic powder.<br />
Set aside. Place the butter in a saute pan <strong>and</strong> melt over medium-high<br />
heat. Add the onion <strong>and</strong> bell pepper to the melted butter.<br />
Cook until tender. Add the egg mixture, tomatoes,<br />
mushrooms, <strong>and</strong> worms. Cook until the eggs set. Serve on a<br />
plate topped with the grated cheese.<br />
Serves 2 to 3<br />
Cooking with Earthworms 131
EARTHWORM MEATLOAF<br />
I'12 pounds ground beef<br />
'12 cup boiled earthworms, finely chopped<br />
I envelope dry onion soup mix<br />
'12 cup evaporated milk<br />
'/2 bell pepper, chopped<br />
I slice fresh bread, torn into bits<br />
Mix all ingredients together <strong>and</strong> place in a loaf pan. Bake<br />
for 1 hour at 400°F. Enjoy.<br />
Serves 4 to 6<br />
CARAMEL EARTHWORM BROWNIES<br />
I package of your favorite brownie mix<br />
(or your own homemade recipe)<br />
2 tablespoons|earthworm flour<br />
I cup chppped nuts<br />
'14 cup bottled caramel sauce<br />
Combine the brownie mix with the earthworm flour <strong>and</strong> prepare<br />
according to package directions. Stir in the nuts.<br />
Pour one-half to two-thirds of the batter into the pan.<br />
Drizzle the caramel sauce on top of the batter. Pour the remaining<br />
batter on top of the caramel sauce. Bake according to package<br />
directions.<br />
Serves 8 to 10<br />
The Worm Book
BUYING GUIDE<br />
TO WORMS, WORM PRODUCTS, AND<br />
Beaver River<br />
P.O. Box 94<br />
W. Kingston, Rl 02892<br />
Phone/Fax: (401) 782-8747<br />
www.merchantsbay.com/<br />
beaverriver<br />
Worms, coir fiber, insert kits,<br />
bins, <strong>and</strong> classroom materials<br />
C. K. Ventures Ltd.<br />
P.O. Box 2052'<br />
Ladysmith, BC VOR2EO<br />
Canada<br />
Metal worm bins<br />
FlowerField Enterprises<br />
10332 Shaver Road<br />
Kalamazoo, Ml 49024<br />
Phone: (616) 327-0108<br />
Worm bins, worms, worm videos,<br />
<strong>and</strong> educational materials<br />
Grangettos Farm <strong>and</strong><br />
Garden Supply<br />
I 105 W. Mission Avenue<br />
Escondido, CA 92025<br />
Phone: (760) 745-4671<br />
Worms <strong>and</strong> organic products,<br />
free catalog<br />
ORGANIC PRODUCTS<br />
Organic Gardeners Resource <strong>and</strong><br />
Design Centre<br />
315 S. Coast Hwy 101, Suite U32<br />
Encinitas. CA 92024<br />
Phone: (888) 514-4004<br />
Email: curly@mill.net<br />
High quality organic fertilizers,<br />
very large selection of organic<br />
products, beneficial insects,<br />
nontoxic pest controls, <strong>and</strong><br />
information for individuals. .<br />
interested in environmentally<br />
friendly gardening practices<br />
Solana Recyclers, Inc.<br />
137 N. El Camino Real<br />
Encinitas, CA 92024<br />
Phone: (760) 436-7986<br />
Fax: (760) 436-8263<br />
Email: solana@adnc.com<br />
Worm bins, worms, compost<br />
bins, literature, <strong>and</strong> technical<br />
help. They also coordinate<br />
Master Composter training<br />
programs <strong>and</strong> composting<br />
workshops.<br />
Simpson's Nursery<br />
13925 Highway 94<br />
Jamal, CA 91935<br />
Worms <strong>and</strong> organic products<br />
133
VermiCo<br />
P.O. Box I 134<br />
Merlin, OR 97532<br />
Phone: (541) 476-9626<br />
Fax: (541) 476-4555<br />
Email: vermico@cdsnet.net<br />
web site: HTTP://www.nwim.com/<br />
vermico I<br />
Can-O-Worms. worms, <strong>and</strong><br />
vermiculture technology<br />
Walter Andersen's Nursery<br />
3642 Enterprise<br />
San Diego, CA 921 10-3212<br />
Phone: (619) 224-8271<br />
Worms <strong>and</strong> organic products<br />
Williams Worm Farm<br />
Cyclone Manufacturing<br />
14893 El Monte Road<br />
Lakeside, CA 92040<br />
(619) 443-1698<br />
Worms, worm bins, <strong>and</strong> supplies<br />
The Worm Book<br />
Worm World, Inc.<br />
12425 NW CR 231<br />
Gainesville, FL 32609<br />
Phone: (352) 485-1235<br />
Fax: (352) 336-3680<br />
Commercial worm bins, worms,<br />
<strong>and</strong> worm products<br />
yelm Earthworm <strong>and</strong><br />
Castings Farm<br />
14741 Lawrence Lake Rd. S.E.<br />
Yelm, WA 98597<br />
Phone: (360) 894-0707<br />
email: yelmworms@aol.com<br />
Worms, castings, <strong>and</strong> vermicul-<br />
ture technology <strong>and</strong> support
Newsletters<br />
Casting Call<br />
GUIDE TO ADDITIONAL<br />
INFORMATION<br />
VermiCo's bimonthly newsletter. The primary focus of this<br />
newsletter is vermiculture, composting, soil fertility, <strong>and</strong> related<br />
issues of organic waste. Subscription rate is $18 for six issues.<br />
Contact: VermiCo<br />
P.O. Box 1134<br />
Merlin, OR 97532<br />
Phone: (541) 476-9626<br />
Fax: (541) 476-4555<br />
Email: vermico@cdsnet.net<br />
Web site: http://www.nwim.com/vermico/<br />
Worm Digest<br />
Order a subscription to Worm Digest, a quarterly newsletter that<br />
bears the subtitle, "Worms Deepening Our Connection to Food<br />
<strong>and</strong> Soil." Articles deal with the promotion of sustainable<br />
agriculture through worms.<br />
United States: $ 12/year (4 issues)<br />
Back Issues: $3.50 each<br />
Contact: Worm Digest<br />
Box 544<br />
Eugene, OR 97440-0544<br />
http://www.wormdigest.org/html<br />
Buying Guide I 35
Some Informational Internet Sitfs<br />
136<br />
Vermicomposting Forum<br />
http://www.oldgrowth.org/cc ompOst/wwwboard/<br />
vermi/index.html<br />
The Burrow<br />
http://gnv.fdt.net/~windld/<br />
BuyerTec Worm Growers Hints<br />
http://www.ozemail.com au/~rhee/worms.htm<br />
The Earthworms as Fertilizer Factory<br />
http://www.rain.org/~sals/worms.html<br />
The Lowly Earthworm: The Gardener's Friend<br />
http://www.ag.usask.ca/ciofa/departments/hort/<br />
hortinfo/misc/earthwor.html<br />
The City Naturist—Earthworms<br />
http://www.nysite.com/nature/fauna/earthworm.htm<br />
Organic Farming<br />
http://www.wdc.net/~sm d/agorg.htm
GLOSSARY<br />
ACIDIC—having characteristics of acids, such as a sour taste<br />
<strong>and</strong> testing lower than seven on a pH meter.<br />
AERATION—getting oxygen into something (a worm bin) by<br />
mixing or turning.<br />
AEROBIC—anything that requires oxygen. Aerobic bacteria<br />
need oxygen to live.<br />
AGGREGATION—the clumping together of soil particles, which<br />
aids in aeration <strong>and</strong> water penetration.<br />
ALBUMIN—a protein component for cocoons that feeds developing<br />
worms.<br />
ALIMENTARY CANAL—the digestive tract of a worm.<br />
ALKALINE—having the characteristics of alkali <strong>and</strong> testing<br />
higher than seven on a pH meter.<br />
ANAEROBIC—anything that does not require oxygen.<br />
Anaerobic bacteria live in conditions that do not have oxygen<br />
ANEClC WORMS—worms that burrow deep into the soil but<br />
forage at night on the surface for freshly decaying plant or<br />
animal residues (example: nightcrawlers).<br />
ANNELID—a worm belonging to the phylum Annelida; it has<br />
a segmented body <strong>and</strong> a coelom.<br />
ANTERIOR—towards the front of a worm.<br />
ANUS—the exit of the digestive tract, usually located near the<br />
rear of an animal.
ARTHROPOD—an invertebrate animal that is a member of the<br />
phylum Arthropoda, including ilnsects, arachnids, <strong>and</strong> crustaceans.<br />
BED-RUN—a term used to describe both adult <strong>and</strong> immature<br />
worms that you would buy together from a worm grower.<br />
BEDDING—materials like newsp; per <strong>and</strong> leaves used as an<br />
organic medium for worm composting.<br />
BENEFICIAL—a term used to des :ribe a plant or animal that<br />
contributes to the well-being of people or nature.<br />
BREEDERS—a term referring to ddult worms that have the<br />
ability to reproduce.<br />
CASTINGS—worm manure or excrement.<br />
CELLULOSE—a compound made of carbon, hydrogen, <strong>and</strong><br />
oxygen that is the principal component of cell walls of<br />
plants. It is a complex carbohydrate.<br />
CUTELLUM—a swollen region nfear the front end of an adult<br />
worm (such as a leech or earthworm) that produces mucus<br />
<strong>and</strong> makes the cocoon for the eggs.<br />
COCOON—an egg case; animalsisuch as moths <strong>and</strong> worms<br />
produce cocoons. Worm cocooihs can carry from two to<br />
twenty worms each..<br />
COELOM—a body cavity, found in annelids <strong>and</strong> other<br />
advanced animals, that is lined on all sides by a thin layer of<br />
cells <strong>and</strong> is a fluid-filled space between the earthworm's body<br />
wall <strong>and</strong> digestive system.<br />
COMPOST—the end product or lumus that is produced by the<br />
decomposer organisms in the cbmposting process.<br />
COMPOSTABLE MATERIALS—organic materials such as leaves<br />
<strong>and</strong> grass that will break down in a compost bin.<br />
COMPOSTING—the process that occurs when organic matter is<br />
broken down by decomposer oirganisms into a nutrient-rich<br />
soil or humus.<br />
The Worm Book
CONSUMERS—organisms that obtain energy by eating other<br />
organisms or food particles.<br />
CROP—a thin-walled sac just behind the earthworm's esophagus<br />
where food is stored briefly on its way through the<br />
digestive system.<br />
CUTICLE—an outer body layer that is secreted by skin cells<br />
<strong>and</strong> helps protect the body from the environment.<br />
DECOMPOSERS—organisms that digest <strong>and</strong> break down into<br />
simpler compounds the organic matter in the dead bodies of<br />
other plants <strong>and</strong> animals.<br />
DECOMPOSITION—the process of breaking down organic<br />
matter into its basic compounds <strong>and</strong> elements, including<br />
nutrients needed for plant growth.<br />
EARTHWORM—a segmented worm that belongs to the phylum<br />
Annelida.<br />
ECOSYSTEM—an interacting dependent system that includes all<br />
plants, animals, <strong>and</strong> inorganic matter.<br />
ENDEMIC—something that belongs to a particular locality or<br />
region.<br />
ENDOGEIC WORMS—soil-dwelling worms that ingest soil <strong>and</strong><br />
extract nutrition from degraded organic matter.<br />
EPIDERMIS—the outer layer of an animal's body.<br />
EPIGEIC WORMS—surface-dwelling worms that ingest freshly<br />
decaying plant or animal residues.<br />
ESOPHAGUS—in worms, this is the food canal that leads from<br />
the mouth to the crop <strong>and</strong> gizzard.<br />
FEED STOCK—a term used to describe food that is fed to<br />
worms or livestock.<br />
FERTILIZER—a substance that is added to the soil to supply<br />
one or more plant nutrients; it can be either natural or<br />
man-made.<br />
Glossary 139
FOOD CHAIN—transfer of food energy through producers,<br />
consumers, <strong>and</strong> decomposers.<br />
FOOD WASTES—food scraps; generally refers to uncooked fruit<br />
<strong>and</strong> vegetable scraps.<br />
FOOD WEB—a complex, interlocking series of food chains.<br />
GIZZARD—sac behind the earthworm's crop that has heavy<br />
muscular walls that grind up fqod with the help of grit<br />
swallowed by the worm.<br />
HABITAT—a place where an organism lives.<br />
HEAP—an unenclosed compost J)ile.<br />
HERMAPHRODITE—an organism that has both male <strong>and</strong><br />
female reproductive organs.<br />
HIBERNATION—a state of dormancy, especially in winter.<br />
HUMUS—finished compost, which has undergone a high<br />
degree of decomposition through the breakdown of plant<br />
<strong>and</strong> animal matter. It is stable, dark in color, <strong>and</strong> has a high<br />
water absorption <strong>and</strong> swelling capability.<br />
HYDRATED LIME—also called calcium hydroxide, it is not<br />
recommended for use in a worm bin.<br />
INFILTRATION—the ability of water to penetrate into soils.<br />
INVERTEBRATES—organisms like insects <strong>and</strong> worms that do<br />
not possess a backbone.<br />
LEACHATE—liquid that results from solid waste decomposition<br />
<strong>and</strong> which has extracted, dissolved, or suspended materials<br />
in it.<br />
LEAF LITTER—the uppermost oiiganic materials that are partly<br />
or not at all decomposed, on tfie surface of the soil.<br />
LEAF MOLD—decomposed or mpstly decomposed leaves.<br />
The Worm Book
MACROORGANISMS—organisms that can be seen without<br />
magnification.<br />
MICROORGANISMS—organisms that are extremely small <strong>and</strong><br />
cannot be seen without magnification.<br />
MUCUS—a slimy substance produced by body cells.<br />
MULCH—a layer of plant residues, such as partially decomposed<br />
plant materials, which is placed on top of garden beds<br />
<strong>and</strong> around plants <strong>and</strong> shrubs to hold in moisture.<br />
NEMATODE—a roundworm belonging to the phylum<br />
Nematoda; these worms have a straight digestive tract that<br />
lies loose within a fluid-filled body space.<br />
NOCTURNAL—an organism that is active during the night.<br />
OLlGOCHAETE—an annelid, such as an earthworm, that has<br />
only a few bristles (setae) <strong>and</strong> has a clitellum.<br />
ORDER—a subdivision of a class of organisms, comprising a<br />
group of related families.<br />
ORGANIC MATTER—any organic material, derived from plants<br />
or animals, that is in a more or less advanced stage of<br />
decomposition.<br />
OVERLOAD—to put more food into a worm bin than can be<br />
processed aerobically.<br />
pH—a chemical term meaning "potential hydrogen." A pH<br />
scale measures the acidity to alkalinity of something on a scale<br />
from one to fourteen. Seven on the scale is neutral.<br />
PARASITE—an organism that lives on or in the body of another<br />
living organism (host) for at least part of its life.<br />
PARTHENOGENESIS—the production of offspring without<br />
fertilization.<br />
PATHOGEN—an organism or virus that causes disease.<br />
Glossary 141
PEST—an organism that is harmful or annoying to humans.<br />
PHARYNX—a muscular part of the digestive tract behind the<br />
mouth that is used to pump fo(j>d into the digestive system.<br />
PHEROMONE—a substance produced by one organism that<br />
influences the behavior or physi|ology of another organism of<br />
the same species.<br />
PHOTOPHOBIC—an organism thdt hates light.<br />
PHYLUM (PL. PHYLA)—a group (bf living things that share a<br />
common body plan.<br />
PRODUCERS—organisms <strong>and</strong> plapts that change energy from<br />
the sun into food energy, which can be used by consumers.<br />
PROSTOMIUM—a fleshy pad that! exists above the mouth of a<br />
worm. It aids in taking in foodl<br />
RECYCLE—to use something aga in <strong>and</strong> again.<br />
REDWORM—a variety of earthw<br />
posting, such as Eisenia fetida.<br />
REGENERATE—to regrow a new<br />
been lost or hurt.<br />
orm suitable for vermicom-<br />
part of the body that has<br />
RODENT RESISTANT—anything designed or modified in such a<br />
way as to deter rodents from rhaking a home in it.<br />
SCIENTIFIC NAME—an internatu: nally recognized Latin name<br />
for a species.<br />
SCREENING—to sift out uncomposted matter <strong>and</strong> worms from<br />
the compost <strong>and</strong> castings.<br />
SEGMENT—a section or part.<br />
SEPTA—sheets of tissue that separate the bodies of annelid<br />
worms into separate segments.<br />
SETAE—the spines or bristles ofl oligochaetes.<br />
The Worm Book
SOIL—a mixture of weathered rocks, s<strong>and</strong>, silt, clay, <strong>and</strong><br />
organic material that covers the earth in a thin layer in<br />
which plants grow.<br />
SOIL CONDITIONER—something that enriches the physical<br />
condition of soil <strong>and</strong> increases its organic content.<br />
SPECIES—a group of individuals that are similar in structure<br />
<strong>and</strong> physiology <strong>and</strong> are capable of reproducing fertile offspring.<br />
VERMICAST—another word for castings produced from worms<br />
that have eaten <strong>and</strong> re-eaten the same material many times.<br />
VERMICOMPOST—the end product from composting with<br />
worms. Vermicompost contains worm castings, broken-down<br />
organic matter, bedding, worm cocoons, worms, <strong>and</strong> other<br />
organisms.<br />
VERM I COM POSTER—a worm bin or a person who composts<br />
with worms.<br />
VERMICULTURE—worm farming or raising earthworms.<br />
WORM BIN—a container especially prepared for worms to live<br />
in <strong>and</strong> eat organic material.<br />
Glossary 143
BOOKS<br />
Appelhof, Mary. Worms Eat My<br />
Flowerfield Press, 1997.<br />
BIBLIOGRAPHY<br />
Garbage, 2nd ed. Kalamazoo, MI:<br />
Ball, Jeff. Rodale's Garden Problen\ Solver, Emmaus, PA: Rodale Press,<br />
1988.<br />
Barnes, Robert D. Invertebrate ^oology, 2nd ed. Philadelphia, PA:<br />
Saunders Company, 1968.<br />
Bogdanov, Peter. Commercial Vermiculture: How To Build a Thriving<br />
Business in Redworms, Merlin, OR: VermiCo., 1996.<br />
Edwards, C. A. <strong>and</strong> J. R. Lofty. Biology of Earthworms, 2nd ed. New<br />
York: Halsted Press, 1977.<br />
Keeton, William T. Biological Scie'nce, 2nd ed. New York: Norton 8c<br />
Company, Inc., 1972.<br />
Martin, Deborah L. <strong>and</strong> Grace Gfershuny, editors. The Rodale Book<br />
of Composting, Emmaus, PA: R[odale Press, 1992.<br />
McGrath, Mike. The Best of Organic Gardening. Emmaus, PA: Rodale<br />
Press, 1996.<br />
McLaughlin, Molly. Earthworms, Dirt, <strong>and</strong> Rotten Leaves. New York:<br />
Macmillan Publishing Company 1986.<br />
<strong>Nancarrow</strong>, <strong>Loren</strong> <strong>and</strong> <strong>Janet</strong> <strong>Hogan</strong> <strong>Taylor</strong>. Dead Snails Leave No<br />
Trails. Berkeley, CA: Ten Speed Press, 1996.<br />
Patent, Dorothy Hinshaw. The Wbrld of Worms. New York: Holiday<br />
House, 1978.<br />
Simon, Seymour. Discovering What Earthworms Do. New York:<br />
McGraw-Hill Book Company, 1969.<br />
<strong>Taylor</strong>, Ronald L. <strong>and</strong> Barbara Jl Carter. Entertaining with Insects,<br />
144<br />
Yorba Linda, CA: Salutek Publishing Company, 1992.
ARTICLES<br />
Bamhara, S. B. (Entomology) <strong>and</strong> R. L. Sherman. "Controlling Mite<br />
Pests in Earthworm Beds." Dept. of Biological & Agricultural<br />
Engineering, North Carolina State University, 1997.<br />
Department of Animal Hygiene Paper Summary. "Effect of<br />
Organophosphorous Insecticides on Cholinesterase activity<br />
in Earthworms from Farmyard." Croatia: University of Zagreb,<br />
1995..<br />
Lyon, W. F. "Earthworm Enemies." HYG-2134-96. Ohio Cooperative<br />
Extension Service. 1996.<br />
Martin, J. P, J. H. Black, <strong>and</strong> R. M. Hawthorne. "Earthworm Biology<br />
<strong>and</strong> Production." Leaflet 2828. University of California Cooperative<br />
Extension Service, July 1976.<br />
Mathies, J. B. "Growing Earthworms for Fun <strong>and</strong> Profit," Zoology<br />
Series 1. Raleigh, NC: North Carolina Cooperative Extension<br />
Service, April 1974.<br />
Townsend, Lee <strong>and</strong> Dan Potter (Entomology) <strong>and</strong> A. J. Powell<br />
(Agronomy), "Earthworms: Thatch-Busters." University of<br />
Kentucky, 1997.<br />
Trotter, Donald W. "Earthworm Update." Sustainable Agriculture,<br />
Davis, CA: University of California, Summer 1994.<br />
UC Cooperative Extension. "Harvesting Your Worm Compost." San<br />
Andreas, CA: 1996<br />
World Resource Foundation. Information Sheets: "Preserving<br />
Resources through Integrated Sustainable Management of Waste,"<br />
Engl<strong>and</strong>: April 1997.<br />
Bibliography 145
NTERNET REFERENCE SlTES<br />
The Burrow at<br />
http://gnv.fdt.net/~windle/<br />
Buyer Tec Worm Growers Hints at<br />
http:www.ozemail.com.au/~ I'hee/worms.htm<br />
Compost Resource Page at httjp://www.oldgrowth.org/<br />
co mpost/wwwboard/verigro up/index, htm I<br />
Earthworms at<br />
http://www.cog.brown.edu/gprdening/worms.html<br />
Newjersey Online's Yucky Site: Worm World at<br />
h tt p://devO I .nj.com/yucky/wci>rm<br />
The City Naturist-Earthworms at<br />
http://www.nysite.com/naturp/fauna/earthworm.htm<br />
The Earthworms as Fertilizer Factory at<br />
h ttp:7/www. rain.org/~sa I s/w(j>rms. htm I<br />
The.Lowly Earthworm: The Gardener's Friend at<br />
http://www.ag.usask.ca/cofa/departments/hort/<br />
hortinfor/misc/ earthwor.htm<br />
Organic Farming at http://www.wdc.net/~smd/agorg.htm<br />
Vermicomposters Forum at htitp://www.oldgrowth.org/<br />
compost/wwwboard/vermi/d; ta/2296. htm I<br />
Worm Songs at<br />
http://www.sci.mus.mn.us/sl<br />
song.html<br />
The Worm Book<br />
m/tf/w/worms/worms/
Acidity, 21, 45, 46, 55, 61, 62. 71.<br />
73, 74, 84, 89. 90<br />
Aeration, 1, 63. 97<br />
Alkaline, 46. 62, 73, 74-75/97.<br />
Angle worm, 19<br />
Annelida. 7, I 7<br />
Ants, 27, 78-81<br />
ant death bait, 79<br />
eradication <strong>and</strong> prevention, 78-79<br />
hot pepper solution, 80-81<br />
natural history, 18<br />
Aristotle. 17<br />
Art, 121-122<br />
Bacteria, 3,4, 16, 26, 27, 42, 44,<br />
56, 58, 63, 84, 94, 98<br />
actinomycetes, 26, 27<br />
mesophilic, 26, 27<br />
psychrophiIic, 26<br />
Bedding, 43-52, 69, 75. 84, 89. 90,<br />
91, 93<br />
about, 43<br />
additives, 52<br />
eggshells, 52,7 1<br />
calcium carbonate(powdered<br />
limestone), 52<br />
hydrated lime, 52<br />
rock dust, 52 .<br />
animal manure, 48-50 •<br />
advantages <strong>and</strong> disadvantages,<br />
48-50<br />
washing manure, 49<br />
coir (coconut fiber), 50-5 I<br />
advantages <strong>and</strong> disadvantages,<br />
50-51<br />
compost. 47-48<br />
advantages <strong>and</strong> disadvantages,<br />
47-48<br />
INDEX<br />
newspaper, 46-47. 72, 90<br />
advantages <strong>and</strong> disadvantages.<br />
46-47<br />
requirements, 44<br />
sawdust, 5 I<br />
sphagnum peat moss, 3 1, 44.<br />
45-46 50, 72<br />
advantages <strong>and</strong> disadvantages,<br />
45-46<br />
wood chips, 50-51<br />
advantages I disadvantages, 5 I<br />
Blue worm, 23<br />
Br<strong>and</strong>ling worm, 2 I<br />
C:N ratio, 5<br />
Calcium, 4, 5<br />
Calcium carbonate. 3, 49, 50, 52. 71<br />
Carbon dioxide, 15,26<br />
Castings, 3-4, 6, 48, 65, 66, 72, 74,<br />
95, 97-100, I 10, I 12<br />
adding to potting soil, 99<br />
adding to transplants, I 00<br />
nutrient content, 98-99<br />
top dressing, 99-100<br />
use as a mulch, 100<br />
use in gardens, 99<br />
Centipedes, 27, 48, 81-82<br />
eradication, 82<br />
natural history, 82<br />
Chlorinated water, 59, 73<br />
Commercial worm growing,<br />
109-117<br />
conducting workshops, 112<br />
delivery of vermicompost, 112<br />
International Worm Growers<br />
Association, I I 6<br />
maintaining vermicomposting<br />
systems, I I I<br />
147
Commercial worm growing,cont'd.<br />
marketing, I I 2<br />
recycling, I I 1<br />
scams, 116-117<br />
selling castings, I 10-1 II<br />
selling worms, 109-1 10<br />
selling worm tea, 112<br />
starting your worm business,<br />
113-114<br />
things to guarantee success,<br />
I 14-1 16<br />
Composting, 4, 26<br />
Consumers, 26-27<br />
first-level, 26-27<br />
second-level, 27<br />
third-level, 27<br />
Cooking with earthworms, 124-132<br />
preparation, I 24-1 25<br />
recipes, I 25-1 32<br />
Apricot-Earthworm Balls, 128<br />
Caramel Earthworm<br />
Brownies, 132<br />
Chinese Worm Skillet<br />
Dish, 130<br />
Earthworm Meatloaf, 132<br />
Earthworm Scramble, I 3 I<br />
Oatmeal Earthworm-Raisin<br />
Muffins, 129<br />
Worm'n'Apple Cake, 126<br />
Vermicelli with Earthworm<br />
Meatballs. 127<br />
Darwin, Charles, 7<br />
Diatomaceous earth, 92-93<br />
Earthworms, 27, 53, 82<br />
body structures, 8-14<br />
blood vessels, 10,12<br />
body wall, I I<br />
buccal cavity, 11,12<br />
cerebral ganglion, 10, 12-13<br />
clitellum, 9, 13, 14, 21, 22, 23<br />
crop, 11,12<br />
epidermis, I I<br />
esophagus, 11,12<br />
gizzard, 10, II, 12, 56<br />
gonopore, 9<br />
head, I I<br />
hearts, 10<br />
The Worm Book<br />
hemoglobin, I 2<br />
intestine, 11,12<br />
mouth, 9, I I<br />
mucus, 10, II, 13, 96<br />
nephridia, 10<br />
pharynx, 11,12<br />
pores, 10<br />
prostomium, I I<br />
setae (bristles), 9<br />
sperm grooves, 9, 14<br />
burrows, 5<br />
cocoons (egg capsules), 14-15,<br />
20, 21, 22, 23, 40, 67<br />
deep-burrowers, 18.19<br />
food, 3, I I, 16, 19, 20, 21, 22, 23<br />
history, 7-8<br />
in agriculture, 104-108<br />
crop management<br />
impacts. 106-108<br />
maintaining pH, 108<br />
' organic material, 107<br />
pesticides, 108<br />
rotating crops, I 08<br />
tillage, 107<br />
winter crops, 107<br />
seeding, 108<br />
in the garden. 6, 96-97<br />
litter-dwellers, 18, 23<br />
locomotion, 10 -<br />
protein, 106, I 24<br />
regeneration. 19, 21, 23<br />
sexing, 13-15<br />
mating. 13-14<br />
shallow-soil dwellers, 18,19<br />
<strong>and</strong> soil composition, 3<br />
where found, 15-16<br />
Eisenia, 17<br />
<strong>and</strong>rei. 2 1,22<br />
fetida, 15, 2 1-22, 24, 97, 105<br />
Enchytraeid worms, 27, 82-83<br />
Eudrilus engeniae (African<br />
nightcrawler), 20<br />
Dew worm, I 9<br />
Feed stock, 53<br />
Fertilizer, 4, 5, 6, 66, 68, 91, 95, 97,<br />
98, 99. 104, 105, 106, 107,<br />
108, III
Fishing worm, 2 1, 22, 24<br />
Flies, 27. 58, 73. 83-87<br />
eradication, 84-87<br />
natural history, 87<br />
Fungi, I 6. 26, 27. 94<br />
Garlic worm, 2 I<br />
Giant nightcrawler, 20<br />
Gnats, 85-86<br />
Grit, 51. 52. 56<br />
Grubs. 27. 76, 87-88<br />
natural history. 87-88<br />
Harvesting, 63-67, 72<br />
egg capsules or cocoons, 67<br />
Humus, 2, 3, 26, 82, 97-98. 104<br />
Indian blue worm, 23<br />
Iron, 4<br />
L<strong>and</strong> Tills, 6, 68. I I I<br />
Light, 21, 42, 65, 72, 76, 90<br />
Linnaeus, Carolus, I 6<br />
Lumbricus, 8, 9, 14, I 6, I 7<br />
rubellus, 16, 20-21, 105<br />
I errestris, 19-20<br />
Magnesium, 4<br />
Malaysian blue worm, 23<br />
Manure, 4.5. I 3. 2 1, 22, 23, 4 I,<br />
44, 48-50. 54, 55. 89, 101-<br />
102. 107<br />
Manure worm, 2 I<br />
Micronutrients. 4<br />
Microorganisms. 1,4,26, 100, 104<br />
thermophilic. 26<br />
Millipedes. 88-89<br />
natural history. 88-89<br />
Minerals. 1.3,4. 5. 52<br />
Mites. 27, 89-91<br />
eradication. 90-9 I<br />
natural history. 89-90<br />
Moisture levels. I 5, 2 1, 25, 44. 45,<br />
62, 69. 72, 84. 90. 97<br />
Mold, 47, 48, 77<br />
Moles, 102-103<br />
repellent, 103<br />
Mulch, 19. 20. 96, 100, 107<br />
Mushrooms, 77<br />
Nematodes, 16. 17, 86, 91-92<br />
beneficial, 92<br />
Night lion, I 9<br />
Night walker, I 9<br />
Nightcrawler, 5, 8. 18, 19-20, 40.<br />
109-1 10<br />
Nitrogen, 4. 5, 50. 53, 54, 55, 98<br />
Nitrogen-fixing bacteria, 3<br />
Oligochaela. 7,17<br />
Oligochaetelogy, I 6<br />
Orchard worm, 19<br />
Oxygen, 3, 12, 13, 15, 62, 63,<br />
70. 74<br />
Pathogens, 56-58<br />
pH, 1,3,45,49, 50, 52, 62-63, 71,<br />
74-75. 90, 99, 108<br />
Perionyx excauitus, 23. 24<br />
Pesticides, 2, 58, 104, 106, 107, 108<br />
Pet feces, 57-58<br />
as a mole repellent, 102<br />
toxoplasmosis, 57<br />
Phosphorus, 4<br />
Plants, 4, 5, 6, 7, 16, 20. 21,22, 23,<br />
26, 63, 87, 88, 89, 91, 95,<br />
96, 97, 98, 99, 100, 102,<br />
106, 120<br />
growth, 52, 97<br />
roots, 3<br />
Poetry, I 18-1 20<br />
Potassium. 4<br />
Potting soil, 99-101<br />
Predaceous beetles. 27<br />
Rain worm, I 9<br />
Recycling,<br />
animal wastes, 6, 54<br />
green wastes, 5-6, 28, 44, 54, 55,<br />
76. 88. I II<br />
kitchen wastes, 6, 28, 53, 56,<br />
61, 83<br />
Red tiger worm, 22<br />
hybrids, 22<br />
Red wiggler, 20, 21,<br />
Redworms, I 7, 20, 39, 40, 6 I,<br />
82-83<br />
Rock dust, 52, 56<br />
Shrews, 102<br />
Slugs, 92<br />
Soil, 2-4, 8, II, 16, 18, 19, 20, 21,<br />
22, 95, 102, 104, 106. 108<br />
composition, 3<br />
Index 149
Songs. 27, 120-121<br />
Sow bugs, 93<br />
Spenceriella, 23<br />
Springtails, 27, 93-94<br />
natural history. 94<br />
Sulfur, 4, 75. 91<br />
Television, I 2 I<br />
Temperature, 19, 20. 21, 22, 23. 26,<br />
27, 57, 61-62, 65, 72, 75,<br />
77, 96<br />
Tiger worm, 21,22<br />
Toads, 86-87<br />
Where to get worms, 39-4 I<br />
Windrows, 101-102, 105<br />
Worm bins,<br />
bedding the bin, 5 1-52, 72<br />
building, 30<br />
plastic bins, 30-33<br />
wooden bins, 33-38<br />
composting process, 25-27<br />
environmental conditions, 61-63<br />
aeration, 63<br />
moisture. 62<br />
pH, 62-63<br />
temperature, 61-62<br />
extra worms, 67-68<br />
feeding, 53-61<br />
how-to, 58-61<br />
how often to feed, 60<br />
how much food. 61<br />
preparing, 58-59<br />
saving food wastes, 58<br />
where to place it, 59-60<br />
food examples, 54<br />
foods to avoid or limit, 53, 7 I<br />
I 0 The Worm Book<br />
harvesting, 63-67<br />
how many worms, 39<br />
insulation, 42-43<br />
location, 4 I -42<br />
maintaining, 53-68<br />
pests in, 55<br />
flies, 73, 83-87<br />
grubs, 76. 87-88<br />
moles <strong>and</strong> shrews, 102-103<br />
problems in, 61, 68-77<br />
odors, 45, 46, 50, 53, 55, 60,<br />
63, 70-7 I, 76<br />
too alkaline, 74-75<br />
worms are dying. 72-73<br />
worms are gone, 75<br />
worms are leaving, 7 1-72<br />
worms are producing castings<br />
slowly, 74<br />
sizes, 28-29<br />
types,<br />
commercial, 28-29<br />
plastic. 30-33<br />
wooden, 33-39<br />
Worm grunting, I 22-123 .<br />
Worm tea, 97, 100<br />
Vermiculture, NO, 116<br />
Vermicompost, 6, 25, 45, 52, 63, 64,<br />
66, 83, 95, 98, 100, 101<br />
in the garden, 95-100<br />
adding to soil, 98<br />
adding to transplants, 98<br />
top dressing, 98<br />
Vermicomposting with worms, 19,<br />
20, 2 1, 22, 23, 26, 53, 77,<br />
104-106, I I I
Garden $11<br />
GOT WORMS?<br />
(Maybe you should get some! If you are a gardener, a fisher, or just<br />
someone concerned about (he environment, earthworms are for you.<br />
With a minimum of fuss, these humble heroes nil I turn your garbage into<br />
the finest, richest compost imaginable.<br />
In The Worm Book, ecu-journalist <strong>Loren</strong> i<strong>Nancarrow</strong> <strong>and</strong> entomologist<br />
<strong>Janet</strong> llogan <strong>Taylor</strong>—intrepid authors of Dead Snails Leave No Trailsleave<br />
no worm unturned in their quest to tell all you need to know<br />
about the lowly yet lovable earthworm, including:<br />
how to build a worm composting bin<br />
(including diagrams for several different bins, from basic to deluxe)<br />
bow worm composting works, <strong>and</strong> why it's such a good idea<br />
how to use worms, castings, <strong>and</strong> vermicompost in your garden \<br />
fascinating essentials of earthworm biology (do they really have<br />
2 heads <strong>and</strong> 5 hearts? how do earthworms mate?)<br />
how (o cook with worms (yep, there really are recipes in (his book}<br />
resources for buying worms <strong>and</strong> worm composting sy stems<br />
(<strong>and</strong> for learning still more about these fabulous critters)<br />
...<strong>and</strong> much more.<br />
The most comprehensive resource book on worm growing <strong>and</strong> worm<br />
composting on the market, The Worm Hook is also a sprightly <strong>and</strong><br />
affectionate look at everyone's favorite invertebrates. It's much<br />
more fun than a barrel of worms. We promise.<br />
TfiiSpfftclPrcss<br />
r