
You also want an ePaper? Increase the reach of your titles
YUMPU automatically turns print PDFs into web optimized ePapers that Google loves.
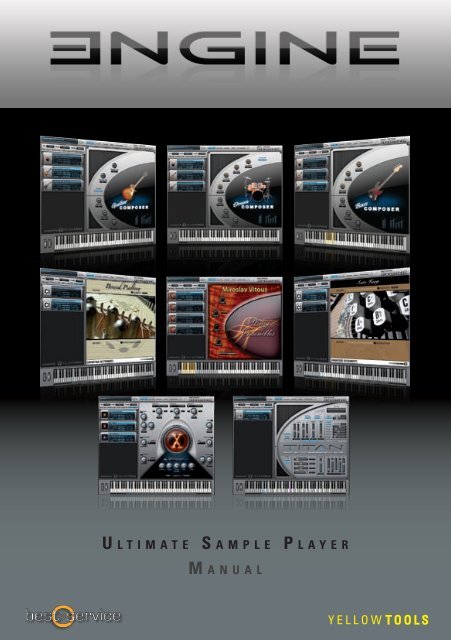
U l t i m a t e Sa m p l e pl a y e r<br />
m a n U a l
OPERATION MANUAL<br />
for<br />
<strong>Engine</strong> 2.0
The information in this document is subject to change without notice and does not represent a<br />
commitment on the part of yellow tools GbR or <strong>Best</strong> <strong>Service</strong> GmbH. The software described by this<br />
document is subject to a License Agreement and may not be copied to other media. No part of this<br />
publication may be copied, reproduced or otherwise transmitted or recorded, for any purpose, without<br />
prior written permission by yellow tools GbR and <strong>Best</strong> <strong>Service</strong> GmbH. All product and company names<br />
are or ® trademarks of their respective owners.<br />
© yellow tools GbR, 2010. All rights reserved. 3rd edition.
Table Of Content<br />
Welcome ...................................................................................................................... 10<br />
Basics & User Interface ..................................................................................... 17<br />
First start of <strong>Engine</strong> ................................................................................................ 17<br />
Using <strong>Engine</strong> as plug-in ........................................................................................ 18<br />
Using <strong>Engine</strong> in standalone mode ...................................................................... 18<br />
Audio Preferences .................................................................................................18<br />
MIDI Preferences ....................................................................................................19<br />
Projects, Layers, Alternates, Sections & Zones .............................................. 20<br />
Zone .........................................................................................................................20<br />
Section ....................................................................................................................20<br />
Alternate ..................................................................................................................20<br />
Layer ........................................................................................................................20<br />
Project .....................................................................................................................20<br />
General Operation ................................................................................................... 21<br />
Input Fields .............................................................................................................21<br />
Pull-Down Menus ...................................................................................................21<br />
Buttons ....................................................................................................................21<br />
Drag‘n‘Drop Support ..............................................................................................22<br />
VST Effects & VST Instruments Import ............................................................. 23<br />
Installation of VST Plug-Ins ...................................................................................23<br />
Loading VST Instruments into <strong>Engine</strong> .................................................................24<br />
Loading VST Effects into <strong>Engine</strong> ..........................................................................26<br />
User Interface ........................................................................................................... 27<br />
Project Area ............................................................................................................28<br />
Layer Area ...............................................................................................................30<br />
Layer Parameter .....................................................................................................32<br />
MIDI Programs ........................................................................................................38<br />
Pre-cache ................................................................................................................39<br />
Auto-Mapping-Import .............................................................................................40<br />
X-Y-Z Mapping ...................................................................................................41<br />
Multi Key Mapping ............................................................................................41<br />
Chromatic Mapping ..........................................................................................42<br />
One Key Mapping .............................................................................................42<br />
Quick Mapping ..................................................................................................42<br />
Elastique: real-time time-stretching & pitch-shifting ...................... 43<br />
Introduction ............................................................................................................... 43<br />
Approach for the use of audio loops ................................................................. 43<br />
Approach for dynamic use ................................................................................... 44
Quick Edit ................................................................................................................... 46<br />
Pro Edit ........................................................................................................................ 48<br />
Module Editor ........................................................................................................... 50<br />
Output Settings ......................................................................................................51<br />
Key Switch ..............................................................................................................52<br />
Keyboard Options ..................................................................................................54<br />
Filters ......................................................................................................................56<br />
Skip ..........................................................................................................................57<br />
Volume AHDSR .......................................................................................................57<br />
Flexible Modifiers .................................................................................................... 61<br />
External Sources ....................................................................................................65<br />
Fix Value ............................................................................................................65<br />
Velocity ..............................................................................................................65<br />
Release Velocity ...............................................................................................66<br />
Random .............................................................................................................66<br />
Pitchbend ..........................................................................................................66<br />
Modwheel ..........................................................................................................66<br />
Mono Aftertouch (channel pressure) ..............................................................66<br />
Poly Aftertouch (key pressure) .......................................................................66<br />
MIDI Automation ...............................................................................................66<br />
Host Automation ...............................................................................................66<br />
Custom Control ................................................................................................66<br />
Key Position (keyboard tracking) ...................................................................66<br />
Key Distance .....................................................................................................67<br />
Key Up ...............................................................................................................67<br />
Key Down ..........................................................................................................67<br />
Internal Sources .....................................................................................................67<br />
LFO (Low Frequency Oscillator) .....................................................................68<br />
AHDSR Envelope ..............................................................................................70<br />
Free Envelope Unipolar / Bipolar ....................................................................70<br />
Step Modulator Unipolar / Bipolar ..................................................................72<br />
Glide (Portamento) ...........................................................................................74<br />
Step Sequencer ................................................................................................75<br />
Arpeggiator .......................................................................................................77<br />
Arranger ............................................................................................................79<br />
Time Modulator .................................................................................................89<br />
Insert FX ............................................................................................................91<br />
Browser ....................................................................................................................... 92<br />
Overview .................................................................................................................... 92<br />
Operation ................................................................................................................... 93<br />
Searching for files ................................................................................................... 95<br />
File display ................................................................................................................ 96<br />
Information batch .................................................................................................... 97
MIDI files .................................................................................................................... 98<br />
Mixer ........................................................................................................................... 100<br />
Content Editor ........................................................................................................101<br />
Group Editor ...........................................................................................................102<br />
Show/Hide Editor ...................................................................................................103<br />
MIDI input pull-down menu .................................................................................103<br />
Channel Display .....................................................................................................104<br />
Layer Channel ........................................................................................................104<br />
Insert Button .........................................................................................................105<br />
Group Name ..........................................................................................................105<br />
BUS sends ............................................................................................................106<br />
Audio Out selection pull-down menu .................................................................107<br />
Solo and Mute button ..........................................................................................107<br />
Level indicator ......................................................................................................107<br />
Volume fader and graphic level meter ...............................................................107<br />
Volume chart.........................................................................................................107<br />
Panorama chart ....................................................................................................108<br />
Channel types.........................................................................................................108<br />
Automation ............................................................................................................. 109<br />
Setup of an automation .......................................................................................109<br />
Additional automation features ......................................................................... 111<br />
Visual presentation of automated parameters .............................................. 113<br />
Insert Filters and Effects................................................................................ 114<br />
Load, save & remove insert filters and effects .............................................. 114<br />
Equalizers ................................................................................................................ 116<br />
4 band parametric EQ ..........................................................................................116<br />
6 band parametric EQ ..........................................................................................116<br />
Vintage 3 band EQ................................................................................................117<br />
Filters ........................................................................................................................ 118<br />
2D Filter .................................................................................................................118<br />
X-Filter ...................................................................................................................118<br />
Filter Follower .......................................................................................................119<br />
Low Cut Filter .......................................................................................................119<br />
High Cut Filter ......................................................................................................120<br />
Multi Mode Filter ...................................................................................................120<br />
LFE Filter ...............................................................................................................121<br />
Satellites HP Filter ................................................................................................121<br />
Dynamics .................................................................................................................122<br />
Compressor ..........................................................................................................122<br />
Limiter ...................................................................................................................123
Gater ......................................................................................................................123<br />
Modulation ...............................................................................................................124<br />
Chorus ...................................................................................................................124<br />
Flanger ..................................................................................................................124<br />
Phaser ...................................................................................................................125<br />
Ring Modulator .....................................................................................................126<br />
Rotary ....................................................................................................................126<br />
Vinylizer.................................................................................................................127<br />
Distortion .................................................................................................................128<br />
Time clipper ..........................................................................................................128<br />
Bit reduction .........................................................................................................128<br />
Dual band distortion ............................................................................................129<br />
Tube distortion .....................................................................................................129<br />
Delay .........................................................................................................................130<br />
Sample delay ........................................................................................................130<br />
Delay ......................................................................................................................130<br />
Filter Delay ............................................................................................................131<br />
Doubler ..................................................................................................................131<br />
Echo ......................................................................................................................132<br />
Helper .......................................................................................................................133<br />
Volume ..................................................................................................................133<br />
Panorama ..............................................................................................................133<br />
XY panorama ........................................................................................................133<br />
Phase invert ..........................................................................................................134<br />
Level meter ...........................................................................................................134<br />
Level meter Pro ....................................................................................................134<br />
Calibration ............................................................................................................134<br />
Metronome ............................................................................................................135<br />
Reference Tone ....................................................................................................135<br />
Channel Manager .................................................................................................135<br />
Surround Panner ..................................................................................................136<br />
Reverb ......................................................................................................................138<br />
Reverb ...................................................................................................................138<br />
Reverb TWO ..........................................................................................................139<br />
Special ......................................................................................................................140<br />
Origami & Origami LE ..........................................................................................140<br />
Origami Positioner ...............................................................................................146<br />
Preamp Modeler ...................................................................................................148<br />
Cabinet Modeler ...................................................................................................149<br />
Mic Modeler ..........................................................................................................150<br />
Pro Surround Environment .......................................................................... 151<br />
Channel Manager...................................................................................................152<br />
Calibration ...............................................................................................................153<br />
LFE Filter .................................................................................................................153
Surround Panner ...................................................................................................154<br />
Insert Filter & Effects ............................................................................................155<br />
Preferences & Help Page ............................................................................... 156<br />
<strong>Engine</strong> settings ......................................................................................................157<br />
RAM Settings and Overview ...............................................................................157<br />
Multi Core Support ................................................................................................157<br />
RF-HDD (Read From Hard Disk Drive) .............................................................158<br />
Preload time ..........................................................................................................158<br />
Unload time ...........................................................................................................158<br />
Block size ..............................................................................................................159<br />
Use original BIT rate / Pre-convert to 32 BIT .................................................159<br />
Output and Surround settings ...........................................................................161<br />
Default Layer Format ............................................................................................161<br />
Surround ..................................................................................................................162<br />
Misc. settings .........................................................................................................163<br />
Default Root Key ....................................................................................................163<br />
Default Author Information .................................................................................163<br />
Debug Log ...............................................................................................................163<br />
Help Page.................................................................................................................164<br />
Credits ....................................................................................................................... 165<br />
License Agreements ......................................................................................... 166<br />
License Agreement Software .............................................................................166<br />
Index ........................................................................................................................... 169
10<br />
CHAPTER 1<br />
Welcome<br />
Welcome<br />
Thank you very much for purchasing <strong>Engine</strong> - the innovative <strong>Best</strong> <strong>Service</strong> Sample Player.<br />
<strong>Engine</strong> was developed in very close cooperation by yellow tools and <strong>Best</strong> <strong>Service</strong> and the<br />
result is one of the most flexible and most powerful sample player available.<br />
<strong>Engine</strong> is entirely based on the well-engineered yellow tools sampler technology<br />
“Independence” and contains the identical, multi-awarded audio engine.<br />
However <strong>Engine</strong> is by far more than just a sample player! It was specially designed as a<br />
platform for many high quality instrument and sound libraries of different developers, united<br />
in one creative software that offers both the intuitive and quick access to the instruments<br />
and limitless editing possibilities even for the smallest details. Furthermore you can even<br />
load any <strong>Engine</strong> instrument directly into the yellow tools sampler “Independence” including<br />
all special features - and thus expand your sound libraries continuously.<br />
With the introduction of <strong>Engine</strong>, yellow tools and <strong>Best</strong> <strong>Service</strong> once again set new<br />
standards for sample based instruments:<br />
With the entirely new and individualized QuickEdit page now every <strong>Engine</strong> product comes<br />
with its own user interface which is completely customized to the respective instrument in<br />
both the design of the parameters and the operation.<br />
Enhanced by a clear user interface, the flexibility of a full-modular structure, stunning<br />
effects and filters and finally many unique features <strong>Engine</strong> is still very easy to use and<br />
offers immediate access to a fantastic and intuitive handling.<br />
To give you utmost control and flexibilty for your music production, <strong>Engine</strong> even allows you<br />
to load 3rd party VST effect plug-ins AND VST instrument plug-ins!<br />
Wether you want to work in mono, stereo or surround environments up to 8.1, <strong>Engine</strong><br />
is prepared for everything and offers creative, flexible and immediate solutions for any<br />
demands of music producers, film-composers, sound designers, songwriters and remixers.<br />
And now be inspired by <strong>Engine</strong> - have fun!
<strong>Best</strong> <strong>Service</strong> <strong>Engine</strong> 2.0<br />
<strong>Manual</strong><br />
The user interface of <strong>Engine</strong> is subdevided into several main categories you can switch<br />
between. These categories contain any parameters and controls you may need for the<br />
implementation of authentic instruments. This concept, clearly arranged and structured,<br />
guarantees an intuitive and user-friendly workflow with <strong>Engine</strong>.<br />
For immediate access to the most important parameters and settings of <strong>Engine</strong> sound<br />
libraries, the default start page of <strong>Engine</strong> is the “QUICK EDIT” page.<br />
One of the most innovative and unique features of <strong>Engine</strong> is the individuality of this page:<br />
Every <strong>Engine</strong> based product and even any single instrument can have its own, specially<br />
customized Quick Edit page - in terms of design and functionality.<br />
Here are some Quick Edit examples of different <strong>Engine</strong> products:<br />
As soon as you load or select an instrument into <strong>Engine</strong>, the respective Quick Edit page<br />
gets displayed automatically.<br />
The controllers on the Quick Edit page are buttons, knobs, faders, sliders and drop-down<br />
menus. The operation is self-explanatory as far as possible.<br />
Like any <strong>Engine</strong> parameter also the parameters on the Quick Edit page support the<br />
innovative options of the MIDI and host automation.<br />
11
12<br />
CHAPTER 1<br />
Welcome<br />
One of the most powerful features of <strong>Engine</strong> is the PRO EDIT page, in particular the<br />
Flexible Modifiers. They let you customize your sounds and instruments at will as you can<br />
connect any source with any destination.<br />
Tempo-synchronized LFOs, the use of any external MIDI controller, randomizers and<br />
flexible free envelopes - <strong>Engine</strong> offers anything you need to modify your music. The<br />
ingenious structure of the modifiers and the perfect integration into the user interface<br />
enable a quick, easy and unmatched workflow.<br />
On this page you can also add Insert Filter and Effects to your instruments. With a click<br />
on the “Insert FX” button the right part of the Modifier sections switches into the Insert FX<br />
section and you can add unlimited number of inserts. The inserts support “drag’n’drop”<br />
workflow so you can change their order afterwards at will.<br />
Click the “Insert FX” button again to switch back to the Modifier section.
<strong>Best</strong> <strong>Service</strong> <strong>Engine</strong> 2.0<br />
<strong>Manual</strong><br />
The sophisticated file BROWSER of <strong>Engine</strong> gives you immediate, fast and easy access to<br />
any files you can use in <strong>Engine</strong>.<br />
You get an overview of your <strong>Engine</strong> Projects, Layers and Sections and also all available<br />
MIDI and audio files inside your <strong>Engine</strong> User Folder folder - so you have five browsers in<br />
one.<br />
Beside the clear overview you can also search for any of your files in a way you have<br />
never experienced before in a software sampler: If you want to search for <strong>Engine</strong> Projects<br />
or Layers you can not only search for the file names but also for categories, dates, authors,<br />
etc. Searching for MIDI files can be done with the attributes bars, bpm, meter, etc. and<br />
the audio file search even accepts the attributes channels, beats, sample rate, size, etc.<br />
For MIDI and audio files the browser contains an automatic “pre-listen” function. If not<br />
deactivated, the playback of a file gets started as soon as you click on it. Additionally you<br />
can edit the pre-listen playback volume for audio files and you can select if MIDI files get<br />
played with their original tempo or your current <strong>Engine</strong> tempo.<br />
With the information batch option you can easily add or replace the information for<br />
Projects, Layer Sets and Layers.<br />
13
14<br />
CHAPTER 1<br />
Welcome<br />
The professional built-in MIXER of <strong>Engine</strong> allows you to edit, mix and finish your instrument<br />
projects completely independent from your host.<br />
You can assign UNLIMITED BUS channels to your project. For your individual settings<br />
each Layer channel contains 5 BUS sends (selectable as pre and post). Furthermore you<br />
can add an unlimited number of „Custom“ channels (internal virtual channels) which let you<br />
customize the Sections of each Layer. Thus you can create additional virtual channels for<br />
an easier and more comfortable editing of your Layer.<br />
Especially for the mixer it is very important to have fast access to your tracks, pure control<br />
and a best possible overview of your channels.<br />
All these features, the individual assignment of your channels in groups and the quick<br />
show/hide overview turn this <strong>Engine</strong> feature by far into the most professional and most<br />
powerful plug-in mixer.
<strong>Best</strong> <strong>Service</strong> <strong>Engine</strong> 2.0<br />
<strong>Manual</strong><br />
The PREFERENCES page contains any parameters to adjust <strong>Engine</strong> to your needs and<br />
and the power of your computer. Many of the parameters are standardized which you may<br />
already know.<br />
The Preferences page affects the complete plug-in, so it is very important to edit the<br />
available parameters in this area very carefully! Making changes may cause incompatibility<br />
with other Projects or the required settings may not get adjusted correctly which in turn<br />
may cause the locking of multiple parameters or even loss of performance.<br />
The Preferences page is divided into 5 areas:<br />
Beside the basic output and MIDI settings you can also create your surround setup - and<br />
save it into presets.<br />
Additionally you can add Libraries, change your user folder and also change your RAM,<br />
Multi Code and hard disk settings.<br />
Please keep in mind that you always have to save the preferences after any changes you<br />
made! Your changes will take effect after the restart of <strong>Engine</strong>.<br />
15
16<br />
CHAPTER 1<br />
Welcome<br />
On the <strong>Engine</strong> HELP Page you have several links to PDF documents (manuals, shortcut<br />
overview, tips & tricks) and to some online links for the newest updates, tutorials and much<br />
more.<br />
The online links require an internet connection and to read the PDF documents on your<br />
computer you need the free Adobe Acrobat Reader or any other application that can open<br />
PDF documents.
Basics & User Interface<br />
First start of <strong>Engine</strong><br />
<strong>Best</strong> <strong>Service</strong> <strong>Engine</strong> 2.0<br />
<strong>Manual</strong><br />
After the first start of <strong>Engine</strong> you can continue adding sound libraries for <strong>Engine</strong>. gestartet<br />
haben, können sie nun ihre Sound Libraries hinzufügen.<br />
Therefore please switch to the “Preferences” page and click on the “Library” tab:<br />
With the “add library” button you can now add instruments for <strong>Engine</strong>.<br />
Please choose your product folder that contains the Layers, Image Files, Presets and<br />
further files.<br />
Independence will add the library accordingly with all content and settings automatically<br />
and after saving the preferences you can load and play the instruments.<br />
If you added a new sound library you maybe have to activate the product after the first<br />
loading process of an instrument. In this case the E-License Manager will open and you<br />
can start with the product activation.<br />
This activation is a one-time process for every computer on which you activate the product.<br />
.<br />
IMPORTANT: For the installation and activation of your product there are separate<br />
manuals available. Please read these documents carefully.<br />
17
18<br />
CHAPTER 2<br />
Basics & User Interface<br />
Using <strong>Engine</strong> as plug-in<br />
Because of all the different sequencers please refer to the manual of your host application<br />
for the process of loading instrument plug-ins. There are no special requirements for using<br />
<strong>Engine</strong> as a plug-in.<br />
Using <strong>Engine</strong> in standalone mode<br />
The <strong>Engine</strong> standalone versions for Mac (PowerPC and IntelMacs) and Windows XP are<br />
extemely stable and powerful and allow you to create your custom <strong>Engine</strong> setup for your<br />
DAW.<br />
If you start the <strong>Engine</strong> standalone version for the first time, the following two setup<br />
windows will appear:<br />
Audio Preferences<br />
<strong>Engine</strong> recognizes all available audio interfaces, their I/O buffer sizes and sample rates:<br />
After the selection of your preferred audio interface we recommend you to set the I/O buffer<br />
size to a minimum of 512 frames. Maybe some more details about this parameter:<br />
The I/O buffer size is the buffer of your audio interface. This buffer allows you a smooth<br />
and uninterrupted performance. On the other hand you have to keep in mind, that the<br />
higher you will set this value, the more latency will be the result. This means that you have<br />
to find the best balance between required performance and acceptable latency.<br />
The sample rate offers the resultion that are supported by your audio interface.<br />
When finished, click on the “OK” button to proceed. You can also change your audio setup<br />
at any time afterwards.<br />
IMPORTANT: <strong>Engine</strong> standalone support up to 64 mono and 64 stereo outputs<br />
simultaneously. To get this maximum of output channels you’ll need<br />
multiple audio interfaces. To create a setup for the use of more than one<br />
audio interface at the same time please switch to the Audio/MIDI<br />
configuration (Mac OS X) or to the settings of your ASIO Multimedia<br />
Driver (Windows XP/Vista).
<strong>Best</strong> <strong>Service</strong> <strong>Engine</strong> 2.0<br />
<strong>Manual</strong><br />
MIDI Preferences<br />
<strong>Engine</strong> can manage up to 32 MIDI ports (up to 512 MIDI channels simultaneously!). <strong>Engine</strong><br />
recognizes all available physical and virtual MIDI ports automatically. Simply click on the<br />
pull-down menus to select the MIDI ports you want to use with <strong>Engine</strong>.<br />
Use the check boxes beside the ports to activate or deactivate the corresponding MIDI<br />
ports. Please keep in mind that you have to assign one MIDI-in port at minimum -<br />
otherwise <strong>Engine</strong> will not get any MIDI input.<br />
You can also change your MIDI preferences at any time afterwards.<br />
19
20<br />
CHAPTER 2<br />
Basics & User Interface<br />
Projects, Layers, Alternates, Sections & Zones<br />
To give you any option for a personal customization of your instruments <strong>Engine</strong> is based on<br />
an very sophisticated architecture and file management - but still very easy and intuitively<br />
to use.<br />
Zone<br />
The smallest but of course most basic element is the Zone. One Zone can be a sample of<br />
a multi-sampled instrument a MIDI file or an audio loop.<br />
Section<br />
Sections are a group of Zones and thus very useful elements to edit multiple Zones<br />
simultaneously. Many <strong>Engine</strong> libraries use Sections mainly to combine the different<br />
articulations, dynamics or playing styles of an instrument into groups for easier editing.<br />
Available sections can get selected and edited on the Pro Edit page.<br />
Alternate<br />
If each note of an instrument was recorded in multiple articulations you will have one<br />
Section for each articulation. For an easier and much faster editing, you can now group all<br />
these Sections to one „Alternate“. So an Alternate enables you to edit the parameters of an<br />
entire group of Sections simultaneously with simply one mouse click. Alternates are also<br />
the basic elements for <strong>Engine</strong>‘s Performance Mode.<br />
Layer<br />
„Layer“ is the most important item of <strong>Engine</strong> and the basic element that contains ALL<br />
settings of an instrument, including all Module settings.<br />
Project<br />
Projects contain ALL settings of the integrated Layer Sets, Layers, Alternates, Sections and<br />
Zones.
General Operation<br />
<strong>Best</strong> <strong>Service</strong> <strong>Engine</strong> 2.0<br />
<strong>Manual</strong><br />
The operation of <strong>Engine</strong> is extremely intuitively and user-friendly. There are some basic<br />
control that we will explain in the following overview:<br />
Input Fields<br />
These are the most common operating controls of <strong>Engine</strong>.<br />
There are several ways to use the input fields:<br />
1.) With the keyboard: Double-click on an input field, enter a new value and press the<br />
return key to activate the new value.<br />
2.) With the mouse:<br />
Click and hold the mouse button on an input field. Keep the mouse button pressed<br />
and move upwards to increase the value or move downwards to decrease the value.<br />
Release the mouse button when you reached the desired value. The faster you move<br />
the mouse the faster the parameter value of the input field will change.<br />
If you use the mouse for adjusting your values, you can additionally use the following<br />
keyboard short cuts:<br />
• For a better finetuning, press and hold the „shift“ key before you move up or down.<br />
• To reset the input field to its „default“ value, press and hold the „command“ key (Mac<br />
OS X) or the „ctrl“ key (Windows XP) and click on the respective input field.<br />
As soon as you start editing the value of an input field (whether with the keyboard or with<br />
the mouse), the area of this input field and the value itself get displayed inversely:<br />
Pull-Down Menus<br />
<strong>Engine</strong>‘s „pull-down“ menus are labeled with a little triangle icon in front of the parameter<br />
name. You can click anywhere on the name or the triangle to open the pull-down menu.<br />
Buttons<br />
Most of the buttons of <strong>Engine</strong> are self-explanatory. Nevertheless there are some special<br />
buttons we want to mention separately:<br />
• „content“ button:<br />
• „bypass“ buttons:<br />
The different Working Areas of <strong>Engine</strong> contain a „content“ button in the upper<br />
right corner. Use this button to switch the left Layer parameter area into the<br />
Content Browser display for the selected Layer and gives you an immediate<br />
overview and choice of all available Sections and Alternates.<br />
Many of Indepencence‘s features and parameters have additional „bypass“<br />
buttons which enable you to deactivate your changes and settings.<br />
For Layers, Sections, Alternates and Legatos there are “add” buttons but you can also just<br />
double-click with your mouse to add new item. All scrollbars in <strong>Engine</strong> support the mouse<br />
wheel, so you can easily scroll any contents with your mouse or the scrollbars.<br />
21
22<br />
CHAPTER 2<br />
Basics & User Interface<br />
Drag‘n‘Drop Support<br />
You can import MIDI and audio files directly from your desktop or any other folder.<br />
Drag the MIDI/audio file(s) you want to import into the Layer display and release your<br />
mouse button. If you drag the file(s) to an empty part of the display, a new Layer gets<br />
created automatically. When you release the mouse button - depending on the file type<br />
- the MIDI import dialog...:<br />
... or the Audio File Import dialog comes up:<br />
If you drag the file(s) onto an existing Layer, the MIDI/audio files get important into this<br />
Layer.
VST Effects & VST Instruments Import<br />
<strong>Best</strong> <strong>Service</strong> <strong>Engine</strong> 2.0<br />
<strong>Manual</strong><br />
<strong>Engine</strong> is the first software sampler that can load 3rd party VST Effect and VST Instrument<br />
plug-ins!<br />
Installation of VST Plug-Ins<br />
To use your VST Effect & VST Instrument plug-ins inside <strong>Engine</strong> you first have to copy<br />
your VST plug-ins into the folder “VST Plug-Ins” inside your <strong>Engine</strong> Application Folder:<br />
During the first start after this process <strong>Engine</strong> starts the validation of the new VST Effects &<br />
Instruments. All VST plug-ins that pass this validation will then be available.<br />
<strong>Engine</strong> automatically recognizes which plug-ins are effects and which are instruments.<br />
Thus you do not have to take care about all the different plug-ins. In the Layer pull-down<br />
menu only the VST Instruments are available - and the Layer & mixer FX menu will only<br />
show VST Effects.<br />
IMPORTANT: <strong>Engine</strong> only accepts VST Effect and VST Instrument plug-ins!<br />
Any other plug-in types get ignored automatically.<br />
23
24<br />
CHAPTER 2<br />
Basics & User Interface<br />
HINT : The “VST Plug-Ins” folder inside the <strong>Engine</strong> Application Folder supports<br />
sub-folders. If you have many VST plug-ins you want to use inside<br />
<strong>Engine</strong> you can create your own sub-folders for a better overview<br />
and copy your plug-ins into these folders.<br />
IMPORTANT: <strong>Engine</strong> will scan the VST Plug-Ins folder of the <strong>Engine</strong> Application Folder<br />
with every start. Any new plug-ins that pass the validation<br />
will be available immediately. If you have a lot of VST plug-ins you want to<br />
use in <strong>Engine</strong>, the validation process may need some time.<br />
Loading VST Instruments into <strong>Engine</strong><br />
VST Instruments can get loaded exactly the same way you load any other instruments into<br />
<strong>Engine</strong>. Click on the name of the Layer you want to use for the VST instrument to open the<br />
Layer pull-down menu and select “VST Instruments”. All available VST Instruments inside<br />
your VST Plug-Ins folder of the <strong>Engine</strong> Application Folder are displayed accordingly:
<strong>Best</strong> <strong>Service</strong> <strong>Engine</strong> 2.0<br />
<strong>Manual</strong><br />
Now you can select the VST Instrument you want to load into <strong>Engine</strong>.<br />
After the loading finished successfully the name of the Layer switches to the name of the<br />
VST Instrument. Layers that contain a VST Instrument display the VST Layer Icon and an<br />
additional “EDIT” button above the icon.<br />
Click on the “EDIT” button to open the user interface of the loaded VST Instrument.<br />
You can now load presets and use the VST instruments in <strong>Engine</strong> without any restrictions.<br />
IMPORTANT: Never remove VST plug-ins you saved with a Project, Layer or Insert FX.<br />
Otherwise the Projects can not get loaded correctly anymore.<br />
NOTE : If you want to move <strong>Engine</strong> Projects between Mac OS X and<br />
Windows XP/Vista that include 3rd party VST plug-ins you have to make sure<br />
that these plug-ins are available on both platforms! Most developers of<br />
VST plug-ins support both the Mac and the Windows platform.<br />
25
26<br />
CHAPTER 2<br />
Basics & User Interface<br />
Loading VST Effects into <strong>Engine</strong><br />
As already mentioned the VST Effect plug-ins are available in the Layer Insert FX area and<br />
in the <strong>Engine</strong> mixer environment. Open the “add insert fx” pull-down menu and select the<br />
VST Effect plug-in you want to load:<br />
The plug-in gets loaded into the VST plug-in window.<br />
Click on the “edit” button to open the user interface of the loaded VST Effect.<br />
You can now load your presets of the VST effect and use both the <strong>Engine</strong> insert filter &<br />
effects and your other VST Effects inside <strong>Engine</strong>.
User Interface<br />
<strong>Best</strong> <strong>Service</strong> <strong>Engine</strong> 2.0<br />
<strong>Manual</strong><br />
The user interface of <strong>Engine</strong> is divided into the basic part on the left and the different<br />
working areas on the right. The multipage structure allows you to switch between the<br />
multiple working areas immediately. For an even better overview some working areas allow<br />
an additional „Content“ view which enlarges the working area to the entire width of <strong>Engine</strong><br />
and hides the Layer details on the left as long as activated.<br />
1<br />
2<br />
1: Project Area with global volume settings, pitch settings in semitones or Hertz, sync<br />
selection and content search option.<br />
2: Layer Area with individual settings for each Layer. The position of the Layers can get<br />
changed by drag‘n‘drop. “solo” option for immediate solo playback of one Layer.<br />
3: Working Area Selection for immediate switching between the main working areas<br />
„Quick Edit”, „Pro Edit“, “Browser“, „Mixer“, „Preferences“ and „Help“.<br />
4: Working Area that always shows the settings of the selected Layer patch.<br />
5: You can show/hide the keyboard with a click on the “keyboard button” in the upper left<br />
corner. The color assignment of the keys is as follows: Keyswitches (yellow), MIDI files<br />
(green), C1 (blue), Dynamic Split (purple) used keys (white), unused keys (grey),<br />
repetition key (red).<br />
27<br />
3<br />
4<br />
5
28<br />
CHAPTER 2<br />
Basics & User Interface<br />
Project Area<br />
An <strong>Engine</strong> Project contains ALL settings of the integrated Layers, Alternates, Sections<br />
and Zones. So any changes of the available parameters in this area will finally affect all<br />
instruments you loaded.<br />
Project pull-down<br />
Project name<br />
Project volume<br />
MIDI panic/bypass<br />
MIDI-IN icon<br />
Project levelmeter<br />
Project pitch Project sync<br />
With the drop-down menu you can load or save your <strong>Engine</strong> Projects. You can also save a<br />
Project as “autoload” file! <strong>Engine</strong> will then always start with the entire content and settings<br />
of your Project automatically. Simply save (replace) your Project as the file “Autoload.ytip”<br />
in the “basics” folder of your <strong>Engine</strong> User Folder. In the project preferences you have the<br />
following three basic options you can activate/deactivate.<br />
• MIDI thru:<br />
Activate this option to enable <strong>Engine</strong> to route incoming MIDI signals from<br />
<strong>Engine</strong> to any other connected hardware or software that can communicate<br />
with <strong>Engine</strong> via MIDI. This can be an external mixer console (like a Yamaha<br />
02R96 hardware) or a software (like Cubase or other host applications). This way you<br />
can even use <strong>Engine</strong> mixer or insert parameters to control the sliders and<br />
faders of an external hardware mixer.<br />
• Remember Layer editing page:<br />
If activated each Layer you select will automatically switch to its lastly used editing<br />
page of <strong>Engine</strong>. If you do not activate this option you will always stay at the<br />
currently selected editing page.
<strong>Best</strong> <strong>Service</strong> <strong>Engine</strong> 2.0<br />
<strong>Manual</strong><br />
• Program Change:<br />
Use this option to generally activate or deactivate the „program change“ feature for<br />
<strong>Engine</strong>. This way you do not have to deactivate program change for each<br />
Layer separately if you maybe do not want to use this feature temporarily. You could<br />
also call it „program change bypass“ feature.<br />
The MIDI-IN icon shows incoming MIDI signals and thus the existing MIDI connection of<br />
<strong>Engine</strong>. If <strong>Engine</strong> should not work correctly during your work, you can use the „MIDI panic/<br />
bypass“ button to mute and reset all note-on MIDI signals immediately.<br />
IMPORTANT: ALL Project parameters affect the entire <strong>Engine</strong> instance!<br />
The volume value assign the general volume for the entire Project. The pitch parameter is<br />
available in semitones and Hertz and assigns the basic tone pitch. This is very useful as<br />
you can switch to a „443“ or „448“ Hertz tune immediately, for example. The value range<br />
for semitones is set to +/- 60 and the value range for Hertz between 380 and 500. You can<br />
switch between the two options with a click on the drop-down. If you only want to change<br />
the tone pitch of single Layers and not the entire Project please read the chapters „Layer<br />
Set Area“ or „Layer Area“ on the following pages.<br />
If you use <strong>Engine</strong> as plug-in in your sequencer software an automatic synchronization<br />
connection gets established to guarantee the unobstructed synchronization with your host.<br />
You will notice that always you change the tempo of your sequencer software also the<br />
tempo in <strong>Engine</strong> will change to the same value accordingly.<br />
IMPORTANT: If you use <strong>Engine</strong> in the standalone mode and you want to use<br />
multiple Modules or Insert Effects and Filters which need a tempo<br />
specification you have to enter this value into the Project tempo display!<br />
29
30<br />
CHAPTER 2<br />
Basics & User Interface<br />
Layer Area<br />
„Layer“ is the most important item of <strong>Engine</strong> and the basic element that contains ALL<br />
settings of an instrument inclusive any Pro Edit settings!!!<br />
As the Layers contain the sounds and instruments of <strong>Engine</strong>, this area finally offers the<br />
most detailed setting options.<br />
Add Layer<br />
Solo (Layer Priority)<br />
Remove Layer Keyboard<br />
Instrument Icon Layer Info<br />
Layer Display<br />
To load an instrument, click on the “add layer” button or double-click in the Layer display<br />
to add a new empty Layer. Then click on the Layer name to open the “Layer drop-down”<br />
menu in witch you can select the instrument.<br />
Beside the list of all available instruments and the standard parameters like load, save,<br />
delete, etc., this pull-down menu also contains further options for your Layer, like the precache<br />
feature and the import options for audio and MIDI files.<br />
The available instruments and Layers depend on the <strong>Engine</strong> products you have installed
<strong>Best</strong> <strong>Service</strong> <strong>Engine</strong> 2.0<br />
<strong>Manual</strong><br />
The “keep settings” option at the bottom of the Layer pull-down menu is a very<br />
helpful funtion to assign ALL current settings of the Layer settings, MIDI settings, the<br />
Miscellaneous area as well as all parameters of the Modules page of the selected Layer to<br />
a new instrument. If you want to assign your settings of these areas to a new instrument,<br />
please click on “keep settings” first and load a new instrument into the same Layer<br />
afterwards - now you replace the content of the Layer with a new instrument, but you keep<br />
the settings of the prior one.<br />
With the option “keep custom control settings” you can also assign your current automation<br />
setup of the Quick Edit Page parameters to a new Layer the same way.<br />
The Layer you select in this menu gets loaded into the Layer for which you opened the<br />
pull-down menu.<br />
31
32<br />
CHAPTER 2<br />
Basics & User Interface<br />
When loading a Layer, the message „Locating Audio/Image files. Please be patient“ shows<br />
up in the working area of <strong>Engine</strong>. After the loading process is finished the name of your<br />
Layer switches from „New Layer“ into the name of the Layer you‘ve loaded.<br />
Above the Layer name there is the name of the manufacturer or of the product of the<br />
loaded Layer. Additionally each Layer contains a “layer icon” left from the Layer display.<br />
Depending on the Layer you‘ve loaded you can start playing the Layer with your keyboard<br />
or other MIDI controller immediately. Some Layers maybe include already prepared<br />
controller features like „key switch“ or other controller commands.<br />
Layer Parameter<br />
Next to the Layer name there are two small arrows that allow fast switching between the<br />
available Layers.<br />
The direction corresponds to the structure of your Layer patches in the Layer pull-down<br />
menu, so if you click the arrow that points upstairs, the current Layer gets replaced with the<br />
next Layer ABOVE the currently loaded Layer in the Layer pull-down menu. The arrow that<br />
points downstairs works the other way around: the current Layer gets replaced with the<br />
next Layer BELOW the currently loaded Layer in the Layer pull-down menu.<br />
As soon as you change any of the editing parameters of the Layer and then click an arrow<br />
to switch to the next Layer, a warning message will show up to avoid the accidental loss of<br />
your unsaved changes.<br />
IMPORTANT: When you switch between Layers with the arrows, your MIDI input<br />
channels get retained to enable continuous playing.<br />
Next to the switch arrows there is a little but very useful level meter that shows the current<br />
volume of the Layer, so you do not always have to switch to the Mixer page.<br />
To delete one or multiple Layers simultaneously press and hold the „shift“ key, click on the<br />
Layers you want to delete and click the „remove“ button afterwards. A warning message<br />
will show up to avoid the accidental deletion of your Layers.
<strong>Best</strong> <strong>Service</strong> <strong>Engine</strong> 2.0<br />
<strong>Manual</strong><br />
The Layer “Solo” button of <strong>Engine</strong> activates an enhanced „Solo“ functionality. This feature<br />
will help you to avoid the permanent selection and deselection of different Layers in order<br />
to achieve different „solo“ settings.<br />
Select one Layer (or press and hold the „shift“ key to select multiple Layers) and click the<br />
„solo“ button. The color of the selected Layer(s) switches from light blue to green and thus<br />
the „solo“ status also gets displayed graphically. Now just the green colored Layers are<br />
audible. As long as the solo option is activated you can add and remove Layers with the<br />
held „shift“ key and your mouse or also select a new Layer. To disable the solo function<br />
please click on the „solo“ button again and all Layers get restored to their standard color<br />
and basic status.<br />
Every Layer additionally contains a useful notepad editor (Layer Info). Use this feature to<br />
take some notes for your Layers or visit the author website. Here you can also enter and<br />
edit the keywords, categories and attributes of the currently selected Layer for the search<br />
on the <strong>Engine</strong> Browser page. There you can also use the “Information Batch” option to add<br />
or replace information for multiple Layers simultaneously.<br />
On the <strong>Engine</strong> Preferences page you can enter a “Default Author Name” and “Default<br />
Author Weblink”. These information will then automatically get added to every new Layer.<br />
33
34<br />
CHAPTER 2<br />
Basics & User Interface<br />
To „mute“ a Layer you can press the “bypass” button of the Layer or also use the following<br />
shortcut: Press and hold the „alt“ key and click on the desired Layer you want to mute. The<br />
color of the Layer name switches from light blue to grey and thus the „mute“ status also<br />
gets displayed graphically.<br />
Use the format pull-down menu to choose if the selected instrument gets processed as<br />
MONO, STEREO or SURROUND (incl. all surround formats) Layer. For more details<br />
about the Surround Environment of <strong>Engine</strong> please refer to the chapter “Pro Surround<br />
Environment”.
<strong>Best</strong> <strong>Service</strong> <strong>Engine</strong> 2.0<br />
<strong>Manual</strong><br />
The Read Model is a very important feature and allows you to switch between RAM (RF-<br />
RAM) and hard disk (RF-HDD) as memory for all loaded sound samples.<br />
The yellow tools RF-HDD technology enables you to load and play instruments completely<br />
independent from their physical size - even if this size is bigger than your available RAM.<br />
Only a small part of the beginning of each required audio file gets loaded into RAM and the<br />
rest remains on the hard disk. The entire audio file only gets reloaded if required. This is a<br />
very complex technology which allows an enormous performance and a so far unreached<br />
loading rate. You can adjust the parameters of the Read Model in <strong>Engine</strong>‘s preferences<br />
(-> see „Preferences“ chapter). To switch between the two read models please click on the<br />
pull-down menu and select your preferred model.<br />
Beside the options “read from HDD” and “read from RAM” you can also activate the<br />
Elastique Time-Stretch & Pitch-Shfting option in this menu. All further details get explained<br />
in the chapter “Elastique”.<br />
For immediate access to your MIDI channel settings, each Layer contains its own MIDI<br />
channel pull-down menu. If you use <strong>Engine</strong> as a standalone version, you will additionally<br />
get the MIDI port pull-down menu with up to 32 virtual and/or physical ports.<br />
35
36<br />
CHAPTER 2<br />
Basics & User Interface<br />
The “transpose” parameter accepts values from -60 semitones to +60 semitones to adjust<br />
the Layer position to your keyboard.<br />
Use “Key Range” to adjust the range of incoming notes that the selected Layer is allowed<br />
to receive. This way you can adjust the playable area of the Layer on the keyboard since<br />
all notes outside this range get ignored.<br />
“Vel Range” (velocity range) allows you to limit the playability of the sound via the velocity<br />
of the notes. The sample will only get played if the velocity of the Note-On MIDI message<br />
is in the range that was defined in the vel range section. Thus you can limit the Layer patch<br />
vertically. This feature is very useful when combining and playing multiple Layers.<br />
<strong>Engine</strong> generally shows the status of a Layer in different colors:<br />
• active Layer: blue font<br />
• selected Layer: light blue font<br />
• solo Layer: green font<br />
• muted Layer: grey font<br />
• keys witch Layer: orange Layer name<br />
Here are some examples how the Layers can look like:<br />
- active Layer<br />
- active Layer<br />
- active Layer<br />
- Layer with active Bypass<br />
- selected, active Layer with key switch
- active Layer<br />
- active Layer<br />
- active and selected Layer<br />
- muted and selected Layer<br />
<strong>Best</strong> <strong>Service</strong> <strong>Engine</strong> 2.0<br />
<strong>Manual</strong><br />
- active and selected Layer with key switch<br />
- active Layer (but muted)<br />
- active „priority“ Layer<br />
- active Layer (but muted)<br />
- muted Layer<br />
- active Layer (but muted)<br />
37
38<br />
CHAPTER 2<br />
Basics & User Interface<br />
MIDI Programs<br />
The MIDI programs feature can be used as powerful remote control for <strong>Engine</strong> and all<br />
included Layers.<br />
If you are used to work with multiple computers you can install <strong>Engine</strong> on a separate<br />
computer without connected monitor, for example, and control it with your host application<br />
on another computer. To switch between different Layers you do not even have to touch<br />
<strong>Engine</strong> on the second computer: you can easily and comfortable switch simply with the<br />
“program change” option of your host application.<br />
Another advantage of this feature is the compatibility to MIDI files (format 1):<br />
As soon as you load a MIDI file that includes a “program change” number into your<br />
hardware or software sequencer, <strong>Engine</strong> will load the corresponding Layer patch<br />
automatically!<br />
Finally “MIDI Programs” turns <strong>Engine</strong> into a powerful workstation for live performances:<br />
You can switch between the currently loaded Layer patches directly with your MIDI<br />
keyboard without any additional loading time (precaching activated!).<br />
To save a Layer patch as a MIDI program you first have to load the desired Layer patch<br />
into <strong>Engine</strong>. After the Layer was loaded please open the Layer internal pull-down menu<br />
(click on the Layer name) and select the option “save layer as midi program”:<br />
Now a new window comes up where you can enter the following information:<br />
• Layer Name: Enter a name for the MIDI program patch.<br />
• Bank Number: Enter the number of the MIDI bank in witch you want to save the Layer.<br />
If the bank number you enter does not exist yet, <strong>Engine</strong> will<br />
create a new bank accordingly.<br />
• Program Number: This is finally the “remote ID” of the Layer. As soon as your MIDI<br />
keyboard or hardware/software host sends this number to<br />
<strong>Engine</strong>, the Layer gets loaded and activated.
<strong>Best</strong> <strong>Service</strong> <strong>Engine</strong> 2.0<br />
<strong>Manual</strong><br />
Of course you can also load the Layers with the “midi programs” option in the Layer<br />
pull-down menu. Use this menu also for an overview of all your existing banks and MIDI<br />
programs.<br />
<strong>Engine</strong> can manage up to 16,383 different banks. Each bank can contain up to 128<br />
different MIDI programs, from 0 to 127 - so a maximum of more than 2,000,000 assignable<br />
MIDI programs!<br />
Pre-cache<br />
<strong>Engine</strong> is a sample-based workstation. So you have to keep in mind that <strong>Engine</strong> has to<br />
manage several gigs of audio files simultaneously. This causes continous loading and<br />
unloading processes - which finally take time...<br />
To accelerate this process and thus your work, we integrated a powerful “pre-cache”<br />
option. All Layers that are part of the pre-cache option you select, get pre-loaded into<br />
<strong>Engine</strong> and are available immediately when you activate them - without any additional<br />
loading time.<br />
“Pre-cache” is extremely usable for any kind of live perfomance with <strong>Engine</strong>: Simply select<br />
your pre-cache option and you can witch between several gigabyte large instruments<br />
immediately!<br />
IMPORTANT: The usability of the ”Pre-cache” feature does not depend on the power of<br />
your computer. It does NOT use additonal RAM like streaming or other<br />
resources of your computer when activated!<br />
39
40<br />
CHAPTER 2<br />
Basics & User Interface<br />
Auto-Mapping-Import<br />
Beside all the different <strong>Engine</strong> sound libraries <strong>Engine</strong> also offers a unique Auto-Mapping-<br />
Import option for AIFF and WAV files. This way you can import up to 25 audio files into<br />
<strong>Engine</strong>. You can also use the „import audio files“ option from the Layer pull-down menu.<br />
You can import single or multiple samples and map them automatically to your keyboard in<br />
2 simple steps: First select the audio files you want to import and then choose the mapping<br />
structure.<br />
The condition precedent to the Auto-Mapping-Import is a uniform naming structure of the<br />
audio files you want to import and map. These structure depends on the mapping type and<br />
is explained on the following pages. To start the Auto-Mapping-Import, click on a Layer to<br />
open the pull-down menu and select „import audio files“. Now select one or multiple audio<br />
files you want to import and click on the „open“ button to continue.<br />
After the selection of the audio files the following window shows up:<br />
The Auto-Mapping-Import offers the following five different mapping structures:
X-Y-Z Mapping<br />
<strong>Best</strong> <strong>Service</strong> <strong>Engine</strong> 2.0<br />
<strong>Manual</strong><br />
This mapping option will import and map entire instruments including multiple velocities<br />
per note and recognizes any available Sections/Alternates. All information regarding the<br />
mapping are included in the filename. A valid name could be: „Concert Guitar XC2 Y04<br />
Z02“.<br />
The „X“ assigns the key on your keyboard or other MIDI controller, the „Y“ assigns the<br />
velocity zoning and the „Z“ assigns the Section/Alternate for the audio file.<br />
The information included in the audio file of our example:<br />
XC2 = the audio file gets mapped on „C2“<br />
Y04 = the audio file gets mapped as fourth velocity split on C2<br />
Z02 = the audio file is part of the second Section/Alternate<br />
Normally the last velocity (e.g. Y12) is the loudest audio file. Nevertheless you can click<br />
the checkbox „first velocity is the loudest“ in case this should apply to your import. If you<br />
also want to create one Section/Alternate even for each individual velocity, simply click the<br />
appropriate checkbox.<br />
Multi Key Mapping<br />
This mapping option is the most typical for the import of other sampling libraries.<br />
In most cases the file names of sampling libraries already contain the key/note. Thus this<br />
mapping option looks at a „note“ assignment at the end of the filename, like „C2“, „D#4“,<br />
etc.<br />
The Multi Key Mapping can import multiple audio files of the same note (e.g. long notes<br />
and slides of each note) and will always assign the full dynamic range (velocity 0 to 127)<br />
to each of them. Thus they get mapped on the same key and overlap. In this case you<br />
can select „create Sections automatically“. After the import you can finetune the mapping<br />
by editing the individual Sections - assign different velocity ranges for each section, for<br />
example.<br />
41
42<br />
CHAPTER 2<br />
Basics & User Interface<br />
Chromatic Mapping<br />
This mapping option is recommended for the import of audio loops or FX samples.<br />
All selected audio files get mapped successively, starting at the assigned key note. The<br />
velocity range for each audio file is always 0 to 127. If you additionally want to create one<br />
Section for each key, simply click the appropriate checkbox.<br />
One Key Mapping<br />
This mapping option is recommended for the import of sounds „key by key“ and enables<br />
you to import multiple audio files that are separated by their velocity splits per note -<br />
mostly drums or percussive instruments. Thus this mapping option „looks“ at a „velocity“<br />
assignment at the end of the filename, like „02“, „15“, etc.<br />
As already mentioned, normally the last velocity (e.g. 12) is the loudest audio file.<br />
Nevertheless you can click the checkbox „first velocity is the loudest“ in case this should<br />
apply to your import. If you additionally want to create one Section for each key, simply<br />
click the appropriate checkbox.<br />
TIP : Beside the Auto-Mapping-Importer there is also the „<strong>Engine</strong> Edition“<br />
of the sampler disc and file format converter „Translator“. With this software from<br />
Chicken Systems you can convert other hardware and software sampler formats to<br />
the <strong>Engine</strong> format.<br />
Quick Mapping<br />
Using this option you can import ONE audio file that gets mapped onto the full key range<br />
automatically (from C-2 to G8). The Root Key is on C3.
Elastique: real-time time-stretching & pitch-shifting<br />
Introduction<br />
<strong>Best</strong> <strong>Service</strong> <strong>Engine</strong> 2.0<br />
<strong>Manual</strong><br />
Sound libraries and virtual instruments can get separated into two general categories:<br />
multi-sampled instruments and loops. One disadvantage of audio loops can be their fixed<br />
tempo which may not always fit to the tempo of your arrangement. For this reason <strong>Engine</strong><br />
offers “Elastique” (by zplane.development) that you can use for changes of the tempo and<br />
pitch of audio loops with very high quality.<br />
Furthermore you can also use Elastique for pitch and tempo changes of multi-sampled<br />
instruments, too. This option is very useful for manipulation, effects and experimental<br />
sound design.<br />
Approach for the use of audio loops<br />
Load a Layer that contains audio loops or import audio loops into an empty Layer.<br />
Afterwards please select the option “Elastique” in the “read model” pull-down menu.<br />
With immediate effect the audio loops get adjusted to <strong>Engine</strong> tempo or the tempo of your<br />
sequencer software.<br />
You can also load multiple audio loops with different tempo settings into the same Layer.<br />
Any differences get automatically adjusted, too, so all audio loops get played with the same<br />
tempo - independent from their original BPM value.<br />
43
44<br />
CHAPTER 3<br />
Elastique Time-Stretch & Pitch-Shifting<br />
Approach for dynamic use<br />
Generally any pitch parameters of samplers create pitch-shifting by the speed-up or<br />
slowing-down of the playback tempo of an audio file - so to speak only the playback tempo<br />
is changed and the pitch retains.<br />
„Elastique“ however changes the original pitch of an audio file in real-time and retains the<br />
playback tempo. So as soon as „Elastique“ is activated, the „pitch“ parameter in <strong>Engine</strong><br />
automatically switches accordingly - both on the „Mapping“ page and the „Modules“ page.<br />
The Mapping page „pitch“ parameter is qualified for static changes of the pitch, whereas<br />
the „pitch“ parameter on the Modules page is qualified for dynamic pitch changes. You can<br />
create changes of the pitch (destination „pitch“) and of the tempo (destination „tempo“) with<br />
the use of the internal sources, like LFO, Step Modulator, Free Envelope, etc., for example.<br />
Switch to the “Modules” page after the selection of “Elastique” in the “read model” pulldown<br />
menu. Two new buttons “auto tempo” and “formants” are now available:<br />
„auto tempo“: If activated, the current BPM settings for all audio files of the Mapping page<br />
get used - if BPM values are available. In this case any further editing of<br />
the parameters „tempo“ and „pitch“ on the „Modules“ page will be based on<br />
these existing BPM values.<br />
If „auto tempo“ is not activated, all files get processed without the<br />
consideration of their BPM values.<br />
„formants“: (Formanten beibehalten) If activated the formants of the audio file get<br />
preserved during the processing. This option improves the time-stretch<br />
quality.
The relevant destinations for Elastique are „pitch“ and „tempo“:<br />
<strong>Best</strong> <strong>Service</strong> <strong>Engine</strong> 2.0<br />
<strong>Manual</strong><br />
Pitch: Changes the pitch of an audio file without changing the original tempo.<br />
Very useful for manipulation and effects.<br />
Tempo: Changes the length of an audio file. Thus the playback speed can be<br />
faster or slower. 100% correspond to the original tempo.<br />
Higher values cause a speed-up - lower values a slowing-down.<br />
45
46<br />
CHAPTER 4<br />
Quick Edit<br />
Quick Edit<br />
For immediate access to the most important parameters and settings of <strong>Engine</strong> sound<br />
libraries, the default start page of <strong>Engine</strong> is the “QUICK EDIT” page.<br />
One of the most innovative and unique features of <strong>Engine</strong> is the individuality of this page:<br />
Every <strong>Engine</strong> based product and even any single instrument can have its own, specially<br />
customized Quick Edit page - in terms of design and functionality.<br />
Here are some Quick Edit examples of different <strong>Engine</strong> products:
<strong>Best</strong> <strong>Service</strong> <strong>Engine</strong> 2.0<br />
<strong>Manual</strong><br />
All parameters on the respective Quick Edit pages are explained in the product-related<br />
manuals very detailed.<br />
As soon as you loaded an instrument in <strong>Engine</strong>, the corresponding Quick Edit page is<br />
shown automatcally.<br />
The controllers on the Quick Edit page are buttons, knobs, faders, sliders and drop-down<br />
menus. The operation is self-explanatory as far as possible, nevertheless here are some<br />
general information about the operation:<br />
Like any <strong>Engine</strong> parameter also the parameters on the Quick Edit page support the<br />
innovative options of the MIDI and host automation.<br />
You can open the automation menu with a right mouse button click - or you press and hold<br />
the „ctrl“ key and click with the left mouse button:<br />
The options of an automation may differ depending on the controller (button or knob).<br />
Please read the chapter “automation” for more details about their display and the functions.<br />
47
48<br />
CHAPTER 5<br />
Pro Edit<br />
Pro Edit<br />
Next to the standard parameters you will notice at first sight, <strong>Engine</strong>‘s Pro Edit page<br />
contains many worldwide unique and sophisticated features!<br />
This page is subdivided into two main parts that allow a fast and intuitive workflow: The<br />
Module Editor in the upper part and the Flexible Modifier Editor in the lower part.<br />
Depending on the Layer patch you load maybe not all parameters/input fields will be visible<br />
from the beginning and it is also possible that your content browser will show more or less<br />
Sections or Alternates in the Content browser.<br />
IMPORTANT: ALL parameters of this page beside Polyphony Range and Outputs<br />
get fully automated with internal modifiers, internal modules, any kind<br />
of external MIDI controllers, or directly with your sequencer software.<br />
All details about automation are explained in this chapter and in the<br />
chapter “Automation”.
<strong>Best</strong> <strong>Service</strong> <strong>Engine</strong> 2.0<br />
<strong>Manual</strong><br />
The upper „select“ pull-down menu allows you an immediate switch between your available<br />
Sections/Alternates of the Layer and your entire Layer. So you easily can edit settings that<br />
only affect parts of your Layer or also edit the settings for the complete Layer.<br />
The „select“ pull-down menu is designed very clearly and also enables you to select/<br />
deselect the available Sections or Alternates in groups. To select a group, click on the pulldown<br />
menu, choose the desired selection and release the mouse button afterwards.<br />
IMPORTANT: After you have selected one or multiple Layers, Sections or Alternates,<br />
ALL available editing parameters on the Module page will exclusively<br />
affect this selection! This kind of subdivision of the editing parameters<br />
allows the most accurate and most detailed possibilities for manipulation<br />
and editing.<br />
For a better overview of the available Sections and Alternates you can open the userfriendly<br />
„Content Browser“ in addition. Click on the „content“ button in the upper right<br />
corner of the Pro Edit page and the Content Browser will open on the left side and<br />
overlap the Layer list and the Layer parameters. Beside the selection of one or multiple<br />
Sections/Alternates (press and hold the „shift“ key for multiple selection) for faster editing,<br />
this browser also shows additional and important information of each available Section and<br />
Alternate, like used key switches with „(C#0)“, used insert effect with „i“, used modifiers<br />
with „m“, etc.<br />
49
50<br />
CHAPTER 5<br />
Pro Edit<br />
Module Editor<br />
Beside the standard and self-explanatory editing parameters like volume, panorama, pitch<br />
and delay you additionally have the possibility to assign a very custom polyphony limitation<br />
that will only affect your selected Layer, Sections or Alternates.<br />
EXAMPLE: To achieve the so-called „hihat effect“ with a self created drum kit, select<br />
your hihat Section in the „select“ pull-down menu or the Content Browser.<br />
Enter the value „1“ into the input filed „key/sel.“ (keys per selection). Now<br />
play the hihat Zones on your keyboard (or another MIDI controller) and you<br />
will notice that always when you play a new note the prior one gets<br />
interrupted. In addition you can assign the fade-out time for the prior note<br />
with the „sel. rel.“ (selection release) parameter.<br />
The performance of your instruments can be optimized by setting the maximum allowed<br />
voices here. There is always an internal limit - due to the power of your computer - that you<br />
can never cross. Nevertheless <strong>Engine</strong> has NO internal limitation (no limit) of played keys<br />
per Layer or played keys in general, but each value underneath this ”physical” limit can be<br />
specified as a new limit for the Layers or the key. Should you ever cross this ”soft” limit<br />
when playing the instrument, then <strong>Engine</strong> will terminate the oldest note with the specified<br />
release time. You’ll be able to hear more notes than you specified in the limit, but only until<br />
the old note finishes its release and is switched off.<br />
To adjust <strong>Engine</strong> best possible to the power of your computer you can here set the<br />
maximum number of keys per Layer, Section or Alternate (depending on what you<br />
selected) incl. the release time that is used to fade out old notes that are switched off by<br />
the keys per layer limit.<br />
<strong>Engine</strong> does not only offer a ”horizontal” limit, but also a ”vertical” polyphony limit per key,<br />
meaning that you can save even more CPU power. This feature also helps you emulate<br />
the behavior of a live played instrument since it removes notes that would sum up in an<br />
unrealistic manner. As an example, when playing a Sourdo you won’t be able to hear the<br />
first beat anymore after playing the fourth one. <strong>Engine</strong> enables you to adjust exactly this<br />
behavior via the limit per key feature - also including the adjustment of the key release<br />
time. <strong>Engine</strong> has NO internal limitation of played keys per Layer or played keys in general.
Output Settings<br />
<strong>Best</strong> <strong>Service</strong> <strong>Engine</strong> 2.0<br />
<strong>Manual</strong><br />
The Output Settings are located on the right side of the first parameter bar. Here you can<br />
immediately route your existing selections to so-called „Custom Channels“ (internal virtual<br />
channels).<br />
<strong>Engine</strong> can manage an unlimited number of Custom Channels. These channels enables<br />
you to subdivide a Layer into multiple internal add-on channels which you then can edit<br />
individually with additional modifiers or insert filter and effects.<br />
IMPORTANT: You can not only route one or multiple Sections and Alternates of a Layer<br />
to a Custom Channel but also the complete Layer!<br />
Now select one or multiple Sections or Alternates in the „select“ pull-down menu or the<br />
Content Browser and click on the output pull-down menu:<br />
This pull-down menu contains a list where you can select the desired Custom Channel for<br />
your selection. As soon as you add a new Custom Channel, the <strong>Engine</strong> Mixer automatically<br />
creates the corresponding channel.<br />
TIP: You can route your Layer, Sections or Alternates to a certain new or already<br />
existing Custom Channel, or even each Layer/Section/Alternate to a separate<br />
Custom Channel to execute any further editing much clearer.<br />
51
52<br />
CHAPTER 5<br />
Pro Edit<br />
The left part below the basic parameters of the Module Editor contains the Key Switch<br />
feature, the playing direction feature, the filter section and the „skip“ feature.<br />
Key Switch<br />
<strong>Engine</strong> offers key switches to switch between Layers or even only between your Sections<br />
and Alternates of a Layer - without affecting the main key switch of the Layer! This way<br />
you can switch between multiple e-bass Layers with the Layer key switch, for example,<br />
and simultaneously switch inside the Layer between the different playing techniques, like<br />
long notes, vibrato notes, tappings, 8th notes, slides, etc. - provided that these playing<br />
techniques exist as individual Sections/Alternates.<br />
To create a key switch select one Layer or one or multiple Sections or Alternates in the<br />
„select“ pull-down menu or the Content Browser. Assign the desired key switch note to your<br />
selection afterwards.<br />
Next to the standard selection of a note that assigns a key switch we also included a<br />
“learn” function that helps for an easier assignment of the key switch note. Click on the key<br />
switch pull-down menu and the following list shows up:
<strong>Best</strong> <strong>Service</strong> <strong>Engine</strong> 2.0<br />
<strong>Manual</strong><br />
Select the “learn” option and press the desired note on your keyboard (or other MIDI<br />
controller) afterwards. Now this note is your key switch note for the selected Layer and it is<br />
also shown in the key switch display accordingly.<br />
Use the „bypass“ button to deactivate the key switch function temporarily.<br />
There are three additional Key Switch modes available:<br />
• default mode: this is the regular Key Switch Mode you already know<br />
• next note mode: if you press a note of this Key Switch Mode, ONLY ONE note<br />
(the next one) will be played with the new Key Switch and after this note<br />
the Key Switch you used before gets activated again.<br />
• hold mode: in this mode you have to press and hold the Key Switch key as long as<br />
you want to play the samples of this Key Switch. As soon as you release<br />
the key on your keyboard the Key Switch you used before gets activated<br />
again.<br />
IMPORTANT: The two modes “next note” and “hold” can ONLY get used with Sections<br />
or Alternates!<br />
53
54<br />
CHAPTER 5<br />
Pro Edit<br />
Keyboard Options<br />
With the Keyboard Options feature you can assign three basic settings for the keyboard<br />
behavior.<br />
1.) Playing Direction: The playing direction feature lets you assign the playback of a Layer,<br />
Section or Alternate depending on the playing direction on your keyboard:<br />
• Upwards & Downwards: The selected Section/Alternate always gets played.<br />
• Upwards: The selected Section/Alternate only gets played, if the next coming note is<br />
above the prior one.<br />
• Downwards: The selected Section/Alternate only gets played, if the next coming note is<br />
below the prior one.<br />
This feature combined with the Tune Model lets you individually assign which note should<br />
create an additional tune and when the note should do it.<br />
Additionally you can use „playing direction“ to assign a duplication of notes to your<br />
keyboard.<br />
2.) Dynamic Split: This feature was specially developed for live performances with <strong>Engine</strong>:<br />
Layers, Sections and Alternates can get assigned to a specific “playing hand” (left hand,<br />
right hand, left & right hand).<br />
Left & right hand means that an instrument is playable “normally” on the entire keyboard<br />
range. This option is the default status for instruments.<br />
If you want to play multiple instruments live and simultaneously - but you only have one<br />
keyboard available - you can assign Layers/Sections/Alternates specifically to one hand
<strong>Best</strong> <strong>Service</strong> <strong>Engine</strong> 2.0<br />
<strong>Manual</strong><br />
and thus split the keyboard “virtually” - in this case the note “C3” is the so-called “split key”<br />
by default (of course you can also change this split key).<br />
Dynamic Split now enables you to play the instruments even beyond this split key - if your<br />
perfomance may exceed the split key: The split key moves dynamically and automatically<br />
adapted to your live performance.<br />
EXAMPLE: You assign the option “left hand” to an electric bass instrument and the<br />
option “right hand” to an acoustic guitar. Split Key is set to C3. With a<br />
standard keyboard split now all bass notes beyond C3 and all guitar notes<br />
below C3 would change to the other instrument automatically. With Dynamic<br />
Split you can now even play the guitar below C3, for example, since the<br />
keyboards moves “virtually” downwards with your performance.<br />
3.) Repetition Note: in this mode the last played note gets repeated automatically. This is<br />
very useful for basses, for example, because the performance of 16th notes then is a lot<br />
easier.<br />
55
56<br />
CHAPTER 5<br />
Pro Edit<br />
Filters<br />
Meanwhile filters is a very common item and their function needn‘t get explained more<br />
detailed. Nevertheless the <strong>Engine</strong> filters has been extended by some additional features.<br />
To activate the filters please click on the „bypass“ button to the left of the filter headline and<br />
click on the pull-down menu to select a filter with its properties:<br />
Among the pristine sound you can use the spot inside the 2D panel to edit both<br />
parameters, frequency cutoff and resonance, simultaneously. This is very useful in practice<br />
but of course you can also edit both parameters individually in their input fields.<br />
The special feature of this filter section is the „absolute“ function. Here an example what it<br />
does:<br />
If you activate filters for an entire Layer patch, the settings will always affect all included<br />
Sections and Alternates. Additionally to these general settings you can select one or<br />
multiple Sections or Alternates and assign custom frequency cutoff and resonance values<br />
exclusively to this selection.<br />
<strong>Engine</strong> will then „add“ these individual values to the general values of the entire Layer and<br />
recalculate new values internally (relative).<br />
If you, on the other hand, want to „separate“ your current selection from the general Layer<br />
filter settings and assign individual filter types and settings to your selected Sections or<br />
Alternates, click the „abs.“ button. Now the general Layer filter setting get ignored for your<br />
entire selection.<br />
EXAMPLE: A Layer patch with 2 Sections is selected and the filter section is activated.<br />
The current resonance value is „40%“. You now select the first Section<br />
and set the resonance value for this Section to „75%“. As the „abs.“ button is<br />
not active, the general Layer filter settings get included and the “40%” now<br />
get calculated as a “100%” range. Thus the recalculated resonance value for<br />
the first Section will be 70% and for the rest of the Layer the value will<br />
be 40%. When you activate the „abs.“ button for the first Section, the<br />
general Layer filter settings get ignored and the resonance value for the first<br />
Section now will be 75%, for the rest of the Layer it will be 40%.<br />
To deactivate the „filter section“ please use the „bypass“ button to the left of the filter<br />
headline.<br />
If you want to assign a dynamic filter performance to your selection, whether by external
<strong>Best</strong> <strong>Service</strong> <strong>Engine</strong> 2.0<br />
<strong>Manual</strong><br />
controllers like velocity, modwheel, MIDI/host automation, etc., or by internal modules like<br />
Free Envelope, Step Modulator, AHDSR Curve, etc., please refer to “Flexible Modifiers”.<br />
Skip<br />
Skip is a very simple but also a very useful feature.<br />
The general play back start position for each sample always gets assigned in the Audio<br />
Editor. Additionally you can use „skip“ to move the start position of one or multiple Sections<br />
or Alternates (and all included Zones) with the editing of only one parameter. We extended<br />
this parameter with two decimal places for the first 100 milliseconds which allows you to<br />
edit the start position frame precisely even for a sample rate of 96 kHz.<br />
Use the „skip“ feature to give your performances a more natural feel. A group of live<br />
musicians will rarely hit a note exactly at the same time, for example. „Skip“ lets you adjust<br />
this delay between the instrument and allows you to simulate slight imperfections of live<br />
performances.<br />
To deactivate the „skip“ feature please use the „bypass“ button to the left of the skip<br />
headline.<br />
IMPORTANT: Like the filter section also the „skip“ parameters can be used with<br />
„absolute“ or „relative“ settings. Please refer to the explanations in the f<br />
ilter section.<br />
Volume AHDSR<br />
The right part below the basic parameters of the Module Editor contains the Volume<br />
AHDSR feature (Volume Attack, Hold, Decay, Sustain, Release Curve).<br />
When a mechanical musical instrument produces sound, the relative volume of the sound<br />
produced changes over time. The way that this varies is different from instrument to<br />
instrument. For instance, a pipe organ, when a key is pressed, plays a note at constant<br />
volume, the sound ending virtually as soon as the key is released. The sound of a guitar,<br />
by contrast, is loudest immediately after it is played, and fades with time. Other instruments<br />
have their own characteristic volume patterns.<br />
The AHDSR envelope is a way to specify the appropriate behavior for a „voice“ created<br />
by the synthesizer. Although usually applied to volume, it is also common to control other<br />
sound elements such as filter frequencies or oscillator pitches via AHDSR envelope.<br />
57
58<br />
CHAPTER 5<br />
Pro Edit<br />
The AHDSR envelope is specified using five parameters:<br />
• Attack: How quickly the sound reaches full volume after the sound is activated (the key<br />
is pressed). For most mechanical instruments, this period is virtually<br />
instantaneous.<br />
• Hold: How long the envelope stays at full volume before entering the decay phase.<br />
• Decay: How quickly the sound reduces in volume after the initial peak and hold time.<br />
• Sustain: The „constant“ volume that the sound takes after decay until the note is<br />
released. Note that this parameter specifies a volume level rather than a<br />
time period.<br />
• Release: How quickly the sound fades after the end of the note (the key is released).<br />
Often, this time is very short. An example where the release is longer might be<br />
a percussion instrument like a glockenspiel, or a piano with the sustain<br />
pedal pressed.<br />
With the VOL. AHDSR curve you can adjust the time flow and simultaneously the volume<br />
flow of your Layer, Section or Alternate.<br />
Generally the AHDSR curve is used in „retrigger“ mode. This means that for each newlyplayed<br />
Zone the curve always starts from the beginning again. You can switch off this<br />
mode at any time with a click on the „retr.“ button in the upper right corner.<br />
Any time related parameters also contain additional curve (in %) or volume settings (in dB)<br />
to enable an even finer adjustment.<br />
Use the „v.“ (vertical) and „h.“ (horizontal) zoom options to customize the view of the curve.<br />
Beside these input fields you can also frame the part of the curve you want to zoom in with<br />
your mouse.<br />
To move an already horizontally zoomed-in view, press and hold the „shift“ key, click with<br />
the mouse on the curve and drag it to the left or to the right. Click the „fit“ button to return to<br />
the general view.
<strong>Best</strong> <strong>Service</strong> <strong>Engine</strong> 2.0<br />
<strong>Manual</strong><br />
IMPORTANT: <strong>Engine</strong>‘s Volume AHDSR allows even positive volume values<br />
amounting to additional 12dB for the „Hold Level“ and „Sustain Level“<br />
parameters. Please use these settings very carefully since this can<br />
possibly cause unwanted overmodulation of your Layers, Sections or<br />
Alternates! Positive volume values get displayed in red immediately.<br />
IMPORTANT: Switched off, the “retrigger” function always only affects audio files,that<br />
are not part of any Section or Alternate but only of a Layer. If you want<br />
to use this feature for Sections or Alternates, you have to use the AHDSR<br />
envelope of the Internal Modifiers.<br />
You can save all your parameter settings as individual preset or also assign them by „copy<br />
& paste“ to other Layers, Sections or Alternates.<br />
To save your settings click on the „presets“ pull-down menu and the select the „save as“<br />
option. A dialog will show up where you can enter your desired name for your preset.<br />
If you click on the „presets“ pull-down menu next time, your preset will show up in the list.<br />
59
60<br />
CHAPTER 5<br />
Pro Edit<br />
Beside the „save as“ option you can also assign your current VOL. AHDSR settings to<br />
other Layers, Sections or Alternates without having to save your changes before. To copy<br />
your current settings click on the „presets“ pull-down menu and select the „copy“ option.<br />
Now select your Layer, Section or Alternate you want to transfer these settings, click on the<br />
„presets“ pull-down menu again and select the „paste“ option afterwards. You will notice<br />
that ALL parameter settings of the current VOL. AHDSR have changed to the values of<br />
your prior curve.<br />
To deactivate the „VOL. AHDSR“ please use the „bypass“ button in the upper right corner.<br />
IMPORTANT: Like the filter section also the „VOL. AHDSR“ curve can be used with<br />
„absolute“ or „relative“ settings. Please refer to the explanations in the<br />
filter section.<br />
TIP: You can also use <strong>Engine</strong>’s Flexible Modifiers to assign full-dynamic<br />
modification to your Filter, Volume AHDSR and Skip settings.
Flexible Modifiers<br />
<strong>Best</strong> <strong>Service</strong> <strong>Engine</strong> 2.0<br />
<strong>Manual</strong><br />
With <strong>Engine</strong>‘s Flexible Modifiers and their modules you can assign additional and specific<br />
modifications to your Layers, Sections and Alternates during your playing.<br />
These modifications can get generated well directed or also at random. The Flexible<br />
Modifier Editor is a really powerful and creative part of <strong>Engine</strong>!<br />
EXAMPLE: By means of a „LFO“ (internal modulator) as „source“ and „pitch“ as<br />
„destination“ you can create a vibrato. Simultaneously you can assign<br />
the intensity of the modification, with the „modwheel“ controller as „source“<br />
and the „LFO intensity“ as „destination“, for example. With this combination<br />
you will create a typical synth vibrato. If you, however, select „volume“<br />
instead of „pitch“ as destination for the first modifier, you will create a typical<br />
tremolo.<br />
<strong>Engine</strong> offers an unlimited number of possible combinations of all types and in any order.<br />
The concurrent access to the same parameter guarantees the total flexibility in all respects.<br />
<strong>Engine</strong>‘s Modifiers are subdivided into two groups:<br />
• External Sources: Incoming MIDI commands like velocity, pitchbend, modwheel or any<br />
other MIDI CC command from your keyboard or from your sequencer<br />
application via MIDI and host automation.<br />
• Internal Sources: These are the <strong>Engine</strong> internal modules like LFO, Glide, Step<br />
Modulator, AHDSR Curve, Free Envelope, Step Sequencer, Arranger,<br />
Arpeggiator and Time Modulator.<br />
Let‘s take a closer look at all internal and external Modifiers:<br />
61
62<br />
CHAPTER 5<br />
Pro Edit<br />
Click on the „modifier“ pull-down menu. All these sources are available all along for onetime<br />
or multiple use.<br />
As soon as you select one of the Modifiers - mod wheel (ctrl. #1), for example - a small box<br />
gets added the Modifier window below the pull-down menu.<br />
With this first step you‘ve selected your „source“. To assign the „destination“ please click on<br />
the appropriate pull-down menu and select „volume“, for example.
<strong>Best</strong> <strong>Service</strong> <strong>Engine</strong> 2.0<br />
<strong>Manual</strong><br />
If you now play the instrument and simultaneously move the mod wheel of your keyboard<br />
up or down you will accordingly change the volume of the instrument in real-time.<br />
Use the two parameters below the „source“ and „destination“ pull-down menus to assign<br />
the range for the modulation. Additionally you can even adjust the character of the curve<br />
for this modulation and thus the progression of the fading between the minimum and<br />
maximum values of the defined range. To open and edit the curve settings of the modifier,<br />
click the „curve“ button and adjust the parameters accordingly.<br />
Beside the general curve character you can additonally also draw your custom controller<br />
curve for external modifiers. This enables you to create custom and fexible switching/<br />
blending between instruments using external controllers. For easier drawing you can also<br />
assign the number of steps (controler values) and even copy, paste or save your settings<br />
as presets. Click the “controller” button to switch to the controller matrix. Use the “x-blend”<br />
parameter for very custom curve characters.<br />
Here are some examples how the controller can be used.<br />
SHORTCUT: Press and hold the “ctrl” key to draw your steps with a red artificial line.<br />
TIP: You can use any external MIDI controller (breath controller, mod wheel, etc.) with<br />
the “controller” feature to switch/blend between multiple Layers, Section and<br />
Alternates. So you can blend between two or more different playing techniques like<br />
long notes, vibrato, tremolo, etc simply with your MIDI controller.<br />
63
64<br />
CHAPTER 5<br />
Pro Edit<br />
IMPORTANT: Some Flexible Modifiers contain additional internal modules, like LFO,<br />
Free Envelope, Step Modulator, etc. These modules get displayed in the<br />
right part of the Flexible Modifier Editor:<br />
Primarily you will get a list of all basic destinations for your Flexible<br />
Modifiers. As soon as you add a Flexible Modifier that contains an<br />
additional internal module, the list of available destinations automatically<br />
gets extended by this module.<br />
Beside the internal and external sources you can also select many parameters of insert<br />
filters and effects as destinations - available options are shown in the menu automatically.<br />
Using this options you can change the “frequency” parameter value (destination) of a 6<br />
band equalizer with the modwheel (source), for example.<br />
Also possible is the assignment of changes of the “dry/wet” values of an Origami Impulse<br />
Response Processor (destination) to the run of a Step Modulator (source). In this case the<br />
“dry/wet” values will change according to the created Stepmodulator run.<br />
TIP: If you use internal sources (LFO, Stepmodulator, Free Envelope, etc.) with this<br />
function, you have to pay attention to activate or deactivate the “retrigger”<br />
parameter of the internal sources. This parameter will define if the run of the<br />
sequence will start from the beginning always you press a new key (retrigger “on”)<br />
or if the run of the sequence continues (retrigger “off”).
<strong>Best</strong> <strong>Service</strong> <strong>Engine</strong> 2.0<br />
<strong>Manual</strong><br />
Beside the available Modifiers, the „modifier“ pull-down menu also contains a „preset“<br />
menu. Presets will always replace all currently loaded modifiers! Use “append” if you want<br />
to add presets. Use “copy/paste” and the “save” options to create your custom presets.<br />
TIP: If you regularly use an external MIDI controller with the Flexible Modifiers, you can<br />
save all your settings as Modifier presets. Thus you do not have to create your<br />
basic setup again and again anew.<br />
External Sources<br />
<strong>Engine</strong> contains the following External Sources:<br />
Fix Value<br />
The only entirely static Modifier of <strong>Engine</strong> that routes the incoming MIDI note-on<br />
commands from your controller to the selected destination.<br />
Velocity<br />
The value of the selected Flexible Modifier destination is depending on the velocity value of<br />
the incoming MIDI command.<br />
65
66<br />
CHAPTER 5<br />
Pro Edit<br />
Release Velocity<br />
Only supported by a few MIDI controllers, mostly keyboards. The value of the selected<br />
Flexible Modifier destination is depending on how fast you released the key of your<br />
keyboard.<br />
Random<br />
Any incoming note-on MIDI command generates a random value within the assigned<br />
Flexible Modifier destination range.<br />
Pitchbend<br />
The value of the selected Flexible Modifier destination is depending on the position of the<br />
pitchbend controller of your keyboard (mostly a wheel or a joystick).<br />
Modwheel<br />
The value of the selected Flexible Modifier destination is depending on the position of the<br />
modwheel controller of your keyboard (mostly a wheel or a joystick).<br />
Mono Aftertouch (channel pressure)<br />
The value of the selected Flexible Modifier destination is generated by pressing a key that<br />
has already been pressed.<br />
Poly Aftertouch (key pressure)<br />
It works just like „Mono Aftertouch“, however, for each key separately.<br />
MIDI Automation<br />
Here can freely select from 128 MIDI CCs (Continuous Controllers) and assign them to a<br />
Flexible Modifier destination.<br />
The “L” button activates the “MIDI learn” function. If you click on this button and then move<br />
an arbitrary controller, <strong>Engine</strong> will take the CC number and the current position of the value<br />
automatically.<br />
Host Automation<br />
Enables the direct automation of Flexible Modifier destinations by your sequencer software.<br />
IMPORTANT: The MIDI and host automation in this area only affects <strong>Engine</strong>’s<br />
Flexible Modifiers. Please read the chapter “Automation” for<br />
the powerful mixer and insert filter and effect automation features of<br />
<strong>Engine</strong>.<br />
Custom Control<br />
Enables the direct assignment of any parameter of the Flexible Modifiers to the knobs and<br />
buttons of the Custom Remote Control area on the Quick Edit page.<br />
Key Position (keyboard tracking)<br />
The value of the selected Flexible Modifier destination is depending on the position of the<br />
key within the entire range of your keyboard (or other MIDI controller).
<strong>Best</strong> <strong>Service</strong> <strong>Engine</strong> 2.0<br />
<strong>Manual</strong><br />
Key Distance<br />
The value of the selected Flexible Modifier destination is depending on the distance<br />
between the prior and upcoming key of your keyboard (or other MIDI controller).<br />
Key Up<br />
It works just like „Key Distance“, however, only for keys within the playing direction<br />
upwards.<br />
Key Down<br />
It works just like „Key Distance“, however, only for keys within the playing direction<br />
downwards.<br />
Internal Sources<br />
Basically each internal Flexible Modifier of <strong>Engine</strong> contains its own „preset“ pull-down<br />
menu, so beside the overall presets for your Flexible Modifiers you can additionally<br />
manage the presets for each single Internal Modifier individually. Also these „preset“ pulldown<br />
menus contain the copy/paste option for the immediate transfer of your settings to<br />
other internal Flexible Modifiers without having to save them before. Additionally you can<br />
minimize the display of each internal Modifier simply with a click on the open/close triangle<br />
in the upper left corner of each Modifier. Even in closed mode you still have full control over<br />
the basic parameters of the internal Modifiers.<br />
Depending on your setup maybe the list of used Internal Sources becomes quite long<br />
(example A). For a better workflow - especially if you work with a large number of Internal<br />
Sources - you can use the “solo view” button. If activated only the currently selected<br />
Internal Source will be opened and all others get minimzed automatically (example B).<br />
Example A: “solo view” button not active.<br />
67
68<br />
CHAPTER 5<br />
Pro Edit<br />
LFO (Low Frequency Oscillator)<br />
Example B: “solo view” button active.<br />
In addition to the main oscillator(s) of a synthesizer, which is responsible for the creation of<br />
the audio signal itself, an LFO is an additional oscillator that operates at a comparatively<br />
lower frequency (hence its name), that modulates the audio signal, thus causing a<br />
difference to be heard in the signal without the actual introduction of another sound source.<br />
Low Frequency Oscillation as a concept was first introduced in the modular synths of the<br />
1960s and 70s — often its effect was ‚accidental‘; such were the extensive capabilities<br />
of a modular synth operator to patch the instrument to create a vast array of different<br />
configurations. They have since appeared in some form on almost every synthesizer,<br />
and more recently other electronic instruments such as samplers have included them, to<br />
augment their capacity for sound alteration.<br />
The principle behind low frequency oscillation as a means of modulating a signal, as<br />
opposed to adding to it, is that its frequency is lower than the audible frequency of the<br />
human ear (20Hz–20kHz) i.e., the frequency is low enough so that it isn‘t heard as a tone.<br />
A low frequency oscillator can be routed to control a variety of different parameters, for<br />
example the frequency of the audio oscillator, the phase, panning, filter frequency, or the<br />
velocity of the synthesizer’s output. For instance, when routed to pitch, an LFO serves to<br />
simulate vibrato, and when an LFO modulates amplitude (volume), it creates tremolo.
<strong>Best</strong> <strong>Service</strong> <strong>Engine</strong> 2.0<br />
<strong>Manual</strong><br />
On most synthesizers and sound modules, there are several different ways in which the<br />
user can alter the effect produced by the LFO. These may include a variety of different<br />
waveforms, a rate control, routing options (as described above), a tempo sync feature, and<br />
an option to control the amount by which the LFO will modulate the audio signal.<br />
Electronic musicians use LFO for a variety of applications, ranging from adding simple<br />
vibrato or tremolo to a melody, to more complex applications such as triggering gate<br />
envelopes. Differences between LFO rates also account for a number of commonly heard<br />
effects in modern music - for instance, a very low rate can be used to modulate filter<br />
frequency, thereby providing the characteristic gradual sensation of the sound becoming<br />
clearer or closer to the listener. Alternatively, a high rate can be used for bizarre ‚rippling‘<br />
sound effects (indeed, another important use of LFO would be for various sound effects<br />
used in films). However, these effects are difficult to describe, instead they are more<br />
understandable simply when heard.<br />
You can choose between the following waveforms: sine, triangle, square, saw and random.<br />
The „retr.“ (retrigger) button lets you select if you want to start the LFO progression always<br />
from the beginning for each newly played note.<br />
The LFO parameters in detail:<br />
Frequency:<br />
Here you can assign the number of waveform repetitions per second and thus the tempo of<br />
the LFO in hertz. 1.00 Hz = one complete waveform repetition per second.<br />
Sync:<br />
Use this option to synchronize the tempo of your LFO to your host application or to <strong>Engine</strong><br />
internally. If activated, the frequency input field will change into a pull-down menu where<br />
you can specifically select the kind of synchronization.<br />
Delay:<br />
Here you can assign a delay to your LFO. Combine this option with an additional AHDSR<br />
curve to create a fade-in of your LFO.<br />
69
70<br />
CHAPTER 5<br />
Pro Edit<br />
AHDSR Envelope<br />
This internal Flexible Modifier lets you adjust a specific modulation envelope for the<br />
selected destination.<br />
All parameters and options are the same as for the basic AHDSR envelope in the Module<br />
Editor.<br />
Free Envelope Unipolar / Bipolar<br />
Free Envelope enables you to create the entire progression of an upcoming modulation in<br />
advance.<br />
In contrast to the AHDSR envelope, that is editable with a maximum of 10 parameters,<br />
Free Envelope allows an unlimited number of freely assignable markers.<br />
IMPORTANT: A Free Envelope marker also always contains a „level“ and a „position“<br />
value. Additionally you can use the „curve“ parameter to adjust the<br />
character how the marker should be reached.<br />
Add markers:<br />
To add a marker to your Free Envelope, simply click on the position in the editing display<br />
where you want to add the marker.
<strong>Best</strong> <strong>Service</strong> <strong>Engine</strong> 2.0<br />
<strong>Manual</strong><br />
Delete markers:<br />
To delete an existing marker, click on the marker „shortly!“ (Otherwise you will select the<br />
marker).<br />
Edit/Move markers:<br />
Basically you can edit the „level“ and „curve“ parameters by entering values into the input<br />
fields or using your mouse (click and hold the value and drag up or down) as usual.<br />
In addition you can edit and move the markers with simply with your mouse. Therefore<br />
click and hold the marker you want to edit and drag it to a new position. The „level“ and<br />
„position“ parameters will change accordingly.<br />
If you want to move multiple markers simultaneously, press and hold the „alt“ key before<br />
you select a marker. Now also all markers to the right of the selected marker get selected<br />
(red color) and you can move them to the new position.<br />
To keep the assigned distance between two markers you want to move, simply click and<br />
hold the green connecting line between the 2 markers (the color changes into red). If<br />
you then drag the two selected markers to a new position you will notice, that their (time)<br />
distance will not change.<br />
TIP: For the fine-tuning of markers you can also press and hold the „shift“ key before<br />
you select a marker. If you now move the marker any changes will be made<br />
decimal places accurately.<br />
You can generally assign if the Free Envelope gets display „unipolar“ or „bipolar“. The only<br />
difference is, that in „bipolar“ mode also negative values of markers get displayed, what<br />
makes you work much easier if the assigned range for your Flexible Modifier destination<br />
contains negative and positive values.<br />
EXAMPLE: Your Flexible Modifier destination is „pitch“ and the assigned range is from<br />
„0“ to „+10“ semitones. Thus the unipolar Free Envelope is quite<br />
enough, since the „level“ value „0%“ corresponds to „0“ semitones and<br />
the value „100%“ corresponds to „+10“ semitones. If you now assign the<br />
„pitch“ range from „-10“ to „+10“ and still work in the unipolar mode, you<br />
have to keep in mind that now the „level“ value „0%“ means „-10“ semitones,<br />
the „level“ value „50%“ means „0“ semitones and the „level“ value „100%“<br />
means „+10“ semitones. This makes it quite difficult since you always have<br />
to think about the value range. If you switch to the bipolar mode, the Free<br />
Envelope display will also include negative values. In our example now<br />
the „level“ value „0%“ means „0“ semitones, „-100%“ means „-10“ semitones<br />
and „100%“ means „+10“ semitones.<br />
71
72<br />
CHAPTER 5<br />
Pro Edit<br />
Use the „sync“ button to synchronize the Free Envelope to your host application or to<br />
<strong>Engine</strong> internally. If activated, the upper timeline of the editing display and the „position“<br />
value will change accordingly. The minimal valid value for the sync option is 1/128.<br />
The „retr.“ (retrigger) button lets you select if you want to start the Free Envelope<br />
progression always from the beginning for each newly played note.<br />
The „loop“ button activates the permanent loop within the two fixed loop markers, visible by<br />
the two horizontal dashed lines.<br />
To zoom in/out the current view of your Free Envelope, simply enter the wanted zoom<br />
factor in the input field or change the value with your mouse. Use the scroll bar to scroll to<br />
the wanted position. To return to the basic view of your entire Free Envelope, click the „fit“<br />
button.<br />
TIP: Beside the scroll bar you can also use the blue timeline to scroll pixel accurately to<br />
the wanted position of your Free Envelope. Simply click and hold any position in<br />
the timeline with your mouse and drag to the left or right.<br />
Step Modulator Unipolar / Bipolar<br />
The Step Modulator enables you to create a so-called „stepped“ modulation. In practice<br />
this internal Flexible Modifiers is commonly used with „pitch“ or „cutoff filter“ as destination,<br />
in order to achieve typically „hashed“ progressions.<br />
<strong>Engine</strong>‘s Step Modulator is extended to 128 steps to enable an even more accurate setup.<br />
Additionally you can also switch between the „unipolar“ and „bipolar“ view of your settings<br />
(see chapter „Free Envelope“).<br />
To draw or edit the progression, simply click (and hold) on the respective bar in the Step<br />
Modulator editing display. Now can adjust the level of the bar by dragging it up or down. To<br />
edit multiple bars simultaneously, keep the mouse button pressed and move your mouse to<br />
the left or right.<br />
SHORTCUT: Press and hold the “ctrl” key to draw your steps with a red artificial line.
<strong>Best</strong> <strong>Service</strong> <strong>Engine</strong> 2.0<br />
<strong>Manual</strong><br />
IMPORTANT: For an easier adjustment of your progression you can edit the parameter<br />
settings of the Step Modulator even during the play-back of the sequence<br />
in real-time.<br />
Let‘s take a closer look to the parameters of the Step Modulator:<br />
„loop“ pull-down menu:<br />
Here you can select between three different loop modes:<br />
• loop: continual repeat of your sequence; always from the beginning.<br />
• loop FB (loop forward/backward): continual repeat of your sequence; however, in<br />
each case from the beginning to the end and then reverse.<br />
• no loop: one-time play-back of your sequence to the end.<br />
Use the „sync“ button to synchronize the Step Modulator to your host application or to<br />
<strong>Engine</strong> internally. If activated, the „frequency input field will change into a pull-down menu<br />
where you can select the different sync options. Additionally the „input quant.“ button for<br />
the MIDI input quantization will appear bottom left in the Step Modulator window.<br />
Use the „retr.“ button, the „presets“ pull-down menu and the „bipolar“ button as already<br />
explained in this chapter.<br />
Steps:<br />
Use the „steps“ input field to adjust the number of used steps. The maximum number of<br />
available steps is 128.<br />
Frequency:<br />
Here you can assign the tempo in hertz. 1.00 Hz = one complete Step Modulator sequence<br />
per second.<br />
X-fade:<br />
Here you can assign a smooth transition for two successive steps.<br />
TIP: If you enter quite large values for the x-fade parameter you will get an extreme<br />
smoothness between the steps in order to achieve very nice and interesting<br />
sequence.<br />
Delay:<br />
Here you can assign a delay to your Step Modulator. Combine this option with an additional<br />
AHDSR curve to create a fade-in of your Step Modulator.<br />
Shuffle:<br />
Self-explanatory ;-)<br />
73
74<br />
CHAPTER 5<br />
Pro Edit<br />
Glide (Portamento)<br />
In current usage, portamento is making a continuous „slide“ up or down in frequency from<br />
a previous note, rather than a discrete change from one note to the next. This is most<br />
commonly encountered on string instruments, such as the guitar or violin, which can<br />
produce a continuous range of frequencies rather than being limited to the chromatic or<br />
diatonic scale, and impossible on a fixed-pitch instrument like the piano.<br />
Portamento can often be generated automatically on synthesizers, where a parameter<br />
setting can be used to control the speed at which an oscillator moves to a new pitch. Often<br />
this parameter is called „glide“. Alternatively, portamento effects can be produced manually<br />
by a skilled player by the use of the pitch wheel at the side of most synthesizer keyboards.<br />
Synth lines with lots of portamento defined West Coast G funk of the mid 1990s, and<br />
continue to be a distinctive part of electronic music today.<br />
In MIDI sequencing, portamento can be generated by using a channel message that<br />
creates a sliding effect by smoothly changing pitch from the last note played to the pitch of<br />
the currently playing note. Additionally <strong>Engine</strong> allows to use also other destinations beside<br />
„pitch“ what can be very useful and also sounds quite interesting.<br />
The available „glide“ parameters of <strong>Engine</strong> are:<br />
Legato button:<br />
If activated, the „glide“ function is only used if two or more played notes overlap each other.<br />
Time:<br />
Assigns the time for the change from one note to the next.<br />
Chromatic button:<br />
If you activate this button, the distance between the played note to the next gets calculated<br />
and the time of your „glide“ gets extended accordingly.<br />
EXAMPLE: Your current time for the „glide“ is set to 100ms. If you now activate the<br />
„chromatic“ button and first play C3 and afterwards D#3, the new calculated<br />
time for the glide will be 300ms.<br />
Key Limit:<br />
Here you can limit the „chromatic“ parameter and assign the maximum considered distance<br />
range for two successively played notes.<br />
If you set this value to 5 semitones, for example, the recalculated time for the glide will<br />
never be larger than these 5 semitones, even if the effective distance between the two<br />
played notes may be larger than 5 semitones.<br />
Curve:<br />
Self-explanatory ;-)
Step Sequencer<br />
<strong>Best</strong> <strong>Service</strong> <strong>Engine</strong> 2.0<br />
<strong>Manual</strong><br />
Like the Step Modulator also the Step Sequencer enables you to create a so-called<br />
„stepped“ sequences of your instruments. Unlike the Step Modulator (which is commonly<br />
used with „pitch“ or „cutoff filter“ as destination), the Step Sequencer only uses the<br />
destination “note on” to achieve typically „hashed“ progressions.<br />
<strong>Engine</strong>‘s Step Sequencer is extended to 64 steps to enable an even more accurate setup.<br />
To draw or edit the progression, simply click (and hold) on the respective bar in the Step<br />
Sequencer editing display. Now can adjust the level of the bar by dragging it up or down.<br />
To edit multiple bars simultaneously, keep the mouse button pressed and move your<br />
mouse to the left or right.<br />
SHORTCUTS: Press and hold the “shift” key (Mac and Windows XP) to edit the bars in<br />
smaller, finer steps.<br />
TIP: The Step Sequencer uses the entire range of your keyboard. This enables you<br />
to create very nice sequences also for strings, for example. As <strong>Engine</strong><br />
allows an unlimited number of Step Sequencers per Layer you can also<br />
use the Step Sequencer to create very custom drum sequences! You can add one<br />
Step Sequencer for each single key of your keyboard (one key per drum<br />
instrument) and thus create a typical drum machine.<br />
Let‘s take a closer look to the parameters of the Step Sequencer:<br />
„sustain“ button:<br />
If activated, the steps get played back until the next step is reached.<br />
„midi thru“ button:<br />
Use this button to route the MIDI notes generated by the Step Sequencer to the MIDI<br />
output or to your sequencer software. You can use this feature to record the MIDI notes<br />
in your sequencer software or to trigger the notes to another hardware or software<br />
instrument.<br />
75
76<br />
CHAPTER 5<br />
Pro Edit<br />
„loop“ pull-down menu:<br />
Here you can select between two different loop modes:<br />
• loop: continual repeat of your sequence; always from the beginning.<br />
• no loop: one-time play-back of your sequence to the end.<br />
„hold” button:<br />
Normally a MIDI file gets played back as long as you press and hold the assigned key of<br />
your keyboard. If you activate the “hold” button you only have to press the key once to start<br />
the playback. If you press the key again the playback will stop.<br />
Grid:<br />
The background matrix to adjust the view of the Step Sequencer.<br />
“time” pull-down menu:<br />
Here you can select the playback speed of your sequence:<br />
• 1/2 x speed: playback in half speed of the original sequence (host tempo or<br />
<strong>Engine</strong> internal tempo).<br />
• 1 x speed: playback in original sequence tempo (host tempo or <strong>Engine</strong> internal<br />
tempo).<br />
• 2 x speed: playback in double speed of the original sequence tempo (host tempo or<br />
<strong>Engine</strong> internal tempo).<br />
Steps:<br />
Use the „steps“ input field to adjust the number of used steps. The maximum number of<br />
available steps is 64.<br />
“rate” pull-down menu:<br />
Here you can select the length of your sequence in quarter steps. If you select “1”, for<br />
example, the length of your sequence is one quarter.<br />
„input quant.“ button:<br />
Automatic adjustment of the start of your sequence to the tempo of your host application.<br />
„delay“ pull-down menu:<br />
Here you can add a delay to the start point of the sequence playback.<br />
Shuffle:<br />
Self-explanatory ;-)
Arpeggiator<br />
<strong>Best</strong> <strong>Service</strong> <strong>Engine</strong> 2.0<br />
<strong>Manual</strong><br />
The Arpeggiator allows you to play alternating notes or chords automatically based on<br />
input, most often from a MIDI controller. This creates an electronically created arpeggio.<br />
Arpeggiators range from simple patterns to complex and user controllable patterns. These<br />
patterns are particularly popular in dance music such as techno, but actually date back to<br />
the earliest of analog synthesizers of the 70’s and 80’s.<br />
The <strong>Engine</strong> Arpeggiator is a lot of fun to play with and can inspire some truly original<br />
ideas, not to mention the ability to enable musicians of all skill levels to play some complex<br />
patterns that may even be impossible to accomplish without the aid of arpeggiation.<br />
The <strong>Engine</strong> Arpeggiator also allows you to import your own MIDI files using the “midi file”<br />
pull-down menu. The default root key of imported MIDI files is “C3”.<br />
You can also drag MIDI files directly from your desktop or other folders into the Arpeggiator<br />
display.<br />
Let‘s take a closer look to the parameters of the Arpeggiator:<br />
„midi thru“ button:<br />
Use this button to route the MIDI notes generated by the Arpeggiator to the MIDI output<br />
or to your sequencer software. You can use this feature to record the MIDI notes in your<br />
sequencer software or to trigger the notes to another hardware or software instrument.<br />
„loop“ pull-down menu:<br />
Here you can select between two different loop modes:<br />
• loop: continual repeat of your sequence; always from the beginning.<br />
• no loop: one-time play-back of your sequence to the end.<br />
77
78<br />
CHAPTER 5<br />
Pro Edit<br />
„dynamic”:<br />
If deactivated, the playback velocity of the Arpeggiator will always be the maximum of<br />
“127”. If you want to use other static velocity values just edit the “vel. offset” parameter<br />
accordingly.<br />
Activate the “dynamic” button and the Arpeggiator playback will depend on the velocity of<br />
your keyboard.<br />
„vel. offset”:<br />
Use this parameter for custom velocity values. Works in the velocity range from -127 to<br />
+127.<br />
„octave”:<br />
Here you can enter the number of octaves for your Arpeggiator sequence.<br />
“mode” pull-down menu:<br />
Here you can select between 15 different playback directions of your Arpeggiator, like “up”,<br />
“down”, “up & down”, etc.<br />
„input quant.“ button:<br />
Automatic adjustment of the start of your Arpeggiator sequence to the tempo of your host<br />
application.<br />
“time” pull-down menu:<br />
Here you can select the playback speed of your Arpeggiator sequence:<br />
• 1/4 x speed: playback in one-quarter speed of the original Arpeggiator sequence (host<br />
tempo or <strong>Engine</strong> internal tempo).<br />
• 1/2 x speed: playback in half speed of the original Arpeggiator sequence (host tempo or<br />
<strong>Engine</strong> internal tempo).<br />
• 1 x speed: playback in original Arpeggiator sequence tempo (host tempo or<br />
<strong>Engine</strong> internal tempo).<br />
• 2 x speed: playback in double speed of the original Arpeggiator sequence tempo (host<br />
tempo or <strong>Engine</strong> internal tempo).<br />
• 4 x speed: playback in quadruplicate speed of the original Arpeggiator sequence tempo<br />
(host tempo or <strong>Engine</strong> internal tempo).<br />
„delay“ pull-down menu:<br />
Here you can add a delay to the start point of the Arpeggiator sequence playback.<br />
Shuffle:<br />
Self-explanatory ;-)<br />
IMPORTANT: Maybe you will need a “gate” parameter for your Arpeggiator. As the<br />
<strong>Engine</strong> AHDSR envelope offers much more options than a simple<br />
gate parameter we recommend you to use this feature for more individual<br />
settings.
Arranger<br />
<strong>Best</strong> <strong>Service</strong> <strong>Engine</strong> 2.0<br />
<strong>Manual</strong><br />
The yellow tools Arranger is a unique and inspiring MIDI file player with automatic chord<br />
recognition.<br />
This means that you can import one or multiple MIDI files (let’s say a little strings<br />
arrangement) into the Arranger and assign these MIDI files to chords. If you now play the<br />
chords on your keyboard the MIDI files get started and the Arranger will transpose the MIDI<br />
files automatically to the correct position - depending on the position of the chord and the<br />
octave.<br />
Check out the available Arranger Layers in the folder “Inspiring Instruments/Arranger” and<br />
you will see how this MIDI player can be used.<br />
Beside the basic window the Arranger has an additional editor window that can be opened<br />
with the “edit” button:<br />
You will only need the editor if you create your own “arrangements” or if you want to edit<br />
parameters of already existing presets.<br />
The Arranger can work in four different modes. Let’s get started with an easy example:<br />
In “easy mode” you only need two MIDI files for your arrangement - one for the major<br />
chords and one for the minor chords. Please select “easy” in the “mode” pull-down menu...<br />
79
80<br />
CHAPTER 5<br />
Pro Edit<br />
now select the chord...<br />
and finally import your MIDI file (in our example the MIDI file for the minor chords).
<strong>Best</strong> <strong>Service</strong> <strong>Engine</strong> 2.0<br />
<strong>Manual</strong><br />
You can also import MIDI files via drag’n’drop directly from your desktop or any other<br />
folder. Please repeat this process and assign another MIDI file for the major chord.<br />
You can use the “auto import MIDI file(s)” option to import multiple MIDI files<br />
simultaneously. Important for this process is the naming structure of the MIDI files that you<br />
want to import. <strong>Engine</strong> looks for an “X” and a “Chord” after your name, so compatible MIDI<br />
files can looke like this: “myfile X C maj.mid” or “myfile X D# min.mid”.<br />
If you now play chords on your keyboard you will notice that different MIDI files get played<br />
for minor chords than for major chords.<br />
Additionally all major and minor chords you will play automatically get transposed correctly,<br />
so you only have to arrange two MIDI chords for your entire performance!<br />
You now may think that major and minor is not enough - of course there are a lot more<br />
chords you can play... For this reason there are three other modes available, so you can<br />
create more custom arrangements:<br />
Beside MIDI files for major and minor chords, the “medium” mode lets you assign MIDI files<br />
also for all other chords:<br />
81
82<br />
CHAPTER 5<br />
Pro Edit<br />
IMPORTANT: The “auto chord harmonizer” is a very sophisticated algorithm that allows<br />
you even in the “easy” and “medium” mode the usage of the key pulldown<br />
menu! Even if you only have very few MIDI files for your chords,<br />
you can activate the “auto chord harmonizer” which will automatically<br />
create and adjust all other chords and scales in real-time - corresponding<br />
to the selected key.<br />
If even this assignment is not enough for you, you can select the “complex” mode and<br />
assign MIDI files to each single note individually:
<strong>Best</strong> <strong>Service</strong> <strong>Engine</strong> 2.0<br />
<strong>Manual</strong><br />
Depending on your arrangement you maybe have a lot of MIDI files to assign. Use the<br />
“key” pull-down menu to change the root key of all MIDI files in one step.<br />
Use the Arranger in “single” mode if you only want to assign MIDI files to each note<br />
separately. In this mode the automatic chord regognition is deactivated, so the Arranger<br />
works like a simple MIDI file player for grooves or lines.<br />
83
84<br />
CHAPTER 5<br />
Pro Edit<br />
The Arranger contains a separate Key Switch option that allows you to use multiple<br />
Arranger banks:<br />
Please choose the option “create new bank”...<br />
... and then assign the Key Switch note you want to use.<br />
This way each Key Switch note can contain different MIDI files - like 20 Arrangers in one.
The Arranger parameters in detail:<br />
<strong>Best</strong> <strong>Service</strong> <strong>Engine</strong> 2.0<br />
<strong>Manual</strong><br />
„follow” button:<br />
If you play a chord, the corresponding MIDI file always gets started from the beginning.<br />
If you want to start the MIDI file from the position of the previously played chord, simply<br />
activate this feature.<br />
„dynamic” button:<br />
All MIDI files normally get played with their original velocity settings. Use this button if you<br />
want to play the MIDI files depending on the velocity you play with your keyboard.<br />
„midi thru” button:<br />
Activate this button if you want to route your MIDI arrangement to another generator<br />
(sampler or synthesizer) or to record the arrangement in your host application.<br />
„presets” pull-down menu:<br />
Here you can load and save your Arranger presets.<br />
„input quant.” (Input Quantization) pull-down menu:<br />
• off: MIDI file playback starts immediately.<br />
• live mode 1: MIDI file playback starts immediately but note-off signals get ignored. This<br />
mode is recommended for strings or pad arrangements.<br />
• live mode 2: MIDI file playback starts immediately but note-off signals have a slight<br />
delay. This mode is recommended for arrangements with fast switches<br />
between different chords.<br />
• next beat: MIDI file playback gets synchronized with your host tempo<br />
(using <strong>Engine</strong> as plug-in) or the <strong>Engine</strong> internal tempo<br />
(in standalone mode). This means that the MIDI file playback always starts<br />
accurately to the next beat.<br />
• next count: MIDI file playback gets synchronized with your host tempo or the<br />
<strong>Engine</strong> internal tempo. This means that the MIDI file playback<br />
always starts accurately to the next count.<br />
• next bar: MIDI file playback gets synchronized with your host tempo or the<br />
<strong>Engine</strong> internal tempo. This means that the MIDI file playback<br />
always starts accurately to the next bar.<br />
85
86<br />
CHAPTER 5<br />
Pro Edit<br />
• previous bar: MIDI file playback gets synchronized with your host tempo or the<br />
<strong>Engine</strong> internal tempo. This means that the MIDI file playback<br />
always starts immediately. The start position depends on the current<br />
playback position of the previous bar.<br />
„edit” button:<br />
Opens the Arranger editor window.<br />
„hold” button:<br />
Normally a MIDI file gets played back as long as you press and hold the assigned chord<br />
on your keyboard. If you activate the “hold” button you only have to play the chord once to<br />
start the playback. If you play new chords, “hold” is still active, so you do not have to hold<br />
the chord. Only if you play the same chord two times successively the playback will stop.<br />
„vel. offset” (velocity offset):<br />
Use this parameter to change the velocity of the entire MIDI file - and thus the dynamic. If<br />
the settings of your MIDI file do not fit the dynamic you need, simply increase/decrease the<br />
velocity value. If you enter the value “-20 vel”, for example, the entire dynamic of the MIDI<br />
file and the related samples gets affected and played back in reduced velocity (original<br />
values minus 20).<br />
„scale vel.” (scale velocity):<br />
This option lets you scale the entire dynamic range of the MIDI file (velocity 0-127) into a<br />
lower range proportionally. You can also use inverted values for “scale velocity” to create<br />
very nice effect.
<strong>Best</strong> <strong>Service</strong> <strong>Engine</strong> 2.0<br />
<strong>Manual</strong><br />
„note filter” pull-down menu:<br />
This option lets you “filter” unwanted notes of the MIDI file and so change the complexity.<br />
The value you select in the pull-down menu is the upper limit. All notes below this value get<br />
filtered.<br />
„shuffle“:<br />
Self-explanatory ;-)<br />
“duration”:<br />
This parameter affects the duration of the notes inside the MIDI files (NOT the MIDI file<br />
duration!). Values below 100% will shorten the notes.<br />
randomizers “time”, “velocity”, „note”:<br />
<strong>Engine</strong> comes with three powerful humanize options to give your MIDI files an incredibly<br />
realistic human touch.<br />
87
88<br />
CHAPTER 5<br />
Pro Edit<br />
„note offset“:<br />
Use this parameter to transpose the entire MIDI file in semitones.<br />
“play range”:<br />
Only velocities inside this range get played.<br />
„speed” pull-down menu:<br />
Here you can select the playback speed of your MIDI file:<br />
• 1/4 x speed: playback in 1/4 speed of the original MIDI file tempo (host tempo or<br />
<strong>Engine</strong> internal tempo).<br />
• 1/2 x speed: playback in 1/2 speed of the original MIDI file tempo (host tempo or<br />
<strong>Engine</strong> internal tempo).<br />
• 1 x speed: playback in original MIDI file tempo (host tempo or <strong>Engine</strong> internal<br />
tempo).<br />
• 2 x speed: playback in double speed of the original MIDI file tempo (host tempo or<br />
<strong>Engine</strong> internal tempo).<br />
• 4 x speed: playback in quadruple speed of the original MIDI file tempo (host tempo or<br />
<strong>Engine</strong> internal tempo).<br />
„transpose” button:<br />
Here you can activate the automatic transposition of the MIDI files - only available in<br />
“expert” mode.<br />
„auto select” button:<br />
If you activate this feature, any chord you play on your keyboard will automatically get<br />
selected in the “select chord” pull-down menu. This is very useful for creating your custom<br />
arrangements.<br />
IMPORTANT: If you assign MIDI files for the inversions of chords, please keep in mind<br />
that you have to use MIDI files for the inversions that are 1 octave below<br />
the original chord.
Time Modulator<br />
<strong>Best</strong> <strong>Service</strong> <strong>Engine</strong> 2.0<br />
<strong>Manual</strong><br />
The Time Modulator is a very useful modifier for the time-related customization of the noteon<br />
and note-off behaviour of your instruments.<br />
Here an example for a better understanding:<br />
If you perform a conga set with the keyboard you will recognize that there are also hand<br />
noises FX beside the instrument samples.<br />
If you press a key an your keyboard a note-on signal gets send and the instrument sound<br />
gets played. As soon as you release the key, a note-off signal gets send and the hand<br />
noise FX sound gets played.<br />
In practice the permanent repeat of this effect can sometimes be unwanted - if you press<br />
and hold a key for a long time, for example. In this case there is a natural release of the<br />
sound sample and the note-off hand noise FX will not sound like the behaviour of a real,<br />
live played instrument.<br />
The <strong>Engine</strong> Time Modulator is the solution for this problem:<br />
You can specify a time range - depending on your instrument - in which note-off signals get<br />
played. Any note-off signal outside this range will not be played.<br />
In detail:<br />
Note-off signals that are sent before the entered minimum value get played normally.<br />
Note off signals that are sent between the entered minimum and maximum value get<br />
played depending on the modifier you assigned to the Time Modulator - from 100% to 0%.<br />
Note-off signals that are sent above the entered maximum value do not get played.<br />
For the conga example the Time Modulator setup could look like this:<br />
• Select the Time Modulator and assign the destination “note-off”.<br />
• For very shortly played notes we always want to get the hand noise FX when the key is<br />
released, so we set the minimum time to 300 milliseconds. This means that if you<br />
release the key during 300 milliseconds, the hand noise FX sounds get played.<br />
• A naturally sounding maximum value for the congas is 2 seconds. This means that if you<br />
release a key between 300 milliseconds and 2 seconds, the hand noise FX sounds get<br />
played with an decreasing velocity - from 100% to 0% of the velocity you played on the<br />
keyboard. This simulates a naturally sounding hand noise effect depending on the tempo<br />
of your perfomance.<br />
• Any note-off signals above 2 seconds do not get played.<br />
TIP: To get even more authenticity and an incredibly real live feeling for your conga<br />
performance, you can add the modifier “random” and select “volume” as<br />
destination.<br />
89
90<br />
CHAPTER 5<br />
Pro Edit<br />
The Time Modulator offers a lot more possibilities that just the management of your noteoff<br />
behaviour. Using the available modes of the Time Modulator and assigning different<br />
destinations you can create very custom and experimental sounding effects. Just check out<br />
one of the following setups:<br />
• Time Modulator mode “poly note-on to note on” with “pitch” destination.<br />
• Time Modulator mode “poly note-off to note on” with “volume” destination.<br />
• Time Modulator mode “mono note-off to note on” with “filter frequency” destination.<br />
The different modes of the Time Modulator are:<br />
• “poly note-on to note off”: Time Modulator starts with the note-off signal.<br />
• “poly note-on to note on”: Time Modulator starts with the second note-on signal that is<br />
not interrupted by a note-off signal.<br />
• “poly note-off to note on”: Time Modulator starts with the first note-on signal after a note-<br />
off signal.<br />
• The “mono” modes work the same way like the “poly” modes but are specially designed<br />
for legato perfomances.
Insert FX<br />
<strong>Best</strong> <strong>Service</strong> <strong>Engine</strong> 2.0<br />
<strong>Manual</strong><br />
In the right upper corner of the Flexible Modifier Editor there is an additional „insert FX“<br />
button. When activated the internal Flexible Modifier window will change to the insert<br />
effects page. Here you can assign all available insert filters and effects of <strong>Engine</strong> also to<br />
any Layer, Section or Alternate - completely independent from the insert FX settings in your<br />
Mixer page.<br />
The font color of the “insert FX” button will change into orange as soon as you’ve added<br />
insert effects or filters to your Layer. This way you will always know which Layer contains<br />
insert effects even if this part of <strong>Engine</strong> is currently not visible. In contrast to the Mixer<br />
(these insert FX settings only get saved in Projects) all the insert FX settings of the Pro<br />
Edit page automatically get saved in you Layer patch and thus are available immediately<br />
after reloading the Layer at a later date.<br />
The functionality and operation of this „insert FX“ section corresponds to the operation in<br />
the Mixer page. Since <strong>Engine</strong> contains very extensive insert filters and effects please refer<br />
to chapter „Insert Filters and Effects“ for all further details.<br />
91
92<br />
CHAPTER 6<br />
Browser<br />
Browser<br />
Overview<br />
The sophisticated file browser of <strong>Engine</strong> gives you immediate, fast and easy access to any<br />
files you can use in <strong>Engine</strong>.<br />
You get an overview of your <strong>Engine</strong> Projects, Layer Sets, Layers and Sections and also all<br />
available MIDI inside your <strong>Engine</strong> User folder - so you have five browsers in one.<br />
Beside the clear overview you can also search for any of your files in a way you have<br />
never experienced before in a software sampler: If you want to search for <strong>Engine</strong> Projects<br />
or Layers you can not only search for the file names but also for categories, dates, authors,<br />
etc. Searching for MIDI files can be done with the attributes bars, bpm, meter, etc. and the<br />
audio file search even accepts the attributes channels, beats, sample rate, size, etc.<br />
For MIDI and audio files the browser contains an automatic “pre-listen” function. If not<br />
deactivated, the playback of a file gets started as soon as you click on it. Additionally you<br />
can edit the pre-listen playback volume for audio files and you can select if MIDI files get<br />
played with their original tempo or your current <strong>Engine</strong> tempo.
Operation<br />
<strong>Best</strong> <strong>Service</strong> <strong>Engine</strong> 2.0<br />
<strong>Manual</strong><br />
At the top of the Browser page you have the six main buttons for the supported file types.<br />
Below these main buttons there are two “navigation arrows” to step through your folders,<br />
a “refresh” button for your <strong>Engine</strong> User Folder folder and a “home” button to switch back<br />
to the top level of the selected file type. On the upper right side of the browser there is the<br />
“search” option. We will explain this one later.<br />
To browse through your files there are two options:<br />
You can click on the triangle icons on the left of each folder to expand its content...<br />
93
94<br />
CHAPTER 6<br />
Browser<br />
... or you can open a folder with a double-click on its name:<br />
To load Projects, Layers and Sections you can use the buttons at the bottom or just<br />
double-click the file you want to load. Layers can also get added to your current Layers. In<br />
this case the Layers do not get loaded into the currently selected Layer (and thus do not<br />
replace the content of the Layer) but added as one or more new Layers.<br />
If there is no Layer existing and you import Layers, Sections or MIDI files, a new Layer gets<br />
created automatically.
Searching for files<br />
<strong>Best</strong> <strong>Service</strong> <strong>Engine</strong> 2.0<br />
<strong>Manual</strong><br />
One of the most sophisticated features of the <strong>Engine</strong> Browser is the search function. You<br />
can not only enter keywords for your search but you can also specify “where” <strong>Engine</strong><br />
should search for your keywords.<br />
Please click on the “search” pull-down menu to open the additional parameters.<br />
Now you can customize your search with the activation/deactivation of the available search<br />
options.<br />
To search for a file simply enter one or more keywords into the “search here...” text field.<br />
Already with the first character you enter <strong>Engine</strong> starts immediately with the search<br />
process.<br />
The last 20 keywords you entered get saved in the “recent searches” tab.<br />
95
96<br />
CHAPTER 6<br />
Browser<br />
File display<br />
The <strong>Engine</strong> Browser can also show you many attributes of your files. This way you can<br />
customize the file display at will to get always the file details you need.<br />
Press and hold the “ctrl.” key or use the right mouse button and click on the headline of<br />
the browser display. The “attributes” menu will open and you can now select which file<br />
attributes get displayed.<br />
Additionally you can also scale the width of your columns. Click on the hyphen of a column<br />
you want to scale up or down and drag it to the desired size. Use your mousewheel or the<br />
scroll bars to scroll the content of the display accordingly.
Information batch<br />
<strong>Best</strong> <strong>Service</strong> <strong>Engine</strong> 2.0<br />
<strong>Manual</strong><br />
For Projects, Layer Sets and Layers there is an information batch option at the bottom of<br />
the browser page. In the pull-down menu you can select which kind of information you<br />
want to add or replace. Afterwards enter the information in the textfield right beside the<br />
pull-down menu and press the “batch” button to start the process for your selected Projects<br />
or Layers.<br />
97
98<br />
CHAPTER 6<br />
Browser<br />
MIDI files<br />
As already mentioned before there are some special options for the search and display of<br />
MIDI files.<br />
You can use the “play” and “stop” buttons at the bottom of the browser to start or stop the<br />
playback of a MIDI file - so you can listen to it before you may load the file. The playback of<br />
the MIDI file will always the instrument(s) of the currently selected Layer.<br />
You can also activate the “autoplay” button - then the MIDI file playback starts automatically<br />
when you click on a MIDI file.<br />
On default the playback tempo of MIDI files is their original tempo. Click the “original<br />
tempo” button if you want to playback MIDI files in your current <strong>Engine</strong> tempo.<br />
To import a MIDI file in the currently selected Layer you can doubleclick on the file name or<br />
press the “execute” button. The MIDI file always gets imported to the key you select in the<br />
pull-down menu left beside the “execute” button.
<strong>Best</strong> <strong>Service</strong> <strong>Engine</strong> 2.0<br />
<strong>Manual</strong><br />
The search parameters for MIDI files are different from the Projects, Layer Sets, Layers<br />
and Sections parameters. Click on the “search” pull-down menu to select the parameters<br />
you want to use for your search.<br />
Also for the MIDI file search the last 20 keywords you entered get saved in the “recent<br />
searches” tab.<br />
Also the file display offers different columns if you are in the MIDI section.<br />
Press and hold the “ctrl.” key or use the right mouse button and click on the display<br />
headline to select the file details you want to get displayed.<br />
In the pull-down menu beside the “original tempo” button you can additionally edit the<br />
playback speed in the steps “1/2 x speed”, “1 x speed” and “2 x speed”.<br />
99
100<br />
Mixer<br />
CHAPTER 7<br />
Mixer<br />
„The mixer of <strong>Engine</strong> is very innovative and by far unique one of the most sophisticated<br />
plug-in mixer worldwide!“ - yellow tools CTO Drazen Vlahovic.<br />
The <strong>Engine</strong> mixer enables an extremely fast workflow and contains everything you need to<br />
finalize and perfect what you have done so far. It is not necessary to leave <strong>Engine</strong> to add<br />
additional insert filters and effects and edit them as requested.<br />
Next to many standard Inserts, <strong>Engine</strong> also comes with many specially optimized filters<br />
and effects. More precisely <strong>Engine</strong> contains a battery (built-in Inserts) of more than 30<br />
integrated filters and effects and is of course expandable with many professional present<br />
and upcoming yellow tools „Filter And Effect Extensions“.<br />
The <strong>Engine</strong> mixer is divided into 4 areas: Content Editor, Group Editor, Show/Hide Editor<br />
and the Channel Display.
Content Editor<br />
<strong>Best</strong> <strong>Service</strong> <strong>Engine</strong> 2.0<br />
<strong>Manual</strong><br />
Below the „edit content“ pull-down menu you have your Edit Selection window that<br />
contains the overview of all used and existing Layer Channels, Custom Channels (virtual<br />
internal channels), BUS Channels and Output Channels.<br />
You can easily select one or more channels (of any kind). Click on the channels to show<br />
the channels directly and connect them with additional functions afterwards - e.g. using<br />
the „show/hide“ pull-down menu to remove the selected channels, to show the selected<br />
channels or use the Group Editor to combine the selected channels to a new group.<br />
Back to the „edit content“ menu which we want to explain with the following example:<br />
Problem and solution:<br />
During your work with extensive Projects it will happen commonly that a few of the Custom<br />
and BUS Channels you‘ve created are not in use anymore and finally dispensable. For<br />
example you may have checked out multiple effects for different Layers or Groups and at<br />
the end there are still some Channels in your Project that are not in use anymore. Exactly<br />
this typical way of working is the reason for this great feature - be sure you‘ll love!<br />
Activating this feature is quite simple:<br />
- click on the „edit content“ pull-down menu.<br />
- select one of the three options, „remove all unused bus & custom channels“, for<br />
example<br />
- release the mouse button and <strong>Engine</strong> will check all BUS and Custom Channels<br />
if they are used and finally all unused channels get removed.<br />
SHORTCUTS: To select and edit multiple channels simultaneously hold the Mac Key<br />
(Mac OS X) or the Strg Key (Windows XP/Vista) and click on the<br />
channels you want to select.<br />
101
102<br />
CHAPTER 7<br />
Mixer<br />
Group Editor<br />
Maybe you‘ve wondered why we used the name „Section“ for a multi selection of multiple<br />
Zones and not the common name „Group“ in the prior „Mapping Editor“ chapter...<br />
Well, here is the reason: „Group“ is a reserved index for our built-in mixer, which stands for<br />
a multi selection of different channels which is a much more common naming in the music<br />
than a multi selection of Zones. The „Group Editor“ contains a „select group“ pull-down<br />
menu and an Edit Selection window. Just select one or more Channels (of any kind), then<br />
click on the „select group“ pull-down and choose between the following options:<br />
Click on „new group“ to create a group of all Channels you selected. You can assign a<br />
name to your new group afterwards.<br />
TIP: For a better overview we recommend you to use always very clear names for your<br />
GROUPS („Drum Kit Room 2 Complete“, for example). If you do not enter a<br />
name for your GROUP <strong>Engine</strong> uses an automatic naming with variables<br />
like „group 1“, „group 2“, etc.<br />
IMPORTANT: Working with the Group Editor is very easy and thus much more<br />
intuitive, easier and much faster. If you combine multiple channels to a<br />
group, you can edit the SOLO buttons or the VOLUME for all Channels<br />
of this group with one mouse click simultaneously, for example.<br />
Further options of the Group Editor are very similar and nearly self-explanatory, like<br />
„rename group“: Select the Group you want to rename from the „rename group“ pull-down<br />
menu and enter the new name in the text window afterwards. Press the „Return“ key and<br />
the new name gets accepted.<br />
SHORTCUTS: To select/edit multiple channels simultaneously hold the Mac Key (Mac)<br />
or the Strg Key (Windows) and click on the channels you want to select.
Show/Hide Editor<br />
<strong>Best</strong> <strong>Service</strong> <strong>Engine</strong> 2.0<br />
<strong>Manual</strong><br />
Definitely the most commonly used editing function of the mixer!<br />
The show/hide editor contains the appropriate pull-down menu and the Edit Selection<br />
Window. Clicking the pull-down menu the following dialog will show up:<br />
Click the desired editing option, like „hide selected“ in the screenshot above, and you will<br />
recognize that all channels you‘ve selected in the Edit Selection Window before now gets<br />
deselected and also the Channel Display at the bottom of this page show less Channels.<br />
IMPORTANT: The show/hide editor hides the channels only visually to enable a better<br />
and faster overview while you are working. Nothing gets deleted or<br />
removed from your Project and you can undo any action at any time.<br />
MIDI input pull-down menu<br />
If there is any MIDI automation activated the <strong>Engine</strong> mixer generally accepts the input from<br />
all MIDI channels (1 to 16). Use this pull-down menu if you want the mixer only to accept<br />
MIDI input from one specific MIDI channel. This is very useful if you work with multiple<br />
automated mixer parameters or insert FX parameters.<br />
103
104<br />
CHAPTER 7<br />
Mixer<br />
Channel Display<br />
At the bottom of the mixer page all existing channels (of any kind) are shown horizontally<br />
one after another. <strong>Engine</strong>‘s mixer contains 5 kinds of channels:<br />
- Layer Channels (name color: blue)<br />
- Custom Channels (name color: green)<br />
- BUS Channels (name color: orange)<br />
- Output Channels (name color: yellow)<br />
- Surround Channels (name color: yellow)<br />
These are shown in this order automatically. BUT: It is possible at any time to define your<br />
custom order of the channels. Just select one or more channels and move them with<br />
drag‘n‘drop to the left or to the right. You will see that now the channels are shown in a<br />
different - your - order.<br />
Of course the different channels distinguish significantly by their inner life and functionality:<br />
Layer Channel<br />
1<br />
2<br />
3<br />
4<br />
5<br />
6<br />
7<br />
8<br />
9<br />
10<br />
The Layer Channel is a graphic chart of a loaded Layer Patch.<br />
As soon as you load a new Layer Patch into <strong>Engine</strong>, a new<br />
channel gets added to the mixer automatically.<br />
A Layer Channel contains the following parameters:<br />
1. Insert Button<br />
2. Group Name<br />
3. Five successively ordered BUS sends including volume<br />
4. Audio Out selection pull-down menu<br />
5. Solo and Mute button<br />
6. Level indicator - maximum reached level index<br />
7. Volume fader and graphic level meter<br />
8. Volume chart<br />
9. Panorama chart<br />
10. Kind and number of Layer
Insert Button<br />
The Insert button has three different states:<br />
A B<br />
<strong>Best</strong> <strong>Service</strong> <strong>Engine</strong> 2.0<br />
<strong>Manual</strong><br />
A - Layer Channel contains NO Insert Filters and Effects<br />
B - Layer Channel contains Insert Filters and Effects and/or the Insert window is open<br />
The standard status of this button is „A“. If you click the button the Insert window opens to<br />
the right side and the status switches to „C“.<br />
In the opened Insert window you can instance and edit the powerful built-in Insert Filters<br />
and Effects that come with <strong>Engine</strong>. You can add unlimited Inserts for to each Layer and<br />
additionally change the order of the inserts dynamically per drag‘n‘drop.<br />
If you click the Insert button again after you‘ve added Inserts the Insert window will close<br />
and the status of the button switches to „B“.<br />
All further information about the <strong>Engine</strong> Filters and Effects are explained very detailed in<br />
chapter “Insert Filters and Effects”.<br />
IMPORTANT: As soon as you instance additional Insert Filters and Effects for a Layer,<br />
a little „Insert“ label gets added to the channel name in the „Edit Content“<br />
and „Show/Hide“ windows. This is very helpful in practice as it supports<br />
an optimum overview.<br />
Group Name<br />
This chart shows the name of the Group - if existing.<br />
105
106<br />
CHAPTER 7<br />
Mixer<br />
BUS sends<br />
<strong>Engine</strong> allows the use of unlimited BUS Channels - and especially with the option to add<br />
as much additional Custom Channels as wanted you will be able to create your custom<br />
environment.<br />
For each Layer Channel you use 5 additional BUS sends, each with the following<br />
parameters:<br />
Pre or post selection, bypass, BUS send volume adjustment and the option to route to a<br />
new or already existing BUS channel.<br />
IMPORTANT: „Pre“ or „post“ assigns if the incoming signal gets routed with its original<br />
volume settings (pre) or including the value of the volume parameter<br />
(post) and thus with edited volume settings.<br />
With the first assignment always „post“ is selected automatically.<br />
You can change this selection at any time using the pull-down menu.<br />
SHORTCUTS: To bypass the BUS Channel you can also press the ALT key<br />
(Mac OS X and Windows XP/Vista) and click the channel you<br />
want to bypass.
Audio Out selection pull-down menu<br />
<strong>Best</strong> <strong>Service</strong> <strong>Engine</strong> 2.0<br />
<strong>Manual</strong><br />
Clicking on the Audio Out pull-down menu you will get a menu with all available outputs.<br />
Just select the output channel you want and your channel gets routed accordingly.<br />
The Audio Our pull-down menu always contains all currently available output channels, so<br />
you can select any Mono, Stereo or Surround channels at will.<br />
Solo and Mute button<br />
Solo and Mute are standard parameters of a channel to play or mute only the selected<br />
channel.<br />
Level indicator<br />
A very useful display! It always shows the maximum reached volume of your session. If<br />
you want or need a new calculation of this value you can reset the level indicator with a<br />
click on the display. Thus the prior value gets deleted and the current value gets calculated.<br />
SHORTCUTS: If you hold the Mac Key (MAC OS X) or the Strg Key (Windows XP/Vista)<br />
and then click the display, all level indicators of all channels of your<br />
session/Project gets reset.<br />
Volume fader and graphic level meter<br />
Just a short comment to these self-explanatory parameters:<br />
Depending on the type of the channel (Mono, Stereo, Surround 5.0, 5.1, etc.) the dynamic<br />
level meter switches automatically to the „correct“ display form. So the level meter of a<br />
Mono channel (of any kind) is displayed with only one bar, for example, or a Surround 5.0<br />
channel with 5 smaller bars.<br />
Volume chart<br />
Next to the volume fader of the „volume fader and graphic level meter“ area you can also<br />
use this parameter to change the volume. The volume display additionally shows the<br />
precise position in dB.<br />
TIP: To get an even finer adjustment of the volume you can also enter the desired value<br />
directly or push and hold the SHIFT Key (Mac OS X and Windows XP/Vista), click<br />
on the value and drag or and down.<br />
107
108<br />
CHAPTER 7<br />
Mixer<br />
Panorama chart<br />
This parameter is only available for Mono and Stereo channels and changes the panorama<br />
of the complete channel.<br />
Channel types<br />
A B C D E<br />
To keep track of your mixer<br />
environment each channel<br />
contains its name/type and<br />
number at the bottom (e.g.<br />
Bus Stereo 2). You can<br />
rename the channels with a<br />
double-click.<br />
Additionally the different<br />
channel types are displayed<br />
in different colors. The<br />
names of Output Channels<br />
are displayed yellow, for<br />
example.<br />
This area is also useful<br />
to move your channel<br />
to another position<br />
(drag‘n‘drop) or to select one<br />
or more channels to add/<br />
combine them to a Group.<br />
The <strong>Engine</strong> mixer contains<br />
the following five types of<br />
Channels:<br />
A - Layer Channel<br />
B - Custom Channel<br />
C - BUS Channel<br />
D - Output Channel<br />
E - Surround Output Channel<br />
Output Channels are sort of the physical forwarding to your sequencer software or<br />
directly to your sound card. The maximum number of Output Channels depends on your<br />
sequencer software or your DA converter and is additionally limited to 64 Mono and 64<br />
Stereo channels per instance. To adjust this number accordingly please read the chapter<br />
„Preferences“.
Automation<br />
<strong>Best</strong> <strong>Service</strong> <strong>Engine</strong> 2.0<br />
<strong>Manual</strong><br />
<strong>Engine</strong> offers MIDI automation with 128 MIDI CCs (Continuous Controller) per MIDI<br />
channel and host automation with 128 host channels per entity. You can use MIDI and host<br />
automation for the channel parameters “volume”, “panorama”, “solo”, “mute” and “BUS<br />
volume” of the <strong>Engine</strong> mixer AND for the insert filters and effects in the mixer area and the<br />
modules area.<br />
On the following pages we will explain the MIDI and host automation assignment of<br />
parameters in <strong>Engine</strong>. Please read the user manual of your host application about the<br />
required settings and assignments for automation in your sequencer software.<br />
IMPORTANT: Because of the flexibility and the nearly limitless possiblities of<br />
<strong>Engine</strong> no parameter names get used for the automation but only<br />
numbers. This enables you to use the same insert filter or effect multiple<br />
times in <strong>Engine</strong> with different automations assigned to the<br />
same parameter.<br />
Setup of an automation<br />
To automate a parameter please click the held „ctrl“ key on the desired parameter to<br />
open the automation pull-down menu (example MIDI automation of the „Multi Mode Filter“<br />
parameter „Frequency“):<br />
109
110<br />
CHAPTER 8<br />
Automation<br />
Select the MIDI controller number „26“ and move your controller 26 of your MIDI keyboard<br />
(or any other MIDI controller) afterwards. You will recognize that the „Frequency“ value will<br />
change accordingly. To make the assignment of MIDI controllers even easier we integrated<br />
next to the manual assignment also a „midi learn“ function. Just click on this option in<br />
the pull-down menu and move any controller of your MIDI keyboard you want to use for<br />
„Frequency“ afterwards. <strong>Engine</strong> recognizes the CC number and its position automatically<br />
and assigns this number to „Frequency“ accordingly.<br />
The “custom learn” option is only available for Layer inserts - not in the mixer. Use this<br />
option to assign the selected parameter to one of the custom remote knobs or buttons on<br />
the Quick Edit page - or select the “custom ctrl #” menu for manual assignment.<br />
You can always view the currently selected controler number of a parameter in the „midi<br />
ctrl #“, „host ctrl #“ or „custom ctrl #“ menus at any time and of course also change it<br />
manually.<br />
The host automation works exactly the same way - you can assign host controller channels<br />
both manually and with „host learn“ (example: “BUS volume” parameter of a “Layer<br />
channel” in the mixer):<br />
Numbers marked with a “*” show an already assigned/used controller number for a MIDI or<br />
host automation.
Additional automation features<br />
<strong>Best</strong> <strong>Service</strong> <strong>Engine</strong> 2.0<br />
<strong>Manual</strong><br />
The automation pull-down menu contains beside the „learn“ and manual assignment of<br />
automation controllers also additional and very useful parameters:<br />
• „off“: With this option you can delete the automation of the assigned parameter.<br />
• „bypass“: With this option you will not delete the automation but only mute it<br />
temporarily. The assigned controller number maintains.<br />
• „invert“: If you activate this option, <strong>Engine</strong> will process the incoming<br />
messages from your controller inverted.<br />
• „set automation minimum value“ & „set automation maximum value“:<br />
Beside the general automation of parameters you can additionally set a<br />
minimum and maximum automation value for each parameter. This means<br />
that you can use the full range (0% to 100%) of the selected controler only<br />
for a specified value range of the assigned (automated) parameter.<br />
Set the parameter to your desired minimum/maximum value and select the<br />
minimum/maximum option in the pull-down menu afterwards.<br />
• „recall automation minimum value“ & „recall automation maximum value“:<br />
Select this option and the parameter value will switch to the currently<br />
assigned minimum/maximum value immediately.<br />
• „reset automation range“: Select this option to reset both the current minimum and the<br />
current maximum values for the automated parameter.<br />
111
112<br />
CHAPTER 8<br />
Automation<br />
• „no automation range scaling“: Select this option to automate a parameter only<br />
within the assigned range. Below or above this range there will no more<br />
changes of the parameter (the last valid value of the range will be used<br />
above/below the maximum/minimum). This option is very useful if you<br />
assigned several parameters to the same Custom Knob. An example:<br />
The following parameters get assigned to the same Custom Knob:<br />
Volume from 0% to 100% - Panorama from 30% to 80% - Reverb WET from<br />
50% to 100%.<br />
Depending on your automation you will get great sounding fades between<br />
different parameter value changes on one Custom Knob.<br />
• „curve“: You can also adjust the settings of the curve behavior from the minimum to<br />
the maximum value. These values can get select between 2, 3 and 4 times<br />
faster/slower as the original curve.<br />
This is very useful if you want to x-fade between 2 parameters - between the<br />
parameters „dry“ and „wet“ of an Origami Impulse Response Processor, for<br />
example
Visual presentation of automated parameters<br />
<strong>Best</strong> <strong>Service</strong> <strong>Engine</strong> 2.0<br />
<strong>Manual</strong><br />
As soon as a parameter of <strong>Engine</strong> is automated, the color of the parameter value<br />
will change. In <strong>Engine</strong> parameters can be indicated in four different ways (example:<br />
„Frequency“):<br />
1.) Standard view: Parameter without automation (color “yellow”).<br />
2.) „midi learn“/„host learn“ view: A „learn“ option for the parameter „Frequency“ was<br />
activated (color “orange”).<br />
3.) Automated view: The parameter „Frequency“ is automated (color “green”).<br />
4.) „bypass“ view: he parameter „Frequency“ is automated but currently muted (color<br />
“grey”).<br />
113
114<br />
CHAPTER 9<br />
Insert Filter and Effects<br />
Insert Filters and Effects<br />
Manipulation is a very popular instrument to edit and customize your sounds. For this<br />
purpose <strong>Engine</strong> offers over 45 stunning filters and effects in ultimate perfection. Since<br />
you can add the available insert filters and effects to both your channels in the built-in<br />
Mixer and to the Flexible Modifier Editor per Layer, Section or Alternate, all details and<br />
explanations in this chapter apply to the Inserts in general, independent from where you<br />
may use them. Regarding the Inserts there are some general but important statements:<br />
• You can add unlimited! Insert filters and effects.<br />
• You can change the order of the Inserts simply per drag‘n‘drop.<br />
• Any Insert that contains a „sync“ button is fully synchronizable to your sequencer<br />
software (host) or to the <strong>Engine</strong> internal tempo and you can also choose the<br />
mode of synchronization.<br />
• Beside the main „insert fx bank“ pull-down menu, that enables you to load, save and<br />
copy/paste already prepared presets of multiple inserts, also each individual insert filter<br />
or effect contains its own „preset“ pull-down menu that includes all these options.<br />
• You can minimize the editing display of each insert with a click on the open/close<br />
triangle in the upper left corner.<br />
• Wherever you may save a preset of your custom insert settings, it will always be<br />
available in the preset pull-down menus of both areas, the Mixer and the Flexible<br />
Modifiers.<br />
IMPORTANT:The processing of the activated insert filters and effects will always be<br />
calculated in the order top down.<br />
Load, save & remove insert filters and effects<br />
As soon as you work with <strong>Engine</strong>‘s insert filters and effect, the upper „insert menu bar“<br />
comes up. There are two ways to load or save an insert filter or effect. You can use the<br />
„insert fx bank“ pull-down menu to load or save a group of inserts at the same time.
<strong>Best</strong> <strong>Service</strong> <strong>Engine</strong> 2.0<br />
<strong>Manual</strong><br />
Use the copy/paste options to transfer the current settings to another Layer, Section or<br />
Alternate without having to save them before. Use the „rebuild menu“ option to refresh the<br />
presets pull-down menu if you have copied presets into your <strong>Engine</strong> User Folder during<br />
your work.<br />
IMPORTANT:If you load an insert fx bank ALL your currently loaded insert filters and<br />
effects get replaced automatically!<br />
The other way is to load or save individual insert filters and effect. Click with your mouse<br />
on the „add insert fx“ pull-down menu. Select the insert you want to add to your channel,<br />
Layer, Section or Alternate and release the mouse button. The selected insert gets added<br />
to the insert display below the pull-down menu. You can add as many inserts as you want<br />
and thus create your custom virtual insert filter and effect rack.<br />
To remove a currently loaded insert simply select the insert you want to remove and click<br />
the „remove“ button in the upper right corner of the insert display. To remove multiple<br />
inserts at the same time, press and hold the „shift“ key and click on all inserts you want<br />
to remove. There is a main „bypass“ button in the upper left corner of the insert display.<br />
If activated ALL currently loaded insert filters and effects get muted. Of course also each<br />
individual insert contains a separate „bypass“ button.<br />
IMPORTANT: If you save the settings of any insert as “autoload.ytp” file in the respective<br />
folder, the currently adjusted parameter values get loaded as default when<br />
ever you add the insert again!<br />
115
116<br />
CHAPTER 9<br />
Insert Filter and Effects<br />
Equalizers<br />
Equalizer provide controls to boost or cut specified frequencies of the audio signal.<br />
4 band parametric EQ<br />
Lowshelf: Below the adjusted frequency the audio signal is boosted (positive dB<br />
values) or cut (negative dB values).<br />
Band 1: Depending on the selected slope of the curve (value 3) the adjusted<br />
frequency is boosted (positive dB values) or cut (negative dB values).<br />
Band 2: Depending on the selected slope of the curve (value 3) the adjusted<br />
frequency is boosted (positive dB values) or cut (negative dB values).<br />
Highshelf: Above the adjusted frequency the audio signal is boosted (positive dB<br />
values) or cut (negative dB values).<br />
Output Gain: The output volume of the audio signal.<br />
6 band parametric EQ<br />
Same as „4 Band parametric EQ“ but with four identical filters.
Vintage 3 band EQ<br />
<strong>Best</strong> <strong>Service</strong> <strong>Engine</strong> 2.0<br />
<strong>Manual</strong><br />
As the name implies: A precise reproduction of a Vintage EQ. The slope of the curve is<br />
already determined for each filter.<br />
Band 1: The adjusted frequency can get boosted (positive dB values) or cut (negative<br />
dB values).<br />
Frequency: Specifies the frequency, above/below which the audio signal gets boosted/<br />
cut.<br />
Output Gain: The output volume of the audio signal.<br />
117
118<br />
Filters<br />
CHAPTER 9<br />
Insert Filter and Effects<br />
2D Filter<br />
With the 2D Filter you can boost or cut the range of<br />
frequencies - depending on the selection of your filter<br />
type and slope. Use the spot in the 2D matrix to edit<br />
both parameters „Frequency“ and „Resonance“<br />
simultaneously.<br />
Slope: Pull-down menu to select the filter type and slope.<br />
Frequency: Specifies the frequency, above/below which the audio signal gets boosted/<br />
cut.<br />
Resonance: Emphasis of the selected frequency from 0% (no emphasis) to 100%<br />
(maximum emphasis).<br />
X-Filter<br />
With X-Filter you can assign an infinitely variable fade between the three filter types „Low<br />
Pass“, „Band Pass“ and „High Pass“.<br />
Frequency: Specifies the frequency, above/below which the audio signal gets boosted/<br />
cut.<br />
Resonance: Emphasis of the selected frequency from 0% (no emphasis) to 100%<br />
(maximum emphasis).<br />
Slope: Pull-down menu to select the slope.<br />
Filter Mode: Fade between „Low Pass“, „Band Pass“ and „High Pass“ from 0% to 100%.
Filter Follower<br />
<strong>Best</strong> <strong>Service</strong> <strong>Engine</strong> 2.0<br />
<strong>Manual</strong><br />
Same as X-Filter. Additionally the Filter Follower changes the settings for „Frequency“ and<br />
„Resonance“ of the selected „Slope“ and „Filter Mode“ in a dynamic ratio to the volume of<br />
the audio signal.<br />
Frequency: Specifies the frequency, above/below which the audio signal gets boosted/<br />
cut.<br />
Resonance: Emphasis of the selected frequency from 0% (no emphasis) to 100%<br />
(maximum emphasis).<br />
Slope: Pull-down menu to select the slope.<br />
Filter Mode: Fade between „Low Pass“, „Band Pass“ and „High Pass“ from 0% to 100%.<br />
Intensity: Intensity of the filter.<br />
Attack: The moment the filter will apply after the audio signal started.<br />
Release: The moment as of the filter will not apply any longer after the audio signal<br />
softens.<br />
Output Gain: The output volume of the audio signal.<br />
Low Cut Filter<br />
With the Low Cut Filter you can cut low frequencies depending on the selected slope.<br />
Slope: Pull-down menu to select the filter type and slope.<br />
Frequency: Specifies the frequency, below which the audio signal gets cut.<br />
119
120<br />
CHAPTER 9<br />
Insert Filter and Effects<br />
High Cut Filter<br />
With the High Cut Filter you can cut high frequencies depending on the selected slope.<br />
Slope: Pull-down menu to select the filter type and slope.<br />
Frequency: Specifies the frequency, above which the audio signal gets cut.<br />
Multi Mode Filter<br />
The „Multimode Filter“ allows the usage of the three filter types „Low Pass“, „Band Pass“<br />
and „High Pass“ simultaneously.<br />
Slope: Pull-down menu to select the slope.<br />
Frequency: Specifies the frequency, above/below which the audio signal gets boosted/cut.<br />
Resonance: Emphasis of the selected frequency from 0% (no emphasis) to 100%<br />
(maximum emphasis).<br />
Low Pass: Volume of the Low Pass part.<br />
Band Pass: Volume of the Band Pass part.<br />
High Pass: Volume of the High Pass part.
LFE Filter<br />
<strong>Best</strong> <strong>Service</strong> <strong>Engine</strong> 2.0<br />
<strong>Manual</strong><br />
If you are working in a surround format that contains a LFE, you can use this filter to cut<br />
high frequencies depending on the selected slope.<br />
LFE creator: Creates a new additional LFE channel out of all available channels.<br />
Slope: Pull-down menu to select the filter slope.<br />
Frequency: Specifies the frequency, above which the LFE signal gets cut.<br />
Output Gain: The output volume of the audio signal.<br />
IMPORTANT: To use the “LFE creator” option you have to select a surround format<br />
that allows an LFE channel (5.1, for example) in the input and output<br />
pull-down menus.<br />
Satellites HP Filter<br />
If you are working in a surround format you can use this filter to cut low frequencies<br />
depending on the selected slope.<br />
Slope: Pull-down menu to select the filter slope.<br />
Frequency: Specifies the frequency, below which the audio signal gets cut.<br />
Output Gain: The output volume of the audio signal.<br />
121
122<br />
CHAPTER 9<br />
Insert Filter and Effects<br />
Dynamics<br />
Compressor<br />
With the „Compressor“ you can reduce the dynamic of your audio signal and thus the<br />
differences between soft and loud signals. Thereby you can turn up the overall signal<br />
higher without exceeding the available headroom and causing unwanted distortions. The<br />
result is more presence and punch of your audio signal.<br />
Input Gain: Here you can turn up or down the volume of your input signal before the<br />
compression applies.<br />
Treshold: Sets the level above which the compressor starts reducing peaks.<br />
Ratio: Determines the amount of compression.<br />
Attack: Sets how long it takes for compression to kick in after the input signal<br />
exceeds the treshold level.<br />
Release: Determines how long it takes for the compression action to stop after the<br />
input signal falls below the treshold level.<br />
Knee: The curve character of the starting compression after exceeding the treshold<br />
level. 0% is a hard start of the compression, 100% an extremely soft start.<br />
Lookahead: This value balances small fluctuations of the audio signal within the entered<br />
time in milliseconds.<br />
Output Gain: The output volume of the audio signal.
Limiter<br />
<strong>Best</strong> <strong>Service</strong> <strong>Engine</strong> 2.0<br />
<strong>Manual</strong><br />
A Limiter regulates the output level of the audio signal gently down, before an overregulation<br />
can take place. Finally the Limiter is also like an „extreme type“ of the<br />
compressor, since it works according to the same principle as the compressor, however the<br />
level of the compression is substantially higher.<br />
Treshold: Determines the value in dB about how much you want to raise the volume of<br />
your audio signal.<br />
Release: Determines how long it takes for the limiter action to stop after the input<br />
signal falls below the treshold level.<br />
Output Gain: The output volume of the audio signal.<br />
Gater<br />
A Gater only lets an audio signal pass through if a determined volume level of the audio<br />
signal is exceeded. With the Gater you can avoid noises of the audio signal and also<br />
control its dynamic.<br />
Treshold: Sets the volume level above which the gater lets the audio signal pass through.<br />
Attack: The rise time of the audio signal after it exceeds the treshold level.<br />
Hold: This value balances small fluctuations of the audio signal within the entered<br />
time in milliseconds.<br />
Release: Determines how long it takes for the gater action to stop after the input signal<br />
falls below the treshold level.<br />
123
124<br />
CHAPTER 9<br />
Insert Filter and Effects<br />
Modulation<br />
Chorus<br />
Chorus doubles the audio signal and detunes the copy compared to the original signal.<br />
Thereby the audio signal sounds softer and is more present.<br />
Depth: Determines the level of the modulation in %.<br />
Speed: Determines the speed of the modulation in hertz.<br />
HF Damp: All frequencies of the audio file above the set value get cut.<br />
Spread: Limitation of the panorama ratio from both sides simultaneously. 100%<br />
corresponds to the full stereo panorama, 0% corresponds to mono.<br />
Dry/Wet: Volume relation between the unprocessed (dry) and the processed (wet) audio<br />
signal.<br />
Sync: Enables the synchronization of the „Speed“ parameter (changes into a select<br />
pull-down menu) to the tempo of your sequencer software (host).<br />
Flanger<br />
Flanger doubles the audio signal and delays the copy compared to the original signal.<br />
Depth: Determines the level of the modulation in %.<br />
Speed: Determines the speed of the modulation in hertz.<br />
HF Damp: All frequencies of the audio file above the set value get cut.<br />
Feedback: Routes the delayed signal back to the module‘s input. Higher values create a<br />
more intense effect.<br />
Spread: Limitation of the panorama ratio from both sides simultaneously. 100%<br />
corresponds to the full stereo panorama, 0% corresponds to mono.<br />
Dry/Wet: Volume relation between the unprocessed (dry) and the processed (wet) audio<br />
signal.<br />
Sync: Enables the synchronization of the „Speed“ parameter (changes into a select<br />
pull-down menu) to the tempo of your sequencer software (host).
Phaser<br />
<strong>Best</strong> <strong>Service</strong> <strong>Engine</strong> 2.0<br />
<strong>Manual</strong><br />
Like „Flanger“ also the „Phaser“ effect splits the input signal, manipulates the frequencies<br />
of one split and then sums the two splits back together.<br />
The result sounds similar to a flanger, but softer and subtler.<br />
Speed: Determines the speed of the modulation in hertz.<br />
Start Freq: Sets the start frequency of the Phaser effect.<br />
Range: Determines the range around the start frequency in which the phaser<br />
modulation takes place. 0% corresponds to no modulation, 100% corresponds<br />
to maximum modulation.<br />
Feedback: Routes the delayed signal back to the module‘s input. Higher values create a<br />
more intense effect..<br />
Spread: Limitation of the panorama ratio from both sides simultaneously. 100%<br />
corresponds to the full stereo panorama, 0% corresponds to mono.<br />
Dry/Wet: Volume relation between the unprocessed (dry) and the processed (wet) audio<br />
signal.<br />
Sync: Enables the synchronization of the „Speed“ parameter (changes into a select<br />
pull-down menu) to the tempo of your sequencer software (host).<br />
125
126<br />
CHAPTER 9<br />
Insert Filter and Effects<br />
Ring Modulator<br />
The Ring Modulator modulates specified adjusted frequency ranges.<br />
Shape: Here you can assign the type of the modulation progress (sinus, square, saw).<br />
Frequency: Here you can adjust the frequency range from 10Hz to 20kHz.<br />
Rotary<br />
This effect is the simulation of a Rotary Speaker.<br />
Crossover: Here you can separate the frequency range of the signal processing - in<br />
above and below the entered value.<br />
Depth: The time-based length of the rotary processing.<br />
Dry/Wet: Here you can adjust the ratio of the non-processed (dry) and processed<br />
(wet) signal.<br />
Output Gain: The output volume of the audio signal.<br />
Low Rate: The frequency of the lower oscillator<br />
Low Trem.: The intensity of the lower oscillator<br />
High Rate: The frequency of the upper oscillator<br />
High Trem.: The intensity of the upper oscillator<br />
Sync: Enables the synchronization of the „low rate“ and “high rate” parameters to<br />
the tempo of your sequencer software (host).
Vinylizer<br />
<strong>Best</strong> <strong>Service</strong> <strong>Engine</strong> 2.0<br />
<strong>Manual</strong><br />
<strong>Engine</strong>‘s Vinylizer includes three different vinyl types (33, 45, 78 tempo) to simulate the<br />
sound of old recordings. Beside the different tempos you can additionally choose between<br />
three categories:<br />
1 = new recording<br />
2 = old recording<br />
3 = very old recording<br />
Model: Selection of the vinyl type.<br />
Model Vol: Volume of the selected vinyl type.<br />
Clicks: Simulation of the „Crackle“ noises of old recordings. 0% corresponds to no<br />
noises, 100% corresponds to many noises.<br />
An authentic value is between 3% and 7%.<br />
Clicks Vol: Volume of the „Crackle“ noises in dB.<br />
Noise: Simulation of noise of old recordings dB.<br />
Lowpass: All frequencies above the set value get cut.<br />
Highpass: All frequencies below the set value get cut.<br />
Output Gain: The output volume of the audio signal.<br />
127
128<br />
CHAPTER 9<br />
Insert Filter and Effects<br />
Distortion<br />
Time clipper<br />
Time Clipper „hacks“ the audio signal and produces an analog rhythmic distortion. This<br />
distortion is however not static, but dynamic - in dependence to the „Depth“ and „Speed“<br />
parameters.<br />
Treshold: Sets the value for Time Clipper to start after the input signal exceeds the<br />
treshold level.<br />
Gain: Determines the level of the modulation in dB.<br />
Depth: Determines the level of the modulation in %.<br />
Speed: Determines the speed of the modulation in hertz.<br />
Volume: The output volume of the audio signal.<br />
Sync: Enables the synchronization of the „Speed“ parameter (changes into a select<br />
pull-down menu) to the tempo of your sequencer software (host).<br />
Bit reduction<br />
Bit reduction reduces the resolution of the audio signal. Thus you can reduce the sound<br />
quality and you can simulate the sounds of older equipment.<br />
Bit Reduct: Here you can assign the new resolution to your audio signal.<br />
24 bit correspond to the current standard of recording studios, 16 bit to an<br />
audio-cd, 8 bit to older samplers and drum machines, 4 bit to very cheap<br />
sound generators (toys, for example).<br />
Sample Red.: Reduces the number of frames and thus creates interesting effects.<br />
Aliased: If sample reduction is used, you can activate this option to avoid unwanted<br />
clicks.<br />
Drive: Creates a digital distortion.
Dual band distortion<br />
<strong>Best</strong> <strong>Service</strong> <strong>Engine</strong> 2.0<br />
<strong>Manual</strong><br />
Dual Band Distortion splits the audio signal and produces an analog distortion. Each split<br />
gets modulated separately.<br />
Frequency: Sets the frequency value where the audio signal gets split.<br />
Drive A: This is the range below the set frequency. The set dB value determines the<br />
volume of the modulation.<br />
Drive B: This is the range above the set frequency. The set dB value determines the<br />
volume of the modulation.<br />
Color: With „color“ you can make the modulated audio signal brighter or closer.<br />
Negative values produce a closer sound, positive values produce a brighter<br />
sound.<br />
Volume: The output volume of the audio signal.<br />
Tube distortion<br />
Tube Distortion produces an analog symmetric or asymmetric distortion of the audio signal.<br />
Drive: The assigned dB value determines the volume level of the modulation.<br />
Low Cut: Specifies the frequency, below which the audio signal gets cut.<br />
HF Damp: All frequencies of the audio file above the set value get cut.<br />
Shape: Here you can choose between symmetric and asymmetric processing.<br />
Volume: The output volume of the audio signal.<br />
129
130<br />
Delay<br />
CHAPTER 9<br />
Insert Filter and Effects<br />
Sample delay<br />
With „Sample Delay“ you can assign a time related movement of the audio signal.<br />
Time L: The delay of the left channel in milliseconds.<br />
Time R: The delay of the right channel in milliseconds.<br />
Link Button: If activated, the entered value gets also assigned to the other channel<br />
automatically. If you edit the value of one channel with your mouse, the value<br />
of the other channel gets scaled accordingly.<br />
Sync Button: Enables the synchronization of the delay to the tempo of your sequencer<br />
software (host).<br />
Delay<br />
Delay can produce one or more delayed copies of the input signal and thus creates an<br />
echo-like sound.<br />
Delay L: The interval for the left channel between hearing the straight signal and the<br />
first delay of the delayed signal.<br />
Feedback L: Sends a portion of the output of the left channels back into the input of the<br />
delay line, which create repeating echoes. 0% corresponds to no delay,<br />
100% corresponds to many delays.<br />
Pan L: Panorama settings of the delay of the left channel from 100L (left) to 100R<br />
(right).<br />
Dry/Wet L: Volume relation between the unprocessed (dry) and the processed (wet) left<br />
channel of the audio signal.<br />
Delay R: The interval for the right channel between hearing the straight signal and the<br />
first delay of the delayed signal.<br />
Feedback R: Sends a portion of the output of the right channels back into the input of the<br />
delay line, which create repeating echoes. 0% corresponds to no delay,<br />
100% corresponds to many delays.
<strong>Best</strong> <strong>Service</strong> <strong>Engine</strong> 2.0<br />
<strong>Manual</strong><br />
Pan R: Panorama settings of the delay of the right channel from 100L (left) to 100R<br />
(right).<br />
Dry/Wet R: Volume relation between the unprocessed (dry) and the processed (wet) right<br />
channel of the audio signal.<br />
Sync: Enables the synchronization of the „Delay L“ and „Delay R“ parameters<br />
(they change into a select pull-down menu) to the tempo of your sequencer<br />
software (host).<br />
Filter Delay<br />
Same as „Delay“.<br />
Additionally you have two more parameters:<br />
Low Cut: Specifies the frequency, below which the audio signal gets cut.<br />
High Cut: Specifies the frequency, above which the audio signal gets cut.<br />
IMPORTANT: The parameters „Low Cut“ and „High Cut“ only correspond to the<br />
processed (wet) signal.<br />
Doubler<br />
Doubler produces a simple duplication of the audio signal.<br />
Time: Here you can assign the time distance between the original audio signal and<br />
the duplicated signal.<br />
131
132<br />
CHAPTER 9<br />
Insert Filter and Effects<br />
Panorama: Panorama settings of the duplicated audio signal from 100L (left) to 100R<br />
(right).<br />
Sync: Enables the synchronization of the „Time“ parameter (changes into a select<br />
pull-down menu) to the tempo of your sequencer software (host).<br />
Phase Invert: If activated, the phase of the newly generated signal gets inverted.<br />
Dry/Wet: Volume relation between the unprocessed (dry) and the processed (wet)<br />
audio signal.<br />
Echo<br />
With Echo you can simulate the typical echo effects of Vintage machines.<br />
Variation: Here you can select the volume progression of the echo effect: „Ramp Down“<br />
starts the first echo with its original volume level and the following echoes get<br />
turned down. „Ramp Up“ starts quiet and becomes louder. With „Constant“ all<br />
echoes have the original volume level of the audio signal.<br />
Delay: The interval between hearing the straight signal and the first echo of the<br />
delayed signal.<br />
Echoes: Number of echoes.<br />
De-Pan: Automatic movement of the echoes between the left and right channel.<br />
100% corresponds to a movement between the full stereo panorama, 0%<br />
corresponds to no movement.<br />
HF Damp: All frequencies of the audio file above the set value get cut.<br />
Dry/Wet: Volume relation between the unprocessed (dry) and the processed (wet)<br />
audio signal.<br />
Sync: Enables the synchronization of the „Delay“ parameter (changes into a select<br />
pull-down menu) to the tempo of your sequencer software (host).
Helper<br />
Volume<br />
Here you can assign volume changes to the entire audio signal.<br />
Panorama<br />
Here you can assign the panorama relation of your entire audio signal.<br />
<strong>Best</strong> <strong>Service</strong> <strong>Engine</strong> 2.0<br />
<strong>Manual</strong><br />
Panorama: Panorama settings from 100L (left) to 100R (right).<br />
Spread: Limitation of the panorama ratio from both sides simultaneously. 100%<br />
corresponds to the full stereo panorama, 0% corresponds to mono.<br />
Auto Pan: Automatic movement of the echoes between the left and right channel.<br />
100% corresponds to a movement between the full stereo panorama, 0%<br />
corresponds to no movement.<br />
A.P. Speed: The speed of the „Auto Pan“ movement in hertz. One complete movement in<br />
one second corresponds to 1.00 hertz.<br />
Sync Button: Enables the synchronization of the „Speed“ parameter (changes into a select<br />
pull-down menu) to the tempo of your sequencer software (host).<br />
XY panorama<br />
Here you can limit the panorama relation of the audio signal. You can assign different<br />
values to each channel.<br />
133
134<br />
CHAPTER 9<br />
Insert Filter and Effects<br />
Phase invert<br />
Here you can invert the phase of the left and/or right channel.<br />
Level meter<br />
The „Level Meter“ displays the current output volume level of the audio signal.<br />
Level meter Pro<br />
The „Levelmeter Pro“ shows RMS and peak values simultaneously:<br />
Calibration<br />
To calibrate the speakers for a surround environment you can use this helper.
Metronome<br />
<strong>Best</strong> <strong>Service</strong> <strong>Engine</strong> 2.0<br />
<strong>Manual</strong><br />
You can use <strong>Engine</strong>’s Metronome with custom tempo, synced to the tempo of <strong>Engine</strong> or<br />
synced to the tempo of your host.<br />
Reference Tone<br />
Use this helper to tune your <strong>Engine</strong> instruments or even your guitars, basses etc.<br />
Channel Manager<br />
A very powerful surround helper that also works in stereo format. Additionally you can route<br />
any channel of your surround format to „L“ (left) and „R“ (right) and thus create a mix down<br />
of your surround format to stereo.<br />
Please refer to the chapter “Pro Surround Environment” for more details.<br />
135
136<br />
CHAPTER 9<br />
Insert Filter and Effects<br />
Surround Panner<br />
The surround panner enables you to use instruments that contain stereo, mono and<br />
surround audio files in any <strong>Engine</strong> surround environment. Corresponding to the position of<br />
the stereo (L & R) or mono (M) or surround (S) icons new volume settings get calculated<br />
for all existing channels of your currently selected surround format.<br />
Radius: Here you can assign the radius of the surround panner. The inner orange<br />
circle displays the “center” dB value and the outer red circle displays the “rear<br />
minimum” dB value of the newly created audio signal.<br />
Mode: Here you can select the mono (for mono audio files), stereo (for stereo<br />
audio files) or surround (for surround files) surround panner.
<strong>Best</strong> <strong>Service</strong> <strong>Engine</strong> 2.0<br />
<strong>Manual</strong><br />
Center: Volume level of the center channel.<br />
LFE: Volume level of the LFE channel.<br />
Output gain: Output volume of all audio channels.<br />
Angle: Determines the angle of the left audio signal from 0° to 360°.<br />
Distance: Determines the distance of the left audio signal to the center position of the<br />
surround format.<br />
Type: In this pull-down menu you can select how to move the audio signal(s).<br />
• free: each audio signal gets moved individually<br />
• x mirror: The audio signals gets mirrored against the x-axis.<br />
• y mirror: The audio signals gets mirrored against the y-axis.<br />
• xy mirror: The audio signals gets mirrored against the x-axis and the y-axis.<br />
• sync: Parallel movement of the audio signals to the x-axis and the y-axis.<br />
Angle: The angle of the right audio signal from 0° to 360°.<br />
Distance: The distance of the right audio signal to the center position of the surround<br />
format.<br />
Front max.: The maximum volume level for the front position of the audio signal.<br />
Front min.: The minimum volume level for the front position of the audio signal.<br />
Center: The volume level for the center position of the audio signal.<br />
Rear max.: The maximum volume level for the rear position of the audio signal.<br />
Rear min.: The minimum volume level for the rear position of the audio signal.<br />
TIP 1: The distance parameter also allows negative values up to -100%. This way you<br />
can move the audio signal(s) from the front left position to the rear right position<br />
with a single move, for example.<br />
TIP 2: Use the surround panner in surround mode to balance your surround audio files.<br />
Keep in mind that any changes of the positions of a surround audio file may<br />
cause phases. Use the “Channel Manager” Helper insert to avoid this problem.<br />
137
138<br />
Reverb<br />
Reverb<br />
CHAPTER 9<br />
Insert Filter and Effects<br />
Reverb produces - unlike echo - continuous sonic reflections of the audio signal.<br />
Thus allows an extremely real simulation of reverbs of different rooms<br />
Model: Select between already prepared reverb simulations.<br />
Level: Here you can raise or lower the volume of the signal even before the<br />
modulation begins.<br />
Time: Determines how long the reverberation lasts in milliseconds. Lower values<br />
equate to smaller rooms, higher values equate to larger rooms.<br />
Spread: Limitation of the panorama ratio from both sides simultaneously. 100%<br />
corresponds to the full stereo panorama, 0% corresponds to mono.<br />
HF Cut: All frequencies above the assigned value get cut.<br />
Predelay: Introduces a short pre-delay before the reverb takes effect.<br />
Dry/Wet: Volume relation between the unprocessed (dry) and the processed (wet) audio<br />
signal.
Reverb TWO<br />
<strong>Best</strong> <strong>Service</strong> <strong>Engine</strong> 2.0<br />
<strong>Manual</strong><br />
Same as „Reverb“.<br />
Additionally you have some further parameter for an even more realistic reverb simulation.<br />
A real reverb always consists of three parts: The original audio signal, the first early<br />
reflection, and finally the ambience produced by the impulse.<br />
Early Refl.: Selection of the room for the first early reflection.<br />
Level: Volume of the first reflection.<br />
Spread: Limitation of the panorama ratio from both sides simultaneously. 100%<br />
corresponds to the full stereo panorama, 0% corresponds to mono.<br />
Predelay: Introduces a short pre-delay before the reverb takes effect.<br />
Frequency: Determines the tempo of the modulation of the processed signal in hertz.<br />
Depth: Determines the level of the modulation of the processed signal in %.<br />
Dry/Wet: Volume relation between the unprocessed (dry) and the processed (wet) audio<br />
signal.<br />
139
140<br />
Special<br />
CHAPTER 9<br />
Insert Filter and Effects<br />
Origami & Origami LE<br />
Origami is a high-end real-time engine to use and edit Impulse Response files, developed<br />
by yellow tools‘ software developers and audio engineers.<br />
In <strong>Engine</strong> Origami and Origami LE are already integrated. Featured with IR files of the<br />
fantastic „INSP:IR Impulse Library“ from Inspired Acoustics, Origami gives you an amazing<br />
listening experience - as if you would be in the room yourself!<br />
To enable you to move your instruments inside the loaded room individually we expanded<br />
Origami by the Positioner feature. After the Positioner is activated you can move your<br />
audio source - and thus your instrument - completely free within the loaded room... as<br />
usual for <strong>Engine</strong> in real-time, of course!!!<br />
ORIGAMI additionally contains the Èlastique SOLOIST Time-Stretch algorithm developed<br />
by zplane.development. With this feature you can edit and customize the playback time<br />
and tune of your audio and impulse response files. The result is a high-quality manipulation<br />
which is specially designed for creating amazing effects.
<strong>Best</strong> <strong>Service</strong> <strong>Engine</strong> 2.0<br />
<strong>Manual</strong><br />
IR format: Multi-channel audio files (interleaved) have to get specified before you can<br />
use them in Origami. An IR file with 5 channels can be 5.0 DD, DTS or<br />
Music, for example. In this pull-down menu you can select the format for the<br />
processing of your Impulse Response files - independent from your selected<br />
input/output format! This way you can use a 5.0 IR file, for example, also in<br />
an 5.1 or any other format up to 8.1... without any prior conversion of the file!<br />
141
142<br />
CHAPTER 9<br />
Insert Filter and Effects<br />
Presets: Use this pull-down menu to load the Impulse Response files that are<br />
included in <strong>Engine</strong> or to load your own presets.<br />
Origami comes with a huge number of premium impulse response files, that<br />
you can use immediately in your productions. These presets are located in the<br />
“IA Production Responses” tab.<br />
You can also load the sources of all included impulse response files to<br />
customize them at will.
<strong>Best</strong> <strong>Service</strong> <strong>Engine</strong> 2.0<br />
<strong>Manual</strong><br />
Since Origami also supports surround impulse response files, there is a<br />
separate tab for the already included surround presets. These presets give you<br />
immediate access to premium surround impulses for your music production.<br />
IMPORTANT: The processing Impulse Response files takes a lot more CPU power than<br />
any other <strong>Engine</strong> insert filter or effect.<br />
143
144<br />
CHAPTER 9<br />
Insert Filter and Effects<br />
IR file info: The “IR file info” button in the upper left corner of Origami lets you switch<br />
to the info page of the currently loaded Impulse Response file. Here you<br />
can enter your own notes and you will see - if available - the location details<br />
and additional author details. After the first click the „IR file info“ button will<br />
switch to the status „back“. To return to the main page just click<br />
the button again.
<strong>Best</strong> <strong>Service</strong> <strong>Engine</strong> 2.0<br />
<strong>Manual</strong><br />
Positioner: Click this button to open the „Positioner“ feature. The „Positioner“ gets<br />
explained on the next page.<br />
Pre-delay: The moment the IR processor will start after the incoming audio signal.<br />
You can assign positive and negative values. Positive values create a<br />
delayed start, with negative values the beginning of the IR file gets skipped.<br />
Time: Here you can assign if the IR file gets used completely or only by<br />
percentage of the entire length.<br />
Tail: Here you can assign the decay time of the IR file - depending on the „time“<br />
value. 100% correspond to the entire length of the IR file less the „time“<br />
portion.<br />
Tail Curve: The curve characteristic of the decay phase (Tail).<br />
High Cut: All frequencies of the IR file above the adjusted value get cut.<br />
True button: The sophisticated Impulse Response Processor „Origami“<br />
even manages „true stereo“ (one multi channel audio file with 4 separate<br />
channels) and „true surround“ processing up to 8.1 (one interleaved<br />
audio file with up to 81 separate channels).<br />
Even in „true stereo“ and „true surround“ mode you can still use the<br />
„positioner“ feature and the new „Channel Manager“ insert allows you any<br />
custom channel routing to fit your needs.<br />
The following processing is supported:<br />
mono to: mono, stereo, surround<br />
stereo to: mono, stereo, true stereo, surround, true surround<br />
surround to: mono, stereo, true stereo, surround, true surround<br />
EQ: See chapter „Equalizer“.<br />
Dry: Volume of the unprocessed audio signal.<br />
Wet: Volume of the processed audio signal.<br />
Pitch: Here you can change the pitch of your impulse response file.<br />
This option is very useful for manipulation and effects.<br />
Formants Button: (preserve formants) If activated the formants of the audio file will be<br />
preserved during the processing.<br />
This imporoves the time-stretch quality.<br />
Tempo: Changes the length of your impulse response file to play it faster or<br />
slower. 100% is the original tempo. Higher values cause an<br />
acceleration, lower values cause a slowdown.<br />
Sync Button: If activated the impulse response file gets synchronized with the tempo<br />
of your host application. This is very useful if you use loops as impulse<br />
response file.<br />
O. Tempo Button: Here you can enter the original tempo of the impulse response file into<br />
the parameter value field. This is specially designed for the use<br />
of audio loops. With a click on the button the loaded file gets<br />
scanned and the tempo will be recognized automatically.<br />
Depending on the number of bars you maybe have to enter a revised<br />
value manually.<br />
Output Gain: The output volume of the audio signal.<br />
145
146<br />
CHAPTER 9<br />
Insert Filter and Effects<br />
Origami Positioner<br />
When you click on the “positioner” button in the upper right corner, the display will switch<br />
to the positioner screen and the button changes into “back”. If the Positioner is not yet<br />
activated, simply click on the orange button inside the 3D panel to activate Origami’s<br />
positioner and to move your instruments inside the virtual room
<strong>Best</strong> <strong>Service</strong> <strong>Engine</strong> 2.0<br />
<strong>Manual</strong><br />
As soon as activated, a “speaker” icon comes up in the middle of the 3D matrix and the<br />
status of the button switches into “active”.<br />
Now you can change the position of the audio signal in your virtual room. To return to the<br />
original position of the audio signal in the center, please press and hold the “Alt” key and<br />
click on the icon. Now the room position will be reset to its default values.<br />
If you are pleased with your audio signal’s position, you can click the “back” button in the<br />
upper right corner to return to your basic screen. Whenever the positioner is activated<br />
and you return to your basic screen or Origami’s “IR file info”, the “positioner” button gets<br />
bordered lightly to show its activated status.<br />
147
148<br />
CHAPTER 9<br />
Insert Filter and Effects<br />
Preamp Modeler<br />
<strong>Engine</strong> comes with a selection of 12 premium preamps.<br />
Model: Use this pull-down menu to select your preamp model.<br />
Presence: This DSP parameter increases the higher middle frequencies of the audio<br />
signal. This way the sound becomes more presence.<br />
Output Gain: The output volume of the audio signal.<br />
.
Cabinet Modeler<br />
<strong>Best</strong> <strong>Service</strong> <strong>Engine</strong> 2.0<br />
<strong>Manual</strong><br />
The Cabinet Modeler offers the simulation of the typical cabinet sound for any of your<br />
instruments - but was specially designed for electric guitars and electric basses.<br />
You can choose between 6 legendary cabinet models of different size and with different<br />
microphone position.<br />
Model: Use this pull-down menu to select your cabinet model.<br />
Color: This parameter allows you to edit the EQ color of the audio signal.<br />
Output Gain: The output volume of the audio signal.<br />
149
150<br />
CHAPTER 9<br />
Insert Filter and Effects<br />
Mic Modeler<br />
The Mic Modeler allows you the immediate assignment of different microphone characters<br />
to your instruments. Available are 14 different legendary microphone models of the<br />
categories „condenser“, „dynamic“ and „tube“.<br />
Depending on the microphone model you can even select between the different positions<br />
and characters „omni directional“, „directional close“, „directional far“ and „directional farer“.<br />
Model: Use this pull-down menu to select your mic model.<br />
Output Gain: The output volume of the audio signal.
Pro Surround Environment<br />
<strong>Best</strong> <strong>Service</strong> <strong>Engine</strong> 2.0<br />
<strong>Manual</strong><br />
<strong>Engine</strong> comes with the most sophisticated Surround Environment you will ever find in any<br />
software sample player and supports all professional surround formats, like Pro Logic,<br />
Dolby Surround, Dolby Digital, DTS, ITU, SDDS and many more up to 8.1. Please keep in<br />
mind that also have to assign the corresponding surround format to the output channel in<br />
the mixer. Of course all insert filter and effects of <strong>Engine</strong> are now fully surround compatible.<br />
151
152<br />
CHAPTER 10<br />
Pro Surround Environment<br />
Worldwide unique in Indepedence is the total flexibility of all the formats: You can<br />
immediately switch between all the available surround formats and <strong>Engine</strong> will<br />
automatically route the channels to the assignment of the new format. Additonally you can<br />
assign the surround formats for each Layer individually, so <strong>Engine</strong> can manage different<br />
surround formats at the same time.<br />
Beside the surround format selection in the Layer area, you also have some further<br />
surround settings on the „Preferences“ page of <strong>Engine</strong>. There you can assign the<br />
preferences for the import settings of your surround files and you have the option to set the<br />
general channel assignment for all multi channel files for three different formats:<br />
Channel Manager<br />
This helper automatically shows all available channels of the currently selected output<br />
format, so if you switch from “stereo”<br />
to “5.1 DTS” the Channel Manager display will switch accordingly:<br />
Additionally you can route any channel of your surround format to „L“ (left) and „R“ (right)<br />
and thus create a mix down of your surround format to stereo. You can also use the<br />
Channel Manager to finetune the volume, delay and output channels of your output format.
<strong>Best</strong> <strong>Service</strong> <strong>Engine</strong> 2.0<br />
<strong>Manual</strong><br />
Calibration<br />
Depending on your speaker position and your room size you can use this helper insert to<br />
calibrate your speakers:<br />
LFE Filter<br />
If you are working in a surround format that contains a LFE, you can use this filter to cut<br />
high frequencies depending on the selected slope. The “LFE creator” button creates a new<br />
additional LFE channel out of all available channels.<br />
Satellites HP Filter<br />
If you are working in a surround format you can use this filter to cut low frequencies<br />
depending on the selected slope.<br />
153
154<br />
CHAPTER 10<br />
Pro Surround Environment<br />
Surround Panner<br />
The surround panner enables you to use instruments that contain stereo, mono or<br />
surround audio files in any <strong>Engine</strong> surround environment. Corresponding to the position of<br />
the stereo (L & R), mono (M) or surround (S) icons new volume settings get calculated for<br />
all existing channels of your currently selected surround format.
<strong>Best</strong> <strong>Service</strong> <strong>Engine</strong> 2.0<br />
<strong>Manual</strong><br />
Insert Filter & Effects<br />
As already mentioned before all <strong>Engine</strong> Filters and Effects are fully surround compatible.<br />
You can switch between the available formats at any time and all inserts will immediately<br />
switch to the new format automatically.<br />
The example below shows the insert “Filter Delay”:<br />
format: Stereo<br />
format: 5.0 SMPTE / ITU / Music<br />
format: 7.1 SDDS Film<br />
155
156<br />
CHAPTER 11<br />
Preferences & Help Page<br />
Preferences & Help Page<br />
The Preferences page contains many standardized parameters which you may already<br />
know. Even though you will be able to make your personal setup immediately some more<br />
details about the available options maybe helpful for you.<br />
Depending on the <strong>Engine</strong> version you use some of the parameters will not be adjustable or<br />
visible on your preferences page. All parameters that are available for your version are of<br />
course freely editable.<br />
The Preferences page affects the complete plug-in, so it is very important to edit the<br />
available parameters in this area very carefully! Making changes may cause incompatibility<br />
with other Projects or the required settings may not get adjusted correctly which in turn<br />
may cause the locking of multiple parameters or even loss of performance.<br />
IMPORTANT: Changes of the Preferences parameters affect the basic ROUTING<br />
SETUP of <strong>Engine</strong>. To accept your changes a restart of<br />
<strong>Engine</strong> is required. Only after this your settings get accepted.<br />
Therefore click on „SAVE PREFERENCES“ after you finished your<br />
setup, close <strong>Engine</strong> and select it again from the plug-in<br />
list of your sequencer software.
<strong>Engine</strong> settings<br />
RAM Settings and Overview<br />
<strong>Best</strong> <strong>Service</strong> <strong>Engine</strong> 2.0<br />
<strong>Manual</strong><br />
Although computers become better and faster all the time, RAM is still a very valuable part.<br />
These parameters give you a permanent summary of the current RAM usage of your<br />
<strong>Engine</strong>. “Minimum RAM” lets you assign the amount of RAM that is always reserved for<br />
<strong>Engine</strong>. „Allocated RAM“ shows the maximum RAM usage of <strong>Engine</strong> during the complete<br />
session. „Used RAM“ is a permanent changing value that shows the exact amount of RAM<br />
<strong>Engine</strong> currently uses.<br />
There are multiple ways to optimize RAM usage of your computer. Therefore please read<br />
the details about the RF-HDD (Read From Hard Disk Drive) feature and the Auto-RAM-<br />
Cleaner.<br />
Multi Core Support<br />
<strong>Engine</strong> supports the reservation and assignment of multi core usage (up to eight cores).<br />
Thus <strong>Engine</strong> has priority access to the number of cores you assign as soon as additional<br />
CPU ressources are needed. Depending on your computer you can use this feature to<br />
boost your performance with a single instance of <strong>Engine</strong>.<br />
The pull-down menu will always contain the number of cores of you computer. If you have<br />
a dual core computer, for example, you only get 2 cores listed.<br />
The support of multi cores and finally the possibility to assign a specific number of cores<br />
for <strong>Engine</strong> is a powerful and unique feature for software sampler - because you can now<br />
assign not only processors but even the cores. If you have an eight core computer, for<br />
example, you can now assign 6 cores to <strong>Engine</strong> and take the other 2 cores remain free -<br />
157
158<br />
CHAPTER 11<br />
Preferences & Help Page<br />
let’s say for your host application. This way there will be never any process of <strong>Engine</strong> and<br />
your host application that will take the same core at the same time - and exactly this result<br />
gives you an unmatched performance!<br />
RF-HDD (Read From Hard Disk Drive)<br />
Our current and also upcoming Virtual Instruments and Sample Libraries are designed<br />
for most professional and most realistic performances. This demand implicates very high<br />
memory requirements. The solution: „RF-HDD“, an innovative and entirely new streaming<br />
technology, exclusively developed by yellow tools software engineers.<br />
Preload time<br />
When loading a Layer only the defined time of each audio file gets „pre-loaded“ into the<br />
RAM of your computer. The „rest“ of each audio file remains on the hard disk and only gets<br />
loaded in case it gets used/played. PRELOAD TIME allows you to adjust this value and<br />
actually accepts values between 200 milliseconds and 3 seconds per audio file. You can<br />
also use the pull-down menu on the right to use the presets.<br />
Unload time<br />
This parameter unloads unused audio files after the defined time. Every played audio file<br />
gets its own „start time“. After the expiration of the entered unload time the sample gets<br />
unloaded immediately. This process discharges the RAM of your computer and so lets you<br />
adjust <strong>Engine</strong> to the performance of your system. Currently you can enter values between<br />
0 milliseconds and 20 seconds.<br />
You can also use the pull-down menu on the right to use the presets.
<strong>Best</strong> <strong>Service</strong> <strong>Engine</strong> 2.0<br />
<strong>Manual</strong><br />
Block size<br />
As <strong>Engine</strong> is design for extremely fast performances and simultaneously has to manage<br />
an enormous amount of audio files we had to add this third parameter. While loading,<br />
block size allows larger loading steps and so reduces the continuous and time-consuming<br />
movements of the read head of the hard disk drive. Depending on the basic speed of your<br />
hard disk you can enter custom values or use the presets in the pull-down menu on the<br />
right.<br />
In practice even slow hard disks become an increased performance in speed and stability.<br />
Even the RF-HDD feature is part of all versions of <strong>Engine</strong> it may happen that the three<br />
parameters are not visible in the Preferences.<br />
In this case please download and install the newest version from www.yellowtools.com.<br />
TIP: Depending on your computer, OS and your system configuration we recommend<br />
you to try multiple combinations with different values of the three parameters.<br />
This way you will find the best results to optimize your system.<br />
Use original BIT rate / Pre-convert to 32 BIT<br />
<strong>Engine</strong> comes with an automatic recognition and immediate internal adjustment of the<br />
settings of your sequencer application. Actually the compatibility up to 32 Bit/192 kHz is<br />
guaranteed. Thereby an entire compatibility to any sequencer and used hardware gets fully<br />
supported. Apart from this you can decide to convert the Audio Files already during the<br />
loading to the appropriate bit rate or to convert them from the RAM only until they get used.<br />
Library Settings<br />
In this area you can add sound libraries for <strong>Engine</strong> - completely independent from where<br />
these libraries are located on your computer.<br />
The location gets saved after your selection and if you should change this location afterwards,<br />
the affected libraries get labelled with „missing).<br />
159
160<br />
CHAPTER 11<br />
Preferences & Help Page<br />
User Folder Settings<br />
Here you can change the location of your User Folder. This folder contains all user related<br />
files (Layers, Presets, Audio Files, Projects, etc.).<br />
The <strong>Engine</strong> application files are not contained in this folder, so the basic functionality of<br />
<strong>Engine</strong> will not be affected by any changes of this folder.<br />
Beside the user folder you have three different „quick links“ you can choose.<br />
You can use the quick links only with audio files in <strong>Engine</strong>!
Output and Surround settings<br />
<strong>Best</strong> <strong>Service</strong> <strong>Engine</strong> 2.0<br />
<strong>Manual</strong><br />
As <strong>Engine</strong> already supports many different interfaces and because of all the different<br />
sequencer applications actually available sometimes it can be required or helpful to<br />
increase or reduce the number of available outputs.<br />
IMPORTANT: Thereby you can also save or require performance of your computer.<br />
At the moment the maximum amount of available outputs is set to 64<br />
MONO and 64 STEREO outputs per instance. Unfortunately many<br />
sequencer applications have different ways to manage additional output<br />
channels of plug-ins. Please read the manual of your sequencer<br />
application how to do it.<br />
Default Layer Format<br />
If you add a new Layer to your project, also a new output channel gets added to the mixer<br />
page accordingly. The output format of this channel in the mixer will be the default format<br />
you select in this pull-down menu.<br />
161
162<br />
CHAPTER 11<br />
Preferences & Help Page<br />
Surround<br />
Any surround preference settings get always saved with your <strong>Engine</strong> Project.<br />
If you import multi channel audio files into <strong>Engine</strong>, you can save your default channel<br />
assignment using the appropriate pull-down menus. Additonally you can also save the<br />
default settings for three different surround output formats and also create your own<br />
presets.<br />
IMPORTANT: After your routing setup you can choose/switch between all available<br />
surround formats in the „Audio Out“ pull-down menu for each Layer<br />
individually and at any time.
Misc. settings<br />
Default Root Key<br />
<strong>Best</strong> <strong>Service</strong> <strong>Engine</strong> 2.0<br />
<strong>Manual</strong><br />
If you import audio files that do not contain a “root key” information, the selected key of this<br />
pull-down menu gets used as default root key.<br />
Default Author Information<br />
The “Default Author Name” and “Default Author Weblink” information automatically get<br />
added to every new Project, Layer Set and Layer you will create. You can also edit these<br />
information at any time afterwards in the corresponding “info” pages.<br />
Debug Log<br />
Using this option activates/deactivates the creation of a log file.<br />
Log files may help us searching for any errors if the application may not run error-free.<br />
163
164<br />
CHAPTER 11<br />
Preferences & Help Page<br />
Help Page<br />
On the <strong>Engine</strong> “Help” Page you have several links to PDF documents (manuals, shortcut<br />
overview, tips & tricks) and to some online links for the newest updates, tutorials and much<br />
more.<br />
The online links require an internet connection and to read the PDF documents on your<br />
computer you need the free Adobe Acrobat Reader or any other application that can open<br />
PDF documents.
Credits<br />
<strong>Best</strong> <strong>Service</strong> <strong>Engine</strong> 2.0<br />
<strong>Manual</strong><br />
Idea and conception: Drazen Vlahovic<br />
Productdesign and projectmanagement: Christian Hellinger, Klaus Kandler, Robert Leutner<br />
Senior software developer: Roman Glomb<br />
Èlastique SOLOIST by zplane.development.<br />
Impulse Response Files: Inspired Acoustics „INSP:IR impulse library“; Entel Ltd., Hungary<br />
User interface: Hans van Even (musicworx, France), yt art division<br />
Graphic design, art direction, packaging designs: yt art division, <strong>Best</strong> <strong>Service</strong><br />
Special Thanks To:<br />
Slavica, Enna and Adrian Vlahovic for their limitless patience,<br />
Gabriele & Amelie Hellinger just for everything,<br />
Roman Glomb for his 36 hours days,<br />
Rita Schaupp, Rolf and Ariane Hellinger, Adelheid Nehring von Oettingen for their support,<br />
Michael Lips from Gravis Shop Karlsruhe, Rudi Metzler and RockShop Karlsruhe for the<br />
support,<br />
Manfred Graf, Reinhold Rausch, KUK GmbH, WIBU Systems AG, Wolfgang Völker,<br />
Patrick Kirst, Zlatko Dozic, Torsten Wieseler, Marcel Millot, Umbo, Martin Straka,<br />
Matthias & Markus Loris, Frank Lemmert, Christian Auer, Casi, Pedro Weis,<br />
the companies Apple, Emagic, Digidesign, Entel, Shirokuma and Chicken Systems,<br />
all yellow tools beta-testers<br />
and all our worldwide resellers and distribution partners.<br />
165
166<br />
CHAPTER 13<br />
License Agreements<br />
License Agreements<br />
License Agreement Software<br />
PLEASE READ THIS LICENSE CAREFULLY BEFORE USING THE SOFTWARE. BY<br />
USING THE SOFTWARE, YOU ARE AGREEING TO BE BOUND BY THE TERMS<br />
OF THIS LICENSE. IF YOU DO NOT AGREE TO THE TERMS OF THIS LICENSE,<br />
PROMPTLY RETURN THE UNUSED SOFTWARE TO THE PLACE WHERE YOU<br />
OBTAINED IT AND YOUR MONEY WILL BE REFUNDED.<br />
1. License.<br />
The application, demonstration, system and other software accompanying this License,<br />
whether on disk, in read only memory, or on any other media (the 'Software'), the related<br />
documentation and sounds are licensed to you by Yellow Tools and its Licensors. You<br />
own the disk on which the Software and sounds are recorded but Yellow tools and/or<br />
Yellow tools' licensors retain title to the Software, related documentation and sounds. This<br />
License allows you to use the Software and sounds on a single computer. You may use<br />
the software on a home or portable computer, provided the software is never used on both<br />
computers at the same time.<br />
2. Restrictions.<br />
The Software contains copyrighted material, trade secrets, and other proprietary material.<br />
In order to protect them, and except as permitted by applicable legislation, you may not<br />
decompile, reverse engineer, disassemble or otherwise reduce the Software to a humanperceivable<br />
form. You may not modify, rent, lease, loan, distribute or create derivative<br />
works based upon the Software and sounds in whole or in part.<br />
3. Termination.<br />
This License is effective until terminated. You may terminate this License at any time by<br />
destroying the Software, related documentation and sounds. This License will terminate<br />
immediately without notice from Yellow Tools if you fail to comply with any provision of<br />
this License. Upon termination you must destroy the Software, related documentation and<br />
sounds.<br />
4. Limited Warranty on Media.<br />
Yellow Tools warrants the compact discs and/or DVD(s) on which the Software and sounds<br />
are fixed to be free from defects in materials and workmanship under normal use for a<br />
period of ninety (90) days from the date of purchase as evidenced by a copy of the receipt.<br />
Yellow Tools entire liability and your exclusive remedy will be replacement of the DVD(s)<br />
and/or compact discs, which shall be returned to Yellow Tools with a copy of the receipt.<br />
Yellow Tools will have no responsibility to replace a disc/DVD damaged by accident, abuse<br />
or misapplication. ANY IMPLIED WARRANTIES ON THE COMPACT DISC/DVD(S),<br />
INCLUDING THE IMPLIED WARRANTIES OF MERCHANTABILITY AND FITNESS FOR<br />
A PARTICULAR PURPOSE, ARE LIMITED IN DURATION TO NINETY (90) DAYS FROM<br />
THE DATE OF DELIVERY. THIS WARRANTY GIVES YOU SPECIFIC LEGAL RIGHTS,<br />
AND YOU MAY ALSO HAVE OTHER RIGHTS WHICH VARY BY JURISDICTION.
<strong>Best</strong> <strong>Service</strong> <strong>Engine</strong> 2.0<br />
<strong>Manual</strong><br />
5. Disclaimer of Warranty on Yellow Tools Software.<br />
You expressly acknowledge and agree that use of the Software and sounds is at your sole<br />
risk. The Software, related documentation and sounds are provided 'AS IS' and without<br />
warranty of any kind and Yellow Tools and Yellow Tools' Licensor(s) (for the purposes<br />
of provisions 4 and 5, Yellow Tools and Yellow Tools' Licensor(s) shall be collectively<br />
referred to as 'Yellow Tools') EXPRESSLY DISCLAIM ALL OTHER WARRANTIES,<br />
EXPRESS OR IMPLIED, INCLUDING, BUT NOT LIMITED TO, THE IMPLIED<br />
WARRANTIES OF MERCHANTABILITY, FITNESS FOR A PARTICULAR PURPOSE<br />
AND NONINFRINGEMENT. YELLOW TOOLS DOES NOT WARRANT THAT THE<br />
FUNCTIONS CONTAINED IN THE SOFTWARE WILL MEET YOUR REQUIREMENTS,<br />
OR THAT THE OPERATION OF THE SOFTWARE WILL BE UNINTERRUPTED OR<br />
ERROR-FREE, OR THAT DEFECTS IN THE SOFTWARE AND THE SOUNDS WILL BE<br />
CORRECTED. FURTHERMORE, YELLOW TOOLS DOES NOT WARRANT OR MAKE<br />
ANY REPRESENTATIONS REGARDING THE USE OR THE RESULTS OF THE USE OF<br />
THE SOFTWARE AND SOUNDS OR RELATED DOCUMENTATION IN TERMS OF THEIR<br />
CORRECTNESS, ACCURACY, RELIABILITY, OR OTHERWISE. NO ORAL OR WRITTEN<br />
INFORMATION OR ADVICE GIVEN BY YELLOW TOOLS OR A YELLOW TOOLS<br />
AUTHORIZED REPRESENTATIVE SHALL CREATE A WARRANTY OR IN ANY WAY<br />
INCREASE THE SCOPE OF THIS WARRANTY. WITHOUT LIMITING THE FOREGOING,<br />
YELLOW TOOLS DISCLAIMS ANY AND ALL EXPRESS OR IMPLIED WARRANTIES OF<br />
ANY KIND, AND YOU EXPRESSLY ASSUME ALL LIABILITIES AND RISKS, FOR USE<br />
OR OPERATION OF THE SOFTWARE, INCLUDING WITHOUT LIMITATION. SHOULD<br />
THE SOFTWARE PROVE DEFECTIVE, YOU (AND NOT YELLOW TOOLS OR A<br />
YELLOW TOOLS AUTHORIZED REPRESENTATIVE) ASSUME THE ENTIRE COST OF<br />
ALL NECESSARY SERVICING, REPAIR OR CORRECTION. SOME JURISDICTIONS<br />
DO NOT ALLOW THE EXCLUSION OF IMPLIED WARRANTIES, SO THE ABOVE<br />
EXCLUSION MAY NOT APPLY TO YOU.<br />
6. Limitation of Liability.<br />
UNDER NO CIRCUMSTANCES INCLUDING NEGLIGENCE, SHALL YELLOW TOOLS<br />
BE LIABLE FOR ANY INCIDENTAL, SPECIAL OR CONSEQUENTIAL DAMAGES THAT<br />
RESULT FROM THE USE OR INABILITY TO USE THE SOFTWARE OR RELATED<br />
DOCUMENTATION, EVEN IF YELLOW TOOLS OR A YELLOW TOOLS AUTHORIZED<br />
REPRESENTATIVE HAS BEEN ADVISED OF THE POSSIBILITY OF SUCH DAMAGES.<br />
SOME JURISDICTIONS DO NOT ALLOW THE LIMITATION OR EXCLUSION OF<br />
LIABILITY FOR INCIDENTAL OR CONSEQUENTIAL DAMAGES SO THE ABOVE<br />
LIMITATION OR EXCLUSION MAY NOT APPLY TO YOU. In no event shall Yellow Tools'<br />
total liability to you for all damages, losses, and causes of action (whether in contract, tort<br />
(including negligence) or otherwise) exceed that portion of the amount paid by you which is<br />
fairly attributable to the Software and sounds.<br />
7. Controlling Law and Severability.<br />
This License shall be governed by and construed in accordance with the laws of the<br />
Federal Republic of Germany. If for any reason a court of competent jurisdiction finds<br />
any provision of this License, or portion thereof, to be unenforceable, that provision of the<br />
License shall be enforced to the maximum extent permissible so as to effect the intent of<br />
the parties, and the remainder of this License shall continue in full force and effect.<br />
167
168<br />
CHAPTER 13<br />
License Agreements<br />
8. Complete Agreement.<br />
This License constitutes the entire agreement between the parties with respect to the<br />
use of the Software, the related documentation and sounds, and supersedes all prior<br />
or contemporaneous understandings or agreements, written or oral, regarding such<br />
subject matter. No amendment to or modification of this License will be binding unless in<br />
writing and signed by a duly authorized representative of Yellow Tools. Should you have<br />
any questions or comments concerning this license, please do not hesitate to write to<br />
Yellow Tools GBR, Richard-Wagner-Str. 14, 76185 Karlsruhe, Germany. attn: Warranty<br />
Information. Email: info@yellowtools.com.
Index<br />
Symbols<br />
2-pole—56<br />
4 band parametric EQ—116<br />
4-pole—56<br />
6 band parametric EQ—116<br />
6-pole—56<br />
10-pole—121<br />
12-pole—121<br />
A<br />
Absolute—56<br />
add library—17<br />
add sound libraries—159<br />
Advanced Legato Mode—98<br />
AHDSR envelope—57, 70<br />
AIFF—40<br />
Alternate—20, 49<br />
Alternate Mode—95<br />
Arpeggiator—77, 79<br />
Arranger—79<br />
ASIO—18<br />
Attack—57<br />
Attributes—33, 96<br />
Audio Out—107<br />
Authorization Key<br />
Key status—164<br />
Auto Import MIDI file(s)—81<br />
Autoload—28<br />
Auto-Mapping-Import—40<br />
Chromatic Mapping—41<br />
Multi Key Mapping—41<br />
One Key Mapping—42<br />
X-Y-Z Mapping—41<br />
Automation—48, 109<br />
Host automation—110<br />
MIDI automation—109<br />
auto tempo—44<br />
B<br />
Bandpass—56<br />
BIT rate—159<br />
Bit Reduction—128<br />
Block size—159<br />
Browser—13, 92<br />
BUS Channels—104<br />
BUS sends—106<br />
Buttons—21<br />
Bypass button—21<br />
Content button—21<br />
Bypass button—21<br />
C<br />
<strong>Best</strong> <strong>Service</strong> <strong>Engine</strong> 2.0<br />
<strong>Manual</strong><br />
Cabinet Modeler—149<br />
Calibration—134, 153<br />
Categories—33<br />
Channel display—104<br />
Channel Manager—135, 152<br />
Channels—104<br />
Custom Channel—51<br />
Layer Channel—104<br />
Output Channel—104<br />
Channel types—108<br />
Chorus—124<br />
Chromatic Mapping—42<br />
Compressor—122<br />
Content Browser—49<br />
Content button—21<br />
Content Editor—101<br />
Controller—63<br />
CPU power—50<br />
Credits—46, 151, 165<br />
Custom Channel—51, 104<br />
Custom Control—66<br />
169
170<br />
D<br />
CHAPTER 14<br />
Index<br />
Debug Log—163<br />
Decay—57<br />
Default Author Information—163<br />
Default Layer Format—161<br />
Delay—129<br />
Destination—62<br />
Distortion—128<br />
Doubler—131<br />
Downwards—54<br />
Dynamics—120<br />
Dynamic Split—54, 55<br />
E<br />
Echo—132<br />
Effects—114<br />
Einstellungen—157<br />
Elastique—43<br />
<strong>Engine</strong> Application Folder—23<br />
<strong>Engine</strong> settings—157<br />
Equalizer—116<br />
External Sources—61, 65<br />
F<br />
File display—96, 97<br />
Filter Delay—131<br />
Filters—56, 114, 117<br />
Fix Value—65<br />
Flexible Modifiers—60<br />
External Sources—61, 65<br />
Internal Sources—61, 67<br />
Formants—44, 145<br />
Free Envelope—61, 70<br />
Frequency—56, 73<br />
G<br />
Glide—61, 74<br />
Graphic level meter—107<br />
Group—49, 102<br />
Group Editor—102<br />
Group Name—105<br />
H<br />
Help—16<br />
Help Page—164<br />
Hertz—29<br />
High Cut Filter—120<br />
Highpass—56<br />
Hold—57<br />
Host Automation—66, 109, 110<br />
I<br />
Import—40<br />
Impulse Response—140<br />
Input Fields—21<br />
Insert button—105<br />
Insert Filter & Effects—155<br />
Insert FX—91<br />
Inserts—91, 114<br />
Internal modules—64<br />
Internal Sources—61, 67<br />
I/O buffer—18<br />
K<br />
keep settings—31<br />
Keyboard—27<br />
Keyboard Options—54<br />
Key Distance—67<br />
Key Down—67<br />
Key Position—66<br />
Key Position (keyboard tracking)—66<br />
Key range—36<br />
Key status—164<br />
Key Switch—52, 84<br />
Key Up—67<br />
keywords—95<br />
L<br />
Layer—20<br />
Auto-Mapping-Import—40<br />
MIDI Basics Settings—34
Notepad—33<br />
Layer Area—32<br />
Layer Channel—104<br />
Learn—53<br />
Level indicator—107<br />
Level Meter—107, 130, 134<br />
Level Meter Pro—134<br />
LFE Filter—121, 153<br />
LFO—61, 68<br />
Library Settings—159<br />
License agreements—166<br />
Software—166<br />
Limiter—122, 123, 124, 128, 129<br />
Loading—32<br />
Loop—73, 75, 77<br />
Loops—43<br />
Low Cut Filter—119<br />
Lowpass—56<br />
M<br />
Mapping—40<br />
Markers—70<br />
Metronome—135<br />
Mic Modeler—150<br />
MIDI—35<br />
MIDI Automation—66, 109<br />
MIDI bank—38<br />
MIDI controller—48<br />
MIDI File Import—77, 81<br />
MIDI Files—98<br />
MIDI-IN icon—29<br />
MIDI input—103<br />
MIDI input channel—32<br />
MIDI learn—66<br />
MIDI panic/bypass—29<br />
MIDI ports—19<br />
MIDI Preferences—19<br />
MIDI programs—38<br />
MIDI settings—34<br />
MIDI thru—28<br />
Misc. settings—163<br />
Mixer—14, 100<br />
<strong>Best</strong> <strong>Service</strong> <strong>Engine</strong> 2.0<br />
<strong>Manual</strong><br />
Content editor—101<br />
Group editor—102<br />
Show/Hide editor—103<br />
Modules Editor—12, 50<br />
Modwheel—61, 66<br />
Mono—34<br />
Mono Aftertouch—66<br />
Mono Aftertouch (channel pressure)—66<br />
Multi Core Support—157<br />
Multi Key Mapping—41<br />
Mute—34, 107<br />
N<br />
Note-off—89<br />
Note-on—89<br />
Notepad—33<br />
O<br />
One Key Mapping—42<br />
Origami—140<br />
Origami LE—140, 149, 150<br />
Output Channels—104<br />
Outputs—51, 107<br />
Output Settings—51<br />
P<br />
Panorama chart—108<br />
Phase invert—134<br />
Phaser—125<br />
Pitch—29, 45<br />
Pitchbend—61, 66<br />
Pitch-Shifting—43<br />
Playing Direction—54<br />
Plug-in—18<br />
Poly Aftertouch—66<br />
Poly Aftertouch (key pressure)—66<br />
Polyphony—50<br />
Portamento—74<br />
Positioner—146<br />
POST—106<br />
171
172<br />
CHAPTER 14<br />
Index<br />
PRE—106<br />
Preamp Modeler—148<br />
Pre-cache—39<br />
Preferences—15, 156<br />
Pre-listen—92<br />
Preload time—158<br />
Priority—33<br />
Program Change—29<br />
Project—20<br />
Pro Surround Environment—151<br />
Pull-Down Menus—21<br />
Q<br />
Quick Edit—11, 46<br />
quick links—160<br />
R<br />
RAM—35, 157<br />
RAM overview—157<br />
Random—66<br />
Reference Tone—135<br />
Relative—56<br />
Release curve—57<br />
Release Velocity—66<br />
Remember Layer editing page—28<br />
Resonance—56<br />
Retrigger—58, 72<br />
Reverb—138<br />
Reverb TWO—139<br />
RF-HDD—35<br />
Ring Modulator—126<br />
Root Key—161, 163<br />
Rotary—126<br />
Route—51<br />
S<br />
Sample delay—134<br />
Sample rate—18<br />
Satellites HP Filter—121, 153<br />
Searching—95<br />
Section—20, 49<br />
Semitones—29<br />
Sequencer—48<br />
Show/Hide Editor—103<br />
Skip—52, 57<br />
Solo—33, 107<br />
sound libraries—159<br />
Source—62<br />
Split Key—55<br />
Standalone—18<br />
Step Modulator—61, 72<br />
Steps—73<br />
Step Sequencer—75<br />
Stereo—34<br />
Surround—34, 151, 162<br />
Surround Channels—104<br />
Surround Panner—136, 154<br />
Sustain—57<br />
Sync—69<br />
T<br />
Tempo—45<br />
Time Modulator—61, 89<br />
Time-Stretching—43<br />
Time-Ttretching—43<br />
Transpose—36<br />
True stereo—145<br />
True surround—145<br />
Tube distortion—129<br />
U<br />
Unload time—158<br />
Upwards—54<br />
Upwards & Downwards—54<br />
User Folder—160<br />
V<br />
Velocity—61, 65<br />
Velocity range—36<br />
Version overview—164<br />
Vintage 3 band EQ—117<br />
Volume—133
Volume AHDSR—57<br />
Volume attack—57<br />
Volume chart—107<br />
Volume fader—107<br />
VST Effects—26<br />
VST Instruments—24<br />
VST Plug-Ins—23<br />
W<br />
WAV—40<br />
X<br />
XY panorama—133<br />
X-Y-Z Mapping—41<br />
Y<br />
Z<br />
Zone—20<br />
Zoom—58<br />
<strong>Best</strong> <strong>Service</strong> <strong>Engine</strong> 2.0<br />
<strong>Manual</strong><br />
173