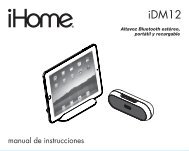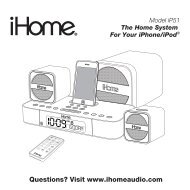
iPL8 User Manual - iHome
iPL8 User Manual - iHome
iPL8 User Manual - iHome

You also want an ePaper? Increase the reach of your titles
YUMPU automatically turns print PDFs into web optimized ePapers that Google loves.
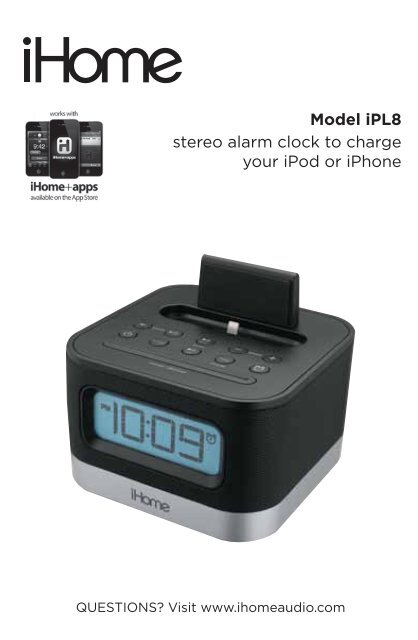
Model <strong>iPL8</strong><br />
stereo alarm clock to charge<br />
your iPod or iPhone<br />
QUESTIONS? Visit www.ihomeaudio.com
WELCOME<br />
Thank you for choosing the <strong>iPL8</strong> from <strong>iHome</strong>. This user guide will get<br />
you up and running quickly and provide helpful hints to maximize<br />
enjoyment. For more information about this and other <strong>iHome</strong><br />
products, please visit www.ihomeaudio.com Note that details on<br />
using <strong>iHome</strong> apps with this unit are not covered in this booklet. For<br />
information on using <strong>iHome</strong> apps, please visit<br />
www.ihomeaudio.com/apps<br />
GETTING STARTED<br />
This unit ships with the following items. Please check to see that all<br />
items are present.<br />
1 <strong>iPL8</strong> speaker system<br />
2 100-240V Universal AC power adaptor<br />
1 2<br />
1
FEATURES & FUNCTIONS<br />
Top panel<br />
Backrest<br />
Lightning Dock<br />
Play/Pause/<br />
Presets Button<br />
Volume Control<br />
Buttons<br />
Power On/Off<br />
Button<br />
Mode Button<br />
Lightning Dock<br />
–/+ Settings Buttons<br />
Time Set/Sleep button<br />
Alarm button<br />
USB Play/Pause Button<br />
Snooze/Dimmer Button<br />
Back panel<br />
DC Jack USB dock<br />
Display<br />
PM Indicator<br />
Volume Indicator<br />
Time Display<br />
Alarm<br />
Indicator<br />
iPod<br />
Indicator<br />
WAKE-TO Indicator<br />
(iPod/Buzzer)<br />
Sleep Indicator<br />
Low Backup Battery Indicator<br />
2
RESETRESET<br />
TESTTEST<br />
CONNECTING TO AC POWER<br />
This unit operates on AC power<br />
using the included 100V-240V<br />
universal AC adaptor for charging<br />
and playing your iPhone or iPod .<br />
Place unit on a stable surface. Plug<br />
the power adaptor into the DC jack<br />
on back of the unit and the other<br />
end into a working wall socket. You<br />
can now charge your iPhone or<br />
iPod.<br />
BACKUP BATTERY<br />
The <strong>iPL8</strong> ships with a CR2450 battery installed for backup to provide<br />
continuous alarm operation and clock settings in the event of a power failure.<br />
Remove the pull tab from the battery compartment on the bottom of the unit<br />
before use. If a power failure occurs or the AC cord is accidentally<br />
disconnected, the display backlight will not remain lit, but current time and<br />
alarm time settings will be temporarily maintained. Otherwise, you must reset<br />
the time and alarm settings.<br />
Note: The<br />
Battery Low icon is located at the right side of clock display.<br />
When the backup battery is low and needs to be replaced, the Battery<br />
Low icon will flash. To replace, follow steps below:<br />
3
BACKUP BATTERY (CONTINUED)<br />
1. Please make sure the AC adaptor is connected. Otherwise all settings<br />
may be lost during battery replacement.<br />
2. Use a Phillips screwdriver to open the backup battery compartment<br />
door located on the bottom of the unit.<br />
3. Remove the exhausted battery. Insert a<br />
new CR2450 battery by easing it under the<br />
tabs in the battery well and pressing down.<br />
Make sure the side marked + is facing up.<br />
4. Close the battery compartment door and<br />
tighten the battery door screw.<br />
Note: Make sure you dispose of battery<br />
properly (see your local regulations).<br />
WARNING: Lithium batteries can explode or cause burns if disassembled,<br />
shorted, recharged, exposed to water, fire, or high temperatures. Do not<br />
place loose batteries in a pocket, purse, or other container containing metal<br />
objects, mix with used or other battery types, or store with hazardous or<br />
combustible materials. Store in cool, dry, ventilated area. Follow applicable<br />
laws and regulations for transport and disposal.<br />
4
SETTING THE TIME:<br />
TIME SYNC & MANUAL<br />
TIME SETTING<br />
TIME SYNC<br />
This unit is equipped with auto sync. By default, the unit will sync to the<br />
time on your iPhone or newer iPod (iPod touch, iPod nano and iPod<br />
Classic; older iPod models such as iPod mini do not support this feature)<br />
whenever you dock it in the Lightning dock OR connect via the USB port<br />
located on back of the unit. During time sync, “SYNC” will flash on the<br />
display, indicating attempted time sync. When successful, the updated<br />
time will appear on the display. If sync is unsuccessful, try to sync again<br />
using a different iPhone or iPod. If sync still doesn’t work, set the time<br />
manually (see below).<br />
SETTING THE TIME MANUALLY<br />
1. Press and hold the Time Set Button until “MAN” or “SYNC” flashes in the<br />
display with one beep. If “SYNC” is displayed, press the + or – Buttons so<br />
“MAN” appears in the display, indicating manual time setting mode.<br />
2. Press and release the Time Set Button. The time will flash in the display.<br />
3. Press the + or – Buttons to set the correct time (hold for rapid adjustment.<br />
Make sure you are setting the time to the correct AM or PM time. The PM<br />
indicator appears at the upper left of the display; there is no AM indicator.<br />
NOTE: The time can be set to standard 12 hour time (AM and PM) or to 24<br />
hour time (sometimes called “military time”). To toggle between 12 and 24<br />
modes, press and release the Alarm Button located on top of the unit at<br />
any time during manual time setting mode.<br />
4. Press and release the Time Set Button to confirm the current time setting<br />
(two beeps will sound) and exit time setting mode.<br />
5
SETTING AND USING THE ALARM<br />
SETTING THE ALARM<br />
This unit lets you wake to your docked iPhone, iPod (iPod),<br />
USB-connected device (USB), FM radio or to the built-in buzzer alarm.<br />
The alarm will sound for 60 minutes or until reset/turned off.<br />
1. Press and hold the Alarm Button until the alarm time display flashes<br />
with one beep.<br />
2. Press the + or – Buttons to adjust the display to the desired alarm time (hold<br />
for rapid adjustment). Remember to set the correct AM or PM alarm time.<br />
3. Press the Alarm Button to confirm the alarm time. The WAKE-TO<br />
indicator will flash on the display. Press the + or – Buttons to toggle<br />
among wake to Lightning dock, USB, FM radio or buzzer, then press<br />
the Alarm Button to access volume setting for the selected alarm<br />
source.<br />
Wake to iPod: If wake to dock (iPod) is selected, press the + or –<br />
Buttons to set the Lightning dock volume (can be set<br />
from 5- 40). The alarm will wake you to the last track<br />
played on your docked iPhone or iPod.<br />
Wake to USB: If wake to USB is selected, press the + or – Buttons to set<br />
the USB dock volume (can be set from 5- 40). The alarm<br />
will wake you to the last track played on the iPhone or<br />
iPod connected to the USB dock.<br />
Wake to radio: If wake to FM is selected, press the + or – Buttons to<br />
select a radio station to wake to, then confirm your<br />
selection by pressing the Alarm Button. Press the + or<br />
– Buttons to set the FM radio alarm volume (can be set<br />
from 5- 40).<br />
Wake to Buzzer: If wake to Buzzer is selected, press the + or – Buttons to<br />
choose HI or LO buzzer alarm volume.<br />
4. Press the Alarm Button to exit and confirm alarm settings. An alarm<br />
icon will appear on the display, indicating that the alarm is set and armed.<br />
6
REVIEWING AND RESETTING THE ALARM<br />
Press and release the Alarm Button at any time to review the current<br />
alarm settings. To toggle the alarm on or off, press the Alarm Button as<br />
needed. When the alarm icon is displayed, the alarm is armed/on.<br />
Press the Power Button or Alarm Button when the alarm is sounding<br />
to reset it to come on again at the same time the next day. Press the<br />
Alarm Button again to turn off/disarm the alarm. The alarm icon will<br />
disappear.<br />
CHARGING YOUR iPHONE OR iPOD<br />
1. Gently dock your iPhone or iPod into the flexible Lightning dock<br />
located on the top of the unit OR connect an iPhone or iPod to the<br />
USB dock on back of unit using the cable that came with your<br />
device.<br />
While your iPhone/iPod is docked in the unit and/or connected via<br />
the USB dock and the unit is connected to AC power, it recharges<br />
(until fully charged). The unit will not overcharge your iPhone/iPod.<br />
Note that non-docking iPod models will NOT charge.<br />
Note: Please make sure your iPhone/iPod is properly docked into the unit.<br />
Failure to do so may damage your iPhone/iPod.<br />
LISTENING TO YOUR iPHONE/iPOD<br />
USING THE LIGHTNING DOCK OR USB DOCK<br />
USING THE LIGHTNING DOCK<br />
1. Dock your already playing iPhone/iPod. The unit will automatically<br />
turn on and you will hear the music playing from your iPhone/iPod.<br />
The iPhone/iPod Icon will appear at the right side of the display,<br />
indicating iPhone/iPod playing mode.<br />
2. Press the or Buttons on the unit to adjust the system volume.<br />
Note: If the volume is too low on the iPhone/iPod, the unit may not detect<br />
that the iPhone/iPod is in play mode. Press the Dock Button to play<br />
it. Press again as needed to pause and resume play.<br />
3 Press the + or – Buttons to go to the next or previous track (hold to scan<br />
backwards or forwards within a track).<br />
4. Press the Power Button to turn off the unit. You can also turn the<br />
unit off by undocking a playing device.<br />
NOTE: Press the Mode Button to cycle from iPod (Lightning dock) to<br />
USB to FM radio modes.<br />
7
USING THE USB DOCK<br />
1. Connect your already playing iPhone/iPod to the USB dock on back<br />
of unit using that cable that came with your device. The unit will<br />
automatically turn on and you will hear the music playing from your<br />
iPhone/iPod. The iPhone/iPod Icon will appear at the right side of the<br />
display, indicating iPhone/iPod playing mode.<br />
2. Press the or Buttons on the unit to adjust the system volume.<br />
Note: If the volume is too low on the iPhone/iPod, the unit may not detect<br />
that the iPhone/iPod is in play mode. Press the USB Button to play it.<br />
Press again as needed to pause and resume play.<br />
3 Press the + or – Buttons to go to the next or previous track (hold to scan<br />
backwards or forwards within a track).<br />
4. Press the Power Button to turn off the unit. You can also turn the<br />
unit off by disconnecting a device playing through the USB dock.<br />
NOTE: Press the Mode Button to cycle from iPod (Lightning dock) to<br />
USB to FM radio modes.<br />
LISTENING TO FM RADIO<br />
Tuning and Playing the Radio<br />
1. Press and release the Power Button to turn on the unit, then press and<br />
release the Mode Button as needed to cycle through dock, USB, and FM<br />
radio modes.<br />
2. When FM mode is selected, press the + or – Buttons to tune the radio to a<br />
desired station. The current radio frequency appears in the bottom of the<br />
display. Press the + or – Buttons for a few seconds to scan for the next<br />
clear station.<br />
3. To memorize a station as a preset:<br />
A. Press the Dock Button as needed to step through the 6 presets<br />
(P1 - P6) to the number you wish to assign, and then hold the Dock<br />
Button until the selected preset number begins flashing in the display.<br />
B. Press the + or – Buttons to tune the radio to a desired station. Hold<br />
briefly to have the radio autoscan/search for the next clear station.<br />
C. Press the Dock Button to confirm the setting, two confirmation<br />
beeps will confirm the setting and the preset number you wish to<br />
assign. Repeat steps A-C to preset up to 6 stations.<br />
4. To listen to a preset station, use the Mode Button to select FM mode, then<br />
press the Dock Button to choose the desired preset.<br />
5. Press the or Button on the unit to adjust the system volume.<br />
8
USING THE UNIT IN OTHER COUNTRIES<br />
Different regions of the world use different FM radio frequency steps and<br />
ranges. You will need to select the one that matches the standards in your<br />
region (USA, EUROPE, JAPAN, AUSTRALIA, or CHINA). The default setting is<br />
USA; if you live in the US, you may skip this section.<br />
1. Press and release the Power Button to turn on the unit, then press and<br />
release the Mode Button as needed to cycle to FM radio mode.<br />
2. Press and hold the Mode Button for about 5 seconds until the region<br />
flashes in the lower part of the display and a beep sounds.<br />
3. Press the + or – Buttons as needed to set the display to your region: USA,<br />
EU (Europe), JPN (Japan), AUS (Australia), or CHN (China).<br />
2. Press and release the Mode Button (or no button within 10 seconds) to<br />
exit the radio frequency setting mode. Two beeps will confirm radio<br />
frequency setting.<br />
SNOOZE/DIMMER OPERATION<br />
1. To program a custom snooze duration, during normal operation (when<br />
alarm is not sounding) press and hold the Snooze/Dimmer Button until<br />
the display flashes, then press the + and – Buttons on the unit to adjust<br />
the snooze time to 1 - 29 minutes.<br />
2. Press the Snooze/Dimmer Button on the <strong>iPL8</strong> after the alarm sounds.<br />
The alarm will be silenced and will come on again in about 9 minutes<br />
(default). You may repeat this cycle several times during the one hour<br />
alarm cycle.<br />
3. During normal operation (when alarm is not sounding), press the<br />
Snooze/Dimmer Button to control the brightness (high, medium, low<br />
and off settings) of the LCD display.<br />
9
SLEEP MODE<br />
Sleep mode lets you sleep to your playing docked or USB connected<br />
iPhone or iPod or to FM radio. Press the Sleep Button as needed to cycle<br />
to the desired sleep duration: 120, 90, 60, 30 or 15 minutes or OFF (turns<br />
sleep mode off). Press the or Button on the unit to adjust sleep<br />
listening level. The unit will revert to normal volume level when sleep<br />
mode ends. Press the Sleep Button during sleep to view the remaining<br />
sleep time; press again to set sleep to next (lower) sleep duration.<br />
MAINTENANCE<br />
• Place the unit on a level surface away from sources of direct sunlight or<br />
excessive heat.<br />
• Protect your furniture when placing your unit on a natural wood and<br />
lacquered finish. A cloth or other protective material should be placed<br />
between it and the furniture.<br />
• Clean your unit with a soft cloth moistened only with mild soap and water.<br />
Stronger cleaning agents, such as Benzene, thinner or similar materials can<br />
damage the surface of the unit.<br />
10
TROUBLESHOOTING<br />
Symptom Possible reason Solution<br />
Unit won’t turn on<br />
Device does not<br />
respond to the<br />
unit and/or<br />
device is playing<br />
but no sound<br />
comes out<br />
AC adaptor isn't plugged<br />
into a working wall socket<br />
or not plugged into the<br />
power jack on back of the<br />
unit<br />
Unit is not properly<br />
connected to power<br />
source and/or Power<br />
Button is not ON/device is<br />
paused<br />
Plug the AC adaptor into a<br />
working wall socket and plug the<br />
connector into the supply jack on<br />
the unit. Make sure any associated<br />
wall switch that controls the outlet<br />
the is ON.<br />
Make sure the unit is properly<br />
connected to AC power source.<br />
Check that the Power Button is lit<br />
up, indicating the unit is ON. Try<br />
adjusting volume on unit and<br />
audio device. Press the Mode<br />
Button to select the iPod (dock),<br />
USB or FM mode. Also try<br />
pressing the Play/Pause Button.<br />
Erratic<br />
performance<br />
No sound<br />
Sound distorted<br />
External interference<br />
Volume is too low<br />
Volume is too high<br />
Sound source is distorted<br />
Move unit away from potential<br />
sources of external interference such<br />
as computers, modems, wireless<br />
devices (routers) or fluorescent light.<br />
Turn volume up on your device<br />
Turn volume down on your device<br />
If the original sound file (MP3) is old<br />
or of poor quality, distortion and noise<br />
are easily noticed with high-power<br />
speakers. Try upgrading file from a<br />
trusted source such as iTunes.<br />
Device doesn’t<br />
charge up<br />
Unit is not properly<br />
connected to AC power<br />
Please make sure the unit is<br />
connected to a working power outlet.<br />
The unit will not charge while<br />
operating on backup battery<br />
11
IMPORTANT SAFETY TIPS<br />
When used in the directed manner, this unit has been designed and manufactured<br />
to ensure your personal safety. However, improper use can result in<br />
potential electrical shock or fire hazards. Please read all safety and operating<br />
instructions carefully before installation and use, and keep these instructions<br />
handy for future reference. Take special note of all warnings listed in these<br />
instructions and on the unit.<br />
1. Water and Moisture – The unit should not be used near water. For example:<br />
near a bathtub, washbowl, kitchen sink, laundry tub, swimming pool or in a<br />
wet basement.<br />
2. Ventilation – The unit should be situated so that its location or position does<br />
not interfere with its proper ventilation. For example, it should not be<br />
situated on a bed, sofa, rug or similar surface that may block ventilation<br />
openings. Also, it should not be placed in a built-in installation, such as a<br />
bookcase or cabinet, which may impede the flow of air through the<br />
ventilation openings.<br />
3. Heat – The unit should be situated away from heat sources such as<br />
radiators, heat registers, stoves or other appliances (including amplifiers)<br />
that produce heat.<br />
4. Power Sources – The unit should be connected to a power supply only of<br />
the type described in the operating instructions or as marked on the<br />
appliance.<br />
5. Power-Cable Protection – Power supply cables should be routed so that<br />
they are not likely to be walked on or pinched by items placed upon or<br />
against them. It is always best to have a clear area from where the cable<br />
exits the unit to where it is plugged into an AC socket.<br />
6. Cleaning – The unit should be cleaned only as recommended. See the<br />
Maintenance section of this manual for cleaning instructions.<br />
7. Objects and Liquid Entry – Care should be taken so that objects do not fall<br />
and liquids are not spilled into any openings or vents located on the<br />
product.<br />
8. Attachments – Do not use attachments not recommended by the product<br />
manufacturer.<br />
9. Lightning and Power Surge Protection – Unplug the unit from the wall<br />
socket and disconnect the antenna or cable system during a lightning<br />
storm or when it is left unattended and unused for long periods of time. This<br />
will prevent damage to the product due to lightning and power-line surges.<br />
10. Overloading – Do not overload wall sockets, extension cords, or integral<br />
convenience receptacles as this can result in a risk of fire or electric shock.<br />
11. Damage Requiring Service – The unit should be serviced by qualified<br />
service personnel when:<br />
A. the power supply cable or plug has been damaged.<br />
B. objects have fallen into or liquid has been spilled into the enclosure.<br />
C. the unit has been exposed to rain.<br />
D. the unit has been dropped or the enclosure damaged.<br />
E. the unit exhibits a marked change in performance or does not operate<br />
normally.<br />
12
IMPORTANT SAFETY TIPS (CONTINUED)<br />
12. Periods of Non use – If the unit is to be left unused for an extended period<br />
of time, such as a month or longer, the power cable should be unplugged<br />
from the unit to prevent damage or corrosion.<br />
13. Servicing – The user should not attempt to service the unit beyond those<br />
methods described in the user’s operating instructions. Service methods<br />
not covered in the operating instructions should be referred to qualified<br />
service personnel.<br />
14. Magnetic Interference: This product’s speakers contain powerful magnets<br />
which could cause interference or damage to sensitive equipment such as<br />
hard drives, CRT televisions and monitors, as well as medical, scientific,<br />
and navigational devices. Keep this unit away from these products at all<br />
times.<br />
A GUIDE TO PRODUCT SAFETY<br />
This device complies with Part 15 of the FCC Rules, operation is subject to the<br />
following two conditions: (1) This device may not cause harmful interference, and (2)<br />
this device must accept any interference received, including interference that may<br />
cause undesired operation.<br />
• Warning: Changes or modifications to this unit not expressly approved by the party<br />
responsible for compliance could void the user’s authority to operate the equipment.<br />
• NOTE: This equipment has been tested and found to comply with the limits for a Class<br />
B digital device, pursuant to Part 15 of the FCC Rules.<br />
These limits are designed to provide reasonable protection against harmful interference in a<br />
residential installation. This equipment generates, uses and can radiate radio frequency<br />
energy and, if not installed and used in accordance with the instructions, may cause harmful<br />
interference to radio communications.<br />
However, there is no guarantee that interference will not occur in a particular installation. If<br />
this equipment does cause harmful interference to radio or television reception, which can<br />
be determined by turning the equipment off and on, the user is encouraged to try to correct<br />
the interference by one or more of the following measures:<br />
• Reorient or relocate the receiving antenna.<br />
• Increase the separation between the equipment and receiver.<br />
• Connect the equipment into an outlet on a circuit different from that to which the<br />
receiver is connected.<br />
• Consult the dealer or an experienced radio/TV technician for help.<br />
This Class B digital apparatus complies with Canadian ICES-003.<br />
Cet appareil numérique de la classe B est conforme à la norme NMB-003 du Canada<br />
13
LIMITED 1 YEAR WARRANTY<br />
<strong>iHome</strong> Products, a division of SDI Technologies Inc. (hereafter referred to as SDI), warrants this<br />
product to be free from defects in workmanship and materials, under normal use and conditions,<br />
for a period of one (1) year from the date of original purchase.<br />
Should this product fail to function in a satisfactory manner, it is best to first return it to the store<br />
where it was originally purchased. Should this fail to resolve the matter and service still be required<br />
by reason of any defect or malfunction during the warranty period, SDI will repair or, at its<br />
discretion, replace this product without charge. This decision is subject to verification of the defect<br />
or malfunction upon delivery of this product to the Factory Service Center authorized by SDI<br />
Customer Service. The product must include proof of purchase, including date of purchase. An<br />
out-of-warranty fee for service will be charged for units that are received without proof of purchase.<br />
Before returning this product for service, please first replace the batteries (if applicable) with fresh<br />
ones, as exhausted or defective batteries are the most common cause of problems encountered.<br />
If service is still required:<br />
1. Call SDI Customer Service at 1-877-446-6301 for Return Authorization and for the address of<br />
the Factory Service Center.<br />
2. Remove the batteries (if applicable) and pack the unit in a well padded, heavy corrugated box.<br />
SDI is not responsible for damage that occurs during shipping to the Factory Service Center.<br />
3. Enclose a photocopy of your sales receipt, credit card statement, or other proof of the date of<br />
purchase, if within the warranty period. Also include your name and address information, a brief<br />
description for why the unit is being returned, and the return authorization number. No unit can be<br />
processed without a return authorization number.<br />
4. Write the return authorization number on the side of the shipping package and send the unit<br />
prepaid and insured to the Factory Service Center address authorized by SDI Customer Service.<br />
Disclaimer of Warranty<br />
NOTE: This warranty is valid only if the product is used for the purpose for which it was designed.<br />
It does not cover (i) products which have been damaged by negligence or willful actions, misuse or<br />
accident, or which have been modified or repaired by unauthorized persons; (ii) cracked or broken<br />
cabinets, or units damaged by excessive heat; (iii) damage to digital media players, CD’s or tape<br />
cassettes (if applicable); (iv) the cost of shipping this product to the Factory Service Center and its<br />
return to the owner.<br />
This warranty is valid only in the United States of America and does not extend to owners of the<br />
product other than to the original purchaser. In no event will SDI or any of its affiliates, contractors,<br />
resellers, their officers, directors,<br />
shareholders, members or agents be liable to you or any third party for any consequential or<br />
incidental damages, any lost profits, actual, exemplary or punitive damages. (Some states do not<br />
allow limitations on implied warranties or exclusion of consequential damages, so these restrictions<br />
may not apply to you.) This warranty gives you specific legal rights, and you may also have other<br />
rights which vary from state to state.<br />
Your acknowledgement and agreement to fully and completely abide by the above mentioned<br />
disclaimer of warranty is contractually binding to you upon your transfer of currency (money order,<br />
cashier's check, or credit card) for purchase of your SDI product.<br />
Questions? Visit www.ihomeaudio.com Toll Free Customer Service: 1-877-446-6301<br />
©SDI Technologies 2013 All rights Reserved<br />
<strong>iPL8</strong>-04092013-A<br />
Printed in China