Fine Art Printing for Photographers - Digital Outback Photo
Fine Art Printing for Photographers - Digital Outback Photo
Fine Art Printing for Photographers - Digital Outback Photo
Create successful ePaper yourself
Turn your PDF publications into a flip-book with our unique Google optimized e-Paper software.
<strong>Fine</strong> <strong>Art</strong> <strong>Printing</strong> <strong>for</strong><br />
<strong><strong>Photo</strong>graphers</strong><br />
Exhibition Quality Prints with Inkjet Printers<br />
2 nd Revised Edition<br />
Uwe Steinmueller • Juergen Gulbins
Uwe Steinmueller, ustein_outback@yahoo.com<br />
Juergen Gulbins, jg@gulbins.de<br />
Publisher: Steinmueller <strong>Photo</strong><br />
Find us on the Web: www.outbackphoto.com<br />
Copy editor: Deborah Cooper, James Johnson<br />
Layout and Type: Juergen Gulbins<br />
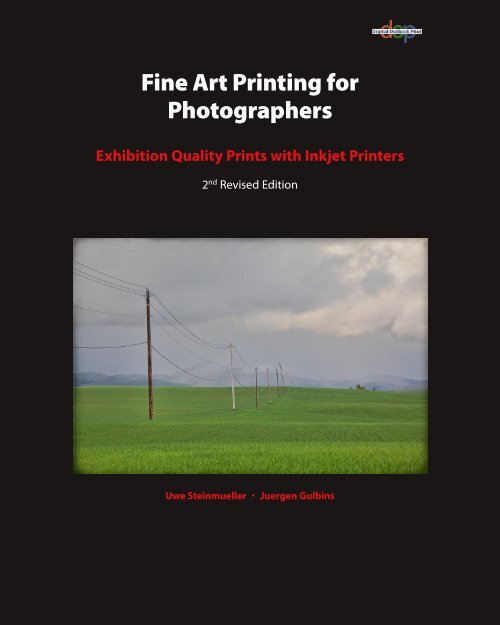
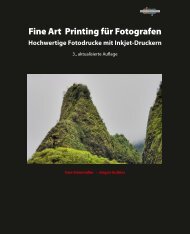
Cover <strong>Photo</strong>: Uwe Steinmueller<br />
© 2011 by Uwe Steinmueller and Juergen Gulbins.<br />
DOP2011_01US, 2011-0308.<br />
2 nd Revised Edition<br />
All product names and services identified throughout this book are trademarks or<br />
registered trademarks of their respective companies. They are used throughout<br />
this book in editorial fashion only and <strong>for</strong> the benefit of such companies. No such<br />
uses, or the use of any trade name, is intended to convey endorsement or other<br />
affiliation with the book.<br />
No part of the material protected by this copyright notice may be reproduced or<br />
utilized in any <strong>for</strong>m, electronic or mechanical, including photocopying, recording,<br />
or by any in<strong>for</strong>mation storage and retrieval system, without written permission<br />
of the copyright owner.
<strong>Fine</strong> <strong>Art</strong> <strong>Printing</strong> <strong>for</strong><br />
<strong><strong>Photo</strong>graphers</strong><br />
Exhibition Quality Prints with Inkjet Printers<br />
2 nd Revised Edition<br />
Uwe Steinmueller · Juergen Gulbins
Contents<br />
0 Preface xi<br />
Foreword by Mac Holbert (Nash Editions)<br />
xiv<br />
1 <strong>Printing</strong> Techniques 1<br />
1.1 Basic <strong>Printing</strong> Techniques 2<br />
How Many Pixels or Dots Per Inch Do You Really Need? 6<br />
1.2 Offset <strong>Printing</strong> 8<br />
1.3 Laser Printers 9<br />
1.4 Dye-Sublimation Printers 11<br />
1.5 LightJet® <strong>Printing</strong> (<strong>Digital</strong> <strong>Photo</strong> Print) 12<br />
1.6 Inkjet <strong>Printing</strong> 15<br />
Inkjet Technology 15<br />
Droplet Size 17<br />
Printer Resolution 17<br />
Number of Inks 18<br />
Types of Inks 18<br />
1.7 Other <strong>Printing</strong> Techniques 19<br />
1.8 How to Pick Your <strong>Fine</strong> <strong>Art</strong> Printer 19<br />
2 Inks, Papers, and Print Permanence 27<br />
2.1 Print Permanence 28<br />
Light as a Factor of Print Permanence 31<br />
Temperature Influencing “Dark Fading” 31<br />
Humidity 32<br />
Gases and Their Influence on Print Permanence 32<br />
Paper Additives 32<br />
How to Improve the Permanence of Your Prints 33<br />
2.2 Inks 34<br />
Dye-Based Inks 34<br />
Pigmented Inks 35<br />
2.3 Papers 36<br />
Paper Characteristics 37<br />
Paper Ingredients 38<br />
Whiteness and Brightness 39<br />
Paper Coating 41<br />
Paper Surface – Paper Finish 43
vi<br />
Contents<br />
Paper Size 44<br />
Matching Inkjet Technology, Subject, Paper, and Ink 44<br />
Some More Characteristics 45<br />
Other Materials 46<br />
Paper Handling 47<br />
3 Color Management <strong>for</strong> <strong>Printing</strong> 51<br />
3.1 Understanding Different Color Models 52<br />
RGB Color Model 53<br />
Lab Color Model 53<br />
CMYK Color Model 53<br />
Grayscale Mode 54<br />
HSB/HSL Color Model 54<br />
Color Spaces 54<br />
3.2 Understanding Color Management 55<br />
Why You Need to Understand Color Management 55<br />
ICC Profiles 56<br />
What is a Color Management System? 56<br />
Color Working Spaces 57<br />
3.3 Visualization of Color Spaces 59<br />
3.4 Color Space Mapping 62<br />
3.5 Creating Device Profiles 63<br />
Camera Profiles 64<br />
Printer Profiles 64<br />
3.6 Profiling Your Monitor 65<br />
Calibration by Eye 65<br />
Hardware-Based Calibration 65<br />
Calibration Settings 65<br />
Calibrating and Profiling Using Eye-One Display 2 66<br />
3.7 <strong>Photo</strong>shop Color-Management Settings 69<br />
3.8 Profiles <strong>for</strong> Your Printer 72<br />
Profiling Your Printer 73<br />
Printer Profiling Using Eye-One <strong>Photo</strong> (i1 <strong>Photo</strong> Pro) 74<br />
3.9 Installing and Uninstalling Profiles 78<br />
3.10 Finding a Printer’s Black Point and White Point 79<br />
3.11 Sanity-Check 80<br />
3.12 Soft-Proofing and Gamut Warning 84<br />
3.13 Metamerism and Bronzing 87
Contents<br />
vii<br />
4 <strong>Fine</strong> <strong>Art</strong> <strong>Printing</strong> Workflow 89<br />
4.1 Basic <strong>Printing</strong> Workflow 90<br />
4.2 Tuning Tonality 90<br />
Global Tonality Tuning 94<br />
Local Tonality Tuning 100<br />
Corrections Related to Certain Tonality Ranges<br />
(Shadows, Midtones, and Highlights) 104<br />
Painting Techniques (Mainly Dodge and Burn) 107<br />
Dodge and Burn Using Layers 109<br />
4.3 Tuning Colors 111<br />
Selective Saturation Improvements 111<br />
More Saturation and Contrast Tricks 113<br />
Variation with “Soft Light” 116<br />
Removing Blue Shadow Casts 117<br />
4.4 “Ring Around” and Variations 119<br />
Ring Around 120<br />
Using Variations 122<br />
4.5 Local Contrast Enhancement 125<br />
4.6 Further Preparations <strong>for</strong> <strong>Printing</strong> 129<br />
4.7 Resizing 130<br />
4.8 Sharpening 131<br />
5 <strong>Fine</strong> <strong>Art</strong> Printers in Practical Use 135<br />
5.1 Printer Installation 136<br />
5.2 Printer Adjustments 138<br />
5.3 General Driver Tasks and Settings 139<br />
Settings that Influence Print Quality 139<br />
More Settings 141<br />
5.4 The Actual Print Workflow 143<br />
5.5 <strong>Printing</strong> Your Image 147<br />
Basic Print Settings 147<br />
<strong>Photo</strong>shop CS5 Print Dialog 150<br />
<strong>Printing</strong> Under Windows with the Epson R3880 153<br />
Color <strong>Printing</strong> with the Canon iPF6100 under Mac OS X 156<br />
Black-and-White <strong>Printing</strong> 160<br />
5.6 <strong>Printing</strong> from Adobe <strong>Photo</strong>shop Lightroom 161<br />
5.7 <strong>Printing</strong> Using a Printer Plug-in 164<br />
5.8 Test Prints 167<br />
5.9 Print Quality Related Issues 168<br />
5.10 Some More Recommendations <strong>for</strong> <strong>Printing</strong> 169<br />
5.11 Printed Frames 171
viii<br />
Contents<br />
6 <strong>Printing</strong> Packages and RIPs 173<br />
6.1 What is a RIP? 174<br />
Why Use a RIP? 174<br />
6.2 <strong>Printing</strong> Using a <strong>Printing</strong> Package 175<br />
Qimage 175<br />
6.3 <strong>Printing</strong> Using a RIP 179<br />
QuadToneRIP 179<br />
ImagePrint by Colorbyte Software 182<br />
EFI Designer Edition 185<br />
7 Black-and-White Prints 189<br />
7.1 Workflow <strong>for</strong> Black-and-White Prints 190<br />
7.2 From Color to Black-and-White 192<br />
Black-and-White Conversion Using the Channel Mixer 193<br />
Using the <strong>Photo</strong>shop "Black & White" Adjustment Function 194<br />
7.3 Printers with Black-and-White-Enabled Drivers 195<br />
B lack-and-White Prints with Epson's <strong>Fine</strong> <strong>Art</strong> Printers 197<br />
Making Black-and-White Prints using the HP Designjet Z3200 199<br />
7.4 Specialized “Raster Image Processing” (RIP) Software <strong>for</strong> Blackand-White<br />
<strong>Printing</strong> 200<br />
Colorbyte’s ImagePrint 200<br />
QuadToneRIP 202<br />
Other Solutions 202<br />
7.5 Soft-Proofing <strong>for</strong> Black-and-White Prints 202<br />
7.6 Papers <strong>for</strong> Black-and-White Prints 205<br />
8 Image Evaluation and Presenting <strong>Fine</strong> <strong>Art</strong> Prints 207<br />
8.1 Critical Image Inspection 208<br />
8.2 Presentation Options 210<br />
8.3 Portfolio Binders 211<br />
8.4 Matting 212<br />
True Matting 212<br />
Faux Matting 218<br />
8.5 Framing a Print 219<br />
8.6 Coating a Print 222<br />
8.7 Displaying a Print in True Light 223<br />
8.8 Storing Prints 225
Contents<br />
ix<br />
A Some <strong>Fine</strong> <strong>Art</strong> Printers 227<br />
A.1 General Points on <strong>Fine</strong> <strong>Art</strong> Printers 228<br />
Inks <strong>for</strong> Black-and-White Prints 228<br />
<strong>Photo</strong> Black and Matte Black Simultaneously On-line 228<br />
Ink Cartridge Volume 229<br />
Print Plug-ins 229<br />
Printer Linearization and Calibration 229<br />
How to Prevent Nozzle Clogging 230<br />
Printer Life Cycles 231<br />
A.2 Epson <strong>Fine</strong> <strong>Art</strong> Printers 233<br />
Epson Stylus <strong>Photo</strong> R800 / R1800 234<br />
Epson Stylus <strong>Photo</strong> R1900 234<br />
Epson Stylus <strong>Photo</strong> R2400 / Pro 4800 / Pro 7800 / Pro 9800 238<br />
Epson Stylus Pro 3800 / Pro 3880 239<br />
Epson Stylus R2880 / Pro 4880 / 7880 / 9880 240<br />
Epson Stylus Pro 11880 241<br />
Epson Stylus Pro 4900 / 7900 / 9900 242<br />
A.3 Canon’s <strong>Fine</strong> <strong>Art</strong> Printers 243<br />
Canon PIXMA Pro9500 / Pro9500 Mk II 244<br />
Canon imagePROGRAF iPF5100 / 6100 / 6300 245<br />
Canon imagePROGRAF iPF8100 / iPF8300 / iPF9100 252<br />
A.4 HP’s <strong>Fine</strong> <strong>Art</strong> Printers 253<br />
HP <strong>Photo</strong>smart Pro B9180 254<br />
HP Designjet Z3200 <strong>Photo</strong> 261<br />
B Papers <strong>for</strong> <strong>Fine</strong> <strong>Art</strong> <strong>Printing</strong> 273<br />
B.1 <strong>Digital</strong> <strong>Fine</strong> <strong>Art</strong> Papers 274<br />
Some Notes on OBAs 275<br />
B.2 Some Examples of <strong>Fine</strong> <strong>Art</strong> Papers 278<br />
Matte Papers 278<br />
Satin/Glossy Coated Rag Papers 279<br />
High-Gloss Papers 280<br />
B.3 A New Generation of Fiber-based and Baryt Papers 281<br />
B.4 Specialty Papers and Canvas 283<br />
B.5 <strong>Fine</strong> <strong>Art</strong> Papers Well Suited <strong>for</strong> Black-and-White Prints 283<br />
A Note on Paper Grammage and Paper Thickness 285<br />
C Glossary and Acronyms 287<br />
D Resources 295<br />
D.1 Recommended Books 295<br />
D.2 Organizations and Institutes 295<br />
D.3 Useful Resources on the Internet 296<br />
Index 303
x<br />
Preface<br />
Camera: Nikon D2X
Preface<br />
0<br />
A brief history<br />
Inkjet printers have been around <strong>for</strong> more than 20 years, yet digital<br />
inkjet printing technology has only come of age in the past few years.<br />
The earliest consumer models lacked the technology and sophistication<br />
to print photographs similar in quality to common silver-halogenid<br />
prints (stereotypical photos printed on photographic paper), developed<br />
from film negatives or slides. Worse, inkjet prints lacked the lightfastness<br />
of silver-halogenid prints. For most users, the digital inkjet printers that<br />
delivered the desired image quality, e.g. Iris prints, were, un<strong>for</strong>tunately,<br />
rarely af<strong>for</strong>dable. This economic obstacle has changed dramatically in the<br />
last few years, with the rise of digital photography. Thus, there is now a<br />
sizeable market <strong>for</strong> a new breed of inkjet printers from seasoned manufacturers<br />
like Epson, HP, Canon, Lexmark and Dell, among other newer<br />
brands.<br />
Among the first Super printers, suitable <strong>for</strong> both fine art printing<br />
and the budget of a broad range of buyers, were the Epson P2000<br />
and P2200 (P2100 in Europe). The breakthrough of this line was based<br />
on quality, af<strong>for</strong>dable price, and an Ultrachrome ink set.<br />
Size matters<br />
Many photographs impress viewers only when presented at an opti mum<br />
viewing size; <strong>for</strong> example, the typical pocket-size 4 x 6 <strong>for</strong>mat is clearly<br />
unsuitable as a pleasing means of displaying a beautiful print. For most<br />
good shots, even the larger Letter, Legal and A4 sizes often leave viewers<br />
wanting more. Enter the A3+/Super prints, which measure an impressive<br />
13 x 19 inches. In 2005, there was an explosion in the use of these<br />
medium- and large-<strong>for</strong>mat prints, an impressive statistic that further in<br />
2006 and 2007 (and beyond) increased when a number of new fine art<br />
printers were introduced by HP, Canon, and Epson.
xii<br />
Preface<br />
For some photographs, it is advisable to produce even larger prints. Printer<br />
manufacturers like Epson, HP and Canon market printers that promise<br />
high-quality prints up to 64 inches wide. There are many other large-<strong>for</strong>mat<br />
printer manufacturers out there, like Encad, Oce, Mutoh, and Roland, yet<br />
they are not designed <strong>for</strong> true, fine art printing. For this reason, we chose<br />
to focus on the moderately sized prints and printers, typically from Letter/<br />
A4 to C/A2. Most of the lessons of fine art print ing, however, can be applied<br />
to both smaller and larger prints and printers.<br />
<strong>Fine</strong> <strong>Art</strong> <strong>Printing</strong> is a Sensuous Endeavor<br />
The highly technical nature of fine art printing should not overshadow its<br />
ability to awaken the senses. As the term “fine art printing” expresses, it is<br />
the printing of art in a highly artistic fashion. It allows you to project onto<br />
paper an image created with a simple digital or film camera, after enhancing<br />
the image with image-manipulation software to more accurately represent<br />
the original. Today’s fine art printing, using a good digital inkjet<br />
printer, allows you to produce a quality of equal or higher value than that<br />
of traditional silver-halogenid prints, and clearly surpasses the quality of<br />
offset or rotogravure printing. When per<strong>for</strong>med optimally, your printing<br />
can achieve a richer color gamut and finer tonal gradations than with traditional<br />
book- and magazine-printing techniques.<br />
Experiment … and Discover!<br />
As with other genres of art, without proper knowledge and practical experience,<br />
the resulting print may not be as accurate as the image on your<br />
computer monitor, so you may have to try several different techniques,<br />
papers, paper sizes, borders, and matte styles. With careful practice, you<br />
will hopefully be on your way to producing museum-quality work with<br />
less ef<strong>for</strong>t than you had previously dreamed.<br />
Though most prints are either displayed in frames behind glass or<br />
Plexiglas, often to reduce glare, this has the effect of reducing the visual<br />
appeal of the print and the fine art paper on which it is printed. There<strong>for</strong>e,<br />
it is important to experiment with different types of fine art paper to<br />
achieve the desired result. Paper with a certain texture and tactile essence<br />
can be very sensuous indeed, so take your time to find the paper that best<br />
suits your taste and needs and to achieve the result you like.<br />
A printing paper’s color, surface, texture, and gloss will determine the<br />
kind of print you will produce, and must be carefully chosen to match the<br />
feeling you wish to project. An architectural shot may require a different<br />
printing paper than a photograph of nature or a landscape. A black-andwhite<br />
print calls <strong>for</strong> a certain type of paper that would be unsuitable to a<br />
full-color shot. A certain print displayed without glass or Plexiglas will<br />
appear entirely different than one framed behind these types of transparent<br />
coverings.
Preface<br />
xiii<br />
Kamera: Nikon D2X<br />
Both authors use digital cameras – Uwe Steinmueller as a professional and<br />
Juergen Gulbins as a serious amateur. They were both led to fine art printing<br />
by the desire to control their workflow from start to finish, from the<br />
shooting of photos to the finished print. <strong>Printing</strong> with a fine art printer <strong>for</strong><br />
them, is not a simple, tiresome task, but the final step, and a very important<br />
one – toward producing a pleasing image.<br />
Planning <strong>for</strong> printing and printing itself takes time, but, in most cases,<br />
only a perfect, finished print gives full value to a good shot. Normally, only<br />
a few of all the photos you take will make it into a perfect, fine art print, but<br />
in many cases, this print will be the crowning glory of your photographic<br />
shooting. With the techniques shown in this book (together with others<br />
books we have published), you should be in complete control from start to<br />
finish.<br />
We hope that the control of this process and the creative tasks along<br />
the way give you the same satisfaction and relaxation we found while doing<br />
it. Producing a satisfying print from your work has similarities to<br />
Christmas: the work is finished, and the present is unwrapped. You must<br />
still find a place to keep or present it, a place where it can be enjoyed <strong>for</strong> years<br />
to come.<br />
Matting, framing, and hanging of<br />
prints is its own subject, and we go<br />
into it only briefly. We do, however,<br />
give some advice on how to keep and<br />
store your prints.<br />
Acknowledgements<br />
Thanks to our many influencers and friends like Bill Atkinson, Jim Collum,<br />
Charles Cramer, Brad Hinkel, Mac Holbert, and Ben Willmore.<br />
Uwe Steinmueller, San José (Cali<strong>for</strong>nia) Januray 2011<br />
Juergen Gulbins, Keltern (Germany)
xiv<br />
Preface<br />
Foreword by Mac Holbert (Nash Editions)<br />
Read our brief introduction to Nash<br />
Editions in our <strong>Printing</strong> Insights #22: “<strong>Digital</strong><br />
Printmaking & Printmakers” at<br />
www.outbackphoto.com/printinginsights/<br />
pi022/essay.html<br />
www.nasheditions.com<br />
In 1989 my partner, Graham Nash, and I embarked on a search <strong>for</strong> a way to<br />
save a large body of his photographic work. The original negatives had been<br />
lost while being shipped from Los Angeles to Graham’s home in San<br />
Francisco. All that was left was a box of “jumbo” contact sheets. Graham<br />
had been offered a show at the Parco Galleries in Tokyo and without his<br />
negatives he was unable to put together an exhibit. In solving the “problem”<br />
we ended up creating a method and a studio that has been recognized<br />
by many as the first fine art digital photography studio in the world. With<br />
the help of our friends, David Coons and Charles Wehrenberg, Jack<br />
Duganne and I experimented with hardware and software and by 1991 had<br />
developed a product that we felt was ready <strong>for</strong> the world. As it turned out<br />
we still had much to learn.<br />
The only source of in<strong>for</strong>mation in those days was from the few individuals<br />
that were involved in the technology. When I opened the door to<br />
Nash Editions in July of 1991, I had basic working knowledge of word processing<br />
and database management but I didn’t have a clue what the difference<br />
was between a pixel and a raster. I asked a lot of questions, nurtured<br />
a lot of friendships and slowly I began to develop an overview of image<br />
processing and image output. By the mid 1990’s the Internet had become<br />
an excellent source of in<strong>for</strong>mation exchange and I began to frequent the<br />
online <strong>for</strong>ums that focused on imaging and printing. I can’t remember<br />
specifically when I first saw the name Uwe Steinmueller but I believe it was<br />
either 2000 or 2001. Suddenly I noticed his name appearing everywhere.<br />
Not only was he in quest of in<strong>for</strong>mation but he was, more importantly,<br />
sharing it with anyone and everyone who would listen.<br />
I finally got to meet Uwe in 2003 when he and his wife Bettina visited<br />
my studio. Their enthusiasm <strong>for</strong> the digital photography revolution was<br />
obvious. I have seen many “experts” come and go over the past 16 years.<br />
Uwe’s expertise and his openness have gained him a high level of respect<br />
and admiration in the evolving world of digital photography.<br />
I am very impressed with the book you are about to read. It’s in<strong>for</strong>mation<br />
like this that has helped to raise the quality of digital output and reduce<br />
the traditional art world’s resistance to the use of digital tools in art. It is a<br />
book written by someone who KNOWS fine art digital printmaking. Uwe’s<br />
style is concise and to the point. This comprehensive and complete guide<br />
to fine art digital printmaking should be included in the library of anyone<br />
who is serious about making fine art digital prints.<br />
I only wish that all this excellent in<strong>for</strong>mation had been available to me<br />
back in 1989 when I embarked on my digital journey. The hours I wasted<br />
… The ink and paper I wasted … The late nights …The cold suppers …<br />
Mac Holbert April 2006
Preface<br />
xv<br />
What’s New in the Second Edition?<br />
This is the second edition of this book. Since the first edition in 2006 quite<br />
a few new printers suitable <strong>for</strong> fine art prints were introduced by HP, Epson<br />
and Canon, some of them outdating printers that we mentioned in the first<br />
edition. We try to cover these new printers in this book. Quite a few new<br />
fine art papers have hit them market, and we will cover these too in the<br />
current edition. We have also found some effective good ways to determine<br />
teh amount of brighteners that are used in specific papers, so we will give<br />
you some hints on this subject as well.<br />
New printers and papers will continue to come up. To facilitate the<br />
update in these, we slightly changed the scheme of the book. The actual<br />
practical printing that is described in chapter 5 now merely serves as an<br />
example. We off-loaded details on specific printers to appendix A, where<br />
you will find a section <strong>for</strong> each specific printer or printer line. Additionally,<br />
you will find updates on these printers on Uwe’s Internet site as soon as we<br />
are able to lay hands on new printer models and we have had the opportunity<br />
to test new papers. So, <strong>for</strong> updates, have a glance at that site from time<br />
to time at: www.outbackprint.com<br />
New functions have appeared in applications described in our first edition;<br />
also new applications and filters have come to the market, which are<br />
described in this second edition. Some of the dialogs of <strong>Photo</strong>shop where<br />
updated when <strong>Photo</strong>shop CS3 was introduced. As the minor changes of the<br />
interface were not relevant <strong>for</strong> our task here, we did not update all screenshots<br />
– please accepts our apologies <strong>for</strong> this.<br />
As we both work on Mac OS X as well as Windows, you will find<br />
screenshots from both plat<strong>for</strong>ms. As the interface and the handling of<br />
<strong>Photo</strong>shop and most other applications are almost identical on both plat<strong>for</strong>ms,<br />
this should not confuse you. When using keyboard shortcuts, in<br />
most cases we will specify both versions – where not, simply substitute the<br />
Windows K key by the Mac  key and the Windows À key by the Á<br />
key when working with Mac OS X (and vice versa). Q stands <strong>for</strong> the Shift<br />
key. Q-K-(A) implies, that you have to press all these keys simultaneously.<br />
This revised reprint of the 2 nd edition includes all the latest changes in<br />
<strong>Photo</strong>shop CS4 and CS5, and also covers printer models introduced in<br />
2009 and 2010. Once again, we haven’t renewed all of the screenshots to<br />
reflect the slightly changed <strong>Photo</strong>shop GUI, as the relevant settings and<br />
menu entries remain the same.
Index 305<br />
light (continued)<br />
sunlight 223<br />
tungsten light 223<br />
UV 31<br />
LightJet 14<br />
printing 12<br />
lignen 39<br />
lines per inch 2, 4<br />
local contrast enhancement 125<br />
lossless compression 290<br />
lpi (LPI) 2, 4, 290<br />
LUCIA EX 231, 252<br />
luminance 65, 290<br />
luminosity 114<br />
LUV 61<br />
lux 291<br />
lx (lux) 291<br />
LZW (Lepel-Zip-Welsch compression) 291<br />
M<br />
mapping<br />
color space 62<br />
master image 90<br />
mat cutting 214<br />
matting 212, 218<br />
faux matting 218<br />
process 212<br />
true matting 212<br />
maximum density 45<br />
medium 154<br />
metadata 291<br />
metamerism 87, 210, 291<br />
microcontrast<br />
enhancement 127<br />
microporous 41<br />
coating 41<br />
midtones 91, 92<br />
mil 291<br />
ml (milliliter) 229<br />
Monaco Systems 299<br />
monitor profile 65<br />
N<br />
nozzle clogging 230<br />
O<br />
OBA (optical brightening agents) 275, 291<br />
offset printing 8<br />
opacity 46<br />
optical brighteners 40, 291<br />
optical brightening agents 40<br />
optical brightening agents (OBA) 275<br />
OSD (online screen display) 67<br />
overcoats 42<br />
P<br />
painting techniques 107<br />
paper 36, 300<br />
additives 32<br />
alpha cellulose paper 39<br />
base weight 37<br />
brightness 39<br />
buffered paper 39, 45<br />
caliper 40<br />
characteristics 37<br />
coating 41, 42<br />
color 39<br />
simulate paper color 85<br />
handling in printer driver 156<br />
ingredients 38<br />
opacity 46<br />
preparation 145<br />
rag paper 38<br />
RC paper 42<br />
size 41, 44<br />
sizes 49<br />
sizing 43<br />
sulphite paper 39<br />
swellable paper 41<br />
thickness 40, 285<br />
weight 40, 290<br />
whiteness 39<br />
P.A.T. (photographic activity test) 291<br />
PCS (profile connection space) 64, 291<br />
perceptual 62, 163, 291<br />
intent 291<br />
perceptual rendering intent 70, 152<br />
permanence<br />
print permanence 28<br />
photographic activity test (P.A.T.) 291<br />
photo print 12<br />
photo printers 4<br />
photo printing 12<br />
<strong>Photo</strong>REt 3<br />
<strong>Photo</strong>shop<br />
color and monitor profile settings 69<br />
conversion options 70<br />
pH-value 45<br />
Pictorico 280<br />
Piezo 15<br />
pigment-based inks 34<br />
pixels per inch 2<br />
PixelTrust 42<br />
plug-ins<br />
print plug-ins 229<br />
point (printed point)<br />
2<br />
portfolio binder 211<br />
PostScript RIP 25<br />
ppc 2<br />
ppi (PPI) 2, 291<br />
precoating 42<br />
preparations <strong>for</strong> printing 129<br />
prepare<br />
image <strong>for</strong> printing 143<br />
printer 145<br />
presentation<br />
options 210<br />
press-proofing 174<br />
primary colors 2, 4, 52, 291<br />
print<br />
archiving 147<br />
color management settings 162<br />
framing 147<br />
heads 25<br />
hexachrome printing 8<br />
paper type 139<br />
permanence 20, 28<br />
planning 143<br />
plug-ins 229<br />
quality 165, 168<br />
quality setting 139<br />
resolution 161<br />
workflow 143<br />
your own image 147<br />
printed point 2<br />
printer<br />
adjustments 138<br />
color calibration 138<br />
connection 136<br />
costs 22<br />
dye-sublimation 11<br />
head alignment 138<br />
head cleaning 138<br />
inkjet printer 15<br />
installation 136<br />
interface 24<br />
linearization and calibration 229<br />
maintenance utilities 158<br />
native resolution 161<br />
preparation 145<br />
profile 64, 72, 137<br />
profiling 73<br />
settings 157<br />
thermo-sublimation 11<br />
unpacking 136<br />
PrintFIX 74<br />
printing 135<br />
black-and-white 20, 189<br />
digital photo print 12<br />
offset printing 8<br />
preparations <strong>for</strong> printing 129<br />
screen printing 19<br />
silk-screen printing 19<br />
techniques 2<br />
using a printing package 175<br />
workflow 90
306<br />
Index<br />
prints<br />
coating 222<br />
displaying 223<br />
framing 219<br />
laminating 222<br />
matting 212<br />
protecting from light 224<br />
storing 225<br />
Pro 4800 240<br />
profile 291<br />
camera profile 64<br />
canned profile 56, 72, 229<br />
custom profile 56, 73<br />
monitor profile 65<br />
printer profile 64<br />
printer profiles 137<br />
profiling 291<br />
profile connection space (PCS) 291<br />
proof<br />
CMYK proofs 174<br />
contract press-proofs 174<br />
Pro<strong>Photo</strong> RGB 58, 59, 61<br />
ProRes 3<br />
PS (<strong>Photo</strong>shop) 291<br />
Q<br />
Qimage 130, 175<br />
QuadTone RIP 160<br />
QuadToneRIP 179, 191, 196, 202<br />
Quick Mask mode 103<br />
R<br />
rag 38<br />
raster cell 3<br />
raster image processor (RIP) 173, 292<br />
rasterization 3<br />
RAW 291<br />
RC (resin coated paper) 41, 42, 48, 291<br />
reception layer 38<br />
reflection 39<br />
relative colorimetric 62, 163, 291<br />
relative colorimetric rendering intent 70<br />
152<br />
rendering intent 57, 140, 152, 163, 291<br />
perceptual 163<br />
saturation 163<br />
resin coated paper (RC) 41, 42, 291<br />
resizing 130<br />
resolution 292<br />
print resolution 161<br />
RGB 292<br />
Adobe RGB (1998) 58, 293<br />
color model 53<br />
ECI-RGB 58, 293<br />
Pro<strong>Photo</strong> RGB 58, 59<br />
RH (relative humidity) 29, 292<br />
Ring Around 120<br />
RIP (raster image processor) 25, 45, 87, 173,<br />
174, 210, 292<br />
<strong>for</strong> black-and-white printing 200<br />
ImagePrint 87<br />
PostScript 25<br />
roller marks 168<br />
rotogravure printing 2<br />
S<br />
sanity-check 80<br />
saturation 291<br />
intent 63<br />
screening 175<br />
screen printing 19<br />
S-curves 99<br />
shadow recovery 101<br />
shadows 91, 92<br />
sharpening 131<br />
creative sharpening 131<br />
output-specific 131<br />
silk-screen printing 19<br />
simulate black ink 85<br />
simulate paper color 85<br />
sizing 42, 43<br />
Smart Sharpen 133<br />
Soft Light (blending mode) 116<br />
soft-proofing 63, 202, 203, 292<br />
black-and-white prints 202<br />
spectrophotometer 25, 65, 73, 74, 210, 230,<br />
253, 261, 262, 263, 265, 269, 292<br />
split toning 201<br />
spraying/coating 33<br />
sRGB 13, 58, 61, 292<br />
stochastic dithering 4<br />
stochastic pattern 4<br />
substrate 37<br />
subtractive color model 53<br />
sulphite 39<br />
sulphite paper 39<br />
sunlight 223<br />
swellable 41<br />
swellable paper 41, 292<br />
T<br />
tagged images 292<br />
test prints 167<br />
thermal degradation 31<br />
thermal inkjets 15<br />
thermo-sublimation printer 11<br />
thickness 285<br />
T-hinge 215<br />
TIFF 292<br />
tonality<br />
highlights 91<br />
midtones 91<br />
regions 91<br />
shadows 91<br />
tuning 90<br />
locally 100<br />
tonal range<br />
reproducing 144<br />
toning<br />
split toning 201<br />
topcoats 42<br />
tungsten light 223<br />
tuning 90<br />
colors 111<br />
tonality 90<br />
U<br />
UltraChrome 233<br />
HDR 233<br />
UltraChrome HDR 233<br />
unsharp mask filter (USM) 132<br />
upsizing 130, 144<br />
up-sizing (DOP Up-sizing) 130<br />
USB 292<br />
USM (unsharp mask filter) 132, 292<br />
UV 31<br />
V<br />
variations 119, 122<br />
vignetting 292<br />
W<br />
water spots 169<br />
WB (white balance) 293<br />
white balance (WB) 293<br />
whiteness 39<br />
white point 65, 79, 80, 293<br />
adaption 293<br />
wide gamut 292<br />
WiFi 24<br />
Wilhelm Imaging Research (WIR) 28, 30<br />
WinColor 71, 78<br />
WIR (Wilhelm Imaging Research) 28, 29,<br />
30, 33, 293<br />
workflow<br />
<strong>for</strong> black-and-white prints 190<br />
print workflow 143<br />
working<br />
(color) space 69<br />
working space 293<br />
X<br />
XMP (extensible metadata plat<strong>for</strong>m) 293<br />
X-Rite 73<br />
Z<br />
Z3100/Z3200 199, 253, 261, 262<br />
ZIP 293


