HX Series Chiller Service Manual General Service ... - Chiller City
HX Series Chiller Service Manual General Service ... - Chiller City
HX Series Chiller Service Manual General Service ... - Chiller City

You also want an ePaper? Increase the reach of your titles
YUMPU automatically turns print PDFs into web optimized ePapers that Google loves.
Contents<br />
<strong>General</strong> Information<br />
After Sale Support ..................................................................................................... 2<br />
CAUTION .................................................................................................................. 5<br />
Theory of operation ................................................................................................... 6<br />
Cool mode ............................................................................................................ 6<br />
Heat/idle mode...................................................................................................... 7<br />
Troubleshooting<br />
Troubleshooting Chart: Runaway cold ...................................................................... 8<br />
Troubleshooting Chart: Runaway hot ........................................................................ 9<br />
Troubleshooting Chart: Weak cooling .................................................................... 10<br />
Troubleshooting Chart: Refrigeration pressures..................................................... 12<br />
Replacement<br />
Compressor ............................................................................................................. 13<br />
Fan Motor ................................................................................................................ 15<br />
Filter/dryer ............................................................................................................... 16<br />
Solenoid valve ......................................................................................................... 17<br />
Tank coil assembly (TCA) ....................................................................................... 19<br />
Water regulating valve ............................................................................................. 23<br />
Refrigeration components (general) ........................................................................ 25<br />
Procedures<br />
Speed check............................................................................................................ 27<br />
Suction Discharge pressure and speed check ........................................................ 28<br />
Condenser maintenance (air cooled & water cooled).............................................. 29<br />
Flushing (closed facility system) .............................................................................. 29<br />
Flushing (tap water system) .................................................................................... 30<br />
Flushing (unit off)..................................................................................................... 31<br />
Commercial flushing chemicals ............................................................................... 32<br />
Hot gas valve (Automatic Discharge Relief (ADR)) ................................................ 33<br />
Schrader valves ....................................................................................................... 36<br />
Leak test and repair of leak ................................................................................ 36<br />
Solenoid coil test ..................................................................................................... 38<br />
Solenoid valve rebuild ............................................................................................. 39<br />
Tank Coil Assembly (TCA) failure and repair ........................................................ 41<br />
3
Contents continued<br />
Water regulating valve setting ................................................................................. 42<br />
Reference<br />
Refrigeration Specifications..................................................................................... 43<br />
R22 pressure - temperature chart ........................................................................... 44<br />
Heat load calculation ............................................................................................... 45<br />
Condenser requirements: Air cooled units ...................................................... 46<br />
Condenser requirements: Water cooled units .................................................. 47<br />
15 pin accessory connector (Optional) pinout ......................................................... 49<br />
Part numbers ........................................................................................................... 50<br />
Diagrams<br />
<strong>HX</strong>-200 Call out drawings........................................................................................ 57<br />
<strong>HX</strong>-300 Call out drawings........................................................................................ 60<br />
<strong>HX</strong>-500 Call out drawings........................................................................................ 64<br />
<strong>HX</strong>-750 Call out drawings........................................................................................ 68<br />
<strong>HX</strong>-200 to 750 Air cooled Flow diagram (R22) ........................................................ 72<br />
<strong>HX</strong>-200 to 750 Water cooled Flow diagram (R22)................................................... 73<br />
Pump flow diagram (CP - PD - TU type pumps) ...................................................... 74<br />
After Sale Support<br />
NESLAB is committed to customer service both during and after<br />
the sale. If you have questions concerning the operation of your<br />
unit, contact our Sales Department. If your unit fails to operate<br />
properly, or if you have questions concerning spare parts or<br />
service contacts, contact our <strong>Service</strong> Department. Before<br />
calling, please obtain the following information from the unit’s<br />
serial number label:<br />
part number:<br />
serial number:<br />
4
CAUTION<br />
This section is intended for use by qualified refrigeration technicians<br />
only. Servicing refrigeration systems is hazardous and<br />
must be performed only by qualified persons.<br />
Refrigeration systems contain various hazards, including (but<br />
not limited to) the following:<br />
1. Refrigeration systems contain refrigerant gases at very high<br />
pressures, even when not running.<br />
2. Sudden release of refrigerant gases will result in rapid expansion<br />
and severe frostbite hazard. Refrigerant gases will<br />
cause severe injury to unprotected flesh.<br />
3. Refrigerant gases are not flammable and are chemically<br />
inert. However, they are heavier than air and will displace<br />
oxygen. They can cause suffocation if released in a confined<br />
area.<br />
4. Refrigerant gases used in this product are classified as<br />
Ozone Depleting Chemicals by the US Environmental Protection<br />
Agency. While they pose no hazard sealed inside the<br />
refrigeration system, intentional release into the atmosphere<br />
is outlawed under the 1990 Clean Air Act.<br />
5. Compressor start and run capacitors store hazardous levels<br />
of electricity, even when the unit is not running or plugged in.<br />
6. Refrigeration system components operate at high temperatures<br />
and present a severe burn hazard.<br />
5
THEORY OF OPERATION<br />
The chiller operates in two modes: COOL or HEAT/IDLE. The<br />
controller compares setpoint to actual temperature and decides<br />
which mode is required. This is a thermostatic (not proportional)<br />
control system. The compressor, pump, and fan motor all run<br />
continuously, regardless of mode.<br />
The thermal transfer of the HEAT/IDLE mode is not as efficient<br />
as the COOL mode. This results in units running at little or no<br />
load to spend most of their time in the HEAT/IDLE mode with<br />
brief periodic COOL periods. A duty cycle of 20% COOL / 80%<br />
HEAT/IDLE may be typical for units running under no load. This<br />
duty cycle will reverse as increasing load is applied, reaching<br />
100% COOL / 0% HEAT/IDLE at full load.<br />
This system results in tighter temperature control than continually<br />
cycling the compressor on and off, as is typical in a household<br />
refrigerator.<br />
The default mode is HEAT/IDLE. A failure of the temperature<br />
sensor or controller will generally result in the HEAT/IDLE<br />
mode. This prevents a possible freezing of the cooling fluid and<br />
resulting damage from fluid expansion.<br />
COOL MODE<br />
If the setpoint is below the actual temperature, the controller is<br />
in COOL mode. The controller triac output provides a closure<br />
to supply line voltage to the solenoid coil. The solenoid valve,<br />
which is normally-closed, is then pulled open by the coil and a<br />
standard refrigeration cooling loop exists.<br />
6
Refrigerant, as a gas, is pressurized in the compressor. It then<br />
enters the condenser and changes to a liquid due to the cooling<br />
provided by the fan and condenser fins. Heat is given up to the<br />
air at this point. The liquid refrigerant exits the condenser and<br />
passes through a filter/dryer which traps contaminants and<br />
absorbs any water moisture in its desiccant element. The refrigerant<br />
then passes through the open solenoid valve and enters<br />
the capillary tube. The restriction of the tube meters the flow.<br />
The capillary tube ends at the evaporator.<br />
The evaporator is a coil located inside the fluid tank. As the<br />
liquid refrigerant encounters the increased volume of the<br />
evaporator, it expands tremendously, changing from a liquid to a<br />
gas, and absorbing heat from the fluid (cooling it) in the process.<br />
The refrigerant, now a gas, exits the evaporator and<br />
passes through the suction filter. The refrigerant then enters the<br />
compressor at low pressure and is re-compressed.<br />
HEAT/IDLE MODE<br />
If the setpoint is above the actual temperature, the controller is<br />
in HEAT/IDLE mode. The triac output opens, turning the solenoid<br />
coil off. The solenoid valve then drops closed. This stops<br />
the flow of refrigerant at that point. The resulting increase in<br />
discharge pressure causes the Hot Gas (also known as an<br />
ADR, or Automatic Discharge Relief) valve to open. The refrigerant<br />
gas is now routed directly to the evaporator. The gas is<br />
not allowed to condense, as it has bypassed the condenser<br />
completely. The hot gas passing through the evaporator<br />
coil adds some heat to the fluid, then returns directly through<br />
the suction filter to the compressor. This unloads the compressor,<br />
resulting in lower discharge pressure, higher suction pressure,<br />
and less power consumption. Observing the suction<br />
pressure in this mode will indicate the setting of the Hot Gas<br />
(ADR) valve.<br />
7
Troubleshooting Chart: Runaway cold<br />
START<br />
Is<br />
Setpoint<br />
< actual<br />
?<br />
YES<br />
Normal<br />
Response<br />
NO<br />
Is<br />
coo l lamp<br />
on?<br />
YES<br />
Can you<br />
get cool<br />
lamp off? *<br />
NO<br />
NO<br />
YES<br />
NO<br />
Is<br />
coil<br />
on?<br />
YES<br />
Calibration<br />
error<br />
UNSURE<br />
Remove coil<br />
from valve<br />
Valve is<br />
stuck open<br />
NO<br />
Does<br />
unit<br />
warm up?<br />
YES<br />
Replace<br />
valve<br />
Valve is<br />
mechanically OK<br />
Not a<br />
Refrigeration<br />
Problem<br />
See VALVE<br />
REPLACEMENT<br />
Problem is in<br />
Controller or<br />
sensor<br />
Test<br />
Refer to<br />
ELECTRICAL & CONTROL<br />
section<br />
STOP<br />
* by manipulating setpoint<br />
8<br />
Drawing 67.cfl<br />
Rick Mills<br />
13 March 1995
Troubleshooting Chart: Runaway hot<br />
START<br />
Is<br />
Setpoint<br />
> actual<br />
?<br />
YES<br />
Normal<br />
response<br />
NO<br />
Is<br />
cool lamp<br />
on?<br />
NO<br />
Can you<br />
get cool<br />
lamp on? *<br />
NO<br />
YES<br />
YES<br />
YES<br />
Is it<br />
cooling<br />
at all ?<br />
YES<br />
Is<br />
coil<br />
on?<br />
NO<br />
Calibration<br />
Error<br />
NO<br />
UNSURE<br />
See TROUBLESHOOTING:<br />
"WEAK COOLING"<br />
Valve is<br />
stuck closed<br />
Any<br />
AC volts<br />
on coil<br />
?<br />
YES<br />
NO<br />
Replace<br />
valve<br />
NO<br />
Any<br />
DC volts<br />
on coil<br />
?<br />
YES<br />
Not a<br />
refrigeration<br />
problem<br />
See VALVE<br />
REPLACEMENT<br />
Problem is in<br />
Controller or<br />
Sensor<br />
Test<br />
Refer to<br />
ELECTRICAL & CONTROL<br />
section<br />
STOP<br />
*by manipulating setpoint<br />
Drawing 68.cfl<br />
Rick Mills<br />
13 March 1995<br />
9
Troubleshooting Chart: Weak cooling<br />
10
Troubleshooting Chart: Weak cooling continued<br />
11
Troubleshooting Chart: Refrigeration pressures<br />
12
Compressor replacement<br />
1. Remove all access panels.<br />
2. Confirm that the problem is not external to the compressor<br />
(electrical) before proceeding. If the compressor does not<br />
start/run, check the following:<br />
A. Is proper voltage present at the<br />
compressor terminals?<br />
B. Are all starting devices (capacitors,<br />
potential relays) good?<br />
Disconnect the unit from line voltage<br />
C. Are the motor windings known to be<br />
good or bad? If in doubt, Ohmmeter<br />
readings of the windings may be compared<br />
to the replacement compressor.<br />
3. Recover the system refrigerant.<br />
4. Disconnect wires, starting devices, etc. from compressor.<br />
5. Remove valve cores from both Shrader valves.<br />
6. Remove the coil from the solenoid valve and move it out of<br />
the torch area. Wrap a damp rag around the solenoid valve<br />
body.<br />
7. Unsolder and remove compressor and dryer.<br />
NOTE: If a compressor burnout is suspected, invert old<br />
compressor and drain out a small sample of oil. Test the oil<br />
for acidity, following the manufacturer’s recommendations on<br />
the acid test kit. If the oil is acidic, the refrigeration system will<br />
need flushing to remove the acidic oil. Replace with new oil.<br />
13
8. Unpack new compressor. Remove plugs from the ports.<br />
Compressors are typically shipped pressurized with a<br />
dry nitrogen charge. Safety glasses are especially<br />
necessary when removing plugs. Orient compressor so<br />
the plug will exit the port pointing away from you and<br />
others.<br />
NOTE: Replacement Copeland compressors already contain<br />
an adequate oil charge. It is not necessary to add any<br />
oil to the new compressor.<br />
9. Remove the suction service port stem from the old compressor,<br />
and insert it into the new compressor.<br />
10. Apply nitrogen purge gas to the stem.<br />
11. Braze in place using BAg 28 (silver solder) compound.<br />
12. Position the new compressor in place.<br />
13. Position the new dryer in place. Ensure the flow direction<br />
arrow points toward the solenoid valve.<br />
14. Wrap a damp rag around the dryer.<br />
15. Apply nitrogen purge gas to the suction service port.<br />
16. Braze the suction and discharge lines to the compressor,<br />
using BAg 28.<br />
17. Braze the dryer in place, using BAg 28.<br />
18. Insert new valve cores in the Shrader valves.<br />
19. Pressurize system and leak check.<br />
20. Evacuate system.<br />
21. Charge system to specification.<br />
22. Test system.<br />
14
Fan Motor Replacement<br />
1. Disconnect unit from its electrical power supply.<br />
2. Remove access panels to gain access to the fan motor and<br />
electrical box. Remove the electrical box cover.<br />
3. Note the location and orientation of the electrical wiring for<br />
installation.<br />
4. Disconnect the electrical wiring from the electrical box.<br />
5. Unbolt the fan cage from the fan shroud.<br />
6. Remove the fan blade.<br />
7. Unbolt the fan motor from the fan cage.<br />
8. Vacuum dust and dirt from the area.<br />
9. Install the new fan motor on to the fan cage.<br />
10. Install the fan blade.<br />
11. Bolt the fan cage to the fan shroud.<br />
12. Install the electrical wiring as noted during removal.<br />
13. Install the electrical box cover.<br />
14. Test the fan motor for operation.<br />
15. Install all access panels.<br />
15
FILTER/DRYER REPLACEMENT<br />
NOTE: The filter/dryer contains a desiccant which will absorb<br />
moisture from the atmosphere. The filter/dryer should be<br />
replaced whenever the refrigeration system has been<br />
opened and allowed to go to atmospheric pressure. Unsealing<br />
and installing the new filter/dryer should be left until the<br />
last possible minute to minimize contamination of its<br />
desiccant.<br />
Disconnect the unit from line voltage<br />
1. Recover the system refrigerant.<br />
2. Remove all Shrader valve cores.<br />
3. Remove solenoid valve internal components (See “Solenoid<br />
valve replacement procedure” for drawing) Wrap a damp rag<br />
around the solenoid valve body.<br />
4. Apply purge gas to the system.<br />
5. Desolder and remove old filter/dryer.<br />
6. Place new filter/dryer in position, with direction-of-flow arrow<br />
pointing towards the liquid line solenoid valve.<br />
7. Wrap the filter/dryer body in a damp rag.<br />
8. Introduce nitrogen purge gas into the discharge service port.<br />
9. Braze connections using BAg 28. Orient torch flame away<br />
from the filter/dryer body. Any bubbling of the paint on the<br />
filter/dryer indicates excessive temperature is being approached<br />
- stop and allow to cool if this occurs.<br />
10. Remove the damp rags and the nitrogen supply.<br />
11. Insert new schrader valve cores.<br />
12. Assemble the solenoid valve (Do Not over tighten - Use two<br />
wrenches).<br />
11. Pressurize and leak check.<br />
12. Evacuate system.<br />
13. Charge system.<br />
14. Test.<br />
15. Install any access panels removed.<br />
16
Solenoid valve replacement:<br />
Disconnect the unit from line voltage<br />
1. Recover refrigerant.<br />
2. Remove coil.<br />
3. Remove all valve cores from the Shrader valves.<br />
4. Note the direction of flow so that the new valve can be properly<br />
positioned during assembly. Disassemble solenoid valve<br />
and remove internal components as shown below.<br />
17
5. Protect all components that could be affected by the soldering<br />
flame with damp rags and metal shielding.<br />
6. Apply a nitrogen purge gas to the system.<br />
7. Unsolder the valve and dryer and remove.<br />
8. Place new valve and dryer in position. Check that the flow<br />
direction arrows on both devices point towards the capillary<br />
tube.<br />
9. Wrap a damp rag around the valve and dryer and protect any<br />
other components/wiring with damp rags and metal shields.<br />
10. Apply nitrogen purge gas to the system.<br />
11. Braze in place using BAg 28 compound (silver solder).<br />
12. Remove rags and inspect brazing.<br />
13. Install new valve cores in the Shrader valves.<br />
14. Assemble solenoid valve assembly. (Use two wrenches and<br />
do not over tighten.)<br />
15. Pressurize system and leak check. The solenoid valve is<br />
closed, so be sure to pressurize both sides.<br />
12. Evacuate the refrigeration system.<br />
13. Install coil.<br />
14. Charge system to specification.<br />
15. Test system.<br />
16. Install any access panels removed.<br />
18
Tank Coil Assembly (TCA) replacement<br />
NOTE: The evaporator coil and the water tank are one unit.<br />
They cannot be separated. The following procedure assumes<br />
that the pump along with its plumbing has been removed.<br />
Disconnect unit from line voltage.<br />
1. Recover refrigerant, if any remains.<br />
2. Drain fluid from system.<br />
3. Remove valve cores from both Shrader valves.<br />
19
4. Remove screws from Tank Cover and lift it off the tank with all<br />
wires, motors, sensors, etc. intact. Invert it and place it to the<br />
side as shown. If more slack is required in the wires, unplug<br />
the connector shown.<br />
5. Remove the two fluid hoses from the water inlet and outlet<br />
stubs.<br />
6. Remove the insulation from the refrigerant inlet and outlet<br />
lines.<br />
7. Unsolder the refrigerant inlet and outlet lines.<br />
CAUTION: The refrigerant inlet and outlet lines are stainless<br />
steel. They are easily damaged by excessive heat.<br />
Never apply the torch flame directly to the stainless. Warm<br />
the copper fittings up slowly and evenly until the solder<br />
liquefies.<br />
8. Remove the four screws that hold the TCA mounting flange<br />
to the mounting rails.<br />
20
9. Lift the TCA straight up out of the unit.<br />
10. Inspect the insulation on the inside of the case walls while<br />
the TCA is removed. Replace any that is wet. Install insulation<br />
on the new TCA.<br />
11. Transfer the strainer from inside the old TCA to the new TCA,<br />
if required.<br />
12. Clean the refrigeration stubs on the new TCA carefully prior<br />
to installation. Clean the inside of the mating copper lines<br />
prior to installation.<br />
13. Lower the TCA into place and secure the mounting flange to<br />
the mounting rails.<br />
CAUTION: The refrigerant inlet and outlet lines are stainless<br />
steel. They are easily damaged by excessive heat.<br />
Solder the fittings as follows:<br />
A. Ensure all fittings have been carefully cleaned.<br />
B. Apply a paste-type flux.<br />
21
C. Assemble fittings.<br />
D. Apply nitrogen purge gas to the suction service port.<br />
E. Warm the copper fittings slowly and evenly.<br />
Do not rush this procedure. Observe the flux<br />
change to a watery clear state.<br />
CAUTION: Never apply the torch flame directly to the<br />
stainless.<br />
F. Apply BAg 28 (silver) solder.<br />
CAUTION: The stainless must never be hot enough<br />
to turn cherry red. This will cause oxidation and the<br />
solder will not wet the oxidized material. If this occurs,<br />
stop immediately. Allow fittings to cool. Polish<br />
the stainless fittings with emery cloth until all traces<br />
of dark oxidation are removed.<br />
14. Disconnect nitrogen purge gas.<br />
15. Install new valve cores in the Shrader valves.<br />
16. Pressurize system and leak check.<br />
17. Evacuate system.<br />
18. Charge system to specification.<br />
19. Test system.<br />
22
WATER REGULATING VALVE:<br />
REPLACEMENT<br />
(present on water-cooled units only)<br />
Disconnect unit from its electrical power supply.<br />
1. Recover refrigerant charge.<br />
2. Remove valve cores from both Shrader valves.<br />
3. Apply nitrogen purge gas to the discharge service port.<br />
4. Unbraze the valve’s sensor pickup from the compressor<br />
discharge line.<br />
5. Braze the new valve’s sensor pickup in place using BCuP3 or<br />
BCuP5 brazing compound. Silver-based solder is not recommended<br />
for this joint.<br />
6. Remove nitrogen supply.<br />
7. Install new valve cores.<br />
8. Begin evacuation of refrigeration system.<br />
9. While system is being pumped down, Turn the adjusting<br />
screw on the old valve fully closed (CCW). Count how many<br />
turns are required to close it.<br />
23
10. Disassemble the two unions holding the original valve in<br />
place.<br />
11. Remove original valve.<br />
12. Transfer fittings to new valve.<br />
13. Mount new valve using the two unions.<br />
14. Turn the adjusting screw on the new valve fully closed.<br />
15. Now back it out the number of turns observed in the previous<br />
step. This will approximate the correct setting.<br />
16. Pressurize system and leak check.<br />
17. Evacuate system.<br />
18. Recharge refrigeration system.<br />
19. Test.<br />
24
Refrigeration Components <strong>General</strong><br />
Replacement Procedures<br />
Note: Make note of the in/out orientation of all components<br />
before disassembly so that they may be correctly oriented<br />
during installation. The Filter/Dryer should always be changed<br />
along with any other refrigeration component or when the refrigeration<br />
system has been exposed to atmospheric moisture.<br />
1. Disconnect the unit from line voltage<br />
2. Remove access panels.<br />
3. Recover system refrigerant.<br />
4. Remove the valve cores.<br />
5. Remove solenoid coil/s.<br />
6. Disassemble solenoid valve/s (this procedure is shown in the<br />
“Solenoid valve replacement procedure”) and remove the<br />
internal components (for purging). Place the nut and stem<br />
back on the valve and secure snugly.<br />
7. Protect all components that could be damaged during brazing<br />
with damp rags and/or metal shielding.<br />
8. Apply a slow nitrogen gas purge.<br />
9. Unsolder all components being changed and remove.<br />
10. Remove nitrogen purge.<br />
NOTE: All components should be clean and silver soldering<br />
flux applied. The Filter/Dryer should be the last<br />
component installed to prevent contamination.<br />
11. Place new components into position. Check that the “IN” /<br />
“OUT” sides are in proper orientation in the system as notes<br />
before removal. If a new solenoid valve is being installed<br />
make sure that it is disassembled (see step 6 above).<br />
25
12. Ensure that all components are protected from heat with<br />
damp rags and / or metal shields.<br />
13. Apply a slow nitrogen gas purge.<br />
14. Braze component/s in place using BAg 28 compound silver<br />
solder.<br />
15. Remove all rags and metal shielding.<br />
16. Inspect all brazing joints.<br />
17. Assemble solenoid valve/s internal parts (this procedure is<br />
shown in the “Solenoid valve replacement procedure”).<br />
18. Install new valve cores.<br />
19. Pressurize the system and check for leaks. Be sure to pressurize<br />
both sides of any solenoid valve and the high and low<br />
side of the system.<br />
20. Evacuate the refrigeration system.<br />
21. Charge the refrigeration system to specifications.<br />
22. Test the unit for proper operation.<br />
23. Install all access covers.<br />
26
Speed check<br />
Speed Check is a term used to describe how fast a unit can<br />
cool across 20°C when it is running at maximum capacity. The<br />
unit of measure is “degrees per minute”. This will provide a<br />
number that is easy to obtain and compare.<br />
1. Find the DROP figure from the table. (For example, the<br />
<strong>HX</strong>100 with a PD-1 pump has a drop of 1.4°C.)<br />
2. Divide the drop in half. (Example: 0.7°C)<br />
3. Add this half to 20°C to find the START point. (Example:<br />
20.7°C)<br />
4. Subtract this half from 20°C to find the STOP point. (Example:<br />
19.3°C). Now the entire drop is centered about 20°C.<br />
5. Connect the unit’s inlet and outlet with as short a loop of<br />
hose as practical. Insert a thermometer with 0.1°C resolution<br />
in the loop.<br />
27
6. Ensure the fluid used is 100% water. Heat the fluid to at least<br />
30°C, then turn unit to full cool.<br />
7. Begin timing as soon as the START temp (20.7°C) is passed.<br />
8. Stop timing when the STOP temp (19.3°C) is passed.<br />
9. Elapsed time must be one minute or less.<br />
Suction Discharge Pressure and Speed Check<br />
Air-Cooled Standard and High Temperature Units (All Pump Types) 1<br />
Unit Suction(psi) Discharge(psi) Speed Check(°C/Minute)<br />
<strong>HX</strong>-75 77 - 84 225 - 250 1.5 - 1.7<br />
<strong>HX</strong>-100 75 - 83 245 - 265 1.3 - 1.6<br />
<strong>HX</strong>-150 70 - 73 240 - 270 2.0 - 2.5<br />
<strong>HX</strong>-200 85 - 105 230 - 255 1.6 - 1.9<br />
<strong>HX</strong>-300 84 - 105 270 - 305 2.4 - 2.7<br />
<strong>HX</strong>-500 80 - 90 215 - 235 2.0 - 2.4<br />
<strong>HX</strong>-750 65 - 75 185 - 215 Not Available<br />
Water-Cooled Standard and High Temperature Units (All Pump Types) 2<br />
Unit Suction(psi) Discharge(psi)<br />
<strong>HX</strong>-75 72 170 Speed check times not<br />
<strong>HX</strong>-100 86 - 92 180 established.<br />
<strong>HX</strong>-150 65 175<br />
<strong>HX</strong>-200 85 - 90 180<br />
<strong>HX</strong>-300 73 - 78 180<br />
<strong>HX</strong>-500 75 - 82 150<br />
<strong>HX</strong>-750 50 - 60 180<br />
1. 27°C unit temperature, water in reservoir, access panel removed.<br />
2. 25°C unit temperature, water in reservoir.<br />
NOTE: For low temperature units please call NESLAB.<br />
28
Condenser, Air Cooled<br />
The condenser should be cleaned periodically. The grille covering<br />
the condenser is removable. The best way to remove dust is<br />
to force it out in the opposite direction from which it entered. If<br />
compressed air is available, direct the air against the inside of<br />
the condenser. If a vacuum cleaner is used, apply the vacuum<br />
to the outside of the condenser. Straighten any bent fins using a<br />
fin comb.<br />
Condenser, Water cooled<br />
The water cooled condenser generally needs no maintenance.<br />
If the cooling water is particularly dirty, deposits may occur and<br />
cause flow restrictions. In this event flushing may be required.<br />
The procedure used depends on whether a closed facility water<br />
cooling system or a tap water system is used. The procedures<br />
are described on the following pages.<br />
Flushing using a closed facility system<br />
1. Turn <strong>HX</strong> off.<br />
2. Close valves on cooling water supply and return lines.<br />
3. Disconnect hoses from cooling water supply and return, and<br />
reverse them.<br />
29
Flushing closed facility system (continued)<br />
4. Open valves on cooling water supply and return lines.<br />
5. Run <strong>HX</strong> normally for 10-15 minutes. Adjust setpoint so <strong>HX</strong><br />
cycles between heat and cool. The condenser flow is now<br />
reversed. This reverse flow will tend to loosen any deposits.<br />
Cooling performance may be less, and the water regulating<br />
valve may make some vibration noise.<br />
6. Turn <strong>HX</strong> off.<br />
7. Close valves on cooling water supply and return lines.<br />
8. Restore hoses to original configuration.<br />
9. Open valves on cooling water supply and return lines.<br />
Flushing using a tap water system<br />
1. Turn <strong>HX</strong> off.<br />
2. Close valve on cooling water supply line.<br />
3. Disconnect hoses from cooling water supply and drain, and<br />
reverse them.<br />
30
Flushing tap water system (continued)<br />
4. Open valve on cooling water supply line.<br />
5. Run <strong>HX</strong> normally for 10-15 minutes. The condenser flow is<br />
now reversed. This reverse flow will tend to loosen any deposits.<br />
Cooling performance may be less, and the water<br />
regulating valve may make some vibration noise.<br />
6. Turn <strong>HX</strong> off.<br />
7. Close valve on cooling water supply.<br />
8. Restore hoses to original configuration.<br />
9. Open valve on cooling water supply line.<br />
Flushing with unit turned off<br />
In either the closed facility or tap water system, it is possible<br />
to flush the condenser even if it not possible or convenient to<br />
turn the <strong>HX</strong> on. This method may be used, for example, if the<br />
<strong>HX</strong> is having other service or maintenance performed at the<br />
same time; or if electricity is not available.<br />
It is necessary to manually open the regulating valve to allow<br />
flow through the condenser. There are two techniques.<br />
A. The valve may be opened by prying up the spring follower<br />
disc using two flat-blade screwdrivers, one on each side. The<br />
valve will be open as long as the spring is compressed. This<br />
is practical for a momentary opening of the valve, as it does<br />
not disturb the adjustment.<br />
31
Flushing with unit turned off (continued)<br />
B. The second technique is to fully open the valve by turning the<br />
adjusting screw clockwise until it stops. Count how many<br />
turns are required so it may be restored later.<br />
Commercial flushing chemicals<br />
Commercial flushing chemicals may be used, provided the<br />
chemical is not harmful to copper. Examine and follow the<br />
container directions carefully.<br />
32
HOT GAS VALVE<br />
(also known as Automatic Discharge Relief valve)<br />
The <strong>HX</strong>-200 thru 750 uses a base-mount type hot gas valve,<br />
mounted near the center of the base of the unit.<br />
OPERATION<br />
This valve is closed during the cool cycle. When the unit<br />
switches to heat cycle, the solenoid valve in the liquid line<br />
closes, and the resulting increase in discharge pressure opens<br />
the hot gas valve. This provides a path for refrigerant gas to<br />
enter the evaporator directly without going through a liquid<br />
phase, providing a heating effect.<br />
33
Hot gas valve (continued)<br />
SETTING<br />
Observing the suction pressure (while the unit is running in the<br />
heat/idle cycle) will indicate the setting of the hot gas valve. The<br />
valve is set correctly when the suction gauge indicates 25 PSIG<br />
for any system using R-22 refrigerant.<br />
The setting is adjusted as shown in the illustrations. Turning the<br />
adjustment clockwise will increase the pressure setting on<br />
either type valve. Contact NESLAB Technical <strong>Service</strong> for setting<br />
specifications on systems using other refrigerants.<br />
LEAK<br />
The base mount type may develop a leak across the<br />
diaphragm. Refrigerant will escape into the adjustment<br />
chamber. The refrigerant will be trapped in the adjustment<br />
chamber (if the dust cap is in place). Over time, the adjustment<br />
chamber pressure will rise from ambient to whatever pressure is<br />
present in the refrigeration system. The pressure across the<br />
diaphragm will equalize. The diaphragm in the valve will cease<br />
to operate correctly, as it expects to have ambient air pressure<br />
on one side.<br />
34
Hot gas valve (continued)<br />
The result will be an open hot gas valve all the time. Refrigerant<br />
will flow through both heat and cool loops simultaneously. The<br />
hot gas and the liquid entering the evaporator will tend to cancel<br />
each other out. The unit will have essentially no cooling<br />
capacity at all, and the fluid temperature will tend to remain<br />
constant.<br />
A leak can be verified as follows: Turn the unit off. Slowly unscrew<br />
the dust cap. If a leak exists, a puff of refrigerant will be<br />
observed to escape from the adjustment chamber when the cap<br />
is removed. Once the pressure is released, the valve will be<br />
able to operate normally. Start the unit and see if performance<br />
is restored. The unit can now be operated temporarily with the<br />
dust cover removed, but the leak still exists and needs repair.<br />
Any further leak detection inside the adjustment chamber<br />
should only be done with an electronic sniffer type detector. Do<br />
not use liquid detection fluid.<br />
RESONATION<br />
It has been observed that certain base-mounted hot gas valves<br />
have a mechanical resonance point. If the valve is adjusted to<br />
that point, the valve will resonate with an audible whine or<br />
moaning sound whenever the unit is in the heat cycle.<br />
If this is observed, it is recommended the setting be tweaked<br />
away from the resonance point. With the unit running in the<br />
heat cycle, turn the adjustment screw in either direction until the<br />
noise stops. Up to one complete turn in either direction is acceptable.<br />
This will not significantly change the performance of<br />
the unit.<br />
35
SCHRADER VALVES<br />
Refrigerant leaks may occur at the valve core of Schrader<br />
valves. These leaks may not be apparent due to the cover and/<br />
or any thread sealant used. NESLAB recommends leak checking<br />
all Schrader valves, especially any that have been accessed<br />
during service.<br />
If the system is emptied of refrigerant, NESLAB recommends<br />
replacing the valve cores with new ones as a preventive measure.<br />
If a leak is suspected but cannot be confirmed with an electronic<br />
leak detector, NESLAB recommends using a party balloon<br />
to trap any escaping refrigerant. This will provide a visual<br />
confirmation of a leak.<br />
BALLOON TEST<br />
1. Remove valve cover, if installed.<br />
2. Stretch a balloon over the Schrader valve threads.<br />
3. A leak will inflate the balloon. Leave the balloon in place<br />
overnight if convenient.<br />
36
SCHRADER VALVES (continued)<br />
4. Replace valve core if a leak is indicated, and retest.<br />
5. Replace valve cover.<br />
A. If it is the gasket type, replace with flare seal cap NESLAB<br />
part number 009121.<br />
B. Inspect flare surfaces on the valve and cap. They should<br />
be smooth and free of burrs.<br />
C. Apply one drop of the appropriate refrigeration oil to the<br />
flared surface of the cap to prevent galling. Do Not Over<br />
Oil - it will displace the sealant.<br />
D. Apply only one drop of sealant (Perma-Lok® LM012<br />
recommended - NESLAB partnumber 013002) to the first<br />
thread of the valve and work it around at least half way,<br />
but no more than one complete turn.<br />
E. Hand tighten cap until is seats. Apply two wrenches - one<br />
on the valve body, one on the cap: and tighten ¼ turn only.<br />
DO NOT OVERTIGHTEN!<br />
37
SOLENOID COIL<br />
The solenoid coil should be energized in the cool cycle (opening<br />
the solenoid valve), and off in the heat cycle.<br />
The coil can be tested by removing the coil from the valve and<br />
sliding the coil over a screwdriver shaft. Turn unit on and adjust<br />
setpoint up and down. You should feel the coil attract the screwdriver<br />
in the cool cycle, and release in the heat cycle.<br />
If the coil never turns on, either the coil is open or the control<br />
voltage is missing. The coil can be tested for continuity using an<br />
Ohmmeter. Turn the unit off. Unplug the coil from the wiring<br />
harness and measure the coil resistance. It should be 750 - 850<br />
Ohms.<br />
Replacements are available as a coil only, or a coil assembly.<br />
The assembly includes the electrical connector. Refer to the<br />
parts list for part numbers.<br />
If a coil is obtained locally, be sure it is type OMKC-1 and rated<br />
for 208VAC. Do not substitute a DC coil.<br />
38
Solenoid valve rebuild<br />
NOTE: Many times the solenoid valve can be rebuilt in place,<br />
completely avoiding any brazing and greatly reducing the time<br />
needed for repair.<br />
Rebuild procedure:<br />
See next page for illustration.<br />
1. Recover refrigerant.<br />
2. Remove coil.<br />
3. Remove large nut from valve body.<br />
4. Remove internal valve components.<br />
5. Inspect interior of valve body for cleanliness and lack of burrs<br />
or wear.<br />
6. Disassemble new valve, and transfer components to the<br />
existing valve body.<br />
7. Install large nut onto valve body.<br />
8. Pressurize system and leak check. As the valve is normally<br />
closed, be sure that both sides of the valve are pressurized.<br />
9. Begin evacuation of system.<br />
10. Install coil.<br />
11. Charge system to specification.<br />
12. Test system.<br />
39
Tank coil assembly failure<br />
A hole developing in the evaporator of the Tank Coil Assembly<br />
can cause serious problems if not detected quickly. Once a hole<br />
occurs, refrigerant will escape into the circulating fluid. Once<br />
the refrigerant is exhausted, circulating fluid will be drawn in<br />
and contaminate the refrigeration system.<br />
A hole in the evaporator may be recognized by a stream of<br />
(refrigerant) bubbles coming to the surface of the circulating<br />
fluid in the tank. If this is observed, it is vital to immediately shut<br />
the system down and drain the circulating fluid until it is below<br />
the level of the leak. This will prevent fluid from being drawn<br />
into the refrigeration system.<br />
Tank Coil Assembly (TCA) repair<br />
A hole occurring in the evaporator may be repaired, provided<br />
the hole is accessible and the capacity exists to weld stainless<br />
steel. A bead of weldment can be placed over the hole. The<br />
most practical method may be to remove the TCA as outlined in<br />
the “Tank Coil Assembly (TCA) replacement” procedure, and<br />
take the TCA to a local welding shop. Advise the welder the coil<br />
is type 304 stainless steel.<br />
If the hole is inaccessible, or no welding capability exists, the<br />
entire TCA should be replaced.<br />
41
Water regulating valve setting<br />
The correct setting of the valve is easily determined.<br />
1. Supply cooling water to <strong>HX</strong>.<br />
2. Direct the outlet hose into a bucket or drain.<br />
3. Turn the <strong>HX</strong> on.<br />
4. Turn the setpoint to minimum. The <strong>HX</strong> should enter the cool<br />
cycle. Observe full flow from the outlet hose. Allow it to run<br />
until all air is displaced.<br />
5. Turn setpoint to maximum. The <strong>HX</strong> should enter the heat<br />
cycle.<br />
6. Adjust the valve stem closed (CCW) until the flow stops.<br />
7. Slowly open the valve stem (CW) until a small but constant<br />
trickle is exiting the outlet hose. This is the point where the<br />
valve is just beginning to crack open. This is the correct<br />
setting.<br />
8. Turn setpoint to minimum. The <strong>HX</strong> should enter the cool<br />
cycle. Full flow should again be observed from the outlet<br />
hose.<br />
42
Refrigeration Specifications<br />
<strong>HX</strong>-200 <strong>HX</strong>-300 <strong>HX</strong>-500 <strong>HX</strong>-750<br />
Air Cooled 9lbs ±0.5 lbs 9lbs ±0.5 lbs 13.5lbs ±0.5 lbs 20lbs ±0.5 lbs<br />
Water Cooled 5lbs ±0.5 lbs 7lbs ±0.5 lbs 10lbs ±0.5 lbs 18lbs ±0.5 lbs<br />
<strong>HX</strong>-200 <strong>HX</strong>-300 <strong>HX</strong>-500 <strong>HX</strong>-750<br />
Cut Out 300 300 300 300<br />
Cut In 200 200 200 200<br />
<strong>HX</strong>-200 <strong>HX</strong>-300 <strong>HX</strong>-500 <strong>HX</strong>-750<br />
Cut Out 3-5 PSIG 3-5 PSIG 3-5 PSIG 3-5 PSIG<br />
Cut In 35-37 PSIG 35-37 PSIG 35-37 PSIG 35-37 PSIG<br />
<strong>HX</strong>-200 <strong>HX</strong>-300 <strong>HX</strong>-500 <strong>HX</strong>-750<br />
Differential 35 PSIG 35 PSIG 35 PSIG 35 PSIG<br />
Cut In 37-40 PSIG 37-40 PSIG 37-40 PSIG 37-40 PSIG<br />
<strong>HX</strong>-200 <strong>HX</strong>-300 <strong>HX</strong>-500 <strong>HX</strong>-750<br />
Suction 85-90PSIG 73-78 PSIG 75-82 PSIG 50-60 PSIG<br />
Discharge ~180 PSIG ~180 PSIG ~180 PSIG ~180 PSIG<br />
*<br />
Charging Data R-22 Standard temperature units<br />
High pressure cutout settings<br />
Low pressure cutout settings Units with cutout/cutin switch<br />
Low pressure cutout settings Units with cutin/differential switch<br />
Standard and High Temperature units suction and discharge pressures*<br />
+25°C unit temperature water in reservoir<br />
Tap water temperature above 15°C may cause discharge to be slightly<br />
higher.<br />
43
R22 PRESSURE - TEMPERATURE CHART<br />
PSIG TEMP, °F PSIG TEMP, °F PSIG TEMP, °F<br />
5* -48 28 5 85 51<br />
4* -47 29 6 90 54<br />
3* -45 30 7 95 56<br />
2* -44 31 8 100 59<br />
1* -43 32 9 105 62<br />
0 -41 33 10 110 64<br />
1 -39 34 11 115 67<br />
2 -37 35 12 120 69<br />
3 -34 36 13 125 72<br />
4 -32 37 14 130 74<br />
5 -30 38 15 135 76<br />
6 -28 39 16 140 78<br />
7 -26 40 17 145 81<br />
8 -24 42 19 150 83<br />
9 -22 44 21 155 85<br />
10 -20 46 23 160 87<br />
11 -19 48 24 165 89<br />
12 -17 50 26 170 91<br />
13 -15 52 28 175 92<br />
14 -14 54 29 180 94<br />
15 -12 56 31 185 96<br />
16 -11 58 32 190 98<br />
17 -9 60 34 195 100<br />
18 -8 62 35 200 101<br />
19 -7 64 37 205 103<br />
20 -5 66 38 210 105<br />
21 -4 68 40 220 108<br />
22 -3 70 41 230 111<br />
23 -1 72 42 240 114<br />
24 0 74 44 250 117<br />
25 1 76 45 260 120<br />
26 2 78 46 275 124<br />
27 4 80 48 290 128<br />
* Inches mercury below one<br />
atmosphere<br />
Drawing 83.wks<br />
Rick Mills<br />
5 April<br />
1995<br />
44
CONDENSER REQUIREMENTS:<br />
AIR COOLED UNITS<br />
The unit should be located in a laboratory or clean industrial<br />
environment where ambient temperatures are inside the range<br />
of +55°F to +95°F (+13°C to +35°C ). The unit will retain its<br />
full rated capacity in ambient temperatures to approximately<br />
+75°F (+24°C ). Above +75°F, derate the cooling capacity<br />
1% for every 1°F above +75°F, to a maximum ambient<br />
temperature of +95°F. The Celsius deration is 1% for every 0.5<br />
°C above 24 °C, to a maximum ambient temperature of +35°C.<br />
The unit must be positioned so the air intake and discharge are<br />
not impeded. Air is drawn in through the left side of the unit and<br />
discharged through the right and rear. A minimum clearance of<br />
2 feet (0.6 meter) on these three sides is necessary for adequate<br />
ventilation. Inadequate ventilation will cause a reduction<br />
in cooling capacity and, in extreme cases, compressor failure.<br />
Excessively dusty areas should be avoided and a periodic<br />
cleaning schedule should be instituted.<br />
Refer to the table to determine the approximate amount of air<br />
intake required for the unit to retain its full rated capacity.<br />
<strong>HX</strong>200:<br />
<strong>HX</strong>300:<br />
<strong>HX</strong>500:<br />
<strong>HX</strong>750:<br />
2000 cfm (56640 lpm)<br />
1900 cfm (53800 lpm)<br />
5000 cfm (141750 lpm)<br />
5600 cfm (158800 lpm)<br />
46
CONDENSER REQUIREMENTS:<br />
WATER COOLED UNITS<br />
The facility cooling water supply must meet or exceed the<br />
requirements shown below for the unit to operate at its full rated<br />
capacity.<br />
As the temperature of the cooling water supply increases, the<br />
required flow and pressure of the cooling water supply increases.<br />
Example: On the <strong>HX</strong>-300, if the temperature of the cooling<br />
water supply is 65°F (18°C), the flow rate must be at least 4.0<br />
gpm ( 15.1 lpm ), with a pressure differential of at least 8 psi<br />
(55 kPa). However, if the temperature of the cooling water<br />
supply rises to 85°F ( 29°C ), the flow rate must be at least 11.0<br />
gpm (42 lpm ), with a pressure differential of at least 25 psi<br />
( 172 kPa).<br />
A water regulating valve, located in TAP WATER line, regulates<br />
the flow rate of the cooling water supply as it enters the unit.<br />
The valve regulates the flow rate based on the heat load. Flow<br />
through the unit stops automatically when the unit is shut off.<br />
47
<strong>HX</strong> 200<br />
55°F (13°C) 65°F (18°C) 75°F (24°C) 85°F (29°C)<br />
Required flow - gpm<br />
Required flow - lpm<br />
Required pressure drop - PSI<br />
Required pressure drop - BAR<br />
Required pressure drop - kPa<br />
1.8<br />
6.8<br />
5.0<br />
0.34<br />
34.48<br />
2.5<br />
9.5<br />
6.0<br />
0.41<br />
41.37<br />
3.5<br />
13.2<br />
7.0<br />
0.48<br />
48.26<br />
6.0<br />
22.7<br />
18.0<br />
1.24<br />
124.11<br />
<strong>HX</strong> 300<br />
55°F (13°C) 65°F (18°C) 75°F (24°C) 85°F (29°C)<br />
Required flow - gpm<br />
Required flow - lpm<br />
Required pressure drop - PSI<br />
Required pressure drop - BAR<br />
Required pressure drop - kPa<br />
2.5<br />
9.5<br />
6.0<br />
0.41<br />
41.37<br />
4.0<br />
15.1<br />
8.0<br />
0.55<br />
55.16<br />
6.5<br />
24.6<br />
13.5<br />
0.93<br />
93.08<br />
11.0<br />
41.6<br />
25.0<br />
1.72<br />
172.37<br />
<strong>HX</strong> 500<br />
55°F (13°C) 65°F (18°C) 75°F (24°C) 85°F (29°C)<br />
Required flow - gpm<br />
Required flow - lpm<br />
Required pressure drop - PSI<br />
Required pressure drop - BAR<br />
Required pressure drop - kPa<br />
3.5<br />
13.2<br />
13.0<br />
0.89<br />
89.63<br />
5.0<br />
18.9<br />
17.0<br />
1.17<br />
117.21<br />
8.0<br />
30.3<br />
23.0<br />
1.58<br />
158.58<br />
16.0<br />
60.6<br />
57.0<br />
3.93<br />
393.00<br />
<strong>HX</strong> 750<br />
Required flow - gpm<br />
Required flow - lpm<br />
Required pressure drop - PSI<br />
Required pressure drop - BAR<br />
Required pressure drop - kPa<br />
55°F (13°C) 65°F (18°C) 75°F (24°C) 85°F (29°C)<br />
6.0<br />
22.7<br />
14.0<br />
0.96<br />
96.53<br />
8.0<br />
30.3<br />
20.0<br />
1.38<br />
137.90<br />
12.5<br />
47.3<br />
28.5<br />
1.96<br />
196.5<br />
16.6<br />
62.8<br />
40.0<br />
2.76<br />
275.79<br />
48
15 pin Accessory<br />
Connector (Optional)<br />
Units with digital controllers may be modified with a 15 pin accessory<br />
connector. To enable the connector slide the LOCAL/REMOTE switch on the<br />
temperature controller to the REMOTE position. The pin out information is<br />
listed below.<br />
8 7 6 5 4 3 2 1<br />
15 14 13 12 11 10 9<br />
15 pin D-subminiature female receptacle<br />
Pin #<br />
Function<br />
1 Chassis ground.<br />
2 No connection.<br />
3 Span +. Indicates the maximum setpoint value the unit can be set<br />
to operate. The temperature scale is 10mV/°C, referenced to analog<br />
ground, pin 6(example: +350mV = +35.0°C).<br />
4 Span -. Indicates the minimum setpoint value the unit can be set<br />
to operate. The temperature scale is 10mV/°C, referenced to<br />
analog ground, pin 6 (example: +50mV = +5.0°C).<br />
5 No connection.<br />
6 Analog ground. The analog ground is physically separated from<br />
the power ground throughout the unit. To prevent offsets that result from<br />
ground currents, the analog and power grounds are only connected at the<br />
unit's power supply. Analog ground should only be used as a reference pin .<br />
7 Sensor temperature (current limited through 2.7K OHM resistor).<br />
The fluid temperature, as measured by the controller’s sensor located in the<br />
reservoir, can be read at this pin. The temperature scale is 10mV/°C,<br />
referenced to analog ground, pin 6 (example: +150mV = +15.0°C).<br />
8 Setpoint out. The present temperature setpoint can be read at<br />
this pin. The temperature scale is 10mV/°C, referenced to analog ground, pin<br />
6 (example: +150mV = +15.0°C).<br />
9 Power Ground.<br />
10 Heater output. Will source 3V at 6mA.<br />
11 No connection.<br />
12 Digital display (input only). An external voltage can be displayed<br />
on the operator panel digital display by applying the voltage to this<br />
pin. The display has a low input resistance and a full scale rating of<br />
±1.99VDC. Input is referenced to analog ground, pin 6. The maximum<br />
voltage applied to the display should be limited to 2VDC.<br />
13 - 5V. Power supply of -5VDC (15mA maximum).<br />
14 +5V. Power supply of +5VDC (15mA maximum).<br />
15 Setpoint in. The temperature setpoint can be controlled by<br />
applying a known voltage to this pin. The temperature scale is 10mV/°C,<br />
referenced to analog ground, pin 6 (example: +230mV = +23.0°C).<br />
49
Air cooled Condensing unit / Water cooled compressor<br />
NESLAB Part Numbers<br />
208/230 60 220/240 50 440/480 60 380/420 50<br />
200WC<br />
200AC<br />
300WC<br />
300AC<br />
500WC<br />
500AC<br />
750WC<br />
007191 007473 007473<br />
007595 007596 007596<br />
007198 007198 007472 007472<br />
007597 007597 007598 007598<br />
007214 007214 007215 007215<br />
007114 007114 007123 007123<br />
007620 007620 007842 007842<br />
750AC<br />
007127 007127 007125 007125<br />
Water cooled units: Compressor fan NESLAB part number<br />
208/230 60 220/240 50 440/480 60 380/420 50<br />
200WC 007402 007402 007402<br />
300WC 007402 007402 007402 007402<br />
500WC 007410 007411 007410 007411<br />
750WC 007410 007411 007410 007411<br />
50
<strong>HX</strong>-200 & <strong>HX</strong>-300 REFRIGERATION PARTS<br />
51
<strong>HX</strong>-500 & <strong>HX</strong>-750 REFRIGERATION PARTS<br />
52
<strong>HX</strong>-200 & <strong>HX</strong>-300 MISCELLANEOUS PARTS<br />
See the following pages for 50 cycle peculiarities<br />
53
<strong>HX</strong>-500 & <strong>HX</strong>-750 MISCELLANEOUS PARTS<br />
See the following pages for 50 cycle peculiarities<br />
54
<strong>HX</strong>-200 & <strong>HX</strong>-300 MISCELLANEOUS PARTS (50 Cycle)<br />
55
<strong>HX</strong>-500 & <strong>HX</strong>-750 MISCELLANEOUS PARTS (50 Cycle)<br />
56
<strong>HX</strong>-200 AC rear view<br />
Tank coil assy....052953<br />
TXV.....009620<br />
Solenoid valve....009475<br />
Solenoid coil....009474<br />
not shown<br />
Condensing unit<br />
Filter/Dryer....9320<br />
Suction Filter....009324<br />
Sight Glass....009604<br />
Fan motor (2)....007522<br />
or 007404<br />
Hot Gas Bypass<br />
Valve....009137<br />
Compressor (part of condensing unit...see Condensing<br />
unit/compressor part number chart).<br />
Low pressure cutout....009818<br />
57
<strong>HX</strong>-200 AC right view<br />
Tank coil assy....052953<br />
Solenoid coil....009476<br />
Solenoid valve....009475<br />
TXV....009602<br />
Sensing bulb<br />
part of TXV<br />
Filter/dryer....009320<br />
Fan motor....007522<br />
or 007404<br />
Receiver (Part of<br />
condensing unit)<br />
Suction filter....009324<br />
Sight glass....009604<br />
Condenser (see<br />
Condensing<br />
unit/compressor<br />
part number<br />
chart)<br />
Accumulator (Part<br />
of condensing<br />
unit)<br />
Hot gas valve<br />
....009138<br />
Caster with brake....013058<br />
Caster no brake....013057<br />
58
<strong>HX</strong>-200 WC right view<br />
Tank coil assy....052953<br />
Sensing bulb<br />
part of TXV<br />
Sight glass....009604<br />
Suction filter....009324<br />
Accumulator....009304<br />
Filter/Dryer....009320<br />
Fan blade....007663<br />
Fan motor ....007402<br />
Solenoid coil....009476<br />
Solenoid valve....009475<br />
TXV....009602<br />
Compressor (see Condensing<br />
unit/compressor<br />
part number chart)<br />
LPC (part of relay<br />
box....7322)<br />
HPC....001297<br />
Water bracket<br />
assy....050194<br />
Caster with brake<br />
....013058<br />
Caster no brake....013057<br />
Water regulating valve....009144<br />
Condenser/receiver<br />
....007190<br />
Hot gas valve....009138<br />
59
<strong>HX</strong>-300 AC rear view<br />
TCA....053620<br />
Solenoid valve....009475<br />
Solenoid coil....009476<br />
not shown<br />
TXV....009611<br />
Filter Dryer....9320<br />
Sight glass....009604<br />
Suction filter....009324<br />
Condensing unit ( see<br />
Condensing unit/<br />
compressor part number<br />
chart)<br />
Hot gas valve....009138<br />
LPC....009818<br />
Compressor (part of<br />
condensing unit)<br />
60
<strong>HX</strong>-300 AC right view<br />
Tank/coil assy....053620<br />
Solenoid coil....009476<br />
Solenoid valve....009475<br />
TXV....009611<br />
Sensing bulb<br />
part of TXV<br />
Filter/dryer....009320<br />
Sight glass...009604<br />
Suction filter....009324<br />
Fan motor....007405<br />
Fan blade....007436<br />
Hot gas valve....009138<br />
Caster with brake....013058<br />
Caster no brake....013057<br />
61
<strong>HX</strong>-300WC rear view<br />
Tank/coil assy....053620<br />
Solenoid valve<br />
....009475<br />
TXV....009611<br />
Sight glass....009604<br />
Filter/Dryer....009320<br />
Solenoid coil<br />
....009476(not<br />
shown)<br />
Accumulator<br />
....009304<br />
Condenser/receiver<br />
....009479<br />
Water bracket assy<br />
....051713<br />
LPC (part of relay<br />
box 007322)<br />
Suction filter<br />
....009324<br />
Hot gas valve....009138<br />
HPC....001297<br />
Base valve....009669<br />
Compressor (see condensing<br />
unit/compressor part number<br />
chart).<br />
62
<strong>HX</strong>-300 WC right view<br />
Solenoid coil ....009476<br />
Solenoid valve....009475<br />
TXV....009611<br />
Fan blade....007663<br />
Fan motor....007402<br />
Sight glass....009604<br />
Accumulator....009304<br />
Condenser/receiver....009479<br />
Caster with brake....013058<br />
LPC (part of relay<br />
box....007322)<br />
HPC....001297<br />
Compressor (see<br />
Condensing unit/<br />
compressor part<br />
number chart)<br />
Water bracket<br />
assy ...051713<br />
Hot gas valve....009138<br />
Caster no brake....013057<br />
Water regulating valve....009138<br />
63
<strong>HX</strong>-500AC rear view<br />
Condensening unit<br />
(CU) (See Condensing<br />
unit/compressor<br />
part number chart)<br />
Suction filter....009324<br />
Accumulator (part<br />
of the CU)<br />
Hot gas valve....009164<br />
Base valve (part<br />
of the CU)<br />
Hot gas solenoid<br />
valve....009478<br />
Hot gas solenoid<br />
coil....009422<br />
(not shown)<br />
LPC....009818<br />
64
<strong>HX</strong>-500AC right view<br />
Tank/coil assy....052957<br />
Sensing bulb (part of<br />
the TXV)<br />
TXV....009623<br />
Solenoid coil....009474<br />
not shown<br />
Solenoid valve....009780<br />
Fan motor....006477<br />
Fan blade....007130<br />
Receiver (part of the CU)<br />
Compressor (part<br />
of the CU)<br />
Sight glass....009604<br />
Filter/Dryer....009627<br />
Caster with brake....000108<br />
Caster no brake....000107<br />
65
<strong>HX</strong>500WC rear view<br />
Solenoid valve....009780<br />
Solenoid coil....009474<br />
not shown<br />
Tank/coil assy<br />
....052957<br />
TXV....009623<br />
Sight glass....009604<br />
Suction filter....009324<br />
Hot gas valve....009164<br />
HPC....001297<br />
LPC (part of relay box 007339)<br />
66
<strong>HX</strong>-500WC right view<br />
Tank/coil assy....052957<br />
Solenoid coil....009474<br />
Solenoid valve....009780<br />
Sensing bulb (part of TXV)<br />
Sight glass....009604<br />
Fan blade....007431<br />
Fan motor (see chart)<br />
TXV....009623<br />
Compressor (See<br />
condensing unit/compressor<br />
part number<br />
chart)<br />
LPC (part of relay<br />
box 007339)<br />
HPC....001297<br />
Suction filter ....009324<br />
Condenser/receiver....007175<br />
Filter/Dryer....009627<br />
Caster with brake....000108<br />
Accumulator<br />
....007338<br />
Water regulating<br />
valve....009165<br />
Caster no brake....000107<br />
Hot gas valve....009164<br />
Base valve....009669<br />
Hot gas solenoid valve....009478<br />
Hot gas solenoid coil....009422<br />
not shown<br />
67
<strong>HX</strong>-750 AC right view<br />
Tank/coil assy....052959<br />
TXV....009604<br />
Sensing bulb (part of TXV)<br />
Liquid line solenoid<br />
valve....009780<br />
Liquid line solenoid<br />
valve coil....009476<br />
not shown<br />
Suction filter....009327<br />
Hot gas solenoid<br />
valve....009478<br />
Hot gas solenoid valve<br />
coil....009422 (not<br />
shown<br />
Caster with brake....000108<br />
Receiver (part of CU)<br />
Sight glass....009604<br />
Filter/dryer....009627<br />
Accumulator (part of the CU)<br />
Caster no brake....000107<br />
68
<strong>HX</strong>-750 AC rear view<br />
Condensing unit<br />
(CU)(see Condensing<br />
unit/compressor part<br />
number chart)<br />
Compressor (part of CU)<br />
Fan blade(2)....009823<br />
Sight glass....009604<br />
Fan motor(2)<br />
....007406<br />
Filter/Dryer....009627<br />
Accumulator Part of CU<br />
Hot gas valve....009164<br />
HPC....007348<br />
LPC....009818<br />
69
<strong>HX</strong>-750WC rear view<br />
Tank/coil assy....052959<br />
Solenoid coil....009476<br />
TXV....009691<br />
Solenoid valve....009780<br />
Accumulator....009314<br />
Suction filter....009327<br />
Water Bracket....051714<br />
Compressor (see<br />
Condensing unit/<br />
compressor part<br />
number chart)<br />
LPC (part of relay<br />
box..007501)<br />
Fan blade....009431<br />
Fan motor see chart<br />
HPC....001297<br />
Hot gas valve....009164<br />
70
<strong>HX</strong>-750WC right view<br />
Tank/coil assy....052959<br />
Solenoid coil....009476<br />
Solenoid valve....009780<br />
TXV....009691<br />
Sensing bulb (part of TXV)<br />
Compressor (see<br />
Condensing unit/<br />
compressor part<br />
number chart)<br />
Condenser/Receiver<br />
....007182<br />
Sight glass....009604<br />
Filter/Dryer....009627<br />
Suction filter<br />
....009327<br />
Accumulator<br />
....009314<br />
Water bracket<br />
....051714<br />
Caster with brake....000108<br />
Base valve....009705<br />
Hot gas valve....009164<br />
Water regulating valve....009170<br />
Caster no brake<br />
....000107<br />
71
Pump Flow<br />
Diagram (CP Pumps)<br />
Reservoir<br />
Out<br />
In<br />
Capillary tube<br />
bypass<br />
Flow Switch<br />
and Strainer<br />
(Optional)<br />
Check valve<br />
Pump<br />
2-way flow<br />
control valve<br />
Pressure gauge<br />
Supply<br />
Return<br />
Pump Flow<br />
Diagram<br />
(PD and TU Pumps)<br />
Relief valve<br />
Reservoir<br />
Strainer<br />
(PD-2 and<br />
TU pumps)<br />
Flow Switch<br />
and Strainer<br />
Out<br />
In<br />
Check valve<br />
(Optional)<br />
Strainer<br />
(PD-1 pumps)<br />
3-way fllow<br />
control valve<br />
Pressure gauge<br />
Supply<br />
Return<br />
74
<strong>HX</strong>-200, <strong>HX</strong>-300,<br />
<strong>HX</strong>-500 & <strong>HX</strong>-750<br />
NESLAB <strong>Manual</strong> P/N U00041<br />
Rev. 30 Jan 1997<br />
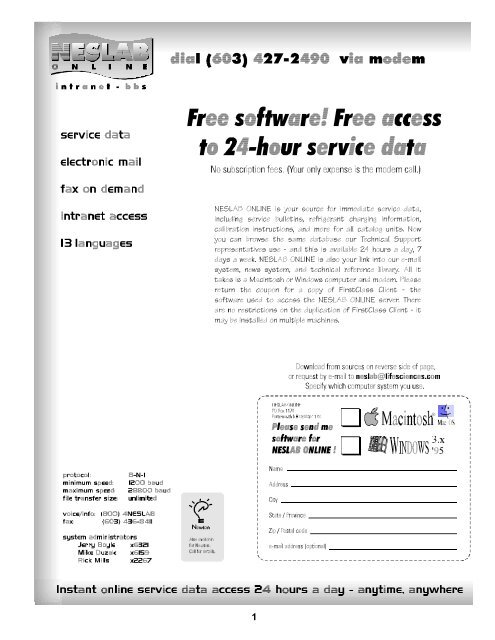
NESLAB online<br />
Product <strong>Service</strong> Information, Electronic Catalog,<br />
Applications Notes, MSDS Forms, e-mail.<br />
<strong>Service</strong> <strong>Manual</strong><br />
Call our bulletin board system<br />
(603)427-2490<br />
Set modem to 8-N-1 protocol, 1200 - 14400 baud<br />
Voice Info: (800) 4-NESLAB<br />
Comments on this manual can be sent to:<br />
NESLAB@lifesciences.com<br />
or visit our Web page at:<br />
http://www.neslabinc.com