AVIC-LINC Firmware Update Instructions - Pioneer
AVIC-LINC Firmware Update Instructions - Pioneer
AVIC-LINC Firmware Update Instructions - Pioneer

Create successful ePaper yourself
Turn your PDF publications into a flip-book with our unique Google optimized e-Paper software.
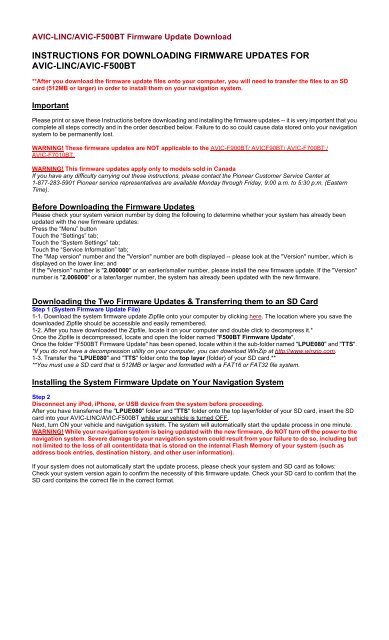
<strong>AVIC</strong>-<strong>LINC</strong>/<strong>AVIC</strong>-F500BT <strong>Firmware</strong> <strong>Update</strong> Download<br />
INSTRUCTIONS FOR DOWNLOADING FIRMWARE UPDATES FOR<br />
<strong>AVIC</strong>-<strong>LINC</strong>/<strong>AVIC</strong>-F500BT<br />
**After you download the firmware update files onto your computer, you will need to transfer the files to an SD<br />
card (512MB or larger) in order to install them on your navigation system.<br />
Important<br />
Please print or save these <strong>Instructions</strong> before downloading and installing the firmware updates -- it is very important that you<br />
complete all steps correctly and in the order described below. Failure to do so could cause data stored onto your navigation<br />
system to be permanently lost.<br />
WARNING! These firmware updates are NOT applicable to the <strong>AVIC</strong>-F900BT/ <strong>AVIC</strong>F90BT/ <strong>AVIC</strong>-F700BT /<br />
<strong>AVIC</strong>-F7010BT.<br />
WARNING! This firmware updates apply only to models sold in Canada<br />
If you have any difficulty carrying out these instructions, please contact the <strong>Pioneer</strong> Customer Service Center at<br />
1-877-283-5901 <strong>Pioneer</strong> service representatives are available Monday through Friday, 9:00 a.m. to 5:30 p.m. (Eastern<br />
Time).<br />
Before Downloading the <strong>Firmware</strong> <strong>Update</strong>s<br />
Please check your system version number by doing the following to determine whether your system has already been<br />
updated with the new firmware updates:<br />
Press the “Menu” button<br />
Touch the “Settings” tab;<br />
Touch the “System Settings” tab;<br />
Touch the “Service Information” tab;<br />
The "Map version" number and the "Version" number are both displayed -- please look at the "Version" number, which is<br />
displayed on the lower line; and<br />
If the "Version" number is "2.000000" or an earlier/smaller number, please install the new firmware update. If the "Version"<br />
number is "2.006000" or a later/larger number, the system has already been updated with the new firmware.<br />
Downloading the Two <strong>Firmware</strong> <strong>Update</strong>s & Transferring them to an SD Card<br />
Step 1 (System <strong>Firmware</strong> <strong>Update</strong> File)<br />
1-1. Download the system firmware update Zipfile onto your computer by clicking here. The location where you save the<br />
downloaded Zipfile should be accessible and easily remembered.<br />
1-2. After you have downloaded the Zipfile, locate it on your computer and double click to decompress it.*<br />
Once the Zipfile is decompressed, locate and open the folder named "F500BT <strong>Firmware</strong> <strong>Update</strong>".<br />
Once the folder "F500BT <strong>Firmware</strong> <strong>Update</strong>" has been opened, locate within it the sub-folder named "LPUE080" and "TTS".<br />
*If you do not have a decompression utility on your computer, you can download WinZip at http://www.winzip.com.<br />
1-3. Transfer the "LPUE080" and "TTS" folder onto the top layer (folder) of your SD card.**<br />
**You must use a SD card that is 512MB or larger and formatted with a FAT16 or FAT32 file system.<br />
Installing the System <strong>Firmware</strong> <strong>Update</strong> on Your Navigation System<br />
Step 2<br />
Disconnect any iPod, iPhone, or USB device from the system before proceeding.<br />
After you have transferred the "LPUE080" folder and "TTS" folder onto the top layer/folder of your SD card, insert the SD<br />
card into your <strong>AVIC</strong>-<strong>LINC</strong>/<strong>AVIC</strong>-F500BT while your vehicle is turned OFF.<br />
Next, turn ON your vehicle and navigation system. The system will automatically start the update process in one minute.<br />
WARNING! While your navigation system is being updated with the new firmware, do NOT turn off the power to the<br />
navigation system. Severe damage to your navigation system could result from your failure to do so, including but<br />
not limited to the loss of all content/data that is stored on the internal Flash Memory of your system (such as<br />
address book entries, destination history, and other user information).<br />
If your system does not automatically start the update process, please check your system and SD card as follows:<br />
Check your system version again to confirm the necessity of this firmware update. Check your SD card to confirm that the<br />
SD card contains the correct file in the correct format.
Step 3<br />
Please wait for the firmware update to be installed - this should take approximately 10 minutes. The system will<br />
automatically reboot after the firmware update is completed.<br />
Step 4<br />
After your system has rebooted itself, press and hold "power" key and turn off the system. Then disconnect power supply<br />
cable and remove battery cell. After 30 seconds, reconnect battery cell and power supply cable and turn on the system.<br />
Installing the TTS <strong>Update</strong><br />
Step 5<br />
After your system has rebooted, press the "Menu" button and touch the "Setting" tab.<br />
Then, touch the "System Setting" button and touch the "Language" button.<br />
Step 6<br />
6-1. Touch the button to the right of "Voice Language" and then choose "English (US) (Jason)" from the list.<br />
6-2. Touch the button to the right of "Voice language" (which shows "English (US) (Jason)") again.
6-3. Touch the "TTS Setup" tab on the right bottom of the screen.<br />
6-4. To update English TTS file, touch the "English (US) (Samantha):TTS" button.<br />
6-5. Touch the "from SD" button.<br />
If you cannot select "from SD", please check your system and SD card as follows:<br />
Check your SD card to confirm that the SD card contains the correct folder and files in the correct format.<br />
6-6. Touch the "English (US) (Samantha):TTS" tab. Then English TTS file will be updated immediately.
WARNING! While your navigation system is being updated with the new firmware, do NOT turn off the power to the<br />
navigation system. Severe damage to your navigation system could result from your failure to do so, including but<br />
not limited to the loss of all content/data that is stored on the internal Flash Memory of your system (such as<br />
address book entries, destination history, and other user information).<br />
If you cannot select "English (US) (Samantha):TTS", please check your system and SD card as follows:<br />
Check your SD card to confirm that the SD card contains the correct folder and files in the correct format.<br />
6-7. Repeat steps from 6-4 to 6-6 to update the Spanish and French TTS files. Select the "Espanol (Isabel):TTS" button to<br />
update the Spanish TTS files, and select the "Francais (CA) (Julie):TTS" button to update the French TTS files.<br />
After your system has rebooted, press the "Menu" button and touch the "Setting" tab.<br />
Then, touch the "System Setting" button and push the "Language" button.<br />
Step 7<br />
After updating all TTS files, turn off your vehicle and turn on again, and wait for your system to boot up.<br />
Determine if Bluetooth Software <strong>Update</strong> is Required<br />
Step 8<br />
*If your unit has previously been updated to version 2.000000, then please skip Step 8 and proceed to Step 9.<br />
Please check your Bluetooth Software version number by doing the following to determine whether your system has already<br />
been updated with the new Bluetooth Software update:<br />
--Press the "Menu" button --Select the "Phone" tab --Select "Phone Settings" --Scroll down the menu and select "Bluetooth<br />
Software <strong>Update</strong>"<br />
--If your system displays the following version number, your system does not need to be updated, proceed to Step 9:<br />
Version: HW100-SW330 RC3<br />
--If your system displays the following version number, and you use a Sony Ericson W300i or Samsung SGH-U900 phones,<br />
your system does not need to be updated, proceed to Step 9:<br />
Version: HW100-SW290 RC3<br />
--If your system displays the following version number, and you do NOT use a Sony Ericson W300i or Samsung SGH-U900<br />
phones, download and install the Primary Bluetooth Software <strong>Update</strong>(Version: HW100-SW330 RC3) from here before<br />
proceeding:<br />
Version: HW100-SW290 RC3<br />
Confirming that the <strong>Firmware</strong> <strong>Update</strong> was Successfully Installed<br />
Step 9<br />
Please follow the steps below to confirm the update process was successful:<br />
9-1. Confirm your System <strong>Firmware</strong> Version<br />
Press the "Menu" button<br />
Select the "Settings" tab<br />
Select "System Settings"<br />
Select "Service Information"<br />
Confirm that your system correctly displays the following information:<br />
Version: 2.006000<br />
9-2. Confirm your Bluetooth Software Version if you updated it<br />
Press the "Menu" button<br />
Select the "Phone" tab<br />
Select "Phone Settings"<br />
Scroll down the menu and select "Bluetooth Software <strong>Update</strong>"<br />
• If you installed the PRIMARY Bluetooth update, confirm that your system correctly displays the following<br />
information:<br />
Version: HW100-SW330 RC3<br />
If you installed the ALTERNATE Bluetooth update, confirm that your system correctly displays the following information:<br />
Version: HW100-SW290 RC3<br />
Your navigation system is now ready for use.
Post-<strong>Update</strong> procedures<br />
Step 10<br />
10-1. Recover the AV setting If an iPod is connected to the system, turn AV1 input to "iPod". Press the "Menu" button and<br />
touch the "Settings" tab. Select "AV Settings", and touch the<br />
"AV1 Input" button until "iPod" is displayed. 10-2. Calibrate the Screen Press the "Menu" button and touch the "Settings"<br />
tab. Select "System Settings", and touch<br />
the "Screen Calibration" button. Proceed with the guidance shown on the display and tap the screen to align the<br />
calibration.<br />
Questions<br />
If you have any questions, please contact the <strong>Pioneer</strong> Customer Service Center at 1-877-283-5901. <strong>Pioneer</strong> service<br />
representatives are available Monday through Friday, 9:00 a.m. to 5:30 p.m. (Eastern Time).