
You also want an ePaper? Increase the reach of your titles
YUMPU automatically turns print PDFs into web optimized ePapers that Google loves.
<strong>Firmware</strong> <strong>Updates</strong><br />
This procedure generally defines the procedure for updating the Unit’s application or option firmware (like Ethernet option<br />
firmware) and library files like Logos and Fonts.<br />
Some firmware versions have proprietary download functionality. For these scenarios, contact your network administrator for<br />
instructions.<br />
File Identification<br />
The necessary update files must be obtained from <strong>Unimark</strong> technical support or engineering. These files may come attached<br />
to an associated Service Bulletin. In these instances, instructions in the Service Bulletin take precedence over this document.<br />
1. Locate the files to be downloaded into the Unit. They will be stored in a ZIP file in the form of:<br />
APPvvvvv.TBB for application firmware, where vvvvv is the version (10713 for version 1.07.13, for example)<br />
NETvvvvv.TBB for Ethernet firmware, where vvvvv is the version (10208 for version 1.02.08, for example)<br />
BOTvvvvv.TBB for Boot Block firmware, where vvvvv is the version (10102 for version 1.01.02, for example)<br />
MBTvvvvv.TBB for Main Boot Block firmware, where vvvvv is the version (10005 for version 1.00.05, for example)<br />
XBTvvvvv.TBB for Transport Boot Block firmware, where vvvvv is the version (10007 for version 1.00.07, for example)<br />
FNTvvvvv.TBB for font library, where vvvvv is the version (10001 for version 1.00.01 for example)<br />
TTFvvvvv.TBB for True Type font library, where vvvvv is the version (90103 for version 9.01.03, for example)<br />
LOGvvvvv.TBB for logo library, where vvvvv is the version (10701 for version 1.07.01, for example)<br />
Note: The number of files used will vary depending on the specific customer version or update requirements. Other names may be<br />
used, especially if multiple files are needed (such as multiple font libraries).<br />
2. Copy and uncompress files to a directory on your local hard drive (C:\<strong>Unimark</strong>\XP or C:\<strong>Unimark</strong>\ET6000 for example).<br />
XP and ET6000 are product model name references. Update files for one product are not compatible with other products,<br />
even though the download process is similar.<br />
Terminal Emulator<br />
<strong>Unimark</strong> uses a terminal emulator program to download update files to the Unit via either the RS-232 serial port or the<br />
Ethernet TCP/IP option if installed. <strong>Unimark</strong> recommends using Tera Term© for this process.<br />
Tera Term is a freeware terminal emulator program and is a very versatile tool for transferring data via the RS-232 serial port<br />
or IP address. You may obtain this from their website: http://hp.vector.co.jp/authors/VA002416/ttermp23.zip<br />
This program requires MS Windows 95 or higher to operate properly.<br />
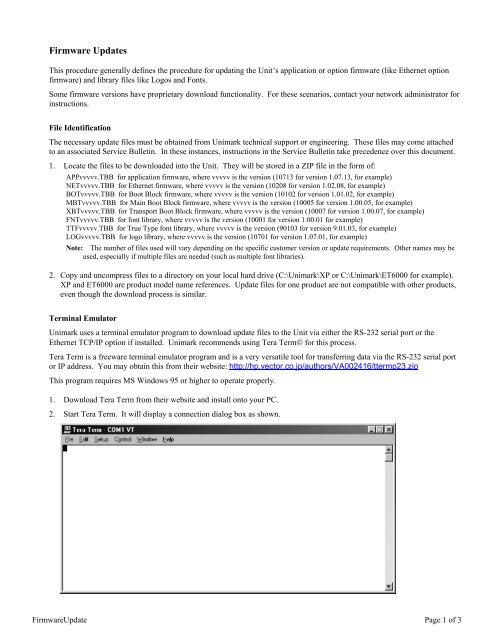
1. Download Tera Term from their website and install onto your PC.<br />
2. Start Tera Term. It will display a connection dialog box as shown.<br />
<strong>Firmware</strong>Update Page 1 of 3
3. Select the “Setup” pull down menu, and then the “Serial port” option. The Serial port setup box will appear. Select the<br />
appropriate COMM port on your PC.<br />
4. Set BAUD rate for 115200. Then set data bit size, stop bit size, and parity to match the unit. Click on the OK button.<br />
Setting Unit Communication Parameters (RS-232)<br />
The Unit can receive data at lower baud rates but this will extend the update time considerably. Therefore it is assumed that<br />
the update will be performed at the maximum baud rate of 115200. The Unit communication protocol must be set for<br />
STX/ETX. This download will not work using ACK/NAK protocol.<br />
1. Take the unit OFFLINE by pressing the ONLINE key. Press the ENTER key.<br />
2. Press the DOWN/UP arrow and find SERVICE menu. Press the ENTER key.<br />
3. Enter service password (UP/DOWN changes the value in each block, LEFT/RIGHT moves the cursor to each block).<br />
4. Press the ENTER key to accept password.<br />
5. Press the DOWN/UP arrow and find COMM PORT SETUP menu. Press the ENTER key.<br />
6. Press the DOWN/UP arrow and find BAUD RATE menu. Press the ENTER key.<br />
7. Press the DOWN/UP arrow and find 115200 option. Press the ENTER key.<br />
8. Press the DOWN/UP arrow and find DATA BITS, STOP BITS, and PARITY menus.<br />
9. Press the ENTER key for each and record these settings (required for Tera Term setup in the previous section).<br />
10. Press the Exit key and back out of the COMM PORT SETUP menu.<br />
11. Press the DOWN/UP arrow and find HOST SETUP menu. Press the ENTER key.<br />
12. Press the DOWN/UP arrow and find COMM PROTOCOL menu. Press the ENTER key.<br />
13. Press the DOWN/UP arrow and find STX/ETX option. Press the ENTER key.<br />
14. Press the ONLINE key. It should not be necessary to select “Y” and ENTER to save this setting permanently. Just<br />
press the ENTER key which will temporarily save the setting while updating firmware. Once power is recycled, the<br />
baud rate and communication protocol should return to the original setting (see note below for exception).<br />
Note: If there are multiple application and boot block updates (which require the Unit to reboot each time), then you will want to save the<br />
comm. parameter changes permanently at the step above. Once all updates have been completed, you will have to manually reset<br />
the parameters back to their original settings.<br />
<strong>Firmware</strong>Update Page 2 of 3
Sending the Update Files<br />
If boot block files are provided, ensure that these are loaded first before any application firmware files.<br />
1. Select the “File” pull down menu, and then the “Send file” option. The Send File transfer box will appear. Select (click<br />
on/highlight) the file to transfer to the unit from the list. MAKE SURE THE BINARY OPTION at the bottom of the<br />
box is checked as shown below.<br />
2. Click on the OPEN button to start the data transmission. A transmission status box will appear.<br />
3. While the file is being downloaded, the unit should display a message “xxxKB Remaining”. This is an indicator of how<br />
much data the unit still expects to receive from the host system.<br />
4. Once the file is downloaded, a message “programming” will appear on the unit’s display.<br />
5. Once the unit finishes programming, it will go back to the Online state and send a message back to the terminal program<br />
in the form of “PDOKvvvvvvv”, where vvvvvvv is the version just programmed into the unit.<br />
Note: Repeat this section for each file required for the complete download procedure. In most cases, only the application firmware<br />
update will be required, but each case depends on the specific customer circumstance.<br />
Contact <strong>Unimark</strong> technical support if you have any problems with this procedure.<br />
<strong>Unimark</strong> Service; US #: (800) 451-2926 UK #: +44 1628-829-990<br />
<strong>Firmware</strong>Update Page 3 of 3