Trinity Halogen Oven Manual
Trinity Halogen Oven Manual
Trinity Halogen Oven Manual

You also want an ePaper? Increase the reach of your titles
YUMPU automatically turns print PDFs into web optimized ePapers that Google loves.
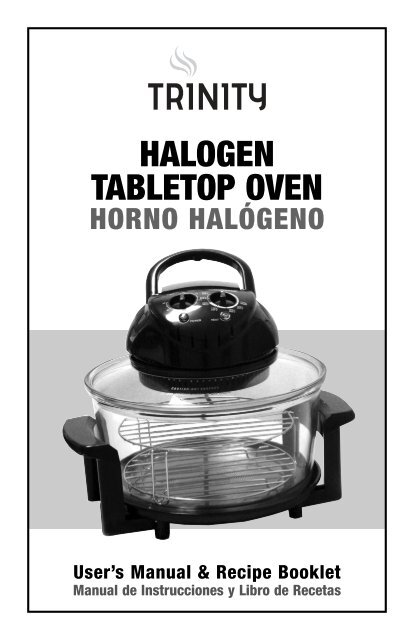
HALOGEN<br />
TABLETOP OVEN<br />
HORNO HALÓGENO<br />
User’s <strong>Manual</strong> & Recipe Booklet<br />
<strong>Manual</strong> de Instrucciones y Libro de Recetas
Contents<br />
Important Safeguards ...........................................................................4<br />
Technical Specifications .......................................................................6<br />
<strong>Oven</strong> Components.................................................................................7<br />
Getting Started ......................................................................................9<br />
Operating Instructions ........................................................................10<br />
Cooking Tips ........................................................................................11<br />
Suggested Cooking Times .................................................................13<br />
Cleaning and Maintenance .................................................................14<br />
Storing ..................................................................................................14<br />
Troubleshooting ...................................................................................16<br />
Recipes .................................................................................................17<br />
Recipe Index ........................................................................................38<br />
ESPAÑOL ..............................................................................................39<br />
Limited Warranty .................................................................................56<br />
1<br />
ENGLISH
Thank you for purchasing the new <strong>Trinity</strong> Tabletop <strong>Halogen</strong> <strong>Oven</strong>.<br />
This oven can be used to grill, broil, bake, steam or roast – all while saving energy<br />
and cooking up to 25 - 50% faster than a conventional oven. It is also up to 75%<br />
more energy efficient. A powerful 1200 W halogen heating element helps to cook<br />
entire meals in a fraction of the time spent using a conventional oven. The oven<br />
heats up instantly, reducing pre-heating times while a convection fan circulates<br />
hot air internally to cook food uniformly and seal in natural juices for full flavor and<br />
aroma.<br />
As the bowl is made of glass, you can clearly see what you are cooking from all<br />
sides and easily obtain the optimum cooking level for your meals. Also, this oven<br />
lends itself to healthy cooking. When meat, poultry or fish are cooked, fats and<br />
oils can drip away through the rack. In addition, this appliance is so compact, it<br />
can be used as an extra warming vessel for entertaining, or, as a primary cooking<br />
vessel in situations where space is limited such as in recreational vehicles, dorm<br />
rooms or even the office.<br />
This user’s manual contains complete information on the use and care of this<br />
product. Please read this manual carefully before operating the <strong>Trinity</strong> Tabletop<br />
<strong>Halogen</strong> <strong>Oven</strong> to ensure proper usage and maintenance. Carefully following the<br />
directions in this booklet will enable you to optimize the performance and lifespan<br />
of the unit.<br />
3<br />
ENGLISH
ENGLISH<br />
IMPORTANT SAFEGUARDS<br />
The product you have purchased is a state of the art appliance. It adheres to<br />
all of the latest safety and technology standards; however, as with any electric<br />
appliance, there are some potential risks. Only operate this oven in accordance<br />
with the instructions provided and only for its intended household use.<br />
PLEASE READ THE INSTRUCTIONS BELOW BEFORE USING THE<br />
APPLIANCE FOR THE FIRST TIME.<br />
• Do not use outdoors or operate where aerosol (spray) products are being used<br />
or where oxygen is being administered.<br />
• The <strong>Halogen</strong> <strong>Oven</strong> is for domestic use only; it is designed to handle normal<br />
household quantities. It is not suitable for continuous or commercial operation.<br />
• Do not operate in the presence of explosive and/or flammable fumes.<br />
• This appliance is not intended for use by persons (including children) with<br />
reduced physical, sensory or mental capabilities, or lack of experience and<br />
knowledge, unless they are carefully supervised or instructed by a person<br />
responsible for their safety.<br />
• Due to the high surface temperature this product reaches when in use, keep<br />
children and pets away from this product.<br />
• Always make sure that children cannot reach the product or any loose cables.<br />
• Use on a secure and stable worktop. Do not place near the edge of the<br />
worktop.<br />
• Do not place the product where it can either fall or be submerged into water or<br />
any other liquid.<br />
• Use the product for its intended household use only.<br />
• Always place the glass pot onto the base before plugging the power cord and<br />
switching on. NEVER operate the oven without first placing it on the supplied<br />
base.<br />
• Do not let the cord hang over the edge of the table or worktop, or make contact<br />
with hot surfaces.<br />
• Do not place on or near a hot gas or electric cooktop or in a heated oven.<br />
• Do not move the oven while in use.<br />
• Surfaces become very hot during operation, and remain hot for some time after<br />
the unit is switched off. Do not touch the lid or the sides of the oven without<br />
protective oven gloves.<br />
• All metal items in the oven, such as the cooking racks, can get very hot during<br />
cooking. Please be careful when removing these items from the oven. Always<br />
wear oven gloves or use the tongs supplied.<br />
4
• Never place unprotected hands inside the oven when in use.<br />
• Never leave the product unattended while in use.<br />
• Please note: The handle on the lid works as a safety mechanism, if the lid is<br />
not on properly or the lid is off the oven, it will automatically turn off.<br />
• If baking cakes, for best results use a cake pan (Not included with the oven).<br />
• Use the handle and wear oven gloves when lifting the lid from the glass oven.<br />
• The lid should be placed on the lid holder, not directly on the countertop, when<br />
taken off during operation. Placing the lid with the heating element facing down<br />
on the countertop might damage your countertop or even cause a fire hazard.<br />
• Always remove the lid away from you so that escaping steam is channeled<br />
away from your face.<br />
• Take care when removing the lid to avoid contact with hot liquid condensation<br />
that may have collected on the inner surface of the lid.<br />
• Be sure to allow the oven body to cool off before cleaning it with a damp cloth.<br />
• Be sure to unplug the oven when it is not in use, when cleaning the oven or<br />
whenever there is a known power failure. Remove the plug from the socket by<br />
pulling on the actual plug. Do not pull the plug out by the cable.<br />
• Use extreme caution when removing pans or cooking racks from the <strong>Halogen</strong><br />
<strong>Oven</strong>.<br />
• Be careful when disposing of hot liquids, particularly fat or oil.<br />
• Never immerse the cord, plug, or lid/control panel of the product in water or<br />
other liquids.<br />
• Re-tighten screws if base becomes loose.<br />
• Regularly check the cable and plug for any signs of damage.<br />
• Do not clean with metal scouring pads: pieces may break off the pads and<br />
make contact with electrical parts, increasing the risk of electrical shock.<br />
• Never operate the <strong>Halogen</strong> <strong>Oven</strong> if it has a damaged cord or plug. If the <strong>Halogen</strong><br />
<strong>Oven</strong> has been dropped or damaged, please contact <strong>Trinity</strong>’s Customer Service<br />
Department at phone 1 (800) 207-0806.<br />
• Do not use any other accessories or attachments not recommended by the<br />
manufacturer. They may result in fire, electrical shock, or personal injury.<br />
• For safety reasons, a broken or damaged cable may only be replaced with a<br />
cable supplied by <strong>Trinity</strong>.<br />
• Never use the cord to carry the product.<br />
• Do not disassemble the product or attempt to modify the plug in any way. This<br />
item is not equipped with any user serviceable parts.<br />
SAVE THESE INSTRUCTIONS<br />
5<br />
ENGLISH
ENGLISH<br />
Technical Specifications<br />
MODEL NUMBER 670040380<br />
RATE 120 V / 1200 ~ 1200 W<br />
TEMPERATURE RANGE 250 F ~ 480 F<br />
TIMER 5 ~ 60 minutes<br />
BOWL DIMENSIONS 13” width x 6.25” depth<br />
CAPACITY 12 quarts<br />
CORD LENGTH 4 FT<br />
WEIGHT 15 lb<br />
6
<strong>Oven</strong> Components<br />
Timer<br />
Safety ON/OFF and Handle<br />
7<br />
Temperature Knob<br />
LED Lights<br />
High Rack Low Rack<br />
Tongs<br />
Non-stick Frying Pan<br />
Lid Holder<br />
Base<br />
Extender Ring<br />
ENGLISH
ENGLISH<br />
• LID — Safety ON/OFF Handle: For safety reasons, the oven will only work if the<br />
handle is completely folded down. If it’s not completely folded down, the oven<br />
will not turn on. Always use this handle to move the lid. To remove the lid, lift it<br />
by the handle. Place it on the lid holder.<br />
• Timer Knob: You can program the cooking time up to 60 minutes. The<br />
timer will switch the oven off after the preset time period has passed and an<br />
alarm will ring momentarily to alert that the cooking time is up.<br />
• Temperature Knob: Easy manual selection of the cooking temperature.<br />
May be adjusted while the unit is in use.<br />
• LED Lights: luminous indicators of the oven’s activity. When you select<br />
your cooking and temperature time, the green and red lights will turn on.<br />
Once the oven reaches the desired temperature the green light will turn off.<br />
When the cooking time has concluded, the red light will turn off.<br />
• LID HOLDER — Metal holder for placing the lid during and after cooking. Take<br />
care not to place the hot lid directly on the table or countertop: this may create<br />
a potential fire hazard or damage the furniture.<br />
• GLASS POT — Made of heat-resistant glass. Dishwasher safe. 12 quart<br />
capacity.<br />
• BASE — Placed under the glass bowl to keep it off the countertop and stabilize<br />
it. NEVER operate the oven without the base.<br />
• EXTENDER RING — Allows expansion of the oven’s capacity by 5 quarts.<br />
Allows for cooking larger food items such as a whole chicken or turkey.<br />
• LOW RACK — Recommended for larger sized foods. May be used by itself or<br />
in combination with the high rack.<br />
• HIGH RACK — Recommended for smaller sized foods to be placed closer to<br />
the heat source. Also recommended for achieving crispness or browning food.<br />
NOTE: It is not strictly necessary to use either of the racks to cook in this oven,<br />
However, it is recommended since it allows for better circulation of air which<br />
results in more even cooking.<br />
• TONGS — Designed to easily remove hot racks from the oven.<br />
• FRYING PAN — Non-stick metal pan specially used for air-frying. It should be<br />
placed on the low rack. Requires little or no oil to cook.<br />
8
Getting Started<br />
Read the safety instructions found in this manual before operating. Before using<br />
this appliance for the first time, follow these steps:<br />
1. Remove all packing materials and literature from inside the oven.<br />
Make sure the oven is in good condition and there are no missing parts or<br />
damages to the glass bowl.<br />
2. Select a flat, heat-resistant, non-flammable surface to operate the halogen<br />
oven on.<br />
3. Remove any dust or soil that may have accumulated on the surface of the<br />
product. Wipe thoroughly with a clean damp cloth. Wash the glass pot in<br />
warm soapy water or in the dishwasher. Dry thoroughly before use. NEVER<br />
submerge the lid in water or any other liquid. Only the glass cooking pot and<br />
racks are dishwasher safe.<br />
4. Before first use, heat up the empty oven at maximum temperature for five<br />
minutes. This will eliminate any odors from within the oven. This also will burn<br />
off any excess lubricants, which were used during the manufacturing process.<br />
A slight amount of smoke may be produced during the first few uses and is<br />
not considered a defect.<br />
NOTE: the handle must be pushed down into a horizontal position to turn the<br />
oven ON. When the handle is in the vertical position, the oven will turn itself<br />
OFF. See illustration below:<br />
Handle up: Power off<br />
Handle down: Power on<br />
5. Allow the appliance cool to room temperature.<br />
6. Wipe the inside of the glass pot a final time. Do not use abrasive cleaners or<br />
scouring pads.<br />
9<br />
ENGLISH
ENGLISH<br />
Operating Instructions<br />
• Place the high and/or low racks in the glass bowl container before placing food<br />
inside. You may also cook directly in the glass bowl but it is recommended to<br />
use at least one of the racks to obtain better circulation and distribution of hot<br />
air within the unit. For best results, keep food approximately 1” to 1.25” from<br />
the glass wall to allow maximum hot air circulation. Foods may be cooked<br />
directly on the racks, on foil or in an oven-safe container.<br />
• Place top lid securely on the glass bowl. Make sure that the food does not<br />
touch the lid.<br />
• Plug the power cord firmly into the outlet.<br />
• Before turning the oven on, push the handle all the way down until it snaps<br />
securely in place. If it is not completely down the oven will not turn on.<br />
• Set the timer to the desired time. The red LED light will illuminate.<br />
• Select the optimum temperature. The green LED light will turn on, as well as<br />
the oven interior light. Both lights will turn off when the selected temperature is<br />
reached. If the inner temperature drops below the selected level, both lights will<br />
turn back on for short periods of time, indicating that the oven is heating up.<br />
• The timer and the red light will switch off after the preset time period is up and<br />
an alarm will sound to alert you that the cooking time is over.<br />
• When the cooking time is over, unplug the device from the outlet. Lift the lid and<br />
place it in the lid holder. NEVER put the hot oven lid directly on the countertop<br />
or table as this might cause damage to the furniture or cause a fire hazard.<br />
• Always use wooden, heat-proof plastic or nylon utensils while cooking. Metal<br />
utensils may scratch the glass bowl.<br />
10
Cooking tips<br />
Roasting<br />
• Place food directly on the low rack. Using an oven safe pan on the rack is also<br />
optional. Using the high rack allows food to be positioned closer to heat source<br />
for additional crispness, browning or for foods to be cooked “well done”.<br />
• Is not necessary to use oil for roasting, but you may do so for foods that tend<br />
to become dry in an oven.<br />
• For a glazing effect, set the food 4 inches away from top heating unit. Apply<br />
the desired glaze and broil at 400 to 480 F until the desired shade of brown is<br />
reached. Fruit jams, preserves and jellies work well as a glaze for broiled foods.<br />
• Roasting time may vary depending on the type of meat or other food, type of<br />
cut, amount of fat, thickness or weight of the item.<br />
• When half the cooking time is up, flipping the food is recommended for even<br />
cooking.<br />
Grilling<br />
• Place food directly on the low rack, don’t use the frying pan.<br />
• Brushing the rack with oil will help to avoid sticking.<br />
• You may cover the bottom of the glass bowl with foil to catch fat and oil<br />
drippings. This will make the oven easier to clean.<br />
Baking<br />
• Use any oven-proof baking dish, preferably nonstick, that will fit comfortably<br />
inside the oven. Place it on the low rack. Take special care in following baking<br />
recipes, as desserts are especially delicate and easy to overcook. Lower the<br />
temperature slightly and turn the baking dish around if too much browning<br />
occurs.<br />
Broiling<br />
• Place food directly on the high rack. You may use the frying pan to broil as well;<br />
it should be placed on the high rack.<br />
• Brushing the rack with oil will help to avoid foods from sticking to its surface.<br />
• You may cover the bottom of the glass bowl with foil to catch fat and oil<br />
drippings. This will make the oven easier to clean.<br />
11<br />
ENGLISH
ENGLISH<br />
Air Frying<br />
• Use the non stick frying pan placed on the low rack.<br />
• Little or no oil is used in this process, yet the effect is like pan-frying or deep<br />
frying. If oil is used, only a thin layer is necessary.<br />
• Once cooking is finished, promptly remove the lid from the glass cooking bowl,<br />
otherwise steam may cause the food to become soggy instead of crispy.<br />
WARNING: NEVER fill the glass bowl with oil. This appliance is not to be used<br />
as a deep fryer! Also, stop cooking immediately if food begins to burn.<br />
Steaming<br />
• To steam, place food in an oven safe bowl or pan on the low rack making sure<br />
that the container does not touch the sides of the oven and cover with foil. Pour<br />
water or broth into the bottom of the glass cooking bowl using half a cup of<br />
liquid for every pound of food. Cook at 350°F with correct suggested cooking<br />
times listed below.<br />
Suggested Cooking Times<br />
NOTE REGARDING COOKING TIMES:<br />
Please note that these cooking times are approximate. Actual cooking times will vary<br />
depending on several factors such as size of the pieces, thickness of cut, quality & freshness<br />
of produce, and temperature of oven at start (if the oven has been used immediately before<br />
starting a new recipe, the cooking time will be slightly shorter than indicated).<br />
Please make sure you test the food for doneness before removing from oven. Use a food<br />
thermometer if possible. If food is under cooked when the cooking time is up, turn the<br />
oven back on for a few additional minutes. Check on the food periodically while the oven is<br />
functioning; if you see excessive browning of scorching on the surface, flip the food over,<br />
lower the temperature slightly, or shorten the cooking time.<br />
MEATS<br />
Beef<br />
TIME TEMPERATURE<br />
Rib Roast 31 minutes per pound (medium) 400 ºF<br />
Meat Loaf (2 pound) 50 - 60 minutes 350ºF<br />
Rib Eye or Strip Steak (1 inch thick) 12 min per side (medium) 400ºF<br />
Flat-iron or flank steak<br />
Pork<br />
8-12 minutes (medium - rare) 375ºF<br />
Loin Roast 29 minutes per pound 360ºF<br />
Chops (1/2 inch thick) 10 - 16 minutes 460ºF<br />
Tenderloin 10 minutes per side 450ºF<br />
Bacon (1 pound)<br />
Lamb<br />
12 - 16 minutes 350ºF<br />
Leg 31 minutes per pound (medium) 390ºF<br />
Chops 21 minutes (medium) 400ºF<br />
12
Hamburgers - 4 Burgers 16 minutes (rare) 400ºF<br />
Hot Dogs (1 1/2 to 2 ounces) 10 minutes 400ºF<br />
Sausage Patties (1 pound) 16 minutes 390ºF<br />
POULTRY<br />
Chicken<br />
TIME TEMPERATURE<br />
Whole 21 minutes per pound 460ºF<br />
Breasts 26 - 31 minutes 460ºF<br />
Tenderloins<br />
Turkey<br />
20 minutes 400ºF<br />
Whole (Un-stuffed) 26 - 31 minutes per pound 460ºF<br />
Half breast (3 pounds) 45 - 60 minutes 460ºF<br />
Cornish Hens 26 minutes per pound 460ºF<br />
SEAFOOD TIME TEMPERATURE<br />
Snapper (Whole) 31 minutes 400ºF<br />
Salmon Steak 10 minutes 400ºF<br />
Grilled Shrimp 12 - 14 minutes 400ºF<br />
Lobster Tails 18 minutes 400ºF<br />
Breaded Fish Fillet(Frozen) 11 - 13 minutes less than package directs 350ºF<br />
Mahi Mahi 5 minutes 450ºF<br />
Crab 10 - 13 minutes 300ºF<br />
VEGETABLES TIME TEMPERATURE<br />
Baked Potato (6 to 8 ounces) 41 minutes 400ºF<br />
Corn on the Cob (4 ears) Unshucked 26 minutes 400ºF<br />
French Fries 16 minutes or until crisp 450ºF<br />
Brussel sprouts 15 - 20 minutes 450ºF<br />
Green beans 15 minutes 450ºF<br />
Onion 15 minutes 450ºF<br />
Potatoes or Sweet Potatoes 15 minutes 450ºF<br />
Asparagus 10 minutes (2 more if they are very thick) 400ºF<br />
EGGS TIME TEMPERATURE<br />
Poached 5 - 6 minutes 350ºF<br />
Soft - Boiled 4 - 5 minutes 400ºF<br />
Omelette 10 - 12 minutes 350ºF<br />
Conventional oven recipes may also be used by slightly adjusting cooking times.<br />
A 25% time reduction is suggested on average.<br />
13<br />
ENGLISH
ENGLISH<br />
Cleaning and maintenance<br />
1. Unplug the oven and allow it to cool completely before performing any<br />
cleaning or maintenance.<br />
2. Once glass bowl has cooled completely, clean all parts thoroughly with warm<br />
soapy water and a damp cloth. The glass bowl and racks are dishwasher<br />
safe.<br />
3. To clean the fan cover, remove the screw and take the cover off to be<br />
washed in warm water with gentle detergent. Allow to dry completely before<br />
re-assembling.<br />
NOTE: spraying the bowl and racks with cooking oil prior to cooking may<br />
facilitate easier cleaning<br />
Self-cleaning - ‘Wash’ setting<br />
This oven has a special self-cleaning setting labeled ‘Wash’ on the temperature<br />
control knob, which may be used to clean the glass bowl:<br />
1. Remove excess food and drain away fat from the glass bowl.<br />
2. Add approximately 1/2 inch of warm water into the glass bowl with a squirt of<br />
dishwashing liquid. Replace the glass lid and turn the temperature control to<br />
‘Wash’.<br />
3. Set the time control to 10 - 15 minutes, depending on how soiled the glass<br />
bowl is. The combination of heat, the swirling motion caused by the fan and<br />
the dish liquid will clean the glass bowl quickly and efficiently.<br />
The cooking racks may also be left in the glass bowl when using the wash<br />
setting to soften any stuck-on residue.<br />
4. Allow the oven to cool.<br />
5. You may still need to use a sponge or scrub brush to remove stubborn<br />
deposits before rinsing and wiping dry.<br />
CAUTION:<br />
• Never immerse the lid, cord, or plug in water or any other liquid.<br />
• If scrubbing is necessary, use a nylon or polyester mesh pad.<br />
• Do not use a steel wool pad or abrasive material.<br />
• Never use solvents or cleaning powder.<br />
• Do not allow liquids to seep inside of the operating mechanism located<br />
on the underside of the lid.<br />
14
Storing<br />
Allow the appliance to cool completely before storing. Store the appliance in a<br />
cool, dry location and cover to protect from dust. Do not place any heavy items<br />
on top of this appliance during storage as this may result in possible damage to<br />
the unit.<br />
You may want to place the lid upside down on the bowl for a more compact<br />
storage and to protect the lid from damage.<br />
15<br />
ENGLISH
ENGLISH<br />
Troubleshooting<br />
Problem OVEN WILL NOT TURN ON<br />
Solution • Make sure that the power cord is plugged in.<br />
• Check, by connecting another electric device, that the outlet is<br />
working properly.<br />
• Check that the thermostat is set to desired temperature. Make sure<br />
the timer has been set. If you select a temperature but do not set<br />
the timer, the oven will not turn on.<br />
• Make sure the handle has been pushed all the way down until it<br />
clicks into place.<br />
Problem OVEN WILL NOT HEAT UP<br />
Solution • Check the thermostat to see if it is set to high temperature.<br />
• Make sure the timer has been set. If you select a temperature but<br />
do not set the timer, the oven will not turn on.<br />
Problem ANY PART OR COMPONENT OF THE OVEN IS BROKEN<br />
Solution • Contact <strong>Trinity</strong> Customer Service by calling 1 (800) 207-0806.<br />
Problem I AM NOT SURE WHAT TYPE OF COOKING VESSEL CAN BE USED<br />
INSIDE OF THE HALOGEN OVEN<br />
Solution • Any cooking vessel that is safe to use in a regular oven is also safe<br />
to use in this halogen oven as well. If unsure, check the cookware’s<br />
manual or contact the cookware manufacturer. Cookware with<br />
plastic parts should not be used in any oven<br />
Problem THE MAIN LIGHT INSIDE THE OVEN TURNED OFF<br />
Solution • When the oven reaches the desired temperature, the interior light<br />
will turn off. This is normal operation. The light will only turn on when<br />
the temperature is lower than the one selected on the temperature<br />
knob.<br />
• Turn the knob to the maximum temperature level. If the light still<br />
does not turn on, contact <strong>Trinity</strong> customer service by calling<br />
1 (800) 207-0806.<br />
Problem THE OVEN PRODUCES SMOKE<br />
Solution • The appearance of a small amount of smoke is normal during<br />
the first few uses. If after a few uses it is still smoking, unplug<br />
the unit and clean any excess grease from the underside of the<br />
lid and operating mechanism. If the problem persists, please<br />
discontinue use and contact <strong>Trinity</strong> customer service by calling<br />
1 (800) 207-0806.<br />
16
Recipes<br />
In the next pages you will find delicious recipes you can prepare in your <strong>Trinity</strong><br />
<strong>Halogen</strong> <strong>Oven</strong>, including appetizers, entrées, sides, breads and desserts.<br />
TIME SAVING TIP: if you are using the frying pan for the recipe, cover it with<br />
aluminum foil and spray it with cooking spray. Once the cooking is done you can<br />
simply remove the tray with little or no cleanup needed.<br />
If you are roasting, you can cover the bottom of the glass bowl with some foil to<br />
catch the drippings, also making cleanup even faster!<br />
NOTE REGARDING COOKING TIMES:<br />
Please note that these cooking times in these recipes might need to be adjusted according<br />
to several factors such as size of the pieces, thickness of cut, quality & freshness of<br />
produce, and temperature of oven at start (if the oven has been used immediately before<br />
starting a new recipe, the cooking time will be 2-3 minutes shorter than indicated).<br />
Please make sure you test the food for doneness before removing from oven. Use a food<br />
thermometer if possible. If food is under cooked when the cooking time is up, turn the<br />
oven back on for a few additional minutes. Check on the food periodically while the oven is<br />
functioning; if you see excessive browning of scorching on the surface, flip the food over,<br />
lower the temperature slightly, or shorten the cooking time.<br />
APPETIZERS<br />
CRISPY BACON-WRAPPED STUFFED DATES<br />
These stuffed dates are enjoyed by everyone! They have the sweet, salty, smooth<br />
and crunchy that satisfies every taste bud!<br />
Ingredients (Serves: 12)<br />
8 bacon slices, cut in thirds<br />
24 smoked almonds (roasted, salted is fine)<br />
24 dates, pitted<br />
3 ounces soft goat cheese<br />
Cut open dates; stuff with ½ - 1 teaspoon goat cheese and one almond. Wrap<br />
date with bacon piece and lay seam down on frying pan.<br />
Place on low rack of oven. Set oven for 400ºF and set timer for 15 minutes. Turn<br />
dates over once at half time.<br />
17<br />
ENGLISH
ENGLISH<br />
CRANBERRY CRAB MEAT APPETIZERS<br />
Crispy little phyllo tart shells with a creamy crab filling and topped with sweet<br />
cranberry.<br />
Ingredients (Serves: 15)<br />
¼ cup cranberry sauce, whole berry, canned<br />
¹⁄3 cup cream cheese, softened<br />
½ cup lump crab meat<br />
Old Bay seasoning, to taste<br />
2 tablespoons green onion, chopped<br />
15 phyllo mini shells, frozen<br />
Place cranberry sauce in a small bowl; beat with whisk until smooth. Combine<br />
cream cheese, crab meat, green onion and Old Bay in a bowl. Fill each shell<br />
with about 1 tsp. of the cream cheese mixture; top with ½ tsp. cranberry sauce.<br />
Arrange on frying pan. Place the pan on the low rack. Set oven for 375ºF and the<br />
timer for 10 minutes.<br />
These can be made up ahead of time and taken right out of the freezer and into<br />
the oven.<br />
HOT BEEF DIP IN BREAD BOWL<br />
Beautiful and delicious party food – spicy and warm beefy, cheesy filling served<br />
in a bread bowl.<br />
Ingredients<br />
1 sourdough round bread loaf<br />
1 pound ground chuck<br />
½ cup water<br />
1 1-oz. pkg. taco seasoning mix<br />
1 8-oz. reduced-fat cream cheese, softened<br />
1 cup light sour cream<br />
2 cups reduced-fat cheddar cheese, sharp, shredded<br />
1 teaspoon Tabasco pepper sauce<br />
Leaving a 1-inch border, cut top from bread, reserving top for lid. Hollow out loaf<br />
to make a bowl, leaving a ½-inch thick shell; set aside.<br />
Crumble beef into an 8” round pan (like a cake pan). On high rack in oven, cook<br />
beef at 400ºF, stirring occasionally, for 5 minutes, or until beef appears cooked<br />
with no pink. Drain.<br />
Add seasoning and ½ cup water to beef and return to high rack for another 5<br />
minutes.<br />
In a bowl, add remaining ingredients and pour into bread bowl. On low rack, heat<br />
for 30 minutes at 300ºF.<br />
Serve with chips.<br />
18
SANTA FE VEGGIE QUESADILLAS<br />
Your family and friends will love these quesadillas for a party or for a meal…quick,<br />
easy and delicious!<br />
Ingredients (Serves: 4)<br />
4 large flour tortillas<br />
½ cup cheddar cheese, low fat, and/or Monterey jack, shredded<br />
½ cup whole kernel corn, drained<br />
½ cup red bell pepper, diced<br />
½ cup black beans, drained<br />
2 green onions, chopped<br />
½ teaspoon cumin<br />
½ teaspoon garlic salt<br />
¼ teaspoon black pepper<br />
Mix all the ingredients, except for tortillas, together. On one half of tortilla, spoon<br />
generous amount of corn-bean mixture; fold over the other half covering mixture.<br />
Place on one half of the frying pan. Repeat with another tortilla.<br />
On high rack of oven, place frying pan and bake for 3 minutes on each side at<br />
400ºF. Repeat with remaining ingredients.<br />
SOUTHWEST CHEESECAKE<br />
As beautiful as a dessert cheesecake, your friends will be delightfully surprised<br />
when they eat this wonderful savory cheesecake with chips!<br />
Ingredients (Serves: 25)<br />
1 cup cornflake crumbs or corn chip crumbs<br />
1 teaspoon garlic salt<br />
2 tablespoons butter<br />
2 8-oz. cream cheese, softened<br />
1 cup Monterey Jack cheese, shredded<br />
¼ teaspoon garlic salt<br />
2 8-oz. sour cream, divided<br />
2 large eggs<br />
½ cup salsa<br />
1 4-oz. green chile, chopped, drained<br />
1 cup guacamole, fresh or frozen, thawed<br />
1 medium tomato, seeded and diced<br />
Tortilla chips or crackers<br />
Prepare 8” springform pan (not included with oven) with cooking spray and wrap<br />
outside of pan with foil. In food processor, blend cornflake crumbs, butter and<br />
garlic salt. Press into prepared springform pan.<br />
19<br />
ENGLISH
ENGLISH<br />
Place pan on the low rack in the oven and bake for 5 minutes at 400ºF.<br />
In a food processor, add the cream cheese, cheese, salt, 8 oz. sour cream, eggs,<br />
salsa, and chilies and blend well, stopping to scrape sides and blend again. Pour<br />
into cornflake crust.<br />
In oven, pour two cups of hot water into the bottom, and place the cheesecake<br />
on the low rack; return for 30 minutes at 350ºF.<br />
Remove from oven and let cool. Cover and refrigerate. When ready to serve, run<br />
knife around cheesecake and release from sides. Spread a layer of sour cream<br />
over top, followed by a layer of guacamole and then, chopped tomatoes. Place<br />
on nice serving dish and garnish with corn chips at the base.<br />
STUFFED PIZZA ROLLS<br />
These will become a favorite with kids and adults alike! Yummy pastry covering<br />
seasoned cheese and pepperoni!<br />
Ingredients (Serves: 8)<br />
1 8-oz. crescent rolls, refrigerated<br />
1 6-oz. pepperoni pizza slices<br />
4 1-oz. Mozzarella cheese sticks, cut in half<br />
1 teaspoon Italian seasoning<br />
½ teaspoon garlic salt<br />
Separate each can of rolls into 8 triangles. Put 2 pepperoni slices and one piece<br />
of cheese on each triangle. Sprinkle with Italian seasoning. Roll up, starting with<br />
wide end, folding over ends to seal in cheese. Place pizza rolls on frying pan.<br />
Place frying pan on low rack and bake at 375ºF for 10 minutes, turning over rolls<br />
halfway through. Serve with marinara sauce.<br />
WHITE BUFFALO WINGS<br />
No one will believe you made these, but they are so easy and really delicious!<br />
Ingredients (Serves: 8)<br />
1 pound chicken tenders<br />
½ pound bacon<br />
½ pound pepperjack cheese, cubed<br />
Flatten chicken tenders. Roll up a chunk of Jack cheese. Wrap with bacon; secure<br />
with toothpick. Place chicken on frying pan and bake for 20 minutes at 375ºF, on<br />
low rack, turning the last five minutes.<br />
These are really good with ranch dressing.<br />
20
ENTRÉES<br />
BARBEQUE ROAST BEEF<br />
Tender strips of beef, with a spicy seasoning and your favorite barbeque sauce.<br />
Ingredients (Serves: 4-6)<br />
1 – 2 pounds flat-iron, flank, or sirloin steak<br />
2 tablespoons Worcestershire sauce<br />
1 tablespoon liquid smoke<br />
1 teaspoon celery salt<br />
1 teaspoon garlic salt<br />
1 teaspoon onion powder<br />
1 16-oz. barbeque sauce<br />
Sprinkle meat with seasonings. On high rack of oven, place steak on frying pan<br />
and roast at 450ºF for 10 minutes; turn over for another 2 minutes. This will be<br />
medium rare, so if a more rare doneness is desired, cut this time.<br />
Let rest for 10 minutes. Slice across the grain at a diagonal in thin slices. Cover<br />
with barbeque sauce and place back in oven for another 5 minutes or until<br />
thoroughly heated.<br />
BARBEQUED ROASTED SALMON<br />
Marinated in a sweet and spicy marinade and roasted to perfection, you won’t<br />
believe how easy this is!<br />
Ingredients (Serves: 4)<br />
¼ cup pineapple juice<br />
2 tablespoons lemon juice, fresh<br />
4 6-oz. Salmon fillet<br />
2 tablespoons brown sugar<br />
4 teaspoons chili powder<br />
2 teaspoons lemon zest<br />
¾ teaspoons cumin, ground<br />
½ teaspoon salt<br />
¼ teaspoon cinnamon<br />
4 – 8 slices pineapple rings<br />
Combine first three ingredients in a zip-loc bag; seal and marinate in refrigerator<br />
1 hour, turning occasionally. Remove fish from bag; discard marinade. Combine<br />
sugar, chili powder, lemon zest, cumin, salt and cinnamon in a bowl. Rub over fish<br />
on both sides and both sides of pineapple.<br />
Lay a sheet of aluminum foil in bottom of oven. Spray low rack with cooking<br />
spray. Place salmon and pineapple directly on low rack and turn on oven to 450ºF<br />
and grill for 5 minutes. Turn over for another 3 minutes.<br />
21<br />
ENGLISH
ENGLISH<br />
BREAKFAST PIZZA<br />
This pizza will become a favorite for breakfast, snack or dinner and you can feel<br />
good about its nutritious ingredients.<br />
Ingredients (Serves: 8)<br />
1 8-oz. crescent roll, reduced fat, refrigerated<br />
1 12-oz. turkey sausage, breakfast type<br />
1 cup hash brown potatoes, shredded, refrigerated<br />
1 cup cheddar cheese, low fat, shredded<br />
¼ cup skim milk<br />
½ teaspoon salt<br />
¼ teaspoon black pepper<br />
1 8-oz. egg substitute, liquid<br />
2 tablespoon Parmesan cheese, grated fresh<br />
In a 9” cake pan, sprayed with cooking spray, crumble turkey sausage. Place on<br />
high rack of oven and cook at 450ºF for 5 minutes, stirring occasionally. When<br />
done, remove and drain.<br />
Unroll crescent rolls and press together, bringing up on sides. Bake on low rack at<br />
400ºF for 5 minutes. Cover pastry with sausage, potatoes, cheese. Combine milk,<br />
salt, pepper and egg substitute, whisking till blended. Carefully pour mixture over<br />
pizza. Sprinkle with Parmesan.<br />
Bake on low rack at 375ºF for 30 minutes, cover with foil after 15 minutes to<br />
prevent too much top browning.<br />
CLASSIC BEEF FAJITAS<br />
Delicious strips of tender beef, seasoned perfectly, together with roasted and<br />
seasoned peppers and onions will have your family requesting this over and over!<br />
Ingredients (Serves: 8)<br />
¼ cup McCormick fajita seasoning or any fajita seasoning, divided<br />
½ teaspoon oregano, divided<br />
¼ cup vegetable oil, divided<br />
¼ cup red wine vinegar, divided<br />
1 ½ pound sirloin, flat-iron or flank steak<br />
1 medium onion, or more, cut into thin strips<br />
1 medium green bell pepper, or more, cut into thin strips<br />
8 flour tortillas, large<br />
Optional toppings: guacamole, salsa, cheese, sour cream<br />
Sprinkle meat with oil, vinegar and seasonings on both sides. Place steak on<br />
frying pan and put on high rack in oven. Roast at 450ºF for 5 minutes on each<br />
side, or to desired doneness. Remove steak and let rest. Add onions and bell<br />
pepper, oil, vinegar and seasoning. On high rack, at 450ºF, roast for 5 minutes;<br />
toss, turn, and roast 5 more minutes.<br />
22
HONEY BOURBON PORK TENDERLOIN<br />
So simple, yet delicious enough for a dinner party!<br />
Ingredients (Serves: 4)<br />
2 pounds pork tenderloin, trimmed<br />
¼ cup honey<br />
¼ cup soy sauce<br />
2 tablespoons bourbon whiskey<br />
Blend honey, soy sauce and whiskey in small saucepan. Heat over medium heat<br />
to blend flavors. Trim pork and sprinkle with olive oil, salt and pepper. Place pork<br />
on frying pan and place on high rack in oven. Roast at 450ºF for 10 minutes on<br />
each side. Let rest 10 minutes and slice into ½ inch slices. Spoon sauce over<br />
pork.<br />
HONEY-PECAN CRUSTED CHICKEN<br />
Better than fried and so much better for you!<br />
½ teaspoon salt<br />
¼ teaspoon black pepper<br />
1 pound chicken tenderloins<br />
¼ cup honey<br />
2 tablespoons Dijon mustard<br />
¾ teaspoon paprika<br />
¼ teaspoon garlic powder<br />
1 ¼ cup cornflake crumbs<br />
½ cup pecan pieces, finely chopped<br />
Cooking spray<br />
Sprinkle salt and pepper evenly over chicken. Combine honey, mustard, paprika,<br />
and garlic powder in a zip-loc bag and add chicken tenders, making sure all are<br />
covered in sauce. Combine cornflakes and pecans in a shallow dish. Coat each<br />
tender in crumb mixture and put on frying pan (8 to a frying pan).<br />
On low rack, at 400ºF, bake chicken 7 minutes, turn and bake 5 minutes more.<br />
23<br />
ENGLISH
ENGLISH<br />
GRILLED MAHI MAHI WITH BLACK BEAN SALSA<br />
Mahi Mahi fillets marinated in a spicy citrus sauce, grilled to perfection and<br />
topped with a colorful, delicious black bean salsa!<br />
Ingredients (Serves: 4)<br />
½ cup soy sauce<br />
½ cup orange juice<br />
¼ cup ketchup<br />
1 tablespoon honey<br />
Juice and zest of one lime<br />
1 large garlic clove, finely minced<br />
1 teaspoon basil, dried<br />
1 teaspoon oregano, dried<br />
Black pepper, fresh ground<br />
4 8-oz. Mahi Mahi steaks or fillets, about 1 inch<br />
1 tablespoon canola oil, for greasing the grill grates<br />
Salsa:<br />
2 cups cherry tomatoes, halved<br />
2 large scallions, white and light green parts, thinly sliced<br />
1 14-oz. can black beans, drained and rinsed<br />
¼ cup cilantro, fresh chopped<br />
1 large jalapeño, finely chopped<br />
2 tablespoons lime juice, about 1 lime<br />
Salt and pepper to taste<br />
Place the soy sauce, orange juice, ketchup, honey, lime juice and zest, basil,<br />
oregano, and pepper in a Ziploc bag and mix well. Add the fish fillets and marinate<br />
in the refrigerator for 30 – 45 minutes.<br />
Toss the tomatoes, scallions, black beans, cilantro, jalapeno, and lime juice in<br />
a medium bowl. Add some salt to taste and set aside to let the flavors develop.<br />
Oil or spray the grill grate. Lay a sheet of foil in the bottom of the oven and place<br />
the low rack on top of the foil. Lay the fish directly on the rack and grill at 450ºF<br />
for 3 minutes. Turn over and grill for 1 – 2 more minutes or until desired doneness.<br />
Serve with the black bean salsa and lime wedges.<br />
24
ITALIAN MEATLOAF W/FRESH BASIL AND SUN-DRIED TOMATOES<br />
This is such a favorite meatloaf, tender, juicy, filled with fresh ingredients and<br />
topped with marinara and cheese.<br />
Ingredients (Serves: 6)<br />
1 cup water, boiling<br />
½ cup sun-dried tomatoes, pack without oil<br />
½ cup ketchup<br />
1 cup bread crumbs, seasoned<br />
¾ cup onion, finely chopped<br />
¾ cup basil, fresh, chopped<br />
½ cup provolone cheese, diced or shredded<br />
2 large egg whites<br />
2 garlic cloves, minced<br />
1 pound ground turkey (1 ½ lb.)<br />
1 cup marinara sauce<br />
4 slices provolone cheese, cut into strips<br />
Combine boiling water and tomatoes in a bowl. Let stand 30 minutes or until<br />
soft. Drain and finely chop. Combine ketchup, breadcrumbs, and the next 6<br />
ingredients (breadcrumbs through turkey) in a large bowl. Add tomatoes to meat<br />
mixture and shape into two oval loaves. Place on frying pan. Bake on low rack at<br />
375ºF for 35 minutes. You may need to cover with foil toward the end of baking to<br />
prevent tops from browning too much. Remove to serving dish. Top with marinara<br />
and strips of provolone.<br />
25<br />
ENGLISH
ENGLISH<br />
HERBED TURKEY BREAST WITH VEGETABLES<br />
Ingredients (Serves 6-8)<br />
1 turkey breast (6 to 7 pounds), bone in, skin on, excess fat trimmed<br />
3 garlic cloves, minced<br />
4 tablespoons butter, softened<br />
3 tablespoons chopped fresh flat-leaf parsley<br />
1 tablespoon minced fresh sage<br />
1 tablespoon minced fresh oregano<br />
1 tablespoon minced fresh rosemary<br />
1 tablespoon olive oil<br />
1 large onion, cut into eighths<br />
4 medium carrots, halved lengthwise and cut into 1 inch pieces<br />
1 ½ pounds assorted small potatoes, scrubbed, halved or quartered<br />
2 tablespoons extra-virgin olive oil<br />
Coarse salt and freshly ground pepper<br />
Rinse turkey and pat dry with paper towels.<br />
Mash garlic and ½ teaspoon salt with the side of a large knife until a paste forms.<br />
Transfer to a small bowl, and add softened butter and herbs. Season with salt<br />
and pepper.<br />
Gently separate turkey skin from breast meat, being careful not to tear the skin.<br />
Spread herb butter mixture evenly under skin, then smooth down to remove<br />
trapped air. Brush turkey with olive oil, and season with salt and pepper.<br />
Place all of the vegetables in the bottom of the oven. Drizzle with extra virgin olive<br />
oil, season with salt and pepper, and toss to combine.<br />
Place low rack on top of vegetables. Place breast on rack and add extension ring<br />
to top of oven. Bake for 11 minutes per pound at 400°F.<br />
Halfway through cooking time, use the tongs to turn the bird so that the other end<br />
of the breast is uppermost. Continue to bake until the juices run clear when you<br />
insert a skewer into the base of the breast or the temperature of an instant read<br />
thermometer registers 165°F when inserted into the thickest part of the breast.<br />
Cover the turkey with foil and allow to rest for 10 to 15 minutes.<br />
Remove vegetables and cover with foil to keep warm. If desired, place cooking<br />
juices in a saucepan and bring to a boil. Add 2 teaspoons of cornstarch that have<br />
been mixed with 1 tablespoon of water. Stir until thickened. Season with salt and<br />
pepper if desired and serve with turkey.<br />
26
SAVORY ROASTED CHICKEN<br />
Ingredients (serves 4)<br />
1 whole chicken (about 4 pounds)<br />
2 tablespoons oil<br />
2 tablespoons melted butter<br />
1 ½ tablespoons lemon juice<br />
2 teaspoons seasoned salt<br />
1 teaspoon garlic powder<br />
1 teaspoon onion powder<br />
½ teaspoon fresh ground black pepper<br />
¼ teaspoon cayenne pepper (optional)<br />
2 whole lemons that have been poked all over with a fork<br />
Rinse the chicken inside and out well under cold water, then pat dry using a paper<br />
towel.<br />
In a small bowl, mix the lemon juice with oil and melted butter until blended, then<br />
rub all over the chicken and under the skin of the chicken breast.<br />
Rub the inside and outside of the chicken with seasoned salt, garlic powder,<br />
onion powder, black pepper and cayenne (you can season the chicken under the<br />
skin also if desired). Place the lemons inside the cavity. Using cotton string, tie<br />
the legs together tightly.<br />
Place chicken on low rack in oven, breast side down. Bake for 35 minutes<br />
at 400°F. Turn chicken over so breast side is up. Top oven with extender ring<br />
and bake an additional 30 minutes or until the temperature of an instant read<br />
thermometer registers 165°F when inserted into the thickest part of a thigh.<br />
Cover with foil and let sit for 15 minutes before slicing.<br />
27<br />
ENGLISH
ENGLISH<br />
FROZEN FOODS<br />
Frozen Drumsticks – Approximately 1.5 lb package (4-5 drumsticks). Bake at<br />
350°F on the low rack for 15 minutes. Separate and turn over the drumsticks and<br />
bake for an additional 15 minutes. Cooking results should be juicy, crispy and<br />
lightly browned.<br />
Frozen Chicken Thighs – Approximately 2.5 lb package (4-5 thighs). Bake at<br />
350°F on the low rack for 25 minutes. Separate and turn over the drumsticks and<br />
bake for an additional 25 minutes. Cooking results should be juicy, crispy and<br />
lightly browned.<br />
French Fries - Cook on low rack in frying pan accessory for 16 minutes at 450°F.<br />
Cooking results should be perfectly crisp and delicious.<br />
Frozen Hamburgers – Use ½ pound frozen 85% lean hamburgers. Baked at<br />
400°F on the low rack for 14 minutes. Turn the burgers over and cooked an<br />
additional 14 minutes. For moist burgers spray before cooking lightly with oil.<br />
Frozen Pork Chops – Use frozen ½ pound bone-in pork chops. Sprayed the<br />
chops with spray oil, seasoned with salt, pepper, onion and garlic powder and<br />
baked at 350°F on the low rack for 15 minutes. Turned the chops over, sprayed<br />
with spray oil and cooked an additional 15 minutes.<br />
Frozen Sirloin Steak – Use a frozen 1 inch thick boneless sirloin steak. Sprayed<br />
the steak with spray oil, seasoned with steak seasoning and baked at 350°F on<br />
the low rack for 14 minutes per side for rare and 16 minutes per side for medium.<br />
28
SIDES<br />
ROASTED VEGETABLES<br />
A delicious and slightly sweet vegetable medley that goes well with white meat or<br />
can be even served on it’s own as a light dinner<br />
Ingredients (Serves: 4)<br />
½ small butternut squash<br />
1 red bell pepper<br />
1 sweet potato, peeled<br />
1-2 Yukon Gold potatoes, peeled<br />
½ red onion<br />
1 tablespoon fresh thyme<br />
2 tablespoons fresh rosemary<br />
4 tablespoons olive oil<br />
2 tablespoons balsamic vinegar<br />
Salt and freshly ground black pepper to taste<br />
Cube the squash, sweet potato and Yukon Gold potatoes into 1 inch cubes.<br />
Coarsely chop the bell pepper (seeded) and the onion. Chop the thyme and the<br />
rosemary. Use a large bowl to combine oil, vinegar, thyme, rosemary, salt and<br />
pepper. Add vegetables to the bowl and toss gently. Place the vegetables in a<br />
shallow baking dish, or directly on the frying pan and place on the low rack. Roast<br />
for 25 minutes at 400ºF, stirring the vegetables gently every 8-10 minutes.<br />
BAKED PINEAPPLE<br />
This deliciously sweet dish can be a side to meats, the breakfast pizza or even a<br />
dessert. The sugar can also be replaced by Splenda® if desired.<br />
Ingredients (Serves: 6)<br />
2 20-oz. pineapple, canned, crushed, in juice, drained<br />
1 cup sugar or Splenda®<br />
2 tablespoons cornstarch<br />
¼ cup water<br />
2 eggs<br />
1 tablespoon vanilla<br />
1 tablespoon butter<br />
1 teaspoon cinnamon, ground<br />
Spray a 1 ½ qt. casserole dish with cooking spray. In bowl, whisk together the<br />
sugar, cornstarch, water, eggs, and vanilla till blended. Add pineapple. Pour into<br />
dish. Top with divided butter and sprinkle top with cinnamon.<br />
Bake on low rack at 375ºF for 38 minutes.<br />
29<br />
ENGLISH
ENGLISH<br />
CORN FRITTER CASSEROLE<br />
Creamy cheesy corn dish.<br />
Ingredients (Serves: 8)<br />
2 tablespoons butter, softened<br />
4 Eggbeaters<br />
1 8-oz. cream cheese, fat free, softened<br />
½ cup onion, finely chopped<br />
½ cup red bell pepper, finely chopped<br />
1 16-oz. whole kernel corn, drained<br />
1 14-oz. can corn, cream-style<br />
1 8-oz. cornbread mix, Jiffy<br />
¼ teaspoon black pepper<br />
Cooking spray<br />
Combine first 3 ingredients in a large bowl, stirring with a whisk until smooth. Stir<br />
in onion, bell pepper, whole-kernel corn, and cream-style corn; mix well. Add<br />
muffin mix and black pepper, stirring until well combined. Pour into casserole dish<br />
sprayed with cooking spray.<br />
On low rack, bake at 375ºF for 40 minutes, covering with foil during the last<br />
minutes to prevent browning top too much.<br />
ROASTED BRUSSEL SPROUTS<br />
Even people that don’t think they like brussel sprouts will love these caramelized<br />
juicy sprouts!<br />
Ingredients (Serves: 4)<br />
1 14-oz. bag frozen baby brussel sprouts<br />
3 tablespoons olive oil<br />
¾ teaspoons kosher salt<br />
½ teaspoon black pepper<br />
½ teaspoon garlic powder<br />
Put sprouts on frying pan and toss with remaining ingredients.<br />
Roast on high rack at 450ºF for 15 – 20 minutes, or until done, turning occasionally.<br />
30
ROASTED GREEN BEANS<br />
These green beans take on a completely different taste and texture when roasted!<br />
Ingredients (Serves: 4)<br />
1 16-oz. baby green beans, frozen<br />
1 large onion, sliced into thin rings<br />
3 tablespoons olive oil<br />
1 teaspoon kosher salt<br />
½ teaspoon black pepper<br />
½ teaspoon garlic powder<br />
2 tablespoons balsamic vinegar<br />
Add package of frozen green beans to the frying pan and toss with all remaining<br />
ingredients, except balsamic vinegar.<br />
Roast on high rack at 450ºF for 15 minutes or until tender, stirring occasionally.<br />
Sprinkle vinegar over beans.<br />
TWICE-BAKED POTATOES<br />
These are the perfect side dish and can be made up ahead of time and baked at<br />
the last minute.<br />
Ingredients (Serves: 6)<br />
3 large baking potatoes<br />
2 tablespoons butter<br />
2 tablespoons cream cheese, fat-free<br />
¼ cup light sour cream<br />
1 cup cheddar cheese, low fat, shredded, divided<br />
1 4-oz. pkg. real bacon bits<br />
½ - 1 cup evaporated skim milk<br />
Prick potatoes with knife and place on frying pan on low rack. Set oven for 1 hour<br />
at 400ºF, stopping to turn after 30 minutes.<br />
Remove potatoes to kitchen towel and wrap to let cool enough to handle. Cut<br />
in half and scoop out potato into bowl. Add remaining ingredients leaving some<br />
of the cheese and bacon for garnishing tops. With electric mixer, beat potato<br />
mixture till smooth. Scoop into potato shells and garnish with cheese and bacon.<br />
When ready to heat again, place on frying pan and heat on low rack of oven at<br />
375ºF for 10 minutes or until heated through.<br />
31<br />
ENGLISH
ENGLISH<br />
ROASTED ONION SALAD<br />
Ingredients (Serves: 4)<br />
2 medium onions, peeled and cut into thin slices<br />
2 tablespoons olive oil<br />
4 cups salad greens<br />
½ cup walnuts, chopped<br />
2 ounces Feta, crumbled<br />
Garlic Vinaigrette:<br />
3 garlic cloves<br />
2 shallots<br />
¼ cup parsley, fresh, chopped<br />
2 tablespoons white wine vinegar<br />
½ teaspoon crushed red pepper<br />
½ teaspoon salt<br />
½ teaspoon black pepper<br />
½ cup olive oil<br />
Arrange onion slices on frying pan and sprinkle with olive oil, salt and pepper. Place<br />
on high rack of oven and roasted at 450ºF for 15 minutes, stirring occasionally.<br />
Toast walnuts in 400ºF oven for 3 minutes, being careful not to burn.<br />
Place all vinaigrette ingredients in small food processor and blend until smooth.<br />
Combine salad greens, Feta, and walnuts. Top with roasted onions and vinaigrette.<br />
ROASTED SWEET POTATOES WITH A KICK!<br />
Sweet, caramelized cubes of roasted sweet potatoes with a spicy twist!<br />
Ingredients (Serves: 2)<br />
1 large or 2 small sweet potatoes<br />
2 tablespoons olive oil<br />
¼ cup brown sugar or brown sugar Splenda®<br />
1 teaspoon cinnamon<br />
½ teaspoon salt<br />
½ teaspoon cayenne<br />
1 pinch cloves, ground<br />
Peel and cube sweet potatoes into ½ inch cubes. Toss potatoes on frying pan<br />
with all the ingredients. Place on high rack in oven and set oven for 450ºF for<br />
15 minutes, stirring occasionally to avoid over-browning the tops. When tender,<br />
remove.<br />
32
MEXICAN CORNBREAD<br />
This could easily be the entrée with a side of pinto beans and/or a nice salad.<br />
Layers of cornbread, ground beef and cheese….delicious!<br />
Ingredients (Serves: 16)<br />
1 cup corn meal<br />
2 large eggs<br />
1 cup milk<br />
1 teaspoon baking soda<br />
¾ teaspoon salt<br />
¼ cup butter, melted<br />
1 16-oz. corn, cream-style<br />
½ cup cooked and chopped bacon, or pkg. of real bacon bits<br />
1 pound ground beef, lean<br />
1 large onion, chopped<br />
2 large jalapenos, or more, chopped<br />
½ pound cheddar cheese, shredded<br />
Mix cornmeal and bacon together. Set aside.<br />
In 9-inch cake pan, crumble ground beef, chopped onions and peppers. On high<br />
rack, 400ºF, cook beef for 5 minutes, stirring occasionally. Drain.<br />
In 2 8-inch cake pans, lined with foil and sprayed with cooking spray, divide and<br />
layer cornmeal mixture, beef, cheese; repeat.<br />
On low rack, bake at 350ºF for 20 minutes, covering with foil the last five minutes<br />
to prevent browning.<br />
ROASTED ASPARAGUS<br />
A classic and easy side dish. Use thicker asparagus stems for this recipe, they<br />
are juicier and better for roasting.<br />
Ingredients<br />
1 lb. fresh green asparagus<br />
2 tablespoons olive oil<br />
1 tablespoon balsamic vinegar or lemon juice<br />
Parmesan cheese for topping<br />
Break the tough ends off the asparagus spears and peel the bottom third if<br />
necessary. Pour olive oil and asparagus in a zip lock bag and shake until spears<br />
are covered in a thin layer of oil.<br />
Place spears side by side on the low rack. Roast for 10 minutes at 400ºF. If your<br />
asparagus is very thick, you might need an additional 2-4 minutes.<br />
Remove form oven onto a serving tray, and sprinkle with balsamic vinegar or<br />
lemon juice. Top with some parmesan cheese.<br />
33<br />
ENGLISH
ENGLISH<br />
BREADS<br />
BASIL PESTO ROLLS<br />
These are the perfect accompaniment to any Italian food!<br />
Ingredients (Serves: 10)<br />
2 cups biscuit mix, dry<br />
2 tablespoons basil pesto, from jar<br />
¼ cup Parmesan cheese, grated<br />
²⁄3 cup milk, nonfat<br />
¼ cup butter, softened or melted<br />
1 teaspoon garlic powder<br />
1 teaspoon parsley, dried<br />
Mix all ingredients, except for butter, garlic powder and parsley, together and<br />
scoop out with ice cream scoop onto frying pan. Place on low rack of oven and<br />
bake at 400ºF for 10 minutes. Mix together remaining ingredients and brush<br />
onto tops of rolls. Return to oven and bake a few more minutes. If you want the<br />
bottoms to brown more, you may want to turn them over the last five minutes of<br />
baking.<br />
CHEESY GARLIC BISCUITS<br />
These biscuits are so wonderful, easy and addictive!<br />
Ingredients (Serves: 10)<br />
2 cups biscuit mix<br />
½ cup, or more, cheddar cheese, shredded<br />
²⁄3 cup skim milk<br />
¼ cup butter, softened or melted<br />
1 teaspoon garlic salt<br />
1 teaspoon parsley, dried<br />
Mix baking mix, cheese, milk together. Drop by small scoops onto frying pan.<br />
Place on low rack of oven and bake at 375ºF for 10 minutes. Last 3 minutes,<br />
brush butter mixture over tops and continue to bake.<br />
34
DESSERTS<br />
CHERRY BERRY PIE<br />
Delicious served warm with ice cream or frozen yogurt!<br />
Ingredients (Serves: 8)<br />
1 frozen or refrigerated pie crust<br />
1 12-oz blueberries, unsweetened, frozen, thawed<br />
1 12-oz dark sweet cherries, frozen, thawed<br />
½ cup sugar<br />
²⁄3 cup flour, divided<br />
3 tablespoons butter<br />
¹⁄3 cup brown sugar, or Splenda® brown sugar<br />
¹⁄8 teaspoon salt<br />
1 teaspoon vanilla<br />
Bake pie crust in 400ºF oven on low rack for 5 minutes.<br />
In a large bowl, combine the berries, sugar, ¹⁄3 cup flour and 1 tsp. vanilla. Mix<br />
well, then spoon berry mixture into the pie crust. Mix together the remaining flour,<br />
brown sugar, salt and butter. Top berry mixture. Bake on low rack at 375ºF for 28<br />
minutes. May need to cover edges with strip of foil if crust is browning too much.<br />
35<br />
ENGLISH
ENGLISH<br />
PIÑA COLADA CHEESECAKE BARS<br />
These luscious bars are delicious but also a nice, light and healthy dessert that<br />
you will make over and over.<br />
Ingredients (Serves: 16)<br />
Crust:<br />
1 cup graham cracker crumbs<br />
2 tablespoons flour<br />
2 tablespoons brown sugar, or Splenda® brown sugar<br />
½ teaspoon ground ginger<br />
2 tablespoons butter, melted<br />
1 tablespoon canola oil<br />
1 tablespoon water<br />
Cooking spray<br />
Filling:<br />
1 cup cottage cheese, low fat<br />
½ cup sugar<br />
¼ cup fat-free cream cheese<br />
1 ½ tablespoons lemon zest<br />
1 tablespoon lemon juice<br />
1 tablespoon pineapple juice<br />
1 dash salt<br />
¾ cup egg substitute, liquid<br />
1 cup pineapple tidbits, canned, in juice drained, for topping<br />
¼ cup flaked coconut<br />
To prepare crust, process every ingredient in food processor. Pour crust into an<br />
8-inch square baking pan (not included with oven), foil-lined and sprayed with<br />
cooking spray. Bake crust for 5 minutes on low rack at 400ºF. Remove.<br />
In food processor, add remaining filling ingredients, except for pineapple and<br />
coconut, and blend well, scraping sides. Pour filling into pie crust and bake bars<br />
at 350ºF for 25 minutes. Let cool and top with drained pineapple and coconut.<br />
When cool, lift foil out of pan and cut into 16 squares. Refrigerate.<br />
36
LEMON CHEESECAKE<br />
A light cheesecake, the perfect ending to a big meal.<br />
Ingredients (Serves: 6)<br />
1 teaspoon butter<br />
½ cup graham cracker crumbs<br />
16 ounces low fat cream cheese, room temperature<br />
½ cup sugar<br />
2 large eggs<br />
1 tablespoon lemon juice, fresh<br />
2 teaspoons lemon zest<br />
½ teaspoon vanilla<br />
½ cup lemon curd, for garnish<br />
Process crumbs and butter till blended. Pour into 7-inch springform pan (not<br />
included with oven) that has been sprayed with cooking spray and foil-wrapped<br />
on the outside. Pour two cups hot water into the bottom of the oven. Place<br />
springform pan on low rack and bake for 5 minutes at 400ºF. Remove.<br />
In food processor, place remaining ingredients, except for lemon curd. Bake at<br />
325°F for 35 minutes. Heat jar of lemon curd in microwave for maybe a minute,<br />
or until softened. Spoon out onto cheesecake and smooth. Refrigerate and when<br />
cooled, can be removed from pan.<br />
CARAMEL TURTLE CHEESECAKE<br />
You are absolutely going to love this dessert and your friends and family are going<br />
to think you are a culinary genius!<br />
Ingredients (Serves: 8)<br />
1 low-fat graham cracker crust<br />
¼ cup butter<br />
1 cup coconut<br />
½ cup chopped pecans<br />
2 low fat cream cheese, 8 oz. each, room temperature<br />
2 eggs, room temperature<br />
½ cup Splenda® brown sugar<br />
1 teaspoon vanilla<br />
Caramel ice cream topping, sugar-free<br />
Optional little chocolate covered caramel candies<br />
In 8 inch cake pan (not included with oven) put butter, coconut and pecans and<br />
add to high rack in oven. Bake for 4 minutes on 400ºF, stirring often and watching<br />
closely not to burn coconut. Remove and cool.<br />
In food processor, add cream cheese, eggs, brown sugar, vanilla and process till<br />
smooth, scraping sides. Pour half of mixture into graham cracker shell and top with<br />
half coconut-pecan mixture and drizzle with caramel topping; top with remaining<br />
cream cheese mixture. Bake on low rack at 325ºF for 20 minutes. Take out and<br />
top with remaining coconut-pecan mixture and drizzle with caramel topping. May<br />
add halved chocolate covered caramel candies for garnish. Refrigerate.<br />
37<br />
ENGLISH
ENGLISH<br />
Recipe Index<br />
APPETIZERS<br />
Crispy Bacon-Wrapped Stuffed Dates .............................................................. 17<br />
Cranberry Crab Meat Appetizers....................................................................... 18<br />
Hot Beef Dip in Bread Bowl .............................................................................. 18<br />
Santa Fe Veggie Quesadillas ............................................................................. 19<br />
Southwest Cheesecake ..................................................................................... 19<br />
Stuffed Pizza Rolls ............................................................................................. 20<br />
White Buffalo Wings .......................................................................................... 20<br />
ENTRÉES<br />
Barbeque Roast Beef ........................................................................................ 21<br />
Barbequed Roasted Salmon ............................................................................. 21<br />
Breakfast Pizza .................................................................................................. 22<br />
Classic Beef Fajitas ........................................................................................... 22<br />
Honey Bourbon Pork Tenderloin ....................................................................... 23<br />
Honey-Pecan Crusted Chicken ........................................................................ 23<br />
Grilled Mahi Mahi with Black Bean Salsa ......................................................... 24<br />
Italian Meatloaf w/Fresh Basil and Sun-Dried Tomatoes .................................. 25<br />
Herbed Turkey Breast with Vegetables ............................................................. 26<br />
Savory Roasted Chicken ................................................................................... 27<br />
FROZEN FOODS<br />
Frozen Drumsticks ............................................................................................. 28<br />
Frozen Chicken Thighs ...................................................................................... 28<br />
Frozen Hamburgers ........................................................................................... 28<br />
Frozen Pork Chops ............................................................................................ 28<br />
Frozen Sirloin Steak ........................................................................................... 28<br />
SIDES<br />
Roasted Vegetables ........................................................................................... 29<br />
Baked Pineapple................................................................................................ 29<br />
Corn Fritter Casserole ....................................................................................... 30<br />
Roasted Brussel Sprouts ................................................................................... 30<br />
Roasted Green Beans ....................................................................................... 31<br />
Twice-Baked Potatoes ....................................................................................... 31<br />
Roasted Onion Salad ......................................................................................... 32<br />
Roasted Sweet Potatoes with a Kick! ............................................................... 32<br />
Mexican Cornbread ........................................................................................... 33<br />
Roasted Asparagus ........................................................................................... 33<br />
BREADS<br />
Basil Pesto Rolls ................................................................................................ 34<br />
Cheesy Garlic Biscuits ....................................................................................... 34<br />
DESSERTS<br />
Cherry Berry Pie ................................................................................................ 35<br />
Piña Colada Cheesecake Bars .......................................................................... 36<br />
Lemon Cheesecake ........................................................................................... 37<br />
Caramel Turtle Cheesecake ............................................................................... 37<br />
38
Contenidos<br />
Consejos de Seguridad ......................................................................42<br />
Especificaciones Técnicas .................................................................44<br />
Características y Funciones ...............................................................45<br />
Antes del Primer Uso .........................................................................47<br />
Instrucciones de Uso .........................................................................48<br />
Consejos Prácticos Para Cocinar .....................................................49<br />
Guía de Cocina ....................................................................................50<br />
Limpieza y Mantenimiento .................................................................52<br />
Almacenamiento ..................................................................................53<br />
Solución de Problemas .......................................................................54<br />
39<br />
ESPAÑOL
Gracias por comprar el nuevo horno de sobremesa halógeno de <strong>Trinity</strong>.<br />
Este horno puede ser usado para cocinar al grill, gratinar, hornear, cocinar al<br />
vapor, asar o deshidratar – todo mientras ahorra energía y tiempo, ya que es<br />
entre un 25-50% más rápido que un horno convencional y alrededor de un<br />
75% más eficiente energéticamente. Su potente calentador halógeno de 1200<br />
vatios le ayuda a cocinar comidas completas en sólo una fracción del tiempo<br />
que tardaría en hacerlo en un horno convencional. Además, este horno se<br />
calienta instantáneamente, reduciendo de esta manera el tiempo necesario para<br />
precalentarlo, a la vez que el ventilador que incorpora permite que el aire caliente<br />
circule por todo el aparato, permitiendo que la comida se cocine uniformemente<br />
reteniendo los jugos que le proporcionan un gusto y aroma exquisitos.<br />
Gracias a que el contenedor está hecho en cristal, usted puede ver en todo<br />
momento cómo se están cocinando los alimentos, pudiendo de esta manera<br />
comprobar cuándo han alcanzado su punto óptimo. Además, este horno le<br />
ayudará a cocinar comidas mucho más sanas. Cuando esté cocinado pescado,<br />
carne o ave, las grasas y aceites se desprenderán y gotearán a través de las<br />
rejillas, quedando recogidas en el fondo del recipiente de cristal. Además este<br />
horno es muy compacto, pudiendo ser utilizado tanto como un recipiente que<br />
simplemente mantiene la comida caliente en su mesa, o como un horno principal<br />
en lugares donde el espacio dedicado a la cocina es reducido (habitaciones de<br />
estudiantes, vehículos de recreo o incluso la oficina de trabajo).<br />
Este manual de instrucciones contiene información sobre el uso y el mantenimiento<br />
de este producto. Por favor, léalo detenidamente antes de comenzar a usar el<br />
horno halógeno de <strong>Trinity</strong> para asegurar que hace un uso correcto del mismo. El<br />
seguimiento cuidadoso de las instrucciones que se muestran en este manual le<br />
garantiza un óptimo uso y una larga vida del producto.<br />
41<br />
ESPAÑOL
ESPAÑOL<br />
CONSEJOS DE SEGURIDAD<br />
El producto que acaba de adquirir sigue todas las últimas directrices de seguridad<br />
y estándares tecnológicos. De cualquier modo, como con todos los aparatos<br />
eléctricos, siempre hay riesgos potenciales. Por ello, utilice este horno halógeno<br />
sólo en el ámbito del hogar, y siempre de acuerdo con las instrucciones que<br />
aparecen en este manual.<br />
POR FAVOR LEA ESTAS INSTRUCCIONES ANTES DE USAR ESTE<br />
ELECTRODOMÉSTICO POR PRIMERA VEZ.<br />
• No use este electrodoméstico en espacios al aire libre o donde se estén usando<br />
aerosoles (sprays) u oxígeno embotellado.<br />
• Este horno halógeno ha sido diseñado para uso doméstico, por lo que no está<br />
preparado para cocinar de forma continua o en cantidades industriales.<br />
• No utilice este horno en presencia de explosivos o materiales inflamables.<br />
• Este electrodoméstico no ha sido diseñado para ser utilizado por personas<br />
(incluidos niños) con capacidades físicas, sensoriales o mentales reducidas,<br />
o con falta de experiencia y conocimiento de su uso, a menos que sean<br />
supervisados o instruidos por una persona que esté a cargo de su seguridad.<br />
• Debido a las altas temperaturas que alcanza la superficie de este producto,<br />
debe mantener a los niños y mascotas alejados del mismo mientras el horno<br />
esté en uso.<br />
• Asegúrese en todo momento de que el producto y sus cables no están al<br />
alcance de los niños.<br />
• Use este electrodoméstico encima de una encimera estable, y nunca lo<br />
coloque cerca del borde de la misma donde podría caerse.<br />
• No coloque este producto en un lugar donde pueda caerse o sumergirse en<br />
agua o cualquier otro líquido.<br />
• Utilice este electrodoméstico sólo para el uso para el que está destinado.<br />
• Coloque siempre el contenedor de cristal en la base antes de enchufar y<br />
encender el horno. NUNCA comience a usar el horno antes de haber colocado<br />
correctamente el contenedor en la base.<br />
• No deje que el cable del horno cuelgue de la encimera o toque superficies<br />
calientes.<br />
• No coloque este horno cerca de una vitrocerámica, placa de gas u horno<br />
caliente.<br />
• No trate de mover el horno mientras está en funcionamiento.<br />
• La superficie de este producto alcanza altas temperaturas mientras el horno<br />
está cocinando, y permanece caliente durante algún tiempo después de<br />
apagar el horno. Por ello, no toque la tapa o las asas a no ser que lleve puestos<br />
guantes de protección.<br />
• Todos los objetos de metal del horno, tales como las rejillas, alcanzan altas<br />
temperaturas mientras el horno está en funcionamiento. Por ello, tenga mucho<br />
42
cuidado cuando saque estos objetos del horno. Utilice siempre guantes de<br />
protección o las pinzas que incorpora el horno cuando quiera manipular estas<br />
partes.<br />
• Nunca introduzca sus manos dentro del horno en funcionamiento.<br />
• Nunca deje el horno desatendido mientras esté en uso.<br />
• Nota importante: el asa de la tapa es también un mecanismo de seguridad, si<br />
la tapa no está colocada correctamente el horno se apagará instantáneamente.<br />
• Si desea hornear tartas le recomendamos que utilice un recipiente para tartas<br />
(no incluido en el horno).<br />
• Use el asa y lleve guantes puestos cuando quite la tapa del contenedor de<br />
cristal.<br />
• Cuando quiera quitar la tapa del horno, ésta debe ser colocada en el soporte<br />
destinado para ello y no encima de la encimera de la cocina. Colocar la<br />
tapa con el calentador mirando hacia la encimera puede causar daños en su<br />
encimera o incluso provocar un incendio.<br />
• No aproxime la tapa a usted cuando vaya a retirarla, para evitar de esta manera<br />
que le alcance el vapor caliente que puede contener la misma.<br />
• Asegúrese de que el cuerpo del horno se enfríe adecuadamente antes de<br />
proceder a su limpieza.<br />
• Asegúrese de desenchufar el horno cuando no esté en funcionamiento, cuando<br />
lo esté limpiando o cuando tenga algún problema técnico por el que no pueda<br />
usarlo. No tire del cable para desenchufar el horno, hágalo tirando del enchufe.<br />
• Sea muy cuidadoso cuando trate de eliminar líquidos, grasas o aceites<br />
calientes del horno.<br />
• Nunca sumerja el cable, el enchufe o la tapa del producto en agua u otros<br />
líquidos.<br />
• Ajuste los tormillos del horno si la base se encuentra demasiado suelta.<br />
• Chequee regularmente el cable y el enchufe para comprobar que no tienen<br />
ningún desperfecto.<br />
• No limpie el horno con estropajos metálicos: éstos pueden romperse en el<br />
interior del horno y entrar en contacto con las partes eléctricas del mismo,<br />
incrementando de esta manera el riesgo de sufrir una descarga eléctrica.<br />
• Nunca utilice este horno halógeno si ve que existen daños en el cable o el<br />
enchufe. Si el horno está dañado, por favor póngase en contacto con<br />
el Departamento de Servicio al Cliente de <strong>Trinity</strong> llamando al teléfono<br />
1 (800) 207-0806.<br />
• No utilice accesorios no recomendados por el fabricante, ya que éstos pueden<br />
causar fuego, descargas eléctricas o daños personales.<br />
• Por razones de seguridad, si el cable del horno está estropeado, éste sólo<br />
debe ser reemplazado por otro cable de <strong>Trinity</strong>.<br />
• Nunca utilice el cable para transportar el producto.<br />
• No trate de desmontar el producto o modificar el enchufe.<br />
GUARDE ESTAS INSTRUCCIONES PARA FUTURAS REFERENCIAS<br />
43<br />
ESPAÑOL
ESPAÑOL<br />
Especificaciones Técnicas<br />
NÚMERO DE MODELO 670040380<br />
VOLTAJE/ POTENCIA 120 V / 1200 ~ 1200 W<br />
RANGO DE TEMPERATURA 250 F ~ 480 F<br />
TEMPORIZADOR 5 ~ 60 minutos<br />
DIMENSIONES CONTENEDOR 13” ancho x 6.25” profundidad<br />
CAPACIDAD 12 cuartos<br />
LONGITUD CABLE 4 pies<br />
PESO 15 libras<br />
44
Características y Funciones<br />
Temporizador<br />
45<br />
Asa con mecanismo de<br />
seguridad de encendido/<br />
apagado<br />
Botón de temperatura<br />
Luces LED<br />
Base<br />
Rejilla superior Rejilla inferior<br />
Pinzas<br />
Sartén Antiadherente<br />
Soporte para tapa<br />
Anilla de extensión<br />
ESPAÑOL
ESPAÑOL<br />
• TAPA: Asa con mecanismo de encendido/apagado (ON/OFF) de seguridad:<br />
por razones de seguridad el horno sólo funcionará cuando el asa esté<br />
completamente plegada. Si éste no es el caso, el horno no se encenderá. Para<br />
quitar la tapa, levántela del asa. Una vez quitada colóquela en el soporte para<br />
la tapa.<br />
• Temporizador: Usted puede programar un tiempo de cocinado de hasta 60<br />
minutos. El temporizador apagará el horno una vez que éste ha cocinado<br />
por el tiempo preestablecido con el temporizador. En ese momento sonará<br />
una alarma indicando que el tiempo de cocinado ha terminado.<br />
• Botón de temperatura: Con él puede ajustar fácilmente la temperatura de<br />
forma manual. Además, le permite ajustar la temperatura mientras el horno<br />
está en funcionamiento.<br />
• Luces LED: Son indicadores luminosos de la actividad del horno. Cuando<br />
seleccione el tiempo de cocinado y la temperatura del horno se encenderán<br />
unas luces verdes y rojas. Una vez que el horno alcance la temperatura<br />
deseada la luz verde se apagará. Y cuando el tiempo de cocinado haya<br />
acabado, la luz roja se apagará.<br />
• SOPORTE PARA TAPA: Objeto de metal que le permite apoyar la tapa<br />
durante y después del cocinado. Tenga cuidado de no colocar la tapa caliente<br />
directamente sobre su encimera, ya que esto puede provocar peligro de<br />
incendio o daños en la encimera.<br />
• CONTENEDOR DE CRISTAL: Fabricado con cristal resistente al calor. Puede<br />
ser lavado en el lavavajillas. Tiene una capacidad de 12 cuartos.<br />
• BASE: Se debe colocar debajo del contenedor de cristal para proteger la<br />
encimera y proporcionar estabilidad al horno. NUNCA cocine en el horno sin<br />
colocar antes la base debajo del contenedor de cristal.<br />
• ANILLA DE EXTENSIÓN: Permite incrementar la capacidad del horno en 5<br />
cuartos más. Gracias a este anillo usted podrá cocinar en este horno alimentos<br />
grandes tales como un pollo entero o un pavo.<br />
• REJILLA INFERIOR: Recomendada para cocinar alimentos de grandes<br />
dimensiones. Puede ser usada individualmente o junto con la rejilla superior.<br />
• REJILLA SUPERIOR: Recomendada para cocinar alimentos de pequeño<br />
tamaño o que necesitan estar cerca de la fuente de calor.<br />
NOTA: No es extrictamente necesario usar las rejillas inferior y superior para<br />
cocinar en este horno. De cualquier manera, es aconsejable utilizarlas ya que<br />
permiten una mejor circulación del aire caliente dentro del horno, lo que se<br />
traduce en unos mejores resultados.<br />
• PINZAS: Diseñadas para facilitar la extracción de las rejillas del horno.<br />
• SARTÉN: Sartén antiadherente especialmente diseñada para ser usada en este<br />
horno. Debe ser colocada en la rejilla inferior. Puede cocinar en ella utilizando<br />
poco o nada de aceite.<br />
46
Antes del Primer Uso<br />
Por favor lea las instrucciones de seguridad antes de utilizar este horno. Antes de<br />
utilizar este horno por primera vez, siga los siguientes pasos:<br />
1. Extraiga todos los materiales de embalaje y folletos del interior del horno.<br />
Asegúrese de que el horno está en buenas condiciones, no faltan piezas y el<br />
contenedor de cristal no presenta ningún desperfecto.<br />
2. Seleccione una superficie resistente al calor y no inflamable para colocar el<br />
horno.<br />
3. Retire cualquier suciedad que haya podido acumularse en la superficie del<br />
horno. Para ello utilice un trapo húmedo. Lave adecuadamente el contenedor<br />
de cristal con agua con jabón o en el lavavajillas, y séquelo cuidadosamente<br />
antes de utilizarlo. NUNCA sumerja la tapa en agua o cualquier otro líquido.<br />
Recuerde que sólo el contenedor de cristal y las rejillas pueden ser lavados<br />
en el lavavajillas.<br />
4. Antes de utilizarlo por primera vez, caliente el horno vacío a la máxima<br />
temperatura durante 5 minutos. Con ello eliminará cualquier olor que pudiera<br />
haber en el horno, así como el exceso de lubricante que pudiera haber (el<br />
lubricante es utilizado en la fabricación del horno).<br />
La utilización del horno por primera vez, así como unas cuantas veces más,<br />
puede provocar la aparición de un ligero humo. Esto es normal y no significa<br />
que el horno esté defectuoso.<br />
NOTA: El asa debe estar completamente plegada en posición horizontal para<br />
que el horno funcione. Cuando el asa está en posición vertical, el horno se<br />
apaga inmediatamente. Por favor vea la imagen mostrada a continuación:<br />
Asa en posición vertical: horno apagado<br />
Asa en posición horizontal: horno encendido<br />
5. Después de su uso, permita que el horno alcance la temperatura ambiente<br />
antes de proceder a su limpieza y alamcenamiento.<br />
6. Limpie de nuevo el interior del contenedor después del primer uso. No use<br />
limpiadores abrasivos ni estropajos de aluminio.<br />
47<br />
ESPAÑOL
ESPAÑOL<br />
Instrucciones de Uso<br />
• Coloque las rejillas inferior y superior en el interior del contenedor de cristal<br />
antes de introducir la comida. También puede cocinar en el horno sin utilizar<br />
las rejillas, aunque es recomendable utilizar al menos una para conseguir una<br />
mejor circulación y distribución del aire caliente en el interior del horno. Para<br />
obtener unos mejores resultados, mantenga la comida a una distancia de 1” a<br />
1.25” de la pared de cristal, ya que con ello conseguirá una mejor circulación<br />
del aire. Los alimentos pueden ser cocinados directamente sobre las rejillas,<br />
sobre papel de aluminio o sobre un contenedor apto para hornos.<br />
• Coloque la tapa adecuadamente sobre el contenedor de cristal. Cerciórese de<br />
que la comida no toca en ningún momento la tapa.<br />
• Enchufe el horno.<br />
• Antes de encender el horno, pliegue el asa hacia abajo hasta su tope . Si no<br />
está colocada correctamente el asa el horno no se encenderá.<br />
• Ajuste el temporizador con el tiempo de cocinado deseado. Una vez hecho, la<br />
luz verde LED se encenderá.<br />
• Seleccione la temperatura que desee. En ese momento se encenderá la<br />
luz verde LED, así como la luz interior del horno. Ambas luces se apagarán<br />
una vez que el horno haya alcanzado la temperatura deseada. Si tras ello la<br />
temperatura desciende por debajo de la marcada anteriormente, ambas luces<br />
se encenderán de nuevo intermitentemente para indicarle que el horno se está<br />
calentando.<br />
• El temporizador y la luz roja se apagarán una vez que haya transcurrido el<br />
tiempo de cocinado marcado. En ese momento sonará una señal acústica para<br />
indicarle que el tiempo de cocinado ha finalizado.<br />
• Una vez acabado el tiempo de cocinado, desenchufe el horno y coloque la<br />
tapa en el soporte para tapa. NUNCA coloque la tapa caliente directamente<br />
sobre su encimera, ya que esto puede provocar peligro de incendio o daños en<br />
la encimera.<br />
• Utilice siempre utensilios de cocina de madera, nylon o plástico a prueba de<br />
calor. Los utensilios de metal pueden provocar arañazos en el contenedor de<br />
cristal.<br />
48
Consejos Prácticos Para Cocinar<br />
Asar<br />
• Coloque la comida directamente en la rejilla inferior. También puede utilizar, si<br />
lo desea, una sartén apta para cocinar en el horno. El uso de la rejilla superior<br />
le permite que los alimentos sean cocinados más cerca de la fuente de calor,<br />
proporcionando una comida más crujiente y dorada.<br />
• No es necesario usar aceite para asar en el horno, aunque sí que es<br />
recomendable su uso si desea cocinar alimentos que tienden a secarse al ser<br />
cocinados en un horno.<br />
• Para obtener un efecto glaseado, coloque los alimentos al menos a 4” de<br />
distancia de la fuente de calor. Extienda el glaseado sobre los alimentos y<br />
áselos a 400 - 480° hasta que hayan adquirido el dorado deseado. Las<br />
mermeladas de frutas, gelatinas y jaleas son glaseados idóneos para utilizar<br />
cuando desee asar un alimento.<br />
• El tiempo requerido para asar puede variar dependiendo del tipo de carne o<br />
alimento que desee cocinar, así como de la cantidad de grasa y grosor que<br />
tenga el propio alimento.<br />
• Cuando haya transcurrido la mitad del tiempo de cocinado programado, es<br />
recomendable que le de la vuelta a la comida para obtener un cocinado más<br />
uniforme.<br />
Cocinar al Grill<br />
• Coloque directamente la comida en la rejilla inferior. No use la sartén.<br />
• Untar aceite en la rejilla le ayudará a evitar que los alimentos se peguen en la<br />
misma.<br />
• Es recomendable que coloque papel de aluminio en el fondo del contenedor<br />
de cristal para que así se puedan recoger fácilmente las grasas y el aceite que<br />
puedan desprender los alimentos. De esta manera le resultará más fácil limpiar<br />
el horno una vez que haya acabado de cocinar.<br />
Hornear<br />
• Use una bandeja o recipiente apto para hornos, mejor si es antiadherente, y<br />
que quepa cómodamente en el horno halógeno. Colóquelo en la rejilla inferior.<br />
Sea especialmente cuidadoso cuando desee hornear postres, ya que es muy<br />
fácil pasarse del tiempo de horneado. Baje la temperatura ligeramente y gire la<br />
bandeja para hornear si ve que los alimentos se están dorando demasiado.<br />
Gratinar<br />
• Coloque directamente los alimentos sobre la rejilla superior. También puede<br />
usar la sartén para el horno, aunque en este caso deberá colocarla en la rejilla<br />
superior.<br />
• Untar aceite en la rejilla le ayudará a evitar que los alimentos se peguen en la<br />
misma.<br />
• Es recomendable que coloque papel de aluminio en el fondo del contenedor<br />
de cristal para que así se puedan recoger fácilmente las grasas y el aceite que<br />
puedan desprender los alimentos. De esta manera le resultará más fácil limpiar<br />
el horno una vez que haya acabado de cocinar.<br />
49<br />
ESPAÑOL
ESPAÑOL<br />
Freír “al aire”<br />
• Use la sartén antiadherente colocada en la rejilla inferior.<br />
• Para freír “al aire” use poco o nada de aceite. De este modo conseguirá unos<br />
resultados muy similares a los que conseguiría friendo en aceite con la sartén<br />
en una cocina de gas. Si desea usar aceite, sólo debe utilizar una pequeña<br />
cantidad.<br />
• Una vez que haya transcurrido el tiempo de cocinado, retire la tapa del horno,<br />
ya que de otra manera el vapor causado por el calor puede provocar que los<br />
alimentos no queden crujientes.<br />
Cocinar al vapor<br />
• Para cocinar al vapor, coloque los alimentos en un cuenco o en una cacerola<br />
resistentes al horno y sitúelos en la rejilla inferior, cerciorándose de que el<br />
recipiente no toque en ningún momento las paredes de cristal. Cubra este<br />
cuenco con papel de aluminio. Añada agua o caldo en el interior del contenedor<br />
de cristal, utilizando medio vaso de líquido por cada libra de comida. Cocine<br />
los alimentos a 350° durante el tiempo indicado en la receta.<br />
Guía de Cocina<br />
AVISO SOBRE LOS TIEMPOS DE COCCIÓN:<br />
Tenga en cuenta que los tiempos de cocción indicados son sólo orientativos. Los tiempos<br />
reales variarán en función de factores como el tamaño de la pieza a cocinar, el grosor del<br />
corte, la calidad y frescura de los alimentos, o la temperatura del horno al comienzo de la<br />
preparación de un plato (si el horno ha sido utilizado inmediatamente antes, estará caliente<br />
y se reducirán los tiempos de cocción ligeramente).<br />
Asegúrese de que los alimentos han quedado bien cocidos antes de retirarlos del horno.<br />
Use un termómetro para comida si es posible. Si los alimentos no están suficientemente<br />
cocidos, vuelva a encender el horno por unos minutos más. Observe la comida que está<br />
preparando con frecuencia durante la cocción. Si ve que la parte superior se está dorando<br />
demasiado, vuelque la pieza boca abajo, reduzca ligeramente la temperatura del horno, o<br />
acorte un poco el tiempo de cocción.<br />
CARNE<br />
Ternera<br />
TIEMPO TEMPERATURA<br />
Costillas asadas 31 minutos por libra (medio hecho) 400°F<br />
Pastel de carne 50-60 minutos 350°F<br />
Costillas finas (1¨ de grosor) 12 minutos por cada lado (medio hecho) 400°F<br />
Filete flank steak<br />
Cerdo<br />
8-12 minutos (medio- poco hecho) 375°F<br />
Lomo asado 29 minutos por cada libra 360°F<br />
Chuletas (1/2¨ de grosor) 10-16 minutos 460°F<br />
Lomo 10 minutos por cada lado 450°F<br />
50
Cordero<br />
Pata 31 minutos por libra (medio hecho) 390°F<br />
Chuletas 21 minutos (medio hecho) 400°F<br />
Hamburguesas- 4 burguers 16 minutos (poco hecho) 400°F<br />
Hot Dogs (1/2 a 2 onzas) 10 minutos 400°F<br />
Salchichas (1 libra) 16 minutos 390°F<br />
ÁVES DE CORRAL<br />
Pollo<br />
TIEMPO TEMPERATURA<br />
Entero 21 minutos por libra 460°F<br />
Pechugas 26-31 minutos 460°F<br />
Lomo<br />
Pavo<br />
20 minutos 400°F<br />
Entero (sin rellenar) 26-31 minutos por libra 460°F<br />
Media pechuga (3 libras) 45-60 minutos 460°F<br />
Gallinas de Cornualles 26 minutos por libra 460°F<br />
MARISCO TIEMPO TEMPERATURA<br />
Snapper (entero) 31 minutos 400°F<br />
Filete de salmón 10 minutos 400°F<br />
Gambas al grill 12-14 minutos 400°F<br />
Colas de langosta 18 minutos 400°F<br />
Filete de pescado empanado (congelado) 11-13 minutos menos de lo que indique el paquete 350°F<br />
Mahi Mahi 5 minutos 450°F<br />
Cangrejo 10-13 minutos 300°F<br />
VEGETALES TIEMPO TEMPERATURA<br />
Patatas al horno (6-8 onzas) 41 minutos 400°F<br />
Mazorca de maíz (4 espigas) 26 minutos 400°F<br />
Patatas fritas 16 minutos o hasta que estén crujientes 450ºF<br />
Coles de Bruselas 15-20 minutos 450ºF<br />
Judías verdes 15 minutos 450ºF<br />
Cebolla 15 minutos 450ºF<br />
Batatas 15 minutos 450ºF<br />
Espárragos 10 minutos (añada 2 más si son muy gruesos) 400°F<br />
HUEVOS TIEMPO TEMPERATURA<br />
Escalfados 5-6 minutos 350°F<br />
Hervidos ligeramente 4-5 minutos 400°F<br />
Tortilla 10-12 minutos 350°F<br />
También puede cocinar en este horno recetas escritas para ser realizadas en un horno<br />
convencional. En ese caso, es necesario reducir los tiempos de cocinado que se expongan<br />
en ellas un 25% aproximadamente.<br />
51<br />
ESPAÑOL
ESPAÑOL<br />
Limpieza y Mantenimiento<br />
1. Desenchufe el horno y deje que se enfríe completamente antes de limpiarlo.<br />
2. Una vez que el contenedor de cristal se haya enfriado completamente, limpie<br />
todas las partes cuidadosamente con agua con jabón y un trapo húmedo.<br />
Tanto el contenedor de cristal como las rejillas pueden ser lavados en el<br />
lavavajillas.<br />
3. Para limpiar la cubierta del ventilador, quite el tornillo para poder separarla<br />
de la tapa. Esta cubierta puede lavarla en agua templada con un detergente<br />
suave. Deje que se seque completamente antes de volver a colocarla en su<br />
sitio.<br />
NOTA: Rociar con aceite en spray el contenedor de cristal y las rejillas antes<br />
de cocinar le permitirá una limpieza posterior de los mismos más fácil.<br />
Autolimpieza – Función “Wash”<br />
Este horno dispone de una función de autolimpieza denominada “Wash”, y<br />
que se encuentra en el botón de temperatura. Con él usted podrá limpiar el<br />
contenedor de cristal automáticamente.<br />
1. Quite los restos de comida y grasa del contenedor de cristal.<br />
2. Añada ½ pulgada de agua templada con un poco de jabón líquido al<br />
contenedor de cristal. Cierre la tapa y gire el botón de temperatura hasta la<br />
marca “Wash”.<br />
3. Seleccione de 10 a 15 minutos en el temporizador, dependiendo de lo sucio<br />
que esté el contenedor. La combinación del calor, el remolino que genera el<br />
ventilador y el jabón líquido permitirán que el contenedor de cristal se limpie<br />
de manera rápida y eficiente.<br />
También puede dejar puestas las rejillas cuando utilice el modo de<br />
autolimpieza. De este modo se limpiarán también de cualquier residuo que<br />
puedan tener.<br />
4. Deje que el horno se enfríe.<br />
5. Tras la autolimpieza es recomendable que utilice un trapo o estropajo suave<br />
para eliminar posibles restos que hayan quedado en el fondo.<br />
PRECAUCIÓN:<br />
• Nunca sumerja la tapa, cable o enchufe en agua o cualquier otro líquido.<br />
• Si necesita rascar la suciedad del horno, hágalo con un estropajo de<br />
nylon o poliéster.<br />
• No utilice para la limpieza del horno estropajos de metal ni materiales<br />
abrasivos.<br />
• Nunca utilice disolventes ni polvos limpiadores.<br />
• Nunca deje que entren líquidos en el mecanismo situado en la parte<br />
inferior de la tapa.<br />
52
Almacenamiento<br />
Deje que el horno se enfríe completamente antes de proceder a su<br />
almacenamiento. Almacene este electrodoméstico en un lugar fresco y seco, y<br />
protegido del polvo.<br />
Para un almacenamiento más compacto, coloque la tapa boca abajo encima del<br />
contenedor de cristal. De esta manera, además, conseguirá proteger mejor la<br />
tapa de posibles daños.<br />
53<br />
ESPAÑOL
ESPAÑOL<br />
Solución de Problemas<br />
Problema EL HORNO NO SE ENCIENDE<br />
Solución • Asegúrese de que el horno está enchufado.<br />
• Asegúrese, conenctando otro aparato eléctrico, de que el enchufe<br />
de corriente funciona correctamente.<br />
• Compruebe de que ha ajustado correctamente la temperatura del<br />
horno. Si usted selecciona la temperatura pero no programa el<br />
temporizador, el horno no se encenderá.<br />
• Compruebe que el asa de la tapa está completamente doblada<br />
hacia abajo (debe escuchar un clic cuando esto suceda).<br />
Problema EL HORNO NO CALIENTA<br />
Solución • Asegúrese de que el termostato está puesto a una temperatura<br />
alta.<br />
• Compruebe que ha programado el temporizador, ya que si usted<br />
selecciona una temperatura pero no programa el temporizador, el<br />
horno no se encenderá.<br />
Problema ALGUNA PARTE DEL HORNO ESTÁ ROTA<br />
Solución • Contacte con el Servicio de Atención al Cliente de <strong>Trinity</strong> llamando<br />
al 1 (800) 207-0806.<br />
Problema NO ESTOY SEGURO DE QUÉ CLASE DE RECIPENTE PUEDE SER<br />
USADO EN EL INTERIOR DEL HORNO<br />
Solución • Cualquier recipiente que sea apto para ser usado en un horno<br />
convencional puede ser usado en este horno halógeno. Si de todas<br />
formas no está seguro, compruébelo en el manual del recipente<br />
o póngase en contacto con el fabricante de dicho recipiente.<br />
Cualquier recipiente que tenga partes de plástico no es apto para<br />
ser usado en este horno.<br />
Problema LA LUZ PRINCIPAL DEL INTERIOR DEL HORNO SE HA APAGADO<br />
Solución • Cuando el horno alcanza la temperatura deseada la luz del interior<br />
del horno se apaga. Esta luz sólo se volverá a encender en el caso<br />
de que la temperatura dentro del horno baje por debajo de la<br />
marcada en el termostáto.<br />
• Ponga al máximo el nivel de temperatura. Si aún así la luz interior<br />
no se enciende, póngase en contacto con el Servicio de Atención al<br />
Cliente de <strong>Trinity</strong> llamando al 1 (800) 207-0806.<br />
54
Problema EL HORNO PRODUCE HUMO<br />
Solución • La aparición de un ligero humo mientras está cocinando con el<br />
horno es normal cuando se usa las primeras veces. Si después<br />
de unos cuantos usos sigue apareciendo humo, desenchufe el<br />
horno y limpie cualquier exceso de grasa que pudiera haber en la<br />
parte inferior de la tapa y en el mecanismo de funcionamiento. Si el<br />
problema continua, deje de utilizar el horno y póngase en contacto<br />
con el Servicio de Atención al Cliente de <strong>Trinity</strong> llamando al<br />
1 (800) 207-0806.<br />
55<br />
ESPAÑOL
Limited Warranty<br />
This manufacturer’s product warranty extends to the original consumer purchaser<br />
of the product. Neither the retailer nor any other company involved in the sale or<br />
promotion of this product is a co-warrantor of this manufacturer warranty.<br />
WARRANTY DURATION: All materials and workmanship are warranted to<br />
the original consumer purchaser for a period of one (1) year from the original<br />
purchase date.<br />
WARRANTY COVERAGE: This product is warranted against defective materials<br />
or workmanship. This warranty is void if the product has been damaged by<br />
accident, in shipment, unreasonable use, misuse, neglect, improper service,<br />
commercial use, repairs by unauthorized personnel or other causes not arising<br />
out of defects in materials or workmanship. This warranty is effective only if<br />
the product is purchased and operated in the USA, and does not extend to<br />
any units which have been used in violation of written instructions furnished by<br />
manufacturer or to units which have been altered or modified or to damage to<br />
products or parts thereof which have had the serial number removed, altered,<br />
defaced or rendered illegible.<br />
WARRANTY DISCLAIMERS: This warranty is in lieu of all warranties expressed or<br />
implied and no representative or person is authorized to assume for manufacturer<br />
any other liability in connection with the sale of our products. There shall be no<br />
claims for defects or failure under any theory of tort, contractor commercial law<br />
including, but not limited to, negligence, gross negligence, strict liability, breach<br />
of warranty and breach of contract.<br />
WARRANTY PERFORMANCE: During the above one-year warranty period, a<br />
product with a defect will be either repaired or replaced with a reconditioned<br />
comparable model (at manufacturer’s option). The repaired or replacement<br />
product will be in warranty for the balance of the one year warranty period<br />
and an additional one-month period. No charge will be made for such repair or<br />
replacement.<br />
SERVICE AND REPAIR: If service is required for an appliance, you should first<br />
call toll free 1-800-207-0806 between the hours of 8:30 am and 5:30 pm Eastern<br />
Standard Time and ask for CUSTOMER SERVICE. Please refer to “<strong>Trinity</strong> <strong>Halogen</strong><br />
<strong>Oven</strong> item # 670041640” when you call.<br />
NOTE: Manufacturer cannot assume responsibility for loss or damage during<br />
incoming shipment. For your protection, carefully package the product for<br />
shipment, and insure it with the carrier. Be sure to enclose the following items<br />
with your appliance: your full name, return address and daytime phone number;<br />
a note describing the problem you experienced; a copy of your sales receipt or<br />
other proof of purchase to determine warranty status. C.O.D. shipments cannot<br />
be accepted.<br />
56
TRINITY HALOGEN OVEN<br />
WARRANTY REGISTRATION CARD<br />
MR./MRS./MS.: ________________________________________________________<br />
TELEPHONE: __________________________________________________________<br />
ADDRESS: ___________________________________________________________<br />
DATE OF PURCHASE: ___________________________________________________<br />
NAME OF STORE WHERE BOUGHT: __________________________________________<br />
NAME OF PRODUCT: ____________________________________________________<br />
EMAIL: ______________________________________________________________<br />
NOTE: Please complete and mail this warranty registration card immediately to protect your warranty service.<br />
TRINITY WARRANTY REGISTRATION<br />
PO BOX 94, LYNDHURST, NJ 07071<br />
✃
The manufacturer reserves the right to modify the<br />
terms described in this manual.<br />
El fabricante se reserva el derecho de modifi car<br />
los modelos descritos en el presente libro de<br />
instrucciones.