CP-S235 User's Manual - Operating Guide - Hitachi America, Ltd.
CP-S235 User's Manual - Operating Guide - Hitachi America, Ltd.
CP-S235 User's Manual - Operating Guide - Hitachi America, Ltd.

Create successful ePaper yourself
Turn your PDF publications into a flip-book with our unique Google optimized e-Paper software.
Projector<br />
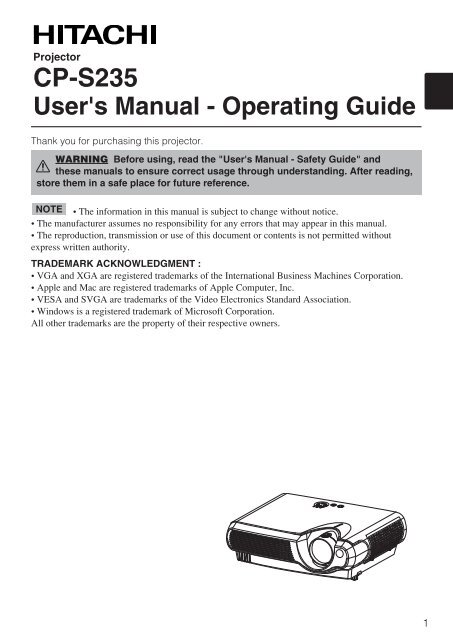
<strong>CP</strong>-<strong>S235</strong><br />
<strong>User's</strong> <strong>Manual</strong> - <strong>Operating</strong> <strong>Guide</strong><br />
Thank you for purchasing this projector.<br />
WARNING Before using, read the "<strong>User's</strong> <strong>Manual</strong> - Safety <strong>Guide</strong>" and<br />
these manuals to ensure correct usage through understanding. After reading,<br />
store them in a safe place for future reference.<br />
NOTE • The information in this manual is subject to change without notice.<br />
• The manufacturer assumes no responsibility for any errors that may appear in this manual.<br />
• The reproduction, transmission or use of this document or contents is not permitted without<br />
express written authority.<br />
TRADEMARK ACKNOWLEDGMENT :<br />
• VGA and XGA are registered trademarks of the International Business Machines Corporation.<br />
• Apple and Mac are registered trademarks of Apple Computer, Inc.<br />
• VESA and SVGA are trademarks of the Video Electronics Standard Association.<br />
• Windows is a registered trademark of Microsoft Corporation.<br />
All other trademarks are the property of their respective owners.<br />
1
Contents<br />
Projector Features 3<br />
Preparation 3<br />
Part Names 4<br />
The Projector 4<br />
Fastening The Lens Cap 4<br />
The Remote Control 6<br />
Setting Up 7<br />
Arrangement 7<br />
Adjusting The Projector’s<br />
Elevator 8<br />
Connecting Your Devices9<br />
Connecting Power Supply 11<br />
Remote Control12<br />
Putting Batteries 12<br />
<strong>Operating</strong> The Remote Control13<br />
Power ON/OFF 14<br />
Turning On The Power 14<br />
Selecting An Input Signal 15<br />
Turning Off The Power 16<br />
<strong>Operating</strong> 17<br />
Adjusting The Volume 17<br />
Temporarily Muting The Sound17<br />
Adjusting The Position 18<br />
Using The Automatic<br />
Adjustment Feature19<br />
Correcting Keystone<br />
Distortions19<br />
Using The Magnify Feature 20<br />
Freezing The Screen 20<br />
Signal Searching 21<br />
Selecting The Aspect Ratio 21<br />
Temporarily Blanking<br />
The Screen 21<br />
Multifunctional Settings 22<br />
Using The Menu Functions 22<br />
MAIN Menu 23<br />
PICTURE-1 Menu 24<br />
PICTURE-2 Menu 26<br />
INPUT Menu 27<br />
AUTO Menu 29<br />
SCREEN Menu 30<br />
OPTION Menu 31<br />
<strong>Operating</strong> The PC Screen 32<br />
Lamp 33<br />
Replacing The Lamp 34<br />
Air Filter 35<br />
Caring For The Air Filter35<br />
Replacing The Air Filter 36<br />
Other Care 37<br />
Caring For The Inside<br />
Of The Projector 37<br />
Caring For The Lens 37<br />
Caring For The Cabinet<br />
And Remote Control 37<br />
Troubleshooting 38<br />
Related Messages 38<br />
Regarding<br />
The Indicator Lamps 40<br />
Phenomena That May Easily Be<br />
Mistaken For Machine Defects 42<br />
Warranty And After-Service 43<br />
Specifications 44<br />
2
Projector Features<br />
This multimedia projector is used to project various computer signals as well as<br />
NTSC / PAL / SECAM video signals onto a screen. Little space is required for<br />
installation and large images can easily be realized.<br />
●Ultra High Brightness<br />
Crisp, ultra-bright presentations is achieved by using a UHB (ultra high brightness) lamp and a highly<br />
efficient optical system.<br />
●Whisper Mode Equipped<br />
Special mode is available for reducing projector noise to achieve quieter operation.<br />
●User Memory Function<br />
This projector can memorize 4 settings by MY MEMORY function.<br />
●Partial Magnification Function<br />
Interesting parts of images can be magnified for closer viewing.<br />
●Keystone Distortion Correction<br />
Quick correction of distorted images electrically.<br />
Preparation<br />
Please see the “Contents Of Package” of the “User’s <strong>Manual</strong> – Quick <strong>Guide</strong>”.<br />
Your projector should come with the items shown there. Contact your dealer<br />
anything is missing.<br />
NOTE<br />
• Keep the original packing material for future reshipment.<br />
3
Part Names<br />
The Projector<br />
Indicates the corresponding<br />
reference page<br />
Zoom ring <br />
Focus ring <br />
Lens<br />
(The picture is<br />
projected from<br />
here.)<br />
<br />
<br />
<br />
Air filter cover<br />
(An air filter is<br />
inside.)<br />
Remote sensor<br />
Elevator button<br />
<br />
Elevator feet<br />
Lens cap<br />
<br />
Projector (Front/Right)<br />
Fastening The Lens Cap<br />
To avoid losing, please fasten the lens cap to the projector using the strap.<br />
Fix the strap to the strap ring of lens Lens cap Strap ring Strap<br />
1<br />
cap, as the right drawing.<br />
Pull<br />
Put one piece of the strap into the<br />
2<br />
groove on rivet, as the right drawing.<br />
Strap<br />
Rivet<br />
3 Push the rivet into the strap hole.<br />
Strap<br />
hole<br />
(Bottom side)<br />
Push in<br />
Rivet<br />
4
Part Names (continued)<br />
The Projector (continued)<br />
INPUT button POWER indicator TEMP indicator<br />
toggles between the signal<br />
ports.<br />
tells the state of power<br />
supply. Refer to the section<br />
lights or blinks when any<br />
problem about internal<br />
RGB VIDEO<br />
“Power ON/OFF”.<br />
temperature has happened.<br />
S-VIDEO<br />
COMPONENT VIDEO<br />
STANDBY/ON <br />
button<br />
prepares for turning the<br />
power on/off. Refer to the<br />
section “Power ON/OFF”.<br />
STANDBY/ON<br />
INPUT<br />
POWER<br />
TEMP<br />
MENU<br />
LAMP<br />
LAMP indicator<br />
lights or blinks when any<br />
problem about the lamp has<br />
happened.<br />
MENU buttons<br />
operate the menu function.<br />
AUDIO R port<br />
L port<br />
(from a video equipment)<br />
<br />
<br />
S-VIDEO port <br />
AUDIO OUT port <br />
AUDIO IN port<br />
(from a computer)<br />
<br />
<br />
VIDEO port <br />
<br />
RGB OUT port<br />
COMPONENT VIDEO - Y <br />
<br />
USB port<br />
COMPONENT VIDEO - CB/PB<br />
<br />
<br />
RGB IN port<br />
COMPONENT VIDEO - CR/PR<br />
<br />
<br />
Power switch<br />
<br />
AC inlet<br />
<br />
CONTROL port<br />
Projector (Rear/Left)<br />
5
Part Names (continued)<br />
6<br />
The Remote Control<br />
RGB button <br />
selects the input signal of<br />
RGB port.<br />
VIDEO button <br />
toggles between the signal<br />
ports of VIDEO, S-VIDEO<br />
and COMPONENT VIDEO.<br />
ASPECT button<br />
toggles between the<br />
modes for aspect ratio.<br />
MAGNIFY ON/OFF<br />
buttons<br />
turns on/off the MAGNIFY<br />
mode.<br />
In the MAGNIFY mode,<br />
To move the<br />
magnified area,<br />
(1) Press the POSITION<br />
button.<br />
(2) Use the cursor buttons<br />
to move the picture.<br />
(3) Press the POSITION<br />
button again to finish.<br />
To shift the magnify<br />
level,<br />
use the cursor /<br />
buttons.<br />
FREEZE button<br />
freezes/reactivates the<br />
picture.<br />
<br />
<br />
<br />
POSITION button <br />
turns on/off the POSITION<br />
mode. (for RGB input)<br />
In the POSITION mode,<br />
To move the picture,<br />
use the cursor buttons.<br />
ESC button <br />
returns to the previous display<br />
at the menu functions.<br />
( Available for<br />
operating PC screen)<br />
SEARCH button<br />
searches for an input<br />
signal between the<br />
following signal ports of<br />
RGB, VIDEO, S-VIDEO<br />
and COMPONENT VIDEO.<br />
ON<br />
OFF<br />
VIDEO<br />
ASPECT<br />
MAGNIFY<br />
FREEZE<br />
POSITION<br />
ESC<br />
RGB<br />
HOME<br />
END<br />
ENTER<br />
SEARCH<br />
AUTO<br />
PAGE UP<br />
PAGE DOWN<br />
BLANK<br />
VOLUME<br />
MUTE<br />
KEYSTONE<br />
MENU<br />
RESET<br />
ENTER button<br />
proceeds to the next operation<br />
at the menu functions.<br />
( Available for<br />
operating PC screen)<br />
, , ,<br />
(Cursor) buttons<br />
works for adjusting or<br />
menu controlling.<br />
( Available for<br />
operating PC screen)<br />
(STANDBY/ON)<br />
button<br />
prepares for turning the<br />
power on/off.<br />
AUTO button<br />
executes automatic<br />
adjustment.<br />
BLANK button<br />
blanks the screen<br />
temporarily.<br />
VOLUME button<br />
turns on/off the VOLUME<br />
mode.<br />
In the VOLUME mode,<br />
To adjust the volume,<br />
use the cursor /<br />
buttons.<br />
KEYBOARD button<br />
operate the PC screen.<br />
MUTE button<br />
mutes/restores the sound.<br />
KEYSTONE<br />
button<br />
turns on/off the KEYSTONE<br />
mode.<br />
In the KEYSTONE mode,<br />
To adjust the<br />
keystone,<br />
use the cursor /<br />
buttons.<br />
MENU button<br />
opens/closes the menu.<br />
RESET button<br />
cancels the adjustment in<br />
progress.<br />
* The adjustments of the<br />
volume etc. are not reset.
Setting Up<br />
Arrangement<br />
WARNING • Install the projector in a suitable environment according to<br />
instructions of the “User’s <strong>Manual</strong> – Safety <strong>Guide</strong>” and this manual.<br />
• The power outlet should be close to the projector and easily accessible.<br />
Refer to the illustrations and tables below to determine the screen size and projection<br />
distance.<br />
The values shown in the table are calculated for a full size screen:800600<br />
(a):Distance from the projector to the screen (±10%)<br />
(b):Distance from the lens center to the bottom of the screen (±10%)<br />
(c):Distance from the lens center to the top of the screen (±10%)<br />
Reference for<br />
the 4:3 aspect ratio<br />
(c)<br />
(b)<br />
Screen<br />
(a)<br />
Lens center<br />
Side View<br />
Screen Size [inch (m)]<br />
(a) [inch (m)] (b) (c)<br />
Min. Max. [inch (cm)] [inch (cm)]<br />
30 (0.8) 35(0.9) 42(1.1) 2(5) 16(41)<br />
40 (1.0) 47(1.2) 56(1.4) 2(6) 22(55)<br />
50 (1.3) 59(1.5) 71(1.8) 3(8) 27(69)<br />
60 (1.5) 71(1.8) 85(2.2) 4(9) 32(82)<br />
70 (1.8) 83(2.1) 99(2.5) 4(11) 38(96)<br />
80 (2.0) 95(2.4) 114(2.9) 5(12) 43(110)<br />
90 (2.3) 107(2.7) 128(3.3) 5(14) 49(123)<br />
100 (2.5) 119(3.0) 143(3.6) 6(15) 54(137)<br />
120 (3.0) 143(3.6) 171(4.4) 7(18) 65(165)<br />
150 (3.8) 179(4.6) 215(5.5) 9(23) 81(206)<br />
200 (5.0) 240(6.1) 287(7.3) 12(30) 108(274)<br />
250 (6.3) 300(7.6) 359(9.1) 15(38) 135(343)<br />
300 (7.5) 360(9.1) 431(10.9) 18(46) 162(411)<br />
Reference for<br />
the 16:9 aspect ratio<br />
(c)<br />
(b)<br />
Screen<br />
(a)<br />
Lens center<br />
Side View<br />
Screen Size [inch (m)]<br />
(a) [inch (m)] (b) (c)<br />
Min. Max. [inch (cm)] [inch (cm)]<br />
30 (0.8) 38(1.0) 46(1.2) 0(1) 15(39)<br />
40 (1.0) 51(1.3) 61(1.6) 1(2) 20(51)<br />
50 (1.3) 64(1.6) 77(2.0) 1(2) 25(64)<br />
60 (1.5) 77(2.0) 93(2.4) 1(2) 30(77)<br />
70 (1.8) 90(2.3) 108(2.8) 1(3) 35(90)<br />
80 (2.0) 104(2.6) 124(3.2) 1(3) 41(103)<br />
90 (2.3) 117(3.0) 140(3.6) 1(4) 46(116)<br />
100 (2.5) 130(3.3) 155(3.9) 2(4) 51(129)<br />
120 (3.0) 156(4.0) 187(4.7) 2(5) 61(154)<br />
150 (3.8) 196(5.0) 234(5.9) 2(6) 76(193)<br />
200 (5.0) 216(6.6) 312(7.9) 3(8) 101(257)<br />
250 (6.3) 327(8.3) 391(9.9) 4(10) 127(322)<br />
300 (7.5) 393(10.0) 469(11.9) 5(12) 152(386)<br />
7
Setting Up (continued)<br />
Adjusting The Projector's Elevator<br />
CAUTION • If you press the elevator buttons without holding the projector, the<br />
projector might crash down, overturn, smash your fingers and possibly result in<br />
malfunction. To prevent damaging the projector and injuring yourself, ALWAYS HOLD<br />
THE PROJECTOR whenever using the elevator buttons to adjust the elevator feet.<br />
You can use the elevator feet to make adjustments if the surface on which you need to set<br />
the projector is uneven or if you otherwise need to adjust the angle of projection. The<br />
adjustment range of the elevator feet is 0 to 9 degrees.<br />
1<br />
2<br />
Press and hold in the elevator buttons.<br />
Raise or lower the projector to the<br />
desired height and then release the<br />
elevator buttons.<br />
When you release the elevator buttons, the elevator<br />
feet will lock into position.<br />
Elevator buttons<br />
3<br />
As necessary, you can also finely<br />
adjust the height of the projector by<br />
twisting the elevator feet by hand.<br />
Elevator feet<br />
8
Setting Up (continued)<br />
Connecting Your Devices<br />
WARNING • Incorrect connecting could result in fire or electrical shock.<br />
Whenever attempting to connect other devices to the projector, please thoroughly read<br />
the "<strong>User's</strong> <strong>Manual</strong> - Safety <strong>Guide</strong>", this manual and the manual of each device to be<br />
connected.<br />
CAUTION • TURN OFF ALL DEVICES prior to connecting them to the projector.<br />
Attempting to connect a live device to the projector may generate extremely loud<br />
noises or other abnormalities that may result in malfunction and/or damage to the<br />
device and/or projector.<br />
ATTENTION • Make sure that you connect devices to the correct port. Incorrect<br />
connection may result in malfunction and/or damage to the device and/or projector.<br />
Refer to the section “TECHNICAL” of this manual for the pin assignment of connectors<br />
and RS-232C communication data.<br />
• Some cables have to be used with core set. Use the accessory cable or a<br />
designated-type cable for the connection. For cables that have a core only at one end,<br />
connect the core to the projector.<br />
• Secure the screws on the connectors and tighten.<br />
• Whenever attempting to connect a laptop computer to the projector, be sure to<br />
activate the laptop’s RGB external image output (set the laptop to CRT display or to<br />
simultaneous LCD and CRT display). For details on how this is done, please refer to the<br />
instruction manual of the corresponding laptop computer.<br />
NOTE About Plug-and-Play Capability<br />
• This projector is compatible with VESA DDC 1/2B. Plug-and-Play can be achieved by<br />
connecting this projector to computers that are VESA DDC (display data channel)<br />
compatible. Please take advantage of this function by connecting the accessory RGB<br />
cable to the RGB port (DDC 1/2B compatible). Plug-and-Play may not work properly if<br />
any other type of connection is attempted.<br />
• Plug-and-Play is a system composed of the computer, its operating system and<br />
peripheral equipment (i.e. display devices).<br />
• Please use the standard drivers in your computer as this projector is a Plug-and-Play<br />
monitor.<br />
NOTE • Some computers may have multiple display screen modes. Use of some of<br />
these modes will not be possible with this projector.<br />
• For some RGB input modes, the optional Mac adapter is necessary.<br />
• When the image resolution is changed on a computer, depending on an input,<br />
automatic adjust function may take some time and may not be completed. In this case,<br />
you may not be able to see a check box to select “Yes/No” for the new resolution on<br />
Windows. Then the resolution will go back to the original. It might be recommended to<br />
use other CRT or TFT monitors to change the resolution.<br />
9
Setting Up (continued)<br />
Please refer to the following for connecting your devices.<br />
See the rear of the projector. You can see the ports.<br />
<br />
Connecting to a computer<br />
RGB out RGB cable (D-sub 15 pin)<br />
Audio out Audio cable (Stereo mini)<br />
RS-232C port RS-232C cable<br />
USB out USB cable<br />
Connecting to a DVD/VCR player<br />
Video out<br />
Audio out (L)<br />
Audio/Video cable<br />
Audio out (R)<br />
<br />
<br />
<br />
<br />
<br />
<br />
<br />
AUDIO OUT<br />
<br />
VIDEO<br />
L-AUDIO-R<br />
S-VIDEO IN<br />
AUDIO IN<br />
VIDEO<br />
AUDIO OUT<br />
S-VIDEO IN<br />
AUDIO IN<br />
Y CB/PB CR/PR<br />
COMPONENT VIDEO<br />
<br />
Y CB/PB CR/PR<br />
COMPONENT VIDEO<br />
L-AUDIO-R<br />
<br />
RGB IN<br />
<br />
CONTROL<br />
RGB IN<br />
CONTROL<br />
RGB OUT<br />
<br />
USB<br />
RGB OUT<br />
USB<br />
If using a SCART RGB input,<br />
Video<br />
AUDIO-L<br />
AUDIO-R SCART SCART cable<br />
G out port<br />
B<br />
R<br />
<br />
<br />
<br />
<br />
<br />
<br />
VIDEO<br />
AUDIO OUT<br />
S-VIDEO IN<br />
AUDIO IN<br />
<br />
<br />
Y CB/PB CR/PR<br />
COMPONENT VIDEO<br />
L-AUDIO-R<br />
RGB IN<br />
CONTROL<br />
RGB OUT<br />
USB<br />
If using a S-video input,<br />
S-video out port S-video cable<br />
Audio out (L)<br />
Audio cable<br />
Audio out (R)<br />
<br />
<br />
<br />
AUDIO OUT<br />
<br />
VIDEO<br />
<br />
S-VIDEO IN<br />
Y CB/PB CR/PR<br />
AUDIO IN<br />
COMPONENT VIDEO<br />
L-AUDIO-R<br />
RGB IN<br />
CONTROL<br />
RGB OUT<br />
USB<br />
If using a component input,<br />
Component (Y) out<br />
Component (CB/PB) out Component cable<br />
Component (CR/PR) out<br />
Audio out (L)<br />
Audio cable<br />
Audio out (R)<br />
<br />
<br />
<br />
<br />
<br />
If using a component input from RGB<br />
port,<br />
Component (Y) out<br />
Component (CB/PB) out Component cable <br />
Component (CR/PR) out (with D-sub 15 pin)<br />
Audio out Audio cable(Stereo mini) <br />
AUDIO OUT<br />
AUDIO IN<br />
AUDIO OUT<br />
<br />
AUDIO IN<br />
VIDEO<br />
S-VIDEO IN<br />
<br />
<br />
L-AUDIO-R<br />
Y CB/PB CR/PR<br />
COMPONENT VIDEO<br />
VIDEO<br />
L-AUDIO-R<br />
S-VIDEO IN<br />
Y CB/PB CR/PR<br />
COMPONENT VIDEO<br />
RGB IN<br />
CONTROL<br />
<br />
RGB IN<br />
CONTROL<br />
RGB OUT<br />
USB<br />
RGB OUT<br />
USB<br />
If using a RGB output, a Audio output,<br />
RGB in RGB cable (D-sub 15 pin)<br />
<br />
Audio in Audio cable (Stereo mini)<br />
<br />
<br />
AUDIO OUT<br />
AUDIO IN<br />
VIDEO<br />
L-AUDIO-R<br />
S-VIDEO IN<br />
Y CB/PB CR/PR<br />
COMPONENT VIDEO<br />
RGB IN<br />
CONTROL<br />
<br />
RGB OUT<br />
USB<br />
10
Setting Up (continued)<br />
Connecting Power Supply<br />
WARNING • Please use extra caution when connecting the power cord as<br />
incorrect or faulty connections may result in FIRE and/or ELECTRICAL SHOCK. Please<br />
adhere to the “User’s manual – Safety <strong>Guide</strong>” and the following.<br />
• Only plug the power cord into outlets rated for use with the power cord’s specified<br />
voltage range.<br />
• Only use the power cord that came with the projector. If it is damaged, contact your<br />
dealer to newly get correct one.<br />
• Never modify the power cord. Never attempt to defeat the ground connection of the<br />
three-pronged plug.<br />
• Make sure that you firmly connect the power cord to the projector and wall outlet.<br />
1<br />
2<br />
Connect the connector of the<br />
power cord to the AC inlet of the<br />
projector. <br />
Firmly plug the power cord’s plug<br />
into the outlet.<br />
AC Inlet<br />
<br />
Connector Side<br />
11
Remote Control<br />
Putting Batteries<br />
CAUTION Always handle the batteries with care and use them only as directed.<br />
Improper use may result in battery cracking or leakage, which could result in fire, injury<br />
and/or pollution of the surrounding environment.<br />
• Keep the battery away from children and pets.<br />
• Be sure to use only the batteries specified for use with the remote control. Do not mix<br />
new batteries with used ones.<br />
• When inserting batteries, verify that the plus and minus terminals are aligned correctly<br />
(as indicated in the remote control).<br />
• When you dispose the battery, you should obey the law in the relative area or country.<br />
1<br />
Remove the<br />
battery cover.<br />
Slide back and<br />
remove the battery<br />
cover in the direction<br />
of the arrow.<br />
Insert the<br />
batteries.<br />
Align and insert the two<br />
AA batteries according to<br />
their plus and minus<br />
terminals (as indicated in<br />
the remote control).<br />
2 3<br />
Close the<br />
battery cover.<br />
Replace the battery<br />
cover in the direction<br />
of the arrow and<br />
snap it back into<br />
place.<br />
12
Remote Control (continued)<br />
<strong>Operating</strong> The Remote Control<br />
ATTENTION • Do not drop or otherwise expose the remote control to physical<br />
impact.<br />
• Do not get the remote control wet or place it on wet objects. Doing so may result in<br />
malfunction.<br />
• Remove the batteries from the remote control and store them in a safe place if you<br />
won’t be using the remote control for an extended period.<br />
• Replace the batteries whenever the remote control starts to malfunction.<br />
• When strong lights, such as direct sunlight or light from an extremely close range<br />
(such as from an inverter fluorescent lamp), hit the projector’s remote sensor, the<br />
remote control may cause to function. Adjust the direction of the projector to keep light<br />
from directly hitting the projector’s remote sensor.<br />
• The remote control works with the projector’s remote<br />
sensor.<br />
• The range of the remote sensor is 3 meters with a 60-<br />
degree range (30 degrees to the left and right of the<br />
remote sensor).<br />
Also a remote signal reflected in the screen etc. may be<br />
available. If it is difficult to send a remote signal to the<br />
sensor directly, please try.<br />
• Since the remote control uses infrared light to send<br />
signals to the projector (Class1 LED), be sure to use the<br />
remote control in an area free from obstacles that could<br />
block the remote control’s output signal to the projector.<br />
Remote sensor<br />
<br />
<br />
approximately<br />
3 meters<br />
13
Power ON/OFF<br />
Turning On The Power<br />
WARNING • When the power is ON, a strong light is emitted. Do not look into the<br />
lens or vents of the projector.<br />
NOTE • Turn the power on/off in right order. Please power on the projector before<br />
the connected devices. Power off the projector after the connected devices.<br />
1<br />
Make sure that the power cord is<br />
firmly and correctly connected to the<br />
projector and outlet.<br />
POWER indicator<br />
POWER<br />
TEMP<br />
LAMP<br />
2<br />
3<br />
When the lens cap is attached, remove<br />
the lens cap.<br />
Set the power switch to [ | ] (ON).<br />
Power switch (ON position)<br />
STANDBY/ON INPUT<br />
MENU<br />
STANDBY/ON button<br />
The POWER indicator will light orange.<br />
4<br />
Press the STANDBY/ON button of the<br />
projector or the button of the remote<br />
control.<br />
The projector lamp will light up and the POWER<br />
indicator will begin blinking green.<br />
According to a setup, the projector lamp may light<br />
up and the POWER indicator may begin blinking<br />
green, without pressing this button.<br />
When the power is completely on, the indicator will<br />
stop blinking and light green.<br />
Power switch<br />
(STANDBY/ON) button<br />
VIDEO RGB SEARCH<br />
ASPECT<br />
AUTO BLANK<br />
MAGNIFY<br />
HOME PAGE UP VOLUME<br />
ON<br />
G O<br />
14
Power ON/OFF (continued)<br />
Selecting An Input Signal<br />
POWER<br />
TEMP<br />
LAMP<br />
1<br />
Using the projector’s control button<br />
Press the INPUT button.<br />
As illustrated below, each time you press the INPUT<br />
button, the projector switches between its input signal<br />
ports. Select the signal you wish to project.<br />
RGB VIDEO S-VIDEO<br />
STANDBY/ON INPUT<br />
MENU<br />
INPUT button<br />
COMPONENT VIDEO<br />
Selecting a RGB signal, using the remote control<br />
Press the RGB button.<br />
When this button is pressed, the projector switches to<br />
the RGB port.<br />
RGB button<br />
VIDEO RGB SEARCH<br />
ASPECT<br />
AUTO BLANK<br />
MAGNIFY<br />
HOME PAGE UP VOLUME<br />
Selecting a video signal, using the remote control<br />
ON<br />
G O<br />
Press the VIDEO button.<br />
As illustrated below, each time you press the VIDEO<br />
button, the projector switches between its input signal<br />
ports. Select the signal you wish to project.<br />
VIDEO S-VIDEO<br />
VIDEO button<br />
VIDEO RGB SEARCH<br />
ASPECT<br />
AUTO BLANK<br />
MAGNIFY<br />
HOME PAGE UP VOLUME<br />
ON<br />
COMPONENT VIDEO<br />
2<br />
Use the zoom ring to adjust the screen<br />
size.<br />
Focus ring<br />
Zoom ring<br />
3<br />
Use the focus ring to focus the picture.<br />
15
Power ON/OFF (continued)<br />
Turning Off The Power<br />
NOTE • Turn the power on/off in right order. Please power on the projector before<br />
the connected devices. Power off the projector after the connected devices.<br />
1<br />
Press the STANDBY/ON button of the<br />
projector or the button of the remote<br />
control.<br />
The message “Power off” will appear on the screen<br />
for approximately 5 seconds.<br />
2<br />
Press the STANDBY/ON button again<br />
while “Power off” the message is<br />
visible.<br />
The projector lamp will go off, and the POWER<br />
indicator will begin blinking orange.<br />
Then the POWER indicator will stop blinking and light<br />
to solid orange when the lamp cooling is complete.<br />
POWER indicator<br />
TEMP<br />
POWER<br />
LAMP<br />
STANDBY/ON INPUT<br />
MENU<br />
STANDBY/ON button<br />
3<br />
Switch the power switch to [O] (OFF).<br />
Power switch (OFF position)<br />
<br />
4<br />
The POWER indicator will go off.<br />
Attached the lens cap.<br />
Power switch<br />
(STANDBY/ON) button<br />
VIDEO<br />
RGB<br />
SEARCH<br />
ASPECT<br />
AUTO<br />
BLANK<br />
MAGNIFY<br />
HOME<br />
PAGE UP<br />
VOLUME<br />
ON<br />
16
<strong>Operating</strong><br />
Adjusting The Volume<br />
VIDEO<br />
ASPECT<br />
MAGNIFY<br />
RGB SEARCH<br />
AUTO BLANK<br />
HOME PAGE UP VOLUME<br />
1<br />
Press the VOLUME button.<br />
As illustrated on the right, a dialog will<br />
appear on the screen to aid you in adjusting<br />
the volume.<br />
VOLUME<br />
VOLUME<br />
ON<br />
OFF<br />
END<br />
PAGE DOWN<br />
MUTE<br />
16<br />
FREEZE<br />
KEYSTONE<br />
POSITION<br />
ESC<br />
ENTER<br />
MENU<br />
RESET<br />
2 Use the / buttons to adjust the<br />
volume.<br />
Press the VOLUME button again to close the dialog and<br />
complete this operation.<br />
(Even if you don't do anything, the dialog will<br />
automatically disappear after a few seconds.)<br />
VOLUME<br />
Press this to increase the volume<br />
Press this to decrease the volume<br />
16<br />
Temporarily Muting The Sound<br />
VIDEO<br />
ASPECT<br />
MAGNIFY<br />
ON<br />
OFF<br />
RGB SEARCH<br />
AUTO BLANK<br />
HOME PAGE UP VOLUME<br />
END PAGE DOWN MUTE<br />
1<br />
Press the MUTE button.<br />
Press the MUTE button.<br />
As illustrated on the right, a dialog will appear on the<br />
screen indicating that you have muted the sound.<br />
(If you don't do anything, the dialog will automatically<br />
disappear after a few seconds.)<br />
Press the MUTE or VOLUME button to restore the sound.<br />
FREEZE<br />
KEYSTONE<br />
VOLUME<br />
POSITION<br />
MENU<br />
MUTE<br />
ENTER<br />
ESC<br />
RESET<br />
16<br />
17
<strong>Operating</strong> (continued)<br />
Adjusting The Position<br />
VIDEO<br />
RGB<br />
SEARCH<br />
1<br />
Press the POSITION button.<br />
As illustrated on the right, a dialog will appear on the screen<br />
to aid you in adjusting the position.<br />
ASPECT<br />
AUTO<br />
BLANK<br />
MAGNIFY<br />
HOME<br />
PAGE UP<br />
VOLUME<br />
ON<br />
OFF<br />
END<br />
PAGE DOWN<br />
MUTE<br />
POSITION<br />
FREEZE<br />
KEYSTONE<br />
POSITION<br />
POSITION<br />
MENU<br />
ESC<br />
ENTER<br />
RESET<br />
2 Use the , , , buttons to adjust<br />
the position.<br />
When you want to initialize the position, press the RESET<br />
button during adjustment.<br />
Press the POSITION button again to close the dialog and<br />
complete this operation. (Even if you don't do anything, the<br />
dialog will automatically disappear after a few seconds.)<br />
This function is only available for RGB input.<br />
NOTE • When a menu is displayed, the operation of adjusting the position works<br />
for the position of not the picture but the menu.<br />
18
<strong>Operating</strong> (continued)<br />
Using The Automatic Adjustment Feature<br />
1<br />
Press the AUTO button.<br />
AUTO<br />
VIDEO<br />
RGB<br />
SEARCH<br />
ASPECT<br />
MAGNIFY<br />
ON<br />
OFF<br />
FREEZE<br />
POSITION<br />
ESC<br />
AUTO BLANK<br />
HOME PAGE UP VOLUME<br />
END PAGE DOWN MUTE<br />
KEYSTONE<br />
MENU<br />
ENTER<br />
RESET<br />
Automatic Adjustment for RGB Input<br />
Horizontal position (H POSITION), vertical position (V POSITION),<br />
clock phase (H PHASE) and horizontal size (H SIZE) are<br />
automatically adjusted.<br />
Make sure that the application window is set to its maximum size<br />
prior to attempting to use this feature. Dark pictures may still be<br />
incorrectly adjusted. Use a bright screen when adjusting.<br />
Automatic Adjustment for Video Input<br />
The signal type best suited for the respective input signal is<br />
selected automatically.<br />
This feature is available only if VIDEO is set to AUTO in the INPUT<br />
menu.<br />
NOTE • The automatic adjustment operation requires approximately 10 seconds.<br />
Also, please note that it may not function correctly with some input.<br />
Correcting Keystone Distortions<br />
VIDEO<br />
ASPECT<br />
MAGNIFY<br />
RGB SEARCH<br />
AUTO BLANK<br />
HOME PAGE UP VOLUME<br />
1<br />
Press the KEYSTONE button.<br />
As illustrated on the right, a dialog will appear on<br />
the screen to aid you in correcting the distortion.<br />
KEYSTONE<br />
ON<br />
KEYSTONE<br />
END<br />
PAGE DOWN<br />
MUTE<br />
OFF<br />
FREEZE<br />
KEYSTONE<br />
+0<br />
POSITION<br />
ESC<br />
ENTER<br />
MENU<br />
RESET<br />
2 Use the , buttons to correct distortion.<br />
Press the KEYSTONE button again to close the dialog<br />
and complete this operation. (Even if you don't do<br />
anything, the dialog will automatically disappear after<br />
a few seconds.)<br />
NOTE • When the WIDE is selected under the ASPECT item of the MAIN menu, this<br />
adjustment is ignored.<br />
• The correcting keystone distortions function may not be work well with some types of<br />
input signals.<br />
• The adjustable range for correcting keystone distortions will vary with the type of<br />
input signal.<br />
19
<strong>Operating</strong> (continued)<br />
Using The Magnify Feature<br />
VIDEO<br />
RGB<br />
SEARCH<br />
1<br />
Press the MAGNIFY (ON) button.<br />
The projector enters MAGNIFY mode.<br />
MAGNIFY<br />
ON<br />
ASPECT<br />
AUTO<br />
BLANK<br />
MAGNIFY<br />
ON<br />
OFF<br />
FREEZE<br />
HOME PAGE UP VOLUME<br />
END PAGE DOWN MUTE<br />
KEYSTONE<br />
2<br />
Press the POSITION button, then use the<br />
, , , buttons to select the area<br />
to zoom. Press the POSITION button again<br />
to finalize the zoom area.<br />
POSITION<br />
MENU<br />
POSITION<br />
POSITION<br />
ENTER<br />
ESC<br />
RESET<br />
20<br />
Freezing The Screen<br />
3 Use the , buttons to adjust the zoom<br />
level.<br />
Press the MAGNIFY (OFF) button to exit MAGNIFY<br />
mode and restore the screen to normal.(The<br />
projector will also automatically exit MAGNIFY<br />
mode if there is a change in the input signal's<br />
state.)<br />
NOTE • The projector will automatically exit from MAGNIFY mode if either the<br />
SEARCH, RGB, AUTO, ASPECT or VIDEO feature is used, or, if there is a change in the<br />
input signal's state.<br />
• The correcting keystone condition may vary when the magnify function is active. In<br />
this case, please make the magnify OFF, so the correcting keystone condition will be<br />
restored.<br />
ON<br />
OFF<br />
FREEZE<br />
POSITION<br />
END<br />
PAGE DOWN<br />
MUTE<br />
KEYSTONE<br />
MENU<br />
1<br />
FREEZE<br />
Press the FREEZE button.<br />
The [II] icon appears and the screen will freeze<br />
at the current image. Press the FREEZE button<br />
again and the [ ] appears as the projector exits FREEZE<br />
mode.<br />
NOTE • The freezing function will automatically finish if either the STANDBY/ON,<br />
SEARCH, RGB, VIDEO, BLANK, AUTO, VOLUME, MUTE, POSITION or MENU button of<br />
remote control is pressed, or if a button of projector is pressed, or if there is a change<br />
in the input signal’s state.<br />
• If the projector continues projecting the same image for a long time (i.e. you forget to<br />
exit FREEZE mode), the image might possibly remain as an afterimage. Do not leave<br />
the projector in FREEZE mode for too long.
<strong>Operating</strong> (continued)<br />
Signal Searching<br />
VIDEO<br />
ASPECT<br />
MAGNIFY<br />
RGB SEARCH<br />
AUTO BLANK<br />
HOME PAGE UP VOLUME<br />
1<br />
Press the SEARCH button.<br />
Cycle through input signals, displaying the images of retrieved signals. If<br />
no signal is found, returns to the signal that was selected before the search<br />
was begun.<br />
RGB VIDEO S-VIDEO<br />
SEARCH<br />
ON<br />
OFF<br />
FREEZE<br />
END<br />
PAGE DOWN<br />
MUTE<br />
KEYSTONE<br />
COMPONENT VIDEO<br />
NOTE • May not function properly with some input signals.<br />
• The signal searching function takes about 10 seconds to display an image.<br />
Selecting The Aspect Ratio<br />
VIDEO RGB SEARCH<br />
ASPECT<br />
AUTO BLANK<br />
1<br />
Press the ASPECT button.<br />
RGB input<br />
4:3 16:9 15:9 32:15<br />
ASPECT<br />
MAGNIFY<br />
HOME<br />
PAGE UP<br />
VOLUME<br />
ON<br />
OFF<br />
FREEZE<br />
POSITION<br />
END PAGE DOWN MUTE<br />
KEYSTONE<br />
MENU<br />
ENTER<br />
• At a RGB input, selecting an aspect ratio may display the message<br />
“SYNC IS OUT OF RANGE”. In this case, please select one of other<br />
aspect ratios.<br />
VIDEO, S-VIDEO, COMPONENT VIDEO input<br />
4:3 16:9 WIDE ZOOM<br />
ESC<br />
RESET<br />
• At a COMPONENT VIDEO input of 16:9 Hi-Vision of 1125i<br />
(1035i/1080i)/750p, only 16:9 can be selected.<br />
• When the 4:3 is selected under the SCREEN TYPE item of the OPTION<br />
menu. WIDE and ZOOM cannot be selected.<br />
Temporarily Blanking The Screen<br />
ON<br />
VIDEO<br />
ASPECT<br />
MAGNIFY<br />
RGB<br />
HOME<br />
SEARCH<br />
AUTO<br />
PAGE UP<br />
BLANK<br />
VOLUME<br />
1<br />
Press the BLANK button.<br />
The input signal screen is shut off, and a blank screen appears. You can<br />
set the blank screen using the menu (from the SCREEN menu, BLANK<br />
select BLANK).<br />
Press the BLANK button again to remove the blank screen,<br />
and return to the input signal screen.<br />
NOTE • The temporarily blanking function will automatically finish if either the STANDBY/ON, SEARCH,<br />
RGB, VIDEO, FREEZE, AUTO, VOLUME, MUTE, POSITION or MENU button of remote control is pressed, or if<br />
a button of projector is pressed, or if there is a change in the input signal’s state.<br />
21
Multifunctional Settings<br />
Using The Menu Functions<br />
This projector has the following menus: MAIN, PICTURE-1, PICTURE-2, INPUT, AUTO,<br />
SCREEN, OPTION. Each of these menus is operated using the same methods. The basic<br />
operations of these menus are as follows.<br />
VIDEO<br />
ASPECT<br />
RGB<br />
SEARCH<br />
AUTO<br />
BLANK<br />
1<br />
Press the MENU<br />
button.<br />
The menu display<br />
appears on the screen.<br />
[ex. Adjusting<br />
VOLUME]<br />
1. Press the MENU<br />
button.<br />
MAGNIFY<br />
HOME<br />
PAGE UP<br />
VOLUME<br />
ON<br />
ESC<br />
OFF<br />
FREEZE<br />
POSITION<br />
ESC<br />
END PAGE DOWN MUTE<br />
KEYSTONE<br />
MENU<br />
ENTER<br />
RESET<br />
MENU<br />
RESET<br />
2 Use the /<br />
buttons to select<br />
a menu , then<br />
press the or<br />
ENTER button.<br />
The display of the<br />
selected menu<br />
appears.<br />
2.Use the /<br />
buttons to select<br />
the OPTION, then<br />
press the or<br />
ENTER button.<br />
ENTER<br />
3 Use the / buttons to select an item,<br />
then press the or ENTER button.<br />
The operation display of the selected item appears.<br />
4 Use the / buttons to operate the item.<br />
When you want to reset the adjustment, press the RESET<br />
button during the operation. Note that the items whose<br />
functions are performed simultaneously with operating (ex.<br />
LANGUAGE, WHISPER, H PHASE etc.) are not reset.<br />
When you want to return to the previous display, press the<br />
or ESC button.<br />
3.Use the /<br />
buttons to select<br />
the VOLUME,<br />
then press the<br />
or ENTER<br />
button.<br />
4.Use the /<br />
buttons to adjust<br />
the VOLUME.<br />
5<br />
Press the MENU button, or do not perform<br />
any operation for several seconds.<br />
The menu display disappears and your operation finishes.<br />
5.Press the MENU<br />
button.<br />
22
Multifunctional Settings (continued)<br />
MAIN Menu<br />
With the MAIN menu, the items shown in the table below can be<br />
performed.<br />
Perform each operation in accordance with the instructions in the<br />
table below.<br />
Item<br />
KEYSTONE<br />
Description<br />
MENU<br />
MAIN<br />
PICTURE-1<br />
PICTURE-2<br />
INPUT<br />
AUTO<br />
SCREEN<br />
OPTION<br />
: SELECT<br />
KEYSTONE<br />
BRIGHT<br />
CONTRAST<br />
ASPECT<br />
WHISPER<br />
MIRROR<br />
LANGUAGE<br />
[Language]<br />
+0<br />
+0<br />
+0<br />
4:3<br />
NORMAL<br />
NORMAL<br />
ENGLISH<br />
Adjust the Keystone (Vertical) Distortion:<br />
Upper in the data Lower in the data<br />
• The adjustable range of this function will vary with the type of input signal. At<br />
some signals, this function may not work well.<br />
• When the V:INVERT or the H&V:INVERT is selected under the MIRROR item, if<br />
the projector screen is inclined or if the projector is angled downward, this<br />
function may not work correctly.<br />
• When the WIDE is selected under the ASPECT item of the MAIN menu, this<br />
adjustment is ignored.<br />
• When the zoom adjustment is set to the TELE side, this correction may be<br />
excessive. This function should be used with zoom set to WIDE whenever<br />
possible.<br />
BRIGHT Adjust Brightness: Light Dark<br />
CONTRAST Adjust Contrast: Strong Weak<br />
ASPECT<br />
WHISPER<br />
MIRROR<br />
LANGUAGE<br />
RESET<br />
Select an Aspect Ratio<br />
At a RGB input:<br />
4:3 16:9 15:9 32:15<br />
• At a RGB input, selecting an aspect ratio may display the message “SYNC IS<br />
OUT OF RANGE”. In this case, please select one of other aspect ratios.<br />
At a VIDEO input, a S-VIDEO input or a COMPONENT VIDEO input:<br />
4:3 16:9 WIDE ZOOM<br />
• At a COMPONENT VIDEO input of 16:9 Hi-Vision of 1125i(1035i/1080i)/750p,<br />
only 16:9 can be selected.<br />
• When the 4:3 is selected under the SCREEN TYPE item of the OPTION menu,<br />
WIDE and ZOOM cannot be selected.<br />
Select the Whisper Mode:<br />
NORMAL WHISPER<br />
• When the WHISPER is selected, acoustic noise and screen brightness are<br />
reduced.<br />
Select a Mirror Status:<br />
NORMAL H:INVERT V:INVERT H&V:INVERT<br />
Select a Menu Language:<br />
ENGLISH FRANÇAIS DEUTSCH ESPAÑOL<br />
ITALIANO NORSK NEDERLANDS<br />
PORTUGUÊS <br />
SVENSKA SUOMI POLSKI<br />
Reset the MAIN Menu Items:<br />
Selecting the EXECUTE performs this function.<br />
EXECUTE CANCEL<br />
• The items of the MAIN menu are collectively returned to the initial setting.<br />
Note that the items WHISPER and LANGUAGE are not reset.<br />
<br />
<br />
<br />
<br />
23
Multifunctional Settings (continued)<br />
PICTURE - 1 Menu<br />
With the PICTURE - 1 menu, the items shown in the Table below can be<br />
performed.<br />
Perform each operation in accordance with the instructions in the table below.<br />
MENU<br />
MAIN<br />
PICTURE-1<br />
PICTURE-2<br />
INPUT<br />
AUTO<br />
SCREEN<br />
OPTION<br />
: SELECT<br />
GAMMA<br />
COLOR BAL R<br />
COLOR BAL G<br />
COLOR BAL B<br />
SHARPNESS<br />
COLOR<br />
TINT<br />
MY MEMORY<br />
NORMAL<br />
+0<br />
+0<br />
+0<br />
+0<br />
+0<br />
+0<br />
SAVE1<br />
Item<br />
GAMMA<br />
Description<br />
Select a Gamma Mode:<br />
NORMAL CINEMA DYNAMIC CUSTOM<br />
• Selecting the COSTOM and then pressing the or the ENTER button calls<br />
the CUSTOM menu.<br />
CUSTOM Menu<br />
Selecting one from the following and then pressing the or the ENTER<br />
button performs each function.<br />
GAMMA COLOR TEMP R G B<br />
• The R, G and B can be selected only when the USER is selected under the<br />
COLOR TEMP.<br />
CUSTOM<br />
GAMMA<br />
CUSTOM<br />
COLOR TEMP<br />
CUSTOM<br />
R<br />
CUSTOM<br />
G<br />
CUSTOM<br />
B<br />
Adjust the Gamma Data:<br />
Up Down<br />
Select a Color Temperature Mode:<br />
HIGH MIDDLE LOW USER<br />
Adjust the Red Color Level for the USER mode of the<br />
COLOR TEMP:<br />
Strong Weak<br />
Adjust the Green Color Level for the USER mode of the<br />
COLOR TEMP:<br />
Strong Weak<br />
Adjust the Blue Color Level for the USER mode of the<br />
COLOR TEMP:<br />
Strong Weak<br />
COLOR BAL R Adjust the Red Color Balance: Strong Weak<br />
COLOR BAL G Adjust the Green Color Balance: Strong Weak<br />
COLOR BAL B Adjust the Blue Color Balance: Strong Weak<br />
24<br />
SHARPNESS<br />
COLOR<br />
TINT<br />
Adjust the Whole Sharpness: Clear Soft<br />
• This is a function for video inputs. This item can’t be selected only at RGB<br />
inputs.<br />
Adjust COLOR : Strong Weak<br />
• This is a function for video inputs. This item can’t be selected only at RGB<br />
inputs including SCART RGB inputs.<br />
• It is unavailable to deepen colors on SECAM signal input. (The adjustment<br />
bar position and value in menu box are changeable but no effect.)<br />
Adjust the Tint: Green Red<br />
• This is a function for video inputs. This item can’t be selected only at RGB<br />
inputs including SCART RGB inputs.
Multifunctional Settings (continued)<br />
PICTURE - 1 Menu (continued)<br />
Item<br />
MY MEMORY<br />
RESET<br />
Description<br />
Load/Save a Setting:<br />
Selecting one from the following and then pressing the or the ENTER<br />
button performs each function.<br />
LOAD1 LOAD2 LOAD3 LOAD4<br />
SAVE1 SAVE2 SAVE3 SAVE4<br />
• This projector has 4 memories called M1, M2, M3 and M4 for settings.<br />
Performing the SAVE1, SAVE2, SAVE3 or SAVE4 puts the current setting data<br />
on the memory whose number corresponds. Performing the LOAD1, LOAD2,<br />
LOAD3 or LOAD4 calls the data of memory whose number corresponds, and<br />
adjusts the picture automatically depending on the data.<br />
• The LOAD1, LOAD2, LOAD3 or LOAD4 cannot be selected when there is no<br />
memory whose number corresponds.<br />
• At a different signal input from the signal that was being inputted when the<br />
setting was memorized, the picture may not be adjusted correctly.<br />
Reset the PICTURE-1 Menu Items:<br />
Selecting the EXECUTE performs this function.<br />
EXECUTE CANCEL<br />
• The items of the PICTURE-1 menu are collectively returned to the initial<br />
setting. Note that the items MY MEMORY and CUSTOM - GAMMA are not<br />
reset.<br />
<br />
<br />
25
Multifunctional Settings (continued)<br />
PICTURE - 2 Menu<br />
With the PICTURE - 2 menu, the items shown in the table below<br />
can be performed.<br />
Perform each operation in accordance with the instructions in the<br />
table below.<br />
MENU<br />
MAIN<br />
PICTURE-1<br />
PICTURE-2<br />
INPUT<br />
AUTO<br />
SCREEN<br />
OPTION<br />
: SELECT<br />
V POSITION<br />
H POSITION<br />
H PHASE<br />
H SIZE<br />
OVER SCAN<br />
RESET<br />
20<br />
142<br />
31<br />
1344<br />
95<br />
Item<br />
V POSITION<br />
H POSITION<br />
H PHASE<br />
H SIZE<br />
OVER SCAN<br />
RESET<br />
Description<br />
Adjust the Vertical Position: Up Down<br />
• This item can be selected only at a RGB input.<br />
Adjust the Horizontal Position: Left Right<br />
• This item can be selected only at a RGB input.<br />
Adjust the Horizontal Phase (to eliminate flicker) :<br />
Right Left<br />
• This item can be selected only at a RGB input or a COMPONENT VIDEO<br />
input.<br />
Adjust the Horizontal Size: Large Small<br />
• When this adjustment is excessive, the picture may not be displayed<br />
correctly. In such a case, please press the RESET button during selection of<br />
this item to reset the H SIZE.<br />
• This item can be selected only at a RGB input.<br />
Adjust the Over-scan Ratio:<br />
Large Small<br />
• This item can be selected only at a VIDEO input, a S-VIDEO input or a<br />
COMPONENT VIDEO input.<br />
• When this adjustment is too large, a certain degradation may appear at the<br />
frame area of the picture. In such a case, please adjust small.<br />
Reset the PICTURE-2 Menu Items:<br />
Selecting the EXECUTE performs this function.<br />
EXECUTE CANCEL<br />
• The items of the PICTURE-2 menu are collectively returned to the initial<br />
setting. Note that the H PHASE item is not reset.<br />
<br />
26
Multifunctional Settings (continued)<br />
INPUT Menu<br />
With the INPUT menu, the items shown in the table below can be<br />
performed.<br />
Perform each operation in accordance with the instructions in the<br />
table below.<br />
MENU<br />
MAIN<br />
PICTURE-1<br />
PICTURE-2<br />
INPUT<br />
AUTO<br />
SCREEN<br />
OPTION<br />
: SELECT<br />
COLOR SPACE<br />
COMPONENT<br />
VIDEO<br />
FRAME LOCK<br />
3D-YCS<br />
VIDEO NR<br />
PROGRESSIVE<br />
INFORMATION<br />
AUTO<br />
COMPONENT<br />
AUTO<br />
TURN ON<br />
NORMAL<br />
LOW<br />
TURN OFF<br />
Item<br />
COLOR SPACE<br />
COMPONENT<br />
VIDEO<br />
FRAME LOCK<br />
3D-YCS<br />
Description<br />
Select a Color Space Mode:<br />
AUTO RGB SMPTE240 REC709 REC601<br />
• This item can be selected only at a RGB input or a COMPONENT VIDEO<br />
input.<br />
• When the AUTO is selected, the optimum mode is automatically selected.<br />
However, it may not work well at some signals. In such a case, select the<br />
SMPTE240 or REC709 for HDTV signal.<br />
Select a Function of COMPONENT VIDEO Jacks:<br />
COMPONENT SCART RGB<br />
• When the SCART RGB is selected, the COMPONENT VIDEO jacks function<br />
as ports for a RGB input with a SCART cable. Refer to the section “Signal<br />
Connectors” of “TECHNICAL”.<br />
Select a Signal Type Mode:<br />
AUTO NTSC PAL SECAM<br />
NTSC 4.43 M-PAL N-PAL<br />
• This item performs only at a VIDEO input or a S-VIDEO input. For a<br />
COMPONENT VIDEO input, although this item is ineffective, the signal type is<br />
identified automatically even if the AUTO is not selected.<br />
• Selecting the AUTO automatically selects the optimum mode. However, it<br />
may not work well at a PAL60 signal and some other signals. If the picture<br />
becomes unstable (ex. a irregular picture, color lack), please select the mode<br />
depending on the input signal.<br />
• The AUTO operation requires approximately 10 seconds.<br />
Select the Frame Lock Mode:<br />
TURN ON TURN OFF<br />
• This function performs only at a RGB input with vertical frequency of 48 to 72<br />
Hz.<br />
• When the TURN ON is selected, a moving picture is displayed more<br />
smoothly.<br />
• This function may cause a certain degradation of the picture. In such a case,<br />
please select the TURN OFF.<br />
Select a 3D-YCS mode:<br />
STILL IMAGE NORMAL TURN OFF<br />
• This function performs only at a VIDEO input of NTSC 3.58.<br />
• NORMAL is the mode for images with a lot of motions like movies, and STILL<br />
IMAGE is the mode for images with few motions or completely still ones like<br />
slides.<br />
• When this function performs, the VIDEO NR function is ineffective.<br />
<br />
27
Multifunctional Settings (continued)<br />
INPUT Menu (continued)<br />
Item<br />
VIDEO NR<br />
PROGRESSIVE<br />
INFORMATION<br />
S2-ASPECT<br />
RESET<br />
Description<br />
Select a Noise Reduction Mode:<br />
HIGH MIDDLE LOW<br />
• This function performs only at a VIDEO input or a S-VIDEO input. At a VIDEO<br />
input of NTSC 3.58, this function performs only when the TURN OFF is<br />
selected under the 3D-YCS.<br />
• When the HIGH, the MIDDLE or the LOW is selected, the noise on screen is<br />
reduced according to each mode.<br />
• When this function is excessive, it may cause a certain degradation of the<br />
picture.<br />
Select the Progressive Mode:<br />
TV FILM TURN OFF<br />
• This function performs only at an interlaced signal of a VIDEO input, a S-<br />
VIDEO input or a COMPONENT VIDEO input of 525i or 625i signal. The FILM<br />
mode is adaptable to the 3-2 Pull-Down system to the conversion.<br />
• When the TV or FILM is selected, the screen image will be crisper. But it may<br />
cause a certain defect (for example, jagged line) of the picture at a quick<br />
moving object. In such a case, please select the TURN OFF, even though the<br />
screen image may lose the crisp.<br />
• This function may cause a certain degradation of the picture. In such a case,<br />
please select the TURN OFF.<br />
Display the Information:<br />
Pressing the or the ENTER button performs this function.<br />
• Use this function when you want the information about the current input (ex.<br />
the resolution and the vertical frequency at a RGB input, the signal type of a<br />
video input) and setting states of the COMPONENT, the VIDEO and the<br />
FLAME LOCK.<br />
Select the S2-ASPECT Mode:<br />
TURN ON TURN OFF<br />
• This function performs only at a S-VIDEO input.<br />
• When the TURN ON is selected, an S2-Video signal can be identified and the<br />
optimum aspect ratio is automatically selected.<br />
• When the ASPECT button of the remote control is used or the ASPECT item of<br />
the MAIN menu is operated, the S2-ASPECT mode will be switched to the<br />
TURN OFF automatically.<br />
Reset the INPUT Menu Items:<br />
Selecting the EXECUTE performs this function.<br />
EXECUTE CANCEL<br />
• The items of the INPUT menu are collectively returned to the initial setting.<br />
Note that the INFORMATION item is not reset.<br />
<br />
28
Multifunctional Settings (continued)<br />
AUTO Menu<br />
With the AUTO menu, the items shown in the table below can be<br />
performed.<br />
Perform each operation in accordance with the instructions in the<br />
table below.<br />
MENU<br />
MAIN<br />
PICTURE-1<br />
PICTURE-2<br />
INPUT<br />
AUTO<br />
SCREEN<br />
OPTION<br />
: SELECT<br />
ADJUST<br />
POWER OFF<br />
SEARCH<br />
RESET<br />
0 min<br />
TURN ON<br />
Item<br />
ADJUST<br />
POWER OFF<br />
SEARCH<br />
Description<br />
Automatically Adjust the Picture:<br />
Pressing the or the ENTER button performs this function.<br />
At a RGB input:<br />
• V POSITION, H POSITION, H PHASE and HSIZE are automatically adjusted.<br />
Please use this function with the maximum window size.<br />
At a VIDEO input or S-VIDEO input:<br />
• This function performs only when the AUTO is selected under the VIDEO item<br />
of the INPUT menu. For a COMPONENT VIDEO input, although this function is<br />
ineffective, the signal type is identified automatically even if the AUTO is not<br />
selected.<br />
• This function automatically selects the optimum mode for the input signal.<br />
However, it may not work well at a PAL60 signal and some other signals. If<br />
the picture becomes unstable (ex. irregular picture, color lack), please use<br />
the function of VIDEO of the INPUT menu.<br />
• The operation of this function requires approximately 10 seconds. Also,<br />
please note that it may not function correctly with some input.<br />
Set the Automatically Power Off Timer:<br />
Long (Max. 99 minutes.) Short (Min. 0 minute =DISABLE)<br />
• This function performs only when the time is set to 1 to 99.<br />
• When the set time passes without a valid signal (there is no signal, or the<br />
signal is out of specifications), the projector lamp automatically goes off, and<br />
the POWER indicator begins blinking. Please refer to the section “Turning<br />
OFF The Power” of “Power ON/OFF” about the turning off.<br />
Automatically Signal Search:<br />
TURN ON TURN OFF<br />
• If the TURN ON is selected under this item when no signal input is detected,<br />
the projector begins searching for an input signal. When an input signal is<br />
detected the projector will cease searching and the picture will appear.<br />
• The priority of a search is as follows:<br />
RGB VIDEO S-VIDEO COMPONENT VIDEO<br />
<br />
• If the projector is unstable to find an input signal at any of its ports, it will<br />
return to the state it was in prior to the search.<br />
RESET<br />
Reset the AUTO Menu Items:<br />
Selecting the EXECUTE performs this function.<br />
EXECUTE CANCEL<br />
• The items of the AUTO menu are collectively returned to the initial setting.<br />
Note that the item ADJUST is not reset.<br />
<br />
29
Multifunctional Settings (continued)<br />
SCREEN Menu<br />
With the SCREEN menu, the items shown in the table below can be<br />
performed.<br />
Perform each operation in accordance with the instructions in the<br />
table below.<br />
MENU<br />
MAIN<br />
PICTURE-1<br />
PICTURE-2<br />
INPUT<br />
AUTO<br />
SCREEN<br />
OPTION<br />
: SELECT<br />
BLANK<br />
BLACK<br />
START UP TURN ON<br />
MENU POSITION<br />
MESSAGE TURN ON<br />
RESET<br />
Item<br />
BLANK<br />
START UP<br />
Description<br />
Select a Blank Screen Color:<br />
BLUE WHITE BLACK<br />
• The blank screen of selected color is displayed by pressing the BLANK<br />
button. Please refer to the section “Temporarily Blanking The Screen” of<br />
“<strong>Operating</strong>” about the screen blanking.<br />
Select the Start Up Screen:<br />
TURN ON TURN OFF<br />
• If the TURN ON is selected when there is no signal or the detected signal is<br />
out of specifications, the blank screen is displayed.<br />
Adjust a Menu Position:<br />
Pressing the or ENTER button start adjusting,<br />
Up<br />
MENU POSITION<br />
Left<br />
Right<br />
MESSAGE<br />
RESET<br />
Down<br />
• The button does not finish this item. When you want to return to the<br />
previous display, please press the ESC button.<br />
Select the Message Mode:<br />
TURN ON TURN OFF<br />
• When the TURN OFF is selected, the following message functions are<br />
disabled:<br />
The message of “AUTO IN PROGRESS”<br />
The message of “NO INPUT IS DETECTED”<br />
The message of “SYNC IS OUT OF RANGE”<br />
The message while being searched for an input signal, “Searching …..”<br />
The message when an input signal is detected, “Detecting …..”<br />
The indication of the input signal by input change.<br />
Reset the SCREEN Menu Items:<br />
Selecting the EXECUTE performs this function.<br />
EXECUTE CANCEL<br />
• The items of the SCREEN menu are collectively returned to the initial setting.<br />
<br />
30
Multifunctional Settings (continued)<br />
OPTION Menu<br />
With the OPTION menu, the items shown in the table below can be performed.<br />
Perform each operation in accordance with the instructions in the table below.<br />
MENU<br />
MAIN<br />
PICTURE-1<br />
PICTURE-2<br />
INPUT<br />
AUTO<br />
SCREEN<br />
OPTION<br />
: SELECT<br />
VOLUME<br />
SCREEN TYPE<br />
LAMP TIME<br />
FILTER TIME<br />
RESET<br />
16<br />
4:3<br />
1234h<br />
21h<br />
Item<br />
Description<br />
VOLUME Adjust Volume: High Low<br />
SCREEN TYPE<br />
LAMP TIME<br />
FILTER TIME<br />
RESET<br />
Select the Screen Type:<br />
4:3 16:9 16:9 16-9<br />
• Please select the screen type used and the picture position in case of 16:9.<br />
This selection is used as basic information for a suitable display. This function<br />
should be performed before other picture adjustment.<br />
To begin the operation of this item, please press the button of the<br />
projector or the RESET button of the remote control for 3 seconds.<br />
Reset the Lamp Timer:<br />
Selecting the RESET performs this function.<br />
RESET CANCEL<br />
• The numerical value of four digits shown on this menu is the projector use<br />
time since the last RESET operation of this item. The value is reset to 0 at the<br />
same time the RESET is selected.<br />
• The value of this function is used to display the message of “CHANGE THE<br />
LAMP”. So this function must be performed only immediately after replacing<br />
the lamp.<br />
Do not perform this function unless you have replaced the lamp. Perform this<br />
function every time the lamp is replaced. Incorrect performing of this function<br />
causes incorrect operation of the message function.<br />
• Please see to the section “Lamp” about replacing the lamp.<br />
<br />
To begin the operation of this item, please press the button of the<br />
projector or the RESET button of the remote control for 3 seconds.<br />
Reset the Filter Timer:<br />
Selecting the RESET performs this function.<br />
RESET CANCEL<br />
• The numerical value of four digits shown on this menu is the projector use<br />
time since the last RESET operation of this item. The value is reset to 0 at the<br />
same time the RESET is selected.<br />
• The value of this function is used to display the message of “CLEAN THE AIR<br />
FILTER”. So this function must be performed only immediately after cleaning<br />
or replacing the air filter.<br />
Do not perform this function unless you have cleaned or replaced the air filter.<br />
Perform this function every time the air filter is cleaned or replaced. Incorrect<br />
performing of this function causes incorrect operation of the message<br />
function.<br />
• Please see to the section “Air Filter” about cleaning and replacing the air<br />
filter.<br />
<br />
Reset the OPTION Menu Items:<br />
Selecting the EXECUTE performs this function.<br />
EXECUTE CANCEL<br />
• The SCREEN TYPE item is returned to the initial setting. Note that the items<br />
VOLUME, LAMP TIME and FILTER TIME are not reset.<br />
<br />
31
<strong>Operating</strong> The PC Screen<br />
You can use the remote control as a simplified mouse or keyboard.<br />
CAUTION Mistaken use of the mouse/keyboard control could damage your equipment.<br />
• Only connect to a PC.<br />
• Before connecting, read the manuals of the device you will connect.<br />
• Do not unplug the connector cables while the computer is operating.<br />
USB Mouse/Keyboard Control<br />
VIDEO<br />
ASPECT<br />
MAGNIFY<br />
ON<br />
OFF<br />
FREEZE<br />
POSITION<br />
ESC<br />
RGB SEARCH<br />
AUTO BLANK<br />
HOME PAGE UP VOLUME<br />
END PAGE DOWN MUTE<br />
KEYSTONE<br />
MENU<br />
ENTER<br />
RESET<br />
1. Connect the projector’s USB terminal to the computer using a USB cable.<br />
The functions in the table below can be controlled.<br />
Available Functions<br />
Remote Control Operation<br />
Move Pointer Use buttons<br />
Left click with mouse<br />
Right click with mouse<br />
Press keyboard’s HOME key<br />
Press keyboard’s END key<br />
Press keyboard’s PAGE UP key<br />
Press keyboard’s PAGE DOWN key<br />
Press keyboard’s ESC key<br />
Press ENTER button<br />
Press RESET button<br />
Press HOME button<br />
Press END button<br />
Press PAGE UP button<br />
Press PAGE DOWN button<br />
Press ESC button<br />
NOTES<br />
• It may not be possible to control notebook PCs, and other computers with built-in pointing devices (e.g.<br />
track balls), using this remote control. In this case, before connecting go into BIOS (system setup) and<br />
select external mouse, and disable the pointing devices. In addition, the mouse may not function if the<br />
computer does not have the needed utility program. See your computer’s hardware manual for details.<br />
• The USB control can be used with Windows 95 OSR 2.1 or higher. It may not be possible to<br />
use the remote control, depending on the computer’s configurations and mouse drivers.<br />
• The USB control can only be used for the functions listed above. You cannot do things like press two buttons<br />
at once (for instance, pressing two buttons at the same time to move the mouse pointer diagonally).<br />
• This function is not available while the lamp is warming up (the POWER indicator flashes green), while adjusting the volume and<br />
display, correcting for trapezoidal distortion, zooming in on the screen, using the BLANK function, or displaying the menu screen.<br />
32
Lamp<br />
WARNING<br />
HIGH VOLTAGE HIGH TEMPERATURE HIGH PRESSURE<br />
The projector uses a high-pressure mercury glass lamp. The lamp can break with a<br />
loud bang, or burn out, if jolted or scratched, handled while hot, or worn over time.<br />
Note that each lamp has a different lifetime, and some may burst or burn out soon after<br />
you start using them. In addition, when the bulb bursts, it is possible for shards of<br />
glass to fly into the lamp housing, and for gas containing mercury to escape from the<br />
projector’s vent holes.<br />
About disposal of a lamp • This product contains a mercury lamp; do not put in<br />
trash. Dispose of in accord with environmental laws.<br />
For lamp recycling, go to www.lamprecycle.org. (in USA)<br />
For product disposal, contact your local government agency or www.eiae.org (in the<br />
US) or www.epsc.ca (in Canada).<br />
For more information, call your dealer.<br />
Disconnect the<br />
plug from the<br />
power outlet<br />
• If the lamp should break (it will make a loud bang when it does), unplug<br />
the power cord from the outlet, and make sure to request a replacement<br />
lamp from your local dealer. Note that shards of glass could damage the<br />
projector’s internals, or cause injury during handling, so please do not try<br />
to clean the projector or replace the lamp yourself.<br />
• If the lamp should break (it will make a loud bang when it does), ventilate<br />
the room well, and make sure not to breathe the gas that comes out of<br />
the projector vents, or get it in your eyes or mouth.<br />
• Before replacing the lamp, make sure the power switch is off and the<br />
power cable is not plugged in, then wait at least 45 minutes for the lamp<br />
to cool sufficiently. Handling the lamp while hot can cause burns, as well<br />
as damaging the lamp.<br />
• Do not open the lamp cover while the projector is suspended from<br />
above. This is dangerous, since if the lamp’s bulb has broken, the<br />
shards will fall out when the cover is opened. In addition, working in high<br />
places is dangerous, so ask your local dealer to have the lamp replaced<br />
even if the bulb is not broken.<br />
• Do not use the projector with the lamp cover removed. At the lamp<br />
replacing, make sure that the screws are screwed in firmly. Loose<br />
screws could result in damage or injury.<br />
• Use only the lamp of the specified type DT00621.<br />
• If the lamp breaks soon after the first time it is used, it is possible that<br />
there are electrical problems elsewhere besides the lamp. If this<br />
happens, contact your local dealer or a service representative.<br />
• Handle with care: jolting or scratching could cause the lamp bulb to<br />
burst during use.<br />
• If the indicators or a message prompts you to replace the lamp (see the<br />
section “Related Messages” and “Regarding the indicator Lamps”),<br />
replace the lamp as soon as possible. Using the lamp for long periods of<br />
time, or past the replacement date, could cause it to burst. Do not use<br />
old (used) lamps; this is a cause of breakage.<br />
33
Lamp (continued)<br />
Replacing The Lamp<br />
WARNING • Please carefully read the “User’s <strong>Manual</strong> - Safety <strong>Guide</strong>”.<br />
CAUTION • Do not reset the lamp timer without replacing the lamp.<br />
• When you replace the lamp, please replace also the air filter. The air filter may be<br />
attached when you buy a replacement lamp for this projector. Please ask your dealer.<br />
If the indicators or a message prompts you to replace the lamp, replace the lamp as soon<br />
as possible. Using the lamp for long periods of time, or past the replacement date, could<br />
cause it to burst. If the projector is mounted on the ceiling, or if the lamp has broken, do<br />
not try to clean the projector or replace the lamp yourself.<br />
Turn off the projector, and unplug the power cord. Allow the lamp<br />
1<br />
bulb to cool for at least 45 minutes.<br />
2<br />
Contact your local dealer to prepare a new lamp. Tell the dealer<br />
your lamp type number. If the projector is mounted on the ceiling,<br />
or if the lamp has broken, also ask the dealer to replace the lamp.<br />
In the case of replacement by yourself,<br />
After making sure that the projector<br />
3<br />
has cooled adequately, slowly flip<br />
over the projector, so that the bottom<br />
is facing up.<br />
4<br />
Hold the release button while sliding<br />
and taking up the lamp cover.<br />
Lamp cover<br />
Release button<br />
5<br />
6<br />
Unscrew the 2 screws, and slowly<br />
pick up the lamp by the handles.<br />
Insert the new lamp, and tighten the 2<br />
screws firmly to lock it in place.<br />
Handles<br />
Screws<br />
34<br />
7<br />
8<br />
9<br />
Slide the lamp cover into place until it locks into position.<br />
Slowly turn the projector so that the top is facing up.<br />
Turn on the projector, and reset the lamp timer. When the lamp has<br />
been replaced after the message of “THE POWER WILL TURN OFF<br />
AFTER 0hr.” is displayed, complete the following operation within<br />
10 minutes of switching power on.<br />
(1) While the projector running, press the MENU button to open the menu.<br />
(2) Choose the “OPTION” on the menu using the / button, then press the button<br />
or ENTER button.<br />
(3) Choose the “LAMP TIME” using the / button, then press and hold the button<br />
of projector or the RESET button of remote control for 3 seconds.<br />
(4) Choose the “RESET” using the button.
Air Filter<br />
WARNING • Please carefully read the “User’s <strong>Manual</strong> - Safety <strong>Guide</strong>”.<br />
• Before replacing the air filter, make sure the power switch is off and the power cable<br />
is not plugged in.<br />
• Use the air filter of the specified type only. Type number: NJ08292 (sold separately)<br />
• Do not use the projector with the air filter and filter cover removed. The use without<br />
the air filter could result in damage.<br />
CAUTION • Do not reset the filter timer without cleaning or replacing the air filter.<br />
• If the air filter becomes clogged by dust or the like, internal temperature rises and<br />
could cause malfunction. The power is automatically turned off in order to prevent the<br />
projector from overheating internally.<br />
• When you replace the lamp, please replace also the air filter. The air filter may be<br />
attached when you buy a replacement lamp for this projector. Please ask your dealer.<br />
Caring For The Air Filter<br />
The air filter should be cleaned about every 100 hours. If the indicators or a message<br />
prompts you to clean the air filter (see the section “Related Messages” and “Regarding<br />
The Indicator Lamps”), clean the air filter as soon as possible. If the air filter becomes<br />
clogged by dust or the like, internal temperature rises and could cause malfunction.<br />
1<br />
Turn off the projector, and unplug the power cord.<br />
Filter Cover<br />
Apply a vacuum cleaner to<br />
2<br />
the top of the filter cover to<br />
clean the air filter.<br />
3<br />
(1) Turn on the projector. While the projector running, press the MENU button to<br />
open the menu.<br />
(2) Choose the “OPTION” on the menu using the / button, then press the<br />
button or ENTER button.<br />
(3) Choose the “FILTER TIME” using the / button, then press and hold the<br />
button of projector or the RESET button of remote control for 3 seconds.<br />
(4) Choose the “RESET” using the button.<br />
35
Replacing The Air Filter<br />
If the soiling will not come off the air filter, or it becomes damaged, then it needs to be<br />
replaced. Please replace the air filter as soon as possible.<br />
1<br />
2<br />
Air Filter (continued)<br />
Turn off the projector, and unplug the power cord.<br />
Contact your local dealer to prepare a<br />
new air filter. Tell the dealer your air<br />
filter type number.<br />
Filter cover<br />
3<br />
4<br />
After making sure that the projector<br />
has cooled adequately, remove the<br />
filter cover. Hold the release buttons of<br />
the filter cover, while pulling up it.<br />
Hold the release buttons of the air<br />
filter, while pulling down it.<br />
Release buttons<br />
Release buttons<br />
Air filter<br />
5<br />
6<br />
Insert a new air filter, and replace the filter cover.<br />
Reset the filter timer.<br />
(1) Turn on the projector. While the projector running, press the MENU button to<br />
open the menu.<br />
(2) Choose the “OPTION” on the menu using the / button, then press the<br />
button or ENTER button.<br />
(3) Choose the “FILTER TIME” using the / button, then press and hold the<br />
button of projector or the RESET button of remote control for 3 seconds.<br />
(4) Choose the “RESET” using the button.<br />
36
Other Care<br />
WARNING • Please carefully read the “User’s <strong>Manual</strong> - Safety <strong>Guide</strong>”.<br />
• Before replacing the air filter, make sure the power switch is off and the power cable<br />
is not plugged in.<br />
ATTENTION • Do not use cleaners or chemicals other than those listed below,<br />
including benzene and paint thinner.<br />
• Do not use aerosols or sprays.<br />
• Do not polish or wipe with hard objects.<br />
Caring For The Inside Of The Projector<br />
In order to ensure the safe use of your projector, please have it cleaned and inspected by<br />
your local dealer about once every 2 years. Never try to care for the inside of the unit<br />
yourself. Doing so is dangerous.<br />
Caring For The Lens<br />
1<br />
2<br />
Turn off the projector, and unplug the<br />
power cord.<br />
Lightly wipe the lens with a<br />
commercially available lens-cleaning<br />
wipe. Do not touch the lens directly<br />
with your hand.<br />
Lens<br />
Caring For The Cabinet And Remote Control<br />
1<br />
Turn off the projector, and unplug the power cord.<br />
2<br />
Wipe lightly with gauze or a soft cloth.<br />
If soiling is severe, dip soft cloth in water or a neutral cleaner dilute in water, and<br />
wipe lightly after wringing well. Then, wipe lightly with a soft, dry cloth.<br />
37
Troubleshooting<br />
Related Messages<br />
When the unit's power is ON, messages such as those shown below may be displayed.<br />
When any such message is displayed on the screen, please respond as described<br />
below. If the same message is displayed after the treatment, or if a message other than<br />
the following appears, please contact your dealer or service company.<br />
Message<br />
CHANGE THE LAMP<br />
AFTER REPLACING LAMP,<br />
RESET THE LAMP TIMER.<br />
(*1)<br />
CHANGE THE LAMP<br />
AFTER REPLACING LAMP,<br />
RESET THE LAMP TIMER.<br />
THE POWER WILL TURN OFF<br />
AFTER ** hr.<br />
(*1)<br />
CHANGE THE LAMP<br />
AFTER REPLACING LAMP,<br />
RESET THE LAMP TIMER.<br />
THE POWER WILL TURN OFF<br />
AFTER 0 hr.<br />
NO INPUT IS DETECTED<br />
ON ***<br />
SYNC IS OUT OF RANGE<br />
ON *** fH *****kHz fV *****Hz<br />
CHECK THE AIR FLOW<br />
Description<br />
Lamp usage time is approaching 2000 hours. (*2)<br />
Preparation of a new lamp, and an early lamp change is<br />
recommended. After you have changed the lamp, please be<br />
sure to reset the lamp timer.<br />
Lamp usage time is approaching 2000 hours. (*2)<br />
A lamp change within ** hours is recommended. When lamp<br />
usage reaches 2000 hours, the power will automatically be<br />
turned OFF. Please change the lamp by referring to the “Lamp”<br />
section of this manual. After you have changed the lamp,<br />
please be sure to reset the lamp timer.<br />
As lamp use has reached 2000 hours (*2), the power will soon<br />
be automatically turned OFF.<br />
Please immediately turn the power off, and change the lamp by<br />
referring to the “Lamp” section of this manual. After you have<br />
changed the lamp, please be sure to reset the lamp timer.<br />
There is no input signal.<br />
Please confirm the signal input connection, and the status of the<br />
signal source.<br />
The horizontal or vertical wavelength of the inputted signal is<br />
outside of the response parameters of this unit.<br />
Please confirm the specs for this unit or the signal source<br />
specs.<br />
The internal portion temperature is rising.<br />
Please turn the power OFF, and allow the unit to cool down at<br />
least 20 minutes. After having confirmed the following items,<br />
please turn the power ON again.<br />
• Is there blockage of the air passage aperture<br />
• Is the air filter dirty<br />
• Does the peripheral temperature exceed 35°C<br />
NOTE (*1) • Although this message will be automatically disappeared after around 3 minutes, it will be reappeared<br />
every time the power is turned ON.<br />
(*2) • Lamps have a finite product life. Lamps are characterized by the fact that, after long hours of usage, a lamp will no<br />
longer light up, or the lamp will break or burst, etc. This unit is equipped with an automatic shut-down function, such that<br />
the power will automatically be turned OFF when lamp usage time has reached 2,000 hours. Please be aware, however,<br />
that among lamp types, there are major differences in product lifetimes; a lamp may thus fail to light even prior to the<br />
functioning of the automatic shut-down function of this unit.<br />
38
Troubleshooting (continued)<br />
Related Messages (continued)<br />
Message<br />
CLEAN THE AIR FILTER<br />
POWER OFF FIRST,<br />
THEN CLEAN THE AIR FILTER.<br />
AFTER CLEANING THE AIR<br />
FILTER,<br />
RESET THE FILTER TIMER.<br />
Description<br />
A note of precaution when cleaning the air filter.<br />
Please immediately turn the power OFF, and clean or change<br />
the air filter by referring to the “Air Filter” section of this manual.<br />
After you have cleaned or changed the air filter, please be sure<br />
to reset the filter timer.<br />
If the same message is displayed after the treatment, please<br />
clean the transparent area of filter cover and the dust-detecting<br />
window, according to the following.<br />
ATTENTION • The transparent area of filter cover and the dust-detecting window<br />
should be cleaned for normal operation of the optical dust detecting system. Please<br />
pay attention not to remain fiber or fragment of cloth inside the duct.<br />
1<br />
2<br />
3<br />
Turn off the projector, and unplug the<br />
power cord.<br />
After making sure that the projector<br />
has cooled adequately, remove the<br />
filter cover.<br />
Hold the release buttons of the filter cover, while<br />
pulling up it.<br />
Wipe the transparent area of the filter<br />
cover by using a swab or a soft cloth.<br />
Filter cover<br />
Release buttons<br />
Filter cover<br />
4<br />
Remove the air filter.<br />
Hold the release buttons of the air filter, while pulling<br />
down it.<br />
Transparent area<br />
Release buttons<br />
5<br />
Wipe the dust-detecting window by<br />
using a soft cloth.<br />
Air filter<br />
Dust detecting window<br />
(Rear side)<br />
(Bottom side)<br />
6<br />
Replace the air filter and filter cover.<br />
39
Troubleshooting (continued)<br />
Regarding The Indicator Lamps<br />
ATTENTION • When the interior portion has become overheated, for safety<br />
purposes, the power source is automatically turned off, and the indicator lamps may<br />
also be turned off. In such a case, press the “” (power OFF) side of the main power<br />
switch, and wait at least 45 minutes. After the unit has sufficiently cooled down, please<br />
make confirmation of the attachment state of the lamp and lamp cover, and then turn<br />
the power on again.<br />
Lighting and flashing of the POWER indicator, the LAMP indicator, and the TEMP indicator<br />
have the meanings as described in the table below. Please respond in accordance with the<br />
instructions within the table. If the same indication is displayed after the treatment, or if an<br />
indication other than the following is displayed, please contact your dealer or service<br />
company.<br />
POWER<br />
indicator<br />
Lighting in<br />
orange<br />
Flashing in<br />
green<br />
Lighting in<br />
green<br />
Flashing in<br />
orange<br />
Blinking in<br />
red<br />
Lighting or<br />
blinking in<br />
red<br />
Lighting or<br />
blinking in<br />
red<br />
LAMP<br />
indicator<br />
Turned off<br />
TEMP<br />
indicator<br />
Turned off<br />
Turned off Turned off<br />
Turned off Turned off<br />
Turned off Turned off<br />
- -<br />
Lighting in<br />
red<br />
Blinking in<br />
red<br />
Turned off<br />
Turned off<br />
Description<br />
The unit is in a standby state. Please refer to the “Power<br />
ON/OFF” section of this manual.<br />
The unit is warming up. Please wait.<br />
The unit is in an ON state. Ordinary operations may be<br />
performed.<br />
The unit is cooling down. Please wait.<br />
The unit is cooling down. A certain error has been detected.<br />
Wait until the POWER indicator has finished flashing, and then<br />
perform the proper response measure using the item<br />
descriptions below as reference.<br />
The projector lamp has not been properly fixed (attached),<br />
the projector lamp does not light, and/or there is a possibility<br />
that the interior portion has become heated. Turn the power<br />
OFF and wait at least 20 minutes. After the unit has sufficiently<br />
cooled down, please make confirmation of the following items,<br />
and then turn the power ON again. If the same indication is<br />
displayed, please change the lamp.<br />
• Is there blockage of the air passage aperture<br />
• Is the air filter is dirty<br />
• Does the peripheral temperature exceed 35°C<br />
The lamp cover has not been properly fixed (attached). Turn<br />
the power OFF and wait at least 45 minutes. After the unit has<br />
sufficiently cooled down, please make confirmation of the<br />
attachment state of the lamp and lamp cover, and then turn<br />
the power ON again.<br />
40
Troubleshooting (continued)<br />
Regarding The Indicator Lamps (continued)<br />
POWER<br />
indicator<br />
LAMP<br />
indicator<br />
TEMP<br />
indicator<br />
Description<br />
Lighting or<br />
blinking in<br />
red<br />
Turned off<br />
Blinking in<br />
red<br />
The cooling fan is not operating. Turn the power OFF and wait<br />
at least 20 minutes. After the unit has sufficiently cooled down,<br />
please make confirmation of the following item, and then<br />
resent the power to ON.<br />
• Is there no foreign matter caught in the cooling fan<br />
Lighting or<br />
blinking in<br />
red<br />
Lighting in<br />
green<br />
Lighting in<br />
green<br />
Turned off<br />
Lighting in<br />
red<br />
Alternative blinking in<br />
the red<br />
Simultaneous blinking<br />
in red<br />
There is a possibility that the interior portion has become<br />
heated. Turn the power OFF and wait at least 20 minutes.<br />
After the unit has sufficiently cooled down, please make<br />
confirmation of the following item, and then resent the power<br />
to ON.<br />
• Is there blockage of the air passage aperture<br />
• Is the air filter is dirty<br />
• Does the peripheral temperature exceed 35°C<br />
There is a possibility that the interior portion has become<br />
overcooled. Please use the unit within the usage temperature<br />
parameters (0°C to 35°C). After the treatment, resent the<br />
power to ON.<br />
It is time to clean the air filter, or there is no air filter. Please<br />
immediately turn the power OFF, and clean or change the air<br />
filter by referring to the “Air Filter” section of this manual. After<br />
you have cleaned or changed the air filter, please be sure to<br />
reset the filter timer. After the treatment, resent the power to<br />
ON.<br />
41
Troubleshooting (continued)<br />
Phenomena That May Easily Be Mistaken For Machine Defects<br />
WARNING • Please carefully read the “User’s <strong>Manual</strong> - Safety <strong>Guide</strong>”.<br />
Never use the projector if abnormal operations such as smoke, strange odor, excessive<br />
sound, damaged casing or elements or cables, penetration of liquids or foreign matter,<br />
etc. should occur.<br />
NOTE • Although bright spots or dark spots may appear on the screen, this is a<br />
unique characteristic of liquid crystal displays, and such do not constitute or imply a<br />
machine defect.<br />
Before requesting repair, please check in accordance with the following chart. If the<br />
situation cannot be corrected, then contact your dealer.<br />
42<br />
Phenomenon<br />
Power does not<br />
come ON.<br />
Neither sounds<br />
nor pictures are<br />
outputted.<br />
Pictures are<br />
displayed,<br />
but no sounds<br />
are heard.<br />
Sounds are<br />
heard,<br />
but no pictures<br />
are displayed.<br />
Colors have a<br />
faded- out<br />
appearance, or<br />
Color tone is<br />
poor.<br />
Cases not involving a machine defect,<br />
and Items to be confirmed<br />
The main power source is not ON.<br />
Turn on the main power.<br />
The electrical power cord is not plugged in.<br />
Correctly connect the power cord.<br />
The main power source has been interrupted during operation,<br />
such as by a power outage (blackout), etc.<br />
Be sure to press the “” (power OFF) side of the main power switch,<br />
and leave this OFF for at least 20 minutes. After the unit has<br />
sufficiently cooled down, turn ON the power source.<br />
The input changeover settings are mismatched.<br />
Select the input signal, and correct the settings.<br />
No signal is being inputted.<br />
Correctly connect the connection cables.<br />
The electrical wiring to this unit is not correctly connected.<br />
Correctly connect the connection cables.<br />
The volume setting has been set at (or adjusted to) an<br />
extremely low level.<br />
Adjust the VOLUME setting to a higher level.<br />
The MUTE mode is the current setting.<br />
Press the MUTE button to release (change) the MUTE mode setting.<br />
The electrical wiring to this unit is not correctly connected.<br />
Correctly connect the connection cables.<br />
The brightness setting has been set at (or adjusted to) an<br />
extremely low level.<br />
Adjust the BRIGHT setting to a brighter level.<br />
The lens cap has not been removed.<br />
Remove the lens cap.<br />
Color settings are not correctly adjusted.<br />
Perform picture adjustments by changing the COLOR BAL R,<br />
COLOR BAL G, COLOR BAL B, COLOR, and/or the TINT settings,<br />
etc.<br />
Reference<br />
pages<br />
11,14<br />
14<br />
15<br />
10<br />
10<br />
17<br />
17<br />
10<br />
23<br />
4,14<br />
24
Troubleshooting (continued)<br />
Phenomena That May Easily Be Mistaken For Machine Defects (continued)<br />
Phenomenon<br />
Pictures appear<br />
dark.<br />
Pictures appear<br />
blurry.<br />
Cases not involving a machine defect,<br />
and Items to be confirmed<br />
The brightness setting and/or contrast setting has not been<br />
properly adjusted.<br />
Perform picture adjustments by changing the BRIGHT and/or<br />
CONTRAST settings, etc.<br />
The WHISPER mode is the current setting.<br />
Change (by releasing) from the WHISPER mode.<br />
Lamp is approaching the end of its product lifetime.<br />
Exchange the old lamp with a new lamp.<br />
Either the FOCUS setting or the H PHASE is not properly<br />
adjusted.<br />
Adjust the focus and the H PHASE setting.<br />
The lens is dirty or misty.<br />
Clean the lens.<br />
Reference<br />
pages<br />
23<br />
32,33<br />
15,26<br />
36<br />
Warranty And After-Service<br />
If a problem occurs with the equipment, first refer to the “Troubleshooting” section of this<br />
manual, and run through the suggested checks. If this does not resolve the problem<br />
contact your dealer or service company. They will tell you what warranty condition is<br />
applied.<br />
43
Specifications<br />
Item<br />
Specification<br />
Product name<br />
Liquid crystal projector<br />
Liquid Panel size<br />
1.4 cm (0.55 type)<br />
crystal Drive system TFT active matrix<br />
panel Pixels<br />
480,000 pixels (800 horizontal x 600 vertical)<br />
Lens<br />
Zoom lens F=1.6 ~ 1.8 f=16.8 ~ 20.1 mm<br />
Lamp<br />
160W UHB<br />
Speaker 1.0W<br />
Power supply AC100 ~ 120V, 2.6A / AC220 ~ 240V, 1.4A<br />
Power consumption<br />
240W<br />
Temperature range<br />
0 ~ 35°C (<strong>Operating</strong>)<br />
Size<br />
332 (W) x 92 (H) x 254 (D) mm (Not including protruding parts)<br />
Weight (mass)<br />
3.0 kg<br />
Ports<br />
Optional Parts<br />
RGB Input Port<br />
RGB IN ..........................1<br />
RGB Output Port<br />
RGB OUT........................1<br />
VIDEO Input Ports<br />
VIDEO ............................1<br />
S-VIDEO ........................1<br />
COMPONENT VIDEO<br />
(CR/PR, CB/PB, Y) ............1<br />
Lamp: DT00621 Air Filter: NJ08292<br />
For others, consult your dealer.<br />
AUDIO Input Ports<br />
AUDIO IN........................1<br />
AUDIO R, L.....................1<br />
AUDIO Output Port<br />
AUDIO OUT....................1<br />
CONTROL Port<br />
CONTROL ....................1<br />
USB Port<br />
USB ................................1<br />
NOTE<br />
• This specifications are subject to change without notice.<br />
AC IN<br />
332<br />
254<br />
85.5<br />
71<br />
110<br />
92<br />
39<br />
44