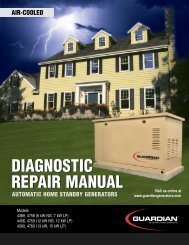
Quietpact 40G Diagnostic Repair Manual Model 4700 - Generac Parts
Quietpact 40G Diagnostic Repair Manual Model 4700 - Generac Parts
Quietpact 40G Diagnostic Repair Manual Model 4700 - Generac Parts

You also want an ePaper? Increase the reach of your titles
YUMPU automatically turns print PDFs into web optimized ePapers that Google loves.
diagnostic<br />
repair<br />
manual<br />
®<br />
QuietPact ® <strong>40G</strong> & 40LP<br />
MODELS:<br />
<strong>4700</strong><br />
4701<br />
4709<br />
recreational vehicle generators
SAFETY<br />
Throughout this publication, “DANGER!” and “CAUTION!” blocks are used to alert the mechanic to special<br />
instructions concerning a particular service or operation that might be hazardous if performed incorrectly or<br />
carelessly. PAY CLOSE ATTENTION TO THEM.<br />
*<br />
DANGER!<br />
UNDER THIS HEADING WILL BE FOUND SPECIAL INSTRUCTIONS WHICH, IF NOT COMPLIED<br />
WITH, COULD RESULT IN PERSONAL INJURY OR DEATH.<br />
*<br />
CAUTION!<br />
Under this heading will be found special instructions which, if not complied with, could result<br />
in damage to equipment and/or property.<br />
These “Safety Alerts” alone cannot eliminate the hazards that they signal. Strict compliance with these special<br />
Instructions plus “common sense” are major accident prevention measures.<br />
NOTICE TO USERS OF THIS MANUAL<br />
This SERVICE MANUAL has been written and published by <strong>Generac</strong> to aid our dealers’ mechanics and company<br />
service personnel when servicing the products described herein.<br />
It is assumed that these personnel are familiar with the servicing procedures for these products, or like or similar<br />
products manufactured and marketed by <strong>Generac</strong>. That they have been trained in the recommended servicing<br />
procedures for these products, including the use of common hand tools and any special <strong>Generac</strong> tools<br />
or tools from other suppliers.<br />
<strong>Generac</strong> could not possibly know of and advise the service trade of all conceivable procedures by which a<br />
service might be performed and of the possible hazards and/or results of each method. We have not undertaken<br />
any such wide evaluation. Therefore, anyone who uses a procedure or tool not recommended by<br />
<strong>Generac</strong> must first satisfy himself that neither his nor the products safety will be endangered by the service<br />
procedure selected.<br />
All information, illustrations and specifications in this manual are based on the latest product information available<br />
at the time of publication.<br />
When working on these products, remember that the electrical system and engine ignition system are capable<br />
of violent and damaging short circuits or severe electrical shocks. If you intend to perform work where electrical<br />
terminals could be grounded or touched, the battery cables should be disconnected at the battery.<br />
Any time the intake or exhaust openings of the engine are exposed during service, they should be covered to<br />
prevent accidental entry of foreign material. Entry of such materials will result in extensive damage when the<br />
engine Is started.<br />
During any maintenance procedure, replacement fasteners must have the same measurements and strength<br />
as the fasteners that were removed. Metric bolts and nuts have numbers that indicate their strength.<br />
Customary bolts use radial lines to indicate strength while most customary nuts do not have strength markings.<br />
Mismatched or incorrect fasteners can cause damage, malfunction and possible injury.<br />
REPLACEMENT PARTS<br />
Components on <strong>Generac</strong> recreational vehicle generators are designed and manufactured to comply with<br />
Recreational Vehicle Industry Association (RVIA) Rules and Regulations to minimize the risk of fire or explosion.<br />
The use of replacement parts that are not in compliance with such Rules and Regulations could result in<br />
a fire or explosion hazard. When servicing this equipment, It is extremely important that all components be<br />
properly installed and tightened. If Improperly Installed and tightened, sparks could Ignite fuel vapors from fuel<br />
system leaks.<br />
Page 2
Table of Contents<br />
Safety ............................ Inside Front Cover<br />
Section 1:<br />
Generator Fundamentals .........................3-6<br />
Magnetism ................................................................... 3<br />
Electromagnetic Fields ....................................... 3<br />
Electromagnetic Induction ................................ 3<br />
A Simple AC Generator ........................................... 4<br />
A More Sophisticated AC Generator ................ 4<br />
Field Boost ................................................................. 6<br />
Generator AC Connection System ................... 6<br />
Section 2:<br />
Major Generator Components.................7-9<br />
Rotor Assembly......................................................... 7<br />
Stator Assembly........................................................ 7<br />
Brush Holder ............................................................ 7<br />
Battery Charge Components ............................. 8<br />
Excitation Circuit Components ......................... 8<br />
Breather Assembly ................................................. 9<br />
Section 3:<br />
Insulation Resistance Tests ................10-12<br />
Effects of Dirt and Moisture .......................... 10<br />
Insulation Resistance Testers ........................ 10<br />
Drying the Generator ......................................... 10<br />
Cleaning the Generator ..................................... 10<br />
Stator Insulation Resistance ........................... 11<br />
Testing Rotor Insulation ................................... 12<br />
The Megohmmeter ................................................. 12<br />
Section 4:<br />
Measuring Electricity ............................13-15<br />
Meters ....................................................................... 13<br />
The VOM ...................................................................... 13<br />
Measuring AC Voltage .......................................... 13<br />
Measuring DC Voltage .......................................... 13<br />
Measuring AC Frequency ................................... 14<br />
Measuring Current .............................................. 14<br />
Measuring Resistance ......................................... 14<br />
Electrical Units .................................................... 15<br />
Ohm’s Law .................................................................. 15<br />
Section 5:<br />
Engine DC Control System ....................16-24<br />
Introduction ........................................................... 16<br />
Operational Analysis ........................................... 16<br />
Engine Controller Circuit Board .................. 22<br />
Battery ...................................................................... 22<br />
7.5 Amp Fuse .............................................................. 23<br />
Fuel Primer Switch ............................................... 23<br />
Start-Stop Switch .................................................. 23<br />
Starter Contactor & Motor .............................. 24<br />
Section 6:<br />
Troubleshooting Flowcharts .................... 25-35<br />
If Problem Involves AC Output ......................... 25<br />
Problem 1 –<br />
Voltage & Frequency are Both<br />
High or Low .............................................................. 25<br />
Problem 2 –<br />
Generator Produces Zero Voltage or<br />
Residual Voltage (5-12 VAC) ................................. 26<br />
Problem 3 –<br />
No Battery Charge Output ................................ 27<br />
Problem 4 –<br />
Excessive Voltage/Frequency Droop<br />
When Load Is Applied ............................................ 28<br />
Problem 5 –<br />
Priming Function Does Not Work .................... 28<br />
Problem 6 –<br />
Engine Will Not Crank ......................................... 29<br />
Problem 7 –<br />
Engine Cranks but Will Not Start ............. 30-31<br />
Problem 8 –<br />
Engine Starts Hard and Runs Rough ........ 32-33<br />
Problem 9 –<br />
Engine Starts Then Shuts Down ...................... 34<br />
Problem 10 –<br />
7.5 Amp (F1) Fuse Blowing ..................................... 35<br />
Section 7:<br />
<strong>Diagnostic</strong> Tests........................................36-60<br />
Test 1 –<br />
Check No-Load Voltage And Frequency........................ 36<br />
Test 2 –<br />
Check Engine Governor................................................. 36<br />
Test 3 –<br />
Test Excitation Circuit Breaker........................................ 37<br />
Test 4 –<br />
Fixed Excitation Test/Rotor Amp Draw .......................... 37<br />
Test 5 –<br />
Wire Continuity............................................................... 38<br />
Test 6 –<br />
Check Field Boost.......................................................... 38<br />
Test 7 –<br />
Test Stator DPE Winding................................................ 39<br />
Test 8 –<br />
Check Sensing Leads/Power Windings.......................... 40<br />
Test 9 –<br />
Check Brush Leads........................................................ 41<br />
Test 10 –<br />
Check Brushes & Slip Rings.......................................... 41<br />
Test 11 –<br />
Check Rotor Assembly................................................... 41<br />
Test 12 –<br />
Check Main Circuit Breakers.......................................... 42<br />
Test 13 –<br />
Check Load Voltage & Frequency.................................. 42<br />
Page 1
Table of Contents<br />
Test 14 –<br />
Check Load Watts & Amperage..................................... 42<br />
Test 15 –<br />
Check Battery Charge Output........................................ 43<br />
Test 16 –<br />
Check Battery Charge Rectifier...................................... 43<br />
Test 17 –<br />
Check Battery Charge Windings/<br />
Battery Charge Resistor................................................. 43<br />
Test 18 –<br />
Try Cranking the Engine................................................. 44<br />
Test 19 –<br />
Test Primer Switch.......................................................... 44<br />
Test 20 –<br />
Check Fuel Pump........................................................... 45<br />
Test 21 –<br />
Check 7.5 Amp Fuse...................................................... 46<br />
Test 22 –<br />
Check Battery & Cables................................................. 46<br />
Test 23 –<br />
Check Power Supply to Circuit Board............................. 47<br />
Test 24 –<br />
Check Start-Stop Switch................................................ 47<br />
Test 25 –<br />
Check Power Supply to Wire 56..................................... 48<br />
Test 26 –<br />
Check Starter Contactor................................................. 48<br />
Test 27 –<br />
Check Starter Motor....................................................... 49<br />
Test 28 –<br />
Check Fuel Supply......................................................... 50<br />
Test 29 –<br />
Check Wire 14 Power Supply......................................... 51<br />
Test 30 –<br />
Check Wire 18................................................................ 52<br />
Test 31 –<br />
Check Fuel Solenoid...................................................... 52<br />
Test 32 –<br />
Check Ignition Spark...................................................... 53<br />
Test 33 –<br />
Check Spark Plug........................................................... 53<br />
Test 34 –<br />
Check Ignition Coil......................................................... 54<br />
Test 35 –<br />
Check Valve Adjustment................................................. 55<br />
Test 36 –<br />
Check Carburetion ......................................................... 55<br />
Test 37 –<br />
Check Choke Solenoid .................................................. 56<br />
Test 38 –<br />
Check Engine / Cylinder Leak Down Test /<br />
Compression Test .......................................................... 58<br />
Test 39 –<br />
Check Oil Pressure Switch ............................................ 59<br />
Test 40 –<br />
Check Oil Temperature Switch ...................................... 59<br />
Test 41 –<br />
Test Choke Heater ......................................................... 60<br />
Test 42 –<br />
Check LPG Fuel Solenoid ............................................. 60<br />
Section 8:<br />
Assembly............................................................. 63<br />
Major disassembly................................................. 63<br />
Enclosure/Panels ...................................................... 63<br />
Rotor/Stator Removal................................................. 63<br />
Flywheel/Ignition Coil Removal.................................. 63<br />
Section 9:<br />
Exploded Views / Part Numbers...........64-85<br />
Enclosure Drawing (LP Units) .......................... 64<br />
Generator Drawing (LP Units) .......................... 66<br />
Control Panel Drawing (LP Units) ................... 68<br />
GN-220 H/SH Engine Drawing (LP Units) ...... 70-73<br />
Gas Regulator Assembly (LP Units) ................ 74<br />
Enclosure Drawing (Gasoline Units) ............ 76<br />
Generator Drawing (Gasoline Units) ............ 78<br />
Control Panel Drawing<br />
(Gasoline Units) ...................................................... 80<br />
GN-220 H/SH Engine Drawing<br />
(Gasoline Units) ................................................ 82-85<br />
Section 10:<br />
Specifications & Charts..........................86-89<br />
Major Features And Dimensions ................. 86-87<br />
Compartment Floor Cutout............................... 88<br />
Generator Specifications .................................. 90<br />
Nominal Resistances of<br />
Generator Windings at 68°F ............................... 90<br />
Engine Speeds and<br />
Voltage Specifications ........................................ 90<br />
Torque Specifications ......................................... 91<br />
Section 11:<br />
Electrical Data..........................................92-93<br />
Electrical Schematic and<br />
Wiring Diagram .................................................. 92-93<br />
Page 2
Section 1<br />
GENERATOR FUNDAMENTALS<br />
Magnetism<br />
Magnetism can be used to produce electricity and<br />
electricity can be used to produce magnetism.<br />
Much about magnetism cannot be explained by our<br />
present knowledge. However, there are certain patterns<br />
of behavior that are known. Application of these<br />
behavior patterns has led to the development of generators,<br />
motors and numerous other devices that utilize<br />
magnetism to produce and use electrical energy.<br />
See Figure 1-1. The space surrounding a magnet is<br />
permeated by magnetic lines of force called “flux”.<br />
These lines of force are concentrated at the magnet’s<br />
north and south poles. They are directed away from<br />
the magnet at its north pole, travel in a loop and reenter<br />
the magnet at its south pole. The lines of force<br />
form definite patterns which vary in intensity depending<br />
on the strength of the magnet. The lines of force<br />
never cross one another. The area surrounding a magnet<br />
in which its lines of force are effective is called a<br />
“magnetic field”.<br />
Like poles of a magnet repel each other, while unlike<br />
poles attract each other.<br />
NOTE: The “right hand rule” is based on the “current<br />
flow” theory which assumes that current<br />
flows from positive to negative. This is opposite<br />
the “electron” theory, which states that current<br />
flows from negative to positive.<br />
Figure 1-2. – The Right Hand Rule<br />
Electromagnetic Induction<br />
Figure 1-1. – Magnetic Lines of Force<br />
Electromagnetic Fields<br />
All conductors through which an electric current Is<br />
flowing have a magnetic field surrounding them. This<br />
field is always at right angles to the conductor. If a<br />
compass is placed near the conductor, the compass<br />
needle will move to a right angle with the conductor.<br />
The following rules apply:<br />
• The greater the current flow through the conductor,<br />
the stronger the magnetic field around the conductor.<br />
• The increase in the number of lines of force is<br />
directly proportional to the increase in current flow<br />
and the field is distributed along the full length of the<br />
conductor.<br />
• The direction of the lines of force around a conductor<br />
can be determined by what is called the “right<br />
hand rule”. To apply this rule, place your right hand<br />
around the conductor with the thumb pointing in the<br />
direction of current flow. The fingers will then be<br />
pointing in the direction of the lines of force.<br />
An electromotive force (EMF) or voltage can be produced<br />
in a conductor by moving the conductor so that<br />
it cuts across the lines of force of a magnetic field.<br />
Similarly, if the magnetic lines of force are moved so<br />
that they cut across a conductor, an EMF (voltage) will<br />
be produced in the conductor. This is the basic principal<br />
of the revolving field generator.<br />
Figure 1-3, below, illustrates a simple revolving field<br />
generator. The permanent magnet (Rotor) is rotated<br />
so that its lines of magnetic force cut across a coil of<br />
wires called a Stator. A voltage is then induced into<br />
the Stator windings. If the Stator circuit is completed<br />
by connecting a load (such as a light bulb), current will<br />
flow in the circuit and the bulb will light.<br />
Figure 1-3. – A Simple Revolving Field Generator<br />
Page 3
Section 1<br />
GENERATOR FUNDAMENTALS<br />
A Simple AC Generator<br />
Figure 1-4 shows a very simple AC Generator. The<br />
generator consists of a rotating magnetic field called a<br />
ROTOR and a stationary coil of wire called a STATOR.<br />
The ROTOR is a permanent magnet which consists of<br />
a SOUTH magnetic pole and a NORTH magnetic<br />
pole.<br />
As the MOTOR turns, its magnetic field cuts across<br />
the stationary STATOR. A voltage is induced Into the<br />
STATOR windings. When the magnet’s NORTH pole<br />
passes the STATOR, current flows in one direction.<br />
Current flows in the opposite direction when the magnet’s<br />
SOUTH pole passes the STATOR. This constant<br />
reversal of current flow results in an alternating current<br />
(AC) waveform that can be diagrammed as shown in<br />
Figure 1-5.<br />
The ROTOR may be a 2-pole type having a single<br />
NORTH and a single SOUTH magnetic pole. Some<br />
ROTORS are 4-pole type with two SOUTH and two<br />
NORTH magnetic poles. The following apply:<br />
1. The 2-pole ROTOR must be turned at 3600 rpm to produce an<br />
AC frequency of 60 Hertz, or at 3000 rpm to deliver an AC frequency<br />
of 50 Hertz.<br />
2. The 4-pole ROTOR must operate at 1800 rpm to deliver a 60<br />
Hertz AC frequency or at 1500 rpm to deliver a 50 Hertz AC<br />
frequency.<br />
(+)<br />
(-)<br />
CURRENT<br />
0 180 360<br />
ONE CYCLE<br />
VOLTAGE<br />
Figure 1-5. – Alternating Current Sine Wave<br />
A More Sophisticated AC Generator<br />
Figure 1-6 represents a more sophisticated generator.<br />
A regulated direct current is delivered into the ROTOR<br />
windings via carbon BRUSHES AND SLIP RINGS.<br />
This results in the creation of a regulated magnetic<br />
field around the ROTOR. As a result, a regulated voltage<br />
is induced into the STATOR. Regulated current<br />
delivered to the ROTOR is called “EXCITATION” current.<br />
AC OUTPUT<br />
240 V<br />
120 V<br />
120 V<br />
STATOR<br />
STATOR<br />
STATOR<br />
ROTOR<br />
DC CURRENT<br />
BRUSHES<br />
SLIP<br />
RINGS<br />
Figure 1-6. – A More Sophisticated Generator<br />
MAGNETIC FIELD<br />
Figure 1-4. – A Simple AC Generator<br />
See Figure 1-7 (next page). The revolving magnetic<br />
field (ROTOR) is driven by the engine at a constant<br />
speed. This constant speed is maintained by a<br />
mechanical engine governor. Units with a 2-pole rotor<br />
require an operating speed of 3600 rpm to deliver a<br />
60 Hertz AC output. Engine governors are set to maintain<br />
approximately 3720 rpm when no electrical loads<br />
are connected to the generator.<br />
Page 4
Section 1<br />
GENERATOR FUNDAMENTALS<br />
Figure 1-7. – Generator Operating Diagram<br />
NOTE: AC output frequency at 3720 rpm will be<br />
about 62 Hertz. The “No-Load” is set slightly high<br />
to prevent excessive rpm, frequency and voltage<br />
droop under heavy electrical loading.<br />
Generator operation may be described briefly as follows:<br />
1. Some “residual” magnetism is normally present in the Rotor and<br />
is sufficient to induce approximately 7 to 12 volts AC Into the<br />
STATOR’s AC power windings.<br />
2. During startup, an engine controller circuit board delivers battery<br />
voltage to the ROTOR, via the brushes and slip rings.<br />
a. The battery voltage is called “Field Boost”.<br />
b. Flow of direct current through the ROTOR<br />
increases the strength of the magnetic field<br />
above that of “residual” magnetism alone.<br />
3. “Residual” plus “Field Boost” magnetism induces a voltage into<br />
the Stator excitation (DPE), battery charge and AC Power windings.<br />
4. Excitation winding unregulated AC output is delivered to an<br />
electronic voltage regulator, via an excitation circuit breaker.<br />
a. A “Reference” voltage has been preset into<br />
the Voltage Regulator.<br />
b. An “Actual” (“sensing”) voltage is delivered<br />
to the Voltage Regulator via sensing leads<br />
from the Stator AC power windings.<br />
c. The Regulator “compares” the actual (sensing)<br />
voltage to its pre-set reference voltage.<br />
(1) If the actual (sensing) voltage is greater<br />
than the pre-set reference voltage, the<br />
Regulator will decrease the regulated current<br />
flow to the Rotor.<br />
(2) If the actual (sensing) voltage is less<br />
than the pre-set reference voltage, the<br />
Regulator will increase the regulated current<br />
flow to the Rotor.<br />
(3) In the manner described, the Regulator<br />
maintains an actual (sensing) voltage that is<br />
equal to the pre-set reference voltage.<br />
NOTE: The Voltage Regulator also changes the<br />
Stator excitation windings alternating current (AC)<br />
output to direct current (DC).<br />
5. When an electrical load is connected across the Stator power<br />
windings, the circuit is completed and an electrical current will<br />
flow.<br />
6. The Rotor’s magnetic field also induces a voltage Into the Stator<br />
battery charge windings.<br />
a. Battery charge winding AC output is delivered<br />
to a battery charge rectifier (BCR)<br />
which changes the AC to direct current<br />
(DC).<br />
b. The rectified DC is then delivered to the unit<br />
battery, to maintain the battery in a charged<br />
state.<br />
c. A 1 ohm, 25 watt Resistor is installed in<br />
series with the grounded side of the battery<br />
charge circuit.<br />
Page 5
Section 1<br />
GENERATOR FUNDAMENTALS<br />
Field Boost<br />
When the engine is cranked during startup, the<br />
engine’s starter contactor is energized closed. Battery<br />
current is then delivered to the starter motor and the<br />
engine cranks.<br />
Closure of the starter contactor contacts also delivers<br />
battery voltage to Pin 13 of an Engine Controller circuit<br />
board. The battery current flows through a 47<br />
ohm, 2 watt resistor and a field boost diode, then to<br />
the Rotor via brushes and slip rings. This is called<br />
“Field Boost” current.<br />
Field boost current is delivered to the Rotor only while<br />
the engine is cranking. The effect is to “flash the field”<br />
every time the engine is cranked. Field boost current<br />
helps ensure that sufficient “pickup” voltage is available<br />
on every startup to turn the Voltage Regulator on<br />
and build AC output voltage.<br />
NOTE: Loss of the Field Boost function may or<br />
may not result in loss of AC power winding output.<br />
If Rotor residual magnetism alone is sufficient to<br />
turn the Regulator on loss of Field Boost may go<br />
unnoticed. However, If residual magnetism alone<br />
Is not enough to turn the Regulator on, loss of the<br />
Field Boost function will result In loss of AC power<br />
winding output to the load. The AC output voltage<br />
will then drop to a value commensurate with the<br />
Rotor’s residual magnetism (about 7-12 VAC).<br />
Generator AC Connection System<br />
120 VAC Output:<br />
The Stator AC power winding consists of two windings<br />
connected in parallel, with each winding capable of<br />
supplying 120 volts AC.<br />
44<br />
22P<br />
WHITE<br />
GREEN<br />
T2<br />
POWER WINDING<br />
120V 30A<br />
11P<br />
CB1<br />
33<br />
T1<br />
BLACk<br />
Figure 1-8. – Power Winding Output<br />
Page 6
Section 2<br />
MAJOR GENERATOR COMPONENTS<br />
6<br />
5<br />
4<br />
1 2<br />
3<br />
1. BRUSH HOLDER<br />
2. REAR BEARING CARRIER<br />
3. BEARING<br />
4. ROTOR<br />
5. STATOR<br />
6. ENGINE ADAPTOR<br />
Figure 2-1. Exploded View of Generator<br />
Rotor Assembly<br />
The Rotor is sometimes called the “revolving field”,<br />
since it provides the magnetic field that induces a voltage<br />
into the stationary Stator windings. Slip rings on<br />
the Rotor shaft allow excitation current from the voltage<br />
regulator to be delivered to the Rotor windings.<br />
The Rotor is directly coupled to the engine crankshaft.<br />
All generator models in this manual utilize a 2-pole<br />
Rotor, i.e., one having a single north and a single<br />
south pole. This type of Rotor must be driven at 3600<br />
rpm for a 60 Hertz AC output, or at 3000 rpm for a 50<br />
Hertz output.<br />
Slip rings may be cleaned. If dull or tarnished, clean<br />
them with fine sandpaper (a 400 grit wet sandpaper is<br />
recommended). DO NOT USE ANY METALLIC GRIT<br />
OR ABRASIVE TO CLEAN SLIP RINGS.<br />
Stator Assembly<br />
The Stator is “sandwiched” between the engine adapter<br />
and rear bearing carrier and retained in that position<br />
by four Stator studs. Windings Included in the<br />
Stator assembly are (a) dual AC power windings, (b)<br />
an excitation or DPE winding, and (c) a battery charge<br />
winding. A total of eleven (11) leads are brought out of<br />
the Stator as follows:<br />
1. Four (4) Stator power winding output leads (Wires No. 11P, 22P,<br />
33 and 44). These leads deliver power to connected electrical<br />
loads.<br />
2. Stator Power winding “sensing” leads (11S and 22S). These<br />
leads deliver an “actual voltage signal to the electronic Voltage<br />
Regulator.<br />
3. Two excitation winding output leads (No. 2 and 6). These leads<br />
deliver unregulated excitation current to the voltage regulator.<br />
4. Three (3) battery charge output leads (No. 55, 66 and 77).<br />
2<br />
11P<br />
22P<br />
33<br />
44<br />
66<br />
6<br />
55<br />
11S<br />
22S<br />
77<br />
Leads 2 & 6 =Stator Excitation Winding<br />
Leads 11S & 22S = Voltage Sensing Leads<br />
Leads 11P & 22P, 33 & 44 = AC Power Windings<br />
Leads 55, 66, 77 = Battery Charge Windings<br />
Figure 2-2. – Stator Output Leads<br />
Brush Holder<br />
The brush holder is retained in the rear bearing carrier<br />
by two M5 screws. It retains two brushes, which contact<br />
the Rotor slip rings and allow current flow from<br />
stationary parts to the revolving Rotor. The positive (+)<br />
brush is located nearest the Rotor bearing.<br />
Page 7
Section 2<br />
Major Generator Components<br />
POWER WINDING<br />
22S<br />
11S<br />
0k<br />
ELECTRONIC<br />
VOLTAGE<br />
REGULATOR<br />
2A<br />
CB3<br />
BRUSHES<br />
2<br />
6<br />
4<br />
DPE WINDING<br />
Figure 2-3. – Brush Holder<br />
0F<br />
FIELD<br />
4<br />
Battery Charge Components<br />
The Stator incorporates dual battery charge windings.<br />
A battery charge rectifier (BCR) changes the AC output<br />
of these windings to direct current (DC). Battery<br />
charge winding output is delivered to the unit battery<br />
via the rectifier, a 7.5 amp fuse and Wire No. 13. A 1<br />
ohm, 25 watt resistor is connected in series with the<br />
grounded side of the circuit.<br />
Figure 2-5. – Schematic- Excitation Circuit<br />
EXCITATION CIRCUIT BREAKER:<br />
The excitation circuit breaker (CB3) is self-resetting<br />
and cannot be reset manually. Should the breaker<br />
open for any reason, excitation current flow to the<br />
Rotor will be lost. The unit’s AC output voltage will<br />
then drop to a value commensurate with the Rotor’s<br />
residual magnetism (about 7-12 VAC).<br />
TO ENGINE<br />
CONTROLLER<br />
CIRCUIT BOARD<br />
2<br />
BCR<br />
2A<br />
TO BATTERY<br />
15<br />
66<br />
77<br />
66<br />
BATTERY CHARGE WINDING<br />
55<br />
0N<br />
R1<br />
BCR = Battery Charge Rectifier<br />
R1 = 1 Ohm, 25 Watt Resistor<br />
Figure 2-4. – Battery Charge Circuit<br />
Excitation Circuit Components<br />
GENERAL:<br />
During operation, the Rotor’s magnetic field induces a<br />
voltage and current flow into the Stator excitation<br />
winding. The resultant AC output is delivered to a voltage<br />
regulator via an excitation circuit breaker (CB3).<br />
Figure 2-6. – Excitation Circuit Breaker<br />
VOLTAGE REGULATOR:<br />
Six (6) leads are connected to the voltage regulator as<br />
follows:<br />
• Two (2) SENSING leads deliver ACTUAL AC output<br />
voltage signals to the regulator. These are Wires No.<br />
11S and 22S.<br />
• Two (2) leads (No. 2A and 6) deliver Stator excitation<br />
winding AC output to the regulator.<br />
• Two (2) leads (0K and 4) deliver the regulated direct<br />
current to the Rotor, via brushes and slip rings.<br />
Page 8
Section 2<br />
Major Generator Components<br />
Breather Assembly<br />
VOLTAGE<br />
ADjUST POT<br />
11S 22S<br />
4<br />
Ok<br />
6<br />
2A<br />
DESCRIPTION:<br />
A crankcase breather is located in the rocker arm<br />
cover of horizontal crankshaft engines (Figure 2-8).<br />
The breather serves to maintain a reduced pressure<br />
in the engine crankcase, to prevent oil from being<br />
forced past the oil seals, gaskets or piston rings.<br />
The CHECK VALVE allows excess pressure to be<br />
vented out of the crankcase and to atmosphere<br />
through the BREATHER TUBE. Two small DRAIN<br />
HOLES allow condensed oil vapors to return to the<br />
crankcase.<br />
LED<br />
CHECK<br />
VALVE<br />
Figure 2-7. – Voltage Regulator<br />
The regulator mounts a “VOLTAGE ADJUST” potentiometer,<br />
used for adjustment of the pre-set<br />
REFERENCE voltage. A lamp (LED) will turn on to<br />
indicate that SENSING voltage is available to the regulator<br />
and the regulator is turned on.<br />
The regulator mounts a “VOLTAGE ADJUST” potentiometer,<br />
used for adjustment of the pre-set<br />
REFERENCE voltage. A lamp (LED) will turn on to<br />
indicate that SENSING voltage is available to the regulator<br />
and that the regulator is turned on.<br />
ROCKER<br />
ARM<br />
COVER<br />
DRAIN HOLE<br />
BREATHER<br />
TUBE<br />
Voltage ADJUSTMENT PROCEDURE:<br />
With the frequency set at 62.5 Hertz and no load on<br />
the generator, slowly turn the voltage adjust pot on the<br />
voltage regulator until 124 VAC is measured. If voltage<br />
is not adjustable, proceed to Section 6 -<br />
Troubleshooting; Problem 2.<br />
NOTE: If, for any reason, sensing voltage to the<br />
regulator is lost, the regulator will shut down and<br />
excitation output to the Rotor will be lost. The AC<br />
output voltage will then drop to a value that is<br />
commensurate with Rotor residual magnetism<br />
(about 7-12 VAC). Without this automatic shutdown<br />
feature, loss of sensing (actual) voltage to the regulator<br />
would result in a “full field” or “full excitation”<br />
condition and an extremely high AC output<br />
voltage.<br />
NOTE: Adjustment of the regulator’s “VOLTAGE<br />
ADJUST” potentiometer must be done only when<br />
the unit is running at its correct governed no-load<br />
speed. Speed is correct when the unit’s no-load<br />
AC output frequency is about 62.5 Hertz. At the<br />
stated frequency, AC output voltage should be<br />
about 124 volts.<br />
Figure 2-8. – Crankcase Breather<br />
INSPECTION:<br />
1. Remove the breather tube. Check tube for cracks, hardening or<br />
other damage. Replace if necessary.<br />
2. Clean the rocker arm cover in commercial solvent.<br />
3. Make sure the two small drain holes are open. If necessary, use<br />
a length of wire to open the holes.<br />
4. Check the rivets that retain the check valve, make sure they are<br />
tight.<br />
5. The breather plate is retained in the rocker arm cover with a<br />
continuous bead of Type 103 black RTV sealant. This sealant<br />
must not leak. Test the sealant for leakage as follows:<br />
a. Seal all holes on the breather plate.<br />
b. Apply air pressure of 5 psi (0.352 kg/cm ) through<br />
the breather hose hole. No leakage must be<br />
observed.<br />
c. If necessary, reseal the plate with Type 103 black<br />
RTV sealant.<br />
Page 9
Section 3<br />
Insulation Resistance Tests<br />
Effects of Dirt and Moisture<br />
Moisture and dirt are detrimental to the continued<br />
good operation of any generator set.<br />
If moisture is allowed to remain in contact with the<br />
Stator and Rotor windings, some of the moisture will<br />
be retained in voids and cracks of the winding<br />
Insulation. This will result in a reduced Insulation resistance<br />
and, eventually, the unit’s AC output will be<br />
affected.<br />
Insulation used in the generator is moisture resistant.<br />
However, prolonged exposure to moisture will gradually<br />
reduce the resistance of the winding insulation.<br />
Dirt can make the problem worse, since it tends to<br />
hold moisture Into contact with the windings. Salt, as<br />
from sea air, contributes to the problem since salt can<br />
absorb moisture from the air. When salt and moisture<br />
combine, they make a good electrical conductor.<br />
Because of the detrimental affects of dirt and moisture,<br />
the generator should be kept as clean and as dry<br />
as possible. Rotor and Stator windings should be tested<br />
periodically with an insulation resistance tester<br />
(such as a megohmmeter or hi-pot tester).<br />
If the Insulation resistance is excessively low, drying<br />
may be required to remove accumulated moisture.<br />
After drying, perform a second insulation resistance<br />
test. If resistance is still low after drying, replacement<br />
of the defective Rotor or Stator may be required.<br />
Insulation Resistance Testers<br />
Figure 3-1 shows one kind of hi-pot tester. The tester<br />
shown has a “Breakdown” lamp that will glow during<br />
the test procedure to indicate an insulation breakdown<br />
in the winding being tested.<br />
*<br />
DANGER!:<br />
INSULATION RESISTANCE<br />
TESTERS SUCH AS HI-POT TESTERS AND<br />
MEGOHMMETERS ARE A SOURCE OF HIGH<br />
AND DANGEROUS ELECTRICAL VOLTAGE.<br />
FOLLOW THE TESTER MANUFACTURER’S<br />
INSTRUCTIONS CAREFULLY. USE COMMON<br />
SENSE TO AVOID DANGEROUS ELECTRICAL<br />
SHOCK<br />
Drying the Generator<br />
GENERAL:<br />
If tests indicate the insulation resistance of a winding<br />
is below a safe value, the winding should be dried<br />
before operating the generator. Some recommended<br />
drying procedures Include (a) heating units and (b)<br />
forced air.<br />
HEATING UNITS:<br />
If drying is needed, the generator can be enclosed in<br />
a covering. Heating units can then be installed to raise<br />
the temperature about 15°-18° F. (8°-10° C.) above<br />
ambient temperature.<br />
FORCED AIR:<br />
Portable forced air heaters can be used to dry the<br />
generator. Direct the heated air into the generator’s air<br />
intake openings. Remove the voltage regulator and<br />
run the unit at no-load. Air temperature at the point of<br />
entry into the generator should not exceed 150° F.<br />
(66° C.).<br />
Cleaning the Generator<br />
GENERAL:<br />
The generator can be cleaned properly only while it is<br />
disassembled. The cleaning method used should be<br />
determined by the type of dirt to be removed. Be sure<br />
to dry the unit after it has been cleaned.<br />
NOTE: A shop that repairs electric motors may be<br />
able to assist you with the proper cleaning of generator<br />
windings. Such shops are often experienced<br />
In special problems such as a sea coast<br />
environment, marine or wetland applications, mining,<br />
etc.<br />
Figure 3-1. – One Type of Hi-Pot Tester<br />
USING SOLVENTS FOR CLEANING:<br />
If dirt contains oil or grease a solvent is generally<br />
required. Only petroleum distillates should be used to<br />
clean electrical components. Recommended are safety<br />
type petroleum solvents having a flash point greater<br />
than 100° F. (38° C.).<br />
Page 10
Section 3<br />
Insulation Resistance Tests<br />
*<br />
CAUTION!:<br />
Some generators may use epoxy<br />
or polyester base winding varnishes. Use solvents<br />
that will not attack such materials.<br />
Use a soft brush or cloth to apply the solvent. Be careful<br />
to avoid damage to wire or winding insulation. After<br />
cleaning, dry all components thoroughly using moisture-free,<br />
low-pressure compressed air.<br />
*<br />
DANGER!:<br />
DO NOT ATTEMPT TO WORK<br />
WITH SOLVENTS IN ANY ENCLOSED AREA.<br />
PROVIDE ADEQUATE VENTILATION WHEN<br />
WORKING WITH SOLVENTS. WITHOUT<br />
ADEQUATE VENTILATION, FIRE, EXPLOSION<br />
OR HEALTH HAZARDS MAY EXIST . WEAR<br />
EYE PROTECTION. WEAR RUBBER GLOVES<br />
TO PROTECT THE HANDS.<br />
CLOTH OR COMPRESSED AIR:<br />
For small parts or when dry dirt is to be removed, a<br />
dry cloth may be satisfactory. Wipe the parts clean,<br />
then use low pressure air at 30 psi (206 Kpa) to blow<br />
dust away.<br />
BRUSHING AND VACUUM CLEANING:<br />
Brushing with a soft bristle brush followed by vacuum<br />
cleaning is a good method of removing dust and dirt.<br />
Use the soft brush to loosen the dirt, then remove it<br />
with the vacuum.<br />
Stator Insulation Resistance<br />
GENERAL:<br />
Insulation resistance is a measure of the Integrity of<br />
the insulating materials that separate electrical windings<br />
from the generator’s steel core. This resistance<br />
can degrade over time due to the presence of contaminants,<br />
dust, dirt, grease and especially moisture).<br />
The normal Insulation resistance for generator windings<br />
is on the order of “millions of ohms” or “megohms”.<br />
When checking the insulation resistance, follow the<br />
tester manufacturer’s Instructions carefully. Do NOT<br />
exceed the applied voltages recommended in this<br />
manual. Do NOT apply the voltage longer than one (1)<br />
second.<br />
*<br />
CAUTION!:<br />
DO NOT connect the Hi-Pot<br />
Tester or Megohmmeter test leads<br />
to any leads that are routed into the<br />
generator control panel. Connect<br />
the tester leads to the Stator or<br />
Rotor leads only.<br />
STATOR SHORT-TO-GROUND TESTS:<br />
See Figure 3-2. To test the Stator for a short-to-ground<br />
condition, proceed as follows:<br />
1. Disconnect and Isolate all Stator leads as follows:<br />
a. Disconnect sensing leads 11S and 22S from<br />
the voltage regulator.<br />
b. Disconnect excitation winding lead No. 6<br />
from the voltage regulator.<br />
c. Disconnect excitation lead No. 2 from the<br />
excitation circuit breaker (CB3).<br />
d. Disconnect battery charge winding leads No.<br />
66 and 77 from the battery charge rectifier<br />
(BCR).<br />
e. Disconnect battery charge winding lead No.<br />
55 from the battery charge resistor (R1).<br />
f. At the main circuit breakers, disconnect AC<br />
power leads No. 11P and 33.<br />
g. At the 4-tab ground terminal (GT), disconnect<br />
Stator power leads No. 22P and 44.<br />
2. When all leads have been disconnected as outlined in Step 1<br />
above, test for a short-to-ground condition as follows:<br />
a. Connect the terminal ends of all Stator leads<br />
together (11S, 22S, 11P, 22P, 33, 44, 2,6,<br />
55, 66, 77).<br />
b. Follow the tester manufacturer’s instructions<br />
carefully. Connect the tester leads across all<br />
Stator leads and to frame ground on the<br />
Stator can. Apply a voltage of 1500 volts. Do<br />
NOT apply voltage longer than one (1) second.<br />
If the test Indicates a breakdown in Insulation, the<br />
Stator should be cleaned, dried and re-tested. If the<br />
winding fails the second test (after cleaning and drying),<br />
replace the Stator assembly.<br />
TEST BETWEEN ISOLATED WINDINGS:<br />
1. Follow the tester manufacturer’s instructions carefully. Connect<br />
the tester test leads across Stator leads No. 11P and 2. Apply a<br />
voltage of 1500 volts- DO NOT EXCEED 1 SECOND.<br />
2. Repeat Step 1 with the tester leads connected across the following<br />
Stator leads:<br />
a. Across Wires No. 33 and 2.<br />
b. Across Wires No. 11P and 66.<br />
c. Across Wires No. 33 and 66.<br />
d. Across Wires No. 2 and 66.<br />
If a breakdown in the insulation between isolated<br />
windings is indicated, clean and dry the Stator. Then,<br />
repeat the test. If the Stator fails the second test,<br />
replace the Stator assembly.<br />
Page 11
Section 3<br />
Insulation Resistance Tests<br />
TEST BETWEEN PARALLEL WINDINGS:<br />
Connect the tester leads across Stator leads No. 11P<br />
and 33. Apply a voltage of 1500 volts. If an insulation<br />
breakdown is indicated, clean and dry the Stator.<br />
Then, repeat the test between parallel windings. If the<br />
Stator fails the second test, replace it.<br />
2<br />
11P<br />
22P<br />
33<br />
44<br />
66<br />
6<br />
55<br />
11S<br />
22S<br />
77<br />
Leads 2 & 6 =Stator Excitation Winding<br />
Leads 11S & 22S = Voltage Sensing Leads<br />
Leads 11P & 22P, 33 & 44 = AC Power Windings<br />
Leads 55, 66, 77 = Battery Charge Windings<br />
Figure 3-2. – Stator Leads<br />
Testing Rotor Insulation<br />
To test the Rotor for insulation breakdown, proceed as<br />
follows:<br />
1. Disconnect wires from the Rotor brushes or remove the brush<br />
holders with brushes.<br />
2. Connect the tester positive (+) test lead to the positive (+) slip<br />
ring (nearest the Rotor bearing). Connect the tester negative (-)<br />
test lead to a clean frame ground (like the Rotor shaft).<br />
POSITIVE (+)<br />
TEST LEAD<br />
Figure 3-3. – Rotor Test Points<br />
3. Apply 1000 volts. DO NOT APPLY VOLTAGE LONGER THAN 1<br />
SECOND.<br />
If an insulation breakdown is indicated, clean and dry<br />
the Rotor then repeat the test. Replace the Rotor if it<br />
fails the second test (after cleaning and drying).<br />
The Megohmmeter<br />
GENERAL:<br />
A megohmmeter, often called a “megger”, consists of<br />
a meter calibrated in megohms and a power supply.<br />
Use a power supply of 1500 volts when testing<br />
Stators; or 1000 volts when testing the Rotor. DO NOT<br />
APPLY VOLTAGE LONGER THAN ONE (1) SECOND.<br />
TESTING STATOR INSULATION:<br />
All parts that might be damaged by the high megger<br />
voltages must be disconnected before testing. Isolate<br />
all Stator leads (Figure 3-2) and connect all of the<br />
Stator leads together. FOLLOW THE MEGGER<br />
MANUFACTURER’S INSTRUCTIONS CAREFULLY.<br />
Use a megger power setting of 1500 volts. Connect<br />
one megger test lead to the junction of all Stator<br />
leads, the other test lead to frame ground on the<br />
Stator can. Read the number of megohms on the<br />
meter.<br />
The MINIMUM acceptable megger reading for Stators<br />
may be calculated using the following formula:<br />
MINIMUM<br />
INSULATION<br />
RESISTANCE<br />
(in “Megohms”)<br />
=<br />
GENERATOR RATED VOLTS<br />
__________________________<br />
1000<br />
EXAMPLE: Generator is rated at 120 volts AC.<br />
Divide “120” by “1000” to obtain “0.12”. Then add<br />
“1” to obtain “1.12” megohms. Minimum Insulation<br />
resistance for a 120 VAC Stator Is 1.12 megohms.<br />
If the Stator insulation resistance is less than the calculated<br />
minimum resistance, clean and dry the Stator.<br />
Then, repeat the test. If resistance is still low, replace<br />
the Stator.<br />
Use the Megger to test for shorts between isolated<br />
windings as outlined “Stator Insulation Resistance”.<br />
Also test between parallel windings. See “Test<br />
Between Parallel Windings" on this page.<br />
TESTING ROTOR INSULATION:<br />
Apply a voltage of 1000 volts across the Rotor positive<br />
(+) slip ring (nearest the rotor bearing), and a clean<br />
frame ground (i.e. the Rotor Shaft). DO NOT EXCEED<br />
1000 VOLTS AND DO NOT APPLY VOLTAGE<br />
LONGER THAN 1 SECOND. FOLLOW THE MEGGER<br />
MANUFACTURER’S INSTRUCTIONS CAREFULLY.<br />
ROTOR MINIMUM INSULATION RESISTANCE:<br />
1.5 megohms<br />
+1<br />
Page 12
Section 4<br />
MEASURING ELECTRICITY<br />
Meters<br />
Devices used to measure electrical properties are<br />
called meters. Meters are available that allow one to<br />
measure (a) AC voltage, (b) DC voltage, (c) AC frequency,<br />
and (d) resistance In ohms. The following<br />
apply:<br />
• To measure AC voltage, use an AC voltmeter.<br />
• To measure DC voltage, use a DC voltmeter.<br />
• Use a frequency meter to measure AC frequency In<br />
“Hertz” or “cycles per second”..<br />
• Use an ohmmeter to read circuit resistance, in<br />
“ohms”.<br />
The VOM<br />
A meter that will permit both voltage and resistance to<br />
be read is the “volt-ohm-milliammeter” or “VOM”.<br />
Some VOM’s are of the “analog” type (not shown).<br />
These meters display the value being measured by<br />
physically deflecting a needle across a graduated<br />
scale. The scale used must be Interpreted by the user.<br />
“Digital” VOM’s (Figure 4-1) are also available and are<br />
generally very accurate. Digital meters display the<br />
measured values directly by converting the values to<br />
numbers.<br />
NOTE: Standard AC voltmeters react to the<br />
AVERAGE value of alternating current. When working<br />
with AC, the effective value is used. For that<br />
reason a different scale is used on an AC voltmeter.<br />
The scale is marked with the effective or “rms”<br />
value even though the meter actually reacts to the<br />
average value. That is why the AC voltmeter will<br />
give an Incorrect reading if used to measure direct<br />
current (DC).<br />
Measuring AC Voltage<br />
An accurate AC voltmeter or a VOM may be used to<br />
read the generator’s AC output voltage. The following<br />
apply:<br />
1. Always read the generator’s AC output voltage only at the unit’s<br />
rated operating speed and AC frequency.<br />
2. The generator’s voltage regulator can be adjusted for correct<br />
output voltage only while the unit is operating at its correct rated<br />
speed and frequency.<br />
3. Only an AC voltmeter may be used to measure AC voltage. DO<br />
NOT USE A DC VOLTMETER FOR THIS PURPOSE.<br />
*<br />
DANGER!:<br />
RV GENERATORS PRODUCE HIGH<br />
AND DANGEROUS VOLTAGES. CONTACT<br />
WITH HIGH VOLTAGE TERMINALS WILL<br />
RESULT IN DANGEROUS AND POSSIBLY<br />
LETHAL ELECTRICAL SHOCK.<br />
Measuring DC Voltage<br />
A DC voltmeter or a VOM may be used to measure<br />
DC voltages. Always observe the following rules:<br />
1. Always observe correct DC polarity.<br />
a. Some VOM’s may be equipped with a polarity<br />
switch.<br />
b. On meters that do not have a polarity switch,<br />
DC polarity must be reversed by reversing<br />
the test leads.<br />
2. Before reading a DC voltage, always set the meter to a higher<br />
voltage scale than the anticipated reading. if in doubt, start at<br />
the highest scale and adjust the scale downward until correct<br />
readings are obtained.<br />
3. The design of some meters is based on the “current flow” theory<br />
while others are based on the “electron flow” theory.<br />
a. The “current flow” theory assumes that direct<br />
current flows from the positive (+) to the<br />
negative (-).<br />
b. The “electron flow” theory assumes that current<br />
flows from negative (-) to positive (+).<br />
NOTE: When testing generators, the “current flow”<br />
theory is applied. That is, current is assumed to<br />
flow from positive (+) to negative (-).<br />
Figure 4-1. – Digital VOM<br />
Page 13
Section 4<br />
MEASURING ELECTRICITY<br />
Measuring AC Frequency<br />
The generator’s AC output frequency is proportional to<br />
Rotor speed. Generators equipped with a 2-pole Rotor<br />
must operate at 3600 rpm to supply a frequency of 60<br />
Hertz. Units with 4-pole Rotor must run at 1800 rpm to<br />
deliver 60 Hertz.<br />
Correct engine and Rotor speed is maintained by an<br />
engine speed governor. For models rated 60 Hertz,<br />
the governor is generally set to maintain a no-load frequency<br />
of about 62 Hertz with a corresponding output<br />
voltage of about 124 volts AC line-to-neutral. Engine<br />
speed and frequency at no-load are set slightly high to<br />
prevent excessive rpm and frequency droop under<br />
heavy electrical loading.<br />
Measuring Current<br />
To read the current flow, in AMPERES, a clamp-on<br />
ammeter may be used. This type of meter indicates<br />
current flow through a conductor by measuring the<br />
strength of the magnetic field around that conductor.<br />
The meter consists essentially of a current transformer<br />
with a split core and a rectifier type instrument connected<br />
to the secondary. The primary of the current<br />
transformer is the conductor through which the current<br />
to be measured flows. The split core allows the<br />
Instrument to be clamped around the conductor without<br />
disconnecting it.<br />
Current flowing through a conductor may be measured<br />
safely and easily. A line-splitter can be used to<br />
measure current in a cord without separating the conductors.<br />
Figure 4-3. – A Line-Splitter<br />
NOTE: If the physical size of the conductor or<br />
ammeter capacity does not permit all lines to be<br />
measured simultaneously, measure current flow in<br />
each individual line. Then, add the Individual readings.<br />
Measuring Resistance<br />
The volt-ohm-milliammeter may be used to measure<br />
the resistance in a circuit. Resistance values can be<br />
very valuable when testing coils or windings, such as<br />
the Stator and Rotor windings.<br />
When testing Stator windings, keep in mind that the<br />
resistance of these windings is very low. Some meters<br />
are not capable of reading such a low resistance and<br />
will simply read “continuity”.<br />
If proper procedures are used, the following conditions<br />
can be detected using a VOM:<br />
• A “short-to-ground” condition in any Stator or Rotor<br />
winding.<br />
• Shorting together of any two parallel Stator windings.<br />
• Shorting together of any two isolated Stator windings.<br />
• An open condition in any Stator or Rotor winding.<br />
Component testing may require a specific resistance<br />
value or a test for “infinity” or “continuity.” Infinity is an<br />
OPEN condition between two electrical points, which<br />
would read as no resistance on a VOM. Continuity is a<br />
closed condition between two electrical points, which<br />
would be indicated as very low resistance or “ZERO”<br />
on a VOM.<br />
Figure 4-2. – Clamp-On Ammeter<br />
Page 14
Section 4<br />
MEASURING ELECTRICITY<br />
Electrical Units<br />
AMPERE:<br />
The rate of electron flow in a circuit is represented by<br />
the AMPERE. The ampere is the number of electrons<br />
flowing past a given point at a given time. One<br />
AMPERE is equal to just slightly more than six thousand<br />
million billion electrons per second.<br />
With alternating current (AC), the electrons flow first in<br />
one direction, then reverse and move in the opposite<br />
direction. They will repeat this cycle at regular intervals.<br />
A wave diagram, called a “sine wave” shows that<br />
current goes from zero to maximum positive value,<br />
then reverses and goes from zero to maximum negative<br />
value. Two reversals of current flow is called a<br />
cycle. The number of cycles per second is called frequency<br />
and is usually stated in “Hertz”.<br />
VOLT:<br />
The VOLT is the unit used to measure electrical<br />
PRESSURE, or the difference in electrical potential<br />
that causes electrons to flow. Very few electrons will<br />
flow when voltage is weak. More electrons will flow as<br />
voltage becomes stronger. VOLTAGE may be considered<br />
to be a state of unbalance and current flow as an<br />
attempt to regain balance. One volt is the amount of<br />
EMF that will cause a current of 1 ampere to flow<br />
through 1 ohm of resistance.<br />
Conductor of a<br />
Circuit<br />
OHM - Unit measuring resistance<br />
or opposition to flow<br />
- +<br />
AMPERE - Unit measuring rate of<br />
current flow (number of electrons<br />
past a given point)<br />
vOLT - Unit measuring force or<br />
difference in potential<br />
causing current flow<br />
Figure 4-4. – Electrical Units<br />
OHM:<br />
The OHM is the unit of RESISTANCE. In every circuit<br />
there is a natural resistance or opposition to the flow<br />
of electrons. When an EMF is applied to a complete<br />
circuit, the electrons are forced to flow in a single<br />
direction rather than their free or orbiting pattern. The<br />
resistance of a conductor depends on (a) its physical<br />
makeup, (b) its cross-sectional area, (c) its length, and<br />
(d) its temperature. As the conductor’s temperature<br />
increases, its resistance increases in direct proportion.<br />
One (1) ohm of resistance will permit one (1) ampere<br />
of current to flow when one (1) volt of electromotive<br />
force (EMF) is applied.<br />
Ohm’s Law<br />
A definite and exact relationship exists between VOLTS,<br />
OHMS and AMPERES. The value of one can be calculated<br />
when the value of the other two are known. Ohm’s<br />
Law states that in any circuit the current will increase<br />
when voltage increases but resistance remains the<br />
same, and current will decrease when resistance<br />
Increases and voltage remains the same.<br />
AMPS<br />
(I)<br />
VOLTS<br />
(E)<br />
Figure 4-5.<br />
OHMS<br />
(R)<br />
If AMPERES is unknown while VOLTS and OHMS are<br />
known, use the following formula:<br />
AMPERES = VOLTS<br />
OHMS<br />
If VOLTS is unknown while AMPERES and OHMS are<br />
known, use the following formula:<br />
VOLTS = AMPERES x OHMS<br />
If OHMS is unknown but VOLTS and AMPERES are<br />
known, use the following:<br />
OHMS = VOLTS<br />
AMPERES<br />
Page 15
Section 5<br />
ENGINE DC CONTROL SYSTEM<br />
Introduction<br />
F1<br />
13<br />
RED<br />
RED<br />
SC<br />
BATTERY<br />
16<br />
BLk<br />
SM<br />
The engine DC control system includes all<br />
components necessary for the operation of<br />
the engine. Operation includes rest, priming,<br />
cranking, starting, running and shutdown.<br />
The system is shown schematically on<br />
Pages16-21.<br />
15<br />
15<br />
SW2<br />
44<br />
GREEN<br />
T2<br />
22P<br />
14<br />
WHITE<br />
0N<br />
0N<br />
0N<br />
0k<br />
0F<br />
NEUTRAL CONNECTION<br />
BY CUSTOMER<br />
j3<br />
j2<br />
14<br />
15<br />
PCB<br />
BATTERY CHARGE WINDING<br />
22S<br />
2A<br />
CB3<br />
2<br />
14A<br />
14<br />
77<br />
R1<br />
j1-1<br />
j1-2<br />
j1-3<br />
j1-4<br />
j1-5<br />
j1-6<br />
j1-7<br />
j1-8<br />
j1-9<br />
j1-10<br />
j1-11<br />
j1-12<br />
j1-13<br />
j1-14<br />
j1-15<br />
BCR<br />
55<br />
66<br />
POWER WINDING<br />
ELECTRONIC<br />
VOLTAGE<br />
REGULATOR<br />
DPE WINDING<br />
FIELD<br />
16<br />
120V 30A<br />
56<br />
90<br />
18A<br />
17<br />
17<br />
4<br />
66<br />
85<br />
0<br />
18<br />
18<br />
11S<br />
6<br />
FP<br />
4<br />
14<br />
SC<br />
SW1<br />
66<br />
66<br />
4<br />
CH<br />
(START)<br />
(STOP)<br />
11P<br />
17<br />
CB1<br />
4 T1<br />
FS 0<br />
IM<br />
33 HM<br />
BLACk<br />
0<br />
CS<br />
0I<br />
17<br />
14<br />
18<br />
15<br />
14A<br />
4<br />
4<br />
85<br />
85<br />
0<br />
SP<br />
0B<br />
HTO<br />
0<br />
LOP<br />
0<br />
REMOTE<br />
PANEL<br />
CONNECTOR<br />
1<br />
2<br />
3<br />
4<br />
5<br />
6<br />
7<br />
1<br />
2<br />
3<br />
4<br />
5<br />
6<br />
7<br />
STOP<br />
START<br />
BLUE<br />
L1<br />
ORANG<br />
BROWN<br />
RED<br />
BROWN<br />
WHITE<br />
14A 15 18 14 17 0<br />
FUEL<br />
PRIME<br />
REMOTE PANEL<br />
(OPTIONAL)<br />
LEGEND<br />
Operational Analysis<br />
CIRCUIT CONDITION- Rest:<br />
Battery voltage is available to the engine<br />
controller circuit board (PCB) from the unit<br />
BATTERY and via (a) the RED battery cable,<br />
Wire 13, a 7.5 amp FUSE (F1), Wire 15 and<br />
circuit board Terminal J3. However, circuit<br />
board action is holding the circuit open and<br />
no action can occur.<br />
Battery output is available to the contacts of<br />
a STARTER CONTACTOR (SC), but the contacts<br />
are open.<br />
Battery voltage is also delivered to the FUEL<br />
PRIMER SWITCH (SW2). The switch is open<br />
and the circuit is incomplete.<br />
= 12VDC SUPPLY<br />
= 12VDC CONTROL<br />
= GROUND<br />
BCR - BATTERY CHARGE RECTIFIER<br />
CB1 - CIRCUIT BREAkER, 30A<br />
CB3 - CIRCUIT BREAkER, 2.5A<br />
CH - CHOkE HEATER<br />
CS - CHOkE SOLENOID<br />
F1 - FUSE, 7.5A<br />
FP - FUEL PUMP-OR-LPG SHUT OFF VALVE<br />
FS - FUEL SOLENOID<br />
GT - TERMINAL, GROUND 4-TAB<br />
HM - METER, HOUR (OPTIONAL)<br />
HTO - SWITCH, HIGH TEMP. OIL (CLOSES ON HIGH TEMP.)<br />
IM - IGNITION MAGNETO<br />
L1 - LIGHT, RUN (OPTIONAL)<br />
LOP - SWITCH, LOW OIL PRESSURE (CLOSES ON LOW PRESSURE)<br />
PCB - ENGINE CONTROLLER<br />
R1 - RESISTOR, 1 OHM 25W<br />
SC - STARTER CONTACTOR<br />
SM - STARTER MOTOR<br />
SW1 - SWITCH, START/STOP<br />
SW2 - SWITCH FUEL PRIMER<br />
SP - SPARk PLUG<br />
TC - TERMINAL, CONN. 4-TAB<br />
= 3-5 VDC FIELD BOOST<br />
/ VOLTAGE REGULATOR<br />
DC OUTPUT<br />
= AC POWER<br />
Page 16
Section 5<br />
ENGINE DC CONTROL SYSTEM<br />
F1<br />
13<br />
RED<br />
RED<br />
SC<br />
BATTERY<br />
16<br />
BLk<br />
SM<br />
CIRCUIT CONDITION- PRIMING:<br />
When the FUEL PRIMER SWITCH (SW2) is<br />
closed by the operator, battery voltage is delivered<br />
across the closed switch contacts and to<br />
the FUEL PUMP (FP) via Wire 14A. The FUEL<br />
SOLENOID (FS) will be energized open via<br />
Wire 14 during cranking and running.<br />
14A<br />
FP<br />
15<br />
15<br />
SW2<br />
44<br />
GREEN<br />
T2<br />
22P<br />
14<br />
WHITE<br />
0N<br />
0N<br />
0N<br />
0k<br />
0F<br />
NEUTRAL CONNECTION<br />
BY CUSTOMER<br />
j3<br />
j2<br />
14<br />
15<br />
PCB<br />
BATTERY CHARGE WINDING<br />
22S<br />
2A<br />
CB3<br />
2<br />
14<br />
77<br />
R1<br />
j1-1<br />
j1-2<br />
j1-3<br />
j1-4<br />
j1-5<br />
j1-6<br />
j1-7<br />
j1-8<br />
j1-9<br />
j1-10<br />
j1-11<br />
j1-12<br />
j1-13<br />
j1-14<br />
j1-15<br />
BCR<br />
55<br />
66<br />
POWER WINDING<br />
ELECTRONIC<br />
VOLTAGE<br />
REGULATOR<br />
DPE WINDING<br />
FIELD<br />
16<br />
120V 30A<br />
56<br />
90<br />
18A<br />
17<br />
17<br />
4<br />
66<br />
85<br />
0<br />
18<br />
18<br />
11S<br />
6<br />
4<br />
14<br />
SC<br />
SW1<br />
66<br />
66<br />
4<br />
CH<br />
(START)<br />
(STOP)<br />
11P<br />
17<br />
CB1<br />
4 T1<br />
FS 0<br />
IM<br />
33 HM<br />
BLACk<br />
0<br />
CS<br />
0I<br />
17<br />
14<br />
18<br />
15<br />
14A<br />
4<br />
4<br />
85<br />
85<br />
0<br />
SP<br />
0B<br />
HTO<br />
0<br />
LOP<br />
0<br />
REMOTE<br />
PANEL<br />
CONNECTOR<br />
1<br />
2<br />
3<br />
4<br />
5<br />
6<br />
7<br />
1<br />
2<br />
3<br />
4<br />
5<br />
6<br />
7<br />
STOP<br />
START<br />
BLUE<br />
14A<br />
L1<br />
BROWN<br />
RED<br />
BROWN<br />
WHITE<br />
18 14 17 0<br />
FUEL<br />
PRIME<br />
REMOTE PANEL<br />
(OPTIONAL)<br />
LEGEND<br />
= 12VDC SUPPLY<br />
= 12VDC CONTROL<br />
= GROUND<br />
BCR - BATTERY CHARGE RECTIFIER<br />
CB1 - CIRCUIT BREAkER, 30A<br />
CB3 - CIRCUIT BREAkER, 2.5A<br />
CH - CHOkE HEATER<br />
CS - CHOkE SOLENOID<br />
F1 - FUSE, 7.5A<br />
FP - FUEL PUMP-OR-LPG SHUT OFF VALVE<br />
FS - FUEL SOLENOID<br />
GT - TERMINAL, GROUND 4-TAB<br />
HM - METER, HOUR (OPTIONAL)<br />
HTO - SWITCH, HIGH TEMP. OIL (CLOSES ON HIGH TEMP.)<br />
IM - IGNITION MAGNETO<br />
L1 - LIGHT, RUN (OPTIONAL)<br />
LOP - SWITCH, LOW OIL PRESSURE (CLOSES ON LOW PRESSURE)<br />
PCB - ENGINE CONTROLLER<br />
R1 - RESISTOR, 1 OHM 25W<br />
SC - STARTER CONTACTOR<br />
SM - STARTER MOTOR<br />
SW1 - SWITCH, START/STOP<br />
SW2 - SWITCH FUEL PRIMER<br />
SP - SPARk PLUG<br />
TC - TERMINAL, CONN. 4-TAB<br />
= 3-5 VDC FIELD BOOST<br />
/ VOLTAGE REGULATOR<br />
DC OUTPUT<br />
= AC POWER<br />
Page 17
Section 5<br />
ENGINE DC CONTROL SYSTEM<br />
15<br />
F1<br />
13<br />
15<br />
SW2<br />
44<br />
GREEN<br />
T2<br />
22P<br />
14<br />
WHITE<br />
0N<br />
0N<br />
0N<br />
0k<br />
0F<br />
NEUTRAL CONNECTION<br />
BY CUSTOMER<br />
RED<br />
RED<br />
j3<br />
j2<br />
14<br />
15<br />
BATTERY CHARGE WINDING<br />
22S<br />
2A<br />
CB3<br />
SC<br />
PCB<br />
2<br />
14A<br />
14<br />
77<br />
R1<br />
BATTERY<br />
j1-1<br />
j1-2<br />
j1-3<br />
j1-4<br />
j1-5<br />
j1-6<br />
j1-7<br />
j1-8<br />
j1-9<br />
j1-10<br />
j1-11<br />
j1-12<br />
j1-13<br />
j1-14<br />
j1-15<br />
BCR<br />
16<br />
55<br />
66<br />
POWER WINDING<br />
ELECTRONIC<br />
VOLTAGE<br />
REGULATOR<br />
DPE WINDING<br />
FIELD<br />
16<br />
120V 30A<br />
56<br />
90<br />
18A<br />
17<br />
17<br />
4<br />
66<br />
0<br />
18<br />
18<br />
11S<br />
6<br />
BLk<br />
SM<br />
FP<br />
4<br />
14<br />
SC<br />
SW1<br />
66<br />
66<br />
4<br />
CH<br />
(START)<br />
(STOP)<br />
11P<br />
17<br />
CB1<br />
4 T1<br />
FS 0<br />
IM<br />
33 HM<br />
BLACk<br />
0<br />
CS<br />
0I<br />
17<br />
14<br />
18<br />
15<br />
14A<br />
4<br />
4<br />
85<br />
85<br />
0<br />
SP<br />
0B<br />
HTO<br />
0<br />
LOP<br />
0<br />
REMOTE<br />
PANEL<br />
CONNECTOR<br />
1<br />
2<br />
3<br />
4<br />
5<br />
6<br />
7<br />
1<br />
2<br />
3<br />
4<br />
5<br />
6<br />
7<br />
STOP<br />
START<br />
BLUE<br />
14A<br />
L1<br />
CIRCUIT CONDITION- CRANKING:<br />
When the START-STOP SWITCH (SW1) is held<br />
at “START” position, Wire 17 from the engine controller<br />
circuit board is connected to frame ground.<br />
Circuit board action will then deliver battery voltage<br />
to (a) a STARTER CONTACTOR (SC) via<br />
Wire 56, and to an automatic CHOKE SOLENOID<br />
(CS) via Wire 90.<br />
When battery voltage energizes the STARTER<br />
CONTACTOR (SC), its contacts close and battery<br />
output is delivered to the STARTER<br />
MOTOR (SM) via Wire 16. The STARTER<br />
MOTOR (SM) energizes and the engine cranks.<br />
When the STARTER CONTACTOR (SC) closes,<br />
battery voltage is delivered to the engine controller<br />
board for field boost.<br />
While cranking, the CHOKE SOLENOID (CS) is<br />
energized cyclically by circuit board action (two<br />
seconds on, two seconds off).<br />
Also while cranking, circuit board action delivers<br />
battery voltage to the Wire 14/14A circuit. This<br />
energizes the FUEL PUMP (FP) ,FUEL<br />
SOLENOID (FS) and CHOKE HEATER (CH).<br />
Circuit board action holds open Wire 18A to<br />
common ground. The Magneto will induce a<br />
spark during cranking.<br />
BROWN<br />
RED<br />
18 14<br />
FUEL<br />
PRIME<br />
BROWN<br />
WHITE<br />
0<br />
REMOTE PANEL<br />
(OPTIONAL)<br />
LEGEND<br />
= 12VDC SUPPLY<br />
= 12VDC CONTROL<br />
= GROUND<br />
BCR - BATTERY CHARGE RECTIFIER<br />
CB1 - CIRCUIT BREAkER, 30A<br />
CB3 - CIRCUIT BREAkER, 2.5A<br />
CH - CHOkE HEATER<br />
CS - CHOkE SOLENOID<br />
F1 - FUSE, 7.5A<br />
FP - FUEL PUMP-OR-LPG SHUT OFF VALVE<br />
FS - FUEL SOLENOID<br />
GT - TERMINAL, GROUND 4-TAB<br />
HM - METER, HOUR (OPTIONAL)<br />
HTO - SWITCH, HIGH TEMP. OIL (CLOSES ON HIGH TEMP.)<br />
IM - IGNITION MAGNETO<br />
L1 - LIGHT, RUN (OPTIONAL)<br />
LOP - SWITCH, LOW OIL PRESSURE (CLOSES ON LOW PRESSURE)<br />
PCB - ENGINE CONTROLLER<br />
R1 - RESISTOR, 1 OHM 25W<br />
SC - STARTER CONTACTOR<br />
SM - STARTER MOTOR<br />
SW1 - SWITCH, START/STOP<br />
SW2 - SWITCH FUEL PRIMER<br />
SP - SPARk PLUG<br />
TC - TERMINAL, CONN. 4-TAB<br />
= 3-5 VDC FIELD BOOST<br />
/ VOLTAGE REGULATOR<br />
DC OUTPUT<br />
= AC POWER<br />
Page 18
Section 5<br />
ENGINE DC CONTROL SYSTEM<br />
15<br />
F1<br />
13<br />
15<br />
SW2<br />
44<br />
GREEN<br />
T2<br />
22P<br />
14<br />
WHITE<br />
0N<br />
0N<br />
0N<br />
0k<br />
0F<br />
NEUTRAL CONNECTION<br />
BY CUSTOMER<br />
RED<br />
RED<br />
j3<br />
j2<br />
14<br />
15<br />
BATTERY CHARGE WINDING<br />
22S<br />
2A<br />
CB3<br />
SC<br />
PCB<br />
2<br />
14A<br />
14<br />
77<br />
R1<br />
BATTERY<br />
j1-1<br />
j1-2<br />
j1-3<br />
j1-4<br />
j1-5<br />
j1-6<br />
j1-7<br />
j1-8<br />
j1-9<br />
j1-10<br />
j1-11<br />
j1-12<br />
j1-13<br />
j1-14<br />
j1-15<br />
BCR<br />
16<br />
55<br />
66<br />
POWER WINDING<br />
ELECTRONIC<br />
VOLTAGE<br />
REGULATOR<br />
DPE WINDING<br />
FIELD<br />
16<br />
120V 30A<br />
56<br />
90<br />
18A<br />
17<br />
17<br />
4<br />
66<br />
0<br />
18<br />
18<br />
11S<br />
6<br />
BLk<br />
SM<br />
FP<br />
4<br />
14<br />
SC<br />
SW1<br />
66<br />
66<br />
4<br />
CH<br />
(START)<br />
(STOP)<br />
11P<br />
17<br />
CB1<br />
4 T1<br />
FS 0<br />
IM<br />
33 HM<br />
BLACk<br />
0<br />
CS<br />
0I<br />
17<br />
14<br />
18<br />
15<br />
14A<br />
4<br />
4<br />
85<br />
85<br />
0<br />
SP<br />
0B<br />
HTO<br />
0<br />
LOP<br />
0<br />
REMOTE<br />
PANEL<br />
CONNECTOR<br />
1<br />
2<br />
3<br />
4<br />
5<br />
6<br />
7<br />
1<br />
2<br />
3<br />
4<br />
5<br />
6<br />
7<br />
STOP<br />
START<br />
BLUE<br />
14A<br />
CIRCUIT CONDITION-RUNNING:<br />
With the FUEL PUMP (FP) operating and<br />
Ignition occurring, the engine should start.<br />
A voltage is induced into the Stator’s<br />
BATTERY CHARGE WINDING. This voltage is<br />
delivered to the ENGINE CONTROLLER<br />
BOARD (PCB) via Wire 66 to prevent<br />
STARTER MOTOR engagement above a certain<br />
rpm.<br />
Circuit board action terminates DC output to<br />
the STARTER CONTACTOR, which then deenergizes<br />
to end cranking and CHOKE<br />
SOLENOID operation. The choke will go to a<br />
position determined by the CHOKE HEATER<br />
(CH).<br />
L1<br />
BROWN<br />
RED<br />
18 14<br />
FUEL<br />
PRIME<br />
BROWN<br />
WHITE<br />
0<br />
REMOTE PANEL<br />
(OPTIONAL)<br />
LEGEND<br />
= 12VDC SUPPLY<br />
= 12VDC CONTROL<br />
= GROUND<br />
BCR - BATTERY CHARGE RECTIFIER<br />
CB1 - CIRCUIT BREAkER, 30A<br />
CB3 - CIRCUIT BREAkER, 2.5A<br />
CH - CHOkE HEATER<br />
CS - CHOkE SOLENOID<br />
F1 - FUSE, 7.5A<br />
FP - FUEL PUMP-OR-LPG SHUT OFF VALVE<br />
FS - FUEL SOLENOID<br />
GT - TERMINAL, GROUND 4-TAB<br />
HM - METER, HOUR (OPTIONAL)<br />
HTO - SWITCH, HIGH TEMP. OIL (CLOSES ON HIGH TEMP.)<br />
IM - IGNITION MAGNETO<br />
L1 - LIGHT, RUN (OPTIONAL)<br />
LOP - SWITCH, LOW OIL PRESSURE (CLOSES ON LOW PRESSURE)<br />
PCB - ENGINE CONTROLLER<br />
R1 - RESISTOR, 1 OHM 25W<br />
SC - STARTER CONTACTOR<br />
SM - STARTER MOTOR<br />
SW1 - SWITCH, START/STOP<br />
SW2 - SWITCH FUEL PRIMER<br />
SP - SPARk PLUG<br />
TC - TERMINAL, CONN. 4-TAB<br />
= 3-5 VDC FIELD BOOST<br />
/ VOLTAGE REGULATOR<br />
DC OUTPUT<br />
= AC POWER<br />
Page 19
Section 5<br />
ENGINE DC CONTROL SYSTEM<br />
F1<br />
13<br />
RED<br />
RED<br />
SC<br />
BATTERY<br />
16<br />
BLk<br />
SM<br />
CIRCUIT CONDITION- SHUTDOWN:<br />
Setting the START-STOP SWITCH (SW1) to<br />
its “STOP” position connects the Wire 18 circuit<br />
to frame ground. Circuit board action then<br />
closes the circuit to Wire 18A, grounding the<br />
ignition coil. Circuit board action opens the<br />
circuit to Wire 14. Ignition and fuel flow terminate<br />
and the engine shuts down.<br />
14A<br />
FP<br />
15<br />
15<br />
SW2<br />
44<br />
GREEN<br />
T2<br />
22P<br />
14<br />
WHITE<br />
0N<br />
0N<br />
0N<br />
0k<br />
0F<br />
NEUTRAL CONNECTION<br />
BY CUSTOMER<br />
j3<br />
j2<br />
14<br />
15<br />
PCB<br />
BATTERY CHARGE WINDING<br />
22S<br />
2A<br />
CB3<br />
2<br />
14<br />
77<br />
R1<br />
j1-1<br />
j1-2<br />
j1-3<br />
j1-4<br />
j1-5<br />
j1-6<br />
j1-7<br />
j1-8<br />
j1-9<br />
j1-10<br />
j1-11<br />
j1-12<br />
j1-13<br />
j1-14<br />
j1-15<br />
BCR<br />
55<br />
66<br />
POWER WINDING<br />
ELECTRONIC<br />
VOLTAGE<br />
REGULATOR<br />
DPE WINDING<br />
FIELD<br />
16<br />
120V 30A<br />
56<br />
90<br />
18A<br />
17<br />
17<br />
4<br />
66<br />
85<br />
0<br />
18<br />
18<br />
11S<br />
6<br />
4<br />
14<br />
SC<br />
SW1<br />
66<br />
66<br />
4<br />
CH<br />
(START)<br />
(STOP)<br />
11P<br />
17<br />
CB1<br />
4 T1<br />
FS 0<br />
IM<br />
33 HM<br />
BLACk<br />
0<br />
CS<br />
0I<br />
17<br />
14<br />
18<br />
15<br />
14A<br />
4<br />
4<br />
85<br />
85<br />
0<br />
SP<br />
0B<br />
HTO<br />
0<br />
LOP<br />
0<br />
REMOTE<br />
PANEL<br />
CONNECTOR<br />
1<br />
2<br />
3<br />
4<br />
5<br />
6<br />
7<br />
1<br />
2<br />
3<br />
4<br />
5<br />
6<br />
7<br />
STOP<br />
START<br />
BLUE<br />
L1<br />
ORANG<br />
BROWN<br />
RED<br />
BROWN<br />
WHITE<br />
14A 15 18 14 17 0<br />
FUEL<br />
PRIME<br />
REMOTE PANEL<br />
(OPTIONAL)<br />
LEGEND<br />
= 12VDC SUPPLY<br />
= 12VDC CONTROL<br />
= GROUND<br />
BCR - BATTERY CHARGE RECTIFIER<br />
CB1 - CIRCUIT BREAkER, 30A<br />
CB3 - CIRCUIT BREAkER, 2.5A<br />
CH - CHOkE HEATER<br />
CS - CHOkE SOLENOID<br />
F1 - FUSE, 7.5A<br />
FP - FUEL PUMP-OR-LPG SHUT OFF VALVE<br />
FS - FUEL SOLENOID<br />
GT - TERMINAL, GROUND 4-TAB<br />
HM - METER, HOUR (OPTIONAL)<br />
HTO - SWITCH, HIGH TEMP. OIL (CLOSES ON HIGH TEMP.)<br />
IM - IGNITION MAGNETO<br />
L1 - LIGHT, RUN (OPTIONAL)<br />
LOP - SWITCH, LOW OIL PRESSURE (CLOSES ON LOW PRESSURE)<br />
PCB - ENGINE CONTROLLER<br />
R1 - RESISTOR, 1 OHM 25W<br />
SC - STARTER CONTACTOR<br />
SM - STARTER MOTOR<br />
SW1 - SWITCH, START/STOP<br />
SW2 - SWITCH FUEL PRIMER<br />
SP - SPARk PLUG<br />
TC - TERMINAL, CONN. 4-TAB<br />
= 3-5 VDC FIELD BOOST<br />
/ VOLTAGE REGULATOR<br />
DC OUTPUT<br />
= AC POWER<br />
Page 20
Section 5<br />
ENGINE DC CONTROL SYSTEM<br />
15<br />
F1<br />
13<br />
15<br />
SW2<br />
44<br />
GREEN<br />
T2<br />
22P<br />
14<br />
WHITE<br />
0N<br />
0N<br />
0N<br />
0k<br />
0F<br />
NEUTRAL CONNECTION<br />
BY CUSTOMER<br />
RED<br />
RED<br />
j3<br />
j2<br />
14<br />
15<br />
BATTERY CHARGE WINDING<br />
22S<br />
2A<br />
CB3<br />
SC<br />
PCB<br />
2<br />
14A<br />
14<br />
77<br />
R1<br />
BATTERY<br />
j1-1<br />
j1-2<br />
j1-3<br />
j1-4<br />
j1-5<br />
j1-6<br />
j1-7<br />
j1-8<br />
j1-9<br />
j1-10<br />
j1-11<br />
j1-12<br />
j1-13<br />
j1-14<br />
j1-15<br />
BCR<br />
16<br />
55<br />
66<br />
POWER WINDING<br />
ELECTRONIC<br />
VOLTAGE<br />
REGULATOR<br />
DPE WINDING<br />
FIELD<br />
16<br />
120V 30A<br />
56<br />
90<br />
18A<br />
17<br />
17<br />
4<br />
66<br />
85<br />
0<br />
18<br />
18<br />
11S<br />
6<br />
BLk<br />
SM<br />
FP<br />
4<br />
14<br />
SC<br />
SW1<br />
66<br />
66<br />
4<br />
CH<br />
(START)<br />
(STOP)<br />
11P<br />
17<br />
CB1<br />
4 T1<br />
FS 0<br />
IM<br />
33 HM<br />
BLACk<br />
0<br />
CS<br />
0I<br />
17<br />
14<br />
18<br />
15<br />
14A<br />
4<br />
4<br />
85<br />
85<br />
0<br />
SP<br />
0B<br />
HTO<br />
0<br />
LOP<br />
0<br />
REMOTE<br />
PANEL<br />
CONNECTOR<br />
1<br />
2<br />
3<br />
4<br />
5<br />
6<br />
7<br />
1<br />
2<br />
3<br />
4<br />
5<br />
6<br />
7<br />
STOP<br />
START<br />
BLUE<br />
L1<br />
CIRCUIT CONDITION- FAULT SHUTDOWN:<br />
T h e e n g i n e m o u n t s a H I G H O I L<br />
TEMPERATURE SWITCH (HTO) and a<br />
LOW OIL PRESSURE SWITCH (LOP).<br />
Should engine oil temperature exceed a preset<br />
value, the switch contacts will close. Wire<br />
85 from the circuit board will connect to<br />
frame ground. Circuit board action will then<br />
initiate a shutdown.<br />
Should engine oil pressure drop below a<br />
safe pre-set value, the switch contacts will<br />
close. On contact closure, Wire 85 will be<br />
connected to frame ground and circuit board<br />
action will initiate an engine shutdown.<br />
The circuit board has a time delay built into it<br />
for the Wire 85 fault shutdowns. At STARTUP<br />
ONLY the circuit board will wait approximately<br />
6 seconds before looking at the Wire 85<br />
fault shutdowns. Once running after the 6<br />
second time delay, grounding Wire 85 thru<br />
either switch will cause an immediate shutdown.<br />
ORANG<br />
BROWN<br />
RED<br />
BROWN<br />
WHITE<br />
14A 15 18 14 17 0<br />
FUEL<br />
PRIME<br />
REMOTE PANEL<br />
(OPTIONAL)<br />
LEGEND<br />
= 12VDC SUPPLY<br />
= 12VDC CONTROL<br />
= GROUND<br />
BCR - BATTERY CHARGE RECTIFIER<br />
CB1 - CIRCUIT BREAkER, 30A<br />
CB3 - CIRCUIT BREAkER, 2.5A<br />
CH - CHOkE HEATER<br />
CS - CHOkE SOLENOID<br />
F1 - FUSE, 7.5A<br />
FP - FUEL PUMP-OR-LPG SHUT OFF VALVE<br />
FS - FUEL SOLENOID<br />
GT - TERMINAL, GROUND 4-TAB<br />
HM - METER, HOUR (OPTIONAL)<br />
HTO - SWITCH, HIGH TEMP. OIL (CLOSES ON HIGH TEMP.)<br />
IM - IGNITION MAGNETO<br />
L1 - LIGHT, RUN (OPTIONAL)<br />
LOP - SWITCH, LOW OIL PRESSURE (CLOSES ON LOW PRESSURE)<br />
PCB - ENGINE CONTROLLER<br />
R1 - RESISTOR, 1 OHM 25W<br />
SC - STARTER CONTACTOR<br />
SM - STARTER MOTOR<br />
SW1 - SWITCH, START/STOP<br />
SW2 - SWITCH FUEL PRIMER<br />
SP - SPARk PLUG<br />
TC - TERMINAL, CONN. 4-TAB<br />
= 3-5 VDC FIELD BOOST<br />
/ VOLTAGE REGULATOR<br />
DC OUTPUT<br />
= AC POWER<br />
Page 21
Section 5<br />
ENGINE DC CONTROL SYSTEM<br />
Engine Controller Circuit Board<br />
GENERAL:<br />
The engine controller board is responsible for cranking,<br />
startup, running and shutdown operations. The<br />
board interconnects with other components of the DC<br />
control system to turn them on and off at the proper<br />
times. It is powered by fused 12 VDC power from the<br />
unit battery.<br />
CIRCUIT BOARD CONNECTIONS:<br />
The circuit board mounts a 15-pin receptacle (J1) and<br />
two single pin terminals (J2 and J3, see Figure 5.3).<br />
Figure 5-2 shows the 15-pin receptacle (J1), the associated<br />
wires and the function(s) of each pin and wire.<br />
In addition to the 15-pin receptacle (J1), the circuit<br />
board is equipped with two single pin terminals (J2<br />
and J3). These terminals may be identified as follows:<br />
PIN WIRE FUNCTION<br />
1 56 Delivers 12 VDC to Starter Contactor (SC) while<br />
cranking only.<br />
2 90 Delivers 12 VDC to Choke Solenoid coil while<br />
cranking only. (Two seconds ON, Two seconds<br />
OFF)<br />
3 — Not used.<br />
4 18A Grounds Magneto for Shutdown.<br />
5 — Not used.<br />
6 17 To Start-Stop switch. When wire is grounded by<br />
setting Start-Stop switch to “START”, engine will<br />
crank.<br />
7 17 To Start-Stop switch on optional Remote Panel.<br />
8 — Not used.<br />
9 4 Field Boost DC to Voltage Regulator and to<br />
Rotor windings.<br />
10 66 Starter Lockout. Prevents cranking while engine<br />
is running.<br />
11 85 Fault shutdown circuit. When grounded by closure<br />
of High Oil Temperature or Low Oil Pressure<br />
Switch engine will shut down.<br />
12 0 Common Ground.<br />
13 16 12 VDC Input to Field Boost circuit while<br />
cranking only.<br />
14 18 To Start-Stop switch. When grounded by setting<br />
Switch to “STOP” engine shuts down.<br />
15 18 To Start-Stop Switch on optional Remote Panel.<br />
Figure 5-2. – Receptacle J1<br />
1. Wire 14 connects to Terminal J2. During cranking and running,<br />
the circuit board delivers battery voltage to the Wire 14 circuit<br />
for the following functions:<br />
a. To operate the electric Fuel Pump (FP).<br />
b. To energize the Fuel Solenoid.<br />
c. To operate the Choke Heater.<br />
d. To the Remote Wire Harness to operate an<br />
hourmeter or a light.<br />
2. Wire 15 connects to Terminal J3. This is the power supply (12<br />
VDC) for the circuit board and the DC control system.<br />
PIN LOCATIONS<br />
1<br />
15 j1-1 thru j1-15<br />
14<br />
j3<br />
j2<br />
j1<br />
Figure 5-3. – Engine Controller Circuit Board<br />
15<br />
Battery<br />
RECOMMENDED BATTERY:<br />
When anticipated ambient temperatures will be consistently<br />
above 32° F. (0° C.), use a 12 volts automotive<br />
type storage battery rated 70 amp-hours and<br />
capable of delivering at least 400 cold cranking<br />
amperes.<br />
If ambient temperatures will be below 32° (0° C.), use<br />
a 12 volt battery rated 95 amp-hours and having a<br />
cold cranking capacity of 400 amperes.<br />
BATTERY CABLES:<br />
Use of battery cables that are too long or too small in<br />
diameter will result in excessive voltage drop. For best<br />
cold weather starting, voltage drop between the battery<br />
and starter should not exceed 0.12 volt per 100<br />
amperes of cranking current.<br />
Select the battery cables based on total cable length<br />
and prevailing ambient temperature. Generally, the<br />
longer the cable and the colder the weather, the larger<br />
the required cable diameter.<br />
The following chart applies:<br />
CABLE LENGTH (IN FEET)<br />
RECOMMENDED CABLE SIZE<br />
0-10 No. 2<br />
11-15 No. 0<br />
16-20 No. 000<br />
Page 22
Section 5<br />
ENGINE DC CONTROL SYSTEM<br />
EFFECTS OF TEMPERATURE:<br />
Battery efficiency is greatly reduced by a decreased<br />
electrolyte temperature. Such low temperatures have<br />
a decided numbing effect on the electrochemical<br />
action. Under high discharge rates (such as cranking),<br />
battery voltage will drop to much lower values in cold<br />
temperatures than in warmer temperatures. The freezing<br />
point of battery electrolyte fluid is affected by the<br />
state of charge of the electrolyte as indicated below:<br />
SPECIFIC GRAVITY<br />
FREEZING POINT<br />
1.220 -35° F. (-37° C.)<br />
1.200 -20° F. (-29° C.)<br />
1.160 0° F. (-18° C.)<br />
ADDING WATER:<br />
Water is lost from a battery as a result of charging and<br />
discharging and must be replaced. If the water is not<br />
replaced and the plates become exposed, they may<br />
become permanently sulfated. In addition, the plates<br />
cannot take full part in the battery action unless they<br />
are completely immersed in electrolyte. Add only<br />
DISTILLED WATER to the battery. DO NOT USE TAP<br />
WATER.<br />
NOTE: Water cannot be added to some “maintenance-free”<br />
batteries.<br />
7.5 Amp Fuse<br />
This panel-mounted Fuse<br />
protects the DC control circuit<br />
against overload and<br />
possible damage. If the<br />
Fuse has melted open due<br />
to an overload, neither the<br />
priming function nor the<br />
cranking function will be<br />
available.<br />
Fuel Primer Switch<br />
Figure5-4<br />
Following generator installation and after the unit has<br />
been idle for some time, the fuel supply line may be<br />
empty. This condition will require a long cranking period<br />
before fuel can reach the carburetor. The Fuel<br />
Primer Switch, when actuated to its “PRIME” position<br />
will deliver battery voltage across the closed switch<br />
contacts to the Fuel Pump (FP) to turn the Pump on.<br />
Pump action will then draw fuel from the supply tank<br />
to prime the fuel lines and carburetor.<br />
CHECKING BATTERY STATE OF CHARGE:<br />
Use an automotive type battery hydrometer to test the<br />
battery state of charge. Follow the hydrometer manufacturer’s<br />
instructions carefully. Generally, a battery<br />
may be considered fully charged when the specific<br />
gravity of its electrolyte is 1.260. If the hydrometer<br />
used does not have a “Percentage of Charge” scale,<br />
compare the readings obtained with the following:<br />
SPECIFIC GRAVITY<br />
PERCENTAGE OF CHARGE<br />
1.260 100%<br />
1.230 75%<br />
1.200 50%<br />
1.170 25%<br />
CHARGING A BATTERY:<br />
Use an automotive type battery charger to recharge a<br />
battery. Battery fluid is an extremely corrosive, sulfuric<br />
acid solution that can cause severe burns. For that<br />
reason, the following precautions must be observed:<br />
• The area in which the battery is being charged must<br />
be well ventilated. When charging a battery, an<br />
explosive gas mixture forms in each cell.<br />
• Do not smoke or break a live circuit near the top of<br />
the battery. Sparking could cause an explosion.<br />
• Avoid spillage of battery fluid. If spillage occurs, flush<br />
the affected area with clear water immediately.<br />
• Wear eye protection when handling a battery.<br />
Figure 5-5. – Primer Switch<br />
Start-Stop Switch<br />
The Start-Stop Switch allows the operator to control<br />
cranking, startup and shutdown. The following wires<br />
connect to the Start-Stop Switch:<br />
1. Wire No. 17 from the Engine Controller circuit board. This Is the<br />
CRANK and START circuit. When the Switch is set to “START”,<br />
Wire 17 is connected to frame ground via Wire OB.<br />
a. With Wire 17 grounded, a Crank Relay on<br />
the circuit board energizes and battery voltage<br />
is delivered to the Starter Contactor via<br />
Wire 56. The Starter contactor energizes, its<br />
contacts close and the engine cranks.<br />
Page 23
Section 5<br />
ENGINE DC CONTROL SYSTEM<br />
b. With Wire 17 grounded, a Run Relay on the<br />
circuit board energizes and battery voltage<br />
is delivered to the Wire 14 circuit. Battery<br />
voltage is delivered to the Fuel Pump, Fuel<br />
Solenoid, Choke Heater and the Remote<br />
Harness.<br />
2. Wire 18 from the Engine Controller board. This Is the ENGINE<br />
STOP circuit. When the Start-Stop Switch is set to “STOP”,<br />
Wire 18 is connected to frame ground via Wire No. 0B. Circuit<br />
board action then opens the circuit to Wire 14, and grounds<br />
Wire 18A. Fuel flow to the carburetor and ignition are terminated.<br />
3. Wire 0B connects the Switch to frame ground.<br />
17<br />
18<br />
SW1<br />
(START)<br />
(STOP)<br />
A. Schematic<br />
0<br />
B. Pictorial<br />
18<br />
17<br />
0<br />
coil via Wire 56. The Contactor energizes and its contacts<br />
close. Battery voltage is then delivered from the<br />
positive battery cable, across the closed contacts and<br />
to the Starter Motor via Wire 16.<br />
56<br />
TO ECB<br />
0<br />
TO GROUND<br />
16<br />
TO STARTER<br />
16<br />
TO ECB<br />
13<br />
TO BATTERY<br />
Figure 5-7. – Starter Contactor<br />
16 (From Starter Contactor)<br />
13<br />
TO FUSE (F1)<br />
Figure 5-6. – Start-Stop Switch<br />
Starter Contactor & Motor<br />
The positive (+) battery cable (13) attaches to one of<br />
the large lugs of the Contactor along with Wire 13 for<br />
DC supply to the Fuse (F1). The Starter cable (16)<br />
attaches to the second large lug, along with Wire 16<br />
for the Field Boost Circuit. Attached to the two small<br />
lugs are Wires 56 and 0.<br />
When the Start-Stop switch is set to “START”, the circuit<br />
board delivers battery voltage to the Contactor<br />
Figure 5-8. – Starter Motor<br />
Page 24
The “Flow Charts” in this section may be used in conjunction<br />
with the “<strong>Diagnostic</strong> Tests” of Section 7.<br />
Numbered tests in the Flow Charts correspond to<br />
identically numbered tests of Section 7.<br />
Introduction<br />
Section 6<br />
TROUBLESHOOTING FLOWCHARTS<br />
Problems 1 through 5 apply to the AC generator only.<br />
Beginning with Problem 6, the engine DC control system<br />
is dealt with.<br />
Page 25
Section 6<br />
TROUBLESHOOTING FLOWCHARTS<br />
Problem 2 - Generator Produces Zerovoltage or Residual voltage (5-12 vAC)<br />
TEST 12 - CHECK<br />
MAIN CIRCUIT<br />
BREAKER<br />
TEST 3 - TEST<br />
EXCITATION<br />
CIRCUIT BREAKER<br />
GOOD -PROCEED<br />
BAD -PROCEED, REPLACE AFTER TESTS<br />
CONCLUDE<br />
RESET TO<br />
“ON”<br />
OR REPLACE<br />
IF BAD<br />
TEST 5 - WIRE<br />
CONTINUITY<br />
A<br />
TEST 4 -<br />
PERFORM FIXED<br />
EXCITATION /<br />
ROTOR AMP<br />
DRAW<br />
B<br />
C<br />
D<br />
TEST 9 -<br />
CHECK<br />
BRUSH<br />
LEADS<br />
BAD<br />
GOOD<br />
BAD<br />
GOOD<br />
TEST 6 -<br />
FIELD BOOST<br />
GOOD<br />
BAD<br />
REPAIR<br />
OR<br />
REPLACE<br />
THEN<br />
RETEST<br />
TEST 7 - TEST<br />
STATOR DPE<br />
WINDING<br />
GOOD<br />
INSULATION<br />
RESISTANCE<br />
TEST PAGE 11<br />
BAD<br />
BAD<br />
REPAIR<br />
OR<br />
REPLACE<br />
TEST 10 -<br />
CHECK<br />
BRUSHES &<br />
SLIP RINGS<br />
GOOD<br />
BAD<br />
REPAIR<br />
OR<br />
REPLACE<br />
REPLACE<br />
VOLTAGE<br />
REGULATOR<br />
TEST 11 -<br />
CHECK ROTOR<br />
ASSEMBLY<br />
BAD<br />
TEST 8 - CHECK<br />
SENSING LEADS /<br />
POWER WINDINGS<br />
BAD<br />
GOOD<br />
GOOD<br />
INSULATION<br />
RESISTANCE<br />
TEST PAGE 11<br />
BAD<br />
REPAIR<br />
OR<br />
REPLACE<br />
INSULATION<br />
RESISTANCE<br />
TEST PAGE 11<br />
BAD<br />
Page 26
Section 6<br />
TROUBLESHOOTING FLOWCHARTS<br />
Problem 2 - Generator Produces Zerovoltage or Residual voltage (5-12 vAC)<br />
(continued)<br />
TEST 11 -<br />
CHECK ROTOR<br />
ASSEMBLY<br />
INSULATION<br />
RESISTANCE<br />
TEST PAGE 11<br />
BAD<br />
REPAIR<br />
OR<br />
REPLACE<br />
BAD<br />
E<br />
TEST 4 -<br />
PERFORM FIXED<br />
EXCITATION /<br />
ROTOR AMP<br />
DRAW<br />
F<br />
G<br />
(PERFORM BOTH TEST 7 & 8)<br />
TEST 7 - TEST<br />
STATOR DPE<br />
WINDING<br />
GOOD<br />
CHECK VOM FUSES -<br />
VERIFY AMP METER<br />
FUNCTIONS<br />
TEST 8 - CHECK<br />
SENSING LEADS /<br />
POWER WINDINGS<br />
GOOD<br />
INSULATION<br />
RESISTANCE<br />
TEST PAGE 11<br />
REPLACE FUSES<br />
- THEN RETEST<br />
EITHER OR<br />
BOTH BAD<br />
BAD<br />
REPAIR<br />
OR<br />
REPLACE<br />
Page 27
Section 6<br />
TROUBLESHOOTING FLOWCHARTS<br />
Problem 4 - Excessive Voltage/Frequency Droop When Load is Applied<br />
GOOD<br />
VERIFY GOOD CONSTANT FUEL SUPPLY<br />
TEST 13 -<br />
CHECK LOAD<br />
VOLTAGE &<br />
FREQUENCY<br />
BAD<br />
TEST 14 - CHECK<br />
LOAD WATTS &<br />
AMPERAGE<br />
NOT OVERLOADED<br />
GOOD<br />
OVERLOADED<br />
REDUCE LOAD<br />
END TEST<br />
TEST 2 - CHECK /<br />
ADJUST ENGINE<br />
GOVERNOR<br />
GOOD<br />
GO TO PROBLEM 8<br />
Problem 5 - Priming Function Does Not Work (Gasoline Units)<br />
TEST 18 - TRY<br />
CRANKING<br />
THE ENGINE<br />
ENGINE<br />
CRANKS<br />
NORMALLY<br />
STILL<br />
WON’T<br />
PRIME<br />
TEST 19 - TEST<br />
PRIMER<br />
SWITCH<br />
WON’T CRANK<br />
REPLACE BAD SWITCH<br />
BAD<br />
GO TO PROBLEM 6<br />
TEST 20 - CHECK<br />
FUEL PUMP<br />
OPERATION<br />
GOOD<br />
REPLACE FUEL PUMP<br />
IF DEFECTIVE<br />
Page 28
Section 6<br />
TROUBLESHOOTING FLOWCHARTS<br />
Problem 6 - Engine Will Not Crank<br />
TEST 21 -<br />
CHECk 7.5<br />
AMP FUSE<br />
TEST 22 - CHECk<br />
BATTERY<br />
& CABLES<br />
FUSE BAD<br />
REPLACE FUSE<br />
BAD<br />
RECHARGE OR REPLACE BATTERY<br />
- CLEAN, REPAIR OR REPLACE BAD<br />
CABLE(S)<br />
FUSE BLOWS<br />
GO TO PROBLEM 10<br />
GOOD<br />
TEST 23 - CHECk<br />
POWER SUPPLY<br />
TO ENGINE<br />
CIRCUIT BOARD<br />
GOOD<br />
TEST 24 -<br />
CHECk<br />
START/STOP<br />
SWITCH<br />
GOOD<br />
BAD<br />
BAD<br />
REPLACE<br />
DEFECTIVE<br />
SWITCH<br />
CHECk WIRING AND<br />
WIRE CONNECTIONS.<br />
REPAIR, RECONNECT<br />
OR REPLACE BAD<br />
WIRES AS REqUIRED<br />
TEST 25 - CHECk<br />
POWER SUPPLY<br />
TO WIRE 56<br />
GOOD<br />
TEST 26 - CHECk<br />
STARTER<br />
CONTACTOR<br />
REPLACE ENGINE<br />
CONTROLLER CIRCUIT<br />
BOARD<br />
BAD<br />
BAD<br />
REPLACE BAD<br />
STARTER<br />
CONTACTOR<br />
TEST 27 - CHECk<br />
STARTER MOTOR<br />
BAD<br />
REPLACE STARTER MOTOR IF DEFECTIVE<br />
GOOD<br />
CHECk FOR<br />
MECHANICAL BINDING<br />
OF THE ENGINE OR<br />
ROTOR<br />
Page 29
Section 6<br />
TROUBLESHOOTING FLOWCHARTS<br />
Problem 7 - Engine Cranks But Will Not Start (Gasoline Units)<br />
TEST 28 -<br />
CHECK FUEL<br />
SUPPLY<br />
O.K.<br />
TEST 29 - CHECK<br />
WIRE 14 POWER<br />
SUPPLY<br />
GOOD<br />
TEST 19 - TEST<br />
PRIMER<br />
SWITCH<br />
LOW FUEL<br />
REPLENISH FUEL SUPPLY<br />
BAD<br />
REPLACE ENGINE<br />
CONTROLLER CIRCUIT<br />
BOARD<br />
REPLACE<br />
BAD<br />
SWITCH<br />
BAD<br />
GOOD<br />
TEST 20 - CHECK<br />
FUEL PUMP<br />
OPERATION<br />
GOOD<br />
TEST 31 -<br />
CHECK FUEL<br />
SOLENOID<br />
GOOD<br />
BAD<br />
REPLACE<br />
FUEL<br />
PUMP<br />
TEST 34 -<br />
CHECK<br />
IGNITION<br />
COIL<br />
TEST 32 -<br />
CHECK<br />
IGNITION<br />
SPARK<br />
WEAK SPARK / NO SPARK /<br />
INTERMITTENT SPARK<br />
BAD<br />
GOOD<br />
REPLACE COIL<br />
BAD<br />
TEST 33 -<br />
CHECK SPARK<br />
PLUG<br />
REPLACE<br />
SOLENOID<br />
GOOD<br />
CLEAN AND REGAP OR<br />
REPLACE SPARK PLUG<br />
TEST 36 - CHECK<br />
CARBURETION<br />
GOOD<br />
TEST 37 - CHECK<br />
CHOKE<br />
SOLENOID<br />
GOOD<br />
ADJUST OR REPAIR<br />
BAD<br />
ADJUST OR REPAIR<br />
TEST 35 - CHECK<br />
VALVE<br />
ADJUSTMENT<br />
NO START<br />
CHECK<br />
FLYWHEEL KEY -<br />
SEE TEST 34<br />
ON PAGE 47<br />
GOOD<br />
TEST 38 - CHECK<br />
ENGINE / CYLINDER<br />
LEAK DOWN TEST /<br />
COMPRESSION<br />
TEST<br />
Page 30
Section 6<br />
TROUBLESHOOTING FLOWCHARTS<br />
Problem 7 - Engine Cranks But Will Not Start (LP Units)<br />
TEST 28 -<br />
CHECK FUEL<br />
SUPPLY<br />
O.K.<br />
TEST 29 - CHECK<br />
WIRE 14 POWER<br />
SUPPLY<br />
GOOD<br />
TEST 19 - TEST<br />
PRIMER<br />
SWITCH<br />
LOW LP PRESSURE<br />
REPLENISH FUEL SUPPLY<br />
BAD<br />
REPLACE ENGINE<br />
CONTROLLER CIRCUIT<br />
BOARD<br />
REPLACE<br />
BAD<br />
SWITCH<br />
BAD<br />
GOOD<br />
TEST 42 - CHECK<br />
LPG FUEL<br />
SOLENOID<br />
GOOD<br />
BAD<br />
REPAIR OR<br />
REPLACE<br />
TEST 32 -<br />
CHECK<br />
IGNITION<br />
SPARK<br />
GOOD<br />
TEST 33 -<br />
CHECK SPARK<br />
PLUG<br />
GOOD<br />
TEST 34 -<br />
CHECK<br />
IGNITION<br />
COIL<br />
WEAK SPARK / NO SPARK /<br />
INTERMITTENT SPARK<br />
BAD<br />
REPLACE COIL<br />
CLEAN AND REGAP OR<br />
REPLACE SPARK PLUG<br />
GOOD<br />
TEST 35 - CHECK<br />
VALVE<br />
ADJUSTMENT<br />
BAD<br />
NO START<br />
TEST 38 - CHECK<br />
ENGINE / CYLINDER<br />
LEAK DOWN TEST /<br />
COMPRESSION<br />
TEST<br />
BAD<br />
GOOD<br />
REPAIR OR REPLACE<br />
AS NECESSARY<br />
CHECK<br />
FLYWHEEL KEY -<br />
SEE TEST 34<br />
ON PAGE 61<br />
ADJUST VALVES<br />
Page 31
Section 6<br />
TROUBLESHOOTING FLOWCHARTS<br />
Problem 8 - Engine Starts Hard and Runs Rough (Gasoline Units)<br />
TEST 32 -<br />
CHECK<br />
IGNITION<br />
SPARK<br />
GOOD<br />
TEST 33 -<br />
CHECK<br />
SPARK<br />
PLUG<br />
GOOD<br />
ENGINE MISS IS APPARENT<br />
CLEAN AND REGAP OR<br />
REPLACE SPARK PLUG<br />
BAD<br />
TEST 34 -<br />
CHECK<br />
IGNITION<br />
COIL<br />
BAD<br />
REPLACE COIL<br />
TEST 36 - CHECK<br />
CARBURETION<br />
GOOD<br />
TEST 37 - CHECK<br />
CHOKE<br />
SOLENOID<br />
GOOD<br />
ENGINE RUNS O.K. NOW<br />
STOP TESTS<br />
BAD<br />
ADJUST, REPAIR OR<br />
REPLACE AS<br />
NECESSARY<br />
BAD<br />
TEST 41 - TEST<br />
CHOKE HEATER<br />
TEST 35 - CHECK<br />
VALVE<br />
ADJUSTMENT<br />
GOOD<br />
CHECK<br />
FLYWHEEL KEY -<br />
SEE TEST 34<br />
GOOD<br />
TEST 38 - CHECK<br />
ENGINE /<br />
CYLINDER LEAK<br />
DOWN TEST /<br />
COMPRESSION<br />
TEST<br />
ADJUST VALVES<br />
REPAIR OR REPLACE<br />
AS NECESSARY<br />
Page 32
Section 6<br />
TROUBLESHOOTING FLOWCHARTS<br />
Problem 8 - Engine Starts Hard and Runs Rough (LP Units)<br />
TEST 28 -<br />
CHECK<br />
FUEL<br />
SUPPLY<br />
GOOD<br />
TEST 32 -<br />
CHECK<br />
IGNITION<br />
SPARK<br />
GOOD<br />
TEST 33 -<br />
CHECK<br />
SPARK<br />
PLUG<br />
GOOD<br />
LOW LP<br />
PRESSURE<br />
ENGINE MISS IS APPARENT<br />
BAD<br />
CLEAN AND REGAP OR<br />
REPLACE SPARK PLUG<br />
REPLENISH<br />
FUEL<br />
SUPPLY<br />
TEST 34 -<br />
CHECK<br />
IGNITION<br />
COIL<br />
BAD<br />
REPLACE COIL<br />
TEST 35 - CHECK<br />
VALVE<br />
ADJUSTMENT<br />
BAD<br />
GOOD<br />
CHECK<br />
FLYWHEEL KEY -<br />
SEE TEST 34<br />
ON PAGE 61<br />
GOOD<br />
TEST 38 - CHECK<br />
ENGINE /<br />
CYLINDER LEAK<br />
DOWN TEST /<br />
COMPRESSION<br />
TEST<br />
BAD<br />
ADJUST VALVES<br />
REPAIR OR REPLACE<br />
AS NECESSARY<br />
GOOD<br />
CHECK FUEL<br />
REGULATOR AND<br />
CARBURETOR<br />
Page 33
Section 6<br />
TROUBLESHOOTING FLOWCHARTS<br />
Page 34
Problem 10 - 7.5A (F1) Fuse Blowing<br />
Section 6<br />
TROUBLESHOOTING FLOWCHARTS<br />
INSTALL NEW<br />
7.5 AMP FUSE<br />
FUSE BLOWS UPON<br />
INSTALLATION<br />
CHECK THAT FUSE<br />
HOLDER IS NOT<br />
GROUNDED<br />
PASS<br />
FAIL<br />
REPLACE HOLDER<br />
DISCONNECT WIRE 15<br />
AT J3 TERMINAL FROM<br />
ENGINE CONTROLLER<br />
CIRCUIT BOARD.<br />
DOES FUSE BLOW?<br />
NO<br />
REPLACE ENGINE<br />
CONTROLLER<br />
CIRCUIT BOARD<br />
YES<br />
FUSE IS GOOD BUT<br />
BLOWS WHEN START /<br />
STOP SWITCH IS<br />
PRESSED<br />
CHECK WIRE 15<br />
FOR SHORTTO<br />
GROUND<br />
CHECK REMOTE<br />
HARNESS WIRE 15<br />
FOR SHORTTO<br />
GROUND<br />
TEST 16 - CHECK<br />
BATTERY CHARGE<br />
RECTIFIER<br />
DISCONNECT WIRE 14 AT J2<br />
TERMINAL ON ENGINE<br />
CONTROLLER CIRCUIT BOARD<br />
AND CHECK WIRE 14 FOR SHORT<br />
TO GROUND.<br />
IS CONTINUITY PRESENT?<br />
NO<br />
YES<br />
PERFORM RESISTANCE TESTS ON FUEL PUMP,<br />
FUEL SOLENOID, CHOKE HEATER AND REMOTE<br />
HARNESS WIRE 14 (SEE * BELOW).<br />
ALSO CHECK WIRE 14 TO EACH COMPONENT<br />
FOR SHORTTO GROUND.<br />
* CHECK FOR CONTINUITY TO FRAME GROUND.<br />
CONNECT ONE TEST LEAD TO THE POSITIVE<br />
WIRE FOR EACH COMPONENT. CONNECT THE<br />
OTHER TEST LEAD TO FRAME GROUND.<br />
RESISTANCE SHOULD BE MEASURED.IF<br />
CONTINUITY “0” IS MEASURED TO GROUND,<br />
THAT COMPONENT OR WIRE IS SHORTED.<br />
ALSO, REFER TO THE INDIVIDUAL TESTS FOR<br />
EACH COMPONENT IN SECTION 7, UNDER<br />
“PROCEDURE - SHORTTO GROUND.”<br />
REPLACE COMPONENT OR WIRE<br />
CHECK CHOKE<br />
SOLENOID AND<br />
STARTER<br />
CONTACTOR<br />
STARTER CONTACTOR<br />
PIN LOCATION J1-1<br />
TEST TO GROUND<br />
CHOKE SOLENOID<br />
PIN LOCATION J1-2<br />
TEST TO GROUND<br />
FAIL<br />
FAIL<br />
CHECK WIRE 56<br />
SHORTTO<br />
GROUND<br />
CHECK WIRE 90<br />
SHORTTO<br />
GROUND<br />
REPAIR OR<br />
REPLACE<br />
COMPONENT<br />
OR WIRE<br />
Page 35
Section 7<br />
DIAGNOSTIC TESTS<br />
Introduction<br />
The “<strong>Diagnostic</strong> Tests” in this chapter may be performed<br />
in conjunction with the “Flow Charts” of<br />
Section 6. Test numbers in this chapter correspond to<br />
the numbered tests in the “Flow Charts”.<br />
Tests 1 through 17 are procedures Involving problems<br />
with the generator’s AC output voltage and frequency<br />
(Problems 1 through 4 in the “Flow Charts”).<br />
Tests 18 through 40 are procedures involving problems<br />
with engine operation (Problems 5 through 9 in the<br />
“Troubleshooting Flow Charts”).<br />
You may wish to read Section 4, “Measuring<br />
Electricity”.<br />
NOTE: Test procedures in this <strong>Manual</strong> are not<br />
necessarily the only acceptable methods for diagnosing<br />
the condition of components and circuits.<br />
All possible methods that might be used for system<br />
diagnosis have not been evaluated. If you<br />
use any diagnostic method other than the method<br />
presented in this <strong>Manual</strong>, you must ensure<br />
that nether neither your safety nor the product’s<br />
safety will be endangered by the procedure or<br />
method you have selected.<br />
Test 1 – Check No-Load Voltage and<br />
Frequency<br />
DISCUSSION:<br />
The first step in analyzing any problem with the AC<br />
generator is to determine the unit’s AC output voltage<br />
and frequency. Once that has been done, you will<br />
know how to proceed with specific diagnostic tests.<br />
PROCEDURE:<br />
1. Set a volt-ohm-milliammeter (VOM) to read AC voltage. Connect<br />
the meter test leads across customer connection leads T1<br />
(Red) and T2 (White).<br />
2. Disconnect or turn OFF all electrical loads. Initial checks and<br />
adjustments are accomplished at no-load.<br />
3. Start the engine, let it stabilize and warm up.<br />
4. Read the AC voltage.<br />
5. Connect an AC frequency meter across AC output leads T1<br />
(Black) and T2 (White). Repeat the above procedure.<br />
RESULTS:<br />
For units rated 60 Hertz, no-load voltage and frequency<br />
should be approximately 122-126 VAC and 61-63<br />
Hertz respectively.<br />
1. If AC voltage and frequency are BOTH correspondingly high or<br />
low, go to Test 2.<br />
2. If AC frequency is good but low or residual voltage is indicated,<br />
go to Test 3.<br />
3. If AC output voltage and frequency are both “zero”, go to Test 12.<br />
4. If the no-load voltage and frequency are within the stated limits,<br />
go to Test 13.<br />
NOTE: The term “low voltage” refers to any voltage<br />
reading that is lower than the unit’s rated voltage.<br />
The term “residual voltage” refers to the output<br />
voltage supplied as a result of Rotor residual magnetism<br />
(approximately 5-12 VAC).<br />
Test 2 – Check Engine Governor<br />
DISCUSSION:<br />
Rotor operating speed and AC output frequency are<br />
proportional. The generator will deliver a frequency of<br />
60 Hertz at 3600 Rotor rpm or 62 Hertz at 3720<br />
Rotor rpm.<br />
The Voltage Regulator should be adjusted to deliver<br />
120 VAC (line-to-neutral) at a frequency of 60 Hertz or<br />
124 VAC (line-to-neutral at 62 Hertz. It is apparent<br />
that, if governed speed is high or low, AC frequency<br />
and voltage will be correspondingly high or low.<br />
Governed speed at no-load is usually set slightly<br />
above the rated speed of 60 Hertz (to 62 Hertz), to<br />
prevent excessive rpm, frequency and voltage droop<br />
under heavy electrical loading.<br />
Governor Adjustment<br />
1. Loosen the GOVERNOR CLAMP BOLT.<br />
2. Push Spring end of GOVERNOR LEVER clockwise to wide<br />
open throttle position of lever.<br />
a. Hold the GOVERNOR LEVER at wide open<br />
throttle and, with a pair of pliers, rotate the<br />
GOVERNOR SHAFT fully clockwise (CW). Use<br />
a minimum amount of force against the governor<br />
shaft.<br />
b. While holding the GOVERNOR SHAFT fully<br />
clockwise and the GOVERNOR LEVER at wide<br />
open throttle, tighten the GOVERNOR CLAMP<br />
BOLT to 70 inch-pounds (8 N-m).<br />
GOVERNOR<br />
SPRING<br />
GOVERNOR<br />
ADjUST<br />
BRACkET<br />
GOVERNOR<br />
LEVER<br />
TO CARBURETOR<br />
THROTTLE<br />
GOVERNOR<br />
ADjUSTMENT<br />
NUT<br />
Figure 7-1. – Governor Adjustment<br />
Page 36
Section 7<br />
DIAGNOSTIC TESTS<br />
3. Start engine, let it stabilize and warm up at no-load.<br />
4. Turn the ADJUSTER NUT to obtain a frequency reading of 62<br />
Hertz.<br />
5. Determine if the GOVERNOR SPRING is properly located in<br />
the slot of the GOVERNOR LEVER as shown in Figure 7-1 on<br />
the previous page.<br />
6. After repositioning the SPRING on a LEVER slot, recheck frequency<br />
reading and, if necessary, readjust ADJUSTER NUT to<br />
obtain 62 Hertz at no-load.<br />
7. When frequency is correct at no-load, check the AC voltage<br />
reading. If voltage is incorrect, the voltage regulator may require<br />
adjustment. See “VOLTAGE ADJUSTMENT PROCEDURE”,<br />
Page 9.<br />
Test 3 – Test Excitation Circuit<br />
Breaker<br />
DISCUSSION:<br />
This circuit breaker (CB3) is normally closed and selfresetting.<br />
It will open in the event of excessive current<br />
from the Stator excitation (DPE) winding. The circuit<br />
breaker should re-close or reset automatically after it<br />
cools down (takes approximately two minutes).<br />
When the breaker (CB3) is open, excitation current to<br />
the Regulator (and to the Rotor) will be lost. The unit’s<br />
AC output voltage will then drop to a value that is<br />
commensurate with the Rotor’s residual magnetism<br />
(about 5-12 volts AC). This test will determine if the<br />
breaker has failed in its open position.<br />
2A<br />
2<br />
2A<br />
PROCEDURE:<br />
Note: After running the unit, allow two minutes for<br />
the breaker to reset.<br />
1. Set a volt-ohm-milliammeter (VOM) to its “Rx1” scale and zero<br />
the meter.<br />
2. In the generator panel, locate the excitation circuit breaker.<br />
Disconnect Wires No. 2 and 2A from the breaker terminals.<br />
3. Connect the meter test leads across the two circuit breaker<br />
(CB3) terminals. The meter should indicate “continuity”.<br />
RESULTS:<br />
1. If the meter did NOT read “continuity”, replace the excitation<br />
(DPE) circuit breaker (CB3), and go to Test 4.<br />
2. If “continuity” was indicated, go to Test 4.<br />
Test 4 – Fixed Excitation Test/Rotor<br />
Amp Draw<br />
DISCUSSION:<br />
The fixed excitation test consists of applying battery<br />
voltage (12 VDC) to the Rotor windings. This allows<br />
that portion of the excitation circuit between the<br />
Voltage Regulator and the Rotor (including the Rotor<br />
itself) to be checked as a possible cause of the problem.<br />
When battery voltage is applied to the Rotor, the<br />
resulting magnetic field around the Rotor should<br />
induce a Stator power winding voltage equal to about<br />
one-half the unit’s rated output voltage.<br />
CONNECT POSITIVE (+)<br />
BATTERY SUPPLY<br />
TO WIRE #4<br />
WIRE NO. 4<br />
TO ROTOR<br />
AND TO ECB<br />
11 22<br />
0 6<br />
2A<br />
CB3<br />
2<br />
A. Schematic B. Pictorial<br />
Figure 7-2. – Excitation “DPE” Circuit Breaker<br />
VOLTAGE<br />
REGULATOR<br />
TERMINALS<br />
Figure 7-3. – Fixed Excitation Test<br />
PROCEDURE:<br />
1. Disconnect Wire #4 from the voltage regulator (VR). (Third terminal<br />
from the top of VR).<br />
2. Connect a jumper wire to Wire #4 and to the 12 volt fused battery<br />
positive supply Wire #15 (Wire #15 located at fuse (F1) holder).<br />
Page 37
Section 7<br />
DIAGNOSTIC TESTS<br />
VOLTAGE RESULTS<br />
WIRE 2 & 6<br />
EXCITATION<br />
WINDING<br />
VOLTAGE RESULTS<br />
WIRE 11 & 22<br />
POWER WINDING<br />
SENSE LEADS<br />
ROTOR<br />
AMP DRAW<br />
TEST 4 RESULTS<br />
A B C D E F G<br />
ABOVE<br />
60 VAC<br />
ABOVE<br />
60 VAC<br />
1.0 - .85 A<br />
± 20%<br />
ABOVE<br />
60 VAC<br />
BELOW<br />
60 VAC<br />
1.0 - .85 A<br />
± 20%<br />
BELOW<br />
60 VAC<br />
ABOVE<br />
60 VAC<br />
1.0 - .85 A<br />
± 20%<br />
ZERO OR<br />
RESIDUAL<br />
VOLTAGE<br />
(5-12 VAC)<br />
ZERO OR<br />
RESIDUAL<br />
VOLTAGE<br />
(5-12 VAC)<br />
ZERO<br />
CURRENT<br />
DRAW<br />
BELOW<br />
60 VAC<br />
BELOW<br />
60 VAC<br />
ABOVE<br />
1.2 A<br />
BELOW<br />
60 VAC<br />
BELOW<br />
60 VAC<br />
1.0 - .85 A<br />
± 20%<br />
(MATCH RESULTS WITH LETTER AND REFER TO FLOW CHART – Problem 2 on Pages 26 & 27)<br />
ABOVE<br />
60 VAC<br />
ABOVE<br />
60 VAC<br />
ZERO<br />
CURRENT<br />
DRAW<br />
3. Set the VOM to measure AC voltage.<br />
4. Disconnect Wire #2 from the DPE breaker (CB3) and connect<br />
one test lead to that wire. Disconnect Wire #6 from the Voltage<br />
Regulator and connect the other test lead to that wire. Start the<br />
generator and measure the AC voltage. It should be above 60<br />
volts. Record the results and stop the generator.<br />
5. Re-connect Wire #2 to the DPE Circuit Breaker (CB3) and reconnect<br />
Wire #6 to the Voltage Regulator.<br />
6. Disconnect Wire #11 from the Voltage Regulator (VR) and connect<br />
one test lead to that wire. Disconnect Wire #22 from the<br />
Voltage Regulator (VR) and connect the other test lead to that<br />
wire. Start the generator and measure the AC voltage. It should<br />
be above 60 volts. Record the results and stop the generator.<br />
7. Re-connect Wire #11 and Wire #22 to the Voltage Regulator (VR).<br />
8. Remove the jumper wire between Wire #4 and 12 volt supply.<br />
9. Set the VOM to measure DC amps.<br />
10. Connect one test lead to the 12 volt fused battery supply Wire<br />
#15, and connect the other test lead to Wire #4 (should still be<br />
disconnected from the VR).<br />
11. Start the generator. Measure the DC current. Record the rotor<br />
amp draw.<br />
12. Stop the generator. Re-connect Wire #4 to the Voltage<br />
Regulator.<br />
Test 5 – Wire Continuity<br />
DISCUSSION:<br />
The Voltage Regulator receives unregulated alternating<br />
current from the Stator Excitation Winding via<br />
Wires 2, 6 and 2A. It also receives voltage sensing<br />
from the Stator AC Power Windings via Wires 11 and<br />
22. The regulator rectifies the AC from the Excitation<br />
Winding and, based on the sensing signals, regulates<br />
that DC current flow to the Rotor. The rectified and<br />
regulated current flow is delivered to the Rotor<br />
Brushes via Wires 4 (+) and 0 (-). This test will verify<br />
the integrity of Wires No. 0 and 2A.<br />
PROCEDURE:<br />
1. Set a VOM to its “Rx1” scale.<br />
2. Remove Wire No. 0 from the Voltage Regulator, fourth terminal<br />
from the top. The Voltage Regulator is labeled next to terminal(-).<br />
3. Connect one test lead to Wire No. 0 and the other test lead to a<br />
clean frame ground. The meter should read continuity.<br />
4. Disconnect Wire No. 2A from the Voltage Regulator, sixth terminal<br />
from the top. Disconnect the other end of this wire from the<br />
Excitation Circuit Breaker (CB3). Connect one test lead to one<br />
end of Wire No. 2A and the other test lead to the other end of<br />
the same wire. The meter should read continuity.<br />
Results:<br />
If continuity was NOT measured across each wire,<br />
repair or replace the wires as needed.<br />
If continuity WAS measured, proceed to Test 6.<br />
Test 6 – Check Field Boost<br />
DISCUSSION:<br />
Field boost current is delivered to the Rotor only while<br />
the engine is being cranked. This current helps ensure<br />
that adequate “pickup” voltage is available to turn the<br />
Voltage Regulator on and build AC output voltage.<br />
Loss of the field boost function may or may not result<br />
in a problem with AC output voltage. If the Rotor’s<br />
residual magnetism is sufficient to turn the Regulator<br />
on, loss of the function may go unnoticed. However, if<br />
the Rotor’s residual magnetism is not enough to turn<br />
the Regulator on, loss of field boost can result in failure<br />
of the unit to generate an output voltage.<br />
Page 38
Section 7<br />
DIAGNOSTIC TESTS<br />
PROCEDURE:<br />
1. Set VOM to measure DC voltage.<br />
2. Disconnect Wire No. 4 from the Voltage Regulator and connect<br />
the positive (+) test lead to it. Connect the negative (-) test lead<br />
to a clean frame ground.<br />
3. Set the Start-Stop switch to “Start.” During cranking only, measure<br />
DC voltage. It should read 3-5 VDC. Reconnect Wire No. 4<br />
to the Voltage Regulator. If voltage is measured, it can be<br />
assumed that the Field Boost is working. Stop testing. If voltage<br />
is not measured, proceed to Step 4.<br />
4. Connect the positive (+) test lead to Wire No. 16 at pin location<br />
J1-13 on the PCB (see Figure 7-4) (J1, J2 & J3 connectors<br />
remain connected to PCB). Connect the negative(-) test lead to<br />
a clean frame ground.<br />
5. Set the Start-Stop switch to “Start.” During cranking only, battery<br />
voltage should measure 11-12 VDC.<br />
6. Connect the positive (+) test lead to Wire No. 4 at pin location<br />
J1-9 on the PCB (see Figure 7-4) (J1, J2 & J3 connectors<br />
remain connected to PCB). Connect the negative(-) test lead to<br />
a clean frame ground.<br />
7. Set the Start-Stop switch to “Start.” During cranking only measure<br />
the DC voltage. It should measure 3-5 VDC.<br />
Test 7 – Test Stator DPE Winding<br />
DISCUSSION:<br />
An open circuit in the Stator excitation windings will<br />
result in a loss of unregulated excitation current to the<br />
Voltage Regulator. The flow of regulated excitation current<br />
to the Rotor will then terminate and the unit’s AC<br />
output voltage will drop to a value that is commensurate<br />
with the rotor’s residual magnetism (about 5 - 12 VAC).<br />
2 6 2 6<br />
A. Schematic B. Pictorial<br />
Figure 7-5. – Stator Excitation Winding<br />
56<br />
+12 VDC<br />
0<br />
STARTER<br />
CONTACTOR<br />
TO VOLTAGE REGULATOR<br />
AND TO ROTOR<br />
TO STARTER<br />
4<br />
16<br />
PROCEDURE:<br />
1. Disconnect Wire No. 2 from the excitation circuit breaker.<br />
2. Disconnect Wire No. 6 from the Voltage Regulator.<br />
3. Set a VOM to its “Rx1” scale and zero the meter.<br />
4. Connect the VOM test leads across the terminal ends of Wires<br />
No. 2 and 6. The VOM should indicate the resistance of the<br />
Stator excitation (DPE) windings.<br />
1 9 13<br />
j3 j2 j1<br />
ENGINE<br />
CONTROLLER<br />
CIRCUIT<br />
BOARD (PCB)<br />
DIODE<br />
RESISTOR<br />
Figure 7-4. – The Field Boost Circuit<br />
Results:<br />
1. If battery voltage was not measured in Step 5, repair or replace<br />
Wire No. 16 between the Starter Contactor and PCB.<br />
2. If field boost voltage was measured in Step 7 but not measured<br />
in Step 3, repair or replace Wire No. 4 between PCB and<br />
Voltage Regulator.<br />
3. If battery voltage was measured in Step 5 but field boost voltage<br />
was not measured in Step 7, replace PCB.<br />
NOMINAL RESISTANCE OF<br />
STATOR EXCITATION “DPE” WINDINGS*<br />
2.168 - 2.510 OHMS<br />
* Resistance values In ohms at 20° C. (68° F.). Actual readings<br />
may vary depending on ambient temperature. A tolerance of<br />
plus or minus 5% is allowed.<br />
5. Now, set the meter to its “Rx1 K” or “Rx10,000” scale and zero<br />
the meter. Test for a “short-to-ground” condition as follows:<br />
a. Connect one meter test lead to Stator lead No.<br />
2, the other test lead to a clean frame ground.<br />
b. The meter should read “infinity”. Any other reading<br />
indicates a “short-to-ground” condition and<br />
the Stator should be replaced.<br />
6. Test for a short between windings as follows:<br />
a. Meter should be set to its “Rx1 K” or “Rx10,000”<br />
scale.<br />
Page 39
Section 7<br />
DIAGNOSTIC TESTS<br />
b. Connect one meter test lead to Stator Wire No.<br />
2, the other test lead to Stator lead No. 11. The<br />
meter should read “Infinity”.<br />
c. Connect one VOM test lead to Stator lead No. 2<br />
the other test lead to Stator lead No. 33. “Infinity”<br />
should be indicated.<br />
d. Connect one VOM test lead to Stator lead No. 2<br />
and connect the other test lead to Stator lead<br />
No. 66. “Infinity” should be indicated.<br />
RESULTS:<br />
1. If the Stator excitation (DPE) windings are open or shorted,<br />
replace the Stator assembly.<br />
2. If the excitation windings are good, perform “Insulation<br />
Resistance Test”, page 11.<br />
Test 8 – Check Sensing Leads / Power<br />
Windings<br />
DISCUSSION:<br />
The Voltage Regulator “regulates” excitation current<br />
flow to the Rotor by electronically comparing sensing<br />
voltage to a pre-set reference voltage. The sensing<br />
voltage is delivered to the Regulator via Wires 11S<br />
and 22S.<br />
If an open circuit exists in sensing leads 11S or 22S,<br />
the normal reaction of an unprotected Regulator would<br />
be to Increase the excitation current to the Rotor in an<br />
effort to increase the actual AC output voltage. This<br />
would result in a “full field” condition and an extremely<br />
high AC output voltage.<br />
To protect the system against such a high AC output<br />
voltage, the Voltage Regulator will shut down if sensing<br />
voltage signals are lost.<br />
If the regulator shuts down, the generator’s AC output<br />
voltage will decrease to a value that is commensurate<br />
with the Rotor’s residual magnetism (about 5-12 VAC).<br />
6. Connect the meter test leads across Stator leads 33 and 44.<br />
Normal power winding resistance should be read.<br />
7. Connect the meter test leads across Stator leads 11S and 22S.<br />
Normal Power Winding resistance should be read.<br />
AC POWER WINDING RESISTANCE (Ohms at 20° C.)<br />
ACROSS WIRES:<br />
OHMS<br />
11P & 22P 0.468Ω - 0.542Ω<br />
11S & 22S 0.468Ω - 0.542Ω<br />
33 & 44 0.468Ω - 0.542Ω<br />
8. Now, set the VOM to its “Rx1 K” or “Rx10,000” scale and zero<br />
the meter.<br />
9. Connect the meter test leads across Stator lead 11P and frame<br />
ground. “Infinity” should be read.<br />
10. Connect the meter test leads across Stator lead 33 and frame<br />
ground. The reading should be “infinity”.<br />
11. Connect the meter test leads across Stator leads Wire 11P<br />
and Wire 33. The reading should be “infinity.”<br />
12. Connect the meter test leads across Stator leads Wire 11P<br />
and Wire 66. The reading should be “infinity.”<br />
13. Connect the meter test leads across Stator leads Wire 33 and<br />
Wire 66. The reading should be “infinity.”<br />
RESULTS:<br />
1. If the Stator passes all steps except Step 7, repair, re-connect<br />
or replace Sensing leads 11S and 22S.<br />
2. Replace the Stator if it’s power windings fail the test. (Note<br />
Result No. 1).<br />
3. If the Power Windings test good, perform the “Insulation<br />
Resistance Test” on Page 11.<br />
PROCEDURE:<br />
Gain access to the generator control panel interior.<br />
Test the Stator power windings, as follows:<br />
1. From main breaker, disconnect Wires 11 P and 33.<br />
2. Also disconnect Wires 22P and 44 from the ground terminal.<br />
3. Disconnect Wires 11S and 22S from the Voltage Regulator.<br />
4. Set a VOM to its “Rx1” scale and zero the meter.<br />
5. Connect the meter test leads across Stator leads 11P and 22P.<br />
Normal power winding resistance should be read.<br />
11P<br />
11S<br />
22S<br />
33<br />
44<br />
22P<br />
11S<br />
22S<br />
11P<br />
33<br />
22P<br />
A. Schematic B. Pictorial<br />
44<br />
Figure 7-6. – Stator Power Winding Leads<br />
Page 40
Section 7<br />
DIAGNOSTIC TESTS<br />
Test 9 – Check Brush Leads<br />
DISCUSSION:<br />
In Test 4, if application of battery voltage to the Rotor<br />
did NOT result in an output of about one-half rated<br />
voltage, the brush leads could be one possible cause<br />
of the problem. This test will check Wires 4 and OK for<br />
an open circuit condition.<br />
PROCEDURE:<br />
1. Set a VOM to its “Rx1” scale and zero the meter.<br />
2. Disconnect Wire No. 4 from the Voltage Regulator and from the<br />
Rotor brush terminal.<br />
3. Connect the VOM test leads across each end of the wire. The<br />
meter should read “continuity”.<br />
4. Disconnect Wire OF from the Rotor Brush Terminal. Connect<br />
one meter test lead to Wire OF. Connect the other test lead to a<br />
clean frame ground. The meter should read continuity.<br />
RESULTS:<br />
1. <strong>Repair</strong>, reconnect or replace any defective wire(s).<br />
2. If wires check good, go to Test 10.<br />
4 OF<br />
Figure 7-7. – Brush Leads<br />
Test 10 – Check Brushes & Slip Rings<br />
DISCUSSION:<br />
Brushes and slip rings are made of special materials<br />
that will provide hundreds of hours of service with little<br />
wear. However, when the generator has been idle for<br />
some time, an oxide film can develop on the slip rings.<br />
This film acts as an insulator and impedes the flow of<br />
excitation current to the Rotor.<br />
If Test 4 resulted in less than one-half rated output<br />
voltage, it is possible that the brushes and slip rings<br />
are at fault.<br />
PROCEDURE:<br />
1. Gain access to the brushes and slip rings.<br />
2. Remove Wire No. 4 from the positive (+) brush terminal.<br />
3. Remove the ground wire (0F) from the negative (-) brush.<br />
4. Remove the brush holder, with brushes.<br />
5. Inspect the brushes for excessive wear, damage, cracks, chipping,<br />
etc.<br />
6. Inspect the brush holder, replace if damaged.<br />
7. Inspect the slip rings.<br />
a. If slip rings appear dull or tarnished they may be<br />
cleaned and polished with fine sandpaper. DO<br />
NOT USE ANY METALLIC GRIT TO CLEAN<br />
SLIP RINGS. (A 400 grit wet sandpaper is recommended).<br />
b. After cleaning slip rings, blow away any sandpaper<br />
residue.<br />
RESULTS:<br />
1. Replace bad brushes. Clean slip rings, if necessary.<br />
2. If brushes and rings are good, go to Test 11.<br />
Test 11 – Check Rotor Assembly<br />
DISCUSSION:<br />
During the “Fixed Excitation Test” (Test 4), if AC output<br />
voltage did not come up to about one-half rated volts,<br />
one possible cause might be a defective Rotor. The<br />
Rotor can be tested for an open or shorted condition<br />
using a volt-ohm-milliammeter (VOM).<br />
Also see Chapter Three, “INSULATION RESISTANCE<br />
TESTS”.<br />
PROCEDURE:<br />
Gain access to the brushes and slip rings. Disconnect<br />
Wire No. 4 and Wire OF from their respective brushes and<br />
remove the brush holder. Then, test the Rotor as follows:<br />
1. Set a VOM to its “Rx1” scale and zero the meter.<br />
2. Connect the positive (+) meter test lead to the positive (+) slip<br />
ring (nearest the Rotor bearing). Connect the common (-) test<br />
lead to the negative (-) slip ring. Read the resistance of the<br />
Rotor windings, in OHMS.<br />
ROTOR RESISTANCE<br />
(Ohms at 20° C. / 68° F):<br />
12.72Ω - 14.73Ω<br />
3. Set the VOM to its “Rx1 K” or “Rx10,000” scale and zero the<br />
meter.<br />
4. Connect the positive (+) meter test lead to the positive (+) slip<br />
ring, the common (-) test lead to a clean frame ground (such as<br />
the Rotor shaft). The meter should read “infinity”.<br />
Page 41
Section 7<br />
DIAGNOSTIC TESTS<br />
RESULTS:<br />
1. Replace the Rotor if it fails the test.<br />
2. If Rotor checks good, perform “Insulation Resistance Test,” on<br />
Page 11.<br />
RESULTS:<br />
1. If breaker is “ON” and continuity is measured, go to Test 3.<br />
2. If breaker is “OFF”, reset to the “ON” position and check for AC<br />
output.<br />
3. If breaker is “ON” and continuity is not measured, replace the<br />
defective circuit breaker.<br />
Test 13 – Check Load Voltage &<br />
Frequency<br />
POSITIVE (+)<br />
TEST LEAD<br />
Figure 7-8. – Rotor Assembly<br />
Test 12 – Check Main Circuit Breaker<br />
DISCUSSION:<br />
The main circuit breaker on the generator panel must<br />
be closed or no output to the load will be available. A<br />
defective breaker may not be able to pass current<br />
even though it is in the “ON” position.<br />
11<br />
33<br />
T1<br />
CB1<br />
A. Schematic B. Pictorial<br />
Figure 7-9. – Main Breaker (Typical)<br />
PROCEDURE:<br />
Set the coach main breaker to it’s “OFF” position.<br />
Check that the appropriate main breaker on the generator<br />
panel is set to its “ON” (closed) position. Set a<br />
VOM to measure resistance and use it to check for<br />
“continuity” across the breaker terminals.<br />
DISCUSSION:<br />
If engine speed appears to drop off excessively when<br />
electrical loads are applied to the generator, the load<br />
voltage and frequency should be checked.<br />
PROCEDURE:<br />
Perform this test in the same manner as Test 1, but<br />
apply a load to the generator equal to its rated capacity.<br />
With load applied check voltage and frequency.<br />
Frequency should not drop below about 58 Hertz with<br />
the load applied.<br />
Voltage should not drop below about 115 VAC with<br />
load applied.<br />
RESULTS:<br />
1. If voltage and/or frequency droop excessively when the load is<br />
applied, go to Test 14.<br />
2. If load voltage and frequency are within limits, end tests.<br />
Test 14 – Check Load Watts & Amperage<br />
DISCUSSION:<br />
This test will determine if the generator’s rated wattage/amperage<br />
capacity has been exceeded.<br />
Continuous electrical loading should not be greater<br />
than the unit’s rated capacity.<br />
PROCEDURE:<br />
Add up the wattages or amperages of all loads powered<br />
by the generator at one time. If desired, a clampon<br />
ammeter may be used to measure current flow.<br />
See “Measuring Current” on Page 14.<br />
RESULTS:<br />
1. If the unit is overloaded, reduce the load.<br />
2. If load is within limits, but frequency and voltage still drop<br />
excessively, complete Test 2, “Check/Adjust Engine Governor”.<br />
If governor adjustment does not correct the problem, go to<br />
Problem 8.<br />
Page 42
Section 7<br />
DIAGNOSTIC TESTS<br />
Test 15 – Check Battery Charge Output<br />
DISCUSSION:<br />
The Battery Charge system consists of a center tap<br />
Battery Charge Winding, a Battery Charge Rectifier,<br />
and a Battery Charge Resistor. During normal operation<br />
the battery charge output will vary between 1 to 2<br />
amps, depending on the load applied to the generator.<br />
Battery Charge Winding Stator Lead Wire No. 66 is<br />
tapped at the Battery Charge Rectifier and connected<br />
to the Engine Control Circuit Board at Pin location<br />
J1-10, and is used as a signal for Starter lockout.<br />
should measure “Infinity.” Connect the negative test lead to the other<br />
outer terminal. Infinity should once again be measured.<br />
Short to Ground:<br />
4. Set the VOM to measure resistance. Connect the positive (+)<br />
test lead to the case housing of the BCR. Connect the negative<br />
(-) test lead to an outer terminal. “Infinity” should be measured.<br />
Now connect the negative test lead to the BCR center terminal.<br />
Infinity should be measured. Next, connect the negative test<br />
lead to the remaining outer BCR terminal. Once again “Infinity”<br />
should be measured.<br />
PROCEDURE:<br />
1. Disconnect Wire No. 15 from the Battery Charge Rectifier (center<br />
terminal). Wire No. 15 is the fused battery supply.<br />
2. Set your VOM to measure DC Amps. Connect the positive (+)<br />
test lead to the center terminal of the Battery Charge Rectifier.<br />
Connect the negative (-) test lead to Wire No. 15 previously disconnected.<br />
66<br />
15<br />
77<br />
3. Start the generator. The amp reading on the VOM should be<br />
approximately 0.8 Amps. Apply full load to the generator. The<br />
amp reading should increase to approximately 2 Amps.<br />
RESULTS:<br />
1. If amperage was measured between 0.8 to 2 Amps in Step 2<br />
and Step 3, the charging system is working.<br />
2. If no amperage was measured, check the VOM fuses and verify<br />
the functioning of the Amp Meter. Verify that the generator fuse<br />
F1 is not blown. If the fuse is bad, replace the fuse and retest. If<br />
meter and fuse are both good, go to Test 16.<br />
Test 16 – Check Battery Charge<br />
Rectifier<br />
DISCUSSION:<br />
The Battery Charge Rectifier (BCR) is a full wave rectifier.<br />
PROCEDURE:<br />
1. Disconnect Wire No. 66, Wire No. 15 and Wire No. 77 from the<br />
Battery Charge Rectifier.<br />
2. Set the VOM to the Diode Test range. Connect the negative (-)<br />
test lead to the center terminal of the BCR. Connect the positive<br />
(+) test lead to an outer terminal. The meter should measure<br />
approximately 0.5 volts. Now connect the positive test lead to<br />
the other outer terminal. Again, the meter should measure<br />
approximately 0.5 volts.<br />
3. Connect the positive (+) test lead to the center terminal of the BCR.<br />
Connect the negative (-) test lead to an outer terminal. The meter<br />
Figure 7-10. – Battery Charge Rectifier<br />
RESULTS:<br />
1. If any of the previous steps has failed, replace the Battery<br />
Charge Rectifier.<br />
2. If the BCR tests good, go to Test 17.<br />
Test 17 – Check Battery Charge<br />
Windings / Battery Charge Resistor<br />
DISCUSSION:<br />
The Battery Charge Winding (BCW) produces AC voltage<br />
that is delivered to the Battery Charge Rectifier.<br />
The Battery Charge Winding is a center tapped winding<br />
consisting of the following Stator Leads: Wire No.<br />
66, Wire No. 77 and Wire No. 55. The Battery Charge<br />
Resistor is used as a currant limiting resistor.<br />
PROCEDURE:<br />
1. Disconnect the Stator Leads (Wire No. 66 and Wire No. 77)<br />
from the Battery Charge Rectifier. (Be sure to disconnect Stator<br />
Lead Wire No. 66 “Black” from Wire No. 66 “Blue” connector for<br />
this test). Disconnect the Stator Lead Wire No. 55 from the<br />
Battery Charge Resistor.<br />
2. Set the VOM to measure resistance at the “R x 1” scale.<br />
Connect one test lead to Stator Lead Wire No. 66. Connect the<br />
Page 43
Section 7<br />
DIAGNOSTIC TESTS<br />
other test lead to Stator Lead Wire No. 55. Normal Battery<br />
Charge Winding resistance should be measured.<br />
3. Connect one test lead to Stator Lead Wire No. 77. Connect the<br />
other test lead to Stator Lead Wire No. 55. Normal Battery<br />
Charge Winding resistance should be measured.<br />
4. Connect one test lead to Stator Lead Wire No. 55. Connect the<br />
other test lead to Stator Leads Wire No. 11 & 33 at the back of<br />
CB1. “Infinity” should be measured.<br />
5. Connect one test lead to Stator Lead Wire No. 55. Disconnect<br />
Stator Lead Wire No. 2 from the DPE circuit breaker (CB3) and<br />
connect the other test lead to Wire No. 2. “Infinity” should be<br />
measured.<br />
6 Connect one test lead to Stator Lead Wire No. 55. Connect the<br />
other test lead to frame ground. “Infinity” should be measured.<br />
7. Connect one test lead to the Battery Charge Resistor terminal<br />
that Wire No. 55 was removed from. Connect the other test lead<br />
to frame ground. One (1) ohm should be measured. If 1 ohm<br />
was not measured, remove Wire No. 0 from the Battery Charge<br />
Resistor. Connect one test lead to Wire No. 0 and the other test<br />
lead to frame ground. Continuity should be measured. <strong>Repair</strong> or<br />
replace Wire No. 0 if defective and retest the Battery Charge<br />
Resistor.<br />
Battery Charge WINDING RESISTANCE:<br />
0.140 - 0.174 Ω<br />
RESULTS:<br />
1. For Steps 2 & 3, keep in mind that the resistance values are<br />
very low. Depending upon the quality of the VOM, it may read<br />
continuity across these winding. Exercise good judgement with<br />
these values.<br />
2. If Steps 2, 3, 4, 5 & 6 fail any test, replace the Stator.<br />
3. In Step 7, if Wire No. 0 reads continuity, but resistor does not<br />
measure 1 ohm, replace the Battery Charge Resistor.<br />
4. If all of the Steps in this test pass, perform “Insulation<br />
Resistance Test” on page 11.<br />
Test 18 – Try Cranking the Engine<br />
DISCUSSION:<br />
If the Fuel Primer Switch on the generator panel is<br />
actuated, but the Fuel Pump does not run (priming<br />
function doesn’t work), perhaps battery voltage is not<br />
available.<br />
PROCEDURE:<br />
Hold the Start-Stop Switch at “START”. The engine<br />
should crank and start.<br />
RESULTS:<br />
1. If the engine cranks normally, but the priming function still<br />
doesn’t work, go to Test 19.<br />
2. If engine will not crank, go to Test 21. Refer to Problem 6 of<br />
Section 6.<br />
3. If engine cranks but won’t start, go to Problem 7 of Section 6.<br />
4. If engine starts hard and runs rough, go to Problem 8 of Section<br />
6.<br />
Test 19 – Test Primer Switch<br />
DISCUSSION:<br />
A defective primer switch can prevent the priming<br />
function from occurring.<br />
Switch failure can also prevent the engine from starting,<br />
since the switch is in series with the Wire14 circuit.<br />
(Also see “Fuel Primer Switch,” page 23).<br />
PROCEDURE:<br />
1. Set a VOM to read battery voltage (12 VDC).<br />
2. Connect the positive (+) meter test lead to the Wire 15 terminal<br />
of the Primer Switch (leave Wire 15 connected to the switch).<br />
Connect the negative (-) meter test lead to frame ground. The<br />
meter should indicate battery voltage.<br />
15<br />
Figure 7-11. – Primer Switch<br />
14<br />
14A<br />
3. Connect the positive (+) meter test lead to the Wire 14 terminal<br />
of the Primer Switch (leave Wire 14 connected to the switch).<br />
Connect the negative (-) meter test lead to a clean frame<br />
ground. Set the Start-Stop switch to “start”. The engine<br />
should crank and battery voltage should be measured.<br />
4. Connect the positive (+) meter test lead to the Wire 14A terminal<br />
of the Primer Switch, the negative (-) meter test lead to<br />
frame ground.<br />
a. With the Primer Switch NOT actuated, no<br />
voltage should be indicated.<br />
Page 44
Section 7<br />
DIAGNOSTIC TESTS<br />
b. Actuate the switch to its “PRIME” position<br />
and the meter should read battery voltage.<br />
5. For gasoline models, disconnect Connector 2 at the Fuel Pump.<br />
Connect the VOM positive (+) test lead to Wire 14A, (Pin 2 of<br />
Connector 2) going up to the Control Panel (see Figure 7-12).<br />
Connect the VOM negative(-) test lead to frame ground. Repeat<br />
Steps 4a and 4b. Battery Voltage should be measured when the<br />
Primer Switch is activated.<br />
PIN 2 - WIRE NO. 14A<br />
PIN 1 - WIRE NO. 0<br />
Figure 7-12. – Harness End of Connector 2<br />
6. For LPG models, disconnect Wire 14A from the LPG Fuel<br />
Solenoid (FS)(see Figure 7-13). Connect the VOM positive (+)<br />
test lead to Wire 14A. Connect the VOM negative(-) test lead to<br />
frame ground. Repeat Steps 4a and 4b. Battery Voltage should<br />
be measured when the Primer Switch is activated.<br />
7. Set the VOM to measure resistance at the “Rx1” scale and zero<br />
the meter.<br />
a. Disconnect Wire 14 from the Primer Switch.<br />
b. Connect the meter test leads across the<br />
Wires 14 and 14A terminals of the switch.<br />
c. With the switch NOT actuated, the meter<br />
should read “Continuity”.<br />
0<br />
FUEL REGULATOR<br />
14A<br />
FUEL SOLENOID<br />
Figure 7-13. – The LPG Fuel Solenoid (FS)<br />
RESULTS:<br />
1. If battery voltage is not indicated in Step 2, check Wire 15 between<br />
the Primer Switch and the 7.5 amp fuse for an open condition.<br />
2. If battery voltage is indicated in Step 2 but not in Step 4, replace<br />
the Primer Switch. If battery voltage is NOT indicated in Step 3<br />
repair or replace Wire 14 between the 4-tab Terminal Connector<br />
(TC) and the Fuel Primer Switch (SW2).<br />
3. If battery voltage was indicated in Step 4 but not in Step 5:<br />
a. For gasoline models repair or replace Wire<br />
14A between the Primer Switch (SW2) and<br />
Fuel Pump Connector 2.<br />
b. For LPG models repair or replace Wire 14A<br />
between the Fuel Prime Switch (SW2) and<br />
the LPG Fuel Solenoid (FS).<br />
4. If the meter reads anything other than “Continuity” in Step 7,<br />
replace the Primer Switch.<br />
5. If the Primer Switch checks good, go to Test 20 for Gasoline<br />
models. For LPG models, go to Test 42.<br />
Test 20 – Check Fuel Pump<br />
DISCUSSION:<br />
An inoperative Fuel Pump will (a) prevent the priming<br />
function from working and (b) prevent the engine from<br />
starting.<br />
PROCEDURE:<br />
1. Remove Fuel Filter and verify that filter is not clogged. Replace<br />
filter if necessary.<br />
2. Verify that fuel is available to Fuel Filter inlet. Use an alternative<br />
fuel supply if questionable.<br />
3. Remove air filter access panel and air filter. Remove fuel hose<br />
from pump. Place a suitable container to catch fuel from fuel<br />
pump line. Activate fuel primer switch. Pump should operate<br />
and fuel should flow. If pump does not operate, proceed to Step<br />
4.<br />
4. In Test 19, Battery Voltage was checked at Connector 2. This<br />
step will test the ground wire. Disconnect Connector 2 at the<br />
Fuel Pump. Set the VOM to measure resistance. Connect one<br />
test lead to Wire No. 0, (Pin 1 of Connector 2) that goes to the<br />
Control Panel. Connect the other test lead to a clean frame<br />
ground. Continuity should be measured.<br />
5. To test for an open fuel pump coil, connect one test lead to the<br />
Red Wire (Pin 2 of Connector 2) going to the fuel pump. Connect<br />
the other test lead to the Black Wire (Pin 1 of Connector 2) going<br />
to the Fuel Pump. The VOM should indicate Fuel Pump coil resistance<br />
of about 29.5 kΩ. (Currant draw of the pump at nominal<br />
voltage is approximately 1.4 amperes MAXIMUM).<br />
Page 45
FLOW<br />
Section 7<br />
DIAGNOSTIC TESTS<br />
Short to Ground:<br />
6. To test for a shorted fuel pump coil, connect one test lead to the<br />
Red Wire (Pin 2 of Connector 2). Connect the other test lead to<br />
the fuel pump housing. “Infinity” should be measured.<br />
Test 21 – Check 7.5 Amp Fuse<br />
DISCUSSION:<br />
If the panel-mounted 7.5 amp fuse (F1) has blown,<br />
engine cranking will not be possible.<br />
Figure 7-16. – 7.5 Amp Fuse<br />
PROCEDURE:<br />
Push In on fuse holder cap and turn counterclockwise.<br />
Then, remove the cap with fuse. Inspect the Fuse.<br />
Figure 7-14. – Electric Fuel Pump<br />
RESULTS:<br />
1. If “Continuity” was not measured in Step 4, repair or replace<br />
Wire No. 0 between Connector 2 and the ground terminal.<br />
2. If “Continuity” is measured in Step 4, but pump does not operate<br />
in Step 3, replace the Fuel Pump.<br />
3. If the pump fails Step 5 or Step 6, replace the Fuel Pump.<br />
Note: If desired, a pressure gauge can be attached<br />
to the pumps outlet side. Pump outlet pressure<br />
should be 2.0 to 3.5 psi.<br />
PIN 2 - RED WIRE<br />
PIN 1 - BLACk WIRE<br />
Figure 7-15. – Harness to Fuel Pump<br />
RESULTS:<br />
If the Fuse element has melted open, replace the<br />
Fuse. If Fuse is good, go to Test 22.<br />
Test 22 – Check Battery & Cables<br />
DISCUSSION:<br />
If the engine won’t crank or cranks too slowly, the battery<br />
may be weak or discharged. See “Battery” on Page 22.<br />
PROCEDURE:<br />
1. Inspect the battery cables and battery posts or terminals for<br />
corrosion, tightness. Measure the voltage at the terminal of the<br />
starter contactor and verify 11-12 volts DC is available to the<br />
generator during cranking. If voltage is below 11 volts DC, measure<br />
at the battery terminals during cranking. If battery voltage<br />
is below 11 volts DC, recharge/replace battery. If battery voltage<br />
is above 11 volts DC, check for proper battery cable sizing (see<br />
“BATTERY CABLES” on Page 22). If battery or cables are still<br />
suspected, connect an alternate battery and cables to the generator<br />
and retest.<br />
2. Use a battery hydrometer to test the battery for (a) state of<br />
charge and (b) condition. Follow the hydrometer manufacturer’s<br />
instructions carefully.<br />
Page 46
Section 7<br />
DIAGNOSTIC TESTS<br />
RESULTS:<br />
1. Clean battery posts and cables as necessary. Make sure battery<br />
cables are tight.<br />
2. Recharge the battery, if necessary.<br />
3. Replace the battery, if necessary.<br />
4. If battery is good, but engine will not crank, go to Test 23.<br />
Test 23 – Check Power Supply to<br />
Circuit Board<br />
DISCUSSION:<br />
If battery voltage is not available to the circuit board,<br />
engine cranking and running will not be possible.<br />
If battery voltage is available to the board, but no DC<br />
output is delivered to the board’s Wire 56 terminal<br />
while attempting to crank, either the circuit board is<br />
defective or the Start-Stop Switch has failed.<br />
This test will determine if battery voltage is available<br />
to the Engine Controller circuit board. Test 24 will<br />
check the Start-Stop Switch. Test 25 will check the DC<br />
power supply to the circuit board’s Wire 56 terminal<br />
(Receptacle J1, Pin 1).<br />
PROCEDURE:<br />
1. On the Engine Controller circuit board, locate Terminal J3 to<br />
which Wire 15 connects.<br />
2. Set a VOM to read battery voltage. Connect the meter test<br />
leads across circuit board Terminal J3 and frame ground. The<br />
meter should read battery voltage.<br />
3. Set the VOM to measure resistance (“Rx1” scale). Connect one<br />
meter test lead to Wire No. 0, Pin location J1-12 on the Engine<br />
Controller Circuit Board. Connect the other test lead to a clean<br />
frame ground. Continuity should be measured.<br />
RESULTS:<br />
1. If battery voltage is NOT indicated in Step 1, check Wire 13<br />
between Starter Contactor and 7.5 amp Fuse, Wire 15 between<br />
the Fuse and the Battery Charge Rectifier, and Wire 15 between<br />
the Battery Charge Rectifier and the Engine Controller circuit<br />
board. <strong>Repair</strong>, reconnect or replace bad wiring as necessary.<br />
2. If battery voltage is indicated but engine will not crank, go to<br />
Test 24.<br />
3. If continuity was not measured in Step 3, repair or replace Wire<br />
No. 0 between the Engine Controller Circuit Board and the<br />
Ground Terminal.<br />
Test 24 – Check Start-Stop Switch<br />
DISCUSSION:<br />
Engine cranking and startup is initiated when Wire 17<br />
from the Engine Controller board is connected to<br />
frame ground by setting the Start-Stop Switch to<br />
“START”.<br />
Engine shutdown occurs when circuit board Wire 18 is<br />
connected to frame ground by the Start-Stop Switch.<br />
SW1<br />
17<br />
18<br />
Figure 7-17. – Start-Stop Switch<br />
0B<br />
A defective Start-Stop Switch can result in (a) failure<br />
to crank when the switch is set to “START”, and/or (b)<br />
failure to shut down when the Switch is set to “STOP”.<br />
PROCEDURE:<br />
1. Set a VOM to its “Rx1” scale and zero the meter.<br />
2. Inspect the ground Wire 0B, between the Start-Stop Switch and<br />
the grounding terminal. Connect one meter test lead to Wire No.<br />
0B on SW1. Connect the other test lead to a clean frame<br />
ground. Continuity should be measured.<br />
3. Disconnect Wire 17 from its Switch terminal and connect it to<br />
frame ground. The engine should crank.<br />
4. Remove the 7.5 amp fuse. Disconnect Wire No. 18, Wire No. 0B<br />
and Wire No. 17 from the start-stop switch (SW1).<br />
5. Connect one test lead to the center terminal of SW1. Connect<br />
the other test lead to an outer terminal of SW1. Infinity should<br />
be measured. Remove the test lead from the outer terminal of<br />
SW1 and connect it to the opposite outer terminal. Infinity<br />
should be measured.<br />
6. Leave the test lead connected to the center terminal of SW1<br />
from Step 5. Connect the other test lead to an outer terminal.<br />
Depress the switch away from the terminal being tested (see<br />
Figure 7-18). Continuity should be measured. Repeat the procedure<br />
with the test lead connected to the other outer terminal.<br />
Continuity should be measured.<br />
Page 47
Section 7<br />
DIAGNOSTIC TESTS<br />
Test 25 – Check Power Supply to Wire 56<br />
INFINITY<br />
INFINITY<br />
INFINITY<br />
CONTINUITY<br />
CONTINUITY<br />
INFINITY<br />
NOT ACTIvATED<br />
START<br />
DEPRESSED<br />
DEPRESSED<br />
STOP<br />
DISCUSSION:<br />
If battery voltage is available to the Engine Controller<br />
board in Test 23, then DC voltage should be delivered<br />
to Wire 56 when the Start Switch is set to “START”<br />
(Test 24). This test will check to see if the circuit board<br />
is delivering battery voltage to the Wire 56 terminal.<br />
PROCEDURE:<br />
1. Set a VOM to measure DC voltage (12 VDC).<br />
2. Disconnect Wire 56 from its Starter Contactor terminal.<br />
3. Connect the meter positive (+) test lead to Wire 56, just disconnected.<br />
Connect the other test lead to frame ground. No voltage<br />
should be indicated.<br />
4. Actuate the Start-Stop Switch to its “START” position. The meter<br />
should indicate battery voltage. If battery voltage is present,<br />
stop the procedure.<br />
5. Connect the VOM positive (+) test lead to Wire No. 56 (Pin<br />
Location J1-1) at the Engine Controller Circuit Board. Connect<br />
the other test lead to frame ground.<br />
6. Actuate the Start-Stop Switch to the “START” position. The<br />
meter should indicate battery voltage.<br />
Figure 7-18. – Test 24, Step 6<br />
RESULTS:<br />
1. If continuity is not measured in Step 2, repair, reconnect or<br />
replace Wire 0B (between Start-Stop Switch and ground terminal)<br />
as necessary.<br />
2. If engine cranks in Step 3 when Wire 17 is grounded, but will<br />
not crank when the Switch is set to “START”, replace the Start-<br />
Stop switch.<br />
3. If the Start-Stop Switch (SW1) failed any part of Steps 5 or 6,<br />
replace the switch.<br />
4. If engine will not crank when Wire 17 is grounded, proceed as<br />
follows:<br />
a. Use a jumper wire to connect the circuit board’s<br />
Wire 17 (pin location J1-6) to ground. If engine<br />
does NOT crank, proceed to Test 25.<br />
b. If engine cranks now, but would not crank in<br />
Step 3 of the procedure, check Wire 17 for continuity<br />
between the circuit board and Start-Stop<br />
Switch. If continuity is not measured, repair or<br />
replace Wire No. 17 between the engine control<br />
board and the Start-Stop switch.<br />
RESULTS:<br />
1. If battery voltage was measured in Step 6, but not in Step 4,<br />
repair or replace Wire No. 56 between the Engine Controller<br />
Circuit Board and Starter Contactor.<br />
2. If battery voltage was not available in Step 6, replace the<br />
Engine Controller Circuit Board.<br />
3. If battery voltage is available in Step 4 but engine does not<br />
crank, go to Test 26.<br />
Test 26 – Check Starter Contactor<br />
DISCUSSION:<br />
If battery voltage is available to the Wire 56 circuit, but<br />
engine won’t crank, one possible cause of the problem<br />
is a failed Starter Contactor.<br />
PROCEDURE:<br />
1. Set the VOM to measure resistance (“R x 1” scale). Connect<br />
one test lead to Wire No. 0 on the Starter Contactor terminal.<br />
Connect the other test lead to frame ground. Continuity should<br />
be measured.<br />
2. Momentarily connect a suitable jumper cable across the two<br />
large terminal studs of the Starter Contactor. The engine should<br />
crank.<br />
Page 48
Section 7<br />
DIAGNOSTIC TESTS<br />
Short to Ground:<br />
3. Set the VOM to measure resistance. Disconnect Wire No. 56<br />
from the Starter Contact terminal. Connect one meter test lead<br />
to the Starter Contact terminal from which Wire No. 56 was just<br />
removed. Connect the other meter test lead to a clean frame<br />
ground. A Starter Contactor coil resistance of 3.9 ohms should<br />
be measured. If continuity is measured, a short to ground exists.<br />
(Current draw of the Starter Contactor coil at nominal voltage is<br />
approximately 3.2 amps).<br />
56<br />
TO ECB<br />
0<br />
TO GROUND<br />
16<br />
TO STARTER<br />
16<br />
TO ECB<br />
13<br />
TO FUSE (F1)<br />
13<br />
TO BATTERY<br />
RESULTS:<br />
1. If battery voltage is indicated on the meter but Starter Motor did<br />
not operate, remove and bench test the Starter Motor (see following<br />
test).<br />
2. If battery voltage was indicated and the starter motor tried to<br />
engage (bendix came up), but engine did not crank, check for<br />
mechanical binding of the engine or rotor.<br />
If engine turns over slightly, go to Test 35 “Check Valve<br />
Adjustment.” Compression release may not be working, or<br />
mechanical binding is occurring.<br />
Testing the Starter Motor<br />
CHECKING THE PINION:<br />
When the starter motor is activated, the pinion gear<br />
should move and engage the flywheel ring gear. If the<br />
pinion does not move normally, inspect the large spiral<br />
threads of the sleeve and pinion for binding or sticking.<br />
16 (From Starter Contactor)<br />
Figure 7-19. – Starter Contactor<br />
RESULTS:<br />
1. If continuity is not measured in Step 1, repair or replace Wire<br />
No. 0 between the Starter Contactor and the ground terminal.<br />
2 If engine cranks during Step 2, but would not crank in Test 25,<br />
remove and replace the Starter Contactor.<br />
3. If engine does not crank in this test, go to Test 27.<br />
Test 27 – Check Starter Motor<br />
DISCUSSION:<br />
If the engine will not crank, the Starter Motor may<br />
have failed. This test will check that possibility.<br />
PROCEDURE:<br />
The battery should have been checked prior to this<br />
test and should be fully charged.<br />
Set a VOM to measure DC voltage (12 VDC). Connect<br />
the meter positive (+) test lead to the cable connection<br />
on the Starter Motor. Connect the common (-) test<br />
lead to the Starter Motor frame.<br />
Set the Start-Stop Switch to its “START” position and<br />
observe the meter. Meter should Indicate battery voltage,<br />
Starter Motor should operate and engine should crank.<br />
Figure 7-20. – Starter Motor<br />
TOOLS FOR STARTER PERFORMANCE TEST:<br />
The following equipment may be used to complete a<br />
performance test of the starter motor:<br />
• A digital multimeter (VOM).<br />
• A tachometer capable of reading up to 1,500 rpm.<br />
• A fully charged 12-volt battery.<br />
STARTER PERFORMANCE TEST:<br />
1. Set the meter to read DC amps.<br />
2. Connect the starter motor, battery and VOM as shown in Figure 7-21.<br />
Page 49
Section 7<br />
DIAGNOSTIC TESTS<br />
3. Insert the tachometer at end of the pinion gear and activate the<br />
starter motor. A starter motor in good condition will be within the<br />
following specifications:<br />
STARTER MOTOR PERFORMANCE SPECIFICATIONS<br />
AT 12 VOLTS DC:<br />
MINIMUM MOTOR RPM = 800<br />
MAXIMUM AMPS = 9<br />
If the starter does not perform satisfactorily, it should<br />
be replaced.<br />
VOM<br />
VICE<br />
Black test lead<br />
connected<br />
to positive<br />
battery terminal<br />
12 VOLT<br />
BATTERY<br />
Red test lead<br />
connected to<br />
starter terminal<br />
only for vapor withdrawal type systems. Vapor withdrawal<br />
systems use the gas vapors that form above<br />
the liquid fuel in the tank. Do NOT attempt to use the<br />
generator with any liquid withdrawal type system.<br />
Gas pressure delivered to the solenoid valve must be<br />
properly regulated by means of a primary gas regulator.<br />
Mount the primary regulator at the gas tank outlet<br />
or in the supply line from the gas tank. The following<br />
rules apply:<br />
• For best results, the primary regulator supplies gaseous<br />
fuel to the secondary regulator at 11 inches<br />
water column. Do NOT exceed 14 inches water column.<br />
• The installer must be sure the primary regulator is<br />
rated at sufficient gas flow to operate the generator<br />
plus all other gas appliances in the circuit.<br />
REGULATOR<br />
11 - 14" WATER COLUMN<br />
PRIMARY<br />
REGULATOR<br />
TACHOMETER<br />
STARTER<br />
MOTOR<br />
Negative battery<br />
terminal<br />
suitably grounded<br />
Figure 7-21 – Starter Performance Test<br />
Test 28 – Check Fuel Supply<br />
DISCUSSION (Gasoline <strong>Model</strong>s):<br />
If the engine cranks but won’t start, don’t overlook the<br />
obvious. The fuel supply may be low. Many RV generator<br />
installations “share” the fuel tank with the vehicle<br />
engine. When such is the case, the Installer may have<br />
used a generator fuel pickup tube that is shorter than<br />
the vehicle engine’s pickup tube. Thus, the generator<br />
will run out of gas before the vehicle engine.<br />
PROCEDURE:<br />
Check fuel level in the supply tank. Attach a fresh fuel<br />
supply if necessary and restart. Fuel may be stale,<br />
causing a hard start.<br />
RESULTS:<br />
1. If necessary, replenish fuel supply.<br />
2. If fuel is good, go to Test 29.<br />
DISCUSSION (LPG <strong>Model</strong>s):<br />
LP gas is stored in pressure tanks as a liquid. The gas<br />
systems used with these generators were designed<br />
CARBURETOR<br />
VAPOR<br />
WITHDRAWAL<br />
TANk<br />
Figure 7-22 – Typical Propane Gas Fuel System<br />
NOTE: Recommended MINIMUM gas flow rate for<br />
all air-cooled QUIETPACT series generators is 67<br />
cubic feet per hour.<br />
If an existing primary gas regulator does not have<br />
a sufficient flow capacity for the generator and<br />
other gas appliances in the circuit, (a) install a primary<br />
regulator with adequate flow rate, or (b)<br />
install a separate regulator only and rated at least<br />
67 cubic feet per hour. The inlet side of any primary<br />
regulator that supplies the generator must connect<br />
directly to a gas pressure tank. Do NOT tee<br />
the generator line into a gas circuit feeding other<br />
areas.<br />
$<br />
CAUTION!:<br />
Use only approved components in<br />
the fuel supply system. All components must<br />
be properly installed in accordance with applicable<br />
codes. Improper installation or use of<br />
unauthorized components may result in fire<br />
Page 50
Section 7<br />
DIAGNOSTIC TESTS<br />
or an explosion. Follow approved methods to<br />
test the system for leaks. No leakage is permitted.<br />
Do not allow fuel vapors to enter the<br />
vehicle interior.<br />
LP gas vapors should be supplied to the secondary<br />
regulator inlet at about 11 inches water column (positive<br />
pressure). The engine pistons draw air in during<br />
the intake stroke (Figure 7-23). This air passes through<br />
a carburetor venturi, which creates a low pressure that<br />
is proportional to the quantity of air being pumped.<br />
The low pressure from the carburetor venturi acts on<br />
the regulator diaphragm to pull the diaphragm toward<br />
the source of low pressure. A lever attached to the<br />
diaphragm opens a valve to permit gas glow through<br />
the carburetor.<br />
TO CARBURETOR<br />
GAS IN<br />
1. Turn LP supply to generator off.<br />
2. Remove the Gas Pressure Tap from the fuel regulator and<br />
install manometer to this port.<br />
3. Turn LP supply to generator on, the gauge should read 11-14<br />
inches water column.<br />
4. For Problem 8 only (Section 6), start the engine and the gauge<br />
should read 11-14 inches water column.<br />
RESULTS:<br />
1. If the LP gas pressure is less than 11-14 inches water column<br />
the fuel supply system must be corrected in order to maintain<br />
11-14 inches water column.<br />
2. If the LP gas pressure is between 11-14 inches water Column,<br />
proceed to Test 29 for Problem 7 (Section 6). Proceed to Test<br />
32 for Problem 8 (Section 6).<br />
FUEL HOSE<br />
GAS<br />
PRESSURE<br />
TAP<br />
HOSE<br />
FITTING<br />
Figure 7-23 – LP Gas Carburetion Diagram<br />
The greater the airflow through the carburetor venturi,<br />
the lower the pressure at the venturi throat. The lower<br />
the pressure at the venturi throat, the greater the diaphragm<br />
movement, and the greater the movement of<br />
the regulator valve. The more the regulator valve<br />
opens, the greater the gas flow that is proportional to<br />
airflow through the generator.<br />
The following facts about the secondary regulator<br />
must be emphasized:<br />
• The regulator must be sensitive to venturi throat<br />
pressure changes throughout the operating range.<br />
• The regulator must be properly adjusted so it will<br />
stop the flow of gas when the engine is not running<br />
(no air flow through the carburetor).<br />
• The slightest airflow (and vacuum in the venturi<br />
throat) should move the regulator valve off its seat<br />
and permit gas to flow.<br />
Procedure:<br />
A water manometer or a gauge that is calibrated in<br />
“ounces per square inch” may be used to measure the<br />
fuel pressure. Fuel pressure at the inlet side of the<br />
LPG Shut Off Valve should be between 11-14 inches<br />
water column as measured with a manometer. The LP<br />
system must be able to maintain 11-14 inches water<br />
column under all load requirements.<br />
Figure 7-24. – Fuel Regulator<br />
Test 29 – Check Wire 14 Power Supply<br />
DISCUSSION:<br />
When the engine is cranked, Engine Controller circuit<br />
board action must deliver battery voltage to the Wire<br />
14 circuit or the engine will not start. This is because<br />
the Wire 14 circuit operates the Fuel Pump and Fuel<br />
Solenoid.<br />
PROCEDURE:<br />
Inside the generator panel, locate the 4-tab terminal<br />
connector (Figure 7-25). Then, proceed as follows:<br />
1. Set a VOM to read battery voltage (12 VDC).<br />
2. Connect the meter positive (+) test lead to the 4-tab terminal<br />
connector, the common (-) test lead to frame ground.<br />
3. Crank the engine and the meter should read battery voltage. If<br />
battery voltage is not measured, proceed to Step 4.<br />
Page 51
Section 7<br />
DIAGNOSTIC TESTS<br />
4. Connect the positive (+) meter test lead to Terminal J2 on the<br />
Engine Controller Circuit Board. Connect the negative (-) test<br />
lead to a clean frame ground.<br />
5. Crank the engine. The meter should indicate battery voltage.<br />
RESULTS:<br />
1. If continuity is measured in Step 2, repair or replace shorted<br />
Wire No. 18 between J1 Connector and Start-Stop Switch.<br />
2. If continuity was measured in Step 3, repair or replace shorted<br />
Wire No. 18 between J1 Connector and remote panel connector.<br />
Test 31 – Check Fuel Solenoid<br />
(Gasoline Units)<br />
DISCUSSION:<br />
If the Fuel Solenoid fails to open, the engine will not<br />
start.<br />
Figure 7-25. – The 4-tab Connector<br />
RESULTS:<br />
1. If the meter Indicated battery voltage, go to Test 30.<br />
2. If battery voltage was NOT indicated in Step 3 but is indicated<br />
in Step 5, check Wire 14 between the 4-tab connector and the<br />
Engine Controller circuit board.<br />
a. <strong>Repair</strong>, reconnect or replace Wire 14 as necessary.<br />
3. If battery voltage was not indicated in Step 5, replace the<br />
Engine Controller Circuit Board.<br />
Test 30 – Check Wire 18<br />
DISCUSSION:<br />
Wire No. 18 controls sending the STOP signal to the<br />
Engine Controller Circuit Board. If Wire No. 18 contacts<br />
ground it will initiate a shutdown. Coach manufacturers<br />
sometimes install a 15 to 30 foot remote harness.<br />
A ground on Wire No. 18 in a remote harness<br />
can also cause a shutdown.<br />
PROCEDURE:<br />
1. Remove the remote harness connector from the generator and<br />
re-test. If generator continues to run, a short is present in the<br />
remote harness. <strong>Repair</strong> or replace the remote harness.<br />
2. Remove the J1 connector from the Engine Controller Circuit<br />
Board. Set the VOM to measure resistance. Connect one test<br />
lead to Pin Location J1-14. Connect the other test lead to a<br />
clean frame ground. Infinity should be measured.<br />
3. Connect one test lead to Pin Location J1-15. Connect the other<br />
test lead to a clean frame ground. Infinity should be measured.<br />
PROCEDURE:<br />
Set the Start-Stop Switch to “START”. The Fuel<br />
Solenoid should actuate.<br />
1. Remove the Control Panel cover to access the back side of the<br />
Fuel Primer Switch.<br />
2. Place a hand on the Fuel Solenoid located at the base of the<br />
carburetor bowl.<br />
3. Connect a jumper between the top and bottom terminals of the<br />
fuel primer switch. This will activate the fuel pump and fuel solenoid.<br />
The fuel solenoid should energize and you should be able<br />
to feel and hear it. If the Fuel Solenoid does not operate, proceed<br />
to Step 4.<br />
14<br />
Figure 7-26. – Connector 3, Fuel Solenoid to Panel<br />
4. Set the VOM to measure DC voltage. Disconnect Connector 3<br />
from the Fuel Solenoid. Connect the positive (+) meter test lead<br />
to Wire No. 14 (Connector 3, Pin 2) that goes to the control<br />
panel. Connect the other test lead to a clean frame ground. Set<br />
the Start-Stop Switch to “START.” Battery voltage should be<br />
measured.<br />
5. Set the VOM to measure resistance. Disconnect Connector 3<br />
from the Fuel Solenoid. Connect one test lead to Wire No. 0<br />
0<br />
Page 52
Section 7<br />
DIAGNOSTIC TESTS<br />
(Connector 3, Pin 1) that goes to the control panel. Connect the<br />
other test lead to a clean frame ground. Continuity should be<br />
measured.<br />
Short to Ground:<br />
6. Set the VOM to measure resistance. Disconnect Connector to<br />
the Fuel Solenoid. Connect one meter test lead to one pin on<br />
the Fuel Solenoid. Connect the other meter test lead to the Fuel<br />
Solenoid housing. Infinity should be measured. If continuity is<br />
measured, a short to ground exists. (Fuel Solenoid coil resistance<br />
is approximately 30.1 ohms. Current draw of the Fuel<br />
Solenoid at nominal voltage is approximately 418 milliamps or<br />
0.418 amps).<br />
RESULTS:<br />
1. If the Fuel Solenoid passes Steps 4 & 5 but does NOT operate<br />
in Step 3, replace or repair Fuel Solenoid.<br />
2. If battery voltage is not measured in Step 4, repair or replace<br />
Wire No. 14 between Connector 3 and the 4-tab terminal.<br />
3. If continuity is not measured in Step 5, repair or replace Wire<br />
No. 0 between the Fuel Solenoid and ground terminal.<br />
4. If the Fuel Solenoid operates, proceed to Test 32.<br />
Test 32 – Check Ignition Spark<br />
6. If spark jumps the tester gap intermittently, the problem may be<br />
in the Ignition Coil. Proceed to Test 34.<br />
SPARk TESTER CLAMP<br />
GROUNDED TO<br />
CYLINDER HEAD<br />
SPARk TESTER<br />
SPARk PLUG<br />
BOOT<br />
Figure 7-27. – Testing Ignition System<br />
SPARk TESTER CLAMP<br />
CONNECTED TO<br />
SPARk PLUG SPARk TESTER<br />
SPARk PLUG<br />
BOOT<br />
DISCUSSION:<br />
A problem in the engine Ignition system can cause<br />
any of the following:<br />
• Engine will not start.<br />
• Engine starts hard, runs rough.<br />
A commercially available spark tester may be used to<br />
test the engine ignition system. One can also be purchased<br />
from <strong>Generac</strong> Power Systems (Part No.<br />
0C5969).<br />
PROCEDURE:<br />
1. Disconnect the high tension lead from the spark plug.<br />
2. Attach the high tension lead to the spark tester terminal.<br />
3. Ground the spark tester clamp by attaching to the cylinder<br />
head.<br />
4. Crank the engine rapidly. Engine must be cranking at 350 rpm<br />
or more. If spark jumps the tester gap, you may assume the<br />
ignition system is working properly.<br />
5. To determine if an engine miss is ignition related, connect the<br />
spark tester in series with the high tension lead and the spark<br />
plug. Then, start the engine. If spark jumps the tester gap at<br />
regular Intervals, but the engine miss continues, the problem<br />
may be in the spark plug or fuel system. Proceed to Test 33.<br />
Figure 7-28. – Checking Engine Miss<br />
RESULTS:<br />
1. If no spark or if engine miss is apparent, go to Test 34.<br />
2. If ignition spark is good, go to Test 33.<br />
Test 33 – Check Spark Plug<br />
DISCUSSION:<br />
During Test 32, if spark jumped the tester gap, the<br />
ignition system must be functioning properly.<br />
However, if the engine misses the spark plug itself<br />
may be fouled.<br />
Page 53
Section 7<br />
DIAGNOSTIC TESTS<br />
PROCEDURE:<br />
Remove spark plug. Clean with a commercial solvent.<br />
DO NOT BLAST CLEAN SPARK PLUGS. Replace<br />
spark plug if badly fouled, if ceramic is cracked, or if<br />
badly worn or damaged. Set gap to 0.030 inch<br />
(0.76mm). Use a Champion RC14YC (or equivalent)<br />
replacement spark plug.<br />
SET PLUG GAP AT 0.030 inch<br />
(0.76 mm)<br />
IGNITION COIL<br />
SPARk PLUG<br />
HIGH TENSION<br />
LEAD<br />
SPARk<br />
PLUG<br />
BOOT<br />
Figure 7-30 – Ignition Coil Assembly<br />
Figure 7-29. – Setting Spark Plug Gap<br />
RESULTS:<br />
1. Clean and regap or replace spark plug as necessary.<br />
2. If spark plug is good, go to Test 36.<br />
Test 34 – Check Ignition Coil<br />
DISCUSSION:<br />
The ignition system used on GH-220 engines is a solid-state<br />
(breakerless) type. The system utilizes a magnet<br />
on the engine flywheel to induce a relatively low<br />
voltage into an ignition coil assembly. Ignition coil<br />
internal components increase the voltage and deliver<br />
the resulting high voltage across the spark plug gap.<br />
The ignition coil houses a solid state-circuit board that<br />
controls ignition timing. Timing is fixed, air gap is nonadjustable<br />
and spark advance is automatic.<br />
Major components of the ignition system include (a)<br />
the ignition coil assembly, (b) the spark plug, (c) the<br />
engine control board and (d) the engine flywheel.<br />
Solid-state components encapsulated in the ignition<br />
coil are not accessible and cannot be serviced. If the<br />
coil is defective, the entire assembly must be replaced.<br />
The air gap between the coil and the flywheel magnet<br />
is fixed and non-adjustable.<br />
The ignition coil assembly (Figure 7-30) consists of (a)<br />
ignition coil, (b) spark plug high tension lead and (c)<br />
spark plug boot.<br />
Procedure:<br />
1. Disconnect Wire No. 18A at the Bullet Connector. Repeat Test 32.<br />
2. If unit now produces spark, disconnect J1 Connector from ECB<br />
(Engine Control Board). Set the VOM to measure resistance.<br />
Connect one test lead to Wire No. 18A (Pin Location J1-4).<br />
Connect the other test lead to a clean frame ground. Infinity<br />
should be measured.<br />
3. If Step 1 produced spark and Step 2 tested good, set the VOM<br />
to measure DC voltage. Connect one test lead to Wire No. 15<br />
(J3 Terminal) on ECB. Connect the other test lead to frame<br />
ground. Battery voltage should be measured. Verify that Wire<br />
No. 15 is connected to J3 and that Wire No. 14 is connected to<br />
J2; if reversed the unit will produce no spark.<br />
4. Set the VOM to measure resistance. Connect the negative (-)<br />
test lead to Wire No. 18A, which goes to the coil. Connect the<br />
positive (+) test lead to frame ground. Approximately 1.5 kΩ<br />
should be measured.<br />
5. Set the VOM to measure resistance. Disconnect the high tension<br />
lead from the spark plug. Connect one test lead to the high<br />
tension lead. Connect the other test lead to frame ground.<br />
Approximately 16 kΩ should be measured.<br />
Results:<br />
1. If infinity is not measured in Step 2, repair or replace grounded<br />
Wire No. 18 between ECB and bullet connector.<br />
2. If battery voltage is not measured in Step 3, reconnect Wire No.<br />
15 and Wire No. 14 to the correct terminal locations.<br />
3. If the Ignition Coil fails Step 4 or Step 5 by a high margin,<br />
replace the Ignition Coil.<br />
4. If the coil passes Step 4 and Step 5, but there is still no spark,<br />
replace the Ignition Coil.<br />
Note: Before replacing the Ignition Coil, check the<br />
Flywheel Magnet.<br />
Page 54
Section 7<br />
DIAGNOSTIC TESTS<br />
CHECKING FLYWHEEL MAGNET:<br />
The flywheel magnet rarely loses its magnetism. If you<br />
suspect a magnet might be defective, a rough test can<br />
be performed as follows:<br />
1. Place the flywheel on a wooden surface.<br />
2. Hold a screwdriver at the extreme end of its handle and with its<br />
point down.<br />
3. Move the tip of the screwdriver to about 3/4 inch (19mm) from<br />
the magnet. The screwdriver blade should be pulled in against<br />
the magnet.<br />
FLYWHEEL KEY:<br />
In all cases, the flywheel’s taper is locked on the<br />
crankshaft taper by the torque of the flywheel nut. A<br />
keyway is provided for alignment only and theoretically<br />
carries no load.<br />
If the flywheel key becomes sheared or even partially<br />
sheared, ignition timing can change. Incorrect timing<br />
can result in hard starting or failure to start.<br />
Figure 7-31 – Adjusting Valve Clearance<br />
Test 35 – Check Valve Adjustment<br />
Discussion:<br />
The valve lash must be adjusted correctly in order to provide<br />
the proper air/fuel mixture to the combustion chamber.<br />
Adjusting Valve Clearance:<br />
Adjust valve clearance with the engine at room temperature.<br />
The piston should be at top dead center<br />
(TDC) of its compression stroke (both valves closed).<br />
An alternative method is to turn the engine over and<br />
position the intake valve fully open (intake valve spring<br />
compressed) and adjust the exhaust valve clearance.<br />
Turn the engine over and position the exhaust valve<br />
fully open (exhaust valve spring compressed) and<br />
adjust the intake valve clearance.<br />
Correct valve clearance is given below, in INCHES<br />
(MILLIMETERS).<br />
Intake Valve 0.001-0.0022 (0.03-0.056)<br />
Exhaust Valve 0.0018-0.003 (0.046-0.07)<br />
1. Loosen the rocker arm jam nut. Use an 8mm allen wrench to turn<br />
the pivot ball stud while checking the clearance between the rocker<br />
arm and valve stem with a feeler gauge (see Figure 7-31).<br />
2. When clearance is correct, hold the pivot ball stud with the allen<br />
wrench and tighten the rocker arm jam nut to the specified<br />
torque with a crow’s foot. After tightening the jam nut, recheck<br />
valve clearance to make sure it did not change.<br />
TORQUE SPECIFICATION<br />
ROCKER ARM JAM NUT<br />
72 inch-pounds<br />
Figure 7-32 – Tightening the Jam Nut<br />
Install Rocker Arm Cover:<br />
1. Use a new rocker arm cover gasket. Install the rocker arm cover<br />
and retain with four screws.<br />
2. Install oil breather tube.<br />
Results:<br />
Adjust valves to specification and retest.<br />
Test 36 – Check Carburetion<br />
DISCUSSION:<br />
If the engine cranks but will not start, one possible<br />
cause of the problem might be the carburetion system.<br />
PROCEDURE:<br />
Before making a carburetion check, be sure the fuel supply<br />
tank has an ample supply of fresh, clean gasoline.<br />
Check that all shutoff valves are open and fuel flows<br />
freely through the fuel line.<br />
Page 55
Section 7<br />
DIAGNOSTIC TESTS<br />
Make sure the automatic choke operates properly.<br />
If the engine will not start, remove and inspect the spark<br />
plug. If the spark plug is wet, look for the following:<br />
• Overchoking.<br />
• Excessively rich fuel mixture.<br />
• Water in fuel.<br />
• Intake valve stuck open.<br />
• Needle/float stuck open.<br />
If the spark plug is dry look for the following:<br />
• Leaking carburetor mounting gaskets.<br />
• Intake valve stuck closed.<br />
• Inoperative fuel pump.<br />
• Plugged fuel filter(s).<br />
• Varnished carburetor<br />
If the engine starts hard or will not start, look for the<br />
following:<br />
• Physical damage to the AC generator. Check the<br />
Rotor for contact with the Stator.<br />
• Starting under load. Make sure all loads are disconnected<br />
or turned off before attempting to crank and<br />
start the engine.<br />
• Check that the automatic choke is working properly.<br />
RESULTS:<br />
If problem has not been solved, go to Test 37. If carburetor<br />
is varnished, clean or replace.<br />
1. Remove fuel line at carburetor and ensure that there is an adequate<br />
amount of fuel entering the carburetor.<br />
2. Remove the float bowl and check to see if there is any foreign<br />
matter in bottom of carburetor bow..<br />
3. The float is plastic and can be removed for access to the needle<br />
so it can be cleaned.<br />
4. With all this removed you can use carburetor cleaner to clean<br />
the rest of the carburetor before reassembly.<br />
5. After cleaning carburetor with an approved carburetor cleaner<br />
blow dry with compressed air and reassemble.<br />
Shelf life on gasoline is 30 days. Proper procedures<br />
need to be taken for carburetors so that the fuel doesn’t<br />
varnish over time. You must use a fuel stabilizer at all<br />
times in order to ensure that the fuel is fresh at all times.<br />
Test 37 – Check Choke Solenoid<br />
DISCUSSION:<br />
The automatic choke is active only during cranking.<br />
When the Start-Stop Switch is held at “START”, a<br />
crank relay on the Engine Controller circuit board is<br />
energized closed to (a) crank the engine and (b) deliver<br />
a cyclic voltage to the Choke Solenoid via Wire No.<br />
90. The Choke Solenoid will be pulled in for about two<br />
seconds, then deactivate for about two seconds. This<br />
cyclic choking action will continue as long as the<br />
engine is being cranked.<br />
NOTE: LP units do not use a Wire #14 or BI-METAL<br />
HEATER ASSEMBLY.<br />
PROCEDURE:<br />
1. Operational Check: Crank the engine. While cranking, the choke<br />
solenoid should pull in about every 2 seconds (2 seconds ON, 2<br />
seconds OFF). If the choke solenoid does not pull in, try adjusting<br />
the choke as follows.<br />
2. Pre-Choke Adjustment: With the CHOKE SOLENOID not actuated,<br />
the carburetor CHOKE PLATE should be approximately 1/8<br />
Inch from its full open position. Verify choke is completely open<br />
once engine is warmed up. If not, power will be down and emissions<br />
will be up. Adjust position of bi-metal HEATER Assembly<br />
by loosening screws until unit starts when cold and the choke is<br />
fully open when engine is up to temperature. Tighten the screws to<br />
complete the adjustment (see Figure 7-36).<br />
3. Choke Solenoid Adjustment: Loosen the screws that retain the<br />
CHOKE SOLENOID to its bracket.<br />
a. Using a screw driver or similar tool, lift the choke<br />
solenoid at the retaining clip as shown in Figure<br />
7-33. Do NOT lift at the BI-METAL HEATER<br />
ASSEMBLY .<br />
b. The solenoid is in the correct position when<br />
Edge A of the carburetor throttle shaft is lined up<br />
parallel to Edge B of the carburetor body as<br />
shown in Figure 7-34.<br />
c. Tighten the screws that retain the CHOKE<br />
SOLENOID to its bracket.<br />
d. Verify that the BI-METAL HEATER ASSEMBLY<br />
operates as described in Step 2. Re-adjust as<br />
necessary.<br />
4. Disconnect Connector 1: Set the VOM to measure DC voltage.<br />
Connect the positive (+) test lead to Wire No. 90 (Pin 2) of<br />
Connector 1 going to the control panel. Connect the negative (-)<br />
test lead to frame ground. Activate the Start-Stop switch to<br />
“START.” During cranking, battery voltage should be measured<br />
cyclically every two seconds.<br />
5. If battery voltage was not measured in Step 4, check at J1<br />
Connector: Connect positive (+) test lead to Pin Location J1-2<br />
at the engine control board. Connect the negative (-) test lead<br />
to frame ground. Activate the Start-Stop switch to “START.”<br />
During cranking, battery voltage should be measured cyclically<br />
every two seconds.<br />
6. Set the VOM to measure resistance. Disconnect Connector 1<br />
from the Choke Solenoid. Connect one test lead to Wire No. 0<br />
(Pin 1) of Connector 1, going to the control panel. Connect the<br />
other test lead to frame ground. Continuity should be measured.<br />
Page 56
Section 7<br />
DIAGNOSTIC TESTS<br />
1<br />
3 0<br />
2<br />
2 90<br />
3<br />
1 14<br />
LOOSEN<br />
SCREWS<br />
TO CHOkE<br />
SOLENOID<br />
TO CONTROL<br />
PANEL<br />
LIFT HERE<br />
Figure 7-35. – Connector 1<br />
7. Set the VOM to measure resistance. Disconnect Connector 1.<br />
Connect one meter test lead to Wire No. 90 (Connector 1, Pin 2)<br />
going to the Choke Solenoid. Connect the other meter test lead<br />
to Wire No. 0 (Connector 1, Pin 1). Approximately 3.7 ohms<br />
should be measured. (Current draw of Choke Solenoid at nominal<br />
voltage is 3.4 amps).<br />
Figure 7-33. – Choke Assembly Adjustment<br />
EDGE A<br />
CHOkE<br />
SOLENOID<br />
PLASTIC<br />
BOOT<br />
BI-METAL<br />
HEATER<br />
ASSEMBLY<br />
CHOkE<br />
SOLENOID<br />
BRACkET<br />
CHOkE SOLENOID<br />
ADjUSTMENT SCREWS<br />
CHOkE<br />
SOLENOID<br />
RETAINING<br />
SCREWS<br />
RETAINING<br />
CLIP<br />
CHOkE<br />
CONTROL<br />
ROD<br />
THROTTLE<br />
SHAFT<br />
Figure 7-36. – Exploded View of Choke Assembly<br />
EDGE B<br />
CARBURETOR<br />
Figure 7-34. – Final Choke Adjustment<br />
Short to Ground:<br />
8. Set the VOM to measure resistance. Disconnect Connector 1.<br />
Connect one meter test lead to Wire No. 90 (Connector 1, Pin 2).<br />
Connect the other meter test lead to the metal Choke Solenoid<br />
housing. Infinity should be measured. If continuity is measured, a<br />
short to ground exists.<br />
RESULTS:<br />
1. If Choke operation is good, go to Test 35 for Problem 7, “Engine<br />
Cranks but Won’t Start.” Go to Test 41 for Problem 8, “Engine<br />
Starts Hard and Runs Rough.”.<br />
Page 57
Section 7<br />
DIAGNOSTIC TESTS<br />
2. If battery voltage was measured in Step 5 but not measured in<br />
Step 4, repair or replace Wire No. 90 between ECB and<br />
Connector 1.<br />
3. If battery voltage is not measured in Step 5 during engine<br />
cranking, replace Engine Control Board.<br />
4. If continuity is not measured in Step 6, repair or replace Wire<br />
No. 0 between the ground terminal and Connector 1.<br />
5. If Choke Solenoid coil resistance is not measured or is incorrect<br />
in Step 7, replace the Choke Solenoid.<br />
CHOkE SOLENOID<br />
CHOkE<br />
SOLENOID<br />
BRACkET<br />
Solenoid moves<br />
in direction<br />
of arrow<br />
when screws<br />
are loosened<br />
Figure 7-37. – Automatic Choke Assembly<br />
Test 38 – Check Engine / Cylinder Leak<br />
Down Test / Compression Test<br />
GENERAL:<br />
Most engine problems may be classified as one or a<br />
combination of the following:<br />
• Will not start.<br />
• Starts hard.<br />
• Lack of power.<br />
• Runs rough.<br />
• Vibration.<br />
• Overheating.<br />
• High oil consumption.<br />
Discussion:<br />
The Cylinder Leak Down Tester checks the sealing<br />
(compression) ability of the engine by measuring air<br />
leakage from the combustion chamber. Compression<br />
loss can present many different symptoms. This test is<br />
designed to detect the section of the engine where the<br />
fault lies before disassembling the engine.<br />
Procedure:<br />
1. Remove the spark plug.<br />
2. Gain access to the flywheel. Remove the valve cover.<br />
3. Rotate the engine crankshaft until the piston reaches top dead<br />
center (TDC). Both valves should be closed.<br />
4. Lock the flywheel at top dead center.<br />
5. Attach cylinder leak down tester adapter to spark plug hole.<br />
6. Connect an air source of at least 90 psi to the leak down tester.<br />
7. Adjust the regulated pressure on the gauge to 80 psi.<br />
8. Read the right hand gauge on the tester for cylinder pressure. 20<br />
percent leakage is normally acceptable. Use good judgement,<br />
and listen for air escaping at the carburetor, the exhaust, and the<br />
crankcase breather. This will determine where the fault lies.<br />
Results:<br />
• Air escapes at the carburetor – check intake valve.<br />
• Air escapes through the exhaust – check exhaust<br />
valve.<br />
• Air escapes through the breather – check piston<br />
rings.<br />
• Air escapes from the cylinder head – the head gasket<br />
should be replaced.<br />
Check Compression:<br />
To check engine compression, remove the spark plug.<br />
Insert an automotive type compression gauge into the<br />
spark plug hole. Crank the engine until there is no further<br />
increase in pressure. The highest reading<br />
obtained is the engine compression pressure.<br />
MINIMUM ALLOWABLE COMPRESSION PRESSURE<br />
COLD ENGINE – GH-220<br />
60 psi<br />
If compression is poor, look for one or more of the following<br />
causes:<br />
• Loose cylinder head bolts.<br />
• Failed cylinder head gasket.<br />
• Burned valves or valve seats.<br />
• Insufficient valve clearance.<br />
• Warped cylinder head.<br />
• Warped valve stem.<br />
• Worn or broken piston ring(s).<br />
• Worn or damaged cylinder bore.<br />
• Broken connecting rod.<br />
• Worn valve seats or valves.<br />
• Worn valve guides.<br />
NOTE: Refer to Engine Service manual No. 0C1103<br />
for further engine service information.<br />
Page 58
Section 7<br />
DIAGNOSTIC TESTS<br />
Test 39 – Check Oil Pressure Switch<br />
DISCUSSION:<br />
Also see “Operational Analysis” on Page 16. The Low<br />
oil Pressure Switch is normally-closed, but is held<br />
open by engine oil pressure during cranking and startup.<br />
Should oil pressure drop below a safe level, the<br />
switch contacts will close to ground the Wire 85 circuit.<br />
Engine controller board action will then initiate an<br />
automatic shutdown.<br />
If the switch fails closed, the engine will crank and<br />
start, but will then shut down after a few seconds.<br />
If the switch fails open, low oil pressure will not result<br />
in automatic shutdown.<br />
3. If oil pressure is below 10 psi, determine cause of low oil pressure.<br />
Refer to Engine Service manual No. 0C1103 for further<br />
engine service information. Verify that the oil is the proper viscosity<br />
for the climate and season.<br />
Test 40 – Test Oil Temperature Switch<br />
DISCUSSION:<br />
If the engine cranks, starts and then shuts down, one<br />
possible cause of the problem may be a high oil temperature<br />
condition. Protective shutdown is a normal<br />
occurrence if the oil temperature switch exceeds<br />
approximately 305°F (151°C).<br />
Figure 7-38. – Oil Pressure Switch<br />
PROCEDURE:<br />
1. Check engine oil level. If necessary, replenish oil level to the<br />
dipstick “FULL” mark.<br />
2. Set a VOM to its “Rx1” scale and zero the meter.<br />
3. Connect the meter test leads across the switch terminals, with<br />
engine shut down. The meter should read “continuity”. A small<br />
amount of resistance is acceptable.<br />
4. Crank the engine. Oil pressure should open the switch contacts<br />
at some point while cranking and starting. Meter should then<br />
indicate “infinity”.<br />
5. If the contacts did not open in Step 5, remove the low oil pressure<br />
switch and connect an oil pressure gauge in it’s place.<br />
Start the engine and measure oil pressure. Pressure should be<br />
above 10 psi.<br />
RESULTS:<br />
1. In Step 4, if “continuity” is not indicated, replace the switch.<br />
2. If oil pressure checked good in Step 6, but Step 5 measured<br />
“infinity,” replace the low oil pressure switch.<br />
Figure 7-39. – Oil Temperature Switch<br />
PROCEDURE:<br />
1. Remove Wire No. 85 from Oil Temperature Switch terminal and<br />
start the generator. If engine starts and runs now, but shuts<br />
down when Wire 85 is connected to the switch terminal, the following<br />
possibilities exist:<br />
a. Oil temperature is too high.<br />
b. The oil temperature switch has failed closed or is<br />
shorted to ground.<br />
2. Remove the switch and place its sensing tip into oil (Figure<br />
7-40). Place a thermometer into the oil.<br />
3. Connect the test leads of a VOM across the switch terminals.<br />
The meter should read “infinity”.<br />
4. Heat the oil. When oil temperature reaches approximately<br />
305°F (151°C), the switch contacts should close and the meter<br />
should read “continuity”.<br />
Page 59
Section 7<br />
DIAGNOSTIC TESTS<br />
Figure 7-40. – Testing Oil Temperature Switch<br />
RESULTS:<br />
1. If the Oil Temperature Switch fails Step 3 or Step 4, replace the<br />
Oil Temperature Switch.<br />
2. If the Oil Temperature Switch is good, an overheat condition<br />
may be occurring. Verify that the installation of the generator is<br />
within specified tolerances. The generator must receive the<br />
proper amount of incoming air, and also be able to exhaust the<br />
cooling air with NO RESTRICTIONS. Check to be sure that the<br />
exhaust pipe is not under the air intake. Refer to the Owner’s<br />
and Installation <strong>Manual</strong> for proper installation specifications.<br />
Test 41 – Test Choke Heater<br />
DISCUSSION:<br />
The Choke Heater is a sensitive heating element<br />
wrapped around a temperature sensitive Bi-Metal<br />
strip. The Bi-Metal strip positions the Choke Plate during<br />
startup. Once running, the Bi-Metal strip will also<br />
allow the Choke Plate to fully open. Power for the<br />
heater element is supplied from Wire No. 14 to assist<br />
the Bi-Metal strip in opening the Choke Plate after<br />
starting. Failure of the Choke Plate to open will cause<br />
an excessively rich fuel-air mixture and engine performance<br />
will suffer.<br />
PROCEDURE:<br />
1. Verify that the Choke Plate on the carburetor is mechanically<br />
free to move and is not binding. If the engine runs rough, check<br />
the operation of the Bi-Metal strip. Allow the engine to run for<br />
five minutes, then inspect the choke position. The Bi-Metal strip<br />
should have been heated by the Choke Heater and should have<br />
expanded to allow the Choke Plate to open fully.<br />
2. If the Choke Plate did not open in Step 1, check the Choke<br />
Heater. Set the VOM to measure DC voltage. Disconnect<br />
Connector 1 at the Choke Assembly. Connect the positive (+)<br />
meter test lead to Wire No. 14 (Connector 1, Pin 3) going to the<br />
control panel. Connect the negative (-) meter test lead to a<br />
clean frame ground. Set the Start-Stop switch to “START.”<br />
Battery voltage should be measured.<br />
3. If battery voltage was not measured in Step 2, set the VOM to<br />
measure resistance. Disconnect Connector 1 at the Choke<br />
Assembly. Connect one meter test lead to Wire No. 14<br />
(Connector 1, Pin 3) going to the control panel. Connect the<br />
other meter test lead to the 4-tab terminal for Wire No. 14 in the<br />
control panel. Continuity should be measured.<br />
4. Set the VOM to measure resistance. Connect one meter test<br />
lead to Wire No. 14 (Connector 1, Pin 3) going to the Choke<br />
Heater. Connect the other meter test lead to the exposed steel<br />
portion of the Choke Heater/Bi-Metal strip. Approximately 37<br />
ohms (±20%) should be measured. (Current draw of the Choke<br />
Heater at nominal voltage is approximately 340 milliamps or<br />
0.340 amps). If continuity is present the Choke Heater has a<br />
short to ground.<br />
Results:<br />
1. If Choke Plate is binding in Step 1, repair or replace binding<br />
Choke Plate. If Choke Heater tests good, go to Test 35.<br />
2. If battery voltage was not measured in Step 2 and continuity<br />
was measured in Step 3, go to Test 29.<br />
3. If continuity was not measured in Step 3, repair or replace Wire<br />
No. 14 between the 4-tab Terminal and Connector 1.<br />
4. If the resistance value is incorrect in Step 4 or the Bi-Metal strip<br />
does not function with voltage present, replace the Choke<br />
Heater.<br />
TEST 42 – CHECK LPG FUEL SOLENOID<br />
DISCUSSION:<br />
If the LPG Fuel Solenoid (FS) fails to open, fuel<br />
will not be available to the engine and it will<br />
not start. PROCEDURE:<br />
1. Place one hand on the top of the LPG Fuel Solenoid. Activate<br />
the Fuel Prime Switch. You should be able to feel as well as<br />
hear the solenoid energize. If solenoid energizes discontinue<br />
testing.<br />
2. Set VOM to measure resistance. Disconnect Wire 0 from the<br />
LPG Fuel Solenoid. Connect one meter test lead to Wire 0.<br />
Connect the other test lead to a clean frame ground. “Continuity”<br />
should be measured. Reconnect Wire 0 to LPG shut off valve.<br />
Page 60
Section 7<br />
DIAGNOSTIC TESTS<br />
Short to Ground:<br />
Set VOM to measure resistance. Disconnect Wire 14A<br />
from the LPG Fuel Solenoid. Connect one meter test<br />
lead to LPG Fuel Solenoid terminal that Wire 14A was<br />
just removed from. Connect the other meter test lead<br />
to a clean frame ground. LPG Fuel Solenoid coil resistance<br />
of approximately 30-32 ohms should be measured.<br />
Current draw of the LPG Fuel Solenoid at nominal<br />
voltage Is approximately 380 milliamps or 0.380<br />
amps.<br />
14A<br />
FUEL SOLENOID<br />
0<br />
FUEL REGULATOR<br />
Figure 7-41. – Fuel Solenoid<br />
RESULTS:<br />
1. If the solenoid energized in Step 1, proceed to Test 32.<br />
2. If “Continuity” was not measured in Step 2 repair or replace<br />
Wire 0 between the LPG Fuel Solenoid (FS) and the Ground<br />
Terminal (GT) in the control panel.<br />
3. If “Continuity” was measured in Step 2, repair or replace the<br />
Fuel Solenoid (FS).<br />
Page 61
NOTES<br />
Page 62
Section 8<br />
ASSEMBLY<br />
Enclosure/Panels:<br />
1. Remove enclosure door.<br />
Major Disassembly<br />
2. Remove the six (6) top cover bolts from the perimeter of the top<br />
cover. Remove top cover. (A 10mm socket is required).<br />
3. Remove top two nuts attaching muffler shield to back enclosure<br />
panel. Move muffler shield up and over back panel to gain<br />
access to two remaining muffler shield nuts. (A 10mm socket is<br />
required).<br />
4. Remove four (4) inside nuts from side panel studs. Remove<br />
three (3) outer side panel bolts. Remove one inside top corner<br />
bolt from side panel. (A 10mm socket is required).<br />
5. Remove one bottom nut from panel divider, and two side nuts<br />
attached to back enclosure. (A 10mm socket is required).<br />
6. Remove rotor/fan bolt (a 13mm socket is required). Remove fan<br />
and panel divider.<br />
7. Remove two starter contactor mounting nuts. Remove seven (7)<br />
outer back enclosure bolts. Remove two inside nuts attached to<br />
front panel divider (a 10mm socket is required). Remove customer<br />
AC connections. Remove four (4) remote harness bolts<br />
(a 7mm socket is required). Remove one nut inside air filter<br />
area (a 10mm socket is required).<br />
8. Remove three (3) hold down nuts to base. Remove two front<br />
panel divider bolts. Remove fuel pump and fuel line. Gently<br />
move control panel out of the way.<br />
Rotor/Stator Removal:<br />
1. Remove enclosure (Steps 1 through 6 of previous procedure).<br />
2. Remove four (4) muffler hold down bolts (a 10mm socket is<br />
required). Remove one 13mm nut and one M8 socket capscrew<br />
from cylinder head (using an 8mm allen wrench cut short).<br />
Remove muffler.<br />
3. Remove two alternator bracket mounting bolts (using a 13mm<br />
socket). Pry up alternator bracket and place a socket underneath<br />
to gain clearance. Remove two bolts holding the alternator<br />
bracket to the rear carrier (using a 10mm wrench). Remove<br />
socket from underneath bracket. Disconnect stator leads from<br />
control panel. Disconnect brush leads from brush block.<br />
Remove brush assembly using a 1/4 inch socket. Remove four<br />
(4) stator hold down bolts. Remove rear carrier. Remove rotor.<br />
Remove two alternator air duct bolts. Remove stator assembly.<br />
Engine Removal:<br />
1. Remove enclosure, Steps 1 through 8.<br />
2. Disconnect Wire No. 16 from starter terminal. Disconnect Wire<br />
No. 18 bullet connector. Disconnect Wire No. 0 and Wire No. 4<br />
from brush assembly. Disconnect Connector 1 from the choke<br />
assembly. Disconnect Wire No. 85 and Wire No. 0 from low oil<br />
pressure switch and high oil temperature switch. Move harness<br />
out of way.<br />
3. Remove air filter. Remove fuel hose from fuel pump and pull<br />
through panel divider.<br />
4. Remove two safety hold nuts from studs going through alternator<br />
mounting bracket and engine mounting bracket (using a<br />
14mm wrench).<br />
5. Remove four (4) mounting nuts from alternator mounting bracket<br />
and engine mounting bracket (using a 13mm socket).<br />
6. Remove engine/alternator assembly. Follow rotor/stator removal<br />
procedure to remove generator from engine.<br />
Flywheel/ignition coil Removal:<br />
1. Remove enclosure, Steps 1 through 8.<br />
2. Remove governor spring. Remove governor bracket adjustor<br />
assembly (one 8mm socket and one 10mm socket). Disconnect<br />
Connector 1 to the choke assembly. Remove three (3) bolts<br />
from the choke assembly bracket (8mm socket). Remove choke<br />
linkage. Remove both assemblies.<br />
3. Remove four (4) remaining blower housing bolts (using an 8mm<br />
socket). Remove housing.<br />
4. Remove two magneto hold down bolts (using an 8mm socket).<br />
5. Remove flywheel nut (using a 24mm socket). Use flywheel puller<br />
to remove flywheel. Use two M8 x 1.25 bolts supplied with<br />
puller for threads in flywheel. Remove flywheel.<br />
Page 63
Section 9<br />
Exploded Views<br />
Enclosure, LP Units – Drawing No. 0F4589-B<br />
Page 64
Section 9<br />
Exploded Views<br />
ITEM QTY. DESCRIPTION<br />
1 1 TRAY, ENCLOSURE<br />
2 1 PANEL, ENCLOSURE SIDE<br />
3 1 PANEL, REAR DIVIDER<br />
4 1 PANEL, ENCLOSURE ROOF<br />
5 1 PANEL, ENCLOSURE BACK<br />
6 1 PANEL, FRONT DIVIDER<br />
7 1 COMPARTMENT, AIR INTAKE<br />
8 1 PANEL, ENCLOSURE DOOR<br />
9 1 SHIELD, MUFFLER<br />
10 2 SLIDE LATCH, FLUSH<br />
11 4 SCREW HHTT M4-0.7 X 10mm<br />
12 1 LP REGULAT0R<br />
13 1 HOSE 3/8” I.D. SINGLE BRAID 33” LONG<br />
14 1 HOSE CLAMP BAND 3/8”<br />
15 1 FOAM, FRONT AIR OUT COMPARTMENT<br />
16 2 SCREW HHC M6-1.0 X 16<br />
17 2 WASHER FLAT ¼”<br />
18 1 BUSHING, 1.09” SNAP<br />
19 2 WASHER LOCK M6-1/4”<br />
20 1 CONTACTOR, STARTER<br />
21 22 NUT FLANGE M6-1.0 NYLOK<br />
22 2 WASHER LOCK M8-5/16”<br />
23 2 NUT HEX 5/16”-18<br />
24 2 BOOT BATTERY CABLE<br />
25 1 PANEL AIR BOX COVER<br />
26 1 SCREW, M6-1.00 x 20mm WING<br />
27 1 BOLT CARR 3/8”-16 X 1” BRASS<br />
28 1 3/8” SPECIAL L/WASHER<br />
ITEM QTY. DESCRIPTION<br />
30 2 NUT HEX M6 X 1.0<br />
31 1 WASHER LOCK 3/8”<br />
32 2 WASHER FLAT 3/8-M10”<br />
33 1 BLOCK, TERMINAL BATTERY POST<br />
34 1 STUD 3/8”-16 X 2”-1/4” BRASS<br />
35 2.1’ TAPE FOAM 1/8” x ½”<br />
36 4 SCREW HHTT M5-0.8 X 10<br />
37 1 CUSTOMER CONNECTION HARNESS<br />
38 1 FOAM, AIR OUT COMPARTMENT SIDE<br />
39 1 CABLE, STARTER<br />
40 1 ASSEMBLY OIL DRAIN<br />
41 20 SCREW SWT 1/4-20 X 5/8 W/W<br />
42 1 CABLE, BATTERY CONNECTION<br />
43 8.75’ FOAM TAPE 1/16” X ½”<br />
44 2 FOAM, AIR INTAKE COMPARTMENT<br />
45 1 FOAM, ROOF AIR OUT COMPARTMENT<br />
46 1 FOAM, BACK COMPARTMENT<br />
47 1 FOAM, DOOR PANEL<br />
48 4 WASHER SELF LOCKING 1”<br />
49 1 WASHER NYLON .250”<br />
50 1 HARDWARE CLOTH COMPARTMENT AIR OUT<br />
51 1 ASSEMBLY, CAP & DIPSTICK<br />
52 4 NUT HEX JAM 3/8”-16 BRASS<br />
53 1 BOX, MUFFLER TAIL PIPE<br />
54 1 GASKET, MUFFLER TAIL PIPE BOX<br />
55 1 LOGO, QP<br />
56 2 RIVET, POP<br />
Page 65
Section 9<br />
Exploded Views<br />
Generator, LP Units – Drawing No. 0F4590-C<br />
Page 66
Section 9<br />
Exploded Views<br />
ITEM QTY. DESCRIPTION<br />
1 1 SCREW IHHC 5/16”-24 x 11-1/4” G5<br />
2 22 WASHER LOCK M8-5/16”<br />
3 1 WASHER FLAT .406” I.D. x 1.62” O.D.<br />
4 1 FAN, 8" CURVE BLADE, 16.5mm I.D.<br />
5 4 SCREW IHHC M8-1.25 X 260mm<br />
6 2 SCREW HHTT M5-0.8 X 16<br />
7 1 ASSEMBLY, BRUSH HOLDER<br />
8 1 CARRIER, REAR BEARING<br />
9 1 BEARING<br />
10 1 ROTOR<br />
11 1 STATOR<br />
12 1 ADAPTOR, ENGINE<br />
13 4 SCREW HHC 5/16”-24 X 3/4"<br />
14 1 GASKET, FRONT DIVIDER<br />
15 4 WASHER FLAT 3/8”-M10<br />
16 4 NUT LOCK HEX 5/16”-18 NYLON<br />
INSERT<br />
17 1 BRACKET, ENGINE MOUNTING<br />
18 18 WASHER FLAT 5/16”<br />
19 3 SCREW HHC 5/16”-18 X 1-1/2”<br />
20 1 5/16” SPECIAL LOCK WASHER<br />
21 10 NUT HEX 5/16”-18<br />
22 2 SCREW SHC M8-1.25 x 18mm<br />
ITEM QTY. DESCRIPTION<br />
23 4 VIBRATION MOUNT<br />
24 6 SCREW HHTT M8-1.2 x 16mm<br />
25 1 BRACKET, ALTERNATOR MOUNTING<br />
26 2.14’ TAPE ELEC. UL FOAM 1/8” x 1/2”<br />
27 1 DUCT, ALTERNATOR AIR<br />
28 1 GASKET, ALTERNATOR DUCT<br />
29 2 NUT WING M6-1.0<br />
30 1 STUD, M6-1.0 OFFSET<br />
31 1 ELEMENT, AIR FILTER<br />
32 1 PRECLEANER, AIR<br />
33 1 WASHER FLAT .281" I.D. x 1.50" O.D.<br />
34 1 WASHER LOCK M6-1/4”<br />
35 1 MUFFLER<br />
36 2 SCREW HHTT M6-1.0 x 12mm<br />
37 2 BOLT CARR 5/16"-18 x 2"<br />
38 2 NUT FLANG 5/16”-18 LOCK<br />
39 1 GASKET, EXHAUST<br />
41 1 SCREW HHC 5/16”-18 X 1-3/4”<br />
42 1 FILTER GASKET RV<br />
43 1 HOSE CLAMP 3/8”<br />
Page 67
Section 9<br />
Exploded Views<br />
Control Panel, LP Units – Drawing No. 0F4591-A<br />
Page 68
Section 9<br />
Exploded Views<br />
ITEM QTY. DESCRIPTION<br />
1 1 REGULATOR VOLTAGE<br />
2 1 TERMINAL BLOCK<br />
3 1 CONTROLLER P.C.B.<br />
4 1 BATTERY CHARGER RECTIFIER<br />
5 2 BUSHING SNAP 1”<br />
6 1 BUSHING SNAP 1-1/4”<br />
7 1 RESISTOR, 1 OHM 25W<br />
8 1 CIRCUIT BREAKER 2.0 Amp (60Hz)<br />
1 CIRCUIT BREAKER 3.0 Amp (50Hz)<br />
9 1 SWITCH S.P.D.T.<br />
10 1 SWITCH S.P.D.T. ON-MOM-ON<br />
11 1 HOLDER FUSE<br />
12 1 FUSE 7.5A<br />
13 1 CIRCUIT BREAKER, 30 X 1 (60HZ)<br />
1 CIRCUIT BREAKER, 15A 2 POLE (50HZ)<br />
14 2 LOCK WASHER SPECIAL<br />
15 2 SCREW HHC M5-0.8 x 30mm<br />
16 2 SCREW HHC M6-1.0 X 16mm<br />
17 5 WASHER LOCK M5<br />
18 1 NUT HEX M5-0.8<br />
ITEM QTY. DESCRIPTION<br />
19 2 SCREW PPHM M4-0.7 x 16mm<br />
20 2 WASHER LOCK #8-M4<br />
21 4 NUT HEX M4-0.7<br />
22 1 SCREW HHC M6-1.0 x 65mm<br />
23 5 WASHER FLAT 1/4”<br />
24 4 WASHER LOCK M6-1/4”<br />
25 4 NUT HEX M6-1.0<br />
26 2 SCREW HHC M5-0.8 X 25mm<br />
27 1 SCREW HHC M5-0.8 X 16mm<br />
28 2 SCREW HHC M6-1.0 X 30mm<br />
29 2 NUT, HEX M3-0.5<br />
30 1 PANEL CONTROL<br />
31 2 SCREW RHM #6-32 X 1/4" SIMS<br />
32 2 TIE WRAP UL 4" (NOT SHOWN)<br />
33 1 DECAL (NOT SHOWN)<br />
34 1 HARNESS (NOT SHOWN)<br />
35 1 BUSHING, SNAP 1.09”<br />
36 2 WASHER LOCK M3<br />
37 2 WASHER FLAT M3<br />
Page 69
Section 9<br />
Exploded Views<br />
GN-220 H/SH Engine, LP Units – Drawing No. 0F5791-G Page 1<br />
Page 70
Section 9<br />
Exploded Views<br />
ITEM QTY. DESCRIPTION<br />
1 1 GUARD, FAN<br />
2 10 SCREW, HHTT M6-1.0 X 8mm<br />
11 (04701-1 ONLY)<br />
3 1 BLOWER HOUSING<br />
1 BLOWER HOUSING (04701-1 ONLY)<br />
4 1 NUT, HEX M16-1.5<br />
5 1 WASHER, M16 CONICAL<br />
6 1 ASSY, CHOKE SOLENOID BRACKET<br />
7 1 FLYWHEEL, WITH RING GEAR<br />
8 1 BACKPLATE, ELECTRIC START<br />
9 10 SCREW HHTT M6-1.0 X 10mm<br />
10 1 KEY, WOODRUFF 4 x 19D<br />
11 2 5/16”-M8 LOCK WASHER<br />
12 2 SCREW SHC M8-1.25 X 40mm<br />
13 1 STARTER ASSEMBLY<br />
14 1 SPARKPLUG<br />
15<br />
16 2 TAPTITE, M6-1.0 x 30mm<br />
17 1 ASSY, IGNITION COIL ADV. W/DIODE<br />
18 2 SCREW PPHM M3-0.5 X 8mm<br />
19 1 BREATHER TUBE<br />
20 1 GASKET, MANIFOLD/ HEAD<br />
21 2 SCREW HHFC M6-1.0 X 30mm<br />
22 1 INTAKE MANIFOLD<br />
23 1 GASKET CARBURETOR/MANIFOLD<br />
24 1 CARBURETOR LP WITH CHOKE NO<br />
IDLE PORT<br />
25 1 GASKET, CARB/ ADAPTOR<br />
26 1 ADAPTOR, CARB<br />
27 2 BOLT, CARB MOUNT M6-1.0 x 75mm<br />
28 1 GASKET, CARB TO AIRBOX<br />
29 1 ASSEMBLY, GOVERNOR LEVER<br />
30 1 ROD, GOVERNOR<br />
ITEM QTY. DESCRIPTION<br />
31 1 SPRING, ANTI LASH<br />
32 1 WASHER, CARB WEAR<br />
33 1 ASSY BRACKET GOVERNOR ADJUST<br />
34 1 ELBOW 90D STREET 1/8NPT<br />
35 1 SPRING, GOVERNOR<br />
36 1 SCREW HHTT M8-1.2 x 16mm<br />
37 1 NUT HEX LOCK M5-0.8 NYLOCK<br />
38 1 TOP WRAPPER<br />
39 1 PLUG, EXPANSION<br />
40 1 LOWER WRAPPER<br />
41 1 GASKET, OIL PSI PAD<br />
2 (04701-1 ONLY)<br />
42 1 ADAPTER, OIL FILTER<br />
43 2 SCREW SHC M6-1.0 X 22mm<br />
2 SCREW SHC M6-1.0 X 35MM G12.9<br />
(04701-1 ONLY)<br />
44 1 SWITCH, OIL- 5 PSI<br />
45 1 FILTER, OIL<br />
46 1 THERMAL SWITCH 305F<br />
47 2 WASHER LOCK M3<br />
48 1 ROD, CHOKE CONTROL<br />
49 1 SOLENOID, CHOKE<br />
50 1 PIN, COTTER<br />
51 2 SCREW PRHMS #4-40 x 1-1/8” LONG<br />
52 1 COVER, CHOKE COIL<br />
53 2 SCREW TAP-R #10-32 X 9/16”<br />
54 2 SCREW HHTT M4-0.7 X 8 BP<br />
55 1 OIL COOLER 220<br />
56 4 CLAMP, HOSE OETIKER STEPLESS 17<br />
57 2 HOSE 3/8” X 16.25” BRAID-WRAP<br />
58 2 BARBED EL 90 1/8 NPT X 3/8<br />
59 1 OIL FILTER SPACER 220RV<br />
Page 71
Section 9<br />
Exploded Views<br />
GN-220 H/SH Engine, LP Units – Drawing No. 0F5791-G Page 2<br />
Page 72
Section 9<br />
Exploded Views<br />
ITEM QTY. DESCRIPTION<br />
1 1 CONNECTING ROD ASSEMBLY<br />
2 1 PISTON PIN<br />
3 1 RING SET, PISTON DIA 75<br />
4 1 GEAR COVER ASSEMBLY<br />
5 5 M8 x 56mm HEAD BOLT<br />
6 1 PISTON, COATED DIA 75<br />
7 2 PIN RETAINER RING<br />
8 1 ASSY, CRANKSHAFT GH220 TAPER<br />
9 1 GOVERNOR “R” PIN<br />
10 2 WASHER FLAT 1/4, .015 THK<br />
11 1 CRANKCASE ASSEMBLY<br />
12 1 GOVERNOR ARM<br />
13 2 OIL SEAL<br />
14 1 GOVERNOR GEAR ASSEMBLY<br />
15 1 GOVERNOR GEAR C-RING<br />
16 1 GOVERNOR SPOOL<br />
17 1 1/8” NPT PIPE PLUG<br />
18 1 CAMSHAFT ASSEMBLY<br />
19 1 CRANKCASE GASKET<br />
20 1 VALVE STEM SEAL<br />
21 1 CYLINDER HEAD GASKET<br />
22 1 OIL PRESSURE RELIEF COVER<br />
23 1 OIL PRESSURE SPRING<br />
24 1 11/32” BALL<br />
25 1 M5 FORM SCREW<br />
26 4 M6-1.0 x 12mm SCREW<br />
ITEM QTY. DESCRIPTION<br />
27 1 GOVERNOR GEAR THRUST WASHER<br />
28 6 SCREW, HHFC M8-1.25 X 35mm<br />
29 1 SPRING WASHER<br />
30 2 VALVE RETAINER<br />
31 2 VALVE SPRING<br />
32 2 VALVE SPRING WEAR WASHER<br />
33 1 GEROTER SET<br />
34 1 “O” RING<br />
35 4 SLEEVE, SEAM DWL<br />
36 1 CYLINDER HEAD ASSEMBLY<br />
37 1 EXHAUST VALVE<br />
38 1 INTAKE VALVE<br />
39 2 PUSH ROD<br />
40 2 TAPPET<br />
41 1 OIL PICK-UP ASSEMBLY<br />
42 1 ROCKER COVER GASKET<br />
43 2 PIVOT BALL STUD<br />
44 2 GN- 191/220 ROCKER ARM<br />
45 2 ROCKER ARM JAM NUT<br />
46 1 PUSH ROD GUIDE PLATE<br />
47 1 1/4” NPT PIPE PLUG<br />
48 1 ROCKER COVER ASSEMBLY<br />
49 1 PLASTIC OIL FILL PLUG<br />
50 4 VALVE SPRING KEEPER<br />
51 1 BARBED ELBOW 90 1/4” NPT X 3/8”<br />
52 1 STUD M8-1.25 / 10mm X 30mm<br />
Page 73
Section 9<br />
Exploded Views<br />
Gas Regulator Assembly, LP Units – Drawing No. 0F5819<br />
2<br />
3<br />
6<br />
9<br />
1<br />
26<br />
8<br />
7<br />
10<br />
13<br />
11<br />
14 12<br />
15<br />
16<br />
17<br />
19<br />
20<br />
18<br />
21<br />
22<br />
23<br />
24<br />
25<br />
Page 74
Section 9<br />
Exploded Views<br />
ITEM QTY. DESCRIPTION<br />
1 1 CASTING, TWIN REGULATOR HOUSING<br />
2 4 SCREW PPHM SEMS M4-0.7 X 10<br />
3 1 SOLENOID COIL, 12VDC<br />
4 1 SPRING-SOLENOID PLUNGER<br />
5 1 PLUNGER LP REG. ASSY<br />
6 1 GASKET, SOLENOID<br />
7 1 INLET, TWIN REGULATOR NO HOLE<br />
8 1 PLUG, EXPANSION 16MM TWINREG<br />
9 1 BARBED STR 1/2NPT X 3/8" W/VS<br />
10 2 PLUG STD PIPE 1/8 STEEL SQ HD<br />
11 2 WASHER FLAT 3.2MM ID X 10MM OD<br />
12 2 SCREW PFILHM M3-0.5 X 5<br />
13 1 SPRING, REGULATOR<br />
14 1 INLET, TWIN REG 11.11 DIA.<br />
15 1 SEAL, INLET REGULATOR<br />
16 1 SUPPORT, INLET SEAL<br />
17 1 PIN, PIVOT ARM<br />
18 1 LEVER, REGULATOR<br />
19 1 GASKET, DIAPHRAGM<br />
20 1 RIVET .118 X .125 ALUMINUM<br />
21 1 SUPPORT, DIAPHRAGM<br />
22 1 DIAPHRAGM, TWIN REGULATOR<br />
23 1 CAP, DIAPHRAGM SUPPORT<br />
24 1 COVER,TWIN REGULATOR<br />
25 8 SCREW HHTT M4-0.7 X 8 BP<br />
26 1 JET LP<br />
Page 75
Section 9<br />
Exploded Views<br />
Enclosure, Gasoline Units – Drawing No. 0D8352-M<br />
Page 76
Section 9<br />
Exploded Views<br />
ITEM QTY. DESCRIPTION<br />
1 1 TRAY, ENCLOSURE<br />
2 1 PANEL, ENCLOSURE SIDE<br />
3 1 PANEL, REAR DIVIDER<br />
4 1 PANEL, ENCLOSURE ROOF<br />
5 1 PANEL, ENCLOSURE BACK<br />
6 1 PANEL, FRONT DIVIDER<br />
7 1 COMPARTMENT, AIR INTAKE<br />
8 1 PANEL, ENCLOSURE DOOR<br />
9 1 SHIELD, MUFFLER<br />
10 2 SLIDE LATCH, FLUSH<br />
11 1 PUMP, FUEL<br />
12 1 FILTER, FUEL<br />
13 1 FUEL LINE, FILTER TO PUMP<br />
14 1 FUEL LINE, PUMP TO CARB<br />
15 2 CLAMP,HOSE WORM GEAR<br />
16 2 SCREW HHC M6-1.0 X 16<br />
17 2 WASHER FLAT ¼”<br />
18 1 BUSHING, 1.09” SNAP<br />
19 2 WASHER LOCK M6-1/4”<br />
20 1 CONTACTOR, STARTER<br />
21 24 NUT FLANGE M6-1.0 NYLOK<br />
22 2 WASHER LOCK M8-5/16”<br />
23 2 NUT HEX 5/16”-18<br />
24 2 BOOT BATTERY CABLE<br />
25 1 PANEL AIR BOX COVER<br />
26 1 SCREW, M6-1.00 x 20mm WING<br />
27 1 BOLT CARR 3/8”-16 X 1”<br />
28 1 3/8” SPECIAL L/WASHER<br />
30 2 NUT HEX M6 X 1.0<br />
31 1 WASHER LOCK 3/8”<br />
32 2 WASHER FLAT 3/8-M10”<br />
33 1 BLOCK, TERMINAL BATTERY POST<br />
ITEM QTY. DESCRIPTION<br />
34 1 STUD 3/8”-16 X 2”-1/4” BRASS<br />
35 2.1’ TAPE FOAM 1/8” x ½”<br />
36 4 SCREW HHTT M5-0.8 X 10<br />
37 1 CUSTOMER CONNECTION<br />
HARNESS<br />
38 1 FOAM, AIR OUT COMPARTMENT<br />
SIDE<br />
39 1 CABLE, STARTER<br />
40 1 ASSEMBLY OIL DRAIN<br />
41 18 SCREW SWT 1/4-20 X 5/8 W/W<br />
42 1 CABLE, BATTERY CONNECTION<br />
43 1 MOUNT, FUEL FILTER SUPPORT<br />
44 2 FOAM, AIR INTAKE COMPARTMENT<br />
45 1 FOAM, ROOF AIR OUT<br />
COMPARTMENT<br />
46 1 FOAM, BACK COMPARTMENT<br />
47 1 FOAM, DOOR PANEL<br />
48 4 WASHER SELF LOCKING 1"<br />
49 1 WASHER NYLON .250”<br />
50 1 HARDWARE CLOTH<br />
COMPARTMENT AIR OUT<br />
51 1 BUSHING, 0.50” SNAP<br />
52 8.5” HOSE, 1/4” ID<br />
53 1 BOX, MUFFLER TAIL PIPE<br />
54 1 GASKET, MUFFLER TAIL PIPE BOX<br />
55 4 NUT HEX JAM 3/8”-16 BRASS<br />
56 1 ASSEMBLY, CAP & DIPSTICK<br />
57 1 FILTER GASKET<br />
58 8.75’ FOAM TAPE 1/16” X ½”<br />
59 1 FOAM, FRONT AIR OUT<br />
COMPARTMENT<br />
60 1 LOGO. QP<br />
61 2 RIVET, POP<br />
Page 77
Section 9<br />
Exploded Views<br />
Generator, Gasoline Units – Drawing No. 0D8353-M<br />
Page 78
Section 9<br />
Exploded Views<br />
ITEM QTY. DESCRIPTION<br />
1 1 SCREW IHHC 5/16”-24 x 11-1/4” G5<br />
2 22 WASHER LOCK M8-5/16”<br />
3 1 WASHER FLAT .406” I.D. x 1.62” O.D.<br />
4 1 FAN, 8" CURVE BLADE, 16.5mm I.D.<br />
5 4 SCREW IHHC M8-1.25 X 260mm<br />
6 2 SCREW HHTT M5-0.8 X 16<br />
7 1 ASSEMBLY, BRUSH HOLDER<br />
8 1 CARRIER, REAR BEARING<br />
9 1 BEARING<br />
10 1 ROTOR<br />
11 1 STATOR<br />
12 1 ADAPTOR, ENGINE<br />
13 4 SCREW HHC 5/16”-24 X 3/4"<br />
14 1 GASKET, FRONT DIVIDER<br />
15 4 WASHER FLAT 3/8”-M10<br />
16 4 NUT LOCK HEX 5/16”-18 NYLON<br />
INSERT<br />
17 1 BRACKET, ENGINE MOUNTING<br />
18 18 WASHER FLAT 5/16”<br />
19 3 SCREW HHC 5/16”-18 X 1-1/2”<br />
20 1 5/16” SPECIAL LOCK WASHER<br />
ITEM QTY. DESCRIPTION<br />
21 10 NUT HEX 5/16”-18<br />
22 2 SCREW SHC M8-1.25 x 18mm<br />
23 4 VIBRATION MOUNT<br />
24 6 SCREW HHTT M8-1.2 x 16mm<br />
25 1 BRACKET, ALTERNATOR MOUNTING<br />
26 2.14’ TAPE ELEC. UL FOAM 1/8” x 1/2”<br />
27 1 DUCT, ALTERNATOR AIR<br />
28 1 GASKET, ALTERNATOR DUCT<br />
29 2 NUT WING M6-1.0<br />
30 1 STUD, M6-1.0 OFFSET<br />
31 1 ELEMENT, AIR FILTER<br />
32<br />
33 1 WASHER FLAT .281" I.D. x 1.50" O.D.<br />
34 1 WASHER LOCK M6-1/4”<br />
35 1 MUFFLER W/ CATALYST<br />
36 2 SCREW HHTT M6-1.0 x 12mm<br />
37 2 BOLT CARR 5/16"-18 x 2"<br />
38 2 NUT FLANG 5/16”-18 LOCK<br />
39 1 GASKET, EXHAUST<br />
41 1 SCREW HHC 5/16”-18 X 1-3/4”<br />
42 1 FILTER GASKET RV<br />
Page 79
Section 9<br />
Exploded Views<br />
Control Panel, Gasoline Units – Drawing No. 0D8354-M<br />
Page 80
Section 9<br />
Exploded Views<br />
ITEM QTY. DESCRIPTION<br />
1 1 REGULATOR VOLTAGE<br />
2 1 TERMINAL BLOCK<br />
3 1 CONTROLLER P.C.B.<br />
4 1 BATTERY CHARGER RECTIFIER<br />
5 1 BUSHING SNAP 1”<br />
2 BUSHING SNAP 1” (04709 ONLY)<br />
6 1 BUSHING SNAP 1-1/4”<br />
7 1 RESISTOR, 1 OHM 25W<br />
8 1 CIRCUIT BREAKER 2.0 Amp (60Hz)<br />
1 CIRCUIT BREAKER 3.0 Amp (50Hz)<br />
9 1 SWITCH S.P.D.T.<br />
10 1 SWITCH S.P.D.T. ON-MOM-ON<br />
11 1 HOLDER FUSE<br />
12 1 FUSE 7.5A<br />
13 1 CIRCUIT BREAKER, 30 X 1 (60HZ)<br />
1 CIRCUIT BREAKER, 15A 2 POLE<br />
(50HZ)<br />
14 2 LOCK WASHER SPECIAL<br />
15 2 SCREW HHC M5-0.8 x 30mm<br />
16 2 SCREW HHC M6-1.0 X 16mm<br />
17 5 WASHER LOCK M5<br />
18 1 NUT HEX M5-0.8<br />
ITEM QTY. DESCRIPTION<br />
19 2 SCREW PPHM M4-0.7 x 16mm<br />
20 2 WASHER LOCK #8-M4<br />
21 4 NUT HEX M4-0.7<br />
22 1 SCREW HHC M6-1.0 x 65mm<br />
23 5 WASHER FLAT 1/4”<br />
24 4 WASHER LOCK M6-1/4”<br />
25 4 NUT HEX M6-1.0<br />
26 2 SCREW HHC M5-0.8 X 25mm<br />
27 1 SCREW HHC M5-0.8 X 16mm<br />
28 2 SCREW HHC M6-1.0 X 30mm<br />
29 2 NUT, HEX M3-0.5<br />
30 1 PANEL CONTROL<br />
31 2 SCREW RHM #6-32 X 1/4” SIMS<br />
32 2 TIE WRAP UL 4” (NOT SHOWN)<br />
33 1 DECAL (NOT SHOWN)<br />
34 1 HARNESS (NOT SHOWN)<br />
35 1 BUSHING, SNAP 1.09”<br />
36 2 WASHER LOCK M3<br />
37 2 WASHER FLAT M3<br />
38 1 DEUTSCH, MOUNTING CLIP<br />
39 1 RIVET POP 0.125” LARGE FLANGE<br />
Page 81
Section 9<br />
Exploded Views<br />
GN-220 H/SH Engine, Gasoline Units – Drawing No. 0D8355-AD Page 1 of 2<br />
Page 82
Section 9<br />
Exploded Views<br />
ITEM QTY. DESCRIPTION<br />
1 1 GUARD, FAN<br />
2 11 SCREW, HHTT M6-1.0 X 8mm<br />
3 1 BLOWER HOUSING<br />
4 1 NUT, HEX M16-1.5<br />
5 1 WASHER, M16 CONICAL<br />
6 1 ASSY CHOKE SOLENOID BRACKET<br />
7 1 FLYWHEEL, WITH RING GEAR<br />
8 1 BACKPLATE, ELECTRIC START<br />
9 9 SCREW HHTT M6-1.0 X 10mm<br />
10 1 KEY, WOODRUFF 4 x 19D<br />
11 2 5/16”-M8 LOCK WASHER<br />
12 2 SCREW SHC M8-1.25 X 40mm<br />
13 1 ASSY, STARTER<br />
14 1 SPARK PLUG, CHAMPION RC14YC<br />
15<br />
16 2 TAPTITE, M6-1.0 x 25 ZINC<br />
17 1 ASSY, IGNITION COIL ADV. W/DIODE<br />
19 1 BREATHER TUBE<br />
20 1 GASKET, MANIFOLD/ HEAD<br />
21 2 SCREW HHFC M6-1.0 X 30mm<br />
22 1 INTAKE MANIFOLD<br />
23 1 GASKET CARBURETOR/MANIFOLD<br />
24 1 CARBURETOR<br />
25 1 GASKET, CARB/ ADAPTOR<br />
26 1 ADAPTOR, CARB<br />
27 2 BOLT, CARB MOUNT M6-1.0 x 75mm<br />
28 1 GASKET, CARB TO AIRBOX<br />
29 1 ASSEMBLY, GOVERNOR LEVER<br />
30 1 ROD, GOVERNOR<br />
31 1 SPRING, ANTI LASH<br />
32 1 WASHER, CARB WEAR<br />
33 1 ASSY BRACKET GOVERNOR ADJUST<br />
34 1 ROD, CHOKE LINKAGE<br />
35 1 SPRING, GOVERNOR<br />
ITEM QTY. DESCRIPTION<br />
36 1 SCREW, HHTT 5/16” X ½” SEMI-GIMLET<br />
37 1 NUT, M5-0.8 LOCK<br />
38 1 TOP WRAPPER<br />
39 1 PLUG, EXPANSION<br />
40 1 LOWER WRAPPER<br />
41 2 GASKET, OIL PSI PAD<br />
42 1 ADAPTER, OIL FILTER<br />
43 2 SCREW SHC M6-1.0 X 20mm G12.9<br />
44 1 SWITCH, OIL- 5 PSI<br />
45 1 FILTER, OIL<br />
52 1 SWITCH, THERMAL 305F<br />
53 2 WASHER LOCK M3<br />
54 2 SCREW PPHM M3-0.5 X 6mm<br />
55 1 ELBOW 90D STREET 1/8NPT<br />
56 2 RHMS #4-40 X 5/16” SEMS<br />
57 1 COTTER PIN<br />
58 1 ROD, CHOKE CONTROL<br />
59 1 BOOT CHOKE SOLENOID PLASTIC<br />
60 2 SCREW TAP-R #10-32 X 9/16”<br />
61 2 RHMS #4-40 X 1/4” SEMS<br />
62 1 ASSEMBLY, BI-METAL/HEATER<br />
63 1 SOLENOID, CHOKE<br />
64 21” FUEL HOSE 3/8 LO-PERM<br />
65 1 BARBED TEE 1/2X3/8X1/2<br />
66 1 BARBED EL 90 1/4NPT X 3/8<br />
67 1 BULKHEAD ADAPTOR FITTING<br />
68 1 PLUG STD PIPE 1/4 COUNTERSUNK<br />
69 2 SCREW HHTT M4-0.7 X 8 BP<br />
70 1 OIL COOLER 220<br />
71 4 CLAMP,HOSE OETIKER STEPLESS 17<br />
72 2 HOSE 3/8" X 16.25" BRAID-WRAP<br />
73 2 BARBED EL 90 1/8NPT X 3/8<br />
74 1 OIL FILTER SPACER 220RV<br />
Page 83
Section 9<br />
Exploded Views<br />
GN-220 H/SH Engine, Gasoline Units – Drawing No. 0D8355-AD Page 2 of 2<br />
Page 84
Section 9<br />
Exploded Views<br />
ITEM QTY. DESCRIPTION<br />
1 1 CONNECTING ROD ASSEMBLY<br />
2 1 PISTON PIN<br />
3 1 PISTON RING SET DIA 75<br />
4 1 GEAR COVER ASSEMBLY<br />
5 5 M8 x 56mm HEAD BOLT<br />
6 1 PISTON, COATED DIA 75<br />
7 2 PIN RETAINER RING<br />
8 1 ASSY, CRANKSHAFT GH220 TAPER<br />
9 1 GOVERNOR “R” PIN<br />
10 2 WASHER FLAT 1/4, .015 THK<br />
11 1 CRANKCASE ASSEMBLY<br />
12 1 GOVERNOR ARM<br />
13 2 OIL SEAL<br />
14 1 GOVERNOR GEAR ASSEMBLY<br />
15 1 GOVERNOR GEAR C-RING<br />
16 1 GOVERNOR SPOOL<br />
17 1 1/8” NPT PIPE PLUG<br />
18 1 CAMSHAFT ASSEMBLY<br />
19 1 CRANKCASE GASKET<br />
20 1 VALVE STEM SEAL<br />
21 1 CYLINDER HEAD GASKET<br />
22 1 OIL PRESSURE RELIEF COVER<br />
23 1 OIL PRESSURE SPRING<br />
24 1 11/32” BALL<br />
25 1 M5 FORM SCREW<br />
26 4 M6-1.0 x 12mm SCREW<br />
ITEM QTY. DESCRIPTION<br />
27 1 GOVERNOR GEAR THRUST WASHER<br />
28 6 SCREW, HHFC M8-1.25 X 35mm<br />
29 1 SPRING WASHER<br />
30 2 VALVE RETAINER<br />
31 2 VALVE SPRING<br />
32 2 VALVE SPRING WEAR WASHER<br />
33 1 GEROTER SET<br />
34 1 “O” RING<br />
35 4 SLEEVE, SEAM DWL<br />
36 1 CYLINDER HEAD ASSEMBLY<br />
37 1 EXHAUST VALVE<br />
38 1 INTAKE VALVE<br />
39 2 PUSH ROD<br />
40 2 TAPPET<br />
41 1 OIL PICK-UP ASSEMBLY<br />
42 1 ROCKER COVER GASKET<br />
43 2 PIVOT BALL STUD<br />
44 2 GN- 191/220 ROCKER ARM<br />
45 2 ROCKER ARM JAM NUT<br />
46 1 PUSH ROD GUIDE PLATE<br />
47 1 1/4” NPT PIPE PLUG<br />
48 1 ROCKER COVER ASSEMBLY<br />
49 1 PLASTIC OIL FILL PLUG<br />
50 4 VALVE SPRING KEEPER<br />
51 1 BARBED ELBOW 90 1/4” NPT X 3/8”<br />
52 1 STUD M8-1.25 / 10mm X 30mm<br />
Page 85
Section 10<br />
SPECIFICATIONS & CHARTS<br />
Major Features and Dimensions (Gasoline Units)– Drawing No. 0D8716 Rev. G<br />
AC OUTPUT<br />
HARNESS<br />
REMOTE PANEL<br />
CONNECTOR<br />
429.5<br />
[ 16 15/16"]<br />
55.5<br />
[ 2 3/16"]<br />
376.5<br />
[ 14 13/16"]<br />
TYP.<br />
6.7<br />
[ 1/4"]<br />
HOT AIR<br />
ExHAUST<br />
416<br />
[ 16 3/8"]<br />
TAIL PIPE<br />
ExIT<br />
48.1<br />
[ 1 7/8"]<br />
29<br />
[ 1 1/8"]<br />
342.2<br />
[ 13 1/2"]<br />
VIEW FROM TOP<br />
423.2<br />
[ 16 11/16"]<br />
82.5<br />
[ 3 1/4"]<br />
343.4<br />
[ 13 1/2"]<br />
717.7<br />
[ 28 1/4"]<br />
5/16"-18 WELDNUTS<br />
(6 PLACES)<br />
50.8<br />
[2"]<br />
210<br />
[ 8 1/4"]<br />
60<br />
[ 2 3/8"]<br />
170<br />
[ 6 11/16"]<br />
AIR<br />
INTAkE<br />
101<br />
[ 4"]<br />
REF.<br />
749.8<br />
[ 29 1/2"]<br />
OIL DRAIN<br />
REF.<br />
483.1<br />
[ 19"]<br />
FUEL FILTER<br />
79<br />
[ 3 1/8"]<br />
83.5<br />
[ 3 5/16"]<br />
176.6<br />
[ 6 15/16"]<br />
36.5 [ 1 7/16"]<br />
222.7<br />
[ 8 3/4"]<br />
300.7<br />
[ 11 13/16"]<br />
369.7<br />
[ 14 9/16"]<br />
688.3<br />
[ 27 1/8"]<br />
736.4<br />
[ 29"]<br />
FRONT DOOR ACCESS FOR<br />
ALL REqUIRED MAINTENANCE<br />
118<br />
[ 4 5/8"]<br />
223.5<br />
[ 8 13/16"]<br />
63.5<br />
[ 2 1/2"]<br />
360.5<br />
[ 14 3/16"]<br />
NOTE: ALL AIR INTAkES AND ExHAUST OUTLETS MUST BE<br />
kEPT CLEAR OF ANY OBSTRUCTIONS. ALL OPEN AREA<br />
IS REqUIRED FOR COOLING.<br />
414.5<br />
[ 16 5/16"]<br />
BATTERY<br />
CONNECTIONS<br />
476.4<br />
[ 18 3/4"]<br />
FEATURES &<br />
DIMENSIONS<br />
Page 86
Section 10<br />
SPECIFICATIONS & CHARTS<br />
Major Features and Dimensions (LP Units) – Drawing No. 0F4610<br />
429.5<br />
[16 15/16"]<br />
55.5<br />
[2 3/16"]<br />
376.5<br />
[14 13/16"]<br />
TYP.<br />
6.7<br />
[1/4"]<br />
HOT AIR<br />
ExHAUST<br />
416<br />
[16 3/8"]<br />
TAIL PIPE<br />
ExIT<br />
48.1<br />
[1 7/8"]<br />
29<br />
[1 1/8"]<br />
342.2<br />
[13 1/2"]<br />
50.8<br />
[2"]<br />
222.7<br />
[8 3/4"]<br />
423.2<br />
[16 11/16"]<br />
82.5<br />
[3 1/4"]<br />
343.4<br />
[13 1/2"]<br />
717.7<br />
[28 1/4"]<br />
210<br />
[8 1/4"]<br />
60<br />
[2 3/8"]<br />
170<br />
[6 11/16"]<br />
AIR<br />
INTAkE<br />
101<br />
[4"]<br />
79<br />
[3 1/8"]<br />
83.5<br />
[3 5/16"]<br />
176.6<br />
[6 15/16"]<br />
476.4<br />
[18 3/4"]<br />
VIEW FROM TOP<br />
36.5<br />
[1 7/16"]<br />
300.7<br />
[11 13/16"]<br />
369.7<br />
[14 9/16"]<br />
688.3<br />
[27 1/8"]<br />
778.9<br />
[30 11/16"]<br />
REF.<br />
OIL DRAIN<br />
736.4<br />
[29"]<br />
FRONT DOOR ACCESS FOR<br />
ALL REqUIRED MAINTENANCE<br />
118<br />
[4 5/8"]<br />
223.5<br />
[8 13/16"]<br />
63.5<br />
[2 1/2"]<br />
5/16"-18 WELDNUTS<br />
(6 PLACES)<br />
414.5<br />
[16 5/16"]<br />
360.5<br />
[14 3/16"]<br />
NOTE: ALL AIR INTAkES AND ExHAUST OUTLETS MUST BE<br />
kEPT CLEAR OF ANY OBSTRUCTIONS. ALL OPEN AREA<br />
IS REqUIRED FOR COOLING.<br />
CONNECTIONS IN<br />
BACk OF GENERATOR<br />
LP FUEL INLET<br />
211.3<br />
[8 5/16"]<br />
71.2<br />
[2 13/16"]<br />
34.3<br />
[1 3/8"<br />
POS. BAT.<br />
CONNECTION<br />
39.6<br />
[1 9/16"]<br />
69.6<br />
[2 3/4"]<br />
NEG. BAT.<br />
CONNECTION<br />
500.2<br />
[19 11/16"]<br />
REF.<br />
REMOTE PANEL<br />
CONNECTOR<br />
AC OUTPUT<br />
HARNESS<br />
FEATURES &<br />
DIMENSIONS<br />
Page 87
Section 10<br />
SPECIFICATIONS & CHARTS<br />
Compartment Floor Cutout – Drawing No. 0G3723-A<br />
Page 88
Section 10<br />
SPECIFICATIONS & CHARTS<br />
Page 89
Section 10<br />
SPECIFICATIONS & CHARTS<br />
TYPE <strong>Quietpact</strong> 40 G <strong>Quietpact</strong> 40 LP<br />
MODEL <strong>4700</strong>/4709 4701<br />
WEIGHT 170 pounds 170 pounds<br />
TYPE OF ROTOR Two-pole Two-pole<br />
RATED WATTS 3600 3400<br />
RATED VOLTS 120 120<br />
PHASE 1-Phase 1-Phase<br />
RATED MAXIMUM LOAD AMPERES 30.0 28.3<br />
RATED FREQUENCY 60 Hz 60<br />
OPERATING SPEED 3600 rpm 3600 rpm<br />
ENGINE MODEL GH-220 GH-220<br />
TYPE OF ENGINE Horizontal Shaft Horizontal Shaft<br />
FUEL SYSTEM Gasoline LP Vapor<br />
COOLING SYSTEM Air-Cooled Air-Cooled<br />
OIL SYSTEM Pressurized with Filter Pressurized with Filter<br />
OIL PUMP Trochoid Type Trochoid Type<br />
AIR CLEANER<br />
Paper element<br />
w/foam pre-cleaner<br />
Paper element<br />
w/foam pre-cleaner<br />
STARTER 12 VDC electric 12 VDC electric<br />
IGNITION SYSTEM Solid State Solid State<br />
SPARK PLUG<br />
SPARK PLUG GAP<br />
Generator Specifications<br />
Champion RC14YC<br />
(or equivalent)<br />
0.030 inch<br />
(0.76mm)<br />
Champion RC14YC<br />
(or equivalent)<br />
0.030 inch<br />
(0.76mm)<br />
NOTE 1: Engine speed will vary between approximately 2400-4000 rpm, depending on the load and load voltage.<br />
Nominal Resistances of Generator Windings at 68°f<br />
Stator Power Windings<br />
11 & 22 0.468 to 0.542 ohm<br />
33 & 44 0.468 to 0.542 ohm<br />
Rotor Winding<br />
Slip Ring to Slip Ring 12.72 to 14.73 ohms<br />
Stator Battery Charge Windings<br />
Lead 55 to 77<br />
0.150 to 0.174 ohm<br />
Lead 55 to 66<br />
0.150 to 0.174 ohm<br />
Excitation “DPE” Winding<br />
Lead 2 to 6<br />
2.168 to 2.510 ohm<br />
Engine Speeds and Voltage Specifications<br />
Listed below are normal running voltages, load voltages and frequency ranges.<br />
LOAD % VOLTAGE (VAC) FREQUENCY (Hz)<br />
0 123-126 62-62.5<br />
50 118-121 61-59<br />
100 112.5-116.5 57-60<br />
Page 90
Section 10<br />
SPECIFICATIONS & CHARTS<br />
torque specifications<br />
LONG BLOCK TORQUE REQUIREMENTS<br />
HEAD BOLTS 22 ft-lbs (±5%)<br />
GEAR COVER BOLTS<br />
18 ft-lbs<br />
CONNECTING ROD CAP BOLTS<br />
10 ft-lbs<br />
VALVE COVER BOLTS<br />
48 in-lbs<br />
ROCKER ARM JAM NUTS<br />
96 in-lbs<br />
OIL PRESSURE RELIEF COVER BOLT<br />
50 in-lbs<br />
OIL FILTER ADAPTER<br />
9 ft-lbs<br />
TRIM TORQUE REQUIREMENTS<br />
M3-.5 PHILLIPS PAN HEAD SCREW INTO ALUMINUM<br />
50 in-lbs<br />
M6-1 TAPTITE SCREW INTO ALUMINUM 96 in-lbs<br />
M6-1 TAPTITE SCREW INTO WELDNUT 96 in-lbs<br />
M8-1.25 TAPTITE SCREW INTO ALUMINUM<br />
18 ft-lbs<br />
STARTER BRACKET TO BLOCK<br />
18 ft-lbs<br />
GOVERNOR LEVER PINCH BOLT<br />
108 in-lbs<br />
FLYWHEEL NUT<br />
82 ft-lbs<br />
SPARK PLUG<br />
15 ft-lbs<br />
RV TORQUE REQUIREMENTS<br />
EXHAUST OUTLET BOLTS<br />
18 ft-lbs<br />
ROTOR BOLT<br />
19 ft-lbs<br />
ALTERNATOR ADAPTOR BOLTS<br />
12 ft-lbs<br />
STATOR BOLTS<br />
12 ft-lbs<br />
M6-1 TAPTITE SCREW INTO PIERCED HOLE 96 in-lbs<br />
Page 91
Section 11<br />
ELECTRICAL DATA<br />
Electrical Schematic and Wiring Diagram – Drawing No. 0D8063-D<br />
BATTERY<br />
RED<br />
BLK<br />
F1<br />
13<br />
RED<br />
SC<br />
16<br />
SM<br />
15<br />
14A<br />
FP<br />
15<br />
SW2<br />
J3<br />
14<br />
PCB<br />
J1-1<br />
16<br />
56<br />
14<br />
SC<br />
CH<br />
FS<br />
0<br />
0<br />
J2<br />
J1-2<br />
90<br />
CS 0<br />
15<br />
14<br />
J1-3<br />
J1-4<br />
18A<br />
IM<br />
SP<br />
J1-5<br />
J1-6 17<br />
J1-7<br />
17<br />
J1-8<br />
J1-9<br />
4<br />
J1-10<br />
66<br />
J1-11<br />
85<br />
SW1<br />
(START)<br />
(STOP)<br />
85<br />
85<br />
0B<br />
HTO<br />
0<br />
LOP<br />
0<br />
J1-12<br />
0<br />
14<br />
15<br />
J1-13<br />
J1-14 18<br />
J1-15<br />
18<br />
BCR<br />
66<br />
66<br />
4<br />
17<br />
0I<br />
17<br />
14<br />
18<br />
15<br />
14<br />
A<br />
REMOTE<br />
PANEL<br />
CONNECTOR<br />
1<br />
2<br />
3<br />
4<br />
5<br />
6<br />
7<br />
8<br />
1<br />
2<br />
3<br />
4<br />
5<br />
6<br />
7<br />
8<br />
BLUE<br />
ORANGE<br />
BROWN<br />
RED<br />
YELLOW<br />
WHITE<br />
77<br />
66<br />
14 A 15 18 14 17 0<br />
BATTERY CHARGE WINDING<br />
55<br />
STOP<br />
0N<br />
R1<br />
START<br />
4<br />
L1<br />
44<br />
0N<br />
22P<br />
POWER WINDING<br />
22S<br />
11S<br />
11P<br />
33<br />
HM<br />
FUEL<br />
PRIME<br />
0K<br />
0N<br />
0F<br />
WHITE<br />
GREEN<br />
T2<br />
NEUTRAL CONNECTION<br />
BY CUSTOMER<br />
2A<br />
CB3<br />
2<br />
ELECTRONIC<br />
VOLTAGE<br />
REGULATOR<br />
DPE WINDING<br />
FIELD<br />
120V 30A<br />
6<br />
4<br />
CB1<br />
4 T1<br />
BLACK<br />
4<br />
REMOTE PANEL<br />
(OPTIONAL)<br />
LEGEND<br />
BCR - BATTERY CHARGE RECTIFIER<br />
CB1 - CIRCUIT BREAKER, 30A<br />
CB3 - CIRCUIT BREAKER, 2.5A<br />
CH - CHOKE HEATER (GASOLINE ONLY)<br />
CS - CHOKE SOLENOID<br />
F1 - FUSE, 7.5A<br />
FP - FUEL PUMP-OR-LPG SHUT OFF VALVE<br />
FS - FUEL SOLENOID (GASOLINE ONLY)<br />
GT - TERMINAL, GROUND 4-TAB<br />
HM - METER, HOUR (OPTIONAL)<br />
HTO - SWITCH, HIGH TEMP. OIL (CLOSES ON HIGH TEMP.)<br />
IM - IGNITION MAGNETO<br />
L1 - LIGHT, RUN (OPTIONAL)<br />
LOP - SWITCH, LOW OIL PRESSURE (CLOSES ON LOW PRESSURE)<br />
PCB - ENGINE CONTROLLER<br />
R1 - RESISTOR, 1 OHM 25W<br />
SC - STARTER CONTACTOR<br />
SM - STARTER MOTOR<br />
SW1 - SWITCH, START/STOP<br />
SW2 - SWITCH FUEL PRIMER<br />
SP - SPARK PLUG<br />
TC - TERMINAL, CONN. 4-TAB<br />
Page 92
Section 11<br />
ELECTRICAL DATA<br />
Electrical Schematic and Wiring Diagram – Drawing No. 0D8063-D<br />
SUPPLIED BY<br />
CUSTOMER<br />
12V<br />
BATTERY<br />
SUPPLIED BY<br />
CUSTOMER<br />
SM<br />
16<br />
SC<br />
13<br />
11S 4<br />
4<br />
22S<br />
0K<br />
6 2A<br />
ELECTRONIC<br />
VOLTAGE<br />
REGULATOR<br />
16 56<br />
0<br />
2A<br />
STATOR<br />
J3<br />
J2<br />
J1-1<br />
J1-2<br />
J1-3<br />
J1-4<br />
J1-5<br />
J1-6<br />
PCB J1-7<br />
J1-8<br />
J1-9<br />
J1-10<br />
J1-11<br />
J1-12<br />
J1-13<br />
J1-14<br />
J1-15<br />
0<br />
90<br />
14<br />
15<br />
14<br />
56<br />
90<br />
18A<br />
17<br />
4<br />
85<br />
18<br />
18<br />
17<br />
66<br />
16<br />
CB3<br />
18A 18<br />
85 18 CONN. 1<br />
PIN#<br />
0<br />
1<br />
2<br />
3<br />
14<br />
FS<br />
0<br />
90<br />
14<br />
18A<br />
18<br />
0<br />
FP<br />
RED<br />
18<br />
2A<br />
2<br />
90<br />
1<br />
2<br />
0<br />
CONN. 2<br />
PIN#<br />
0<br />
0<br />
85<br />
2A<br />
2<br />
14<br />
13<br />
15<br />
14<br />
17<br />
66<br />
15<br />
0<br />
14<br />
BCR<br />
13<br />
2A<br />
15<br />
17<br />
4<br />
14<br />
14A<br />
F1<br />
15<br />
15<br />
4<br />
2<br />
77<br />
66<br />
0K<br />
0<br />
0<br />
0<br />
14 TC<br />
SW2<br />
18<br />
14A<br />
15<br />
0<br />
0<br />
GT<br />
17<br />
SW1<br />
0B<br />
18<br />
0I<br />
15<br />
17<br />
14<br />
CB1<br />
14A<br />
0N<br />
0F<br />
33<br />
11P<br />
BLACK<br />
22S<br />
6<br />
11S<br />
2<br />
77<br />
0F<br />
33<br />
66<br />
11P<br />
11P<br />
44<br />
33 11P<br />
22P<br />
44<br />
55<br />
22P<br />
WHITE<br />
GT<br />
RED<br />
0F<br />
55<br />
CLOSEST TO BEARING<br />
4<br />
0I<br />
17<br />
14<br />
18<br />
0N<br />
15<br />
1<br />
8<br />
2<br />
3 7<br />
4<br />
14A<br />
6<br />
5<br />
R1<br />
REMOTE<br />
PANEL<br />
CONNECTOR<br />
FIELD<br />
14A<br />
15<br />
14A<br />
15<br />
85<br />
LOP<br />
FILTER MTG<br />
0 HTO<br />
SCREW<br />
18A<br />
T1<br />
T2<br />
GREEN<br />
90<br />
CS<br />
0<br />
SP1<br />
BLACK<br />
WHITE<br />
GREEN<br />
CUSTOMER<br />
AC CONNECTION<br />
14 CH<br />
IM1<br />
NEUTRAL CONNECTION<br />
BY CUSTOMER<br />
Page 93
Notes<br />
Page 94
Part No. 0E1881 rev. C / Printed in USA 03.09<br />
© 2009 <strong>Generac</strong> Power Systems, Inc. All rights reserved.<br />
<strong>Generac</strong> Power Systems, Inc.<br />
S45 W29290 Hwy. 59 • Waukesha, WI 53189<br />
1-888-GENERAC (1-888-436-3722) • generac.com