
You also want an ePaper? Increase the reach of your titles
YUMPU automatically turns print PDFs into web optimized ePapers that Google loves.
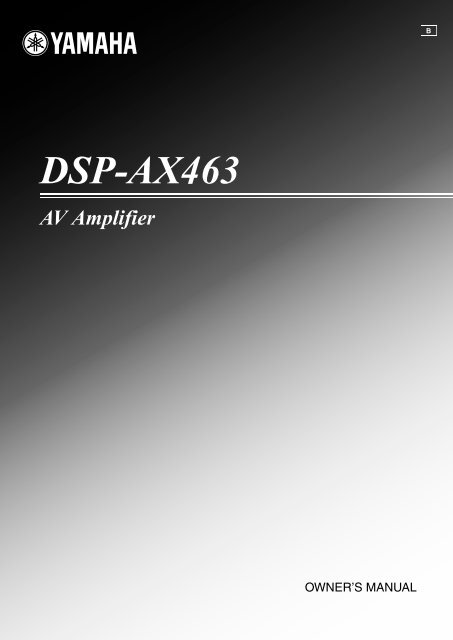
DSP-AX463<br />
AV Amplifier<br />
OWNER’S <strong>MANUAL</strong><br />
B
CAUTION: READ THIS BEFORE OPERATING YOUR UNIT.<br />
1 To assure the finest performance, please read this manual<br />
carefully. Keep it in a safe place for future reference.<br />
2 Install this sound system in a well ventilated, cool, dry, clean<br />
place – away from direct sunlight, heat sources, vibration,<br />
dust, moisture, and/or cold. Allow ventilation space of at least<br />
30 cm on the top, 20 cm on the left and right, and 20 cm on<br />
the back of this unit.<br />
3 Locate this unit away from other electrical appliances, motors,<br />
or transformers to avoid humming sounds.<br />
4 Do not expose this unit to sudden temperature changes from<br />
cold to hot, and do not locate this unit in a environment with<br />
high humidity (i.e. a room with a humidifier) to prevent<br />
condensation inside this unit, which may cause an electrical<br />
shock, fire, damage to this unit, and/or personal injury.<br />
5 Avoid installing this unit where foreign object may fall onto<br />
this unit and/or this unit may be exposed to liquid dripping or<br />
splashing. On the top of this unit, do not place:<br />
– other components, as they may cause damage and/or<br />
discoloration on the surface of this unit.<br />
– burning objects (i.e. candles), as they may cause fire,<br />
damage to this unit, and/or personal injury.<br />
– containers with liquid in them, as they may fall and liquid<br />
may cause electrical shock to the user and/or damage to<br />
this unit.<br />
6 Do not cover this unit with a newspaper, tablecloth, curtain,<br />
etc. in order not to obstruct heat radiation. If the temperature<br />
inside this unit rises, it may cause fire, damage to this unit,<br />
and/or personal injury.<br />
7 Do not plug in this unit to a wall outlet until all connections<br />
are complete.<br />
8 Do not operate this unit upside-down. It may overheat,<br />
possibly causing damage.<br />
9 Do not use force on switches, knobs and/or cords.<br />
10 When disconnecting the power cable from the wall outlet,<br />
grasp the plug; do not pull the cord.<br />
11 Do not clean this unit with chemical solvents; this might<br />
damage the finish. Use a clean, dry cloth.<br />
12 Only voltage specified on this unit must be used. Using this<br />
unit with a higher voltage than specified is dangerous and may<br />
cause fire, damage to this unit, and/or personal injury. Yamaha<br />
will not be held responsible for any damage resulting from use<br />
of this unit with a voltage other than specified.<br />
13 To prevent damage by lightning, keep the power cord and<br />
outdoor antennas disconnected from a wall outlet or the unit<br />
during a lightning storm.<br />
14 Do not attempt to modify or fix this unit. Contact qualified<br />
Yamaha service personnel when any service is needed. The<br />
cabinet should never be opened for any reasons.<br />
15 When not planning to use this unit for long periods of time<br />
(i.e. vacation), disconnect the AC power plug from the wall<br />
outlet.<br />
16 Install this unit near the AC outlet and where the AC power<br />
plug can be reached easily.<br />
17 Be sure to read the “Troubleshooting” section on common<br />
operating errors before concluding that this unit is faulty.<br />
18 Before moving this unit, press ASTANDBY/ON to set this<br />
unit in the standby mode, and disconnect the AC power plug<br />
from the wall outlet.<br />
En<br />
Caution: Read this before operating your unit.<br />
19 Excessive sound pressure from earphones and headphones can<br />
cause hearing loss.<br />
20 The batteries shall not be exposed to excessive heat such as<br />
sunshine, fire or the like.<br />
WARNING<br />
TO REDUCE THE RISK OF FIRE OR ELECTRIC<br />
SHOCK, DO NOT EXPOSE THIS UNIT TO RAIN<br />
OR MOISTURE.<br />
This unit is not disconnected from the AC power<br />
source as long as it is connected to the wall outlet, even<br />
if this unit itself is turned off by ASTANDBY/ON.<br />
This state is called the standby mode. In this state, this<br />
unit is designed to consume a very small quantity of<br />
power.<br />
■ For U.K. customers<br />
If the socket outlets in the home are not suitable for the<br />
plug supplied with this appliance, it should be cut off and<br />
an appropriate 3 pin plug fitted. For details, refer to the<br />
instructions described below.<br />
Note<br />
The plug severed from the mains lead must be destroyed, as a<br />
plug with bared flexible cord is hazardous if engaged in a live<br />
socket outlet.<br />
■ Special Instructions for U.K. Model<br />
IMPORTANT<br />
THE WIRES IN MAINS LEAD ARE COLOURED IN<br />
ACCORDANCE WITH THE FOLLOWING CODE:<br />
Blue: NEUTRAL<br />
Brown: LIVE<br />
As the colours of the wires in the mains lead of this apparatus<br />
may not correspond with the coloured markings identifying<br />
the terminals in your plug, proceed as follows:<br />
The wire which is coloured BLUE must be connected to the<br />
terminal which is marked with the letter N or coloured<br />
BLACK. The wire which is coloured BROWN must be<br />
connected to the terminal which is marked with the letter L or<br />
coloured RED.<br />
Making sure that neither core is connected to the earth<br />
terminal of the three pin plug.<br />
This symbol mark is according to the<br />
EU directive 2002/96/EC.<br />
This symbol mark means that electrical<br />
and electronic equipment, at their endof-life,<br />
should be disposed of separately<br />
from your household waste.<br />
Please act according to your local rules<br />
and do not dispose of your old products<br />
with your normal household waste.
INTRODUCTION<br />
Features ................................................................... 2<br />
Getting started ........................................................ 3<br />
Quick start guide .................................................... 4<br />
Preparation: Check the items..................................... 4<br />
Step 1: Set up your speakers...................................... 5<br />
Step 2: Connect your DVD player and<br />
other components .................................................. 6<br />
Step 3: Press SCENE 1 button................................... 7<br />
What do you want to do with this unit?..................... 8<br />
PREPARATION<br />
Connections ............................................................. 9<br />
Rear panel .................................................................. 9<br />
Placing speakers....................................................... 10<br />
Connecting speakers ................................................ 11<br />
Information on jacks and cable plugs ...................... 13<br />
Information on HDMI.......................................... 14<br />
Audio and video signal flow.................................... 14<br />
Connecting video components................................. 15<br />
Connecting other components ................................. 16<br />
Connecting audio components................................. 18<br />
Connecting a Yamaha iPod universal dock<br />
or Bluetooth adapter ........................................ 19<br />
Using the VIDEO AUX jacks on the front panel .... 19<br />
Connecting the power cable..................................... 20<br />
Turning on and off the power .................................. 20<br />
Front panel display .................................................. 21<br />
Optimizing the speaker setting<br />
for your listening room .................................... 23<br />
Using AUTO SETUP .............................................. 23<br />
BASIC OPERATION<br />
Selecting the SCENE templates........................... 27<br />
Selecting the desired SCENE template.................... 27<br />
Creating your original SCENE templates................ 30<br />
Using remote control on the SCENE feature........... 31<br />
Playback ................................................................ 32<br />
Basic operations....................................................... 32<br />
Selecting audio input jacks<br />
(AUDIO SELECT).............................................. 33<br />
Selecting the MULTI CH INPUT component......... 33<br />
Displaying the current status of this unit<br />
on a video monitor............................................... 34<br />
Using your headphones............................................ 34<br />
Muting the audio output........................................... 34<br />
Playing video sources in the background<br />
of an audio source................................................ 35<br />
Displaying the input source information ................. 35<br />
Using the sleep timer ............................................... 36<br />
Sound field programs ........................................... 37<br />
Sound field program descriptions............................ 37<br />
Using audio features ............................................. 40<br />
Enjoying high quality sound.................................... 40<br />
Adjusting the tonal quality....................................... 40<br />
Adjusting the speaker level...................................... 40<br />
Selecting the night listening mode........................... 41<br />
Using a USB memory device or a USB portable<br />
audio player....................................................... 42<br />
Playback operation................................................... 42<br />
Contents<br />
Using iPod ..........................................................44<br />
Controlling iPod................................................... 44<br />
Using Bluetooth components............................46<br />
Pairing the Bluetooth adapter and your<br />
Bluetooth component....................................... 46<br />
Playback of the Bluetooth component................. 46<br />
Recording...............................................................47<br />
ADVANCED OPERATION<br />
SET MENU ............................................................48<br />
Using SET MENU................................................... 49<br />
1 SOUND MENU.................................................... 50<br />
2 INPUT MENU...................................................... 55<br />
3 OPTION MENU................................................... 57<br />
Remote control features........................................60<br />
Controlling this unit, a TV, or other components.... 60<br />
Setting remote control codes ................................... 62<br />
Advanced setup......................................................63<br />
ADDITIONAL INFORMATION<br />
Troubleshooting.....................................................64<br />
Glossary..................................................................73<br />
Specifications .........................................................75<br />
Index .......................................................................76<br />
APPENDIX<br />
(at the end of this manual)<br />
Front panel................................................................i<br />
Remote control ....................................................... ii<br />
List of remote control codes ................................. iii<br />
About this manual<br />
y indicates a tip for your operation.<br />
Some operations can be performed by using either the buttons on the<br />
front panel or the ones on the remote control. In case the button<br />
names differ between the front panel and the remote control, the<br />
button name on the remote control is given in parentheses.<br />
This manual is printed prior to production. Design and specifications<br />
are subject to change in part as a result of improvements, etc. In case<br />
of differences between the manual and product, the product has<br />
priority.<br />
“ESPEAKERS” or “3DVD” (example) indicates the name of the<br />
parts on the front panel or the remote control. Refer to the attached<br />
sheet or the pages at the end of this manual for the information about<br />
each position of the parts.<br />
The symbol “☞ ” with page number(s) indicates the corresponding<br />
reference page(s).<br />
1 En<br />
INTRODUCTION<br />
PREPARATION<br />
BASIC<br />
OPERATION<br />
ADVANCED<br />
OPERATION<br />
ADDITIONAL<br />
INFORMATION APPENDIX<br />
English
Features<br />
Built-in 5-channel power amplifier<br />
◆ Minimum RMS output power<br />
1 kHz, 0.9% THD, 6 Ω<br />
105 W/ch<br />
SCENE select function<br />
◆ Preset SCENE templates for various situations<br />
◆ SCENE template customizing capability<br />
Decoders and DSP circuits<br />
◆ Proprietary Yamaha technology for the creation of multichannel<br />
surround sound<br />
◆ Compressed Music Enhancer mode<br />
◆ Dolby Digital decoder<br />
◆ Dolby Pro Logic/Dolby Pro Logic II decoder<br />
◆ DTS decoder<br />
◆ Virtual CINEMA DSP<br />
◆ SILENT CINEMA<br />
HDMI (High-Definition Multimedia Interface)<br />
◆ HDMI interface for standard, enhanced or high-definition<br />
video (includes 1080p video signal transmission) as well as<br />
multi-channel digital audio<br />
Manufactured under license from Dolby Laboratories.<br />
“Dolby”, “Pro Logic”, and the double-D symbol are trademarks<br />
of Dolby Laboratories.<br />
“SILENT CINEMA” is a trademark of Yamaha Corporation.<br />
iPod<br />
“iPod” is a trademark of Apple, Inc., registered in the U.S. and<br />
other countries.<br />
2 En<br />
Features<br />
DOCK terminal<br />
◆ DOCK terminal to connect a Yamaha iPod universal dock<br />
(such as YDS-10, sold separately) or Bluetooth adapter<br />
(such as YBA-10, sold separately).<br />
USB features<br />
◆ USB port to connect a USB memory device or a USB portable<br />
audio player<br />
◆ MP3, WMA and WAV capability<br />
Other features<br />
◆ YPAO (Yamaha Parametric Room Acoustic Optimizer) for<br />
automatic speaker setup<br />
◆ 192-kHz/24-bit D/A converter<br />
◆ DIRECT mode for high quality sound for all sources<br />
◆ 6 additional input jacks for discrete multi-channel input<br />
◆ OSD (on-screen display) menus that allow you to optimize<br />
this unit to suit your individual audiovisual system<br />
◆ Component video input/output capability<br />
(3 COMPONENT VIDEO INs and 1 MONITOR OUT)<br />
◆ Optical and coaxial digital audio signal jacks<br />
◆ Sleep timer<br />
◆ Cinema and music night listening modes<br />
◆ iPod controlling capability<br />
◆ Remote control with preset remote control codes<br />
“DTS” and “DTS Digital Surround” are registered trademarks of<br />
DTS, Inc.<br />
Bluetooth<br />
Bluetooth is a registered trademark of the Bluetooth SIG and is<br />
used by Yamaha in accordance with a license agreement.<br />
“HDMI”, the “HDMI” logo and “High-Definition Multimedia<br />
Interface” are trademarks or registered trademarks of HDMI<br />
Licensing LLC.
■ Supplied accessories<br />
Check that you received all of the following parts.<br />
❏ Remote control<br />
❏ Batteries (2) (AAA, R03, UM-4)<br />
❏ Optimizer microphone<br />
Getting started<br />
Getting started<br />
■ Installing batteries in the remote control<br />
1 Take off the battery compartment cover.<br />
2 Insert the two supplied batteries<br />
(AAA, R03, UM-4) according to the polarity<br />
markings (+ and –) on the inside of the<br />
battery compartment.<br />
3 Snap the battery compartment cover back<br />
into place.<br />
Notes<br />
1<br />
3<br />
2<br />
Change all of the batteries if you notice that the operation range<br />
of the remote control decreases.<br />
Do not use an old battery and a new one together.<br />
Do not use different types of batteries (such as alkaline and<br />
manganese batteries) together. Read the packaging carefully as<br />
these different types of batteries may have the same shape and<br />
color.<br />
If the batteries have leaked, dispose of them immediately. Avoid<br />
touching the leaked material or letting it come into contact with<br />
clothing, etc. Clean the battery compartment thoroughly before<br />
installing new batteries.<br />
Do not throw away batteries with general house waste; dispose<br />
of them correctly in accordance with your local regulations.<br />
If the remote control is without batteries for more than 2<br />
minutes, or if exhausted batteries remain in the remote control,<br />
the contents of the memory may be cleared. When the memory<br />
is cleared, insert new batteries and set up the remote control<br />
code.<br />
3 En<br />
INTRODUCTION<br />
English
Quick start guide<br />
The following steps describe the easiest way to enjoy<br />
DVD movie playback in your home theater.<br />
4 En<br />
Video monitor<br />
Front left<br />
speaker<br />
Center speaker<br />
DVD player<br />
Front right<br />
speaker<br />
Surround left<br />
speaker<br />
Subwoofer<br />
Step 1: Set up your speakers<br />
Quick start guide<br />
Surround right<br />
speaker<br />
Step 2: Connect your DVD player<br />
and other components<br />
Step 3: Press SCENE 1 button<br />
Enjoy DVD playback!<br />
☞ P. 5<br />
☞ P. 6<br />
☞ P. 7<br />
Preparation: Check the items<br />
Prepare the following items.<br />
❏ Speakers<br />
❏ Front speaker .....................................x 2<br />
❏ Center speaker ...................................x 1<br />
❏ Surround speaker ..............................x 2<br />
Select magnetically shielded speakers. The<br />
minimum required speakers are two front speakers.<br />
The priority of the requirement of other speakers is<br />
as follows:<br />
1. Two surround speakers<br />
2. Center speaker<br />
❏ Active subwoofer ...................................x 1<br />
Select an active subwoofer equipped with an RCA<br />
input jack.<br />
❏ Speaker cable .........................................x 5<br />
❏ Subwoofer cable .....................................x 1<br />
Select a monaural RCA cable.<br />
❏ DVD player ..............................................x 1<br />
Select DVD player equipped with coaxial digital<br />
audio output jack and composite video output<br />
jack.<br />
❏ Video monitor ..........................................x 1<br />
Select a TV monitor, video monitor or projector<br />
equipped with a composite video input jack.<br />
❏ Video cable .............................................x 2<br />
Select an RCA composite video cable.<br />
❏ Digital coaxial audio cable ....................x 1
Step 1: Set up your speakers<br />
Place your speakers in the room and connect them to this<br />
unit.<br />
L<br />
R<br />
VIDEO<br />
DVD DTV/CBL IN DVR OUT<br />
COAXIAL<br />
DVD<br />
DTV/CBL CD<br />
DVD IN1 IN2<br />
DTV/CBL<br />
OUT<br />
HDMI DIGITAL INPUT<br />
DOCK<br />
DVD<br />
COMPONENT VIDEO<br />
PR PB Y PRPB DTV/CBL<br />
Y<br />
VIDEO<br />
1 2 3<br />
MONITOR OUT<br />
MONITOR<br />
OUT<br />
CENTER<br />
MD/<br />
CD-R DVD DTV/CBL DVR<br />
OUT<br />
IN<br />
IN OUT<br />
FRONT<br />
SUB<br />
(PLAY) (REC)<br />
SURROUND WOOFER<br />
CD TUNER<br />
AUDIO<br />
MULTI CH INPUT<br />
OPTICAL<br />
DVR<br />
OUTPUT<br />
SUB<br />
WOOFER<br />
CENTER<br />
R FRONT A<br />
L<br />
SPEAKERS<br />
R SURROUND L<br />
R FRONT B L<br />
1 Place your speakers and subwoofer in the<br />
room.<br />
2 Connect speaker cables to each speaker.<br />
Cables are colored or shaped differently, perhaps with<br />
a stripe, groove or ridge. Connect the striped<br />
(grooved, etc.) cable to the “+” (red) terminals of<br />
your speaker. Connect the plain cable to the “–”<br />
(black) terminals.<br />
3 Connect each speaker cable to the<br />
corresponding speaker terminal of this unit.<br />
1 2 3 4<br />
1 Make sure that this unit and the subwoofer are<br />
unplugged from the AC wall outlets.<br />
2 Twist the exposed wires of the speaker cables<br />
together to prevent short circuits.<br />
3 Do not let the bare speaker wires touch each other.<br />
4 Do not let the bare speaker wires touch any metal<br />
part of this unit.<br />
Quick start guide<br />
Be sure to connect the left channel (L), right channel<br />
(R), “+” (red) and “–” (black) properly.<br />
Front and center speakers<br />
Loosen Insert Tighten<br />
To the center<br />
speaker<br />
Surround speakers<br />
4 Connect the subwoofer cable to the input<br />
jack of the subwoofer and the SUBWOOFER<br />
OUTPUT jack of this unit.<br />
Subwoofer<br />
Input jack<br />
To the front<br />
right speaker<br />
Subwoofer cable<br />
To the surround<br />
right speaker<br />
To the front<br />
left speaker<br />
To the surround<br />
left speaker<br />
AV amplifier<br />
SUBWOOFER<br />
OUTPUT jack<br />
5 En<br />
INTRODUCTION<br />
English
Quick start guide<br />
Step 2: Connect your DVD player<br />
and other components<br />
L<br />
R<br />
1 Connect the digital coaxial audio cable to the<br />
digital coaxial audio output jack of your DVD<br />
player and the DVD DIGITAL INPUT COAXIAL<br />
jack of this unit.<br />
2 Connect the video cable to the composite<br />
video output jack of your DVD player and the<br />
DVD VIDEO jack of this unit.<br />
6 En<br />
VIDEO<br />
VIDEO<br />
COAXIAL<br />
MONITOR<br />
DVD DTV/CBL IN DVR OUT MONITOR<br />
DVD DTV/CBL IN DVR OUT<br />
OUT<br />
OPTICAL<br />
DVD<br />
DTV/CBL CD<br />
DVD IN1 IN2<br />
DTV/CBL<br />
OUT<br />
HDMI DIGITAL INPUT<br />
DOCK<br />
DVD<br />
COMPONENT VIDEO<br />
PR PB Y PRPB DTV/CBL<br />
Y<br />
1 2 3<br />
1 2 3<br />
MONITOR OUT<br />
CENTER<br />
MD/<br />
CD-R DVD DTV/CBL DVR<br />
OUT<br />
IN<br />
IN OUT<br />
FRONT<br />
SUB<br />
(PLAY) (REC)<br />
SURROUND WOOFER<br />
CD TUNER<br />
AUDIO<br />
MULTI CH INPUT<br />
Digital coaxial<br />
audio output jack<br />
DVR<br />
OUTPUT<br />
SUB<br />
WOOFER<br />
CENTER<br />
R FRONT A L<br />
SPEAKERS<br />
R SURROUND L<br />
R FRONT B L<br />
Make sure that this unit and the DVD<br />
player are unplugged from the AC wall<br />
outlets.<br />
DVD player AV amplifier<br />
DVD player<br />
Digital coaxial audio<br />
cable<br />
DVD DIGITAL INPUT<br />
COAXIAL jack<br />
AV amplifier<br />
Composite video<br />
output jack Video cable DVD VIDEO jack<br />
3 Connect the video cable to the video input<br />
jack of your video monitor and the VIDEO<br />
MONITOR OUT jack of this unit.<br />
Video input<br />
jack<br />
Video monitor AV amplifier<br />
Video cable<br />
4 Connect the power plug of this unit and other<br />
components into the AC wall outlet.<br />
■ For further connections<br />
VIDEO MONITOR OUT<br />
jack<br />
Using the other kind of speaker<br />
combinations ☞ P. 11<br />
Connecting video components ☞ P. 15<br />
Connecting a DVD player ☞ P. 16<br />
Connecting a DVD recorder ☞ P. 17<br />
Connecting a set-top box ☞ P. 17<br />
Connecting a CD player, a CD recorder<br />
/MD recorder, and a tuner ☞ P. 18<br />
Connecting a multi-format player<br />
or an external decoder ☞ P. 18<br />
Connecting a Yamaha iPod/Bluetooth dock<br />
☞ P. 19<br />
Using the VIDEO AUX jacks on the front<br />
panel ☞ P. 19<br />
Using the USB jack on the front panel<br />
☞ P. 42
Step 3: Press SCENE 1 button<br />
1 Turn on the video monitor and then set the<br />
input source selector of the video monitor to<br />
this unit.<br />
2 Press BSCENE 1.<br />
This unit is turned on. “DVD Viewing” appears in the<br />
front panel display, and this unit automatically<br />
optimize own status for the DVD playback.<br />
y<br />
The indicator on the selected SCENE button lights up while<br />
this unit is in the SCENE mode.<br />
3 Start playback of the desired DVD on your<br />
player.<br />
4 Rotate DVOLUME to adjust the volume.<br />
Note<br />
When you change the input source or sound field program, the<br />
SCENE mode is deactivated.<br />
Quick start guide<br />
■ About SCENE function<br />
Just by pressing one SCENE button, you can turn on this<br />
unit and recall your favorite input source and sound field<br />
program according to the SCENE template that has been<br />
assigned to the SCENE button. The SCENE templates are<br />
built combinations of input sources and sound field<br />
programs.<br />
y<br />
If you connect a Yamaha product that has capability of the<br />
SCENE control signals, this unit can automatically activate the<br />
component and start playback. Refer to the instruction manual of<br />
the DVD player for further information.<br />
■ The default assigned SCENE templates<br />
Default<br />
SCENE<br />
button<br />
SCENE<br />
1<br />
SCENE<br />
2<br />
SCENE<br />
3<br />
SCENE<br />
4<br />
Note<br />
The name of the SCENE template<br />
and its description<br />
DVD Movie Viewing<br />
– input source: DVD<br />
– sound field program: Movie Dramatic<br />
For when you want to enjoy a movie from the<br />
connected DVD player.<br />
Music Disc Listening<br />
– input source: DVD<br />
– sound field program: 2ch Stereo<br />
For when you want to listen to a music disc from<br />
the connected DVD player.<br />
TV Viewing *1<br />
– input source: DTV/CBL<br />
– sound field program: STRAIGHT<br />
For when you want to watch a TV program.<br />
Radio Listening *2<br />
– input source: TUNER<br />
– sound field program: 5ch Enhancer<br />
For when you want to listen to a music program<br />
from the FM radio station.<br />
*1 You must connect a cable TV or a satellite tuner to this unit in<br />
advance. See page 17 for details.<br />
*2 You must connect a FM/AM/DAB tuner to this unit in advance.<br />
See page 18 for details.<br />
y<br />
You can change the assigned SCENE template for the SCENE<br />
buttons. See page 27 for details.<br />
7 En<br />
INTRODUCTION<br />
English
Quick start guide<br />
■ After using this unit...<br />
Press ASTANDBY/ON on the front panel to set<br />
this unit to the standby mode.<br />
This unit is set to the standby mode. In the standby mode,<br />
this unit consumes a small amount of power in order to<br />
receive infrared signals from the remote control. To turn<br />
on this unit from the standby mode, press ASTANDBY/<br />
ON (or GPOWER). See page 20 for details.<br />
8 En<br />
What do you want to do with this<br />
unit?<br />
■ Customizing the SCENE templates<br />
Using various SCENE templates ☞ P. 27<br />
Creating your original SCENE templates<br />
☞ P. 30<br />
■ Using various input sources<br />
Basic controls of this unit<br />
Using your USB portable device<br />
☞ P. 32<br />
with this unit ☞ P. 42<br />
Using your iPod with this unit<br />
Using your Bluetooth components<br />
☞ P. 44<br />
with this unit ☞ P. 46<br />
■ Using various sound features<br />
Using various sound field programs<br />
☞ P. 37<br />
Using the direct mode for the high<br />
quality sound ☞ P. 40<br />
Customizing the sound field programs<br />
☞ P. 39<br />
■ Adjusting the parameters of this unit<br />
Automatically optimizing the speaker<br />
parameters for your listening room<br />
(AUTO SETUP) ☞ P. 23<br />
Manually adjusting various parameters of<br />
this unit ☞ P. 48<br />
Setting the remote control ☞ P. 60<br />
Adjusting the advanced parameters ☞ P. 63<br />
■ Additional features<br />
Automatically turning off this unit ☞ P. 36
Rear panel<br />
L<br />
R<br />
DVD<br />
DTV/CBL CD<br />
DVD IN1 DTV/CBL IN2<br />
HDMI<br />
OUT<br />
DIGITAL INPUT<br />
DVD<br />
COMPONENT VIDEO<br />
DTV/CBL<br />
PR PB Y PRPB Y<br />
MD/<br />
CD-R OUT<br />
IN<br />
(PLAY) (REC)<br />
DVD DTV/CBL IN DVR OUT<br />
1 2 3<br />
MONITOR<br />
OUT<br />
CENTER<br />
DVD DTV/CBL<br />
IN OUT<br />
DVR<br />
CD TUNER<br />
FRONT<br />
SUB<br />
SURROUND WOOFER<br />
AUDIO MULTI CH INPUT<br />
OUTPUT<br />
Connections<br />
1 2 3 4 5<br />
VIDEO<br />
COAXIAL<br />
MONITOR OUT<br />
6 7<br />
8 9<br />
OPTICAL<br />
Name Page<br />
1 HDMI jacks 14<br />
2 DIGITAL INPUT jacks 13<br />
3 COMPONENT VIDEO jacks 13<br />
4 DOCK terminal 19<br />
5 Speaker terminals 11<br />
6 VIDEO jacks 13<br />
7 AUDIO jacks 13<br />
8 MULTI CH INPUT jacks 18<br />
9 SUBWOOFER OUTPUT jack 11<br />
DVR<br />
DOCK<br />
SUB<br />
WOOFER<br />
CENTER<br />
R FRONT A L<br />
SPEAKERS<br />
R SURROUND L<br />
R FRONT B L<br />
Connections<br />
9 En<br />
PREPARATION<br />
English
Connections<br />
Placing speakers<br />
The speaker layout below shows the speaker setting we recommend. You can use it to enjoy CINEMA DSP and multichannel<br />
audio sources.<br />
Front left and right speakers (FL and FR)<br />
The front speakers are used for the main source sound plus effect sounds. Place these speakers at an equal distance from the<br />
ideal listening position. The distance of each speaker from each side of the video monitor should be the same.<br />
Center speaker (C)<br />
The center speaker is for the center channel sounds (dialog, vocals, etc.). If for some reason it is not practical to use a<br />
center speaker, you can do without it. Best results, however, are obtained with the full system.<br />
Surround left and right speakers (SL and SR)<br />
The surround speakers are used for effect and surround sounds.<br />
Subwoofer (SW)<br />
The use of a subwoofer with a built-in amplifier, such as the Yamaha Active Servo Processing Subwoofer System, is<br />
effective not only for reinforcing bass frequencies from any or all channels, but also for high fidelity sound reproduction<br />
of the LFE (low-frequency effect) channel included in Dolby Digital and DTS sources. The position of the subwoofer is<br />
not so critical, because low bass sounds are not highly directional. But it is better to place the subwoofer near the front<br />
speakers. Turn it slightly toward the center of the room to reduce wall reflections.<br />
10 En<br />
SL<br />
SL<br />
FL C FR<br />
30˚<br />
60˚<br />
80˚<br />
SR<br />
SR<br />
FL<br />
C<br />
FR<br />
SL<br />
SW<br />
SR
Connecting speakers<br />
Connections<br />
Be sure to connect the left channel (L), right channel (R), “+” (red) and “–” (black) properly. If the connections are faulty,<br />
this unit cannot reproduce the input sources accurately.<br />
Caution<br />
Before connecting the speakers, make sure that the AC power plug is disconnected from the AC wall outlet.<br />
Do not let the bare speaker wires touch each other or let them touch any metal part of this unit. This could damage<br />
this unit and/or the speakers. If the speaker wires are short-circuited, “CHECK SP WIRES” appears in the front<br />
panel display when you turn on this unit.<br />
Use the magnetically shielded speakers. If this type of speaker still creates interference with the monitor, place the<br />
speakers away from the monitor.<br />
L<br />
R<br />
DVD<br />
DTV/CBL CD<br />
DVD IN1 DTV/CBL IN2<br />
HDMI<br />
OUT<br />
DIGITAL INPUT<br />
DVD<br />
COMPONENT VIDEO<br />
DTV/CBL<br />
PR PB Y PRPB Y<br />
MD/<br />
CD-R OUT<br />
IN<br />
(PLAY) (REC)<br />
VIDEO<br />
VIDEO<br />
DVD DTV/CBL IN DVR OUT<br />
IN OUT<br />
DVD DTV/CBL DVR<br />
AUDIO<br />
COAXIAL<br />
1 2 3<br />
MONITOR OUT<br />
MONITOR<br />
OUT<br />
CD TUNER<br />
OPTICAL<br />
FRONT SURROUND<br />
Subwoofer<br />
MULTI CH INPUT<br />
CENTER<br />
SUB<br />
WOOFER<br />
DVR<br />
Center<br />
speaker<br />
OUTPUT<br />
DOCK<br />
SUB<br />
WOOFER<br />
CENTER<br />
R FRONT A L<br />
Right Left<br />
Front speakers<br />
(FRONT A)<br />
Surround speakers<br />
SPEAKERS<br />
Right<br />
R SURROUND L<br />
R FRONT B L<br />
Left<br />
FRONT B terminals<br />
Connect the alternative front speaker system<br />
(FRONT B).<br />
11 En<br />
PREPARATION<br />
English
Connections<br />
■ Before connecting to the SPEAKERS<br />
terminal<br />
A speaker cord is actually a pair of insulated cables<br />
running side by side. Cables are colored or shaped<br />
differently, perhaps with a stripe, groove or ridges.<br />
Connect the striped (grooved, etc.) cable to the “+” (red)<br />
terminals of this unit and your speaker. Connect the plain<br />
cable to the “–” (black) terminals.<br />
Remove approximately 10 mm (3/8”) of insulation<br />
from the end of each speaker cable and then<br />
twist the bare wires of the cable together to<br />
prevent short circuits.<br />
■ Connecting to the SPEAKER terminals<br />
1 Loosen the knob.<br />
2 Insert the bare end of the speaker wire into<br />
the hole on the terminal.<br />
3 Tighten the knob to secure the wire.<br />
12 En<br />
10 mm (3/8”)<br />
1<br />
3<br />
2<br />
Red: positive (+)<br />
Black: negative (–)
Information on jacks and cable plugs<br />
Connect one of the type of the audio jack(s) and/or video jack(s) that your input components are equipped with.<br />
■ Audio jacks<br />
This unit has three types of audio jacks. Connection<br />
depends on the availability of audio jacks on your other<br />
components.<br />
AUDIO jacks<br />
For conventional analog audio signals transmitted via left<br />
and right analog audio cables. Connect red plugs to the<br />
right jacks and white plugs to the left jacks.<br />
DIGITAL AUDIO COAXIAL jacks<br />
For digital audio signals transmitted via coaxial digital<br />
audio cables.<br />
DIGITAL AUDIO OPTICAL jacks<br />
For digital audio signals transmitted via optical digital<br />
audio cables.<br />
Notes<br />
AUDIO<br />
L R<br />
L<br />
Audio jacks and cable plugs Video jacks and cable plugs<br />
DIGITAL AUDIO<br />
COAXIAL<br />
DIGITAL AUDIO<br />
OPTICAL<br />
You can use the digital jacks to input PCM, Dolby Digital and<br />
DTS bitstreams. Optical input jacks are compatible with digital<br />
signals with up to 96 kHz of sampling frequency.<br />
This unit handles digital and analog signals independently. Thus<br />
audio signals input at the digital jacks are not output at the<br />
analog AUDIO OUT (REC) jacks.<br />
VIDEO<br />
V<br />
COMPONENT VIDEO<br />
PR PB Y<br />
(White) (Red) (Orange) (Yellow) (Red) (Blue) (Green)<br />
R<br />
Left and right<br />
analog audio<br />
cable plugs<br />
C<br />
Coaxial<br />
digital audio<br />
cable plug<br />
O<br />
Optical<br />
digital<br />
audio cable<br />
plug<br />
Composite<br />
video cable<br />
plug<br />
PR PB Y<br />
Connections<br />
■ Video jacks<br />
This unit has two types of video jacks. Connection<br />
depends on the availability of input jacks on your video<br />
monitor.<br />
VIDEO jacks<br />
For conventional composite video signals transmitted via<br />
composite video cables.<br />
COMPONENT VIDEO jacks<br />
For component signals, separated into the luminance (Y)<br />
and chrominance (PB, PR) video signals transmitted on<br />
separate wires of component video cables.<br />
Video signal flow for MONITOR OUT<br />
COMPONENT<br />
VIDEO<br />
VIDEO<br />
Note<br />
Input<br />
Component<br />
video cable<br />
plugs<br />
Output<br />
(MONITOR OUT)<br />
PR PB Y PR PB Y<br />
The OSD signal is not output at the DVR OUT (REC) jacks.<br />
13 En<br />
PREPARATION<br />
English
Connections<br />
Information on HDMI<br />
■ HDMI compatibility with this unit<br />
Audio signal<br />
types<br />
When CPPM copy-protected DVD audio is played back, video<br />
and audio signals may not be output depending on the type of<br />
the DVD player.<br />
This unit is not compatible with HDCP-incompatible HDMI or<br />
DVI components.<br />
You can check the potential problem about the HDMI<br />
connection (see page 35).<br />
■ Audio signal flow<br />
14 En<br />
Audio signal<br />
formats<br />
2ch Linear PCM 2ch, 32-192 kHz,<br />
16/20/24 bit<br />
Multi-ch Linear<br />
PCM<br />
8ch, 32-192 kHz,<br />
16/20/24 bit<br />
Compatible<br />
HDMI<br />
components<br />
CD, DVD-Video,<br />
DVD-Audio, etc.<br />
DVD-Audio, etc.<br />
Bitstream Dolby Digital, DTS DVD-Video, etc.<br />
This unit’s HDMI interface is based on the following<br />
standards:<br />
HDMI Version 1.2a (High-Definition Multimedia<br />
Interface Specification Version 1.2a) licensed by<br />
HDMI Licensing, LLC.<br />
HDCP (High-bandwidth Digital Content Protection<br />
System) licensed by Digital Content Protection,<br />
LLC.<br />
Notes<br />
Audio and video signal flow<br />
Notes<br />
HDMI<br />
AUDIO<br />
Input<br />
Digital output<br />
Analog output<br />
Output<br />
2-channel as well as multi-channel PCM, Dolby Digital and<br />
DTS signals input at the HDMI IN DVD or HDMI IN DTV/<br />
CBL jack can be output at the HDMI OUT jack only when<br />
“SUPPORT AUDIO” is set to “Other” (see page 54).<br />
Audio signals input at the HDMI IN jacks are not output at the<br />
AUDIO output jacks.<br />
■ HDMI jack and cable plug<br />
y<br />
We recommend using an HDMI cable shorter than 5 meters (16<br />
feet) with the HDMI logo printed on it.<br />
Use a conversion cable (HDMI jack ↔ DVI-D jack) to connect<br />
this unit to other DVI components.<br />
Notes<br />
HDMI<br />
HDMI cable plug<br />
Do not disconnect or connect the cable or turn off the power of<br />
the HDMI components connected to the HDMI OUT jack of<br />
this unit while data is being transferred. Doing so may disrupt<br />
playback or cause noise.<br />
Audio signals input at input jacks other than the HDMI IN DVD<br />
or HDMI IN DTV/CBL jack of this unit cannot be digitally<br />
output at the HDMI OUT jack.<br />
If you turn off the power of the video monitor connected to the<br />
HDMI OUT jack via a DVI connection, this unit may fail to<br />
establish the connection to the component.<br />
■ Video signal flow<br />
HDMI<br />
COMPONENT<br />
VIDEO<br />
VIDEO<br />
Input<br />
Through<br />
Output
Connecting video components<br />
Connect your TV (or projector) to the HDMI OUT jack,<br />
the COMPONENT VIDEO MONITOR OUT jacks, or the<br />
VIDEO MONITOR OUT jack of this unit.<br />
Make sure that this unit and other<br />
components are unplugged from the<br />
AC wall outlets.<br />
y<br />
You can choose to play back HDMI audio signals on this unit or<br />
on another HDMI component connected to the HDMI OUT jack<br />
of this unit. Use the “SUPPORT AUDIO” parameter in “SOUND<br />
MENU” to select the component to play back HDMI audio<br />
signals (see page 54).<br />
D/<br />
-R OUT<br />
(REC)<br />
DVD<br />
COAXIAL<br />
MONITOR<br />
DTV/CBL IN DVR OUT MONITOR<br />
OUT<br />
1 2 3<br />
Notes<br />
DVD<br />
DTV/CBL CD<br />
VD IN1 DTV/CBL IN2<br />
HDMI<br />
OUT<br />
DIGITAL INPUT<br />
DVD<br />
COMPONENT VIDEO<br />
DTV/CBL<br />
PR PB Y<br />
PRPB Y<br />
HDMI in<br />
VIDEO<br />
MONITOR OUT<br />
OPTICAL<br />
DVD DTV/CBL<br />
IN OUT<br />
DVR<br />
CD TUNER<br />
FRONT<br />
SUB<br />
SURROUND WOOFER<br />
AUDIO MULTI CH INPUT<br />
OUTPUT<br />
PR PB<br />
Component<br />
video in<br />
TV (or projector)<br />
indicates recommended connections<br />
indicates alternative connections<br />
Y<br />
V<br />
Video in<br />
Connections<br />
Some video monitors connected to this unit via a DVI<br />
connection fail to recognize the HDMI audio/video signals<br />
being input if they are in the standby mode. In this case, the<br />
HDMI indicator flashes irregularly.<br />
When you connect your TV monitor or projector via HDMI<br />
connection, the OSD does not appear. In such cases, connect the<br />
TV monitor or projector via component, or video connection.<br />
Connect the input source components to the HDMI IN DVD or<br />
HDMI IN DTV/CBL jack to display the video images on the<br />
video monitor connected to the HDMI OUT jack.<br />
CENTER<br />
DVR<br />
WO<br />
15 En<br />
PREPARATION<br />
English
Connections<br />
Connecting other components<br />
■ Connecting a DVD player<br />
16 En<br />
Make sure that this unit and other<br />
components are unplugged from the<br />
AC wall outlets.<br />
L<br />
R<br />
MD/<br />
CD-R OUT<br />
IN<br />
(PLAY) (REC)<br />
HDMI out<br />
VIDEO<br />
DVD<br />
Video out<br />
DTV/CBL IN DVR OUT<br />
IN OUT<br />
DVD<br />
DTV/CBL DVR<br />
AUDIO<br />
DVD player<br />
Audio out<br />
COAXIAL<br />
MONITOR<br />
OUT<br />
Notes<br />
Be sure to make the same type of video connections as those<br />
made for your TV (see page 15).<br />
To make a digital connection to a component other than the<br />
default component assigned to DIGITAL INPUT jack, select<br />
the corresponding setting for “OPTICAL IN” or “COAXIAL<br />
IN” in “INPUT ASSIGNMENT” (see page 55).<br />
DVD<br />
DTV/CBL CD<br />
DVD<br />
IN1<br />
DTV/CBL IN2<br />
HDMI OUT<br />
DIGITAL INPUT<br />
DVD<br />
COMPONENT VIDEO<br />
DTV/CBL<br />
PR PB Y<br />
PRPB Y<br />
VIDEO<br />
Coaxial out<br />
1<br />
2 3<br />
MONITOR OUT<br />
CD TUNER<br />
OPTICAL<br />
Component<br />
video out<br />
V R L<br />
C<br />
PR PB Y<br />
FRONT SURROUND<br />
MULTI CH INPUT<br />
CENTER<br />
SUB<br />
WOOFER<br />
DVR<br />
OUTPUT<br />
WO<br />
indicates recommended connections<br />
indicates alternative connections<br />
(One for the video connection,<br />
and one for the audio connection)
■ Connecting a DVD recorder, PVR or VCR<br />
■ Connecting a set-top box<br />
L<br />
R<br />
MD/<br />
CD-R OUT<br />
IN<br />
(PLAY) (REC)<br />
L<br />
R<br />
VIDEO<br />
DVD<br />
DTV/CBL CD<br />
DVD IN1 DTV/CBL IN2<br />
HDMI<br />
OUT<br />
DIGITAL INPUT<br />
DVD<br />
COMPONENT VIDEO<br />
DTV/CBL<br />
PR PB Y PR PB Y<br />
MD/<br />
CD-R OUT<br />
IN<br />
(PLAY) (REC)<br />
DVD<br />
VIDEO<br />
DVD<br />
VIDEO<br />
DTV/CBL IN DVR OUT<br />
IN<br />
IN<br />
OUT<br />
DVD DTV/CBL DVR<br />
AUDIO<br />
V<br />
Audio out<br />
DTV/CBL IN DVR OUT<br />
IN OUT<br />
DVD DTV/CBL<br />
DVR<br />
AUDIO<br />
Audio in<br />
1 2 3<br />
MONITOR OUT<br />
MONITOR<br />
OUT<br />
R L R L<br />
Satellite receiver, cable TV<br />
receiver or HDTV decoder<br />
COAXIAL<br />
1 2 3<br />
MONITOR<br />
OUT<br />
CD TUNER<br />
FRONT<br />
CD TUNER<br />
Video in<br />
Video out<br />
OPTICAL<br />
SURROUND<br />
MULTI CH INPUT<br />
FRONT<br />
SURROUND<br />
MULTI CH INPUT<br />
DVD<br />
DTV/CBL CD<br />
DVD IN1 DTV/CBL IN2<br />
HDMI<br />
OUT<br />
2<br />
DIGITAL INPUT<br />
DVD<br />
COMPONENT VIDEO<br />
DTV/CBL<br />
PR PB Y PR PB Y<br />
VIDEO<br />
MONITOR OUT<br />
CENTER<br />
SUB<br />
WOOFER<br />
DVR<br />
OUTPUT<br />
V PR PB Y<br />
CENTER<br />
SUB<br />
WOOFER<br />
DVD recorder,<br />
PVR or VCR<br />
HDMI out Component video out<br />
Video out<br />
V L R<br />
Audio out<br />
O<br />
Optical out<br />
DVR<br />
OUTPUT<br />
PR PB Y<br />
WO<br />
W<br />
Component video out<br />
indicates recommended<br />
connections<br />
Connections<br />
indicates alternative<br />
connections (One for the video<br />
connection, and one for the<br />
audio connection)<br />
17 En<br />
PREPARATION<br />
English
Connections<br />
Connecting audio components<br />
Connect the audio components as follows.<br />
■ Connecting a CD player, a CD recorder/<br />
MD recorder, and a tuner<br />
Notes<br />
When you connect your CD player via analog and digital<br />
connection, priority is given to the signal input at the DIGITAL<br />
INPUT jack.<br />
To make a digital connection to a component other than the<br />
default component assigned to each DIGITAL INPUT jack,<br />
select the corresponding setting in “INPUT ASSIGNMENT”<br />
(see page 55).<br />
■ Connecting a multi-format player or an external decoder<br />
This unit is equipped with 6 additional input jacks (FRONT L/R, SURROUND L/R, CENTER and SUBWOOFER) for<br />
discrete multi-channel input from a multi-format player, external decoder or sound processor. Connect the output jacks<br />
on your multi-format player or external decoder to the MULTI CH INPUT jacks. Be sure to match the left and right<br />
output jacks to the left and right input jacks for the front and surround channels.<br />
Notes<br />
When you select the component connected to the MULTI CH INPUT jacks as the input source (see page 33), this unit automatically<br />
turns off the digital sound field processor, and you cannot select sound field programs.<br />
This unit does not redirect signals input at the MULTI CH INPUT jacks to accommodate for missing speakers. We recommend that<br />
you connect a 5.1-channel speaker system before using this feature.<br />
18 En<br />
L R<br />
Audio in<br />
CD recorder or<br />
MD recorder<br />
L<br />
R<br />
Audio out<br />
L<br />
R<br />
DVD<br />
DTV/CBL CD<br />
DVD IN1 DTV/CBL IN2<br />
HDMI<br />
OUT<br />
DIGITAL INPUT<br />
DVD<br />
COMPONENT VIDEO<br />
PR PB Y PR<br />
VIDEO<br />
DVD<br />
VIDEO<br />
DTV/CBL IN DVR OUT<br />
COAXIAL<br />
1 2 3<br />
MONITOR OUT<br />
MONITOR<br />
OUT<br />
MD/<br />
CD-R DVD DTV/CBL DVR<br />
OUT<br />
IN MD/<br />
(PLAY) CD-R (REC)<br />
IN OUT<br />
CD TUNER<br />
AUDIO<br />
OUT<br />
IN<br />
(PLAY) (REC)<br />
CD TUNER<br />
AUDIO<br />
Front out<br />
L<br />
R<br />
CENTER<br />
SUB<br />
FRONT SURROUND WOOFER<br />
MULTI CH INPUT<br />
L R L R<br />
Surround out<br />
Subwoofer out<br />
Multi-format player/<br />
External decoder<br />
OPTICAL<br />
Make sure that this unit and other<br />
components are unplugged from the<br />
AC wall outlets.<br />
indicates recommended connections<br />
indicates alternative connections<br />
FRONT SURROUND W<br />
Center out<br />
MULTI CH INPU<br />
L<br />
R<br />
L<br />
R<br />
O<br />
Audio out<br />
Audio out<br />
CD player<br />
Tuner<br />
Optical out
Connecting a Yamaha iPod<br />
universal dock or Bluetooth<br />
adapter<br />
Make sure that this unit and other<br />
components are unplugged from the<br />
AC wall outlets.<br />
This unit is equipped with the DOCK terminal on the rear<br />
panel that allows you to connect a Yamaha iPod universal<br />
dock (such as YDS-10, sold separately) or Bluetooth<br />
adapter (such as YBA-10, sold separately). Connect a<br />
Yamaha iPod universal dock or Bluetooth adapter to the<br />
DOCK terminal on the rear panel of this unit using its<br />
dedicated cable.<br />
DTV/CBL<br />
PB Y<br />
DVR<br />
DOCK<br />
Yamaha iPod universal dock<br />
or Bluetooth adapter<br />
Connections<br />
Using the VIDEO AUX jacks on the<br />
front panel<br />
Use the VIDEO AUX jacks on the front panel to connect a<br />
game console or a video camera to this unit.<br />
Caution<br />
Be sure to turn down the volume of this unit and other<br />
components before making connections.<br />
Notes<br />
To reproduce the source signals input at these jacks, select<br />
“V-AUX” as the input source.<br />
When audio signals are input at the AUDIO jacks and the<br />
DOCK terminal on the rear panel, the priority order of the input<br />
signal is as follows:<br />
1. DOCK<br />
2. AUDIO<br />
STANDBY/<br />
ON<br />
PHONES<br />
SILENT CINEMA<br />
SPEAKERS<br />
A/B/OFF<br />
TONE CONTROL<br />
l PROGRAM h<br />
Video<br />
output<br />
STRAIGHT<br />
EFFECT<br />
SCENE<br />
1 2 3 4<br />
DIRECT<br />
l INPUT h<br />
VIDEO AUX<br />
VIDEO L AUDIO R<br />
V L R<br />
Game console or<br />
video camera<br />
OPTIMIZER MIC<br />
AUDIO SELECT<br />
Audio<br />
output<br />
VOLUME<br />
VIDEO AUX USB<br />
VIDEO L AUDIO R<br />
19 En<br />
PREPARATION<br />
English
Connections<br />
Connecting the power cable<br />
Once all connections are complete, plug the power cable<br />
into the AC wall outlet.<br />
20 En<br />
Power cable<br />
Turning on and off the power<br />
■ Turning on this unit<br />
Press ASTANDBY/ON (or GPOWER) to turn<br />
on this unit.<br />
y<br />
When you turn on this unit, there will be a 4 to 5-second delay<br />
before this unit can reproduce sound.<br />
■ Set this unit to the standby mode<br />
Press ASTANDBY/ON (or HSTANDBY) to set<br />
this unit to the standby mode.<br />
In the standby mode, this unit consumes a small amount of<br />
power in order to receive infrared signals from the remote<br />
control.
Front panel display<br />
USB<br />
PCM<br />
7<br />
1<br />
MULTI CH DVR V-AUX DTV/CBL DVD MD/CD-R CD TUNER<br />
DOCK ENHANCER<br />
YPAO<br />
q DIGITAL<br />
q PL<br />
SP<br />
AB SILENT CINEMA<br />
VIRTUAL<br />
SLEEP<br />
8<br />
1 HDMI indicator<br />
Lights up when the signal of the selected input source is<br />
input at the HDMI IN jacks (see page 14).<br />
2 DOCK indicator<br />
Lights up when you station your iPod in a Yamaha<br />
iPod universal dock (such as YDS-10, sold separately)<br />
connected to the DOCK terminal of this unit (see<br />
page 19) and V-AUX is selected as the input source.<br />
Flashes while the connected Yamaha Bluetooth adapter<br />
(such as YBA-10, sold separately) and the Bluetooth<br />
component is in the paring (see page 46) or the<br />
Bluetooth adapter is searching the Bluetooth<br />
component (see page 46).<br />
Lights up while the connected Yamaha Bluetooth<br />
adapter is connected to the Bluetooth component (see<br />
page 19).<br />
3 ENHANCER indicator<br />
Lights up when the Compressed Music Enhancer mode is<br />
selected (see page 37).<br />
4 Input source indicators<br />
The corresponding cursor lights up to show the currently<br />
selected input source.<br />
5 YPAO indicator<br />
Lights up when you run “AUTO SETUP” and when the<br />
speaker settings set in “AUTO SETUP” are used without<br />
any modifications (see page 23).<br />
2 3 4 5 6<br />
9<br />
0 A<br />
B<br />
C<br />
Connections<br />
VOL.<br />
MUTE dB<br />
ft<br />
LFE<br />
L C R<br />
ms<br />
dB<br />
SL SR<br />
6 MUTE indicator and VOLUME level indicator<br />
The MUTE indicator flashes while the MUTE function<br />
is on (see page 34).<br />
Indicates the current volume level.<br />
7 PCM indicator<br />
Lights up when this unit is reproducing PCM (Pulse Code<br />
Modulation) digital audio signals.<br />
8 Decoder indicators<br />
The respective indicator lights up when any of the<br />
decoders of this unit function.<br />
9 Headphone indicator<br />
Lights up when headphones are connected (see page 34).<br />
0 SP A B indicators<br />
Light up according to the set of front speakers activated<br />
(see page 32).<br />
SP A: The FRONT A speakers are activated.<br />
SP B: The FRONT B speakers are activated.<br />
D<br />
21 En<br />
PREPARATION<br />
English
Connections<br />
A CINEMA DSP indicator<br />
Lights up when you select a CINEMA DSP sound<br />
field program (see page 38).<br />
VIRTUAL indicator<br />
Lights up when Virtual CINEMA DSP is active (see<br />
page 38).<br />
SILENT CINEMA indicator<br />
Lights up when headphones are connected and a<br />
sound field program is selected (see page 38).<br />
B Multi-information display<br />
Shows the name of the current sound field program and<br />
other information when adjusting or changing settings.<br />
C SLEEP indicator<br />
Lights up while the sleep timer is on (see page 36).<br />
D Input channel and speaker indicators<br />
LFE<br />
L C R<br />
SL SR<br />
22 En<br />
LFE indicator<br />
Input channel indicators<br />
Input channel indicators<br />
Indicate the channel components of the current<br />
digital input signal.<br />
Light up or flash according to the settings of the<br />
speakers when this unit is in the automatic setup<br />
procedure (see page 23) or the speaker level setting<br />
procedure in the “SP LEVEL” (see page 52).<br />
■ Using the remote control<br />
The remote control transmits a directional infrared ray.<br />
Be sure to aim the remote control directly at the remote<br />
control sensor on this unit during operation.<br />
1 Infrared window<br />
Outputs infrared control signals. Aim this window at the<br />
component you want to operate.<br />
y<br />
To set the remote control codes for other components, see<br />
page 62.<br />
Notes<br />
Approximately 6 m<br />
30º 30º<br />
Do not spill water or other liquids on the remote control.<br />
Do not drop the remote control.<br />
Do not leave or store the remote control in the following types<br />
of conditions:<br />
– places of high humidity, such as near a bath<br />
– places of high temperature, such as near a heater or stove<br />
– places of extremely low temperatures<br />
– dusty places
Optimizing the speaker setting for your listening room<br />
Optimizing the speaker setting for your listening room<br />
This unit employs the YPAO (Yamaha Parametric Room Acoustic Optimizer) technology which lets you avoid<br />
troublesome listening-based speaker setup and achieves highly accurate sound adjustments automatically. The supplied<br />
optimizer microphone collects and this unit analyzes the sound your speakers produce in your actual listening<br />
environment.<br />
Using AUTO SETUP<br />
Notes<br />
Be advised that it is normal for loud test tones to be output<br />
during the “AUTO SETUP” procedure.<br />
To achieve the best results, make sure the room is as quiet as<br />
possible while the “AUTO SETUP” procedure is in progress. If<br />
there is too much ambient noise, the results may not be<br />
satisfactory.<br />
y<br />
You can run “AUTO SETUP” using the system menu that appears<br />
in the OSD or in the front panel display. This manual uses the<br />
OSD illustrations to explain the “AUTO SETUP” procedure.<br />
1 Make sure of the following check points.<br />
Note<br />
Before starting the automatic setup, check the following<br />
check points.<br />
❏ Speakers are connected appropriately.<br />
❏ Headphones are disconnected from this unit.<br />
❏ This unit and the video monitor are turned on.<br />
❏ This unit is selected as the video input source of<br />
the video monitor.<br />
❏ The connected subwoofer is turned on and the<br />
volume level is set to about half way (or slightly<br />
less).<br />
❏ The crossover frequency controls of the<br />
connected subwoofer is set to the maximum.<br />
VOLUME<br />
CROSSOVER<br />
HIGH CUT<br />
MIN MAX MIN MAX<br />
Controls of a subwoofer (example)<br />
❏ FRONT A speakers are selected as the front<br />
speaker system (see page 32).<br />
❏ The room is sufficiently quiet.<br />
2 Connect the supplied optimizer microphone<br />
to the OPTIMIZER MIC jack on the front<br />
panel.<br />
OPTIMIZER MIC<br />
AUDIO SELECT<br />
VIDEO AUX<br />
L AUDIO<br />
USB<br />
VIDEO R<br />
Optimizer<br />
microphone<br />
The following display appears in the OSD.<br />
AUTO SETUP<br />
SETUP;;;;;;;AUTO<br />
. START<br />
Automatic<br />
Processing<br />
of all item<br />
[ ]/[ ]:Up/Down<br />
[ p ]/[ [ ]:Select<br />
p<br />
p<br />
3 Place the optimizer microphone at your<br />
normal listening position on a flat level<br />
surface with the microphone heading<br />
upward.<br />
Optimizer microphone<br />
y<br />
It is recommended that you use a tripod (etc.) to affix the<br />
optimizer microphone at the same height as your ears would be<br />
when you are seated in your listening position. You can use the<br />
attached screw of a tripod (etc.) to fix the optimizer microphone<br />
to the tripod (etc.).<br />
23 En<br />
PREPARATION<br />
English
Optimizing the speaker setting for your listening room<br />
4 Make sure that “SETUP” is set to “AUTO”<br />
and the pointer is pointing at “START”.<br />
24 En<br />
y<br />
You can also select the following setup methods. In this<br />
case, press 7k to select “SETUP”, press 7l / h to<br />
select the one of the following choices and then select<br />
“START”.<br />
Choices: AUTO, RELOAD, UNDO, DEFAULT<br />
Select “AUTO” to automatically run the entire<br />
“AUTO SETUP” procedure.<br />
Select “RELOAD” to reload the last “AUTO<br />
SETUP” settings and override the previous<br />
settings.<br />
Select “UNDO” to undo the last “AUTO SETUP”<br />
settings and restore the previous settings.<br />
Select “DEFAULT” to reset the “AUTO SETUP”<br />
parameters to the initial factory settings.<br />
Note<br />
“RELOAD” or “UNDO” is available only when you have<br />
previously run “AUTO SETUP” and confirmed the results.<br />
5 Press 7n to select “START” and then press<br />
7ENTER to start the setup procedure.<br />
The following message appears in the OSD.<br />
NOTICE<br />
Loudtesttonesare<br />
output. <br />
<br />
Pleasekeepquiet<br />
orleavetheroom.<br />
Press[ENTER]<br />
<br />
Before proceeding next operation<br />
Once you perform the next operation, this unit starts the<br />
automatic setup procedure. For more accurate<br />
measurements, keep quiet and move to the wall where<br />
speakers are not around. We recommend that you leave<br />
the listening room during the automatic setup<br />
procedure.<br />
6 Press 7ENTER to start the setup<br />
procedure.<br />
This unit starts the auto setup procedure. Loud test<br />
tones are output from each speaker during the auto<br />
setup procedure. Once all items are set, the result<br />
display appears in the OSD.<br />
Notes<br />
During the auto setup procedure, do not perform any<br />
operation on this unit.<br />
We recommend getting out of the room while this unit is in<br />
the auto setup procedure. It takes approximately 3 minutes<br />
for this unit to complete the auto setup procedure.<br />
This unit performs the following checks:<br />
Speaker wiring/volume level WIRING/LEVEL<br />
Checks which speakers are connected and the<br />
polarity of each speaker. Also checks and adjusts the<br />
volume level of each speaker.<br />
Speaker distance DISTANCE<br />
Checks the distance of each speaker from the<br />
listening position and adjusts the timing of each<br />
channel.<br />
Speaker size SIZE<br />
Checks the frequency response of each speaker and<br />
sets the appropriate low-frequency crossover for each<br />
channel.
The display changes as follows.<br />
The results displayed under “RESULT” are as follows.<br />
Number of speakers SP<br />
Displays the number of speakers connected to this unit in<br />
the following order:<br />
Front/Back/Subwoofer<br />
Speaker distance DIST<br />
Displays the speaker distance from the listening position<br />
in the following order:<br />
Closest speaker distance/Farthest speaker distance<br />
Speaker level LVL<br />
Displays the speaker output level in the following order:<br />
Lowest speaker output level/Highest speaker output level<br />
Notes<br />
AUTO SETUP<br />
SETUP;;;;;;;AUTO<br />
. START<br />
Automatic<br />
Processing<br />
of all item<br />
[ ]/[ ]:Up/Down<br />
[ENTER]:Start<br />
p<br />
AUTO SETUP<br />
p<br />
INITIALIZING<br />
. WIRING/LEVEL<br />
DISTANCE<br />
SIZE <br />
WAITING;;;<br />
;;;;;;;;;;<br />
[]:Exit<br />
AUTO SETUP<br />
[<br />
RESULT<br />
SP :<br />
DIST:<br />
LVL :<br />
3/2/0.1<br />
3.2/3.5m<br />
-2/+2dB<br />
. > SET CANCEL<br />
[ ]/[ ]:Up/Down<br />
[ENTER]:Enter<br />
If “E-9:INTERNAL ERROR” appears during the testing<br />
procedure, restart from step 4.<br />
If you selected “RELOAD” in step 4, no test tones are output.<br />
If an error occurs during the “AUTO SETUP” procedure, the<br />
setup procedure is canceled and an error screen appears. For<br />
details, see “If an error screen appears” on page 26.<br />
When this unit detects potential problems during the “AUTO<br />
SETUP” procedure, “WARNING” and the number of warning<br />
messages appears (see page 26).<br />
Optimizing the speaker setting for your listening room<br />
7 Press 7k and 7ENTER to display the<br />
setup results in detail.<br />
8 Press 7l / h repeatedly to toggle between<br />
the setup result displays.<br />
y<br />
If you are not satisfied with the results or want to manually<br />
adjust each parameter, run “<strong>MANUAL</strong> SETUP” (see<br />
page 48).<br />
Note<br />
Results of the speaker<br />
connection and wiring<br />
Results of the speaker<br />
distance from the<br />
listening position<br />
Results of the speaker<br />
size<br />
Results of the speaker<br />
output level<br />
The distances displayed in the “DISTANCE” results may be<br />
longer than the actual distance depending on the<br />
characteristics of your speakers.<br />
9 Press 7ENTER to return to the result<br />
display.<br />
AUTO SETUP<br />
. RESULT<br />
SP : 3/2/0.1<br />
DIST: 3.2/3.5m<br />
LVL : -2/+2dB<br />
><br />
SET CANCEL<br />
[ ]/[ ]:Up/Down<br />
[ENTER]:Detail<br />
25 En<br />
PREPARATION<br />
English
Optimizing the speaker setting for your listening room<br />
10 Press 7n and then press 7l / h to select<br />
“SET” or “CANCEL”.<br />
Choices: SET, CANCEL<br />
Select “SET” to confirm the “AUTO SETUP”<br />
results.<br />
Select “CANCEL” to cancel the “AUTO SETUP”<br />
results.<br />
11 Press 7ENTER to confirm your selection.<br />
The top “SET MENU” display appears in the OSD.<br />
12 Press KMENU to exit from “SET MENU”.<br />
13 Disconnect the optimizer microphone from<br />
this unit.<br />
The optimizer microphone is sensitive to heat. Keep it<br />
away from direct sunlight and do not place it on top<br />
of this unit.<br />
y<br />
If you change speakers, speaker positions, or the layout of your<br />
listening environment, run “AUTO SETUP” again to recalibrate<br />
your system.<br />
■ If an error screen appears<br />
Press 7k / n / l / h to select “RETRY” or<br />
“EXIT” and then press 7ENTER.<br />
The following display is an example where “E-8:USER<br />
CANCEL” appears in the OSD.<br />
Choices: RETRY, EXIT<br />
Select “RETRY” to retry the “AUTO SETUP”<br />
procedure.<br />
Select “EXIT” to exit from the “AUTO SETUP”<br />
procedure.<br />
26 En<br />
SET MENU<br />
TOP MENU<br />
. ;AUTO SETUP<br />
;<strong>MANUAL</strong> SETUP<br />
.A;SIGNAL INFO<br />
ERROR<br />
[ ]/[ ]:Up/Down<br />
[ENTER]:Enter<br />
p<br />
p<br />
. E-8:USER CANCEL<br />
Can't detect<br />
signal at MIC<br />
> RETRY EXIT<br />
[ ]/[ ]:Select<br />
[ENTER]:Enter<br />
■ If “WARNING” appears<br />
When this unit detects potential problems during the<br />
“AUTO SETUP” procedure, “WARNING” appears in the<br />
result display. Check the warning messages to correct your<br />
speaker settings.<br />
Note<br />
Warnings differ from errors in that warnings do not cancel the<br />
“AUTO SETUP” procedure.<br />
1 Make sure the pointer is pointing at<br />
“WARNING” and then press 7ENTER to<br />
display the detailed information about the<br />
warning.<br />
The number on the right of “WARNING” indicates<br />
the number of warning messages.<br />
AUTO SETUP<br />
. WARNING(2)<br />
RESULT<br />
SP : 3/2/0.1<br />
DIST: 3.2/3.5m<br />
LVL : -2/+2dB<br />
> SET CANCEL<br />
[ ]/[ ]:Up/Down<br />
[ENTER]:Detail<br />
2 Press 7l / h repeatedly to toggle between<br />
the warning displays.<br />
WARNING<br />
W-1:OUT OF PHASE<br />
Reverse channel<br />
AAAAFLAAAAA---<br />
AAACENTER<br />
AAAASLAAAAA---<br />
[ ]/[ ]:Select<br />
[ENTER]:Return<br />
y<br />
For details about each warning message, see the “AUTO<br />
SETUP” section in “Troubleshooting” on page 67.<br />
When the corresponding warning message is not<br />
applicable to a speaker, “– –” is displayed instead.<br />
3 Press 7ENTER to return to the result<br />
display.
This unit is equipped with 16 preset SCENE templates for<br />
various situations of using this unit. As the initial factory<br />
setting, the following SCENE templates are assigned to<br />
each SCENE button:<br />
SCENE 1: DVD Movie Viewing<br />
SCENE 2: Music Disc Listening<br />
SCENE 3: TV Viewing<br />
SCENE 4: Radio Listening<br />
If you want to use other SCENE templates, you can select<br />
the desired SCENE templates from the SCENE template<br />
library and assign the templates to the selected SCENE<br />
buttons on the front panel and the remote control.<br />
Select the desired SCENE<br />
template<br />
SCENE template library<br />
(Image)<br />
Selecting the desired SCENE<br />
template<br />
1 Press and hold the desired BSCENE (or<br />
5SCENE) button for 3 seconds.<br />
The indicator on the selected SCENE button on the<br />
front panel starts to flash, and the name of the<br />
currently assigned SCENE template appears in the<br />
front panel display.<br />
Selecting the SCENE templates<br />
1<br />
Assign the<br />
SCENE<br />
template to the<br />
SCENE button<br />
3 seconds 3 seconds<br />
1<br />
Front panel<br />
or<br />
1<br />
Flashes<br />
1<br />
Remote control<br />
DVD MovieView<br />
SELECTING THE SCENE TEMPLATES<br />
2 Press JINPUT l / h (or press 4AMP and<br />
then press 7l / h) to select the desired<br />
template.<br />
3 Press the BSCENE (or 5SCENE) button<br />
again to confirm the selection.<br />
The selected SCENE template is assigned to the<br />
button.<br />
Note<br />
1<br />
AMP<br />
Front panel<br />
l INPUT h<br />
Front panel<br />
or<br />
Remote control<br />
ENTER<br />
DVD Viewing<br />
or<br />
Once the desired SCENE templates are assigned to the<br />
corresponding SCENE buttons, you may need to set the input<br />
source of the SCENE template on the remote control. See page 31<br />
for details.<br />
1<br />
Remote control<br />
27 En<br />
BASIC<br />
OPERATION<br />
English
Selecting the SCENE templates<br />
■ Which SCENE template would you like to select?<br />
Note<br />
* When iPod is connected to the Yamaha iPod universal dock or a Bluetooth component is connected to the Bluetooth adapter, this unit<br />
plays back the audio sources input at the DOCK terminal.<br />
y<br />
You can create your original SCENE templates by editing the preset SCENE templates. See page 30 for details.<br />
28 En<br />
Which source do you like to<br />
play back?<br />
Video sources<br />
(DVD video,<br />
Recorded video)<br />
Music discs (CD, SACD<br />
or DVD-Audio)<br />
Radio programs<br />
iPod or Bluetooth<br />
component<br />
USB memory device<br />
or USB portable<br />
audio player<br />
TV programs<br />
Video games<br />
Which component do you<br />
like for playback?<br />
DVD<br />
DVR<br />
DVD<br />
CD<br />
TUNER<br />
DOCK<br />
USB<br />
DTV/CBL<br />
V-AUX*<br />
SCENE templates<br />
DVD Viewing<br />
DVD Movie Viewing<br />
DVD Live Viewing<br />
DVR Viewing<br />
Disc Hi-fi Listening<br />
Music Disc Listening<br />
Disc Listening<br />
CD Hi-fi Listening<br />
CD Listening<br />
CD Music Listening<br />
Radio Listening<br />
Dock Listening<br />
USB Audio Listening<br />
TV Viewing<br />
TV Sports Viewing<br />
Game Playing<br />
Default<br />
SCENE buttons<br />
1<br />
2<br />
4<br />
3
Selecting the SCENE templates<br />
■ Preset SCENE templates descriptions<br />
The illustrations of the SCENE button in the following table indicate the assigned SCENE buttons in the default setting.<br />
SCENE template Input source Playback mode Features<br />
DVD Viewing DVD STRAIGHT Select this SCENE template when you play back general<br />
contents on the DVD player.<br />
DVD Movie Viewing DVD MOVIE<br />
Movie Dramatic<br />
1<br />
DVD Live Viewing DVD MUSIC<br />
Pop/Rock<br />
DVR Viewing DVR MOVIE<br />
Movie Dramatic<br />
Select this SCENE template when you play back movies on<br />
your DVD player.<br />
Select this SCENE template when you enjoy the music live<br />
video on your DVD player.<br />
Select this SCENE template when you play back movies on<br />
your digital video recorder.<br />
Disc Hi-fi Listening DVD DIRECT Select this SCENE template when you enjoy the high fidelity<br />
sound of the music discs on your DVD player.<br />
Music Disc<br />
Listening<br />
2<br />
DVD STEREO<br />
2ch Stereo<br />
Disc Listening DVD STEREO<br />
5ch Stereo<br />
Select this SCENE template when you play back music discs<br />
on your DVD player.<br />
Select this SCENE template when you play back music<br />
sources on your DVD player as the background music.<br />
CD Hi-fi Listening CD DIRECT Select this SCENE template when you enjoy the high fidelity<br />
sound of the music discs on your CD player.<br />
CD Listening CD STEREO<br />
5ch Stereo<br />
CD Music Listening CD STEREO<br />
2ch Stereo<br />
Radio Listening TUNER MUSIC ENHANCER<br />
5ch Enhancer<br />
4<br />
Dock Listening DOCK MUSIC ENHANCER<br />
5ch Enhancer<br />
USB Audio<br />
Listening<br />
USB MUSIC ENHANCER<br />
5ch Enhancer<br />
Select this SCENE template when you play back music discs<br />
on your CD player as the background music.<br />
Select this SCENE template when you play back music source<br />
on your CD player.<br />
Select this SCENE template when you enjoy radio programs.<br />
Select this SCENE template when you play back music on<br />
your iPod stationed in a Yamaha iPod universal dock or<br />
Bluetooth component that is connected to the Bluetooth<br />
adapter.<br />
Select this SCENE template when you play back music on<br />
your USB memory device or a USB portable audio player.<br />
TV Viewing DTV/CBL STRAIGHT Select this SCENE template when you enjoy general<br />
programs on your TV.<br />
3<br />
TV Sports Viewing DTV/CBL ENTERTAINMENT<br />
TV Sports<br />
Game Playing V-AUX ENTERTAINMENT<br />
Game<br />
Select this SCENE template when you enjoy sports programs<br />
on your TV.<br />
Select this SCENE template when you play video games.<br />
29 En<br />
BASIC<br />
OPERATION<br />
English
Selecting the SCENE templates<br />
Creating your original SCENE<br />
templates<br />
You can create your original SCENE templates for each<br />
SCENE button. You can refer to the preset 16 SCENE<br />
templates to create the original SCENE templates.<br />
■ Customizing the preset SCENE<br />
templates<br />
Use this feature to customize the preset SCENE templates.<br />
Select a SCENE template<br />
SCENE template library<br />
(Image)<br />
1 Turn on the video monitor connected to this<br />
unit.<br />
2 Press and hold the desired 5SCENE button<br />
for 3 seconds.<br />
The SCENE template customizing screen appears on<br />
the video monitor.<br />
30 En<br />
Note<br />
1<br />
3 seconds<br />
Create the original SCENE<br />
template<br />
SCENE : DVD Viewing<br />
INPUT : DVD<br />
SCENE : DVD Viewing<br />
When the SCENE template you want to customize is not<br />
assigned to any of the 5SCENE buttons, press 4AMP<br />
and then press 7l / h repeatedly to recall the desired<br />
SCENE template on the menu screen.<br />
1<br />
Assign to the SCENE<br />
button<br />
3 Press 4AMP and then 7k / n to select the<br />
desired parameter of the SCENE template<br />
and then 7l / h to select the desired value<br />
of the selected parameter.<br />
You can adjust the following parameters for a SCENE<br />
template:<br />
INPUT: The input source component<br />
MODE: The active sound field programs,<br />
STRAIGHT or DIRECT mode (see<br />
pages 38 and 40)<br />
• NIGHT: The night listening mode setting (see<br />
page 41)<br />
− SYSTEM: Keeps the current night listening<br />
mode.<br />
− CINEMA: Sets the night listening mode to the<br />
CINEMA mode.<br />
− MUSIC: Sets the night listening mode to the<br />
MUSIC mode.<br />
4 Press the 5SCENE button again to confirm<br />
the edit.<br />
y<br />
An asterisk mark (*) appears by the name of the original SCENE<br />
template.<br />
Notes<br />
1<br />
Once the desired SCENE templates are assigned to the<br />
corresponding 5SCENE buttons, you may need to set the<br />
input source of the SCENE template on the remote control. See<br />
page 31 for details.<br />
You can create a customized SCENE template for each<br />
5SCENE button, and if you create another customized<br />
SCENE template, this unit overwrites the old customized<br />
SCENE template with the new one.<br />
The newly created template is only available for the assigned<br />
5SCENE button.<br />
■ Renaming the SCENE templates<br />
Select the name of the SCENE template at step 3<br />
of “Customizing the preset SCENE templates”<br />
and then press 7ENTER.<br />
Press 7k / n to select the desired character.<br />
Press 7l / h to place “_” (underscore) under the<br />
space or the desired character.<br />
Press 8RETURN to cancel the new name.<br />
Press 7ENTER to confirm the new name.
Using remote control on the SCENE feature<br />
■ Controlling the input source<br />
components in the SCENE mode<br />
You can operate both this unit and the input source<br />
component by using the remote control. You must set the<br />
appropriate remote control code for each input source in<br />
advance (see page 62).<br />
1 Press the desired 5SCENE button on the<br />
remote control.<br />
2 Press the desired buttons in the * area below<br />
to control the input source component of the<br />
selected SCENE template.<br />
Note<br />
*<br />
POWER POWER STANDBY POWER<br />
TV AV<br />
USB<br />
CD MD/CD-R TUNER<br />
DVD DTV/CBL DVR<br />
V-AUX/DOCK B C<br />
C D<br />
AMP TV INPUT TV MUTE TV VOL<br />
1<br />
BAND LEVEL<br />
TITLE<br />
RETURN<br />
MEMORY<br />
REC<br />
A B<br />
2<br />
ENTER<br />
SCENE<br />
l PROG h ENHANCER<br />
1 2 3<br />
SUR. DECODE<br />
4<br />
STRAIGHT DIRECT NIGHT PARAMETER<br />
5 6 7 8<br />
MULTI CH AUDIO SLEEP<br />
IN SEL<br />
9 0 10 ENT<br />
* These buttons control the input source component. See page 61<br />
for details of the function of each button.<br />
MUTE<br />
TV CH<br />
SRCH MODE<br />
MENU VOLUME<br />
DISPLAY<br />
FREQ/TEXT EON MODE - PTY SEEK - START<br />
3<br />
4<br />
SCENE buttons<br />
Selecting the SCENE templates<br />
■ Setting input source of the customized<br />
SCENE template on the remote control<br />
If you customize the input source of the selected SCENE<br />
template, you must set the input source of the SCENE<br />
template on the remote control to operate the input source<br />
component correctly.<br />
Press and hold the 5SCENE button and the<br />
desired input selector button (3) for 3 seconds.<br />
y<br />
Press the 5SCENE button again to operate the input source<br />
component.<br />
31 En<br />
BASIC<br />
OPERATION<br />
English
PLAYBACK<br />
Caution<br />
Extreme caution should be exercised when you play<br />
back CDs encoded in DTS. If you play back a CD<br />
encoded in DTS on a DTS-incompatible CD player,<br />
you will only hear some unwanted noise that may<br />
damage your speakers. Check whether your CD player<br />
supports CDs encoded in DTS. Also, check the sound<br />
output level of your CD player before you play back a<br />
CD encoded in DTS.<br />
Basic operations<br />
1 Turn on the video monitor connected to this<br />
unit.<br />
2 Press ESPEAKERS repeatedly to select the<br />
front speakers you want to use.<br />
The respective speaker indicators lights up in the<br />
front panel display.<br />
3 Press JINPUT l / h repeatedly (or press<br />
one of the input selector buttons (3)) to<br />
select the desired input source.<br />
The name of the currently selected input source<br />
appears in the front panel display for a few seconds.<br />
4 Start playback on the selected component.<br />
Refer to the operating instructions for the source<br />
component.<br />
32 En<br />
USB<br />
Available input sources<br />
MULTI CH DVR V-AUX DTV/CBL DVD MD/CD-R CD TUNER<br />
INPUT:DVD<br />
Currently selected input<br />
source<br />
Playback<br />
5 Rotate DVOLUME (or press<br />
LVOLUME +/–) to adjust the volume to the<br />
desired output level.<br />
6 Press GPROGRAM l / h repeatedly (or<br />
press 4AMP and then APROG l / h<br />
repeatedly) to select the desired sound field<br />
program.<br />
The name of the selected sound field program appears<br />
in the front panel display.<br />
See page 37 for details about sound field programs.<br />
Notes<br />
Movie Dramatic<br />
Currently selected<br />
surround field program<br />
Choose a sound field program based on your listening<br />
preference, not merely on the name of the program.<br />
When you select an input source, this unit automatically selects<br />
the last sound field program used with the corresponding input<br />
source.<br />
Sound field programs cannot be selected when the component<br />
connected to the MULTI CH INPUT jacks is selected as the<br />
input source (see page 33).<br />
When PCM signals with a sampling frequency higher than 48<br />
kHz are input, this unit is automatically set to the “STRAIGHT”<br />
mode (see page 38).<br />
To display information about the currently selected input source<br />
in the OSD, see page 35 for details.<br />
■ A quick guide to contents<br />
When you want to...<br />
See<br />
page<br />
Enjoy high quality sound 40<br />
Adjust the tonal quality of the front speakers 40<br />
Adjust the parameters of sound field programs 39<br />
Enjoy the sources with a wide dynamic range at night 41<br />
Use headphones 34<br />
Select a decoder to play back sources with 38<br />
Automatically set this unit to the standby mode 36
Selecting audio input jacks<br />
(AUDIO SELECT)<br />
This unit comes with a variety of input jacks. Use this<br />
feature (audio input jack select) to switch between input<br />
jacks when more than one input jack is assigned to as the<br />
same input source.<br />
y<br />
We recommend setting the audio input jack select to “AUTO”<br />
in most cases.<br />
You can adjust the default audio input jack select of this unit by<br />
using “AUDIO SELECT” in “OPTION MENU” (see page 58).<br />
Press KAUDIO SELECT (or press 4AMP and<br />
then EAUDIO SEL) repeatedly to select the<br />
desired audio input jack select setting.<br />
AUDIO SELECT Function<br />
AUTO<br />
HDMI<br />
COAX/OPT<br />
ANALOG<br />
Note<br />
USB<br />
Available input sources<br />
MULTI CH DVR V-AUX DTV/CBL DVD MD/CD-R CD TUNER<br />
A.SEL:AUTO<br />
Currently selected audio input jack select setting<br />
Automatically selects input signals in the<br />
following order:<br />
(1) HDMI<br />
(2) Digital signals<br />
(3) Analog signals<br />
Selects only HDMI signals. When HDMI<br />
signals are not input, no sound is output.<br />
Selects only digital signals. When no<br />
signals are input, no sound is output.<br />
Selects only analog signals. If no analog<br />
signals are input, no sound is output.<br />
This feature is not available when no digital input jacks<br />
(OPTICAL, COAXIAL and HDMI) are assigned. In addition,<br />
HDMI is not available as an audio input jack select setting when<br />
the HDMI IN DVD and HDMI IN DTV/CBL jacks are not used.<br />
Use “INPUT ASSIGNMENT” in “INPUT MENU” to reassign<br />
the respective input jack (see page 55).<br />
Selecting the MULTI CH INPUT<br />
component<br />
Playback<br />
Use this feature to select the component connected to the<br />
MULTI CH INPUT jacks (see page 18) as the input<br />
source.<br />
Press JINPUT l / h repeatedly (or press<br />
4AMP and then DMULTI CH IN) to select<br />
MULTI CH.<br />
“MULTI CH” appears in the front panel display.<br />
y<br />
Use “MULTI CH SET” menu in “INPUT MENU” to set the<br />
parameters for MULTI CH INPUT (see page 56).<br />
Note<br />
The input signals are amplified and output directly without sound<br />
processing. Therefore, you cannot activate sound field programs,<br />
the night listening mode, etc. while MULTI CH is selected as the<br />
input source.<br />
33 En<br />
BASIC<br />
OPERATION<br />
English
Playback<br />
Displaying the current status of<br />
this unit on a video monitor<br />
You can display the operating information of this unit on a<br />
video monitor.<br />
1 Turn on the video monitor connected to this<br />
unit.<br />
2 Press MDISPLAY.<br />
The current status screen appears in the OSD.<br />
y<br />
You can select the amount of time that the current status is<br />
displayed in the OSD by using the “OSD-AMP” parameter in<br />
“OPTION MENU” (see page 57).<br />
Note<br />
The OSD signal is not output at the DVR VIDEO OUT jacks and<br />
will not be recorded.<br />
34 En<br />
STATUSVOL:-40dB<br />
DVDMovieViewing<br />
MOVIE<br />
MovieSpacious<br />
INPUT:DVD<br />
A.SEL:HDMI<br />
NIGHT:CINEMA(MID)<br />
<br />
<br />
[DISPLAY]:STATUSOFF<br />
<br />
Using your headphones<br />
Connect a pair of headphones with a stereo<br />
analog audio cable plug to the PHONES jack on<br />
the front panel.<br />
y<br />
When you select a sound field program, SILENT CINEMA mode<br />
is automatically activated (see page 38).<br />
Notes<br />
When you connect headphones, no signals are output at the<br />
speaker terminals.<br />
All Dolby Digital and DTS audio signals are mixed down to the<br />
left and right headphone channels.<br />
Muting the audio output<br />
Press IMUTE to mute the audio output. Press<br />
IMUTE again to resume the audio output.<br />
y<br />
You can also rotate DVOLUME or press LVOLUME +/– to<br />
resume the audio output.<br />
You can adjust the muting level by using the “MUTE TYPE”<br />
parameter in “SOUND MENU” (see page 53).<br />
The MUTE indicator flashes in the front panel display when the<br />
audio output is muted and disappears from the front panel<br />
display when the audio output is resumed.
Playing video sources in the<br />
background of an audio source<br />
You can combine a video image from a video source with<br />
sound from an audio source. For example, you can enjoy<br />
listening to classical music while viewing beautiful<br />
scenery from the video source on the video monitor.<br />
Press the input selector buttons (3) to select a<br />
video source and then an audio source.<br />
USB<br />
CD MD/CD-R TUNER<br />
DVD<br />
V-AUX<br />
DTV/CBL DVR<br />
Audio sources<br />
Video sources<br />
y<br />
You can also select “MULTI CH” as the audio source (see<br />
page 33). Press 4AMP and then press DMULTI CH IN.<br />
Set the “BGV” parameter in the “MULTI CH SET” menu to the<br />
desired setting to select the default background video input<br />
source of the MULTI CH INPUT sources (see page 56).<br />
Displaying the input source<br />
information<br />
You can display the format, sampling frequency, channel,<br />
bit rate and flag data of the current input signal.<br />
1 Press 4AMP and then KMENU.<br />
The top “SET MENU” display appears in the OSD.<br />
SET MENU<br />
TOP MENU<br />
. ;AUTO SETUP<br />
;<strong>MANUAL</strong> SETUP<br />
.A;SIGNAL INFO<br />
[ ]/[ ]:Up/Down<br />
[ENTER]:Enter<br />
p<br />
p<br />
2 Press 7n repeatedly to select “SIGNAL<br />
INFO” and then press 7ENTER.<br />
The audio information about the input source appears<br />
in the OSD.<br />
3 Press 7l / h to toggle between the audio<br />
and video information displays.<br />
4 Press KMENU again to exit from “SET<br />
MENU”.<br />
■ Audio information<br />
Information Descriptions<br />
FORMAT<br />
SAMPLING<br />
CHANNEL<br />
BITRATE<br />
FLAG<br />
Note<br />
Playback<br />
“–––” appears when this unit cannot display the corresponding<br />
information.<br />
■ Video information<br />
“–––” appears when this unit cannot display the corresponding<br />
information.<br />
HDMI error and message<br />
Signal format. When this unit cannot detect a<br />
digital signal, it automatically switches to<br />
analog input.<br />
The number of samples per second taken from<br />
a continuous signal to make a discrete signal.<br />
The number of source channels in the input<br />
signal (front/surround/LFE). For example, a<br />
multi-channel soundtrack with 3 front<br />
channels, 2 surround channels and LFE, is<br />
displayed as “3/2/0.1”.<br />
The number of bits passing a given point per<br />
second.<br />
Flag data encoded in DTS, Dolby Digital, or<br />
PCM signals that cue this unit to automatically<br />
switch decoders.<br />
Information Descriptions<br />
HDMI SIGNAL<br />
HDMI RES.<br />
HDMI ERROR<br />
(Only when error<br />
is detected)<br />
Note<br />
Type of the source video signals and the<br />
video signals output at the HDMI OUT<br />
jack of this unit.<br />
Resolution of the HDMI signals input or<br />
output at the HDMI IN/OUT jacks of this<br />
unit.<br />
Error message for HDMI sources or<br />
connected HDMI devices. See “HDMI<br />
error and message” for details.<br />
Message Cause<br />
DEVICE OVER The number of the connected HDMI<br />
components is over the limit.<br />
HDCP ERROR HDCP authentication failed.<br />
OUT OF RES. The connected monitor is not compatible<br />
with the resolution of the input video signal.<br />
35 En<br />
BASIC<br />
OPERATION<br />
English
Playback<br />
Using the sleep timer<br />
Use this feature to automatically set this unit to the<br />
standby mode after a certain amount of time.<br />
Press 4AMP and then press RSLEEP<br />
repeatedly to set the amount of time.<br />
Each time you press RSLEEP, the front panel display<br />
changes as shown below.<br />
The SLEEP indicator flashes while you are switching the<br />
amount of time for the sleep timer. Once the sleep timer is<br />
set, the SLEEP indicator lights up in the front panel<br />
display, and the display returns to the selected sound field<br />
program.<br />
y<br />
To cancel the sleep timer, press 4AMP and then press<br />
RSLEEP repeatedly until “SLEEP OFF” appears in the front<br />
panel display.<br />
The sleep timer setting can also be canceled by pressing<br />
ASTANDBY/ON (or HSTANDBY) to set this unit to the<br />
standby mode.<br />
36 En<br />
SLEEP 120min SLEEP 90min<br />
SLEEP OFF<br />
SLEEP 30min<br />
SLEEP 60min
This unit is equipped with a variety of precise digital<br />
decoders that allow you to enjoy multi-channel playback<br />
from almost any stereo or multi-channel sound source.<br />
Press GPROGRAM l / h (or press 4AMP and<br />
then press APROG l / h repeatedly).<br />
The name of the selected sound field program appears in<br />
the front panel display.<br />
Sound field program descriptions<br />
Sound field programs<br />
Notes<br />
Category Program Features<br />
MUSIC<br />
ENTERTAINMENT<br />
Note<br />
MOVIE<br />
STEREO<br />
MUSIC<br />
ENHANCER<br />
Pop/Rock<br />
Hall<br />
Jazz<br />
Game<br />
TV Sports<br />
Movie Spacious<br />
Movie Dramatic<br />
2ch Stereo<br />
5ch Stereo<br />
2ch Enhancer<br />
5ch Enhancer<br />
SOUND FIELD PROGRAMS<br />
When you select an input source, this unit automatically selects<br />
the last sound field program used with the corresponding input<br />
source.<br />
Sound field programs cannot be selected when the component<br />
connected to the MULTI CH INPUT jacks is selected as the<br />
input source (see page 33).<br />
When PCM signals with a sampling frequency higher than<br />
48 kHz are input, this unit is automatically set to the<br />
“STRAIGHT” mode (see page 38).<br />
y<br />
Choose a sound field program based on your listening preference,<br />
not merely on the name of the program itself.<br />
CINEMA DSP processing. This program presents an image of pop, rock, or jazz live<br />
concert. The sound field reproduces the spaciousness of a massive pavilion with an emphasis<br />
on the vividness of vocals on the stage and solo instruments and the beats of rhythm<br />
instruments.<br />
CINEMA DSP processing. This sound field is suitable for classic and orchestral music. The<br />
program uses data collected in a large concert hall in Munich. You can enjoy delicate and<br />
beautiful reverberation and a majestic atmosphere.<br />
CINEMA DSP processing. The sound field is suitable for jazz and fusion music. It uses data<br />
collected in a famous jazz club in New York. You can enjoy clear reverberation.<br />
CINEMA DSP processing. You can enjoy dynamic and thrilling sound effects as you play<br />
games. The program lets you feel the depth and three-dimensional surrounding sounds of the<br />
field where you are playing, and offers cinema-like surrounding sound effects for the scenes<br />
of movies.<br />
CINEMA DSP processing. You can enjoy sports relays broadcast in stereo and variety shows<br />
with a live sound environment. For sports relays, the voices of commentators and<br />
announcers come clearly from the center; the cheers and atmosphere in the stadium spread<br />
around within a comfortable range, and you can feel like as if you are in the stadium.<br />
CINEMA DSP processing. The sound field is suitable for movies with an emphasis on<br />
spectacular sound effects, and is a perfect fit with a wide screen. The program reproduces a<br />
wide dynamic range from minimum sound effects to powerful sounds.<br />
CINEMA DSP processing. This sound field is also suitable for movies with an emphasis on<br />
three-dimensional sound effects. It restrains reverberation to an moderate extent, but<br />
reproduces sound effects and background music in a soft, three-dimensional manner with<br />
clarity and center orientation of voices as pivots.<br />
Downmixes multi-channel sources to 2 channel or plays back 2-channel sources as they are.<br />
CINEMA DSP processing. Using this program increases the listening position range. This is<br />
a sound field suitable for background music at parties.<br />
Select these programs to play back compression artifacts (such as the MP3 format) in<br />
2-channel or 5-channel stereo. This program enhances your listening experience by<br />
regenerating the missing harmonics in a compression artifact.<br />
The sound field programs of this unit are recreations of real-world acoustic environments made from precise measurements taken in the<br />
actual concert hall, music venue, movie theater, etc. Thus, you may notice variations in the strength of the reflections coming from each<br />
direction.<br />
37 En<br />
BASIC<br />
OPERATION<br />
English
Sound field programs<br />
■ Enjoying 2-channel sources using the<br />
standard decoders<br />
Signals input from 2-channel sources can also be played<br />
back on multi-channels.<br />
Press 4AMP and then press OSUR. DECODE<br />
repeatedly to select a decoder.<br />
You can select from the following decoders depending on<br />
the type of source you are playing and your personal<br />
preference.<br />
38 En<br />
Decoder Functions<br />
Pro Logic<br />
PLII Movie<br />
PLII Music<br />
PLII Game<br />
Dolby Pro Logic processing for any<br />
sources<br />
Dolby Pro Logic II processing for<br />
movie sources<br />
Dolby Pro Logic II processing for<br />
music sources<br />
Dolby Pro Logic II processing for<br />
game sources<br />
■ Using sound field programs without<br />
surround speakers<br />
(Virtual CINEMA DSP)<br />
Virtual CINEMA DSP allows you to enjoy the CINEMA<br />
DSP programs without surround speakers by creating<br />
virtual speakers.<br />
If you set “SUR. L/R SP” to “NONE” (see page 51),<br />
Virtual CINEMA DSP is automatically activated<br />
whenever you select a CINEMA DSP program<br />
(see page 37).<br />
Note<br />
Virtual CINEMA DSP will not be activated even when<br />
“SUR. L/R SP” is set to “NONE” (see page 51) in the following<br />
cases:<br />
– when “5ch Stereo” (see page 37) is selected.<br />
– when headphones are connected to the PHONES jack.<br />
■ Enjoying multi-channel sources and<br />
sound field programs with headphones<br />
(SILENT CINEMA)<br />
SILENT CINEMA allows you to enjoy multi-channel<br />
music or movie sound, including Dolby Digital and DTS<br />
sources, through ordinary headphones. SILENT CINEMA<br />
is automatically activated whenever you connect<br />
headphones to the PHONES jack while listening to<br />
CINEMA DSP sound field programs (except for 5ch<br />
Stereo) (see page 37). When activated, the SILENT<br />
CINEMA indicator lights up in the front panel display.<br />
■ Enjoying unprocessed input sources<br />
(Straight decoding mode)<br />
When this unit is in the “STRAIGHT” mode, multichannel<br />
sources are decoded straight into the appropriate<br />
channels without any additional effect processing. 2channel<br />
stereo sources are output from only the front left<br />
and right speakers.<br />
Press HSTRAIGHT (or press 4AMP and then<br />
press BSTRAIGHT) to select “STRAIGHT”.<br />
To deactivate the “STRAIGHT” mode, press<br />
HSTRAIGHT (or press 4AMP and then<br />
BSTRAIGHT) again so that “STRAIGHT” disappears<br />
from the front panel display.
■ Editing sound fields parameters<br />
You can enjoy good quality sound with the factory default<br />
parameters. Although you do not have to change the initial<br />
settings, you can change some of the parameters to better<br />
suit the input source or your listening room.<br />
1 While listening to a source, press 4AMP<br />
and then press QPARAMETER.<br />
2 Press 7k / n to select the desired parameter<br />
you want to change.<br />
3 Press 7l / h to change the parameter<br />
value.<br />
Note<br />
You cannot change parameter values when “MEMORY GUARD”<br />
in “OPTION MENU” is set to “ON” (see page 57).<br />
Sound field programs<br />
y<br />
Initial settings are indicated in bold under each parameter.<br />
For Pop/Rock, Hall, Jazz, Game, TV Sports,<br />
Movie Spacious and Movie Dramatic:<br />
DSP level DSP LEVEL<br />
Function: Adjusts the effect level.<br />
Choices: MIN, MID, MAX<br />
For 2ch Enhancer and 5ch Enhancer:<br />
Effect level EFFECT LEVEL<br />
Function: Adjusts the effect level.<br />
Choices: LOW, HIGH<br />
For Pro Logic II Music:<br />
Panorama PANORAMA<br />
Function: Sends stereo signals to the surround<br />
speakers as well as the front speakers for<br />
a wraparound effect.<br />
Choices: OFF, ON<br />
Dimension DIMENSION<br />
Function: Gradually adjusts the sound field either<br />
towards the front or towards the rear.<br />
Control range: –3 (towards the rear) to +3 (towards the<br />
front), initial setting is STD (standard).<br />
Center width CT WIDTH<br />
Function: Adjusts the center image from all three<br />
front speakers to varying degrees. A<br />
larger value adjusts the center image<br />
towards the front left and right speakers.<br />
Control range: 0 (center channel sound is output only<br />
from center speaker) to 7 (center channel<br />
sound is output only from front left and<br />
right speakers), initial setting is 3.<br />
39 En<br />
BASIC<br />
OPERATION<br />
English
USING AUDIO FEATURES<br />
Enjoying high quality sound<br />
Use the DIRECT mode to enjoy the high quality sounds of<br />
the selected source. When the DIRECT mode is activated,<br />
this unit plays back the selected source with the least<br />
circuitry.<br />
Press IDIRECT (or press 4AMP and then<br />
CDIRECT) to select “DIRECT”.<br />
Notes<br />
“TONE CONTROL” and “SOUND MENU” (see page 50)<br />
settings (except for speaker level settings) are not effective.<br />
The front panel display automatically dims.<br />
y<br />
While DIRECT mode is activated, the front panel display turns on<br />
momentarily when an operation is performed.<br />
Adjusting the tonal quality<br />
Use this feature to adjust the balance of bass and treble for<br />
the front left and right speaker channels.<br />
y<br />
Speaker and headphone adjustments are stored independently.<br />
1 Press FTONE CONTROL repeatedly to<br />
select the high-frequency response<br />
(TREBLE) or the low-frequency response<br />
(BASS).<br />
2 Press GPROGRAM l / h repeatedly to<br />
adjust the high-frequency response<br />
(TREBLE) or the low-frequency response<br />
(BASS).<br />
Notes<br />
If you increase or decrease the high-frequency or the lowfrequency<br />
sound to an extreme level, the tonal quality of the<br />
surround speakers may not match.<br />
TONE CONTROL is not effective when this unit is in the<br />
DIRECT mode, or when MULTI CH is selected as the input<br />
source.<br />
40 En<br />
Using audio features<br />
Adjusting the speaker level<br />
You can adjust the output level of each speaker while<br />
listening to a music source. This is also possible when<br />
playing sources input at the MULTI CH INPUT jacks.<br />
Note<br />
This operation will override the level adjustments made in<br />
“AUTO SETUP” (see page 23) and “SP LEVEL” (see page 52).<br />
1 Press 4AMP and then press 6LEVEL on<br />
the remote control and then 7k / n to select<br />
the speaker you want to adjust.<br />
Display Adjusted speaker<br />
FRONT L Front left speaker<br />
FRONT R Front right speaker<br />
CENTER Center speaker<br />
SWFR Subwoofer<br />
SUR. L Surround left speaker<br />
SUR. R Surround right speaker<br />
y<br />
The available speaker channels differ depending on the<br />
setting of the speakers.<br />
When the video monitor is turned on, the “SPEAKER<br />
LEVEL” adjustment menu appears in the video monitor.<br />
2 Press 7l / h to adjust the speaker output<br />
level.<br />
Press 7h to increase the value.<br />
Press 7l to decrease the value.<br />
Control range: –10 dB to +10 dB<br />
3 Press 6LEVEL to turn off the speaker level<br />
adjustment display.
Selecting the night listening mode<br />
The night listening modes are designed to improve<br />
listenability at lower volumes or at night.<br />
1 Press 4AMP and then PNIGHT repeatedly<br />
to select “NIGHT:CINEMA” or<br />
“NIGHT:MUSIC”.<br />
Choices: NIGHT:CINEMA, NIGHT:MUSIC, OFF<br />
Select “NIGHT:CINEMA” when watching films to<br />
reduce the dynamic range of film soundtracks and<br />
make dialog easier to hear at lower volumes.<br />
Select “NIGHT:MUSIC” when listening to music<br />
sources to preserve ease-of-listening for all sounds.<br />
Select “OFF” if you do not want to use this feature.<br />
y<br />
When a night listening mode is selected, the NIGHT<br />
indicator lights up in the front panel display.<br />
2 Press 7l / h to adjust the effect level while<br />
“NIGHT:CINEMA” or “NIGHT:MUSIC” is<br />
displayed in the front panel display.<br />
Choices: MIN, MID, MAX<br />
Select “MIN” for minimum compression.<br />
Select “MID” for standard compression.<br />
Select “MAX” for maximum compression.<br />
y<br />
“NIGHT:CINEMA” and “NIGHT:MUSIC” adjustments are<br />
stored independently.<br />
Notes<br />
Effect.Lvl:MID<br />
You cannot use the night listening modes in the following cases:<br />
– when the DIRECT mode (see page 40) is selected.<br />
– when the component connected to the MULTI CH INPUT<br />
jacks is selected as the input source (see page 33).<br />
– when headphones are connected to the PHONES jack.<br />
The night listening modes may vary in effectiveness depending<br />
on the input source and surround sound settings you use.<br />
Using audio features<br />
41 En<br />
BASIC<br />
OPERATION<br />
English
USING A USB MEMORY DEVICE OR A USB PORTABLE AUDIO PLAYER<br />
Use this feature to enjoy WAV (PCM format only), MP3 and WMA files saved on your USB memory device or USB<br />
portable audio player connected to the USB port on the front panel of this unit.<br />
■ Supported USB devices<br />
This unit supports USB mass storage class devices (except<br />
USB hard disk drives) using FAT16 or FAT32 format.<br />
Notes<br />
Only the first partition (32 GB or less) is displayed in the OSD.<br />
You cannot select files in other partitions.<br />
Up to 8 levels of directory hierarchy and 500 music files per<br />
directory are recognized.<br />
Some devices may not work properly even if they meet the<br />
requirements.<br />
Some WAV, MP3 and WMA files may not be playable or may<br />
be noisy when played.<br />
■ Connecting a USB memory device or a<br />
USB potable audio player<br />
Connect a USB jack of a USB memory device or<br />
USB portable audio player to the USB port on the<br />
front panel of this unit.<br />
STANDBY/<br />
ON<br />
PHONES<br />
SILENT CINEMA<br />
42 En<br />
Using a USB memory device or a USB portable audio player<br />
SPEAKERS<br />
A/B/OFF<br />
TONE CONTROL<br />
l PROGRAM h<br />
STRAIGHT<br />
EFFECT<br />
SCENE<br />
1 2 3 4<br />
DIRECT<br />
l INPUT h<br />
OPTIMIZER MIC<br />
AUDIO SELECT<br />
USB memory device<br />
or USB portable<br />
audio player<br />
VOLUME<br />
VIDEO AUX USB<br />
VIDEO L AUDIO R<br />
USB<br />
Playback operation<br />
Follow the procedures below to enjoy the music stored in<br />
your USB device or a USB portable audio player.<br />
1 Press JINPUT l / h repeatedly (or press<br />
3USB) to select USB.<br />
The cursor on the left of the USB indicator lights up<br />
in the front panel display, and the contents previously<br />
played is automatically played.<br />
Lights up<br />
USB<br />
MULTI CH DVR V-AUX DTV/CBL DVD MD/CD-R CD TUNER<br />
INPUT:USB<br />
2 Press MDISPLAY to display the top USB file<br />
list.<br />
The USB file list appears in the OSD.<br />
USB Root<br />
Ellis Margellis<br />
Frankie Zipper<br />
Hall in Call<br />
Jackie Pastarius<br />
Jmiel<br />
Jean-Luc Ponta<br />
Jim Hallo<br />
1/7<br />
><br />
><br />
><br />
><br />
><br />
><br />
><br />
y<br />
“i” in the right corner of each menu line indicates that<br />
there is a submenu available in the next menu level.<br />
When this unit is in the top directory, “Root” appears<br />
beside “USB”.
3 Press 7 k / n / l / h on the remote control<br />
to select the desired file.<br />
Press 7 k / n to select the desired file/folder.<br />
Press 7 ENTER or 7 h to enter the selected<br />
folder.<br />
Press 7 l to return to the previous folder level.<br />
4 Press 7ENTER to play the selected file.<br />
y<br />
You can use 9b / a to skip backward/forward and<br />
9 h / s to start/stop playback independently from the menu<br />
in the OSD.<br />
You can set the settings for repeat and shuffle mode by using the<br />
“USB PLAY STYLE” parameters in “OPTION MENU” (see<br />
page 59).<br />
You can select the display mode in the front panel display by<br />
using “FL SCROLL” in “OPTION MENU” (see page 57).<br />
Using a USB memory device or a USB portable audio player<br />
■ The function of the play information<br />
display<br />
[1] Name of the artist<br />
[2] Name of the album<br />
[3] Name of the song<br />
[4] Elapsed time<br />
Note<br />
[1]<br />
[2]<br />
[3]<br />
[4]<br />
When the elapsed time exceed “99:59”, “--:--” appeared<br />
instead of the time.<br />
[5] (playback) icon<br />
USB [Play]<br />
FrankieZipper<br />
. Made-to-orderaaaaaAA<br />
;RoadtoIndiaaaAAAA<br />
.A<br />
00:00<br />
[6] All (all repeat), 1<br />
(single repeat) icons<br />
When “REPEAT” of the “USB PLAY STYLE” in “OPTION<br />
MENU” (see page 59) is set to “OFF”, no icon appears in the<br />
top right corner while files or folders are being played.<br />
[7] (shuffle) icon<br />
When “SHUFFLE” of the “USB PLAY STYLE” in<br />
“OPTION MENU” (see page 59) is set to “OFF”, no icon<br />
appears in the top right corner while files or holders are being<br />
played.<br />
All<br />
[5]<br />
[6]<br />
[7]<br />
43 En<br />
BASIC<br />
OPERATION<br />
English
USING IPOD<br />
Once you have stationed your iPod in a Yamaha iPod universal dock (such as YDS-10, sold separately) connected to the<br />
DOCK terminal of this unit (see page 19), you can enjoy playback of your iPod using the supplied remote control. You<br />
can also use the Compressed Music Enhancer mode of this unit to improve the sound quality of the compression artifacts<br />
(such as the MP3 format) stored on your iPod (see page 19).<br />
Notes<br />
Only iPod (Click and Wheel), iPod nano, and iPod mini are supported.<br />
Some features may not be compatible depending on the model or the software version of your iPod.<br />
y<br />
For a complete list of status messages that appear in the front panel display and in the OSD, see the “iPod” section in<br />
“Troubleshooting” on page 70.<br />
Once your iPod is stationed in a Yamaha iPod universal dock, this unit begins signal transmission with your iPod.<br />
Once the connection between your iPod and this unit is complete, “iPod connected” appears in the front panel display and the DOCK<br />
indicator lights up in the front panel display.<br />
Only the analog audio and video signals of your iPod are input at the DOCK terminal, and the analog audio signals can be output at the<br />
analog AUDIO OUT (REC) jacks for recording.<br />
Controlling iPod<br />
You can control your iPod when “V-AUX” is selected as the input source. The operations of your iPod can be done with<br />
the aid of the OSD of this unit (menu browse mode) or without it (simple remote mode).<br />
■ Remote control operation ■ Controlling iPod in the simple remote<br />
Before performing the following operations, press 3V-AUX/<br />
DOCK.<br />
44 En<br />
Button Function<br />
7 ENTER Subsequent menu<br />
k Menu up<br />
n Menu down<br />
l Previous menu<br />
h Subsequent menu<br />
9 ll Search backward (Press and hold)<br />
hh Search forward (Press and hold)<br />
b Skip backward<br />
a Skip forward<br />
e Pause (Menu browse mode)<br />
Play/Pause (Simple remote mode)<br />
p Play (Menu browse mode)<br />
Play/Pause (Simple remote mode)<br />
K MENU Previous menu<br />
M DISPLAY Display<br />
Using iPod<br />
mode<br />
You can perform the basic operations of your iPod (play,<br />
stop, skip, etc.) using the supplied remote control without<br />
the aid of the OSD of this unit.<br />
y<br />
You can view the photos or video clips stored on your iPod<br />
(some models only).<br />
Operations can be also done with the controls on your iPod.
■ Controlling iPod in the menu browse<br />
mode<br />
You can perform the advanced operations of your iPod<br />
using the supplied remote control when you connect this<br />
unit and a monitor using the VIDEO connection. You can<br />
browse the songs stored on your iPod in the OSD. Further,<br />
you can change or adjust settings for your iPod to suit<br />
your personal preferences.<br />
y<br />
The name of the song being played also appears in the front<br />
panel display according to the “FL SCROLL” parameter in<br />
“OPTION MENU” (see page 57).<br />
You can select the amount of time the iPod menu and play<br />
information is displayed in the OSD by using the “OSD-<br />
SOURCE” in “OPTION MENU” (see page 57)<br />
Notes<br />
Operations cannot be done with the controls on your iPod.<br />
The Yamaha logo appears in the display window of your iPod.<br />
There are some characters that cannot be displayed in the front<br />
panel display or in the OSD of this unit. Those characters are<br />
replaced with underscores “_”.<br />
The “Settings” parameters can be changed or adjusted only in<br />
the OSD. Press 7ENTER repeatedly to toggle between the<br />
“Settings” parameter settings.<br />
You cannot browse the photos or video clips stored on your<br />
iPod in the OSD. Use the simple remote mode to enjoy<br />
watching the photos or video clips stored on your iPod.<br />
1 Press 3V-AUX/DOCK and then<br />
MDISPLAY.<br />
The following display appears in the OSD.<br />
iPod Top<br />
Playlists<br />
Artists<br />
Albums<br />
Songs<br />
Genres<br />
Composers<br />
Settings<br />
2 Press 7k / n / l / h to navigate the iPod<br />
menu and then press 7ENTER to begin<br />
playback of the selected song.<br />
Choices: Playlists (playlists), Artists (artists), Albums<br />
(albums), Songs (songs), Genres (genres),<br />
Composers (composers), Settings (settings)<br />
Playlists > Songs<br />
Artists > Albums > Songs<br />
Albums > Songs<br />
Songs<br />
Genres > Artists > Albums > Songs<br />
Composers > Albums > Songs<br />
Settings > Shuffle, Repeat<br />
><br />
><br />
><br />
><br />
><br />
><br />
><br />
Using iPod<br />
Shuffle Shuffle<br />
Use this feature to set this unit to play songs or albums in<br />
random order.<br />
Choices: Off, Songs, Albums<br />
Select “Off ” to deactivate this feature.<br />
Select “Songs” to set this unit to play songs in random<br />
order.<br />
Select “Albums” to set this unit to play albums in<br />
random order.<br />
y<br />
When “Shuffle” is set to a setting other than “Off ”, “ ” appears<br />
in the top right corner while songs or albums are being shuffled.<br />
Repeat Repeat<br />
Use this feature to set this unit to repeat one song or a<br />
sequence of songs.<br />
Choices: Off, One, All<br />
Select “Off ” to deactivate this feature.<br />
Select “One” to set this unit to repeat one song.<br />
Select “All” to set this unit to repeat a sequence of<br />
songs.<br />
y<br />
When “Repeat” is set to a setting other than “Off ”, “ ” or “ ”<br />
1 All<br />
appears in the top right corner while one song or a sequence of<br />
songs are being repeated.<br />
■ The function of the play information<br />
display<br />
[1]<br />
[2]<br />
[3]<br />
[4]<br />
[5]<br />
[6]<br />
iPod[Play] All<br />
1/9<br />
<br />
FrankieZipper<br />
Made-to-order<br />
RoadtoIndia<br />
<br />
<br />
<br />
||;;;;;;;;;;;;;;;;;;<br />
0:51-7:44<br />
[1] Playback status<br />
[2] Track number/total tracks<br />
[3] Artist name<br />
[4] Song title<br />
[5] Progress bar<br />
[6] Elapsed time<br />
[7] Shuffle and repeat icons<br />
[8] (playback), (pausing), (search<br />
forward) and (search backward)<br />
[9] Name of the album<br />
[10] Remaining time<br />
[7]<br />
[8]<br />
[9]<br />
[10]<br />
45 En<br />
BASIC<br />
OPERATION<br />
English
USING BLUETOOTH COMPONENTS<br />
You can connect a Yamaha Bluetooth adapter (such as YBA-10, sold separately) to the DOCK terminal of this unit and<br />
enjoy the music contents stored in your Bluetooth component (such as a portable music player) without wiring between<br />
this unit and the Bluetooth component. You need to perform “pairing” the connected Bluetooth adapter and your<br />
Bluetooth component in advance.<br />
Pairing the Bluetooth adapter<br />
and your Bluetooth component<br />
Pairing must be performed when using a Bluetooth<br />
component with the Bluetooth adapter connected to this<br />
unit for the first time or if the pairing data has been<br />
deleted. “Pairing” refers to the operation of registering a<br />
Bluetooth component for Bluetooth communications.<br />
y<br />
You only need the pairing operation for the first time that you<br />
use the Bluetooth component with the Bluetooth adapter.<br />
Pairing requires operations on this unit and on the other<br />
component with which Bluetooth communications are to be<br />
established. If necessary, refer to the other component’s<br />
operating instructions.<br />
There are two pairing methods: pairing by using “START<br />
PAIRING” in “SET MENU” and quick pairing.<br />
■ Pairing by using “SET MENU”<br />
Use this feature to perform pairing with the video monitor.<br />
Select “START PAIRING” in “INPUT MENU”. See<br />
page 55 for details.<br />
■ Quick pairing<br />
To ensure security, a time limit of 8 minutes is set for the<br />
pairing operation. You are recommended to read and fully<br />
understand all the instructions before starting.<br />
1 Press 3V-AUX/DOCK to select “V-AUX” as<br />
the input source.<br />
2 Turn on the Bluetooth component you want<br />
to pair with.<br />
3 Press and hold 6BAND for 3 seconds.<br />
Once the Bluetooth adapter starts pairing,<br />
“Searching...” appears for a moment. While the<br />
Bluetooth adapter is in the pairing mode, DOCK<br />
indicator flashes in the front panel display.<br />
y<br />
To cancel the pairing, press 6BAND again.<br />
46 En<br />
Using Bluetooth components<br />
If the Bluetooth adapter is not connected to the DOCK<br />
terminal of this unit, “No BT adapter” appears in the front<br />
panel display.<br />
4 Check that the Bluetooth component detects<br />
the Bluetooth adapter.<br />
If the Bluetooth component detects the Bluetooth<br />
adapter, “YBA-10 YAMAHA” (example) appears in<br />
the Bluetooth device list.<br />
5 Select the Bluetooth adapter in the Bluetooth<br />
device list and then enter the pass key<br />
“0000” on the Bluetooth component.<br />
When the pairing procedure is successful,<br />
“Completed” appears in the front panel display.<br />
Note<br />
Note<br />
The Yamaha Bluetooth adapter can be paired with up to eight<br />
Bluetooth components. When pairing is conducted successfully<br />
with a ninth component and the pairing data is registered, the<br />
pairing data for the least recently used other component is<br />
cleared.<br />
Playback of the Bluetooth<br />
component<br />
1 Press JINPUT l / h repeatedly (or press<br />
3V-AUX/DOCK) to select “V-AUX” as the<br />
input source.<br />
2 Start playback of your Bluetooth component.<br />
When the connected Bluetooth adapter detects the<br />
Bluetooth component, “BT connected” and the<br />
DOCK indicator appears in the front panel display.<br />
y<br />
When you press 7ENTER, the connected Bluetooth adapter<br />
searches and connect to the last connected Bluetooth<br />
component. If the Bluetooth adapter cannot find the Bluetooth<br />
component, “Not found” appears in the front panel display.<br />
To disconnect the Bluetooth adapter from the Bluetooth<br />
component, press 8RETURN.
RECORDING<br />
Recording adjustments and other operations are performed from the recording components. Refer to the operating<br />
instructions for those components.<br />
Notes<br />
When this unit is set to the standby mode, you cannot record between other components connected to this unit.<br />
TONE CONTROL (see page 40) and VOLUME settings, speaker levels (see page 40) and the sound field programs (see page 37) do<br />
not affect recorded material.<br />
The source connected to the MULTI CH INPUT jacks of this unit cannot be recorded.<br />
Digital signals input at the DIGITAL INPUT jacks are not output at the analog AUDIO OUT (REC) jacks for recording. Therefore, if<br />
your source component is connected to provide only digital signals, you cannot record the source.<br />
A given input source is not output on the same OUT (REC) channel.<br />
The analog audio signals input at the DOCK terminal can be output at the analog AUDIO OUT (REC) jacks for recording.<br />
Once you have connected a recording component to this unit, keep the component turned on while using this unit. If the component is<br />
turned off, this unit may distort the sound from other components.<br />
Check the copyright laws in your country to record from CDs, radio, etc. Recording of copyrighted material may infringe copyright<br />
laws.<br />
y<br />
Do a test recording before you start an actual recording.<br />
1 Turn on all the connected components.<br />
2 Press JINPUT l / h repeatedly (or press<br />
one of the input selector buttons (3)) to<br />
select the source component you want to<br />
record from.<br />
Recording<br />
If you play back a video source that uses scrambled or encoded signals to prevent it from being dubbed, the picture<br />
itself may be disturbed due to those signals.<br />
3 Start playback on the selected source<br />
component or select a broadcast station.<br />
4 Start recording on the recording component.<br />
47 En<br />
BASIC<br />
OPERATION<br />
English
SET MENU<br />
You can use the following parameters in “SET MENU” to adjust a variety of system settings and customize the way this<br />
unit operates. Change the initial settings (indicated in bold under each parameter) to reflect the needs of your listening<br />
environment.<br />
■ Auto setup AUTO SETUP<br />
Use this feature to automatically adjust speaker and system parameters (see page 23).<br />
■ Manual setup <strong>MANUAL</strong> SETUP<br />
Use this feature to manually adjust speaker and system parameters.<br />
Sound menu 1 SOUND MENU<br />
Input menu 2 INPUT MENU<br />
48 En<br />
SET MENU<br />
Parameter Features Page<br />
A)SPEAKER SET<br />
Selects the size of each speaker, the speakers for low-frequency signal output, and the<br />
crossover frequency, and the location of the front speakers connected to the FRONT B<br />
terminals.<br />
B)SP LEVEL Adjusts the output level of each speaker. 52<br />
C)SP DISTANCE Adjusts the delay time of each speaker. 52<br />
D)CENTER GEQ Adjusts the tonal quality of the center speaker. 53<br />
E)LFE LEVEL Adjusts the output level of the LFE channel for Dolby Digital or DTS signals. 53<br />
F)DYNAMIC RANGE Adjusts the dynamic range of Dolby Digital or DTS signals. 53<br />
G)AUDIO SET Adjusts the muting level, audio delay, maximum volume level and initial volume level. 53<br />
H)HDMI SET<br />
Selects whether to play back HDMI audio signals on this unit or on another HDMI<br />
component connected to the HDMI OUT jack.<br />
Parameter Features Page<br />
A)INPUT ASSIGNMENT Assigns the input jacks of this unit according to the component to be used. 55<br />
B)INPUT RENAME Changes the name of the input source. 55<br />
C)VOLUME TRIM Adjusts the output volume of each input source. 56<br />
D)DECODER MODE<br />
E)MULTI CH SET<br />
Selects the decoder mode for the sources connected to the DIGITAL INPUT jacks on the<br />
rear panel of this unit.<br />
Selects the video source played in the background of the sources input from the MULTI CH<br />
INPUT jacks.<br />
50<br />
54<br />
56<br />
56
Option menu 3 OPTION MENU<br />
■ Signal information SIGNAL INFO<br />
Use this feature to check audio signal information (see page 35).<br />
Use the remote control to access and adjust each<br />
parameter.<br />
y<br />
You can change the “SET MENU” parameters while this unit is<br />
reproducing sound.<br />
1 Press 4AMP and then press KMENU to<br />
enter “SET MENU”.<br />
The top “SET MENU” display appears in the OSD.<br />
2 Press 7k / n to select “<strong>MANUAL</strong> SETUP”.<br />
SET MENU<br />
Parameter Features Page<br />
A)DISPLAY SET<br />
Adjusts the brightness of the front panel display and the way in which iPod information is<br />
displayed.<br />
B)MEMORY GUARD Locks sound field program parameters and other “SET MENU” settings. 57<br />
C)AUDIO SELECT<br />
Designates the default audio input jack select setting for the input sources connected to the<br />
DIGITAL INPUT jacks when you turn on the power of this unit.<br />
D)PARAM. INI Initializes the parameters of a group of sound field programs. 58<br />
E)BLUETOOTH SET<br />
Pair the connected Yamaha Bluetooth adapter (such as YBA-10, sold separately) with a<br />
Bluetooth component (see page 46).<br />
F)USB PLAY STYLE Adjusts the playback style of a USB source. 59<br />
Using SET MENU<br />
SET MENU<br />
TOPAMENU<br />
. ;AUTO SETUP<br />
.A;<strong>MANUAL</strong> SETUP<br />
;SIGNAL INFO<br />
[ ]/[ ]:Up/Down<br />
[ENTER]:Enter<br />
p<br />
SET MENU<br />
p<br />
TOPAMENU<br />
;AUTO SETUP<br />
.A;<strong>MANUAL</strong> SETUP<br />
;SIGNAL INFO<br />
[ ]/[ ]:Up/Down<br />
[ENTER]:Enter<br />
p<br />
p<br />
3 Press 7ENTER to enter “<strong>MANUAL</strong> SETUP”.<br />
The “<strong>MANUAL</strong> SETUP” display appears in the<br />
OSD.<br />
;<strong>MANUAL</strong> SETUP<br />
. 1 SOUND MENU<br />
2 INPUT MENU<br />
3 OPTION MENU<br />
[ ]/[ ]:Up/Down<br />
[ENTER]:Enter<br />
p<br />
p<br />
4 Press 7k / n / l / h and 7ENTER to select<br />
and change the parameter.<br />
Press 7k / n to select the desired menu or<br />
parameter.<br />
Press 7l / h to change the parameter value.<br />
Press 7ENTER to enter the selected menu or to<br />
confirm the parameter.<br />
Press 8RETURN to return to the previous menu<br />
level.<br />
5 Press KMENU to exit from “SET MENU”.<br />
57<br />
58<br />
58<br />
49 En<br />
ADVANCED<br />
OPERATION<br />
English
SET MENU<br />
1 SOUND MENU<br />
Use this menu to manually adjust any speaker settings or<br />
compensate for video signal processing delays when using<br />
LCD monitors or projectors.<br />
;<strong>MANUAL</strong> SETUP<br />
■ Speaker settings A)SPEAKER SET<br />
Use this feature to manually adjust any speaker settings.<br />
FRONT B speaker setting FRONT B<br />
Use this feature to select the location of the front speakers<br />
connected to the FRONT B terminals.<br />
Choices: FRONT, ZONE B<br />
Select “FRONT” to turn on or off SPEAKERS A and B<br />
when the speakers connected to the FRONT B<br />
terminals are set in the main zone.<br />
Select “ZONE B” if the speakers connected to the<br />
FRONT B terminals are set in another zone. If<br />
SPEAKERS A is turned off and SPEAKERS B is<br />
turned on, all the speakers including the subwoofer in<br />
the main zone are muted and this unit outputs sound at<br />
the FRONT B terminals only.<br />
Notes<br />
If you connect headphones to the PHONES jack of this unit, the<br />
sound is output from both headphones and the FRONT B<br />
terminals when “FRONT B” is set to “ZONE B”.<br />
If a DSP program is selected when “FRONT B” is set to<br />
“ZONE B”, this unit automatically enters the Virtual CINEMA<br />
DSP mode (see page 38).<br />
50 En<br />
1 SOUND MENU 1/2<br />
. A)SPEAKER SET<br />
B)SP LEVEL<br />
C)SP DISTANCE<br />
D)CENTER GEQ<br />
E)LFE LEVEL<br />
[ ]/[ ]:Up/Down<br />
[ENTER]:Enter<br />
p<br />
p<br />
1 SOUND MENU<br />
;<strong>MANUAL</strong> SETUP<br />
1 SOUND MENU 2/2<br />
. F)DYNAMIC RANGE<br />
G)AUDIO SET<br />
H)HDMI SET<br />
[ ]/[ ]:Up/Down<br />
[ENTER]:Enter<br />
p<br />
A)SPEAKER SET<br />
FRONT B;;;;FRONT<br />
[ ]/[ ]:Up/Down<br />
[ p ]/[ [ ]:Select<br />
p<br />
p<br />
p<br />
Woofer section of a speaker is 16 cm (6.5 in) or larger:<br />
large<br />
Woofer section of a speaker is smaller than 16 cm<br />
(6.5 in): small<br />
Front speakers FRONT SP<br />
Choices: SMALL, LARGE<br />
When the front speakers are large<br />
Select “LARGE” (large).<br />
When the front speakers are small<br />
Select “SMALL” (small).<br />
Note<br />
1 SOUND MENU<br />
A)SPEAKER SET<br />
FRONT SP<br />
When “LFE/BASS OUT” is set to “FRONT” (see page 51), you<br />
can select only “LARGE” in “FRONT SP”. If the value of<br />
“FRONT SP” is set to a setting other than “LARGE” in advance,<br />
this unit automatically changes the value to “LARGE”.<br />
Center speaker CENTER SP<br />
Choices: NONE, SML, LRG<br />
1 SOUND MENU<br />
SMALL >LARGE<br />
A)SPEAKER SET<br />
CENTER SP<br />
NONE >SML LRG<br />
When the center speaker is large<br />
Select “LRG” (large).<br />
When the center speaker is small<br />
Select “SML” (small).<br />
When you do not use the center speaker<br />
Select “NONE” (none). The center channel signals are<br />
directed to the front left and right speakers.
Surround left/right speakers SUR. L/R SP<br />
Choices: NONE, SML, LRG<br />
1 SOUND MENU<br />
A)SPEAKER SET<br />
SUR. L/R SP<br />
NONE >SML LRG<br />
When the surround speakers are large<br />
Select “LRG” (large).<br />
When the surround speakers are small<br />
Select “SML” (small).<br />
When you do not use the surround speakers<br />
Select “NONE” (none). This unit is set to the Virtual<br />
CINEMA DSP mode (see page 38).<br />
LFE Bass out LFE/BASS OUT<br />
Use this feature to select the speakers that output the LFE<br />
(low-frequency effect) and the low-frequency signals.<br />
Choices: SWFR, FRNT, BOTH<br />
1 SOUND MENU<br />
A)SPEAKER SET<br />
LFE/BASS OUT<br />
SWFR FRNT>BOTH<br />
When a subwoofer is connected to this unit<br />
and you want to get natural bass sound<br />
Select “SWFR” (subwoofer). The LFE signals as well<br />
as the low-frequency signals of other speakers set to<br />
“SML” (or “SMALL”) are directed to the subwoofer.<br />
When a subwoofer is connected to this unit<br />
and you want to get rich bass sound<br />
Select “BOTH” (both). The low-frequency signals of<br />
any source are output from the subwoofer. The LFE<br />
signals as well as the low-frequency signals of other<br />
speakers set to “SML” (or “SMALL”) are directed to<br />
the subwoofer. The low-frequency signals of the front<br />
left and right channels are directed to the front left and<br />
right speakers and the subwoofer regardless of the<br />
“FRONT SP” setting (see page 50).<br />
When you do not use a subwoofer<br />
Select “FRNT” (front). The LFE signals, the lowfrequency<br />
signals of the front left and right channels,<br />
and the low-frequency signals of other speakers set to<br />
“SML” (or “SMALL”) are all directed to the front left<br />
and right speakers regardless of the “FRONT SP”<br />
setting (see page 50).<br />
SET MENU<br />
Crossover CROSS OVER<br />
Use this feature to select a crossover frequency of all the<br />
speakers set to “SML” (or “SMALL”) in “SPEAKER<br />
SET” (see pages 50). All frequencies below the selected<br />
frequency will be sent to the subwoofer or front speakers<br />
depending on the setting of “LFE/BASS OUT” in<br />
“SPEAKER SET” (see pages 50).<br />
Choices: 40Hz, 60Hz, 80Hz, 90Hz, 100Hz, 110Hz,<br />
120Hz, 160Hz, 200Hz<br />
1 SOUND MENU<br />
A)SPEAKER SET<br />
CROSSOVER<br />
FREQ;;;80Hz<br />
Subwoofer phase SUBWOOFER PHASE<br />
Use this feature to switch the phase of your subwoofer if<br />
bass sounds are lacking or unclear.<br />
Choices: NORMAL, REVERSE<br />
1 SOUND MENU<br />
A)SPEAKER SET<br />
SUBWOOFER PHASE<br />
>NORMAL REVERSE<br />
Select “NORMAL” if you do not want to reverse the<br />
phase of your subwoofer.<br />
Select “REVERSE” to reverse the phase of your<br />
subwoofer.<br />
51 En<br />
ADVANCED<br />
OPERATION<br />
English
SET MENU<br />
■ Speaker level B)SP LEVEL<br />
Use this feature to manually adjust the output level of each<br />
speaker.<br />
Control range: –10 to +10 dB<br />
Control step: 1 dB<br />
Initial setting: 0 dB<br />
1 SOUND MENU<br />
B)SP LEVEL 1/2<br />
-__________+<br />
. FR.L<br />
FR.R<br />
CNTR<br />
SWFR<br />
FR.L<br />
FR.R<br />
CNTR<br />
SWFR<br />
SUR.L<br />
SUR.R<br />
Note<br />
The available speaker channels differ depending on the setting of<br />
the speakers.<br />
52 En<br />
SP LEVEL Adjusted speaker<br />
Front left speaker<br />
Front right speaker<br />
Center speaker<br />
Subwoofer<br />
1 SOUND MENU<br />
Surround left speaker<br />
Surround right speaker<br />
B)SP LEVEL 2/2<br />
-__________+<br />
.SUR.L<br />
SUR.R<br />
■ Speaker distance C)SP DISTANCE<br />
Use this feature to manually adjust the distance of each<br />
speaker and the delay applied to the respective channel.<br />
Ideally, each speaker should be the same distance from the<br />
main listening position. However, this is not possible in<br />
most home situations. Thus, a certain amount of delay<br />
must be applied to the sound from each speaker so that all<br />
sounds will arrive at the listening position at the same<br />
time.<br />
1 SOUND MENU<br />
Unit UNIT<br />
Choices: meters (m), feet (ft)<br />
Initial setting: meters (m)<br />
Select “meters” to adjust speaker distances in meters.<br />
Select “feet” to adjust speaker distances in feet.<br />
Speaker distances<br />
Control range: 0.30 to 24.00 m (1.0 to 80.0 ft)<br />
Control step: 0.10 m (0.5 ft)<br />
Initial setting:<br />
FRONT L/FRONT R/SWFR: 3.00 m (10.0 ft)<br />
CENTER: 2.60 m (8.5 ft)<br />
SUR. L/SUR. R: 2.40 m (8.0 ft)<br />
SP DISTANCE Adjusted speaker<br />
FRONT L<br />
FRONT R<br />
CENTER<br />
SWFR<br />
SUR. L<br />
SUR. R<br />
Note<br />
C)SP DISTANCE 1/2<br />
. UNIT;;;;;;meters<br />
FRONT L;;;;3.00m<br />
FRONT R;;;;3.00m<br />
CENTER;;;;;2.60m<br />
SWFR;;;;;;;3.00m<br />
[ ]/[ ]:Up/Down<br />
[ p ]/[ [ ]:Adjust<br />
p<br />
p<br />
Front left speaker<br />
Front right speaker<br />
Center speaker<br />
Subwoofer<br />
1 SOUND MENU<br />
Surround left speaker<br />
C)SP DISTANCE 2/2<br />
. SUR. L;;;;;3.00m<br />
SUR. R;;;;;3.00m<br />
Surround right speaker<br />
[ ]/[ ]:Up/Down<br />
[ p ]/[ [<br />
]:Adjust<br />
The available speaker channels differ depending on the setting of<br />
the speakers.<br />
p<br />
p
■ Center speaker equalizer D)CENTER GEQ<br />
Use this feature to adjust the built-in 5-frequency band<br />
(100Hz, 300Hz, 1kHz, 3kHz and 10kHz) graphic<br />
equalizer for the center channel so that the tonal quality of<br />
the center speaker matches that of the front speakers. You<br />
can make adjustments while listening to the currently<br />
selected source component or a test tone.<br />
Control range: –6.0 to +6.0 dB<br />
Control step: 0.5 dB<br />
Initial setting: 0 dB<br />
Test tone TEST<br />
Use this feature to make adjustments for “CENTER GEQ”<br />
while listening to a test tone.<br />
Choices: OFF, ON<br />
Select “OFF” to stop test tones and output the currently<br />
selected source component.<br />
Select “ON” to output test tones from the center and<br />
front left speakers.<br />
■ Low-frequency effect level E)LFE LEVEL<br />
Use this feature to adjust the output level of the LFE (lowfrequency<br />
effect) channel according to the capacity of<br />
your subwoofer or headphones. The LFE channel carries<br />
low-frequency special effects which are only added to<br />
certain scenes. This setting is effective when the input<br />
signal contains the LFE channel.<br />
Control range: –20 to 0 dB<br />
Control step: 1 dB<br />
Speaker SPEAKER<br />
Adjusts the speaker LFE level.<br />
Headphone HEADPHONE<br />
Adjusts the headphone LFE level.<br />
Note<br />
1 SOUND MENU<br />
D)CENTER GEQ<br />
TEST >OFF ON<br />
. 100Hz ;;;;;; 0dB<br />
300Hz ;;;;;; 0dB<br />
1kHz ;;;;;; 0dB<br />
3kHz ;;;;;; 0dB<br />
10kHz ;;;;;; 0dB<br />
[ ]/[ ]:Up/Down<br />
[ p ]/[ [ ]:Adjust<br />
p<br />
1 SOUND MENU<br />
p<br />
E)LFE LEVEL<br />
. SPEAKER;;;;;;0dB<br />
HEADPHONE;;;;0dB<br />
[ ]/[ ]:Up/Down<br />
[ p ]/[ [ ]:Adjust<br />
p<br />
p<br />
Depending on the settings of “LFE/BASS OUT” (see page 51),<br />
some signals may not be output at the SUBWOOFER OUTPUT<br />
jack.<br />
SET MENU<br />
■ Dynamic range F)DYNAMIC RANGE<br />
Use this feature to select the amount of dynamic range<br />
compression to be applied to your speakers or<br />
headphones. This setting is effective only when this unit is<br />
decoding Dolby Digital and DTS signals.<br />
1 SOUND MENU<br />
F)DYNAMIC RANGE<br />
. SPEAKER;;;;;;MAX<br />
HEADPHONE;;;;MAX<br />
[ ]/[ ]:Up/Down<br />
[ p ]/[ [ ]:Adjust<br />
p<br />
Speaker SPEAKER<br />
Adjusts the speaker compression.<br />
p<br />
Headphone HEADPHONE<br />
Adjusts the headphone compression.<br />
Choices: MIN, STD, MAX<br />
Select “MIN” (minimum) if you regularly listen at low<br />
volume levels.<br />
Select “STD” (standard) for general use.<br />
Select “MAX” (maximum) to preserve the greatest<br />
amount of dynamic range.<br />
■ Audio settings G)AUDIO SET<br />
Use this feature to adjust the overall audio settings of this<br />
unit.<br />
1 SOUND MENU<br />
G)AUDIO SET<br />
. MUTE TYPE;;;FULL<br />
A.DELAY;;;;;;0ms<br />
MAX VOL.;;;+16dB<br />
INIT.VOL.;;;;OFF<br />
[ ]/[ ]:Up/Down<br />
[ p ]/[ [ ]:Select<br />
p<br />
p<br />
Mute type MUTE TYPE<br />
Use this feature to adjust how much the mute function<br />
reduces the output volume (see page 34).<br />
Choices: FULL, –20dB<br />
Select “FULL” to completely mute all the audio<br />
output.<br />
Select “–20dB” to reduce the current volume by 20 dB.<br />
Audio delay A.DELAY<br />
Use this feature to delay the sound output and synchronize<br />
it with the video image. This may be necessary when<br />
using certain LCD monitors or projectors.<br />
Control range: 0 to 160 ms<br />
Control step: 1 ms<br />
53 En<br />
ADVANCED<br />
OPERATION<br />
English
SET MENU<br />
Maximum volume MAX VOL.<br />
Use this feature to set the maximum volume level. This<br />
feature is useful to avoid the unexpected loud sound by<br />
mistake. For example, the original volume range is –80 dB<br />
to +16 dB. However, when “MAX VOL.” is set to –5 dB,<br />
the volume range becomes –80 dB to –5 dB.<br />
Control range: –30 dB to +10 dB, +16 dB<br />
Control step: 5 dB<br />
Note<br />
The “MAX VOL.” setting takes priority over the “Initial Volume”<br />
setting. For example, if “INIT.VOL.” is set to –20 dB and “MAX<br />
VOL.” is set to –30 dB, the volume level is automatically set to<br />
–30 dB when you turn on the power of this unit next time.<br />
Initial volume INIT.VOL.<br />
Use this feature to set the volume level when the power of<br />
this unit is turned on.<br />
Choices: OFF, MUTE, –80 dB to +16 dB<br />
Control step: 1 dB<br />
Note<br />
The “MAX VOL.” setting takes priority over the “INIT.VOL.”<br />
setting.<br />
54 En<br />
■ HDMI set H)HDMI SET<br />
Use this feature to select the component to play back<br />
HDMI audio signals.<br />
Support audio SUPPORT AUDIO<br />
Use this feature to select whether to play back HDMI<br />
audio signals on this unit or on another HDMI component<br />
connected to the HDMI OUT jack on the rear panel of this<br />
unit.<br />
Choice Functions<br />
DSP-AX463 Plays back HDMI audio signals on this unit. The<br />
HDMI audio signals input at the HDMI input<br />
jacks of this unit are not output to the HDMI<br />
component connected to the HDMI OUT jack on<br />
the rear panel of this unit.<br />
Other<br />
Notes<br />
1 SOUND MENU<br />
H)HDMI SET<br />
SUPPORT AUDIO:<br />
DSP-AX463<br />
[ p ]/[ [ ]:Select<br />
[ENTER]:Return<br />
Plays back HDMI audio signals on another<br />
HDMI component connected to the HDMI OUT<br />
jack.<br />
This unit transmits audio and video signals input at the HDMI<br />
input jacks to the HDMI out jack only when this unit is turned<br />
on even if “SUPPORT AUDIO” is set to “Other”.<br />
Available audio/video signals depend on the specification of the<br />
connected video monitor. Refer to the instruction manual of<br />
each connected component.
2 INPUT MENU<br />
Use this menu to reassign the input jacks, select the<br />
decoder mode or rename the input source.<br />
■ Input assignment<br />
A)INPUT ASSIGNMENT<br />
Use this feature to assign the input jacks according to the<br />
component to be used if the initial settings of this unit do<br />
not correspond to your needs. Change the following<br />
parameters to reassign the respective jacks and effectively<br />
connect more components.<br />
Once the input jacks are reassigned, you can select the<br />
corresponding component by using OINPUT l / h (or<br />
the input selector buttons (3)).<br />
For COAXIAL INPUT jack 1<br />
COAXIAL IN (1)<br />
Choices: (1) CD, MD/CD-R, DVD, DTV/CBL,<br />
V-AUX, DVR<br />
For OPTICAL INPUT jacks 2 and 3<br />
OPTICAL IN (2)<br />
OPTICAL IN (3)<br />
Choices: (2) CD, MD/CD-R, DVD, DTV/CBL,<br />
V-AUX, DVR<br />
(3) CD, MD/CD-R, DVD, DTV/CBL,<br />
V-AUX, DVR<br />
Note<br />
;<strong>MANUAL</strong> SETUP<br />
2 INPUT MENU<br />
. A)INPUT ASSIGNMENT<br />
B)INPUT RENAME<br />
C)VOLUME TRIM<br />
D)DECODER MODE<br />
E)MULTI CH SET<br />
[ ]/[ ]:Up/Down<br />
[ENTER]:Enter<br />
p<br />
2 INPUT MENU<br />
You cannot select a specific item more than once.<br />
p<br />
A)INPUT ASSIGNMENT<br />
COAXIAL IN<br />
. (1);;;;; DVD<br />
( DVD )<br />
[ p ]/[ [ ]:Select<br />
2 INPUT MENU<br />
A)INPUT ASSIGNMENT<br />
OPTICAL IN<br />
. (2);;;;;DTV/CBL<br />
(DTV/CBL )<br />
(3);;;;; CD<br />
( CD )<br />
[ p ]/[ [ ]:Select<br />
For HDMI jacks 1 and 2<br />
HDMI IN [1]<br />
HDMI IN [2]<br />
Choices: [1] DVD, DTV/CBL, V-AUX, DVR<br />
[2] DVD, DTV/CBL, V-AUX, DVR<br />
SET MENU<br />
■ Input rename B)INPUT RENAME<br />
Use this feature to change the name of the input source<br />
that appears in the OSD and in the front panel display.<br />
1 Press one of the input selector buttons (3)<br />
or DMULTI CH IN to select the input<br />
source you want to change the name of.<br />
2 Press 4AMP and then press 7l / h on the<br />
remote control to place the “_” (underscore)<br />
under the space or the character you want to<br />
edit.<br />
3 Press 7k / n to select the character you<br />
want to use and then press 7l / h to move<br />
to the next space.<br />
Notes<br />
USB<br />
2 INPUT MENU<br />
A)INPUT ASSIGNMENT<br />
HDMI IN<br />
. [IN1];;; DVD<br />
( DVD )<br />
[IN2];;;DTV/CBL<br />
(DTV/CBL )<br />
[ p ]/[ [ ]:Select<br />
2 INPUT MENU<br />
B)INPUT RENAME<br />
DVD -> DVD<br />
[ p ]/[ [ ]:Position<br />
[ ]/[ ]:Chara.<br />
p<br />
CD MD/CD-R TUNER<br />
DVD<br />
V-AUX/DOCK<br />
DTV/CBL DVR<br />
p<br />
or<br />
MULTI CH IN<br />
You can use up to 8 characters for each input.<br />
Press 7n to change the character in the following order,<br />
or press 7k to go in the reverse order:<br />
A to Z, a space, 0 to 9, a space, a to z, a space, symbols (#,<br />
*, –, +, etc.)<br />
55 En<br />
ADVANCED<br />
OPERATION<br />
English
SET MENU<br />
4 Repeat steps 1 through 3 to rename each<br />
input source.<br />
5 Press 7ENTER to exit from “INPUT<br />
RENAME”.<br />
■ Volume trim C)VOLUME TRIM<br />
Use this feature to adjust the output volume of each<br />
source. This is useful if you want to balance the level of<br />
each input source to avoid sudden changes in volume<br />
when switching between input sources.<br />
Choices: CD, MD/CD-R, TUNER, DVD,<br />
DTV/CBL, V-AUX, DVR, DOCK, USB,<br />
MULTI CH<br />
Control range: –6.0 to +6.0 dB<br />
Control step: 1.0 dB<br />
Initial setting: 0.0 dB<br />
Note<br />
You can only adjust the value for DOCK when your iPod is<br />
stationed in the Yamaha Universal Dock connected to this unit.<br />
■ Decoder mode D)DECODER MODE<br />
Decoder select mode<br />
Use this feature to designate the default decoder mode for<br />
the input sources connected to the DIGITAL INPUT jacks<br />
when you turn on the power of this unit.<br />
Choices: AUTO, LAST<br />
Select “AUTO” if you want this unit to automatically<br />
detect the type of input signals and select the<br />
appropriate decoder mode.<br />
Select “LAST” if you want this unit to automatically<br />
select the last decoder mode used the connected input<br />
source.<br />
56 En<br />
2 INPUT MENU<br />
C)VOLUME TRIM<br />
DVD<br />
DVD ;;;;;0.0dB<br />
[ p ]/[ [ ]:Adjust<br />
[RETURN]:Exit<br />
2 INPUT MENU<br />
D)DECODER MODE<br />
. >AUTO LAST<br />
CD ;;;;AUTO<br />
DVD ;;;;AUTO<br />
DTV/CBL ;;;;AUTO<br />
[ ]/[ ]:Up/Down<br />
[ p ]/[ [ ]:Select<br />
p<br />
p<br />
DTS decoder prioritize setting<br />
Choices: AUTO, DTS<br />
Select “AUTO” if you want this unit to automatically<br />
detect input signal types and select the appropriate<br />
input mode.<br />
Select “DTS” when you play back a DTS-CD.<br />
■ Multi channel input setup<br />
E)MULTI CH SET<br />
2 INPUT MENU<br />
E)MULTI CH SET<br />
BGV;;;;;;;;;LAST<br />
[ p ]/[ [ ]:Select<br />
Background Video BGV<br />
Use this feature to select the video source played in the<br />
background of the sources input at the MULTI CH INPUT<br />
jacks.<br />
Choices: DVD, DTV/CBL, V-AUX, DVR, LAST<br />
y<br />
Select “LAST” to set this unit to automatically select the last<br />
selected video source as the background video source.
3 OPTION MENU<br />
Use this menu to adjust the optional system parameters.<br />
;<strong>MANUAL</strong> SETUP<br />
3 OPTION MENU 1/2<br />
. A)DISPLAY SET<br />
B)MEMORY GUARD<br />
C)AUDIO SELECT<br />
D)PARAM. INI<br />
[ ]/[ ]:Up/Down<br />
[ENTER]:Enter<br />
p<br />
p<br />
■ Display settings A)DISPLAY SET<br />
3 OPTION MENU<br />
A)DISPLAY SET<br />
DIMMER;;;;;;;;;0<br />
FL SCROLL;;;CONT<br />
. OSD SHIFT;;;;;;0<br />
OSD-SOURCE;;;30s<br />
OSD-AMP;;;;;;30s<br />
[ ]/[ ]:Up/Down<br />
[ p ]/[ [ ]:Select<br />
p<br />
p<br />
;<strong>MANUAL</strong> SETUP<br />
3 OPTION MENU 2/2<br />
E)BLUETOOTH SET<br />
. F)USB PLAY STYLE<br />
[ ]/[ ]:Up/Down<br />
[ENTER]:Enter<br />
Dimmer DIMMER<br />
Use this feature to adjust the brightness of the front panel<br />
display.<br />
Control range: –4 to 0<br />
Control step: 1<br />
Press 7l to make the front panel display dimmer.<br />
Press 7h to make the front panel display brighter.<br />
Front panel display scroll FL SCROLL<br />
Use this feature to set whether to display the information<br />
(such as a song title or a channel name) in the front panel<br />
display in a continuous manner or by the first 14<br />
alphanumeric characters after scrolling all characters once<br />
when “DOCK” is selected as the input source.<br />
Choices: CONT, ONCE<br />
Select “CONT” to display the operation status in the<br />
front panel display in a continuous manner.<br />
Select “ONCE” to display the operation status in the<br />
front panel display by the first 14 alphanumeric<br />
characters after scrolling all characters once.<br />
OSD shift OSD SHIFT<br />
Use this feature to adjust the vertical position of the OSD.<br />
Control range: –5 (downward) to +5 (upward)<br />
Control step: 1<br />
Initial setting: 0<br />
Press 7l to lower the position of the OSD.<br />
Press 7h to raise the position of the OSD.<br />
p<br />
p<br />
SET MENU<br />
Source feature OSD display time<br />
OSD-SOURCE<br />
Use this feature to set the amount of time to display the<br />
iPod menu in the OSD after you perform a certain<br />
operation.<br />
Choices: ON, 10s, 30s<br />
Select “ON” to display the OSD unceasingly during an<br />
operation.<br />
Select “10s” to turn off the OSD 10 seconds after you<br />
perform a certain operation.<br />
Select “30s” to turn off the OSD 30 seconds after you<br />
perform a certain operation.<br />
Amplifier function OSD display time<br />
OSD-AMP<br />
Use this feature to set the amount of time to display the<br />
status after you perform a certain operation.<br />
Choices: ON, 10s, 30s<br />
Select “ON” to display the OSD constantly during an<br />
operation.<br />
Select “10s” to turn off the OSD 10 seconds after you<br />
perform a certain operation.<br />
Select “30s” to turn off the OSD 30 seconds after you<br />
perform a certain operation.<br />
■ Memory guard B)MEMORY GUARD<br />
Use this feature to prevent accidental changes to DSP<br />
program parameter values and other system settings.<br />
Choices: OFF, ON<br />
Select “OFF” to turn off the “MEMORY GUARD”<br />
feature.<br />
Select “ON” to protect:<br />
– sound field program parameters<br />
– all “SET MENU” items<br />
– all speaker levels<br />
– SCENE template parameters<br />
Note<br />
3 OPTION MENU<br />
B)MEMORY GUARD<br />
>OFF ON<br />
[ p ]/[ [ ]:Select<br />
When “MEMORY GUARD” is set to “ON”, you cannot select<br />
and adjust any other “SET MENU” items.<br />
57 En<br />
ADVANCED<br />
OPERATION<br />
English
SET MENU<br />
■ Audio select C)AUDIO SELECT<br />
Use this feature to designate the default audio input jack<br />
select setting for the input sources when you turn on the<br />
power of this unit.<br />
Choices: AUTO, LAST<br />
Select “AUTO” if you want this unit to automatically<br />
detect the type of input signals and select the<br />
appropriate input mode.<br />
Select “LAST” if you want this unit to automatically<br />
select the last input mode used for the connected input<br />
source (see page 33).<br />
■ Parameter initialization D)PARAM. INI<br />
Use this feature to set all the parameters of the sound field<br />
programs to the initial factory settings.<br />
Choices: NO, YES<br />
Select “NO” to cancel the parameter initialization and<br />
return to the previous menu screen.<br />
Select “YES” and press 7ENTER to set all the sound<br />
field parameters to the initial factory settings.<br />
Notes<br />
You cannot automatically revert to the previous parameter<br />
settings once you initialize the sound field program parameters.<br />
You cannot separately initialize individual sound field<br />
programs.<br />
You cannot initialize any sound field program groups when<br />
“MEMORY GUARD” is set to “ON”.<br />
58 En<br />
3 OPTION MENU<br />
C)AUDIO SELECT<br />
>AUTO LAST<br />
[ p ]/[ [ ]:Select<br />
3 OPTION MENU<br />
D)PARAM. INI<br />
>NO YES<br />
[ p ]/[ [ ]:Select<br />
[ENTER]:Return<br />
■ Bluetooth setting E)BLUETOOTH SET<br />
Use this feature to start pairing the connected Yamaha<br />
Bluetooth adapter (such as YBA-10, sold separately) with<br />
your Bluetooth component. For details about the pairing,<br />
refer to “Pairing the Bluetooth adapter and your<br />
Bluetooth component” on page 46.<br />
To ensure security, a time limit of 8 minutes is set for<br />
the pairing operation. You are recommended to read<br />
and fully understand all the instructions before starting.<br />
1 Press 7ENTER to start pairing.<br />
The connected Bluetooth adapter starts searching<br />
Bluetooth components. “Searching...” appears in the<br />
video monitor.<br />
2 Check that the Bluetooth component detects<br />
the Bluetooth adapter.<br />
If the Bluetooth component the Bluetooth adapter,<br />
“YBA-10 YAMAHA” (example) appears in the<br />
Bluetooth device list.<br />
3 Select the Bluetooth adapter in the Bluetooth<br />
device list and then enter the pass key<br />
“0000” on the Bluetooth component.<br />
Once this unit completes the pairing successfully,<br />
“Pairing completed” appears.<br />
y<br />
To cancel the pairing, press 8RETURN to exit from<br />
“START PAIRING”.<br />
4 Press 8RETURN to exit from “START<br />
PAIRING”.<br />
Notes<br />
3 OPTION MENU<br />
E)BLUETOOTH SET<br />
. START PAIRING<br />
[ENTER]:Enter<br />
If the connected Bluetooth adapter cannot find any Bluetooth<br />
components, “Not found” appears.<br />
If a Bluetooth adapter is not connected to this unit, “No BT<br />
adapter” appears.
■ USB playback styles F)USB PLAY STYLE<br />
Use this feature to adjust the playback style according to<br />
your preference. You can shuffle files in a random order or<br />
repeat one specific file or a sequence of files.<br />
3 OPTION MENU<br />
F)USB PLAY STYLE<br />
REPEAT.......OFF<br />
. SHUFFLE......OFF<br />
[ ]/[ ]:Up/Down<br />
[ p ]/[ [ ]:Select<br />
p<br />
p<br />
Repeat REPEAT<br />
Use this feature to set this unit to repeat one file or a<br />
sequence of files.<br />
Choices: OFF, SINGLE, ALL<br />
Select “OFF” to deactivate this feature.<br />
Select “SINGLE” to set this unit to repeat one file.<br />
Select “ALL” to set this unit to repeat a sequence of<br />
files.<br />
Shuffle SHUFFLE<br />
Use this feature to set this unit to play files or folders in a<br />
random order.<br />
Choices: OFF, ON<br />
Select “OFF” to deactivate this feature.<br />
Select “ON” to set this unit to play files or folders in a<br />
random order.<br />
SET MENU<br />
59 En<br />
ADVANCED<br />
OPERATION<br />
English
Remote control features<br />
In addition to controlling this unit, the remote control can also operate other audiovisual components made by Yamaha<br />
and other manufacturers. To control your TV or other components, you must set up the appropriate remote control code<br />
for each input source (see page 62).<br />
■ Controlling this unit<br />
Press 4AMP to control this unit.<br />
*1 These buttons always control this unit.<br />
*2 These buttons control this unit only when 4AMP is pressed.<br />
60 En<br />
Remote control features<br />
Controlling this unit, a TV, or other components<br />
Notes<br />
AMP<br />
*2<br />
POWER POWER STANDBY POWER<br />
TV AV<br />
USB<br />
DVD DTV/CBL DVR<br />
V-AUX/DOCK C D<br />
AMP TV INPUT TV MUTE TV VOL<br />
BAND LEVEL<br />
TITLE<br />
REC<br />
A B<br />
CD MD/CD-R TUNER<br />
1<br />
RETURN<br />
MEMORY<br />
2<br />
ENTER<br />
SCENE<br />
MUTE<br />
TV CH<br />
MENU VOLUME<br />
DISPLAY<br />
FREQ/TEXT EON MODE - PTY SEEK - START<br />
l PROG h ENHANCER<br />
1 2 3<br />
SUR. DECODE<br />
4<br />
STRAIGHT DIRECT PARAMETER<br />
5 6<br />
NIGHT<br />
7 8<br />
MULTI CH IN AUDIO SEL SLEEP<br />
9 0 10 ENT<br />
3<br />
4<br />
*1<br />
■ Controlling a TV<br />
Press 3DTV/CBL to control your TV. To control your<br />
TV, you must set the appropriate remote control code for<br />
DTV/CBL (see page 62).<br />
Notes<br />
DTV/CBL<br />
*2<br />
POWER POWER STANDBY POWER<br />
TV AV<br />
USB<br />
CD MD/CD-R TUNER<br />
DVD DTV/CBL DVR<br />
V-AUX/DOCK<br />
AMP TV INPUT TV MUTE TV VOL<br />
1<br />
BAND LEVEL<br />
TITLE<br />
RETURN<br />
MEMORY<br />
REC<br />
A B<br />
C D<br />
l PROG h ENHANCER<br />
1 2 3<br />
SUR. DECODE<br />
4<br />
STRAIGHT DIRECT PARAMETER<br />
5 6<br />
NIGHT<br />
7 8<br />
MULTI CH IN AUDIO SEL SLEEP<br />
9 0 10 ENT<br />
*1 These buttons always control your TV regardless of whether<br />
you press 3DTV/CBL or not.<br />
Remote control Digital TV/Cable TV<br />
TV POWER Turns on or off the power.<br />
TV CH +/– Changes the channel number.<br />
ENTER<br />
TV VOL +/–<br />
Increases or decreases the volume<br />
level.<br />
TV INPUT Changes the input source.<br />
TV MUTE Mutes the audio output.<br />
*2 These buttons control your TV only when 3DTV/CBL is<br />
pressed. For details, see the “Digital TV/Cable TV” column on<br />
page 61.<br />
y<br />
You can control more than one TV by setting the appropriate<br />
remote control code for any input source selector buttons other<br />
than 3DTV/CBL. In such a case, you can control the buttons<br />
highlighted above (*1 and *2) when you press the input source<br />
selector button.<br />
2<br />
SCENE<br />
3<br />
MUTE<br />
TV CH<br />
MENU VOLUME<br />
DISPLAY<br />
FREQ/TEXT EON MODE - PTY SEEK - START<br />
4<br />
*1
■ Controlling other components<br />
Press one of the input selector buttons (3) or A to D<br />
buttons to control other components. You must set the<br />
appropriate remote control code for each input source in<br />
advance (see page 62). The following table shows the<br />
function of each control button used to control other<br />
components assigned to each input selector button. Be<br />
advised that some buttons may not correctly operate the<br />
selected component.<br />
y<br />
The remote control has 13 modes (input areas) to control<br />
components so that the remote control can operate up to 13<br />
different components.<br />
When you press one of the optional component control area<br />
buttons (A to D), you can control the desired component<br />
without changing the input source of this unit.<br />
Remote control<br />
DVD player/<br />
recorder<br />
VCR<br />
Digital TV/<br />
Cable TV<br />
POWER POWER STANDBY POWER<br />
TV AV<br />
DVD DTV/CBL DVR<br />
V-AUX/DOCK C D<br />
AMP TV INPUT TV MUTE TV VOL<br />
Remote control features<br />
Notes<br />
*1 This button is operational only when the original remote control supplied with the component has a POWER button.<br />
*2 These buttons operate your DVD recorder only when you set the appropriate remote control code for DVR (see page 62).<br />
[1]<br />
USB<br />
A B<br />
CD MD/CD-R TUNER<br />
1<br />
2<br />
SCENE<br />
3<br />
MUTE<br />
TV CH<br />
LD player CD player<br />
4<br />
[2]<br />
[3]<br />
[4]<br />
[5]<br />
[6]<br />
BAND LEVEL<br />
TITLE<br />
RETURN<br />
MEMORY<br />
REC<br />
ENTER<br />
MENU VOLUME<br />
DISPLAY<br />
FREQ/TEXT EON MODE - PTY SEEK - START<br />
l PROG h ENHANCER<br />
1 2 3<br />
SUR. DECODE<br />
4<br />
STRAIGHT DIRECT PARAMETER<br />
5 6<br />
NIGHT<br />
7 8<br />
MULTI CH IN AUDIO SEL SLEEP<br />
9 0 10 ENT<br />
MD/CD<br />
recorder<br />
[1] AV POWER Power *1 Power *1 Power *2 Power *1 Power *1 Power *1<br />
[2] TITLE Title Band<br />
[3] PRESET/CH k<br />
Up VCR channel up Up<br />
Preset up (1-8)/<br />
Tuning up<br />
PRESET/CH n Down<br />
VCR channel<br />
down<br />
Down<br />
A/B/C/D/E l Left Left<br />
[7]<br />
[8]<br />
[9]<br />
Tuner<br />
Preset down<br />
(1-8)/Tuning<br />
down<br />
Preset down<br />
(A-E)<br />
A/B/C/D/E h Right Right<br />
Preset up<br />
(A-E)<br />
ENTER Enter Enter Hold<br />
[4] RETURN Return Return Memory<br />
[5] REC Disc skip<br />
(player)<br />
Rec (recorder)<br />
Rec Rec *2 Disc skip Rec<br />
p Play Play Play *2 Play Play Play<br />
w<br />
Search<br />
backward<br />
Search backward<br />
f Search forward Search forward<br />
Search backward<br />
*2<br />
Search forward<br />
*2<br />
Search backward Search backward Search backward Information<br />
Search forward Search forward Search forward<br />
e Pause Pause Pause *2 Pause Pause Pause<br />
b Skip backward Skip backward<br />
Skip backward<br />
*2<br />
Skip backward Skip backward Skip backward<br />
a Skip forward Skip forward Skip forward *2 Skip forward Skip forward Skip forward<br />
Audio program<br />
down<br />
Audio program<br />
up<br />
s Stop Stop Stop *2 Stop Stop Stop<br />
[6] 1-9, 0, +10<br />
Numeric buttons Numeric buttons Numeric buttons Numeric buttons Numeric buttons Numeric buttons<br />
Preset stations<br />
(1-8)<br />
[7] MENU Menu Menu Search mode<br />
[8] DISPLAY Display Display Display Display Display Display Display<br />
[9] ENT Title/Index Enter Enter Chapter/Time Index Index Enter<br />
61 En<br />
ADVANCED<br />
OPERATION<br />
English
Remote control features<br />
Setting remote control codes<br />
You can control other components by setting the<br />
appropriate remote control codes. For a complete list of<br />
available remote control codes, refer to “List of remote<br />
control codes” at the end of this manual.<br />
Remote control code default settings<br />
Input<br />
source<br />
Note<br />
You may not be able to operate your Yamaha component even if a<br />
Yamaha remote control code is preset as listed above. In this case,<br />
try setting another Yamaha remote control code.<br />
62 En<br />
Component<br />
category<br />
Manufacturer<br />
Default<br />
code<br />
CD CD Yamaha 5013<br />
MD/CD-R CD-R Yamaha 5001<br />
TUNER TUNER Yamaha 5007<br />
DVD DVD Yamaha 2000<br />
DTV/CBL — — —<br />
V-AUX TUNER Yamaha 5011<br />
DVR DVR Yamaha 2011<br />
USB TUNER Yamaha 5012<br />
A TUNER Yamaha 5009<br />
B TUNER Yamaha 5017<br />
C TUNER Yamaha 5009<br />
D TUNER Yamaha 5017<br />
1 While pressing and holding one of the input<br />
selector buttons (3) on the remote control to<br />
select the input area you want to set up,<br />
press 2AV POWER for more than 3<br />
seconds.<br />
2 Press the numeric buttons (0 to 9) (F) to<br />
enter the four-digit remote control code for<br />
the component to be used.<br />
When the setting succeeds, “RemoteSetup OK”<br />
appears; however, when it does not, “RemoteSetup<br />
NG” appears in the front panel display.<br />
Notes<br />
USB<br />
DVD<br />
A B<br />
CD MD/CD-R TUNER<br />
DTV/CBL DVR<br />
V-AUX/DOCK C D<br />
While holding down<br />
POWER<br />
AV<br />
Press for 3<br />
seconds<br />
If the manufacturer of your component has more than one code,<br />
try each of them until you find the correct one.<br />
If you do not press any buttons within 30 seconds in step 2, the<br />
setup process is canceled. If this happens, repeat the setup<br />
procedure.
This unit has additional menus that are displayed in the<br />
front panel display. The advanced setup menu offers<br />
additional operations to adjust and customize the way this<br />
unit operates. Change the initial settings (indicated in bold<br />
under each parameter) to reflect the needs of your<br />
listening environment.<br />
Notes<br />
Only ASTANDBY/ON, GPROGRAM l / h and<br />
HSTRAIGHT are effective while you are using the advanced<br />
setup menu.<br />
No other operations can be made while you are using the<br />
advanced setup menu.<br />
The advanced setup menu is only available in the front panel<br />
display.<br />
1 Press ASTANDBY/ON to set this unit to the<br />
standby mode.<br />
2 Press and hold FTONE CONTROL and<br />
then press ASTANDBY/ON to turn on this<br />
unit.<br />
This unit turns on, and the advanced setup menu<br />
appears in the front panel display.<br />
3 Press HSTRAIGHT repeatedly to change<br />
the selected parameter setting.<br />
4 Press ASTANDBY/ON to confirm your<br />
selection and set this unit to the standby<br />
mode.<br />
y<br />
The settings you made are reflected next time you turn on this<br />
unit.<br />
Advanced setup<br />
Advanced setup<br />
■ Initializing INIT.<br />
Use this feature to reset all the parameters of this unit to<br />
the initial factory settings (see page 72).<br />
Choices: CANCEL, RESET<br />
Select “CANCEL” not to reset any parameters of this<br />
unit.<br />
Select “RESET” to reset the parameters of this unit.<br />
Notes<br />
This setting completely resets all the parameters of this unit<br />
including the “SET MENU” parameters. However, the<br />
advanced setup menu parameters will not be initialized.<br />
The initial factory settings are activated next time you turn on<br />
this unit.<br />
63 En<br />
ADVANCED<br />
OPERATION<br />
English
Troubleshooting<br />
Refer to the table below when this unit does not function properly. If the problem you are experiencing is not listed below<br />
or if the instruction below does not help, turn off this unit, disconnect the power cable, and contact the nearest authorized<br />
Yamaha dealer or service center.<br />
■ General<br />
64 En<br />
Troubleshooting<br />
Problem Cause Remedy<br />
This unit fails to turn<br />
on or enters the<br />
standby mode soon<br />
after the power is<br />
turned on.<br />
The power cable is not connected or the<br />
plug is not completely inserted.<br />
The protection circuitry has been<br />
activated.<br />
This unit has been exposed to a strong<br />
external electric shock (such as lightning<br />
or strong static electricity).<br />
No sound. Incorrect input or output cable<br />
connections.<br />
No appropriate Audio input jack select has<br />
been set.<br />
Audio input jack select is set to “HDMI”,<br />
“COAX/OPT” or “ANALOG”.<br />
Audio input jack select is set to<br />
“ANALOG” while playing a source<br />
encoded in Dolby Digital or DTS.<br />
No appropriate input source has been<br />
selected.<br />
See<br />
page<br />
Connect the power cable firmly. —<br />
Make sure that all speaker wire connections on this<br />
unit and on all speakers are secure and that the wire<br />
for each connection does not touch anything other<br />
than its respective connection.<br />
Set this unit to the standby mode, disconnect the<br />
power cable, plug it back in after 30 seconds and then<br />
use it normally.<br />
Connect the cables properly. If the problem persists,<br />
the cables may be defective.<br />
11<br />
—<br />
13-18<br />
Set an appropriate Audio input jack select. 33<br />
Set Audio input jack select to “AUTO”. 33<br />
Set Audio input jack select to “AUTO” or<br />
“COAX/OPT”.<br />
Select an appropriate input source with JINPUT<br />
l / h (or the input selector buttons(3)).<br />
Speaker connections are not secure. Secure the connections. 11<br />
The front speakers to be used have not<br />
been selected properly.<br />
Select the front speakers with ESPEAKERS. 32<br />
The volume is turned down. Turn up the volume. —<br />
The sound is muted. Press IMUTE or LVOLUME +/– to resume audio<br />
output and then adjust the volume.<br />
Signals this unit cannot reproduce are<br />
being input from a source component,<br />
such as a CD-ROM.<br />
The HDMI components connected to this<br />
unit do not support the HDCP copy<br />
protection standards.<br />
“SUPPORT AUDIO” is set to “Other” and<br />
“HDMI” audio signals are not being<br />
played back on this unit.<br />
Play a source whose signals can be reproduced by this<br />
unit.<br />
Connect HDMI components that support the HDCP<br />
copy protection standards.<br />
Set “SUPPORT AUDIO” to “DSP-AX463” in<br />
“<strong>MANUAL</strong> SETUP”.<br />
33<br />
32<br />
34<br />
—<br />
14<br />
54
Problem Cause Remedy<br />
The sound suddenly<br />
goes off.<br />
Sound is heard from<br />
the speaker on one<br />
side only.<br />
Only the center<br />
speaker outputs<br />
substantial sound.<br />
No sound is heard<br />
from the center<br />
speaker.<br />
No sound is heard<br />
from the surround<br />
speakers.<br />
No sound from the<br />
center, surround<br />
speakers when the<br />
FRONT B speakers<br />
are activated.<br />
No sound is heard<br />
from the subwoofer.<br />
The protection circuitry has been activated<br />
because of a short circuit, etc.<br />
Check that the speaker wires are not touching each<br />
other and then turn this unit back on.<br />
Troubleshooting<br />
The sleep timer has turned off this unit. Turn on this unit, and play the source again. —<br />
The sound is muted. Press IMUTE or LVOLUME +/– to resume audio<br />
output.<br />
Incorrect cable connections. Connect the cables properly. If the problem persists,<br />
the cables may be defective.<br />
Incorrect settings in “SP LEVEL”. Adjust the “SP LEVEL” settings. 40<br />
When playing a monaural source with a<br />
CINEMA DSP program, the source signal<br />
is directed to the center channel, and the<br />
front and surround speakers output effect<br />
sounds.<br />
“CENTER SP” in “SPEAKER SET” is set<br />
to “NONE”.<br />
Some sound field programs do not output<br />
sounds from the center speaker.<br />
“SUR. L/R SP” in “SPEAKER SET” is<br />
set to “NONE”.<br />
This unit is in the “STRAIGHT” mode<br />
and a monaural source is being played<br />
back.<br />
“FRONT B” in “SPEAKER SET” is set to<br />
“ZONE B”.<br />
“LFE/BASS OUT” in “SPEAKER SET”<br />
is set to “FRNT” when a Dolby Digital or<br />
DTS signal is being played.<br />
“LFE/BASS OUT” in “SPEAKER SET”<br />
is set to “SWFR” or “FRNT” when a 2channel<br />
source is being played.<br />
The source does not contain lowfrequency<br />
bass signals.<br />
See<br />
page<br />
—<br />
34<br />
11-18<br />
This is not malfunction. —<br />
Set “CENTER SP” to “SML” or “LRG”. 50<br />
Try another sound field program. 37<br />
Set “SUR. L/R SP” to “SML” or “LRG”. 51<br />
Press BSTRAIGHT so that “STRAIGHT”<br />
disappears from the front panel display.<br />
Set “FRONT B” to “FRONT”. 50<br />
Set “LFE/BASS OUT” to “SWFR” or “BOTH”. 51<br />
Set “LFE/BASS OUT” to “SWFR” or “BOTH”. 51<br />
This is not malfunction. —<br />
38<br />
65 En<br />
ADDITIONAL<br />
INFORMATION<br />
English
Troubleshooting<br />
66 En<br />
Problem Cause Remedy<br />
Dolby Digital or DTS<br />
sources cannot be<br />
played. (Dolby Digital<br />
or DTS indicator in<br />
the front panel<br />
display does not light<br />
up.)<br />
A humming sound is<br />
heard.<br />
The volume level<br />
cannot be increased,<br />
or the sound is<br />
distorted.<br />
The sound effect<br />
cannot be recorded.<br />
A source cannot be<br />
recorded by an<br />
analog component<br />
connected to the<br />
AUDIO OUT (REC)<br />
jacks.<br />
The sound field<br />
parameters and some<br />
other settings of this<br />
unit cannot be<br />
changed.<br />
This unit does not<br />
operate properly.<br />
No sound is heard<br />
from the connected<br />
HDMI component.<br />
“CHECK SP WIRES”<br />
appears in the front<br />
panel display.<br />
There is noise<br />
interference from<br />
digital or radio<br />
frequency equipment.<br />
The picture is<br />
disturbed.<br />
This unit suddenly<br />
enters the standby<br />
mode.<br />
The connected component is not set to<br />
output Dolby Digital or DTS digital<br />
signals.<br />
Audio input jack select is set to<br />
“ANALOG”.<br />
Make an appropriate setting following the operating<br />
instructions for your component.<br />
See<br />
page<br />
Set Audio input jack select to “AUTO”. 33<br />
Incorrect cable connections. Connect the audio cables firmly. If the problem<br />
persists, the cables may be defective.<br />
You are attempting to set the volume level<br />
higher than the maximum volume level.<br />
The component connected to the AUDIO<br />
OUT (REC) jacks of this unit is turned<br />
off.<br />
It is not possible to record the sound effect<br />
with a recording component.<br />
The source component is not connected to<br />
the analog AUDIO IN jacks of this unit.<br />
“MEMORY GUARD” in “OPTION<br />
MENU” is set to “ON”.<br />
The internal microcomputer has been<br />
frozen by an external electric shock (such<br />
as lightning or excessive static electricity)<br />
or by a power supply with low voltage.<br />
The HDMI component does not accept the<br />
multi-channel audio signals.<br />
Adjust “MAX VOL.” setting. 54<br />
Turn on the power of the component. —<br />
This is not malfunction. —<br />
Connect the source component to the analog AUDIO<br />
IN jacks.<br />
—<br />
—<br />
14, 18<br />
Set “MEMORY GUARD” to “OFF”. 57<br />
Disconnect the power cable from the AC wall outlet<br />
and then plug it in again after about 30 seconds.<br />
Convert the multi-channel audio signals to the 2channel<br />
audio signals at the source component such<br />
as a DVD player.<br />
Speaker cables are short-circuited. Make sure all speaker cables are connected correctly. 11<br />
This unit is too close to the digital or highfrequency<br />
equipment.<br />
The video source uses scrambled or<br />
encoded signals to prevent dubbing.<br />
The internal temperature is too high and<br />
the overheat protection circuitry has been<br />
activated.<br />
Move this unit further away from such equipment. —<br />
This in not malfunction. —<br />
Wait about 1 hour for this unit to cool down and then<br />
turn it back on.<br />
—<br />
—<br />
—
■ AUTO SETUP<br />
Before AUTO SETUP<br />
Error message Cause Remedy<br />
Connect MIC! Optimizer microphone is not connected. Connect the supplied optimizer microphone<br />
to the OPTIMIZER MIC jack on the front<br />
panel.<br />
Troubleshooting<br />
Unplug HP! Headphones are connected. Unplug the headphones. —<br />
During AUTO SETUP<br />
Error message Cause Remedy<br />
E-1:NO FRONT SP Front L/R channel signals are not detected. Check the front L/R speaker connections. 11<br />
E-2:NO SUR.SP A surround channel signal is not detected. Check the surround speaker connections. 11<br />
E-4:NOISY Background noise is too loud. Try running “AUTO SETUP” in a quiet<br />
environment.<br />
E-6:NO MIC<br />
E-7:NO SIGNAL<br />
E-8:USER CANCEL<br />
The optimizer microphone was unplugged<br />
during the “AUTO SETUP” procedure.<br />
The optimizer microphone does not detect<br />
test tones.<br />
The “AUTO SETUP” procedure was<br />
cancelled due to user activity.<br />
Turn off noisy electric equipment like air<br />
conditioners or move them away from the<br />
optimizer microphone.<br />
Connect the supplied optimizer microphone<br />
to OPTIMIZER MIC jack on the front<br />
panel.<br />
See<br />
page<br />
23<br />
See<br />
page<br />
—<br />
—<br />
23<br />
Check the microphone setting. 23<br />
Check the speaker connections and<br />
placement.<br />
10, 11,<br />
23<br />
Run “AUTO SETUP” again. 23<br />
E-9:INTERNAL ERROR An internal error occurred. Run “AUTO SETUP” again. 23<br />
67 En<br />
ADDITIONAL<br />
INFORMATION<br />
English
Troubleshooting<br />
After AUTO SETUP<br />
If the “ERROR” or “WARNING” screens appears, check the cause of the problem, then run “AUTO SETUP” again.<br />
If a warning message “W-1”, “W-2”, or “W-3” appears, corrections are made, but they may not be optimal.<br />
If an error message “E-9” occurs repeatedly, please contact a qualified Yamaha service center.<br />
68 En<br />
Warning message Cause Remedy<br />
W-1:OUT OF PHASE<br />
Speaker polarity is not correct. This<br />
message may appear depending on the<br />
speakers even when the speakers are<br />
connected correctly.<br />
W-2:OVER 24m (80ft) The distance between the nearest speaker<br />
and the furthest speaker is out of adjustable<br />
range.<br />
W-3:LEVEL ERROR<br />
Notes<br />
The difference of volume level among<br />
speakers is excessive. (No level correction<br />
is made.)<br />
Check the speaker connections for proper<br />
polarity (+ or –).<br />
Bring the speaker closer to the listening<br />
position.<br />
If “SWFR:TOO LOUD” or “SWFR:TOO<br />
LOW” appears, adjust the output volume of<br />
the subwoofer.<br />
Readjust the speaker installation so that all<br />
speakers are set in locations with similar<br />
conditions.<br />
See<br />
page<br />
12<br />
—<br />
23, 52<br />
Check the speaker connections. 11<br />
Use speakers of similar quality. —<br />
—
■ USB<br />
Problem Cause Remedy<br />
The music files and<br />
directories in the USB<br />
device cannot be<br />
viewed.<br />
The USB device<br />
cannot be recognized.<br />
“Disconnected” is<br />
displayed even when<br />
a USB device is<br />
present.<br />
The music files and directories are placed<br />
in locations other than the FAT area.<br />
You are attempting to browse directory<br />
hierarchies of over 8 levels or a directory<br />
with more than 500 files.<br />
The connected USB device is other than a<br />
USB mass storage class USB memory<br />
device or USB portable audio player.<br />
This unit recognized the USB device as an<br />
illegal device.<br />
Place music files and directories in the FAT area.<br />
Modify the data structure on your USB device.<br />
This unit can recognize only a USB mass storage<br />
class USB memory device (except USB hard disk<br />
drives) or USB portable audio player. Also note that it<br />
cannot recognize certain USB devices even when they<br />
are devices as described above.<br />
Some devices may become easier to recognize when<br />
they are inserted before turning this unit on.<br />
Turn this unit off then on again.<br />
Status message Cause Remedy<br />
Disconnected<br />
Access error<br />
Your USB memory device or USB<br />
portable audio player has been<br />
disconnected from the USB port of this<br />
unit.<br />
There is a problem with the signal path<br />
from your USB memory device or USB<br />
portable audio player to this unit.<br />
This unit cannot access your USB<br />
memory device or USB portable audio<br />
player.<br />
There is a problem with the signal path<br />
from your USB memory device or USB<br />
portable audio player to this unit.<br />
Check the connection between this unit and your<br />
USB memory device or USB portable audio player.<br />
Turn off this unit and reconnect your USB memory<br />
device or USB portable audio player to the USB port<br />
of this unit.<br />
Try resetting your USB memory device or USB<br />
portable audio player.<br />
Troubleshooting<br />
See<br />
page<br />
—<br />
—<br />
42<br />
20<br />
20<br />
See<br />
page<br />
Try another USB memory device or USB portable<br />
audio player. —<br />
Turn off this unit and reconnect your USB memory<br />
device or USB portable audio player to the USB port<br />
of this unit.<br />
Try resetting your USB memory device or USB<br />
portable audio player.<br />
Unable to play No varied data is detected. Try another USB memory device or USB portable<br />
audio player.<br />
—<br />
42<br />
—<br />
42<br />
—<br />
—<br />
69 En<br />
ADDITIONAL<br />
INFORMATION<br />
English
Troubleshooting<br />
■ iPod<br />
Note<br />
In case of a transmission error without a status message appearing in the front panel and in the OSD, check the connection to your iPod<br />
(see page 19).<br />
70 En<br />
Status message Cause Remedy<br />
Loading...<br />
Connect error<br />
Unknown iPod<br />
This unit is in the middle of recognizing<br />
the connection with your iPod.<br />
This unit is in the middle of acquiring<br />
song lists from your iPod.<br />
There is a problem with the signal path<br />
from your iPod to this unit.<br />
The iPod being used is not supported by<br />
this unit.<br />
iPod connected Your iPod is properly stationed in a<br />
Yamaha iPod universal dock (YDS-10,<br />
sold separately) connected to the DOCK<br />
terminal of this unit, and the connection<br />
between your iPod and this unit is<br />
complete.<br />
Disconnected<br />
Unable to play<br />
Your iPod was removed from a Yamaha<br />
iPod universal dock (YDS-10, sold<br />
separately) connected to the DOCK<br />
terminal of this unit.<br />
This unit cannot play back the songs<br />
currently stored on your iPod.<br />
Turn off this unit and reconnect the Yamaha iPod<br />
universal dock to the DOCK terminal of this unit.<br />
See<br />
page<br />
Try resetting your iPod. —<br />
Only iPod (Click and Wheel), iPod nano, and iPod<br />
mini are supported.<br />
Station your iPod back in a Yamaha iPod universal<br />
dock (YDS-10, sold separately) connected to the<br />
DOCK terminal of this unit.<br />
Check that the songs currently stored on your iPod<br />
are playable.<br />
Store some other playable music files on your iPod. —<br />
19<br />
—<br />
19<br />
—
■ Bluetooth<br />
Status message Cause Remedy<br />
Searching...<br />
Completed<br />
Canceled<br />
BT connected<br />
Disconnected<br />
No BT adapter<br />
The Bluetooth adapter and the Bluetooth<br />
component is in the middle of the pairing.<br />
The Bluetooth adapter and the Bluetooth<br />
component is in the middle of establishing<br />
the connection.<br />
The paring is completed.<br />
The paring is canceled.<br />
The connection between the Yamaha<br />
Bluetooth adapter (such as YBA-10, sold<br />
separately) and the Bluetooth component<br />
is established.<br />
The Bluetooth component is disconnected<br />
from the Yamaha Bluetooth adapter (such<br />
as YBA-10, sold separately).<br />
The Bluetooth adapter is not connected to<br />
the DOCK terminal.<br />
Connect the Yamaha Bluetooth adapter (such as<br />
YBA-10, sold separately) to the DOCK terminal.<br />
Troubleshooting<br />
See<br />
page<br />
19<br />
71 En<br />
ADDITIONAL<br />
INFORMATION<br />
English
Troubleshooting<br />
■ Remote control<br />
■ Resetting the system<br />
Use this feature to reset all the parameters of this unit to<br />
the initial factory settings.<br />
1 Press ASTANDBY/ON on the front panel to<br />
set this unit to the standby mode.<br />
2 Press and hold FTONE CONTROL and<br />
then press ASTANDBY/ON to turn on this<br />
unit.<br />
The advanced setup menu appears in the front panel<br />
display.<br />
3 Press GPROGRAM l / h to select “INIT.”.<br />
4 Press HSTRAIGHT repeatedly to select<br />
“RESET”.<br />
Select “CANCEL” to cancel the initialization<br />
procedure without making any changes.<br />
5 Press ASTANDBY/ON to confirm your<br />
selection and set this unit to the standby<br />
mode.<br />
72 En<br />
Problem Cause Remedy<br />
The remote control<br />
does not work nor<br />
function properly.<br />
Wrong distance or angle. The remote control functions within a maximum<br />
range of 6 m (20 ft) and no more than 30 degrees offaxis<br />
from the front panel.<br />
Direct sunlight or lighting (from an<br />
inverter type of fluorescent lamp, etc.) is<br />
striking the remote control sensor of this<br />
unit.<br />
See<br />
page<br />
Reposition this unit. —<br />
The batteries are weak. Replace all batteries. 3<br />
The remote control code is not correctly<br />
set.<br />
Even if the remote control code is<br />
correctly set, there are some models that<br />
do not respond to the remote control.<br />
Set the remote control code correctly using “List of<br />
remote control codes” at the end of this manual.<br />
Try setting another code for the same manufacturer<br />
using “List of remote control codes” at the end of this<br />
manual.<br />
Notes<br />
This procedure completely resets all the parameters of this unit<br />
including the “SET MENU” parameters. However, the<br />
advanced setup menu parameters will not be initialized.<br />
The initial factory settings are activated next time you turn on<br />
this unit.<br />
y<br />
To cancel the initialization procedure at any time without making<br />
any changes, press HSTRAIGHT repeatedly to select<br />
“CANCEL” and then press ASTANDBY/ON.<br />
22<br />
62<br />
62
■ CINEMA DSP<br />
Since the Dolby Surround and DTS systems were<br />
originally designed for use in movie theaters, their effect<br />
is best felt in a theater having many speakers designed for<br />
acoustic effects. Since home conditions, such as room<br />
size, wall material, number of speakers, and so on, can<br />
differ so widely, it is inevitable that there are differences in<br />
the sound heard. Based on a wealth of actually measured<br />
data, Yamaha CINEMA DSP uses Yamaha original sound<br />
field technology to combine Dolby Pro Logic, Dolby<br />
Digital and DTS systems to provide the audiovisual<br />
experience of a movie theater in the listening room of your<br />
own home.<br />
■ Component video signal<br />
With the component video signal system, the video signal<br />
is separated into the Y signal for the luminance and the PB<br />
and PR signals for the chrominance. Color can be<br />
reproduced more faithfully with this system because each<br />
of these signals is independent. The component signal is<br />
also called the “color difference signal” because the<br />
luminance signal is subtracted from the color signal. A<br />
monitor with component input jacks is required in order to<br />
output component signals.<br />
■ Composite video signal<br />
With the composite video signal system, the video signal<br />
is composed of three basic elements of a video picture:<br />
color, brightness and synchronization data. A composite<br />
video jack on a video component transmits these three<br />
elements combined.<br />
■ Dolby Digital<br />
Dolby Digital is a digital surround sound system that gives<br />
you completely independent multi-channel audio. With 3<br />
front channels (front L/R and center), and 2 surround<br />
stereo channels, Dolby Digital provides 5 full-range audio<br />
channels. With an additional channel especially for bass<br />
effects, called LFE (Low Frequency Effect), the system<br />
has a total of 5.1-channels (LFE is counted as 0.1<br />
channel). By using 2-channel stereo for the surround<br />
speakers, more accurate moving sound effects and<br />
surround sound environment are possible than with Dolby<br />
Surround. The wide dynamic range from maximum to<br />
minimum volume reproduced by the 5 full-range channels<br />
and the precise sound orientation generated using digital<br />
sound processing provide listeners with unprecedented<br />
excitement and realism. With this unit, any sound<br />
environment from monaural up to a 5.1-channel<br />
configuration can be freely selected for your enjoyment.<br />
Glossary<br />
Glossary<br />
■ Dolby Pro Logic II<br />
Dolby Pro Logic II is an improved technique used to<br />
decode vast numbers of existing Dolby Surround sources.<br />
This new technology enables a discrete 5-channel<br />
playback with 2 front left and right channels, 1 center<br />
channel, and 2 surround left and right channels instead of<br />
only 1 surround channel for conventional Pro Logic<br />
technology. There are three modes available: “Music<br />
mode” for music sources, “Movie mode” for movie<br />
sources and “Game mode” for game sources.<br />
■ Dolby Surround<br />
Dolby Surround uses a 4-channel analog recording system<br />
to reproduce realistic and dynamic sound effects: 2 front<br />
left and right channels (stereo), a center channel for dialog<br />
(monaural), and a surround channel for special sound<br />
effects (monaural). The surround channel reproduces<br />
sound within a narrow frequency range. Dolby Surround is<br />
widely used with nearly all video tapes and laser discs,<br />
and in many TV and cable broadcasts as well. The Dolby<br />
Pro Logic decoder built into this unit employs a digital<br />
signal processing system that automatically stabilizes the<br />
volume on each channel to enhance moving sound effects<br />
and directionality.<br />
■ DTS Digital Surround<br />
DTS digital surround was developed to replace the analog<br />
soundtracks of movies with a 5.1-channel digital sound<br />
track, and is now rapidly gaining popularity in movie<br />
theaters around the world. DTS, Inc. has developed a<br />
home theater system so that you can enjoy the depth of<br />
sound and natural spatial representation of DTS digital<br />
surround in your home. This system produces practically<br />
distortion-free 5.1-channel sound (technically, left, right<br />
and center channels, 2 surround channels, plus an LFE 0.1<br />
channel as a subwoofer, for a total of 5.1-channels).<br />
73 En<br />
ADDITIONAL<br />
INFORMATION<br />
English
Glossary<br />
■ HDMI<br />
HDMI (High-Definition Multimedia Interface) is the first<br />
industry-supported, uncompressed, all-digital audio/video<br />
interface. Providing an interface between any source (such<br />
as a set-top box or AV receiver) and an audio/video<br />
monitor (such as a digital television), HDMI supports<br />
standard, enhanced or high-definition video as well as<br />
multi-channel digital audio using a single cable. HDMI<br />
transmits all ATSC HDTV standards and supports 8channel<br />
digital audio, with bandwidth to spare to<br />
accommodate future enhancements and requirements.<br />
When used in combination with HDCP (High-bandwidth<br />
Digital Content Protection), HDMI provides a secure<br />
audio/video interface that meets the security requirements<br />
of content providers and system operators. For further<br />
information on HDMI, visit the HDMI website at<br />
“http://www.hdmi.org/”.<br />
■ LFE 0.1 channel<br />
This channel reproduces low-frequency signals. The<br />
frequency range of this channel is from 20 Hz to 120 Hz.<br />
This channel is counted as 0.1 because it only enforces a<br />
low-frequency range compared to the full-range<br />
reproduced by the other 5 channels in Dolby Digital or<br />
DTS 5.1-channel systems.<br />
■ MP3<br />
One of the audio compression methods used by MPEG. It<br />
employs the irreversible compression method, which<br />
achieves a high compression rate by thinning out the data<br />
of hardly audible part to the human ears. It is said to be<br />
capable of compressing the data quantity by about 1/11<br />
(128 kbps) while maintaining a similar audio quality to<br />
music CD.<br />
■ PCM (Linear PCM)<br />
Linear PCM is a signal format under which an analog<br />
audio signal is digitized, recorded and transmitted without<br />
using any compression. This is used as a method of<br />
recording CDs and DVD audio. The PCM system uses a<br />
technique for sampling the size of the analog signal per<br />
very small unit of time. Standing for “Pulse Code<br />
Modulation”, the analog signal is encoded as pulses and<br />
then modulated for recording.<br />
74 En<br />
■ Sampling frequency and number of<br />
quantized bits<br />
When digitizing an analog audio signal, the number of<br />
times the signal is sampled per second is called the<br />
sampling frequency, while the degree of fineness when<br />
converting the sound level into a numeric value is called<br />
the number of quantized bits. The range of rates that can<br />
be played back is determined based on the sampling rate,<br />
while the dynamic range representing the sound level<br />
difference is determined by the number of quantized bits.<br />
In principle, the higher the sampling frequency, the wider<br />
the range of frequencies that can be played back, and the<br />
higher the number of quantized bits, the more finely the<br />
sound level can be reproduced.<br />
■ SILENT CINEMA<br />
Yamaha has developed a natural, realistic sound effect<br />
DSP algorithm for headphones. Parameters for<br />
headphones have been set for each sound field so that<br />
accurate representations of all the sound field programs<br />
can be enjoyed on headphones.<br />
■ Virtual CINEMA DSP<br />
Yamaha has developed a Virtual CINEMA DSP algorithm<br />
that allows you to enjoy DSP sound field surround effects<br />
even without any surround speakers by using virtual<br />
surround speakers. It is even possible to enjoy Virtual<br />
CINEMA DSP using a minimal two-speaker system that<br />
does not include a center speaker.<br />
■ WAV<br />
Windows standard audio file format, which defines the<br />
method of recording the digital data obtained by<br />
converting audio signals. It does not specify the<br />
compression (coding) method so a desired compression<br />
method can be used with it. By default, it is compatible<br />
with the PCM method (no compression) and some<br />
compression methods including the ADPCM method.<br />
■ WMA<br />
An audio compression method developed by Microsoft<br />
Corporation. It employs the irreversible compression<br />
method, which achieves a high compression rate by<br />
thinning out the data of hardly audible part to the human<br />
ears. It is said to be capable of compressing the data<br />
quantity by about 1/22 (64 kbps) while maintaining a<br />
similar audio quality to music CD.
AUDIO SECTION<br />
Minimum RMS Output Power for Front, Center, Surround<br />
1 kHz, 0.9% THD, 6 Ω ....................................................... 105 W<br />
Dynamic Power<br />
IHF, 6/4/2 Ω .......................................................... 100/110/125 W<br />
Maximum Input Signal<br />
CD, etc. Effect On, 1 kHz, 0.5% THD ................... 2.0 V or more<br />
Frequency Response<br />
CD, etc. to Front L/R ............................. 10 Hz to 100 kHz, –3 dB<br />
Total Harmonic Distortion<br />
1 kHz, 50 W, Front L/R, 6 Ω ................................... 0.06% or less<br />
Signal to Noise Ratio (IHF-A Network)<br />
CD (200 mV) to Front L/R, Effect Off ................... 98 dB or more<br />
CD (250 mV) to Front L/R, Effect Off ................. 100 dB or more<br />
Residual Noise (IHF-A Network)<br />
Front L/R ............................................................... 150 µV or less<br />
Channel Separation (1 kHz/10 kHz)<br />
CD, etc. (5.1 kΩ shorted) to Front L/R<br />
................................................................... 60 dB/45 dB or more<br />
Tone Control (Front L/R)<br />
BASS Boost/Cut ................................................... ±10 dB/100 Hz<br />
TREBLE Boost/Cut .............................................. ±10 dB/20 kHz<br />
Headphone Jack Rated Output/Impedance .............. 400 mV/470 Ω<br />
Input Sensitivity/Input Impedance<br />
CD, etc. ................................................................. 200 mV/47 kΩ<br />
MULTI CH INPUT ............................................... 200 mV/47 kΩ<br />
Output Level/Output Impedance<br />
AUDIO OUT (REC) ............................................ 200 mV/1.2 kΩ<br />
SUBWOOFER OUTPUT ............................................ 4 V/1.2 kΩ<br />
Filter Characteristics (fc=40/60/80/90/100/110/120/160/200 Hz)<br />
H.P.F.<br />
(FRONT SP, CENTER SP, SUR. L/R SP:<br />
SMALL/SML) ............................................................12 dB/oct.<br />
L.P.F. (Subwoofer) ......................................................... 24 dB/oct.<br />
Specifications<br />
Specifications<br />
VIDEO SECTION<br />
Video Signal Type (Gray back).................................................. PAL<br />
Signal Level<br />
Composite ................................................................. 1 Vp-p/75 Ω<br />
Component ................... 1 Vp-p/75 Ω (Y), 0.7 Vp-p/75 Ω (PB/PR)<br />
Signal to Noise Ratio ................................................ 50 dB or more<br />
Maximum Input Level........................................... 1.5 Vp-p or more<br />
Frequency Response (MONITOR OUT)<br />
Component Signal .................................... 5 Hz to 60 MHz, –3 dB<br />
GENERAL<br />
Power Supply ....................................................... 230 V AC, 50 Hz<br />
Power Consumption .............................................................. 240 W<br />
Standby Power Consumption ................................................. 0.8 W<br />
Dimensions (W x H x D) ................................. 435 x 151 x 352 mm<br />
(17-1/8” x 5-15/16” x 13-7/8”)<br />
Weight ............................................................. 8.5 kg (18 lbs 12 oz)<br />
* Specifications are subject to change without notice.<br />
75 En<br />
ADDITIONAL<br />
INFORMATION<br />
English
INDEX<br />
■ Numerics<br />
1 SOUND MENU, Manual setup ........ 48<br />
2 INPUT MENU, Manual setup .......... 48<br />
2ch Enhancer, Sound field program .... 37<br />
2ch Stereo, Sound field program ......... 37<br />
3 OPTION MENU ............................... 57<br />
3 OPTION MENU, Manual setup ....... 49<br />
5ch Enhancer, Sound field program .... 37<br />
5ch Stereo, Sound field program ......... 37<br />
■ A<br />
A)DISPLAY SET, Option menu ......... 57<br />
A)INPUT ASSIGNMENT,<br />
Input menu ....................................... 55<br />
A)SPEAKER SET, Sound menu ......... 50<br />
A.DELAY, Audio settings ................... 53<br />
Amplifier function OSD display time,<br />
Display settings ............................... 57<br />
Audio components, Connection ........... 18<br />
Audio delay, Audio settings ................. 53<br />
Audio information ................................ 35<br />
Audio input jacks selection .................. 33<br />
AUDIO jacks ....................................... 13<br />
Audio jacks .......................................... 13<br />
AUDIO SELECT ................................. 33<br />
Audio select, Option menu .................. 58<br />
Audio settings, Sound menu ................ 53<br />
Audio signal flow ................................. 14<br />
AUTO SETUP ..................................... 23<br />
AUTO SETUP, Error message ............ 67<br />
■ B<br />
B)INPUT RENAME, Input menu ....... 55<br />
B)MEMORY GUARD, Option menu .57<br />
B)SPEAKER LEVEL, Sound menu .... 52<br />
Background Video, Multi channel input<br />
setup ................................................. 56<br />
BGV, Multi channel input setup .......... 56<br />
Bluetooth setting, Option menu ........... 58<br />
BT connected,<br />
Bluetooth status message ................. 71<br />
■ C<br />
C)AUDIO SELECT, Option menu ...... 58<br />
C)SP DISTANCE, Sound menu .......... 52<br />
C)VOLUME TRIM, Input menu ......... 56<br />
Canceled, Troubleshooting .................. 71<br />
CD player, Connection ........................ 18<br />
CD recorder, Connection ..................... 18<br />
CENTER SP, Speaker settings ............ 50<br />
Center speaker equalizer, Sound menu 53<br />
Center speaker, Speaker settings ......... 50<br />
Center width, Sound field parameter ... 39<br />
CINEMA DSP indicator ...................... 22<br />
COAXIAL IN (1),<br />
Input assignment .............................. 55<br />
COAXIAL INPUT assignment, Input<br />
assignment ....................................... 55<br />
COAXIAL INPUT jacks ..................... 55<br />
Completed, Bluetooth status message .71<br />
76 En<br />
Index<br />
COMPONENT VIDEO jacks ..............13<br />
Connect error, iPod controlling status<br />
message ............................................70<br />
Connect MIC!,<br />
Auto setup error message .................67<br />
Connecting to the FRONT A<br />
terminals ...........................................12<br />
Connection, Audio components ...........18<br />
Connection, CD player .........................18<br />
Connection, CD recorder .....................18<br />
Connection, DVD player ......................16<br />
Connection, DVD recorder ..................17<br />
Connection, external decoder ...............18<br />
Connection, HDMI ...............................14<br />
Connection, MD recorder ....................18<br />
Connection, Multi-format player .........18<br />
Connection, Power cable ......................20<br />
Connection, PVR .................................17<br />
Connection, set-top boxes ....................17<br />
Connection, VCR .................................17<br />
Connection, Video components ...........15<br />
Connection,<br />
Yamaha iPod universal dock ...........19<br />
Controlling a TV ..................................60<br />
Controlling other components, Remote<br />
control ..............................................61<br />
Controlling this unit,<br />
Remote control .................................60<br />
Creating original SCENE templates ....30<br />
CROSSOVER, Speaker settings ..........51<br />
Crossover, Speaker settings .................51<br />
CT WIDTH,<br />
Sound field parameter ......................39<br />
Current status display ...........................34<br />
■ D<br />
D)CENTER GEQ, Sound menu ...........53<br />
D)DECODER MODE,<br />
Input menu .......................................56<br />
D)PARAM. INI, Option menu .............58<br />
Decoder indicators ...............................21<br />
Decoder mode, Input menu ..................56<br />
Decoder select mode,<br />
Decoder mode ..................................56<br />
DIGITAL AUDIO COAXIAL jacks ...13<br />
DIGITAL AUDIO OPTICAL jacks ....13<br />
DIMENSION, Sound field parameter ..39<br />
Dimension, Sound field parameter .......39<br />
DIMMER, Display settings ..................57<br />
Dimmer, Display settings .....................57<br />
DIRECT ...............................................40<br />
Disconnected,<br />
Bluetooth status message .................71<br />
Disconnected, iPod controlling status<br />
message ............................................70<br />
Display settings, Option menu .............57<br />
DIST .....................................................25<br />
DIST, Auto setup result .......................25<br />
DISTANCE ..........................................24<br />
DISTANCE, Auto setup ......................24<br />
DOCK indicator .................................. 21<br />
DSP LEVEL, Sound field parameter .. 39<br />
DSP level, Sound field parameter ....... 39<br />
DTS decoder prioritize setting, Decoder<br />
mode ................................................ 56<br />
DVD player connection ....................... 16<br />
DVD recorder connection ................... 17<br />
Dynamic range, Sound menu .............. 53<br />
■ E<br />
E)LFE LEVEL, Sound menu .............. 53<br />
E)MULTI CH SET, Input menu .......... 56<br />
E-1:NO FRONT SP,<br />
Auto setup error message ................ 67<br />
E-2:NO SURR.SP,<br />
Auto setup error message ................ 67<br />
E-4:NOISY,<br />
Auto setup error message ................ 67<br />
E-6:NO MIC,<br />
Auto setup error message ................ 67<br />
E-7:NO SIGNAL,<br />
Auto setup error message ................ 67<br />
E-8:USER CANCEL,<br />
Auto setup error message ................ 67<br />
E-9:INTERNAL ERROR,<br />
Auto setup error message ................ 67<br />
Effect level, Sound field parameter ..... 39<br />
ENHANCER indicator ........................ 21<br />
External decoder connection ............... 18<br />
■ F<br />
F)DYNAMIC RANGE,<br />
Sound menu ..................................... 53<br />
Factory presets, Advanced setup ......... 63<br />
FL SCROLL, Display settings ............ 57<br />
FRONT B speaker setting, Speaker<br />
settings ............................................. 50<br />
FRONT B, Speaker settings ................ 50<br />
Front panel display .............................. 21<br />
Front panel display scroll,<br />
Display settings ............................... 57<br />
FRONT SP, Speaker settings .............. 50<br />
Front speakers, Speaker settings ......... 50<br />
■ G<br />
G)AUDIO SET, Sound menu .............. 53<br />
Games, Sound field program ............... 37<br />
■ H<br />
H) HDMI SET, Sound menu ............... 54<br />
Hall, Sound field program ................... 37<br />
HDMI indicator ................................... 21<br />
HDMI set, Sound menu ....................... 54<br />
HDMI, Connection .............................. 14<br />
HEADPHONE, Dynamic range .......... 53<br />
Headphone, Dynamic range ................ 53<br />
HEADPHONE, Low-frequency effect<br />
level ................................................. 53<br />
Headphone,<br />
Low-frequency effect level ............. 53<br />
Headphones ......................................... 34
Headphones indicator .......................... 21<br />
■ I<br />
Infrared window, Remote control ........ 22<br />
INI.VOL., Audio settings .................... 54<br />
Initial volume, Audio settings .............. 54<br />
Input assignment, Input menu .............. 55<br />
Input channel and speaker indicators ... 22<br />
Input channel indicators ....................... 22<br />
Input menu, Manual setup ................... 48<br />
Input rename, Input menu .................... 55<br />
Input source indicators ......................... 21<br />
Input source information display ......... 35<br />
iPod connected, iPod controlling status<br />
message ............................................ 70<br />
iPod control, Status message ............... 70<br />
iPod using ............................................ 44<br />
■ J<br />
Jazz, Sound field program ................... 37<br />
■ L<br />
LFE/BASS OUT, Speaker settings ...... 51<br />
LFE/Bass out, Speaker settings ........... 51<br />
Loading..., iPod controlling status<br />
message ............................................ 70<br />
Low-frequency effect level,<br />
Sound menu ..................................... 53<br />
LVL ...................................................... 25<br />
LVL, Auto setup result ........................ 25<br />
■ M<br />
<strong>MANUAL</strong> SETUP, SET MENU ......... 48<br />
Manual setup, SET MENU .................. 48<br />
MAX VOL., Audio settings ................. 54<br />
Maximum volume, Audio settings ....... 54<br />
MD recorder, Connection .................... 18<br />
Memory guard, Option menu ............... 57<br />
Menu browse mode,<br />
iPod controlling ............................... 45<br />
Movie Dramatic,<br />
Sound field program ........................ 37<br />
Movie Spacious,<br />
Sound field program ........................ 37<br />
MULTI CH INPUT component<br />
selection ........................................... 33<br />
Multi channel input setup,<br />
Input menu ....................................... 56<br />
Multi-channel source<br />
with headphones .............................. 38<br />
Multi-format player connection ........... 18<br />
Multi-information display .................... 22<br />
MUTE .................................................. 34<br />
MUTE indicator ................................... 21<br />
MUTE TYPE, Audio settings .............. 53<br />
Muting .................................................. 34<br />
■ N<br />
Night listening mode ............................ 41<br />
No BT Adapter,<br />
Bluetooth status message ................. 71<br />
Number of speakers ............................. 25<br />
Number of speakers,<br />
Auto setup result .............................. 25<br />
■ O<br />
OPTICAL IN (2),<br />
Input assignment ..............................55<br />
OPTICAL IN (3),<br />
Input assignment ..............................55<br />
OPTICAL INPUT assignment, Input<br />
assignment ........................................55<br />
OPTIMIZER MIC jack, Auto setup .....23<br />
Optimizer microphone .........................23<br />
Optimizer microphone, Auto setup ......23<br />
Optimizing speaker setting ...................23<br />
Option menu, Manual setup .................49<br />
OSD SHIFT, Display settings ..............57<br />
OSD shift, Display settings ..................57<br />
OSD-AMP, Display settings ................57<br />
OSD-SOURCE, Display settings .........57<br />
Other components controlling by remote<br />
control ..............................................61<br />
Other components controlling, Remote<br />
control ..............................................61<br />
■ P<br />
PANORAMA,<br />
Sound field parameter ......................39<br />
Panorama, Sound field parameter ........39<br />
Parameter initialization,<br />
Option menu .....................................58<br />
PCM indicator ......................................21<br />
PHONES jack .......................................34<br />
Play information display,<br />
iPod controlling ................................45<br />
Play information display,<br />
USB controlling ...............................43<br />
Playing video sources<br />
in the background .............................35<br />
PLII Game ............................................38<br />
PLII Movie ...........................................38<br />
PLII Music ...........................................38<br />
Pop/Rock, Sound field program ...........37<br />
Power cable, Connection ......................20<br />
Preset SCENE templates ......................29<br />
PRESET, Advanced setup ....................63<br />
Pro Logic ..............................................38<br />
Pure hi-fi sound ....................................40<br />
PVR connection ...................................17<br />
■ R<br />
Remote control codes ........................... iii<br />
Remote control, Troubleshooting .........72<br />
Rename, SCENE template ...................30<br />
Repeat ...................................................45<br />
Repeat, iPod controlling .......................45<br />
Resetting the system .............................72<br />
■ S<br />
SCENE 1 ................................................7<br />
SCENE template selection ...................27<br />
Searching...,<br />
Bluetooth status message .................71<br />
Selection, Audio input jacks ................33<br />
Selection,<br />
MULTI CH INPUT component .......33<br />
Selection, SCENE template .................27<br />
SET MENU ..........................................48<br />
Index<br />
Setting remote control codes ............... 62<br />
Setting SCENE template input source,<br />
Remote control ................................ 31<br />
Set-top box connection ........................ 17<br />
Shuffle, iPod controlling ..................... 45<br />
SILENT CINEMA ............................... 38<br />
SILENT CINEMA indicator ............... 22<br />
Simple remote mode,<br />
iPod controlling ............................... 44<br />
SIZE ..................................................... 24<br />
SIZE, Auto setup ................................. 24<br />
SLEEP indicator .................................. 22<br />
Sleep timer ........................................... 36<br />
Sound field programs<br />
with headphones .............................. 38<br />
Sound menu, Manual setup ................. 48<br />
Source feature OSD display time, Display<br />
settings ............................................. 57<br />
SP ......................................................... 25<br />
SP A B indicators ................................ 21<br />
SP, Auto setup result ........................... 25<br />
Speaker distance ............................ 24, 25<br />
Speaker distance, Auto setup ............... 24<br />
Speaker distance, Auto setup result ..... 25<br />
Speaker distance, Sound menu ............ 52<br />
Speaker distances, Speaker distance .... 52<br />
Speaker level ....................................... 25<br />
Speaker level adjustment ..................... 40<br />
Speaker level, Auto setup result .......... 25<br />
Speaker level, Sound menu ................. 52<br />
Speaker settings, Sound menu ............. 50<br />
Speaker size ......................................... 24<br />
Speaker size, Auto setup ...................... 24<br />
Speaker wiring ..................................... 24<br />
Speaker wiring, Auto setup ................. 24<br />
Speaker wiring/volume level,<br />
Auto setup ....................................... 24<br />
SPEAKER, Dynamic range ................. 53<br />
Speaker, Dynamic range ...................... 53<br />
SPEAKER,<br />
Low-frequency effect level ............. 53<br />
Speaker, Low-frequency effect level ... 53<br />
Specifications ...................................... 75<br />
STRAIGHT ......................................... 38<br />
Straight ................................................ 38<br />
SUBWOOFER PHASE,<br />
Speaker settings ............................... 51<br />
Subwoofer phase, Speaker settings ..... 51<br />
SUPPORT AUDIO, HDMI set ............ 54<br />
Support audio, HDMI set .................... 54<br />
SUR. L/R SP, Speaker settings ............ 51<br />
Surround left/right speakers, Speaker<br />
settings ............................................. 51<br />
■ T<br />
Test tone, Center speaker equalizer ..... 53<br />
TEST, Center speaker equalizer .......... 53<br />
Tonal quality adjustment ..................... 40<br />
Troubleshooting ................................... 64<br />
Turning off the power .......................... 20<br />
Turning on the power .......................... 20<br />
TV Sports, Sound field program ......... 37<br />
77 En<br />
ADDITIONAL<br />
INFORMATION<br />
English
Index<br />
■ U<br />
Unable to play, iPod controlling status<br />
message ............................................ 70<br />
UNIT, Speaker distance ....................... 52<br />
Unit, Speaker distance ......................... 52<br />
Unknown iPod, iPod controlling status<br />
message ............................................ 70<br />
Unplug HP!,<br />
Auto setup error message ................ 67<br />
USB memory device using, USB portable<br />
audio player using ............................ 42<br />
USB playback operation ...................... 42<br />
USB playback styles ............................ 59<br />
USB, Troubleshooting ......................... 69<br />
■ V<br />
VCR connection ................................... 17<br />
VIDEO AUX jacks, Front panel .......... 19<br />
Video components, Connection ........... 15<br />
Video information ................................ 35<br />
VIDEO jacks ........................................ 13<br />
Video jacks .......................................... 13<br />
Video signal flow ................................. 14<br />
Video sources in the background ......... 35<br />
Virtual CINEMA DSP ......................... 38<br />
VIRTUAL indicator ............................. 22<br />
VOLUME level indicator .................... 21<br />
Volume Trim, Input menu ................... 56<br />
■ W<br />
W-1:OUT OF PHASE,<br />
Auto setup error message ................ 68<br />
W-2:DISTANCE ERROR,<br />
Auto setup error message ................ 68<br />
W-3:LEVEL ERROR,<br />
Auto setup error message ................ 68<br />
WIRING/LEVEL ................................. 24<br />
WIRING/LEVEL, Auto setup ............. 24<br />
■ Y<br />
Yamaha iPod universal dock,<br />
Connection ....................................... 19<br />
Yamaha Parametric Room Acoustic<br />
Optimizer ......................................... 23<br />
YPAO ................................................... 23<br />
YPAO (Yamaha Parametric Room<br />
Acoustic Optimizer) ........................ 23<br />
YPAO indicator ................................... 21<br />
“ESPEAKERS” or “3DVD” (example)<br />
indicates the name of the parts on the front<br />
panel or the remote control. Refer to the<br />
attached sheet or the pages at the end of this<br />
manual for the information about each<br />
position of the parts.<br />
78 En
Limited Guarantee for <strong>Europe</strong>an Economic Area (EEA) and Switzerland<br />
Thank you for having chosen a Yamaha product. In the unlikely event that your Yamaha product needs guarantee service, please contact the dealer from<br />
whom it was purchased. If you experience any difficulty, please contact Yamaha representative office in your country. You can find full details on our<br />
website (http://www.yamaha-hifi.com/ or http://www.yamaha-uk.com/ for U.K. resident).<br />
The product is guaranteed to be free from defects in workmanship or materials for a period of two years from the date of the original purchase. Yamaha<br />
undertakes, subject to the conditions listed below, to have the faulty product or any part(s) repaired, or replaced at Yamaha’s discretion, without any charge<br />
for parts or labour. Yamaha reserves the right to replace a product with that of a similar kind and/or value and condition, where a model has been<br />
discontinued or is considered uneconomic to repair.<br />
Conditions<br />
1. The original invoice or sales receipt (showing date of purchase, product code and dealer’s name) MUST accompany the defective product, along with a<br />
statement detailing the fault. In the absence of this clear proof of purchase, Yamaha reserves the right to refuse to provide free of charge service and the<br />
product may be returned at the customer’s expense.<br />
2. The product MUST have been purchased from an AUTHORISED Yamaha dealer within the <strong>Europe</strong>an Economic Area (EEA) or Switzerland.<br />
3. The product must not have been the subject of any modifications or alterations, unless authorised in writing by Yamaha.<br />
4. The following are excluded from this guarantee:<br />
a. Periodic maintenance and repair or replacement of parts due to normal wear and tear.<br />
b. Damage resulting from:<br />
(1) Repairs performed by the customer himself or by an unauthorised third party.<br />
(2) Inadequate packaging or mishandling, when the product is in transit from the customer. Please note that it is the customer’s responsibility to<br />
ensure the product is adequately packaged when returning the product for repair.<br />
(3) Misuse, including but not limited to (a) failure to use the product for its normal purpose or in accordance with Yamaha’s instructions on the proper<br />
use, maintenance and storage, and (b) installation or use of the product in a manner inconsistent with the technical or safety standards in force in<br />
the country where it is used.<br />
(4) Accidents, lightning, water, fire, improper ventilation, battery leakage or any cause beyond Yamaha’s control.<br />
(5) Defects of the system into which this product is incorporated and/or incompatibility with third party products.<br />
(6) Use of a product imported into the EEA and/or Switzerland, not by Yamaha, where that product does not conform to the technical or safety<br />
standards of the country of use and/or to the standard specification of a product sold by Yamaha in the EEA and/or Switzerland.<br />
(7) Non AV (Audio Visual) related products.<br />
(Products subject to “Yamaha AV Guarantee Statement” are defined in our website at http://www.yamaha-hifi.com/ or<br />
http://www.yamaha-uk.com/ for U.K. resident.)<br />
5. Where the guarantee differs between the country of purchase and the country of use of the product, the guarantee of the country of use shall apply.<br />
6. Yamaha may not be held responsible for any losses or damages, whether direct, consequential or otherwise, save for the repair or replacement of the<br />
product.<br />
7. Please backup any custom settings or data, as Yamaha may not be held responsible for any alteration or loss to such settings or data.<br />
8. This guarantee does not affect the consumer’s statutory rights under applicable national laws in force or the consumer’s rights against the dealer arising<br />
from their sales/purchase contract.<br />
79 En<br />
English
■ Front panel<br />
i<br />
A B C<br />
D<br />
STANDBY<br />
/ON<br />
PHONES<br />
SILENT CINEMA<br />
SPEAKERS<br />
A/B/OFF<br />
TONE CONTROL<br />
l PROGRAM h<br />
STRAIGHT<br />
EFFECT<br />
SCENE<br />
1 2 3 4<br />
DIRECT<br />
l INPUT h<br />
OPTIMIZER MIC<br />
AUDIO SELECT<br />
E F G H I J K<br />
VOLUME<br />
VIDEO AUX USB<br />
VIDEO L AUDIO R
■ Remote control<br />
1<br />
2<br />
3<br />
4<br />
5<br />
6<br />
7<br />
8<br />
9<br />
0<br />
A<br />
B<br />
C<br />
D<br />
E<br />
F<br />
POWER POWER<br />
TV AV<br />
DVD<br />
AMP<br />
REC<br />
TV INPUT<br />
l PROG h<br />
1 2<br />
STANDBY<br />
CD MD/CD-R TUNER<br />
DTV/CBL DVR<br />
V-AUX/DOCK C D<br />
1<br />
BAND LEVEL<br />
TITLE<br />
RETURN<br />
MEMORY<br />
USB A B<br />
2<br />
ENTER<br />
SCENE<br />
TV MUTE<br />
POWER<br />
MUTE<br />
TV CH<br />
TV VOL<br />
MENU VOLUME<br />
DISPLAY<br />
FREQ/TEXT EON MODE - PTY SEEK - START<br />
ENHANCER SUR. DECODE<br />
3 4<br />
STRAIGHT DIRECT NIGHT PARAMETER<br />
5 6 7 8<br />
MULTI CH IN AUDIO SEL SLEEP<br />
9 0 10 ENT<br />
3<br />
4<br />
G<br />
H<br />
I<br />
J<br />
K<br />
L<br />
M<br />
N<br />
O<br />
P<br />
Q<br />
R<br />
ii<br />
APPENDIX
List of remote control codes<br />
Blu-ray player<br />
Samsung 2137<br />
CD player<br />
Yamaha 5000, 5013<br />
CD Recorder<br />
Yamaha 5001<br />
DVD<br />
Acoustic Solutions<br />
2078<br />
Aiwa 2055, 2100<br />
Akai 2096<br />
Akura 2076<br />
Alba 2078, 2086<br />
Apex 2027, 2049<br />
Awa 2078<br />
Axion 2078<br />
Brainwave 2096<br />
Brandt 2073, 2085<br />
Broksonic 2060<br />
Bush 2075, 2078, 2112<br />
Centrex 2077<br />
Classic 2078<br />
Clatronic 2075<br />
Coby 2078<br />
C-Tech 2074<br />
CyberHome 2025, 2079, 2091<br />
Daewoo 2092, 2098<br />
Dansai 2096<br />
Daytek 2080, 2089<br />
DEC 2075<br />
Denon 2030, 2102, 2103<br />
Denver 2075, 2076<br />
Diamond 2074<br />
DK Digital 2094<br />
Dual 2078<br />
D-Vision 2096<br />
DVX 2074<br />
Elta 2096<br />
Euroline 2096<br />
Funai 2052, 2058<br />
Global Solutions2074<br />
Global Sphere 2074<br />
Goodmans 2075, 2077, 2078<br />
Grundig 2077, 2098<br />
H&B 2075<br />
Haaz 2074<br />
HE 2078<br />
Hitachi 2032, 2072<br />
Home Electronics<br />
2078<br />
Innovation 2072<br />
Irradio 2134<br />
JDB 2078<br />
JVC 2033, 2045, 2053,<br />
2073, 2099<br />
Kenwood 2030, 2097<br />
Kingavon 2075<br />
Koda 2075<br />
Lawson 2074<br />
Lenco 2075<br />
LG 2084, 2087<br />
Lifetec 2072<br />
Limit 2074<br />
LogicLab 2074<br />
Luxor 2077<br />
Magnavox 2037, 2073, 2075<br />
Magnum 2072<br />
MBO 2078<br />
iii<br />
Medion 2072<br />
Micromaxx 2072<br />
Micromedia 2073<br />
Microstar 2072<br />
Mitsubishi 2035<br />
Mizuda 2075<br />
Mustek 2078<br />
Naiko 2077<br />
Onkyo 2073, 2135<br />
Orava 2075<br />
P&B 2075<br />
Pacific 2074<br />
Panasonic 2030, 2040, 2054,<br />
2057, 2105, 2110<br />
Philips 2019, 2026, 2046,<br />
2073, 2081, 2090<br />
Pioneer 2036, 2082<br />
Proline 2077<br />
Provision 2075<br />
RCA 2031, 2042, 2050,<br />
2051<br />
Red Star 2076<br />
Reoc 2074<br />
Roadstar 2075, 2078, 2086<br />
Rowa 2077<br />
Saba 2085<br />
Sabaki 2074<br />
Samsung 2032, 2041, 2104,<br />
2113<br />
Sansui 2074<br />
Sanyo 2095<br />
ScanMagic 2078<br />
Scientific Labs 2074<br />
Scott 2088<br />
SEG 2074, 2086<br />
Sharp 2034, 2043, 2059,<br />
2093, 2106<br />
Silva 2076<br />
Singer 2074<br />
Skymaster 2074, 2078<br />
Skyworth 2076<br />
SM Electronic 2074, 2078<br />
Sony 2028, 2029, 2039,<br />
2083, 2107<br />
Soundmaster 2074<br />
Soundmax 2074<br />
Standard 2074<br />
Star Cluster 2074<br />
Starmedia 2075<br />
Supervision 2074, 2078<br />
Sylvania 2052, 2058<br />
Synn 2074<br />
TCM 2072<br />
Teac 2074<br />
Tec 2076<br />
Technics 2030<br />
Technika 2096<br />
Technosonic 2096<br />
Tevion 2072, 2074<br />
Thomson 2085, 2109<br />
Tokai 2076<br />
Toshiba 2026, 2044, 2048,<br />
2056, 2073, 2108,<br />
2111<br />
United 2078<br />
Voxson 2078<br />
Wharfedale 2074<br />
Xlogic 2074<br />
Yakumo 2077<br />
Yamada 2077<br />
Yamaha 2000, 2001, 2003,<br />
2030, 2101<br />
Yukai 2078<br />
Zenith 2038, 2047, 2073<br />
DVD Recorder<br />
Apex 2024<br />
JVC 2070<br />
LG 2071<br />
Panasonic 2020, 2065, 2066,<br />
2067<br />
Philips 2019, 2061, 2062,<br />
2063<br />
Pioneer 2021<br />
RCA 2018<br />
Sony 2022, 2064<br />
Toshiba 2068<br />
Yamaha 2023<br />
Yukai 2069<br />
DVD/LD<br />
Pioneer 2036<br />
DVD/VCR<br />
JVC 1017, 2045<br />
LG 1071, 2087<br />
Panasonic 1020, 1072, 2040,<br />
2105<br />
Philips 1025<br />
RCA 1022, 2042<br />
Samsung 1021, 2041, 2104<br />
Sharp 1023, 1073, 2043,<br />
2106<br />
Sony 1019, 1074, 2039,<br />
2107<br />
Toshiba 1024, 1075, 2044,<br />
2108<br />
Zenith 1026, 2047<br />
DVD-DVR<br />
Panasonic 2067<br />
Pioneer 2114<br />
Samsung 2115<br />
Toshiba 2068<br />
DVR<br />
ABS 2132<br />
Alienware 2132<br />
CyberPower 2132<br />
Dell 2132<br />
DIRECTV 2123, 2128, 2129,<br />
2133<br />
DISH Network 2126, 2127<br />
Dishpro 2126<br />
Echostar 2126, 2127<br />
Expressvu 2126<br />
Gateway 2132<br />
GOI 2126<br />
Hewlett Packard 2132<br />
Hitachi 2008<br />
Howard Computers<br />
2132<br />
HTS 2126<br />
Hughes 2123, 2128<br />
Humax 2123<br />
Hush 2132<br />
iBUYPOWER 2132<br />
JVC 2126, 2127<br />
Linksys 2132<br />
Media Center PC<br />
2132<br />
Microsoft 2132<br />
Mind 2132<br />
Niveus Media 2132<br />
Northgate 2132<br />
Panasonic 2015, 2016, 2017,<br />
2120<br />
Philips 2117, 2121, 2123,<br />
2128<br />
Pioneer 2012, 2013, 2014<br />
Proscan 2129<br />
RCA 2116, 2124, 2129,<br />
2133<br />
ReplayTV 2118, 2119, 2120<br />
Sharp 2009, 2010<br />
Sonic Blue 2119, 2120<br />
Sony 2005, 2006, 2007,<br />
2122, 2130, 2131,<br />
2132<br />
Stack 10 2132<br />
Stack 9 2132<br />
Systemax 2132<br />
Tagar Systems 2132<br />
Tivo 2116, 2121, 2122,<br />
2123, 2130, 2131<br />
Toshiba 2004, 2125, 2132<br />
Touch 2132<br />
UltimateTV 2133<br />
Viewsonic 2132<br />
Voodoo 2132<br />
Yamaha 2011<br />
ZT Group 2132<br />
HD DVD<br />
Toshiba 2136<br />
iPod<br />
Yamaha 5011
LD player<br />
Yamaha 2002<br />
MD<br />
Yamaha 5002, 5003, 5004<br />
TAPE DECK<br />
Yamaha 5005, 5006<br />
TUNER<br />
Yamaha 5007, 5008, 5009,<br />
5010, 5012, 5014,<br />
5015, 5016, 5017,<br />
5018<br />
TV<br />
Acer 0093<br />
Acme 0207<br />
Acura 0208<br />
ADA 0255<br />
ADC 0206<br />
Admiral 0058, 0205, 0206,<br />
0210, 0211<br />
Adyson 0200, 0207<br />
Agashi 0200<br />
Agazi 0206<br />
AGB 0204<br />
Aiko 0127, 0200, 0207,<br />
0208<br />
Aiwa 0028, 0139, 0229,<br />
0237<br />
Akai 0059, 0065, 0127,<br />
0129, 0130, 0200,<br />
0204, 0208, 0209,<br />
0213, 0217, 0218,<br />
0255<br />
Akiba 0209, 0218<br />
Akura 0206, 0209, 0218<br />
Alaron 0200<br />
Alba 0200, 0207, 0208,<br />
0209, 0217, 0218<br />
ALBIRAL 0212<br />
Allstar 0213<br />
Amplivision 0207<br />
Amstrad 0204, 0206, 0208,<br />
0209, 0218<br />
Amtron 0062<br />
Anam 0208<br />
Anam National 0062<br />
Anglo 0208<br />
Anitech 0206, 0208<br />
Ansonic 0203, 0208<br />
AOC 0060, 0061<br />
Apex 0118, 0122, 0132<br />
Arc en Ciel 0216<br />
Arcam 0200<br />
Arcam Delta 0207<br />
Aristona 0213, 0217<br />
ASA 0205, 0211<br />
Asberg 0213<br />
Astra 0208<br />
Asuka 0200, 0206, 0207,<br />
0209, 0218<br />
Atlantic 0200, 0207, 0213,<br />
0217<br />
Atori 0208<br />
Audiosonic 0207, 0208, 0209,<br />
0213, 0216, 0217,<br />
0218<br />
AudioTon 0207<br />
Audiovox 0062<br />
Autovox 0205, 0206, 0207<br />
Awa 0200<br />
Baird 0216<br />
Bang & Olufsen 0205<br />
Basic Line 0208, 0209, 0213,<br />
0218<br />
Bastide 0207<br />
Baur 0217<br />
Beko 0228<br />
Belcor 0060<br />
Bell & Howell 0058, 0064<br />
Benq 0081<br />
Beon 0213, 0217<br />
Bestar 0213<br />
Binatone 0207<br />
Black Star 0214<br />
Blaupunkt 0255<br />
Blue Sky 0209, 0218<br />
Bondstec 0214<br />
Boots 0207<br />
Bradford 0062<br />
Brandt 0216, 0226<br />
Brionvega 0205, 0213, 0217<br />
Britannia 0200, 0207<br />
Brockwood 0060<br />
Broksonic 0138<br />
Bruns 0205<br />
BSR 0215<br />
BTC 0209, 0218<br />
Bush 0177, 0208, 0209,<br />
0210, 0213, 0215,<br />
0216, 0217, 0218,<br />
0230, 0237<br />
Candle 0060, 0061<br />
Capsonic 0206<br />
Cascade 0208<br />
Cathay 0213, 0217<br />
CCE 0127<br />
Celebrity 0059<br />
Centurion 0213, 0217<br />
Century 0205<br />
CGE 0214, 0215<br />
Cimline 0208, 0218<br />
Citizen 0060, 0061, 0062,<br />
0064<br />
City 0208<br />
Clarivox 0212, 0217<br />
Clatronic 0206, 0207, 0208,<br />
0209, 0213, 0214,<br />
0218<br />
CMS 0200<br />
Colortyme 0060, 0061<br />
Concerto 0060, 0061<br />
Concorde 0208<br />
Condor 0200, 0207, 0213<br />
Contec 0200, 0207, 0208<br />
Contec/Cony 0062<br />
Continental Edison<br />
0216<br />
Cosmel 0208<br />
Craig 0062<br />
Crosley 0205, 0214, 0215<br />
Crown 0062, 0063, 0128,<br />
0208, 0213, 0217<br />
CS Electronics 0200, 0207, 0209,<br />
0214, 0218<br />
CTC 0214<br />
Curtis Mathes 0057, 0060, 0061,<br />
0064, 0065<br />
CXC 0062<br />
Cybertron 0209, 0218<br />
Daewoo 0060, 0061, 0120,<br />
0127, 0155, 0193,<br />
0200, 0207, 0208,<br />
0213, 0218, 0238<br />
Dainichi 0200, 0209, 0218<br />
Dansai 0200, 0206, 0213,<br />
0217<br />
Dantax 0217<br />
Daytron 0060, 0061, 0208<br />
De Graaf 0210<br />
Decca 0204, 0207, 0213,<br />
0217<br />
Desmet 0213, 0217<br />
Diamond 0200<br />
Dimensia 0057<br />
Dixi 0208, 0213, 0217<br />
DTS 0208<br />
Dual 0207, 0215, 0216<br />
Dual-Tec 0207, 0208, 0215<br />
Dumont 0060, 0127, 0205,<br />
0207<br />
Durabrand 0126<br />
Dux 0217<br />
Dynatron 0213, 0217<br />
Elbe 0203, 0204, 0212,<br />
0218<br />
Elbe-Sharp 0204<br />
Elcit 0204, 0205<br />
ELECTRO TECH<br />
0208<br />
Electroband 0059<br />
Electrohome 0059, 0060, 0061<br />
Elin 0200, 0207, 0213,<br />
0217<br />
Elite 0209, 0213, 0218<br />
Elman 0215<br />
Elta 0200, 0208<br />
Emerson 0060, 0061, 0062,<br />
0064, 0128, 0205<br />
Envision 0060, 0061<br />
Erres 0213, 0217<br />
ESA 0080<br />
Etron 0208<br />
Euro-Feel 0206<br />
Euroline 0217<br />
Euroman 0200<br />
Euromann 0206, 0207, 0213<br />
Europhon 0200, 0204, 0207,<br />
0213, 0215<br />
Fenner 0208<br />
Ferguson 0212, 0217, 0226<br />
Fidelity 0200, 0207, 0210<br />
Finlandia 0210<br />
Finlux 0204, 0205, 0207,<br />
0213, 0215, 0217<br />
Firstline 0200, 0207, 0208,<br />
0213, 0214<br />
Fisher 0064, 0127, 0128,<br />
0205, 0207, 0215<br />
Flint 0213, 0218<br />
Formenti 0200, 0205, 0207,<br />
0215, 0217<br />
Formenti-Phoenix<br />
0200<br />
Fortress 0205<br />
Frontech 0206, 0208, 0210,<br />
0211, 0214<br />
Fujitsu 0023, 0024, 0025,<br />
0088, 0127<br />
Funai 0033, 0034, 0035,<br />
0036, 0037, 0062,<br />
0206<br />
Futuretech 0062<br />
Gateway 0094<br />
GBC 0208, 0215, 0218<br />
GE 0057, 0060, 0061,<br />
0122, 0147<br />
GEC 0204, 0207, 0211,<br />
0213, 0217<br />
Geloso 0208, 0210, 0215<br />
General Technic 0208<br />
Genexxa 0209, 0211, 0213,<br />
0218<br />
Gibralter 0060<br />
GoldHand 0200<br />
GoldStar 0060, 0061, 0127,<br />
0128, 0200, 0201,<br />
0207, 0208, 0210,<br />
0213, 0214, 0215,<br />
0217<br />
Goodmans 0171, 0201, 0204,<br />
0206, 0208, 0213,<br />
0217, 0240<br />
GPM 0209, 0218<br />
Graetz 0211<br />
Granada 0204, 0207, 0210,<br />
0213, 0217<br />
Grandin 0208, 0209, 0217<br />
Grundig 0128, 0130, 0222,<br />
0236, 0255<br />
Grunpy 0062<br />
Halifax 0200, 0206, 0207<br />
Hallmark 0060, 0061<br />
Hampton 0200, 0207<br />
Hanseatic 0203, 0207, 0208,<br />
0213, 0215, 0217<br />
Hantarex 0204, 0208<br />
Harvard 0062<br />
HCM 0206, 0207, 0208,<br />
0218<br />
Hifivox 0216<br />
Higashi 0200<br />
Hinari 0208, 0209, 0213,<br />
0217, 0218<br />
Hisawa 0209, 0218<br />
Hitachi 0006, 0014, 0015,<br />
0016, 0042, 0060,<br />
0061, 0095, 0105,<br />
0127, 0156, 0179,<br />
0180, 0204, 0207,<br />
0210, 0211, 0215,<br />
0216, 0251<br />
Hornyphon 0213<br />
Hoshai 0209, 0218<br />
Huanyu 0200, 0207<br />
Hygashi 0200, 0207<br />
Hyper 0200, 0207, 0208,<br />
0214, 0215<br />
Hypson 0206, 0207, 0213,<br />
0217<br />
ICE 0127, 0200, 0206,<br />
0207, 0208, 0209,<br />
0213, 0218<br />
ICeS 0200, 0218<br />
IMA 0062<br />
Imperial 0211, 0213, 0214,<br />
0215<br />
Indiana 0213, 0217<br />
Infinity 0063<br />
Ingelen 0211<br />
Ingersol 0208<br />
Inno Hit 0201, 0204, 0207,<br />
0208, 0209, 0213,<br />
0217, 0218<br />
Innovation 0206, 0208<br />
Interbuy 0208, 0214<br />
Interfunk 0205, 0211, 0213,<br />
0214, 0216, 0217<br />
International 0200<br />
Intervision 0206, 0207, 0218<br />
Irradio 0201, 0208, 0209,<br />
0213, 0217, 0218<br />
Isukai 0209, 0218<br />
ITC 0207, 0215<br />
ITS 0200, 0209, 0213,<br />
0218<br />
iv<br />
APPENDIX
ITT 0129, 0208, 0211<br />
ITV 0208, 0217<br />
JBL 0063<br />
JC Penney 0057, 0060, 0061<br />
JCB 0059<br />
Jensen 0060, 0061<br />
JVC 0017, 0018, 0019,<br />
0108, 0136, 0153,<br />
0178, 0190, 0213,<br />
0218<br />
Kaisui 0200, 0207, 0208,<br />
0209, 0218<br />
Kamosonic 0207<br />
Kamp 0200, 0207<br />
Kapsch 0211<br />
Karcher 0207, 0208, 0212,<br />
0217<br />
Kawasho 0059, 0060, 0061,<br />
0200<br />
Kendo 0128, 0210<br />
Kennedy 0215<br />
Kenwood 0060, 0061<br />
Kingsley 0200, 0207<br />
Kloss Novabeam<br />
0062<br />
Kneissel 0203<br />
Kolster 0213<br />
Konka 0209, 0218<br />
Korpel 0213, 0217<br />
Korting 0205<br />
Koyoda 0208<br />
KTV 0062, 0127, 0207<br />
Kyoto 0200, 0212<br />
Lenco 0208<br />
Lenoir 0207, 0208<br />
Lesa 0214<br />
Leyco 0206, 0213, 0217<br />
LG 0016, 0038, 0039,<br />
0127, 0128, 0157,<br />
0158, 0163, 0164,<br />
0166, 0188, 0189,<br />
0200, 0201, 0207,<br />
0208, 0210, 0213,<br />
0214, 0215, 0217<br />
Liesenk 0217<br />
Life 0206, 0208<br />
Lifetec 0206, 0208, 0218<br />
Loewe 0063, 0128, 0203,<br />
0204, 0223, 0227<br />
Loewe Opta 0205, 0213, 0217<br />
Logik 0058<br />
Luma 0210, 0217<br />
Lumatron 0210, 0213, 0217<br />
Lux May 0213<br />
Luxman 0060, 0061<br />
Luxor 0201, 0207, 0210<br />
LXI 0057, 0061, 0063,<br />
0064<br />
Magnadyne 0204, 0205, 0214,<br />
0215, 0217<br />
Magnafon 0200, 0204, 0207<br />
Magnavox 0060, 0061, 0063,<br />
0102, 0103, 0150<br />
Magnum 0206, 0208<br />
Majestic 0058<br />
Mandor 0206<br />
Manesth 0206, 0207, 0213,<br />
0217<br />
Marantz 0060, 0061, 0063,<br />
0090, 0213, 0217<br />
Marelli 0205<br />
Mark 0200, 0213, 0217<br />
Matsui 0204, 0207, 0208,<br />
0210, 0213, 0217<br />
Mediator 0213, 0217<br />
v<br />
Medion 0206, 0208<br />
Megatron 0061<br />
Melectronic 0200, 0207, 0208,<br />
0211, 0213, 0216,<br />
0217<br />
Memorex 0058, 0061, 0064,<br />
0208<br />
Memphis 0208<br />
Metz 0205<br />
MGA 0060, 0061<br />
Micromaxx 0206, 0208<br />
Microstar 0206, 0208<br />
Minerva 0204<br />
Minoka 0213<br />
Mitsubishi 0006, 0015, 0016,<br />
0048, 0060, 0061,<br />
0104, 0112, 0113,<br />
0125, 0205, 0213<br />
Mivar 0200, 0201, 0202,<br />
0203, 0204, 0207<br />
Montgomery Ward<br />
0058<br />
MTC 0060, 0061, 0128,<br />
0200<br />
Multi System 0217<br />
Multitech 0062, 0127, 0128,<br />
0200, 0207, 0208,<br />
0210, 0214, 0215,<br />
0217<br />
Murphy 0200, 0207<br />
NAD 0061<br />
Naonis 0210<br />
NEC 0026, 0053, 0060,<br />
0061, 0096, 0127<br />
Neckermann 0205, 0207, 0210,<br />
0213, 0217, 0255<br />
NEI 0213, 0217<br />
Nesco 0214<br />
NET-TV 0082, 0101<br />
New Tech 0208, 0213<br />
New World 0209, 0218<br />
Nicamagic 0200, 0207<br />
Nikkai 0200, 0206, 0207,<br />
0209, 0213, 0217,<br />
0218<br />
Nikko 0061<br />
Nobliko 0200, 0207<br />
Nogamatic 0216<br />
Nokia 0129, 0211<br />
Nordmende 0205, 0211, 0213,<br />
0216<br />
Nordvision 0217<br />
Oceanic 0211<br />
Olevia 0084<br />
ONCEAS 0207<br />
Onwa 0062, 0218<br />
Orbit 0213<br />
Orion 0126, 0204, 0208,<br />
0213, 0217, 0235<br />
Orline 0218<br />
Orsowe 0204<br />
Osaki 0127, 0206, 0207,<br />
0209, 0218<br />
Osio 0201<br />
Oso 0209, 0218<br />
Osume 0218<br />
Otto Versand 0204, 0207, 0213,<br />
0215, 0216, 0217,<br />
0255<br />
Pael 0200, 0207<br />
Palladium 0207<br />
Panama 0200, 0206, 0207,<br />
0208<br />
Panasonic 0006, 0007, 0063,<br />
0073, 0074, 0097,<br />
0110, 0114, 0137,<br />
0141, 0151, 0162,<br />
0165, 0186, 0204,<br />
0211, 0244, 0245,<br />
0246, 0254<br />
Pathe Cinema 0200, 0203, 0207,<br />
0212, 0215<br />
Pathe Marconi 0212, 0216<br />
Pausa 0208<br />
Perdio 0200<br />
Philco 0060, 0061, 0063,<br />
0128, 0205, 0214,<br />
0215<br />
Philharmonic 0207<br />
Philips 0040, 0060, 0063,<br />
0072, 0115, 0116,<br />
0124, 0130, 0150,<br />
0175, 0184, 0187,<br />
0205, 0207, 0213,<br />
0215, 0217, 0220,<br />
0221, 0232, 0233,<br />
0252, 0253<br />
Philips Magnavox<br />
0124<br />
Phoenix 0200, 0205, 0213,<br />
0217<br />
Phonola 0200, 0205, 0213,<br />
0217<br />
Pilot 0060<br />
Pioneer 0012, 0013, 0060,<br />
0061, 0098, 0109,<br />
0117, 0128, 0181,<br />
0182, 0194, 0195,<br />
0211, 0213, 0216,<br />
0217, 0250<br />
Plantron 0206, 0213<br />
Polaroid 0075<br />
Poppy 0208<br />
Portland 0060, 0061<br />
Prandoni-Prince 0204, 0210<br />
Precision 0207<br />
Prima 0208, 0211<br />
Profex 0208<br />
Profi-Tronic 0213<br />
Proline 0213<br />
Proscan 0057<br />
Prosonic 0200, 0207, 0217<br />
Protech 0206, 0207, 0208,<br />
0213, 0214, 0215,<br />
0217<br />
Proton 0060, 0061<br />
Provision 0217<br />
Pulsar 0060<br />
Pye 0213, 0217<br />
Pymi 0208<br />
Quasar 0152, 0214<br />
Quelle 0201, 0206, 0207,<br />
0213, 0214, 0215,<br />
0217<br />
Radialva 0218<br />
Radio Shack 0064<br />
Radio Shack/Realistic<br />
0057, 0060, 0061,<br />
0062, 0064<br />
Radiola 0213, 0217<br />
Radiomarelli 0204, 0205, 0214<br />
Radiotone 0213<br />
RCA 0057, 0060, 0061,<br />
0091, 0133, 0135,<br />
0147, 0149<br />
Realistic 0064<br />
Revox 0213, 0217<br />
Rex 0206, 0210, 0211<br />
RFT 0203, 0205<br />
Rhapsody 0200<br />
R-Line 0213, 0217<br />
Roadstar 0206, 0208, 0209,<br />
0218, 0237<br />
Robotron 0205<br />
Rowa 0200<br />
RTF 0205<br />
Saba 0204, 0205, 0211,<br />
0216<br />
saccs 0212<br />
Saisho 0204, 0206, 0207,<br />
0208<br />
Salora 0201, 0204, 0210,<br />
0211, 0215<br />
Sambers 0204<br />
Sampo 0060, 0061, 0083,<br />
0101<br />
Samsung 0029, 0030, 0031,<br />
0032, 0044, 0045,<br />
0046, 0047, 0060,<br />
0061, 0065, 0068,<br />
0069, 0071, 0079,<br />
0087, 0127, 0128,<br />
0130, 0144, 0160,<br />
0161, 0170, 0176,<br />
0183, 0185, 0200,<br />
0201, 0206, 0207,<br />
0208, 0213, 0217,<br />
0239, 0241, 0242,<br />
0243<br />
Sandra 0200, 0207<br />
Sansui 0123, 0126, 0213<br />
Sanyo 0020, 0021, 0022,<br />
0049, 0060, 0064,<br />
0127, 0128, 0200,<br />
0203, 0207, 0215<br />
SBR 0217<br />
SCHAUB LORENTZ<br />
0211<br />
Schneider 0207, 0209, 0213,<br />
0215, 0216, 0217,<br />
0218<br />
Scotch 0061<br />
Scott 0060, 0061, 0062<br />
Sears 0057, 0060, 0061,<br />
0064<br />
SEG 0200, 0206, 0207,<br />
0214, 0215, 0217<br />
SEI 0204<br />
SEI-Sinudyne 0204, 0205, 0211<br />
Seleco 0210, 0211, 0215<br />
Sencora 0208<br />
Sentra 0218<br />
Serino 0200<br />
Sharp 0009, 0010, 0011,<br />
0060, 0061, 0066,<br />
0070, 0087, 0111,<br />
0143, 0145, 0167,<br />
0168, 0169, 0198,<br />
0204, 0224, 0247,<br />
0248, 0249<br />
Shogun 0060<br />
Siarem 0204, 0205, 0215<br />
Sicatel 0212<br />
Siemens 0255<br />
Sierra 0213<br />
Signature 0058<br />
Silva 0200<br />
Singer 0205, 0214, 0215<br />
Sinudyne 0204, 0205, 0215,<br />
0217<br />
Skantic 0211<br />
Solavox 0211
Sonoko 0206, 0207, 0208,<br />
0213, 0217<br />
Sonolor 0211<br />
Sontec 0213, 0217<br />
Sony 0041, 0059, 0067,<br />
0085, 0086, 0174,<br />
0196, 0199, 0208,<br />
0219, 0234<br />
Sound & Vision 0209, 0218<br />
Soundesign 0060, 0061, 0062<br />
Soundwave 0213, 0217<br />
SSS 0060, 0062<br />
Standard 0207, 0208, 0209,<br />
0213, 0218<br />
Starlight 0217<br />
Starlite 0062<br />
Stenway 0218<br />
Stern 0210, 0211<br />
Sunkai 0208, 0218<br />
Sunwood 0208, 0213<br />
Superla 0200, 0204, 0207<br />
SuperTech 0200<br />
Supra 0208<br />
Supreme 0059<br />
Susumu 0209<br />
Sutron 0208<br />
Sydney 0200, 0207<br />
Sylvania 0060, 0061, 0063,<br />
0080, 0134, 0142,<br />
0148<br />
Symphonic 0062, 0080<br />
Sysline 0217<br />
Sytong 0200<br />
Tandy 0127, 0207, 0209,<br />
0211, 0218<br />
Tashiko 0200, 0207, 0210<br />
Tatung 0127, 0204, 0207,<br />
0213, 0217, 0237<br />
TCM 0206, 0208<br />
Teac 0127<br />
Tec 0207, 0208, 0214,<br />
0215<br />
Techwood 0060, 0061<br />
Teknika 0058, 0060, 0061,<br />
0062<br />
Teleavia 0216<br />
Telecor 0218<br />
Telefunken 0065, 0213, 0216<br />
Telegazi 0218<br />
Teletech 0208, 0214, 0217<br />
Teleton 0207<br />
Televideon 0200<br />
Tensai 0208, 0209, 0213,<br />
0218<br />
Tesmet 0213<br />
Tevion 0206, 0208<br />
Texet 0200, 0207<br />
Thomson 0191, 0192, 0207,<br />
0213, 0216, 0226<br />
Thorn 0212, 0217<br />
TMK 0060, 0061<br />
Tokai 0213<br />
Tokyo 0200, 0207<br />
Toshiba 0027, 0043, 0053,<br />
0054, 0064, 0078,<br />
0089, 0090, 0106,<br />
0107, 0127, 0131,<br />
0140, 0146, 0159,<br />
0197, 0225, 0231,<br />
0237<br />
Towada 0211, 0215<br />
Transtec 0200<br />
Trident 0204<br />
Tristar 0218<br />
Triumph 0204<br />
Uher 0211, 0213<br />
Ultravox 0200, 0205, 0207,<br />
0214, 0215<br />
United 0217<br />
Universum 0127, 0128, 0129,<br />
0201, 0206, 0213,<br />
0214, 0215, 0217<br />
Univox 0212<br />
Vestel 0210, 0211, 0213,<br />
0214, 0215, 0217<br />
Vexa 0208, 0217<br />
Victor 0213<br />
VIDEOLOGIC 0200<br />
Videologique 0200, 0207, 0209,<br />
0218<br />
Videosat 0214<br />
VideoSystem 0213<br />
Videotechnic 0200<br />
Vidtech 0060, 0061<br />
Viewsonic 0076, 0077, 0092,<br />
0099, 0172, 0173<br />
Visiola 0200, 0207<br />
Vision 0213<br />
Vortec 0213, 0217<br />
Voxson 0205, 0210, 0211,<br />
0213<br />
Waltham 0207, 0212<br />
Wards 0057, 0058, 0060,<br />
0061, 0063<br />
Watson 0213, 0217, 0218<br />
Watt Radio 0200, 0207, 0212,<br />
0215<br />
Wega 0205<br />
Weltblick 0213, 0217<br />
Weston 0215<br />
White Westinghouse<br />
0200, 0207, 0217<br />
Yamaha 0000, 0001, 0002,<br />
0003, 0004, 0005,<br />
0060, 0061<br />
Yamishi 0218<br />
Yoko 0200, 0206, 0207,<br />
0208, 0209, 0213,<br />
0217, 0218<br />
Yorx 0209, 0218<br />
Zanussi 0210<br />
Zenith 0058, 0060, 0100,<br />
0105, 0119, 0121,<br />
0154<br />
TV/DVD<br />
Aiwa 0139, 2055<br />
Apex 0132, 2049<br />
Broksonic 0138, 2060<br />
Bush 0230, 2112<br />
JVC 0136, 2053<br />
Panasonic 0137, 0254, 2054,<br />
2110<br />
RCA 0133, 0135, 2050,<br />
2051<br />
Sylvania 0134, 2052<br />
Thomson 0226, 2109<br />
Toshiba 0131, 0231, 2048,<br />
2111<br />
TV/DVD/VCR<br />
Panasonic 0141, 1040, 2057<br />
Samsung 0241, 1070, 2113<br />
Sharp 0143, 1028, 2059<br />
Sylvania 0142, 1041, 2058<br />
Toshiba 0140, 1029, 2056<br />
TV/VCR<br />
Aiwa 0237, 1066<br />
Bush 0237, 1066<br />
Daewoo 0155, 0238, 1038,<br />
1067<br />
GE 0147, 1030<br />
Goodmans 0240, 1069<br />
Grundig 0236, 1062<br />
Hitachi 0156, 1039<br />
JVC 0153, 1036<br />
Magnavox 0150, 1033<br />
Orion 0235, 1065<br />
Panasonic 0151, 1034<br />
Philips 0150, 0232, 0233,<br />
1033, 1062, 1063<br />
Quasar 0152, 1035<br />
RCA 0149, 1032<br />
Roadstar 0237, 1066<br />
Samsung 0144, 0239, 1027,<br />
1068<br />
Sharp 0145, 1028<br />
Sony 0234, 1064<br />
Sylvania 0148, 1031<br />
Tatung 0237, 1066<br />
Toshiba 0146, 0237, 1029,<br />
1066<br />
Zenith 0154, 1037<br />
VCR<br />
Admiral 1008, 1013<br />
Adventura 1005<br />
Aiwa 1005, 1042, 1043,<br />
1044, 1066<br />
Akai 1007, 1043<br />
Akiba 1050<br />
Akura 1043, 1050<br />
Alba 1044, 1050<br />
American High 1004<br />
Amstrad 1042<br />
Anitech 1050<br />
ASA 1045, 1046<br />
Asha 1002, 1014<br />
Asuka 1042, 1045, 1046,<br />
1050<br />
Audio Dynamics1000<br />
Audiovox 1003<br />
Baird 1042, 1043, 1047<br />
Basic Line 1044, 1050<br />
Baur 1046<br />
Beaumark 1002, 1014<br />
Bell & Howell 1001<br />
Blaupunkt 1046, 1048<br />
Broksonic 1012, 1013<br />
Bush 1044, 1050, 1066<br />
Calix 1003<br />
Candle 1002, 1003<br />
Canon 1004<br />
CCE 1006<br />
CGE 1042, 1043<br />
Cimline 1044, 1050<br />
Citizen 1002, 1003<br />
Colortyme 1000<br />
Colt 1006<br />
Craig 1002, 1003, 1006,<br />
1014<br />
Crown 1050<br />
Curtis Mathes 1000, 1002, 1004,<br />
1009<br />
Cybernex 1002, 1014<br />
Daewoo 1005, 1038, 1061,<br />
1067<br />
Dansai 1050<br />
Dantax 1044<br />
DBX 1000<br />
De Graaf 1046, 1049<br />
Decca 1042, 1043, 1046<br />
Denon 1010<br />
Dimensia 1009<br />
Dual 1043, 1046<br />
Dumont 1042, 1046, 1047,<br />
1049<br />
Dynatech 1005<br />
Electrohome 1003<br />
Electrophonic 1003<br />
Elta 1050<br />
Emerson 1003, 1004, 1005,<br />
1012, 1013<br />
Etzuko 1050<br />
Ferguson 1043<br />
Fidelity 1042<br />
Finlandia 1046, 1047, 1049<br />
Finlux 1042, 1043, 1046,<br />
1047, 1049<br />
FIRST LINE 1044, 1045, 1049,<br />
1050<br />
Fisher 1001, 1047<br />
Flint 1044<br />
Formenti/Phoenix<br />
1046<br />
Fuji 1004<br />
Fujitsu 1042<br />
Funai 1005, 1042<br />
Galaxy 1042<br />
Garrard 1005<br />
GBC 1050<br />
GE 1002, 1004, 1009,<br />
1014, 1030<br />
GEC 1046<br />
Geloso 1050<br />
General Technic 1044, 1048<br />
Go Video 1014<br />
GoldHand 1050<br />
Goldstar 1000, 1003, 1042,<br />
1045<br />
Goodmans 1042, 1045, 1050,<br />
1069<br />
Gradiente 1005<br />
Graetz 1043, 1047<br />
Granada 1046, 1047, 1049<br />
Grandin 1042, 1045, 1050<br />
Grundig 1046, 1050, 1062<br />
Hanseatic 1045, 1046<br />
Harley Davidson1005<br />
Harman/Kardon 1000<br />
Harwood 1006<br />
HCM 1050<br />
Headquarter 1001<br />
Hinari 1044, 1050<br />
Hisawa 1044<br />
Hitachi 1007, 1010, 1039,<br />
1042, 1043, 1046,<br />
1049<br />
Hughes Network Systems<br />
1010<br />
Hypson 1044, 1050<br />
Imperial 1042<br />
Inno Hit 1046, 1050<br />
Innovation 1044, 1048<br />
Instant Replay 1004<br />
Interbuy 1045<br />
Interfunk 1046, 1047<br />
Intervision 1042<br />
Irradio 1045, 1050<br />
ITT 1043, 1047<br />
ITV 1045<br />
JC Penney 1000, 1001, 1002,<br />
1003, 1004, 1006<br />
JCL 1004<br />
Jensen 1007<br />
JVC 1000, 1001, 1007,<br />
1011, 1017, 1036,<br />
1043<br />
Kaisui 1050<br />
vi<br />
APPENDIX
Karcher 1046<br />
Kendo 1044<br />
Kenwood 1000, 1001, 1007,<br />
1011, 1043<br />
KLH 1006<br />
Kodak 1003, 1004<br />
Korpel 1050<br />
Leyco 1050<br />
LG 1003, 1042, 1045,<br />
1071<br />
Lifetec 1044, 1048<br />
Lloyd's 1005<br />
Loewe 1048<br />
Loewe Opta 1045, 1046<br />
Logik 1006, 1050<br />
Luxor 1047<br />
LXI 1003<br />
M Electronic 1042<br />
Magnasonic 1047<br />
Magnavox 1004, 1018, 1033<br />
Magnin 1003, 1014<br />
Manesth 1050<br />
Marantz 1000, 1001, 1004,<br />
1046, 1051<br />
Marta 1003<br />
Matsui 1044, 1045<br />
Matsushita 1004<br />
Mediator 1046<br />
Medion 1044, 1048<br />
MEI 1004<br />
Memorex 1001, 1002, 1003,<br />
1004, 1005, 1008,<br />
1013, 1014, 1042,<br />
1045, 1047<br />
Memphis 1050<br />
Metz 1048<br />
MGA 1014<br />
MGN Technology<br />
1002, 1014<br />
Micromaxx 1044, 1048<br />
Microstar 1044, 1048<br />
Migros 1042<br />
Minolta 1010<br />
Mitsubishi 1011, 1042, 1046<br />
Montgomery Ward<br />
1008<br />
Motorola 1004, 1008<br />
MTC 1002, 1014<br />
Multitech 1002, 1005, 1006,<br />
1042, 1046, 1050<br />
Murphy 1042<br />
National 1048<br />
NEC 1000, 1001, 1007,<br />
1011, 1043, 1051<br />
Neckermann 1043, 1046<br />
NEI 1046<br />
Nesco 1050<br />
Nikko 1003<br />
Noblex 1002, 1014<br />
Nokia 1043, 1047<br />
Nordmende 1043<br />
Oceanic 1042, 1043<br />
Okano 1044<br />
Olympus 1004<br />
Optimus 1003, 1008<br />
Orion 1012, 1013, 1044,<br />
1065<br />
Orson 1042<br />
Osaki 1042, 1045, 1050<br />
Otto Versand 1046<br />
Palladium 1043, 1045, 1050<br />
Panasonic 1004, 1020, 1034,<br />
1040, 1048, 1054,<br />
1072<br />
Pathe Marconi 1043<br />
Penney 1010, 1014<br />
Pentax 1010, 1049<br />
Perdio 1042<br />
Philco 1004, 1051<br />
Philips 1004, 1025, 1033,<br />
1046, 1056, 1057,<br />
1059, 1062, 1063<br />
Philips Magnavox<br />
1018<br />
Phonola 1046<br />
Pilot 1003<br />
Pioneer 1011, 1046<br />
Prinz 1042<br />
Profex 1050<br />
Profitronic 1014<br />
Proline 1042<br />
Proscan 1009<br />
Prosonic 1044<br />
Protec 1006<br />
Pye 1046, 1056<br />
Quarter 1001<br />
Quartz 1001, 1047<br />
Quasar 1004, 1035<br />
Quelle 1042, 1046, 1047<br />
Radio Shack 1003<br />
Radio Shack/Realistic<br />
1001, 1002, 1003,<br />
1004, 1005, 1008<br />
Radiola 1046<br />
Radix 1003<br />
Randex 1003<br />
RCA 1002, 1004, 1009,<br />
1010, 1014, 1015,<br />
1022, 1032<br />
Realistic 1001, 1002, 1003,<br />
1004, 1005, 1008<br />
Rex 1043<br />
RFT 1046<br />
Roadstar 1045, 1050, 1066<br />
Saba 1043<br />
Saisho 1044, 1050<br />
Salora 1047<br />
Samsung 1002, 1014, 1021,<br />
1027, 1052, 1068,<br />
1070<br />
Sanky 1008<br />
Sansui 1007, 1011, 1013,<br />
1043<br />
Sanyo 1001, 1002, 1014,<br />
1047<br />
SBR 1046<br />
Schaub Lorenz 1042, 1043, 1047<br />
Schneider 1042, 1044, 1045,<br />
1046, 1050<br />
Scott 1012<br />
Sears 1001, 1003, 1004,<br />
1010<br />
SEG 1050<br />
SEI-Sinudyne 1046<br />
Seleco 1043<br />
Sentron 1050<br />
Sharp 1008, 1023, 1028,<br />
1053, 1073<br />
Shintom 1006, 1047, 1050<br />
Shivaki 1045<br />
Shogun 1002, 1014<br />
Siemens 1045, 1047<br />
Signature 2000 1008<br />
Silva 1045<br />
Singer 1004, 1006<br />
Sinudyne 1046<br />
Sontec 1045<br />
Sony 1016, 1019, 1055,<br />
1060, 1064, 1074<br />
STS 1004, 1010<br />
Sunkai 1044<br />
YAMAHA ELECTRONICS CORPORATION, USA 6660 ORANGETHORPE AVE., BUENA PARK, CALIF. 90620, U.S.A.<br />
YAMAHA CANADA MUSIC LTD. 135 MILNER AVE., SCARBOROUGH, ONTARIO M1S 3R1, CANADA<br />
YAMAHA ELECTRONIK EUROPA G.m.b.H. SIEMENSSTR. 22-34, 25462 RELLINGEN BEI HAMBURG, GERMANY<br />
YAMAHA ELECTRONIQUE FRANCE S.A. RUE AMBROISE CROIZAT BP70 CROISSY-BEAUBOURG 77312 MARNE-LA-VALLEE CEDEX02, FRANCE<br />
YAMAHA ELECTRONICS (UK) LTD. YAMAHA HOUSE, 200 RICKMANSWORTH ROAD WATFORD, HERTS WD18 7GQ, ENGLAND<br />
YAMAHA SCANDINAVIA A.B. J A WETTERGRENS GATA 1, BOX 30053, 400 43 VÄSTRA FRÖLUNDA, SWEDEN<br />
YAMAHA MUSIC AUSTRALIA PTY. LTD. LEVEL 1, 99 QUEENSBRIDGE STREET, SOUTHBANK, VIC 3006, AUSTRALIA<br />
Sunstar 1042<br />
Suntronic 1042<br />
Sunwood 1050<br />
Sylvania 1004, 1005, 1031,<br />
1041<br />
Symphonic 1005<br />
Taisho 1044<br />
Tandy 1001<br />
Tashiko 1003, 1042<br />
Tatung 1007, 1042, 1043,<br />
1046, 1066<br />
TCM 1044, 1048<br />
Teac 1005, 1007<br />
Technics 1004, 1048<br />
Teknika 1003, 1004, 1005<br />
Teleavia 1043<br />
Telefunken 1043<br />
Tenosal 1050<br />
Tensai 1042, 1045, 1050<br />
Tevion 1044, 1048<br />
Thomson 1043, 1058<br />
Thorn 1043, 1047<br />
TMK 1002, 1014<br />
Tokai 1045, 1050<br />
Tonsai 1050<br />
Toshiba 1013, 1024, 1029,<br />
1043, 1046, 1066,<br />
1075<br />
Totevision 1002, 1003, 1014<br />
Towada 1050<br />
Towika 1050<br />
Uher 1045<br />
Unitech 1002, 1014<br />
Universum 1042, 1045, 1046<br />
Vector Research 1000<br />
Video Concepts 1000<br />
Videon 1044, 1048<br />
Videosonic 1002, 1014<br />
Wards 1002, 1003, 1004,<br />
1005, 1006, 1008,<br />
1010, 1014<br />
Weltblick 1045<br />
White Westinghouse<br />
1013<br />
XR-1000 1004, 1005, 1006<br />
Yamaha 1000, 1001, 1007<br />
Yamishi 1050<br />
Yokan 1050<br />
Yoko 1045, 1050<br />
Zenith 1013, 1026, 1037<br />
© 2008 All rights reserved.<br />
Printed in China WN25770
The circled numbers and alphabets correspond to those in the Owner’s Manual.<br />
■ Front panel<br />
A B C<br />
D<br />
STANDBY<br />
/ON<br />
PHONES<br />
SILENT CINEMA<br />
SPEAKERS<br />
A/B/OFF<br />
TONE CONTROL<br />
l PROGRAM h<br />
STRAIGHT<br />
EFFECT<br />
SCENE<br />
1 2 3 4<br />
DIRECT<br />
l INPUT h<br />
OPTIMIZER MIC<br />
AUDIO SELECT<br />
E F G H I J K<br />
VOLUME<br />
VIDEO AUX USB<br />
VIDEO L AUDIO R<br />
B<br />
DSP-AX463
■ Remote control<br />
1<br />
2<br />
3<br />
4<br />
5<br />
6<br />
7<br />
8<br />
9<br />
0<br />
A<br />
B<br />
C<br />
D<br />
E<br />
F<br />
POWER POWER<br />
TV AV<br />
DVD<br />
AMP<br />
REC<br />
TV INPUT<br />
l PROG h<br />
1 2<br />
STANDBY<br />
CD MD/CD-R TUNER<br />
DTV/CBL DVR<br />
V-AUX/DOCK C D<br />
1<br />
BAND LEVEL<br />
TITLE<br />
RETURN<br />
MEMORY<br />
USB A B<br />
2<br />
ENTER<br />
SCENE<br />
TV MUTE<br />
POWER<br />
MUTE<br />
TV CH<br />
TV VOL<br />
MENU VOLUME<br />
DISPLAY<br />
FREQ/TEXT EON MODE - PTY SEEK - START<br />
ENHANCER SUR. DECODE<br />
3 4<br />
STRAIGHT DIRECT NIGHT PARAMETER<br />
5 6 7 8<br />
MULTI CH IN AUDIO SEL SLEEP<br />
9 0 10 ENT<br />
3<br />
4<br />
G<br />
H<br />
I<br />
J<br />
K<br />
L<br />
M<br />
N<br />
O<br />
P<br />
Q<br />
R<br />
Printed in China<br />
WN26220