
Create successful ePaper yourself
Turn your PDF publications into a flip-book with our unique Google optimized e-Paper software.
FOR SL 110 CARVE ABS:<br />
Connect the Carve-Flex-Mid-plate with tab located under<br />
the heel base plate (pict 10).<br />
pict 10<br />
Place the assembly over the prepared holes and fasten<br />
the screws. Place the toe over the Carve-Flex-Mid-Plate<br />
and the drilled holes and fasten the screws. Tighten the<br />
rear screws first, then the front screws.<br />
FOR TWO PIECE BINDINGS:<br />
Place the binding over the predrilled holes and tighten the<br />
screws.<br />
pict 11<br />
6. FORWARD PRESSURE<br />
Check to make sure the boot meets international standards<br />
and is not damaged.<br />
Place the boot in the binding and close it. The indicating<br />
pointer should rest within the scribed area (pict 12) if not,<br />
you have to adjust the forward pressure.<br />
DON’T OPEN THE LENGTH ADJUSTMENT LOCK AS LONG<br />
AS A SKI BOOT IS FIXED IN THE BINDING.<br />
Place the ski boot in the open binding and rest the boot<br />
heel on the brake pedal. Lift the length adjustment lock<br />
with a screwdriver and slide the heel until the heel cup just<br />
touches the boot. Lock the length adjustment by pushing<br />
it down. Latch the boot in the binding and check forward<br />
pressure again. The toe pincers should not be pressed open<br />
and the indicating pointer should rest within the scribed<br />
area (pict 12).<br />
pict 12<br />
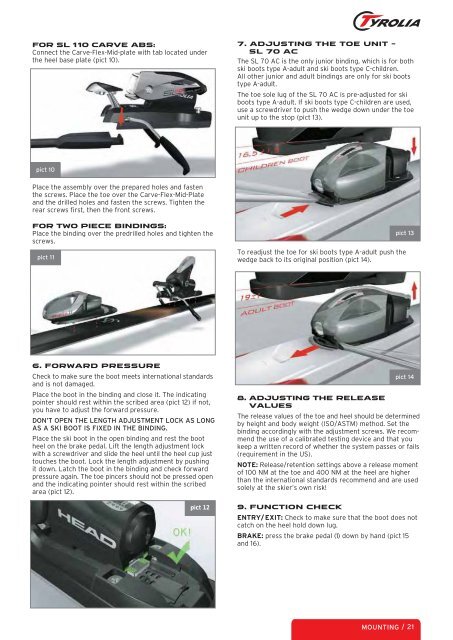
7. ADJUSTING THE TOE UNIT -<br />
SL 70 AC<br />
The SL 70 AC is the only junior binding, which is for both<br />
ski boots type A-adult and ski boots type C-children.<br />
All other junior and adult bindings are only for ski boots<br />
type A-adult.<br />
The toe sole lug of the SL 70 AC is pre-adjusted for ski<br />
boots type A-adult. If ski boots type C-children are used,<br />
use a screwdriver to push the wedge down under the toe<br />
unit up to the stop (pict 13).<br />
To readjust the toe for ski boots type A-adult push the<br />
wedge back to its original position (pict 14).<br />
8. ADJUSTING THE RELEASE<br />
VALUES<br />
pict 13<br />
pict 14<br />
The release values of the toe and heel should be determined<br />
by height and body weight (ISO/ASTM) method. Set the<br />
binding accordingly with the adjustment screws. We recommend<br />
the use of a calibrated testing device and that you<br />
keep a written record of whether the system passes or fails<br />
(requirement in the US).<br />
NOTE: Release/retention settings above a release moment<br />
of 100 NM at the toe and 400 NM at the heel are higher<br />
than the international standards recommend and are used<br />
solely at the skier’s own risk!<br />
9. FUNCTION CHECK<br />
ENTRY/ EXIT: Check to make sure that the boot does not<br />
catch on the heel hold down lug.<br />
BRAKE: press the brake pedal (1) down by hand (pict 15<br />
and 16).<br />
MOUNTING / 21