
Create successful ePaper yourself
Turn your PDF publications into a flip-book with our unique Google optimized e-Paper software.
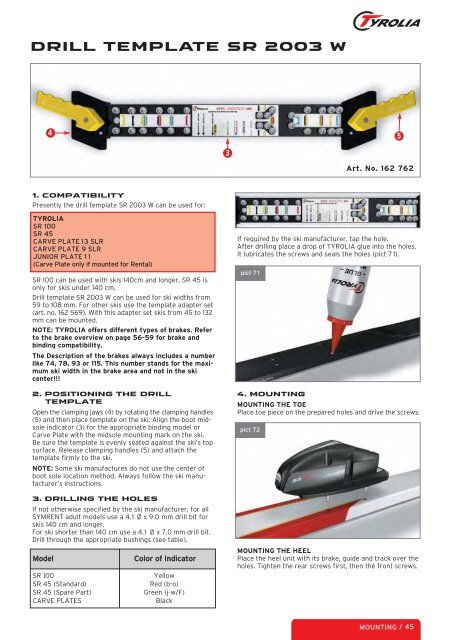
DRILL TEMPLATE SR 2003 W<br />
4 5<br />
1. COMPATIBILITY<br />
Presently the drill template SR 2003 W can be used for:<br />
TYROLIA<br />
SR 100<br />
SR 45<br />
CARVE PLATE 13 SLR<br />
CARVE PLATE 9 SLR<br />
JUNIOR PLATE 1 1<br />
(Carve Plate only if mounted for Rental)<br />
SR 100 can be used with skis 140cm and longer. SR 45 is<br />
only for skis under 140 cm.<br />
Drill template SR 2003 W can be used for ski widths from<br />
59 to 108 mm. For other skis use the template adapter set<br />
(art. no. 162 569). With this adapter set skis from 45 to 132<br />
mm can be mounted.<br />
NOTE: TYROLIA offers different types of brakes. Refer<br />
to the brake overview on page 56-59 for brake and<br />
binding compatibility.<br />
The Description of the brakes always includes a number<br />
like 74, 78, 93 or 115. This number stands for the maximum<br />
ski width in the brake area and not in the ski<br />
center!!!<br />
2. POSITIONING THE DRILL<br />
TEMPLATE<br />
Open the clamping jaws (4) by rotating the clamping handles<br />
(5) and then place template on the ski. Align the boot midsole<br />
indicator (3) for the appropriate binding model or<br />
Carve Plate with the midsole mounting mark on the ski.<br />
Be sure the template is evenly seated against the ski’s top<br />
surface. Release clamping handles (5) and attach the<br />
template firmly to the ski.<br />
NOTE: Some ski manufactures do not use the center of<br />
boot sole location method. Always follow the ski manufacturer’s<br />
instructions.<br />
3. DRILLING THE HOLES<br />
If not otherwise specified by the ski manufacturer, for all<br />
SYMRENT adult models use a 4.1 Ø x 9.0 mm drill bit for<br />
skis 140 cm and longer.<br />
For ski shorter than 140 cm use a 4.1 Ø x 7.0 mm drill bit.<br />
Drill through the appropriate bushings (see table).<br />
Model Color of Indicator<br />
SR 100 Yellow<br />
SR 45 (Standard) Red (b-o)<br />
SR 45 (Spare Part) Green (j-w/F)<br />
CARVE PLATES Black<br />
3<br />
If required by the ski manufacturer, tap the hole.<br />
After drilling place a drop of TYROLIA glue into the holes.<br />
It lubricates the screws and seals the holes (pict 7 1).<br />
pict 7 1<br />
4. MOUNTING<br />
MOUNTING THE TOE<br />
Place toe piece on the prepared holes and drive the screws.<br />
pict 72<br />
Art. No. 162 762<br />
MOUNTING THE HEEL<br />
Place the heel unit with its brake, guide and track over the<br />
holes. Tighten the rear screws first, then the front screws.<br />
MOUNTING / 45