
Create successful ePaper yourself
Turn your PDF publications into a flip-book with our unique Google optimized e-Paper software.
Operator’s Manual<br />
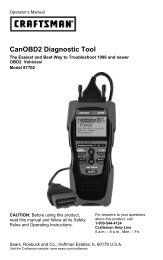
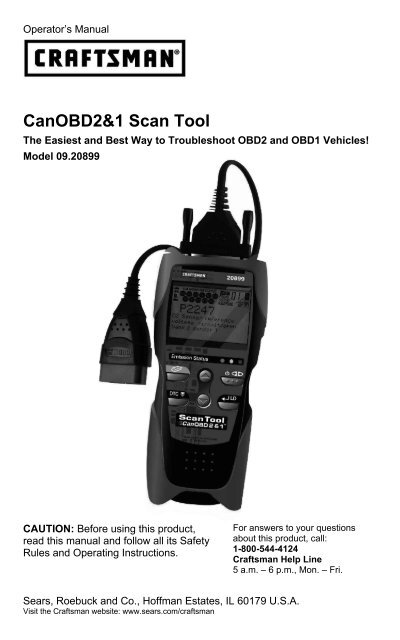
CanOBD2&1 <strong>Scan</strong> <strong>Tool</strong><br />
The Easiest and Best Way to Troubleshoot OBD2 and OBD1 Vehicles!<br />
Model 09.20899<br />
CAUTION: Before using this product,<br />
read this manual and follow all its Safety<br />
Rules and Operating Instructions.<br />
For answers to your questions<br />
about this product, call:<br />
1-800-544-4124<br />
Craftsman Help Line<br />
5 a.m. – 6 p.m., Mon. – Fri.<br />
<strong>Sears</strong>, Roebuck and Co., Hoffman Estates, IL 60179 U.S.A.<br />
Visit the Craftsman website: www.sears.com/craftsman
Table of Contents<br />
INTRODUCTION<br />
WHAT IS OBD? ....................................................................................................... 1<br />
YOU CAN DO IT! ............................................................................................................... 2<br />
SAFETY PRECAUTIONS<br />
SAFETY FIRST! ...................................................................................................... 3<br />
ABOUT THE CANOBD2&1 SCAN TOOL<br />
BATTERY INSTALLATION / REPLACEMENT ....................................................... 5<br />
ADJUSTMENTS/SETTINGS AND DTC LIBRARY ................................................. 5<br />
CANOBD2&1 SCAN TOOL CONTROLS<br />
CONTROLS AND INDICATORS ............................................................................. 10<br />
DISPLAY FUNCTIONS ........................................................................................... 12<br />
VIEWING DTCs IN THE CANOBD2&1 SCAN TOOL’S MEMORY ......................... 13<br />
PREPARATION FOR TESTING<br />
PRELIMINARY VEHICLE DIAGNOSTIC WORKSHEET ........................................ 15<br />
BEFORE YOU BEGIN ............................................................................................. 18<br />
VEHICLE SERVICE MANUALS .............................................................................. 19<br />
GENERAL CODE RETRIEVAL PROCEDURES<br />
OBD1 SYSTEMS .................................................................................................... 20<br />
OBD2 SYSTEMS .................................................................................................... 20<br />
OBD2 SYSTEMS<br />
VEHICLES COVERED ............................................................................................ 21<br />
DIAGNOSTIC TROUBLE CODES (DTCs) .............................................................. 22<br />
CODE RETRIEVAL PROCEDURE ......................................................................... 24<br />
VIEWING ENHANCED DTCs ................................................................................. 30<br />
ERASING DIAGNOSTIC TROUBLE CODES (DTCs) ............................................. 36<br />
I/M READINESS TESTING ...................................................................................... 41<br />
OBD2 LIVE DATA MODE<br />
VIEWING LIVE DATA ............................................................................................. 47<br />
CUSTOMIZING LIVE DATA (PIDs) ......................................................................... 48<br />
RECORDING (CAPTURING) LIVE DATA .............................................................. 49<br />
LIVE DATA PLAYBACK .......................................................................................... 53<br />
GENERIC (GLOBAL) OBD2 PID LIST .............................................................................. 56<br />
ADDITIONAL OBD2 TESTS<br />
O2 SENSOR TEST ................................................................................................. 61<br />
NON-CONTINUOUS TEST ..................................................................................... 63<br />
SYSTEM TEST ....................................................................................................... 64<br />
VEHICLE ID ............................................................................................................ 65<br />
CHRYSLER/JEEP OBD1 SYSTEMS<br />
CHRYSLER/JEEP OBD1 SYSTEMS ...................................................................... 68<br />
VEHICLES COVERED ............................................................................................ 69<br />
INSTRUMENT PANEL INDICATOR LIGHTS ......................................................... 69<br />
DATA LINK CONNECTOR (DLC) ........................................................................... 69<br />
CODE RETRIEVAL PROCEDURE ......................................................................... 70<br />
FORD OBD1 SYSTEMS<br />
FORD COMPUTER SYSTEM OVERVIEW ............................................................ 74<br />
VEHICLES COVERED ............................................................................................ 74<br />
TEST CONNECTORS ............................................................................................. 77<br />
CONNECTING THE CANOBD2&1 SCAN TOOL ................................................... 78<br />
DIAGNOSTIC TROUBLE CODES (DTCs) .............................................................. 78<br />
CODE RETRIEVAL PROCEDURES ....................................................................... 79<br />
ADDITIONAL TESTS FOR EEC-IV SYSTEMS ...................................................... 88<br />
GM OBD1 SYSTEMS<br />
YOUR VEHICLE'S COMPUTER SYSTEM ............................................................. 97<br />
VEHICLES COVERED ............................................................................................ 97<br />
ABOUT THE CANOBD2&1 SCAN TOOL ............................................................... 98<br />
DATA LINK CONNECTOR (DLC) ........................................................................... 98<br />
MALFUNCTION INDICATOR LIGHT (MIL) ............................................................. 98<br />
DIAGNOSTIC TROUBLE CODES (DTC's) ............................................................. 98<br />
CODE RETRIEVAL PROCEDURE ......................................................................... 99<br />
TOYOTA/LEXUS OBD1 SYSTEMS<br />
ON-BOARD VEHICLE DIAGNOSTICS (OBD1) ..................................................... 103<br />
VEHICLES COVERED ............................................................................................ 103<br />
DATA LINK CONNECTOR (DLC) ........................................................................... 106<br />
INSTRUMENT PANEL MALFUNCTION INDICATOR LIGHTS (MIL) ............................. 106<br />
DIAGNOSTIC TROUBLE CODES .......................................................................... 107<br />
CODE RETRIEVAL PROCEDURE ......................................................................... 107<br />
SERVICING DTCS<br />
SERVICING DTCs - OBD I ..................................................................................... 110<br />
ERASING DTCS<br />
ERASING DTCs (OBD I SYSTEMS) ....................................................................... 112<br />
GLOSSARY<br />
GLOSSARY OF TERMS AND ABBREVIATIONS .................................................. 114<br />
WARRANTY AND REPLACEMENT PARTS<br />
CRAFTSMAN TWO YEAR FULL WARRANTY ...................................................... 117<br />
REPLACEMENT PARTS AND TECHNICAL SUPPORT ........................................ 117<br />
i CanOBD2&1
WHAT IS OBD?<br />
Introduction<br />
WHAT IS OBD?<br />
The Enhanced CanOBD2&1 <strong>Scan</strong> <strong>Tool</strong> is designed to work on most<br />
Chrysler, Ford, GM and Toyota OBD1 systems and all OBD2<br />
compliant vehicles.<br />
One of the most exciting improvements in the<br />
automobile industry was the addition of onboard<br />
diagnostics (OBD) on vehicles, or in more<br />
basic terms, the computer that activates the<br />
vehicle’s “CHECK ENGINE” light. OBD1 was<br />
designed to monitor manufacturer-specific<br />
systems on vehicles built from 1981 to 1995.<br />
Then came the development of OBD2, which is on all 1996 cars and<br />
light trucks sold in the United States. These systems are part of a<br />
government mandate to lower vehicle emissions. The sophisticated<br />
programs in the vehicle’s on-board computer system are designed to<br />
detect failures in a range of vehicle systems. Diagnostic information can<br />
be accessed through a Data Link Connector test port specifically<br />
designed for this purpose. For all OBD systems, if a problem is found,<br />
the computer turns on the “CHECK ENGINE” light to warn the driver,<br />
and sets a Diagnostic Trouble Code (DTC) to identify where the problem<br />
occurred. A special diagnostic tool, such as the Enhanced CanOBD2&1<br />
<strong>Scan</strong> <strong>Tool</strong>, is required to retrieve these codes, which consumers and<br />
professionals use as a starting point for repairs.<br />
The Enhanced CanOBD2&1 <strong>Scan</strong> <strong>Tool</strong> provides the additional ability to<br />
retrieve enhanced DTCs from most Chrysler/Jeep, General Motors,<br />
Ford, Mazda and Isuzu vehicles. The types of enhanced data available<br />
depends on the vehicle make.<br />
CanOBD2&1 1
You Can Do It!<br />
EASY TO USE – EASY TO VIEW – EASY TO DEFINE<br />
Easy To Use . . . .<br />
� Connect the CanOBD2&1 <strong>Scan</strong> <strong>Tool</strong> to<br />
the vehicle’s test connector.<br />
� Turn the ignition key "On.”<br />
� Press the POWER/LINK button.<br />
Easy To View . . . .<br />
� The CanOBD2&1 <strong>Scan</strong> <strong>Tool</strong> retrieves<br />
stored codes, as well as Freeze Frame<br />
data and I/M Readiness status (OBD2<br />
systems only).<br />
� Codes, I/M Readiness status and<br />
Freeze Frame data are displayed on the<br />
CanOBD2&1 <strong>Scan</strong> <strong>Tool</strong>’s display<br />
screen. System status is indicated by<br />
LED indicators.<br />
Easy To Define . . . .<br />
� Read code definitions from the<br />
CanOBD2&1 <strong>Scan</strong> <strong>Tool</strong>’s display.<br />
� View Freeze Frame data (OBD2<br />
systems only).<br />
� View, record and playback live data<br />
(OBD2 systems only).<br />
2 CanOBD2&1
SAFETY FIRST!<br />
Safety Precautions<br />
SAFETY FIRST!<br />
This manual describes common test procedures used by<br />
experienced service technicians. Many test procedures<br />
require precautions to avoid accidents that can result in<br />
personal injury, and/or damage to your vehicle or test<br />
equipment. Always read your vehicle's service manual and<br />
follow its safety precautions before and during any test or<br />
service procedure. ALWAYS observe the following general<br />
safety precautions:<br />
When an engine is running, it produces carbon monoxide,<br />
a toxic and poisonous gas. To prevent serious injury or<br />
death from carbon monoxide poisoning, operate the<br />
vehicle ONLY in a well-ventilated area.<br />
P<br />
To avoid personal injury, instrument damage and/or damage<br />
to your vehicle; do not use the CanOBD2&1 <strong>Scan</strong> <strong>Tool</strong><br />
before reading this manual.<br />
R<br />
To protect your eyes from propelled objects as well as hot<br />
or caustic liquids, always wear approved safety eye<br />
protection.<br />
When an engine is running, many parts (such as the<br />
coolant fan, pulleys, fan belt etc.) turn at high speed. To<br />
avoid serious injury, always be aware of moving parts.<br />
Keep a safe distance from these parts as well as other<br />
potentially moving objects.<br />
Engine parts become very hot when the engine is running.<br />
To prevent severe burns, avoid contact with hot engine<br />
parts.<br />
Before starting an engine for testing or troubleshooting,<br />
N<br />
make sure the parking brake is engaged. Put the<br />
L<br />
transmission in park (for automatic transmission) or<br />
neutral (for manual transmission). Block the drive wheels<br />
with suitable blocks.<br />
Connecting or disconnecting test equipment when the<br />
ignition is ON can damage test equipment and the<br />
vehicle's electronic components. Turn the ignition OFF<br />
before connecting the CanODB2&1 <strong>Scan</strong> <strong>Tool</strong> to or<br />
disconnecting the CanODB2&1 <strong>Scan</strong> <strong>Tool</strong> from the<br />
vehicle’s Data Link Connector (DLC).<br />
D<br />
CanOBD2&1 3
Safety Precautions<br />
SAFETY FIRST!<br />
To prevent damage to the on-board computer when taking<br />
vehicle electrical measurements, always use a digital<br />
multimeter with at least 10 megOhms of impedance.<br />
Fuel and battery vapors are highly flammable. To prevent<br />
an explosion, keep all sparks, heated items and open<br />
flames away from the battery and fuel / fuel vapors. DO<br />
NOT SMOKE NEAR THE VEHICLE DURING TESTING.<br />
Don't wear loose clothing or jewelry when working on an<br />
engine. Loose clothing can become caught in the fan,<br />
pulleys, belts, etc. Jewelry is highly conductive, and can<br />
cause a severe burn if it makes contact between a power<br />
source and ground.<br />
4 CanOBD2&1
About the CanOBD2&1 <strong>Scan</strong> <strong>Tool</strong><br />
BATTERY INSTALL/REPLACEMENT - ADJUSTMENTS/SETTINGS & DTC LIBRARY<br />
BATTERY INSTALLATION / REPLACEMENT<br />
Replace batteries when the battery symbol is visible on display<br />
and/or the 3 LEDS are all lit and no other data is visible on screen.<br />
1. Locate the battery cover on the back of the CanOBD2&1 <strong>Scan</strong> <strong>Tool</strong>.<br />
2. Slide the battery cover off (use your fingers).<br />
3. Replace batteries with three AA-size batteries (for longer life, use<br />
Alkaline-type batteries).<br />
4. Reinstall the battery cover on the back of the CanOBD2&1 <strong>Scan</strong> <strong>Tool</strong>.<br />
Language Selection After Battery Installation<br />
The first time the unit is turned on, you must<br />
select the desired display language (English,<br />
French or Spanish) as follows:<br />
1. Press and hold the POWER/LINK<br />
button for approximately 3 seconds to<br />
turn the CanOBD2&1 <strong>Scan</strong> <strong>Tool</strong> “ON.”<br />
� The Select Language screen displays.<br />
2. Use the UP and DOWN buttons, as necessary, to highlight<br />
the desired display language.<br />
3. When the desired display language is selected, press the<br />
ENTER/LD button to confirm your selection.<br />
After the initial language selection is performed, it, as well as<br />
other settings, can be changed as desired. Proceed to<br />
“ADJUSTMENTS/SETTINGS AND DTC LIBRARY” below for<br />
further instructions.<br />
ADJUSTMENTS/SETTINGS AND DTC LIBRARY<br />
The CanOBD2&1 <strong>Scan</strong> <strong>Tool</strong> lets you make several adjustments and<br />
settings to configure the tool to your particular needs. It also contains an<br />
OBD2 DTC Library that allows you to search for DTC definitions. The<br />
following functions, adjustments and settings can be performed when<br />
the CanOBD2&1 <strong>Scan</strong> <strong>Tool</strong> is in “MENU Mode”:<br />
� Adjust Brightness: Adjusts the brightness of the display screen.<br />
� Display Backlight: Turns the display backlight on and off.<br />
� DTC Library: Lets you search the library of OBD2 DTC definitions.<br />
� Select Language: Sets the display language for the CanOBD2&1<br />
<strong>Scan</strong> <strong>Tool</strong> to English, French or Spanish.<br />
� Unit of Measurement: Sets the Unit of Measure for the<br />
CanOBD2&1 <strong>Scan</strong> <strong>Tool</strong>’s display to USA or metric.<br />
� Menu Exit: Exits “MENU Mode”.<br />
CanOBD2&1 5
About the CanOBD2&1 <strong>Scan</strong> <strong>Tool</strong><br />
ADJUSTMENTS/SETTINGS AND DTC LIBRARY<br />
Adjustments and settings can be made only when the<br />
CanOBD2&1 <strong>Scan</strong> <strong>Tool</strong> is NOT connected to a vehicle.<br />
To enter the MENU Mode:<br />
1. With the CanOBD2&1 <strong>Scan</strong> <strong>Tool</strong> OFF,<br />
press and hold the UP button, then<br />
press and release the POWER/LINK<br />
button.<br />
� The Setup Menu displays.<br />
2. Release the UP button.<br />
DO NOT release the UP button until the Setup Menu is<br />
visible on the display.<br />
3. Make adjustments and settings as described in the following<br />
paragraphs.<br />
Adjusting Display Brightness<br />
1. Use the UP and DOWN buttons,<br />
as necessary, to highlight Adjust<br />
Brightness in the Setup Menu, then<br />
press the ENTER/LD button.<br />
� The Adjust Brightness screen<br />
�<br />
displays.<br />
The Brightness field shows the current<br />
brightness setting, from 0 to 43.<br />
2. Press the UP button to decrease the<br />
brightness of the display (make the<br />
display darker).<br />
3. Press the DOWN button to increase<br />
the brightness of the display (make the<br />
display lighter).<br />
4. When the desired brightness is obtained, press the ENTER/LD<br />
button to save your changes and return to the Setup Menu.<br />
Using the Backlight<br />
1. Use the UP and DOWN buttons,<br />
as necessary, to highlight Display<br />
Backlight in the Setup Menu, then<br />
press the ENTER/LD button.<br />
� The Display Backlight screen displays.<br />
6 CanOBD2&1
About the CanOBD2&1 <strong>Scan</strong> <strong>Tool</strong><br />
ADJUSTMENTS/SETTINGS AND DTC LIBRARY<br />
2. Press the UP or DOWN button,<br />
as necessary, to select the desired<br />
backlight mode, either ON or OFF.<br />
3. When the desired backlight mode is<br />
selected, press the ENTER/LD<br />
button to save your changes.<br />
� The display returns to the MENU,<br />
and the backlight turns “on” or “off”<br />
as selected.<br />
Searching for a DTC Definition Using the DTC Library (applicable<br />
to OBD2 systems only)<br />
1. Use the UP and DOWN buttons,<br />
as necessary, to highlight DTC Library<br />
in the Setup Menu, then press the<br />
ENTER/LD button.<br />
� The Enter DTC screen displays. The<br />
screen shows the code “P0001”,<br />
with the “P” flashing.<br />
2. Use the UP and DOWN buttons,<br />
as necessary, to scroll to the desired<br />
DTC type (P=Powertrain, U=Network,<br />
B=Body, C=Chassis), then press the<br />
DTC SCROLL button.<br />
� The selected character displays<br />
“solid”, and the next character<br />
begins flashing.<br />
3. Select the remaining characters in the DTC in the same way,<br />
pressing the DTC SCROLL button to confirm each character.<br />
When you have selected all the DTC characters, press the<br />
ENTER/LD button to view the DTC definition.<br />
� If you entered a “Generic” DTC<br />
(DTCs that start with “P0”, “P2” and<br />
some “P3”):<br />
- The selected DTC and DTC<br />
definition (if available), show on<br />
the CanOBD2&1 <strong>Scan</strong> <strong>Tool</strong>’s<br />
display.<br />
If a definition for the DTC you entered is not available, an<br />
advisory message shows on the CanOBD2&1 <strong>Scan</strong> <strong>Tool</strong>’s<br />
display.<br />
� If you entered a “Manufacturer-Specific” DTC (DTCs that start<br />
with “P1” and some “P3”):<br />
CanOBD2&1 7
About the CanOBD2&1 <strong>Scan</strong> <strong>Tool</strong><br />
ADJUSTMENTS/SETTINGS AND DTC LIBRARY<br />
- The “Select Manufacturer” screen<br />
displays.<br />
- Use the UP and DOWN<br />
buttons, as necessary, to<br />
highlight the appropriate<br />
manufacturer, then press the<br />
ENTER/LD button to display<br />
the correct DTC for your vehicle.<br />
If a definition for the DTC you<br />
entered is not available, an<br />
advisory message shows on the<br />
CanOBD2&1 <strong>Scan</strong> <strong>Tool</strong>’s display.<br />
4. If you wish to view definitions for<br />
additional DTCs, press the ENTER/LD<br />
button to return to the DTC Library<br />
screen, and repeat steps 2 and 3.<br />
5. When all desired DTCs have been viewed, press the ERASE<br />
button to exit the DTC Library and return to the Setup Menu.<br />
Selecting the Display Language<br />
1. Use the UP and DOWN buttons,<br />
as necessary, to highlight Select<br />
Language in the Setup Menu, then<br />
press the ENTER/LD button.<br />
� The Select Language screen displays.<br />
� The currently selected display<br />
Language is highlighted.<br />
2. Press the UP or DOWN button,<br />
as necessary, to highlight the desired<br />
display language.<br />
3. When the desired display language is<br />
highlighted, press the ENTER/LD<br />
button to save your changes and return<br />
to the Setup Menu (shown in the<br />
selected display language).<br />
Setting the Unit of Measurement<br />
1. Use the UP and DOWN buttons,<br />
as necessary, to highlight Unit of<br />
Measure in the Setup Menu, then<br />
press the ENTER/LD button.<br />
8 CanOBD2&1
About the CanOBD2&1 <strong>Scan</strong> <strong>Tool</strong><br />
ADJUSTMENTS/SETTINGS AND DTC LIBRARY<br />
2. Press the UP or DOWN button,<br />
as necessary, to highlight the desired<br />
Unit of Measure.<br />
3. When the desired Unit of Measure<br />
value is selected, press the ENTER/LD<br />
button to save your changes and<br />
return to the Setup Menu.<br />
Exiting the MENU Mode<br />
1. Use the UP and DOWN buttons, as necessary, to highlight<br />
Menu Exit in the Setup Menu, then press the ENTER/LD<br />
button.<br />
� If diagnostic data IS currently stored in the CanOBD2&1 <strong>Scan</strong><br />
<strong>Tool</strong>’s memory, the stored data is shown on the display.<br />
� If diagnostic data IS NOT currently stored in the CanOBD2&1<br />
<strong>Scan</strong> <strong>Tool</strong>’s memory, the “Linking Instructions” screen is shown<br />
on the display.<br />
CanOBD2&1 9
CanOBD2&1 <strong>Scan</strong> <strong>Tool</strong> Controls<br />
CONTROLS AND INDICATORS<br />
CONTROLS AND INDICATORS<br />
6<br />
1<br />
2<br />
5<br />
11<br />
10<br />
7 8<br />
9<br />
3<br />
4<br />
12 13 14 15<br />
Figure 1. Controls and Indicators<br />
See Figure 1 for the locations of items 1 through 16, below.<br />
1. ERASE button - Erases Diagnostic Trouble Codes (DTCs), and<br />
“Freeze Frame” data from your vehicle’s computer, and resets<br />
Monitor status. (“Freeze Frame” data and Monitor status are<br />
applicable to OBD2 systems only.)<br />
2. DTC SCROLL button - Displays the DTC View screen and/or<br />
scrolls the LCD display to view DTCs when more than one DTC is<br />
present.<br />
3. POWER/LINK button - When the CanOBD2&1 <strong>Scan</strong> <strong>Tool</strong> IS<br />
NOT connected to a vehicle, turns the CanOBD2&1 <strong>Scan</strong> <strong>Tool</strong> “On”<br />
and “Off”. When the CanOBD2&1 <strong>Scan</strong> <strong>Tool</strong> is connected to a<br />
vehicle, links the CanOBD2&1 <strong>Scan</strong> <strong>Tool</strong> to the vehicle’s PCM to<br />
retrieve diagnostic data from the computer’s memory. (The LINK<br />
function is applicable to OBD2 systems only.)<br />
To turn the CanOBD2&1 <strong>Scan</strong> <strong>Tool</strong> "On", you must press and<br />
hold the POWER/LINK button for approximately 3<br />
seconds.<br />
10 CanOBD2&1<br />
16
CanOBD2&1 <strong>Scan</strong> <strong>Tool</strong> Controls<br />
CONTROLS AND INDICATORS<br />
4. ENTER/LIVE DATA button - When in MENU mode, confirms<br />
the selected option or value. When linked to a vehicle, places the<br />
CanOBD2&1 <strong>Scan</strong> <strong>Tool</strong> in "Live Data" mode.<br />
5. DOWN button - When in MENU mode, scrolls DOWN through<br />
the menu and submenu selection options. When retrieving and<br />
viewing DTCs, scrolls down through the current display screen to<br />
display any additional data.<br />
6. UP button - When in MENU mode, scrolls UP through the menu<br />
and submenu selection options. When retrieving and viewing DTCs,<br />
scrolls ups through the current display screen to display any<br />
additional data.<br />
7. GREEN LED - Indicates that all engine systems are running<br />
normally (all Monitors on the vehicle are active and performing their<br />
diagnostic testing, and no DTCs are present). (Monitors are<br />
applicable to OBD2 systems only.)<br />
8. YELLOW LED - Indicates there is a possible problem. A “Pending”<br />
or a history DTC is present and/or some of the vehicle’s emission<br />
monitors have not run their diagnostic testing. (Monitors and<br />
pending DTCs are applicable to OBD2 systems only.)<br />
9. RED LED - Indicates there is a problem in one or more of the<br />
vehicle’s systems. The red LED is also used to show that DTC(s)<br />
are present. DTCs are shown on the CanOBD2&1 <strong>Scan</strong> <strong>Tool</strong>’s<br />
display. In this case, the Malfunction Indicator (“Check Engine”)<br />
lamp on the vehicle’s instrument panel will light steady on.<br />
10. Display - Displays Setup Menu and submenus, test results,<br />
CanOBD2&1 <strong>Scan</strong> <strong>Tool</strong> functions and Monitor status information.<br />
See DISPLAY FUNCTIONS, on next page, for more details.<br />
(Monitors are applicable to OBD2 systems only.)<br />
11. Cable - Connects the CanOBD2&1 <strong>Scan</strong> <strong>Tool</strong> to the vehicle’s Data<br />
Link Connector (DLC) when retrieving codes from OBD I systems<br />
(used with items 12, 13, 14 and 16).<br />
12. CHRYSLER Connector Cable Adaptor - Installs on cable (item 11)<br />
when connecting to a Chrysler OBD1 Data Link Connector.<br />
13. FORD Connector Cable Adaptor - Installs on cable (item 11) when<br />
connecting to a Ford OBD1 Data Link Connector.<br />
14. GM Connector Cable Adaptor - Installs on cable (item 11) when<br />
connecting to a GM OBD1 Data Link Connector.<br />
15. OBD II Cable - Connects the CanOBD2&1 <strong>Scan</strong> <strong>Tool</strong> to the<br />
vehicle's Data Link Connector (DLC) when retrieving codes from<br />
OBD II systems.<br />
16. TOYOTA Connector Cable Adaptor - Installs on cable (item 11)<br />
when connecting to a Toyota OBD1 Data Link Connector.<br />
CanOBD2&1 11
CanOBD2&1 <strong>Scan</strong> <strong>Tool</strong> Controls<br />
DISPLAY FUNCTIONS<br />
DISPLAY FUNCTIONS<br />
3<br />
4<br />
5<br />
6<br />
7<br />
8<br />
2 1 11 12 13<br />
Figure 2. Display Functions<br />
See Figure 2 for the locations of items 1 through 16, following.<br />
1. I/M MONITOR STATUS field - Identifies the I/M Monitor status area.<br />
(This function is applicable to OBD2 systems only.)<br />
2. Monitor icons - Indicate which Monitors are supported by the<br />
vehicle under test, and whether or not the associated Monitor has<br />
run its diagnostic testing (Monitor status). When a Monitor icon is<br />
solid, it indicates that the associated Monitor has completed its<br />
diagnostic testing. When a Monitor icon is flashing, it indicates that<br />
the vehicle supports the associated Monitor, but the Monitor has not<br />
yet run its diagnostic testing. (This function is applicable to OBD2<br />
systems only.)<br />
3. Vehicle icon - Indicates whether or not the CanOBD2&1<br />
<strong>Scan</strong> <strong>Tool</strong> is being properly powered through the vehicle’s Data<br />
Link Connector (DLC). A visible icon indicates that the<br />
CanOBD2&1 <strong>Scan</strong> <strong>Tool</strong> is being powered through the vehicle’s<br />
DLC connector.<br />
4. Link icon - Indicates whether or not the CanOBD2&1 <strong>Scan</strong> <strong>Tool</strong><br />
is communicating (linked) with the vehicle’s on-board computer.<br />
When visible, the CanOBD2&1 <strong>Scan</strong> <strong>Tool</strong> is communicating with the<br />
computer. If the Link icon is not visible, the CanOBD2&1 <strong>Scan</strong> <strong>Tool</strong><br />
is not communicating with the computer.<br />
5. Computer icon - When this icon is visible it indicates that the<br />
CanOBD2&1 <strong>Scan</strong> <strong>Tool</strong> is linked to a personal computer. An<br />
optional “PC Link Kit” is available that makes it possible to upload<br />
retrieved data to a personal computer.<br />
6. CanOBD2&1 <strong>Scan</strong> <strong>Tool</strong> Internal Battery icon - When visible,<br />
indicates the CanOBD2&1 <strong>Scan</strong> <strong>Tool</strong> batteries are “low” and should<br />
be replaced. If the batteries are not replaced when the battery<br />
symbol is "on", all 3 LEDs will light up as a last resort indicator to<br />
warn you that the batteries need replacement. No data will be<br />
displayed on screen when all 3 LEDs are lit.<br />
12 CanOBD2&1<br />
15<br />
16<br />
14<br />
10<br />
9
CanOBD2&1 <strong>Scan</strong> <strong>Tool</strong> Controls<br />
VIEWING DTCs IN THE CANOBD2&1 SCAN TOOL’S MEMORY<br />
7. DTC Display Area - Displays the Diagnostic Trouble Code (DTC)<br />
number. Each fault is assigned a code number that is specific to that<br />
fault.<br />
8. Test Data Display Area - Displays DTC definitions, Freeze Frame<br />
data, and other pertinent test information messages.<br />
9. FREEZE FRAME icon - Indicates that there is Freeze Frame data<br />
from “Priority Code” (Code #1) stored in the vehicle’s computer<br />
memory.<br />
10. HISTORY icon - Indicates the currently displayed DTC is a “History”<br />
code.<br />
11. PENDING icon - Indicates the currently displayed DTC is a<br />
“Pending” code.<br />
12. MIL icon - Indicates the status of the Malfunction Indicator Lamp<br />
(MIL). The MIL icon is visible only when a DTC has commanded the<br />
MIL on the vehicle’s dashboard to light.<br />
13. Code Number Sequence - The CanOBD2&1 <strong>Scan</strong> <strong>Tool</strong> assigns a<br />
sequence number to each DTC that is present in the computer’s<br />
memory, starting with “01.” This number indicates which code is<br />
currently displayed. Code number “01” is always the highest priority<br />
code, and the one for which “Freeze Frame” data has been stored.<br />
(Freeze Frame data is applicable to OBD2 systems only.)<br />
If “01” is a “Pending” code, there may or may not be “Freeze<br />
Frame” data stored in memory.<br />
14. Code Enumerator - Indicates the total number of codes retrieved<br />
from the vehicle’s computer.<br />
15. Generic DTC icon - When visible, indicates that the currently<br />
displayed DTC is a “Generic” or “Universal” code. (This function is<br />
applicable to OBD2 systems only.)<br />
16. Enhanced DTC icon - When visible, indicates that the currently<br />
displayed DTC is a Manufacturer Specific Code. (This function is<br />
applicable to OBD2 systems only.)<br />
VIEWING DTCs IN THE CANOBD2&1 SCAN TOOL’S<br />
MEMORY<br />
To view DTC’s and other diagnostic data stored in the CanOBD2&1<br />
<strong>Scan</strong> <strong>Tool</strong>’s memory, do the following:<br />
1. With no DLC cable connected to the CanOBD2&1 <strong>Scan</strong> <strong>Tool</strong>, press<br />
the POWER/LINK button to turn the CanOBD2&1 <strong>Scan</strong> <strong>Tool</strong><br />
“on”.<br />
� The “To Retrieve DTCs” screen<br />
shows on the CanOBD2&1 <strong>Scan</strong><br />
<strong>Tool</strong>’s display. Press the button<br />
for instructions to view DTC’s in<br />
memory.<br />
CanOBD2&1 13
CanOBD2&1 <strong>Scan</strong> <strong>Tool</strong> Controls<br />
VIEWING DTCs IN THE CANOBD2&1 SCAN TOOL’S MEMORY<br />
2. Press the ENTER/LD button.<br />
� The “Select OBD System” screen<br />
displays.<br />
3. Use the and keys to highlight<br />
and select your vehicle’s OBD system<br />
(OBD1 or OBD2). Press the ENTER/LD<br />
button to continue.<br />
� Select “Back” if you wish to return to<br />
the Main Menu.<br />
4. If DTCs are present in the CanOBD2&1<br />
<strong>Scan</strong> <strong>Tool</strong>’s memory, the first stored<br />
DTC will display on the screen.<br />
� If more than one DTC is present,<br />
use the DTC SCROLL button to<br />
scroll through the DTC’s.<br />
5. For OBD2 systems only - Freeze<br />
Frame Data (if available) will display<br />
after DTC #1.<br />
6. If no DTCs are in the CanOBD2&1 <strong>Scan</strong><br />
<strong>Tool</strong>’s memory, a “No DTC’s are<br />
presently stored in the Code Readers<br />
memory” message displays.<br />
14 CanOBD2&1
Preparation for Testing<br />
PRELIMINARY VEHICLE DIAGNOSTIC WORKSHEET<br />
PRELIMINARY VEHICLE DIAGNOSTIC WORKSHEET<br />
The purpose of this form is to help you gather preliminary information on<br />
your vehicle before you retrieve codes. By having a complete account of<br />
your vehicle's current problem(s), you will be able to systematically<br />
pinpoint the problem(s) by comparing your answers to the fault codes<br />
you retrieve. You can also provide this information to your mechanic to<br />
assist in diagnosis and help avoid costly and unnecessary repairs. It is<br />
important for you to complete this form to help you and/or your<br />
mechanic have a clear understanding of your vehicle's problems.<br />
NAME:<br />
DATE:<br />
VIN*:<br />
YEAR:<br />
MAKE:<br />
MODEL:<br />
ENGINE SIZE:<br />
VEHICLE MILEAGE:<br />
*VIN: Vehicle Identification Number, found at the base of the windshield<br />
on a metallic plate, or at the driver door latch area (consult your vehicle<br />
owner's manual for location).<br />
TRANSMISSION:<br />
❏ Automatic<br />
❏ Manual<br />
Please check all applicable items in each category.<br />
DESCRIBE THE PROBLEM:<br />
CanOBD2&1 15
Preparation for Testing<br />
PRELIMINARY VEHICLE DIAGNOSTIC WORKSHEET<br />
WHEN DID YOU FIRST NOTICE THE PROBLEM:<br />
❏ Just Started<br />
❏ Started Last Week<br />
❏ Started Last Month<br />
❏ Other:<br />
LIST ANY REPAIRS DONE IN THE PAST SIX MONTHS:<br />
PROBLEMS STARTING<br />
❏ No symptoms<br />
❏ Will not crank<br />
ENGINE QUITS OR STALLS<br />
❏ No symptoms<br />
❏ Right after starting<br />
❏ When shifting into gear<br />
❏ During steady-speed<br />
driving<br />
IDLING CONDITIONS<br />
❏ No symptoms<br />
❏ Is too slow at all times<br />
❏ Is too fast<br />
RUNNING CONDITIONS<br />
❏ No symptoms<br />
❏ Runs rough<br />
❏ Lacks power<br />
❏ Bucks and jerks<br />
❏ Poor fuel economy<br />
❏ Hesitates or stumbles on<br />
accelerations<br />
m<br />
❏ Cranks, but will not start<br />
❏ Starts, but takes a long<br />
time<br />
❏ Right after vehicle<br />
comes to a stop<br />
❏ While idling<br />
❏ During acceleration<br />
❏ When parking<br />
❏ Is sometimes too fast or<br />
too slow<br />
❏ Is rough or uneven<br />
❏ Fluctuates up and down<br />
❏ Backfires<br />
❏ Misfires or cuts out<br />
❏ Engine knocks, pings or<br />
rattles<br />
❏ Surges<br />
❏ Dieseling or run-on<br />
16 CanOBD2&1
Preparation for Testing<br />
PRELIMINARY VEHICLE DIAGNOSTIC WORKSHEET<br />
AUTOMATIC TRANSMISSION PROBLEMS (if applicable)<br />
❏ No symptoms<br />
❏ Vehicle does not move<br />
❏ Shifts too early or too late<br />
when in gear<br />
❏ Changes gear incorrectly<br />
❏ Jerks or bucks<br />
PROBLEM OCCURS<br />
❏ Morning ❏ Afternoon ❏ Anytime<br />
ENGINE TEMPERATURE WHEN PROBLEM OCCURS<br />
❏ Cold ❏ Warm ❏ Hot<br />
DRIVING CONDITIONS WHEN PROBLEM OCCURS<br />
❏ Short - less than 2 miles<br />
❏ With headlights on<br />
❏ 2 - 10 miles<br />
❏ During acceleration<br />
❏ Long - more than 10 miles<br />
❏ Mostly driving downhill<br />
❏ Stop and go<br />
❏ Mostly driving uphill<br />
❏ While turning<br />
❏ Mostly driving level<br />
❏ While braking<br />
❏ Mostly driving curvy<br />
❏ At gear engagement<br />
roads<br />
❏ With A/C operating<br />
❏ Mostly driving rough<br />
roads<br />
DRIVING HABITS<br />
❏ Mostly city driving<br />
❏ Drive less than 10 miles per day<br />
❏ Highway<br />
❏ Drive 10 to 50 miles per day<br />
❏ Park vehicle inside<br />
❏ Drive more than 50 miles per<br />
❏ Park vehicle outside<br />
day<br />
GASOLINE USED<br />
❏ 87 Octane<br />
❏ 91 Octane<br />
❏ 89 Octane<br />
❏ More than 91 Octane<br />
WEATHER CONDITIONS WHEN PROBLEM OCCURS<br />
❏ 32 - 55° F (0 - 13° C)<br />
❏ Above 55° F (13° C)<br />
❏ Below freezing (32° F / 0° C)<br />
CHECK ENGINE LIGHT / DASH WARNING LIGHT<br />
❏ Sometimes ON ❏ Always ON ❏ Never ON<br />
PECULIAR SMELLS<br />
❏ "Hot"<br />
❏ Gasoline<br />
❏ Burning oil<br />
❏ Electrical<br />
❏ Sulfur ("rotten egg")<br />
❏ Burning rubber<br />
STRANGE NOISES<br />
❏ Rattle<br />
❏ Knock<br />
❏ Squeak<br />
❏ Other<br />
CanOBD2&1 17
Preparation for Testing<br />
BEFORE YOU BEGIN<br />
BEFORE YOU BEGIN<br />
The Enhanced CanOBD2&1 <strong>Scan</strong><br />
<strong>Tool</strong> aids in monitoring electronicand<br />
emissions-related faults in<br />
your vehicle and retrieving fault<br />
codes related to malfunctions in<br />
these systems. Mechanical problems<br />
such as low oil level or<br />
damaged hoses, wiring or electrical connectors can cause poor engine<br />
performance and may also cause a fault code to set. Fix any known<br />
mechanical problems before performing any test. See your vehicle’s service<br />
manual or a mechanic for more information.<br />
Check the following areas before starting any test:<br />
� Check the engine oil, power steering fluid, transmission fluid (if<br />
applicable), engine coolant and other fluids for proper levels. Top off<br />
low fluid levels if needed.<br />
� Make sure the air filter is clean and in good condition. Make sure all<br />
air filter ducts are properly connected. Check the air filter ducts for<br />
holes, rips or cracks.<br />
� Make sure all engine belts are in good condition. Check for cracked,<br />
torn, brittle, loose or missing belts.<br />
� Make sure mechanical linkages to engine sensors (throttle, gearshift<br />
position, transmission, etc.) are secure and properly connected. See<br />
your vehicle’s service manual for locations.<br />
� Check all rubber hoses (radiator) and steel hoses (vacuum/fuel) for<br />
leaks, cracks, blockage or other damage. Make sure all hoses are<br />
routed and connected properly.<br />
� Make sure all spark plugs are clean and in good condition. Check<br />
for damaged, loose, disconnected or missing spark plug wires.<br />
� Make sure the battery terminals are clean and tight. Check for<br />
corrosion or broken connections. Check for proper battery and<br />
charging system voltages.<br />
� Check all electrical wiring and harnesses for proper connection.<br />
Make sure wire insulation is in good condition, and there are no bare<br />
wires.<br />
� Make sure the engine is mechanically sound. If needed, perform a<br />
compression check, engine vacuum check, timing check (if<br />
applicable), etc.<br />
18 CanOBD2&1
VEHICLE SERVICE MANUALS<br />
Preparation for Testing<br />
VEHICLE SERVICE MANUALS<br />
Always refer to the manufacturer’s service manual for your vehicle<br />
before performing any test or repair procedures. Contact your local car<br />
dealership, auto parts store or bookstore for availability of these<br />
manuals. The following companies publish valuable repair manuals:<br />
� Haynes Publications<br />
861 Lawrence Drive<br />
Newbury Park, California 91320<br />
Phone: 800-442-9637<br />
� Mitchell International<br />
14145 Danielson Street<br />
Poway, California 92064<br />
Phone: 888-724-6742<br />
� Motor Publications<br />
5600 Crooks Road, Suite 200<br />
Troy, Michigan 48098<br />
Phone: 800-426-6867<br />
FACTORY SOURCES<br />
Ford, GM, Chrysler, Honda, Isuzu, Hyundai and Subaru Service<br />
Manuals<br />
� Helm Inc.<br />
14310 Hamilton Avenue<br />
Highland Park, Michigan 48203<br />
Phone: 800-782-4356<br />
CanOBD2&1 19
General Code Retrieval Procedures<br />
OBD1 SYSTEMS / OBD2 SYSTEMS<br />
Procedures for Retrieving Diagnostic Trouble Codes from OBD1<br />
systems are vehicle manufacturer specific. Each manufacturer uses<br />
their own procedure.<br />
Procedures for retrieving Diagnostic Trouble Codes from OBD2 systems<br />
are generic, and apply to all vehicles equipped with OBD2 systems.<br />
From the following list, select the procedure that applies to your<br />
vehicle’s OBD system, and proceed to appropriate section for detailed<br />
code retrieval procedures.<br />
OBD1 SYSTEMS<br />
Most cars and light trucks (under 8500 GW) sold in the U.S. from early<br />
1980’s to 1995 are equipped with what is known as the first generation<br />
of On-Board Diagnostics or “OBD1”.<br />
� If your Chrysler/Jeep, Ford, GM or Toyota vehicle, (1995 and older)<br />
is equipped with an ‘OBD1 System”, proceed to the proper section<br />
as indicated below, for a detailed application list and code retrieval<br />
procedures:<br />
� CHRYSLER/JEEP .............................page 68<br />
� FORD................................................. page 74<br />
� GM .....................................................page 97<br />
� TOYOTA ............................................page 103<br />
OBD2 SYSTEMS<br />
ALL 1996 and newer cars and light trucks (under 8500 GW) sold in the<br />
U.S. are equipped with what is known as the second generation of On-<br />
Board Diagnostics or “OBD2”.<br />
� If your vehicle (1996 and newer) is equipped with an “OBD2<br />
System”, proceed to the OBD2 SYSTEMS section on page 20 for a<br />
detailed application list, code retrieval procedures, Monitor status,<br />
and Freeze Frame data information.<br />
20 CanOBD2&1
VEHICLES COVERED<br />
VEHICLE EMISSION CONTROL INFORMATION<br />
VEHICLE<br />
MANUFACTURER<br />
ENGINE FAMILY EFN2.6YBT2BA<br />
DISPLACEMENT 2.6L<br />
OBD II<br />
CERTIFIED<br />
THIS VEHICLE CONFORMS TO U.S. EPA AND STATE<br />
OF CALIFORNIA REGULATIONS APPLICABLE TO<br />
1999 MODEL YEAR NEW TLEV PASSENGER CARS.<br />
REFER TO SERVICE MANUAL FOR ADDITIONAL INFORMATION<br />
TUNE-UP CONDITIONS: NORMAL OPERATING ENGINE TEMPERATURE,<br />
ACCESSORIES OFF, COOLING FAN OFF, TRANSMISSION IN NEUTRAL<br />
EXHAUST EMISSIONS STANDARDS STANDARD CATEGORY<br />
CERTIFICATION<br />
IN-USE<br />
SPARK PLUG<br />
TYPE NGK BPRE-11<br />
GAP: 1.1MM<br />
CATALYST<br />
TLEV<br />
TLEV INTERMEDIATE<br />
OBD2 Systems<br />
VEHICLES COVERED<br />
The Enhanced CanOBD2&1 <strong>Scan</strong> <strong>Tool</strong> is designed to work on all OBD2<br />
compliant vehicles. All 1996 and newer vehicles (cars and light trucks)<br />
sold in the United States are OBD2 compliant.<br />
Federal law requires that all 1996 and newer cars and light<br />
trucks sold in the United States must be OBD2 compliant; this<br />
includes all Domestic, Asian and European vehicles.<br />
Some 1994 and 1995 vehicles are OBD2 compliant. To find out if a<br />
1994 or 1995 vehicle is OBD2 compliant, check the following:<br />
1. The Vehicle Emissions Control Information (VECI) Label. This<br />
label is located under the hood or by the radiator of most vehicles. If<br />
the vehicle is OBD2 compliant, the label will state “OBD II<br />
Certified.”<br />
2. Government Regulations require that all<br />
OBD2 compliant vehicles must have a<br />
“common” sixteen-pin Data Link<br />
Connector (DLC).<br />
OBD II<br />
CERTIFIED<br />
Some 1994 and 1995 vehicles have 16-pin connectors but are not<br />
OBD2 compliant. Only those vehicles with a Vehicle Emissions Control<br />
Label stating “OBD II Certified” are OBD2 compliant.<br />
Data Link Connector (DLC) Location<br />
The 16-pin DLC is usually<br />
located under the instrument<br />
panel (dash), within 12 inches<br />
(300 mm) of center of the panel,<br />
on the driver’s side of most<br />
vehicles. It should be easily<br />
accessible and visible from a<br />
kneeling position outside the<br />
vehicle with the door open.<br />
LEFT CORNER<br />
OF DASH<br />
NEAR<br />
CENTER<br />
OF DASH<br />
1 2 3 4 5 6 7 8<br />
9 10111213141516<br />
BEHIND<br />
ASHTRAY<br />
CanOBD2&1 21
OBD2 Systems<br />
DIAGNOSTIC TROUBLE CODES (DTCs)<br />
On some Asian and European vehicles the DLC is located<br />
behind the “ashtray” (the ashtray must be removed to<br />
access it) or on the far left corner of the dash. If the DLC<br />
cannot be located, consult the vehicle’s service manual for<br />
the location.<br />
DIAGNOSTIC TROUBLE CODES (DTCs)<br />
Diagnostic Trouble Codes (DTCs) are<br />
meant to guide you to the proper<br />
service procedure in the vehicle’s<br />
service manual. DO NOT replace parts<br />
based only on DTCs without first<br />
consulting the vehicle’s service manual<br />
for proper testing procedures for that<br />
particular system, circuit or component.<br />
Diagnostic Trouble<br />
Codes (DTCs) are<br />
codes that identify a<br />
specific problem area.<br />
DTCs are alphanumeric codes that are used to identify a<br />
problem that is present in any of the systems that are<br />
monitored by the on-board computer (PCM). Each trouble<br />
code has an assigned message that identifies the circuit,<br />
component or system area where the problem was found.<br />
OBD2 diagnostic trouble codes are made up of five characters:<br />
� The 1st character is a letter. It identifies the “main system” where<br />
the fault occurred (Body, Chassis, Powertrain, or Network).<br />
� The 2nd character is a numeric digit. It identifies the “type” of code<br />
(Generic or Manufacturer-Specific).<br />
Generic DTCs are codes that are used by all vehicle<br />
manufacturers. The standards for generic DTCs, as well as<br />
their definitions, are set by the Society of Automotive<br />
Engineers (SAE).<br />
Manufacturer-Specific DTCs are codes that are controlled by<br />
the vehicle manufacturers. The Federal Government does not<br />
require vehicle manufacturers to go beyond the standardized<br />
generic DTCs in order to comply with the new OBD2<br />
emissions standards. However, manufacturers are free to<br />
expand beyond the standardized codes to make their systems<br />
easier to diagnose.<br />
� The 3rd character is a numeric digit. It identifies the specific<br />
system or sub-system where the problem is located.<br />
� The 4th and 5th characters are numeric digits. They identify the<br />
section of the system that is malfunctioning.<br />
22 CanOBD2&1
B<br />
C<br />
P<br />
U<br />
0<br />
1<br />
2<br />
3<br />
- Body<br />
-<br />
-<br />
-<br />
-<br />
-<br />
-<br />
-<br />
Chassis<br />
Powertrain<br />
Network<br />
Generic<br />
Manufacturer Specific<br />
Generic<br />
Includes both Generic and Manufacturer<br />
Specific Codes<br />
Identifies the system where the<br />
problem is located:<br />
1<br />
2<br />
3<br />
4<br />
5<br />
6<br />
7<br />
8<br />
-<br />
-<br />
-<br />
-<br />
-<br />
-<br />
-<br />
-<br />
Fuel and Air Metering<br />
Fuel and Air Metering (injector circuit<br />
malfunction only)<br />
Ignition System or Misfire<br />
Auxiliary Emission Control System<br />
Vehicle Speed Control and Idle Control<br />
System<br />
Computer Output Circuits<br />
Transmission<br />
Transmission<br />
Identifies what section of the system<br />
is malfunctioning<br />
DTCs and MIL Status<br />
OBD2 Systems<br />
DIAGNOSTIC TROUBLE CODES (DTCs)<br />
OBD2 DTC EXAMPLE<br />
P0201 - Injector Circuit Malfunction, Cylinder 1<br />
P 0 2 0 1<br />
When the vehicle’s on-board computer detects<br />
a failure in an emissions-related component or<br />
system, the computer’s internal diagnostic<br />
program assigns a diagnostic trouble code<br />
(DTC) that points to the system (and subsystem)<br />
where the fault was found. The diagnostic<br />
program saves the code in the computer’s<br />
memory. It records a “Freeze Frame” of conditions present when the<br />
fault was found, and lights the Malfunction Indicator Lamp (MIL). Some<br />
faults require detection for two trips in a row before the MIL is turned on.<br />
The “Malfunction Indicator Lamp” (MIL) is the accepted term<br />
used to describe the lamp on the dashboard that lights to warn<br />
the driver that an emissions-related fault has been found.<br />
Some manufacturers may still call this lamp a “Check Engine”<br />
or “Service Engine Soon” light.<br />
CanOBD2&1 23
OBD2 Systems<br />
CODE RETRIEVAL PROCEDURE<br />
CODE RETRIEVAL PROCEDURE<br />
Retrieving and using Diagnostic Trouble Codes (DTCs) for<br />
troubleshooting vehicle operation is only one part of an<br />
overall diagnostic strategy.<br />
Never replace a part based only on the DTC definition.<br />
Each DTC has a set of testing procedures, instructions<br />
and flow charts that must be followed to confirm the<br />
location of the problem. This information is found in the<br />
vehicle's service manual. Always refer to the vehicle's<br />
service manual for detailed testing instructions.<br />
Check your vehicle thoroughly before performing<br />
any test. See BEFORE YOU BEGIN on page 18<br />
for details.<br />
ALWAYS observe safety precautions whenever working on a<br />
vehicle. See Safety Precautions on page 3 for more<br />
information.<br />
1. Turn the ignition OFF.<br />
2. Locate the vehicle's 16-pin Data Link<br />
Connector (DLC). See page 21 for<br />
connector location.<br />
Some DLCs have a plastic cover<br />
that must be removed before<br />
connecting the CanOBD2&1 <strong>Scan</strong><br />
<strong>Tool</strong> cable connector.<br />
If the CanOBD2&1 <strong>Scan</strong> <strong>Tool</strong> is ON,<br />
turn it OFF by pressing the<br />
POWER/LINK button BEFORE<br />
connecting the CanOBD2&1 <strong>Scan</strong><br />
<strong>Tool</strong> to the DLC.<br />
3. Connect the OBD II Cable to the CanOBD2&1 <strong>Scan</strong> <strong>Tool</strong>, then<br />
connect to the vehicle’s DLC.<br />
� If you have problems connecting the cable connector to the DLC,<br />
rotate the connector 180° and try again.<br />
� If you still have problems, check the<br />
pins on the CanOBD2&1 <strong>Scan</strong><br />
<strong>Tool</strong>’s DLC and on the vehicle’s<br />
DLC.<br />
4. When the CanOBD2&1 <strong>Scan</strong> <strong>Tool</strong>’s<br />
cable connector is properly connected<br />
to the vehicle’s DLC, the unit automatically<br />
turns ON, and the display shows<br />
instructions for linking to the vehicle’s<br />
on-board computer.<br />
24 CanOBD2&1
OBD2 Systems<br />
CODE RETRIEVAL PROCEDURE<br />
� If the unit does not power on automatically when connected to<br />
the vehicle’s DLC connector, it usually indicates there is no<br />
power present at the vehicle’s DLC connector. Check your fuse<br />
panel and replace any burned-out fuses.<br />
� If replacing the fuse(s) does not correct the problem, consult<br />
your vehicle’s repair manual to identify the proper computer<br />
(PCM) fuse/circuit, and perform any necessary repairs before<br />
proceeding.<br />
5. Turn the ignition on. DO NOT start the engine.<br />
6. Press and release the CanOBD2&1 <strong>Scan</strong> <strong>Tool</strong>’s POWER/LINK<br />
button.<br />
� The CanOBD2&1 <strong>Scan</strong> <strong>Tool</strong> will<br />
automatically start a check of the<br />
vehicle’s computer to determine<br />
which type of communication<br />
protocol it is using. When the<br />
CanOBD2&1 <strong>Scan</strong> <strong>Tool</strong> identifies<br />
the computer’s communication<br />
protocol, a communication link is established.<br />
The protocol type used by<br />
the vehicle’s computer is shown on<br />
the display.<br />
A PROTOCOL is a set of rules and procedures for<br />
regulating data transmission between computers, and<br />
between testing equipment and computers. As of this<br />
writing, five different types of protocols (ISO 9141, Keyword<br />
2000, J1850 PWM, J1850 VPW and CAN) are in use by<br />
vehicle manufacturers. The CanOBD2&1 <strong>Scan</strong> <strong>Tool</strong><br />
automatically identifies the protocol type and establishes a<br />
communication link with the vehicle’s computer.<br />
7. After approximately 10~60 seconds, the CanOBD2&1 <strong>Scan</strong> <strong>Tool</strong> will<br />
retrieve and display any Diagnostic Trouble Codes, Monitor Status<br />
and Freeze Frame Data retrieved from the vehicle’s computer<br />
memory.<br />
� If the CanOBD2&1 <strong>Scan</strong> <strong>Tool</strong> fails<br />
to link to the vehicle’s computer a<br />
“Linking Failed” message shows on<br />
the CanOBD2&1 <strong>Scan</strong> <strong>Tool</strong>’s<br />
display.<br />
- Verify the connection at the DLC<br />
and verify the ignition is ON.<br />
- Turn the ignition OFF, wait 5 seconds, then turn back ON to<br />
reset the computer.<br />
- Ensure your vehicle is OBD2 compliant. See VEHICLES<br />
COVERED on page 21 for vehicle compliance verification<br />
information.<br />
CanOBD2&1 25
OBD2 Systems<br />
CODE RETRIEVAL PROCEDURE<br />
� The CanOBD2&1 <strong>Scan</strong> <strong>Tool</strong> will<br />
automatically re-link to the vehicle’s<br />
computer every 30 seconds to<br />
refresh the data being retrieved.<br />
When data is being refreshed, the<br />
message “One moment Auto – link<br />
in progress” is shown on the display.<br />
This action repeats as long as the<br />
CanOBD2&1 <strong>Scan</strong> <strong>Tool</strong> is<br />
�<br />
communicating with the vehicle’s<br />
computer.<br />
The CanOBD2&1 <strong>Scan</strong> <strong>Tool</strong> will<br />
display a code only if codes are<br />
present in the vehicle’s computer<br />
memory. If no codes are present, a<br />
“No DTC’s are presently stored in<br />
the vehicle’s computer” message is<br />
displayed.<br />
� The CanOBD2&1 <strong>Scan</strong> <strong>Tool</strong> is capable of retrieving and storing<br />
up to 32 codes in memory, for immediate or later viewing.<br />
8. To read the display:<br />
Refer to DISPLAY FUNCTIONS on page 12 for a description<br />
of display elements.<br />
� A visible icon indicates that the CanOBD2&1 <strong>Scan</strong> <strong>Tool</strong> is<br />
being powered through the vehicle’s DLC connector.<br />
� A visible icon indicates that the CanOBD2&1 <strong>Scan</strong> <strong>Tool</strong> is<br />
�<br />
linked to (communicating with) the vehicle’s computer.<br />
The I/M Monitor Status icons indicate the type and number of<br />
Monitors the vehicle supports, and provide indications of the<br />
current status of the vehicle’s Monitors. A solid Monitor icon<br />
indicates the associated Monitor has run and completed its<br />
testing. A blinking Monitor icon indicates the associated Monitor<br />
has not run and completed its testing.<br />
� The upper right hand corner of the<br />
display shows the number of the<br />
code currently being displayed, the<br />
total number of codes retrieved, the<br />
type of code (G = Generic; M =<br />
Enhanced or Manufacturer specific),<br />
and whether or not the displayed<br />
code commanded the MIL on. If the<br />
code being displayed is a PENDING<br />
code, the PENDING icon is shown.<br />
� The Diagnostic Trouble Code (DTC) and related code definition<br />
are shown in the lower section of the display.<br />
26 CanOBD2&1
OBD2 Systems<br />
CODE RETRIEVAL PROCEDURE<br />
In the case of long code definitions, or when viewing<br />
Freeze Frame data, a small arrow is shown in the<br />
upper/lower right-hand corner of the code display area<br />
to indicate the presence of additional information. Use<br />
the and buttons, as necessary, to view the<br />
additional information.<br />
If a definition for the currently displayed code is not<br />
available, an advisory message shows on the<br />
CanOBD2&1 <strong>Scan</strong> <strong>Tool</strong>’s display.<br />
9. Read and interpret Diagnostic Trouble Codes/system condition<br />
using the display and the green, yellow and red LEDs.<br />
The green, yellow and red LEDs are used (with the LCD<br />
display) as visual aids to make it easier to determine<br />
engine system conditions.<br />
� Green LED – Indicates that all<br />
engine systems are “OK” and<br />
operating normally. All Monitors<br />
supported by the vehicle have run<br />
and performed their diagnostic<br />
testing, and no trouble codes are<br />
present. A zero will show on the<br />
CanOBD2&1 <strong>Scan</strong> <strong>Tool</strong>’s display,<br />
and all Monitor icons will be solid.<br />
� Yellow LED – Indicates one of the following conditions:<br />
A. A PENDING CODE IS PRESENT –<br />
If the yellow LED is illuminated, it<br />
may indicate a Pending code is<br />
present. Check the CanOBD2&1<br />
<strong>Scan</strong> <strong>Tool</strong>’s display for confirmation.<br />
A Pending code is confirmed by the<br />
presence of a numeric code and the<br />
word PENDING on the CanOBD2&1<br />
<strong>Scan</strong> <strong>Tool</strong>’s display.<br />
B. MONITOR NOT RUN STATUS – If<br />
the CanOBD2&1 <strong>Scan</strong> <strong>Tool</strong>’s<br />
display shows a zero (indicating<br />
there are no DTC’s present in the<br />
vehicle’s computer memory), but the<br />
yellow LED is illuminated, it may be<br />
an indication that some of the<br />
Monitors supported by the vehicle<br />
have not yet run and completed<br />
their diagnostic testing. Check the<br />
CanOBD2&1 <strong>Scan</strong> <strong>Tool</strong>’s display for confirmation. All Monitor<br />
icons that are blinking have not yet run and completed their<br />
diagnostic testing; all Monitor icons that are solid have run and<br />
completed their diagnostic testing.<br />
CanOBD2&1 27
OBD2 Systems<br />
CODE RETRIEVAL PROCEDURE<br />
� Red LED – Indicates there is a<br />
problem with one or more of the<br />
vehicle’s systems. The red LED is<br />
also used to indicate that DTC(s)<br />
are present (displayed on the<br />
CanOBD2&1 <strong>Scan</strong> <strong>Tool</strong>’s screen).<br />
In this case, the Malfunction<br />
�<br />
Indicator (Check Engine) lamp on<br />
the vehicle’s instrument panel will<br />
be illuminated.<br />
DTC’s that start with “P0”, “P2” and<br />
some “P3” are considered Generic<br />
(Universal). All Generic DTC<br />
definitions are the same on all<br />
OBD2 equipped vehicles. The<br />
CanOBD2&1 <strong>Scan</strong> <strong>Tool</strong><br />
automatically displays the code<br />
definitions for Generic DTC’s.<br />
If the Generic definition for the<br />
currently displayed code is not<br />
available, an advisory message<br />
shows on the CanOBD2&1 <strong>Scan</strong><br />
<strong>Tool</strong>’s display.<br />
� DTC’s that start with “P1” and some<br />
“P3” are Manufacturer specific codes<br />
and their code definitions vary with<br />
each vehicle manufacturer. When a<br />
Manufacturer specific DTC is<br />
retrieved, the LCD display shows a<br />
list of vehicle manufacturers. Use the<br />
UP and DOWN buttons, as<br />
necessary, to highlight the appropriate<br />
manufacturer, then press the<br />
ENTER/LD button to display the<br />
correct code definition for your vehicle.<br />
If the manufacturer for your vehicle is not listed, use the UP<br />
and DOWN buttons, as necessary, to select Other<br />
manufacturer and press the ENTER/LD<br />
additional DTC information.<br />
button for<br />
If the Manufacturer Specific<br />
definition for the currently<br />
displayed code is not available, an<br />
advisory message shows on the<br />
CanOBD2&1 <strong>Scan</strong> <strong>Tool</strong>’s display.<br />
10. If more than one code was retrieved press the DTC SCROLL<br />
button, as necessary, to display additional codes one at a time.<br />
28 CanOBD2&1
OBD2 Systems<br />
CODE RETRIEVAL PROCEDURE<br />
� Each time the DTC SCROLL button is pressed and<br />
�<br />
released, the CanOBD2&1 <strong>Scan</strong> <strong>Tool</strong> will scroll and display the<br />
next DTC in sequence until all DTCs in its memory have<br />
displayed.<br />
Freeze Frame Data (if available) will display after DTC #1.<br />
Whenever the Scroll function is used to view additional<br />
codes, the CanOBD2&1 <strong>Scan</strong> <strong>Tool</strong>’s communication link<br />
with the vehicle’s computer disconnects. To re-establish<br />
communication, press the POWER/LINK button again.<br />
� In OBD2 systems, when an<br />
emissions-related engine malfunction<br />
occurs that causes a DTC to set,<br />
a record or snapshot of engine<br />
conditions at the time that the<br />
malfunction occurred is also saved<br />
in the vehicle’s computer memory.<br />
The record saved is called Freeze<br />
Frame data. Saved engine<br />
conditions include, but are not limited to: engine speed, open or<br />
closed loop operation, fuel system commands, coolant<br />
temperature, calculated load value, fuel pressure, vehicle speed,<br />
air flow rate, and intake manifold pressure.<br />
If more than one malfunction is present that causes more<br />
than one DTC to be set, only the code with the highest<br />
priority will contain Freeze Frame data. The code<br />
designated “01” on the CanOBD2&1 <strong>Scan</strong> <strong>Tool</strong>’s display is<br />
referred to as the PRIORITY code, and Freeze Frame data<br />
always refers to this code. The priority code is also the one<br />
that has commanded the MIL on.<br />
Retrieved information can be uploaded to a Personal<br />
Computer (PC) with the use of an optional “PC Link Kit.”<br />
See instructions included with PC-Link program for more<br />
information.<br />
11. When the last retrieved DTC has been displayed and the DTC<br />
SCROLL button is pressed, the CanOBD2&1 <strong>Scan</strong> <strong>Tool</strong> enters<br />
the “enhanced” mode.<br />
� See VIEWING ENHANCED DTCs on page 30 to view enhanced<br />
DTCs for your vehicle.<br />
� If you do not wish to view enhanced DTCs, press the DTC<br />
SCROLL button to return to the OBD2 DTC screen.<br />
If a Manufacturer specific DTC was returned during the code<br />
retrieval process, and the manufacturer selected for the code<br />
was not Chrysler, Jeep, Ford, Mazda, General Motors or<br />
Isuzu, pressing the DTC SCROLL button after display of<br />
the last retrieved DTC returns the screen to the first retrieved<br />
DTC (the Enhanced DTC menu is not displayed).<br />
CanOBD2&1 29
OBD2 Systems<br />
VIEWING ENHANCED DTCs<br />
12. Determine engine system(s) condition by viewing the CanOBD2&1<br />
<strong>Scan</strong> <strong>Tool</strong>’s display for any retrieved Diagnostic Trouble Codes,<br />
code definitions, Freeze Frame data and interpreting the green,<br />
yellow and red LEDs.<br />
� If DTC’s were retrieved and you are going to perform the repairs<br />
yourself, proceed by consulting the Vehicle’s Service Repair<br />
Manual for testing instructions, testing procedures, and flow<br />
charts related to retrieved code(s).<br />
� If you plan to take the vehicle to a professional to have it<br />
serviced, complete the PRELIMINARY VEHICLE DIAGNOSTIC<br />
WORKSHEET on page 15 and take it together with the retrieved<br />
codes, freeze frame data and LED information to aid in the<br />
troubleshooting procedure.<br />
� To prolong battery life, the CanOBD2&1 <strong>Scan</strong> <strong>Tool</strong> automatically<br />
shuts “Off” approximately three minutes after it is disconnected<br />
from the vehicle. The DTCs retrieved, Monitor Status and<br />
Freeze Frame data (if any) will remain in the CanOBD2&1 <strong>Scan</strong><br />
<strong>Tool</strong>’s memory, and may be viewed at any time by turning the<br />
unit “On”. If the CanOBD2&1 <strong>Scan</strong> <strong>Tool</strong>’s batteries are removed,<br />
or if the CanOBD2&1 <strong>Scan</strong> <strong>Tool</strong> is re-linked to a vehicle to<br />
retrieve codes/data, any prior codes/data in its memory are<br />
automatically cleared.<br />
VIEWING ENHANCED DTCs<br />
Following the code retrieval procedure (see CODE RETRIEVAL<br />
PROCEDURE on page 24), when the last retrieved DTC has been<br />
displayed and the DTC SCROLL button is pressed, the CanOBD2&1<br />
<strong>Scan</strong> <strong>Tool</strong> enters the “enhanced” mode. The “enhanced” mode provides<br />
the ability to retrieve enhanced DTCs from most Chrysler/Jeep,<br />
Ford/Mazda, GM/Isuzu, Honda/Acura and Toyota/Lexus vehicles. The<br />
types of enhanced data available depends on the vehicle make.<br />
The screen shown when the CanOBD2&1 <strong>Scan</strong> <strong>Tool</strong> enters the<br />
“enhanced” mode depends on the type(s) of DTC(s) returned during the<br />
code retrieval process:<br />
� If no DTCs were retrieved, or only<br />
generic DTCs were retrieved, the<br />
Enhanced DTCs Main menu displays.<br />
Use the UP and DOWN buttons,<br />
as necessary, to highlight the<br />
appropriate manufacturer, then press<br />
the ENTER/LD button to display the<br />
Enhanced menu for the selected vehicle<br />
manufacturer.<br />
If the manufacturer of the vehicle from which codes were<br />
retrieved is not listed, press the DTC SCROLL button<br />
to return to the OBD2 DTC screen. Enhanced data is not<br />
available for your vehicle.<br />
30 CanOBD2&1
OBD2 Systems<br />
VIEWING ENHANCED DTCs<br />
� If a Manufacturer specific DTC was<br />
retrieved, and the manufacturer selected<br />
for the code was Chrysler, Jeep, Ford,<br />
Mazda, General Motors, Isuzu, Honda,<br />
Acura, Toyota or Lexus, a confirmation<br />
message displays. Press the ENTER/LD<br />
button to display the Enhanced<br />
menu for the selected vehicle<br />
manufacturer, or, press the DTC<br />
SCROLL button to return to the OBD2 DTC screen.<br />
� If a Manufacturer specific DTC was retrieved, and the manufacturer<br />
selected for the code was not Chrysler, Jeep, Ford, Mazda, General<br />
Motors, Isuzu, Honda, Acura, Toyota or Lexus, the “enhanced”<br />
mode is bypassed, and the OBD2 DTC screen shows the first code<br />
retrieved. Enhanced data is not available for your vehicle.<br />
Refer to the appropriate paragraph to view enhanced data for your vehicle:<br />
� Chrysler/Jeep......................................... page 31<br />
� Ford/Mazda............................................ page 33<br />
� GM/Isuzu................................................ page 34<br />
� Honda/Acura .......................................... page 36<br />
� Toyota/Lexus ......................................... page 37<br />
Chrysler/Jeep Enhanced DTCs<br />
When Chrysler/Jeep is selected from the Enhanced DTCs Main menu,<br />
the Chrysler Enhanced menu displays. You may view either “Engine<br />
DTCs” or “Transmission DTCs.”<br />
1. Use the UP and DOWN buttons,<br />
as necessary, to highlight the desired<br />
option, then press the ENTER/LD<br />
button.<br />
Transmission DTCs are not supported<br />
on most Chrysler/Jeep vehicles<br />
manufactured prior to 2002.<br />
� A “One moment please” message displays while the CanOBD2&1<br />
<strong>Scan</strong> <strong>Tool</strong> retrieves the selected DTCs.<br />
� If the CanOBD2&1 <strong>Scan</strong> <strong>Tool</strong> fails to<br />
link to the vehicle’s computer, a<br />
“Linking Failed” message shows on<br />
the CanOBD2&1 <strong>Scan</strong> <strong>Tool</strong>’s display.<br />
- Verify the ignition is ON, then<br />
press the ENTER/LD<br />
to continue.<br />
2. To read the display:<br />
button<br />
Refer to DISPLAY FUNCTIONS on page 12 for a<br />
description of LCD display elements.<br />
CanOBD2&1 31
OBD2 Systems<br />
VIEWING ENHANCED DTCs<br />
� A visible icon indicates that the CanOBD2&1 <strong>Scan</strong> <strong>Tool</strong> is<br />
being powered through the vehicle’s DLC connector.<br />
� A visible icon indicates that the CanOBD2&1 <strong>Scan</strong> <strong>Tool</strong> is<br />
�<br />
linked to (communicating with) the vehicle’s computer.<br />
The upper right hand corner of the<br />
display shows the number of the<br />
code currently being displayed, the<br />
total number of codes retrieved.<br />
� The Diagnostic Trouble Code (DTC)<br />
and related code definition are<br />
shown in the lower section of the<br />
LCD display.<br />
I/M MONITOR STATUS icons are not displayed when<br />
viewing enhanced DTCs.<br />
In the case of long code definitions, or when viewing<br />
Freeze Frame data, a small arrow is shown in the<br />
upper/lower right-hand corner of the code display area<br />
to indicate the presence of additional information. Use<br />
the and buttons, as necessary, to view the<br />
additional information.<br />
� The CanOBD2&1 <strong>Scan</strong> <strong>Tool</strong> will<br />
display a code only if codes are<br />
present in the vehicle’s computer<br />
memory. If no codes are present, a<br />
“No Enhanced DTC’s are presently<br />
stored in the vehicle’s computer” is<br />
displayed. Press the ENTER/LD<br />
button to return to the Chrysler<br />
Enhanced menu.<br />
3. If more than one code was retrieved press the DTC SCROLL<br />
button, as necessary, to display additional codes one at a time.<br />
� Whenever the Scroll function is used to view additional codes,<br />
the CanOBD2&1 <strong>Scan</strong> <strong>Tool</strong>’s communication link with the<br />
vehicle’s computer disconnects. To re-establish communication,<br />
press the LINK button again.<br />
4. When the last retrieved DTC has been displayed and the DTC<br />
SCROLL button is pressed, the CanOBD2&1 <strong>Scan</strong> <strong>Tool</strong> returns<br />
to the Chrysler Enhanced menu.<br />
� To view additional enhanced DTCs, repeat steps 1 through 4,<br />
above.<br />
� To exit the enhanced mode, use the UP and DOWN<br />
buttons, as necessary, to select Exit from the Chrysler<br />
Enhanced menu, then press the ENTER/LD button. The<br />
CanOBD2&1 <strong>Scan</strong> <strong>Tool</strong> returns to the OBD2 DTC screen.<br />
32 CanOBD2&1
Ford/Mazda Enhanced DTCs<br />
OBD2 Systems<br />
VIEWING ENHANCED DTCs<br />
Mazda Enhanced DTCs are available for Mazda-branded<br />
Ford vehicles only.<br />
When Ford/Mazda is selected from the Enhanced DTCs Main menu,<br />
the Ford/Mazda Enhanced menu displays. You may view DTCs for<br />
either the “Continuous Memory Test”, “KOEO (Key On Engine Off) Test”<br />
or “KOER (Key On Engine Running) Test.”<br />
1. Use the UP and DOWN buttons, as<br />
necessary, to highlight the desired option,<br />
then press the ENTER/LD button.<br />
When choosing to view KOER<br />
Test DTCs, start the vehicle’s<br />
engine before making your<br />
selection.<br />
� A “One moment please” message displays, while the<br />
�<br />
CanOBD2&1 <strong>Scan</strong> <strong>Tool</strong> retrieves the selected DTCs.<br />
If the CanOBD2&1 <strong>Scan</strong> <strong>Tool</strong> fails to<br />
link to the vehicle’s computer, a<br />
“Linking Failed” message shows on<br />
the CanOBD2&1 <strong>Scan</strong> <strong>Tool</strong>’s Display.<br />
- Verify the ignition is ON, then<br />
press the ENTER/LD<br />
to continue.<br />
button<br />
� If the KOER Test was selected, and<br />
the vehicle’s engine is not running,<br />
an advisory message shows on the<br />
CanOBD2&1 <strong>Scan</strong> <strong>Tool</strong>’s display.<br />
- Start the vehicle’s engine, then<br />
press the ENTER/LD<br />
to continue.<br />
2. To read the display:<br />
button<br />
Refer to DISPLAY FUNCTIONS on page 12 for a<br />
description of LCD display elements.<br />
� A visible icon indicates that the CanOBD2&1 <strong>Scan</strong> <strong>Tool</strong> is<br />
being powered through the vehicle’s DLC connector.<br />
� A visible icon indicates that the CanOBD2&1 <strong>Scan</strong> <strong>Tool</strong> is<br />
�<br />
linked to (communicating with) the vehicle’s computer.<br />
The upper right hand corner of the<br />
display shows the number of the<br />
code currently being displayed, the<br />
total number of codes retrieved.<br />
� The Diagnostic Trouble Code (DTC)<br />
and related code definition are shown in<br />
the lower section of the LCD display.<br />
CanOBD2&1 33
OBD2 Systems<br />
VIEWING ENHANCED DTCs<br />
I/M MONITOR STATUS icons are not displayed when<br />
viewing enhanced DTCs.<br />
In the case of long code definitions, or when viewing<br />
Freeze Frame data, a small arrow is shown in the<br />
upper/lower right-hand corner of the code display area<br />
to indicate the presence of additional information. Use<br />
the and buttons, as necessary, to view the<br />
additional information.<br />
� The CanOBD2&1 <strong>Scan</strong> <strong>Tool</strong> will display<br />
a code only if codes are present in the<br />
vehicle’s computer memory. If no codes<br />
are present, a “No Enhanced DTC’s are<br />
presently stored in the vehicle’s<br />
computer” is displayed. Press the<br />
ENTER/LD button to return to the<br />
Ford/Mazda Enhanced menu.<br />
3. If more than one code was retrieved press the DTC SCROLL<br />
button, as necessary, to display additional codes one at a time.<br />
� Whenever the Scroll function is used to view additional codes,<br />
the CanOBD2&1 <strong>Scan</strong> <strong>Tool</strong>’s communication link with the<br />
vehicle’s computer disconnects. To re-establish communication,<br />
press the LINK button again.<br />
4. When the last retrieved DTC has been displayed and the DTC<br />
SCROLL button is pressed, the CanOBD2&1 <strong>Scan</strong> <strong>Tool</strong> returns<br />
to the Ford/Mazda Enhanced menu.<br />
� To view additional enhanced DTCs, repeat steps 1 through 4,<br />
above.<br />
� To exit the enhanced mode, use the UP and DOWN<br />
buttons, as necessary, to select Exit from the Ford/Mazda<br />
Enhanced menu, then press the ENTER/LD button. The<br />
CanOBD2&1 <strong>Scan</strong> <strong>Tool</strong> returns to the OBD2 DTC screen.<br />
General Motors/Isuzu Enhanced DTCs<br />
When GM/Isuzu is selected from the Enhanced DTCs Main menu, the<br />
GM/Isuzu Enhanced menu displays. You may view the “MIL DTC”,<br />
“Current DTC”, “Fail Since Clear DTC” or “History DTC.”<br />
1. Use the UP and DOWN buttons,<br />
as necessary, to highlight the desired<br />
option, then press the ENTER/LD<br />
button.<br />
� A “One moment please” message<br />
displays while the CanOBD2&1 <strong>Scan</strong><br />
<strong>Tool</strong> retrieves the selected DTCs.<br />
34 CanOBD2&1
OBD2 Systems<br />
VIEWING ENHANCED DTCs<br />
� If the CanOBD2&1 <strong>Scan</strong> <strong>Tool</strong> fails to<br />
link to the vehicle’s computer, a<br />
“Linking Failed” message shows on<br />
the CanOBD2&1 <strong>Scan</strong> <strong>Tool</strong>’s display.<br />
- Verify the ignition is ON, then<br />
press the ENTER/LD button<br />
to continue.<br />
2. To read the display:<br />
Refer to DISPLAY FUNCTIONS on page 12 for a<br />
description of LCD display elements.<br />
� A visible icon indicates that the CanOBD2&1 <strong>Scan</strong> <strong>Tool</strong> is<br />
being powered through the vehicle’s DLC connector.<br />
� A visible icon indicates that the CanOBD2&1 <strong>Scan</strong> <strong>Tool</strong> is<br />
�<br />
linked to (communicating with) the vehicle’s computer.<br />
The upper right hand corner of the<br />
display shows the number of the<br />
code currently being displayed, the<br />
total number of codes retrieved.<br />
� The Diagnostic Trouble Code (DTC)<br />
and related code definition are<br />
shown in the lower section of the<br />
LCD display.<br />
I/M MONITOR STATUS icons are not displayed when<br />
viewing enhanced DTCs.<br />
In the case of long code definitions, or when viewing<br />
Freeze Frame data, a small arrow is shown in the<br />
upper/lower right-hand corner of the code display area<br />
to indicate the presence of additional information. Use<br />
the and buttons, as necessary, to view the<br />
�<br />
additional information.<br />
The CanOBD2&1 <strong>Scan</strong> <strong>Tool</strong> will<br />
display a code only if codes are<br />
present in the vehicle’s computer<br />
memory. If no codes are present, a<br />
“No Enhanced DTC’s are presently<br />
stored in the vehicle’s computer” is<br />
displayed. Press the ENTER/LD<br />
button to return to the GM Enhanced<br />
menu.<br />
3. If more than one code was retrieved press the DTC SCROLL<br />
button, as necessary, to display additional codes one at a time.<br />
� Whenever the Scroll function is used to view additional codes,<br />
the CanOBD2&1 <strong>Scan</strong> <strong>Tool</strong>’s communication link with the<br />
vehicle’s computer disconnects. To re-establish communication,<br />
press the LINK button again.<br />
CanOBD2&1 35
OBD2 Systems<br />
VIEWING ENHANCED DTCs<br />
4. When the last retrieved DTC has been displayed and the DTC<br />
SCROLL button is pressed, the CanOBD2&1 <strong>Scan</strong> <strong>Tool</strong> returns<br />
to the GM/Isuzu Enhanced menu.<br />
� To view additional enhanced DTCs, repeat steps 1 through 4,<br />
above.<br />
� To exit the enhanced mode, use the UP and DOWN<br />
buttons, as necessary, to select Exit from the GM/Isuzu<br />
Enhanced menu, then press the ENTER/LD button. The<br />
CanOBD2&1 <strong>Scan</strong> <strong>Tool</strong> returns to the OBD2 DTC screen.<br />
Honda/Acura Enhanced DTCs<br />
When Honda/Acura is selected from the<br />
Enhanced DTCs Main menu, the Honda<br />
Acura Enhanced menu displays. Depending<br />
on the protocol used to communicate with<br />
your vehicle, the Honda/Acura Enhanced<br />
menu provides options to view:<br />
� Permanent DTCs or Temporary DTCs<br />
� Confirmed DTCs or History DTCs<br />
1. Use the UP and DOWN buttons,<br />
as necessary, to highlight the desired<br />
option, then press the ENTER/LD<br />
button.<br />
� A “One moment please” message<br />
displays while the <strong>Scan</strong> <strong>Tool</strong><br />
�<br />
retrieves the selected DTCs.<br />
If the <strong>Scan</strong> <strong>Tool</strong> fails to link to the<br />
vehicle’s computer, a “Linking<br />
Failed” message shows on the <strong>Scan</strong><br />
<strong>Tool</strong>’s display.<br />
- Verify the ignition is ON, then<br />
press the ENTER/LD<br />
to continue.<br />
2. To read the display:<br />
button<br />
Refer to DISPLAY FUNCTIONS on page 12 for a description<br />
of LCD display elements.<br />
� A visible icon indicates that the <strong>Scan</strong> <strong>Tool</strong> is being powered<br />
through the vehicle’s DLC connector.<br />
� A visible icon indicates that the <strong>Scan</strong> <strong>Tool</strong> is linked to<br />
�<br />
(communicating with) the vehicle’s computer.<br />
The upper right hand corner of the display shows the number of<br />
the code currently being displayed, the total number of codes<br />
retrieved.<br />
36 CanOBD2&1
OBD2 Systems<br />
VIEWING ENHANCED DTCs<br />
� The Diagnostic Trouble Code (DTC)<br />
and related code definition are<br />
shown in the lower section of the<br />
LCD display.<br />
I/M MONITOR STATUS<br />
icons are not displayed<br />
when<br />
DTCs.<br />
viewing enhanced<br />
In the case of long code definitions, or when viewing<br />
Freeze Frame data, a small arrow is shown in the<br />
upper/lower right-hand corner of the code display area<br />
to indicate the presence of additional information. Use<br />
the and buttons, as necessary, to view the<br />
additional information.<br />
� The <strong>Scan</strong> <strong>Tool</strong> will display a code only<br />
if codes are present in the vehicle’s<br />
computer memory. If no codes are<br />
present, a “No Enhanced DTC’s are<br />
presently stored in the vehicle’s<br />
computer” is displayed. Press the<br />
ENTER/LD button to return to the<br />
Honda/Acura Enhanced menu.<br />
3. If more than one code was retrieved press the DTC SCROLL<br />
button, as necessary, to display additional codes one at a time.<br />
� Whenever the Scroll function is used to view additional codes,<br />
the <strong>Scan</strong> <strong>Tool</strong>’s communication link with the vehicle’s computer<br />
disconnects. To re-establish communication, press the LINK<br />
button again.<br />
4. When the last retrieved DTC has been displayed and the DTC<br />
SCROLL button is pressed, the <strong>Scan</strong> <strong>Tool</strong> returns to the<br />
Honda/Acura Enhanced menu.<br />
� To view additional enhanced DTCs, repeat steps 1 through 4, above.<br />
� To exit the enhanced mode, use the UP and DOWN<br />
buttons, as necessary, to select Exit from the Honda/Acura<br />
Enhanced menu, then press the ENTER/LD button. The<br />
<strong>Scan</strong> <strong>Tool</strong> returns to the OBD2 DTC screen.<br />
Toyota/Lexus Enhanced DTCs<br />
When Toyota/Lexus is selected from the<br />
Enhanced DTCs Main menu, the<br />
Toyota/Lexus Enhanced menu displays.<br />
Depending on the protocol used to<br />
communicate with your vehicle, the<br />
Toyota/Lexus Enhanced menu provides<br />
options to view:<br />
CanOBD2&1 37
OBD2 Systems<br />
VIEWING ENHANCED DTCs<br />
� Current DTCs or History DTCs<br />
� Current DTCs, Historical DTCs or Readiness DTCs<br />
1. Use the UP and DOWN buttons,<br />
as necessary, to highlight the desired<br />
option, then press the ENTER/LD<br />
button.<br />
� A “One moment please” message<br />
displays, while the <strong>Scan</strong> <strong>Tool</strong><br />
retrieves the selected DTCs.<br />
� If the <strong>Scan</strong> <strong>Tool</strong> fails to link to the<br />
vehicle’s computer, a “Linking<br />
Failed” message shows on the <strong>Scan</strong><br />
<strong>Tool</strong>’s Display.<br />
- Verify the ignition is ON, then<br />
press the ENTER/LD<br />
to continue.<br />
2. To read the display:<br />
button<br />
Refer to DISPLAY FUNCTIONS on page 12 for a description<br />
of LCD display elements.<br />
� A visible icon indicates that the <strong>Scan</strong> <strong>Tool</strong> is being powered<br />
through the vehicle’s DLC connector.<br />
� A visible icon indicates that the <strong>Scan</strong> <strong>Tool</strong> is linked to<br />
(communicating with) the vehicle’s computer.<br />
� The upper right hand corner of<br />
the display shows the number of<br />
the code currently being displayed,<br />
the total number of codes<br />
retrieved.<br />
� The Diagnostic Trouble Code (DTC)<br />
and related code definition are<br />
shown in the lower section of the<br />
LCD display.<br />
I/M MONITOR STATUS icons are not displayed when<br />
viewing enhanced DTCs.<br />
In the case of long code definitions, or when viewing<br />
Freeze Frame data, a small arrow is shown in the<br />
upper/lower right-hand corner of the code display area<br />
to indicate the presence of additional information. Use<br />
the and buttons, as necessary, to view the<br />
additional information.<br />
38 CanOBD2&1
OBD2 Systems<br />
ERASING DIAGNOSTIC TROUBLE CODES (DTCs)<br />
� The <strong>Scan</strong> <strong>Tool</strong> will display a code only if<br />
codes are present in the vehicle’s<br />
computer memory. If no codes are<br />
present, a “No Enhanced DTC’s are<br />
presently stored in the vehicle’s<br />
computer” is displayed. Press the<br />
ENTER/LD button to return to the<br />
Toyota/Lexus Enhanced menu.<br />
3. If more than one code was retrieved press the DTC SCROLL<br />
button, as necessary, to display additional codes one at a time.<br />
4. Whenever the Scroll function is used to view additional codes, the<br />
<strong>Scan</strong> <strong>Tool</strong>’s communication link with the vehicle’s computer<br />
disconnects. To re-establish communication, press the LINK<br />
button again.<br />
5. When the last retrieved DTC has been displayed and the DTC<br />
SCROLL button is pressed, the <strong>Scan</strong> <strong>Tool</strong> returns to the<br />
Toyota/Lexus Enhanced menu.<br />
� To view additional enhanced DTCs, repeat steps 1 through 4,<br />
above.<br />
� To exit the enhanced mode, use the UP and DOWN<br />
buttons, as necessary, to select Exit from the Toyota/Lexus<br />
Enhanced menu, then press the ENTER/LD button. The<br />
<strong>Scan</strong> <strong>Tool</strong> returns to the OBD2 DTC screen.<br />
ERASING DIAGNOSTIC TROUBLE CODES (DTCs)<br />
When the CanOBD2&1 <strong>Scan</strong> <strong>Tool</strong>’s ERASE function is<br />
used to erase DTCs from the vehicle's on-board computer,<br />
"Freeze Frame" data and manufacturer-specific enhanced<br />
data are also erased.<br />
If you plan to take the vehicle to a Service Center for repair, DO NOT<br />
erase the codes from the vehicle's computer. If the codes are erased,<br />
valuable information that might help the technician troubleshoot the<br />
problem will also be erased.<br />
Erase DTCs from the computer's memory as follows:<br />
When DTCs are erased from the vehicle's computer memory,<br />
the I/M Readiness Monitor Status program resets the status of<br />
all Monitors to a not run "flashing" condition. To set all of the<br />
Monitors to a DONE status, an OBD2 Drive Cycle must be<br />
performed. Refer to your vehicle's service manual for<br />
information on how to perform an OBD2 Drive Cycle for the<br />
vehicle under test.<br />
CanOBD2&1 39
OBD2 Systems<br />
ERASING DIAGNOSTIC TROUBLE CODES (DTCs)<br />
The CanOBD2&1 <strong>Scan</strong> <strong>Tool</strong> must<br />
be connected to the vehicle’s DLC<br />
to erase the codes from the<br />
computer’s memory. If you press<br />
the ERASE button when the<br />
CanOBD2&1 <strong>Scan</strong> <strong>Tool</strong> is not<br />
connected to the vehicle’s DLC, the<br />
erase instruction screen displays.<br />
The Erase function can be performed only from the OBD2<br />
DTC screen. The Erase function cannot be performed while<br />
the CanOBD2&1 <strong>Scan</strong> <strong>Tool</strong> is in “enhanced” mode.<br />
1. If not connected already, connect the<br />
CanOBD2&1 <strong>Scan</strong> <strong>Tool</strong> to the vehicle's<br />
DLC, and turn the ignition "On.” (If the<br />
CanOBD2&1 <strong>Scan</strong> <strong>Tool</strong> is already<br />
connected and linked to the vehicle's<br />
computer, proceed directly to step 4. If<br />
not, continue to step 2.)<br />
2. Turn the ignition ON. DO NOT start the<br />
engine. Press and release the<br />
POWER/LINK button to establish<br />
communication with the vehicle's<br />
computer.<br />
3. Press and release the ERASE<br />
button. A confirmation message shows<br />
on the LCD display.<br />
- If you are sure you want to proceed<br />
press the ERASE button again to<br />
erase DTCs from the vehicle’s<br />
computer.<br />
- If you do not want to continue with the erase process, press the<br />
POWER/LINK button to exit the erase mode.<br />
4. If you chose to erase DTCs, a progress<br />
screen displays while the erase function<br />
is in progress.<br />
� If the erase was successful, a<br />
confirmation message shows on the<br />
display. Press the POWER/LINK<br />
button to return to the DTC<br />
screen.<br />
� If the erase was not successful, an<br />
advisory message shows on the<br />
display. Verify that the CanOBD2&1<br />
<strong>Scan</strong> <strong>Tool</strong> is properly connected to<br />
the vehicle’s DLC and that the<br />
ignition is on, then repeat steps 2<br />
and 3, above.<br />
40 CanOBD2&1
OBD2 Systems<br />
I/M READINESS TESTING<br />
Erasing DTCs does not fix the problem(s) that caused the<br />
code(s) to be set. If proper repairs to correct the problem that<br />
caused the code(s) to be set are not made, the code(s) will<br />
appear again (and the check engine light will illuminate) as<br />
soon as the vehicle is driven long enough for its Monitors to<br />
complete their testing.<br />
I/M READINESS TESTING<br />
I/M is an Inspection and Maintenance program legislated by the<br />
Government to meet federal clean-air standards.<br />
The program requires that a vehicle be taken periodically to an<br />
Emissions Station for an "Emissions Test" or "Smog Check,” where the<br />
emissions-related components and systems are inspected and tested<br />
for proper operation. Emissions Tests are generally performed once a<br />
year, or once every two years.<br />
On OBD2 systems, the I/M program is enhanced by requiring vehicles<br />
to meet stricter test standards. One of the tests instituted by the Federal<br />
Government is called I/M 240. On I/M 240, the vehicle under test is<br />
driven under different speeds and load conditions on a dynamometer for<br />
240 seconds, while the vehicle's emissions are measured.<br />
Emissions tests vary depending on the geographic or regional<br />
area in which the vehicle is registered. If the vehicle is<br />
registered in a highly urbanized area, the I/M 240 is probably<br />
the type of test required. If the vehicle is registered in a rural<br />
area, the stricter “dynamometer type” test may not be required.<br />
I/M Readiness Monitors<br />
I/M Readiness shows whether the various emissions-related systems on<br />
the vehicle are operating properly and are ready for Inspection and<br />
Maintenance testing.<br />
State and Federal Governments enacted Regulations, Procedures and<br />
Emission Standards to ensure that all emissions-related components<br />
and systems are continuously or periodically monitored, tested and<br />
diagnosed whenever the vehicle is in operation. It also requires vehicle<br />
manufacturers to automatically detect and report any problems or faults<br />
that may increase the vehicle's emissions to an unacceptable level.<br />
The vehicle's emissions control system consists of several components<br />
or sub-systems (Oxygen Sensor, Catalytic Converter, EGR, Fuel<br />
System, etc.) that aid in reducing vehicle emissions.<br />
To have an efficient Vehicle Emission Control System, all the emissionsrelated<br />
components and systems must work correctly whenever the<br />
vehicle is in operation.<br />
To comply with State and Federal Government regulations, vehicle<br />
manufacturers designed a series of special computer programs called<br />
"Monitors" that are programmed into the vehicle's computer. Each of<br />
these Monitors is specifically designed to run tests and diagnostics on a<br />
specific emissions-related component or system (Oxygen Sensor,<br />
CanOBD2&1 41
OBD2 Systems<br />
I/M READINESS TESTING<br />
Catalytic Converter, EGR Valve, Fuel System, etc.) to ensure their<br />
proper operation. Currently, there are a maximum of eleven Monitors<br />
available for use.<br />
Each Monitor has a specific function to test and diagnose only its<br />
designated emissions-related component or system. The names<br />
of the Monitors (Oxygen Sensor Monitor, Catalyst Monitor, EGR<br />
Monitor, Misfire Monitor, etc.) describe which component or<br />
system each Monitor is designed to test and diagnose.<br />
Emissions Inspection and Maintenance (I/M) Readiness<br />
Monitor Status Information<br />
I/M Readiness Monitor Status shows which of the vehicle's Monitors<br />
have run and completed their diagnosis and testing, and which ones<br />
have not yet run and completed testing and diagnosis of their<br />
designated sections of the vehicle's emissions system.<br />
� If a Monitor was able to meet all the conditions required to enable it<br />
to perform the self-diagnosis and testing of its assigned engine<br />
system, it means the monitor "HAS RUN.”<br />
� If a Monitor has not yet met all the conditions required for it to<br />
perform the self-diagnosis and testing of its assigned engine system;<br />
it means the Monitor "HAS NOT RUN.”<br />
The Monitor Run/Not Run status does not show whether<br />
or not a problem exists in a system. Monitor status only<br />
indicates whether a particular Monitor has or has not run<br />
and performed the self-diagnosis and testing of its<br />
associated system.<br />
Performing I/M Readiness Quick Check<br />
When a vehicle first comes from the factory, all Monitors<br />
indicate a “HAVE RUN” status. This indicates that all Monitors<br />
have run and completed their diagnostic testing. The “HAVE<br />
RUN” status remains in the computer's memory, unless the<br />
Diagnostic Trouble Codes are erased or the vehicle's<br />
computer memory is cleared.<br />
The CanOBD2&1 <strong>Scan</strong> <strong>Tool</strong> allows you to retrieve Monitor/System<br />
Status Information to help you determine if the vehicle is ready for an<br />
Emissions Test (Smog Check). In addition to retrieving Diagnostic<br />
Trouble Codes, the CanOBD2&1 <strong>Scan</strong> <strong>Tool</strong> also retrieves Monitor<br />
Run/Not Run status. This information is very important since different<br />
areas of the state/country have different emissions laws and regulations<br />
concerning Monitor Run/Not Run status.<br />
Before an Emissions Test (Smog Check) can be performed, your<br />
vehicle must meet certain rules, requirements and procedures legislated<br />
by the Federal and state (country) governments where you live.<br />
42 CanOBD2&1
OBD2 Systems<br />
I/M READINESS TESTING<br />
1. In most areas, one of the requirements that must be met before a<br />
vehicle is allowed to be Emissions Tested (Smog Checked) is that<br />
the vehicle does not have any Diagnostic Trouble Codes present<br />
(with the exception of PENDING Diagnostic Trouble Codes).<br />
2. In addition to the requirement that no Diagnostic Trouble Codes be<br />
present, some areas also require that all the Monitors that a<br />
particular vehicle supports indicate a "Has Run" status condition<br />
before an Emissions Check may be performed.<br />
3. Other areas may only require that some (but not all) Monitors<br />
indicate a "Has Run" status before an Emissions Test (Smog Check)<br />
may be performed.<br />
Monitors with a "Has Run" status indicate that all the<br />
required conditions they needed to perform diagnosis and<br />
testing of their assigned engine area (system) have been<br />
met, and all diagnostic testing has completed<br />
successfully.<br />
Monitors with a "Has Not Run" status have not yet met the<br />
conditions they need to perform diagnosis and testing of<br />
their assigned engine area (system), and have not been<br />
able to perform diagnostic testing on that system.<br />
The green, yellow and red LEDs provide a quick way to help you<br />
determine if a vehicle is ready for an Emissions Test (Smog Check).<br />
Follow the instructions below to perform the Quick Check.<br />
Perform the CODE RETRIEVAL PROCEDURE as described on page<br />
24, then interpret the LED indications as follows:<br />
Interpreting I/M Readiness Test Results<br />
1. GREEN LED - Indicates that all engine<br />
systems are "OK" and operating normally<br />
(all Monitors supported by the vehicle have<br />
run and performed their self-diagnostic<br />
testing). The vehicle is ready for an<br />
Emissions Test (Smog Check), and there is<br />
a good possibility that it can be certified.<br />
2. YELLOW LED - Determine from the CODE RETRIEVAL<br />
PROCEDURE (page 24) which of the two possible conditions is<br />
causing the yellow LED to light.<br />
� If a "PENDING" Diagnostic Trouble<br />
Code is causing the yellow LED to<br />
light, it is possible that the vehicle<br />
will be allowed to be tested for<br />
emissions and certified. Currently,<br />
most areas (states) will allow an<br />
Emissions Test (Smog Check) to be<br />
performed if the only code in the<br />
vehicle's computer is a "PENDING"<br />
Diagnostic Trouble Code.<br />
CanOBD2&1 43
OBD2 Systems<br />
I/M READINESS TESTING<br />
� If the illumination of the Yellow LED is<br />
being caused by monitors that “have<br />
not run” their diagnostic testing, then<br />
the issue of the vehicle being ready for<br />
an Emissions Test (Smog Check)<br />
depends on the emissions regulations<br />
and laws of your local area.<br />
- Some areas require that all Monitors indicate a "Has Run"<br />
status before they allow an Emissions Test (Smog Check) to<br />
be performed. Other areas only require that some, but not all,<br />
Monitors have run their self-diagnostic testing before an<br />
Emissions Test (Smog Check) may be performed.<br />
From the code retrieval procedure, determine the status of<br />
each Monitor (a solid Monitor icon shows Monitor "Has Run"<br />
status, a flashing Monitor icon indicates "Has Not Run" status).<br />
Take this information to an emissions professional to<br />
determine (based on your test results) if your vehicle is ready<br />
for an Emissions Test (Smog Check).<br />
3. RED LED - Indicates there is a problem<br />
with one or more of the vehicle's<br />
systems. A vehicle displaying a red LED<br />
is definitely not ready for an Emissions<br />
Test (Smog Check). The red LED is<br />
also an indication that there are<br />
Diagnostic Trouble Code(s) present<br />
(displayed on the CanOBD2&1 <strong>Scan</strong><br />
<strong>Tool</strong>'s screen). The Malfunction<br />
Indicator (Check Engine) Lamp on the<br />
vehicle's instrument panel will light steady. The problem that is<br />
causing the red LED to light must be repaired before an Emissions<br />
Test (Smog Check) can be performed. It is also suggested that the<br />
vehicle be inspected/repaired before driving the vehicle further.<br />
If the Red LED was obtained, there is a definite problem present in<br />
the system(s). In these cases, you have the following options.<br />
� Repair the vehicle yourself. If you are going to perform the<br />
repairs yourself, proceed by reading the vehicle service manual<br />
and following all its procedures and recommendations.<br />
� Take the vehicle to a professional to have it serviced. The<br />
problem(s) causing the red LED to light must be repaired before<br />
the vehicle is ready for an Emissions Test (Smog Check).<br />
Using the I/M Readiness Monitor Status to Confirm a Repair<br />
The I/M Readiness Monitor Status function can be used (after repair of a<br />
fault has been performed) to confirm that the repair has been performed<br />
correctly, and/or to check for Monitor Run Status. Use the following<br />
procedure to determine I/M Readiness Monitor Status:<br />
44 CanOBD2&1
OBD2 Systems<br />
I/M READINESS TESTING<br />
1. Using retrieved Diagnostic Trouble Codes (DTCs) and code<br />
definitions as a guide, and following manufacturer's repair<br />
procedures, repair the fault or faults as instructed.<br />
2. After the fault or faults have been repaired, connect the<br />
CanOBD2&1 <strong>Scan</strong> <strong>Tool</strong> to the vehicle's DLC and erase the code or<br />
codes from the vehicle's computer memory.<br />
� See page 36 for procedures for ERASING DIAGNOSTIC<br />
TROUBLE CODES (DTCs) from the vehicle's on-board<br />
computer.<br />
� Write the codes down on a piece of paper for reference before<br />
erasing.<br />
3. After the erase procedure is performed, most of the Monitor icons on<br />
the CanOBD2&1 <strong>Scan</strong> <strong>Tool</strong>’s display will be flashing. Leave the<br />
CanOBD2&1 <strong>Scan</strong> <strong>Tool</strong> connected to the vehicle, and perform a<br />
Trip Drive Cycle for each "flashing" Monitor:<br />
Misfire, Fuel and Comprehensive Component Monitors run<br />
continuously and their icons will always be on solid, even after<br />
the erase function is performed.<br />
� Each DTC is associated with a specific Monitor. Consult the<br />
vehicle's service manual to identify the Monitor (or Monitors)<br />
associated with the faults that were repaired. Follow the<br />
manufacturer's procedures to perform a Trip Drive Cycle for the<br />
appropriate Monitors.<br />
� While observing the Monitor icons on the CanOBD2&1 <strong>Scan</strong><br />
<strong>Tool</strong>’s display, perform a Trip Drive Cycle for the appropriate<br />
Monitor or Monitors.<br />
WARNING: If the vehicle needs to be driven in order to perform a<br />
Trip Drive Cycle, ALWAYS have a second person help you. One<br />
person should drive the vehicle while the other person observes the<br />
Monitor icons on the CanOBD2&1 <strong>Scan</strong> <strong>Tool</strong> for Monitor RUN status.<br />
Trying to drive and observe the CanOBD2&1 <strong>Scan</strong> <strong>Tool</strong> at the same<br />
time is dangerous, and could cause a serious traffic accident.<br />
4. When a Monitor's Trip Drive Cycle is performed properly, the<br />
Monitor icon on the CanOBD2&1 <strong>Scan</strong> <strong>Tool</strong>’s display changes from<br />
"flashing" to "solid,” indicating that the Monitor has run and finished<br />
its diagnostic testing.<br />
� If, after the Monitor has run, the MIL on the vehicle's dash is not<br />
lit, and no stored or pending codes associated with that<br />
particular Monitor are present in the vehicle's computer, the<br />
repair was successful.<br />
� If, after the Monitor has run, the MIL on the vehicle's dash lights<br />
and/or a DTC associated with that Monitor is present in the<br />
vehicle's computer, the repair was unsuccessful. Refer to the<br />
vehicle's service manual and recheck repair procedures.<br />
The Enhanced CanOBD2&1 <strong>Scan</strong> <strong>Tool</strong> is a special diagnostic tool that<br />
communicates with the vehicle's computer. The CanOBD2&1 <strong>Scan</strong> <strong>Tool</strong><br />
lets you view and/or "capture" (record) "real-time" Live Data. This<br />
information includes values (volts, rpm, temperature, speed etc.) and<br />
CanOBD2&1 45
OBD2 Systems<br />
I/M READINESS TESTING<br />
system status information (open loop, closed loop, fuel system status,<br />
etc.) generated by the various vehicle sensors, switches and actuators.<br />
In effect the CanOBD2&1 <strong>Scan</strong> <strong>Tool</strong> lets you view, in "real time", the<br />
same signal values generated by the sensors, actuators, switches<br />
and/or vehicle system status information used by the vehicle's computer<br />
when calculating and conducting system adjustments and corrections.<br />
The real time (Live Data) vehicle operating information (values/status) that<br />
the computer supplies to the CanOBD2&1 <strong>Scan</strong> <strong>Tool</strong> for each sensor,<br />
actuator, switch, etc. is called Parameter Identification (PID) Data.<br />
Each PID (sensor, actuator switch, status, etc.) has a set of operating<br />
characteristics and features (parameters) that serve to identify it. The<br />
CanOBD2&1 <strong>Scan</strong> <strong>Tool</strong> displays this information for each sensor,<br />
actuator, switch or status that is supported by the vehicle under test.<br />
WARNING: If the vehicle must be driven in order to perform a<br />
troubleshooting procedure, ALWAYS have a second person help you.<br />
One person should drive the vehicle while the other person observes<br />
the CanOBD2&1 <strong>Scan</strong> <strong>Tool</strong> data. Trying to drive and operate the<br />
CanOBD2&1 <strong>Scan</strong> <strong>Tool</strong> at the same time is dangerous, and could<br />
cause a serious traffic accident.<br />
46 CanOBD2&1
VIEWING LIVE DATA<br />
OBD2 Live Data Mode<br />
VIEWING LIVE DATA<br />
1. Follow steps 1 through 7 of the CODE RETRIEVAL PROCEDURE<br />
(page 24) to place the CanOBD2&1 <strong>Scan</strong> <strong>Tool</strong> in "Code Retrieval"<br />
mode.<br />
2. Press and release the ENTER/LD<br />
button to place the CanOBD2&1 <strong>Scan</strong><br />
<strong>Tool</strong> in "Live Data" mode.<br />
3. Real-time Live Data (PID) information<br />
supported by the vehicle under test<br />
displays.<br />
Remember, what you are viewing is "real-time" Live Data. The<br />
values (volts, rpm, temperature, vehicle speed, system status<br />
etc) for the various PIDS displayed may change as the<br />
vehicle's operating conditions change.<br />
4. A vehicle usually supports several PIDs, however, only a limited<br />
amount of PID data can be displayed on the screen at one time. If<br />
additional PID data is available, a small arrow will be shown on the<br />
display. Use the UP and DOWN buttons, as necessary, to<br />
scroll up or down to view all available PID data.<br />
� If communication with the vehicle is lost<br />
while viewing Live Data, a Communication<br />
Lost" message shows on the<br />
CanOBD2&1 <strong>Scan</strong> <strong>Tool</strong>'s display.<br />
5. If you experience vehicle problems, view<br />
and/or compare the Live Data (PID)<br />
information displayed on the CanOBD2&1<br />
<strong>Scan</strong> <strong>Tool</strong> to specifications in the vehicle's<br />
repair manual.<br />
If desired, you can "customize" the Live Data display to show<br />
only those PIDs you are interested in viewing. See<br />
Customizing Live Data (PIDs) below for details. You may<br />
also choose to "capture" (record) Live Data for later viewing.<br />
See RECORDING (CAPTURING) LIVE DATA on page 49 for<br />
details.<br />
6. You can toggle back and forth between the DTC screen (to view<br />
DTCs) and Live Data screen (to view PIDs) by alternately pressing<br />
and releasing the DTC SCROLL and the ENTER/LD<br />
buttons once (the unit will stay linked to the vehicle while toggling<br />
between modes). If the DTC SCROLL button is pressed twice,<br />
then the screen will scroll to the next DTC and the CanOBD2&1<br />
<strong>Scan</strong> <strong>Tool</strong> will be taken out of link.<br />
When toggling from the Live Data to the DTC screen a “One<br />
moment please...” message will temporarily display, followed<br />
by the DTC screen.<br />
CanOBD2&1 47
OBD2 Live Data Mode<br />
CUSTOMIZING LIVE DATA (PIDs)<br />
CUSTOMIZING LIVE DATA (PIDs)<br />
This feature lets you customize the CanOBD2&1 <strong>Scan</strong> <strong>Tool</strong> display to<br />
show only those PIDs that are of interest at the current time. You can<br />
customize the Live Data display by placing the CanOBD2&1 <strong>Scan</strong> <strong>Tool</strong><br />
in "Custom Live Data" mode and selecting only the PIDs that you wish<br />
to display. To customize the Live Data display, proceed as follows:<br />
1. With the CanOBD1&1 <strong>Scan</strong> <strong>Tool</strong> in<br />
"Live Data" mode (see VIEWING LIVE<br />
DATA on page 47 for details), press and<br />
hold the ENTER/LD button until the<br />
"Mode Selection Menu" appears.<br />
2. Use the UP and DOWN buttons,<br />
as necessary, to highlight Live Data<br />
Menu, then press the ENTER/LD<br />
button.<br />
� The "Live Data Menu" displays.<br />
3. Use the UP and DOWN buttons, as<br />
necessary, to highlight Custom Live Data,<br />
then press the ENTER/LD button.<br />
� The "Custom Live Data" menu<br />
displays, with the first PID in the<br />
menu highlighted.<br />
4. Use the UP and DOWN buttons<br />
to scroll through the available PIDs.<br />
When the PID you wish to display is<br />
highlighted, press the ENTER/LD<br />
button to select it (a "checkmark" will<br />
show in the checkbox to the right of the<br />
PID to confirm your selection). Repeat<br />
the procedure until only the PIDs you<br />
want to display have all been selected.<br />
� To deselect a currently selected PID, highlight the PID, then<br />
press the ENTER/LD button. The checkmark will be<br />
removed from the checkbox.<br />
5. When you are finished making your selection(s), scroll to the end of<br />
the PID list and highlight the word DONE, then press the ENTER/LD<br />
button.<br />
� The CanOBD2&1 <strong>Scan</strong> <strong>Tool</strong> is now in "Custom Live Data" mode.<br />
Only the PIDs you selected are shown on the CanOBD2&1 <strong>Scan</strong><br />
<strong>Tool</strong>s display.<br />
� To toggle between the "Custom Live Data" display and the full<br />
Live Data display, momentarily press the ENTER/LD button.<br />
� To exit the "Custom Live Data" mode, press and hold the<br />
ENTER/LD button until the “Mode Selection Menu” displays.<br />
48 CanOBD2&1
RECORDING (CAPTURING) LIVE DATA<br />
OBD2 Live Data Mode<br />
RECORDING (CAPTURING) LIVE DATA<br />
You can record and save several frames of Live Data information for<br />
each PID supported by the vehicle in the CanOBD2&1 <strong>Scan</strong> <strong>Tool</strong>'s<br />
memory. Recorded Live Data can serve as valuable information to help<br />
you in the troubleshooting of vehicle problems.<br />
There are two ways that the CanOBD2&1 <strong>Scan</strong> <strong>Tool</strong> can "record" Live<br />
Data:<br />
� Record by DTC Trigger<br />
� Record by Manual Trigger<br />
If the POWER/LINK button is pressed at any time while in<br />
Live Data mode, any stored (recorded) Live Data will be<br />
cleared (erased) from the CanOBD2&1 <strong>Scan</strong> <strong>Tool</strong>’s memory.<br />
Record by DTC Trigger<br />
This function automatically records (captures) Live Data information<br />
when a DTC sets and saves it in the CanOBD2&1 <strong>Scan</strong> <strong>Tool</strong>’s memory.<br />
The recorded (captured) data can be a valuable troubleshooting aid,<br />
particularly if you are experiencing a fault that is causing a DTC to set.<br />
1. With the CanOBD2&1 <strong>Scan</strong> <strong>Tool</strong> in<br />
"Live Data" mode (see VIEWING LIVE<br />
DATA on page 47 for details), press and<br />
hold the ENTER/LD button until the<br />
"Mode Selection Menu" appears.<br />
2. Use the UP and DOWN buttons,<br />
as necessary, to highlight Live Data<br />
Menu, then press the ENTER/LD<br />
button.<br />
� The "Live Data Menu" displays.<br />
3. Use the UP and DOWN buttons,<br />
as necessary, to highlight Record Live<br />
Data, then press the ENTER/LD<br />
button.<br />
� The "Record Live Data Menu" displays.<br />
4. Use the UP and DOWN buttons,<br />
as necessary, to highlight Record by<br />
DTC trigger, then press the ENTER/LD<br />
button.<br />
5. When the "Record by DTC Trigger" screen displays, select the<br />
desired trigger point as follows:<br />
CanOBD2&1 49
OBD2 Live Data Mode<br />
RECORDING (CAPTURING) LIVE DATA<br />
�<br />
The CanOBD2&1 <strong>Scan</strong> <strong>Tool</strong> is capable of recording<br />
approximately 20 frames of Live Data. Record by DTC<br />
trigger lets you select the point in time at which you wish<br />
the CanOBD2&1 <strong>Scan</strong> <strong>Tool</strong> to begin recording Live Data.<br />
You can set the trigger point to record the 20 frames of<br />
data before an event (when the DTC sets), after the event,<br />
or in the middle (10 frames before and 10 frames after the<br />
event.<br />
Beginning - records approximately<br />
20 frames of Live Data after the<br />
DTC sets.<br />
� Middle - records approximately 10<br />
frames of Live Data before and 10<br />
frames after the DTC sets.<br />
� End - records approximately 20<br />
frames of Live Data before the DTC<br />
sets.<br />
6. Use the UP and DOWN buttons, as necessary, to select the<br />
desired trigger point, then press the ENTER/LD button.<br />
� A "One moment please. . ."<br />
message shows on the display.<br />
When the CanOBD2&1 <strong>Scan</strong> <strong>Tool</strong> is<br />
ready to record Live Data, the<br />
"Record Live Data" screen displays.<br />
7. Put the engine in the operating condition<br />
that causes the DTC to set.<br />
� If necessary, drive the vehicle until you reach the vehicle speed<br />
at which the problem occurs.<br />
8. When the CanOBD2&1 <strong>Scan</strong> <strong>Tool</strong> detects a fault that causes a DTC<br />
to set, it automatically records and saves approximately 20 frames<br />
of Live Data information in its memory (according to your trigger<br />
selection) for each PID supported by the vehicle.<br />
� All three LEDs will blink for three<br />
seconds to indicate that Live Data is<br />
being recorded, and a "One moment<br />
please..." message shows on the<br />
display.<br />
� When recording is complete, a<br />
confirmation screen displays, asking<br />
if you would like to view the<br />
recorded data. Use the UP and<br />
DOWN buttons, as necessary, to<br />
select Yes or No, as desired, then<br />
press the ENTER/LD button.<br />
50 CanOBD2&1
OBD2 Live Data Mode<br />
RECORDING (CAPTURING) LIVE DATA<br />
If Yes is selected, the CanOBD2&1 <strong>Scan</strong> <strong>Tool</strong> enters<br />
"Playback" mode from which you can view a frame-by-frame<br />
playback of recorded Live Data (see LIVE DATA PLAYBACK<br />
on page 53 for details). If No is selected, the display returns to<br />
the "Live Data View" mode.<br />
9. You can exit the "Record Live Data Mode" at any time by pressing<br />
and holding the ENTER/LD button until the "Mode Selection<br />
Menu" displays.<br />
If desired, you can transfer the recorded Live Data information<br />
to a personal computer using the optional PC-LINK program<br />
(see instructions included with PC-Link for more information).<br />
Record by Manual Trigger<br />
This option lets you select the precise time at which the Live Data<br />
recording will occur. Record by Manual Trigger can be a very valuable<br />
diagnostic tool when troubleshooting intermittent problems that do not<br />
meet the requirements for a DTC to set. Even though a DTC is not<br />
present, the intermittent problems will sometimes manifest themselves<br />
briefly, for a few fractions of a second and/or only at certain vehicle<br />
speeds or vehicle operating conditions.<br />
1. With the CanOBD2&1 <strong>Scan</strong> <strong>Tool</strong> in<br />
"Live Data" mode (see VIEWING LIVE<br />
DATA on page 47 for details), press and<br />
hold the ENTER/LD button until the<br />
"Mode Selection Menu" appears.<br />
2. Use the UP and DOWN buttons,<br />
as necessary, to highlight Live Data<br />
Menu, then press the ENTER/LD<br />
button.<br />
� The "Live Data Menu" displays.<br />
3. Use the UP and DOWN buttons,<br />
as necessary, to highlight Record Live<br />
Data, then press the ENTER/LD<br />
button.<br />
� The "Record Live Data Menu" displays.<br />
4. Use the UP and DOWN buttons,<br />
as necessary, to highlight Record by<br />
manual trigger, then press the<br />
ENTER/LD button.<br />
5. When the "Record by Manual Trigger" screen displays, select the<br />
desired trigger point as follows:<br />
CanOBD2&1 51
OBD2 Live Data Mode<br />
RECORDING (CAPTURING) LIVE DATA<br />
The CanOBD2&1 <strong>Scan</strong> <strong>Tool</strong> is capable of recording<br />
approximately 20 frames of Live Data. Record by DTC trigger<br />
lets you select the point in time at which you wish the<br />
CanOBD2&1 <strong>Scan</strong> <strong>Tool</strong> to begin recording Live Data. You can<br />
set the trigger point to record the 20 frames of data before an<br />
event (when the DTC was set), after the event, or in the middle<br />
(10 frames before and 10 frames after the event.<br />
� Beginning - records approximately<br />
20 frames of Live Data after the<br />
ENTER/LD button was pressed.<br />
� Middle - records approximately 10<br />
frames of Live Data before and 10<br />
frames after the ENTER/LD<br />
button was pressed.<br />
� End - records approximately 20 frames of Live Data before the<br />
ENTER/LD button was pressed.<br />
6. Use the UP and DOWN buttons, as necessary, to select the<br />
desired trigger point, then press the ENTER/LD button.<br />
� A "One moment please. . ."<br />
message shows on the display.<br />
When the CanOBD2&1 <strong>Scan</strong> <strong>Tool</strong> is<br />
ready to record Live Data, the<br />
"Record Live Data" screen displays.<br />
7. Put the engine in the operating condition<br />
where the problem manifests itself.<br />
� If necessary, drive the vehicle until you reach the vehicle speed<br />
at which the problem occurs.<br />
8. When the problem occurs, press and<br />
release the ENTER/LD button.<br />
� All three LEDs will blink for three<br />
seconds to indicate that Live Data is<br />
being recorded, and a "One moment<br />
please. . ." message shows on the<br />
display.<br />
� When recording is complete, a<br />
confirmation screen displays, asking<br />
if you would like to view the<br />
recorded data. Use the UP and<br />
DOWN buttons, as necessary, to<br />
select Yes or No, as desired, then<br />
press the ENTER/LD button.<br />
If Yes is selected, the CanOBD2&1 <strong>Scan</strong> <strong>Tool</strong> enters "Playback" mode<br />
from which you can view a frame-by-frame playback of recorded Live<br />
Data (see LIVE DATA PLAYBACK on page 53 for details). If No is<br />
selected, the display returns to the "Live Data View" mode.<br />
52 CanOBD2&1
OBD2 Live Data Mode<br />
LIVE DATA PLAYBACK<br />
9. You can exit the "Record Live Data Mode" at any time by pressing<br />
and holding the ENTER/LD button until the "Mode Selection<br />
Menu" displays.<br />
If desired, you can transfer the recorded Live Data information<br />
to a personal computer using the optional PC-LINK program<br />
(see instructions included with PC-Link for more information).<br />
Important Information<br />
1. When Live Data capture is complete, the green, yellow and red LEDs<br />
on the CanOBD2&1 <strong>Scan</strong> <strong>Tool</strong> will flash four times to indicate that<br />
Live Data is being saved to the CanOBD2&1 <strong>Scan</strong> <strong>Tool</strong>'s memory.<br />
2. When you are LINKED to a vehicle and you are in the “Live Data<br />
View mode”, you can toggle between “Live Data View” mode and<br />
“DTC view” mode by alternately pressing and releasing the DTC<br />
SCROLL or the ENTER/LD buttons. The CanOBD2&1<br />
<strong>Scan</strong> <strong>Tool</strong> will stay linked to the vehicle’s computer during this<br />
process. However, if the DTC SCROLL button is pressed twice<br />
the DTC screen will be advanced to the next DTC screen and the<br />
CanOBD2&1 <strong>Scan</strong> <strong>Tool</strong> will be taken out of link.<br />
LIVE DATA PLAYBACK<br />
Once Live Data has been recorded, it is saved in the CanOBD2&1 <strong>Scan</strong><br />
<strong>Tool</strong>'s memory. You can view recorded Live Data immediately after<br />
recording by selecting Yes from the Record Live Data confirmation<br />
screen (see RECORDING (CAPTURING) LIVE DATA on page 49 for<br />
more information), or you can view it later using the "Playback" function.<br />
1. If the Code Reader is connected to a vehicle:<br />
� With the CanOBD1&1 <strong>Scan</strong> <strong>Tool</strong> in<br />
"Live Data" mode (see VIEWING<br />
LIVE DATA on page 47 for details),<br />
press and hold the ENTER/LD<br />
button until the "Mode Selection<br />
Menu" appears.<br />
� Use the UP and DOWN<br />
buttons, as necessary, to highlight<br />
Live Data Menu, then press the<br />
ENTER/LD button. The "Live<br />
Data Menu" displays.<br />
� Use the UP and DOWN<br />
buttons, as necessary, to highlight<br />
Playback Live Data, then press the<br />
ENTER/LD button.<br />
CanOBD2&1 53
OBD2 Live Data Mode<br />
LIVE DATA PLAYBACK<br />
2. If the Code Reader is not connected to<br />
a vehicle:<br />
� With the CanOBD2&1 <strong>Scan</strong> <strong>Tool</strong> not<br />
connected to a vehicle, press the<br />
POWER/LINK button. The “To<br />
Link” screen shows on the<br />
CanOBD2&1 <strong>Scan</strong> <strong>Tool</strong>’s display.<br />
Press the DOWN button for<br />
instructions to view DTCs in<br />
memory.<br />
� Press the ENTER/LD button.<br />
The “Select OBD System” screen<br />
displays.<br />
� Use the UP and DOWN<br />
buttons, as necessary, to highlight<br />
OBD2 Vehicle, then press the<br />
ENTER/LD button. The display<br />
shows the first DTC stored in the<br />
CanOBD2&1 <strong>Scan</strong> <strong>Tool</strong>’s memory.<br />
� Press the ENTER/LD button to<br />
place the CanOBD2&1 <strong>Scan</strong> <strong>Tool</strong> in<br />
"Live Data Playback" mode.<br />
3. The display shows the recorded Live Data, beginning with the<br />
"trigger" frame.<br />
When you select Yes from the<br />
Record Live Data confirmation<br />
screen, the CanOBD2&1 <strong>Scan</strong><br />
<strong>Tool</strong> enters the "Live Data<br />
Playback" mode, and the display<br />
shows the recorded Live Data,<br />
beginning with the "trigger" frame.<br />
� A vehicle usually supports several PIDs, however, only a<br />
limited amount of PID data can be displayed on the screen at<br />
one time. If additional PID data is available, a small arrow will<br />
be shown on the display. Use the UP and DOWN<br />
buttons, as necessary, to scroll up or down to view all available<br />
PID data.<br />
� When viewing recorded Live Data, look for any irregularities in<br />
any of the PID values/signal information (LTFT %, RPM, MAP,<br />
TEMP, etc.). If any PIDs are not within specification, or<br />
irregularities are detected, follow the procedures in the vehicle's<br />
service repair manual to perform additional troubleshooting and<br />
repair.<br />
54 CanOBD2&1
OBD2 Live Data Mode<br />
LIVE DATA PLAYBACK<br />
When recorded Live Data is<br />
played back, all available PIDs are<br />
shown, even if you have customized<br />
the Live Data selections.<br />
If there is no Live Data currently<br />
stored in the CanOBD2&1 <strong>Scan</strong><br />
<strong>Tool</strong>'s memory, an advisory<br />
message shows on the display.<br />
Press the DTC SCROLL button to exit the "Live Data<br />
Playback" mode.<br />
4. When you have viewed all PID information for the current frame of<br />
Live Data, use the DOWN button to scroll to the end of the PID<br />
list. Highlight Next Frame or Previous Frame, as desired, then press<br />
the ENTER/LD button.<br />
5. When you have finished viewing the recorded Live Data, exit the<br />
“Live Data Playback” mode using the appropriate procedure shown<br />
below:<br />
� If the Enhanced CanOBD2&1 <strong>Scan</strong> <strong>Tool</strong> is connected to a<br />
vehicle, use the DOWN button to scroll to the end of the PID<br />
list, highlight Exit Playback, then press the ENTER/LD<br />
button.<br />
� If the CanOBD2&1 <strong>Scan</strong> <strong>Tool</strong> is not connected to a vehicle,<br />
press the DTC SCROLL button.<br />
CanOBD2&1 55
Generic (Global) OBD2 PID List<br />
The following is a list of Generic (Global) PIDs and their descriptions.<br />
<strong>Tool</strong> Display Unit Value PID Description<br />
ACC Pedal D % XXX.X Accelerator Pedal Position D<br />
ACC Pedal E % XXX.X Accelerator Pedal Position E<br />
ACC Pedal F % XXX.X Accelerator Pedal Position F<br />
Air Status - UPS, DNS,<br />
OFF<br />
Commanded Secondary Air Status<br />
Ambient *C /<br />
*F<br />
XXX Ambient Air Temperature<br />
Aux Input<br />
Status<br />
- On / Off Auxiliary Input Status<br />
BARO kPa<br />
/inHg<br />
XXX /<br />
XX.X<br />
Barometric Pressure<br />
Calc LOAD % XXX.X Calculated LOAD Value<br />
CAT Temp 11 *C /<br />
*F<br />
CAT Temp 12 *C /<br />
*F<br />
CAT Temp 21 *C /<br />
*F<br />
CAT Temp 22 *C /<br />
*F<br />
Command<br />
EGR<br />
Command<br />
EVAP<br />
Command<br />
TAC<br />
Dist DTC Clr km<br />
/mile<br />
Dist MIL ON km<br />
/mile<br />
s<br />
ECT *C /<br />
*F<br />
XXXX.X Catalyst Temperature Bank 1-<br />
Sensor 1<br />
XXXX.X Catalyst Temperature Bank 1-<br />
Sensor 2<br />
XXXX.X Catalyst Temperature Bank 2-<br />
Sensor 1<br />
XXXX.X Catalyst Temperature Bank 2-<br />
Sensor 2<br />
% XXX.X Commanded EGR<br />
% XXX.X Commanded Evaporative Purge<br />
% XXX.X Commanded Throttle Actuator<br />
XXXXX Distance since DTC Cleared<br />
XXXXX Distance Traveled while MIL ON<br />
XXX / XXX Engine Coolant Temp<br />
ECU Volts V XX.XXX Control Module Voltage<br />
EGR Error % XXX.X EGR Error<br />
Eng RPM min XXXXX Engine RPM<br />
EQ Ratio - X.XXX Commanded Equivalence Ratio<br />
EQ Ratio 11 - X.XXX Bank 1 - Sensor 1 Equivalence<br />
Ratio<br />
EQ Ratio 12 - X.XXX Bank 1 - Sensor 2 Equivalence<br />
Ratio<br />
56 CanOBD2&1
Generic (Global) OBD2 PID List<br />
<strong>Tool</strong> Display Unit Value PID Description<br />
EQ Ratio 13 - X.XXX Bank 1 - Sensor 3 Equivalence<br />
Ratio<br />
EQ Ratio 14 - X.XXX Bank 1 - Sensor 4 Equivalence<br />
Ratio<br />
EQ Ratio 21 - X.XXX Bank 2 - Sensor 1 Equivalence<br />
Ratio<br />
EQ Ratio 22 - X.XXX Bank 2 - Sensor 2 Equivalence<br />
Ratio<br />
EQ Ratio 23 - X.XXX Bank 2 - Sensor 3 Equivalence<br />
Ratio<br />
EQ Ratio 24 - X.XXX Bank 2 - Sensor 4 Equivalence<br />
Ratio<br />
EVAP Press Pa /in<br />
H2O<br />
FP / Vac kPa<br />
/PSI<br />
XXXX.XX<br />
/XX.XXX<br />
XXXX.XXX<br />
/XXX.X<br />
Evap System Vapor Pressure<br />
Fuel Rail Pressure relative<br />
toVacuum<br />
Fuel Level % XXX.X Fuel Level Input<br />
Fuel Press kPa XXX / Fuel Rail Pressure<br />
/PSI XX.X<br />
Fuel Press kPa XXXXX Fuel Rail Pressure<br />
/PSI /XXXX.X<br />
Fuel Sys 1 - OL Fuel System 1 Status<br />
Fuel Sys 1 - CL Fuel System 1 Status<br />
Fuel Sys 1 - OL-Drive Fuel System 1 Status<br />
Fuel Sys 1 - OL-Fault Fuel System 1 Status<br />
Fuel Sys 1 - CL-Fault Fuel System 1 Status<br />
Fuel Sys 2 - OL Fuel System 2 Status<br />
Fuel Sys 2 - CL Fuel System 2 Status<br />
Fuel Sys 2 - OL-Drive Fuel System 2 Status<br />
Fuel Sys 2 - OL-Fault Fuel System 2 Status<br />
Fuel Sys 2 - CL-Fault Fuel System 2 Status<br />
IAT *C /<br />
*F<br />
XXX / XXX Intake Air Temperature<br />
LOAD Value % XXX.X Absolute Load Value<br />
LTFT B1 % XXX.X Long Term Fuel Trim-Bank 1<br />
LTFT B2 % XXX.X Long Term Fuel Trim-Bank 2<br />
LTFT B3 % XXX.X Long Term Fuel Trim-Bank 3<br />
LTFT B4 % XXX.X Long Term Fuel Trim-Bank 4<br />
MAF g/s ; XXX.XX / Air Flow Rate from Mass Air Flow<br />
lb/min XXXX.X Sensor<br />
CanOBD2&1 57
Generic (Global) OBD2 PID List<br />
<strong>Tool</strong> Display Unit Value PID Description<br />
MAP kPa XXX / Intake Manifold Absolute Pressure<br />
/PSI XX.X<br />
MIL On Time hrs,<br />
min<br />
XXXX, XX Engine Run Time while MIL ON<br />
Monitor Status - ICONS on<br />
Display<br />
Monitor Status this Driving Cycle<br />
O2S B1 S1 V X.XXX Bank 1 - Sensor 1<br />
O2S B1 S1<br />
mA<br />
mA X.XXX Bank 1 - Sensor 1 O2S Current<br />
O2S B1 S1 V V X.XXX Bank 1 - Sensor 1 O2S Voltage<br />
O2S B1 S2 V X.XXX Bank 1 - Sensor 2<br />
O2S B1 S2<br />
mA<br />
mA X.XXX Bank 1 - Sensor 2 O2S Current<br />
O2S B1 S2 V V X.XXX Bank 1 - Sensor 2 O2S Voltage<br />
O2S B1 S3 V X.XXX Bank 1 - Sensor 3<br />
O2S B1 S3<br />
mA<br />
mA X.XXX Bank 1 - Sensor 3 O2S Current<br />
O2S B1 S3 V V X.XXX Bank 1 - Sensor 3 O2S Voltage<br />
O2S B1 S4 V X.XXX Bank 1 - Sensor 4<br />
O2S B1 S4<br />
mA<br />
mA X.XXX Bank 1 - Sensor 4 O2S Current<br />
O2S B1 S4 V V X.XXX Bank 1 - Sensor 4 O2S Voltage<br />
O2S B2 S1 V X.XXX Bank 2 - Sensor 1<br />
O2S B2 S1<br />
mA<br />
mA X.XXX Bank 2 - Sensor 1 O2S Current<br />
O2S B2 S1 V V X.XXX Bank 2 - Sensor 1 O2S Voltage<br />
O2S B2 S2 V X.XXX Bank 2 - Sensor 2<br />
O2S B2 S2<br />
mA<br />
mA X.XXX Bank 2 - Sensor 2 O2S Current<br />
O2S B2 S2 V V X.XXX Bank 2 - Sensor 2 O2S Voltage<br />
O2S B2 S3 V X.XXX Bank 2 - Sensor 3<br />
O2S B2 S3<br />
mA<br />
mA X.XXX Bank 2 - Sensor 3 O2S Current<br />
O2S B2 S3 V V X.XXX Bank 2 - Sensor 3 O2S Voltage<br />
O2S B2 S4 V X.XXX Bank 2 - Sensor 4<br />
O2S B2 S4<br />
mA<br />
mA X.XXX Bank 2 - Sensor 4 O2S Current<br />
O2S B2 S4 V V X.XXX Bank 2 - Sensor 4 O2S Voltage<br />
O2S Location - O2S11 Oxygen Sensor, Bank 1, Sensor 1<br />
O2S Location - O2S12 Oxygen Sensor, Bank 1, Sensor 2<br />
O2S Location - O2S13 Oxygen Sensor, Bank 1, Sensor 3<br />
58 CanOBD2&1
Generic (Global) OBD2 PID List<br />
<strong>Tool</strong> Display Unit Value PID Description<br />
O2S Location - O2S14 Oxygen Sensor, Bank 1, Sensor 4<br />
O2S Location - O2S21 Oxygen Sensor, Bank 2, Sensor 1<br />
O2S Location - O2S22 Oxygen Sensor, Bank 2, Sensor 1<br />
O2S Location - O2S23 Oxygen Sensor, Bank 2, Sensor 3<br />
O2S Location - O2S24 Oxygen Sensor, Bank 2, Sensor 4<br />
O2S Location - O2S11 Oxygen Sensor, Bank 1, Sensor 1<br />
O2S Location - O2S12 Oxygen Sensor, Bank 1, Sensor 2<br />
O2S Location - O2S21 Oxygen Sensor, Bank 2, Sensor 1<br />
O2S Location - O2S22 Oxygen Sensor, Bank 2, Sensor 2<br />
O2S Location - O2S31 Oxygen Sensor, Bank 3, Sensor 1<br />
O2S Location - O2S32 Oxygen Sensor, Bank 3, Sensor 2<br />
O2S Location - O2S41 Oxygen Sensor, Bank 4, Sensor 1<br />
O2S Location - O2S42 Oxygen Sensor, Bank 4, Sensor 2<br />
OBD Support - OBD2 OBD Requirements<br />
OBD Support - OBD OBD Requirements<br />
OBD Support - OBD and<br />
OBD2<br />
OBD Requirements<br />
OBD Support - OBD1 OBD Requirements<br />
OBD Support - No OBD OBD Requirements<br />
OBD Support - EOBD OBD Requirements<br />
OBD Support - EOBD and<br />
OBD2<br />
OBD Requirements<br />
OBD Support - EOBD and<br />
OBD<br />
OBD Requirements<br />
OBD Support - EOBD,<br />
OBD and<br />
OBD2<br />
OBD Requirements<br />
OBD Support - JOBD OBD Requirements<br />
OBD Support - JOBD and<br />
OBD2<br />
OBD Requirements<br />
OBD Support - JOBD and<br />
EOBD<br />
OBD Requirements<br />
OBD Support - JOBD,<br />
EOBD and<br />
OBD2<br />
OBD Requirements<br />
PTO Status - On / Off Power Take Off Status<br />
Rel TPS % XXX.X Relative Throttle Position<br />
Spark Adv deg XX Ignition Timing Advance #1<br />
Cylinder<br />
STFT B1 % XXX.X Short Term Fuel Trim-Bank 1<br />
STFT B1 S1 % XXX.X Bank 1 - Sensor 1<br />
CanOBD2&1 59
Generic (Global) OBD2 PID List<br />
<strong>Tool</strong> Display Unit Value PID Description<br />
STFT B1 S2 % XXX.X Bank 1 - Sensor 2<br />
STFT B1 S3 % XXX.X Bank 1 - Sensor 3<br />
STFT B1 S4 % XXX.X Bank 1 - Sensor 4<br />
STFT B2 % XXX.X Short Term Fuel Trim-Bank 2<br />
STFT B2 S1 % XXX.X Bank 2 - Sensor 1<br />
STFT B2 S2 % XXX.X Bank 2 - Sensor 2<br />
STFT B2 S3 % XXX.X Bank 2 - Sensor 3<br />
STFT B2 S4 % XXX.X Bank 2 - Sensor 4<br />
STFT B3 % XXX.X Short Term Fuel Trim-Bank 3<br />
STFT B4 % XXX.X Short Term Fuel Trim-Bank 4<br />
Time DTC Clr hrs,<br />
min<br />
XXXX, XX Time since DTC Cleared<br />
Time Since<br />
Start<br />
sec XXXX Time Since Engine Start<br />
TPS % XXX.X Absolute Throttle Position<br />
TPS B % XXX.X Absolute Throttle Position B<br />
TPS C % XXX.X Absolute Throttle Position C<br />
Veh Speed km/h /<br />
mph<br />
XXX / XXX Vehicle Speed Sensor<br />
Warm-up DTC<br />
Clr<br />
- XXX # Warm-ups since DTC Cleared<br />
60 CanOBD2&1
Additional OBD2 Tests<br />
O2 SENSOR TEST<br />
In addition to retrieving Diagnostic Trouble Code (DTC) and viewing<br />
Live Data, you can use the Enhanced CanOBD2&1 <strong>Scan</strong> <strong>Tool</strong> to<br />
perform additional diagnostic tests, and to view diagnostic and vehicle<br />
information stored in your vehicle's on-board computer.<br />
Additional tests are accessed through the<br />
"Mode Selection Menu." To access the<br />
"Mode Selection Menu", place the<br />
CanOBD2&1 <strong>Scan</strong> <strong>Tool</strong> in "Live Data"<br />
mode (see VIEWING LIVE DATA on page<br />
47 for details), then press and hold the<br />
ENTER/LD button until the "Mode<br />
Selection Menu" appears.<br />
The following functions are available from the "Mode Selection Menu":<br />
� Live Data Menu - Displays the "Live Data Menu" from which you<br />
can choose to record, customize and play back Live Data (see the<br />
Live Data Mode section beginning on page 47 for more information)<br />
� O2 Sensor Test - Retrieves and displays O2 sensor monitor test<br />
results from your vehicle's on-board computer.<br />
� Non-Continuous Test - Retrieves and displays test results for<br />
emission-related powertrain components and systems that are not<br />
continuously monitored.<br />
� System Test - Performs a leak test for the vehicle's EVAP system.<br />
� Vehicle ID - Retrieves the vehicle's VIN number, calibration ID(s)<br />
and other related information, and lets you view a listing of available<br />
modules for the vehicle.<br />
O2 SENSOR TEST<br />
OBD2 regulations require that applicable vehicles monitor and test<br />
operation of the oxygen (O2) sensors to identify problems that can affect<br />
fuel efficiency and vehicle emissions. These tests are performed<br />
automatically when engine operating conditions are within predefined<br />
limits. Results of these tests are stored in the on-board computer's<br />
memory.<br />
The O2 Sensor Test function lets you retrieve and view O2 sensor<br />
monitor test results for the most recently completed tests from your<br />
vehicle's on-board computer.<br />
Vehicles are equipped with multiple O2 sensors. O2 sensors are<br />
installed both upstream of (before) and downstream of (after) the<br />
exhaust system Catalytic Converters. The name of an O2 sensor<br />
identifies its location in the exhaust system. The name of each O2<br />
sensor is made up of three parts:<br />
O2S XX YY -or- O2S X Y<br />
� O2S -this is the basic designation for all O2 sensors.<br />
CanOBD2&1 61
Additional OBD2 Tests<br />
O2 SENSOR TEST<br />
� X or XX - These characters identify the location of the O2 sensor in<br />
relation to a cylinder bank. An O2 sensor for cylinder bank 1 is<br />
identified by the designation “1” or "B1"; a sensor for cylinder bank 2<br />
is identified as “2” or "B2."<br />
“Bank One” indicates the side of the engine where cylinder<br />
number one is located (V-type engines). Bank Two is opposite<br />
of Bank One.<br />
� Y or YY - These characters identity the location of the O2 sensor in<br />
relation to the exhaust system catalyst. An O2 sensor located upstream of<br />
the catalyst is identified by the designation”1” or "S1", a sensor located<br />
downstream of the Catalytic Converter is identified as “2” or "S2."<br />
For example, O2S12 or O2SB1S2 is the designation for the<br />
downstream O2 sensor for cylinder bank 1.<br />
The CanOBD2&1 <strong>Scan</strong> <strong>Tool</strong> does not perform O2 sensor tests,<br />
but retrieves results from the most recently performed O2<br />
sensor tests from the on-board computer's memory. You may<br />
retrieve O2 sensor test results for only one test of one sensor<br />
at any given time.<br />
1. From the "Mode Selection Menu", use<br />
the UP and DOWN buttons, as<br />
necessary, to highlight O2 Sensor Test,<br />
then press the ENTER/LD button.<br />
� The "Select Sensor" screen displays.<br />
The screen shows all O2 sensors<br />
applicable to the vehicle under test.<br />
If O2 sensor tests are not<br />
supported by the vehicle under<br />
test, an advisory message shows<br />
on the CanOBD2&1 <strong>Scan</strong> <strong>Tool</strong>'s<br />
display. Press the ENTER/LD<br />
button to return to "Live Data"<br />
mode.<br />
2. Use the UP and DOWN buttons,<br />
as necessary, to highlight the O2 sensor<br />
for which you wish to view test results,<br />
then press the ENTER/LD button.<br />
3. When test results have been retrieved,<br />
results of the first test for the selected<br />
sensor will show on the CanOBD2&1<br />
<strong>Scan</strong> <strong>Tool</strong>'s display.<br />
4. Use the UP and DOWN buttons,<br />
as necessary, to view results for<br />
additional tests.<br />
62 CanOBD2&1
5. When you have finished viewing the<br />
retrieved test data, scroll to the end of<br />
the display to select Exit, then press the<br />
ENTER/LD button to return to the<br />
"Select Test" screen.<br />
NON-CONTINUOUS TEST<br />
Additional OBD2 Tests<br />
NON-CONTINUOUS TEST<br />
The Non-Continuous Test function retrieves and displays test results<br />
for emission-related powertrain components and systems that are not<br />
continuously monitored. The tests available are determined by the<br />
vehicle manufacturer.<br />
The CanOBD2&1 <strong>Scan</strong> <strong>Tool</strong> does not perform non-continuous<br />
test, but retrieves results from the most recently performed<br />
tests from the on-board computer’s memory. You may retrieve<br />
non-continuous test results for only one test at any given time.<br />
1. From the "Mode Selection Menu", use<br />
the UP and DOWN buttons, as<br />
necessary, to highlight Non-<br />
Continuous Test, then press the<br />
ENTER/LD button.<br />
� The “Select Test” screen displays.<br />
The screen shows all tests<br />
applicable to the vehicle under test.<br />
Refer to the vehicle’s service repair<br />
manual for information related to<br />
non-continuous tests.<br />
If non-continuous tests are not<br />
supported by the vehicle under test,<br />
an advisory message shows on the<br />
CanOBD2&1 <strong>Scan</strong> <strong>Tool</strong>'s display.<br />
Press the ENTER/LD button to<br />
return to the Mode Selection menu.<br />
2. Use the UP and DOWN buttons,<br />
as necessary, to highlight the desired<br />
test, then press the ENTER/LD<br />
button.<br />
3. A “One moment please. . .” message<br />
displays while the request is sent to the<br />
vehicle’s on-board computer.<br />
4. When test results have been retrieved, data for the selected test will<br />
show on the CanOBD2&1 <strong>Scan</strong> <strong>Tool</strong>’s display. The display shows<br />
the following information:<br />
CanOBD2&1 63
Additional OBD2 Tests<br />
SYSTEM TEST<br />
� Test ID number<br />
� Module ID number<br />
� Component ID number<br />
� Min or Max test limit<br />
Only one test limit, either Min<br />
or Max, is shown for any given<br />
test.<br />
� Test Value and status<br />
Status is calculated by the CanOBD2&1 <strong>Scan</strong> <strong>Tool</strong> by<br />
comparing the Test Value against the displayed test limit<br />
(either Min or Max). Status is shown as either Low, High<br />
or OK.<br />
5. When you have finished viewing the retrieved test data, scroll to the<br />
end of the display to select Exit, then press the ENTER/LD<br />
button to return to the “Select Test” screen.<br />
SYSTEM TEST<br />
The System Test function lets you initiate a leak test for the vehicle's<br />
EVAP system.<br />
The CanOBD2&1 <strong>Scan</strong> <strong>Tool</strong> does not perform the leak test,<br />
but signals the vehicle's on-board computer to initiate the<br />
test. The vehicle manufacturer determines the criteria and<br />
method for stopping the test once it has been started.<br />
BEFORE using the System Test function, refer to the<br />
vehicle's service repair manual to determine the procedures<br />
necessary to stop the test.<br />
1. From the "Mode Selection Menu", use<br />
the UP and DOWN buttons as<br />
necessary, to highlight System Test,<br />
then press the ENTER/LD button.<br />
� The "System Test Menu" displays.<br />
2. Use the UP and DOWN buttons,<br />
as necessary, to highlight EVAP Leak<br />
Test, then press the ENTER/LD<br />
button.<br />
3. A "One moment please..." message<br />
displays while the request is sent to the<br />
vehicle's on-board computer.<br />
64 CanOBD2&1
Some vehicle manufacturers do not<br />
allow CanOBD2&1 <strong>Scan</strong> <strong>Tool</strong>s or<br />
other external devices to control<br />
vehicle systems. If the EVAP Leak<br />
Test is not supported by the vehicle<br />
under test, an advisory message<br />
shows on the CanOBD2&1 <strong>Scan</strong><br />
<strong>Tool</strong>'s display. Press the ENTER/LD<br />
button to return to the System<br />
Test menu.<br />
4. When the EVAP leak test has been<br />
initiated by the vehicle's on-board<br />
computer, a confirmation message<br />
shows on the CanOBD2&1 <strong>Scan</strong> <strong>Tool</strong>'s<br />
display. Press the ENTER/LD<br />
button to return to the “Select Test”<br />
screen.<br />
VEHICLE ID<br />
Additional OBD2 Tests<br />
VEHICLE ID<br />
The Vehicle ID function offers two options for retrieving reference<br />
information for the vehicle under test; Vehicle ID and Available<br />
Modules.<br />
Retrieving Vehicle ID Information<br />
The Vehicle ID function is applicable to model year 2000 and<br />
newer OBD2-compliant vehicles.<br />
The CanOBD2&1 <strong>Scan</strong> <strong>Tool</strong> can retrieve a list of information (provided<br />
by the vehicle manufacturer), unique to the vehicle under test, from the<br />
vehicle's on-board computer. This information may include:<br />
� The vehicle's VIN number<br />
� The control module identification number<br />
� The vehicle's calibration ID(s). These IDs uniquely identify the<br />
software version(s) for the vehicle's control module(s).<br />
� The Vehicle's Calibration Verification Number(s) (CVNs) required by<br />
ODB2 regulations. CVNs are used to determine if emission-related<br />
calibrations for the vehicle under test have been changed. One or<br />
more CVNs may be returned by the vehicle's computer.<br />
1. From the "Mode Selection Menu", use<br />
the UP and DOWN buttons, as<br />
necessary, to highlight Vehicle ID, then<br />
press the ENTER/LD button.<br />
� The "Vehicle Information<br />
displays.<br />
Menu"<br />
CanOBD2&1 65
Additional OBD2 Tests<br />
VEHICLE ID<br />
If the Vehicle ID function is not<br />
supported by the vehicle under<br />
test, an advisory message shows<br />
on the CanOBD2&1 <strong>Scan</strong> <strong>Tool</strong>'s<br />
display. Press the ENTER/LD<br />
button to return to the Mode<br />
Selection menu.<br />
2. Use the UP and DOWN buttons,<br />
as necessary, to highlight Vehicle ID,<br />
then press the ENTER/LD button.<br />
3. A "One moment please..." message<br />
displays while the requested information<br />
is retrieved from the vehicle's computer.<br />
The first time the Vehicle ID function is used, it may take<br />
several minutes to retrieve the information from the vehicle's<br />
computer.<br />
4. When the retrieval process is completed,<br />
the vehicle ID information is shown on<br />
the CanOBD2&1 <strong>Scan</strong> <strong>Tool</strong>'s display.<br />
Use the UP and DOWN buttons,<br />
as necessary, to view the entire list.<br />
5. When you have finished viewing the<br />
retrieved vehicle ID information, press<br />
the ENTER/LD button to return to<br />
"Live Data" mode.<br />
Viewing Available Modules<br />
The CanOBD2&1 <strong>Scan</strong> <strong>Tool</strong> can retrieve a list of modules supported by<br />
the vehicle under test.<br />
1. From the "Mode Selection Menu", use<br />
the UP and DOWN buttons, as<br />
necessary, to highlight Vehicle ID, then<br />
press the ENTER/LD button.<br />
� The "Vehicle Information Menu" displays.<br />
If the Vehicle ID function is not<br />
supported by the vehicle under<br />
test, an advisory message shows<br />
on the CanOBD2&1 <strong>Scan</strong> <strong>Tool</strong>'s<br />
display. Press the ENTER/LD<br />
button to return to "Live Data"<br />
mode.<br />
66 CanOBD2&1
2. Use the UP and DOWN buttons,<br />
as necessary, to highlight Available<br />
Modules, then press the ENTER/LD<br />
button.<br />
3. A "One moment please..." message<br />
displays while the requested information<br />
is retrieved from the vehicle's computer.<br />
4. When the retrieval process is completed,<br />
a complete list of modules supported by<br />
the vehicle under test is shown on the<br />
CanOBD2&1 <strong>Scan</strong> <strong>Tool</strong>'s display. Use<br />
the UP and DOWN buttons, as<br />
necessary, to view the entire list.<br />
5. When you have finished viewing the list<br />
of available modules, press the<br />
ENTER/LD button to return to "Live<br />
Data" mode.<br />
Additional OBD2 Tests<br />
VEHICLE ID<br />
CanOBD2&1 67
Chrysler/Jeep OBD1 Systems<br />
CHRYSLER/JEEP OBD1 SYSTEMS<br />
CHRYSLER/JEEP OBD1 SYSTEMS<br />
Chrysler Motors On-Board Computer Systems<br />
Chrysler Motors introduced its first electronic fuel injected vehicle in late<br />
1983. The on-board computer management systems used on Chrysler<br />
vehicles have evolved over the years, and their names have changed<br />
accordingly.<br />
1983-87: The on-board computer used in these vehicles is a splitsystem,<br />
composed of two separate units: the Logic Module and the<br />
Power Module. The Logic Module contains a microprocessor which<br />
processes data received from sensors located throughout the vehicle<br />
and makes decisions (based on these inputs) which effect engine<br />
operation. The Logic Module is usually located on the right-hand side,<br />
behind the kick panel. The Power Module supplies operating power to<br />
the Logic Module, and contains the circuits which control the highcurrent<br />
devices. Power Module operation is controlled by the Logic<br />
Module. The Power Module is located in the engine compartment, near<br />
the vehicle’s battery.<br />
1987-90: This system is called a Single Module Engine Controller<br />
(SMEC). This system still uses two separate circuit boards (Logic<br />
Module and Power Module). However, both circuit boards are located in<br />
a common enclosure.<br />
1989-95: This system is called a Single Board Engine Controller<br />
(SBEC). On this system, the Logic Module and Power Module circuit<br />
boards are integrated on a single circuit board.<br />
1993-97: Beginning in 1993, the computer was renamed the Powertrain<br />
Control Module (PCM). In addition to controlling the engine<br />
management system and emission system, the computer also takes an<br />
active role in controlling powertrain (transmission system) operation.<br />
Unless otherwise specified, all references to “computer” within<br />
this manual also apply to “Logic Module/ Power Module”,<br />
“SMEC”, “SBEC” or “PCM”.<br />
Jeep On-Board Computer Systems<br />
1993-95: In 1993, Jeep on-board computer systems (fuel injected<br />
vehicles only) were converted to the Chrysler on-board computer<br />
systems. All 1993 through 1995 fuel injected Jeep and Chrysler vehicles<br />
are equipped with similar on-board computer systems.<br />
68 CanOBD2&1
VEHICLES COVERED<br />
Chrysler/Jeep OBD1 Systems<br />
VEHICLES COVERED / PANEL INDICATOR LIGHTS /DLC<br />
This section covers Chrysler fuel injected vehicles from 1983-1995.<br />
Type<br />
Passenger<br />
Cars<br />
Light Truck<br />
and Vans<br />
Model<br />
Year Model<br />
1983-1995 Chrysler, Dodge and Plymouth Fuel<br />
Injected Models Only (Excluding<br />
Lasor/Talon 1.8L, 2.0L (ALL YEARS), 1990<br />
Monaco/Premier, 1993-1995 Intrepid, LHS,<br />
Concorde and Vision, 1995 Avenger,<br />
Stealth (ALL YEARS) and Cirrus 2.5L (ALL<br />
YEARS))<br />
1987-1995 Chrysler, Dodge and Plymouth Fuel<br />
Injected Models Only<br />
1992-1995 Diesel Models<br />
Jeep 1993-1995 Jeep Fuel Injected Models Only<br />
INSTRUMENT PANEL INDICATOR LIGHTS<br />
Your vehicle’s instrument panel has either a “Power Loss”, “Check<br />
Engine” or “Malfunction Indicator Lamp”, depending on the year of the<br />
vehicle. These lights are designed to warn you of component<br />
malfunctions.<br />
POWER<br />
LOSS<br />
CHECK<br />
ENGINE<br />
MALFUNCTION<br />
INDICATOR<br />
LAMP<br />
If your instrument panel indicator lights do not come on when<br />
you turn on the ignition, please refer to your vehicle’s service<br />
manual. You may have problems in the car’s circuitry. It is<br />
recommended that you fix these problems before retrieving<br />
DTC’s from your vehicle’s computer.<br />
DATA LINK CONNECTOR (DLC)<br />
Chrysler vehicles are equipped with special<br />
test connectors that make it possible to<br />
connect specialized testing equipment that<br />
communicates with the vehicle’s on-board<br />
computer. Chrysler’s vehicle test connectors<br />
are usually dark in color (BLACK or GREY)<br />
and are located under the hood.<br />
CanOBD2&1 69
Chrysler/Jeep OBD1 Systems<br />
CODE RETRIEVAL PROCEDURE<br />
CODE RETRIEVAL PROCEDURE<br />
Retrieving and using Diagnostic Trouble Codes (DTCs) for<br />
troubleshooting vehicle operation is only one part of an<br />
overall diagnostic strategy.<br />
Never replace a part based only on the DTC definition.<br />
Each DTC has a set of testing procedures, instructions and<br />
flow charts that must be followed to confirm the location<br />
of the problem. This information is found in the vehicle’s<br />
service manual. Always refer to the vehicle’s service manual<br />
for detailed testing instructions.<br />
Check your vehicle thoroughly before performing<br />
any test. See BEFORE YOU BEGIN on page 18 for<br />
details.<br />
ALWAYS observe safety precautions whenever working on a<br />
vehicle. See Safety Precautions on page 3 for more information.<br />
1. Locate the vehicle’s Data Link Connector (DLC). See Data Link<br />
Connector (DLC) on page 69 for connector location.<br />
Some DLCs have a plastic cover that must be removed before<br />
connecting the CanOBD2&1 <strong>Tool</strong>’s cable connector.<br />
2. Connect the CanOBD2&1 <strong>Scan</strong> <strong>Tool</strong><br />
cable (with the Chrysler Connector<br />
Cable Adaptor attached) to the<br />
CanOBD2&1 <strong>Scan</strong> <strong>Tool</strong>, then connect<br />
the adaptor to the vehicle’s DLC. Press<br />
the POWER/LINK button to turn the<br />
CanOBD2&1 <strong>Scan</strong> <strong>Tool</strong> ON.<br />
� Set the parking brake, and make<br />
sure all vehicle accessories are<br />
turned off.<br />
3. Turn the ignition ON. DO NOT start the<br />
engine. Press the ENTER/LD<br />
button to continue.<br />
4. Select the model year of the vehicle from which you wish to retrieve<br />
codes:<br />
If a previous vehicle selection is currently saved in the<br />
CanOBD2&1 <strong>Scan</strong> <strong>Tool</strong>'s memory, the "Current<br />
Selection/Select New Vehicle" menu displays. If no previous<br />
vehicle selection is stored in the CanOBD2&1 <strong>Scan</strong> <strong>Tool</strong>'s<br />
memory, the "Select Vehicle Year" menu displays. Use the<br />
and buttons, as necessary, to make your selection.<br />
70 CanOBD2&1
Chrysler/Jeep OBD1 Systems<br />
CODE RETRIEVAL PROCEDURE<br />
� To retrieve DTCs from the vehicle selection currently in the<br />
CanOBD2&1 <strong>Scan</strong> <strong>Tool</strong>’s memory:<br />
- From the “Current Selection/<br />
Select New Vehicle” screen,<br />
highlight Current Selection and<br />
press the ENTER/LD button.<br />
�<br />
- Proceed to step 5 to continue.<br />
To retrieve DTCs from a new<br />
vehicle:<br />
- From the “Current Selection/<br />
Select New Vehicle” screen,<br />
highlight Select New Vehicle and<br />
press the ENTER/LD button;<br />
the “Select Vehicle Year” menu<br />
displays.<br />
- Highlight the desired year, then press the ENTER/LD<br />
button. The “Current Selection/Select New Vehicle” screen<br />
displays for your confirmation.<br />
FCC - means 1994 Four Cylinder Control Module for<br />
the 1994 Chrysler vehicles.<br />
- If the year shown in the “Current Selection” field is correct,<br />
highlight Current Selection and press the ENTER/LD<br />
button. Proceed to step 5 to continue.<br />
If the year shown is not correct, highlight Select New<br />
Vehicle and press the ENTER/LD button to return<br />
to the “Select Vehicle Year” menu to make your<br />
corrections.<br />
5. Prepare the vehicle to retrieve codes:<br />
� For 1988-1995 Chrysler/Jeep vehicles: The CanOBD2&1<br />
<strong>Scan</strong> <strong>Tool</strong> will automatically begin the code retrieval process.<br />
Proceed to step 6 to continue.<br />
� For 1984-1988 Chrysler vehicles ONLY: WITHOUT starting<br />
the engine, turn ignition ON, OFF, ON, OFF and ON again within<br />
5 seconds to activate the code retrieval process. Proceed to<br />
step 6 to continue.<br />
6. When the CanOBD2&1 <strong>Scan</strong> <strong>Tool</strong> is in<br />
the process of retrieving codes, a “One<br />
Moment Please...” message shows on<br />
the CanOBD2&1 <strong>Scan</strong> <strong>Tool</strong>’s display.<br />
CanOBD2&1 71
Chrysler/Jeep OBD1 Systems<br />
CODE RETRIEVAL PROCEDURE<br />
� If the CanOBD2&1 <strong>Scan</strong> <strong>Tool</strong> fails<br />
to link to the vehicle’s computer, a<br />
“Vehicle is not responding” message<br />
shows on the CanOBD2&1 <strong>Scan</strong><br />
<strong>Tool</strong>’s display. Do the following:<br />
- Verify the ignition is ON.<br />
- Check the cable connections at<br />
the CanOBD2&1 <strong>Scan</strong> <strong>Tool</strong> and<br />
at the vehicle’s DLC.<br />
- Turn the ignition OFF, wait 10-12 seconds, then turn back ON<br />
to reset the computer.<br />
- Press the ENTER/LD<br />
6 as necessary.<br />
button and repeat steps 4 through<br />
7. If the CanOBD2&1 <strong>Scan</strong> <strong>Tool</strong> was able<br />
to link to the vehicle successfully a<br />
"Code retrieval was successful..."<br />
message shows temporarily on the<br />
CanOBD2&1 <strong>Scan</strong> <strong>Tool</strong>’s display<br />
followed by any retrieved DTCs.<br />
� The CanOBD2&1 <strong>Scan</strong> <strong>Tool</strong> will<br />
display a code only if codes are<br />
present in the vehicle's computer<br />
memory. If no codes are present, a<br />
"No DTC's are presently stored in<br />
the vehicle's computer" message is<br />
displayed.<br />
8. If more than one code was retrieved<br />
press the DTC SCROLL button, as<br />
necessary, to display additional codes<br />
one at a time.<br />
In the case of long code definitions, a small arrow is shown in<br />
the upper/lower right-hand corner of the code display area to<br />
indicate the presence of additional information. Use the<br />
and buttons, as necessary, to view the additional<br />
information.<br />
9. Disconnect the CanOBD2&1 <strong>Scan</strong> <strong>Tool</strong> from the vehicle and turn<br />
the ignition key OFF.<br />
10. To prolong battery life, the CanOBD2&1 <strong>Scan</strong> <strong>Tool</strong> automatically<br />
shuts "Off" after approximately three minutes of no button activity.<br />
The DTCs retrieved will remain in the CanOBD2&1 <strong>Scan</strong> <strong>Tool</strong>'s<br />
memory, and may be viewed at any time. If the CanOBD2&1 <strong>Scan</strong><br />
<strong>Tool</strong>’s batteries are removed, or if the CanOBD2&1 <strong>Scan</strong> <strong>Tool</strong> is relinked<br />
to a vehicle to retrieve codes, any prior codes in its memory<br />
are automatically cleared.<br />
� See VIEWING DTCs IN THE CANOBD2&1 SCAN TOOL’S<br />
MEMORY on page 13 to view DTCs stored in the CanOBD2&1<br />
<strong>Scan</strong> <strong>Tool</strong>’s memory.<br />
72 CanOBD2&1
Chrysler/Jeep OBD1 Systems<br />
CODE RETRIEVAL PROCEDURE<br />
11. Follow the testing and repair procedures outlined in the vehicle's<br />
service repair manual to correct "hard" DTCs. Codes should be<br />
addressed and eliminated in the order they were received, erasing<br />
(see ERASING DTCs (OBD I SYSTEMS) on page 112) and<br />
retesting after each repair is made to be sure the fault was<br />
eliminated.<br />
The green, yellow and red LEDs are used (with the LCD<br />
display) as visual aids to make it easier to determine engine<br />
system conditions. See SERVICING DTCs - OBD I on page<br />
110 for information on interpreting LEDs and servicing DTCs.<br />
CanOBD2&1 73
Ford OBD1 Systems<br />
FORD COMPUTER SYSTEM OVERVIEW - VEHICLES COVERED<br />
FORD COMPUTER SYSTEM OVERVIEW<br />
The Enhanced CanOBD2&1 <strong>Scan</strong> <strong>Tool</strong> is compatible only with<br />
EEC-IV Computer Control systems.<br />
IMPORTANT: When the computer is in Self-Test mode (is<br />
testing the sensors or actuators for proper operation), it relies<br />
on voltage signals that is sends to and / or receives from the<br />
sensors or actuators to determine whether or not these<br />
components are operating properly. The sensors and<br />
actuators are all connected to the computer by wires. If any<br />
defects are present in any part of the circuit that connects<br />
these devices to the computer (such as defective connectors<br />
or wires, faulty grounds, improper voltage, shorts etc.), the<br />
voltage signal that the computer receives from these devices<br />
will be affected. The computer has no way of determining if the<br />
improper voltage signal is being caused by a defect in the<br />
circuit or by the sensors or actuators themselves. Keep this in<br />
mind when servicing fault codes, and do not replace any<br />
devices (sensors or actuators) before checking the complete<br />
circuit (or circuits) that are part of the device from which the<br />
code was generated.<br />
VEHICLES COVERED<br />
CAR - Ford, Lincoln, Mercury Computer System/<strong>Tool</strong> Application<br />
Table<br />
The following table lists the year and model of all the cars that are<br />
covered by the CanOBD2&1 <strong>Scan</strong> <strong>Tool</strong>.<br />
Engine<br />
8th VIN<br />
Digit**<br />
Fuel Systems<br />
(Carburetor<br />
Model) Application/Special Notes<br />
1981-1982<br />
1.6L I-4 5, 2 EFI, EFI Turbo Escort, EXP, LN7, Lynx<br />
2.3L I-4 5 EFI Turbo Capri, Cougar, Mustang, T-Bird<br />
2.3L I-4 HSC R, J FBC (6149)* Capri, Fairmont, LTD, Marquis,<br />
Mustang, Tempo, Topaz,<br />
Zephyr<br />
1.6L I-4 4, 5,<br />
8<br />
2.3L I-4<br />
2.3L I-4<br />
OHC<br />
EFI<br />
EFI Turbo<br />
A, J, R FBC<br />
(YFA)* (6149)*<br />
1984-1986<br />
Escort, EXP, Lynx<br />
Capri, Cougar, LTD, Marquis,<br />
Mustang, Tempo, Topaz<br />
2.3L I-4 T, W EFI Turbo Capri, Cougar, Merkur XR4Ti,<br />
Mustang, T-Bird<br />
2.3L I-4 HSC S, X CFI Tempo, Topaz<br />
3.8L V-6 3 CFI Capri, Cougar, LTD, Marquis,<br />
Mustang, T-Bird<br />
Computer<br />
System<br />
EEC-IV<br />
EEC-IV<br />
74 CanOBD2&1
Engine<br />
8th VIN<br />
Digit**<br />
Ford OBD1 Systems<br />
VEHICLES COVERED - CARS<br />
Fuel Systems<br />
(Carburetor<br />
Model) Application/Special Notes<br />
1984-1986 (Cont)<br />
5.0L V-8 F, M CFI, SEFI Capri, Continental, Colony<br />
Park, Cougar, Country Squire,<br />
Crown Victoria, Grand Marquis,<br />
LTD, Mark VII, Marquis,<br />
Mustang, T-Bird, Town Car<br />
1987-1993<br />
1.9L I-4 J, 9 EFI, CFI, SFI Escort, EXP, Lynx, Tracer<br />
2.0L I-4 A SEFI Probe (1993 manual<br />
transmission only)<br />
2.3L I-4 A FBC (YFA)* Capri, LTD, Marquis, Mustang<br />
(1996 models)<br />
2.3L I-4 OHC A, M EFI Mustang<br />
2.3L I-4 T, W EFI Turbo Capri, Cougar, Merkur,<br />
Mustang, T-Bird, XR4Ti<br />
2.3L I-4 HSC S, X CFI, EFI, SEFI Tempo, Topaz<br />
2.5L I-4 D EFI, CFI Sable, Taurus<br />
3.0L V-6<br />
3.0L V-6 SHO<br />
3.8L V-6 3, 4, C,<br />
R<br />
1, U, Y EFI, SEFI, SFI Probe, Sable, Taurus, Tempo,<br />
Topaz (VIN 1 Taurus models<br />
are Flexible Fuel)<br />
CFI, EFI, SFI Capri, Continental, Cougar,<br />
LTD, Marquis, Mustang, Sable,<br />
T-Bird, Taurus<br />
4.6L V-8 W, V SEFI Crown Victoria, Grand Marquis,<br />
Mark VII, Town Car<br />
5.0L V-8 F, M, E,<br />
T, D, 4<br />
SEFI Capri, Continental, Cougar,<br />
Crown Victoria, Grand Marquis,<br />
Mark VII, Mustang, Mustang<br />
Cobra, T-Bird, Town Car<br />
1994<br />
1.9L I-4 J SFI Escort, Topaz, Tracer<br />
2.0L I-4 A SFI Probe<br />
3.0L V-6 1, U, Y SFI Sable, Taurus, Tempo (VIN 1<br />
Taurus models are Flexible Fuel)<br />
3.8L V-6<br />
3.8L V-6 SC<br />
4<br />
R<br />
SFI Continental, Cougar, Sable,<br />
Taurus, T-Bird<br />
4.6L V-8 W, V SFI Crown Victoria, Grand Marquis,<br />
Mark VIII, Town Car<br />
5.0L V-8 T, D SFI Mustang, Mustang Cobra<br />
1995<br />
1.9L I-4 J SFI Escort, Tracer<br />
2.0L I-4 A, 3 SFI Contour, Mystique, Probe<br />
2.5L V-6 L SFI Contour, Mystique<br />
3.0L V-6 1, U<br />
3.0L V-6 SHO Y<br />
3.8L V-6 4<br />
3.8L V-6 SC R<br />
SFI Sable, Taurus (VIN 1 Taurus<br />
models are Flexible Fuel)<br />
SFI Cougar, Sable, Taurus, T-Bird<br />
Computer<br />
System<br />
EEC-IV<br />
EEC-IV<br />
EEC-IV<br />
EEC-IV<br />
CanOBD2&1 75
Ford OBD1 Systems<br />
VEHICLES COVERED - TRUCKS<br />
Engine<br />
4.6L V8<br />
DOHC<br />
8th VIN<br />
Digit**<br />
5.0L V-8 HO T<br />
5.0L V-8 SHP D<br />
Fuel Systems<br />
(Carburetor<br />
Model) Application/Special Notes<br />
1995 (Cont)<br />
V SFI Mark VIII<br />
SFI Mustang<br />
Computer<br />
System<br />
EEC-IV<br />
NOTES<br />
* Carburetor Model. Carburetor model numbers are usually stamped on top of the<br />
carburetor, or on a metal tab attached to the carburetor. Consult your vehicle’s repair manual<br />
for proper identification.<br />
**VIN Number. The VIN number(s) used in this column identify the vehicle’s engine type.<br />
This number is the 8th digit of the VIN (Vehicle Identification Number). Consult your vehicle’s<br />
repair manual for details.<br />
Application Table Definitions. CFI = Central Fuel Injection; DOHC = Dual Overhead Cam;<br />
EFI = Electronic Fuel Injection; FBC = Feedback Carburetor; HSC = High Swirl Combustion;<br />
MFI = Multiport Fuel Injection; OHC = Overhead Cam; SC = Super Charged; SEFI =<br />
Sequential Electronic Fuel Injection; SFI = Sequential Fuel Injection; SHO = Super High<br />
Output<br />
TRUCKS/VANS - Ford Computer System <strong>Tool</strong> Application Table<br />
The following table lists the year and model of all the trucks and vans<br />
that are covered by the CanOBD2&1 <strong>Scan</strong> <strong>Tool</strong>.<br />
Engine<br />
8th VIN<br />
Digit**<br />
Fuel Systems<br />
(Carburetor<br />
Model) Application/Special Notes<br />
1983<br />
Computer<br />
System<br />
2.8L V-6 S FBC (2150A)* Bronco II and Ranger Pickup<br />
1984<br />
EEC-IV<br />
2.8L V-6 S FBC (2150A)* Bronco II, Ranger Pickup<br />
EEC-IV<br />
4.9L I-6 Y FBC (YFA)* Bronco, E and F Series<br />
5.0L V-8<br />
5.8L V-8<br />
F<br />
G<br />
FBC (2150A)*<br />
FBC (2150A)*<br />
Trucks/Vans (8500 lb. GVW or<br />
less only)<br />
2.3L I-4 OHC A EFI<br />
2.9L V-6 T EFI<br />
2.8L V-6 S FBC (2150A)*<br />
4.9L I-6 Y, 9 FBC (YFA)*,<br />
EFI<br />
5.0L V-8 F FBC (2150A)*<br />
5.0L V-8 N<br />
EFI<br />
5.8L V-8 G FBC (2150A)*<br />
7.3L V-8 M Diesel<br />
7.5L V-8 G EFI<br />
2.3L I-4 OHC A EFI, MFI<br />
2.9L V-6 T EFI<br />
1985-1990<br />
Aerostar, Bronco II, Ranger<br />
(excluding Diesel)<br />
Bronco, E and F Series<br />
Trucks/Vans (8500 lb. GVW or<br />
less only)<br />
E and F Series Trucks/Vans<br />
(8500 lb. GVW or less only)<br />
1991-1994<br />
EEC-IV<br />
Ranger EEC-IV<br />
76 CanOBD2&1
Engine<br />
8th VIN<br />
Digit**<br />
Ford OBD1 Systems<br />
TEST CONNECTORS<br />
Fuel Systems<br />
(Carburetor<br />
Model) Application/Special Notes<br />
1991-1994 (Cont)<br />
3.0L V-6 U EFI, SEFI, SFI Aerostar, Ranger<br />
4.0L V-6 X EFI, MFI Aerostar, Explorer, Ranger<br />
4.9L I-6 Y, H EFI, MFI, SFI<br />
5.0L V-8 N EFI, MFI, SFI<br />
5.8L V-8 H, R EFI, MFI, SFI<br />
7.3L V-8 M Diesel<br />
7.3L V-8 K Turbo Diesel<br />
7.5L V-8 G EFI, MFI<br />
3.0L V-6 U SFI<br />
Bronco, E and F Series<br />
Trucks/Vans (8500 lb. GVW or<br />
less only)<br />
E and F Series Trucks/Vans<br />
(Excludes 1994 diesel models)<br />
1995<br />
Aerostar (Excludes Explorer,<br />
Ranger and Windstar)<br />
4.0L V-6 X SFI<br />
4.9L I-6 Y SFI E and F series Trucks and<br />
Vans (Excludes Natural Gas<br />
equipped vehicles)<br />
5.0L V-8 N SFI Bronco, E and F series Trucks<br />
5.8L V-8 H, R MFI and Vans<br />
7.5L V-8 G MFI E-350; F-250-350 (Excludes<br />
California ); F-Super Duty<br />
(Excludes Diesel)<br />
Computer<br />
System<br />
EEC-IV<br />
EEC-IV<br />
NOTES<br />
* Carburetor Model. Carburetor model numbers are usually stamped on top of the carburetor,<br />
or on a metal tab attached to the carburetor. Consult your vehicle’s repair manual for<br />
proper identification.<br />
**VIN Number. The VIN number(s) used in this column identify the vehicle’s engine type.<br />
This number is the 8th digit of the VIN (Vehicle Identification Number). Consult your vehicle’s<br />
repair manual for details.<br />
Application Table Definitions. EFI = Electronic Fuel Injection; FBC = Feedback Carburetor;<br />
MFI = Multiport Fuel Injection; OHC = Overhead Cam; SC = Super Charged; SEFI =<br />
Sequential Electronic Fuel Injection; SFI = Sequential Fuel Injection<br />
TEST CONNECTORS<br />
Ford vehicles are equipped with<br />
special test connectors that make<br />
it possible to connect specialized<br />
testing equipment that communicates<br />
with the vehicle's onboard<br />
computer. Ford's vehicle test<br />
connectors are usually dark in<br />
color (BLACK or GREY). Sometimes<br />
they have a plastic cover<br />
over them or are labeled EEC Test.<br />
The connectors can be found in<br />
the following general locations in<br />
the engine compartment: EEC-IV TEST CONNECTOR<br />
CanOBD2&1 77<br />
6-PIN<br />
SINGLE<br />
PIN
Ford OBD1 Systems<br />
CONNECTING THE CANOBD2&1 SCAN TOOL - DIAGNOSTIC TROUBLE CODES<br />
� Near the front corner (right or left).<br />
� Near the fender well (right or left).<br />
� Near the fire wall (right or left).<br />
CONNECTING THE CANOBD2&1 SCAN TOOL<br />
The CanOBD2&1 <strong>Scan</strong> <strong>Tool</strong>'s Ford Connector Cable<br />
Adaptor is designed to match the vehicle's computer DLC.<br />
When properly connected, the vehicle's DLC should match<br />
the pre-molded guides around the adaptor. Make sure the<br />
adaptor and the vehicle's DLC mate properly before<br />
applying force. Forcing the adaptor onto the DLC<br />
improperly may result in damage to the adaptor and/or<br />
CanOBD2&1 <strong>Scan</strong> <strong>Tool</strong>, and possible damage to the<br />
vehicle's computer system.<br />
� Connect the CanOBD2&1 <strong>Scan</strong> <strong>Tool</strong> to BOTH.<br />
1. Large, six pin female connector<br />
with molded housing<br />
EEC-IV<br />
TEST<br />
2. Small, single pin female connector<br />
CONNECTOR<br />
1988 and newer vehicles<br />
may have more than one<br />
similar connector for other<br />
systems (i.e. Anti-Lock<br />
CODE<br />
Brakes). Only the connector<br />
READER<br />
with an extra single pin is the<br />
correct test connector for<br />
computer service codes use. If you have any questions about<br />
the correct connector, please refer to your vehicle's service<br />
manual for detailed information.<br />
DIAGNOSTIC TROUBLE CODES (DTCs)<br />
Diagnostic Trouble Codes, or Fault Codes, can be used to identify<br />
engine systems or components that are malfunctioning. The computer<br />
records codes for two types of problems:<br />
� "Hard" Diagnostic Trouble Codes<br />
"Hard" DTCs represent problems which are happening now and<br />
cause the instrument panel Malfunction Indicator Lamp (MIL) or<br />
Check engine light to illuminate and remain on until the failure is<br />
repaired. A DTC is stored in the vehicle's computer memory for<br />
each fault detected. A <strong>Tool</strong> or <strong>Scan</strong>ner can be used to retrieve<br />
DTCs that are stored in the vehicle's computer memory.<br />
78 CanOBD2&1
Ford OBD1 Systems<br />
CODE RETRIEVAL PROCEDURES - OVERVIEW - KOEO TEST<br />
� Intermittent/History DTCs<br />
Intermittent/History DTCs are stored in the computer's memory for<br />
problems that occur intermittently, or for problems that happened in<br />
the past but are not currently present. Intermittent DTCs may cause<br />
the Malfunction Indicator light to flicker or stay on until the<br />
intermittent malfunction goes away. However, the corresponding<br />
fault code will be stored in memory as a history DTC. If the<br />
malfunction that caused the history DTC to set does not recur within<br />
a predetermined length of time (usually within 40-80 ignition key<br />
start cycles), the computer will automatically erase the related fault<br />
code from its memory.<br />
CODE RETRIEVAL PROCEDURES<br />
Overview of Ford Code Retrieval Process<br />
Ford's computer self-diagnostic system is divided into four main<br />
sections:<br />
1. "Key On Engine Off" (KOEO) Self-Test<br />
2. "Continuous Memory" (CM) Self-Test<br />
3. "Key On Engine Running" (KOER) Self-Test<br />
4. Other EEC-IV System tests<br />
These Self-Tests are specially designed to monitor and/or test the<br />
various components and circuits that are controlled by the vehicle's<br />
computer, and to save and/or transmit diagnostic test results to the<br />
CanOBD2&1 <strong>Scan</strong> <strong>Tool</strong> in the form of numerical fault codes.<br />
The "Continuous Memory" Self-Test is designed to run continuously<br />
whenever the vehicle is normal operation. If a fault is detected by the<br />
"Continuous Memory" Self-Test, a fault code is saved in the vehicle's<br />
computer memory for later retrieval.<br />
Ford’s On-Board Diagnostic Self-Tests are designed in such a way that<br />
in order to properly diagnose a problem, you must perform all the Self-<br />
Tests, in the proper sequence.<br />
As described previously, some tests are designed to detect problems<br />
only when the vehicle is in normal operation. Some tests are designed<br />
to activate components and detect problems only with the Key On and<br />
Engine Off. Other tests are designed to activate components and test<br />
their operation only with the Key On and Engine Running. Do not take<br />
short cuts. If you fail to perform a test, or you perform a test out of<br />
sequence, you might miss a problem that is only detected during that<br />
part of the test.<br />
Key On Engine Off (KOEO) Test<br />
During the KOEO Self-Test, two groups of codes are retrieved by the<br />
CanOBD2&1 <strong>Scan</strong> <strong>Tool</strong>.<br />
CanOBD2&1 79
Ford OBD1 Systems<br />
CODE RETRIEVAL PROCEDURES - KOEO TEST<br />
� The first group of codes retrieved by the CanOBD2&1 <strong>Scan</strong> <strong>Tool</strong> are<br />
called "KOEO codes". A "KOEO" icon will show in the upper right<br />
corner of the display to indicate that the code retrieved is a "KOEO"<br />
code.<br />
� The second group of codes are called "Continuous Memory" codes.<br />
A "CM" icon will show in the upper right corner of the display to<br />
indicate that the code retrieved is a "Continuous Memory" code.<br />
Check your vehicle thoroughly before performing any test. See<br />
BEFORE YOU BEGIN on page 18 for details.<br />
ALWAYS observe safety precautions whenever working on a<br />
vehicle. See Safety Precautions on page 3 for more information.<br />
1. Locate the vehicle's Data Link Connector (DLC). See Data Link<br />
Connector (DLC) on page 77 for connector location.<br />
Some DLCs have a plastic cover that must be removed before<br />
connecting the CanOBD2&1 <strong>Scan</strong> <strong>Tool</strong>'s cable connector.<br />
2. Connect the CanOBD2&1 <strong>Scan</strong> <strong>Tool</strong><br />
cable (with the Ford Connector Cable<br />
Adaptor attached) to the CanOBD2&1<br />
<strong>Scan</strong> <strong>Tool</strong>, then connect the adaptor to<br />
the vehicle's DLC. Press the<br />
POWER/LINK button to turn the<br />
CanOBD2&1 <strong>Scan</strong> <strong>Tool</strong> ON, then press<br />
the ENTER/LD button to continue.<br />
� The Ford EEC-IV System menu displays.<br />
Use the and buttons, as<br />
necessary,<br />
selections.<br />
to make menu<br />
3. From the Ford EEC-IV System menu, highlight KOEO Test, then<br />
press the ENTER/LD button.<br />
4. When prompted by the CanOBD2&1 <strong>Scan</strong> <strong>Tool</strong>, start and warm-up<br />
engine to normal operating temperature. Press the ENTER/LD<br />
button to continue.<br />
5. Turn ignition key OFF and wait for the on-screen prompt. If you wish<br />
to exit the KOEO test at this time, press the ENTER/LD<br />
to return to the Ford EEC-IV System menu.<br />
button<br />
6. When prompted by the CanOBD2&1 <strong>Scan</strong> <strong>Tool</strong>, turn the ignition ON.<br />
DO NOT start the engine. If your vehicle is equipped with one of the<br />
following engine types, perform the added procedures described<br />
below:<br />
� For 4.9L engines with standard transmission: Press and hold<br />
the clutch until all codes are sent (steps 7 through 9).<br />
80 CanOBD2&1
Ford OBD1 Systems<br />
CODE RETRIEVAL PROCEDURES - KOEO TEST<br />
� For 7.3L diesel engines: Press and hold accelerator until all<br />
codes are sent (steps 7 through 9).<br />
� For 2.3L turbo engines with octane switch: Put switch in<br />
premium position.<br />
7. Press the ENTER/LD button to continue.<br />
8. While codes are being retrieved, a "One<br />
moment please KOEO test is in<br />
progress..." message shows on the<br />
CanOBD2&1 <strong>Scan</strong> <strong>Tool</strong>'s display.<br />
As soon as the ignition is turned<br />
"on", the vehicle's computer enters<br />
the Self-Test mode. Clicking<br />
�<br />
sounds will be heard coming from<br />
the engine. This is normal. It<br />
indicates that the vehicle's computer is activating relays,<br />
solenoids, and other components to check their operation.<br />
WARNING: On some vehicles equipped with an Electric<br />
Cooling Fan, the computer activates the cooling fan to<br />
check its operation. To avoid injury, keep hands or any<br />
part of your body a safe distance from the engine during<br />
this test.<br />
If the CanOBD2&1 <strong>Scan</strong> <strong>Tool</strong> fails to<br />
link to the vehicle's computer, a<br />
"Vehicle is not responding" message<br />
shows on the CanOBD2&1 <strong>Scan</strong><br />
<strong>Tool</strong>'s display. Do the following:<br />
- Verify the ignition is ON.<br />
- Check the cable connections at<br />
the CanOBD2&1 <strong>Scan</strong> <strong>Tool</strong> and<br />
at the vehicle's DLC.<br />
- Turn the ignition OFF, wait 10 seconds, then turn back ON to<br />
reset the computer.<br />
BE SURE to perform the added procedures in step 6, if<br />
appropriate for your vehicle, during code retrieval.<br />
- Press ENTER/LD button to continue.<br />
9. If the CanOBD2&1 <strong>Scan</strong> <strong>Tool</strong> was able to link to the vehicle<br />
successfully a "Code retrieval was successful..." message shows<br />
temporarily on the CanOBD2&1 <strong>Scan</strong> <strong>Tool</strong>'s display followed by any<br />
retrieved DTCs.<br />
� The CanOBD2&1 <strong>Scan</strong> <strong>Tool</strong> will<br />
display a code only if codes are<br />
present in the vehicle's computer<br />
memory.<br />
� If no problems are found during the<br />
KOEO Self-Test, the computer<br />
sends a "PASS" code (code 11 or<br />
111) to the CanOBD2&1 <strong>Scan</strong> <strong>Tool</strong>.<br />
CanOBD2&1 81
Ford OBD1 Systems<br />
CODE RETRIEVAL PROCEDURES - KOEO TEST<br />
� If no Continuous Memory codes are<br />
present in the vehicle's computer<br />
memory, the CanOBD2&1 <strong>Scan</strong><br />
<strong>Tool</strong> will display a "PASS" code<br />
(code 11 or 111).<br />
Most Ford EEC-IV vehicle computers<br />
up to 1991 use a two-digit<br />
code system. From 1991 to 1995<br />
most use a three digit code system.<br />
10. If more than one code was retrieved, press DTC SCROLL<br />
button, as necessary, to display additional codes one at a time.<br />
In the case of long code definitions, a small arrow is shown in<br />
the upper/lower right-hand corner of the code display area to<br />
indicate the presence of additional information. Use the<br />
and buttons, as necessary, to view the additional<br />
information.<br />
11. Disconnect the CanOBD2&1 <strong>Scan</strong> <strong>Tool</strong> from the vehicle and turn<br />
the ignition key OFF.<br />
12. To prolong battery life, the CanOBD2&1 <strong>Scan</strong> <strong>Tool</strong> automatically<br />
shuts "Off" after approximately three minutes of no button activity.<br />
The DTCs retrieved will remain in the CanOBD2&1 <strong>Scan</strong> <strong>Tool</strong>'s<br />
memory, and may be viewed at any time. If the CanOBD2&1 <strong>Scan</strong><br />
<strong>Tool</strong>'s batteries are removed, or if the CanOBD2&1 <strong>Scan</strong> <strong>Tool</strong> is relinked<br />
to a vehicle to retrieve codes, any prior codes in its memory<br />
are automatically cleared.<br />
� See VIEWING DTCs IN THE CANOBD2&1 SCAN TOOL’S<br />
MEMORY on page 13 to view DTCs stored in the CanOBD2&1<br />
<strong>Scan</strong> <strong>Tool</strong>'s memory.<br />
13. Follow the testing and repair procedures outlined in the vehicle's<br />
service repair manual to correct "hard" DTCs. Codes should be<br />
addressed and eliminated in the order they were received, erasing<br />
(see ERASING DTCs (OBD I SYSTEMS) on page 112) and retesting<br />
after each repair is done to be sure the fault was eliminated.<br />
IMPORTANT: DO NOT service "Continuous Memory" codes at<br />
this time. Before "Continuous Memory" codes can be serviced,<br />
both the KOEO and the KOER Self-Tests must pass (a PASS<br />
code 11 or 111 is obtained). After both of these tests have<br />
passed, erase the vehicle's computer memory (see ERASING<br />
DTCs (OBD I SYSTEMS) on page 112), take the vehicle for a<br />
short drive, then repeat the KOEO Self-Test. If any Continuous<br />
Memory faults are present, service them all this time. Consult<br />
the vehicle's service repair manual for servicing Continuous<br />
Memory Fault Codes.<br />
The green, yellow and red LEDs are used (with the LCD<br />
display) as visual aids to make it easier to determine engine<br />
system conditions. See SERVICING DTCs - OBD I on page<br />
110 for information on interpreting LEDs and servicing DTCs.<br />
82 CanOBD2&1
Engine Timing Check<br />
Ford OBD1 Systems<br />
CODE RETRIEVAL PROCEDURES - ENGINE TIMING CHECK<br />
Do not proceed to the ignition timing check procedure or the<br />
KOER test until a PASS code (code 11 or 111) for KOEO test<br />
is obtained.<br />
Before performing the KOER Self-Test, the vehicle's Ignition<br />
Base Timing and the computer's ability to electronically control<br />
timing advance must be checked for proper operation.<br />
Maladjustment of ignition timing, or a problem in the advance<br />
circuit, might generate false fault codes when performing the<br />
KOER Self-Test that would cause the test to be invalid. Use<br />
the following procedures to check for proper ignition timing and<br />
to verify the computer's ability to electronically advance ignition<br />
timing.<br />
The following "Timing Check" procedure is only<br />
applicable to 1992 and older vehicles (excluding diesel<br />
engines). For 1993 and newer vehicles, refer to the<br />
vehicle's service repair manual for procedures to check<br />
and adjust timing. DO NOT ATTEMPT TO ADJUST TIMING<br />
ON THESE VEHICLES WITHOUT MANUFACTURER'S<br />
SPECIFICATIONS AND PROCEDURES.<br />
For 1992 and older vehicles, the CanOBD2&1 <strong>Scan</strong> <strong>Tool</strong> can be used in<br />
combination with a timing light to check ignition timing and the vehicle<br />
computers ability to advance ignition timing.<br />
Check your vehicle thoroughly before performing any test. See<br />
BEFORE YOU BEGIN on page 18 for details.<br />
ALWAYS observe safety precautions whenever working on a<br />
vehicle. Read and follow Safety Precautions on page 3 before<br />
performing this test.<br />
� A timing light is required to perform this test.<br />
� The vehicle must pass the KOEO Test (page 79) before performing<br />
this test.<br />
1. Locate the vehicle's Data Link Connector (DLC). See Data Link<br />
Connector on page 77 for connector location.<br />
Some DLCs have a plastic cover that must be removed before<br />
connecting the CanOBD2&1 <strong>Scan</strong> <strong>Tool</strong>'s cable connector.<br />
2. Connect the CanOBD2&1 <strong>Scan</strong> <strong>Tool</strong><br />
cable (with the Ford Connector Cable<br />
Adaptor attached) to the CanOBD2&1<br />
<strong>Scan</strong> <strong>Tool</strong>, then connect the adaptor to<br />
the vehicle's DLC. Press the<br />
POWER/LINK button to turn the<br />
CanOBD2&1 <strong>Scan</strong> <strong>Tool</strong> ON, then press<br />
ENTER/LD button to continue.<br />
CanOBD2&1 83
Ford OBD1 Systems<br />
CODE RETRIEVAL PROCEDURES - ENGINE TIMING CHECK<br />
� The Ford EEC-IV System menu<br />
displays.<br />
Use the and buttons, as<br />
necessary, to make menu<br />
selections.<br />
3. From the Ford EEC-IV System menu,<br />
highlight Timing Check, then press the<br />
ENTER/LD button.<br />
� The Timing Check menu displays.<br />
4. From the Timing Check menu, highlight<br />
the appropriate option for the vehicle<br />
under test, then press the ENTER/LD<br />
button.<br />
� 1993 and newer selected - an<br />
instructional message shows on the<br />
CanOBD2&1 <strong>Scan</strong> <strong>Tool</strong>’s display,<br />
referring you to the vehicle’s service<br />
manual for timing check procedures.<br />
Press the ENTER/LD button to<br />
return to the Ford EEC-IV System<br />
menu.<br />
� 1992 and older selected - proceed to step 5.<br />
5. When prompted by the CanOBD2&1 <strong>Scan</strong> <strong>Tool</strong>, start and warm-up<br />
engine to normal operating temperature. Press the ENTER/LD<br />
button to continue.<br />
6. Turn off all vehicle accessories, then turn ignition key OFF and wait<br />
for the on screen prompt. If you wish to exit the Timing Check<br />
procedure at this time, press the ENTER/LD button.<br />
7. When prompted by the CanOBD2&1<br />
<strong>Scan</strong> <strong>Tool</strong>, start the engine and press<br />
the ENTER/LD button.<br />
� A "One moment please preparation<br />
for test is in progress” message<br />
shows temporarily on the<br />
CanOBD2&1 <strong>Scan</strong> <strong>Tool</strong>'s display,<br />
followed by the message "Perform<br />
Timing Check within two minutes."<br />
8. When "Perform Timing Check within 2 minutes" displays, perform<br />
the Timing Check as follows:<br />
84 CanOBD2&1
Ford OBD1 Systems<br />
CODE RETRIEVAL PROCEDURES - KOER TEST<br />
� The vehicle's computer is programmed<br />
to advance ignition timing<br />
20° (±3°) above the vehicle's "base<br />
timing" value, and to freeze this<br />
setting for two minutes from the time<br />
the "Perform Timing Check within 2<br />
minutes" message displays. This<br />
allows the user to check the computer's<br />
ability to advance ignition<br />
timing.<br />
� Within this two-minute period, follow instructions in the vehicle's<br />
service repair manual to check the ignition timing with a timing<br />
light and ensure that it is 20° above the specified base timing<br />
value (±3°).<br />
Example: If base timing specification is 10° BTDC, the acceptable<br />
timing light reading should be in the range of 27° to 33° BTDC.<br />
Base-timing specifications can be found on the Vehicle<br />
Emission Control Information (VECI) decal. The decal is<br />
located under the hood or near the radiator. If the VECI decal<br />
is missing or damaged, refer to your vehicle's service repair<br />
manual for specifications.<br />
9. If timing light readings are within the acceptable range:<br />
� Base timing and the vehicle computer's ability to advance timing<br />
are working properly.<br />
� Proceed to the KOER Self-Test below.<br />
10. If timing light readings are not within the acceptable range:<br />
� Base timing may be out of adjustment, or the computer may<br />
have problems with the timing advance circuit.<br />
� Refer to the vehicle's service repair manual for procedures on<br />
adjusting and/or repairing ignition timing. Repairs to ignition<br />
timing must be made before proceeding to the KOER Test.<br />
Key on Engine Running (KOER) Self-Test<br />
IMPORTANT: The KOEO Self-Test (page 79) must be<br />
performed first, and a "pass code" (code 11 or 111) must be<br />
obtained before performing the KOER Self-Test; otherwise,<br />
results of the KOER Self-Test may be invalid.<br />
Ignition timing and timing advance must be operating properly<br />
in order for the KOER Self-Test results to be considered valid.<br />
Perform an Engine Timing check (page 83) before performing<br />
the KOER Self-Test.<br />
Check your vehicle thoroughly before performing any test. See<br />
BEFORE YOU BEGIN on page 18 for details.<br />
ALWAYS observe safety precautions whenever working on a<br />
vehicle. Read and follow Safety Precautions on page 3 before<br />
performing this test.<br />
CanOBD2&1 85
Ford OBD1 Systems<br />
CODE RETRIEVAL PROCEDURES - KOER TEST<br />
� The vehicle must pass the Engine Timing Check (page 83) before<br />
performing this test.<br />
1. Locate the vehicle's Data Link Connector (DLC). See Data Link<br />
Connector (DLC) on page 77 for connector location.<br />
Some DLCs have a plastic cover that must be removed before<br />
connecting the CanOBD2&1 <strong>Scan</strong> <strong>Tool</strong> cable connector.<br />
2. Connect the CanOBD2&1 <strong>Scan</strong> <strong>Tool</strong><br />
cable (with the Ford Connector Cable<br />
Adaptor attached) to the CanOBD2&1<br />
<strong>Scan</strong> <strong>Tool</strong>, then connect the adaptor to<br />
the vehicle's DLC. Press the<br />
POWER/LINK button to turn the<br />
CanOBD2&1 <strong>Scan</strong> <strong>Tool</strong> ON, then press<br />
the ENTER/LD button to continue.<br />
� The Ford EEC-IV System menu displays.<br />
Use the and buttons, as<br />
necessary, to make menu selections.<br />
3. From the Ford EEC-IV System menu,<br />
highlight KOER Test, then press the<br />
ENTER/LD button.<br />
4. When prompted by the CanOBD2&1 <strong>Scan</strong> <strong>Tool</strong>, start and warm-up<br />
engine to normal operating temperature. Press the ENTER/LD<br />
button to continue.<br />
5. Turn off all vehicle accessories, then turn ignition key OFF and wait<br />
for the on screen prompt. If you wish to exit the KOER test at this<br />
time, press the ENTER/LD button.<br />
6. When prompted by the CanOBD2&1<br />
<strong>Scan</strong> <strong>Tool</strong>, start the engine and press<br />
the ENTER/LD button to continue.<br />
A "One moment please KOER test is in<br />
progress..." message shows temporarily<br />
on the CanOBD2&1 <strong>Scan</strong> <strong>Tool</strong>'s display.<br />
7. The CanOBD2&1 <strong>Scan</strong> <strong>Tool</strong> will retrieve<br />
and display the Cylinder Identification<br />
(ID) Code. The Cylinder ID Code<br />
identifies the number of cylinders of the<br />
vehicle that is under test.<br />
If the CanOBD2&1 <strong>Scan</strong> <strong>Tool</strong> fails to<br />
retrieve CYL ID and DTCs, its<br />
possible that the KOEO Test was not<br />
performed properly before proceeding<br />
to the KOER Test. Go back and<br />
perform the KOEO Test (page 79) until a PASS code is obtained.<br />
86 CanOBD2&1
Ford OBD1 Systems<br />
CODE RETRIEVAL PROCEDURES - KOER TEST<br />
8. Perform the following procedures when prompted by the message<br />
on the CanOBD2&1 <strong>Scan</strong> <strong>Tool</strong>'s display.<br />
� Turn the steering wheel 1/2 turn to right, hold for four seconds<br />
and release.<br />
� Press the brake pedal to the floor and then release it.<br />
� Cycle the Overdrive Switch (if equipped).<br />
� Quickly press the accelerator pedal to the floor and then release it.<br />
9. After the above procedures are<br />
performed a "One moment please<br />
KOER test is in progress..." message<br />
shows temporarily on the CanOBD2&1<br />
<strong>Scan</strong> <strong>Tool</strong>'s display, followed by a<br />
"Retrieving codes" message.<br />
10. If the CanOBD2&1 <strong>Scan</strong> <strong>Tool</strong> was able<br />
to link to the vehicle successfully, a<br />
“Code retrieval was successful...” message shows temporarily on<br />
the CanOBD2&1 <strong>Scan</strong> <strong>Tool</strong>’s display, followed by any retrieved<br />
DTCs.<br />
If code 98 or 998 displays, the<br />
vehicle is operating in "Failure<br />
Mode". The computer goes into<br />
failure mode when it detects a<br />
signal from a sensor that indicates<br />
the sensor has failed and is<br />
completely out of specifications.<br />
The computer substitutes a fixed<br />
signal value for the failed sensor<br />
to keep the vehicle running. Failure mode codes 98 or 998 are<br />
usually accompanied by one or more Diagnostic Trouble<br />
Codes that indicate the failed sensor. A vehicle operating in<br />
failure mode is operating at a minimal level, and the faults that<br />
are causing these Diagnostic Trouble Codes to set must be<br />
repaired as soon as possible.<br />
Most Ford EEC-IV vehicle computers up to 1991 use a twodigit<br />
code system. From 1991 to 1995 most use a three-digit<br />
code system.<br />
11. If no problems are found during the<br />
KOER Self-Test, the computer sends a<br />
"PASS code" (code 11 or 111) to the<br />
CanOBD2&1 <strong>Scan</strong> <strong>Tool</strong>. Code 11 or<br />
111 indicates that all the relays and<br />
actuators and their related circuits that<br />
were tested during the KOER Self-Test<br />
are OK, and no faults were found.<br />
12. After the CanOBD2&1 <strong>Scan</strong> <strong>Tool</strong> retrieves all the KOER Self-Test<br />
DTCs, turn the engine off, and disconnect the CanOBD2&1 <strong>Scan</strong><br />
<strong>Tool</strong> from the vehicle's test connectors. The DTCs retrieved are now<br />
stored in the CanOBD2&1 <strong>Scan</strong> <strong>Tool</strong>'s memory.<br />
CanOBD2&1 87
Ford OBD1 Systems<br />
ADDITIONAL TESTS FOR EEC-IV SYSTEMS - CYLINDER BALANCE TEST<br />
� See VIEWING DTCs IN THE CANOBD2&1 SCAN TOOL’S<br />
MEMORY on page 13 to view DTCs stored in the CanOBD2&1<br />
<strong>Scan</strong> <strong>Tool</strong>'s memory.<br />
All retrieved DTCs will remain in the CanOBD2&1 <strong>Scan</strong> <strong>Tool</strong>'s<br />
memory. If the KOER Test procedure is performed again,<br />
DTC's from a prior test will automatically clear and will be<br />
replaced by the most current DTCs retrieved.<br />
13. All KOER codes that are retrieved by the CanOBD2&1 <strong>Scan</strong> <strong>Tool</strong><br />
during the KOER Self-Test represent problems that are present now<br />
(at the time the test is performed). The related vehicle problems that<br />
caused the codes to be sent must be repaired using the procedures<br />
described in the vehicle's repair manual.<br />
The green, yellow and red LEDs are used (with the LCD<br />
display) as visual aids to make it easier to determine engine<br />
system conditions. See SERVICING DTCs - OBD I on page<br />
110 for information on interpreting LEDs and servicing DTCs.<br />
14. After all repairs have been completed, repeat the KOER Self-Test.<br />
15. If a "pass code" (code 11 or 111) is<br />
received, it indicates that the repairs<br />
were successful and all the related<br />
systems are working properly.<br />
16. If a "pass code" (code 111 or 111) is not<br />
received, the repair was unsuccessful.<br />
Consult the vehicle's service manual<br />
and recheck repair procedure.<br />
ADDITIONAL TESTS FOR EEC-IV SYSTEMS<br />
These tests are additional, supplemental tests, and are not<br />
needed to retrieve Diagnostic Trouble Codes. Ford has<br />
included them to further assist the technician / do-it-yourselfer<br />
in the troubleshooting of vehicle problems.<br />
Cylinder Balance Test (Vehicles equipped with Sequential<br />
Electronic Fuel Injected (SEFI) systems only)<br />
The Cylinder Balance Test assists in finding a weak or noncontributing<br />
cylinder. The computer shuts off fuel (cuts off power to injectors) to each<br />
cylinder, in sequence, and monitors for RPM changes (drop). Based on<br />
this information, the computer determines if all the cylinders are<br />
contributing power equally (for proper engine operation), or if some<br />
cylinders are only contributing partially or not contributing at all.<br />
SEFI Introduction<br />
Sequential Electronic Fuel Injection (SEFI) belongs to a family of fuel<br />
injection systems called "Multi-port/Multipoint Fuel Injection". Multi-port<br />
(MFI) fuel injection systems contain one fuel injector per cylinder, and<br />
the vehicle's computer electronically controls their operation. On some<br />
multi-port fuel injection systems, the injectors all fire at the same time<br />
88 CanOBD2&1
Ford OBD1 Systems<br />
ADDITIONAL TESTS FOR EEC-IV SYSTEMS - CYLINDER BALANCE TEST<br />
and at every engine revolution. On other systems the injectors fire in<br />
groups and/or at every other engine revolution. What distinguishes<br />
Sequential Electronic Fuel Injection systems from other multi-port fuel<br />
injection systems is that each injector is independently energized and<br />
fires sequentially one after the other in the proper firing order. This gives<br />
the vehicle's computer more control to cut the fuel to one injector at a<br />
time (this can't be accomplished on the other systems because they fire<br />
in groups of two ore more injectors).<br />
Cylinder Balance Test Procedure<br />
Check your vehicle thoroughly before performing any test. See<br />
BEFORE YOU BEGIN on page 18 for details.<br />
ALWAYS observe safety precautions whenever working on a<br />
vehicle. Read and follow Safety Precautions on page 3 before<br />
performing this test.<br />
1. Locate the vehicle's Data Link Connector (DLC). See Data Link<br />
Connector (DLC) on page 77 for connector location.<br />
Some DLCs have a plastic cover that must be removed before<br />
connecting the CanOBD2&1 <strong>Scan</strong> <strong>Tool</strong> cable connector.<br />
2. Connect the CanOBD2&1 <strong>Scan</strong> <strong>Tool</strong><br />
cable (with the Ford Connector Cable<br />
Adaptor attached) to the CanOBD2&1<br />
<strong>Scan</strong> <strong>Tool</strong>, then connect the adaptor to<br />
the vehicle's DLC. Press the<br />
POWER/LINK button to turn the<br />
CanOBD2&1 <strong>Scan</strong> <strong>Tool</strong> ON, then press<br />
the ENTER/LD button to continue.<br />
� The Ford EEC-IV System menu displays.<br />
Use the<br />
selections.<br />
and buttons, as necessary, to make menu<br />
3. From the Ford EEC-IV System menu,<br />
highlight Cylinder Balance Test, then<br />
press the ENTER/LD button.<br />
� An “application” advisory message<br />
shows on the CanOBD2&1 <strong>Scan</strong><br />
<strong>Tool</strong>’s display.<br />
� If your vehicle IS equipped with the<br />
Sequential Fuel Injection, press the<br />
ENTER/LD button to continue.<br />
� If your vehicle IS NOT equipped with Sequential Fuel Injection,<br />
select Back, then press the ENTER/LD button to exit the<br />
Cylinder Balance Test.<br />
4. When prompted by the CanOBD2&1 <strong>Scan</strong> <strong>Tool</strong>, start and warm-up<br />
engine to normal operating temperature. Press the ENTER/LD<br />
button to continue.<br />
CanOBD2&1 89
Ford OBD1 Systems<br />
ADDITIONAL TESTS FOR EEC-IV SYSTEMS - CYLINDER BALANCE TEST<br />
5. Turn off all vehicle accessories, then turn ignition key OFF and wait<br />
for the on screen prompt. If you wish to exit the Cylinder Balance<br />
test at this time, press the ENTER/LD<br />
6. When instructed by the message on the<br />
CanOBD2&1 <strong>Scan</strong> <strong>Tool</strong>'s display, start<br />
the engine and press the ENTER/LD<br />
button. A "One moment please<br />
preparation for test is in progress..."<br />
message shows temporarily on the<br />
CanOBD2&1 <strong>Scan</strong> <strong>Tool</strong>'s display.<br />
7. When prompted by the CanOBD2&1<br />
<strong>Scan</strong> <strong>Tool</strong>, lightly press the accelerator<br />
pedal half way and release to activate<br />
the cylinder balance test.<br />
For 1986 models ONLY: Fully<br />
button.<br />
press<br />
release.<br />
accelerator once and<br />
� A “One moment please test is in<br />
progress...” message shows on the CanOBD2&1 <strong>Scan</strong> <strong>Tool</strong>’s<br />
display.<br />
� The computer is now in Cylinder Balance Test mode, and will<br />
start cutting fuel to each cylinder in sequence to determine if all<br />
the cylinders are contributing equally. It may take up to five<br />
minutes before the test results are transmitted to the<br />
CanOBD2&1 <strong>Scan</strong> <strong>Tool</strong>.<br />
8. If the vehicle's computer fails to enter Cylinder Balance Test mode,<br />
do the following:<br />
� Lightly press the accelerator pedal again as described in step 7<br />
above.<br />
� Check your vehicle's fuel injection system and make sure that it<br />
is a Sequential Electronic Fuel Injection (SEFI) system. This test<br />
is applicable only to SEFI or SFI systems.<br />
9. After the Cylinder Balance Test is<br />
completed, the test results are sent to<br />
the CanOBD2&1 <strong>Scan</strong> <strong>Tool</strong>.<br />
� The computer compares the power<br />
contribution that each cylinder<br />
makes to engine operation.<br />
10. If all cylinders are contributing equally,<br />
the computer determines that power<br />
distribution is normal and a “System<br />
Pass” message will display.<br />
90 CanOBD2&1
Ford OBD1 Systems<br />
ADDITIONAL TESTS FOR EEC-IV SYSTEMS - RELAY AND SOLENOID TEST<br />
If the computer detects a problem with a cylinder(s) when<br />
performing the initial Cylinder Balance Test, it needs to<br />
repeat the test two more times to properly determine<br />
which cylinder or cylinders are malfunctioning. If this is<br />
the case, the CanOBD2&1 <strong>Scan</strong> <strong>Tool</strong> will display the<br />
“Lightly press the accelerator half way and release”<br />
message again instead of the “System Pass”. Proceed to<br />
step 11.<br />
11. If a cylinder is not contributing at the same level as the other<br />
cylinders, the computer prompts you to repeat the test two more<br />
times by displaying the “Lightly press the accelerator half way and<br />
release” message again. Each time the message displays, perform<br />
the procedures as instructed.<br />
12. After the repeat Cylinder Balance tests<br />
have completed, the computer will<br />
identify which cylinder (or cylinders) are<br />
not contributing equally, and will send<br />
this information to the CanOBD2&1<br />
<strong>Scan</strong> <strong>Tool</strong>’s display.<br />
� If any weak cylinders are identified,<br />
consult the vehicle’s service repair<br />
manual to perform further testing<br />
and/or repairs.<br />
Relay and Solenoid Test (Output State Check)<br />
The "Output State Check" is a special program in the vehicle's computer<br />
that allows the user to energize (turn ON) and de-energize (turn OFF),<br />
on command, most of the actuators (relays and solenoids) that are<br />
controlled by the computer.<br />
Use this test to check computer output voltages and relay/solenoid<br />
operation.<br />
The fuel injectors and fuel pump are not energized during this<br />
test. Check your vehicle thoroughly before performing any test.<br />
See BEFORE YOU BEGIN on page 18 for details.<br />
ALWAYS observe safety precautions whenever working on a<br />
vehicle.<br />
Read and follow Safety Precautions on page 3 before performing<br />
this test.<br />
1. Locate the vehicle's Data Link Connector (DLC). See Data Link<br />
Connector (DLC) on page 77 for connector location.<br />
Some DLCs have a plastic cover that must be removed before<br />
connecting the CanOBD2&1 <strong>Scan</strong> <strong>Tool</strong> cable connector.<br />
CanOBD2&1 91
Ford OBD1 Systems<br />
ADDITIONAL TESTS FOR EEC-IV SYSTEMS - RELAY AND SOLENOID TEST<br />
2. Connect the CanOBD2&1 <strong>Scan</strong> <strong>Tool</strong><br />
cable (with the Ford Connector Cable<br />
Adaptor attached) to the CanOBD2&1<br />
<strong>Scan</strong> <strong>Tool</strong>, then connect the adaptor to<br />
the vehicle's DLC. Press the<br />
POWER/LINK button to turn the<br />
CanOBD2&1 <strong>Scan</strong> <strong>Tool</strong> ON, then press<br />
the ENTER/LD button to continue.<br />
� The Ford EEC-IV System menu displays.<br />
Use the and buttons, as necessary, to make menu<br />
selections.<br />
3. From the Ford EEC-IV System menu,<br />
highlight Output State Check, then<br />
press the ENTER/LD button.<br />
4. When prompted by the CanOBD2&1<br />
<strong>Scan</strong> <strong>Tool</strong>, start and warm-up engine to<br />
normal operating temperature. Press<br />
the ENTER/LD button to continue.<br />
5. Turn ignition key OFF and wait for the on screen prompt. If you wish<br />
to exit the Output State Check at this time, press the ENTER/LD<br />
button.<br />
6. When prompted by the CanOBD2&1 <strong>Scan</strong> <strong>Tool</strong>, turn ignition ON.<br />
DO NOT start the engine. If your vehicle is equipped with one of the<br />
following engine types, perform the added procedures described<br />
below:<br />
� For 4.9L engines with standard transmission: Press and hold<br />
the clutch until the "Output State Check Active" screen displays.<br />
� For 7.3L diesel engines: Press and hold accelerator until the<br />
"Output State Check Active" screen displays<br />
� For 2.3L turbo engines with octane switch: Put switch in<br />
premium position.<br />
7. Press the ENTER/LD button to continue.<br />
8. A "One moment please test is in<br />
progress..." message shows on the<br />
CanOBD2&1 <strong>Scan</strong> <strong>Tool</strong>'s display.<br />
As soon as the ignition is turned<br />
"on", the vehicle's computer enters<br />
the Self-Test mode. Clicking<br />
sounds will be heard coming from<br />
the engine. This is normal.<br />
WARNING: On some vehicles equipped with an Electric<br />
Cooling Fan, the computer activates the cooling fan to<br />
check its operation. To avoid injury, keep hands or any part<br />
of your body a safe distance from engine during the test.<br />
92 CanOBD2&1
Ford OBD1 Systems<br />
ADDITIONAL TESTS FOR EEC-IV SYSTEMS - RELAY AND SOLENOID TEST<br />
� If the CanOBD2&1 <strong>Scan</strong> <strong>Tool</strong> fails to<br />
link to the vehicle's computer, a<br />
"Vehicle is not responding" message<br />
shows on the CanOBD2&1 <strong>Scan</strong><br />
<strong>Tool</strong>'s display. Do the following:<br />
- Verify the ignition is ON.<br />
- Check the cable connections at<br />
the Code Reader and at the<br />
vehicle's DLC.<br />
- Turn the ignition OFF, wait 10 seconds, then turn back ON to<br />
reset the computer.<br />
BE SURE to perform the added procedures in step 6, if<br />
appropriate for your vehicle, BEFORE turning the<br />
ignition ON.<br />
- Press ENTER/LD button to continue.<br />
9. If the CanOBD2&1 <strong>Scan</strong> <strong>Tool</strong> was able<br />
to link to the vehicle successfully an<br />
"Output State check active..." message<br />
shows temporarily on the CanOBD2&1<br />
<strong>Scan</strong> <strong>Tool</strong>'s display. This message is<br />
followed by a display that instructs you<br />
how to perform the test.<br />
10. Press the accelerator pedal once, then release. This activates the<br />
Output State Check and energizes most of the actuators (relays and<br />
solenoids) that are controlled by the vehicle's computer.<br />
If your vehicle is equipped with an Integrated Vehicle Speed<br />
Control, disconnect the vacuum supply hose from the speed<br />
control servo before pressing the accelerator. Reconnect<br />
vacuum hose after test.<br />
11. To de-energize the actuators, press the accelerator pedal again and<br />
release, the actuators are now de-energized.<br />
12. The procedure can be repeated as many times as desired by<br />
pressing and releasing the accelerator pedal to energize and deenergize<br />
the actuators.<br />
13. Consult the vehicle's service repair manual for a list of actuators<br />
(solenoids and relays) controlled by the computer that apply to the<br />
vehicle under test, and which actuators should energize and deenergize<br />
when performing the Output State Check. All applicable<br />
actuators should be on when energized and off when de-energized.<br />
14. If an actuator is not responding to the Output State Check, follow the<br />
procedures described in the vehicle's service manual to check<br />
computer actuator output circuit voltages and/or grounds.<br />
15. The Output State Check will stay active as long as desired. To quit<br />
the Output State Check, turn the ignition OFF and disconnect the<br />
CanOBD2&1 <strong>Scan</strong> <strong>Tool</strong> from the vehicle.<br />
CanOBD2&1 93
Ford OBD1 Systems<br />
ADDITIONAL TESTS FOR EEC-IV SYSTEMS - WIGGLE TEST<br />
Wiggle Test<br />
Since any DTC’s from Wiggle Test results are saved in<br />
Continuous Memory, it is suggested that you clear any DTC’s<br />
in Continuous Memory before performing Wiggle Test (see<br />
ERASING DTCs (OBD I SYSTEMS) on page 112 for procedures).<br />
This way you start with a clean slate, and any faults<br />
detected during the procedure will be related to that particular<br />
circuit tested.<br />
Use this test to check for intermittent faults in some circuits.<br />
Circuits Tested:<br />
1984 & Newer - Air Charge Temp Sensor (ACT), Barometer Pressure<br />
Sensor (BP), Engine Coolant Temp Sensor (ECT), Exhaust Gas<br />
Oxygen Sensor (EGO), EGR Valve Posit<br />
1985 & Newer - Vane Air Flow Sensor (VAF)<br />
1986 & Newer - Pressure Feedback EGR Sensor (PFE)<br />
1990 & Newer - Exhaust Gas Oxygen Sensor (EGO), Ignition<br />
Diagnostic Monitor (IDM) (DIS or Dual Plug DIS only), Idle Tracking<br />
Switch (ITS), Mass Air Flow Sensor (MAF)<br />
ALWAYS observe safety precautions whenever working on a<br />
vehicle. Read and follow Safety Precautions on page 3 before<br />
performing this test.<br />
1. Locate the vehicle's Data Link Connector (DLC). See Data Link<br />
Connector (DLC) on page 77 for connector location.<br />
Some DLCs have a plastic cover that must be removed before<br />
connecting the CanOBD2&1 <strong>Scan</strong> <strong>Tool</strong> cable connector.<br />
2. Connect the CanOBD2&1 <strong>Scan</strong> <strong>Tool</strong> cable (with the Ford Connector<br />
Cable Adaptor attached) to the CanOBD2&1 <strong>Scan</strong> <strong>Tool</strong>, then<br />
connect the adaptor to the vehicle's DLC. Press the POWER/LINK<br />
button to turn the CanOBD2&1 <strong>Scan</strong> <strong>Tool</strong> ON, then press the<br />
ENTER/LD button to continue.<br />
� The Ford EEC-IV System menu displays.<br />
Use the<br />
selections.<br />
and buttons, as necessary, to make menu<br />
3. From the Ford EEC-IV System menu,<br />
highlight Wiggle Test, then press the<br />
ENTER/LD button.<br />
4. When prompted by the CanOBD2&1<br />
<strong>Scan</strong> <strong>Tool</strong>, start and warm-up engine to<br />
normal operating temperature. Press<br />
the ENTER/LD button to continue.<br />
5. Turn ignition key OFF and wait for the on-screen prompt. If you wish<br />
to exit the KOEO test at this time, press the ENTER/LD button.<br />
94 CanOBD2&1
Ford OBD1 Systems<br />
ADDITIONAL TESTS FOR EEC-IV SYSTEMS - WIGGLE TEST<br />
6. Select the desired Wiggle Test from the<br />
menu displayed.<br />
� To perform the KOEO Wiggle Test:<br />
- Highlight KOEO Wiggle Test.<br />
- Turn ignition ON. DO NOT start<br />
the engine.<br />
- Press the ENTER/LD button<br />
to continue.<br />
� To perform the KOER Wiggle Test:<br />
- Highlight KOER Wiggle Test.<br />
- Turn the ignition ON and start the engine.<br />
- Press the ENTER/LD button to continue.<br />
7. A "One moment please test is in<br />
progress" message shows temporarily<br />
on the CanOBD2&1 <strong>Scan</strong> <strong>Tool</strong>’s display.<br />
� If the CanOBD2&1 <strong>Scan</strong> <strong>Tool</strong> fails<br />
to link to the vehicle's computer, a<br />
"Vehicle is not responding" message<br />
shows on the CanOBD2&1<br />
<strong>Scan</strong> <strong>Tool</strong>'s display. Do the following:<br />
For KOEO Wiggle Test:<br />
- Verify the ignition is ON.<br />
- Turn the ignition OFF, wait 10 seconds, then turn back ON to<br />
reset the computer. Press the ENTER/LD button to<br />
continue.<br />
For KOER Wiggle Test:<br />
- Turn the engine OFF, wait 10 seconds, then turn back ON.<br />
Press the ENTER/LD button to continue.<br />
BE SURE to perform the added procedures in step 6, if<br />
appropriate for your vehicle, BEFORE turning the<br />
ignition ON.<br />
- Press ENTER/LD button to continue.<br />
8. If the CanOBD2&1 <strong>Scan</strong> <strong>Tool</strong> was able to link to the vehicle<br />
successfully, a "Wiggle test is active..." message shows temporarily<br />
on the CanOBD2&1 <strong>Scan</strong> <strong>Tool</strong>’s display. This is followed by a<br />
message instructing you how to perform the test.<br />
� Press the ENTER/LD<br />
Test at this time.<br />
button if you wish to exit the Wiggle<br />
9. Wiggle, tap and move the suspected sensor or wiring.<br />
CanOBD2&1 95
Ford OBD1 Systems<br />
ADDITIONAL TESTS FOR EEC-IV SYSTEMS - WIGGLE TEST<br />
� If no faults are detected when performing<br />
the Wiggle Test, a "System<br />
Pass" message displays.<br />
� If a fault is detected when performing<br />
the Wiggle Test, a "Circuit<br />
Fault detected" message displays.<br />
If the Wiggle Test detects<br />
any problems, the related<br />
DTC will be stored by the<br />
computer in "Continuous<br />
Memory". To view any<br />
Wiggle Test DTC’s you<br />
must perform the KOEO<br />
Test. See page 79 for<br />
KOEO Test procedures.<br />
10. Follow the procedures in the vehicle's service repair manual to<br />
perform troubleshooting and repairs for Wiggle Test results.<br />
11. The Wiggle Test will stay active as long as desired. To quit the<br />
Wiggle Test, turn the ignition OFF and disconnect the CanOBD2&1<br />
<strong>Scan</strong> <strong>Tool</strong> from the vehicle.<br />
96 CanOBD2&1
GM OBD1 Systems<br />
YOUR VEHICLE’S COMPUTER SYSTEM - VEHICLES COVERED<br />
YOUR VEHICLE'S COMPUTER SYSTEM<br />
Today's vehicles are equipped with computer self-testing abilities that<br />
can locate problems in your vehicle and store them as Diagnostic<br />
Trouble Codes (DTC's) in the vehicle's onboard computer. The<br />
Enhanced CanOBD2&1 <strong>Scan</strong> <strong>Tool</strong> allows you access to the computer's<br />
memory and retrieves the DTC's.<br />
VEHICLES COVERED<br />
The CanOBD2&1 <strong>Scan</strong> <strong>Tool</strong> may be used to retrieve engine service<br />
codes from most General Motors (GM) domestic cars and trucks<br />
(EXCEPT Geo, Nova, Saturn and Sprint).<br />
Model<br />
Year Make Model<br />
1982-93 Buick Century, Electra, Electra Wagon, Estate Wagon,<br />
Le Sabre, Le Sabre Wagon, Park Avenue, Reatta,<br />
Regal, Grand National, Riviera, Roadmaster,<br />
Skyhawk, Skylark, Somerset<br />
1994<br />
Cadillac De Ville, El Dorado, Fleetwood, Seville<br />
Chevrolet Berreta, Camaro, Caprice, Cavalier, Celebrity,<br />
Chevette, Citation, Corisca, Corvette, El Camino,<br />
Impala, Lumina, Monte Carlo<br />
Oldsmobile Achieva, Calais, Custom Cruiser, Cutlass Calais,<br />
Ciera, Cutlass Cruiser, Cruiser Wagon, Cutlass<br />
Supreme, Supreme Classic, Delta 88, Eightyeight,<br />
Firenze, Ninety-eight, Omega, Toronado,<br />
Touring Sedan, Trofeo<br />
Pontiac 6000, 6000 STE, Bonneville, Fiero, Firebird,<br />
Grand Am, Grand Prix, J 2000, Lemans,<br />
J Parisienne, Phoenix, Safari, Safari Wagon,<br />
Sunbird, T 1000<br />
Trucks and<br />
Vans<br />
Buick<br />
Chevrolet<br />
All one ton capacity or less with gas engines<br />
Roadmaster 5.7 liter<br />
Camaro 3.4 liter/5.7 liter, Caprice 5.7 liter,<br />
Caprice 5.7 liter, Cavalier 3.1 liter,<br />
Lumina 3.1 liter<br />
Pontiac Firebird 3.4 liter/5.7 liter, Sunbird 2.0 liter/<br />
3.1 liter<br />
Trucks and All one ton capacity or less with gas engines<br />
Vans<br />
CanOBD2&1 97
GM OBD1 Systems<br />
ABOUT THE CANOBD2&1 SCAN TOOL - DLC – MIL - DTCs<br />
Model<br />
Year Make Model<br />
1995 Chevrolet Caprice 4.3 liter<br />
Trucks and<br />
Vans<br />
All one ton capacity or less with gas engines<br />
(EXCEPT S/T Series vehicles)<br />
In addition to the above list, the CanOBD2&1 <strong>Scan</strong> <strong>Tool</strong> IS<br />
ALSO COMPATIBLE with OBD1 GM models that are<br />
equipped with "Climate Control Computers".<br />
For 1994 and 1995 vehicles, only the models listed above are<br />
compatible with the CanOBD2&1 <strong>Scan</strong> <strong>Tool</strong>.<br />
ABOUT THE CANOBD2&1 SCAN TOOL<br />
The CanOBD2&1 <strong>Scan</strong> <strong>Tool</strong> is a device that connects to your vehicle's<br />
Data Link Connector to retrieve any Diagnostic Trouble Codes that are<br />
stored in the vehicle's on-board computer.<br />
DATA LINK CONNECTOR (DLC)<br />
Your vehicle test connector is known as the<br />
Assembly Line Data Link (ALDL) connector,<br />
Assembly Line Communication Link (ALCL)<br />
Connector or the Data Link Connector<br />
(DLC). The GM DLC connector contains 12<br />
pins and is usually black in color. On most<br />
GM vehicles, the connector is found under the left side of the dashboard.<br />
MALFUNCTION INDICATOR LIGHT (MIL)<br />
Your vehicle's instrument panel has a Malfunction Indicator Light (MIL)<br />
also called the "Check Engine" or "Service Engine soon" light. The MIL<br />
is an indicator to warn the vehicle operator of a problem in the computer<br />
control system.<br />
CHECK ENGINE<br />
SERVICE<br />
ENGINE<br />
SOON<br />
If your instrument panel indicator lights do not come on when<br />
you turn on the ignition, please refer to your vehicle's service<br />
manual. You may have problems in the vehicle's circuitry.<br />
DIAGNOSTIC TROUBLE CODES (DTC's)<br />
The service codes are also called "fault codes", "Diagnostic Trouble<br />
Codes" (DTC's) or "trouble codes". These codes can be used to identify<br />
systems or components that are malfunctioning. The computer records<br />
codes for two types of problems:<br />
98 CanOBD2&1
GM OBD1 Systems<br />
CODE RETRIEVAL PROCEDURE<br />
� "Hard" Diagnostic Trouble Codes<br />
"Hard" DTCs represent problems that are occurring now and cause the<br />
instrument panel Malfunction Indicator Lamp (MIL) or Check Engine light to<br />
illuminate and remain on until the failure is repaired. A DTC is stored in the<br />
vehicle's computer memory for each fault detected. A <strong>Tool</strong> or <strong>Scan</strong>ner can<br />
be used to retrieve DTCs that are stored in the vehicle's computer memory.<br />
� Intermittent/History DTCs<br />
Intermittent/History DTCs are stored in the computer's memory for<br />
problems that occur intermittently, or for problems that happened in the<br />
past but are not currently present. Intermittent DTCs may cause the<br />
Malfunction Indicator light to flicker or stay on until the intermittent<br />
malfunction goes away. However, the corresponding fault code will be<br />
stored in memory as a history DTC. If the malfunction that caused the<br />
history DTC to set does not recur within a predetermined length of time<br />
(usually within 40-80 ignition key start cycles), the computer will<br />
automatically erase the related fault code from its memory.<br />
CODE RETRIEVAL PROCEDURE<br />
Retrieving and using Diagnostic Trouble Codes (DTCs) for<br />
troubleshooting vehicle operation is only one part of an<br />
overall diagnostic strategy.<br />
Never replace a part based only on the DTC definition.<br />
Each DTC has a set of testing procedures, instructions<br />
and flow charts that must be followed to confirm the<br />
location of the problem. This information is found in the<br />
vehicle's service manual. Always refer to the vehicle's<br />
service manual for detailed testing instructions.<br />
Check your vehicle thoroughly before performing<br />
any test. See BEFORE YOU BEGIN on page 18<br />
for details.<br />
ALWAYS observe safety precautions whenever working on a<br />
vehicle. See Safety Precautions on page 3 for more information.<br />
1. Locate the vehicle's Data Link Connector (DLC). See Data Link<br />
Connector (DLC) on page 98 for connector location.<br />
Some DLCs have a plastic cover that must be removed before<br />
connecting the CanOBD2&1 <strong>Scan</strong> <strong>Tool</strong>'s cable connector.<br />
2. Connect the CanOBD2&1 <strong>Scan</strong> <strong>Tool</strong> cable<br />
(with the GM Connector Cable Adaptor<br />
attached) to the CanOBD2&1 <strong>Scan</strong> <strong>Tool</strong>,<br />
then connect the adaptor to the vehicle’s<br />
DLC. Press the POWER/LINK button to<br />
turn the CanOBD2&1 <strong>Scan</strong> <strong>Tool</strong> ON, then<br />
press the ENTER/LD button to continue.<br />
CanOBD2&1 99
GM OBD1 Systems<br />
CODE RETRIEVAL PROCEDURE<br />
3. Select the model year of the vehicle from which you wish to retrieve<br />
codes:<br />
If a previous vehicle selection is currently saved in the<br />
CanOBD2&1 <strong>Scan</strong> <strong>Tool</strong>'s memory, the "Current<br />
Selection/Select New Vehicle" menu displays. If no previous<br />
vehicle selection is stored in the CanOBD2&1 <strong>Scan</strong> <strong>Tool</strong>'s<br />
memory, "Select Vehicle Year" menu displays.<br />
Use the<br />
selections.<br />
and buttons, as necessary, to make menu<br />
� To retrieve DTCs from the vehicle selection currently in the<br />
CanOBD2&1 <strong>Scan</strong> <strong>Tool</strong>’s memory:<br />
- From the “Current Selection/<br />
Select New Vehicle” screen,<br />
�<br />
highlight Current Selection, turn<br />
ignition key ON (DO NOT start<br />
engine) and press the ENTER/LD<br />
button.<br />
- Proceed to step 5 to continue.<br />
To retrieve DTCs from a new<br />
vehicle:<br />
- From the “Current Selection/<br />
Select New Vehicle” screen,<br />
highlight Select New Vehicle and<br />
press the ENTER/LD button;<br />
the “Select Vehicle Year” menu<br />
displays.<br />
- Highlight the desired year, then<br />
press the ENTER/LD button;<br />
the “Enter the 8th digit of VIN”<br />
menu displays.<br />
- Highlight the 8th digit of the<br />
vehicle’s VIN, then press the<br />
ENTER/LD button.<br />
If the “Enter 4th VIN Digit” screen displays (not applicable to all<br />
vehicles), highlight the 4th digit of the vehicle’s VIN, then press<br />
the ENTER/LD button.<br />
- The “Current Selection/Select New Vehicle” screen displays<br />
for your confirmation.<br />
- If the information shown in the “Current Selection” field is<br />
correct, highlight Current Selection, turn ignition key ON (DO<br />
NOT start engine) and press the ENTER/LD<br />
Proceed to step 4 to continue.<br />
button.<br />
100 CanOBD2&1
GM OBD1 Systems<br />
CODE RETRIEVAL PROCEDURE<br />
If the year shown is not correct, highlight Select New Vehicle<br />
and press the ENTER/LD button to return to the “Select<br />
Vehicle Year” menu to make your corrections.<br />
4. When the CanOBD2&1 <strong>Scan</strong> <strong>Tool</strong> is in<br />
the process of retrieving codes, a "One<br />
moment please..." message shows on<br />
the CanOBD2&1 <strong>Scan</strong> <strong>Tool</strong>’s display.<br />
� If the CanOBD2&1 <strong>Scan</strong> <strong>Tool</strong> fails<br />
to link to the vehicle's computer, a<br />
"Vehicle is not responding" message<br />
shows on the CanOBD2&1<br />
<strong>Scan</strong> <strong>Tool</strong>’s display. Do the following:<br />
- Verify the ignition is ON.<br />
- Check the cable connections at<br />
the CanOBD2&1 <strong>Scan</strong> <strong>Tool</strong> and<br />
at the vehicle’s DLC.<br />
- Turn the ignition OFF, wait 10-12<br />
seconds, then turn back ON to<br />
reset the computer.<br />
- Press the ENTER/LD button<br />
and repeat steps 3 and 4 as<br />
necessary.<br />
5. If the CanOBD2&1 <strong>Scan</strong> <strong>Tool</strong> was able<br />
to link to the vehicle successfully, a<br />
"Code retrieval was successful..."<br />
message shows temporarily on the<br />
CanOBD2&1 <strong>Scan</strong> <strong>Tool</strong>’s display,<br />
followed by any retrieved DTCs.<br />
� The CanOBD2&1 <strong>Scan</strong> <strong>Tool</strong> will display a code only of codes<br />
are present in the vehicle's computer memory. If no codes are<br />
present, a "No DTC's are presently stored in the vehicle's<br />
computer" is displayed.<br />
6. If more than one code was retrieved, press the DTC SCROLL<br />
button, as necessary, to display additional codes one at a time.<br />
In the case of long code definitions, a small arrow is shown in<br />
the upper/lower right-hand corner of the code display area to<br />
indicate the presence of additional information. Use the<br />
and<br />
tion.<br />
buttons, as necessary, to view the additional informa-<br />
Code 12 will always be present and it has one of the following meanings:<br />
� If code 12 is the only DTC retrieved and your vehicle "STARTS OK"<br />
then code 12 indicates system "PASS" and all computer control<br />
systems are functioning properly.<br />
� If code 12 is present and your vehicle "DOES NOT START", then it<br />
may indicate a problem with the ignition control system.<br />
CanOBD2&1 101
GM OBD1 Systems<br />
CODE RETRIEVAL PROCEDURE<br />
7. Disconnect the CanOBD2&1 <strong>Scan</strong> <strong>Tool</strong> from the vehicle and turn<br />
the ignition key OFF.<br />
8. To prolong battery life, the CanOBD2&1 <strong>Scan</strong> <strong>Tool</strong> automatically<br />
shuts "Off" after approximately three minutes with no button activity.<br />
The DTCs retrieved will remain in the CanOBD2&1 <strong>Scan</strong> <strong>Tool</strong>'s<br />
memory, and may be viewed at any time. If the CanOBD2&1 <strong>Scan</strong><br />
<strong>Tool</strong>’s batteries are removed, or if the CanOBD2&1 <strong>Scan</strong> <strong>Tool</strong> is relinked<br />
to a vehicle to retrieve codes, any prior codes in its memory<br />
are automatically cleared.<br />
� See VIEWING DTCs IN THE CANOBD2&1 SCAN TOOL’S<br />
MEMORY on page 13 to view DTCs stored in the CanOBD2&1<br />
<strong>Scan</strong> <strong>Tool</strong>’s memory.<br />
9. Follow the testing and repair procedures outlined in the vehicle's<br />
service repair manual to correct "hard" DTCs. Codes should be<br />
addressed and eliminated in the order they were received, erasing<br />
(see ERASING DTCs (OBD I SYSTEMS) on page 112) and<br />
retesting after each repair is made to be sure the fault was<br />
eliminated. Code 12 will appear alone when no other fault codes are<br />
present.<br />
� It may be necessary to test drive the vehicle to reset "hard" fault<br />
codes 13, 15, 24, 44, 45, and 55 after they have been erased.<br />
Whenever codes 51, 52, 54, or 55 are displayed with other<br />
codes, troubleshoot and eliminate the "50 Series" codes first,<br />
then proceed with the lower numbered codes.<br />
The green, yellow and red LEDs are used (with the LCD<br />
display) as visual aids to make it easier to determine engine<br />
system conditions. See SERVICING DTCs - OBD I on page<br />
110 for information on interpreting LEDs and servicing DTCs.<br />
102 CanOBD2&1
Toyota/Lexus OBD1 Systems<br />
ON-BOARD VEHICLE DIAGNOSTICS (OBD1) - VEHICLES COVERED<br />
ON-BOARD VEHICLE DIAGNOSTICS (OBD1)<br />
� Beginning in 1988, California's Air Resources Board (CARB), and<br />
later, the Federal Government's Environmental Protection Agency<br />
(EPA), required vehicle manufacturers to include a self diagnostic<br />
program capable of identifying an emissions-related fault via the<br />
vehicles On-Board Computers (some manufacturers used OBD<br />
before it was required). The first generation of Onboard Diagnostics<br />
came to be known as OBD I.<br />
� OBD I is a set of self-testing or self-diagnosing instructions that are<br />
programmed into the vehicle's on-board computer.<br />
� The program is specifically designed to detect failures in the sensors,<br />
actuators, switches and wiring of the various vehicle emissionsrelated<br />
systems (fuel injection system, ignition system, EGR system,<br />
catalytic converter, etc.). If the computer detects a failure in any one<br />
of these components or systems, it alerts the driver by illuminating<br />
the "Check Engine" light on the dash.<br />
� The computer also assigns a numeric code (OBD I systems utilized<br />
a 2 or 3 digit code) for each specific problem that it detects, and<br />
stores these codes in it's memory for later retrieval. The codes can<br />
be retrieved from the computer's memory with the use of a device<br />
called a "<strong>Tool</strong>" or a "<strong>Scan</strong> <strong>Tool</strong>".<br />
With the exception of some 1994 and 1995 vehicles, most<br />
vehicles from about 1982 to 1995 are equipped with OBD I<br />
systems.<br />
VEHICLES COVERED<br />
The following tables identify the Toyota and Lexus OBD1 vehicles that<br />
are covered by the Enhanced CanOBD2&1 <strong>Scan</strong> <strong>Tool</strong>.<br />
DLC 1 Cars<br />
Year Model<br />
Eng.<br />
Size<br />
Eng.<br />
Code<br />
DOHC/<br />
SOHC Other<br />
DLC<br />
Type<br />
1995 Camry Coupe 2.2L 5S-FE DOHC 1<br />
1992 Camry Sedan 2.2L 5S-FE DOHC 1<br />
1992 Camry Sedan 3.0L 2VZ-FE DOHC 1<br />
1993 Camry Sedan 3.0L 3VZ-FE DOHC 1<br />
1993 Camry Sedan 2.2L 5S-FE DOHC 1<br />
1994 Camry Sedan 2.2L 5S-FE DOHC 1<br />
1993 Celica 2.0L 3S-GTE DOHC Turbo 1<br />
1993 Celica 2.2L 5S-FE DOHC 1<br />
1994 Celica 1.8L 7A-FE DOHC 1<br />
1994 Celica 2.2L 5S-FE DOHC 1<br />
CanOBD2&1 103
Toyota/Lexus OBD1 Systems<br />
VEHICLES COVERED<br />
Year Model<br />
1992 Celica<br />
Convertible<br />
Eng.<br />
Size<br />
Eng.<br />
Code<br />
DOHC/<br />
SOHC Other<br />
DLC<br />
Type<br />
2.2L 5S-FE DOHC A/T 1<br />
1992 Celica Coupe 1.6L 4A-FE DOHC 1<br />
1992 Celica Coupe 2.2L 5S-FE DOHC A/T 1<br />
1993 Celica Coupe 1.6L 4A-FE DOHC 1<br />
1995 Celica Coupe 1.8L 7A-FE DOHC 1<br />
1992 Celica Liftback 2.0L 3S-GTE DOHC Turbo 1<br />
1992 Celica Liftback 2.2L 5S-FE DOHC 1<br />
1993 Corolla Sedan 1.6L 4A-FE DOHC 1<br />
1993 Corolla Sedan 1.8L 7A-FE DOHC 1<br />
1994 Corolla Sedan 1.6L 4A-FE DOHC 1<br />
1994 Corolla Sedan 1.8L 7A-FE DOHC 1<br />
1993 ES-300 3.0L 3VZ-FE DOHC 1<br />
1993 GS-300 3.0L 2JZ-GE DOHC 1<br />
1993 LS-400 4.0L 1UZ-FE DOHC 1<br />
1993 MR2 2.0L 3S-GTE DOHC Turbo 1<br />
1993 MR2 2.2L 5S-FE DOHC 1<br />
1994 MR2 2.0L 3S-GTE DOHC Turbo 1<br />
1994 MR2 2.2L 5S-FE DOHC 1<br />
1994 Paseo 1.5L 5E-FE DOHC 1<br />
1995 Paseo 1.5L 5E-FE DOHC 1<br />
1995 SC-300 3.0L 2JZ-GE DOHC 1<br />
1991 Supra 3.0L 7M-GTE DOHC Turbo 1<br />
1991 Supra 3.0L 7M-GE DOHC 1<br />
1992 Supra 3.0L 7M-GTE DOHC Turbo 1<br />
1992 Supra 3.0L 7M-GE DOHC 1<br />
1993 Tercel Sedan 1.5L 3E-E SOHC 1<br />
1994 Tercel Sedan 1.5L 3E SOHC 1<br />
DLC 2 Cars<br />
Year Model<br />
Eng.<br />
Size<br />
Eng.<br />
Code<br />
DOHC/<br />
SOHC Other<br />
DLC<br />
Type<br />
1989 Cressida 3.0L 7M-GE DOHC 2<br />
1990 Cressida 3.0L 7M-GE DOHC 2<br />
1991 Cressida 3.0L 7M-GE DOHC 2<br />
1992 Cressida 3.0L 7M-GE DOHC 2<br />
1993 Camry 3.0L 3VZ-FE DOHC 2<br />
104 CanOBD2&1
Year Model<br />
Toyota/Lexus OBD1 Systems<br />
VEHICLES COVERED<br />
Eng.<br />
Size<br />
Eng.<br />
Code<br />
DOHC/<br />
SOHC Other<br />
DLC<br />
Type<br />
1993 Supra 3.0L 2JZ-GTE DOHC Turbo 2<br />
1993 Supra 3.0L 2JZ-GE DOHC 2<br />
1994 Camry 3.0L 3VZ-FE DOHC 2<br />
1994 Supra 3.0L 2JZ-GTE DOHC Turbo 2<br />
1994 Supra 3.0L 2JZ-GE DOHC 2<br />
1995 Supra 3.0L 2JZ-GTE DOHC Turbo 2<br />
1995 Supra 3.0L 2JZ-GE DOHC 2<br />
1992 SC-300 3.0L 2JZ-GE DOHC 2<br />
1990 ES-250 2.5L 2VZ-FE DOHC 2<br />
1991 ES-250 2.5L 2VZ-FE DOHC 2<br />
1992 ES-300 3.0L 3VZ-FE DOHC 2<br />
1992 SC-400 4.0L 1UZ-FE DOHC 2<br />
1991 LS-400 4.0L 1UZ-FE DOHC 2<br />
1992 LS-400 4.0L 1UZ-FE DOHC 2<br />
1993 SC-400 4.0L 1UZ-FE DOHC 2<br />
1994 SC-400 4.0L 1UZ-FE DOHC 2<br />
1994 SC-300 3.0L 2JZ-GE DOHC 2<br />
1993 SC-400 4.0L 1UZ-FE DOHC 2<br />
1994 GS-300 3.0L 2JZ-GE DOHC 2<br />
1993 SC-300 3.0L 2JZ-GE DOHC 2<br />
DLC 1 Light Trucks<br />
Eng. Eng. DOHC/<br />
DLC<br />
Year Model<br />
Size Code SOHC Other Type<br />
1992 Previa 2.4L 2TZ-FE DOHC 1<br />
1993 Previa 2.4L 2TZ-FE DOHC 1<br />
1994 Previa 2.4L 2TZ-FE DOHC 1<br />
1994 T100 3.0L 3VZ-FE SOHC 1<br />
1995 4 Runner 2.4L 22R-E SOHC 1<br />
1995 4 Runner 3.0L 3VZ-FE SOHC 1<br />
1995 Pickup 2.4L 22R-E SOHC 1<br />
1995 Pickup 3.0L 3VZ-FE SOHC 1<br />
1995 Previa 2.4L 2TZ-FE DOHC 1<br />
CanOBD2&1 105
Toyota/Lexus OBD1 Systems<br />
DATA LINK CONNECTOR (DLC) / MIL<br />
DATA LINK CONNECTOR (DLC)<br />
Toyota vehicles are equipped with special Test Connectors that make it<br />
possible to connect specialized testing equipment that communicates<br />
with the vehicle's onboard computer. The CanOBD2&1 <strong>Scan</strong> <strong>Tool</strong> is<br />
designed for use with two types of Toyota DLC connectors; DLC<br />
Number 1 and DLC Number 2, as described below.<br />
The CanOBD2&1 <strong>Scan</strong> <strong>Tool</strong>'s Toyota Connector Cable<br />
Adaptor is designed to match the vehicle's DLC. Make sure<br />
the adaptor mates properly before applying any force when<br />
making the connection. Applying force to the connector when<br />
not mated properly may cause damage to the connectors.<br />
1. Type 1 connector is also known as Data Link Connector Number 1.<br />
The type 1 DLC connector is a rectangular connector and is usually<br />
black or gray in color. The connector is located under the hood<br />
(engine compartment) in the following general locations:<br />
� Front corner (right or left)<br />
� Front corner (right or left)<br />
� Fender well (right or left)<br />
� Fire wall (right or left)<br />
It has a cover labeled "DIAGNOSTIC", "DIAGNOSIS", or "CHECK<br />
CONN", Use the square head of the Toyota Connector Cable<br />
Adaptor on vehicles with this type of connector.<br />
2. Type 2 connector is also known as Data<br />
Link Connector (DLC) Number 2. The<br />
type 2 DLC connector is a round<br />
connector and is usually black or gray in<br />
color.<br />
� The connector is located "under the<br />
dash" on the left hand side.<br />
It may have a protective cap that needs to be removed before<br />
connecting the CanOBD2&1 <strong>Scan</strong> <strong>Tool</strong>'s DLC. Use the round head<br />
of the Toyota Connector Cable Adaptor on vehicles with this type of<br />
connector.<br />
INSTRUMENT PANEL MALFUNCTION INDICATOR LIGHTS (MIL)<br />
Your vehicle's instrument panel has a Malfunction Indicator Light (MIL)<br />
also called the "Check Engine" or "Service Engine soon" light. The MIL<br />
is an indicator to warn the vehicle operator of a problem in the computer<br />
control system.<br />
CHECK ENGINE<br />
SERVICE<br />
ENGINE<br />
SOON<br />
106 CanOBD2&1
Toyota/Lexus OBD1 Systems<br />
DIAGNOSTIC TROUBLE CODES / CODE RETRIEVAL PROCEDURE<br />
If your instrument panel indicator lights do not come on when<br />
you turn on the ignition, please refer to your vehicle's service<br />
manual. You may have problems in the car's circuitry. It is<br />
recommended that you fix these problems before retrieving<br />
DTCs from your vehicle’s computer.<br />
DIAGNOSTIC TROUBLE CODES<br />
Diagnostic Trouble Codes, or Fault Codes, can be used to identify<br />
engine systems or components that are malfunctioning. The computer<br />
records codes for the following two types of engine problems:<br />
� "Hard" Diagnostic Trouble Codes<br />
"Hard" DTCs represent problems that are occurring now and cause<br />
the instrument panel Malfunction Indicator Lamp (MIL) or Check<br />
Engine light to illuminate and remain on until the failure is repaired.<br />
A DTC is stored in the vehicle's computer memory for each fault<br />
detected. A <strong>Tool</strong> or <strong>Scan</strong>ner can be used to retrieve DTCs that are<br />
stored in the vehicle's computer memory.<br />
� Intermittent/History DTCs<br />
Intermittent/History DTCs are stored in the computer's memory for<br />
problems that occur intermittently, or for problems that happened in<br />
the past but are not currently present. Intermittent DTCs may cause<br />
the Malfunction Indicator light to flicker or stay on until the<br />
intermittent malfunction goes away. However, the corresponding<br />
fault code will be stored in memory as a history DTC. If the<br />
malfunction that caused the history DTC to set does not recur within<br />
a predetermined length of time (usually within 40-80 ignition key<br />
start cycles), the computer will automatically erase the related fault<br />
code from its memory.<br />
CODE RETRIEVAL PROCEDURE<br />
Retrieving and using Diagnostic Trouble Codes (DTCs) for<br />
troubleshooting vehicle operation is only one part of an<br />
overall diagnostic strategy.<br />
Never replace a part based only on the DTC definition.<br />
Each DTC has a set of testing procedures, instructions<br />
and flow charts that must be followed to confirm the<br />
location of the problem. This information is found in the<br />
vehicle's service manual. Always refer to the vehicle's<br />
service manual for detailed testing instructions.<br />
Check your vehicle thoroughly before performing<br />
any test. See BEFORE YOU BEGIN on page 18<br />
for details.<br />
ALWAYS observe safety precautions whenever working on a<br />
vehicle. See Safety Precautions on page 3 for more information.<br />
CanOBD2&1 107
Toyota/Lexus OBD1 Systems<br />
CODE RETRIEVAL PROCEDURE<br />
1. Locate the vehicle's Data Link Connector (DLC). See Data Link<br />
Connector (DLC) on page 106 for connection location.<br />
Some DLCs have a plastic cover that must be removed before<br />
connecting the CanOBD2&1 <strong>Scan</strong> <strong>Tool</strong>'s cable connector.<br />
2. Connect the CanOBD2&1 <strong>Scan</strong> <strong>Tool</strong> cable (with the Toyota<br />
Connector Cable Adaptor attached) to the CanOBD2&1 <strong>Scan</strong><br />
<strong>Tool</strong>, then connect the adaptor to the vehicle’s DLC. Press the<br />
POWER/LINK button to turn the CanOBD2&1 <strong>Scan</strong> <strong>Tool</strong><br />
ON.<br />
3. Turn ignition ON and start engine. Warm engine to operating<br />
temperature. (Shut engine off after warm up).<br />
4. When prompted by the CanOBD2&1 <strong>Scan</strong> <strong>Tool</strong>, do the following<br />
before proceeding to step 5:<br />
� Turn ignition ON. DO NOT start the<br />
engine.<br />
� Make sure throttle is closed.<br />
� Set gear lever in "park" (for<br />
�<br />
automatic transmissions) or “neutral”<br />
for manual transmissions.<br />
Turn off all accessories.<br />
5. Press the ENTER/LD button to continue.<br />
� The CanOBD2&1 <strong>Scan</strong> <strong>Tool</strong> will begin the code retrieval<br />
process.<br />
6. When the CanOBD2&1 <strong>Scan</strong> <strong>Tool</strong> is in<br />
the process of retrieving codes, a "One<br />
moment please..." message shows on<br />
the CanOBD2&1 <strong>Scan</strong> <strong>Tool</strong>’s display.<br />
� If the CanOBD2&1 <strong>Scan</strong> <strong>Tool</strong> fails<br />
to link to the vehicle’s computer a<br />
“Vehicle is not responding” message<br />
shows on the CanOBD2&1 <strong>Scan</strong><br />
<strong>Tool</strong>’s display. Do the following:<br />
- Verify the ignition is ON.<br />
- Check the cable connections at<br />
the CanOBD2&1 <strong>Scan</strong> <strong>Tool</strong> and<br />
at the vehicle’s DLC.<br />
- Turn the ignition OFF, wait 10-12<br />
seconds, then turn back ON to<br />
reset the computer.<br />
- Press the ENTER/LD button and repeat steps 3 through<br />
5 as necessary.<br />
108 CanOBD2&1
Toyota/Lexus OBD1 Systems<br />
CODE RETRIEVAL PROCEDURE<br />
7. If the CanOBD2&1 <strong>Scan</strong> <strong>Tool</strong> was able<br />
to link to the vehicle successfully a<br />
"Code retrieval was successful..."<br />
message shows temporarily on the<br />
CanOBD2&1 <strong>Scan</strong> <strong>Tool</strong>’s display<br />
followed by any retrieved DTCs.<br />
� The CanOBD2&1 <strong>Scan</strong> <strong>Tool</strong> will<br />
display a code only if codes are<br />
present in the vehicle's computer<br />
memory. If no codes are present, a<br />
"No DTCs are presently stored in<br />
the vehicle's computer" message is<br />
displayed.<br />
8. If more than one code was retrieved<br />
press the DTC SCROLL , as<br />
necessary, to display additional codes<br />
one at a time.<br />
In the case of long code definitions, a small arrow is shown in<br />
the upper/lower right-hand corner of the code display area to<br />
indicate the presence of additional information. Use the<br />
and buttons, as necessary, to view the additional information.<br />
9. Disconnect the CanOBD2&1 <strong>Scan</strong> <strong>Tool</strong> from the vehicle and turn<br />
the ignition key OFF.<br />
10. To prolong battery life, the CanOBD2&1 <strong>Scan</strong> <strong>Tool</strong> automatically<br />
shuts "Off" after approximately three minutes with no button activity.<br />
The DTCs retrieved will remain in the CanOBD2&1 <strong>Scan</strong> <strong>Tool</strong>'s<br />
memory, and may be viewed at any time. If the CanOBD2&1 <strong>Scan</strong><br />
<strong>Tool</strong>’s batteries are removed, or if the CanOBD2&1 <strong>Scan</strong> <strong>Tool</strong> is relinked<br />
to a vehicle to retrieve codes, any prior codes in its memory<br />
are automatically cleared.<br />
� See VIEWING DTCs IN THE CANOBD2&1 SCAN TOOL’S<br />
MEMORY on page 13 to view DTCs stored in the CanOBD2&1<br />
<strong>Scan</strong> <strong>Tool</strong>’s memory.<br />
11. Follow the testing and repair procedures outlined in the vehicle's<br />
service repair manual to correct "hard" DTCs. Codes should be<br />
addressed and eliminated in the order they were received, erasing<br />
(see ERASING DTCs (OBD I SYSTEMS) on page 112) and<br />
retesting after each repair is made to be sure the fault was<br />
eliminated.<br />
The green, yellow and red LEDs are used (with the LCD<br />
display) as visual aids to make it easier to determine engine<br />
system conditions. See SERVICING DTCs - OBD I on page<br />
110 for information on interpreting LEDs and servicing DTCs.<br />
CanOBD2&1 109
Servicing DTCs<br />
OBD1 SYSTEMS<br />
SERVICING DTCs - OBD I<br />
Retrieving and using Diagnostic Trouble Codes (DTCs) for<br />
troubleshooting vehicle operation is only one part of an<br />
overall diagnostic strategy.<br />
Never replace a part based only on the DTC definition.<br />
Each DTC has a set of testing procedures, instructions<br />
and flow charts that must be followed to confirm the<br />
location of the problem. This information is found in the<br />
vehicle's service manual. Always refer to the vehicle's<br />
service manual for detailed testing instructions.<br />
1. Determine engine system(s) condition by viewing the<br />
CanOBD2&1 <strong>Scan</strong> <strong>Tool</strong>'s display for any retrieved<br />
Diagnostic Trouble Codes, code definitions and<br />
interpreting the green, yellow and red LEDs.<br />
The green, yellow and red LEDs are used (with the display) as<br />
visual aids to make it easier to determine engine system<br />
conditions.<br />
2. Green LED - Indicates that all engine<br />
systems are "OK" and operating<br />
normally. No trouble codes are present.<br />
If you are not experiencing any vehicle<br />
problems NO FURTHER TESTING IS<br />
REQUIRED.<br />
� If you are still experiencing vehicle<br />
problems even through the green<br />
LED illuminates, the problem is not<br />
in the computer control systems. See the NO CODES<br />
troubleshooting section of your vehicle's repair manual for<br />
further troubleshooting instructions.<br />
3. Yellow LED - Indicates an Intermittent or History DTC is present.<br />
Intermittent/History DTCs are stored in the computer's memory for<br />
problems that occur intermittently, or for problems that happened in the<br />
past but are not currently present. Intermittent DTCs may cause the<br />
Malfunction Indicator light to flicker or stay on until the intermittent<br />
malfunction goes away. However, the corresponding fault code will be<br />
stored in memory as a history DTC. If the malfunction that caused the<br />
history DTC to set does not recur within a predetermined length of time<br />
(usually within 40-80 ignition key start cycles), the computer will<br />
automatically erase the related fault code from its memory.<br />
� HISTORY DTC - On some vehicles, the computer will keep a<br />
record or history of DTCs that relate to problems that happened<br />
in the past but are no longer present. These DTCs will not<br />
command the MIL or Check Engine light "On", but the yellow<br />
LED will be illuminated.<br />
110 CanOBD2&1
4. Red LED - Indicates there is a problem<br />
with one or more of the vehicle's<br />
systems. The red LED is also used to<br />
indicate that DTC(s) are present<br />
(displayed on the CanOBD2&1 <strong>Scan</strong><br />
<strong>Tool</strong>'s screen). In this case, the MIL or<br />
Check Engine light on the vehicle's<br />
instrument panel will be illuminated.<br />
Servicing DTCs<br />
OBD1 SYSTEMS<br />
� If DTC's were retrieved and you are going to perform the repairs<br />
yourself, proceed by consulting the vehicle's service repair<br />
manual for testing instructions, testing procedures, and flow<br />
charts related to retrieved code(s).<br />
� If you plan to take the vehicle to a professional to have it<br />
serviced, complete the PRELIMINARY VEHICLE DIAGNOSTIC<br />
WORKSHEET on page 15 and take it, together with the<br />
retrieved codes and LED information, to aid in the<br />
Troubleshooting procedure.<br />
Retrieved information can be uploaded to a Personal<br />
Computer (PC) with the use of an optional PC-Link Kit. For<br />
more information, see instructions included with PC-Link<br />
software.<br />
CanOBD2&1 111
Erasing DTCs<br />
OBD1 SYSTEMS<br />
ERASING DTCs (OBD I SYSTEMS)<br />
When the CanOBD2&1 <strong>Scan</strong> <strong>Tool</strong>'s ERASE function is<br />
used to erase DTCs from the vehicle's on-board computer,<br />
manufacturer specific data (where applicable) is also<br />
erased.<br />
If you plan to take the vehicle to a service center for repair, DO NOT<br />
erase the codes from the vehicle's computer. If the codes are erased,<br />
valuable information that might help the technician troubleshoot the<br />
problem will also be erased.<br />
Erase DTC’s from the computer’s memory as follows:<br />
1. Connect the CanOBD2&1 <strong>Scan</strong> <strong>Tool</strong> to the vehicle’s DLC. Press the<br />
ENTER/LD button to continue.<br />
2. Turn the ignition ON. DO NOT start the engine.<br />
For FORD systems only, first perform step 3 below, then turn<br />
ignition “ON” and press the ENTER/LD button to continue.<br />
3. Press and release the ERASE button. A confirmation message<br />
shows on the CanOBD2&1 <strong>Scan</strong> <strong>Tool</strong>’s display.<br />
- If you are sure you want to proceed,<br />
press the ERASE button again to<br />
erase DTCs from the vehicle's<br />
computer.<br />
- If you do not want to continue with the<br />
erase process, press the ENTER/LD<br />
button to exit the erase function.<br />
4. If you chose to erase DTCs, a status<br />
screen displays while the erase function<br />
is in progress.<br />
� If the erase was successful, a<br />
confirmation message shows on the<br />
CanOBD2&1 <strong>Scan</strong> <strong>Tool</strong>’s LCD<br />
display. press the ENTER/LD<br />
button to exit.<br />
Due to the differences in computer systems, the CanOBD2&1<br />
<strong>Scan</strong> <strong>Tool</strong> can be used to erase codes for some vehicles,<br />
while others require codes to be erased manually. If the “To<br />
erase DTC’s consult the vehicle’s service repair manual...”<br />
screen displays, you must consult the vehicle’s service repair<br />
manual for procedures to erase DTCs.<br />
112 CanOBD2&1
Erasing DTCs<br />
OBD1 SYSTEMS<br />
� If the erase was not successful, an<br />
advisory message shows on the<br />
CanOBD2&1 <strong>Scan</strong> <strong>Tool</strong>’s display.<br />
Verify that the CanOBD2&1 <strong>Scan</strong><br />
<strong>Tool</strong> is properly connected to the<br />
vehicle's DLC and that the ignition is<br />
ON. If the erase process still does<br />
not complete, turn the ignition OFF,<br />
wait 10 seconds, then turn back ON<br />
and repeat steps 2 and 3.<br />
FORD systems will not display an erase was not successful<br />
message. If the “One moment please erase in progress”<br />
message on the display does NOT change after 3 minutes, it<br />
indicates that the erase function has failed. Check the DLC<br />
connections and make sure the ignition key is “ON”. Perform<br />
the ERASE function again.<br />
Erasing DTCs does not fix the problem(s) that caused the<br />
code(s) to be set. If proper repairs to correct the problem that<br />
caused the code(s) to be set are not made, the code(s) will<br />
appear again and the check engine light will illuminate as soon<br />
as the problem that cause the DTC to set manifests itself.<br />
CanOBD2&1 113
Glossary<br />
GLOSSARY OF TERMS AND ABBREVIATIONS<br />
GLOSSARY OF TERMS AND ABBREVIATIONS<br />
CARB – California Air Resources Board<br />
CCM – Central Control Module<br />
Computer Control System – An electronic control system, consisting<br />
of an on-board computer and related sensors, switches and actuators,<br />
used to ensure peak performance and fuel efficiency while reducing<br />
pollutants in the vehicle’s emissions.<br />
DIY – Do-It-Yourself<br />
DLC – Data Link Connector<br />
Drive Cycle – An extended set of driving procedures that takes into<br />
consideration the various types of driving conditions encountered in real<br />
life.<br />
Driving Condition – A specific environmental or operation condition<br />
under which a vehicle is operated; such as starting the vehicle when<br />
cold, driving at steady speed (cruising), accelerating, etc.<br />
DTC(s) – Diagnostic Trouble Code(s)<br />
EGR – Exhaust Gas Recirculation<br />
EPA – Environmental Protection Agency<br />
EVAP – Evaporative Emissions System<br />
Fault Code – See DTCs<br />
Freeze Frame – A digital representation of engine and/or emissions<br />
system conditions present when a fault code was recorded.<br />
FTP – Fuel Tank Pressure<br />
Generic Code – A DTC that applies to all OBD2 compliant vehicles.<br />
I/M Readiness – An indication of whether or not a vehicle’s emissionsrelated<br />
system are operating properly and are ready for Inspection and<br />
Maintenance testing.<br />
I/M Test / Emissions Test / Smog Check – A functional test of a<br />
vehicle to determine if tailpipe emissions are within Federal/State/Local<br />
requirements.<br />
LCD – Liquid Crystal Display<br />
LED – Light Emitting Diode<br />
LTFT – Long Term Fuel Trim, is a program in the vehicle’s computer<br />
designed to add or subtract fuel from the vehicle to compensate for<br />
operating conditions that vary from the ideal A/F ratio (long term).<br />
Manufacturer Specific Code – A DTC that applies only to OBD2<br />
compliant vehicles made by a specific manufacturer.<br />
MIL – Malfunction Indicator Lamp (also referred to as “Check Engine”<br />
light<br />
OBD1 – On-Board Diagnostics Version 1 (also referred to as “OBD I”)<br />
114 CanOBD2&1
Glossary<br />
GLOSSARY OF TERMS AND ABBREVIATIONS<br />
OBD2 – On-Board Diagnostics Version 2 (also referred to as “OBD II”)<br />
On-Board Computer – The central processing unit in the vehicle’s<br />
computer control system.<br />
PCM – Powertrain Control Module<br />
Pending Code – A code recorded on the “first trip” for a “two-trip” code.<br />
If the fault that caused the code to be set is not detected on the second<br />
trip, the code is automatically erased.<br />
PID – Parameter Identification<br />
STFT – Short Term Fuel Trim, is a program in the vehicle’s computer<br />
designed to add or subtract fuel from the vehicle to compensate for<br />
operating conditions that vary from the ideal A/F ratio. The vehicle uses<br />
this program to make minor fuel adjustments (fine tune) on a short-term<br />
basis.<br />
Trip Drive Cycle – Vehicle operation that provides the necessary<br />
driving condition to enable a vehicle Monitor to run and complete its<br />
diagnostic testing.<br />
VECI – Vehicle Emission Control Information Decal<br />
CanOBD2&1 115
Notes<br />
116 CanOBD2&1
Warranty and Replacement Parts<br />
CRAFTSMAN TWO YEAR FULL WARRANTY<br />
If this Craftsman <strong>Scan</strong> <strong>Tool</strong> fails due to a defect in material or<br />
workmanship within two years from the date of purchase, return it to any<br />
<strong>Sears</strong> store, Parts & Repair Service Center or other Craftsman outlet for<br />
free repair (or replacement if repair proves impossible).<br />
This warranty applies for only 90 days if this <strong>Scan</strong> <strong>Tool</strong> is ever used for<br />
commercial or rental purposes.<br />
This warranty gives you specific legal rights, and you may also have<br />
other rights which vary from state to state.<br />
<strong>Sears</strong>, Roebuck and Co., Hoffman Estates, IL 60179<br />
REPLACEMENT PARTS AND TECHNICAL SUPPORT<br />
CanOBD 2& 1 Unit MRP #05-1403C<br />
CanOBD2 Cable MRP #05-4220<br />
GM OBD1 Adapter MRP #05-0005<br />
Ford OBD1 Adapter MRP #05-0004<br />
Chrysler OBD1 Adapter MRP #05-0006<br />
Toyota / Lexus OBD1 Adapter MRP #05-0009<br />
Extension Cable MRP #13-0007<br />
PC - Link Cable MRP #13-0008<br />
Diagnostic Software PC - Link MRP #93-0212<br />
English Manual MRP #93-0202<br />
Spanish Manual MRP #93-0203<br />
French Manual MRP #93-0204<br />
CanOBD 2& 1 <strong>Tool</strong>case MRP #83-0026<br />
For answers to your questions about this product, call:<br />
1-800-544-4124<br />
Craftsman Help Line<br />
5 a.m. – 6 p.m., Mon. – Fri.<br />
CanOBD2&1 117
Get it fixed, at your home or ours!<br />
Your Home<br />
For expert troubleshooting and home solutions advice:<br />
Our Home<br />
For repair of carry-in items like vacuums, lawn equipment,<br />
and electronics, call anytime for the location of the nearest<br />
<strong>Sears</strong> Parts & Repair Service Center<br />
1-800-488-1222 (U.S.A.) 1-800-469-4663 (Canada)<br />
www.sears.com www.sears.ca<br />
To purchase a protection agreement on a product serviced by <strong>Sears</strong>:<br />
1-800-827-6655 (U.S.A.) 1-800-361-6665 (Canada)<br />
Para pedir servicio de reparación<br />
a domicilio, y para ordenar piezas:<br />
1-888-SU-HOGAR®<br />
(1-888-784-6427)<br />
www.managemyhome.com<br />
For repair – in your home – of all major brand appliances,<br />
lawn and garden equipment, or heating and cooling systems,<br />
no matter who made it, no matter who sold it!<br />
For the replacement parts, accessories and<br />
owner’s manuals that you need to do-it-yourself.<br />
For <strong>Sears</strong> professional installation of home appliances<br />
and items like garage door openers and water heaters.<br />
© <strong>Sears</strong> Brands, LLC<br />
1-800-4-MY-HOME ® Call anytime, day or night<br />
(1-800-469-4663) (U.S.A. and Canada)<br />
www.sears.com www.sears.ca<br />
Au Canada pour service en français:<br />
1-800-LE-FOYER MC<br />
(1-800-533-6937)<br />
www.sears.ca<br />
® Registered Trademark / TM Trademark / SM Service Mark of <strong>Sears</strong> Brands, LLC<br />
® Marca Registrada / TM Marca de Fábrica / SM Marca de Servicio de <strong>Sears</strong> Brands, LLC<br />
MC Marque de commerce / MD Marque déposée de <strong>Sears</strong> Brands, LLC<br />
Copyright © 2007 IEC. All Right Reserved. Instruction MRP #93-0202