

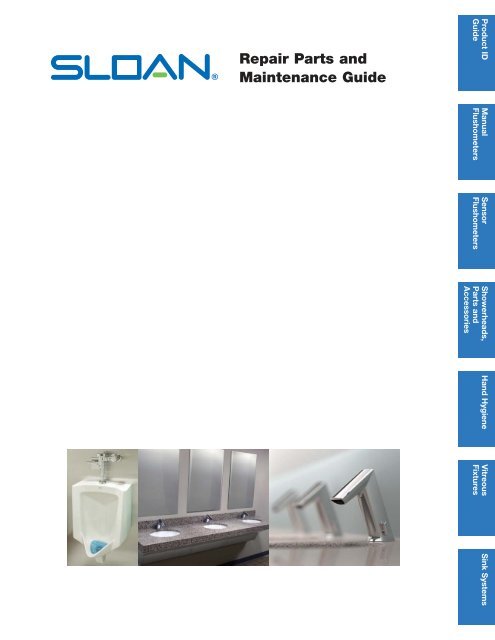
Repair Parts and Maintenance Guide | Sloan - Sloan Valve Company
Repair Parts and Maintenance Guide | Sloan - Sloan Valve Company
Repair Parts and Maintenance Guide | Sloan - Sloan Valve Company

You also want an ePaper? Increase the reach of your titles
YUMPU automatically turns print PDFs into web optimized ePapers that Google loves.
<strong>Repair</strong> <strong>Parts</strong> <strong>and</strong><br />
<strong>Maintenance</strong> <strong>Guide</strong><br />
Product ID<br />
<strong>Guide</strong><br />
Manual<br />
Flushometers<br />
Sensor<br />
Flushometers<br />
Showerheads,<br />
<strong>Parts</strong> <strong>and</strong><br />
Accessories<br />
H<strong>and</strong> Hygiene Vitreous<br />
Fixtures<br />
Sink Systems
<strong>Sloan</strong> Plumbing Products Terms Effective Date: February 1, 2012<br />
Minimum Order $100.00 NET<br />
TERMS<br />
All prices are F.O.B. Factory with full freight allowed on $3,000.00 net within the United States (contiguous), such allowance to be<br />
based on the lowest rate medium of transportation. Additional freight services, such as construction site delivery, lift gate delivery<br />
service, re-consigned freight or notification charges, are not included in FFA terms, <strong>and</strong> will result in additional freight charges. All<br />
Sink Systems orders are full freight allowed on $10,000.00 net within the United States (contiguous), such allowance to be based<br />
on the lowest rate medium of transportation. Terms for Export Shipment on application.<br />
CASH DISCOUNT TERMS: 2% 30 days, NET 31 days from date of invoice<br />
A 2% discount is offered for payment received on or before 30 days from date of invoice with the net amount due the next day,<br />
subject to a service charge of 1% applied monthly. Any conditions or terms payment on purchase orders which are contradictory<br />
to our cash discount offer shall be of no effect. Please address envelope in all “CAPS” (upper case) when remitting to<br />
9134 PAYSPHERE CIRCLE, CHICAGO, IL 60674<br />
LIMITED WARRANTY<br />
Unless otherwise noted, <strong>Sloan</strong> <strong>Valve</strong> <strong>Company</strong> warrants its product, manufactured <strong>and</strong> sold for commercial or industrial uses, to be<br />
free from defects in material <strong>and</strong> workmanship for a period of three (3) years (one (1) year for special finishes, SF faucets, PWT<br />
electronics <strong>and</strong> 30 days for PWT software) from date of first purchase. During this period, <strong>Sloan</strong> <strong>Valve</strong> <strong>Company</strong> will, at its option,<br />
repair, replace, or refund the purchase price of any product which fails to conform with this warranty under normal use <strong>and</strong> service.<br />
This shall be the sole <strong>and</strong> exclusive remedy under this warranty. Products must be returned to <strong>Sloan</strong> <strong>Valve</strong> <strong>Company</strong>, at customer’s<br />
cost. No claims will be allowed for labor, transportation or other costs. This warranty extends only to persons or organizations who<br />
purchase <strong>Sloan</strong> <strong>Valve</strong> <strong>Company</strong>’s products directly from <strong>Sloan</strong> <strong>Valve</strong> <strong>Company</strong> for purpose of resale. This warranty does not cover the<br />
life of the batteries.<br />
THERE ARE NO WARRANTIES WHICH EXTEND BEYOND THE DESCRIPTION ON THE FACE HEREOF. IN NO EVENT IS SLOAN<br />
VALVE COMPANY RESPONSIBLE FOR ANY CONSEQUENTIAL DAMAGES OF ANY MEASURE WHATSOEVER.<br />
RETURN MATERIAL POLICY<br />
Products which are determined to be defective or shipped incorrectly by <strong>Sloan</strong> <strong>Valve</strong> <strong>Company</strong> will be credited at invoice price.<br />
Products returned for reasons other than defects or <strong>Sloan</strong> shipping errors are subject to a 25% h<strong>and</strong>ling charge, return freight is at<br />
customers expense. All returns of Special Finish, Special Order, Scrub Sinks <strong>and</strong> <strong>Sloan</strong>Stone product are subject to a<br />
minimum 50% h<strong>and</strong>ling charge <strong>and</strong> must be returned within one year. If the invoice is not available, then credit will be<br />
issued based on the previous price sheet, if the price sheet is less than a year old. All returns must be authorized by the factory<br />
prior to returning. The factory will issue a return material authorization (RMA) number. The RMA number must be written on the<br />
shipping label, each load inspection <strong>and</strong> all related documentation.<br />
All returned material should be returned in the original, unopened shipping cartons, or suitably packed. The material is to be<br />
packaged such that it will not be damaged during the return. Any material obsoleted by <strong>Sloan</strong> <strong>Valve</strong> <strong>Company</strong> can not be returned.<br />
Material over two years old is subject to a 50% h<strong>and</strong>ling charge. Manual product/parts over 5 years old <strong>and</strong> electronic<br />
product over 3 years old will not be accepted. PWT electronics will not be accepted after one year.<br />
Deductions will be made for any material returned that is not in saleable condition. Material not in saleable condition will be<br />
returned to customer or scrapped at customer request.<br />
When material is to be returned, call your representative, who will contact the factory for an RMA number.<br />
The following information will be necessary:<br />
A. Invoice Number <strong>and</strong>/or Sales Order Number<br />
B. Product Part Number<br />
C. Product Code Number<br />
D. Product Date Code<br />
E. Quantity<br />
F. Reason for return requests (be specific, “defective” is not a reason). Material returned as defective but, on inspection,<br />
is found to be serviceable will be subject to a 25% h<strong>and</strong>ling charge. A test report will be available on request.<br />
G. All returns are to be freight prepaid.<br />
The RMA number must be on each load <strong>and</strong> each container.<br />
SHORTAGES, INCORRECT SHIPMENTS, PROOF OF DELIVERY REQUESTS<br />
Claims for shortages or incorrect filling of orders must be made within 30 days from date of delivery. No claim over six months<br />
old will be honored. Deliveries that are short carton(s) or have damaged carton(s) must be reported immediately. Damaged<br />
carton(s) must be kept for Carrier Claim Inspector.<br />
DISCLAIMER<br />
The prices herein are subject to change without notice <strong>and</strong> supercede all previous prices. The possession of this price sheet by<br />
any person is not to be construed as an offer to sell them, nor anyone else, the goods listed herein at the price or terms stated.
Product Identification <strong>Guide</strong><br />
Flushometer Identification Page 5-6<br />
Faucet Identification Page 7<br />
Vitreous Fixture Identification Page 8<br />
Sink System Identification Page 9<br />
Manual Flushometers<br />
Diaphragm Royal ® 11-13<br />
Royal II ® – OBSOLETE 14<br />
Continental ® – OBSOLETE 14<br />
UPPERCUT Dual-Flush 15<br />
<strong>Sloan</strong> 16-18<br />
Regal ® 19-21<br />
Series 900 ® Hydraulic 22-27<br />
Concealed (Royal ® ) 28-29<br />
Piston Crown ® 30-31<br />
Crown II ® – OBSOLETE 30-31<br />
Gem 2 ® 32-35<br />
Naval ® 36-38<br />
Dolphin ® (Self-Closing) 39-41<br />
Bedpan Slimline ® 42-44<br />
Washer<br />
Sensor Activated Flushometers<br />
Hardwire Optima ® Royal ® 45-47, 49-52<br />
Optima ® Royal ® ES-S TMO 53<br />
Exposed<br />
Optima ® Royal ® ES-S TMO 54<br />
Concealed<br />
Optima ® Royal ® 55-56<br />
ES-S TMO SWB<br />
Optima ® Regal ® 48-52<br />
SMOOTH ® 57-58<br />
<strong>Sloan</strong> ECOS ® 59-60<br />
Battery G2 Optima Plus ® 61-63<br />
Optima Plus ® 66-71<br />
Optima Plus ® <strong>Sloan</strong> 72-75<br />
SMOOTH ® 76-77<br />
SMO 78-79<br />
<strong>Sloan</strong> ECOS ® 80-83<br />
<strong>Sloan</strong> SOLIS ® 84-87<br />
<strong>Sloan</strong> SOLIS ® Concealed 88-89<br />
Showerheads, <strong>Parts</strong> <strong>and</strong><br />
Accessories<br />
Act-O-Matic ® 90-91<br />
Control Stop 92-99<br />
Tail Piece 100-101<br />
Vacuum Breaker Trap Primer 102-105<br />
Small Vacuum Breaker <strong>Repair</strong> Kits 106<br />
Push, Pull, Pedal Push <strong>and</strong> 107-110<br />
Pedal H<strong>and</strong>le Push Button<br />
Flush Connections <strong>and</strong> Flanges 111-116<br />
Bumpers, Pipe <strong>and</strong> Tube Supports 117<br />
Floor <strong>Valve</strong>s 118<br />
Sweat Solder Kits 119<br />
Flushometer <strong>Parts</strong> Quick Reference <strong>Guide</strong> 120<br />
<strong>Repair</strong> <strong>Parts</strong> <strong>and</strong> <strong>Maintenance</strong> <strong>Guide</strong><br />
Table of Contents<br />
H<strong>and</strong> Hygiene<br />
BASYS EFX-1 (High)/ 121-127<br />
EFX-2 (Mid) IR<br />
EFX-3 (Low)/ 128-133<br />
EFX-6 (Low IB) IR<br />
EFX-8 (Wall) IR 134-139<br />
EFX-3 (Low)/ 140-143<br />
EFX-6 (Low IB) CAP<br />
Hardwire Optima ® i.q. EAF-100 144-146<br />
Optima ® ELF-10/ 147-148<br />
ESF-20/ESF-30<br />
Optima ® ETF-80/880 149-150<br />
Optima ® ETF-500 151-152<br />
Optima ® ETF-600/ETF-610 153-154<br />
Optima ® ETF-660/ETF-770 155-156<br />
Optima ® ETF-700 157-158<br />
Optima ® ETF-800 159-161<br />
LINO EAF-200 162-163<br />
Lumino EAF-225 164-165<br />
Optima ® EAF-700 166-169<br />
Battery Optima ® i.q. EAF-150 170-172<br />
Optima Plus ® EBF-85 173-174<br />
Optima Plus ® EBF-550 175-176<br />
Optima Plus ® EBF-615/ 177-178<br />
EBF-650<br />
Optima Plus ® EBF-625/ 179-180<br />
EBF-655<br />
Optima Plus ® EBF-750 181-182<br />
<strong>Sloan</strong> SOLIS ® EAF-275 183-184<br />
Optima Plus ® ERF-885 – 185-186<br />
OBSOLETE<br />
LINO EAF-250 187-188<br />
Optima Plus ® EAF-750 189-192<br />
SF-2100/SF-2150/ 193-194<br />
SF-2200/SF-2250<br />
SF-2300/SF-2350 195-196<br />
SF-2400/SF-2450 197-198<br />
Accessories Optima ® Faucet Trim Plates 199<br />
Spout End Devices Chart 200-201<br />
SJS-1750 Soap Dispenser 202-203<br />
Surface Mounted Electronic H<strong>and</strong> Dryer 204-205<br />
The information contained in this document is subject to change without notice.<br />
If further assistance is required, please contact <strong>Sloan</strong> Technical Support at 1-888-SLOAN-14 (1-888-756-2614) or visit our website at<br />
www.sloanvalve.com<br />
Products shown in this maintenance binder <strong>and</strong> in other catalogs are covered by several United States <strong>and</strong> foreign patents, including patent pending.<br />
3<br />
Vitreous Fixtures<br />
Gravity Tank Toilet 206-207<br />
Water Wall Hung 208-209<br />
Closets Floor Mount 210-211<br />
Urinals St<strong>and</strong>ard 212-213<br />
Retrofit 214-215<br />
Sinks SS-3001 Undermount 216<br />
SS-3002 Drop-In Series<br />
SS-3003 Wall Hung with<br />
Backsplash Series<br />
SS-3804 ADA Wall Hung<br />
Sinks Systems<br />
<strong>Sloan</strong>Stone ® ELS-62000 217<br />
ELS ELS-63000 218<br />
ELS-73000 219<br />
ELS-73000 220<br />
<strong>Sloan</strong>Stone ® EW-42000 221, 223<br />
EW EW-43000 222-223<br />
EW-62000/ 224-225, 228<br />
EW-62050<br />
EW-63000/EW-63050 226-228<br />
EW-72000/EW-72000-30 229-230<br />
EW-73000/EW-73000-30 231-232<br />
<strong>Sloan</strong>Stone ® EWF-40000 233-234<br />
EWF<br />
Bio-Deck ELB-50000 235-236<br />
<strong>Sloan</strong>Stone ® ELC-40000 237-238<br />
ELC ELC-81000 239, 242<br />
ELC-82000 240, 242<br />
ELC-83000 241, 242<br />
AQUS ® HMA-7000 243-244<br />
Product Variation Suffixes 245
This page intentionally left blank.<br />
4<br />
<strong>Repair</strong> <strong>Parts</strong> <strong>and</strong> <strong>Maintenance</strong> <strong>Guide</strong>
5<br />
<strong>Repair</strong> <strong>Parts</strong> <strong>and</strong> <strong>Maintenance</strong> <strong>Guide</strong><br />
Flushometer Identification<br />
IN ORDER FOR THE WATER CLOSET OR URINAL TO PERFORM PROPERLY FOR ITS INTENDED USE, YOU MUST FOLLOW THESE INSTRUCTIONS:<br />
A. IDENTIFY YOUR FLUSHOMETER MODEL NO.<br />
B. CHECK FOR THE WATER CONSUMPTION LABEL ATTACHED TO FLUSHOMETER AND FIXTURE, ENSURING THEY MATCH.<br />
C. REFER TO SPECIFIC FLUSHOMETER SECTION IN GUIDE FOR APPROPRIATE REPLACEMENT PART NO.<br />
1. IDENTIFY<br />
YOUR SLOAN<br />
FLUSHOMETER<br />
Identify our <strong>Sloan</strong><br />
flushometer from the<br />
vacuum breaker, cap,<br />
cover or from<br />
identification label at<br />
the bottom of the<br />
valve body. (<strong>Sloan</strong><br />
parts only supplied).<br />
CHOOSE YOUR FLUSHOMETER:<br />
Manual Diaphragm Flushometers (Pages 11-21)<br />
Royal ®<br />
Exposed Concealed Water Closet Urinal<br />
(Chrome<br />
Plated)<br />
Hydraulic Diaphragm Flushometers (Pages 22-29) Manual Piston Flushometers (Pages 30-38)<br />
Series 900 ® Concealed Series 900 ® Exposed<br />
(Rough<br />
Brass<br />
behind<br />
wall)<br />
Crown II ® is<br />
OBSOLETE<br />
Manual Self-Closing Flushometers (Pages 39-41) Slimline ® Bedpan Washer (Pages 42-44)<br />
Dolphin ®<br />
Royal II ®<br />
OBSOLETE<br />
(Check water inlet<br />
at top or back of<br />
fixture. Typically<br />
3.5 gpf to 1.6 gpf,<br />
larger vacuum<br />
breaker)<br />
Continental ® <strong>Sloan</strong> ® Regal ®<br />
OBSOLETE<br />
Crown ® /Crown II ® Gem 2 ® Naval ®<br />
For electronic<br />
components use<br />
Sensor Flushometer<br />
Section.<br />
(Typically 1.0 gpf<br />
or 0.5 gpf, smaller,<br />
beveled vacuum<br />
breaker, wall<br />
mounted)<br />
Known as<br />
Regal ® XL<br />
(Since mid-<br />
2010)<br />
Product ID<br />
<strong>Guide</strong>
Product ID<br />
<strong>Guide</strong><br />
Sensor Activated Hardwire Diaphragm Flushometers (Pages 45-60)<br />
2. CHOOSE REPLACEMENT PARTS FROM THESE PAGES:<br />
Manual Diaphragm Flushometers ..................................................11-21<br />
Hydraulic Diaphragm Flushometer ................................................ 22-29<br />
Manual Piston Flushometers......................................................... 30-38<br />
Manual Self-Closing Flushometer.................................................. 39-41<br />
6<br />
<strong>Repair</strong> <strong>Parts</strong> <strong>and</strong> <strong>Maintenance</strong> <strong>Guide</strong><br />
Flushometer Identification<br />
Optima ® Hardwired Optima ® ES-S-WB Optima ® ES-S TMO SMOOTH ® Hardwired <strong>Sloan</strong> ECOS ® Hardwired<br />
Optima ® Royal ®<br />
ES-S TMO Concealed<br />
Battery/Solar-Powered Sensor Activated Flushometers (Pages 61-89)<br />
G2 Optima Plus ® SLOAN ® Optima Plus ® SMOOTH ®<br />
<strong>Sloan</strong> SOLIS ®<br />
Optima ® Royal ® ES-S TMO<br />
Concealed with SWB<br />
SOLIS ® CONCEALED<br />
SMO <strong>Sloan</strong> ECOS ®<br />
Manual Diaphragm Bedpan Washer Flushometer ............................... 42-44<br />
Sensor Activated Hardwired Flushometers ......................................... 45-60<br />
Sensor Activated Battery/Solar-Powered Flushometers ....................... 61-89
Faucet Identification<br />
IDENTIFY YOUR SLOAN FAUCET (HAND HYGIENE SECTION) AND CHOOSE REPLACEMENT PARTS FROM THE PAGES LISTED:<br />
BASYS Faucets (Pages 121-143)<br />
EFX-1 (IR) SERIES<br />
Pages 121-127<br />
Optima ® Hardwire Faucets (Pages 115-136)<br />
EAF-100<br />
Pages 144-146<br />
ETF-600<br />
Pages 153-154<br />
EAF-225<br />
Pages 164-165<br />
EAF-150<br />
Pages 170-172<br />
ERF-885<br />
Pages 185-186<br />
ELF-10<br />
Pages 147-148<br />
ETF-610<br />
Pages 153-154<br />
EBF-85<br />
Pages 173-174<br />
EAF-250<br />
Pages 187-188<br />
ETF-660<br />
Pages 155-156<br />
Optima Plus ® Battery Powered Faucets (Pages 137-161)<br />
OBSOLETE<br />
EFX-2 (IR) SERIES<br />
Pages 121-127<br />
OBSOLETE<br />
EAF-700<br />
Pages 157-158<br />
EFX-3 (IR) SERIES<br />
Pages 128-133<br />
OBSOLETE OBSOLETE<br />
ESF-20<br />
Pages 147-148<br />
EBF-550<br />
Pages 175-176<br />
EAF-750<br />
Pages 189-192<br />
EFX-6 (IR) SERIES<br />
Pages 128-133<br />
ESF-30<br />
Pages 147-148<br />
ETF-770<br />
Pages 155-156<br />
EBF-615/EBF625<br />
Pages 177-180<br />
SF-2100/SF-2150<br />
Pages 1193-194<br />
7<br />
<strong>Repair</strong> <strong>Parts</strong> <strong>and</strong> <strong>Maintenance</strong> <strong>Guide</strong><br />
EFX-8 (IR) SERIES<br />
Pages 134-139<br />
ETF-80<br />
Pages 149-150<br />
ETF-700<br />
Pages 157-158<br />
EBF-650/EBF655<br />
Pages 177-180<br />
SF-2200/SF-2250<br />
Pages 193-194<br />
EFX-3 (CAP) SERIES<br />
Pages 140-143<br />
ETF-880<br />
Pages 149-150<br />
ETF-800<br />
Pages 159-161<br />
EBF-750<br />
Pages 180-182<br />
SF-2300/SF-2350<br />
Pages 195-196<br />
EFX-6 (CAP) SERIES<br />
Pages 140-143<br />
ETF-500<br />
Pages 151-152<br />
EAF-200<br />
Pages 162-163<br />
EAF-275<br />
Pages 183-184<br />
SF-2400/SF-2450<br />
Pages 197-198<br />
Product ID<br />
<strong>Guide</strong>
Product ID<br />
<strong>Guide</strong><br />
IDENTIFY YOUR SLOAN FIXTURE:<br />
8<br />
<strong>Repair</strong> <strong>Parts</strong> <strong>and</strong> <strong>Maintenance</strong> <strong>Guide</strong><br />
Vitreous Fixture Identification
IDENTIFY YOUR SLOANSTONE LAVATORY SINK:<br />
ELS-43XXX/ELS-63XXX/ELS-73XXX<br />
9<br />
<strong>Repair</strong> <strong>Parts</strong> <strong>and</strong> <strong>Maintenance</strong> <strong>Guide</strong><br />
<strong>Sloan</strong>Stone ® Identification<br />
Careful consideration was given to the naming convention for <strong>Sloan</strong>Stone® solid-surface lavatories. This page helps explain the logic behind the model<br />
names <strong>and</strong> will help you to be able to identify the product easily <strong>and</strong> consistently via the model numbers. Please take the time to look through the<br />
specification sheets <strong>and</strong> Sink System brochure to help you better underst<strong>and</strong> the naming convention.<br />
THE PREFIX<br />
Prefixes are used to identify the group/category of Bio-Deck <strong>and</strong> <strong>Sloan</strong>Stone solid-surface lavatory systems. Here are some ways to help you remember<br />
the group:<br />
ELS Electronic Lavatory System These have a curved basin <strong>and</strong> <strong>Sloan</strong> faucets<br />
EW Electronic Washstation These have a curved basin <strong>and</strong> an integrated EL-1500 sensor<br />
ELC Electronic Lavatory Countertop These are flat lavatory decks with <strong>Sloan</strong> faucets<br />
EWF Electronic Wash Fountain These have a square type basin <strong>and</strong> an integrated EL-1500 sensor<br />
ELB Electronic Lavatory Bio-Deck These are flat lavatory decks made of biobased material with <strong>Sloan</strong> pedestal faucets<br />
The sample images below show the various groups/categories of <strong>Sloan</strong>Stone lavatory systems<br />
EW-42000*<br />
ELC-42XXX/ELC-72XXX/ELB-52XXX EWF-43000*<br />
THE NUMBERS<br />
Numbers are used to identify the style of Bio-Deck <strong>and</strong> <strong>Sloan</strong>Stone solid-surface lavatory systems. Let’s review the ELS-42650. This is a <strong>Sloan</strong>Stone, 2<br />
station lavatory system with a curved basin <strong>and</strong> two Optima Plus® EBF-650 faucets. The first number is 4. The number 4 denotes the origin as United<br />
States. All <strong>Sloan</strong>Stone sinks with a 4 or 5 will be Buy American Act Compliant, while 6, 7 <strong>and</strong> 8 will comply with the Trade Agreements Act. The next number<br />
is 2. This number indicates the number of users the sink can service or the amount of stations, which vary from model to model. The next 3-4 digits are<br />
used to identify the <strong>Sloan</strong> faucet that is installed on the unit, or in some cases, to denote that there are not <strong>Sloan</strong> faucets on the lavatory system, in which<br />
case 000 will be the last three digits. *Both EW <strong>and</strong> EWF models will always end in 000.<br />
Let’s break down the components of the ELS-42650.<br />
ELS 4 2 650<br />
Denotes that this model<br />
has a curved basin with<br />
<strong>Sloan</strong> faucets<br />
Let’s break down the components of the ELB-522150.<br />
ELB 5 2 2150<br />
Denotes that this model is<br />
a flat lavatory deck made<br />
of biobased material with<br />
<strong>Sloan</strong> faucets<br />
Denotes that this product is Buy American Act<br />
Compliant. All Buy American Act Compliant<br />
sinks will begin with 4 or 5. Trade Agreements<br />
Act sinks will begin with 6, 7 or 8.<br />
Denotes that this product is Buy American Act<br />
Compliant. All Buy American Act Compliant sinks<br />
will begin with 4 or 5. Trade Agreements Act<br />
sinks will begin with 6, 7 or 8.<br />
Indicates the number<br />
of users or stations<br />
the sink can<br />
accommodate.<br />
Indicates the number of<br />
users or stations the<br />
sink can accommodate.<br />
Indicates the model of<br />
<strong>Sloan</strong> faucet offered.<br />
In this case it is<br />
referring to EBF-650.<br />
Indicates the model of<br />
<strong>Sloan</strong> faucet offered.<br />
In this case it is<br />
referring to SF-2150.<br />
Product ID<br />
<strong>Guide</strong>
Product ID<br />
<strong>Guide</strong><br />
This page intentionally left blank.<br />
10<br />
<strong>Repair</strong> <strong>Parts</strong> <strong>and</strong> <strong>Maintenance</strong> <strong>Guide</strong>
Tailpiece<br />
Control Stop <strong>and</strong> Caps<br />
TAILPIECES, CONTROL STOPS<br />
AND FLUSH CONNECTIONS<br />
For additional information on<br />
tailpieces, control stops <strong>and</strong> flush<br />
connections see Showerheads, <strong>Parts</strong><br />
<strong>and</strong> Accessories Tab.<br />
<strong>Valve</strong> Body<br />
Body only<br />
Body with tail<br />
Consuly factory for<br />
proper application<br />
11<br />
<strong>Repair</strong> <strong>Parts</strong> <strong>and</strong> <strong>Maintenance</strong> <strong>Guide</strong><br />
Royal ®<br />
Flushometer<br />
PARTS LIST<br />
Item<br />
No. Code No. Part No. Description<br />
1. 0301172 A-72 CP Cover<br />
— A-72-HE CP High Efficiency Cover<br />
2. 0301168 A-71 Inside Cover<br />
3. — Dual Filtered Bypass Diaphragm Assembly<br />
(refer to table <strong>and</strong> diagram on following page)<br />
4. 0302390 B-73-A CP ADA-Compliant Triple Seal H<strong>and</strong>le Assembly<br />
5. 0301082 A-6 CP H<strong>and</strong>le Coupling<br />
6. 0302109 B-7-A CP Socket Assembly<br />
7. 0302389 B-74-A CP ADA-Compliant H<strong>and</strong>le<br />
8. 3302306 B-51-A Triple Seal H<strong>and</strong>le <strong>Repair</strong> Kit<br />
9. 5301139 A-31 H<strong>and</strong>le Gasket – 48 per package<br />
10. 0306125 F-5-AW 3/4” (19 mm) CP Spud Coupling Assembly<br />
0306140 F-5-AU 1-1/4” (32 mm) CP Spud Coupling Assembly<br />
0306146 F-5-AT 1-1/2” (38 mm) CP Spud Coupling Assembly<br />
10A. SEE SLIP JOINT GASKETS AND RINGS TABLE BELOW<br />
11. 3323182 V-651-A High Back Pressure Vacuum Breaker <strong>Repair</strong> Kit<br />
12. 3393004 V-600-AA 3/4” (19 mm) x 9” (228 mm) CP Vacuum Breaker<br />
3393006 V-600-AA 1-1/4” (32 mm) x 9” (228 mm) CP Vacuum Breaker<br />
3393007 V-600-AA 1-1/2” (38 mm) x 9” (228 mm) CP Vacuum Breaker<br />
13. 0308676 H-550 CP Stop Coupling<br />
14. 0308801 H-551-A CP Adjustable Tailpiece 2-1/16” (52 mm long)<br />
St<strong>and</strong>ard Length*<br />
15A. 5308696 H-553 O-ring – 24 per package<br />
15B. 5308381 H-552 Locking Ring – 12 per package<br />
16. 3308386 H-700-A 1” (25 mm) CP Bak-Chek ® Screwdriver Stop<br />
3308384 H-700-A 3/4” (19 mm) CP Bak-Chek ® Screwdriver Stop<br />
17. 3308853 H-541-ASD Control Stop <strong>Repair</strong> Kit †<br />
3308856 H-543-ASD Control Stop <strong>Repair</strong> Kit ‡<br />
18. 0308612 H-622 CP Bonnet †<br />
0308843 H-577 CP Bonnet ‡ – DISCONTINUED<br />
19. 3308772 H-1010-A V<strong>and</strong>al Resistant Control Stop Cap Assembly †<br />
3308790 H-1009-A V<strong>and</strong>al Resistant Control Stop Cap Assembly ‡<br />
H-600 3/4” Stop only<br />
20. 0308738 H-573 Control Stop Cap CP †<br />
0308848 H-582 Control Stop Cap CP ‡<br />
21. 3308866 H-574 Control Stop Cap with Bumper †<br />
(–YO Variation)<br />
22. 3308867 H-576 Control Stop Cap with Extended Bumper †<br />
(–YG Variation)<br />
* See pages 100-101 for additional lengths<br />
† For use with 1” <strong>and</strong> 3/4” H-700-A <strong>and</strong> 1” H-600-A Bak-Chek ® screwdriver control stop<br />
‡ For use with 3/4" H-600-A Bak-Chek ® screwdriver control stop<br />
<strong>Sloan</strong> products are also available in satin, brushed nickel, chrome, gold <strong>and</strong> polished brass finishes – contact<br />
factory for part numbers.<br />
ITEM 10A. SLIP JOINT GASKETS AND RINGS<br />
Size Code No. Part No. Description<br />
1-1/2” 5306058 F-3 Red Friction Ring<br />
5322001 VBF-5 Black Slip Joint Gasket<br />
0319086/5319086 S-30 Flexible Seat<br />
0319079 S-21 Rigid Seat (rubber over brass)<br />
1-1/2” x 1-1/4” 0396062 F-105 Slip Joint Gasket – Rigid<br />
1-1/4” 5306057 F-3 Red Friction Ring<br />
5322176 VBF-5 Black Slip Joint Gasket<br />
0307052/5307052 G-21 Rigid Seat (rubber over brass)<br />
1” 5306056 F-3 Red Friction Ring<br />
5306115 F-5 Black Slip Joint Gasket<br />
3/4” 5306055 F-3 Red Friction Ring<br />
5306113 F-5 Black Slip Joint Gasket<br />
Manual<br />
Flushometers
Manual<br />
Flushometers<br />
DUAL FILTERED DIAPHRAGM ASSEMBLY<br />
Available in diaphragm only <strong>and</strong> Royal ® Performance Kits.<br />
Royal ® Performance Kit includes dual filtered diaphragm assembly (item 3),<br />
h<strong>and</strong>le repair kit with triple seal packing (item 8), high back pressure<br />
vacuum breaker repair kit (item 11), <strong>and</strong> one tailpiece O-ring (item 15A).<br />
DIAPHRAGM ONLY KIT contains “drop-in” dual filtered diaphragm assembly<br />
(item 3) ONLY.<br />
The dual filtered diaphragm can be used in Royal, ® Regal, ® <strong>and</strong> similar<br />
diaphragm-style valve bodies. For use in <strong>Sloan</strong> valve bodies with a bellshaped<br />
cover (manufactured before 1964), replace the bottom filter ring in<br />
these kits with a blue A-108 filter ring (not shown <strong>Sloan</strong> Code No. 5301283).<br />
NOTE: In January 1998, the Royal ® diaphragm design was upgraded to a<br />
preassembled unit with two (2) plastic filtering rings attached to the rubber diaphragm<br />
(one on top <strong>and</strong> one on bottom). If the flushometer you are servicing has our older,<br />
segmented diaphragm with brass by-pass hole, refer to our Regal section for<br />
additional troubleshooting information.<br />
The colors of the relief valve <strong>and</strong><br />
the refill head plus the shape of<br />
flow ring identify the flush volume<br />
of a DUAL FILTERED DIAPHRAGM<br />
ASSEMBLY.<br />
12<br />
<strong>Repair</strong> <strong>Parts</strong> <strong>and</strong> <strong>Maintenance</strong> <strong>Guide</strong><br />
Royal ®<br />
Flushometer<br />
ROYAL ® PERFORMANCE KIT<br />
Relief Refill Flow<br />
Code No. Part No. Description <strong>Valve</strong> † Head* Ring<br />
3301070 A-1101-A Low Consumption Water Closets-1.6 gpf (6.0 Lpf)** Green Gray Smooth<br />
3301071 A-1102-A Water Saver Water Closets-3.5 gpf (13.2 Lpf)** White Gray Smooth<br />
3301072 A-1103-A 9 Liter European Water Closets-2.4 gpf (9.0 Lpf) Blue Gray Smooth<br />
3301073 A-1106-A Wash Down Urinals-0.5 gpf (1.9 Lpf) Green Black Smooth<br />
3301074 A-1107-A Low Consumption Urinals-1.0 gpf (3.8 Lpf)** Green Black Slotted<br />
3301075 A-1108-A Water Saver Urinals-1.5 gpf (5.7 Lpf)** Black Black Smooth<br />
*Closet refill heads (gray) have larger slots than urinal refill heads (black).<br />
DIAPHRAGM ONLY KIT<br />
Relief Refill Flow<br />
Code No. Part No. Description <strong>Valve</strong> † Head* Ring<br />
3301502 A-1041-A Low Consumption Water Closets-1.6 gpf (6.0 Lpf)** Green Gray Smooth<br />
3301501 A-1038-A Water Saver Water Closets-3.5 gpf (13.2 Lpf)** White Gray Smooth<br />
3301505 A-1044-A 9 Liter European Water Closets-2.4 gpf (9.0 Lpf) Blue Gray Smooth<br />
3301504 A-1043-A Wash Down Urinals-0.5 gpf (1.9 Lpf) Green Black Smooth<br />
3301503 A-1042-A Low Consumption Urinals-1.0 gpf (3.8 Lpf)** Green Black Slotted<br />
3301500 A-1037-A Water Saver Urinals-1.5 gpf (5.7 Lpf)** Black Black Smooth<br />
3301506 A-1045-A High-Efficiency Water Closets-1.28 gpf (4.8 Lpf) Blue Gray Smooth<br />
3301142 A-1047-A High-Efficiency Urinals-0.25 gpf (1.0 Lpf) with White Inserts White HEU Black Smooth<br />
3301143 A-1050-A High-Efficiency Urinals-0.125 gpf (0.5 Lpf) with Green Inserts White HEU Black Smooth<br />
COVER<br />
BODY<br />
HANDLE COUPLING<br />
HANDLE ASSEMBLY<br />
FLUSH CONNECTION<br />
(VACUUM BREAKER)<br />
SPUD COUPLING<br />
STOP<br />
COUPLING<br />
TAILPIECE<br />
CONTROL<br />
STOP<br />
OUTLET COUPLING<br />
SPUD FLANGE<br />
SUPPLY<br />
FLANGE<br />
† Consult factory for availability of replacement plastic relief valves (green, black, blue, <strong>and</strong> white) <strong>and</strong> brass relief valves.<br />
NOTE: For older water closets that require 4.5 gpf (17.0 Lpf), choose kits A-1102-A or A-1038-A, but remove the flow ring before use. For blowout-style urinals that require 3.5 gpf (13.2 Lpf),<br />
choose kits A-1102-A or A-1038-A. For service sinks that require 6.5 gpf (24.6 Lpf), order A-36-A diaphragm repair kit (not shown <strong>Sloan</strong> Code No. 3301036) <strong>and</strong> remove the flow ring before<br />
use. Regulations for low consumption fixtures prohibit the use of higher flush volumes.<br />
*Closet refill heads (gray) have larger slots than urinal refill Heads (black).<br />
** Water Saver (3.5 gpf closet <strong>and</strong> 1.5 gpf urinal) <strong>and</strong> Low Consumption (1.6 gpf closet <strong>and</strong> 1.0 gpf urinal) fixtures must use matching gpf (Lpf) diaphragm kits; using a smaller gpf (Lpf) kit in<br />
fixtures not intended for less volume will result in inadequate dilution in urinals <strong>and</strong> improper evacuation in closets.
TROUBLESHOOTING GUIDE<br />
ATTENTION INSTALLERS: With the exception of the control stop inlet,<br />
DO NOT USE pipe sealant or plumbing grease on any valve component or<br />
coupling! To protect the chrome or special finish of <strong>Sloan</strong> flushometers,<br />
DO NOT USE toothed tools to install or service these valves. Use our A-50<br />
Super-Wrench or other smooth-jawed wrench to secure couplings.<br />
Regulations for low consumption fixtures (1.6 gpf/6.0 Lpf closets <strong>and</strong><br />
1.0 gpf/3.8 Lpf urinals) prohibit use of higher flush volumes.<br />
1. Flushometer does not function (no flush).<br />
A. Control stop or main supply valve is closed. Open control stop or main<br />
supply valve.<br />
B. H<strong>and</strong>le assembly is damaged. Replace B-73-A h<strong>and</strong>le or repair with<br />
B-51-A h<strong>and</strong>le repair kit.<br />
C. Relief valve is damaged. Replace relief valve.<br />
2. H<strong>and</strong>le leaks.<br />
A. H<strong>and</strong>le seal or h<strong>and</strong>le assembly is damaged. Replace B-73-A h<strong>and</strong>le<br />
or repair with B-51-A h<strong>and</strong>le repair kit.<br />
3. Water splashes from fixture.<br />
A. Control stop is open wider than necessary. Adjust control stop for<br />
desired delivery of water volume.<br />
B. Water saver/conventional diaphragm assembly is installed on low<br />
consumption fixture or closet diaphragm assembly is installed on<br />
urinal fixture. Determine the required flush volume (see label on valve<br />
or markings on fixture). Replace diaphragm assembly or relief valve<br />
for appropriate flush volume of fixture.<br />
4. Volume of water is insufficient to adequately siphon fixture.<br />
A. Control stop is not open wide enough. Adjust control stop for desired<br />
delivery of water volume.<br />
B. Diaphragm assembly is damaged. Replace diaphragm assembly.<br />
C. Low consumption diaphragm assembly is installed on water<br />
saver/conventional fixture or urinal diaphragm assembly is installed<br />
on closet fixture. Determine the required flush volume (see label on<br />
valve or markings on fixture). Replace diaphragm assembly or relief<br />
valve for appropriate flush volume of fixture.<br />
D. Inadequate water volume or pressure is available from supply.<br />
Increase flow rate or pressure to the valve. If gauges are not available<br />
to measure supply pressure/volume, remove relief valve from<br />
diaphragm assembly <strong>and</strong> open the control stop.<br />
If the fixture siphons: Additional water volume is required. Install<br />
higher flushing volume relief valve or diaphragm assembly or cut flow<br />
ring from guide. IMPORTANT: LAWS AND REGULATIONS PROHIBIT<br />
THE USE OF HIGHER FLUSHING VOLUMES THAN LISTED ON<br />
FIXTURE OR FLUSHOMETER.<br />
If the fixture DOES NOT siphon (or a low consumption flush is<br />
required): Additional steps must be taken to increase the water<br />
pressure <strong>and</strong>/or volume at the water supply. Contact fixture<br />
manufacturer for minimum supply requirements of fixture.<br />
13<br />
<strong>Repair</strong> <strong>Parts</strong> <strong>and</strong> <strong>Maintenance</strong> <strong>Guide</strong><br />
Royal ®<br />
Flushometer<br />
5. Flushometer valve closes immediately (short flush).<br />
A. Worn or damaged diaphragm assembly. Replace diaphragm<br />
assembly.<br />
B. H<strong>and</strong>le assembly is damaged. Replace B-73-A h<strong>and</strong>le or repair with<br />
B-51-A h<strong>and</strong>le repair kit.<br />
C. Low consumption diaphragm assembly is installed on water<br />
saver/conventional fixture or urinal diaphragm assembly is installed<br />
on closet fixture. Determine the required flush volume (see label on<br />
valve or markings on fixture). Replace relief valve or diaphragm<br />
assembly for appropriate flush volume of fixture.<br />
6. Length of flush is too long (long flush) or fails to shut off.<br />
A. By-pass hole (upper filter ring) of diaphragm assembly is dirty.<br />
Remove the diaphragm assembly. Disassemble the filter rings from<br />
the diaphragm, wash under running water, <strong>and</strong> reassemble. Replace<br />
as necessary.<br />
B. Relief valve or diaphragm assembly is damaged. Replace relief valve<br />
or diaphragm assembly.<br />
C. Water saver/conventional diaphragm assembly is installed on low<br />
consumption fixture or closet diaphragm assembly is installed on<br />
urinal fixture. Determine the required flush volume (see label on valve<br />
or markings on fixture). Replace diaphragm assembly or relief valve<br />
for appropriate flush volume of fixture.<br />
D. Inside cover is damaged. Install new A-71 part.<br />
E. Line water pressure dropped <strong>and</strong> is insufficient to close valve. Close<br />
the control stop until pressure is restored.<br />
F. Relief valve is not seated properly. Disassemble diaphragm<br />
components (relief valve, filter rings, <strong>and</strong> diaphragm unit), wash under<br />
running water, <strong>and</strong> reassemble. Replace as necessary.<br />
7. Chattering noise is heard during flush.<br />
A. Inside cover is damaged. Install new A-71 part.<br />
B. Relief valve or diaphragm assembly is damaged. Replace relief valve<br />
or diaphragm assembly.<br />
CARE AND CLEANING INSTRUCTIONS<br />
DO NOT USE abrasive or chemical cleaners to clean flushometers that may<br />
dull the luster <strong>and</strong> attack the chrome or decorative finish. Use ONLY mild<br />
soap <strong>and</strong> water, then wipe dry with a clean towel or cloth. When cleaning<br />
the bathroom tile, protect the flushometer from any splattering of cleaner.<br />
Acids <strong>and</strong> cleaning fluids can discolor or remove chrome plating.<br />
When assistance is required, please contact<br />
<strong>Sloan</strong> Technical Support at: 1-888-SLOAN-14 (1-888-756-2614).<br />
Manual<br />
Flushometers
Manual<br />
Flushometers<br />
COVER<br />
HANDLE ASSEMBLY<br />
OUTLET COUPLING<br />
SPUD COUPLING<br />
THIS PRODUCT IS NO LONGER<br />
AVAILABLE AS A COMPLETE ASSEMBLY.<br />
REPAIR PARTS REMAIN AVAILABLE<br />
FOR A LIMITED TIME.<br />
COVER<br />
THIS PRODUCT IS NO LONGER<br />
AVAILABLE AS A COMPLETE ASSEMBLY.<br />
REPAIR PARTS REMAIN AVAILABLE<br />
FOR A LIMITED TIME.<br />
14<br />
<strong>Repair</strong> <strong>Parts</strong> <strong>and</strong> <strong>Maintenance</strong> <strong>Guide</strong><br />
Royal II ®<br />
Flushometer<br />
The Royal II ® flushometer offers everything the Royal ® has – <strong>and</strong> more.<br />
PLEASE REFER TO THE ROYAL ® SECTION for all maintenance issues on the<br />
Royal II, with the exceptions noted in the chart below.<br />
Royal II ® ’s new h<strong>and</strong>le is a one-piece design for smoother lines. Its aesthetic<br />
cover accentuates the Royal II ® ’s new design, <strong>and</strong> the new vacuum breaker<br />
couplings <strong>and</strong> flange add the finishing touches.<br />
PARTS LIST<br />
Code No. Part No. Description<br />
0301298 A-206 Royal II ® Cover<br />
0302375 B-95-A Royal II ® H<strong>and</strong>le Assembly<br />
0306145 F-56-A Royal II ® Spud Coupling Assembly 1-1/2” CP<br />
0306128 F-57-A Royal II ® Spud Coupling Assembly 3/4” CP<br />
0306127 F-58-A Royal II ® Spud Coupling Assembly 1-1/4” CP<br />
0323369 V-572 Royal II ® Coupling CP<br />
Continental ®<br />
Flushometer<br />
The Continental ® flushometer is part of the <strong>Sloan</strong> flushometer designer<br />
series, <strong>and</strong> offers proven Royal ® performance – <strong>and</strong> more. PLEASE REFER<br />
TO THE ROYAL ® SECTION for all maintenance issues on the Continental ® ,<br />
with the exceptions noted in the chart below.<br />
Continental ® ’s sleek styling make it ideal for many applications.<br />
PARTS LIST<br />
Code No. Part No. Description<br />
0301077 A-4 Continental ® Cover<br />
0301221 A-71 Continental ® Inside Cover<br />
SLIP JOINT GASKETS AND RINGS<br />
For additional information on Slip Joint Gaskets <strong>and</strong> Rings see Item 10A<br />
table at bottom of page 11.
2<br />
7<br />
4<br />
5<br />
6<br />
1<br />
3<br />
15<br />
<strong>Repair</strong> <strong>Parts</strong> <strong>and</strong> <strong>Maintenance</strong> <strong>Guide</strong><br />
UPPERCUT ® Dual-Flush<br />
Flushometer<br />
PARTS LIST<br />
Item<br />
No. Code No. Part No. Description<br />
1. — † <strong>Valve</strong> Assembly<br />
2. 3372003 WES-212 ADA Compliant Dual-Flush H<strong>and</strong>le<br />
3372010 WES-212 ADA Compliant Dual-Flush H<strong>and</strong>le (Spanish)<br />
3. 3308386 H-700-A Bak-Chek ® Control Stop<br />
4. 3393007 V-600-AA 1-1/2” (38 mm) x 9” (229 mm) Vacuum Breaker<br />
Assembly ‡<br />
5. 0306146 F-5-AT 1-1/2” (38 mm) Spud Coupling Assembly<br />
6. 3308782 H-633-AA 1” (25 mm) CP Sweat Solder Kit with Cast Set Screw<br />
Flange<br />
7. 5301139 A-31 H<strong>and</strong>le Gasket – 48 per package<br />
8. 0319101 SU-1 Wall Plate (English)<br />
0372019 WES-18 Wall Plate (Spanish)<br />
† Part number varies with valve model variation; consult factory.<br />
‡ Length varies with valve model variation; consult factory.<br />
8<br />
Manual<br />
Flushometers
Manual<br />
Flushometers<br />
2<br />
9<br />
2A<br />
7<br />
4A 4D 4B 4C<br />
5<br />
6A<br />
6 6A<br />
6 6B 6<br />
6<br />
6C<br />
8<br />
1<br />
3<br />
16<br />
<strong>Repair</strong> <strong>Parts</strong> <strong>and</strong> <strong>Maintenance</strong> <strong>Guide</strong><br />
<strong>Sloan</strong><br />
Flushometer<br />
PARTS LIST<br />
Item<br />
No. Code No. Part No. Description<br />
1. — A-3-A <strong>Valve</strong> Assembly – contact Tech Support for<br />
proper assembly<br />
2. 0302390 B-73-A ADA Compliant H<strong>and</strong>le Assembly<br />
2A. 0301082 A-6 CP H<strong>and</strong>le Coupling<br />
3. — H-710-A Bak-Chek ® Control Stop – 3/4” or 1”<br />
4A. 5323007 V-500-AA 1-1/2” (38 mm) x 9” (229 mm) Vacuum<br />
Breaker Assembly **<br />
4B. 5323006 V-500-AA 1-1/4” (32 mm) x 9” (229 mm) Vacuum<br />
Breaker Assembly<br />
4C. 5323005 V-500-AA 3/4” (19 mm) x 9” (229 mm) Vacuum<br />
Breaker Assembly<br />
4D. — V-500-A Vacuum Breaker Assembly<br />
5. 0396293 F-109 1-1/2” (38 mm) Elbow Flush Connection<br />
6. SEE SLIP JOINT GASKETS AND RINGS TABLE BELOW<br />
6A. 0306145 F-56-A 1-1/2” (38 mm) Spud Coupling Assembly<br />
6B. 0306142 F-55-A 1-1/4” (32 mm) Spud Coupling Assembly<br />
6C. 0306102 F-54-A 3/4” (19 mm) Spud Coupling Assembly<br />
7. — F-7 Supply Flange (Supplied when <strong>Valve</strong> is not<br />
Ordered with Sweat Solder Kit)<br />
8. 3308782 H-633-AA 1” (25 mm) Sweat Solder Kit with Cast<br />
Set Screw Flange<br />
3308788 H-636-AA 3/4” (19 mm) Sweat Solder Kit with Cast<br />
Set Screw Flange<br />
9. 037800PK SV-10 CP <strong>Sloan</strong> Cover<br />
— SV-10-HE CP High Efficiency <strong>Sloan</strong> Cover<br />
* Part number varies with valve model variation; consult factory.<br />
** Length varies with valve model variation; consult factory.<br />
For a complete listing of flushometer <strong>Valve</strong> components <strong>and</strong> <strong>Repair</strong> Kits, see one<br />
of our <strong>Maintenance</strong> <strong>Guide</strong>s or consult your nearest Plumbing Wholesaler.<br />
For optimum water conservation <strong>and</strong> flushometer performance, use only Genuine<br />
<strong>Sloan</strong> <strong>Parts</strong>.<br />
NOTICE:<br />
The information contained in this document is subject to change without notice.<br />
ITEM 6. SLIP JOINT GASKETS AND RINGS<br />
Size Code No. Part No. Description<br />
1-1/2” 5306058 F-3 Red Friction Ring<br />
5322001 VBF-5 Black Slip Joint Gasket<br />
0319086/5319086 S-30 Flexible Seat<br />
0319079 S-21 Rigid Seat (rubber over brass)<br />
1-1/2” x 1-1/4” 0396062 F-105 Slip Joint Gasket – Rigid<br />
1-1/4” 5306057 F-3 Red Friction Ring<br />
5322176 VBF-5 Black Slip Joint Gasket<br />
0307052/5307052 G-21 Rigid Seat (rubber over brass)<br />
1” 5306056 F-3 Red Friction Ring<br />
5306115 F-5 Black Slip Joint Gasket<br />
3/4” 5306055 F-3 Red Friction Ring<br />
5306113 F-5 Black Slip Joint Gasket
COVER<br />
HANDLE COUPLING<br />
HANDLE ASSEMBLY<br />
BODY<br />
FLUSH CONNECTION<br />
(VACUUM BREAKER)<br />
SPUD COUPLING<br />
1a 1b<br />
TAILPIECE<br />
STOP COUPLING<br />
OUTLET COUPLING<br />
SPUD FLANGE<br />
SUPPLY<br />
FLANGE<br />
CONTROL<br />
STOP<br />
17<br />
<strong>Repair</strong> <strong>Parts</strong> <strong>and</strong> <strong>Maintenance</strong> <strong>Guide</strong><br />
<strong>Sloan</strong><br />
Flushometer<br />
DIAPHRAGM INSIDE PARTS KITS<br />
(SEE ILLUSTRATION BELOW)<br />
Refer to <strong>Parts</strong> List. Includes Relief <strong>Valve</strong> <strong>and</strong> Diaphragm Assembly<br />
Item<br />
No. Code No. Part No. Application<br />
A. 3378041 SV-41-A 1.6 gpf/6.0 Lpf - Closet<br />
B. 3378038 SV-38-A 3.5 gpf/13.2 Lpf - Closet<br />
C. 3378044 SV-44-A 2.4 gpf/9.0 Lpf - Closet<br />
D. 3378037 SV-37-A 1.5 gpf/5.7 Lpf - Urinal<br />
E. 3378042 SV-42-A 1.0 gpf/3.8 Lpf - Urinal<br />
F. 3378043 SV-43-A 0.5 gpf/1.9 Lpf - Urinal<br />
INSIDE COMPONENTS<br />
Item<br />
No. Code No. Part No. Description<br />
1a. 5301211 A-19-ALC Relief <strong>Valve</strong>, Green (Closet/Urinal-LC) – 12 per package<br />
1b. 5301058 A-19-AC Relief <strong>Valve</strong>, White (Closet) – 12 per package<br />
1c. 0301143 A-19-AL Relief <strong>Valve</strong>, Blue (9 Liter Closet) – 12 per package<br />
1d. 5301059 A-19-AU Relief <strong>Valve</strong>, Black (Urinal) – 12 per package<br />
1c 1d 1a 1a<br />
A B C D E F<br />
1.6 gpf/6.0 Lpf 3.5 gpf/13.2 Lpf 2.4 gpf/9.0 Lpf 1.5 gpf/5.7 Lpf 1.0 gpf/3.8 Lpf 0.5 gpf/1.9 Lpf<br />
DIAPHRAGM REPAIR KITS<br />
Item<br />
No. Code No. Part No. Description<br />
G. 3378020 SV-20-AC Water Closet<br />
H. 3378021 SV-20-AU Urinal<br />
G Diaphagm H Diaphagm<br />
Refill Head<br />
A-212<br />
Refill Head<br />
A-99<br />
Manual<br />
Flushometers
Manual<br />
Flushometers<br />
TROUBLESHOOTING GUIDE<br />
ATTENTION INSTALLERS: With the exception of the control stop inlet,<br />
DO NOT USE pipe sealant or plumbing grease on any valve component or<br />
coupling! To protect the chrome or special finish of <strong>Sloan</strong> flushometers,<br />
DO NOT USE toothed tools to install or service these valves. Use our A-50<br />
Super-Wrench or other smooth-jawed wrench to secure couplings.<br />
Regulations for low consumption fixtures (1.6 gpf/6.0 Lpf closets <strong>and</strong><br />
1.0 gpf/3.8 Lpf urinals) prohibit use of higher flush volumes.<br />
1. Flushometer does not function (no flush).<br />
A. Control stop or main valve is closed. Open control stop or main valve.<br />
B. H<strong>and</strong>le assembly is worn. Install h<strong>and</strong>le repair kit or replace h<strong>and</strong>le<br />
assembly.<br />
C. Relief valve is worn. Replace Inside <strong>Parts</strong> Kit.<br />
2. Insufficient volume of water to adequately siphon fixture.<br />
A. Control Stop not open enough. Adjust Control Stop for desired delivery<br />
of water volume.<br />
B. Urinal flushometer <strong>Parts</strong> inside a Closet flushometer. Replace inside<br />
urinal parts with proper closet flushometer parts.<br />
C. Low consumption flushometer installed on a non-low consumption<br />
fixture. Replace Inside <strong>Parts</strong> Kit with Water Saver Kit.<br />
D. Water Saver Kit installed in old, non-Water Saver bowl. Position Refill<br />
Head so that SIDE 1 is in the UP position.<br />
E. Water supply volume or pressure is inadequate. If no gauges are<br />
available to properly measure supply pressure or volume of water<br />
at the flushometer, then remove the Relief <strong>Valve</strong> from the Inside<br />
<strong>Parts</strong> Kit, reassemble the flushometer <strong>and</strong> completely open the<br />
Control Stop.<br />
If the fixture siphons, more water volume is required. If a 3.5 gpf<br />
Inside <strong>Parts</strong> Kit is installed in the flushometer, then first flip the<br />
Refill Head (under the diaphragm) to obtain a 4.5 gpf volume. If this<br />
volume is still inadequate, remove the Flow Ring from the <strong>Guide</strong> to<br />
obtain a 6.5 gpf kit. If additional flow is still required, try a Low<br />
Pressure <strong>Guide</strong> Kit. IMPORTANT: LAWS AND REGULATIONS<br />
PROHIBIT THE USE OF HIGHER FLUSHING VOLUMES THAN<br />
LISTED ON FIXTURE OR FLUSHOMETER.<br />
If fixture does not siphon or if a Low Consumption fixture is<br />
installed, or if the above steps do not prove satisfactory, steps must<br />
be taken to increase the water supply pressure <strong>and</strong>/or volume.<br />
Contact the fixture manufacturer for minimum water supply<br />
requirements of the fixture.<br />
3. Flushometer closes off immediately.<br />
A. Ruptured or damaged Diaphragm. Replace Inside <strong>Parts</strong> Kit.<br />
B. Enlarged By-pass orifice from corrosion or damage. Replace Inside<br />
<strong>Parts</strong> Kit.<br />
4. Length of flush is too short (short flushing).<br />
A. Diaphragm Assembly <strong>and</strong> <strong>Guide</strong> Assembly are not h<strong>and</strong>-tight. Screw<br />
the two assemblies h<strong>and</strong>-tight.<br />
B. Enlarged By-pass orifice from corrosion or damage. Replace Inside<br />
<strong>Parts</strong> Kit.<br />
C. Urinal flushometer <strong>Parts</strong> inside a Closet flushometer. Replace Inside<br />
Urinal <strong>Parts</strong> with proper Closet flushometer <strong>Parts</strong>.<br />
D. Low Consumption flushometer installed on a higher Consumption<br />
fixture. Replace Inside <strong>Parts</strong> Kit with Water Saver Kit.<br />
E. H<strong>and</strong>le Assembly is damaged. Replace H<strong>and</strong>le.<br />
18<br />
<strong>Repair</strong> <strong>Parts</strong> <strong>and</strong> <strong>Maintenance</strong> <strong>Guide</strong><br />
<strong>Sloan</strong><br />
Flushometer<br />
5. Length of flush is too long (long flushing) or continuous.<br />
A. Relief valve is not seating properly or By-pass orifice is clogged<br />
because of foreign material, or By-pass orifice is closed by an<br />
invisible gelatinous film from “over-treated” water. Disassemble the<br />
working parts <strong>and</strong> wash thoroughly.<br />
NOTE: SIZE OF ORIFICE IN THE BY-PASS IS EXTREMELY IMPORTANT<br />
FOR PROPER METERING OF WATER INTO THE UPPER CHAMBER OF<br />
THE FLUSHOMETER. DO NOT ENLARGE OR DAMAGE THIS ORIFICE.<br />
REPLACE INSIDE KIT IF CLEANING DOES NOT CORRECT PROBLEM.<br />
B. Supply line water pressure has dropped <strong>and</strong> is not sufficient to close<br />
the valve. Close Control Stop until pressure has been restored.<br />
C. Closet flushometer <strong>Parts</strong> inside a Urinal flushometer. Replace Inside<br />
Closet <strong>Parts</strong> with proper Urinal flushometer <strong>Parts</strong>.<br />
D. Inside Cover is damaged. Replace Inside Cover.<br />
6. Chattering noise is heard during flush.<br />
A. The Segment Diaphragm is installed upside-down. Replace the<br />
Segment Diaphragm to the proper position as instructed by markings<br />
on the Diaphragm.<br />
B. Inside Cover is damaged. Replace Inside Cover.<br />
7. H<strong>and</strong>le Leaks.<br />
A. H<strong>and</strong>le Gasket, Seal or Assembly is damaged. Replace as required.<br />
CARE AND CLEANING INSTRUCTIONS<br />
DO NOT use abrasive or chemical cleaners (including chlorine bleach) to<br />
clean flushometers that may dull the luster <strong>and</strong> attack the chrome or special<br />
decorative finishes. Use ONLY mild soap <strong>and</strong> water, then wipe dry with a<br />
clean towel or cloth.<br />
While cleaning the bathroom tile, protect the flushometer from any<br />
splattering of cleaner. Acids <strong>and</strong> cleaning fluids will discolor or remove<br />
chrome plating.<br />
When assistance is required, please contact<br />
<strong>Sloan</strong> Technical Support at: 1-888-SLOAN-14 (1-888-756-2614).
The repair kits <strong>and</strong> parts listed on this page are<br />
designed to service all <strong>Sloan</strong> diaphragm type<br />
flushometers, including those manufactured for<br />
low consumption (LC) usage.<br />
ABBREVIATIONS:<br />
9<br />
CP = Chrome plated<br />
gpf = gallons per flush<br />
Lpf = Liters per flush<br />
LC = Low consumption<br />
pkg = package<br />
10<br />
11<br />
12<br />
13<br />
1<br />
2<br />
7<br />
(Items 3 thru 6,<br />
refer to illustration<br />
on next page.)<br />
<strong>Valve</strong> Body<br />
(not sold separately)<br />
8<br />
14<br />
15<br />
17<br />
20A<br />
20B<br />
PARTS LIST<br />
Item<br />
No. Code No. Part No. Description<br />
1. 0317004 R-10 CP Cover<br />
— R-10-HE CP High Efficiency Cover<br />
2. 0301168 A-71 Inside Cover<br />
SEE ITEMS 3A THROUGH 6E IN CHART ON NEXT PAGE<br />
3A. 5301058 A-19-AC Relief <strong>Valve</strong>, White (Closet) – 12 per package<br />
3B. 5301059 A-19-AU Relief <strong>Valve</strong>, Black (Urinal) – 12 per package<br />
3C. 5301211 A-19-ALC Relief <strong>Valve</strong>, Green (Closet/Urinal-LC) –<br />
12 per package<br />
3D. 0301143 A-19-AL Relief <strong>Valve</strong>, Blue (9 Liter Closet) – 12 per package<br />
4. 5301111 A-15-A Disc – for all Inside <strong>Parts</strong> Kits – 12 per package<br />
5. 5301188 A-156-A Diaphragm – for all Inside <strong>Parts</strong> Kits –<br />
12 per package<br />
6A. 5301236 A-163-A <strong>Guide</strong> Assembly 4.5 gpf/17.0 Lpf Closet &<br />
1.5 gpf/5.7 Lpf Urinal –12 per package<br />
6B. 5301032 A-152-A <strong>Guide</strong> Assembly 3.5 gpf/13.2 Lpf Closet –<br />
12 per package<br />
6C. 5301031 A-151-A <strong>Guide</strong> Assembly 1.6 gpf/6.0 Lpf LC Closet –<br />
12 per package<br />
6D. 5301155 A-155-A <strong>Guide</strong> Assembly 1.0 gpf/3.8 Lpf LC Urinal –<br />
12 per package<br />
6E. 5301157 A-157-A <strong>Guide</strong> Assembly 0.5 gpf/1.9 Lpf Urinal –<br />
12 per package<br />
7. SEE INSIDE PARTS KITS CHART ON NEXT PAGE<br />
8. 5302297 B-39 Seal – 12 per package<br />
9. 5302279 B-32-A CP H<strong>and</strong>le Assembly – 6 per package<br />
0302390 B-73-A CP H<strong>and</strong>icap H<strong>and</strong>le Assembly<br />
(ADA Compliant)<br />
10. 0301082 A-6 CP H<strong>and</strong>le Coupling<br />
11. 0302109 B-7-A CP Socket Assembly<br />
12. 5302274 B-32 CP H<strong>and</strong>le Grip – 12 per package<br />
0302389 B-74-A CP H<strong>and</strong>icap H<strong>and</strong>le Grip (ADA Compliant)<br />
15A<br />
16<br />
18<br />
19<br />
19<br />
<strong>Repair</strong> <strong>Parts</strong> <strong>and</strong> <strong>Maintenance</strong> <strong>Guide</strong><br />
Regal ®<br />
Flushometer<br />
28<br />
25<br />
24<br />
23<br />
26<br />
21<br />
22<br />
27<br />
NOTE: Also for use with Regal ® XL<br />
(Since mid-2010)<br />
TAILPIECES, CONTROL STOPS<br />
AND FLUSH CONNECTIONS<br />
For additional information on<br />
tailpieces, control stops <strong>and</strong> flush<br />
connections see Showerheads, <strong>Parts</strong><br />
<strong>and</strong> Accessories Tab.<br />
Item<br />
No.Code No. Part No. Description<br />
13. 5302305 B-50-A H<strong>and</strong>le <strong>Repair</strong> Kit – 6 per package<br />
14. 5301139 A-31 H<strong>and</strong>le Gasket – 48 per package<br />
15. 0306102 F-54-A 3/4'' CP Spud Coupling Assembly<br />
0306142 F-55-A 1-1/4'' CP Spud Coupling Assembly<br />
0306145 F-56-A 1-1/2'' CP Spud Coupling Assembly<br />
15A. SEE SLIP JOINT GASKETS AND RINGS TABLE BELOW<br />
16. 3323192 V-551-A Vacuum Breaker <strong>Repair</strong> Kit<br />
17. 5323005 V-500-AA 3/4'' x 9'' CP Vacuum Breaker – 6 per package<br />
5323006 V-500-AA 1-1/4'' x 9'' CP Vacuum Breaker – 6 per package<br />
5323007 V-500-AA 1-1/2'' x 9'' CP Vacuum Breaker – 6 per package<br />
18. 0308676 H-550 CP Stop Coupling †<br />
19. 0308801 H-551-A CP Adjustable Tailpiece 2-1/16'' long †<br />
20A. 5308696 H-553 O-ring – 24 per package<br />
20B. 5308381 H-552 Locking ring – 12 per package<br />
21. 0388065 H-790-A 1'' Screwdriver Bak-Chek ® Stop CP – complete<br />
0388064 H-790-A 3/4'' Screwdriver Bak-Chek ® Stop CP – complete<br />
0388029 H-740-A 1'' Screwdriver Bak-Chek ® Stop CP – OBSOLETE<br />
0388031 H-740-A 3/4'' Screwdriver Bak-Chek ® Stop CP – OBSOLETE<br />
22. 3308853 H-541-ASD 1'' Control Stop <strong>Repair</strong> Kit *<br />
3308856 H-543-ASD 3/4'' Control Stop <strong>Repair</strong> Kit **<br />
23. 0308612 H-622 CP Bonnet (Current Regal)<br />
. 0308991 H-639 CP Bonnet – Pre 2010 Regal Stops*<br />
0308601 H-538 CP Bonnet ** – OBSOLETE<br />
24. 5388001 H-1012-A CP Cap – 6 per package VP<br />
25. 5310034 J-2/J-7 Bumper Assembly – 6 per package – OBSOLETE<br />
26. 3308866 H-574 Stop Cap, chrome plated with Seat Bumper (-YO)<br />
27. 3308867 H-576 Stop Cap, chrome plated with Extended Seat<br />
Bumper (-YG)<br />
28. 5388002 H-528 Hole Plug<br />
† See pages 100-101 for additional lengths<br />
*For use with 1" <strong>and</strong> 3/4" H-740-A CP (less cap) <strong>and</strong> 1" – H-540-A CP (with H-37 cap) Bak-Chek ® screwdriver<br />
control stops<br />
**For use with 3/4" H-740-A CP Bak-Chek ® screwdriver control stops<br />
ITEM 15A. SLIP JOINT GASKETS AND RINGS<br />
Size Code No. Part No. Description<br />
1-1/2” 5306058 F-3 Red Friction Ring<br />
5322001 VBF-5 Black Slip Joint Gasket<br />
0319086/5319086 S-30 Flexible Seat<br />
0319079 S-21 Rigid Seat (rubber over brass)<br />
1-1/2” x 1-1/4” 0396062 F-105 Slip Joint Gasket – Rigid<br />
1-1/4” 5306057 F-3 Red Friction Ring<br />
5322176 VBF-5 Black Slip Joint Gasket<br />
0307052/5307052 G-21 Rigid Seat (rubber over brass)<br />
1” 5306056 F-3 Red Friction Ring<br />
5306115 F-5 Black Slip Joint Gasket<br />
3/4” 5306055 F-3 Red Friction Ring<br />
5306113 F-5 Black Slip Joint Gasket<br />
Manual<br />
Flushometers
Manual<br />
Flushometers<br />
A<br />
3A<br />
4<br />
5<br />
6A<br />
COVER<br />
BODY<br />
HANDLE COUPLING<br />
HANDLE ASSEMBLY<br />
FLUSH CONNECTION<br />
(VACUUM BREAKER)<br />
SPUD COUPLING<br />
3B<br />
4<br />
5<br />
6A<br />
TAILPIECE<br />
STOP COUPLING<br />
OUTLET COUPLING<br />
3A<br />
4<br />
5<br />
6B<br />
SPUD FLANGE<br />
CONTROL<br />
STOP<br />
SUPPLY<br />
FLANGE<br />
3C<br />
4<br />
5<br />
6C<br />
20<br />
<strong>Repair</strong> <strong>Parts</strong> <strong>and</strong> <strong>Maintenance</strong> <strong>Guide</strong><br />
Regal ®<br />
Flushometer<br />
MASTER FLUSHOMETER REBUILDING KITS<br />
(SEE PARTS LIST – ON PREVIOUS PAGE)<br />
Refer to <strong>Parts</strong> List. Includes Items 7, 13, 16 & 20<br />
Code No. Part No. Description<br />
3317001 R-1001-A Rebuild Kit (4.5 gpf/17.0 Lpf) Closet/Service Sink<br />
3317002 R-1002-A Rebuild Kit (1.5 gpf/5.7 Lpf) Urinal<br />
3317003 R-1003-A Rebuild Kit (3.5 gpf/13.2 Lpf) Closet<br />
3317004 R-1004-A Rebuild Kit (1.6 gpf/6.0 Lpf) Closet<br />
3317005 R-1005-A Rebuild Kit (1.0 gpf/3.8 Lpf) LC Urinal<br />
3317011 R-1011-A Rebuild Kit (0.5 gpf/1.9 Lpf) Urinal<br />
3317012 R-1012-A Rebuild Kit (2.4 gpf/9.0 Lpf) Closet<br />
REPAIR KIT WASHER SET (SEE PARTS LIST – ON PREVIOUS PAGE)<br />
5301189 A-156-AA <strong>Repair</strong> Kit Washer Set – Includes: 4, 5, 8 & 14<br />
ITEM 7. INSIDE PARTS KITS (SEE ILLUSTRATIONS BELOW)<br />
Item<br />
No. Code No. Part No. Application<br />
A. 3301036 A-36-A 4.5 gpf/17.0 Lpf - Closet<br />
B. 3301037 A-37-A 1.5 gpf/5.7 Lpf - Urinal<br />
C. 3301038 A-38-A 3.5 gpf/13.2 Lpf - Closet<br />
D. 3301041 A-41-A 1.6 gpf/6.0 Lpf - Closet<br />
E. 3301044 A-42-A 1.0 gpf/3.8 Lpf - Urinal<br />
F. 3301081 A-43-A 0.5 gpf/1.9 Lpf - Urinal<br />
G. 3301024 A-44-A 2.4 gpf/9.0 Lpf - Closet<br />
ITEM 7. INSIDE PARTS COMPONENTS (SEE ILLUSTRATIONS BELOW)<br />
Item<br />
No. Code No. Part No. Description<br />
3A. 5301058 A-19-AC Relief <strong>Valve</strong>, White (Closet) – 12 per pkg.<br />
3B. 5301059 A-19-AU Relief <strong>Valve</strong>, Black (Urinal) – 12 per pkg.<br />
3C. 5301211 A-19-ALC Relief <strong>Valve</strong>, Green (Closet/Urinal-LC) – 12 per pkg.<br />
3D. 0301143 A-19-AL Relief <strong>Valve</strong>, Blue (9 Liter Closet) – 12 per pkg.<br />
4. 5301111 A-15-A Disc – for all Inside <strong>Parts</strong> Kits – 12 per pkg.<br />
5. 5301188 A-156-A Diaphragm – for all Inside <strong>Parts</strong> Kits – 12 per pkg.<br />
6A. 5301236 A-163-A <strong>Guide</strong> Assembly 4.5 gpf/17.0 Lpf Closet &<br />
1.5 gpf/5.7 Lpf Urinal –12 per package<br />
6B. 5301032 A-152-A <strong>Guide</strong> Assembly 3.5 gpf/13.2 Lpf Closet –<br />
12 per package<br />
6C. 5301031 A-151-A <strong>Guide</strong> Assembly 1.6 gpf/6.0 Lpf LC Closet –<br />
12 per package<br />
6D. 5301155 A-155-A <strong>Guide</strong> Assembly 1.0 gpf/3.8 Lpf LC Urinal –<br />
12 per package<br />
6E. 5301157 A-157-A <strong>Guide</strong> Assembly 0.5 gpf/1.9 Lpf Urinal –<br />
12 per package<br />
3C<br />
4<br />
5<br />
6D<br />
3C<br />
4<br />
5<br />
6E<br />
NOTE: Also for use with Regal ® XL<br />
(Since mid-2010)<br />
B C D E F G<br />
4.5 gpf/17.0 Lpf 1.5 gpf/5.7 Lpf 3.5 gpf/13.2 Lpf 1.6 gpf/6.0 Lpf 1.0 gpf/3.8 Lpf 0.5 gpf/1.9 Lpf 2.4 gpf/9.0 Lpf<br />
3D<br />
4<br />
5<br />
6C
TROUBLESHOOTING GUIDE<br />
ATTENTION INSTALLERS: With the exception of the control stop inlet,<br />
DO NOT USE pipe sealant or plumbing grease on any valve component or<br />
coupling! To protect the chrome or special finish of <strong>Sloan</strong> flushometers,<br />
DO NOT USE toothed tools to install or service these valves. Use our A-50<br />
Super-Wrench or other smooth-jawed wrench to secure couplings.<br />
Regulations for low consumption fixtures (1.6 gpf/6.0 Lpf closets <strong>and</strong><br />
1.0 gpf/3.8 Lpf urinals) prohibit use of higher flush volumes.<br />
1. Flushometer does not function.<br />
A. Control stop or main valve is closed. Open control stop or main valve.<br />
B. H<strong>and</strong>le assembly is worn. Install h<strong>and</strong>le repair kit B-50-A or replace<br />
h<strong>and</strong>le.<br />
C. Relief valve is worn. Replace inside parts kit.<br />
2. Insufficient volume of water to adequately siphon fixture.<br />
A. Control stop not open enough. Adjust control stop for desired delivery<br />
of water.<br />
B. Urinal flushometer parts inside a closet flushometer. Replace inside<br />
urinal parts with proper closet flushometer parts.<br />
C. Low consumption flushometer installed on a non-low consumption<br />
fixture. Replace A-41-A inside parts kit with A-38-A water saver kit.<br />
D. Water saver kit installed in old, non-water saver bowl. Position refill<br />
head A-170-1 so that SIDE 1 is in the UP position.<br />
E. Inadequate volume or pressure at supply. If no gauges are available to<br />
properly measure supply pressure or volume of water at the<br />
flushometer, then remove the relief valve from the inside parts kit,<br />
reassemble the flushometer <strong>and</strong> open the control stop.<br />
If the fixture siphons, more water volume is required. If a 3.5 gpf<br />
inside parts kit is installed in the flushometer, then first flip the refill<br />
head (under the diaphragm) to obtain a 4.5 gpf volume. If this<br />
volume is still inadequate, remove the flow ring from the guide to<br />
obtain a 6.5 gpf kit. If additional flow is still required, try a low<br />
pressure guide kit A-175-A. IMPORTANT: LAWS AND<br />
REGULATIONS PROHIBIT THE USE OF HIGHER FLUSHING<br />
VOLUMES THAN LISTED ON FIXTURE OR FLUSHOMETER.<br />
If fixture does not siphon or if a low consumption fixture is installed,<br />
or if the above steps do not prove satisfactory, steps must be taken<br />
to increase the pressure <strong>and</strong>/or supply.<br />
3. Flushometer closes off immediately.<br />
A. Ruptured or damaged diaphragm. Install inside parts kit to correct<br />
above problems <strong>and</strong> update flushometer.<br />
B. Enlarged by-pass orifice from corrosion or damage. Install inside parts<br />
kit to correct above problem <strong>and</strong> update flushometer.<br />
4. Length of flush is too short (short flushing).<br />
A. Diaphragm assembly <strong>and</strong> guide assembly are not h<strong>and</strong>-tight. Screw<br />
the two assemblies h<strong>and</strong>-tight.<br />
B. Enlarged by-pass orifice from corrosion or damage. Install NEW inside<br />
parts kit to correct problem <strong>and</strong> update flushometer.<br />
C. A-19-AU (black) urinal relief valve in closet flushometer. Replace relief<br />
valve with A-19-AC (white) closet relief valve.<br />
D. B-41-A low consumption kit installed in non-low consumption fixture.<br />
Replace with proper inside parts kit.<br />
E. H<strong>and</strong>le assembly is worn. Install h<strong>and</strong>le repair kit B-50-A or replace<br />
the h<strong>and</strong>le.<br />
21<br />
<strong>Repair</strong> <strong>Parts</strong> <strong>and</strong> <strong>Maintenance</strong> <strong>Guide</strong><br />
Regal ®<br />
Flushometer<br />
NOTE: Also for use with Regal ® XL<br />
(Since mid-2010)<br />
5. Length of flush is too long (long flushing) or fails to close off.<br />
A. Relief valve is not seating properly or by-pass orifice is clogged<br />
because of foreign material, or by-pass orifice is closed by an<br />
invisible gelatinous film from “over-treated” water. Disassemble the<br />
working parts <strong>and</strong> wash thoroughly.<br />
NOTE: SIZE OF ORIFICE IN THE BY-PASS IS EXTREMELY IMPORTANT<br />
FOR PROPER METERING OF WATER INTO THE UPPER CHAMBER OF<br />
THE FLUSHOMETER. DO NOT ENLARGE OR DAMAGE THIS ORIFICE.<br />
REPLACE INSIDE KIT IF CLEANING DOES NOT CORRECT PROBLEM.<br />
B. Line pressure has dropped <strong>and</strong> is not sufficient to force relief valve to<br />
seat. Shut off all control stops until pressure has been restored, then<br />
open them again.<br />
C. A-19-AC (white) closet relief valve has been used in a 1 or 1-1/2 gpf<br />
urinal. Replace with A-19-AU (black) relief valve.<br />
D. Inside cover is cracked or damaged. Replace the inside cover A-71.<br />
6. Chattering noise in flushometer.<br />
A. The A-156-A segment diaphragm has been installed upside-down.<br />
Replace the segment diaphragm to the proper position as instructed<br />
by markings on the diaphragm.<br />
B. The inside cover has been distorted from wear, freezing or abuse.<br />
replace inside cover.<br />
7. Leaking at h<strong>and</strong>le assembly.<br />
A. The B-39 seal is worn or deteriorated. Install new B-39 seal.<br />
NOTE: The B-39 seal will easily slide right onto the B-40 bushing if it<br />
is wet.<br />
B. H<strong>and</strong>le gasket has been omitted. Install A-31 h<strong>and</strong>le gasket or h<strong>and</strong>le<br />
repair kit B-50-A.<br />
C. <strong>Valve</strong> h<strong>and</strong>le bushing is worn. Install h<strong>and</strong>le repair kit B-50-A.<br />
CARE AND CLEANING INSTRUCTIONS<br />
DO NOT use abrasive or chemical cleaners to clean flushometers, they may<br />
dull the luster <strong>and</strong> attack the chrome or special decorative finishes. Use<br />
ONLY mild soap <strong>and</strong> water, then wipe dry with a clean towel or cloth.<br />
While cleaning the bathroom tile, the flushometer should be protected from<br />
any splattering of cleaner. Acids <strong>and</strong> cleaning fluids can discolor or remove<br />
chrome plating.<br />
When assistance is required, please contact<br />
<strong>Sloan</strong> Technical Support at: 1-888-SLOAN-14 (1-888-756-2614).<br />
Manual<br />
Flushometers
Manual<br />
Flushometers<br />
9<br />
10<br />
8<br />
4A<br />
6A<br />
2E<br />
2D<br />
2A<br />
4D<br />
5<br />
2C<br />
2B<br />
6A<br />
7<br />
1<br />
4C<br />
3A<br />
11A<br />
4B<br />
6C 6B<br />
3B<br />
11B<br />
22<br />
<strong>Repair</strong> <strong>Parts</strong> <strong>and</strong> <strong>Maintenance</strong> <strong>Guide</strong><br />
Series 900 ® Flushometer<br />
PARTS LIST FOR SERIES 900 ® EXPOSED FLUSHOMETER<br />
Item<br />
No. Code No. Part No. Description<br />
1. 0301048 A-143-A <strong>Valve</strong> Body<br />
2A. 0318065PK HY-65 <strong>Valve</strong> Actuator Housing<br />
2B. 0301082PK A-6 Housing Nut<br />
2C. 3318001PK HY-83-A Actuator Cartridge Assembly<br />
2D. 0318023PK HY-24 Tube Fittings (two required)<br />
2E. 0318033PK HY-35 Fitting Nuts (two required)<br />
3A. 3308386 H-700-A Bak-Chek ® Control Stop (Royal <strong>Valve</strong>s) for 1”<br />
3308384 for ¾”<br />
3B. 0388065 H-790-A Bak-Chek ® Control Stop (Regal XL <strong>Valve</strong>s) for 1”<br />
0388064 for ¾”<br />
4A. 3893004 V-600-AA 1½” (38 mm) Vacuum Breaker Assembly<br />
4B. 3393006 V-600-AA 1¼” (32 mm) Vacuum Breaker Assembly<br />
4C. 3393004 V-600-AA ¾” (19 mm) Vacuum Breaker Assembly<br />
4D. 0393003 V-600-A Vacuum Breaker<br />
5. 0396293 F-109 1½” (38 mm) Elbow Flush Connection<br />
6A. 0306146 F-5-AT 1-1/2” (38 mm) Spud Coupling Assembly<br />
(Royal <strong>Valve</strong>s)<br />
0306145 F-56-A 1½” (38 mm) Spud Coupling Assembly<br />
(Regal XL <strong>Valve</strong>s)<br />
6B. 0306140 F-5-AU 1¼” (32 mm) Spud Coupling Assembly (Royal <strong>Valve</strong>s)<br />
0306142 F-55-A 1¼” (32 mm) Spud Coupling Assembly<br />
(Regal XL <strong>Valve</strong>s)<br />
6C. 0306125 F-5-AW ¾” (19 mm) Spud Coupling Assembly (Royal <strong>Valve</strong>s)<br />
0306102 F-54-A ¾” (19 mm) Spud Coupling Assembly<br />
(Regal XL <strong>Valve</strong>s)<br />
7. 3308782 H-633-AA 1” (25 mm) Sweat Solder Kit & Cast Wall Flange<br />
w/Set Screw<br />
3308788 H-636-AA ¾” (19 mm) Sweat Solder Kit & Cast Wall Flange<br />
w/Set Screw<br />
8. 0318064PK HY-64 6” Chrome Sleeve<br />
9. ‡ F-7 Supply Flange<br />
10. 3318002 HY-112-A Plate with Screws<br />
11A. 3308772 H-1010-A Free Spinning V<strong>and</strong>al Resistant Stop Cap<br />
(Royal <strong>Valve</strong>s)<br />
11B. 5388002 H-528 V<strong>and</strong>al Resistant Hole Plug (Regal <strong>Valve</strong>s)<br />
† Part number varies with valve model variation; consult factory.<br />
‡ Length varies with valve variation; consult factory.
PARTS LIST FOR SERIES 900 ® CONCEALED FLUSHOMETER<br />
Item<br />
No. Code No. Part No. Description<br />
1. 0301173 A-72 RB Royal ® Cover<br />
2. 0301168 A-71 Inside Cover<br />
3. SEE THE INSIDE PARTS KIT CHART ON NEXT PAGE<br />
4. 3323182 V-651-A Vacuum Breaker <strong>Repair</strong> Kit<br />
5. 0308690 H-550 RB Tailpiece Coupling<br />
6. 0308802 H-551-A RB Adjustable Tailpiece, 2-1/16” (52 mm)<br />
7A. 5308696 H-553 O-ring – 24 per package<br />
7B. 5308381 H-552 Locking ring – 12 per package<br />
8. 0388010 H-730-A RB Wheel H<strong>and</strong>le Bak-Chek ® Control Stop<br />
9A. 3308855 H-541-A 1” Wheel H<strong>and</strong>le <strong>Repair</strong> Kit for H-730-A Control Stop<br />
9B. 3308858 H-543-A 3/4” Wheel H<strong>and</strong>le <strong>Repair</strong> Kit for H-730-A<br />
Control Stop<br />
10. 0308919 H-558-A Wheel H<strong>and</strong>le<br />
11A. 0308615 H-623 1” RB Bonnet<br />
11B. 0208083 H-623 3/4” RB Bonnet<br />
12. See page V-600-AA Royal Vacuum Breaker Flush Connection<br />
111 (specify length <strong>and</strong> size)<br />
13. 0306619 F-2-AA 1-1/2” (38 mm) RB Couplings (2 each), Friction Rings<br />
(2 each), <strong>and</strong> Rubber Gaskets (2 each)<br />
14. 0206146 F-21 RB Elbow<br />
15. 0306091 F-2-A 1-1/2” (38 mm) RB Coupling <strong>and</strong> S-21 Flat Rigid<br />
Gasket<br />
16. See pages F-100 RB Flared End Flush Connection (specify length)<br />
111-116<br />
17. See pages F-15-A 3/4” (19 mm) RB Elbow Flush Connection with<br />
111-116 Coupling <strong>and</strong> Rubber Gasket (specify length)<br />
18. 0306054 F-2-A 3/4” (19 mm) RB Coupling, Friction Ring, <strong>and</strong><br />
Rubber Gasket<br />
19. 0318024 HY-25 RB <strong>Valve</strong> Actuator Housing only<br />
20. 0318023 HY-24 Tube Fitting (2 required)<br />
21. 0318033 HY-35 Tube Fitting Nut (2 required)<br />
22. 0318093 HY-30 1/4” (6 mm) x 48” (1219 mm) Connecting Tubes<br />
(2 required)<br />
23. 0301082 A-6 RB H<strong>and</strong>le Coupling Nut<br />
24. 3318005 HY-109-A Actuator Housing Assembly<br />
(includes Item 19, 20, 21, 23 <strong>and</strong> 26)<br />
25. 3318001 HY-83-A Actuator Cartridge Assembly<br />
26. 0337086 DO-22 O-ring for HY-109-A Adapter<br />
27. SEE SLIP JOINT GASKETS AND RINGS TABLE BELOW<br />
28. 0301050 A143-A RB <strong>Valve</strong> Body<br />
ITEM 27. SLIP JOINT GASKETS AND RINGS<br />
Size Code No. Part No. Description<br />
1-1/2” 5306058 F-3 Red Friction Ring<br />
5322001 VBF-5 Black Slip Joint Gasket<br />
0319086/5319086 S-30 Flexible Seat<br />
0319079 S-21 Rigid Seat (rubber over brass)<br />
1-1/2” x 1-1/4” 0396062 F-105 Slip Joint Gasket – Rigid<br />
1-1/4” 5306057 F-3 Red Friction Ring<br />
5322176 VBF-5 Black Slip Joint Gasket<br />
0307052/5307052 G-21 Rigid Seat (rubber over brass)<br />
1” 5306056 F-3 Red Friction Ring<br />
5306115 F-5 Black Slip Joint Gasket<br />
3/4” 5306055 F-3 Red Friction Ring<br />
5306113 F-5 Black Slip Joint Gasket<br />
23<br />
<strong>Repair</strong> <strong>Parts</strong> <strong>and</strong> <strong>Maintenance</strong> <strong>Guide</strong><br />
Series 900 ® Flushometer<br />
22<br />
Series 900 ®<br />
Concealed<br />
Flushometer<br />
21<br />
20<br />
24<br />
19<br />
23<br />
To Push Button Actuator<br />
See Actuator Variations for<br />
applicable Push Button style.<br />
15<br />
18<br />
26<br />
1<br />
2<br />
3<br />
25<br />
27<br />
S-21 Rigid Seat<br />
TAILPIECES, CONTROL STOPS, PUSH BUTTONS AND<br />
FLUSH CONNECTIONS<br />
For additional information on tailpieces, control stops, push<br />
buttons <strong>and</strong> flush connections see Showerheads, <strong>Parts</strong> <strong>and</strong><br />
Accessories Tab.<br />
17<br />
16<br />
27<br />
10<br />
11A<br />
11B<br />
13<br />
9A<br />
9B<br />
7B<br />
28<br />
4<br />
12<br />
Includes<br />
Item No. 4<br />
14<br />
27<br />
ABBREVIATIONS:<br />
CP = Chrome plated<br />
RB = Rough brass<br />
gpf = gallons per flush<br />
Lpf = Liters per flush<br />
LC = Low consumption<br />
WH = Wheel h<strong>and</strong>le<br />
5<br />
7A<br />
8<br />
6<br />
27<br />
Manual<br />
Flushometers
Manual<br />
Flushometers<br />
Connecting<br />
Tubes<br />
BODY<br />
ACTUATOR<br />
(FLUSHOMETER)<br />
Push Button Actuator<br />
(Specify Type)<br />
COVER<br />
TAILPIECE<br />
COUPLING<br />
CONTROL<br />
STOP<br />
FLUSH CONNECTION<br />
(VACUUM BREAKER)<br />
STOP<br />
COUPLING<br />
Elbow flush connection,<br />
couplings & outlet Tube<br />
24<br />
<strong>Repair</strong> <strong>Parts</strong> <strong>and</strong> <strong>Maintenance</strong> <strong>Guide</strong><br />
Series 900 ® Flushometer<br />
ITEM 3. INSIDE PARTS KITS (SEE ILLUSTRATION ON PREVIOUS PAGE)<br />
Code No. Part No. Application<br />
3301502 A-1041-A Low Consumption Water Closets-<br />
1.6 gpf (6.0 Lpf)*<br />
3301501 A-1038-A Water Saver Water Closets-3.5 gpf (13.2 Lpf)*<br />
3301505 A-1044-A 9 Liter European Water Closets-2.4 gpf (9.0 Lpf)<br />
3301504 A-1043-A Wash Down Urinals-0.5 gpf (1.9 Lpf)<br />
3301503 A-1042-A Low Consumption Urinals-1.0 gpf (3.8 Lpf)*<br />
3301500 A-1037-A Water Saver Urinals-1.5 gpf (5.7 Lpf)*<br />
3301506 A-1045-A High-Efficiency Water Closets-1.28 gpf (4.8 Lpf)<br />
* Water Saver (3.5 gpf closet <strong>and</strong> 1.5 gpf urinal) <strong>and</strong> Low Consumption (1.6 gpf closet <strong>and</strong> 1.0 gpf urinal) fixtures<br />
must use matching gpf (Lpf) diaphragm kits; using a smaller gpf (Lpf) kit in fixtures not intended for less volume<br />
will result in inadequate dilution in urinals <strong>and</strong> improper evacuation in closets.<br />
HYDRAULIC INSIDE PARTS REPAIR KITS<br />
Code No. Part No. Description<br />
3318011 HY-1101-A Hydraulic Royal 1.6C<br />
3318012 HY-1102-A Hydraulic Royal 3.5C<br />
3318013 HY-1103-A Hydraulic Royal 2.4C<br />
3318014 HY-1106-A Hydraulic Royal 0.5U<br />
3318015 HY-1107-A Hydraulic Royal 1.0U<br />
3318016 HY-1108-A Hydraulic Royal 1.5U<br />
Comes with: Diaphragm, Actuator Cartridge Assembly,<br />
Tailpiece O-ring <strong>and</strong> Vacuum Breaker Assembly<br />
HY-1101-A
HY-49-A (0318049)<br />
METAL PARTITION PUSH BUTTON<br />
Item<br />
No. Code No. Part No. Description<br />
1. 3318007 HY-1000-A Push Button Kit –<br />
includes Push Button,<br />
Flange, Spring & Set<br />
Screw<br />
2. 0318004 HY-3 Spring<br />
3. 3318010 HY-1003-A Mounting Flange Kit –<br />
includes Mounting<br />
Flange, Mounting Nut,<br />
Screws (2) & Tinnerman<br />
Nuts (2)<br />
4. 0318123 HY-71-A Actuator Assembly<br />
NOTE: Includes HY-32-A cartridge (shown at right)<br />
NOTE: Maximum distance from button to valve is 20’<br />
(longer tubing required)<br />
HY-100-A (0318117)<br />
FIXTURE WALL METAL PUSH BUTTON<br />
Item<br />
No. Code No. Part No. Description<br />
1. 0318117 HY-100-A Fixture Wall Metal Button Assembly<br />
2. 3318006 HY-111-A Metal Button Kit<br />
3. 0305134 EL-109 Spring<br />
4. 0318078 HY-50-A Actuator Assembly<br />
5. 0318033 HY-35 Tube Fitting Nut (2 required)<br />
6. 0318028 HY-29 Threaded Rod<br />
7. 0318109 HY-105 Spacer<br />
8. 3318009 HY-1002-A Mounting Strap Kit<br />
HY-33-A (0318001)<br />
FIXTURE WALL PUSH BUTTON<br />
1. 0318001 HY-33-A Fixture Wall Push Button Assembly<br />
2. 3318007 HY-1000-A Push Button Kit<br />
3. 0318004 HY-3 Spring<br />
4. 3318008 HY-1001-A Mounting Flange Kit<br />
5. 0318078 HY-50-A Actuator Assembly<br />
6. 0318033 HY-35 Tube Fitting Nut (2 required)<br />
7. 0318028 HY-29 Threaded Rod<br />
8. 0318109 HY-105 Spacer<br />
9. 3318009 HY-1002-A Mounting Strap Kit<br />
HY-72-A (0318072)<br />
SIDE WALL PUSH BUTTON<br />
25<br />
<strong>Repair</strong> <strong>Parts</strong> <strong>and</strong> <strong>Maintenance</strong> <strong>Guide</strong><br />
Item<br />
No. Code No. Part No. Description<br />
1. 3318007 HY-1000-A Push Button Kit – includes<br />
Push Button, Flange,<br />
Spring & Set Screw<br />
2. 0318004 HY-3 Spring<br />
3. 3318008 HY-1001-A Mounting Flange Kit –<br />
includes Mounting Flange,<br />
Mounting Nut, Screws (2),<br />
Nuts (2) & Washers (2)<br />
4. 0318123 HY-71-A Actuator Assembly<br />
5. 0318041 HY-40 Plate<br />
6. 0305173 EL-173 Screws (4)<br />
7. 0318073 HY-73 Extension Adapter<br />
8. 0318074 HY-74 Extension Stem<br />
NOTE: Includes HY-32-A cartridge (shown at right)<br />
NOTE: Maximum distance from button to valve is 20’<br />
(longer tubing required)<br />
Series 900 ® Flushometer<br />
HY-108-A (0318119)<br />
PENAL WARE METAL<br />
PUSH BUTTON<br />
Item<br />
No. Code No. Part No. Description<br />
1. 0318116 HY-91 Flange<br />
2. 0318111 HY-94 Mounting Washer<br />
3. 0318112 HY-93 Mounting Nut<br />
4. 0318115 HY-86-A Push Button Assembly<br />
5. 0305134 EL-109 Spring<br />
6. 0318078 HY-50-A Actuator Assembly<br />
NOTE: Includes HY-32-A cartridge (shown below)<br />
NOTE: Maximum distance from button to valve is 20’<br />
(longer tubing required)<br />
HY-32-A ACTUATOR CARTRIDGE ASSEMBLY<br />
For use with<br />
HY-50-A <strong>and</strong><br />
HY-71-A actuator<br />
assemblies<br />
Manual<br />
Flushometers
Manual<br />
Flushometers<br />
TROUBLESHOOTING GUIDE<br />
1. Push Button Leaks.<br />
The actuator cartridge has an accumulation of lime or its seals are<br />
damaged or worn. Replace with a new HY-32-A cartridge.<br />
2. The flushometer does not flush <strong>and</strong> a small amount of leakage is<br />
visible below the valve.<br />
A. Foreign material lodged in the cartridge. Remove the cartridge <strong>and</strong><br />
inspect for foreign material. Clean under running water.<br />
B. The actuator cartridge has an accumulation of lime or its seals are<br />
damaged or worn. Replace with a new HY-32-A cartridge.<br />
C. Plastic Tubing is installed incorrectly. Install plastic tubing correctly<br />
(Steps 4 <strong>and</strong> 6).<br />
ACTUATOR CARTRIDGE REMOVAL<br />
Plastic Push Button Actuator Removal:<br />
(1)Loosen the setscrew in the button flange <strong>and</strong> remove the button,<br />
flange, <strong>and</strong> spring from the actuator body.<br />
(2)Unscrew the cartridge from the actuator body.<br />
NOTE: An automatic check valve in the actuator body allows<br />
removal of the cartridge without turning off the water.<br />
Metal Push Button Actuator Removal:<br />
(1) Remove the button or actuator assembly from the wall or fixture.<br />
(2) Disassemble the flange or button assembly from the actuator body.<br />
(3) Unscrew the cartridge from the actuator body.<br />
NOTE: The metal Push Button is designed to be v<strong>and</strong>al-proof <strong>and</strong><br />
must be removed from the wall or fixture for service.<br />
3. The flushometer does not flush or flushes only once <strong>and</strong> will not<br />
flush a second time when the button is pushed.<br />
A. The plunger is lodged in the actuator cartridge or the plunger bypass<br />
hole is clogged. Remove actuator housing <strong>and</strong> cartridge from the<br />
Flushometer. Clean under running water. If cartridge parts are worn,<br />
deteriorated or limed up <strong>and</strong> problem persists after cleaning, replace<br />
with a new HY-83-A cartridge.<br />
B. Plastic Tubing is installed incorrectly. Install plastic tubing correctly.<br />
REMOVAL OF THE ACTUATOR FROM THE FLUSHOMETER:<br />
Turn off water at the Control Stop. Unscrew the actuator housing<br />
coupling nut from the flushometer. Remove the actuator housing from<br />
the flushometer. The tubing connections can be left intact. Carefully<br />
remove the actuator cartridge from the flushometer body to prevent the<br />
actuator from abrupt separation due to expansion of an internal spring. If<br />
the actuator cartridge is lodged in the flushometer body cavity, gently<br />
grip the exposed portion of the cartridge with a channel-lock pliers <strong>and</strong><br />
rotate back <strong>and</strong> forth to loosen the o-ring seal. Carefully separate the<br />
actuator housing to reveal the spring <strong>and</strong> plunger.<br />
4. Flushometer does not function (no flush).<br />
A. Control Stop or Main <strong>Valve</strong> is Closed. Open Control Stop or Main<br />
<strong>Valve</strong>.<br />
B. Relief valve is worn. Replace Performance Kit (Royal) or Inside <strong>Parts</strong><br />
Kit (Regal XL).<br />
26<br />
<strong>Repair</strong> <strong>Parts</strong> <strong>and</strong> <strong>Maintenance</strong> <strong>Guide</strong><br />
Series 900 ® Flushometer<br />
5. Volume of water is not sufficient to siphon fixture.<br />
A. Control Stop is not open wide enough. Adjust Control Stop for desired<br />
delivery of water volume.<br />
B. Urinal flushometer parts installed in a closet flushometer. Replace<br />
inside urinal Flushometer parts with proper closet flushometer parts.<br />
C. Incorrect dual filtered diaphragm assembly (Royal) or inside parts kit<br />
(Regal XL) is installed in flushometer; for instance, Urinal assembly<br />
inside a Closet flushometer, or Low Consumption assembly inside a<br />
higher consumption fixture. Determine the flush volume required by<br />
the fixture <strong>and</strong> replace Royal Performance Kit or Inside <strong>Parts</strong> Kit. Use<br />
valve label <strong>and</strong> markings on fixture for reference.<br />
D. Water supply volume or pressure is inadequate. If no gauges are<br />
available to properly measure supply pressure or volume of water at<br />
the Flushometer, then remove the Relief <strong>Valve</strong> from the Dual Filtered<br />
Diaphragm Assembly (Royal) or Inside <strong>Parts</strong> Kit (Regal XL),<br />
reassemble the flushometer <strong>and</strong> completely open the Control Stop. If<br />
the fixture siphons, more water volume is required.<br />
For Royal — Install a higher flushing volume Royal Performance Kit.<br />
For Regal XL — If a 3.5 gpf Inside <strong>Parts</strong> Kit is installed in the<br />
flushometer, then first flip the refill head (under the diaphragm) to obtain<br />
a 4.5 gpf volume. If this volume is still inadequate, remove the flow ring<br />
from the guide to obtain a 6.5 gpf Kit. If additional flow is still required,<br />
try a low pressure guide kit A-175-A (0301104).<br />
IMPORTANT — LAWS AND REGULATIONS REQUIRING PROHIBIT<br />
THE USE OF HIGHER FLUSHING VOLUMES THAN LISTED ON<br />
FIXTURE OR FLUSHOMETER.<br />
If the fixture does not siphon or if a Low Consumption flush is required,<br />
steps must be taken to increase the water supply pressure <strong>and</strong>/or<br />
volume. Contact the fixture manufacturer for minimum water supply<br />
requirements of the fixture.<br />
6. Flushometer closes off immediately.<br />
A. Ruptured or damaged diaphragm. Replace Royal Performance Kit<br />
(Royal) or Inside <strong>Parts</strong> Kit (Regal XL).<br />
B. For Regal XL— An enlarged bypass orifice from corrosion or<br />
damage. Replace Inside <strong>Parts</strong> Kit.<br />
7. Length of flush is too short (Short Flush).<br />
A. For Regal XL — The diaphragm Assembly <strong>and</strong> <strong>Guide</strong> Assembly are<br />
not h<strong>and</strong> tight. Screw the two assemblies h<strong>and</strong> tight.<br />
B. For Regal XL — An enlarged bypass orifice from corrosion or<br />
damage. Replace Inside <strong>Parts</strong> Kit.<br />
C. Dual Filtered Diaphragm Assembly (Royal) or Inside <strong>Parts</strong> Kit (Regal<br />
XL) is damaged. Replace Royal Performance Kit or Inside <strong>Parts</strong> Kit.<br />
D. Incorrect dual filtered diaphragm assembly (Royal) or Inside <strong>Parts</strong> Kit<br />
(Regal XL) is installed in flushometer; for instance, urinal assembly<br />
inside a closet flushometer, or Low Consumption assembly inside a<br />
higher consumption fixture. Determine the flush volume required by<br />
the fixture <strong>and</strong> replace Royal Performance Kit or Inside <strong>Parts</strong> Kit. Use<br />
valve label <strong>and</strong> markings on fixture for reference.
TROUBLESHOOTING GUIDE (CONTINUED)<br />
7. Length of flush is too long (Long Flush) or continuous.<br />
A. For Royal — Metering bypass hole in Diaphragm is clogged.<br />
Remove the Dual filtered Diaphragm Assembly. Remove the Primary<br />
<strong>and</strong> Secondary Filter Rings from the Diaphragm <strong>and</strong> wash under<br />
running water. Replace Royal Performance Kit if cleaning does not<br />
correct the problem.<br />
B. For Regal XL — Relief <strong>Valve</strong> (A-19-A) is not seating properly or<br />
bypass orifice is clogged. Disassemble the working parts <strong>and</strong> wash<br />
thoroughly.<br />
NOTE: SIZE OF THE ORIFICE IN THE BYPASS IS OF UTMOST<br />
IMPORTANCE FOR THE PROPER METERING OF WATER INTO THE<br />
UPPER CHAMBER OF THE FLUSHOMETER. DO NOT ENLARGE OR<br />
DAMAGE THIS ORIFICE. REPLACE INSIDE PARTS KIT IF CLEANING<br />
DOES NOT CORRECT PROBLEM.<br />
C. Supply line water pressure has dropped <strong>and</strong> is not sufficient to close<br />
the valve. Close Control Stop until pressure is restored.<br />
D. Dual filtered diaphragm assembly (Royal) or Inside <strong>Parts</strong> Kit (Regal XL)<br />
is damaged. Replace Royal Performance Kit or Inside <strong>Parts</strong> Kit.<br />
E. Incorrect dual filtered diaphragm assembly (Royal) or Inside <strong>Parts</strong> Kit<br />
(Regal XL) is installed in flushometer; for instance, Urinal assembly<br />
inside a Closet flushometer, or Low Consumption assembly inside a<br />
higher consumption fixture. Determine the flush volume required by<br />
the fixture <strong>and</strong> replace Royal Performance Kit or Inside <strong>Parts</strong> Kit. Use<br />
valve label <strong>and</strong> markings on fixture for reference.<br />
F. White Closet Relief <strong>Valve</strong> has been used in a urinal flushometer.<br />
Replace Closet Relief <strong>Valve</strong> (A-19-AC) with Black Urinal Relief <strong>Valve</strong><br />
(A-19-AU).<br />
G. Inside Cover is cracked or damaged. Replace the Inside Cover (A-71).<br />
H. Conditions in the piping system may contribute to the noise. A degree<br />
of high pressure in the piping may be relieved by adjustments to<br />
Control Stop. Other noises created by loose pipes, lack of air<br />
chambers, inadequate pipe sizes, etc., are problems that must be<br />
discussed with the building engineer.<br />
8. Chattering noise is heard during flush.<br />
A. Inside cover is damaged. Replace Inside Cover (A-71).<br />
B. For Regal XL — A-156-A Segment Diaphragm has been installed<br />
upside-down. Reposition the Segment Diaphragm properly (see<br />
markings on the Diaphragm).<br />
CARE AND CLEANING INSTRUCTIONS<br />
DO NOT use abrasive or chemical cleaners to clean flushometers, they may<br />
dull the luster <strong>and</strong> attack the chrome or special decorative finishes. Use<br />
ONLY mild soap <strong>and</strong> water, then wipe dry with a clean towel or cloth.<br />
While cleaning the bathroom tile, the exposed flushometer h<strong>and</strong>le, button or<br />
piping should be protected from any splattering of cleaner. Acids <strong>and</strong><br />
cleaning fluids can discolor or remove chrome plating.<br />
When assistance is required, please contact<br />
<strong>Sloan</strong> Technical Support at: 1-888-SLOAN-14 (1-888-756-2614).<br />
27<br />
<strong>Repair</strong> <strong>Parts</strong> <strong>and</strong> <strong>Maintenance</strong> <strong>Guide</strong><br />
Series 900 ® Flushometer<br />
Manual<br />
Flushometers
Manual<br />
Flushometers<br />
3<br />
5<br />
4<br />
“L” Dimension PUSH BUTTON ID CHART (All dimensions in inches)<br />
28<br />
<strong>Repair</strong> <strong>Parts</strong> <strong>and</strong> <strong>Maintenance</strong> <strong>Guide</strong><br />
Concealed Flushometer (Royal ® )<br />
TAILPIECES, CONTROL STOPS, FLUSH CONNECTIONS<br />
AND HANDLE ASSEMBLIES<br />
For additional information on tailpieces, control stops, flush connections, <strong>and</strong><br />
h<strong>and</strong>le assemblies see Showerheads, <strong>Parts</strong> <strong>and</strong> Accessories Tab.<br />
PARTS LIST<br />
Item<br />
No. Code No. Part No. Description<br />
1. 0388010 H-730-A 1” RB Wheel H<strong>and</strong>le Bak-Chek ® Control Stop<br />
0388011 H-730-A 3/4” RB Wheel H<strong>and</strong>le Bak-Chek ® Control Stop<br />
2. 3301093 A-1013-A Concealed <strong>Valve</strong> H<strong>and</strong>le Cap Kit<br />
FOR SPECIFYING PROPER LENGTHS FOR ITEMS 3, 4 AND 5, SEE CHART BELOW<br />
3. — C-43-A 3” (76 mm) Push Button Actuator Assembly<br />
4. — C-9-A Blind Nut Push Button Actuator Assembly<br />
5. — B-12-A Lever Actuator Assembly<br />
Wall Thickness 1 2 3 4 5 6 7 8 9 10 11 12 13 14 15<br />
“L” Dimension 3 3/4 4 3/4 5 3/4 6 3/4 7 3/4 8 3/4 9 3/4 10 3/4 11 3/4 12 3/4 13 3/4 14 3/4 15 3/4 16 3/4 17 3/4<br />
“A” (B-15-A)<br />
Filler Rod<br />
1 5/8 2 5/8 3 5/8 4 5/8 5 5/8 6 5/8 7 5/8 8 5/8 9 5/8 10 5/8 11 5/8 12 5/8 13 5/8 14 5/8 15 5/8<br />
“B” (B-6-A)<br />
Socket Assembly<br />
2 1/2 3 1/2 4 1/2 5 1/2 6 1/2 7 1/2 8 1/2 9 1/2 10 1/2 11 1/2 12 1/2 13 1/2 14 1/2 15 1/2 16 1/2<br />
B-23 Flange<br />
C-2 Pushbutton<br />
Wall Thickness<br />
1 2<br />
SEE FLUSH CONNECTIONS<br />
IN SHOWERHEADS, PARTS<br />
AND ACCESSORIES TAB<br />
Specify the “L” dimension for the proper length of the<br />
push button assembly<br />
“B”<br />
“A”<br />
B-15-A<br />
Filler Rod<br />
B-24 Locknut<br />
VALVE BODY<br />
(NOT SOLD SEPARATELY)<br />
C-7 Spring<br />
B-6-A Socket Assembly<br />
A-6 Coupling<br />
A-31 Gasket<br />
B-85 Seal<br />
Notes: 1. “L” Dimension = Wall thickness (to nearest whole inch) + 2 3/4”<br />
2. 1 1/2” Diameter Hole Opening Required Through Wall<br />
B-8-A Plunger<br />
B-101 Brass Bushing
TROUBLESHOOTING GUIDE<br />
ATTENTION INSTALLERS: With the exception of the control stop inlet,<br />
DO NOT USE pipe sealant or plumbing grease on any valve component or<br />
coupling! To protect the chrome or special finish of <strong>Sloan</strong> flushometers,<br />
DO NOT USE toothed tools to install or service these valves. Use our A-50<br />
Super-Wrench or other smooth-jawed wrench to secure couplings.<br />
Regulations for low consumption fixtures (1.6 gpf/6.0 Lpf closets <strong>and</strong><br />
1.0 gpf/3.8 Lpf urinals) prohibit use of higher flush volumes.<br />
1. Flushometer does not function.<br />
A. Control Stop or Main <strong>Valve</strong> is Closed. Open Control Stop or<br />
Main <strong>Valve</strong>.<br />
B. H<strong>and</strong>le or Push Button Assembly is worn. Install <strong>Sloan</strong> H<strong>and</strong>le <strong>Repair</strong><br />
Kit (C-70-A) or replace h<strong>and</strong>le or push button.<br />
C. Relief <strong>Valve</strong> is worn. Replace Inside <strong>Parts</strong> Kit.<br />
2. Insufficient volume of water to adequately siphon fixture.<br />
A. Control Stop not open enough. Adjust Control Stop for desired delivery<br />
of water.<br />
B. Urinal flushometer <strong>Parts</strong> inside a Closet flushometer. Replace Inside<br />
Urinal <strong>Parts</strong> with proper Closet flushometer <strong>Parts</strong>.<br />
C. Low Consumption flushometer installed on a non-Low Consumption<br />
fixture. Replace A-41-A Inside <strong>Parts</strong> Kit with A-38-A Water Saver Kit.<br />
D. Water Saver Kit installed in old, non-Water Saver bowl. Position Refill<br />
Head A-170 so that SIDE 1 is in the UP Position.<br />
E. Inadequate volume or pressure at supply.<br />
If no gauges are available to properly measure supply pressure or<br />
volume of water at the flushometer, then remove the Relief <strong>Valve</strong><br />
from the Inside <strong>Parts</strong> Kit, reassemble the flushometer <strong>and</strong> open the<br />
Control Stop. If the fixture siphons, more water volume is required.<br />
If a 3.5 gpf Inside <strong>Parts</strong> Kit is installed in the flushometer, then first<br />
flip the Refill Head (under the Diaphragm) to obtain a 4.5 gpf volume.<br />
If this volume is still inadequate, remove the Flow Ring from the<br />
<strong>Guide</strong> to obtain a 6.5 gpf Kit. If additional flow is still required,<br />
try a Low Pressure <strong>Guide</strong> Kit A-175-A (#0301104). IMPORTANT:<br />
Laws <strong>and</strong> regulation prohibit the use of higher flushing volumes than<br />
listed on fixture or flushometer.<br />
If fixture does not siphon or if a Low Consumption fixture is<br />
installed, or if the above steps do not prove satisfactory, steps<br />
must be taken to increase the pressure <strong>and</strong>/or supply.<br />
3. Flushometer closes off immediately.<br />
A. Ruptured or damaged Diaphragm. Install Inside <strong>Parts</strong> Kit to correct<br />
problem <strong>and</strong> update flushometer.<br />
B. Enlarged By-pass orifice from corrosion or damage. Install Inside<br />
<strong>Parts</strong> Kit to correct problem <strong>and</strong> update flushometer.<br />
4. Length of flush is too short (Short Flushing).<br />
A. Diaphragm Assembly <strong>and</strong> <strong>Guide</strong> Assembly are not h<strong>and</strong>-tight. Screw<br />
the two assemblies h<strong>and</strong>-tight.<br />
B. Enlarged By-pass orifice from corrosion or damage. Install NEW Inside<br />
<strong>Parts</strong> Kit to correct problem <strong>and</strong> update flushometer.<br />
C. A-19-AU (Black) Urinal Relief <strong>Valve</strong> in Closet flushometer. Replace<br />
Relief <strong>Valve</strong> with A-19-AC (White) Closet Relief <strong>Valve</strong>.<br />
D. A-41-A Low Consumption Kit installed in non-Low Consumption<br />
fixture. Replace with proper Inside <strong>Parts</strong> Kit.<br />
E. H<strong>and</strong>le Assembly is worn. Install H<strong>and</strong>le <strong>Repair</strong> Kit C-70-A or replace<br />
the H<strong>and</strong>le.<br />
29<br />
<strong>Repair</strong> <strong>Parts</strong> <strong>and</strong> <strong>Maintenance</strong> <strong>Guide</strong><br />
Concealed Flushometer (Royal ® )<br />
5. Length of flush is too long (Long Flushing) or fails to close off.<br />
A. Relief <strong>Valve</strong> is not seating properly or By-pass orifice is clogged<br />
because of foreign material, or By-pass orifice is closed by an<br />
invisible gelatinous film from “over-treated” water. Disassemble the<br />
working parts <strong>and</strong> wash thoroughly. NOTE: SIZE OF ORIFICE IN THE<br />
BY-PASS IS EXTREMELY IMPORTANT FOR PROPER METERING OF<br />
WATER INTO THE UPPER CHAMBER OF THE FLUSHOMETER. DO NOT<br />
ENLARGE OR DAMAGE THIS ORIFICE. REPLACE INSIDE KIT IF<br />
CLEANING DOES NOT CORRECT PROBLEM.<br />
B. Line pressure has dropped <strong>and</strong> is not sufficient to force Relief <strong>Valve</strong> to<br />
seat. Shut off all control stops until pressure has been restored, then<br />
open them again.<br />
C. A-19-AC (White) Closet Relief <strong>Valve</strong> has been used in a 1 or 1-1/2<br />
gpf Urinal. Replace with A-19-AU (Black) Relief <strong>Valve</strong>.<br />
D. Inside Cover is cracked or damaged. Replace the Inside Cover (A-71).<br />
6. Chattering noise in flushometer.<br />
A. The A-156-A Segment Diaphragm has been installed upside-down.<br />
Replace the Segment Diaphragm to the proper position as instructed<br />
by markings on the Diaphragm.<br />
B. The Inside Cover has become distorted from wear, freezing or abuse.<br />
Replace Inside Cover.<br />
7. Leaking at H<strong>and</strong>le or Push Button Assembly.<br />
A. The B-39 Seal is worn or deteriorated. Install new B-39 Seal. NOTE:<br />
The B-39 Seal will easily slide onto the B-40 Bushing if it is wet.<br />
B. H<strong>and</strong>le gasket has been omitted. Install A-31 H<strong>and</strong>le Gasket or <strong>Sloan</strong><br />
H<strong>and</strong>le <strong>Repair</strong> Kit (C-70-A).<br />
C. <strong>Valve</strong> H<strong>and</strong>le Bushing is worn. Install <strong>Sloan</strong> H<strong>and</strong>le <strong>Repair</strong> Kit<br />
(C-70-A).<br />
CARE AND CLEANING INSTRUCTIONS<br />
DO NOT use abrasive or chemical cleaners to clean flushometers, they may<br />
dull the luster <strong>and</strong> attack the chrome or special decorative finishes. Use<br />
ONLY mild soap <strong>and</strong> water, then wipe dry with a clean towel or cloth.<br />
While cleaning the bathroom tile, the exposed flushometer h<strong>and</strong>le, button or<br />
piping should be protected from any splattering of cleaner. Acids <strong>and</strong><br />
cleaning fluids can discolor or remove chrome plating.<br />
When assistance is required, please contact<br />
<strong>Sloan</strong> Technical Support at: 1-888-SLOAN-14 (1-888-756-2614).<br />
Manual<br />
Flushometers
Manual<br />
Flushometers<br />
10B<br />
10A<br />
9B<br />
9A<br />
PARTS LIST<br />
5A<br />
8<br />
5B<br />
8<br />
6A<br />
Crown ®<br />
shown<br />
6B<br />
NOTE: For Crown flushometers made<br />
prior to 2004, please refer to Naval<br />
flushometer section on page 36<br />
7<br />
7<br />
3B<br />
1<br />
2<br />
3A<br />
4<br />
13<br />
NOTE: Crown II No Longer Available<br />
As A Complete Assembly. <strong>Repair</strong> <strong>Parts</strong><br />
Remain Available For A Limited Time.<br />
Item<br />
No. Code No. Part No. Description<br />
1. 0332006 CR-116 CP Cover<br />
2. 0332030 CR-133 Cover O-ring<br />
3. 0332045 CR-132-A CP H<strong>and</strong>le <strong>and</strong> Cover Trim Ring Kit (Includes items<br />
3A & 3B) (CROWN ® II ONLY)<br />
0332046 CR-132-A PVDPB H<strong>and</strong>le <strong>and</strong> Cover Trim Ring Kit (Includes<br />
items 3A & 3B) (CROWN ® II ONLY)<br />
0332048 CR-132-A PVDBN H<strong>and</strong>le <strong>and</strong> Cover Trim Ring Kit (Includes<br />
items 3A & 3B) (CROWN ® II ONLY)<br />
0332049 CR-132-A PVDSF H<strong>and</strong>le <strong>and</strong> Cover Trim Ring Kit (Includes<br />
items 3A & 3B) (CROWN ® II ONLY)<br />
3A. 0332035 CR-134 Cover Trim Ring (CROWN ® ONLY)<br />
0332009 CR-120 PVDPB Cover Trim Ring (CROWN ® II ONLY)<br />
0332032 CR-120 PVDGP Cover Trim Ring (CROWN ® II ONLY)<br />
0332033 CR-120 PVDBN Cover Trim Ring (CROWN ® II ONLY)<br />
0332034 CR-120 PVDSF Cover Trim Ring (CROWN ® II ONLY)<br />
3B. 0332005 CR-113 PVDPB H<strong>and</strong>le Trim Ring (CROWN ® II ONLY)<br />
0332028 CR-113 PVDBN H<strong>and</strong>le Trim Ring (CROWN ® II ONLY)<br />
0332029 CR-113 PVDSF H<strong>and</strong>le Trim Ring (CROWN ® II ONLY)<br />
4. 3332003 CR-1004-A Piston Kit – 1.6 gpf/6.0 Lpf Water Closet<br />
3332004 CR-1005-A Piston Kit – 1.0 gpf/3.8 Lpf Urinal<br />
3332005 CR-1006-A Piston Kit – 0.5 gpf/1.9 Lpf Urinal<br />
0372008 WES-16-A Piston Kit – 1.28 gpf/4.8 Lpf Closet<br />
ALL PISTON KITS INCLUDE CR-125-A MAIN SEAT AND CR-124-A INSIDE COVER<br />
ASSEMBLY AS SHOWN IN ITEM 4. PISTON KIT COMPONENTS TABLE TO THE RIGHT.<br />
16B<br />
11<br />
12<br />
13A<br />
21 22 23<br />
14<br />
16A<br />
20<br />
19<br />
15<br />
17<br />
18<br />
TAILPIECES,<br />
CONTROL STOPS<br />
AND FLUSH<br />
CONNECTIONS<br />
For additional<br />
information on<br />
tailpieces, control<br />
stops <strong>and</strong> flush<br />
connections see<br />
Showerheads, <strong>Parts</strong><br />
<strong>and</strong> Accessories Tab.<br />
Finish legend<br />
CP Chrome Plate<br />
PVDPB Polished Brass<br />
PVDBN Brushed Nickel<br />
PVDSF Satin Chrome<br />
30<br />
<strong>Repair</strong> <strong>Parts</strong> <strong>and</strong> <strong>Maintenance</strong> <strong>Guide</strong><br />
Crown ® Flushometer<br />
Crown ® II (Obsolete)<br />
Item<br />
No. Code No. Part No. Description<br />
5A. 0302353 B-30-A ADA-Compliant H<strong>and</strong>le Assembly CP<br />
5B. 0302390 B-73-A ADA-Compliant H<strong>and</strong>le Assembly CP<br />
6A. 3332006 CR-1007 H<strong>and</strong>le <strong>Repair</strong> Kit<br />
6B. 3302306 B-51-A H<strong>and</strong>le <strong>Repair</strong> Kit<br />
7. 5301139 A-31 H<strong>and</strong>le Gasket – 48 per package<br />
8. 0302389 B-74-A H<strong>and</strong>le Grip Sub-Assembly ADA<br />
9A. 0302309 B-56 Sleeve<br />
9B. 0302109 B-7-A CP Socket Assembly<br />
10A. 0302354 B-53 H<strong>and</strong>le Socket<br />
10B. 0301082 A-6 CP H<strong>and</strong>le Coupling<br />
11. 3393004 V-600-AA 3/4” (19 mm) x 9” (229 mm) Vacuum Breaker -<br />
6 per package<br />
3393006 V-600-AA 1-1/4” (32 mm) x 9” (229 mm) Vacuum Breaker -<br />
6 per package<br />
3393007 V-600-AA 1-1/2” (38 mm) x 9” (229 mm) Vacuum Breaker -<br />
6 per package<br />
12. 3323182 V-651-A High Back Pressure Vacuum Breaker <strong>Repair</strong> Kit<br />
13. 3332000 CR-1008-A 3/4” (19 mm) Spud Coupling Assembly<br />
3332001 CR-1009-A 1-1/4” (32 mm) Spud Coupling Assembly<br />
3332002 CR-1010-A 1-1/2” (38 mm) Spud Coupling Assembly<br />
13A. SEE SLIP JOINT GASKETS AND RINGS TABLE ON BOTTOM, PAGE 25<br />
14. 0308676 H-550 Stop Coupling<br />
15. 0308801 H-551-A Adjustable Tailpiece (2-1/16” /52 mm long)<br />
16A. 5308696 H-553 O-ring – 24 per package<br />
16B. 5308381 H-552 Locking Ring – 12 per package<br />
17. 0388000 H-700-A 1” Screwdriver Bak-Chek ® Stop CP<br />
0388001 H-700-A 3/4” Screwdriver Bak-Chek ® Stop CP<br />
18. 3308853 H-541-ASD Control Stop <strong>Repair</strong> Kit †<br />
3308856 H-543-ASD Control Stop <strong>Repair</strong> Kit ‡ for 3/4” Stops H-600, H-640<br />
19. 0308612 H-622 CP Bonnet †<br />
0308843 H-577 CP Bonnet ‡ – OBSOLETE<br />
20. 3308840 H-573-A Locking V<strong>and</strong>al Resistant Control Stop Cap includes<br />
H-573 Stop Cap CP <strong>and</strong> H-648 Friction Ring †<br />
0308848 H-582 Locking V<strong>and</strong>al Resistant Control Stop Cap CP ‡<br />
21. 3308651 H-651 V<strong>and</strong>al Resistant Control Stop Cap Assembly †<br />
22. 3308866 H-574 Control Stop Cap w/Bumper (-YO Variation) †<br />
23. 3308867 H-576 Control Stop Cap w/Extended Bumper<br />
(-YG Variation) †<br />
— 0305190 EL-190-A H<strong>and</strong>le Adapter (manual only) for Optima ® Version<br />
(not shown) to convert to manual<br />
† For use w/H-700-A 1'' & 3/4” <strong>and</strong> H-600-A 1'' Screwdriver Bak-Chek ® Control Stops.<br />
‡ For use w/H-600-A 3/4” Screwdriver Bak-Chek ® Control Stops.<br />
ITEM 4. PISTON KIT COMPONENTS<br />
Item Code No. Part No. Description<br />
A. 0332000 CR-124-A Inside Cover Sub-Assembly<br />
B. *** *** Piston Cover<br />
C. 5332095 CR-68-A Molded Cup –<br />
12 per package<br />
D. 5328019 SH-406 Spring – 12 per package<br />
E. *** *** Relief <strong>Valve</strong><br />
F. 0307116 G-95 Relief <strong>Valve</strong> Seat<br />
G. *** *** Piston Body<br />
H. 0332013 CR-125-A Main Seat – 6 per package<br />
I. 0307210 G-85 Filter O-ring<br />
J. 0305135 EL-110 O-ring<br />
*** Indicates component is NOT available separately<br />
The information contained in this document is subject to change without notice.<br />
I<br />
A<br />
B<br />
C<br />
D<br />
E<br />
F<br />
G<br />
H<br />
J
TROUBLESHOOTING GUIDE<br />
IMPORTANT: The CROWN ® flushometer is engineered for quiet operation.<br />
Excessive water flow creates noise, while too little water flow may not satisfy<br />
the needs of the fixture. Proper adjustment is made when plumbing fixture is<br />
cleansed after each flush without splashing water out from the lip AND a<br />
quiet flushing cycle is achieved.<br />
Never open Control Stop to where the flow from the valve exceeds the flow<br />
capability of the fixture. In the event of a valve failure, the fixture must be<br />
able to accommodate a continuous flow from the valve.<br />
ATTENTION INSTALLERS: With the exception of the control stop inlet,<br />
DO NOT USE pipe sealant or plumbing grease on any valve component or<br />
coupling! To protect the chrome or special finish of <strong>Sloan</strong> flushometers,<br />
DO NOT USE toothed tools to install or service these valves. Use our A-50<br />
Super-Wrench or other smooth-jawed wrench to secure couplings.<br />
Regulations for low consumption fixtures (1.6 gpf/6.0 Lpf closets <strong>and</strong><br />
1.0 gpf/3.8 Lpf urinals) prohibit use of higher flush volumes.<br />
1. <strong>Valve</strong> does not function.<br />
A. Control stop or main valve is closed.<br />
Open control stop or main valve.<br />
B. H<strong>and</strong>le assembly is worn.<br />
Install <strong>Sloan</strong> h<strong>and</strong>le repair kit, or replace h<strong>and</strong>le.<br />
C. Relief valve is worn <strong>and</strong> sticking in UP position.<br />
Replace piston.<br />
2. Insufficient volume of water to adequately siphon fixture.<br />
A. Control stop not open enough.<br />
Adjust control stop for desired delivery of water.<br />
B. Urinal piston parts inside a closet valve.<br />
Replace piston parts with proper closet piston.<br />
C. Low consumption valve installed on a non-low consumption fixture.<br />
Replace with proper flushometer. Crown ® flushometers are not<br />
available with flush volume higher than 1.6 gpf/6.0 Lpf.<br />
D. Inadequate volume or pressure at supply.<br />
Increase water pressure or supply (flow) to valve. Consult factory for<br />
assistance.<br />
COVER<br />
BODY<br />
HANDLE<br />
COUPLING<br />
HANDLE ASSEMBLY<br />
FLUSH CONNECTION<br />
(VACUUM BREAKER)<br />
SPUD COUPLING<br />
CROWN ®<br />
SHOWN<br />
Piston Water Closet Water Closet Urinal Urinal Water Closet<br />
Identification CR-135-A CR-159-A CR-137-A CR-138-A G-154-A<br />
Chart 0332024 0332106 0332025 0332026 0307103<br />
Piston<br />
Color<br />
Stem<br />
Grooves<br />
Cap Color<br />
COVER<br />
TRIM RING<br />
STOP COUPLING<br />
CONTROL<br />
STOP<br />
SUPPLY<br />
TAILPIECE FLANGE<br />
OUTLET<br />
COUPLING<br />
SPUD FLANGE<br />
COVER<br />
BODY<br />
HANDLE<br />
TRIM RING<br />
HANDLE ASSEMBLY<br />
FLUSH CONNECTION<br />
(VACUUM BREAKER)<br />
SPUD COUPLING<br />
CROWN ® II<br />
SHOWN<br />
COVER<br />
TRIM RING<br />
STOP COUPLING<br />
CONTROL<br />
STOP<br />
SUPPLY<br />
TAILPIECE FLANGE<br />
OUTLET<br />
COUPLING<br />
SPUD FLANGE<br />
1.6 gpf (6.0 Lpf) 2.4 gpf (9.0 Lpf) 1.0 gpf (3.8 Lpf) 0.5 gpf (1.9 Lpf) 1.28 gpf (4.8 Lpf)<br />
Barrel (Large Ribs<br />
or Small Ribs)<br />
Cap Color Green Blue Yellow Red Deep Purple<br />
Piston Color Clear Blue Clear Clear Black<br />
Barrel Large Ribs Large Ribs Small Ribs Small Ribs Large Ribs<br />
Grooves 1 0 1 3 0<br />
31<br />
<strong>Repair</strong> <strong>Parts</strong> <strong>and</strong> <strong>Maintenance</strong> <strong>Guide</strong><br />
Crown ® Flushometer<br />
Crown ® II (Obsolete)<br />
3. Length of flush too short (short flushing) or valve closes off<br />
immediately.<br />
A. Piston assembly is not h<strong>and</strong>-tight.<br />
Screw the assembly h<strong>and</strong>-tight.<br />
B. Enlarged bypass orifice from corrosion or damage.<br />
Install NEW inside parts kit to correct problem <strong>and</strong> update flushometer.<br />
C. Urinal piston in closet flushometer.<br />
Replace piston with proper closet piston.<br />
D. Low consumption piston installed in non-low consumption fixture.<br />
Replace with proper flushometer. Crown ® flushometers are not<br />
available with flush volume higher than 1.6 gpf/6.0 Lpf.<br />
E. H<strong>and</strong>le assembly worn.<br />
Install <strong>Sloan</strong> h<strong>and</strong>le repair kit.<br />
4. Length of flush too long (long flushing) or fails to close off.<br />
A. Piston is not seating properly or bypass orifice is clogged because of<br />
foreign material, or bypass orifice is clogged by an invisible gelatinous<br />
film from “over-treated” water.<br />
Disassemble the working parts <strong>and</strong> wash thoroughly. NOTE: Size of the<br />
orifice in the bypass is of utmost importance for the proper metering of<br />
water into the upper chamber of the valve. DO NOT enlarge or damage<br />
this orifice. Replace Piston if cleaning does not correct problem.<br />
B. Line pressure has dropped <strong>and</strong> is not sufficient to force Relief <strong>Valve</strong><br />
to seat.<br />
Shut off all control stops until pressure has been restored, then open<br />
them again.<br />
C. CR-125-A main seat is fouled with debris or is worn.<br />
Clean or replace CR-125-A main seat.<br />
5. Leaking at H<strong>and</strong>le Assembly.<br />
A. The B-85 seal may have deteriorated.<br />
Install new B-85 seal. NOTE: The B-85 seal will easily slide onto<br />
the bushing if it is wet.<br />
B. H<strong>and</strong>le gasket has been omitted.<br />
Install A-31 h<strong>and</strong>le gasket or <strong>Sloan</strong> h<strong>and</strong>le repair kit.<br />
C. <strong>Valve</strong> h<strong>and</strong>le bushing is worn.<br />
Install <strong>Sloan</strong> h<strong>and</strong>le repair kit.<br />
CARE AND CLEANING INSTRUCTIONS<br />
DO NOT use abrasive or chemical cleaners (including chlorine bleach) to<br />
clean flushometers that may dull the luster <strong>and</strong> attack the chrome or special<br />
decorative finishes. Use ONLY mild soap <strong>and</strong> water, then wipe dry with clean<br />
cloth or towel.<br />
While cleaning the bathroom tile, the flushometer should be protected from<br />
any splattering of cleaner. Acids <strong>and</strong> cleaning fluids will discolor or remove<br />
chrome plating.<br />
When assistance is required, please contact<br />
<strong>Sloan</strong> Technical Support at:<br />
1-888-SLOAN-14 (1-888-756-2614).<br />
Manual<br />
Flushometers
Manual<br />
Flushometers<br />
TAILPIECES, CONTROL STOPS<br />
AND FLUSH CONNECTIONS<br />
For additional information on<br />
tailpieces, control stops <strong>and</strong> flush<br />
connections see Showerheads, <strong>Parts</strong><br />
<strong>and</strong> Accessories Tab.<br />
ITEM 6A. SLIP JOINT GASKETS AND RINGS<br />
Size Code No. Part No. Description<br />
1-1/2” 5306058 F-3 Red Friction Ring<br />
5322001 VBF-5 Black Slip Joint Gasket<br />
0319086/5319086 S-30 Flexible Seat<br />
0319079 S-21 Rigid Seat (rubber over brass)<br />
1-1/2” x 1-1/4” 0396062 F-105 Slip Joint Gasket – Rigid<br />
1-1/4” 5306057 F-3 Red Friction Ring<br />
5322176 VBF-5 Black Slip Joint Gasket<br />
0307052/5307052 G-21 Rigid Seat (rubber over brass)<br />
1” 5306056 F-3 Red Friction Ring<br />
5306115 F-5 Black Slip Joint Gasket<br />
3/4” 5306055 F-3 Red Friction Ring<br />
5306113 F-5 Black Slip Joint Gasket<br />
6A<br />
32<br />
<strong>Repair</strong> <strong>Parts</strong> <strong>and</strong> <strong>Maintenance</strong> <strong>Guide</strong><br />
Gem 2 ® Flushometer<br />
PARTS LIST<br />
Item<br />
No. Code No. Part No. Description<br />
1. 0307142 G-105 CP Cover<br />
2. 0307139 G-106 Slip Disc<br />
3. 3307135 G-1022-A Piston Kit – 1.28 gpf/4.8 Lpf Water Closet<br />
0307193 G-1007-A Piston Kit – 3.5 gpf/13.2 Lpf Water Closet<br />
0307195 G-1016-A Piston Kit – 1.6 gpf/6 Lpf Water Closet<br />
0307192 G-1009-A Piston Kit – 1.5 gpf/5.7 Lpf Urinal<br />
0307185 G-1017-A Piston Kit – 1.0 gpf/3.8 Lpf Urinal<br />
3307133 G-1018-A Piston Kit – 0.5 gpf/1.9 Lpf Urinal<br />
3307134 G-1019-A Piston Kit – 2.4 gpf/9.0 Lpf Water Closet<br />
PISTON KITS FOR OLD STYLE ADJUSTABLE GEM FLUSHOMETERS<br />
0307043 G-1003-A Piston Kit – Water Closet<br />
0307044 G-1002-A Piston Kit – Urinal<br />
ALL PISTON KITS INCLUDE G-21 MAIN SEAT (See next page)<br />
4. 5323005 V-500-AA 3/4” x 9'' Vacuum Breaker – 6 per package<br />
5323006 V-500-AA 1-1/4” x 9'' Vacuum Breaker – 6 per package<br />
5323007 V-500-AA 1-1/2” x 9'' Vacuum Breaker – 6 per package<br />
5. 3323192 V-551-A Vacuum Breaker <strong>Repair</strong> Kit<br />
6. 3332002 CR-1010-A 1-1/2” (38 mm) Spud Coupling<br />
3332001 CR-1009-A 1-1/4” (32 mm) Spud Coupling<br />
3332000 CR-1008-A 3/4” (19 mm) Spud Coupling<br />
6A. SEE SLIP JOINT GASKETS AND RINGS TABLE BELOW LEFT<br />
7. 0308676 H-550 Stop Coupling<br />
8. 0308801 H-551-A Adjustable Tailpiece 2-1/16” (St<strong>and</strong>ard Length)<br />
9A. 5308696 H-553 O-ring – 24 per package<br />
9B. 5308381 H-552 Locking ring – 12 per package<br />
10. 0388000 H-700-A 1'' Screwdriver Bak-Chek ® Stop CP – complete<br />
0388001 H-700-A 3/4” Screwdriver Bak-Chek ® Stop CP – complete<br />
11. 3308853 H-541-A Control Stop <strong>Repair</strong> Kit*<br />
3308856 H-543-A Control Stop <strong>Repair</strong> Kit**<br />
12. 0308612 H-622 CP Bonnet*<br />
0308843 H-577 CP Bonnet** – OBSOLETE<br />
13. 3308840 H-573-A Control Stop Cap CP*<br />
0308848 H-582 Control Stop Cap CP**<br />
14. 3308791 H-1010-A V<strong>and</strong>al Resistant Control Stop Cap Assembly*<br />
3308790 H-1009-A V<strong>and</strong>al Resistant Control Stop Cap Assembly**<br />
15. 3308866 H-574 Control Stop Cap w/Bumper (-YO Variation)*<br />
16. 3308867 H-576 Control Stop Cap w/Extended Bumper (-YG Variation)*<br />
HANDLE REPAIR KIT<br />
17. 0307100 G-143 H<strong>and</strong>le Assembly<br />
18. 5307074 G-50-A H<strong>and</strong>le <strong>Repair</strong> Kit – 6 per package<br />
19. 5307065 G-35 H<strong>and</strong>le Gasket – 48 per package<br />
20. 5302297 B-39 H<strong>and</strong>le Seal – 12 per package<br />
21. 0307024 G-145 H<strong>and</strong>le Grip<br />
22. 0307020 G-144 H<strong>and</strong>le Socket<br />
*For use with 1” <strong>and</strong> 3/4” H-700-A <strong>and</strong> 1” H-600-A Bak-Chek ® screwdriver control stop<br />
**For use with 3/4" H-600-A Bak-Chek ® screwdriver control stop
Piston<br />
Cover<br />
Color<br />
Piston<br />
Color<br />
Barrel<br />
(Slotted<br />
or Solid)<br />
Stem<br />
Grooves<br />
Gem 2 Pistons can be<br />
identified by the color,<br />
shape <strong>and</strong> marking of the<br />
above components.<br />
ITEM 3. PISTON KITS<br />
33<br />
<strong>Repair</strong> <strong>Parts</strong> <strong>and</strong> <strong>Maintenance</strong> <strong>Guide</strong><br />
Gem 2 ® Flushometer<br />
Code No. Part No. Description Cover Color Piston Color Barrel Grooves<br />
0307193 G-1007-A 3.5 gpf (13.2 Lpf) – Water Closet White Gray Slotted 2<br />
0307195 G-1016-A 1.6 gpf (6.0 Lpf) – Water Closet Green Black Slotted 2*<br />
0307192 G-1009-A 1.5 gpf (5.7 Lpf) – Urinal Black Black Solid 2<br />
0307185 G-1017-A 1.0 gpf (3.8 Lpf) – Urinal Yellow Black Solid 1<br />
3307133 G-1018-A 0.5 gpf (1.8 Lpf) – Urinal Red Black Solid 3<br />
3307134 G-1019-A 2.4 gpf (9.0 Lpf) – Water Closet Blue Gray Slotted 0<br />
— G-1022-A 1.28 gpf (4.8 Lpf) – Water Closet Deep Purple Black Slotted 0<br />
G-1007-A G-1016-A G-1009-A G-1017-A G-1018-A G-1019-A G-1022-A<br />
3.5 gpf<br />
(13.2 Lpf)<br />
ITEM 3. PISTON COMPONENTS<br />
Item Code No. Part No. Description<br />
A. *** *** Piston Cover<br />
B. 5307106 G-78 Molded Cup – 12 per package<br />
C. 0307130 G-102 Spring<br />
D. *** *** Relief <strong>Valve</strong><br />
E. 0307116 G-95 Relief <strong>Valve</strong> Seat<br />
F. *** *** Piston Body<br />
G. 0307210 G-85 Filter O-ring<br />
H. 5307052 G-21 Main Seat – 6 per package<br />
REPAIR KIT<br />
1.6 gpf<br />
(6.0 Lpf)<br />
*Prior to February 2006-1 Groove<br />
1.5 gpf<br />
(5.7 Lpf)<br />
Code No. Part No. Description<br />
3307128 G-1011-A <strong>Repair</strong> Kit includes Items: 2, 6, 7, B, C, E,<br />
G & H<br />
For old style adjustable GEM flushometers use kit: G-1005-A<br />
*** Indicates component is NOT available separately<br />
1.0 gpf<br />
(3.8 Lpf)<br />
0.5 gpf<br />
(1.8 Lpf)<br />
COVER<br />
BODY<br />
HANDLE<br />
COUPLING<br />
HANDLE<br />
ASSEMBLY<br />
SPUD COUPLING<br />
2.4 gpf<br />
(9.0 Lpf)<br />
1.28 gpf<br />
(4.8 Lpf)<br />
STOP<br />
COUPLING<br />
FLUSH CONNECTION<br />
(VACUUM BREAKER)<br />
CONTROL<br />
STOP<br />
TAILPIECE<br />
SUPPLY FLANGE<br />
OUTLET<br />
COUPLING<br />
SPUD FLANGE<br />
Manual<br />
Flushometers
Manual<br />
Flushometers<br />
REPAIR PARTS FOR OLD STYLE GEM FLUSHOMETERS (PRE-1985)<br />
Adjustable Cover<br />
Item<br />
No. Code No. Part No. Description<br />
1. — G-24 CP Cover Screw – OBSOLETE<br />
2. — G-23 CP Cover – OBSOLETE<br />
— G-26 CP Cover for Bumper – OBSOLETE<br />
3. — G-27 Bumper (12 per package) – OBSOLETE<br />
4. 0307058 G-25 Cover Gasket (12 per package)<br />
5. — G-4 RB Inside Cover – OBSOLETE<br />
6. — G-6 RB Regular Screw – OBSOLETE<br />
7. — S-26 Packing<br />
8. — S-24 Packing Disc<br />
9. — G-10 RB Packing Nut – OBSOLETE<br />
10. — G-65 Gasket – OBSOLETE<br />
11. — G-5 Gasket<br />
SPUD COUPLING FOR OLD STYLE GEM FLUSHOMETERS<br />
(PRE-MAY, 2003)<br />
Item<br />
No. Code No. Part No. Description<br />
1. 0306125 F-5-A 3/4” Spud Coupling<br />
0305140 F-5-A 1-1/4” Spud Coupling<br />
0306146 F-5-A 1-1/2” Spud Coupling<br />
1A. SEE SLIP JOINT GASKETS AND RINGS TABLE ON BOTTOM, PAGE 30<br />
1A<br />
1<br />
2<br />
3<br />
4<br />
5<br />
6<br />
7<br />
8<br />
9<br />
10<br />
11<br />
1<br />
34<br />
<strong>Repair</strong> <strong>Parts</strong> <strong>and</strong> <strong>Maintenance</strong> <strong>Guide</strong><br />
Gem 2 ® Flushometer<br />
HANDLE ASSEMBLY FOR OLD STYLE GEM FLUSHOMETERS<br />
(PRE-MAY, 2003)<br />
Item<br />
No. Code No. Part No. Description<br />
1. 0307100 G-143-A H<strong>and</strong>le Assembly – 6 per package<br />
2. 5307074 G-50-A H<strong>and</strong>le <strong>Repair</strong> Kit – 6 per package<br />
3. 5307065 G-35 H<strong>and</strong>le Gasket – 48 per package<br />
4. 5302297 B-39 H<strong>and</strong>le Seal – (12 per package)<br />
5. — G-36 H<strong>and</strong>le Grip<br />
6. — G-28 H<strong>and</strong>le Socket<br />
REPAIR PARTS FOR OLD STYLE PISTON<br />
Item<br />
No. Code No. Part No. Description<br />
12. 0307105 G-77 Piston Cover<br />
13. 0307106 G-78 Molded Cup<br />
14. 0307113 G-84 Spring<br />
15. 0307110 B-81-A Relief <strong>Valve</strong><br />
16. 0307112 G-83 Relief <strong>Valve</strong> Seat<br />
17. — G-75 Closet Piston Body<br />
— G-76 Urinal Piston Body<br />
18. 0307052 G-21 Main Seat<br />
PISTON KITS FOR OLD STYLE ADJUSTABLE GEM VALVES<br />
Code No. Part No. Description Piston Color Barrel Grooves<br />
0307044 G-1002-A Urinal Black Solid 0<br />
0307043 G-1003-A Water Closet Black Slotted 0<br />
G-1002-A G-1003-A<br />
12<br />
13<br />
14<br />
15<br />
16<br />
17<br />
18
TROUBLESHOOTING GUIDE<br />
IMPORTANT: The GEM flushometer is engineered for quiet operation.<br />
Excessive water flow creates noise, while too little water flow may not satisfy<br />
the needs of the fixture. Proper adjustment is made when plumbing fixture is<br />
cleansed after each flush without splashing water out from the lip AND a<br />
quiet flushing cycle is achieved.<br />
Never open Control Stop to where the flow from the valve exceeds the flow<br />
capability of the fixture. In the event of a valve failure, the fixture must be<br />
able to accommodate a continuous flow from the valve.<br />
ATTENTION INSTALLERS: With the exception of the control stop inlet,<br />
DO NOT USE pipe sealant or plumbing grease on any valve component or<br />
coupling! To protect the chrome or special finish of <strong>Sloan</strong> flushometers,<br />
DO NOT USE toothed tools to install or service these valves. Use our A-50<br />
Super-Wrench or other smooth-jawed wrench to secure couplings.<br />
Regulations for low consumption fixtures (1.6 gpf/6.0 Lpf closets <strong>and</strong><br />
1.0 gpf/3.8 Lpf urinals) prohibit use of higher flush volumes.<br />
1. <strong>Valve</strong> does not function.<br />
A. Control stop or main valve is closed. Open control stop or main valve.<br />
B. H<strong>and</strong>le assembly is worn. Install h<strong>and</strong>le repair kit G-50-A or replace<br />
h<strong>and</strong>le.<br />
C. Relief valve is worn <strong>and</strong> sticking in UP position. Replace piston.<br />
2. Insufficient volume of water to adequately siphon fixture.<br />
A. Control stop not open enough. Adjust control stop for desired delivery<br />
of water.<br />
B. Urinal piston parts inside a closet valve. Replace piston parts with<br />
proper closet piston.<br />
C. Low consumption valve installed on a non-low consumption fixture.<br />
Replace with proper piston kit.<br />
D. Inadequate volume or pressure at supply. Increase water pressure or<br />
supply (flow) to valve. Consult factory for assistance.<br />
3. Length of flush too short (short flushing) or<br />
valve closes off immediately.<br />
A. Piston assembly is not h<strong>and</strong>-tight. Screw the assembly h<strong>and</strong>-tight.<br />
B. Enlarged by-pass orifice from corrosion or damage. Install NEW inside<br />
parts kit to correct problem <strong>and</strong> update flushometer.<br />
C. Urinal piston in closet flushometer. Replace piston with proper closet<br />
piston.<br />
D. Low consumption piston installed in non-low consumption fixture.<br />
Replace with proper piston kit.<br />
E. H<strong>and</strong>le assembly worn. Install h<strong>and</strong>le repair kit G-50-A.<br />
35<br />
<strong>Repair</strong> <strong>Parts</strong> <strong>and</strong> <strong>Maintenance</strong> <strong>Guide</strong><br />
Gem 2 ® Flushometer<br />
4. Length of flush too long (long flushing) or fails to close off.<br />
A. Piston is not seating properly or by-pass orifice is clogged because of<br />
foreign material, or by-pass orifice is clogged by an invisible<br />
gelatinous film from “over-treated” water. Disassemble the working<br />
parts <strong>and</strong> wash thoroughly.<br />
NOTE: Size of the orifice in the by-pass is of utmost importance for<br />
the proper metering of water into the upper chamber of the valve. DO<br />
NOT enlarge or damage this orifice. Replace piston if cleaning does<br />
not correct problem.<br />
B. Line pressure has dropped <strong>and</strong> is not sufficient to force relief valve to<br />
seat. Shut off all control stops until pressure has been restored, then<br />
open them again.<br />
C. 3.5 gpf closet piston has been used in a 1 or 1.5 gpf urinal or on a<br />
1.6 gpf toilet. Replace with proper piston.<br />
D. G-21 main seat is fouled with debris or is worn. Clean or replace<br />
main seat.<br />
5. Leaking at h<strong>and</strong>le assembly.<br />
A. The B-39 seal may have deteriorated. Install new B-39 seal.<br />
NOTE: The seal will easily slide right onto the bushing if it is wet.<br />
B. H<strong>and</strong>le gasket has been omitted. Install G-35 h<strong>and</strong>le gasket or <strong>Sloan</strong><br />
h<strong>and</strong>le repair kit G-50-A.<br />
C. <strong>Valve</strong> h<strong>and</strong>le bushing is worn. Install <strong>Sloan</strong> h<strong>and</strong>le repair kit G-50-A.<br />
CARE AND CLEANING INSTRUCTIONS<br />
DO NOT use abrasive or chemical cleaners to clean flushometers as they<br />
may dull the luster <strong>and</strong> attack the chrome or special decorative finishes. Use<br />
ONLY mild soap <strong>and</strong> water, then wipe dry with clean cloth or towel.<br />
While cleaning the bathroom tile, the flushometer should be protected from<br />
any splattering of cleaner. Acids <strong>and</strong> cleaning fluids can discolor or remove<br />
chrome plating.<br />
When assistance is required, please contact<br />
<strong>Sloan</strong> Technical Support at: 1-888-SLOAN-14 (1-888-756-2614).<br />
Manual<br />
Flushometers
Manual<br />
Flushometers<br />
22<br />
27<br />
PARTS LIST<br />
22<br />
23<br />
23<br />
26<br />
21<br />
24<br />
Item<br />
No. Code No. Part No. Description<br />
1. 0314229 CN-86-A Cover Assembly CP<br />
0314310 CN-89-A Cover Assembly CP One Pint*<br />
1.6 gpf/6.0 Lpf, 1.0 gpf/3.8 Lpf<br />
2. 5314010 CN-1007-A Cap Screw <strong>Repair</strong> Kit – 6 per package<br />
3. 0314208 CN-36 Cover Screw CP<br />
4. 0314209 CN-30 Cover Screw Gasket<br />
5. 0314304 CN-84 Cover<br />
6. 0214019 CN-55 Cover Liner<br />
7. 3314015 CN-1008-A Regulating Screw <strong>Repair</strong> Kit**<br />
8. 0314303 CN-81 Volume Adjustment Gasket<br />
9. 0314315 CN-88-A Low Consumption Volume Adjustment Sleeve<br />
Sub-Assembly 1.6 gpf/6.0 Lpf, 1.0 gpf/3.8 Lpf<br />
10. 0314302 CN-80 Volume Adjustment Screw<br />
11. 0314300 CN-78 Volume Adjustment Sleeve<br />
0314307 CN-87 Volume Adjustment Sleeve One Pint***<br />
12. 0314301 CN-79 Volume Adjustment Housing<br />
13. 5314243 CN-76 Cover Gasket – 12 per package<br />
14. 0314016 CN-1002-A Piston – Closet<br />
0314017 CN-1003-A Piston – Urinal<br />
15. 0314234 CN-21-A Main Seat Assembly<br />
16. 0314224 CN-111-A Main Seat<br />
17. 0314220 CN-113 Main Seat Ring<br />
18. 0314020 CN-3 Body CP (Not sold separately)<br />
19. 5301139 A-31 H<strong>and</strong>le Gasket – 48 per package<br />
28<br />
25<br />
9<br />
20<br />
19<br />
30<br />
13<br />
14<br />
15<br />
31<br />
18<br />
29<br />
4 3<br />
5<br />
6<br />
8<br />
10<br />
11<br />
12<br />
2<br />
7<br />
16<br />
17<br />
31A<br />
1<br />
36<br />
<strong>Repair</strong> <strong>Parts</strong> <strong>and</strong> <strong>Maintenance</strong> <strong>Guide</strong><br />
Naval ® Flushometer<br />
35<br />
34A<br />
34B<br />
32<br />
36<br />
33<br />
38<br />
41<br />
40<br />
37<br />
39<br />
Also for use with Crown ® (Old style),<br />
Star <strong>and</strong> Marine<br />
Item<br />
No. Code No. Part No. Description<br />
20. 5302297 B-39 H<strong>and</strong>le Seal – 12 per package<br />
21. 0302390 B-73-A Triple Seal H<strong>and</strong>icap H<strong>and</strong>le Assembly (ADA<br />
Compliant)<br />
22. 0301082 A-6 H<strong>and</strong>le Coupling CP<br />
23. 0302109 B-7-A Socket Assembly CP<br />
24. 0302389 B-74-A H<strong>and</strong>icap H<strong>and</strong>le Grip CP (ADA Compliant)<br />
25. 3302306 B-51-A Triple Seal H<strong>and</strong>le <strong>Repair</strong> Kit – 1 per package<br />
26. 0303351 C-42-A 3'' Push Button Assembly CP<br />
27. 3303347 C-1000-A 3'' Push Button Replacement Kit<br />
28. 3303396 C-64-A 3'' Push Button <strong>Repair</strong> Kit<br />
29. 5323005 V-500-A 3/4'' x 9'' Vacuum Breaker<br />
5323006 V-500-A 1-1/4'' x 9'' Vacuum Breaker<br />
5323007 V-500-A 1-1/2'' x 9'' Vacuum Breaker<br />
30. 3323192 V-551-A Vacuum Breaker <strong>Repair</strong> Kit<br />
31. 0306125 F-5-AW 3/4'' Spud Coupling CP<br />
0306140 F-5-AU 1-1/4'' Spud Coupling CP<br />
0306146 F-5-AT 1-1/2'' Spud Coupling CP<br />
31A. SEE SLIP JOINT GASKETS AND RINGS TABLE ON BOTTOM, PAGE 30<br />
32. 0308676 H-550 Stop Coupling CP<br />
33. 0314289 NH-551-A Adjustable Tailpiece 2-1/16'' CP<br />
34A. 5308696 H-553 O-ring – 24 per package<br />
34B. 5308381 H-552 Locking ring – 12 per package<br />
35. 0308063 H-6 Ground Joint Stop Coupling CP<br />
36. 0314028 NH-5 Ground Joint Tailpiece 1-5/8''<br />
37. 0388022 H-710-A 1'' Adjustable Tailpiece SD Bak-Chek ® Control Stop CP<br />
0388025 H-710-A 3/4'' Adjustable Tailpiece SD Bak-Chek ® Control Stop CP<br />
38. 0388024 H-710-AG 1'' Ground Joint Screwdriver Bak-Chek ® Control Stop CP<br />
0388026 H-710-AG 3/4'' Ground Joint Screwdriver Bak-Chek ®<br />
Control Stop CP<br />
39. 3308853 H-541-A Control Stop <strong>Repair</strong> Kit †<br />
3308856 H-543-A Control Stop <strong>Repair</strong> Kit ‡<br />
40. 0308612 H-622 Bonnet CP †<br />
0308843 H-577 Bonnet CP ‡ – OBSOLETE<br />
41. 0308840 H-573 Control Stop Cap CP †<br />
0308848 H-582 Control Stop Cap CP ‡<br />
42. 3308772 H-1010-A V<strong>and</strong>al Resistant Stop Cap Assembly †<br />
3308790 H-1009-A V<strong>and</strong>al Resistant Stop Cap Assembly ‡<br />
43. 3308866 H-574 Control Stop Cap with Bumper †<br />
44. 3308867 H-576 Control Stop Cap with Extended Bumper †<br />
* Use CN-89-A Cover Assembly One-Pint for reduced flush volumes 1.6 gpf/6.0 Lpf, 1.0 gpf/3.8 Lpf<br />
** CN-1008-A Regulating Screw <strong>Repair</strong> Kit contains the parts shown plus the parts for old style adjusting screw<br />
as currently shown on the repair guide (CN-24, CN-25, CN-26, CN-61)<br />
*** Use CN-87 Volume Adjustment Sleeve One-Pint for reduced flush volumes<br />
† For use with 1" <strong>and</strong> 3/4" H-740-A-CP (less cap) <strong>and</strong> 1" H-540-A-CP (w/H-37 cap) Bak-Chek ® screwdriver<br />
control stops<br />
‡ For use with 3/4" H-740-A-CP Bak-Chek ® screwdriver control stops<br />
42<br />
43<br />
44<br />
TAILPIECES, CONTROL STOPS<br />
AND FLUSH CONNECTIONS<br />
For additional information on<br />
tailpieces, control stops <strong>and</strong> flush<br />
connections see Showerheads, <strong>Parts</strong><br />
<strong>and</strong> Accessories Tab.
K<br />
L<br />
HANDLE<br />
COVER<br />
BODY<br />
HANDLE<br />
COUPLING<br />
FLUSH CONNECTION<br />
(VACUUM BREAKER)<br />
SPUD COUPLING<br />
A<br />
B<br />
C<br />
D<br />
E<br />
F<br />
G<br />
H<br />
I<br />
J<br />
M<br />
CLOSET URINAL<br />
P<br />
TAILPIECE<br />
N<br />
O<br />
STOP COUPLING<br />
SPUD<br />
FLANGE<br />
CONTROL STOP<br />
SUPPLY<br />
FLANGE<br />
37<br />
<strong>Repair</strong> <strong>Parts</strong> <strong>and</strong> <strong>Maintenance</strong> <strong>Guide</strong><br />
Naval ® Flushometer<br />
NAVAL PISTON COMPONENTS (Items 14 thru 17 on previous page)<br />
Item Code No. Part No. Description<br />
A. 0314200 CN-17 Top Plate Screws – 24 per package<br />
B. 0314082 CN-15 Top Plate<br />
0314179 CN-15-A Top Plate – Shower <strong>Valve</strong> only<br />
C. 0314314 CN-92 Support Cup Lip Seal<br />
D. 5314188 CN-68-A Single Lip Cup – 12 per package<br />
E. 0314204 CN-57 Xpelor<br />
F. 0314228 CN-160 Piston Body<br />
G. 5328019 SH-406 Spring – 12 per package (Replaces S/CN-58<br />
Safety Bar)<br />
H. 0314078 CN-18-A Relief <strong>Valve</strong><br />
I. 5314226 CN-120 Relief <strong>Valve</strong> Seat – 12 per package<br />
J. 0314240 CN-123-AC <strong>Guide</strong> Assembly – Closet<br />
K. 0314231 CN-23 <strong>Guide</strong> – Closet<br />
L. 0314237 CN-144 Restriction Ring – Closet<br />
M. 0314242 CN-123-AU <strong>Guide</strong> Assembly – Urinal<br />
N. 0314189 CN-43 RC <strong>Guide</strong> – Urinal<br />
O. — CN-45 NK Restriction Ring – Urinal<br />
P. 0314234 CN-21-A Main Seat<br />
0314223 CN-121-A Main Seat – Shower <strong>Valve</strong> only<br />
NOTE: Naval ® pistons can be used to replace pistons in older Crown ® <strong>and</strong> Star flushometers.<br />
REPAIR KITS<br />
Code No. Part No. Description<br />
0314016 CN-1002-A Piston with Main Seat – Closet<br />
0314017 CN-1003-A Piston with Main Seat – Urinal<br />
5314094 CN-1004-A Piston Rebuild Kit – Closet & Urinal – 6 per package<br />
includes: 13, A, B, C, D, E, I, K, Cap Screw Gasket &<br />
Regulating Screw Packing<br />
5314184 CN-1006-A Piston Rebuild Kit – Shower – 6 per package<br />
includes: 13, A, B, C, D, E, I, K, Cap Screw Gasket &<br />
Regulating Screw Packing<br />
5314184 CN-1008-A Regulating Screw <strong>Repair</strong> Kit – includes: 2, 8, 9, CN-24<br />
Packing Disc, CN-25 Packing Gl<strong>and</strong>, CN-26 Packing<br />
Regulating Screw, CN-61 Screw Regulating Stable Piston<br />
0314191 CN-1009-A Piston with Main Seat – Shower<br />
5314050 CN-1010-A Crown ® /Naval ® <strong>Valve</strong> Washer Set – 6 per package<br />
includes: 13, 19, 20, C, D, I, K, Cap Screw Gasket &<br />
Regulating Screw Packing<br />
5319049 S-14-AA Double Cup <strong>Repair</strong> Kit (Old style Crown, Star <strong>and</strong> Marine)<br />
5319046 S-14-A Double Cup Lip Seal only<br />
(Old style Crown, Star <strong>and</strong> Marine)<br />
ITEM 31A. SLIP JOINT GASKETS AND RINGS<br />
Also for use with Crown ® (Old style),<br />
Star <strong>and</strong> Marine<br />
Size Code No. Part No. Description<br />
1-1/2” 5306058 F-3 Red Friction Ring<br />
5322001 VBF-5 Black Slip Joint Gasket<br />
0319086/5319086 S-30 Flexible Seat<br />
0319079 S-21 Rigid Seat (rubber over brass)<br />
1-1/2” x 1-1/4” 0396062 F-105 Slip Joint Gasket – Rigid<br />
1-1/4” 5306057 F-3 Red Friction Ring<br />
5322176 VBF-5 Black Slip Joint Gasket<br />
0307052/5307052 G-21 Rigid Seat (rubber over brass)<br />
1” 5306056 F-3 Red Friction Ring<br />
5306115 F-5 Black Slip Joint Gasket<br />
3/4” 5306055 F-3 Red Friction Ring<br />
5306113 F-5 Black Slip Joint Gasket<br />
Manual<br />
Flushometers
Manual<br />
Flushometers<br />
TROUBLESHOOTING GUIDE<br />
IMPORTANT: The NAVAL ® flushometer is engineered for quiet operation.<br />
Excessive water flow creates noise, while too little water flow may not satisfy<br />
the needs of the fixture. Proper adjustment is made when plumbing fixture is<br />
cleansed after each flush without splashing water out from the lip AND a<br />
quiet flushing cycle is achieved.<br />
Never open Control Stop to where the flow from the valve exceeds the flow<br />
capability of the fixture. In the event of a valve failure, the fixture must be<br />
able to accommodate a continuous flow from the valve.<br />
ATTENTION INSTALLERS: With the exception of the control stop inlet,<br />
DO NOT USE pipe sealant or plumbing grease on any valve component or<br />
coupling! To protect the chrome or special finish of <strong>Sloan</strong> flushometers,<br />
DO NOT USE toothed tools to install or service these valves. Use our A-50<br />
Super-Wrench or other smooth-jawed wrench to secure couplings.<br />
Regulations for low consumption fixtures (1.6 gpf/6.0 Lpf closets <strong>and</strong><br />
1.0 gpf/3.8 Lpf urinals) prohibit use of higher flush volumes.<br />
NOTE: In all piston variations the SH-406 spring has replaced the “U” bar. In<br />
all piston variations the CN-68-A single lip cup has replaced the S-14-A<br />
double lip cup. When rebuilding a piston, install the CN-68-A single lip cup<br />
with the cup facing down.<br />
1. <strong>Valve</strong> does not function.<br />
A. Control stop or main valve closed. Open control stop or main valve.<br />
B. H<strong>and</strong>le assembly is worn. Install h<strong>and</strong>le repair kit B-51-A or<br />
replace h<strong>and</strong>le.<br />
2. Insufficient volume of water to adequately siphon fixture.<br />
A. Control stop not open enough. Adjust control stop for desired delivery<br />
of water.<br />
B. Urinal or shower piston installed in a closet valve or older blow out<br />
urinal. Replace piston with proper closet piston (see item 4).<br />
C. Regulating screw (on top of valve) not at proper setting. Turn<br />
regulating screw counterclockwise to increase flush. Adjustment<br />
range: urinal – 1/2 to 3 gpf (1.9 to 11.4 Lpf); closet – 1-1/2 to<br />
7 gpf (5.7 to 26.5 Lpf).<br />
D. Piston worn out. <strong>Repair</strong> or replace piston.<br />
E. Inadequate volume or pressure at supply. If no gauges are available to<br />
properly measure supply pressure or volume of water at the valve,<br />
then completely remove the entire piston from the valve, reassemble<br />
cover <strong>and</strong> open control stop to allow water to pass through empty<br />
valve. If the supply is adequate to siphon the fixture, remove the flow<br />
ring from the bottom of the piston to provide additional flow. If the<br />
supply is not adequate to siphon the fixture, steps should be taken to<br />
increase the pressure <strong>and</strong>/or supply.<br />
3. Length of flush too short (short flushing) or valve closes<br />
off immediately.<br />
A. Regulating screw not at a proper setting. Turn regulating screw<br />
counterclockwise to lengthen flush.<br />
B. Water passing by damaged or worn piston cup. <strong>Repair</strong> or<br />
replace piston.<br />
C. Loose piston assembly or loose top plate screw. Tighten top plate<br />
screws. Screw piston body <strong>and</strong> guide together (h<strong>and</strong> tighten ONLY –<br />
rubber relief valve seat will distort if screwed too tight).<br />
D. Damaged or worn piston top plate or expelor. <strong>Repair</strong> or<br />
replace piston.<br />
E. Urinal or shower piston installed in a closet valve or older blow out<br />
urinal. Replace piston with closet piston CN-1002-A.<br />
38<br />
<strong>Repair</strong> <strong>Parts</strong> <strong>and</strong> <strong>Maintenance</strong> <strong>Guide</strong><br />
Naval ® Flushometer<br />
Also for use with Crown ® (Old style),<br />
Star <strong>and</strong> Marine<br />
4. Length of flush too long (long flushing) or fails to close off.<br />
A. Regulating screw not at proper setting. Turn regulating screw<br />
clockwise to shorten flush.<br />
B. Relief valve in piston is not seating properly due to wear or debris.<br />
Disassemble piston assembly <strong>and</strong> wash under running water. <strong>Repair</strong><br />
or replace piston if necessary.<br />
C. By-pass holes in piston or top plate clogged or fouled with debris.<br />
Disassemble piston assembly <strong>and</strong> wash under running water. <strong>Repair</strong><br />
or replace piston if necessary.<br />
D. Closet piston installed in urinal valve. Replace piston with urinal<br />
piston CN-1003-A.<br />
E. Line water pressure has dropped <strong>and</strong> is not sufficient to force relief<br />
valve to seat. Shut off control stop until pressure has been restored,<br />
then reopen stop.<br />
5. Water splashes from fixture.<br />
A. Supply volume is more than necessary. Adjust control stop to meet<br />
flow rate required for proper cleansing of fixture.<br />
B. Lime or mineral accumulation on fixture vortex or spreader holes.<br />
Remove lime or mineral build-up in fixture.<br />
6. Flush is not considered “quiet” or makes noise at close off.<br />
A. Control stop not properly adjusted. Adjust control stop to meet flow<br />
rate required for proper cleansing of the fixture.<br />
B. Worn, damaged or loose main seat. Replace main seat.<br />
C. Worn piston. <strong>Repair</strong> or replace piston.<br />
7. Leaking at h<strong>and</strong>le assembly.<br />
A. The B-39 h<strong>and</strong>le seal may be deteriorated. Install new B-39 h<strong>and</strong>le<br />
seal. NOTE: The B-39 seal will easily slide right onto the bushing<br />
if it is wet.<br />
B. H<strong>and</strong>le gasket has been omitted. Install A-31 h<strong>and</strong>le gasket or h<strong>and</strong>le<br />
repair kit B-51-A.<br />
C. <strong>Valve</strong> H<strong>and</strong>le bushing is worn. Install h<strong>and</strong>le repair kit B-51-A.<br />
CARE AND CLEANING INSTRUCTIONS<br />
DO NOT use abrasive or chemical cleaners to clean flushometers that may<br />
dull the luster <strong>and</strong> attack the chrome or special decorative finishes. Use<br />
ONLY mild soap <strong>and</strong> water, then wipe dry with clean cloth or towel.<br />
While cleaning the bathroom tile, protect the flushometer from any<br />
splattering of cleaner. Acids <strong>and</strong> cleaning fluids can discolor or remove<br />
chrome plating.<br />
When assistance is required, please contact<br />
<strong>Sloan</strong> Technical Support at: 1-888-SLOAN-14 (1-888-756-2614).
39<br />
<strong>Repair</strong> <strong>Parts</strong> <strong>and</strong> <strong>Maintenance</strong> <strong>Guide</strong><br />
Dolphin ® Flushometer<br />
PARTS LIST—DOLPHIN ® FLUSHOMETER<br />
Item<br />
No. Code No. Part No. Description<br />
1. 0337007 DO-1 Cover Nut CP<br />
2. 5337125 DO-2 O-ring-Seat – 1 required – 6 per package<br />
(Cover Gasket)<br />
3. 5337129 DO-28 Retaining Ring – 1 required – 24 per package<br />
4. 5337006 DO-4 Stem Nut RB – 1 required – 6 per package<br />
5. 0337004 DO-5 Piston<br />
6. 5337075 DO-6 O-ring-Piston – 1 required – 6 per package<br />
7. 5337039 DO-7 Piston Spring – 1 required – 6 per package<br />
8. 5337011 DO-11 Cover Screw CP – 4 required – 24 per package<br />
9. 0337003 DO-10 Upper Body CP<br />
10. 0337042 DO-20 H<strong>and</strong>le <strong>and</strong> Socket Assembly CP<br />
0337012 DO-26 Socket<br />
11. 5337126 DO-3 Regulating Screw RB – 1 required –<br />
6 per package<br />
12. 0337087 DO-9 Stem RB<br />
13. 0328336 SH-75 O-ring-Throttle Seal (2 required)<br />
14. 0337005 DO-14 Bushing RB<br />
15. 0337009 DO-16 Compression Spring (Main Spring)<br />
16. 5337034 DO-17 Insert RB – 1 required – 6 per package<br />
17. 0337018 DO-15 “Flex-Sac”<br />
18. 0337084 DO-18 Seating Nut. Part of DO-32 “Flex-Sac” Assembly<br />
(See below)<br />
19. 0337016 DO-19 Seat Assembly w/O-ring<br />
20. 0337086 DO-22 O-ring<br />
21A. 0337031 DO-13-NC Lower Body CP-Closet<br />
21B. 0337032 DO-13-NU Lower Body CP-Urinal<br />
REPLACEMENT AND REPAIR KITS<br />
A. 0337044 DO-1000-A Piston with O-ring. Component parts:<br />
Items 5 <strong>and</strong> 6<br />
B. 3337035 DO-1001-A <strong>Repair</strong> Kit-Dolphin H<strong>and</strong>le. Component parts:<br />
Items 10, 11, 12, <strong>and</strong> 13<br />
C. 0337134 DO-32 Flex-Sac Assembly. Component parts:<br />
Items 17 <strong>and</strong> 18<br />
D. 0337136 DO-32-AA <strong>Repair</strong> Kit-“Flex-Sac” Assembly. Component parts:<br />
Items 2, 6, 13, 17, <strong>and</strong> 18<br />
E. 0337137 DO-32-AAN <strong>Repair</strong> Kit-“Flex-Sac” <strong>and</strong> Stem. Component parts:<br />
Items 2, 6, 7, 13, 15, 17, 18, 19, <strong>and</strong> 20<br />
F. 0337036 DO-19-A Seat Assembly with O-ring. Component parts:<br />
Items 19 <strong>and</strong> 20<br />
G. 0337030 DO-12-A Upper Body Assembly. Component parts:<br />
Items 1 through 7 <strong>and</strong> 9 through 18<br />
H. 0337055 DO-13-A-NC Lower Body Assembly for Closet. Component parts:<br />
Item 21 Lower Body, Coupling (CP), <strong>and</strong> Ground<br />
Joint Tail (CP)<br />
Manual<br />
Flushometers
Manual<br />
Flushometers<br />
PARTS LIST—DOLPHIN ® FLUSHOMETER MODELS AND VARIATIONS<br />
Item<br />
No. Code No. Part No. Description<br />
1. 0337023 DO-90-AAGNC Closet <strong>Valve</strong> Body <strong>and</strong> H<strong>and</strong>le Assembly —<br />
Dolphin Type I<br />
0337025 DO-90-AAGNU Urinal <strong>Valve</strong> Body <strong>and</strong> H<strong>and</strong>le Assembly —<br />
Dolphin Type II<br />
2A. 0388025 H-710-A Bak-Chek ® Control Stop CP with 3/4” NPTF Inlet<br />
for Adjustable Tail<br />
0388022 H-710-A Bak-Chek ® Control Stop CP with 1” NPTF Inlet for<br />
Adjustable Tail<br />
2B. 0388048 NH-710-AG Bak-Chek ® Control Stop with 3/4” NPTF Inlet for<br />
Ground Joint Tail (Naval Brass; use with<br />
Shipboard flushometer Models Type II Class A<br />
<strong>and</strong> B; requires A-35 Reducer Bushing)<br />
0388058 NH-710-AG Bak-Chek ® Control Stop with 1” NPTF Inlet for<br />
Ground Joint Tail (Naval Brass)<br />
0388044 NH-710-AGS Bak-Chek ® Control Stop with 1” NPSM Inlet for<br />
Ground Joint Tail (Naval Brass; use with<br />
Shipboard flushometer Models Type I <strong>and</strong> II when<br />
Sil-Braze Adapter is used)<br />
3. 0306196 F-7 1" (25 mm) Supply Flange CP (Supplied When<br />
<strong>Valve</strong> is NOT Ordered with Sweat Solder Kit)<br />
0306191 F-7 3/4" (19 mm) Supply Flange CP (Supplied When<br />
<strong>Valve</strong> is NOT Ordered with Sweat Solder Kit)<br />
4. 3308782 H-633-AA 1" (25 mm) Sweat Solder Kit with Cast Set Screw<br />
Flange CP (“–YBYC” Variation)<br />
3308788 H-636-AA 3/4" (19 mm) Sweat Solder Kit with Cast Set<br />
Screw Flange CP (“–YBYC” Variation)<br />
5A. 0323013 V-500-AA 1-1/2" (38 mm) x 10-1/2" (267 mm) Vacuum<br />
Breaker Assembly CP (Model 110/111)<br />
0323019 V-500-AA 1-1/2" (38 mm) x 23" (534 mm) Vacuum<br />
Breaker Assembly CP (Model 115)<br />
5B1. 0396119 F-101 1-1/2" (38 mm) x 10-1/2" (267 mm) Outlet Tube<br />
CP Type I Class B<br />
5B2. 0306093 F-2-AT Coupling CP with S-30 gasket<br />
5C1. ‡ 0314004 NF-1 1-1/2" (38 mm) Scored Outlet CP (Shipboard<br />
Model, Type I, Class A)<br />
5C2. ‡ 2104180 F-2-AT Coupling CP with S-30 gasket<br />
5D1. 0323010 V-500-A 1-1/2" (38 mm) Vacuum Breaker<br />
Assembly CP (Model 120 does not include<br />
F-2-A Coupling, see Item 5D2 below)<br />
5D2. 0306092 F-2-A Coupling CP with S-30 gasket<br />
5E. ‡ 0306850 NF-29-A Outlet Tube Assembly 3/4" (19 mm) x 6-1/2”<br />
(165 mm) Scored Outlet with 1/2" Offset<br />
(Shipboard Model, Type II, Class A)<br />
5F. 0306849 NF-29-A 3/4" (19 mm) x 6-1/2” (165 mm) Flush Connection<br />
with 1/2" Offset <strong>and</strong> 3/4" x 1/2" Reducer for<br />
1/2" Spud (Shipboard Model, Type II, Class B)<br />
5G. ‡ 0323004 V-500-AA 3/4" (19 mm) x 10-1/2" (267 mm) Vacuum<br />
Breaker Assembly CP (Model 186)<br />
5H. ‡ 0306780 F-29-A 3/4" (19 mm) x 10-1/2" (267 mm) Flush<br />
Connection CP (Model 186–XYW)<br />
6. † 0396302 F-109 1-1/2" (38 mm) Flush Connection CP<br />
7. SEE SLIP JOINT GASKETS AND RINGS TABLE ON BOTTOM, PAGE 30<br />
7A. 0306146 F-5-AT 1-1/2" (38 mm) Spud Coupling Assembly<br />
(Models 110/111, 115, 120)<br />
7B. 0306125 F-5-AW 3/4" (19 mm) Spud Coupling Assembly<br />
(Model 186)<br />
8. 0306982 F-40 1/2" (13 mm) Sil-Braze Adapter<br />
‡ Cut to proper length at installation. Allow a minimum of 5” (127 mm) between tube ends when using rubber<br />
hose for shock mounted equipment.<br />
† This Outlet Tube is available in various lengths. Consult factory for assistance.<br />
IMPORTANT NOTES<br />
With the exception of the control stop inlet, DO NOT USE pipe sealant or plumbing grease on any valve<br />
component or coupling!<br />
Protect the chrome or special finish of <strong>Sloan</strong> flushometers — DO NOT USE toothed tools to install<br />
or service these valves.<br />
Use a A-50 Super-Wrench or smooth jawed spud wrench to secure all couplings.<br />
40<br />
<strong>Repair</strong> <strong>Parts</strong> <strong>and</strong> <strong>Maintenance</strong> <strong>Guide</strong><br />
Dolphin ® Flushometer
PARTS LIST—DOLPHIN ® FLUSHOMETER MODELS AND VARIATIONS<br />
Size Code No. Part No. Description<br />
ITEM 7. Slip Joint Gaskets <strong>and</strong> Rings<br />
1-1/2” 5306058 F-3 Red Friction Ring<br />
5322001 VBF-5 Black Slip Joint Gasket<br />
0319086/5319086 S-30 Flexible Seat<br />
0319079 S-21 Rigid Seat (rubber over brass)<br />
1-1/2” x 1-1/4” 0396062 F-105 Slip Joint Gasket – Rigid<br />
1-1/4” 5306057 F-3 Red Friction Ring<br />
5322176 VBF-5 Black Slip Joint Gasket<br />
0307052/5307052 G-21 Rigid Seat (rubber over brass)<br />
1” 5306056 F-3 Red Friction Ring<br />
5306115 F-5 Black Slip Joint Gasket<br />
3/4” 5306055 F-3 Red Friction Ring<br />
5306113 F-5 Black Slip Joint Gasket<br />
41<br />
<strong>Repair</strong> <strong>Parts</strong> <strong>and</strong> <strong>Maintenance</strong> <strong>Guide</strong><br />
Dolphin ® Flushometer<br />
TROUBLESHOOTING GUIDE<br />
1. Flushometer does not function.<br />
A. Control stop or main valve is closed. Open control stop or main valve.<br />
B. H<strong>and</strong>le socket assembly is damaged. Replace DO-20 h<strong>and</strong>le socket<br />
assembly.<br />
2. Volume of water is inadequate to siphon fixture.<br />
A. Control stop is not open enough. Adjust control stop for desired<br />
delivery of water volume.<br />
B. Timing of flushometer closure is set too fast. Remove DO-1 cover nut.<br />
Use a small blade screwdriver to turn DO-3 regulating screw<br />
clockwise.<br />
C. Water supply volume or pressure is inadequate. If no gauges are<br />
available to properly measure supply pressure or volume, completely<br />
open control stop <strong>and</strong> hold down flushometer h<strong>and</strong>le without allowing<br />
it to close. If fixture siphons, increase timing of closure (see previous<br />
solution). If fixture does not siphon, steps must be taken to increase<br />
the supply pressure <strong>and</strong>/or volume. Contact fixture manufacturer for<br />
minimum water supply requirements of fixture.<br />
3. Flushometer closes immediately.<br />
A. Oil chamber of upper body is empty. Remove DO-1 cover nut. Fill oil<br />
chamber with SAE 10 Oil.<br />
B. Piston seal is worn or damaged. Replace DO-6 piston O-ring seal.<br />
4. Length of flush is too short (short flushing).<br />
A. Volume of oil in oil chamber of upper body is low. Remove DO-1 cover<br />
nut. Fill oil chamber with SAE 10 oil.<br />
B. Timing of flushometer closure is not adequately adjusted. Remove<br />
DO-1 cover nut. Using small blade screwdriver, turn DO-3 regulating<br />
screw clockwise until a satisfactory flush is achieved.<br />
5. Length of flush is too long (long flushing).<br />
A. Timing of flushometer closure not adequately adjusted. Remove DO-1<br />
cover nut. Using small blade screwdriver, turn DO-3 regulating screw<br />
counterclockwise until a satisfactory flush is achieved.<br />
6. Oil is leaking from h<strong>and</strong>le.<br />
A. Stem seals are worn or damaged. Replace two (2) SH-75 throttle seal<br />
O-rings.<br />
7. <strong>Valve</strong> does not close completely (water trickle).<br />
A. Compression spring is worn or damaged. Replace DO-16<br />
compression spring.<br />
B. Flex-sac assembly is worn. Replace DO-15 flex-sac.<br />
CARE AND CLEANING INSTRUCTIONS<br />
DO NOT use abrasive or chemical cleaners to clean flushometers, they may<br />
dull the luster <strong>and</strong> attack the chrome finish. Use ONLY mild soap <strong>and</strong> water,<br />
<strong>and</strong> then wipe dry with a clean towel or cloth. When cleaning, protect the<br />
exposed flushometer from any splattering of cleaner. Acids <strong>and</strong> cleaning<br />
fluids can discolor or remove chrome plating.<br />
When assistance is required, please contact<br />
<strong>Sloan</strong> Technical Support at: 1-888-SLOAN-14 (1-888-756-2614).<br />
Manual<br />
Flushometers
Manual<br />
Flushometers<br />
15<br />
14<br />
17<br />
16<br />
14A<br />
18 14A<br />
12<br />
13<br />
11<br />
10<br />
9A<br />
See Royal ® flushometer on Page 7 for<br />
all parts kits <strong>and</strong> components<br />
4<br />
6<br />
2<br />
7A<br />
8<br />
9<br />
1<br />
3<br />
5<br />
7B<br />
42<br />
<strong>Repair</strong> <strong>Parts</strong> <strong>and</strong> <strong>Maintenance</strong> <strong>Guide</strong><br />
Slimline ® Bedpan Washer<br />
Flushometer<br />
PARTS LIST<br />
Item<br />
No. Code No. Part No. Description<br />
1. 0393009 V-600-AA 1-1/2'' x 21-1/2'' CP Vacuum Breaker<br />
0393008 V-600-AA 1-1/2'' x 13-1/2'' CP Vacuum Breaker (ADA height)<br />
0393029 V-600-AA 1-1/2'' x 21-1/2'' CP Vacuum Breaker w/2'' Offset<br />
2. 3323182 V-651-A Vacuum Breaker <strong>Repair</strong> Kit<br />
3. 0306093 F-2-A 1-1/2'' Slip Joint Coupling<br />
4. 0309001 DV-1 Diverter <strong>Valve</strong> Body (non-Deoseptic bottle)<br />
0309052 DV-17 Diverter <strong>Valve</strong> Body (Deoseptic bottle)<br />
5. 3309035 DV-1001-A Wall Support Kit<br />
6. 0309027 F-1003 Outlet Tube Gasket – for Flanged Tubes only<br />
7A. 0309029 F-1005 Outlet Tube<br />
7B. 0396525 F-182 Outlet Tube w/1-1/2'' Offset<br />
8. 0306045 F-2 1-1/2" Coupling Nut<br />
9. 0306146 F-5-A 1-1/2'' Spud Coupling Assembly<br />
9A. SEE SLIP JOINT GASKETS AND RINGS TABLE ON BOTTOM, PAGE 30<br />
10. 3309044 DV-32-AA 12” Spray Arm Replacement Kit<br />
3309077 DV-1014-A Short Spray Arm Replacement Kit<br />
(for use with F-182 Offset Outlet Tube)<br />
11. 3309032 DV-1007-A Spray Arm <strong>Repair</strong> Kit<br />
12. 3309037 DV-1003-A Pivot Replacement Kit<br />
— 0309021 DV-55-A Diverter <strong>Valve</strong> Assembly <strong>and</strong> 12” Spray Arm<br />
Assembly includes: 3, 4, 8, 10, 12<br />
— 0309022 DV-69-A Diverter <strong>Valve</strong> Assembly <strong>and</strong> 10” Spray Arm<br />
Assembly includes: 3, 4, 8, 10, 12<br />
13. 3309015 DV-1017-A <strong>Repair</strong> Kit 15” Sanigard ® Spray Arm<br />
DEOSEPTIC UNIT PARTS<br />
Item<br />
No. Code No. Part No. Description<br />
14. 3309036 DV-1002-A Deoseptic Pivot Replacement Kit<br />
14A. 5337075 DO-6 O-ring-Piston – 2 required – 6 per package<br />
14B. 0309004 DV-4 Set Screw<br />
14C. 0309016 DV-16 Diverter <strong>Valve</strong> Seal Washer<br />
14D. 0309014 DV-14 Diverter <strong>Valve</strong> Seal<br />
15. 0309024 DV-21 Plug Button<br />
16. 0309033 DV-33-A Swivel & ball check Assembly<br />
17. 0309036 DV-36-A Aspirator Tube Assembly<br />
18. 0309018 DV-29 Deoseptic Solution Bottle<br />
BEDPAN WASHER REBUILD KITS<br />
Code No. Part No. Description<br />
5309031 DV-50-A Diverter Rebuild Kit Includes Outlet Tube Gasket (Item 6),<br />
Spray Arm <strong>Repair</strong> Kit (Item 11), <strong>and</strong> all Items in Pivot<br />
Replacement Kit (Item 12) except Pivot.<br />
3309040 DV-1004-A Deoseptic Diverter Rebuild Kit Includes Outlet Tube Gasket<br />
(Item 6), Spray Arm <strong>Repair</strong> Kit (Item 11), <strong>and</strong> all Items in<br />
Pivot Replacement Kit (Item 13) except Pivot.<br />
To convert a st<strong>and</strong>ard diverter assembly to a deoseptic diverter assembly use:<br />
3309048 DV-1005-A Deoseptic Conversion Kit<br />
SANIGUARD ® HANDLE ASSEMBLY<br />
Code No. Part No. Description<br />
0302230 B-73-A-SG H<strong>and</strong>le Assembly CP (ADA complaint) with Sani-Guard
ITEM 9A. SLIP JOINT GASKETS AND RINGS<br />
Size Code No. Part No. Description<br />
1-1/2” 5306058 F-3 Red Friction Ring<br />
5322001 VBF-5 Black Slip Joint Gasket<br />
0319086/5319086 S-30 Flexible Seat<br />
0319079 S-21 Rigid Seat (rubber over brass)<br />
1-1/2” x 1-1/4” 0396062 F-105 Slip Joint Gasket – Rigid<br />
1-1/4” 5306057 F-3 Red Friction Ring<br />
5322176 VBF-5 Black Slip Joint Gasket<br />
0307052/5307052 G-21 Rigid Seat (rubber over brass)<br />
1” 5306056 F-3 Red Friction Ring<br />
5306115 F-5 Black Slip Joint Gasket<br />
3/4” 5306055 F-3 Red Friction Ring<br />
5306113 F-5 Black Slip Joint Gasket<br />
SLIMLINE ® BEDPAN WASHER RETROFIT DIVERTERS<br />
Code No. Part No. Description<br />
3309022 DV-100 CP Diverter <strong>Valve</strong> Assembly<br />
3309047 DV-105 CP Deoseptic Diverter Assembly<br />
3309052 DV-135 CP Deoseptic Diverter Assembly 2” Offset<br />
3309061 DV-115 CP Deoseptic Diverter Assembly ADA<br />
3309062 DV-115-R CP Deoseptic Diverter Assembly ADA<br />
3309065 DV-120 CP Diverter Assembly ADA 1-1/2” Offset<br />
3309066 DV-120-R CP Diverter Assembly ADA 1-1/2” Offset<br />
3309069 DV-125 CP Deoseptic Diverter Assembly ADA Offset<br />
3309070 DV-125-R CP Deoseptic Diverter Assembly ADA Offset<br />
3309051 DV-130 CP Diverter Assembly 2 Offset<br />
SLIMLINE ® BEDPAN REPAIR KITS<br />
3309035 DV-1001 Kit Bedpan Washer Wall Support<br />
3309036 DV-1002 <strong>Repair</strong> Kit Deoseptic Pivot<br />
3309037 DV-1003 <strong>Repair</strong> Kit Bedpan Washer Pivot<br />
3309040 DV-1004 <strong>Repair</strong> Kit Deoseptic Diverter<br />
3309048 DV-1005 Conversion Kit Deoseptic Diverter Assembly<br />
3309032 DV-1007 <strong>Repair</strong> Kit Spray Arm<br />
3309077 DV-1014 <strong>Repair</strong> Kit 10” Spray Arm<br />
3309044 DV-32-AA <strong>Repair</strong> Kit 12” Spray Arm<br />
3309015 DV-1017-A <strong>Repair</strong> Kit 15” Spray Arm<br />
REBUILDING THE SLOAN SLIMLINE DIVERTER ASSEMBLY:<br />
To disassemble diverter valve: Loosen set screw <strong>and</strong> remove spray arm<br />
from pivot. Slide pivot out of diverter valve body.<br />
To further disassemble deoseptic diverters:<br />
Remove plug cap <strong>and</strong> retaining ring.<br />
Slide swivel <strong>and</strong> ball check assembly<br />
off pivot shaft, exposing all internal<br />
components.<br />
NOTE: This disassembly<br />
can be done without<br />
removing pivot assembly<br />
from diverter valve body.<br />
DV-32-AA ARM ASSEMBLY<br />
3/32'' ALLEN<br />
WRENCH<br />
DV-4 SET SCREW<br />
DV-47 WASHER<br />
DV-3 "O"-RING<br />
43<br />
<strong>Repair</strong> <strong>Parts</strong> <strong>and</strong> <strong>Maintenance</strong> <strong>Guide</strong><br />
Slimline ® Bedpan Washer<br />
Flushometer<br />
ROYAL FLUSHOMETER<br />
WALL SUPPORT<br />
ROD & FLANGE<br />
SPUD FLANGE<br />
FLUSH CONNECTION<br />
(VACUUM BREAKER)<br />
SPRAY HEAD<br />
DIVERTER ARM<br />
DIVERTER VALVE<br />
OUTLET TUBE<br />
Manual<br />
Flushometers
Manual<br />
Flushometers<br />
TROUBLESHOOTING GUIDE<br />
See Royal ® flushometer troubleshooting section for all problems regarding<br />
the flushometer <strong>and</strong> the flushing discharge.<br />
1. Diverter leaking at spray arm.<br />
A. Diverter spray arm (old style) is damaged. Replace diverter arm with<br />
new spray arm replacement kit.<br />
NOTE: On old style diverter spray arm, the spray arm O-ring was<br />
placed on groove at the end of the spray arm. When installing new<br />
spray arm kit, place washer into bottom of hole of nozzle pivot. Then<br />
place the O-ring on top of washer. Insert new spray arm into the<br />
pivot, pressing in slightly. While holding spray arm in place, tighten<br />
set screw.<br />
B. Spray arm O-ring is damaged or installed improperly. Re-install O-ring<br />
as described above in step (A.). If leakage persists replace using<br />
spray arm kit DV-1007-A.<br />
2. Diverter leaking at nozzle pivot.<br />
A. One or both pivot O-rings are worn. Replace nozzle pivot assembly.<br />
Use pivot replacement kit.<br />
B. Diverter seal washer worn or missing. Replace pivot seals. Use<br />
diverter rebuild kit.<br />
C. Nozzle pivot damaged or defective. Replace nozzle pivot assembly.<br />
Use pivot replacement kit.<br />
3. Erratic spray pattern from spray arm nozzle.<br />
A. Debris clogging nozzle screen. Wash nozzle screen under<br />
running water.<br />
B. Damaged or missing nozzle screen or spray disc. Replace using<br />
DV-1007-A spray arm replacement kit.<br />
44<br />
<strong>Repair</strong> <strong>Parts</strong> <strong>and</strong> <strong>Maintenance</strong> <strong>Guide</strong><br />
Slimline ® Bedpan Washer<br />
Flushometer<br />
4. Deoseptic solution not siphoning from bottle during flush cycle<br />
(deoseptic models only).<br />
A. Adjusting screw not open. Open adjusting screw until adequate<br />
amount of solution is siphoned from bottle during flush cycle.<br />
B. Aspirator tube screen clogged. Remove solution bottle. Remove<br />
aspirator tube from swivel & ball check assembly <strong>and</strong> wash screen<br />
under running water.<br />
C. Aspirator tube not installed completely onto swivel & ball check<br />
assembly. Remove solution bottle. Make sure aspirator tube is pushed<br />
completely onto nipple of swivel & ball check assembly.<br />
D. Aspirator tube cracked. Replace aspirator tube assembly.<br />
E. Rubber ball check stuck inside swivel & ball check assembly. Remove<br />
solution bottle <strong>and</strong> aspirator tube from swivel & ball check assembly.<br />
Gently insert small implement (paper clip, small dia. hex key, etc.) into<br />
nipple of swivel & ball check assembly to dislodge rubber ball check.<br />
Stop pushing once water starts to trickle from nipple.<br />
NOTE: If ball is pushed too hard or too far it may fall out of seat.<br />
Should this occur, the swivel & ball check assembly must be removed<br />
<strong>and</strong> ball replaced. To do this, remove retaining ring using retaining<br />
clip pliers. Pull swivel & ball check assembly off of adjusting screw<br />
being careful not to drop rubber ball check. Place rubber ball back<br />
into seat of swivel & ball check assembly <strong>and</strong> reassemble. If ball <strong>and</strong><br />
seals appear worn rebuild.<br />
5. Water leaking back into solution bottle.<br />
A. Rubber ball damaged or missing. Replace rubber ball using<br />
DV-1004-A deoseptic diverter rebuild kit.<br />
B. Rubber ball not sitting in seat of swivel & ball check assembly.<br />
Remove swivel & ball check assembly taking care not to lose rubber<br />
ball. Insert rubber ball back into seat of swivel & ball check assembly<br />
<strong>and</strong> reassemble.<br />
NOTE: Follow steps in solution (E.) of problem 4.<br />
CARE AND CLEANING INSTRUCTIONS<br />
DO NOT use abrasive or chemical cleaners to clean flushometers as they<br />
may dull the luster <strong>and</strong> attack the chrome or special decorative finishes. Use<br />
ONLY mild soap <strong>and</strong> water, then wipe dry with clean cloth or towel. While<br />
cleaning the bathroom tile, the flushometer should be protected from any<br />
splattering of cleaner. Acids <strong>and</strong> cleaning fluids can discolor or remove<br />
chrome plating.<br />
When assistance is required, please contact<br />
<strong>Sloan</strong> Technical Support at: 1-888-SLOAN-14 (1-888-756-2614).
7<br />
Concealed Urinal Models<br />
<strong>and</strong> TMO Models<br />
5<br />
8 8<br />
CURRENT COVER AND MOUNTING PLATE PARTS FOR ROYAL ® URINAL FLUSHOMETER<br />
Item<br />
No. Code No. Part No. Description<br />
1. ‡ Solenoid Activated <strong>Valve</strong> Assembly<br />
2. 0306249 F-15 Tail Assembly †<br />
3. 0345150 EL-431-A Flange Assembly<br />
4. 3305100 EL-640-A CP Cover Plate with Sensor <strong>and</strong> Mounting Hardware<br />
Assembled (Exposed Models)<br />
(includes EL-549 mounting plate)<br />
Concealed <strong>and</strong> Exposed<br />
Water Closet Models<br />
Item<br />
No. Code No. Part No. Description<br />
1. ‡ Solenoid Activated <strong>Valve</strong> Assembly<br />
2. 0306249 F-15 Tail Assembly †<br />
3. 0345150 EL-431-A Flange Assembly<br />
4. 3305105 EL-625-A CP Cover Plate with Mounting Hardware Assembled<br />
(Closet only) (includes EL-543 mounting plate)<br />
5. — EL-549 Mounting Plate<br />
6<br />
CURRENT COVER AND MOUNTING PLATE PARTS FOR ROYAL ® CLOSET FLUSHOMETER<br />
5<br />
7<br />
6<br />
45<br />
<strong>Repair</strong> <strong>Parts</strong> <strong>and</strong> <strong>Maintenance</strong> <strong>Guide</strong><br />
Optima ® Flushometers<br />
Current style Royal ® (after 09/26/10)<br />
6<br />
Exposed Urinal Models<br />
4<br />
Item<br />
No. Code No. Part No. Description<br />
5. 3305101 EL-645-A CP Cover Plate with Sensor Assembled<br />
(Concealed Models)<br />
6. — EL-549 Mounting Plate (Exposed Models)<br />
7. — EL-592 Mounting Plate<br />
8. — EL-177 Screws (requires four (4) screws per mounting plate)<br />
— 3305620 EL-1500 Urinal Sensor Replacement<br />
(Exposed <strong>and</strong> Concealed Models, not shown)<br />
† NOTE: For exposed & concealed solenoids manufactured before 2003 or not shown here,<br />
consult factory for individual part assembly.<br />
‡ Part number varies with valve model variation; consult factory.<br />
5<br />
Exposed Water Closet Models<br />
4<br />
3<br />
Item<br />
No. Code No. Part No. Description<br />
6. — EL-177 Screws (requires four screws per mounting bracket)<br />
7. 3305104 EL-595-A CP Cover Plate with Sensor <strong>and</strong> Override Switch<br />
Assembled (Closet only)<br />
3305621 EL-1500-L Closet Sensor Replacement Kit<br />
(Closet only, not shown)<br />
† NOTE: For exposed & concealed solenoids manufactured before 2003 or not shown here,<br />
consult factory for individual part assembly.<br />
‡ Part number varies with valve model variation; consult factory.<br />
2<br />
1<br />
3<br />
2<br />
Royal flushometer parts, solenoid<br />
parts <strong>and</strong> assemblies, see page<br />
46 <strong>and</strong> 47<br />
1<br />
Royal flushometer parts, solenoid<br />
parts <strong>and</strong> assemblies, see page<br />
46 <strong>and</strong> 47<br />
Sensor<br />
Flushometers
Sensor<br />
Flushometers<br />
ABBREVIATIONS:<br />
CP - Chrome Plated<br />
RB - Rough Brass<br />
gpf - gallons per flush<br />
Lpf - Liters per flush<br />
NOTE: Gang box<br />
is not supplied.<br />
21<br />
20<br />
19<br />
Exposed<br />
or Concealed<br />
Water Closet<br />
18<br />
15<br />
16<br />
Concealed<br />
Urinal<br />
SOLENOID/SENSOR PARTS AND ASSEMBLIES LIST<br />
Item<br />
No. Code No. Part No. Description<br />
1A. 3305043 EL-128-A Actuator Cartridge Assembly <strong>Repair</strong> Kit Includes<br />
Spring, Plunger <strong>Guide</strong>, Solenoid <strong>Valve</strong> Seat, <strong>Valve</strong><br />
Piston Assembly, <strong>and</strong> O-Ring (also available for<br />
ES-SM flushometers)<br />
1B. 0305135 EL-110 O-Ring<br />
2A. 0305328 EL-124-1 120V only (no sensor)<br />
3305044 EL-1029-A CP Cartridge/Solenoid Kit EL-124-1 (120V) <strong>and</strong><br />
EL128-A<br />
0305329 EL-124-2 24 VAC Solenoid Assembly (exposed installation)<br />
Includes H<strong>and</strong>le Coupling, 24 VAC Coil, Face Plate for<br />
24 VAC Solenoid, Solenoid Adapter, Solenoid Shaft<br />
Assembly, Nut for Solenoid, Solenoid Housing,<br />
Solenoid Flux Plate, <strong>and</strong> O-Ring<br />
3305045 EL-1028-A CP Cartridge/Solenoid Kit EL-124-2 (24V) <strong>and</strong> EL128-A<br />
2B. 0305330 EL-138-1 120V only (no sensor)<br />
0305331 EL-138-2 24 VAC Solenoid Assembly (concealed installation)<br />
Includes H<strong>and</strong>le Coupling, 24 VAC Coil, Face Plate for<br />
24 VAC Solenoid, Solenoid Adapter, Solenoid Shaft<br />
Assembly, Nut for Solenoid, Solenoid Base Plate <strong>and</strong><br />
Solenoid Cover Assembly<br />
3A. 0337086 DO-22 O-Ring<br />
3B. 0305132 EL-104 RB Adapter for Solenoid<br />
3C. 0305165 EL-163-A Solenoid Shaft Assembly Includes Gasket, Plunger,<br />
Plunger Spring, <strong>and</strong> Solenoid Shaft<br />
4. 0301082 A-6 CP H<strong>and</strong>le Coupling (exposed installation)<br />
5A. 0305166 EL-164 Solenoid Flux Plate (exposed installation) fine thread<br />
5B. — EL-542 N/A Separately<br />
6. 0305119 EL-165-1 120 V Coil<br />
0305118 EL-165-2 24 VAC Coil<br />
7A. 0345120 EL-162-2 CP Solenoid Housing (exposed installation) fine thread<br />
0305164 EL-162-1 CP Solenoid Housing (120V) course thread also used<br />
on pre-2001 24 V<br />
7B. 0305336 EL-541-A Solenoid Cover Assembly (Includes Flux Plate)<br />
8. 0305127 EL-102-2 Face Plate for 24 VAC Solenoid (exposed installation)<br />
19<br />
17<br />
12<br />
12<br />
12<br />
Exposed<br />
Urinal<br />
14<br />
13<br />
19<br />
17<br />
Exposed or<br />
Concealed<br />
Water Closet<br />
11<br />
12<br />
26<br />
10†<br />
9A<br />
9B<br />
27<br />
8<br />
8<br />
46<br />
<strong>Repair</strong> <strong>Parts</strong> <strong>and</strong> <strong>Maintenance</strong> <strong>Guide</strong><br />
Optima ® Flushometers<br />
Old Royal ® until 05/09, current <strong>Sloan</strong>/Regal ®<br />
12<br />
7B<br />
7A<br />
Exposed Urinal w/Overide<br />
3A<br />
6<br />
6<br />
1B<br />
5B<br />
5A<br />
Item<br />
No. Code No. Part No. Description<br />
9A. 0305125 EL-101 CP Nut for Solenoid (exposed installation)<br />
9B. 0305167 EL-166 Housing Nut for Solenoid (concealed installation)<br />
10. 0306249 F-15 Tail †<br />
0305145 EL-123-A Old Style ESS 24V course thread (120V also)<br />
0305337PK EL-226 1-1/4” Extension for EL-123-A course thread<br />
11. 0345150 EL-431-A CP Flange Assembly (exposed installation)<br />
0305139 EL-176-A Old Style ESS 24V course thread (120V also)<br />
12. 0305152 EL-152 CP Screws (requires four screws per cover plate)<br />
13. 0305151 EL-151 CP Cover Plate for Sensor <strong>and</strong> Solenoid Operator<br />
(Urinal only)<br />
14. 0305219 EL-201 CP Cover Plate for Sensor <strong>and</strong> Override Button<br />
(Closet only)<br />
15. 0318066 HY-66 CP Cover Plate for Solenoid Operator (Closet only)<br />
16. 0305161 EL-161 CP Cover Plate for Sensor<br />
17. 0305323 EL-168-A Yoke Assembly (Urinal only)<br />
18. 0305324 EL-141-A Override Switch <strong>and</strong> Yoke Assembly (Closet only)<br />
19. 3305620 EL-1500 Urinal Sensor Replacement Kit (Urinal only)<br />
20. 3305621 EL-1500-L Closet Sensor Replacement Kit (Closet only)<br />
21. 0345154 EL-154 Transformer (120 VAC) (also available for ES-SM<br />
flushometers) 50 VA plate mount<br />
0345999 EL-342 Transformer (240 VAC) (also available for ES-SM<br />
flushometers) 50 VA plate mount<br />
22. 3345047 EL-461 Surface Mounted Sensor <strong>and</strong> Override Button<br />
Assembly (closet only)<br />
23. 3345048 EL-497 Surface Mounted Sensor Assembly (urinal only)<br />
24. 3345048 EL-297 Solenoid Assembly<br />
25. 3365003 ETF-492-A Control Module<br />
26. 0345266 EL-566-A Exposed Plate with Override Button (Urinal only)<br />
27. 0345267 EL-567-A Yoke Assembly for EL-566-A<br />
— 0305148 EL-227 <strong>Repair</strong> Tool Kit for EL-163-A <strong>Repair</strong> Kit<br />
— 0345016 EL-387-A Override Button Replacement for EL-566-A<br />
† NOTE: For exposed & concealed solenoids manufactured before 2001 or not shown here,<br />
consult factory for individual part assembly.<br />
4<br />
2A Exposed Solenoid<br />
2B<br />
4<br />
Concealed Solenoid<br />
3C<br />
3C<br />
3A<br />
3B<br />
3B<br />
1B<br />
3A<br />
3A<br />
To <strong>Valve</strong><br />
Royal<br />
22<br />
23<br />
25<br />
® ES-SM Surface Mounted Sensor Components<br />
Note: Royal ES-SM<br />
surface mounted<br />
components are<br />
not compatible with<br />
ES-S flushometer<br />
24<br />
components.<br />
Concealed Water Closet Concealed Urinal ES-SM Solenoid<br />
1A<br />
To<br />
<strong>Valve</strong><br />
1A
1<br />
TO SOLENOID<br />
(SEE PAGE 46)<br />
6<br />
2<br />
3<br />
43<br />
4<br />
ABBREVIATIONS:<br />
CP Chrome Plated<br />
RB Rough Brass<br />
SD Screwdriver<br />
WH Wheel H<strong>and</strong>le<br />
gpf gallons per flush<br />
Lpf Liters per flush<br />
7<br />
5<br />
8<br />
11<br />
17<br />
10<br />
21<br />
22<br />
19<br />
18<br />
9<br />
13<br />
14<br />
15<br />
CONCEALED WH<br />
20<br />
12<br />
16<br />
47<br />
<strong>Repair</strong> <strong>Parts</strong> <strong>and</strong> <strong>Maintenance</strong> <strong>Guide</strong><br />
Optima ® Royal ® Flushometers<br />
OPTIMA ® ROYAL ® FLUSHOMETER PARTS LIST<br />
Item<br />
No. Code No. Part No. Description<br />
1. 0301172 A-72 CP Cover<br />
2. 0301168 A-71 Inside Cover<br />
3. SEE DIAPHRAGM ASSEMBLY CHART ON PAGE 42<br />
4. 3323182 V-651-A Vacuum Breaker <strong>Repair</strong> Kit<br />
5. 3393004 V-600-AA 3/4" (19 mm) x 9" (229 mm) CP Vacuum Breaker<br />
3393006 V-600-AA 1-1/4" (32 mm) x 9" (229 mm) CP Vacuum Breaker<br />
3393007 V-600-AA 1-1/2" (38 mm) x 9" (229 mm) CP Vacuum Breaker<br />
6. 0306125 F-5-AW 3/4" (19 mm) CP Spud Coupling Assembly<br />
0306140 F-5-AU 1-1/4" (32 mm) CP Spud Coupling Assembly<br />
0306146 F-5-AT 1-1/2" (38 mm) CP Spud Coupling Assembly<br />
7. SEE SLIP JOINT GASKETS AND RINGS TABLE ON ITEM 31A ON NEXT PAGE<br />
8. 0308676 H-550 CP Stop Coupling<br />
9. 0308801 H-551-A CP Adjustable Tail 2-1/16" (52 mm) long<br />
10. 5308696 H-553 O-Ring – 24 per package<br />
11. 5308381 H-552 Locking ring – 12 per package<br />
12. 3308386 H-700-A 1" (25 mm) Screwdriver Bak-Chek ® Angle Stop<br />
CP – complete<br />
3308384 H-700-A 3/4" (19 mm) Screwdriver Bak-Chek ® Angle Stop<br />
CP – complete<br />
13. 3308853 H-541-A-SD Control Stop <strong>Repair</strong> Kit for use with 1" (25 mm)<br />
H-700-A & 3/4" (19 mm) H-700-A, 1" (25 mm)<br />
H-600-A, 1" (25 mm) & 3/4" (19 mm) H-700-A<br />
<strong>and</strong> 1" (25 mm) H-540-A SD Stops<br />
3308856 H-543-A-SD Control Stop <strong>Repair</strong> Kit for use with 3/4" (19 mm)<br />
H-600-A <strong>and</strong> H-540-A SD Stops<br />
14. 0308612 H-622 CP Bonnet for use with 1" (25 mm) & 3/4" (19 mm)<br />
H-700-A <strong>and</strong> 1" (25 mm) H-600-A SD Stops<br />
0308843 H-577 CP Bonnet for use with 3/4" (19 mm) H-600-A<br />
SD Stops – OBSOLETE<br />
15. 3308772 H-1010-A 1" (25 mm) V<strong>and</strong>al Resistant Control Stop Cap<br />
Assembly for use with 1" (25 mm) & 3/4"<br />
(19 mm) H-700-A <strong>and</strong> 1" (25 mm)<br />
H-600-A SD Stops<br />
3308790 H-1009-A 3/4" (19 mm) V<strong>and</strong>al Resistant Control Stop Cap<br />
Assembly for use with 3/4" (19 mm)<br />
H-600-A SD Stops<br />
16. 0308840 H-573 1" (25 mm) Control Stop Cap CP for use with<br />
1" (25 mm) & 3/4" (19 mm) H-700-A <strong>and</strong><br />
1" (25 mm) H-600-A SD Stops<br />
0308848 H-582 3/4" (19 mm) Control Stop Cap CP for use with<br />
3/4" (19 mm) H-600-A SD Stops<br />
17. 3308866 H-574 1" (25 mm) Control Stop Cap with Bumper for use<br />
with 1" (25 mm) & 3/4" (19 mm) H-700-A <strong>and</strong><br />
1" (25 mm) H-600-A SD Stops<br />
18. 3308867 H-576 1" (25 mm) Control Stop Cap with Extended<br />
Bumper for use with 1" (25 mm) & 3/4" (19 mm)<br />
H-700-A <strong>and</strong> 1" (25 mm) H-600-A SD Stops<br />
19. 3308860 H-1006-A <strong>Repair</strong> Kit for 1" (25 mm) Stops with Concealed<br />
WH for use with 1" (25 mm) H-700-A, H-600-A,<br />
<strong>and</strong> H-543-AWH WH Series Stops<br />
3308859 H-1007-A <strong>Repair</strong> Kit 3/4" (19 mm) Stops with Concealed WH<br />
for use with 3/4" (19 mm) H-700-A WH<br />
Series Stops<br />
20. 0388010 H-730-A 1" (25 mm) Concealed WH Bak-Chek ®<br />
Angle Stop RB<br />
0388011 H-730-A 3/4" (19 mm) Concealed WH Bak-Chek ® Angle<br />
Stop RB<br />
21. 3308872 H-1011-A <strong>Repair</strong> Kit (for Concealed WH only; does not<br />
include bonnet)<br />
42. 0208083 H-623 Bonnet<br />
0308705 H-561 Bonnet – OBSOLETE<br />
43. 0301048 A-143-A CP <strong>Valve</strong> Body<br />
0301050 A-143-A RB <strong>Valve</strong> Body<br />
Sensor<br />
Flushometers
Sensor<br />
Flushometers<br />
TO SOLENOID<br />
(SEE PAGE 46)<br />
11<br />
7<br />
1<br />
8<br />
20<br />
9<br />
19<br />
10<br />
12<br />
16<br />
2<br />
5<br />
17<br />
4<br />
18<br />
3<br />
14<br />
6<br />
15<br />
13<br />
48<br />
<strong>Repair</strong> <strong>Parts</strong> <strong>and</strong> <strong>Maintenance</strong> <strong>Guide</strong><br />
Optima ® Regal ®<br />
Flushometers<br />
OPTIMA ® REGAL ® FLUSHOMETER PARTS LIST<br />
Item<br />
No. Code No. Part No. Description<br />
1. 0301168 A-71 Inside Cover<br />
2. 0308676 H-550 CP Stop Coupling<br />
3. 0308801 H-551-A CP Adjustable Tail 2-1/16" (52 mm) long<br />
4. 5308696 H-553 O-Ring – 24 per package<br />
5. 5308381 H-552 Locking ring – 12 per package<br />
6. 3308853 H-541-A-SD Control Stop <strong>Repair</strong> Kit for use with 1" (25 mm)<br />
H-700-A & 3/4" (19 mm) H-700-A, 1" (25 mm)<br />
H-600-A, 1" (25 mm) & 3/4" (19 mm) H-700-A<br />
<strong>and</strong> 1" (25 mm) H-540-A SD Stops<br />
3308856 H-543-A-SD Control Stop <strong>Repair</strong> Kit for use with 3/4" (19 mm)<br />
H-600-A<br />
7. 0317004 R-10 CP Cover<br />
8. SEE INSIDE PARTS ASSEMBLY CHART ON PAGE 42<br />
9. 3323192 V-551-A Vacuum Breaker <strong>Repair</strong> Kit<br />
10. 5323005 V-500-AA 3/4" (19 mm) x 9" (229 mm) CP Vacuum Breaker<br />
5323006 V-500-AA 1-1/4" (32 mm) x 9" (229 mm) CP<br />
Vacuum Breaker<br />
5323007 V-500-AA 1-1/2" (38 mm) x 9" (229 mm) CP<br />
Vacuum Breaker<br />
11. 0306102 F-54-A 3/4" (19 mm) CP Spud Coupling Assembly<br />
0306142 F-55-A 1-1/4" (32 mm) CP Spud Coupling Assembly<br />
0306145 F-56-A 1-1/2" (38 mm) CP Spud Coupling Assembly<br />
12. SEE SLIP JOINT GASKETS AND RINGS TABLE BELOW<br />
13. 0388065 H-790-A 1" Screwdriver Stop Adjustable<br />
0388064 H-790-A 3/4" Screwdriver Stop Adjustable<br />
0388029 H-740-A 1" (25 mm) SD Bak-Chek ® Stop CP – complete<br />
OBSOLETE<br />
0388031 H-740-A 3/4" (19 mm) SD Bak-Chek ® Stop CP – complete<br />
OBSOLETE<br />
14. 0308612 H-622 CP Bonnet (Current Regal ® )<br />
0308991 H-639 CP Bonnet for use with 1" (25 mm) & 3/4"<br />
(19 mm) H-700-A <strong>and</strong> 1" (25 mm) H-540-A<br />
SD Stops – Pre 2010 Regal ® Stops<br />
0308601 H-538 CP Bonnet for use with H-700-A 3/4" (19 mm)<br />
SD Stop – OBSOLETE<br />
15. 5388001 H-1012-A CP Cap – 6 per package VP<br />
16. 5310034 J-2/J-7 Bumper Assembly – 6 per package – OBSOLETE<br />
17. 3308866 H-574 Stop Cap, chrome plated with Seat Bumper (-YO)<br />
18. 3308867 H-576 Stop Cap, chrome plated with Extended Seat<br />
Bumper (-YG)<br />
19. 5388002 H-528 Hole Plug<br />
20. 0301048 A-143-A CP <strong>Valve</strong> Body<br />
0301050 A-143-A RB <strong>Valve</strong> Body<br />
NOTE: Also refer to the Royal ® , Regal ® , control stop <strong>and</strong> flush connection sections.<br />
ITEM 31A. SLIP JOINT GASKETS AND RINGS<br />
NOTE: Also for use with Regal ® XL<br />
(Since mid-2010)<br />
Size Code No. Part No. Description<br />
1-1/2” 5306058 F-3 Red Friction Ring<br />
5322001 VBF-5 Black Slip Joint Gasket<br />
0319086/5319086 S-30 Flexible Seat<br />
0319079 S-21 Rigid Seat (rubber over brass)<br />
1-1/2” x 1-1/4” 0396062 F-105 Slip Joint Gasket – Rigid<br />
1-1/4” 5306057 F-3 Red Friction Ring<br />
5322176 VBF-5 Black Slip Joint Gasket<br />
0307052/5307052 G-21 Rigid Seat (rubber over brass)<br />
1” 5306056 F-3 Red Friction Ring<br />
5306115 F-5 Black Slip Joint Gasket<br />
3/4” 5306055 F-3 Red Friction Ring<br />
5306113 F-5 Black Slip Joint Gasket
ROYAL ® ESS (ITEM 24) REPAIR KIT<br />
49<br />
<strong>Repair</strong> <strong>Parts</strong> <strong>and</strong> <strong>Maintenance</strong> <strong>Guide</strong><br />
Relief Refill Flow<br />
Code No. Part No. Description <strong>Valve</strong> Head* Ring<br />
3345013 EL-1101-A Low Consumption Water Closets-1.6 gpf (6.0 Lpf) Green Gray Smooth<br />
3345014 EL-1102-A Water Saver Water Closets-3.5 gpf (13.2 Lpf) White Gray Smooth<br />
3345015 EL-1103-A 9 Liter European Water Closets-2.4 gpf (9.0 Lpf) Blue Gray Smooth<br />
3345016 EL-1106-A Wash Down Urinals-0.5 gpf (1.9 Lpf) Green Black Smooth<br />
3345017 EL-1107-A Low Consumption Urinals-1.0 gpf (3.8 Lpf) Green Black Slotted<br />
3345018 EL-1108-A Water Saver Urinals-1.5 gpf (5.7 Lpf) Black Black Smooth<br />
DIAPHRAGM ONLY KIT<br />
Relief Refill Flow<br />
Code No. Part No. Description <strong>Valve</strong> Head* Ring<br />
3301502 A-1041-A Low Consumption Water Closets-1.6 gpf (6.0 Lpf) Green Gray Smooth<br />
3301501 A-1038-A Water Saver Water Closets-3.5 gpf (13.2 Lpf) White Gray Smooth<br />
3301506 A-1045-A High Efficiency Water Closets-1.28 gpf (4.8 Lpf) Blue Gray Smooth<br />
3301505 A-1044-A 9 Liter European Water Closets-2.4 gpf (9.0 Lpf) Blue Gray Smooth<br />
3301504 A-1043-A Wash Down Urinals-0.5 gpf (1.9 Lpf) Green Black Smooth<br />
3321503 A-1042-A Low Consumption Urinals-1.0 gpf (3.8 Lpf) Green Black Slotted<br />
3301500 A-1037-A Water Saver Urinals-1.5 gpf (5.7 Lpf) Black Black Smooth<br />
3301142 A-1047-A High Efficiency Urinals-0.25 gpf (1.0 Lpf) with White Inserts White HEU Black Smooth<br />
3301143 A-1050-A High Efficiency Urinals-0.125 gpf (0.5 Lpf) with Green Inserts White HEU Black Smooth<br />
*NOTE: Water closet refill heads (gray) have larger slots than urinal refill heads (black).<br />
REGAL ® ESS (ITEM 28)<br />
INSIDE PARTS KITS ASSEMBLY<br />
NOTE: Also for use with Regal ® XL (Since mid-2010)<br />
Code No. Part No. Description<br />
3301036 A-36-A 4.5 gpf/17.0 Lpf-Closet<br />
3301037 A-37-A 1.5 gpf/5.7 Lpf-Urinal<br />
3301038 A-38-A 3.5 gpf/13.2 Lpf-Closet<br />
3301041 A-41-A 1.6 gpf/6.0 Lpf-Closet<br />
3301044 A-42-A 1.0 gpf/3.8 Lpf-Urinal<br />
3301081 A-43-A 0.5 gpf/1.9 Lpf-Urinal<br />
3301024 A-44-A 2.4 gpf/9.0 Lpf-Closet<br />
4.5 gpf/<br />
17.0 Lpf<br />
A-36-A<br />
Closet<br />
1.5 gpf/<br />
5.7 Lpf<br />
A-37-A<br />
Urinal<br />
REGAL ® INSIDE PARTS LIST** NOTE: Also for use with Regal ® XL (Since mid-2010)<br />
Item<br />
No. Code No. Part No. Description<br />
A. 5301058 A-19-AC Relief <strong>Valve</strong>, White (Closet)<br />
B. 5301059 A-19-AU Relief <strong>Valve</strong>, Black (Urinal)<br />
C. 5301211 A-19-ALC Relief <strong>Valve</strong>, Green (Closet/Urinal-Low Consumption)<br />
D. 0301143 A-19-AL Relief <strong>Valve</strong>, Blue (9 Liter Closet)<br />
E. 5301111 A-15-A Disc<br />
F. 5301188 A-156-A Diaphragm<br />
G. 5301236 A-163-A <strong>Guide</strong> Assembly 4.5 gpf/17.0 Lpf Closet <strong>and</strong> 1.5 gpf/5.7 Lpf Urinal<br />
H. 5301032 A-152-A <strong>Guide</strong> Assembly 3.5 gpf/13.2 Lpf Closet<br />
I. 5301031 A-151-A <strong>Guide</strong> Assembly 1.6 gpf/6.0 Lpf Closet<br />
J. 5301155 A-155-A <strong>Guide</strong> Assembly 1.0 gpf/3.8 Lpf Urinal<br />
K. 5301157 A-157-A <strong>Guide</strong> Assembly 0.5 gpf/1.9 Lpf Urinal<br />
**NOTE: All Regal ® inside part items are supplied in 12 per package.<br />
Optima ® Flushometers<br />
3.5 gpf/<br />
13.2 Lpf<br />
A-38-A<br />
Closet<br />
1.6 gpf/<br />
6.0 Lpf<br />
A-41-A<br />
Closet<br />
1.0 gpf/<br />
3.8 Lpf<br />
A-42-A<br />
Urinal<br />
To identify the Flush Volume of a<br />
DUAL FILTERED DIAPHRAGM<br />
ASSEMBLY, look at the color of the<br />
relief valve, the refill head <strong>and</strong><br />
the shape of flow ring.<br />
*NOTE: Water closet refill<br />
heads (gray) have larger slots than<br />
urinal refill heads (black).<br />
0.5 gpf/<br />
1.9 Lpf<br />
A-43-A<br />
Urinal<br />
2.4 gpf/<br />
9.0 Lpf<br />
A-44-A<br />
Closet<br />
Sensor<br />
Flushometers
Sensor<br />
Flushometers<br />
SOLENOID/SENSOR KITS LIST<br />
Code No. Part No. Description<br />
3305045 EL-124-2 CP 24 VAC Solenoid Assembly for exposed applications.<br />
Includes 24 VAC solenoid assembly <strong>and</strong> actuator cartridge<br />
assembly repair kit.<br />
3305154 EL-1001-A Closet flushometer Electronic Accessories Kit with Override.<br />
Includes screws, hex wrench, plate for 2-gang electrical box,<br />
mounting plate, override switch, yoke assembly, closet<br />
sensor replacement kit, an Optima ® sticker <strong>and</strong> sensor<br />
Installation Instructions.<br />
3305170 EL-1005-A Exposed Urinal flushometer Electronic Accessories Kit.<br />
Includes plate for 2-gang electrical box, four screws, yoke,<br />
hex wrench, washer, urinal sensor replacement kit, an<br />
Optima ® sticker <strong>and</strong> sensor Installation Instructions.<br />
3305172 EL-1007-A Concealed Urinal flushometer Accessories Kit. Includes<br />
screws, yoke, plate for 2-gang electrical box, hex wrench,<br />
washer, urinal sensor replacement kit, an Optima ® sticker<br />
<strong>and</strong> sensor Installation Instructions.<br />
EL-195<br />
EL-196<br />
EL-216 Closet<br />
EL-193 Urinal<br />
EL-126<br />
EL-127<br />
EL-125<br />
EL-125<br />
WB-37<br />
WB-6<br />
EL-197<br />
EL-141-A<br />
(Water Closet only)<br />
EL-1500-L Closet<br />
EL-1500 Urinal<br />
Panel shown with<br />
hole for override<br />
switch (closet<br />
applications only)<br />
50<br />
<strong>Repair</strong> <strong>Parts</strong> <strong>and</strong> <strong>Maintenance</strong> <strong>Guide</strong><br />
Optima ® Flushometers<br />
WALL BOX KITS CLOSET MODELS<br />
Code No. Part No. Description<br />
3305180 EL-192-A Closet Wall Box Kit – Stainless Steel. Includes four Mounting<br />
Screws, four Hex Nuts, four Lock Washers, Mounting<br />
Bracket, Electrical Box, Electrical Box Cover, Override Switch<br />
Subassembly, Wall Box 13" x 17" (330 mm x 432 mm) with<br />
14.5” x 18.5” (368 mm x 470 mm) Stainless Steel Wall Box<br />
Cover with hole for override switch, Spanner Bit <strong>and</strong> Closet<br />
Sensor Replacement Kit.<br />
3305160 EL-192-ALS Same as EL-192-A. Sensor NOT included.<br />
WALL BOX KITS URINAL MODELS<br />
3305178 EL-191-A Urinal Wall Box Kit – Stainless Steel. Includes Mounting<br />
Screws, Hex Nuts, Lock Washers, Wall Box 13" x 17"<br />
(330 mm x 432 mm) with 14.5” x 18.5” (368 mm x 470 mm)<br />
Stainless Steel Wall Box Cover, Mounting Bracket, Electrical<br />
Box, Electrical Box Cover, Spanner Bit, Urinal Sensor<br />
Replacement Kit.<br />
3305158 EL-191-ALS Same as EL-191-A. Sensor NOT included.<br />
WALL BOX PARTS<br />
0305845 EL-318 #8 Spanner Bit for WB-37 Spanner Screws (#8)<br />
0334021 WB-37 Spanner Head Screws for ESS WB<br />
5334000 WB-1000-A 6 Pack of WB-37 Screws<br />
— EL-216 Wall Box Frame <strong>and</strong> Stainless Steel Wall Box Cover for Water<br />
Closet. Mounting Hardware <strong>and</strong> Sensor NOT Included.<br />
— EL-193 Wall Box Frame <strong>and</strong> Stainless Steel Wall Box Cover for<br />
Urinal. Mounting Hardware <strong>and</strong> Sensor NOT Included.<br />
TYPICAL WIRING DIAGRAM FOR ONE FLUSH VALVE TYPICAL WIRING DIAGRAM FOR ONE OR MORE FLUSH VALVE(S)<br />
Override Button<br />
Transformer<br />
To <strong>Valve</strong> 24 VAC in<br />
Sensor<br />
Override Button<br />
To <strong>Valve</strong> 24 VAC in<br />
Override Button Override Button<br />
Sensor Sensor Sensor<br />
Transformer
SENSOR REPLACEMENT<br />
NOTE: The EL-1500 series Optima sensor (a two-wire unit) replaces the<br />
older EL-150 series sensors (either three-wire or four-wire units). Refer to<br />
the wiring history shown below.<br />
IMPORTANT<br />
Be certain to disconnect the 24 VAC power supply either at the<br />
transformer or the fuse box. Failure to disable the power supply can<br />
result in damage to the EL-1500 series sensor.<br />
The solenoid activated must be removed from the valve on exposed urinal<br />
installations. Do not damage the O-ring seal on the operator assembly.<br />
1. Remove the cover plate (for wall box installation, remove cover panel) <strong>and</strong><br />
old sensor from the wall installation. Use a 5/64" hex wrench to remove<br />
the cover plate screws (or #8 drilled spanner head screwdriver EL-318 to<br />
remove the v<strong>and</strong>al-resistant screws from the wall box cover panel.)<br />
FIGURE 1A<br />
ORIENTATION<br />
ARROW<br />
2. Connect one 24 VAC lead to the sensor terminal labeled “24 VAC IN”<br />
(see Figure 1B).<br />
On an old three-wire series EL-150 sensor, this wire was connected<br />
to the BLACK sensor lead.<br />
On an old four-wire series EL-150 sensor, this wire was connected to<br />
the BROWN sensor lead.<br />
3. Connect one solenoid lead to the sensor terminal labeled “TO VALVE”<br />
(see Figure 1B).<br />
On an old three-wire or four-wire EL-150 series sensor, this wire was<br />
connected to the RED sensor lead.<br />
4. Connect the remaining 24 VAC lead to the remaining solenoid lead.<br />
On an old three-wire series EL-150 sensor, these wires were<br />
connected to the WHITE sensor leads.<br />
On an old four-wire EL-150 series sensor, these wires were connected<br />
to the YELLOW <strong>and</strong> BLUE (or in very early models, the inner BROWN)<br />
sensor leads.<br />
5. On Water Closet installations only, connect the override button (shown as<br />
the override switch in wiring diagram) parallel to the EL-1500-L sensor.<br />
6. Reinstall the sensor with the orientation arrow on the lens side of the<br />
sensor pointing UP (see Figure 1A). Replace the cover plate (or wall box<br />
panel) <strong>and</strong> tighten the cover plate (or wall box panel) screws.<br />
7. Reconnect the 24 VAC power supply at the transformer or the fuse box.<br />
WIRING DIAGRAM<br />
FIGURE 2<br />
120 VAC<br />
COMMON<br />
24 VAC<br />
EL-1500 SERIES SENSOR<br />
* OVERRIDE SWITCH USED WITH<br />
WATER CLOSETS ONLY<br />
FIGURE 1B<br />
OVERRIDE<br />
SWITCH*<br />
24 VAC COIL<br />
COIL WIRE<br />
GROUND<br />
SCREW<br />
EL-1500 SERIES SENSOR<br />
IN SOLENOID<br />
HOUSING<br />
OVERRIDE<br />
SWITCH*<br />
24 VAC COIL<br />
COIL WIRE<br />
“24 VAC IN” CONNECTION<br />
GROUND SCREW<br />
IN SOLENOID<br />
HOUSING<br />
GND<br />
UNIT #1<br />
UNIT #2 THRU #10<br />
(IF USED)<br />
“TO VALVE”<br />
CONNECTION<br />
NOTE: A MAXIMUM OF TEN (10) SENSOR FLUSHOMETER UNITS CAN ACTIVATE FROM ONE (1) SLOAN<br />
EL-154 TRANSFORMER. CLASS 2 UL LISTED, 48 VA (MIN.) AT 24 VAC, PLATE MOUNTED.<br />
51<br />
<strong>Repair</strong> <strong>Parts</strong> <strong>and</strong> <strong>Maintenance</strong> <strong>Guide</strong><br />
Optima ® Flushometers<br />
START-UP MODE<br />
The self-adaptive sensor automatically adapts to the surrounding<br />
environment when 24 volt supply is activated. No manual adjustments are<br />
required. Start-up mode will take approximately one (1) minute to complete<br />
its cycle <strong>and</strong> is important that no non-permanent target is present at this<br />
time. A continuous red light visible in sensor window indicates sensor is in<br />
the start-up mode. If the red light is flashing, this indicates that the sensor is<br />
picking up a target. Unless this target is a permanent fixture in the sensor’s<br />
environment (i.e., wall or stall door), it must be removed from the view of the<br />
sensor. Then, either disconnect the 24 volt supply for twenty (20) seconds or<br />
more, or push the manual override button for more than twenty (20)<br />
seconds in closet set-up. Reconnect the 24 VAC power supply at the<br />
transformer or the fuse box. When the start-up cycle is complete, there will<br />
be no light visible in the sensor window.<br />
NOTE: If the 24 volt power supply is ever interrupted for longer than<br />
twenty (20) seconds, the start-up mode automatically begins when<br />
power is restored.<br />
Incorrect wiring or a short in the 24 volt power supply is indicated by a<br />
continuous warning signal seen in the senosr window. The visible red light<br />
flashes an “SOS” signal: three (3) slow, three (3) fast, three (3) slow flashes.<br />
EL-1500 SERIES<br />
SENSOR<br />
START-UP MODE (FOR PREVIOUS SENSOR)<br />
NOTE: It is important that only permanent targets are present at this time.<br />
The self-adaptive sensor automatically adjusts to the surrounding<br />
environment when the 24 volt supply is activated. No manual adjustment is<br />
required. The start-up cycle completes in approximately five (5) minutes. A<br />
continuous red light visible in the sensor window indicates the start-up<br />
mode. If the red light flashes, the sensor detects a target. Unless this target<br />
is a permanent fixture in the sensor’s environment (i.e., a wall or stall door),<br />
it must be removed from the view of the sensor. If a target is permanent, the<br />
sensor will adapt itself around this target. In this case, the start-up mode<br />
may take up to ten (10) minutes. When the start-up cycle is complete, the<br />
red light will no longer be visible in the sensor window.<br />
NOTE: If the 24 volt power supply is ever interrupted for longer than fifteen<br />
(15) seconds, the start-up mode begins automatically when power is<br />
restored.<br />
Incorrect wiring or a short in the 24 volt power supply will initiate a warning<br />
signal in the sensor window. The visible light flashes a continuous “S-O-S”<br />
signal: three (3) fast, three (3) slow, <strong>and</strong> three (3) fast flashes.<br />
EL-150 Wiring History for 4-wire <strong>and</strong> 3-wire sensors<br />
Release date 03/09/78<br />
brown red<br />
brown<br />
“24 VAC IN”<br />
red<br />
Release date 08/11/83<br />
brown<br />
brown red red<br />
with<br />
yellow or<br />
all yellow<br />
“TO VALVE”<br />
CONNECTION<br />
Release date 02/02/87<br />
blue red<br />
brown<br />
Release date 12/12/90<br />
red black white<br />
yellow<br />
51<br />
Sensor<br />
Flushometers
Sensor<br />
Flushometers<br />
TROUBLESHOOTING GUIDE<br />
ATTENTION INSTALLERS: With the exception of the control stop inlet,<br />
DO NOT USE pipe sealant or plumbing grease on any valve component or<br />
coupling! To protect the chrome or special finish of <strong>Sloan</strong> flushometers,<br />
DO NOT USE toothed tools to install or service these valves. Use our A-50<br />
Super-Wrench or other smooth-jawed wrench to secure couplings.<br />
Regulations for low consumption fixtures (1.6 gpf/6.0 Lpf closets <strong>and</strong><br />
1.0 gpf/3.8 Lpf urinals) prohibit use of higher flush volumes.<br />
Urinals (EL-1500 Sensor)<br />
When the sensor detects a user, a slow flashing red light appears in the<br />
sensor window. After eight (8) to ten (10) seconds, the light flashes rapidly<br />
to indicate that the sensor is armed. When the sensor no longer detects a<br />
user, the sensor immediately activates the solenoid valve after a 0.5 second<br />
delay.<br />
Water Closets (EL-1500-L Sensor)<br />
Detection <strong>and</strong> activation are the same as for the urinal EL-1500 sensor<br />
(ABOVE) except when the sensor no longer detects an user, the sensor<br />
activates the solenoid valve after a three (3) second delay.<br />
The EL-1500 urinal <strong>and</strong> EL-1500-L closet self-adaptive sensors are<br />
equipped with a “Sentinel Flush” feature. These units automatically activate<br />
the solenoid every twenty-four (24) hours after the last user.<br />
1. <strong>Valve</strong> does not function (red light does not flash when user<br />
steps in front of sensor).<br />
A. No power is being supplied to sensor. Ensure that the main power is<br />
turned “ON”. Check transformer, leads <strong>and</strong> connections. <strong>Repair</strong> or<br />
replace as necessary.<br />
B. EL-1500/EL-1500-L sensor is not operating. Replace sensor.<br />
2. <strong>Valve</strong> does not function (red light flashes when user steps in<br />
front of sensor).<br />
INDICATOR: The red light stops flashing when user steps away<br />
<strong>and</strong> the valve makes a “clicking” sound but does not flush.<br />
A. No water is being supplied to the valve. Make certain that water<br />
supply is turned “ON” <strong>and</strong> the control stop is open.<br />
B. EL-128-A cartridge is fouled or jammed. Turn electronic power to<br />
valve “OFF” (failure to do so could result in damage to the solenoid<br />
coil). Remove the solenoid operator from the valve <strong>and</strong> remove the<br />
EL-128-A cartridge. Clean <strong>and</strong>/or repair as necessary.<br />
INDICATOR: The red light stops flashing when user steps<br />
away but the valve does NOT make a “clicking” sound <strong>and</strong><br />
does NOT flush.<br />
A. EL-163-A solenoid shaft assembly is fouled or jammed. Turn<br />
electronic power to valve “OFF” (failure to do so could result in<br />
damage to the solenoid coil). Remove EL-101 or EL-166 nut from the<br />
solenoid operator. Remove the coil from the solenoid operator. Use a<br />
spanner wrench or pliers to remove the EL-163-A solenoid shaft<br />
assembly from valve. Clean <strong>and</strong>/or replace as necessary. Be sure to<br />
replace plunger spring when reassembling solenoid shaft assembly.<br />
INDICATOR: The red light flashes three (3) fast flashes, three (3)<br />
slow flashes then three (3) fast flashes (“S-O-S”) <strong>and</strong> continues<br />
to repeat this cycle even when user steps out of the sensor’s<br />
detection range.<br />
A. EL-1500/EL-1500-L sensor wiring connections are incorrect. Rewire<br />
sensor to valve. One solenoid lead connects to the “TO VALVE”<br />
connection on sensor. One transformer lead connects to the “24 VAC<br />
IN” connection on sensor. Second solenoid lead <strong>and</strong> second<br />
transformer lead connect together.<br />
B. Wiring to sensor is ground shorted. Find short in wiring circuit <strong>and</strong><br />
correct.<br />
C. EL-165-2 solenoid coil is burnt out or coil is not connected to<br />
solenoid plunger shaft. Reinstall or replace coil as necessary.<br />
52<br />
<strong>Repair</strong> <strong>Parts</strong> <strong>and</strong> <strong>Maintenance</strong> <strong>Guide</strong><br />
Optima ® Flushometers<br />
3. Range too short.<br />
A. Power down unit for 30 seconds. Power up. Wait six minutes for<br />
calibration.<br />
B. If reset does not work, replace.<br />
4. Volume of water is insufficient to adequately siphon fixture.<br />
A. Control stop is not open wide enough. Adjust control stop for desired<br />
water delivery.<br />
B. Low consumption unit is installed on water saver or conventional<br />
fixture. Replace diaphragm component parts of valve with kit that<br />
corresponds to appropriate flush volume of fixture.<br />
C. Inadequate water volume or pressure available from supply. Increase<br />
pressure or supply (flow rate) to the valve. Consult factory for<br />
assistance.<br />
5. Length of flush is too long (long flushing) or valve fails<br />
to shut off.<br />
A. Water saver valve is installed on low consumption fixture. Replace<br />
diaphragm component parts of valve with kit that corresponds to<br />
appropriate flush volume of fixture.<br />
B. Relief valve in diaphragm is not seated properly or by-pass hole in<br />
diaphragm is clogged. Disassemble inside diaphragm component<br />
parts <strong>and</strong> wash parts thoroughly. Replace worn parts if necessary.<br />
6. Water splashes from fixture.<br />
A. Supply flow rate is more than necessary. Adjust control stop to meet<br />
flow rate required for proper cleansing of the fixture.<br />
B. Closet valve is installed on urinal fixture. Replace closet diaphragm<br />
component parts with proper urinal kit (inside diaphragm assembly or<br />
inside parts kit).<br />
CARE AND CLEANING INSTRUCTIONS<br />
DO NOT USE abrasive or chemical cleaners to clean flushometers or sensor<br />
that may dull the luster <strong>and</strong> attack the chrome or special decorative finishes.<br />
Use ONLY mild soap <strong>and</strong> water, then wipe dry with a clean towel or cloth.<br />
When cleaning the bathroom tile, protect the flushometer from any<br />
splattering of cleaner. Acids <strong>and</strong> cleaning fluids can discolor or remove<br />
chrome plating.<br />
When assistance is required, please contact<br />
<strong>Sloan</strong> Technical Support at: 1-888-SLOAN-14 (1-888-756-2614).
8<br />
5A<br />
7<br />
10<br />
4B<br />
12<br />
1<br />
4A<br />
9A/9B<br />
6A 6D 6B 6D 6C 6D<br />
11<br />
5B 5C<br />
2<br />
13<br />
3<br />
53<br />
<strong>Repair</strong> <strong>Parts</strong> <strong>and</strong> <strong>Maintenance</strong> <strong>Guide</strong><br />
Optima ® Royal ® ES-S TMO<br />
Exposed Flushometers<br />
ROYAL ® OPTIMA ® ES-S TMO EXPOSED FLUSHOMETER PARTS LIST<br />
Item<br />
No. Code No. Part No. Description<br />
1. ‡ Solenoid Activated <strong>Valve</strong> Assembly<br />
2. ‡ H-700-A Bak-Chek ® Control Stop<br />
3. 3308772 H-1010-A V<strong>and</strong>al Resistant Stop Cap<br />
4A. 3308782 H-633-AA 1" (25 mm) Sweat Solder Kit<br />
4B. 3308603 H-532 Adapter, 1" NPT to 1" Tube<br />
3308607 H-535. Adapter, 3/4" NPT to 3/4" Tube<br />
5A. — V-600-AA 1-1/2" (38 mm) Vacuum Breaker Assembly CP<br />
(Models 110/111, 115, <strong>and</strong> 116)<br />
5B. — V-600-AA 1-1/4" (32 mm) x 9" (229 mm) Vacuum Breaker<br />
Assembly CP (Model 180 ES-S)<br />
5C. — V-600-AA 3/4" (19 mm) x 9" (229 mm) Vacuum Breaker<br />
Assembly CP (Model 186 ES-S)<br />
6A. 0306146 F-5-AT 1-1/2" (38 mm) Spud Coupling Assembly CP<br />
(Models 110/111, 115, <strong>and</strong> 116)<br />
6B. 0306140 F-5-AU 1-1/4" (32 mm) Spud Coupling Assembly CP<br />
(Model 180)<br />
6C. 0306125 F-5-AW 3/4" (19 mm) Spud Coupling Assembly CP<br />
(Model 186)<br />
6D. SEE SLIP JOINT GASKETS AND RINGS ON TABLE BELOW<br />
7. ‡ F-15 Tail Assembly<br />
8. 0302323PK B-110-A Flange Assembly<br />
9A. 3305107 EL-635-A CP Cover Plate with Sensor (Mounting Plate <strong>and</strong><br />
Screws included) (Models 110/111,<br />
115, <strong>and</strong> 116)<br />
9B. 3305101 EL-645-A CP Cover Plate with Sensor (Mounting Plate <strong>and</strong><br />
Screws included) (Models 180 <strong>and</strong> 186)<br />
10. 0305329 EL-124-2 CP 24V Solenoid Assembly<br />
11. 0303009 C-2-A True Mechanical Override Button<br />
12. 3325814 EBV-1017-A CP <strong>Valve</strong> H<strong>and</strong>le Cap<br />
13. 0301082PK A-6 CP Nut<br />
14. 3345080 EL-1026-A ES-S to ES-S-TMO Conversion Kit Exposed<br />
includes Body/Tail assembly (no inside parts or<br />
covers) #11, #12, #13, DO-22 <strong>and</strong> EL-110 O rings<br />
‡ Part number varies with valve model variation; consult factory.<br />
ITEM 6D. SLIP JOINT GASKETS AND RINGS<br />
Size Code No. Part No. Description<br />
1-1/2” 5306058 F-3 Red Friction Ring<br />
5322001 VBF-5 Black Slip Joint Gasket<br />
0319086/5319086 S-30 Flexible Seat<br />
0319079 S-21 Rigid Seat (rubber over brass)<br />
1-1/2” x 1-1/4” 0396062 F-105 Slip Joint Gasket – Rigid<br />
1-1/4” 5306057 F-3 Red Friction Ring<br />
5322176 VBF-5 Black Slip Joint Gasket<br />
0307052/5307052 G-21 Rigid Seat (rubber over brass)<br />
1” 5306056 F-3 Red Friction Ring<br />
5306115 F-5 Black Slip Joint Gasket<br />
3/4” 5306055 F-3 Red Friction Ring<br />
5306113 F-5 Black Slip Joint Gasket<br />
Sensor<br />
Flushometers
Sensor<br />
Flushometers<br />
3<br />
4<br />
19<br />
2<br />
18A 13A/B<br />
18A<br />
12A<br />
12B<br />
18A<br />
18A<br />
14A/B<br />
Optima ES-S TMO<br />
Concealed Model 152<br />
15<br />
9<br />
10<br />
5<br />
Optima ES-S TMO<br />
Concealed Model 195<br />
6<br />
16<br />
17<br />
7<br />
8<br />
11<br />
18<br />
1A/1B<br />
54<br />
<strong>Repair</strong> <strong>Parts</strong> <strong>and</strong> <strong>Maintenance</strong> <strong>Guide</strong><br />
Optima ® Royal ® ES-S TMO<br />
Concealed Flushometers<br />
ROYAL ® OPTIMA ® ES-S TMO CONCEALED FLUSHOMETER PARTS LIST<br />
Item<br />
No. Code No. Part No. Description<br />
1A. 3305107 EL-635-A CP Cover Plate with Sensor (Mounting Screws<br />
included) (Model 152)<br />
1B. 3305101 EL-645-A CP Cover Plate with Sensor (Mounting Screws<br />
included) (Model 195)<br />
2. ‡ — <strong>Valve</strong> Assembly<br />
3. 3301093 A-1013-A Concealed <strong>Valve</strong> H<strong>and</strong>le Cap RB<br />
4. 0305331 EL-138-2 RB Concealed 24V Solenoid Assembly<br />
5. ‡ H-730-A RB Bak-Chek ® Control Stop<br />
6. 3318001 HY-83-A Actuator Cartridge<br />
7. 3318005 HY-109-A-1 <strong>Valve</strong> Actuator Assembly<br />
8. 0318093 HY-30 1/4" (6 mm) x 48” (1219 mm) Connecting Tubes<br />
9. 0318117 HY-100-A-1 Metal Push Button Assembly<br />
10. ‡ V-500-AA 1-1/2" (38 mm) Vacuum Breaker Assembly RB<br />
(Model 152)<br />
11. ‡ V-500-AA 3/4" (19 mm) Vacuum Breaker Assembly RB<br />
(Model 192)<br />
12A. 0306088 F-2-AT 1-1/2" (38 mm) Slip Joint Coupling Assembly RB<br />
(Model 152)<br />
12B. 0306054 F-2-AW 3/4" (19 mm) Slip Joint Coupling Assembly RB<br />
(Model 192)<br />
13A. ‡ F-110 1-1/4" (32 mm) Outlet Tube with Flange <strong>and</strong><br />
Scoring (Model 152)<br />
13B. ‡ F-100 1-1/2" (38 mm) Outlet Tube with Flange <strong>and</strong><br />
Scoring (Model 152)<br />
14A. 0306059 F-2-AU 1-1/4" (32 mm) Slip Joint Coupling Assembly RB<br />
(Model 152)<br />
14B. 0306088 F-2-AT 1-1/2" (38 mm) Slip Joint Coupling Assembly RB<br />
(Model 152)<br />
15. 0306091 F-2-A 1-1/2" (38 mm) Coupling with S-21 Gasket<br />
(Model 152)<br />
16. 0206146PK F-21 1-1/2" (38 mm) Double Male Slip Joint Elbow<br />
17. ‡ F-15-A ELL with 3/4" (19 mm) Tail<br />
18. 0306054 F-2-AW 3/4" (19 mm) Slip Joint Coupling<br />
18A. SEE SLIP JOINT GASKETS AND RINGS TABLE BELOW<br />
19. 0305190 EL-190-A H<strong>and</strong>le Adapter Assembly<br />
‡ Part number varies with valve model variation; consult factory.<br />
ITEM 18A. SLIP JOINT GASKETS AND RINGS<br />
Size Code No. Part No. Description<br />
1-1/2” 5306058 F-3 Red Friction Ring<br />
5322001 VBF-5 Black Slip Joint Gasket<br />
0319086/5319086 S-30 Flexible Seat<br />
0319079 S-21 Rigid Seat (rubber over brass)<br />
1-1/2” x 1-1/4” 0396062 F-105 Slip Joint Gasket – Rigid<br />
1-1/4” 5306057 F-3 Red Friction Ring<br />
5322176 VBF-5 Black Slip Joint Gasket<br />
0307052/5307052 G-21 Rigid Seat (rubber over brass)<br />
1” 5306056 F-3 Red Friction Ring<br />
5306115 F-5 Black Slip Joint Gasket<br />
3/4” 5306055 F-3 Red Friction Ring<br />
5306113 F-5 Black Slip Joint Gasket<br />
54
22<br />
9<br />
3<br />
4<br />
2<br />
12A<br />
12 12<br />
13A/B<br />
12B 12 12<br />
14A/B<br />
23<br />
15<br />
10<br />
16<br />
5<br />
6<br />
17<br />
11<br />
1A/1B<br />
18<br />
7<br />
8<br />
19<br />
20<br />
21<br />
55<br />
<strong>Repair</strong> <strong>Parts</strong> <strong>and</strong> <strong>Maintenance</strong> <strong>Guide</strong><br />
Optima ® Royal ® ES-S TMO with<br />
SWB Concealed Flushometers<br />
ROYAL ® OPTIMA ® ES-S TMO WITH SWB PARTS LIST<br />
Item<br />
No. Code No. Part No. Description<br />
1A. — WB-55-A Wall Box Cover Plate Assembly (Model 152)<br />
1B. — WB-60-A Wall Box Cover Plate Assembly (Model 195)<br />
2. ‡ — <strong>Valve</strong> Assembly<br />
3. 3301093 A-1013-A Concealed <strong>Valve</strong> H<strong>and</strong>le Cap RB<br />
4. 0305331 EL-138-2 RB Concealed 24V Solenoid Assembly<br />
5. ‡ H-730-A RB Bak-Chek ® Control Stop<br />
6. 3318001 HY-83-A Actuator Cartridge<br />
7. 3318005 HY-109-A-1 <strong>Valve</strong> Actuator Assembly<br />
8. 0318117 HY-30 1/4" (6 mm) x 48” (1219 mm) Connecting Tubes<br />
9. — — 12” x 12” x 4” Wall Box Assembly<br />
10. ‡ V-500-AA 1-1/2" (38 mm) Vacuum Breaker Assembly RB<br />
(Model 152)<br />
11. ‡ V-500-AA 3/4" (19 mm) Vacuum Breaker Assembly RB<br />
(Model 192)<br />
12. SEE SLIP JOINT GASKETS AND RINGS TABLE BELOW<br />
12A. 0306088 F-2-AT 1-1/2" (38 mm) Slip Joint Coupling Assembly RB<br />
(Model 152)<br />
12B. 0306054 F-2-AW 3/4" (19 mm) Slip Joint Coupling Assembly RB<br />
(Model 192)<br />
13A. ‡ F-110 1-1/4" (32 mm) Outlet Tube Flanged <strong>and</strong> Scored<br />
(Model 152)<br />
13B. ‡ F-100 1-1/2" (38 mm) Outlet Tube Flanged <strong>and</strong> Scored<br />
(Model 152)<br />
14A. 0306059 F-2-AU 1-1/4" (32 mm) Slip Joint Coupling Assembly RB<br />
(Model 152)<br />
14B. 0306088 F-2-AT 1-1/2" (38 mm) Slip Joint Coupling Assembly RB<br />
(Model 152)<br />
15. 0306091 F-2-A 1-1/2" (38 mm) Coupling with S-21 Gasket<br />
(Model 152) †<br />
16. 0206146PK F-21 1-1/2" (38 mm) Double Male Slip Joint Elbow<br />
17. 0306366 F-15-A ELL with 3/4" (19 mm) Tail (Model 195)†<br />
18. 0306054 F-2-AW 3/4" (19 mm) Slip Joint Coupling<br />
19. 0334017 WB-18 U-Type Nuts (4) 1/4-20<br />
20. — WB-49 Tamper Resistant Screws (4) 1/4-20 x 1-1/2<br />
21. — HY-126 Elbow Fitting (2)<br />
22. 0318078 HY-50-A Hydraulic Actuator Assembly<br />
23. 0305190 EL-190-A H<strong>and</strong>le Adapter Assembly<br />
† “L” Dimension available between the lengths of 2” <strong>and</strong> 10¾”<br />
‡ Part number varies with valve model variation; consult factory.<br />
ITEM 12. SLIP JOINT GASKETS AND RINGS<br />
Size Code No. Part No. Description<br />
1-1/2” 5306058 F-3 Red Friction Ring<br />
5322001 VBF-5 Black Slip Joint Gasket<br />
0319086/5319086 S-30 Flexible Seat<br />
0319079 S-21 Rigid Seat (rubber over brass)<br />
1-1/2” x 1-1/4” 0396062 F-105 Slip Joint Gasket – Rigid<br />
1-1/4” 5306057 F-3 Red Friction Ring<br />
5322176 VBF-5 Black Slip Joint Gasket<br />
0307052/5307052 G-21 Rigid Seat (rubber over brass)<br />
1” 5306056 F-3 Red Friction Ring<br />
5306115 F-5 Black Slip Joint Gasket<br />
3/4” 5306055 F-3 Red Friction Ring<br />
5306113 F-5 Black Slip Joint Gasket<br />
Sensor<br />
Flushometers
Sensor<br />
Flushometers<br />
TROUBLESHOOTING GUIDE<br />
Urinals (EL-1500 Sensor)<br />
When the sensor detects a user, a slow flashing red light appears in the<br />
sensor window. After eight (8) to ten (10) seconds, the light flashes rapidly to<br />
indicate that the sensor is armed. When the sensor no longer detects a user,<br />
the sensor immediately activates the solenoid valve after a 0.5 second delay.<br />
Water Closets (EL-1500-L Sensor)<br />
Detection <strong>and</strong> activation are the same as for the urinal EL-1500 sensor<br />
(ABOVE) except when the sensor no longer detects an user, the sensor<br />
activates the solenoid valve after a three (3) second delay.<br />
The EL-1500 urinal <strong>and</strong> EL-1500-L closet self-adaptive sensors are<br />
equipped with a “Sentinel Flush” feature. These units automatically activate<br />
the solenoid every twenty-four (24) hours after the last user.<br />
1. <strong>Valve</strong> does not function (red light does not flash<br />
when user steps in front of sensor).<br />
A. No power is being supplied to sensor. Ensure that the main power is<br />
turned “ON.” Check transformer, leads <strong>and</strong> connections. <strong>Repair</strong> or<br />
replace as necessary.<br />
B. EL-1500-L Sensor is not operating. Replace the EL-1500-L Sensor.<br />
2. <strong>Valve</strong> does not function (red light flashes when user steps in<br />
front of sensor).<br />
INDICATOR: Red light stops flashing when user steps away <strong>and</strong><br />
valve makes a “clicking” sound but does not flush.<br />
A. No water is being supplied to the valve. Make certain that the water<br />
supply is turned “ON” <strong>and</strong> the Control Stop is open. No power is being<br />
supplied to sensor. Ensure that the main power is turned “ON.” Check<br />
transformer, leads <strong>and</strong> connections. <strong>Repair</strong> or replace as necessary.<br />
B. EL-128-A cartridge is fouled or jammed. Turn electronic power to<br />
valve “OFF” (failure to do so could result in damage to the solenoid<br />
coil. Remove the solenoid operator from the valve <strong>and</strong> remove the<br />
EL-128-A cartridge. Clean <strong>and</strong>/or repair as necessary.<br />
INDICATOR: The red light stops flashing when user steps<br />
away but the valve does NOT make a “clicking” sound <strong>and</strong><br />
does NOT flush.<br />
A. EL-163-A solenoid shaft assembly is fouled or jammed.<br />
Turn electronic power to valve “OFF” (failure to do so could result in<br />
damage to the solenoid coil). Remove EL-101 or EL-166 nut from the<br />
solenoid operator. Remove the coil from the solenoid operator. Use a<br />
spanner wrench or pliers to remove the EL-163-A solenoid shaft<br />
assembly from valve. Clean <strong>and</strong>/or replace as necessary. Be sure to<br />
replace plunger spring when reassembling Solenoid Shaft Assembly.<br />
INDICATOR: The red light flashes three (3) short flashes,<br />
three (3) long flashes then three (3) short flashes (“S-O-S”) <strong>and</strong><br />
continues to repeat this cycle even when user steps out of the<br />
sensor’s detection range.<br />
A. EL-1500-L Sensor wiring connections are incorrect. Rewire Sensor to<br />
valve. One solenoid lead connects to the “TO VALVE” connection on<br />
Sensor. One transformer lead connects to the “24 VAC IN” connection<br />
on Sensor. Second solenoid lead <strong>and</strong> second transformer lead connect<br />
together.<br />
B. Wiring to Sensor is ground shorted.<br />
Find short in wiring circuit <strong>and</strong> correct.<br />
C. EL-165-2 solenoid coil is burnt out or coil is not connected to solenoid<br />
plunger shaft. Reinstall or replace coil as necessary.<br />
3. Volume of water is insufficient to adequately siphon fixture.<br />
A. Control Stop is not open wide enough. Adjust control stop for desired<br />
water delivery.<br />
B. Low Consumption unit is installed on Water Saver or Conventional<br />
fixture. Replace Diaphragm component parts of valve with kit that<br />
corresponds to appropriate flush volume of fixture.<br />
C. Inadequate water volume or pressure available from supply.<br />
Increase pressure or supply (flow rate) to the valve. Consult factory<br />
for assistance.<br />
56<br />
<strong>Repair</strong> <strong>Parts</strong> <strong>and</strong> <strong>Maintenance</strong> <strong>Guide</strong><br />
Optima ® Royal ® ES-S TMO (SWB)<br />
Flushometers<br />
4. Length of flush is too long (long flushing) or valve fails<br />
to shut off.<br />
A. Water Saver valve is installed on Low Consumption fixture.<br />
Replace Diaphragm component parts of valve with kit that<br />
corresponds to appropriate flush volume of fixture.<br />
B. Relief valve in diaphragm is not seated properly or bypass hole in<br />
diaphragm is clogged. Disassemble inside Diaphragm component<br />
parts <strong>and</strong> wash parts thoroughly. Replace worn parts if necessary.<br />
5. Water splashes from fixture.<br />
A. Supply flow rate is more than necessary. Adjust Control Stop to meet<br />
flow rate required for proper cleansing of the fixture.<br />
6. Leakage occurring at the Push Button (Concealed models only).<br />
A. Damaged or worn seals or lime build up in the actuator cartridge.<br />
Replace with new HY-32-A cartridge.<br />
7. The flushometer does not flush or flushes only once <strong>and</strong> will not<br />
flush a second time when the button is pushed (Concealed<br />
models only).<br />
A. The plunger is lodged in the actuator cartridge or the plunger by-pass<br />
hole is clogged. Remove the actuator housing <strong>and</strong> cartridge from the<br />
flushometer. Clean under running water. If cartridge parts are worn,<br />
deteriorated or limed up <strong>and</strong> problem persists after cleaning, replace<br />
with new HY-83-A cartridge.<br />
1. Turn off water at the control stop.<br />
2. Unscrew the housing coupling nut from the flushometer.<br />
3. Remove the actuator housing from the flushometer. The tubing<br />
connections can be left intact.<br />
3. Remove the actuator cartridge from the flushometer body. Care<br />
should be taken so that upon removal the actuator does not<br />
abruptly separate due to spring compression within. If the actuator<br />
cartridge is lodged in the body cavity, grip the exposed portion<br />
gently with a pair of channel lock pliers <strong>and</strong> rotate back <strong>and</strong> forth to<br />
loosen the “O” ring seal.<br />
5. Separate the actuator housing to reveal the spring <strong>and</strong> plunger.<br />
B. Plastic Tubing Installed Incorrectly. Install Plastic Tubing Correctly.<br />
8. The flushometer does not flush <strong>and</strong> a small amount of leakage is<br />
visible below the valve (Concealed models only).<br />
A. Foreign material lodged in the cartridge. Remove the cartridge <strong>and</strong><br />
inspect for foreign material. Clean under running water.<br />
B. Damaged or worn seals or lime build up in the actuator cartridge.<br />
Replace with new HY-32-A cartridge.<br />
1. Remove the button or actuator assembly from the wall or fixture.<br />
2. Disassemble the flange or button assembly from the actuator body.<br />
3. Unscrew the cartridge from the actuator body. Note: The metal push<br />
button was designed to be v<strong>and</strong>al-proof <strong>and</strong> thus requires removal<br />
from the wall for servicing.<br />
C. Plastic Tubing installed incorrectly. Install Plastic Tubing Correctly.<br />
CARE AND CLEANING INSTRUCTIONS<br />
DO NOT USE abrasive or chemical cleaners to clean flushometers or sensor<br />
that may dull the luster <strong>and</strong> attack the chrome or special decorative finishes.<br />
Use ONLY mild soap <strong>and</strong> water, then wipe dry with a clean towel or cloth.<br />
When cleaning the bathroom tile, protect the flushometer from any<br />
splattering of cleaner. Acids <strong>and</strong> cleaning fluids can discolor or remove<br />
chrome plating.<br />
When assistance is required, please contact<br />
<strong>Sloan</strong> Technical Support at: 1-888-SLOAN-14 (1-888-756-2614).
1<br />
2<br />
57<br />
<strong>Repair</strong> <strong>Parts</strong> <strong>and</strong> <strong>Maintenance</strong> <strong>Guide</strong><br />
SMOOTH ® Flushometer Hardwired<br />
Side-Mount-Operator-Over-The-H<strong>and</strong>le<br />
AC powered, sensor activated retrofit unit for<br />
exposed closet <strong>and</strong> urinal flushometers.<br />
PARTS LIST<br />
Item<br />
No. Code No. Part No. Description<br />
1. 3305201 EL-600-A Side Mount Operator for Water Closets (Toilets)<br />
<strong>and</strong> Urinals<br />
2. — EL-612-A Wall Flange Hardware Mounting Kit<br />
— — EL-601-A Replacement Power Adapter<br />
ACCESSORY TRANSFORMERS<br />
— 0345095 EL-386 120 VAC/6 VAC, 50/60 Hz (3 VA)<br />
Plug-in (will operate 1 unit)<br />
— 0345125 EL-451 120 VAC/6 VAC, 50/60 Hz (25 VA)<br />
Box Mount (will operate up to 8 units)<br />
One EL-386 Transformer serves one (1)<br />
OPTIMA ® Closet/Urinal flushometer.<br />
One EL-451 Transformer serves up to eight (8)<br />
OPTIMA ® Closet/Urinal flushometers.<br />
Sensor<br />
Flushometers
Sensor<br />
Flushometers<br />
58<br />
<strong>Repair</strong> <strong>Parts</strong> <strong>and</strong> <strong>Maintenance</strong> <strong>Guide</strong><br />
SMOOTH ® Flushometer Hardwired<br />
Side-Mount-Operator-Over-The-H<strong>and</strong>le<br />
ADJUSTMENT PROCEDURES CARE AND CLEANING OF CHROME AND SPECIAL FINISHES<br />
Mode A<br />
DO NOT use abrasive or chemical cleaners to clean flushometers as they<br />
The SMOOTH unit may be reset to normal range by fully pressing <strong>and</strong><br />
holding in the Override H<strong>and</strong>le until the Red LED light in the Sensor Window<br />
may dull the luster <strong>and</strong> attack the chrome or special decorative finishes.<br />
Use ONLY mild soap <strong>and</strong> water, then wipe dry with clean cloth or towel.<br />
illuminates. Then immediately release the Override H<strong>and</strong>le.<br />
While cleaning the bathroom tile, the flushometer should be protected<br />
Mode B<br />
The SMOOTH unit may be set to reduced range for closet applications by<br />
from any splattering of cleaner. Acids <strong>and</strong> cleaning fluids can discolor<br />
or remove chrome plating.<br />
pressing <strong>and</strong> holding in the Override H<strong>and</strong>le until the Red LED light in the<br />
Sensor Window flashes a slow long blinking light. Then immediately release When assistance is required, please contact<br />
the Override H<strong>and</strong>le.<br />
Mode C (Urinal Only)<br />
The SMOOTH unit may be set to reduced range by pressing <strong>and</strong> holding<br />
in the Override H<strong>and</strong>le until the Red LED light in the Sensor Window<br />
displays a rapid on <strong>and</strong> off blinking light. Then immediately release the<br />
Override H<strong>and</strong>le.<br />
<strong>Sloan</strong> Technical Support at: 1-888-SLOAN-14 (1-888-756-2614).
9<br />
1B<br />
1A<br />
4<br />
12<br />
14<br />
2<br />
15<br />
13<br />
3<br />
15A<br />
5<br />
6<br />
7<br />
8<br />
10<br />
11<br />
59<br />
<strong>Repair</strong> <strong>Parts</strong> <strong>and</strong> <strong>Maintenance</strong> <strong>Guide</strong><br />
SLOAN ECOS ® Hardwired<br />
Flushometers<br />
PARTS LIST<br />
Item<br />
No. Code No. Part No. Description<br />
Items Included with the RESS Retrofit <strong>and</strong> Complete <strong>Sloan</strong> ECOS ®<br />
Electronic Hardwire <strong>Valve</strong>s Only<br />
1A. ‡ — <strong>Sloan</strong> ECOS ® Electronic Hardwire<br />
Dual Flush Assembly<br />
1B. ‡ — <strong>Sloan</strong> ECOS ® Electronic Single-Flush Assembly<br />
2. 3325001 EBV-1020-A 1.6 gpf/6.0 Lpf Closet Flex Tube Diaphragm Kit<br />
3. 5325122 EBV-95 Flush Volume Regulator (Green)<br />
4. — EL-612-A Solenoid Wall Flange<br />
5. 0325159 EBV-137 7/64" Hex Wrench<br />
6. 0305823 EBV-22 Strap Wrench<br />
7. 0325194 EBV-91 Range Adjustment Tool<br />
8. 0372031 WES-19 English Operation Instruction Plate<br />
— WES-22 Spanish Operation Instruction Plate<br />
9. 3325814 EBV-1017-A H<strong>and</strong>le Cap (RESS-C Retrofit Models only)<br />
Items Included with the Complete <strong>Sloan</strong> ECOS ®<br />
Electronic Hardwire <strong>Valve</strong>s Only<br />
10. 3308386 H-700-A 1" (25 mm) Bak-Chek ® Control Stop<br />
11. 3308797 H-1010-A V<strong>and</strong>al Resistant Stop Cap<br />
12. 0305381PK EBV-36-A <strong>Valve</strong> Body<br />
13. — H-633-AA 1" (25 mm) Sweat Solder Kit<br />
14. — V-600-AA 1½" (38 mm) x 10" (254 mm) Vacuum Breaker<br />
(Model 110)<br />
— V-600-AA 1½" (38 mm) x 23" (584 mm) Vacuum Breaker<br />
(Model 115)<br />
0393049 V-600-AA 1½" (38 mm) x 26" (660 mm) Vacuum Breaker<br />
(Model 116)<br />
15. 0306146 F-5-AT 1½" Spud Coupling Assembly<br />
(Models 111, 115, <strong>and</strong> 116)<br />
15A. SEE SLIP JOINT GASKETS AND RINGS TABLE BELOW<br />
‡ Part number varies with valve model variation; consult factory.<br />
The EBV-1020-A Kit is supplied with multiple Flush Volume Regulators. The installer must use the correct<br />
Regulator when installing the kit.<br />
ITEM 15A. SLIP JOINT GASKETS AND RINGS<br />
Size Code No. Part No. Description<br />
1-1/2” 5306058 F-3 Red Friction Ring<br />
5322001 VBF-5 Black Slip Joint Gasket<br />
0319086/5319086 S-30 Flexible Seat<br />
0319079 S-21 Rigid Seat (rubber over brass)<br />
1-1/2” x 1-1/4” 0396062 F-105 Slip Joint Gasket – Rigid<br />
1-1/4” 5306057 F-3 Red Friction Ring<br />
5322176 VBF-5 Black Slip Joint Gasket<br />
0307052/5307052 G-21 Rigid Seat (rubber over brass)<br />
1” 5306056 F-3 Red Friction Ring<br />
5306115 F-5 Black Slip Joint Gasket<br />
3/4” 5306055 F-3 Red Friction Ring<br />
5306113 F-5 Black Slip Joint Gasket<br />
FLEX TUBE DIAPHRAGM ASSEMBLY<br />
<strong>Sloan</strong> ECOS ® Electronic <strong>Valve</strong> Models Feature<br />
<strong>Sloan</strong>’s Exclusive Flex Tube Diaphragm for the<br />
ultimate in valve performance, reliability <strong>and</strong><br />
chloramine resistance.<br />
Sensor<br />
Flushometers
Sensor<br />
Flushometers<br />
RANGE ADJUSTMENT (ADJUST ONLY IF NECESSARY)<br />
The <strong>Sloan</strong> ECOS ® Electronic<br />
Hardwire flushometer has a<br />
factory set sensing range:<br />
Water Closet Models – 22”<br />
(559 mm) to 42” (1067 mm)<br />
Urinals 15” (381 mm) to 30”<br />
(762 mm)<br />
The Factory setting should<br />
be satisfactory for most<br />
installations.<br />
If the range is too short (i.e.,<br />
not picking up the user) or<br />
too long (i.e., picking up<br />
opposite wall or stall door)<br />
the range can be adjusted.<br />
COUNTER-<br />
CLOCKWISE<br />
Decreases<br />
the Range<br />
CLOCKWISE<br />
Increases<br />
the Range<br />
Note: Water does not<br />
have to be turned off to<br />
adjust range.<br />
Loosen the two screws on<br />
top of the unit. Remove the override button assembly. Remove the rubber<br />
plug from top of electronic sensor module to uncover the potentiometer.<br />
Range Adjustment Procedure<br />
For the first ten (10) minutes of operation, a visible light flashes in the<br />
sensing window of the <strong>Sloan</strong> ECOS ® Electronic Hardwire flushometer when a<br />
user is detected. The visible light feature can be reactivated after ten (10)<br />
minutes by turning the power off <strong>and</strong> on. Check the range by stepping<br />
toward the unit until the light flashes, indicating the sensor’s maximum<br />
detection limit. Adjust the range potentiometer screw located on top of the<br />
sensor module a few degrees CLOCKWISE to increase the range or a few<br />
degrees COUNTER-CLOCKWISE to decrease the range. Repeat this<br />
adjustment until the desired range is achieved.<br />
Always determine the sensing range with metal cover <strong>and</strong> lens<br />
window installed on top of the unit.<br />
Important: Adjust in small increments only! Range potentiometer<br />
adjustment screw rotates only ¾ of a turn; DO NOT over-rotate.<br />
When range adjustment is satisfactory, replace the rubber plug. Reinstall<br />
override button <strong>and</strong> tighten the two screws on top of the unit.<br />
TROUBLESHOOTING GUIDE<br />
1. Sensor flashes continuously only when user steps within range.<br />
A. Unit in Start-Up mode; no problem. This feature is active for the first<br />
ten (10) minutes of operation.<br />
2. <strong>Valve</strong> does not flush; sensor does not picking up the user.<br />
A. Range too short; increase the range.<br />
3. <strong>Valve</strong> does not flush; sensor picking up opposite wall or surface,<br />
or only flushes when someone walks by. light flashes<br />
continuously for first 10 minutes even with no one in front of<br />
the sensor.<br />
A. Range too long; shorten the range.<br />
4. <strong>Valve</strong> does not flush even after adjustment.<br />
A. Range Adjustment Potentiometer set at full "max" or full "min"<br />
setting. Readjust Potentiometer away from full "max" or "min" setting.<br />
B. Problem with the Electronic Sensor Module; replace the Electronic<br />
Sensor Module.<br />
60<br />
<strong>Repair</strong> <strong>Parts</strong> <strong>and</strong> <strong>Maintenance</strong> <strong>Guide</strong><br />
SLOAN ECOS ® Hardwired<br />
Flushometers<br />
5. <strong>Valve</strong> Does Not Shut Off.<br />
A. Bypass Orifice in Diaphragm is clogged with dirt or debris, or Bypass<br />
is clogged by an invisible gelatinous film due to "over-treated" water.<br />
Remove Flex Tube Diaphragm <strong>and</strong> wash under running water. Note:<br />
Size of Orifice in the Bypass is of utmost importance for the proper<br />
metering of water by the valve. DO NOT ENLARGE OR DAMAGE THIS<br />
ORIFICE. Replace Flex Tube Diaphragm if cleaning does not correct<br />
the problem.<br />
B. Dirt or debris fouling Stem or Flex Tube Diaphragm. Remove Flex Tube<br />
Diaphragm <strong>and</strong> wash under running water.<br />
C. O-ring on Stem of Flex Tube Diaphragm is damaged or worn. Replace<br />
O-ring if necessary.<br />
D. Problem with Electronic Sensor Module; replace Sensor Module.<br />
6. Not enough water to the fixture to flush properly.<br />
A. The wrong Flush Volume Regulator was installed in Flex Tube<br />
Diaphragm Kit. Install the correct Regulator (see Step 7 of these<br />
instructions).<br />
B. Wrong <strong>Sloan</strong> ECOS ® Electronic Hardwire model installed; i.e., 1.6 gpf<br />
model installed on 3.5 gallon closet fixture.<br />
C. Enlarged Bypass in Diaphragm. Replace the Flex Tube Diaphragm.<br />
D. Control Stop not adjusted properly. Readjust Control Stop.<br />
E. Inadequate volume or pressure at supply. Increase water pressure or<br />
supply (flow) to valve. Consult factory for assistance.<br />
7. Too much water to fixture.<br />
A. The wrong Flush Volume Regulator was installed in Flex Tube<br />
Diaphragm Kit. Install the correct Regulator (see Step 7 of these<br />
instructions).<br />
B. Control Stop not adjusted properly. Readjust the Control Stop.<br />
C. Wrong <strong>Sloan</strong> ECOS ® Electronic Hardwire model installed; i.e., 3.5 gpf.<br />
model installed on 1.6 gallon fixture. Replace with proper <strong>Sloan</strong><br />
ECOS ® Electronic Hardwire model.<br />
D. Dirt in Diaphragm Bypass. Clean under running water or replace Flex<br />
Tube Diaphragm. Note: The EBV-46-A Beam Deflector is no longer<br />
required or available for the <strong>Sloan</strong> ECOS ® TROUBLESHOOTING GUIDE (CONTINUED)<br />
Electronic Hardwire Dual<br />
Flush sensor.<br />
CARE AND CLEANING INSTRUCTIONS<br />
DO NOT USE abrasive or chemical cleaners to clean flushometers that may<br />
dull the luster <strong>and</strong> attack the chrome or special decorative finishes. Use<br />
ONLY mild soap <strong>and</strong> water, then wipe dry with a clean towel or cloth.<br />
When cleaning the bathroom tile, protect the flushometer from any<br />
splattering of cleaner. Acids <strong>and</strong> cleaning fluids can discolor or remove<br />
chrome plating.<br />
When assistance is required, please contact<br />
<strong>Sloan</strong> Technical Support at: 1-888-SLOAN-14 (1-888-756-2614).
A-3 Body<br />
25<br />
26<br />
Earlier model with<br />
EBV-36-A body<br />
1<br />
8<br />
3<br />
10<br />
16A<br />
5<br />
7<br />
6<br />
4<br />
9<br />
14<br />
24<br />
16<br />
2<br />
19A<br />
19B<br />
15<br />
17<br />
23<br />
21<br />
22<br />
12<br />
11<br />
18<br />
13<br />
20<br />
61<br />
<strong>Repair</strong> <strong>Parts</strong> <strong>and</strong> <strong>Maintenance</strong> <strong>Guide</strong><br />
G2 Optima Plus ® Flushometer<br />
For use with <strong>Sloan</strong>’s G2 Optima Plus ® flushometer introduced May, 2003.<br />
For older Optima Plus ® flushometers (produced from 1992 – 2003) <strong>and</strong><br />
Regal Pro ® Optima Plus ® flushometers see pages 66 thru 71.<br />
SENSOR MODULE COMPONENT PARTS<br />
Item<br />
No. Code No. Part No. Description<br />
1. 0325160 EBV-138-A G2 Cover/Ring/Sensor Assembly – Water Closet<br />
0325161 EBV-139-A G2 Cover/Ring/Sensor Assembly – Urinal<br />
0325166 EBV-149-A G2 Cover/Ring/Sensor Assembly – Water Closet<br />
w/Zurn Ring<br />
0325167 EBV-150-A G2 Cover/Ring/Sensor Assembly –<br />
Urinal w/Zurn Ring<br />
2. 0325168 EBV-142-A Cover Assembly<br />
3. 0325172 EBV-130-A Override Button Assembly includes screws & hex<br />
wrench<br />
0325170 EBV-132-A Screws (2) <strong>and</strong> Allen Wrench Only<br />
4. 0325169 EBV-131 Lens Window Cover<br />
5. 0325804 EBV-14 Locking Ring CP<br />
0325210 EBV-168 Locking Ring CP<br />
3325524 EBV-31-A Locking Ring – for Zurn <strong>Valve</strong>s<br />
6. 3325450 EBV-129-A-C G2 Electronic Module – Water Closet<br />
3325451 EBV-129-A-U G2 Electronic Module – Urinal<br />
7. 0325171 EBV-134 Cover Rest Plate<br />
8. 3325456 EBV-145-A Inside Cover Assembly (includes solenoid<br />
EBV-136-A)<br />
3325089 EBV-1010-A Inside Cover Assembly (excludes solenoid)<br />
9. 3325453 EBV-136-A Solenoid (For G2 Modules only)*<br />
10. SEE CHART NEXT PAGE Flex Tube Diaphragm Kit<br />
* Refer to Page 58 for instructions regarding solenoid replacement.<br />
ACCESSORIES<br />
11. 0325107 EBV-91 Trimpot Adjustment Screwdriver<br />
12. 0305823 EBV-22 Strap Wrench<br />
13. 0325170 EBV-132-A Allen Wrench<br />
VALVE COMPONENT PARTS<br />
14. 3323182 V-651-A Vacuum Breaker <strong>Repair</strong> Kit<br />
15. 0393004 V-600-AA 3/4’’ x 9’’ CP Vacuum Breaker<br />
0393006 V-600-AA 1-1/4’’ x 9’’ CP Vacuum Breaker<br />
3393007 V-600-AA 1-1/2’’ x 9’’ CP Vacuum Breaker<br />
16. 0306125 F-5-AW 3/4’’ CP Spud Coupling<br />
0306140 F-5-AU 1-1/4’’ CP Spud Coupling<br />
0306146 F-5-AT 1-1/2’’ CP Spud Coupling<br />
16A. SEE SLIP JOINT GASKETS AND RINGS TABLE ON NEXT PAGE<br />
17. 0308676 H-550 CP Stop Coupling<br />
18. 0308801 H-551-A CP Adjustable Tailpiece 2-1/16’’ long<br />
19A. 5308696 H-553 O-ring – 24 per package<br />
19B. 5308381 H-552 Locking ring – 12 per package<br />
20. 3308386 H-700-A 1’’ Screwdriver Bak-Chek ® Stop CP – complete<br />
3308384 H-700-A 3/4’’ Screwdriver Bak-Chek ® Stop CP – complete<br />
21. 3308853 H-541-A Control Stop <strong>Repair</strong> Kit †<br />
3308856 H-543-A Control Stop <strong>Repair</strong> Kit ‡ 3/4” H-540/H-600 only<br />
22. 0308612 H-622 CP Bonnet †<br />
0308843 H-577 CP Bonnet ‡ – OBSOLETE<br />
23. 3308772 H-1010-A V<strong>and</strong>al Resistant Control Stop Cap Assembly †<br />
3308790 H-1009-A V<strong>and</strong>al Resistant Control Stop Cap Assembly ‡<br />
24. 3325816 EBV-1019-A 3/4’’ Decorative Stop Cap<br />
3308866 H-574 1’’ Decorative Stop Cap<br />
25. 3325814 EBV-1017-A H<strong>and</strong>le Cap — Metal<br />
26. 0311042 K-46 Blind Nut Gasket<br />
† For use with 1” <strong>and</strong> 3/4” H-700-A <strong>and</strong> 1” H-600-A Bak-Chek ® screwdriver control stop<br />
‡ For use with H-600-A 3/4’’ screwdriver Bak-Chek ® control stops<br />
Sensor<br />
Flushometers
Sensor<br />
Flushometers<br />
<strong>Sloan</strong> introduced its Optima Plus ® battery powered sensor flushometer in<br />
1992, revolutionizing the flushing of water closets <strong>and</strong> urinals. In both new<br />
construction <strong>and</strong> retrofit applications, the use of the Optima Plus has<br />
become the st<strong>and</strong>ard method for many facilities to improve restroom<br />
hygiene <strong>and</strong> ensure h<strong>and</strong>icap accessibility compliance.<br />
In May, 2003 <strong>Sloan</strong> introduced the G2 Optima Plus.<br />
The G2 Optima Plus builds on the success of the original product <strong>and</strong> offers<br />
many technological advancements to further improve on performance <strong>and</strong><br />
reliability expected of sensor activated plumbing. In addition to a new<br />
aesthetic design, the G2 Optima Plus features a new state-of-the-art<br />
electronic <strong>and</strong> optical package <strong>and</strong> a unique solenoid operator that keeps the<br />
moving components of the solenoid completely isolated from the water<br />
supply. This ensures long life <strong>and</strong> low maintenance regardless of local<br />
water condition.<br />
The G2 Optima Plus replaces the original Optima Plus product, which was<br />
phased out of production in mid-2003.<br />
The <strong>Sloan</strong> G2 Optima Plus automatic battery powered flushometer relies on<br />
an infrared sensor to detect a user <strong>and</strong> activate a flushing cycle. No physical<br />
contact with the flushometer surface is necessary, assuring sanitary<br />
protection. G2 Optima Plus flushometers are ADA compliant devices.<br />
The flushometer is triggered by means of an active infrared sensor. The<br />
Optima Plus sensor emits a continuous invisible light beam. When a user<br />
enters the beam’s effective range, the beam is reflected into the Optima<br />
Plus scanner window. The user is now detected. After the user moves out of<br />
the effective range of the sensor, a signal is sent to the flushometer solenoid<br />
<strong>and</strong>, after appropriate arming <strong>and</strong>/or flush delays, the flush cycle is initiated.<br />
ITEM 10. FLEX TUBE DIAPHRAGM KIT<br />
Regulator<br />
Code No. Part No. Description Color *<br />
3325090 EBV-1025-A Urinal-0.25 gpf/1.0 Lpf GREEN<br />
3325003 EBV-1023-A Urinal-0.5 gpf/1.9 Lpf †‡ GREEN<br />
3325000 EBV-1022-A Urinal-1.0 gpf/3.8 Lpf GREEN<br />
3325000 EBV-1022-A Urinal-1.5 gpf/5.7 Lpf † BLACK<br />
3325001 EBV-1020-A Urinal-3.5 gpf/13.2 Lpf † WHITE<br />
3325031 EBV-1024-A Closet-1.28 gpf/4.8 Lpf GREEN<br />
3325001 EBV-1020-A Closet-1.6 gpf/6.0 Lpf † GREEN<br />
3325014 EBV-1021-A Closet-2.4 gpf/9.0 Lpf BLUE<br />
3325001 EBV-1020-A Closet-3.5 gpf/13.2 Lpf WHITE<br />
3325001 EBV-1020-A Closet-4.5 gpf/17.0 Lpf § WHITE<br />
† EBV-1020-A <strong>and</strong> EBV-1022-A are supplied with multiple regulators.<br />
‡ A 0.5 gpf (1.9 Lpf) urinal kit can be converted to a 1.0 gpf (3.8 Lpf) by cutting <strong>and</strong> removing the<br />
smooth A-164 flow ring from the guide.<br />
§ For a 4.5 gpf (17 Lpf) water closet flush use EBV-1020-A with the white regulator, <strong>and</strong> cut <strong>and</strong> remove the<br />
A-164 flow ring from the guide.<br />
* Color of regulator to be used with flex tube diaphragm to obtain the listed flush volume.<br />
O-RING<br />
Code No. Part No. Description<br />
5325056 EBV-83 O-ring – 6 per package<br />
REGULATOR<br />
O-RING<br />
(Code No.<br />
5325056)<br />
FLEX TUBE<br />
DIAPHRAGM<br />
REGULATOR<br />
(MUST BE<br />
INSTALLED<br />
PAST 0-RING)<br />
62<br />
<strong>Repair</strong> <strong>Parts</strong> <strong>and</strong> <strong>Maintenance</strong> <strong>Guide</strong><br />
G2 Optima Plus ® Flushometer<br />
COVER<br />
LOCKING RING<br />
BODY<br />
FLUSH CONNECTION<br />
(VACUUM BREAKER)<br />
SPUD COUPLING<br />
TAILPIECE<br />
OVERRIDE BUTTON<br />
STOP COUPLING<br />
OUTLET COUPLING<br />
SPUD FLANGE<br />
CONTROL<br />
STOP<br />
SUPPLY FLANGE<br />
REGULATORS<br />
The flush volume of the flex tube diaphragm kit is controlled by the<br />
regulator. Regulators are identified by color. Some flex tube diaphragm kits<br />
are supplied with multiple regulators. The installer must make sure the<br />
proper regulator is used when installing the flex tube diaphragm kit.<br />
REGULATOR (SOLD 6 PER PACKAGE)<br />
Regulator<br />
Code No. Part No. Description Color<br />
5325122 EBV-95 Urinal-0.25 gpf/1.0 Lpf GREEN<br />
5325122 EBV-95 Urinal-0.5 gpf/1.9 Lpf GREEN<br />
5325122 EBV-95 Urinal-1.0 gpf/3.8 Lpf GREEN<br />
5325129 EBV-102-2 Urinal-1.5 gpf/5.7 Lpf BLACK<br />
5325130 EBV-102-1 Urinal-3.5 gpf/13.2 Lpf WHITE<br />
5325122 EBV-95 Closet-1.28 gpf/4.8 Lpf GREEN<br />
5325122 EBV-95 Closet-1.6 gpf/6.0 Lpf GREEN<br />
5325130 EBV-102-1 Closet-3.5 gpf/13.2 Lpf WHITE<br />
5325128 EBV-101 Closet-2.4 gpf/9.0 Lpf BLUE<br />
EBV-1020-A <strong>and</strong> EBV-1022-A are supplied with multiple flush volume regulators.<br />
The installer must use the correct regulator when installing the kit.<br />
ITEM 16A. SLIP JOINT GASKETS AND RINGS<br />
Size Code No. Part No. Description<br />
1-1/2” 5306058 F-3 Red Friction Ring<br />
5322001 VBF-5 Black Slip Joint Gasket<br />
0319086/5319086 S-30 Flexible Seat<br />
0319079 S-21 Rigid Seat (rubber over brass)<br />
1-1/2” x 1-1/4” 0396062 F-105 Slip Joint Gasket – Rigid<br />
1-1/4” 5306057 F-3 Red Friction Ring<br />
5322176 VBF-5 Black Slip Joint Gasket<br />
0307052/5307052 G-21 Rigid Seat (rubber over brass)<br />
1” 5306056 F-3 Red Friction Ring<br />
5306115 F-5 Black Slip Joint Gasket<br />
3/4” 5306055 F-3 Red Friction Ring<br />
5306113 F-5 Black Slip Joint Gasket
SOLENOID REPLACEMENT<br />
Code No. Part No. Description<br />
3325453 EBV-136-A Solenoid operator<br />
For G2 Optima Plus ® modules (identified by a<br />
blue module).<br />
1. Turn off water <strong>and</strong> relieve pressure by loosening Tailpiece<br />
coupling <strong>and</strong> re-tighten. Loosen <strong>and</strong> remove top screws along<br />
with the outer cover assembly.<br />
2. Disconnect wire clip from battery door <strong>and</strong> remove module from<br />
inner metal cover assembly.<br />
3. Remove Solenoid by turning counter clockwise. Remove any<br />
remaining O-rings or parts in orifice.<br />
Back View<br />
Front View<br />
63<br />
<strong>Repair</strong> <strong>Parts</strong> <strong>and</strong> <strong>Maintenance</strong> <strong>Guide</strong><br />
G2 Optima Plus ® Flushometer<br />
5. Make sure all O-rings (2) are installed on the grey End cap<br />
of the new Isolated Operator. Install Isolated Operator by<br />
threading it (clockwise) into the Housing. Tighten with fingers<br />
beyond just snug.<br />
6. Mount module on inner cover assembly. Reconnect the plastic<br />
clip on the battery door.<br />
7. Assemble outer cover assembly.<br />
Close up<br />
Note. Verify that rubber insert is installed<br />
4. Remove black plastic Housing from the threaded end of new<br />
Isolated Operator by unscrewing (counterclockwise). It is normal<br />
to find fluid inside this housing. 8. Turn on water at control stop. Installation complete.<br />
Sensor<br />
Flushometers
Sensor<br />
Flushometers<br />
BATTERY REPLACEMENT<br />
When G2 Optima Plus ® has approximately 4,000 flushes left, the same red<br />
light that appears at start-up will flash four (4) times quickly whenever an<br />
object is detected. When this occurs, we recommend changing the batteries<br />
as follows:<br />
When required, replace batteries with four (4) alkaline type AA batteries.<br />
Note: Water does not have to be turned off to replace batteries.<br />
Loosen the two (2) screws on top of unit. Remove the complete cover<br />
assembly. Lift the sensor module from its plate. Unplug the electrical<br />
connector from battery compartment cover. Loosen the retaining screw on<br />
battery compartment cover <strong>and</strong> remove battery compartment cover. Install<br />
four (4) alkaline type AA batteries exactly as illustrated at right.<br />
Install battery compartment cover <strong>and</strong> secure with retaining screw. Make<br />
certain that battery compartment cover is fully compressed against gasket<br />
to provide a seal; Do not overtighten. Plug the electrical connector into the<br />
battery compartment cover. Reinstall the sensor module onto the plate.<br />
Reinstall the complete cover assembly onto the plate. Tighten the two<br />
(2) screws on top of the unit.<br />
RANGE ADJUSTMENT (ADJUST ONLY IF NECESSARY)<br />
The G2 Optima Plus has a factory set sensing range:<br />
Water closet models – 22" to 42" (559 mm to 1067 mm)<br />
Urinal models – 15" to 30" (381 mm to 762 mm)<br />
The Factory setting should be satisfactory for most installations.<br />
If the range is too short (i.e., not picking up users) or too long (i.e., picking<br />
up opposite wall or stall door) the range can be adjusted.<br />
Note: Water does not have to be turned off to adjust range.<br />
Loosen the two screws on top of the unit. Remove the override button.<br />
Remove the rubber plug from top of electronic sensor module to uncover<br />
the potentiometer.<br />
RANGE ADJUSTMENT PROCEDURE<br />
For the first ten (10) minutes of operation, a visible red light flashes in the<br />
sensing window of the G2 Optima Plus flushometer when a user is detected.<br />
This visible red light feature can be reactivated after ten (10) minutes by<br />
opening <strong>and</strong> closing the battery compartment door or holding the override<br />
button for (1) minute.<br />
Check the range by stepping toward the unit until the red light flashes,<br />
indicating the sensor’s detection of a user. Adjust the range potentiometer<br />
screw located on top of the sensor module a few degrees CLOCKWISE to<br />
increase the range or a few degrees COUNTERCLOCKWISE to decrease the<br />
range. Repeat this adjustment until the desired range is achieved.<br />
Always determine the sensing range with metal cover <strong>and</strong> lens<br />
window on top of the unit.<br />
Important: Adjust in small increments only! Range potentiometer<br />
adjustment screw rotates only 3/4 of a turn; DO NOT over-rotate.<br />
When range adjustment is satisfactory, replace the rubber plug. Reinstall<br />
override button <strong>and</strong> tighten the two screws on top of the unit.<br />
64<br />
<strong>Repair</strong> <strong>Parts</strong> <strong>and</strong> <strong>Maintenance</strong> <strong>Guide</strong><br />
G2 Optima Plus ® Flushometer<br />
7/64” ALLEN WRENCH<br />
COVER ASSEMBLY<br />
SENSOR MODULE<br />
PLATE<br />
BATTERY COMPARTMENT COVER<br />
SENSOR MODULE (BACKSIDE SHOWN)<br />
RETAINING SCREW<br />
ELECTRICAL CONNECTOR<br />
RECEPTACLE<br />
COUNTERCLOCKWISE CLOCKWISE<br />
Decreases<br />
Range<br />
Increases<br />
Range
TROUBLESHOOTING AND MAINTAINING THE SLOAN G2 OPTIMA PLUS ® FLUSHOMETER<br />
IMPORTANT: This product contains mechanical <strong>and</strong>/or electrical<br />
components that are subject to normal wear. These components should be<br />
checked on a regular basis <strong>and</strong> replaced as needed to maintain the valve’s<br />
performance.<br />
Never open Control Stop to where the flow from the valve exceeds the flow<br />
capability of the fixture. In the event of a valve failure, the fixture must be<br />
able to accommodate a continuous flow from the valve.<br />
ATTENTION INSTALLERS: With the exception of the control stop inlet,<br />
DO NOT USE pipe sealant or plumbing grease on any valve component or<br />
coupling! To protect the chrome or special finish of <strong>Sloan</strong> flushometers,<br />
DO NOT USE toothed tools to install or service these valves. Use our A-50<br />
Super-Wrench or other smooth-jawed wrench to secure couplings.<br />
Regulations for low consumption fixtures (1.6 gpf/6.0 Lpf closets <strong>and</strong><br />
1.0 gpf/3.8 Lpf urinals) prohibit use of higher flush volumes.<br />
1. Sensor flashes continuously only when user steps within range.<br />
A. Unit in start-up mode; no problem. This feature is active for the first<br />
ten (10) minutes of operation.<br />
2. <strong>Valve</strong> does not flush; sensor not picking up user.<br />
A. Range too short; increase the range.<br />
3. <strong>Valve</strong> does not flush; sensor picking up opposite wall or surface,<br />
or only flushes when someone walks by. Red light flashes<br />
continuously for first 10 minutes even with no one in front of<br />
the sensor.<br />
A. Range too long; shorten range.<br />
4. <strong>Valve</strong> does not flush even after adjustment.<br />
A. Range adjustment potentiometer set at full “max” or full “min” setting.<br />
Readjust potentiometer away from full “max” or “min” setting.<br />
B. Batteries completely used up; replace batteries.<br />
C. Problem with electronic sensor module; replace electronic sensor<br />
module.<br />
5. Unit flashes 4 quick times when user steps within range.<br />
A. Batteries low; replace batteries.<br />
6. <strong>Valve</strong> does not shut off.<br />
A. By-pass orifice in diaphragm is clogged with dirt or debris, or by-pass<br />
is clogged by an invisible gelatinous film due to “over-treated” water.<br />
Remove flex tube diaphragm <strong>and</strong> wash under running water.<br />
Note: Size of orifice in the by-pass is of utmost importance for the<br />
proper metering of water by the valve. DO NOT ENLARGE OR<br />
DAMAGE THIS ORIFICE. Replace flex tube diaphragm if cleaning<br />
does not correct the problem.<br />
B. Dirt or debris fouling stem or flex tube diaphragm. Remove flex tube<br />
diaphragm <strong>and</strong> wash under running water.<br />
C. O-ring on stem of flex tube diaphragm is damaged or worn. Replace<br />
O-ring if necessary.<br />
D. Problem with solenoid. If cleaning does not correct problem, replace<br />
with new solenoid operator.<br />
65<br />
<strong>Repair</strong> <strong>Parts</strong> <strong>and</strong> <strong>Maintenance</strong> <strong>Guide</strong><br />
G2 Optima Plus ® Flushometer<br />
7. Not enough water to fixture.<br />
A. Wrong flush volume regulator installed in flex tube diaphragm kit.<br />
Install the correct regulator.<br />
B. Wrong Optima Plus ® model installed; i.e., 1.0 gpf urinal installed<br />
on 3.5 gpf closet fixture. Replace with proper Optima Plus model.<br />
C. Enlarged by-pass in diaphragm. Replace flex tube diaphragm.<br />
D. Control stop not adjusted properly. Readjust control stop.<br />
E. Inadequate volume or pressure at supply. Increase water pressure<br />
or supply (flow) to valve. Consult factory for assistance.<br />
8. Too much water to fixture.<br />
A. Wrong flush volume regulator installed in flex tube diaphragm kit.<br />
Install the correct regulator.<br />
B. Control stop not adjusted properly. Readjust control stop.<br />
C. Wrong Optima Plus model installed; i.e., 3 gpf model installed on 1.0<br />
or 1.5 gpf urinal fixture.<br />
D. Dirt in diaphragm by-pass. Clean under running water or replace flex<br />
tube diaphragm.<br />
Note: The EBV-46-A beam deflector is no longer required or available<br />
for the G2 Optima Plus.<br />
CARE AND CLEANING INSTRUCTIONS<br />
DO NOT use abrasive or chemical cleaners to clean the G2 Optima Plus, they<br />
may dull the luster <strong>and</strong> attack the plastic cover <strong>and</strong> the chrome finish of the<br />
flushometer. Use ONLY mild soap <strong>and</strong> water, then wipe dry with clean cloth<br />
or towel. While cleaning the bathroom tile, the Optima Plus should be<br />
protected from any splattering of cleaner. Acids <strong>and</strong> cleaning fluids can<br />
discolor or remove chrome plating.<br />
When assistance is required, please contact<br />
<strong>Sloan</strong> Technical Support at: 1-888-SLOAN-14 (1-888-756-2614).<br />
Sensor<br />
Flushometers
Sensor<br />
Flushometers<br />
4<br />
5<br />
1<br />
7<br />
2<br />
3<br />
2A<br />
6<br />
8<br />
OBSOLETE<br />
66<br />
<strong>Repair</strong> <strong>Parts</strong> <strong>and</strong> <strong>Maintenance</strong> <strong>Guide</strong><br />
Optima Plus ® Flushometers<br />
For all Optima Plus ® produced from 1992 – 2003 <strong>and</strong><br />
Regal Pro ® Optima Plus ® produced after May, 2003.<br />
The Optima Plus ® is currently being phased out <strong>and</strong> will become<br />
obsolete at some point in the future. Some repair parts may not<br />
be available. See the G2 Optima Plus ® flushometer page 61<br />
for current parts.<br />
SENSOR MODULE COMPONENT PARTS<br />
Item<br />
No. Code No. Part No. Description<br />
1. 0325804 EBV-14 Locking Ring<br />
3325524 EBV-31-A Locking Ring for Zurn <strong>Valve</strong> Bodies<br />
2. 3325013 EBV-60-A Metal Cover Assembly with Override Button (Water<br />
Closet)<br />
3325016 EBV-1033-A Metal Cover Assembly w/Override Button for Zurn<br />
<strong>Valve</strong> Body (Water Closet)<br />
2A. 3325055 EBV-1042-A Replacement Override Button Kit for plastic covers<br />
(Old Style)<br />
3. 5325011 EBV-67 Cover Gasket — 12 per package<br />
4. SEE CHART PAGE 63 — ELECTRONIC MODULE<br />
5. 0325814 EBV-21-A Inside Cover Assembly (Includes Solenoid)<br />
6. 3325462 EBV-144-A Isolated Solenoid Operator †<br />
7. SEE CHART PAGE 64 — Flex Tube Diaphragm Kit<br />
8. 3325537 EBV-46-A Beam Deflector ‡ – OBSOLETE<br />
† The new EBV-144-A solenoid replaces the solenoid used with the old style black EBV-26-A modules only. For<br />
blue EBV-146-A-U or EBV-146-A-C G2 modules, use the EBV-136-A solenoid operator. Refer to Page 65 for<br />
instructions regarding solenoid replacement.<br />
‡ Beam deflectors are for use on black, old style modules. They are not required (<strong>and</strong> will not work) on<br />
Blue G2 modules.<br />
LOCKING RING<br />
HANDLE<br />
CAP/COUPLING<br />
COVER<br />
BODY<br />
FLUSH CONNECTION<br />
(VACUUM BREAKER)<br />
SPUD COUPLING<br />
OVERRIDE BUTTON<br />
STOP COUPLING<br />
TAILPIECE<br />
OUTLET COUPLING<br />
SPUD FLANGE<br />
CONTROL STOP<br />
SUPPLY FLANGE
9<br />
13A<br />
9A<br />
10<br />
22<br />
21<br />
23<br />
16B<br />
16A<br />
14<br />
19<br />
20<br />
18<br />
15<br />
<strong>Valve</strong> Body (Part number varies with<br />
valve model variation; consult factory)<br />
11<br />
12<br />
13<br />
17<br />
67<br />
<strong>Repair</strong> <strong>Parts</strong> <strong>and</strong> <strong>Maintenance</strong> <strong>Guide</strong><br />
Optima Plus ® Flushometers<br />
OTHER VALVE COMPONENT PARTS<br />
Item<br />
No. Code No. Part No. Description<br />
9. 3325814 EBV-1017-A H<strong>and</strong>le Cap — Metal<br />
9A. 0311042 K-46 Blind Nut Gasket<br />
10. 3325815 EBV-1018-A H<strong>and</strong>le Cap — Metal Coupling/Plastic Hole Cap<br />
11. 3323182 V-651-A Vacuum Breaker <strong>Repair</strong> Kit<br />
12. 3393004 V-600-AA 3/4" (19 mm) x 9’’ (229 mm) CP Vacuum Breaker<br />
3393006 V-600-AA 1-1/4" (32 mm) x 9’’ (229 mm) CP<br />
Vacuum Breaker<br />
3393007 V-600-AA 1-1/2’’ (38 mm) x 9’’ (229 mm) CP<br />
Vacuum Breaker<br />
13. 0306125 F-5-AW 3/4’’ (19 mm) CP Spud Coupling<br />
0306140 F-5-AU 1-1/4" (32 mm) CP Spud Coupling<br />
0306146 F-5-AT 1-1/2’’ (38 mm) CP Spud Coupling<br />
13A. SEE SLIP JOINT GASKETS AND RINGS TABLE BELOW<br />
14. 0308676 H-550 CP Stop Coupling<br />
15. 0308801 H-551-A CP Adjustable Tailpiece 2-1/16’’ (52 mm) long<br />
16A. 5308696 H-553 O-ring — 24 per package<br />
16B. 5308381 H-552 Locking ring – 12 per package<br />
17. 3308386 H-700-A 1’’ (25 mm) Screwdriver Bak-Chek ® Stop CP —<br />
complete<br />
3308384 H-700-A 3/4’’ (19 mm) Screwdriver Bak-Chek ® Stop CP —<br />
complete<br />
18. 3308853 H-541-A Control Stop <strong>Repair</strong> Kit † 3/4” H-600/H-540 only<br />
3308856 H-543-A Control Stop <strong>Repair</strong> Kit ‡<br />
19. 0308612 H-622 CP Bonnet †<br />
0308843 H-577 CP Bonnet 3/4” H-600/H-540 only – OBSOLETE ‡<br />
20. 3308772 H-1010-A V<strong>and</strong>al Resistant Control Stop Cap Assembly †<br />
3308790 H-1009-A V<strong>and</strong>al Resistant Control Stop Cap Assembly ‡<br />
21. 3325816 EBV-1019-A 3/4’’ (19 mm) Decorative Stop Cap<br />
3308866 H-574 1’’ (25 mm) Decorative Stop Cap<br />
ACCESSORIES<br />
22. 0325107 EBV-91 Trimpot Adjustment Screwdriver<br />
23. 0305823 EBV-22 Disposable Strap Wrench<br />
† For use w/H-700-A 1’’ & 3/4’’ <strong>and</strong> H-600-A 1’’ screwdriver Bak-Chek ® control stops,<br />
also marked with Quiet Stop II<br />
‡ For use w/H-600-A 3/4’’ urinal screwdriver Bak-Chek ® control stops, also marked with Quiet Stop II<br />
.<br />
ITEM 13A. SLIP JOINT GASKETS AND RINGS<br />
Size Code No. Part No. Description<br />
1-1/2” 5306058 F-3 Red Friction Ring<br />
5322001 VBF-5 Black Slip Joint Gasket<br />
0319086/5319086 S-30 Flexible Seat<br />
0319079 S-21 Rigid Seat (rubber over brass)<br />
1-1/2” x 1-1/4” 0396062 F-105 Slip Joint Gasket – Rigid<br />
1-1/4” 5306057 F-3 Red Friction Ring<br />
5322176 VBF-5 Black Slip Joint Gasket<br />
0307052/5307052 G-21 Rigid Seat (rubber over brass)<br />
1” 5306056 F-3 Red Friction Ring<br />
5306115 F-5 Black Slip Joint Gasket<br />
3/4” 5306055 F-3 Red Friction Ring<br />
5306113 F-5 Black Slip Joint Gasket<br />
Sensor<br />
Flushometers
Sensor<br />
Flushometers<br />
ELECTRONIC MODULE ASSEMBLY CHART<br />
The electronic <strong>and</strong> optical improvements of the G2<br />
Optima Plus ® have been incorporated into the electronic<br />
modules for use with older Optima Plus products.<br />
Optima Plus ® modules can be identified by color.<br />
Old style modules are black <strong>and</strong> have a wire that runs<br />
along the side of the unit.<br />
G2 modules are blue <strong>and</strong> have a wire only on the back<br />
of the unit.<br />
ELECTRONIC SENSOR<br />
MODULE<br />
There are now only two electronic module assembly variations for use with<br />
older Optima Plus valves:<br />
EBV-146-A-U Urinal<br />
EBV-146-A-C Water closet<br />
This chart cross references the part numbers <strong>and</strong> code numbers of our new<br />
electronic modules over from our old module numbers.<br />
The modules include the solenoid, inner cover <strong>and</strong> electronic module.<br />
These modules are for use with older Optima Plus <strong>and</strong> Regal Pro ® Optima<br />
Plus ® valves only.<br />
BATTERY REPLACEMENT<br />
When Optima Plus has approximately 4,000 flushes left, the same red light<br />
that appears at start-up will flash four (4) times quickly whenever an object<br />
is detected. When this occurs, we recommend changing the batteries.<br />
On Optima Plus, shut off water <strong>and</strong> relieve pressure.<br />
Separate locking ring, cover <strong>and</strong> diaphragm from electronic sensor module.<br />
Loosen retaining screw on battery compartment door <strong>and</strong> remove battery<br />
compartment door. Install four (4) alkaline, AA batteries exactly as<br />
illustrated. Install battery compartment door <strong>and</strong> secure with retaining<br />
screw. Make certain that battery compartment door is fully compressed<br />
against gasket to provide a seal; do not overtighten.<br />
FLEX TUBE DIAPHRAGM ASSEMBLY<br />
In early 2003 <strong>Sloan</strong> introduced the flex tube diaphragm kit into the Optima<br />
Plus. This design completely replaced the old Optima Plus diaphragm kit<br />
that featured the metal shaft with the quad Ring. This change further<br />
improved the reliability of the Optima Plus as it replaced a wearable dynamic<br />
seal (the Quad Ring) with a non-moving static O-ring seal.<br />
The flex tube diaphragm kit also features <strong>Sloan</strong>’s exclusive dual-filter<br />
diaphragm. The dual-filter diaphragm helps to protect the valve from waterborne<br />
sediment that can cause the valve to stick open <strong>and</strong> run on. The dualfilter<br />
diaphragm is also made from <strong>Sloan</strong>’s Permex ® synthetic rubber<br />
material for resistance against chloramines <strong>and</strong> other water treatment<br />
chemicals.<br />
The flex tube diaphragm can be used to replace all generations of<br />
<strong>Sloan</strong> Optima Plus ® diaphragm kits. The same flex tube diaphragm<br />
kits are used in the G2 Optima Plus ® valve.<br />
68<br />
<strong>Repair</strong> <strong>Parts</strong> <strong>and</strong> <strong>Maintenance</strong> <strong>Guide</strong><br />
Optima Plus ® Flushometers<br />
Use To Replace<br />
Code No. Part No. Description Old Part No.<br />
0325177 EBV-146-A-U Electronic — 0.5 gpf/1.9 Lpf Urinal EBV-26-A-U-0.5<br />
Module<br />
0325177 EBV-146-A-U Electronic — 1.0 gpf/3.8 Lpf Urinal EBV-26-A-U-1.0<br />
Module<br />
0325177 EBV-146-A-U Electronic — 1.5 gpf/5.7 Lpf Urinal EBV-26-A-U-1.5<br />
Module<br />
0325177 EBV-146-A-U Electronic — 3.5 gpf/13.2 Lpf Urinal EBV-26-A-U-3.5<br />
Module<br />
0325176 EBV-146-A-C Electronic — 1.6 gpf/6.0 Lpf Closet EBV-26-A-C-1.6<br />
Module<br />
0325176 EBV-146-A-C Electronic — 2.4 gpf/9.0 Lpf Closet EBV-26-A-C-2.4<br />
Module<br />
0325176 EBV-146-A-C Electronic — 3.5 gpf/13.2 Lpf Closet EBV-26-A-C-3.5<br />
Module<br />
0325176 EBV-146-A-C Electronic — 4.5 gpf/17.0 Lpf Closet EBV-26-A-C-4.5<br />
Module<br />
Note: EBV-26-A modules are no longer available. Use the EBV-146-A-U or EBV-146-A-C module shown.
FLEX TUBE DIAPHRAGM KITS<br />
REGULATORS<br />
0-RING<br />
OLD STYLE KITS ABOVE<br />
ARE OBSOLETE.<br />
SEE CHART FOR<br />
REPLACEMENT.<br />
REGULATOR<br />
Code No. Description<br />
5325056 O-ring – 6 per package<br />
REGULATOR (MUST<br />
BE INSTALLED<br />
PAST 0-RING)<br />
FLEX TUBE<br />
DIAPHRAGM<br />
OLD STYLE DIAPHRAGM INSIDE PARTS<br />
O-RING<br />
FLEX TUBE<br />
DIAPHRAGM<br />
The flush volume of the flex tube<br />
diaphragm kit is controlled by the<br />
regulator. Regulators are identified by<br />
color. Some flex tube diaphragm kits<br />
are supplied with multiple regulators.<br />
The installer must make sure the<br />
proper regulator is used when<br />
installing the flex tube diaphragm kit.<br />
The 5325813<br />
Quad Ring is<br />
still available.<br />
QUAD RING<br />
Code No. Part No. Description<br />
5325813 EBV-18 Quad Ring –<br />
12 per package<br />
69<br />
<strong>Repair</strong> <strong>Parts</strong> <strong>and</strong> <strong>Maintenance</strong> <strong>Guide</strong><br />
Optima Plus ® Flushometers<br />
Use To Replace<br />
Code No. Part No. Description Color* Old Part No.<br />
3325003 EBV-1023-A URINAL GREEN EBV-32-A-U-0.5<br />
0.5 gpf/1.9 Lpf ‡<br />
3325000 EBV-1022-A URINAL GREEN EBV-32-A-U-1.0<br />
1.0 gpf/3.8 Lpf †<br />
3325000 EBV-1022-A URINAL BLACK EBV-32-A-U-1.5<br />
1.5 gpf/5.7 Lpf †<br />
3325001 EBV-1020-A URINAL WHITE EBV-20-A-U-3.5<br />
3.5 gpf/13.2 Lpf †<br />
3325031 EBV-1024-A CLOSET GREEN —<br />
1.28 gpf/4.8 Lpf<br />
3325001 EBV-1020-A CLOSET GREEN EBV-10-A-C-1.6<br />
1.6 gpf/6.0 Lpf †<br />
3325014 EBV-1021-A CLOSET BLUE EBV-10-A-C-2.4<br />
2.4 gpf/9.0 Lpf<br />
3325001 EBV-1020-A CLOSET WHITE EBV-10-A-C-3.5<br />
3.5 gpf/13.2 Lpf †<br />
3325001 EBV-1020-A CLOSET WHITE EBV-10-A-C-4.5<br />
4.5 gpf/17.0 Lpf §<br />
† The EBV-1020-A <strong>and</strong> EBV-1022-A kits are supplied with multiple regulators.<br />
‡ A 0.5 gpf (1.9 Lpf) urinal kit can be converted to a 1.0 gpf (3.8 Lpf) by cutting <strong>and</strong> removing the smooth<br />
A-164 flow ring from the guide.<br />
§ For a 4.5 gpf (17.0 Lpf) water closet flush, use the EBV-1020-A kit with the white regulator, <strong>and</strong> cut<br />
<strong>and</strong> remove the A-164 flow ring from the guide.<br />
* Color of regulator to be used with flex tube diaphragm to obtain the listed flush volume.<br />
REGULATOR (Sold 6 per package)<br />
Code No. Part No. Description Regulator Color<br />
5325122 EBV-95 Urinal-0.5 gpf/1.9 Lpf GREEN<br />
5325122 EBV-95 Urinal-1.0 gpf/3.8 Lpf GREEN<br />
5325129 EBV-102-2 Urinal-1.5 gpf/5.7 Lpf BLACK<br />
5325130 EBV-102-1 Urinal-3.5 gpf/13.2 Lpf WHITE<br />
5325122 EBV-95 Closet-1.28 gpf/4.8 Lpf GREEN<br />
5325122 EBV-95 Closet-1.6 gpf/6.0 Lpf GREEN<br />
5325130 EBV-102-1 Closet-3.5 gpf/13.2 Lpf WHITE<br />
5325128 EBV-101 Closet-2.4 gpf/9.0 Lpf BLUE<br />
The EBV-1020-A <strong>and</strong> EBV-1022-A kits are supplied with multiple flush volume regulators. The installer must use<br />
the correct regulator when installing the kit.<br />
Sensor<br />
Flushometers
Sensor<br />
Flushometers<br />
SOLENOID REPLACEMENT<br />
Code No. Part No. Description<br />
3325462 EBV-144-A Solenoid operator<br />
For use with black Optima Plus ® EBV-26-A<br />
modules only (produced 1992-2003).<br />
For G2 Optima Plus ® modules (identified by a<br />
blue module) use the EBV-136-A solenoid.<br />
1. Remove battery cover <strong>and</strong> batteries from existing<br />
sensor module.<br />
2. Disconnect the white plastic connector that connects<br />
the black <strong>and</strong> red wires on the side of the module.<br />
3. Unscrew (counterclockwise) the existing solenoid valve from<br />
the base plate.<br />
4. Remove white plastic seat <strong>and</strong> O-rings that are located inside<br />
the housing.<br />
Back View<br />
70<br />
<strong>Repair</strong> <strong>Parts</strong> <strong>and</strong> <strong>Maintenance</strong> <strong>Guide</strong><br />
Optima Plus ® Flushometers<br />
(All Optima products manufactured prior to May, 2003)<br />
5. Remove clear plastic housing from the threaded end of new<br />
operator by unscrewing (counterclockwise). It is normal to find<br />
water inside this housing.<br />
7. Reinstall batteries in the correct position <strong>and</strong> reattach<br />
battery door.<br />
Front View<br />
6. Make sure O-ring is installed on the gray housing of the new<br />
operator. Install isolated operator by threading it (clockwise) into<br />
the housing. Tighten with fingers beyond just snug.<br />
8. Reconnect the white plastic connectors on the side of the<br />
module. Slide the white connector into the clip to secure. Tuck<br />
wiring in close to module. If valve runs, tighten solenoid further.
TROUBLESHOOTING GUIDE<br />
IMPORTANT: The OPTIMA PLUS ® flushometer is engineered for quiet<br />
operation. Excessive water flow creates noise, while too little water flow may<br />
not satisfy the needs of the fixture. Proper adjustment is made when<br />
plumbing fixture is cleansed after each flush without splashing water out<br />
from the lip AND a quiet flushing cycle is achieved.<br />
Never open Control Stop to where the flow from the valve exceeds the flow<br />
capability of the fixture. In the event of a valve failure, the fixture must be<br />
able to accommodate a continuous flow from the valve.<br />
ATTENTION INSTALLERS: With the exception of the control stop inlet,<br />
DO NOT USE pipe sealant or plumbing grease on any valve component or<br />
coupling! To protect the chrome or special finish of <strong>Sloan</strong> flushometers,<br />
DO NOT USE toothed tools to install or service these valves. Use our A-50<br />
Super-Wrench or other smooth-jawed wrench to secure couplings.<br />
Regulations for low consumption fixtures (1.6 gpf/6.0 Lpf closets <strong>and</strong><br />
1.0 gpf/3.8 Lpf urinals) prohibit use of higher flush volumes.<br />
1. Sensor flashes continuously only when user steps within range.<br />
A. Unit in start-up mode; no problem. This feature is active for the<br />
first 10 minutes of operation.<br />
2. <strong>Valve</strong> does not flush; sensor not picking up user.<br />
A. Range too short; increase the range.<br />
B. Optima Plus installed on a high rough-in fixture (beam is shooting<br />
over the user’s head). Install the EBV-46-A beam deflector (black<br />
modules only).<br />
3. <strong>Valve</strong> does not flush; sensor picking up opposite wall or surface,<br />
or only flushes when someone walks by. Red light flashes<br />
continuously for first 10 minutes even with no one<br />
in front of the sensor.<br />
A. Range too long; shorten range.<br />
COUNTERCLOCKWISE CLOCKWISE<br />
Decreases<br />
Range<br />
Increases<br />
Range<br />
B. Sensor is picking up mirror or highly reflective wall or surface in front<br />
of fixture. Install Optima Plus ® slightly “off-center” (2 to 5 degrees) to<br />
eliminate direct reflection off of mirror or opposite wall or surface.<br />
4. <strong>Valve</strong> does not flush even after adjustment.<br />
A. Range adjustment potentiometer set at full “max” or full “min”<br />
setting. Readjust potentiometer away from full “max” or “min” setting.<br />
B. Batteries completely used up; replace batteries.<br />
C. Problem with electronic sensor module; replace electronic sensor<br />
module.<br />
5. Unit flashes 4 quick times when user steps within range.<br />
A. Batteries low; replace batteries.<br />
6. <strong>Valve</strong> does not shut off.<br />
A. By-pass orifice in diaphragm is clogged with dirt or debris, or by-pass<br />
is clogged by an invisible gelatinous film due to “over-treated” water.<br />
Remove diaphragm <strong>and</strong> wash under running water. Replace with new<br />
diaphragm if cleaning does not correct the problem.<br />
B. Dirt or debris fouling stem or flex tube diaphragm. Remove flex<br />
tube diaphragm <strong>and</strong> wash under running water.<br />
C. Problem with solenoid. If cleaning does not correct the problem,<br />
replace with new isolated solenoid operator.<br />
71<br />
<strong>Repair</strong> <strong>Parts</strong> <strong>and</strong> <strong>Maintenance</strong> <strong>Guide</strong><br />
Optima Plus ® Flushometers<br />
7. Not enough water to fixture.<br />
A. Wrong Optima Plus flex tube diaphragm installed; i.e., 1.0 gpf<br />
urinal installed on 3.5 gpf closet fixture. Replace with proper<br />
diaphragm assembly.<br />
B. Enlarged by-pass in diaphragm. Replace with flex tube<br />
diaphragm kit.<br />
C. Control stop not adjusted properly. Readjust control stop.<br />
D. Inadequate volume or pressure at supply. Increase water pressure<br />
or supply (flow) to valve. Consult factory for assistance.<br />
8. Too much water to fixture.<br />
A. Control stop not adjusted properly. Readjust control stop.<br />
B. Wrong Optima Plus flex tube diaphragm installed; i.e., 3.0 gpf model<br />
installed on 1.0 or 1.5 gpf urinal fixture. Replace with proper Optima<br />
Plus diaphragm assembly.<br />
C. Dirt in diaphragm by-pass. Clean under running water or replace<br />
with new flex tube diaphragm.<br />
9. Men’s room closet bowls unflushed.<br />
A. Closet being used as urinal. Angle sensor slightly off fixture<br />
centerline to detect st<strong>and</strong>ing person in front of fixture.<br />
BATTERIES<br />
When required, replace batteries with four (4) alkaline type AA batteries.<br />
CARE AND CLEANING OF CHROME AND SPECIAL FINISHES<br />
DO NOT use abrasive or chemical cleaners to clean flushometers as they<br />
may dull the luster <strong>and</strong> attack the chrome or special decorative finishes.<br />
Use ONLY mild soap <strong>and</strong> water, then wipe dry with clean cloth or towel.<br />
While cleaning the bathroom tile, the flushometer should be protected<br />
from any splattering of cleaner. Acids <strong>and</strong> cleaning fluids can discolor<br />
or remove chrome plating.<br />
When assistance is required, please contact<br />
<strong>Sloan</strong> Technical Support at: 1-888-SLOAN-14 (1-888-756-2614).<br />
Sensor<br />
Flushometers
Sensor<br />
Flushometers<br />
A-3 Body<br />
10<br />
10<br />
Earlier model with<br />
EBV-36-A body<br />
18A<br />
1<br />
3<br />
4<br />
6<br />
2<br />
7A<br />
14<br />
17<br />
7<br />
8<br />
18B 18C<br />
19D 19A 19D 19B 19D 19C<br />
20<br />
9<br />
5<br />
13<br />
15<br />
12<br />
11<br />
16<br />
72<br />
<strong>Repair</strong> <strong>Parts</strong> <strong>and</strong> <strong>Maintenance</strong> <strong>Guide</strong><br />
Optima Plus ® <strong>Sloan</strong> Flushometer <br />
PARTS LIST<br />
Item<br />
No. Code No. Part No. Description<br />
1. 0325298 EBV-189-A Cover/Ring/Sensor Assembly - Water Closet<br />
0325299 EBV-190-A Cover/Ring/Sensor Assembly - Urinal<br />
0325239 EBV-198-A Cover/Ring/Sensor Assembly - Water Closet<br />
w/ Zurn ring<br />
0325240 EBV-199-A Cover/Ring/Sensor Assembly - Urinal w/Zurn ring<br />
2. 0325241 EBV-192-A Cover Assembly<br />
3. N/A EBV-168 Locking Ring - Plastic inner cover only –<br />
Use 3325089, EBV-1010-A<br />
0305843 EBV-14 Locking Ring - Metal inner cover only<br />
0305843 EBV-30-A Locking Ring - for Zurn valves<br />
4. 3325450 EBV-129-A-C Electronic Module - Water Closet<br />
3325451 EBV-129-A-U Electronic Module - Urinal<br />
5. 3325089 EBV-1010-A Metal Inner Cover <strong>Repair</strong> Kit<br />
Includes Items Nos. 3, 5, 6 <strong>and</strong> 7<br />
6. 0325171 EBV-134 Cover Rest Plate<br />
7. 3325453 EBV-136-A Solenoid<br />
7A. 3325456 EBV-145-A Inside Cover Assembly (includes solenoid<br />
EBV-136-A) Does not replace Plastic Inner Cover.<br />
Use Item No. 5<br />
8. SEE CHART NEXT PAGE Flex Tube Diaphragm Assembly<br />
9. SEE CHART NEXT PAGE Flush Volume Regulator<br />
10. 0325286 EBV-186 H<strong>and</strong>le Cap Kit<br />
11. 0325107 EBV-91 Range Adjustment Tool<br />
12. 0305823 EBV-22 Strap Wrench<br />
13. 0325159 EBV-137 7/64" Hex Wrench<br />
14. 3308785 H-634-AA 1" (25 mm) Sweat Solder Kit<br />
3308788 H-636-AA 3/4" (19 mm) Sweat Solder Kit<br />
15. 3308386 H-700-A 1" (25 mm) Bak-Chek ® Control Stop<br />
3308384 H-700-A 3/4" (19 mm) Bak-Chek ® Control Stop<br />
16. 3308840 H-573-A Stop Cap<br />
17. 0305381PK A-3-A <strong>Valve</strong> Body *<br />
18A. 5323007 V-500-AA 1-1/2" (38 mm) x 9" (229 mm) Vacuum Breaker<br />
(Model 8110/8111)<br />
0323014 V-500-AA 1-1/2" (38 mm) x 13 1/2" (343 mm) Vacuum<br />
Breaker (Model 8113)<br />
0323019 V-500-AA 1-1/2" (38 mm) x 23" (584 mm) Vacuum Breaker<br />
(Model 8115)<br />
0323021 V-500-AA 1-1/2" (38 mm) x 26" (660 mm) Vacuum Breaker<br />
(Model 8116)<br />
18B. 5323006 V-500-AA 1-1/4" (32 mm) x 9" (229 mm) Vacuum Breaker<br />
(Model 8180)<br />
18C. 5323005 V-500-AA 3/4" (19 mm) x 9" (229 mm) Vacuum Breaker<br />
(Model 8186)<br />
19A. 0306145 F-56-A 1-1/2" Spud Coupling Assembly<br />
(Models 8110, 8115 & 8116)<br />
19B. 0306142 F-55-A 1-1/4" Spud Coupling Assembly (Model 8180)<br />
19C. 0306102 F-54-A 3/4" Spud Coupling Assembly (Model 8186)<br />
19D. SEE SLIP JOINT GASKETS AND RINGS TABLE ON NEXT PAGE<br />
20. 3323192 V-551-A Vacuum Breaker <strong>Repair</strong> Kit<br />
* Part number varies with valve model variation; consult factory.
LOCKING RING<br />
COVER<br />
BODY<br />
FLUSH CONNECTION<br />
(VACUUM BREAKER)<br />
SPUD COUPLING<br />
OVERRIDE BUTTON<br />
STOP COUPLING<br />
TAILPIECE<br />
OUTLET COUPLING<br />
SPUD FLANGE<br />
CONTROL STOP<br />
SUPPLY FLANGE<br />
OPERATION<br />
A continuous, INVISIBLE light beam is emitted from the Optima Plus ® Sensor.<br />
As the user enters the beam's effective range, 22 to 42 inches (559 mm to<br />
1067 mm) for closet installations <strong>and</strong> 15 to 30 inches (381 mm to 762 mm)<br />
for urinal installations, the beam is reflected into the Scanner Window to<br />
activate the Output Circuit. Once activated, the Output Circuit continues in a<br />
“hold” mode for as long as the user remains within the effective range of<br />
the sensor.<br />
When the user steps away, the loss of reflected light initiates an electrical<br />
“one-time” signal that activates the flushing cycle to flush the fixture. The<br />
Circuit automatically resets <strong>and</strong> is ready for the next user.<br />
73<br />
<strong>Repair</strong> <strong>Parts</strong> <strong>and</strong> <strong>Maintenance</strong> <strong>Guide</strong><br />
Optima Plus ® <strong>Sloan</strong> Flushometer <br />
ITEM 8. FLEX TUBE DIAPHRAGM KIT<br />
Code No. Part No. Description<br />
Regulator<br />
Color *<br />
3325150 EBV-1050-A Urinal-0.5 gpf/1.9 Lpf GREEN<br />
3325151 EBV-1051-A Urinal-1.0 gpf/3.8 Lpf † GREEN<br />
3325153 EBV-1053-A Closet-1.6 gpf/6.0 Lpf † GREEN<br />
3325152 EBV-1052-A Closet-2.4 gpf/9.0 Lpf BLUE<br />
† The EBV-1051-A <strong>and</strong> EBV-1053-A Kits are supplied with multiple Regulators.<br />
* Color of regulator to be used with flex tube diaphragm to obtain the listed flush volume.<br />
A 1.0 gpf (3.8 Lpf) Urinal kit can be converted to a 1.5 gpf (5.7 Lpf) Urinal by replacing<br />
the Green Regulator with the supplied Black Regulator.<br />
A 1.6 gpf (6.0 Lpf) Closet kit can be converted to a 3.5 gpf (13.2 Lpf) Closet by replacing<br />
the Green Regulator with the supplied White Regulator.<br />
ITEM 9. REGULATORS<br />
The flush volume of the flex tube diaphragm kit is controlled by the<br />
regulator. Regulators are identified by color. Some flex tube diaphragm kits<br />
are supplied with multiple regulators. The installer must make sure the<br />
proper regulator is used when installing the flex tube diaphragm kit.<br />
REGULATOR (SOLD 6 PER PACKAGE)<br />
Regulator<br />
Code No. Part No. Description Color<br />
5325122 EBV-95 Urinal-0.5 gpf/1.9 Lpf GREEN<br />
5325122 EBV-95 Urinal-1.0 gpf/3.8 Lpf GREEN<br />
5325122 EBV-95 Closet-1.6 gpf/6.0 Lpf GREEN<br />
5325128 EBV-101 Closet-2.4 gpf/9.0 Lpf BLUE<br />
FLEX TUBE DIAPHRAGM ASSEMBLY<br />
0-RING<br />
REGULATOR<br />
(MUST BE<br />
INSTALLED<br />
PAST 0-RING)<br />
FLEX TUBE<br />
DIAPHRAGM<br />
ITEM 19D. SLIP JOINT GASKETS AND RINGS<br />
Optima Plus <strong>Valve</strong> Models Feature <strong>Sloan</strong>’s<br />
Exclusive Flex Tube Diaphragm for the<br />
ultimate in valve performance, reliability <strong>and</strong><br />
Chloramine resistance.<br />
Size Code No. Part No. Description<br />
1-1/2” 5306058 F-3 Red Friction Ring<br />
5322001 VBF-5 Black Slip Joint Gasket<br />
0319086/5319086 S-30 Flexible Seat<br />
0319079 S-21 Rigid Seat (rubber over brass)<br />
1-1/2” x 1-1/4” 0396062 F-105 Slip Joint Gasket – Rigid<br />
1-1/4” 5306057 F-3 Red Friction Ring<br />
5322176 VBF-5 Black Slip Joint Gasket<br />
0307052/5307052 G-21 Rigid Seat (rubber over brass)<br />
1” 5306056 F-3 Red Friction Ring<br />
5306115 F-5 Black Slip Joint Gasket<br />
3/4” 5306055 F-3 Red Friction Ring<br />
5306113 F-5 Black Slip Joint Gasket<br />
Sensor<br />
Flushometers
Sensor<br />
Flushometers<br />
BATTERY REPLACEMENT<br />
When required, replace batteries with four (4) Alkaline AA-Size Batteries.<br />
Note: Water does not have to be turned off to replace batteries.<br />
Loosen the two (2) Screws on top of unit. Remove the complete Cover<br />
Assembly. Lift the Sensor Module from its Plate. Unplug the Electrical<br />
Connector from Battery Compartment Cover. Loosen the Retaining Screw on<br />
Battery Compartment Cover <strong>and</strong> remove Battery Compartment Cover. Install<br />
four (4) Alkaline AA-Size Batteries exactly as illustrated.<br />
Install Battery Compartment Cover <strong>and</strong> secure with Retaining Screw. Make<br />
certain that Battery Compartment Cover is fully compressed against Gasket<br />
to provide a seal; Do Not overtighten. Plug the Electrical Connector into the<br />
Battery Compartment Cover. Reinstall the Sensor Module onto the Plate.<br />
Reinstall the complete Cover Assembly onto the Plate. Tighten the two (2)<br />
Screws on top of the unit.<br />
RANGE ADJUSTMENT (ADJUST ONLY IF NECESSARY)<br />
The Optima Plus ® has a factory set sensing range:<br />
Water Closet Models - 22" to 42" (559 mm to 1067 mm)<br />
Urinal Models - 15" to 30" (381 mm to 762 mm)<br />
The Factory setting should be satisfactory for most installations.<br />
If the range is too short (i.e., not picking up users) or too long (i.e., picking<br />
up opposite wall or stall door) the range can be adjusted.<br />
Note: Water does not have to be turned off to adjust range.<br />
Refer to Illustration on at right.<br />
Loosen the two Screws on top of the unit. Remove the Override Button.<br />
Remove the Rubber Plug from top of Electronic Sensor Module to uncover<br />
the Potentiometer.<br />
RANGE ADJUSTMENT PROCEDURE<br />
For the first ten (10) minutes of operation, a Visible Red Light flashes in the<br />
Sensing Window of the Optima Plus flushometer when a user is detected.<br />
This Visible Red Light feature can be reactivated after ten (10) minutes by<br />
opening <strong>and</strong> closing the Battery Compartment Door.<br />
Check the range by stepping toward the unit until the Red Light flashes,<br />
indicating the Sensor's maximum detection limit. Adjust the Range<br />
Potentiometer Screw located on top of the Sensor Module a few degrees<br />
CLOCKWISE to increase the range or a few degrees COUNTERCLOCKWISE<br />
to decrease the range. Repeat this adjustment until the desired range is<br />
achieved.<br />
Always Determine the Sensing Range with Plastic Cover <strong>and</strong> Lens<br />
Window On Top of the Unit.<br />
Important: Adjust in small increments only! Range Potentiometer<br />
Adjustment Screw rotates only 3/4 of a turn; DO NOT over-rotate.<br />
When range adjustment is satisfactory, replace the Rubber Plug. Reinstall<br />
Override Button <strong>and</strong> tighten the two Screws on top of the unit.<br />
74<br />
<strong>Repair</strong> <strong>Parts</strong> <strong>and</strong> <strong>Maintenance</strong> <strong>Guide</strong><br />
Optima Plus ® <strong>Sloan</strong> Flushometer <br />
COUNTER-<br />
CLOCKWISE CLOCKWISE<br />
Decreases<br />
Range<br />
7/64” ALLEN WRENCH<br />
COVER ASSEMBLY<br />
SENSOR MODULE<br />
PLATE<br />
BATTERY COMPARTMENT COVER<br />
SENSOR MODULE (BACKSIDE SHOWN)<br />
RETAINING SCREW<br />
ELECTRICAL CONNECTOR<br />
RECEPTACLE<br />
Increases<br />
Range
TROUBLESHOOTING AND MAINTAINING THE SLOAN OPTIMA PLUS ® FLUSHOMETER<br />
IMPORTANT: This product contains mechanical <strong>and</strong>/or electrical<br />
components that are subject to normal wear. These components should<br />
be checked on a regular basis <strong>and</strong> replaced as needed to maintain the<br />
valve’s performance.<br />
Never open Control Stop to where the flow from the valve exceeds the flow<br />
capability of the fixture. In the event of a valve failure, the fixture must be<br />
able to accommodate a continuous flow from the valve.<br />
ATTENTION INSTALLERS: With the exception of the control stop inlet,<br />
DO NOT USE pipe sealant or plumbing grease on any valve component or<br />
coupling! To protect the chrome or special finish of <strong>Sloan</strong> flushometers,<br />
DO NOT USE toothed tools to install or service these valves. Use our A-50<br />
Super-Wrench or other smooth-jawed wrench to secure couplings.<br />
Regulations for low consumption fixtures (1.6 gpf/6.0 Lpf closets <strong>and</strong><br />
1.0 gpf/3.8 Lpf urinals) prohibit use of higher flush volumes.<br />
1. Sensor flashes continuously only when user steps<br />
within range.<br />
A. Unit in Start-Up mode; no problem. This feature is active for the first<br />
ten (10) minutes of operation.<br />
2. <strong>Valve</strong> does not flush; sensor not picking up user.<br />
A. Range too short; increase the range.<br />
3. <strong>Valve</strong> does not flush; sensor picking up opposite wall or surface,<br />
or only flushes when someone walks by. Red light flashes<br />
continuously for first 10 minutes even with no one in front of<br />
the sensor.<br />
A. Range too long; shorten range.<br />
4. <strong>Valve</strong> does not flush even after adjustment.<br />
A. Range Adjustment Potentiometer set at full “max” or full “min” setting.<br />
Readjust Potentiometer away from full “max” or “min” setting.<br />
B. Batteries completely used up; replace batteries.<br />
C. Problem with Electronic Sensor Module; replace Electronic Sensor<br />
Module.<br />
5. Unit flashes four (4) quick times when user steps within range.<br />
A. Batteries low; replace batteries.<br />
6. <strong>Valve</strong> does not shut off.<br />
A. Bypass Orifice in Diaphragm is clogged with dirt or debris, or Bypass<br />
is clogged by an invisible gelatinous film due to “over-treated” water.<br />
Remove Flex Tube Diaphragm <strong>and</strong> wash under running water.<br />
Note: Size of orifice in the by-pass is of utmost importance for the<br />
proper metering of water by the valve. DO NOT ENLARGE OR<br />
DAMAGE THIS ORIFICE. Replace flex tube diaphragm if cleaning<br />
does not correct the problem.<br />
B. Dirt or debris fouling Stem or Flex Tube Diaphragm. Remove Flex Tube<br />
Diaphragm <strong>and</strong> wash under running water.<br />
C. O-ring on Stem of Flex Tube Diaphragm is damaged or worn. Replace<br />
O-ring if necessary.<br />
D. Problem with Electronic Sensor Module; replace Sensor Module.<br />
75<br />
<strong>Repair</strong> <strong>Parts</strong> <strong>and</strong> <strong>Maintenance</strong> <strong>Guide</strong><br />
Optima Plus ® <strong>Sloan</strong> Flushometer <br />
7. Not enough water to fixture.<br />
A. Wrong Flush Volume Regulator installed in Flex Tube Diaphragm Kit.<br />
Install the correct Regulator (see Step 6 of these instructions).<br />
B. Wrong Optima Plus ® Diaphragm kit installed; i.e., 1 gpf. urinal<br />
installed on 3.5 gal. closet fixture. Replace with proper Optima Plus<br />
diaphragm kit.<br />
C. Enlarged Bypass in Diaphragm. Replace Flex Tube Diaphragm.<br />
D. Control Stop not adjusted properly. Readjust Control Stop.<br />
E. Inadequate volume or pressure at supply. Increase water pressure or<br />
supply (flow) to valve. Consult factory for assistance.<br />
8. Too much water to fixture.<br />
A. Wrong Flush Volume Regulator installed in Flex Tube Diaphragm Kit.<br />
Install the correct Regulator (see Step 6 of these instructions).<br />
B. Control Stop not adjusted properly. Readjust Control Stop.<br />
C. Wrong Optima Plus Diaphragm kit installed; i.e., 3.5 gpf. closet<br />
installed on 0.5 gal. urinal fixture. Replace with proper Optima Plus<br />
Diaphragm kit.<br />
D. Dirt in Diaphragm Bypass. Clean under running water or replace Flex<br />
Tube Diaphragm.<br />
CARE AND CLEANING OF CHROME AND SPECIAL FINISHES<br />
DO NOT use abrasive or chemical cleaners to clean flushometers as they<br />
may dull the luster <strong>and</strong> attack the chrome or special decorative finishes.<br />
Use ONLY soap <strong>and</strong> water, then wipe dry with clean cloth or towel.<br />
While cleaning the bathroom tile, the flushometer should be protected from<br />
any splattering of cleaner. Acids <strong>and</strong> cleaning fluids can discolor or remove<br />
chrome plating.<br />
When assistance is required, please contact<br />
<strong>Sloan</strong> Technical Support at: 1-888-SLOAN-14 (1-888-756-2614).<br />
Sensor<br />
Flushometers
Sensor<br />
Flushometers<br />
1<br />
76<br />
<strong>Repair</strong> <strong>Parts</strong> <strong>and</strong> <strong>Maintenance</strong> <strong>Guide</strong><br />
SMOOTH ® Flushometer<br />
Side-Mount-Operator-Over-The-H<strong>and</strong>le<br />
Battery powered, sensor activated retrofit unit for exposed closet <strong>and</strong> urinal<br />
flushometers.<br />
PARTS LIST<br />
Item<br />
No. Code No. Part No. Description<br />
1. 3325201 EBV-200-A Side Mount Operator for Water Closets (Toilets)<br />
<strong>and</strong> Urinals
ADJUSTMENT PROCEDURES<br />
Mode A<br />
The SMOOTH unit may be reset to normal range by fully pressing <strong>and</strong><br />
holding in the Override H<strong>and</strong>le until the Red LED light in the Sensor Window<br />
illuminates. Then immediately release the Override H<strong>and</strong>le.<br />
Mode B<br />
The SMOOTH unit may be set to reduced range for closet applications by<br />
pressing <strong>and</strong> holding in the Override H<strong>and</strong>le until the Red LED light in the<br />
Sensor Window flashes a slow long blinking light. Then immediately release<br />
the Override H<strong>and</strong>le.<br />
Mode C<br />
The SMOOTH unit may be set to reduced range by pressing <strong>and</strong> holding<br />
in the Override H<strong>and</strong>le until the Red LED light in the Sensor Window<br />
displays a rapid on <strong>and</strong> off blinking light. Then immediately release the<br />
Override H<strong>and</strong>le.<br />
BATTERIES<br />
When required, replace batteries with four (4) alkaline type C batteries.<br />
1. Release Mounting Clamp by turning the Mounting Screw<br />
counterclockwise with a 1/8” hex wrench.<br />
2. Swing the Mounting Clamp into the open position.<br />
3. Slide the unit from the flushometer body.<br />
4. Open Battery Compartment Door <strong>and</strong> remove old batteries from unit.<br />
Replace batteries with 4 (four) new C-size batteries. Close Battery<br />
Compartment Door. Reinstall unit.<br />
1<br />
3<br />
4<br />
2<br />
77<br />
<strong>Repair</strong> <strong>Parts</strong> <strong>and</strong> <strong>Maintenance</strong> <strong>Guide</strong><br />
SMOOTH ® Flushometer<br />
Side-Mount-Operator-Over-The-H<strong>and</strong>le<br />
TROUBLESHOOTING GUIDE<br />
1. Red LED light in the sensor window flashes<br />
twice as fast as normal.<br />
A. When a user enters the sensor’s effective range <strong>and</strong> the Red LED<br />
light in the sensor window flashes twice as fast as normal, the<br />
batteries need replacement. Refer to the Battery Replacement<br />
Instructions.<br />
CARE AND CLEANING OF CHROME AND SPECIAL FINISHES<br />
DO NOT use abrasive or chemical cleaners to clean flushometers as they<br />
may dull the luster <strong>and</strong> attack the chrome or special decorative finishes.<br />
Use ONLY mild soap <strong>and</strong> water, then wipe dry with clean cloth or towel.<br />
While cleaning the bathroom tile, the flushometer should be protected<br />
from any splattering of cleaner. Acids <strong>and</strong> cleaning fluids can discolor<br />
or remove chrome plating.<br />
When assistance is required, please contact<br />
<strong>Sloan</strong> Technical Support at: 1-888-SLOAN-14 (1-888-756-2614).<br />
Sensor<br />
Flushometers
Sensor<br />
Flushometers<br />
1<br />
7<br />
Only use with GEM 2 ®<br />
flushometers when<br />
converting to a Sensor<br />
Activated SMO (Side<br />
Mount Operator) Unit<br />
8<br />
4<br />
6<br />
3<br />
2<br />
9<br />
5<br />
78<br />
<strong>Repair</strong> <strong>Parts</strong> <strong>and</strong> <strong>Maintenance</strong> <strong>Guide</strong><br />
SMO<br />
Side-Mount-Operator<br />
Battery powered, sensor activated retrofit unit for exposed closet <strong>and</strong> urinal<br />
flushometers.<br />
PARTS LIST<br />
Item<br />
No. Code No. Part No. Description<br />
1. 0325105 EBV-89-A Side Mount Operator for Water Closets (Toilets)<br />
<strong>and</strong> Urinals<br />
2 0325151 EBV-121 Gasket (Red)<br />
3 0325148 EBV-118 Lens<br />
4 0325153 EBV-123 Button repair kit<br />
5 0325150 EBV-120 Wrench<br />
6 0325157 EBV-127 Metal Cover Closet w/OR<br />
7 0325149 EBV-119 Allen Wrench 3mm security hex<br />
8 0325192 EBV-157 H<strong>and</strong>le Adapter Kit (Includes O-ring) for GEM 2 ®<br />
9 — B-39 H<strong>and</strong>le Seal<br />
Note: Battery door screw is not an available part. Use M4-0.7 x 12 mm screw as suitable replacement.
TO CHANGE ACTIVATION DISTANCE FOR THE OBJECT LOCK SENSOR<br />
1. Remove battery compartment<br />
tray as shown at left.<br />
1<br />
2. Remove cover as shown at left.<br />
3. Remove sensor adjuster tool as<br />
shown at left. Replace battery<br />
compartment in Side Mount<br />
Operator to activate unit.<br />
2<br />
4. Press sensor range reset button<br />
as shown below (the green L.E.D.<br />
will flash continuously when it<br />
has an object in view for the<br />
seven minute reset period).<br />
5. St<strong>and</strong> at desired activation 3<br />
distance.<br />
6. Use sensor adjuster tool (see<br />
below) <strong>and</strong> turn Distance<br />
Sensor Adjusting Tool<br />
Adjustment Screw all the way down<br />
<strong>and</strong> then turn slowly up until green L.E.D. begins to flash.<br />
7. Ensure Object Lock Sensor is not detecting stall door or wall by closing<br />
door, stepping out of sensor path <strong>and</strong> making sure green L.E.D. is not<br />
flashing. If sensor locks onto door or wall, unit will not flush properly.<br />
Shorten activation distance.<br />
8. Remove battery compartment, replace sensor adjuster tool <strong>and</strong><br />
cover. Replace battery compartment tray to reactivate Side Mount<br />
Operator unit.<br />
9. After 7 minute start-up sequence, the green L.E.D. will flash only<br />
3 times when a user is in view (after a 5 second delay).<br />
Installation Instructions for GEM 2 ®<br />
EBV-157 H<strong>and</strong>le Adapter Kit<br />
When converting a GEM 2 ® manual<br />
flushometer to a Sensor Activated<br />
flushometer with an SMO (Side Mount<br />
Operator), an EBV-157 H<strong>and</strong>le Adapter<br />
must be used.<br />
1. Remove h<strong>and</strong>le assembly<br />
from flushometer.<br />
2. Place O-ring over the hub in<br />
the SMO connection area.<br />
O-ring shown<br />
installed on hub<br />
EBV-89-A SMO<br />
(Side Mount Operator) Unit<br />
79<br />
<strong>Repair</strong> <strong>Parts</strong> <strong>and</strong> <strong>Maintenance</strong> <strong>Guide</strong><br />
SMO<br />
Side-Mount-Operator<br />
TROUBLESHOOTING GUIDE<br />
1. Green L.E.D. (light) flashes 3 times when there are no users<br />
A. Front of Object Lock Sensor is covered or Object Lock Sensor is set<br />
too far out, registering the opposite wall or door as a user. Remove<br />
item covering sensor or adjust Object Lock Sensor activation distance.<br />
(See section – Adjusting Your Side Mount Operator)<br />
2. Green L.E.D. (light) flashes continuously when Object Lock<br />
Sensor is activated by a user<br />
A. Side Mount Operator unit is in 7 minute start up mode (when first<br />
activated) or Sensor Range Reset Button has been depressed. Green<br />
L.E.D. (light) will flash only 3 times acknowledging a user is in view<br />
after the 7 minute start up mode<br />
3. Orange L.E.D. (light) flashes<br />
A. Batteries need replacing. Replace batteries.<br />
4. Not enough water to fixture or too much water to fixture<br />
A. Diaphragm damaged or valve control stop improperly adjusted.<br />
Replace diaphragm <strong>and</strong>/or adjust valve control stop<br />
5. <strong>Valve</strong> will not operate<br />
A. Object Lock Sensor range set too close to Side Mount Operator,<br />
batteries are dead, or water supply is turned off. Adjust Object Lock<br />
Sensor – Replace batteries – Turn water on.<br />
6. <strong>Valve</strong> does not shut off<br />
A. Dirt or debris preventing diaphragm from functioning properly.<br />
Remove dirt or debris, consult valve manufacturer’s directions.<br />
7. <strong>Valve</strong> does not flush even after Object Lock Sensor<br />
has been adjusted<br />
A. Dead batteries. Replace batteries.<br />
CARE AND CLEANING OF CHROME AND SPECIAL FINISHES<br />
DO NOT use abrasive or chemical cleaners to clean flushometers as they<br />
may dull the luster <strong>and</strong> attack the chrome or special decorative finishes.<br />
Use ONLY mild soap <strong>and</strong> water, then wipe dry with clean cloth or towel.<br />
While cleaning the bathroom tile, the flushometer should be protected<br />
from any splattering of cleaner. Acids <strong>and</strong> cleaning fluids can discolor<br />
or remove chrome plating.<br />
When assistance is required, please contact<br />
<strong>Sloan</strong> Technical Support at: 1-888-SLOAN-14 (1-888-756-2614).<br />
Sensor<br />
Flushometers
Sensor<br />
Flushometers<br />
21<br />
22A<br />
16<br />
21<br />
22<br />
22A<br />
17<br />
2<br />
22<br />
22A<br />
FLEX TUBE DIAPHRAGM ASSEMBLY<br />
1<br />
12<br />
5<br />
6<br />
7<br />
9<br />
8A<br />
20<br />
4<br />
3<br />
10<br />
21<br />
<strong>Sloan</strong> ECOS ® Electronic <strong>Valve</strong> Models Feature<br />
<strong>Sloan</strong>’s Exclusive flex tube diaphragm for the<br />
ultimate in valve performance, reliability <strong>and</strong><br />
chloramine resistance.<br />
22<br />
11<br />
15<br />
14<br />
13<br />
8<br />
18<br />
19<br />
80<br />
<strong>Repair</strong> <strong>Parts</strong> <strong>and</strong> <strong>Maintenance</strong> <strong>Guide</strong><br />
<strong>Sloan</strong> ECOS ® Single-Flush <strong>and</strong><br />
Dual-Flush Flushometers<br />
Battery powered, sensor activated unit for exposed closet <strong>and</strong> urinal<br />
flushometers.<br />
PARTS LIST<br />
Item<br />
No. Code No. Part No. Description<br />
Items Included with RESS Retrofit <strong>and</strong> Complete <strong>Sloan</strong> ECOS ®<br />
Electronic Dual-Flush <strong>Valve</strong>s<br />
1. 0372055 WES-55-A Cover/Ring/Sensor Assembly - <strong>Sloan</strong> ECOS ®<br />
Electronic Dual-Flush<br />
— WES-60-A Cover/Ring/Sensor Assembly w/ Zurn ring -<br />
<strong>Sloan</strong> ECOS ® Electronic Dual-Flush<br />
2. 0325246 EBV-191-A Cover Assembly <strong>Sloan</strong> ECOS Electronic Dual-Flush<br />
3. 0372033 WES-23-A Button Cover Assembly with screws - <strong>Sloan</strong> ECOS ®<br />
Electronic Dual-Flush<br />
0325170 EBV-132-A Screws (2) <strong>and</strong> Hex Wrench Only<br />
4. 0325169 EBV-131 Lens Window Cover<br />
5. — EBV-168 Locking Ring - Plastic inner cover only –<br />
Use 3325089, EBV-1010-A<br />
0305843 EBV-14 Locking Ring - Metal inner cover only<br />
— EBV-172 Locking Ring - for Zurn valves<br />
6. 0325247 EBV-196-A Module - <strong>Sloan</strong> ECOS ® Electronic Dual-Flush<br />
7. 0325171 EBV-134 Cover Rest Plate<br />
8. 3325089 EBV-1010-A Metal Inner Cover <strong>Repair</strong> Kit<br />
Includes Items Nos. 5, 7, 8 <strong>and</strong> 9<br />
8A. 3325456 EBV-145-A Inside Cover Assembly (includes solenoid<br />
EBV-136-A) Does not replace Plastic Inner Cover.<br />
Use Item No. 8<br />
9. 3325453 EBV-136-A Solenoid<br />
10. SEE CHART NEXT PAGE Flex Tube Diaphragm Assembly<br />
11. SEE CHART NEXT PAGE Flush Volume Regulator<br />
12. 3325814 EBV-1017-A H<strong>and</strong>le Cap (RESS Retrofit Models only)<br />
13. 0325194 EBV-91 Range Adjustment Tool<br />
14. 0305823 EBV-22 Strap Wrench<br />
15. 0325159 EBV-137 7/64" Hex Wrench<br />
16. 0372031 WES-19 English Operation Instruction Plate<br />
— WES-22 Spanish Operation Instruction Plate<br />
Items Included with Complete <strong>Sloan</strong> ECOS ® Electronic Single-Flush <strong>and</strong><br />
Dual-Flush <strong>Valve</strong>s Only<br />
17. 3308785 H-634-AA 1" (25 mm) Sweat Solder Kit<br />
18. 0388000 H-700-A 1" (25 mm) Bak-Chek ® Control Stop<br />
19. 3308797 H-1010-A V<strong>and</strong>al Resistant Stop Cap<br />
20. 0305381PK EBV-36-A <strong>Valve</strong> Body<br />
21. — V-600-AA 1-1/2" (38 mm) x 10" (254 mm)<br />
Vacuum Breaker (Model 8111)<br />
— V-600-AA 1-1/2" (38 mm) x 23" (584 mm) Vacuum Breaker<br />
(Model 8115)<br />
0393049 V-600-AA 1-1/2" (38 mm) x 26" (660 mm) Vacuum Breaker<br />
(Model 8116)<br />
— V-600-AA 1-1/4" (32 mm) x 10" (254 mm) Vacuum Breaker<br />
— V-600-AA 3/4" (19 mm) x 10" (254 mm) Vacuum Breaker<br />
22. 0306146 F-5-AT 1-1/2" Spud Coupling Assembly<br />
(Models 8111, 8115 & 8116)<br />
F-5-AU 1-1/4" Spud Coupling Assembly<br />
(Models 8180)<br />
F-5-AW 3/4" Spud Coupling Assembly<br />
(Models 8186)<br />
22A. SEE SLIP JOINT GASKETS AND RINGS TABLE ON NEXT PAGE<br />
The EBV-1020-A Kit is supplied with multiple Flush Volume Regulators. The installer must use the correct<br />
Regulator when installing the kit.
ITEM 10. FLEX TUBE DIAPHRAGM KIT SELECTION GUIDE<br />
Code No. Part No. Description<br />
Regulator<br />
Color<br />
3325003 EBV-1023-A 0.5 gpf/1.9 Lpf Urinal GREEN<br />
3325031 EBV-1024-A 1.28 gpf/4.8 Lpf Closet- GREEN<br />
The EBV-1020-A Kit is supplied with multiple Flush Volume Regulators. The installer must use the correct<br />
Regulator when installing the kit.<br />
ITEM 11. REGULATORS<br />
The flush volume of the flex tube diaphragm kit is controlled by the<br />
regulator. Regulators are identified by color. Some flex tube diaphragm kits<br />
are supplied with multiple regulators. The installer must make sure the<br />
proper regulator is used when installing the flex tube diaphragm kit.<br />
REGULATOR (SOLD 6 PER PACKAGE)<br />
Regulator<br />
Code No. Part No. Description Color<br />
5325122 EBV-95 Urinal-0.5 gpf/1.9 Lpf GREEN<br />
5325122 EBV-95 Closet-1.28 gpf/4.8 Lpf GREEN<br />
FLEX TUBE DIAPHRAGM ASSEMBLY<br />
0-RING<br />
REGULATOR<br />
(MUST BE<br />
INSTALLED<br />
PAST 0-RING)<br />
FLEX TUBE<br />
DIAPHRAGM<br />
<strong>Sloan</strong> ECOS ® Models Feature <strong>Sloan</strong>’s Exclusive<br />
Flex Tube Diaphragm for the<br />
ultimate in valve performance, reliability <strong>and</strong><br />
Chloramine resistance.<br />
ITEM 22A. SLIP JOINT GASKETS AND RINGS<br />
Size Code No. Part No. Description<br />
1-1/2” 5306058 F-3 Red Friction Ring<br />
5322001 VBF-5 Black Slip Joint Gasket<br />
0319086/5319086 S-30 Flexible Seat<br />
0319079 S-21 Rigid Seat (rubber over brass)<br />
1-1/2” x 1-1/4” 0396062 F-105 Slip Joint Gasket – Rigid<br />
1-1/4” 5306057 F-3 Red Friction Ring<br />
5322176 VBF-5 Black Slip Joint Gasket<br />
0307052/5307052 G-21 Rigid Seat (rubber over brass)<br />
1” 5306056 F-3 Red Friction Ring<br />
5306115 F-5 Black Slip Joint Gasket<br />
3/4” 5306055 F-3 Red Friction Ring<br />
5306113 F-5 Black Slip Joint Gasket<br />
CARTRIDGE ASSEMBLY<br />
Code No. Part No. Description<br />
3325098 EBV-1026-A 0.125 gpf/0.5 Lpf Cartridge Assembly<br />
3325098 EBV-1026-A 0.25 gpf/1.0 Lpf Cartridge Assembly<br />
81<br />
<strong>Repair</strong> <strong>Parts</strong> <strong>and</strong> <strong>Maintenance</strong> <strong>Guide</strong><br />
<strong>Sloan</strong> ECOS ® Single-Flush <strong>and</strong><br />
Dual-Flush Flushometer<br />
BODY<br />
WATER<br />
CLOSET<br />
DUAL-FLUSH BUTTONS<br />
COVER<br />
TAILPIECE<br />
OUTLET COUPLING<br />
FLUSH CONNECTION<br />
(VACUUM BREAKER)<br />
SPUD COUPLING<br />
SPUD FLANGE<br />
LOCKING RING<br />
STOP COUPLING<br />
CONTROL STOP<br />
SUPPLY FLANGE<br />
URINAL<br />
SINGLE-FLUSH<br />
MODEL<br />
OPERATION<br />
Manual Operation<br />
<strong>Sloan</strong> ECOS ® Electronic Dual-Flush flushometers incorporate intuitive Splitbutton<br />
design for easy manual activation. The small button controls the<br />
reduced flush cycle (1.1 gpf/4.2 Lpf), the large button controls the full flush<br />
cycle (1.6 gpf/6.0 Lpf). Straightforward graphics alert user to proper<br />
activation. Reduced flush for liquid waste, full flush for solid waste. To<br />
further educate the user, two (2) instructional wall plates are included with<br />
each <strong>Sloan</strong> ECOS Dual-Flush flushometer. For single-flush operation a single<br />
button is available for user’s discretion.<br />
Automatic Operation<br />
<strong>Sloan</strong> ECOS Electronic flushometers can also be activated via multi-lobular<br />
infrared sensor. By detecting user presence <strong>and</strong> duration, the <strong>Sloan</strong> ECOS<br />
Smart Sense Technology will determine the proper flush volume for<br />
unequalled water efficiency.<br />
1. A continuous, INVISIBLE<br />
light beam is emitted<br />
from the <strong>Sloan</strong> ECOS ®<br />
CLOSET<br />
Sensor.<br />
2. As the user enters the<br />
beam's effective range,<br />
22 to 42 inches<br />
(559 mm to 1067 mm)<br />
SQUAT TOILET<br />
for closet installations<br />
<strong>and</strong> 15 to 30 inches<br />
(381 mm to 762 mm)<br />
for urinal installations,<br />
the beam is reflected<br />
into the Scanner<br />
Window to activate the<br />
URINAL<br />
Output Circuit. Once<br />
activated, the Output<br />
Circuit continues in a<br />
“hold” mode for as long<br />
as the user remains<br />
within the effective<br />
range of the sensor. For<br />
Dual-Flush models, if the user stays longer than 65 seconds, a full flush<br />
will automatically initiate when the user leaves. For Single-Flush models,<br />
once the user steps away, a full flush will automatically initiate.<br />
3. For a Dual-Flush model, once a user is detected, if the user leaves in<br />
65 seconds or less, a reduced flush will automatically initiate. The circuit<br />
automatically resets <strong>and</strong> is ready for the next user. For a Single-Flush<br />
model, when the user steps away, this initiates a full flush. The circuit<br />
automatically resets <strong>and</strong> is ready for the next user.<br />
Sensor<br />
Flushometers
Sensor<br />
Flushometers<br />
BATTERY REPLACEMENT<br />
When required, replace batteries with four<br />
(4) Alkaline AA-Size Batteries.<br />
Note: Water does not have to be turned off to replace batteries.<br />
Loosen the two (2) screws on top of unit. Remove the complete Cover<br />
Assembly. Lift the Sensor Module from its Plate. Unplug the Electrical<br />
Connector from Battery Compartment Cover. Loosen the Retaining Screw on<br />
Battery Compartment Cover <strong>and</strong> remove Battery Compartment Cover. Install<br />
four (4) alkaline type AA batteries exactly as illustrated at right.<br />
Install Battery Compartment Cover <strong>and</strong> secure with Retaining Screw. Make<br />
certain that Battery Compartment Cover is fully compressed against Gasket<br />
to provide a seal; Do not overtighten. Plug the Electrical Connector into the<br />
Battery Compartment Cover. Reinstall the Sensor Module onto the Plate.<br />
Reinstall the complete Cover Assembly onto the Plate. Tighten the two<br />
(2) Screws on top of the unit.<br />
RANGE ADJUSTMENT (ADJUST ONLY IF NECESSARY)<br />
The <strong>Sloan</strong> ECOS ® Electronic flushometer has a factory set sensing range:<br />
Water closet models – 22" to 42" (559 mm to 1067 mm)<br />
Urinal models – 15" to 30" (381 mm to 762 mm)<br />
The Factory setting should be satisfactory for most installations.<br />
If the range is too short (i.e., not picking up users) or too long (i.e., picking<br />
up opposite wall or stall door) the range can be adjusted.<br />
Note: Water does not have to be turned off to adjust range.<br />
Loosen the two screws on top of the unit. Remove the Override Button.<br />
Remove the Rubber Plug from top of Electronic Sensor Module to uncover<br />
the Potentiometer.<br />
RANGE ADJUSTMENT PROCEDURE<br />
For the first ten (10) minutes of operation, a Visible Light flashes in the<br />
Sensing Window of the <strong>Sloan</strong> ECOS ® Electronic flushometer when a user is<br />
detected. This Visible Light feature can be reactivated after ten (10) minutes<br />
by opening <strong>and</strong> closing the Battery Compartment Door.<br />
Check the range by stepping toward the unit until the Light flashes, indicating<br />
the Sensor’s maximum detection limit. Adjust the Range Potentiometer Screw<br />
located on top of the Sensor Module a few degrees CLOCKWISE to increase<br />
the range or a few degrees COUNTERCLOCKWISE to decrease the range.<br />
Repeat this adjustment until the desired range is achieved.<br />
Always Determine the Sensing Range with Metal Cover <strong>and</strong> Lens<br />
Window On Top of the Unit.<br />
Important: Adjust in small increments only! Range Potentiometer<br />
Adjustment Screw rotates only 3/4 of a turn; DO NOT over-rotate.<br />
When range adjustment is satisfactory, replace the Rubber Plug. Reinstall<br />
Override Button <strong>and</strong> tighten the two Screws on top of the unit.<br />
RECOMMENDED WALL PLATE LOCATIONS – FOR DUAL-FLUSH FLUSHOMETERS<br />
Centered over flushometer On stall door<br />
82<br />
<strong>Repair</strong> <strong>Parts</strong> <strong>and</strong> <strong>Maintenance</strong> <strong>Guide</strong><br />
<strong>Sloan</strong> ECOS ® Single-Flush <strong>and</strong><br />
Dual-Flush Flushometer<br />
7/64” ALLEN WRENCH<br />
COVER ASSEMBLY<br />
PLATE<br />
SENSOR MODULE<br />
SENSOR MODULE<br />
(BACKSIDE SHOWN)<br />
ELECTRICAL CONNECTOR<br />
RECEPTACLE<br />
COUNTERCLOCKWISE CLOCKWISE<br />
Decreases<br />
Range<br />
Increases<br />
Range<br />
RETAINING<br />
SCREW<br />
BATTERY<br />
COMPARTMENT<br />
COVER
TROUBLESHOOTING AND MAINTAINING THE SLOAN ECOS ® FLUSHOMETER<br />
1. Sensor Flashes Continuously Only When User Steps Within Range.<br />
A. Unit in Start-Up mode; no problem. This feature is active for the first<br />
ten (10) minutes of operation.<br />
2. <strong>Valve</strong> Does Not Flush; Sensor Not Picking Up User.<br />
A. Range too short; increase the range.<br />
3. <strong>Valve</strong> Does Not Flush; Sensor Picking Up Opposite Wall or<br />
Surface, or Only Flushes When Someone Walks By. Light Flashes<br />
Continuously for First 10 Minutes Even with No One in Front of<br />
the Sensor.<br />
A. Range too long; shorten range.<br />
4. <strong>Valve</strong> Does Not Flush Even After Adjustment.<br />
A. Range Adjustment Potentiometer set at full "max" or full "min" setting.<br />
Readjust Potentiometer away from full "max" or "min" setting.<br />
B. Batteries completely used up; replace batteries.<br />
C. Problem with Electronic Sensor Module; replace Electronic Sensor<br />
Module.<br />
5. Unit Flashes 4 Quick Times When User Steps Within Range.<br />
A. Batteries low; replace batteries.<br />
6. <strong>Valve</strong> Does Not Shut Off.<br />
A. Bypass Orifice in Diaphragm is clogged with dirt or debris, or Bypass is<br />
clogged by an invisible gelatinous film due to “over-treated” water.<br />
Remove Flex Tube Diaphragm <strong>and</strong> wash under running water.<br />
Note: Size of Orifice in the Bypass is of utmost importance for the<br />
proper metering of water by the valve. DO NOT ENLARGE OR DAMAGE<br />
THIS ORIFICE. Replace Flex Tube Diaphragm if cleaning does not<br />
correct the problem.<br />
B. Dirt or debris fouling Stem or Flex Tube Diaphragm. Remove Flex Tube<br />
Diaphragm <strong>and</strong> wash under running water.<br />
C. O-ring on Stem of Flex Tube Diaphragm is damaged or worn. Replace<br />
O-ring if necessary.<br />
D. Problem with Electronic Sensor Module; replace Sensor Module.<br />
7. Not Enough Water to Fixture.<br />
A. Wrong Flush Volume Regulator installed in Flex Tube Diaphragm Kit.<br />
Install the correct Regulator (see Step 7 of these instructions).<br />
B. Wrong <strong>Sloan</strong> ECOS ® Electronic model installed; i.e., 1.6 gpf/1.1 gpf<br />
model installed on 3.5 gal. closet fixture.<br />
C. Enlarged Bypass in Diaphragm. Replace Flex Tube Diaphragm.<br />
D. Control Stop not adjusted properly. Readjust Control Stop.<br />
E. Inadequate volume or pressure at supply. Increase water pressure or<br />
supply (flow) to valve. Consult factory for assistance.<br />
8. Too Much Water to Fixture.<br />
A. Wrong Flush Volume Regulator installed in Flex Tube Diaphragm Kit.<br />
Install the correct Regulator (see Step 7 of these instructions).<br />
B. Control Stop not adjusted properly. Readjust Control Stop.<br />
C. Wrong <strong>Sloan</strong> ECOS model installed; i.e., 0.5 gpf. model installed on<br />
0.125 gal. fixture. Replace with proper <strong>Sloan</strong> ECOS Electronic Dual-<br />
Flush model.<br />
D. Dirt in Diaphragm Bypass. Clean under running water or replace Flex<br />
Tube Diaphragm.<br />
Note: The EBV-46-A Beam Deflector is no longer required or available<br />
for the <strong>Sloan</strong> ECOS.<br />
83<br />
<strong>Repair</strong> <strong>Parts</strong> <strong>and</strong> <strong>Maintenance</strong> <strong>Guide</strong><br />
<strong>Sloan</strong> ECOS ® Single-Flush <strong>and</strong><br />
Dual-Flush Flushometer<br />
CARE AND CLEANING INSTRUCTIONS<br />
DO NOT use abrasive or chemical cleaners to clean the <strong>Sloan</strong> ECOS<br />
flushometer as they may dull the luster <strong>and</strong> attack the plastic cover <strong>and</strong> the<br />
chrome finish of the flushometer. Use ONLY mild soap <strong>and</strong> water, then wipe<br />
dry with clean cloth or towel.<br />
While cleaning the bathroom tile, the flushometer should be protected from<br />
any splattering of cleaner. Acids <strong>and</strong> cleaning fluids can discolor or remove<br />
chrome plating.<br />
When assistance is required, please contact<br />
<strong>Sloan</strong> Technical Support at: 1-888-SLOAN-14 (1-888-756-2614).<br />
Sensor<br />
Flushometers
Sensor<br />
Flushometers<br />
1<br />
18A<br />
10<br />
19D<br />
6<br />
2<br />
3<br />
4<br />
15<br />
5<br />
7<br />
8<br />
<strong>Valve</strong> Body<br />
(not sold separately)<br />
18B<br />
Dual-Flush<br />
20<br />
Single<br />
Button Flush<br />
18B<br />
12<br />
16<br />
11<br />
17<br />
19A 19B 19C<br />
19D 19D<br />
9<br />
6A<br />
14<br />
13<br />
84<br />
<strong>Repair</strong> <strong>Parts</strong> <strong>and</strong> <strong>Maintenance</strong> <strong>Guide</strong><br />
<strong>Sloan</strong> SOLIS ® Single-Flush <strong>and</strong><br />
Dual-Flush Flushometer<br />
Solar powered, sensor activated unit for exposed closet <strong>and</strong><br />
urinal flushometers.<br />
PARTS LIST<br />
Item<br />
No. Code No. Part No. Description<br />
Items Included with RESS Retrofit <strong>and</strong> Complete <strong>Sloan</strong> SOLIS ® <strong>Valve</strong>s<br />
1. 0325300 EBV-304-A Cover/Sensor/Assembly - Water Closet<br />
(Single Button Flush)<br />
0325320 EBV-320-A Cover/Sensor/Assembly (Zurn) - Water Closet<br />
(Single Button Flush)<br />
0372024 WES-24-A Cover/Sensor/Assembly - Water Closet<br />
(Dual-Flush)<br />
0372028 WES-28-A Cover/Sensor/Assembly (Zurn) - Water Closet<br />
(Dual-Flush)<br />
0325301 EBV-306-A Cover/Sensor/Assembly - Urinal<br />
(Single Button Flush)<br />
0325321 EBV-321-A Cover/Sensor/Assembly (Zurn) - Urinal<br />
(Single Button Flush)<br />
2. 0325311 EBV-311-A Cover Assembly - (Dual-Flush)<br />
0325309 EBV-309-A Cover Assembly - (Single Button Flush)<br />
3. 0325804 EBV-14 Locking Ring<br />
3325524 EBV-31-A Locking Ring - for Zurn valves<br />
4. 0325312 EBV-312-A-C Sensor Assembly - Water Closet<br />
(Single Button Flush)<br />
0325313 EBV-312-A-U Sensor Assembly - Urinal (Single Button Flush)<br />
0372038 WES-33-A Sensor Assembly - Water Closet (Dual-Flush)<br />
5. 0325171 EBV-134 Cover Rest Plate<br />
6. 3325456 EBV-145-A Inside Cover Assembly (includes solenoid<br />
EBV-136-A) Does not replace Plastic Inner Cover.<br />
Use Item No. 6A<br />
6A. 3325089 EBV-1010-A Metal Inner Cover <strong>Repair</strong> Kit<br />
Includes Items Nos. 3, 5, <strong>and</strong> 6<br />
7. 3325453 EBV-136-A Solenoid<br />
8. SEE CHART NEXT PAGE Flex Tube Diaphragm Assembly<br />
9. SEE CHART NEXT PAGE Flush Volume Regulator<br />
10. 3325814 EBV-1017-A H<strong>and</strong>le Cap (RESS Retrofit Models Only)<br />
11. 0325107 EBV-91 Range Adjustment Tool<br />
12. 0305823 EBV-22 Strap Wrench<br />
13. 0325159 EBV-137 7/64” Hex Wrench<br />
14. — WES-27 English Plate (Dual-Flush only)<br />
— WES-29 Spanish Plate (Dual-Flush only)<br />
Items Included with Complete <strong>Sloan</strong> SOLIS ® <strong>Valve</strong>s Only<br />
15. 3308782 H-633-AA 1” (25 mm) Sweat Solder Kit<br />
3308788 H-636-AA 3/4” (19 mm) Sweat Solder Kit<br />
16. 3308386 H-700-A 1” (25 mm) Bak-Chek ® Control Stop<br />
3308384 H-700-A 3/4” (19 mm) Bak-Chek ® Control Stop<br />
17. 3308772 H-1010-A V<strong>and</strong>al Resistant Stop Cap<br />
18A. — V-600-AA 1-1/2” (38 mm) x 10” (254 mm) Vacuum Breaker<br />
(Model 8110)<br />
18B. — V-600-AA 1-1/4” (32 mm) x 10-1/2” (267 mm) Vacuum<br />
Breaker (Model 8180)<br />
18C. — V-600-AA 3/4” (19 mm) x 10-1/2” (267 mm) Vacuum<br />
Breaker (Model 8186)<br />
19A. 0306146 F-5-AT 1-1/2” Spud Coupling Assembly<br />
(Models 8110, 8115 & 8116)<br />
19B. 0306140 F-5-AU 1-1/4” Spud Coupling Assembly (Model 8180)<br />
19C. 0306125 F-5-AW 3/4” Spud Coupling Assembly (Model 8186)<br />
19D. SEE SLIP JOINT GASKETS AND RINGS TABLE ON NEXT PAGE<br />
20. 0305381PK EBV-36-A <strong>Valve</strong> Body
ITEM 8. FLEX TUBE DIAPHRAGM KIT SELECTION GUIDE<br />
Code No. Part No. Description<br />
Regulator<br />
Color<br />
3325001 EBV-1020-A 1.6 gpf/6.0 Lpf Closet GREEN<br />
3325003 EBV-1023-A 0.5 gpf/1.9 Lpf Urinal GREEN<br />
The EBV-1020-A Kit is supplied with multiple Flush Volume Regulators. The installer must use the correct<br />
Regulator when installing the kit.<br />
ITEM 9. REGULATORS<br />
The flush volume of the flex tube diaphragm kit is controlled by the<br />
regulator. Regulators are identified by color. Some flex tube diaphragm kits<br />
are supplied with multiple regulators. The installer must make sure the<br />
proper regulator is used when installing the flex tube diaphragm kit.<br />
REGULATOR (SOLD 6 PER PACKAGE)<br />
Regulator<br />
Code No. Part No. Description Color<br />
5325122 EBV-95 Urinal-0.5 gpf/1.9 Lpf GREEN<br />
5325122 EBV-95 Closet-1.6 gpf/6.0 Lpf GREEN<br />
FLEX TUBE DIAPHRAGM ASSEMBLY<br />
0-RING<br />
REGULATOR<br />
(MUST BE<br />
INSTALLED<br />
PAST 0-RING)<br />
FLEX TUBE<br />
DIAPHRAGM<br />
Optima Plus <strong>Valve</strong> Models Feature <strong>Sloan</strong>’s<br />
Exclusive Flex Tube Diaphragm for the<br />
ultimate in valve performance, reliability <strong>and</strong><br />
Chloramine resistance.<br />
ITEM 19D. SLIP JOINT GASKETS AND RINGS<br />
Size Code No. Part No. Description<br />
1-1/2” 5306058 F-3 Red Friction Ring<br />
5322001 VBF-5 Black Slip Joint Gasket<br />
0319086/5319086 S-30 Flexible Seat<br />
0319079 S-21 Rigid Seat (rubber over brass)<br />
1-1/2” x 1-1/4” 0396062 F-105 Slip Joint Gasket – Rigid<br />
1-1/4” 5306057 F-3 Red Friction Ring<br />
5322176 VBF-5 Black Slip Joint Gasket<br />
0307052/5307052 G-21 Rigid Seat (rubber over brass)<br />
1” 5306056 F-3 Red Friction Ring<br />
5306115 F-5 Black Slip Joint Gasket<br />
3/4” 5306055 F-3 Red Friction Ring<br />
5306113 F-5 Black Slip Joint Gasket<br />
CARTRIDGE ASSEMBLY<br />
Code No. Part No. Description<br />
3325098 EBV-1026-A 0.125 gpf/0.5 Lpf Cartridge Assembly<br />
3325098 EBV-1026-A 0.25 gpf/1.0 Lpf Cartridge Assembly<br />
85<br />
<strong>Repair</strong> <strong>Parts</strong> <strong>and</strong> <strong>Maintenance</strong> <strong>Guide</strong><br />
<strong>Sloan</strong> SOLIS ® Single-Flush <strong>and</strong><br />
Dual-Flush Flushometer<br />
OPERATION<br />
1. A continuous, INVISIBLE<br />
light beam is emitted from<br />
the <strong>Sloan</strong> SOLIS ® Sensor.<br />
2. As the user enters the<br />
beam's effective range, 22<br />
to 42 inches (559 mm to<br />
1067 mm) for closet<br />
installations <strong>and</strong> 15 to 30<br />
inches (381 mm to 762<br />
mm) for urinal installations,<br />
the beam is reflected into<br />
the Scanner Window to<br />
activate the Output Circuit.<br />
Once activated, the Output<br />
Circuit continues in a<br />
“hold” mode for as long as<br />
the user remains within<br />
the effective range of the<br />
sensor. For Dual-Flush<br />
models, if the user stays<br />
longer than 65 seconds, a<br />
full flush will automatically<br />
initiate when the user<br />
leaves. For Single-Flush<br />
models, once the user<br />
steps away, a full flush will<br />
automatically initiate.<br />
3. For a Dual-Flush models,<br />
once a user is detected, if<br />
the user leaves in 65<br />
seconds or less, a reduced<br />
flush will automatically<br />
initiate. The circuit<br />
automatically resets <strong>and</strong> is<br />
ready for the next user. For<br />
a Single-Flush models ,<br />
when the user steps away,<br />
this initiates a full flush.<br />
The circuit automatically<br />
resets <strong>and</strong> is ready for the<br />
next user.<br />
LOCKING RING<br />
COVER<br />
BODY<br />
FLUSH CONNECTION<br />
(VACUUM BREAKER)<br />
SPUD COUPLING<br />
STOP COUPLING<br />
TAILPIECE<br />
DUAL-FLUSH BUTTONS<br />
OUTLET COUPLING<br />
SPUD FLANGE<br />
CLOSET<br />
SQUAT TOILET<br />
URINAL<br />
CONTROL STOP<br />
SUPPLY FLANGE<br />
Sensor<br />
Flushometers
Sensor<br />
Flushometers<br />
BATTERY REPLACEMENT<br />
When required, replace batteries with four (4) Alkaline AA-Size Batteries.<br />
Note: Water does not have to be turned off to replace Batteries.<br />
Loosen the two (2) Screws on top of unit. Remove the complete Cover<br />
Assembly. Lift the Sensor Module from its Plate. Unplug the Electrical<br />
Connector from Battery Compartment Cover. Loosen the Retaining Screw on<br />
Battery Compartment Cover <strong>and</strong> remove Battery Compartment Cover. Install<br />
four (4) Alkaline AA-Size Batteries exactly as illustrated.<br />
Install Battery Compartment Cover <strong>and</strong> secure with Retaining Screw. Make<br />
certain that Battery Compartment Cover is fully compressed against Gasket<br />
to provide a seal; Do not overtighten. Plug the Electrical Connector into the<br />
Battery Compartment Cover. Reinstall the Sensor Module onto the Plate.<br />
Reinstall the complete Cover Assembly onto the Plate. Tighten the two<br />
(2) Screws on top of the unit.<br />
RANGE ADJUSTMENT (ADJUST ONLY IF NECESSARY)<br />
The <strong>Sloan</strong> SOLIS ® has a factory set sensing range:<br />
Water Closet Models - 22” to 42” (559 mm to 1067 mm)<br />
Urinal Models - 15” to 30” (381 mm to 762 mm)<br />
The Factory setting should be satisfactory for most installations.<br />
If the range is too short (i.e., not picking up users) or too long (i.e., picking<br />
up opposite wall or stall door) the range can be adjusted.<br />
Note: Water does not have to be turned off to adjust range.<br />
Loosen the two Screws on top of the unit <strong>and</strong> remove cover. Remove the<br />
Rubber Plug from top of Electronic Sensor Module to uncover the<br />
Potentiometer.<br />
RANGE ADJUSTMENT PROCEDURE<br />
For the first ten (10) minutes of operation, a Visible Light flashes in the<br />
Sensing Window of the <strong>Sloan</strong> SOLIS ® flushometer when a user is detected.<br />
This Visible Light feature can be reactivated after ten (10) minutes by<br />
opening <strong>and</strong> closing the Battery Compartment Door.<br />
Check the range by stepping toward the unit until the Light flashes, indicating<br />
the Sensor's maximum detection limit. Adjust the Range Potentiometer Screw<br />
located on top of the Sensor Module a few degrees CLOCKWISE to increase<br />
the range or a few degrees COUNTERCLOCKWISE to decrease the range.<br />
Repeat this adjustment until the desired range is achieved.<br />
Always Determine the Sensing Range with Metal Cover <strong>and</strong> Lens<br />
Window On Top of the Unit.<br />
Important: Adjust in small increments only! Range Potentiometer<br />
Adjustment Screw rotates only ¾ of a turn; DO NOT over-rotate.<br />
When range adjustment is satisfactory, replace the Rubber Plug. Reinstall<br />
Cover <strong>and</strong> tighten the two Screws on top of the unit.<br />
RECOMMENDED WALL PLATE LOCATIONS<br />
Centered over flushometer On stall door<br />
86<br />
<strong>Repair</strong> <strong>Parts</strong> <strong>and</strong> <strong>Maintenance</strong> <strong>Guide</strong><br />
<strong>Sloan</strong> SOLIS ® Single-Flush <strong>and</strong><br />
Dual-Flush Flushometer<br />
SENSOR<br />
MODULE<br />
ELECTRICAL CONNECTOR RECEPTACLE<br />
RETAINING<br />
SCREW<br />
BATTERY<br />
COMPARTMENT<br />
COVER<br />
Important: Adjust in small increments only! Range Potentiometer<br />
Adjustment Screw rotates only 3/4 of a turn; DO NOT over-rotate.<br />
When range adjustment is satisfactory, replace the Rubber Plug. Reinstall<br />
Cover <strong>and</strong> tighten the two Screws on top of the unit.<br />
COUNTER-<br />
CLOCKWISE CLOCKWISE<br />
Decreases<br />
Range<br />
COVER ASSEMBLY<br />
(single-flush model shown)<br />
SENSOR<br />
MODULE<br />
PLATE<br />
Increases<br />
Range<br />
COVER ASSEMBLY<br />
(single-flush model shown)
1. Sensor Flashes Continuously Only When User Steps Within Range.<br />
A. Unit in Start-Up mode; no problem. This feature is active for the first<br />
ten (10) minutes of operation.<br />
2. <strong>Valve</strong> Does Not Flush; Sensor Not Picking Up User.<br />
A. Range too short; increase the range.<br />
3. <strong>Valve</strong> Does Not Flush; Sensor Picking Up Opposite Wall or<br />
Surface, or Only Flushes When Someone Walks By. Light Flashes<br />
Continuously for First 10 Minutes Even with No One in Front of<br />
the Sensor.<br />
A. Range too long; shorten range.<br />
4. <strong>Valve</strong> Does Not Flush Even After Adjustment.<br />
A. Range Adjustment Potentiometer set at full “max” or full “min” setting.<br />
Readjust Potentiometer away from full “max” or “min” setting.<br />
B. Batteries completely used up; replace batteries.<br />
C. Problem with Electronic Sensor Module; replace Electronic<br />
Sensor Module.<br />
5. Unit Flashes 4 Quick Times When User Steps Within Range.<br />
A. Batteries low; replace batteries.<br />
6. <strong>Valve</strong> Does Not Shut Off.<br />
A. Bypass Orifice in Diaphragm is clogged with dirt or debris, or Bypass is<br />
clogged by an invisible gelatinous film due to “over-treated” water.<br />
Remove Flex Tube Diaphragm <strong>and</strong> wash under running water.<br />
Note: Size of Orifice in the Bypass is of utmost importance for the<br />
proper metering of water by the valve. DO NOT ENLARGE OR DAMAGE<br />
THIS ORIFICE. Replace Flex Tube Diaphragm if cleaning does not<br />
correct the problem.<br />
B. Dirt or debris fouling Stem or Flex Tube Diaphragm. Remove Flex Tube<br />
Diaphragm <strong>and</strong> wash under running water.<br />
C. O-ring on Stem of Flex Tube Diaphragm is damaged or worn.<br />
Replace O-ring if necessary.<br />
D. Problem with Electronic Sensor Module; replace Sensor Module.<br />
7. Not Enough Water to Fixture.<br />
A. Wrong Flush Volume Regulator installed in Flex Tube Diaphragm Kit.<br />
Install the correct Regulator (see Step 7 of these instructions).<br />
B. Wrong <strong>Sloan</strong> SOLIS ® model installed; i.e., 1 gpf. Urinal installed on<br />
3.5 gal. Closet fixture. Replace with proper <strong>Sloan</strong> SOLIS ® model.<br />
C. Enlarged Bypass in Diaphragm. Replace Flex Tube Diaphragm.<br />
D. Control Stop not adjusted properly. Readjust Control Stop.<br />
E. Inadequate volume or pressure at supply. Increase water pressure or<br />
supply (flow) to valve. Consult factory for assistance.<br />
8. Too Much Water to Fixture.<br />
A. Wrong Flush Volume Regulator installed in Flex Tube Diaphragm Kit.<br />
Install the correct Regulator (see Step 7 of these instructions).<br />
B. Control Stop not adjusted properly. Readjust Control Stop.<br />
C. Wrong <strong>Sloan</strong> SOLIS ® model installed; i.e., 3 gpf. Model installed on<br />
1.0 or 1.5 gal. Urinal fixture. Replace with proper <strong>Sloan</strong> SOLIS ® mode.<br />
D. Dirt in Diaphragm Bypass. Clean under running water or replace<br />
Flex Tube Diaphragm.<br />
Note: The EBV-46-A Beam Deflector is not required or available for<br />
the <strong>Sloan</strong> SOLIS ® .<br />
87<br />
<strong>Repair</strong> <strong>Parts</strong> <strong>and</strong> <strong>Maintenance</strong> <strong>Guide</strong><br />
<strong>Sloan</strong> SOLIS ® Single-Flush <strong>and</strong><br />
Dual-Flush Flushometer<br />
TROUBLESHOOTING GUIDE CARE AND CLEANING INSTRUCTIONS<br />
DO NOT use abrasive or chemical cleaners to clean flushometers as they<br />
may dull the luster <strong>and</strong> attack the chrome or special decorative finishes.<br />
Use ONLY soap <strong>and</strong> water, then wipe dry with clean cloth or towel.<br />
While cleaning the bathroom tile, the flushometer should be protected from<br />
any splattering of cleaner. Acids <strong>and</strong> cleaning fluids can discolor or remove<br />
chrome plating.<br />
When assistance is required, please contact<br />
<strong>Sloan</strong> Technical Support at: 1-888-SLOAN-14 (1-888-756-2614).<br />
Sensor<br />
Flushometers
Sensor<br />
Flushometers<br />
6<br />
22<br />
10<br />
11<br />
12<br />
13<br />
REAR<br />
VIEW<br />
16<br />
FRONT<br />
VIEW<br />
17<br />
18<br />
14<br />
SOLIS 8152 SWB SOLIS 8195 SWB<br />
4<br />
23<br />
O<br />
L<br />
3A 3B<br />
7<br />
21<br />
8<br />
20<br />
5<br />
19<br />
20A 2<br />
9<br />
15<br />
88<br />
<strong>Repair</strong> <strong>Parts</strong> <strong>and</strong> <strong>Maintenance</strong> <strong>Guide</strong><br />
<strong>Sloan</strong> SOLIS ® Concealed<br />
Flushometers<br />
PARTS LIST<br />
Item<br />
No. Code No. Part No. Description<br />
1 0301050 A-143-A RB Hydraulic <strong>Valve</strong> Body<br />
2 0388010 H-730-A RB Bak-Chek ® 1” Control Stop<br />
0388011 H-730-A RB Bak-Chek ® 3/4” Control Stop<br />
3A ‡ V-500-AA 1-1/2” (38 mm) Vacuum Breaker Assembly RB<br />
(Model 8152)<br />
3B ‡ V-500-AA 3/4” (19 mm) Vacuum Breaker Assembly RB<br />
(Model 8195)<br />
4 0306619 F-2-AA 1-1/2” (38 mm) Slip Joint Coupling RB<br />
(Set of Two)<br />
5 ‡ F-15-A ELL with 3/4” (19 mm) Tail RB (Model 8195)<br />
6 0206146PK F-21 1-1/2” (38 mm) Double Male Slip Elbow<br />
7 ‡ F-100 1-1/2” (38 mm) Outlet Tube RB<br />
8 0306091 F-2-A 1-1/2” (38 mm) Coupling with S-21 Gasket<br />
9 0306054 F-2-AW 3/4” (19 mm) Slip Joint Coupling RB<br />
10 ‡ ‡ Frame<br />
11 0334017PK WB-18 U-Type Nuts (4)<br />
12 0318123 HY-71-A-1 Hydraulic Actuator Assembly with Fittings<br />
13 — — Override Mount Assembly<br />
14 — — ¼-20 x 1½ Tamper Resistant Screws (4)<br />
15 ‡ ‡ Wall Plate Assembly<br />
16 ‡ — Override Button Assembly<br />
17 ‡ ‡ Sensor Assembly<br />
18 ‡ ‡ Sensor Retainer<br />
19 ‡ ‡ Dual Filtered Fixed Bypass Diaphragm<br />
20 0000000 EBV-355-A Cover Assembly (includes items 20A <strong>and</strong> 21)<br />
20A 0325804PK EBV-14 Coupling<br />
21 0000000 EBV-356-A Solenoid<br />
22 0000000 — <strong>Valve</strong> Actuator Assembly for SOLIS concealed<br />
23 3318001 HY-83-A Actuator Cartridge<br />
–– HY-30-84 ¼” (6 mm) x 84” (2134 mm) Connecting Tubes<br />
(not shown)<br />
–– HY-30-24 ¼” (6 mm) x 24” (610 mm) Connecting Tubes<br />
(not shown)<br />
† Flow volume varies with valve model <strong>and</strong> desired flush volume.<br />
‡ Code <strong>and</strong>/or Part number varies with valve model variation; consult factory.<br />
ITEM 4A. SLIP JOINT GASKETS AND RINGS<br />
Size Code No. Part No. Description<br />
1-1/2” 5306058 F-3 Red Friction Ring<br />
5322001 VBF-5 Black Slip Joint Gasket<br />
0319086/5319086 S-30 Flexible Seat<br />
0319079 S-21 Rigid Seat (rubber over brass)<br />
1-1/2” x 1-1/4” 0396062 F-105 Slip Joint Gasket – Rigid<br />
1-1/4” 5306057 F-3 Red Friction Ring<br />
5322176 VBF-5 Black Slip Joint Gasket<br />
0307052/5307052 G-21 Rigid Seat (rubber over brass)<br />
1” 5306056 F-3 Red Friction Ring<br />
5306115 F-5 Black Slip Joint Gasket<br />
3/4” 5306055 F-3 Red Friction Ring<br />
5306113 F-5 Black Slip Joint Gasket
TROUBLESHOOTING GUIDE<br />
NOTE: Upon detection of the user, the red indicator light flashes slowly for a<br />
period of eight seconds. When the user leaves the detection range, the<br />
indicator light flashes rapidly <strong>and</strong> the Sensor initiates the flush sequence.<br />
Then the indicator light stops flashing <strong>and</strong> the valve flushes. The valve will<br />
flush after a three-second delay.<br />
1. Sensor flashes continuously only when user steps within range.<br />
A. Unit in Start-Up mode; no problem. This feature is active for the first<br />
ten (10) minutes of operation.<br />
2. <strong>Valve</strong> does not flush; sensor does not picking up user.<br />
A. Range too short; increase the range.<br />
3. <strong>Valve</strong> does not flush; sensor picking up opposite wall or<br />
surface, or only flushes when someone walks by. light flashes<br />
continuously for first 10 minutes even with no one in front of<br />
the sensor.<br />
A. Range too long; shorten range.<br />
4. <strong>Valve</strong> does not flush even after adjustment.<br />
A. Range Adjustment Potentiometer set at full "max" or full "min"<br />
setting. Re-adjust Potentiometer away from full "max" or "min"<br />
setting.<br />
B. Batteries completely used up; replace batteries.<br />
C. Problem with Electronic Sensor module; replace Electronic Sensor<br />
module.<br />
5. Unit flashes 4 quick times when user steps within range.<br />
A. Batteries low; replace batteries.<br />
6. <strong>Valve</strong> does not shut off.<br />
A. Bypass Orifice in Diaphragm is clogged with dirt or debris, or Bypass<br />
is clogged by an invisible gelatinous film due to "over-treated" water.<br />
Remove Flex Tube Diaphragm <strong>and</strong> wash under running water. Note:<br />
Size of Orifice in the Bypass is of utmost importance for the proper<br />
metering of water by the valve. DO NOT ENLARGE OR DAMAGE THIS<br />
ORIFICE. Replace Flex Tube Diaphragm if cleaning does not correct<br />
the problem.<br />
B. Dirt or debris fouling Stem or Flex Tube Diaphragm. Remove Flex Tube<br />
Diaphragm <strong>and</strong> wash under running water.<br />
C. O-ring on Stem of Flex Tube Diaphragm is damaged or worn. Replace<br />
O-ring if necessary.<br />
D. Problem with Electronic Sensor Module; replace Sensor Module.<br />
89<br />
<strong>Repair</strong> <strong>Parts</strong> <strong>and</strong> <strong>Maintenance</strong> <strong>Guide</strong><br />
<strong>Sloan</strong> SOLIS ® Concealed<br />
Flushometers<br />
7. Not enough water to fixture.<br />
A. Wrong Flush Volume Regulator installed in Flex Tube Diaphragm Kit.<br />
Install the correct Regulator (see Step 4 of these instructions).<br />
B. Wrong <strong>Sloan</strong> SOLIS ® model installed; i.e., 1 gpf. urinal installed on<br />
3.5 gal. Closet fixture. Replace with proper <strong>Sloan</strong> SOLIS ® model.<br />
C. Enlarged Bypass in Diaphragm. Replace Flex Tube Diaphragm.<br />
D. Control Stop not adjusted properly. Readjust Control Stop.<br />
E. Inadequate volume or pressure at supply. Increase water pressure<br />
or supply (flow) to valve. Consult factory for assistance.<br />
8. Too much water to fixture.<br />
A. Wrong Flush Volume Regulator installed in Flex Tube Diaphragm Kit.<br />
Install the correct Regulator.<br />
B. Control Stop not adjusted properly. Readjust Control Stop.<br />
C. Wrong <strong>Sloan</strong> SOLIS ® model installed; i.e., 3 gpf. model installed<br />
on 1.0 or 1.5 gal. urinal fixture. Replace with proper<br />
<strong>Sloan</strong> SOLIS ® model.<br />
D. Dirt in Diaphragm Bypass. Clean under running water or replace<br />
Flex Tube Diaphragm.<br />
Note: The EBV-46-A Beam Deflector is not required or available for<br />
the <strong>Sloan</strong> SOLIS ® .<br />
!!! IMPORTANT — CONTROL STOP SETTING !!!<br />
NEVER OPEN CONTROL STOP TO WHERE THE FLOW FROM THE VALVE<br />
EXCEEDS THE FLOW CAPABILITY OF THE FIXTURE. IN THE EVENT OF<br />
A VALVE FAILURE, THE FIXTURE MUST BE ABLE TO ACCOMMODATE A<br />
CONTINUOUS FLOW FROM THE VALVE.<br />
CARE AND CLEANING INSTRUCTIONS<br />
DO NOT USE abrasive or chemical cleaners to clean flushometers that may<br />
dull the luster <strong>and</strong> attack the chrome or special decorative finishes. Use<br />
ONLY mild soap <strong>and</strong> water, then wipe dry with a clean towel or cloth.<br />
When cleaning the bathroom tile, protect the flushometer from any<br />
splattering of cleaner. Acids <strong>and</strong> cleaning fluids can discolor or remove<br />
chrome plating.<br />
When assistance is required, please contact<br />
<strong>Sloan</strong> Technical Support at: 1-888-SLOAN-14 (1-888-756-2614).<br />
Sensor<br />
Flushometers
Showerheads,<br />
<strong>Parts</strong> <strong>and</strong><br />
Accessories<br />
AC-51 4021000<br />
Self-cleaning chrome plated showerhead<br />
without (less) thumb screw volume control <strong>and</strong><br />
universal ball joint. Pressure compensating<br />
2.5 gpm/9.4 Lpm maximum flow control. All<br />
brass construction. 1/2'' I.P.S. inlet.<br />
AC-11 4020100<br />
Self-cleaning chrome plated showerhead<br />
with thumb screw volume control <strong>and</strong><br />
universal ball joint. Pressure compensating<br />
2.5 gpm/9.4 Lpm maximum flow control. All<br />
brass construction. 1/2'' I.P.S. inlet.<br />
SHOWERHEAD REPAIR KITS<br />
GROVE INDICATES<br />
SH-2-N.<br />
(NO GROOVE<br />
INDICATES<br />
OBSOLETE SH-2)<br />
MODEL AC-51/AC-11<br />
WITH VOLUME CONTROL SHOWN<br />
Code No. Part No. Description<br />
For St<strong>and</strong>ard Spray<br />
4328470 N/A <strong>Repair</strong> Kit for St<strong>and</strong>ard Spray Showerhead<br />
includes Items Nos. 1-4 (below)<br />
For Needle Spray<br />
4328466 SH-1002-A <strong>Repair</strong> Kit for Needle Spray Showerhead<br />
includes Items Nos. 1-4 (below)<br />
OBSOLETE<br />
1<br />
2<br />
3<br />
4<br />
5<br />
90<br />
<strong>Repair</strong> <strong>Parts</strong> <strong>and</strong> <strong>Maintenance</strong> <strong>Guide</strong><br />
Act-O-Matic ® Showerhead<br />
PARTS FOR ACT-O-MATIC ® SHOWERHEAD AC-11/AC-51<br />
Item<br />
No. Code No. Part No. Description<br />
1. 3328026 SH-1007-A Ball Joint Coupling with Volume Control †<br />
0328059 AC-18-AV Ball Joint Coupling less Volume Control<br />
2. 5328010 SH-1000-A SH-3 Gasket – 24 per package<br />
3. 0328001 SH-1 Body ‡<br />
4. 4328470 SH-1003-A Piston Assembly † – OBSOLETE<br />
4328466 SH-1002-A Piston Assembly – Needle Spray †<br />
5. 0328004 SH-2 Coupling Ring ‡ – OBSOLETE<br />
0328005 SH-2-N Coupling Ring – Needle Spray ‡ SH-1002-A –<br />
available in SH-1008-A<br />
— 432846 SH-1008-A <strong>Repair</strong> Kit for Needle Spray Showerhead<br />
includes Items Nos. 2-5 at left.<br />
† Includes SH-3 gasket.<br />
‡ Chrome plated. Consult factory for other available finishes.<br />
FLOW CONTROL MODEL CONVERSION<br />
To convert an older Act-O-Matic showerhead to a flow control model,<br />
use repair kit SH-1008-A. <strong>Repair</strong> Kit contains gasket (item 2), piston<br />
assembly – needle spray (item 4) <strong>and</strong> coupling ring – needle spray (item 5).<br />
NEEDLE SPRAY<br />
NOTE: To properly repair an Act-O-Matic showerhead, it is important to<br />
identify needle spray part designs. Shower heads with 3 gpm (11 Lpm) or<br />
2.5 gpm (9.4 Lpm) flow controls produced since 1985 use needle spray<br />
piston assembly <strong>and</strong> a needle spray coupling ring. Needle spray shower<br />
heads can be identified by the following: coupling ring (SH-2-N) has groove<br />
on knurled diameter; plus an “N” marked on the back of the black spray<br />
disc in the piston assembly. When repairing an Act-O-Matic shower head<br />
with a flow control it is important to identify whether the part is of the needle<br />
spray design.<br />
SLOAN ACT-O-MATIC ® MODELS<br />
In accordance with Federal <strong>and</strong> State water conservation requirements, all<br />
<strong>Sloan</strong> Act-O-Matic showerheads manufactured after January 1, 1994 are<br />
available only with an integral 2.5 gpm (9.4 Lpm) flow control. Replacement<br />
components will continue to be available for non-flow control Act-O-Matic<br />
showerhead models. Act-O-Matic showerheads rated at 3 gpm (11 Lpm)<br />
should be repaired using the components shown for the current<br />
2.5 gpm (9.4 Lpm) models.<br />
For <strong>Sloan</strong> Act-O-Matic model 100 series<br />
shower-heads (discontinued in 1970) use<br />
piston assembly SH-1003-A <strong>and</strong> SH-2-N.
SH-1009-A REPAIR KIT FOR AC-450<br />
MODEL SHOWERHEAD INCLUDES:<br />
Item Description<br />
1. Showerhead Spray Disc Assembly<br />
2. Spray Disc O-ring<br />
3. Adjustment Screw O-ring<br />
4. Pipe Fitting O-ring<br />
5. 2.5 gpm (9.4 Lpm) Flow Control Kit<br />
Code No. 4328210, Part SH-1010-A<br />
Note: Items 2, 3 <strong>and</strong> 4 are also available in<br />
O-ring replacement kit SH-1001-A.<br />
SERVICING INSTRUCTIONS<br />
1. Remove showerhead from wall by unscrewing<br />
two (2) cap screws. Use 5/32'' allen head<br />
wrench.<br />
2. Remove adjustment screw from showerhead<br />
body.<br />
3. Remove spray disc assembly by pushing through back of<br />
showerhead body.<br />
4. Clean inside of showerhead body of all sediment <strong>and</strong> replace all<br />
O-ring seals.<br />
5. Replace (or add) flow control in pipe fitting.<br />
6. Replace spray disc assembly <strong>and</strong> reassemble showerhead in<br />
reverse order.<br />
AC-450 4024500 AC-460 4024600<br />
Institutional style self-cleaning showerhead similar <strong>Sloan</strong> Act-O-Matic<br />
institutional style models.<br />
In accordance with Federal <strong>and</strong> State water conservation requirements, all<br />
<strong>Sloan</strong> Act-O-Matic ® showerheads manufactured after January 1, 1994 are<br />
available only with an integral 2.5 gpm (9.4 Lpm) flow control. All model<br />
variations of AC-450/AC-460 Act-O-Matic showerheads can be repaired using<br />
the SH-1009-A repair kit (see above). When repairing an older AC-450 without<br />
a flow control, install the 2.5 gpm (9.4 Lpm) flow control supplied with the<br />
repair kit.<br />
SHOWERHEAD FLOW CONTROLS<br />
Code No. Part No. Description<br />
For St<strong>and</strong>ard Showerheads<br />
4328285 AC-300-A B-4 4 Gallon Flow Control for Showerhead<br />
Models AC-10, AC-11, AC-51 And AC-75 – OBSOLETE<br />
4328287 AC-310-A B-3 3 Gallon Flow Control for Showerhead<br />
Models AC-10, AC-11, AC-51 And AC-75 – OBSOLETE<br />
For Institutional Showerheads<br />
4328290 AC-320-A B-4 4 Gallon Flow Control for Showerhead<br />
Models AC-450 – OBSOLETE<br />
4328289 AC-325-A B-3 3 Gallon Flow Control for Showerhead<br />
Models AC-450 – OBSOLETE<br />
91<br />
<strong>Repair</strong> <strong>Parts</strong> <strong>and</strong> <strong>Maintenance</strong> <strong>Guide</strong><br />
Act-O-Matic ® Showerhead<br />
PIPE FITTING<br />
4<br />
5<br />
TO CLEAN SPRAY DISC ASSEMBLY:<br />
1. Disassemble showerhead according to<br />
servicing instructions shown above.<br />
2. Use spanner wrench or pliers to<br />
disassemble spray disc assembly<br />
(see exploded view).<br />
3. Clean sediment <strong>and</strong> debris from<br />
all components.<br />
4. Replace with repair kit<br />
Code No. 4328471,<br />
part SH-1009-A if necessary.<br />
3<br />
ADJUSTMENT SCREW<br />
2<br />
1<br />
SPRAY DISC ASSEMBLY<br />
SPRAY DISC<br />
ASSEMBLY<br />
Item 1<br />
(see above<br />
illustration)<br />
When assistance is required, please contact<br />
<strong>Sloan</strong> Technical Support at: 1-888-SLOAN-14 (1-888-756-2614).<br />
Showerheads,<br />
<strong>Parts</strong> <strong>and</strong><br />
Accessories
Showerheads,<br />
<strong>Parts</strong> <strong>and</strong><br />
Accessories<br />
CONTROL STOP AND REPLACEMENT PARTS<br />
<strong>Repair</strong> <strong>Parts</strong> <strong>and</strong> <strong>Maintenance</strong> <strong>Guide</strong><br />
Control Stop<br />
Code No. Part No. Description<br />
H-700 Stop, chrome plated: Screwdriver Angle Stop with H-1010-A V<strong>and</strong>al Resistant Cap<br />
Complete Stops<br />
A<br />
3308384 H-700-A 3/4” NPTF inlet for adjustable tail<br />
3308386 H-700-A 1” NPTF inlet for adjustable tail<br />
B<br />
3308385 H-700-AG 3/4” NPTF inlet for ground joint tail<br />
3308387 H-700-AG 1” NPTF inlet for ground joint tail<br />
C<br />
3308388 H-700-AW<br />
<strong>Repair</strong> <strong>Parts</strong><br />
1” Whitworth inlet for adjustable tail<br />
3308772 H-1010-A A V<strong>and</strong>al Resistant Cap*, chrome plated<br />
0308612 H-622 B Bonnet, chrome plated<br />
3308853 H-541-ASD C Control Stop <strong>Repair</strong> Kit*<br />
H-710 Stop, chrome plated: Screwdriver Angle Stop with H-573-A Locking V<strong>and</strong>al Resistant Cap<br />
H-700 Series Bak-Chek ® control stops <strong>and</strong> replacement<br />
parts (available for 3/4” <strong>and</strong> 1” water supply inlet pipes)<br />
Replaces H-600 <strong>and</strong> H-540 Series control stops<br />
H-720 Stop, chrome plated: Screwdriver Angle Stop with H-574 Short bumper Cap (-YO Variation)<br />
A<br />
B<br />
C<br />
A<br />
B<br />
C<br />
92<br />
Complete Stops<br />
0388025 H-710-A 3/4” NPTF inlet for adjustable tail<br />
0388022 H-710-A 1” NPTF inlet for adjustable tail<br />
0388026 H-710-AG 3/4” NPTF inlet for ground joint tail<br />
0388024 H-710-AG 1” NPTF inlet for ground joint tail<br />
0388037 H-710-AW 1” Whitworth inlet for adjustable tail<br />
0388062 H-710-AAR 1” BSP British St<strong>and</strong>ard Pipe inlet for adjustable tail<br />
0388043 NH-710-A 1” NPTF inlet for adjustable tail (Naval brass)<br />
0388048 NH-710-AG 3/4” NPTF inlet for ground joint tail (Naval brass)<br />
0388058 NH-710-AG 1” NPTF inlet for ground joint tail (Naval brass)<br />
0388042 NH-710-AW 1” Whitworth inlet for adjustable tail (Naval brass)<br />
0388045 NH-710-AGW 1” Whitworth inlet for ground joint tail (Naval brass)<br />
0388044 NH-710-AGS 1” NPSM inlet for ground joint tail (Naval brass)<br />
<strong>Repair</strong> <strong>Parts</strong><br />
3308840 H-573-A A Locking V<strong>and</strong>al Resistant Cap*, chrome plated<br />
0308612 H-622 B Bonnet, chrome plated<br />
3308853 H-541-ASD C Control Stop <strong>Repair</strong> Kit*<br />
Complete Stops<br />
0388034 H-720-A 1” NPTF inlet for adjustable tail<br />
0388033 H-720-AG 1” NPTF inlet for ground joint tail<br />
0388038 H-720-AW 1” Whitworth inlet for adjustable tail<br />
<strong>Repair</strong> <strong>Parts</strong><br />
3308866 H-574 A Stop Cap with Seat Bumper*, chrome plated<br />
0308612 H-622 B Bonnet, chrome plated<br />
3308853 H-541-ASD C Control Stop <strong>Repair</strong> Kit*<br />
*Refer to page 95 for diagrams of our Stop Caps <strong>and</strong> page 96 for the components supplied in our Control Stop<br />
<strong>Repair</strong> Kits.
CONTROL STOP AND REPLACEMENT PARTS<br />
Code No. Part No. Description<br />
H-725 Stop, chrome plated: Screwdriver Angle Stop with H-576 Extended Bumper Cap (-YG Variation)<br />
Complete Stops<br />
A<br />
0388035<br />
0388057<br />
H-725-A<br />
H-725-AG<br />
1” NPTF inlet for adjustable tail<br />
1” NPTF inlet for ground joint tail<br />
B<br />
0388039<br />
0388047<br />
H-725-AW<br />
NH-725-AGW<br />
1” Whitworth inlet for adjustable tail<br />
1” Whitworth inlet for ground joint tail (Naval brass)<br />
<strong>Repair</strong> <strong>Parts</strong><br />
C<br />
3308867 H-576 A Stop Cap with Extended Seat Bumper*, chrome<br />
plated<br />
0308612 H-622 B Bonnet, chrome plated<br />
3308853 H-541-ASD C Control Stop <strong>Repair</strong> Kit*<br />
H-730 Stop, rough brass: Concealed Wheel H<strong>and</strong>le Angle Stop<br />
H-735 Stop, chrome plated: Exposed Wheel H<strong>and</strong>le Angle Stop<br />
A<br />
B<br />
C<br />
A<br />
B<br />
C<br />
93<br />
<strong>Repair</strong> <strong>Parts</strong> <strong>and</strong> <strong>Maintenance</strong> <strong>Guide</strong><br />
Control Stop<br />
Complete Stops<br />
0388011 H-730-A 3/4” NPTF inlet for adjustable tail<br />
0388010 H-730-A 1” NPTF inlet for adjustable tail<br />
0388014 H-730-AG 3/4” NPTF inlet for ground joint tail<br />
0388013 H-730-AG 1” NPTF inlet for ground joint tail<br />
0388012 H-730-AW 1” Whitworth inlet for adjustable tail<br />
0388056 NH-730-AG 3/4” NPTF inlet for ground joint tail (Naval brass)<br />
0388017 NH-730-AG 1” NPTF inlet for ground joint tail (Naval brass)<br />
0388041 NH-730-AW 1” Whitworth inlet for adjustable tail (Naval brass)<br />
0388046 NH-730-AGW 1” Whitworth inlet for ground joint tail (Naval brass)<br />
<strong>Repair</strong> <strong>Parts</strong><br />
3308872 H-1011-A A Concealed Wheel H<strong>and</strong>le <strong>Repair</strong> Kit*<br />
0208083 H-623 B Bonnet, rough brass<br />
3308860 H-1006-A C Control Stop <strong>Repair</strong> Kit*<br />
Complete Stops<br />
0388007 H-735-A 3/4” NPTF inlet for adjustable tail<br />
0388006 H-735-A 1” NPTF inlet for adjustable tail<br />
0388009 H-735-AG 3/4” NPTF inlet for ground joint tail<br />
0388008 H-735-AG 1” NPTF inlet for ground joint tail<br />
<strong>Repair</strong> <strong>Parts</strong><br />
3308060 H-1002-A A Exposed Wheel H<strong>and</strong>le <strong>Repair</strong> Kit*<br />
0308615 H-623 B Bonnet, chrome plated<br />
3308855 H-541-AWH C Control Stop <strong>Repair</strong> Kit*<br />
*Refer to page 95 for diagrams of our Stop Caps <strong>and</strong> page 96 for the components supplied in our<br />
Control Stop <strong>Repair</strong> Kits.<br />
Showerheads,<br />
<strong>Parts</strong> <strong>and</strong><br />
Accessories
Showerheads,<br />
<strong>Parts</strong> <strong>and</strong><br />
Accessories<br />
CONTROL STOP AND REPLACEMENT PARTS<br />
94<br />
<strong>Repair</strong> <strong>Parts</strong> <strong>and</strong> <strong>Maintenance</strong> <strong>Guide</strong><br />
Control Stop<br />
Code No. Part No. Description<br />
H-740 Stop, chrome plated: Screwdriver Angle Stop with H-37 Cap (Regal ® <strong>Valve</strong> Stop) – OBSOLETE<br />
H-790 Stop, chrome plated: Screwdriver Angle Stop with V<strong>and</strong>al Resistant Cap (for Regal or Regal XL <strong>Valve</strong> Stop)<br />
Complete Stops For Regal ® flushometers<br />
0388031 H-740-A 3/4” NPTF inlet for adjustable tail – OBSOLETE<br />
0388029<br />
0388040<br />
H-740-A<br />
H-740-AG<br />
1” NPTF inlet for adjustable tail – OBSOLETE<br />
3/4” NPTF inlet for ground joint tail – OBSOLETE<br />
0388028 H-740-AG 1” NPTF inlet for ground joint tail – OBSOLETE<br />
Complete Stops For Regal ® H-790<br />
A1<br />
A2<br />
B<br />
C<br />
“XL” flushometers<br />
0388064 H-790-A 3/4” NPTF inlet for adjustable tail<br />
0388065 H-790-A 1” NPTF inlet for adjustable tail<br />
0388068 H-790-AG 3/4” NPTF inlet for ground joint tail<br />
H-740<br />
0388067 H-790-AG 1” NPTF inlet for ground joint tail<br />
<strong>Repair</strong> <strong>Parts</strong><br />
OBSOLETE<br />
5388002<br />
5388001<br />
H-538<br />
H-1012-A<br />
A1 Hole Plug<br />
A2 V<strong>and</strong>al Resistant Socket Cap*, chrome plated with set<br />
screw, for Regal “XL” flushometer – 6 per package<br />
0308612 H-622 B Bonnet, chrome plated<br />
3308853 H-541-ASD C Control Stop <strong>Repair</strong> Kit*<br />
H-745 Stop, chrome plated: Screwdriver Angle Stop with J-2/J-7 Bumper (for Regal ® <strong>Valve</strong> Stop) (-YO/-YG Variations) – OBSOLETE<br />
H-750 Stop, chrome plated: Screwdriver Straight Stop with H-1010-A V<strong>and</strong>al Resistant Cap<br />
H-760 Stop, chrome plated: Screwdriver Straight Stop with H-573-A Locking V<strong>and</strong>al Resistant Cap<br />
A<br />
B<br />
C<br />
A<br />
B<br />
C<br />
A<br />
B<br />
C<br />
Complete Stops<br />
0388035 H-725-A 1” NPTF inlet for adjustable tail<br />
<strong>Repair</strong> <strong>Parts</strong><br />
5310034 J-2/J-7 A Cap*, chrome plated – 6 per package – OBSOLETE<br />
0308991 H-639 B Bonnet, chrome plated – OBSOLETE<br />
3308853 H-541-ASD C Control Stop <strong>Repair</strong> Kit* – OBSOLETE<br />
Complete Stops<br />
3308389 H-750-AG 1” NPTF inlet for ground joint tail<br />
<strong>Repair</strong> <strong>Parts</strong><br />
3308772 H-1010-A A V<strong>and</strong>al Resistant Cap*, chrome plated<br />
0308612 H-622 B Bonnet, chrome plated<br />
3308853 H-541-ASD C Control Stop <strong>Repair</strong> Kit*<br />
Complete Stops<br />
0388023 H-760-AG 1” NPTF inlet for ground joint tail<br />
<strong>Repair</strong> <strong>Parts</strong><br />
0308738 H-573-A A Locking V<strong>and</strong>al Resistant Cap*, chrome plated<br />
0308612 H-622 B Bonnet, chrome plated<br />
3308853 H-541-ASD C Control Stop <strong>Repair</strong> Kit*<br />
*Refer to page 95 for diagrams of our Stop Caps <strong>and</strong> page 96 for the components supplied in our<br />
Control Stop <strong>Repair</strong> Kits.
CONTROL STOP AND REPLACEMENT PARTS<br />
H-770 Stop, rough brass: Concealed Wheel H<strong>and</strong>le Straight Stop<br />
H-775 Stop, chrome plated: Exposed Wheel H<strong>and</strong>le Straight Stop<br />
<strong>Repair</strong> <strong>Parts</strong> <strong>and</strong> <strong>Maintenance</strong> <strong>Guide</strong><br />
Control Stop<br />
Code No. Part No. Description<br />
Complete Stops<br />
0388030 H-770-AG 1” NPTF inlet for ground joint tail<br />
<strong>Repair</strong> <strong>Parts</strong><br />
3308872 H-1011-A A Concealed Wheel H<strong>and</strong>le <strong>Repair</strong> Kit*<br />
0208083 H-623 B Bonnet, rough brass<br />
3308860 H-1006-A C Control Stop <strong>Repair</strong> Kit*<br />
Complete Stops<br />
0388036 H-775-AG 1” NPTF inlet for ground joint tail<br />
<strong>Repair</strong> <strong>Parts</strong><br />
3308060 H-1002-A A Exposed Wheel H<strong>and</strong>le <strong>Repair</strong> Kit*<br />
0308615 H-623 B Bonnet, chrome plated<br />
3308855 H-541-AWH C Control Stop <strong>Repair</strong> Kit*<br />
H-780 Stop, chrome plated: Screwdriver Straight Stop with H-37 Cap (Regal ® <strong>Valve</strong> Stop) <strong>and</strong><br />
H-795 Stop, chrome plated: Screwdriver Straight Stop with V<strong>and</strong>al Resistant Cap (for Regal or Regal XL <strong>Valve</strong> Stop)<br />
Complete Stops For Regal ® flushometers<br />
0388027 H-780-AG 1” NPTF inlet for ground joint tail – OBSOLETE<br />
Complete Stops For Regal ® A<br />
B<br />
“XL” flushometers<br />
C<br />
0388079 H-795-AG<br />
<strong>Repair</strong> <strong>Parts</strong><br />
1” NPTF inlet for ground joint tail<br />
5388001 H-1012-A A V<strong>and</strong>al Resistant Socket Cap*, chrome plated with set<br />
screw, for Regal “XL” flushometer – 6 per package<br />
For H-790 Stop, refer to information shown for H-740 <strong>and</strong> H-790 Stops<br />
For H-795 Stop, refer to information shown for H-780 <strong>and</strong> H-795 Stops<br />
0308991 H-639 B Bonnet, chrome plated<br />
3308853 H-541-ASD C Control Stop <strong>Repair</strong> Kit*<br />
CONTROL STOP AND REPLACEMENT PARTS FOR H-540, H-600 AND H-700 SERIES CONTROL STOPS<br />
A<br />
B<br />
C<br />
A<br />
B<br />
C<br />
Replacement Stop Caps for Screwdriver Control Stops for H-540, H-600, <strong>and</strong> H-700 Series Control Stops<br />
For 1” H-600 <strong>and</strong> H-700 Series Stops <strong>and</strong> 3/4” H-700 Series Stops<br />
Item<br />
A.<br />
B.<br />
C.<br />
D<br />
No.<br />
A.<br />
Code No.<br />
3308772<br />
Part No.<br />
H-1010-A<br />
Description<br />
V<strong>and</strong>al Resistant Stop Cap, chrome plated,<br />
with Sleeve<br />
5308954 H-628 Plastic Sleeve only – 6 per package<br />
B. 3308840 H-573-A Locking V<strong>and</strong>al Resistant Stop Cap, chrome<br />
plated<br />
E.<br />
F.<br />
C. 3308866 H-574 Stop Cap, chrome plated with Seat<br />
Bumper (-YO)<br />
D. 3308867 H-576 Stop Cap, chrome plated with Extended<br />
Seat Bumper (-YG)<br />
For 3/4” H-600 Series Stops<br />
E. 3308790 H-1009-A V<strong>and</strong>al Resistant Stop Cap, chrome plated,<br />
G.<br />
H. I.<br />
with Sleeve <strong>and</strong> 3/4” Bonnet<br />
5308952 H-614 Plastic Sleeve only – 6 per package<br />
F. 0308848 H-582 Stop Cap, chrome plated<br />
For all H-40, H-440, H-540 <strong>and</strong> H-740 Series Stops<br />
G. 5388001 H-1012-A V<strong>and</strong>al Resistant Stop Cap with set screw,<br />
chrome plated – 6 per package<br />
H. 5310034 J-2/J-7 Stop Cap, chrome plated with Seat Bumper<br />
– 6 per package – OBSOLETE<br />
. I. 5388002 H-528 Hole Plug<br />
95<br />
Showerheads,<br />
<strong>Parts</strong> <strong>and</strong><br />
Accessories
Showerheads,<br />
<strong>Parts</strong> <strong>and</strong><br />
Accessories<br />
96<br />
<strong>Repair</strong> <strong>Parts</strong> <strong>and</strong> <strong>Maintenance</strong> <strong>Guide</strong><br />
Control Stop<br />
CONTROL STOP AND REPLACEMENT PARTS FOR H-540, H-600 AND H-700 SERIES CONTROL STOPS<br />
Screwdriver Control Stop <strong>Repair</strong> Kits<br />
BONNET<br />
SEAT<br />
Code No. Part No. Description<br />
Complete <strong>Repair</strong> Kits<br />
3308853 H-541-ASD For 1” H-540, H-600 <strong>and</strong> H-700 Series Stops <strong>and</strong> 3/4”<br />
H-700 Series Stops<br />
3308856 H-543-ASD For 3/4” H-540 <strong>and</strong> H-600 Series Stops<br />
Bonnets<br />
0308612 H-622 For 1” H-600 <strong>and</strong> H-700 Series Stops <strong>and</strong> 3/4” H-700<br />
Series Stops<br />
0308991 H-639 For 1” H-540 <strong>and</strong> H-740 Series Stops <strong>and</strong> 3/4” H-740<br />
Series Stops<br />
0308843 H-577 For 3/4” H-600 Series Stops – OBSOLETE<br />
0308601 H-538 For 3/4” H-540 Series Stops – OBSOLETE<br />
Seat only – 6 per package<br />
5308850 H-584 For 1” H-540, H-600 <strong>and</strong> H-700 Series Stops <strong>and</strong> 3/4”<br />
H-700 Series Stops<br />
5308836 H-569 For 3/4” H-540 <strong>and</strong> H-600 Series Stops<br />
Concealed Wheel H<strong>and</strong>le Control Stop <strong>Repair</strong> Kits – Note: <strong>Repair</strong> Kit includes H-1011-A Wheel H<strong>and</strong>le <strong>Repair</strong> Kit<br />
Complete <strong>Repair</strong> Kits<br />
3308860 H-1006-A For 1” H-540, H-600 <strong>and</strong> H-700 WH Series Stops <strong>and</strong><br />
3/4” H-700 WH Series Stops<br />
WHEEL HANDLE REPAIR KIT*<br />
3308859 H-1007-A For 3/4” H-540 <strong>and</strong> H-600 Series Stops<br />
Wheel H<strong>and</strong>le <strong>Repair</strong> Kit — Note: <strong>Repair</strong> Kit includes h<strong>and</strong>le,<br />
BONNET<br />
screw <strong>and</strong> lockwasher<br />
3308872 H-1011-A For all Concealed Wheel H<strong>and</strong>le Stops<br />
SEAT<br />
Exposed Wheel H<strong>and</strong>le Control Stop <strong>Repair</strong> Kits<br />
BONNET<br />
SEAT<br />
CONTROL STOP REPAIR KIT<br />
CONTROL STOP REPAIR KIT<br />
WHEEL HANDLE REPAIR KIT<br />
CONTROL STOP REPAIR KIT<br />
Bonnets<br />
0208083 H-623 For 1” H-540, H-600 <strong>and</strong> H-700 WH Series Stops <strong>and</strong><br />
3/4” H-700 Series Stops<br />
0308705 H-561 For 3/4” H-540, H-600 Series Stops – OBSOLETE<br />
Seat only – 6 per package<br />
5308850 H-584 For 1” H-540, H-600 <strong>and</strong> H-700 WH Series Stops <strong>and</strong><br />
3/4” H-700 WH Series Stops<br />
5308836 H-569 For 3/4” H-540 <strong>and</strong> H-600 Series Stops<br />
NOTE: H-540 <strong>and</strong> H-600 Series concealed wheel h<strong>and</strong>le stops made prior to 1993 featured a design identical to<br />
the exposed wheel h<strong>and</strong>le design. These stops can be repaired using an exposed wheel h<strong>and</strong>le repair kit or<br />
converted to the current design by using a concealed wheel h<strong>and</strong>le repair kit.<br />
Complete <strong>Repair</strong> Kits<br />
3308855 H-541-AWH For 1” H-540, H-600 <strong>and</strong> H-700 WH Series Stops <strong>and</strong><br />
3/4” H-700 Series Stops<br />
3308858 H-543-AWH For 3/4” H-540 <strong>and</strong> H-600 Series Stops<br />
Wheel H<strong>and</strong>le <strong>Repair</strong> Kit — Note: <strong>Repair</strong> Kit includes h<strong>and</strong>le, washer,<br />
screw <strong>and</strong> lockwasher<br />
3308060 H-1002-A For all Exposed Wheel H<strong>and</strong>le Stops<br />
5308059 H-1003-A Screw <strong>and</strong> Lockwasher only – 12 per package<br />
Bonnets<br />
0308615 H-623 For 1” H-540, H-600 <strong>and</strong> H-700 WH Series Stops <strong>and</strong><br />
3/4” H-700 Series Stops<br />
0308705 H-561 For 3/4” H-540 <strong>and</strong> H-600 Series Stops – OBSOLETE<br />
Seat only – 6 per package<br />
5308850 H-584 For 1” H-540, H-600 <strong>and</strong> H-700 WH Series Stops <strong>and</strong><br />
3/4” H-700 WH Series Stops<br />
5308836 H-569 For 3/4” H-540 <strong>and</strong> H-600 Series Stops<br />
NOTE: 1” <strong>and</strong> 3/4” H-700 Series stops use “common stop” repair kits. 1” <strong>and</strong> 3/4” H-540 <strong>and</strong> H-600 Series stops<br />
use stop repair kits unique to each size. See the “common stop” on page 99 for more details.
CONTROL STOP AND REPLACEMENT PARTS FOR OLDER CONTROL STOPS<br />
Code No. Part No. Description<br />
H-10-A 1” Screwdriver Angle Stop, (also fits H-15-A 1” Screwdriver Straight Stop) — used from 1920’s through 1940’s<br />
5308077 H-12 Packing only – 12 per package<br />
— — Bonnet no longer available<br />
H-10-A 1” Wheel H<strong>and</strong>le Angle Stop (also fits H-15-A 1” Wheel H<strong>and</strong>le Straight Stop) — Used from 1920’s through 1940’s<br />
5308077 H-12 Packing only – 12 per package<br />
— — Bonnet no longer available<br />
H-20-A 1/2” <strong>and</strong> 3/4” Screwdriver Angle Stop (also fits H-30-A Screwdriver Straight Stop) — Used from 1920’s through 1950’s<br />
5308077 H-12 Packing only – 12 per package<br />
— — Bonnet no longer available<br />
H-20-A 1/2” <strong>and</strong> 3/4” Wheel H<strong>and</strong>le Angle Stop (also fits H-30-A Wheel H<strong>and</strong>le Straight Stop) — Used from 1920’s through 1950’s<br />
5308077 H-12 Packing only – 12 per package<br />
— — Bonnet no longer available<br />
H-40-A 3/4” <strong>and</strong> 1” Screwdriver Angle Stop (also fits H-45-A Screwdriver Straight Stop) — Used from 1930’s through 1960’s<br />
3308277 H-47-A-SD <strong>Repair</strong> kit includes packing ring, key socket, lock shield,<br />
retaining ring, screw assembly, <strong>and</strong> packing<br />
0308176 H-39-A-SD Bonnet assembly repair kit includes a bonnet assembled<br />
with packing ring, key socket, retaining ring, screw<br />
assembly, <strong>and</strong> packing plus our H-37 V<strong>and</strong>al Resistant<br />
Stop Cap that replaces the lock shield<br />
5308077 H-12 Packing only – 12 per package<br />
0308167 H-39 Bonnet Only<br />
H-40-A 3/4” <strong>and</strong> 1” Wheel H<strong>and</strong>le Angle Stop (also fits H-45-A Wheel H<strong>and</strong>le Straight Stop) — Used from 1930’s through 1960’s<br />
97<br />
<strong>Repair</strong> <strong>Parts</strong> <strong>and</strong> <strong>Maintenance</strong> <strong>Guide</strong><br />
Control Stop<br />
3308278 H-47-A-WH <strong>Repair</strong> kit includes packing ring, screw, wheel h<strong>and</strong>le,<br />
key stem, gl<strong>and</strong> for wheel h<strong>and</strong>le, retaining gl<strong>and</strong>, screw<br />
assembly, washer <strong>and</strong> packing<br />
0308175 H-39-A-WH Bonnet assembly repair kit includes a bonnet assembled<br />
with packing ring, screw, wheel h<strong>and</strong>le, key stem, gl<strong>and</strong><br />
for wheel h<strong>and</strong>le, retaining gl<strong>and</strong>, screw assembly,<br />
washer <strong>and</strong> packing<br />
5308077 H-12 Packing only – 12 per package<br />
0308170 H-39 Bonnet Only<br />
Showerheads,<br />
<strong>Parts</strong> <strong>and</strong><br />
Accessories
Showerheads,<br />
<strong>Parts</strong> <strong>and</strong><br />
Accessories<br />
CONTROL STOP AND REPLACEMENT PARTS<br />
98<br />
<strong>Repair</strong> <strong>Parts</strong> <strong>and</strong> <strong>Maintenance</strong> <strong>Guide</strong><br />
Control Stop<br />
Code No. Part No. Description<br />
H-340-A 3/4” <strong>and</strong> 1” Screwdriver <strong>and</strong> Wheel H<strong>and</strong>le Angle Stops — Used from 1940’s through 1950’s<br />
The only replacement part available for this stop is the rubber plug.<br />
0308433 H-382-A Rubber Plug<br />
H-440-A 3/4” Screwdriver Angle Stop — Used from 1950’s through 1960’s<br />
H-440-A 3/4” Wheel H<strong>and</strong>le Angle Stop — Used from 1950’s through 1960’s<br />
3308442 H-484-A-SD <strong>Repair</strong> kit includes lock shield, packing, key stem, rubber<br />
plug, <strong>and</strong> packing ring<br />
0308432 H-439-AU Bonnet assembly repair kit includes a bonnet assembled<br />
with packing, key stem, rubber plug, <strong>and</strong> packing ring<br />
plus our H-37 V<strong>and</strong>al Resistant Stop Cap that replaces<br />
the lock shield<br />
0308434 H-439 Bonnet<br />
0308490 H-484-A Rubber Plug<br />
5308077 H-12 Packing only – 12 per package<br />
0308435 H-439 Bonnet<br />
0308490 H-484-A Rubber Plug<br />
5308077 H-12 Packing only – 12 per package<br />
H-440-A 1” Screwdriver Angle Stop (also fits H-445-A Screwdriver Straight Stop) — Used from 1950’s through 1960’s<br />
3308453 H-482-A-SD <strong>Repair</strong> kit includes lock shield, packing, key stem, rubber<br />
plug, <strong>and</strong> packing ring<br />
0308428 H-439-A Bonnet assembly repair kit includes a bonnet assembled<br />
with packing ring, key socket, retaining ring, screw<br />
assembly, <strong>and</strong> packing plus our H-37 V<strong>and</strong>al Resistant<br />
Stop Cap that replaces the lock shield<br />
0308434 H-439 Bonnet<br />
0308489 H-482-A Rubber Plug<br />
5308077 H-12 Packing only – 12 per package<br />
H-440-A 1” Wheel H<strong>and</strong>le Angle Stop (also fits H-445-A Wheel H<strong>and</strong>le Straight Stop) — Used from 1950’s through 1960’s<br />
0308435 H-439 Bonnet<br />
0308489 H-482-A Rubber Plug<br />
5308077 H-12 Packing only – 12 per package<br />
NOTE: H-440 Series control stops were used with <strong>Sloan</strong>’s “Quiet Flush” flushometer models.<br />
NOTE: All obsolete control stops are for ground joint tailpiece connections.<br />
NOTE: <strong>Sloan</strong> <strong>Valve</strong> <strong>Company</strong> has made other stops up to 1964. If you have an older stop that is not listed on these<br />
two pages, the repair parts are obsolete. Prior to 1964, all stops were ground joint connections; the H-700-AG<br />
series stops, 3/4” <strong>and</strong> 1” angle stops, <strong>and</strong> 1” straight stops, are the current replacement.
THE “COMMON STOP”<br />
In 1996, <strong>Sloan</strong> began using the H-700 series of control stops with all<br />
flushometers. This “common stop” offers 3/4” <strong>and</strong> 1” supply inlet size<br />
options, yet uses a single repair kit for both urinal <strong>and</strong> water closet stops.<br />
This change primarily affects the H-700 series 3/4” stops, which now use<br />
the same repair kit as 1” stops. <strong>Repair</strong> kits for the smaller H-540 <strong>and</strong> H-600<br />
3/4” stops remain available <strong>and</strong> are included in this section.<br />
The “common stop” body offers precise control over flow rates delivered<br />
through the valve. This feature is important, especially for 1-gallon urinal<br />
designs. This finite flow adjustment makes the difference between a proper<br />
flush <strong>and</strong> an ineffective flush that splashes <strong>and</strong> spills.<br />
The “common stop” internal components are interchangeable with their<br />
counterparts in older H-600 <strong>and</strong> H-540 stops. The distinctively contoured<br />
seat plug in the “common stop” allows a finer flow rate adjustment similar to<br />
that of a needle valve. Unlike natural rubber components that can be<br />
destroyed by water treatment products, our synthetic Permex rubber seat<br />
plugs resist the effects of chloramines. Our stop spring, formerly brass, is<br />
now constructed of stainless steel. This helps prevent corrosion from the<br />
increasingly aggressive water supplies we see today.<br />
All complete “common stops” now have bonnets stamped with an H-700<br />
series number. Both exposed <strong>and</strong> concealed wheel h<strong>and</strong>le stops are<br />
stamped H-700-WH series. The H-740 <strong>and</strong> H-780 stops that replace the<br />
H-540 series stops used with Regal valves are stamped H-740 series.<br />
CONTROL STOP DESIGNS<br />
Supply Inlets<br />
<strong>Sloan</strong> supplies control stops in two basic inlet sizes:<br />
1. 3/4” NPTF — For most urinal flushometers<br />
2. 1” NPTF — For all water closet flushometers <strong>and</strong> blow-out<br />
urinal flushometers<br />
Control stops are also available in some models with the following inlets for<br />
specialized <strong>and</strong> export applications:<br />
1. 1” Whitworth thread<br />
2. 1” BSP British St<strong>and</strong>ard Pipe inlet<br />
3. 1” NSPM Straight thread — for use with shipboard Sil-Braz fittings<br />
Tailpiece Connections<br />
The majority of flushometers supplied by <strong>Sloan</strong> since 1964 feature an<br />
adjustable tailpiece. Connection of the valve tailpiece to the control stop is<br />
made with a sliding O-ring seal.<br />
Older valves (produced before 1964), <strong>and</strong> valves furnished for salt-water<br />
installations, <strong>and</strong> all straight stops utilized a metal-to-metal ground joint (GJ)<br />
connection.<br />
When replacing an older stop, it is important to note which type of stop<br />
connection is required.<br />
Stops for use with salt water must be made from Naval brass.<br />
99<br />
<strong>Repair</strong> <strong>Parts</strong> <strong>and</strong> <strong>Maintenance</strong> <strong>Guide</strong><br />
Control Stop<br />
GENERAL INSTALLATION INSTRUCTIONS<br />
Install the <strong>Sloan</strong> Bak-Chek ® control stop to water supply line with outlet<br />
positioned as required. Tighten the control stop coupling with a wrench.<br />
SUPPLY FLANGE<br />
SET SCREW<br />
(8-32 X 5/8)<br />
IRON PIPE NIPPLE OR<br />
COPPER PIPE WITH SWEAT<br />
SOLDER ADAPTER<br />
COVERING TUBE<br />
BAK-CHEK ®<br />
CONTROL STOP<br />
CONTROL STOP ADJUSTMENT<br />
After installation or service, readjust the control stop to meet the flow rate<br />
required for the proper cleansing of the fixture. Open the control stop<br />
COUNTERCLOCKWISE one full turn from the closed position. Activate<br />
flushometer.<br />
Adjust control stop after each flush until the rate of flow delivered properly<br />
cleanses the fixture. Turn the control stop adjustment screw (or wheel<br />
h<strong>and</strong>le) COUNTERCLOCKWISE to increase the flow rate or CLOCKWISE to<br />
decrease the flow rate.<br />
TURN COUNTERCLOCKWISE<br />
TO OPEN<br />
TURN CLOCKWISE<br />
TO CLOSE<br />
Important: A <strong>Sloan</strong> flushometer is engineered for quiet operation. Excessive<br />
water flow creates noise, while too little water flow may not satisfy the<br />
needs of the fixture. Proper adjustment is made when the plumbing fixture is<br />
cleansed after each flush without splashing water out from the lip AND a<br />
quiet flushing cycle is achieved.<br />
The control stop should never be opened to the point where the flow from<br />
the valve exceeds the flow capability of the fixture. In the event of a valve<br />
failure, the fixture must be able to accommodate a continuous flow from<br />
the valve.<br />
MAINTENANCE AND CLEANING<br />
Control stops have moving parts that may wear over time. Deterioration of<br />
rubber parts may result in an incomplete seal. If you can not shut off the<br />
stop completely, or if leakage is visible at the adjustment screw, order one of<br />
our control stop repair kits <strong>and</strong> rebuild the control stop.<br />
DO NOT use abrasive or chemical cleaners to clean flushometers. These<br />
cleaners may dull the luster <strong>and</strong> attack the chrome or special decorative<br />
finishes. Use ONLY mild soap <strong>and</strong> water, <strong>and</strong> then wipe dry with a clean<br />
cloth or towel. While cleaning the bathroom tile, protect the flushometer<br />
from any splattering of cleaner. Acids <strong>and</strong> cleaning fluids can discolor or<br />
remove chrome plating.<br />
Showerheads,<br />
<strong>Parts</strong> <strong>and</strong><br />
Accessories
Showerheads,<br />
<strong>Parts</strong> <strong>and</strong><br />
Accessories<br />
TAILPIECES<br />
The tailpiece is the connection between<br />
the valve body <strong>and</strong> the control stop.<br />
<strong>Sloan</strong> adjustable <strong>and</strong> ground joint<br />
tailpieces are threaded into the valve<br />
body at the factory. <strong>Sloan</strong> tailpieces<br />
are available in a variety of lengths to<br />
accommodate installation rough-in errors<br />
H-551-A<br />
<strong>and</strong> unique installation requirements.<br />
<strong>Sloan</strong> flushometer br<strong>and</strong>s feature three types of tailpiece connections:<br />
H-551 ADJUSTABLE<br />
TAILPIECE<br />
TAILPIECE REPLACEMENT<br />
H-530 TAILPIECE REMOVAL BAR<br />
0334014<br />
H-5 GROUND JOINT<br />
TAILPIECE<br />
H-130-A ADJUSTABLE<br />
GROUND JOINT TAILPIECE<br />
<strong>Sloan</strong> adjustable <strong>and</strong> ground<br />
joint tailpieces are assembled<br />
into the valve body using a<br />
pipe thread. Significant force<br />
is used to drive the tailpiece<br />
into the valve body. As such,<br />
removal of the old tailpiece<br />
may be difficult.<br />
For replacement, we<br />
recommend using the H-530 tailpiece removal bar (Code No. 0334014).<br />
Remove the flushometer cover <strong>and</strong> interior parts. Secure the tailpiece<br />
removal bar vertically in a vice. Place the flushometer tailpiece over the bar.<br />
The cast lugs inside the tailpiece will catch on the bar. Insert a length of<br />
3/4" pipe into the barrel of the valve body. Unscrew tailpiece from<br />
valve body.<br />
Assemble the new tailpiece into the valve body in the reverse manner. Use<br />
teflon tape (or pipe sealant) on tailpiece pipe threads. Ensure that both the<br />
coupling <strong>and</strong> the locking ring (adjustable tailpiece only) are on the tailpiece<br />
before tightening the assembly. Do NOT use sealant on the first few threads<br />
of the tailpiece.<br />
100<br />
<strong>Repair</strong> <strong>Parts</strong> <strong>and</strong> <strong>Maintenance</strong> <strong>Guide</strong><br />
Tailpiece<br />
H-551-A ADJUSTABLE TAILPIECE CONNECTION<br />
The majority of flushometers supplied by <strong>Sloan</strong> since 1964 feature the<br />
H-551-A adjustable tailpiece. The valve tailpiece connects to the control stop<br />
with a sliding O-ring seal. The H-551-A adjustable tailpiece st<strong>and</strong>ard length<br />
is 2-1/16" (54 mm). This is designed for a st<strong>and</strong>ard flushometer installation<br />
in which the distance between the centerline of the valve <strong>and</strong><br />
the centerline of the water supply inlet is 4-3/4" (121 mm). The adjustable<br />
tailpiece allows for a variance of ±1/2" (13 mm) from this nominal<br />
dimension.<br />
H-551-A<br />
Item<br />
No. Code No. Part No. Description<br />
1. 0308676 H-550 Coupling CP<br />
0308690 H-550 Coupling RB<br />
2. 5308381 H-552 Locking Ring – 12 per package<br />
3. 5308696 H-553 O-Ring – 24 per package<br />
4. 0308801 H-551-A 2-1/16" (53 mm) Tailpiece Assembly † CP<br />
0308802 H-551-A 2-1/16" (53 mm) Tailpiece Assembly † RB<br />
0308803 H-551-A 3-1/16" (78 mm) Tailpiece Assembly † CP<br />
0308805 H-551-A 4-1/16" (103 mm) Tailpiece Assembly † CP<br />
0308807 H-551-A 5-1/16" (129 mm) Tailpiece Assembly † CP<br />
0308809 H-551-A 6-1/16" (154 mm) Tailpiece Assembly † CP<br />
† Each tailpiece assembly includes an H-553 O-Ring <strong>and</strong> an H-552 locking ring.<br />
Abbreviations: CP: chrome plated; RB: rough brass<br />
<strong>Sloan</strong> <strong>Valve</strong> <strong>Company</strong> can also provide products not shown in our current catalog.<br />
For our special finishes, consult factory for part numbers.
H-5 GROUND JOINT TAILPIECE CONNECTION<br />
Older valves (prior to 1964), valves furnished for saltwater<br />
installations, <strong>and</strong> all <strong>Sloan</strong> flushometers furnished<br />
with straight stops use a metal-to-metal ground joint<br />
(GJ) tailpiece connection. The st<strong>and</strong>ard length of the<br />
H-5 tailpiece is 1-3/4" (44 mm) for a st<strong>and</strong>ard 4-3/4"<br />
(121 mm) rough-in dimension; other lengths are<br />
available in 1/4" (6 mm) increments.<br />
The ground joint tailpiece connection<br />
cannot be adjusted in the field, so<br />
rough-in must be exact. Replacement<br />
H-5 tailpieces can compensate for<br />
rough-in errors.<br />
CHROME PLATED COMPONENTS<br />
Item<br />
No. Code No. Description<br />
1. 0308063 H-6 Coupling<br />
2. See below H-5 Ground Joint Tailpiece<br />
“X” Tailpiece Length<br />
0308019 4-1/4" (108 mm) 1-1/4" (32 mm)<br />
0308023 4-1/2" (114 mm) 1-1/2" (38 mm)<br />
0308026 4-3/4" (121 mm) 1-3/4" (44 mm)<br />
0308030 5" (127 mm) 2" (51 mm)<br />
0308031 5-1/4" (133 mm) 2-1/4" (57 mm)<br />
0308033 5-1/2" (140 mm) 2-1/2" (64 mm)<br />
0308034 5-3/4" (146 mm) 2-3/4" (70 mm)<br />
0308035 6" (152 mm) 3" (76 mm)<br />
0308037 6-1/4" (159 mm) 3-1/4" (83 mm)<br />
0308038 6-1/2" (165 mm) 3-1/2" (89 mm)<br />
0308040 6-3/4" (171 mm) 3-3/4" (95 mm)<br />
0308041 7" (178 mm) 4" (102 mm)<br />
0308042 7-1/4" (184 mm) 4-1/4" (108 mm)<br />
0308043 7-1/2" (191 mm) 4-1/2" (114 mm)<br />
0308044 7-3/4" (197 mm) 4-3/4" (121 mm)<br />
0308045 8" (203 mm) 5" (127 mm)<br />
0308047 8-1/2" (216 mm) 5-1/2" (140 mm)<br />
0308050 9" (229 mm) 6" (152 mm)<br />
ROUGH BRASS COMPONENTS<br />
1. 0308063 H-6 Coupling<br />
2. See below H-5 Ground Joint Tailpiece<br />
“X” Tailpiece Length<br />
0308028 4-3/4" (121 mm) 1-3/4" (44 mm)<br />
NOTE: “X” indicates the distance between the centerline of valve <strong>and</strong> the centerline of the water supply. Ground<br />
joint couplings are notched for identification.<br />
101<br />
<strong>Repair</strong> <strong>Parts</strong> <strong>and</strong> <strong>Maintenance</strong> <strong>Guide</strong><br />
Tailpiece<br />
“XDT” FLUSHOMETER FOR CANADIAN TECK VALVES<br />
<strong>Sloan</strong> can provide a flushometer with a<br />
tailpiece that can connect to a Cambridge<br />
Brass Teck (Wal-teck) supply stop. This<br />
special valve assembly is specified as our<br />
“–XDT” variation. This tailpiece cannot be<br />
replaced in the field.<br />
Item<br />
No. Code No. Part No. Description<br />
1. 5308934 H-501 Locking Ring – 6 per package<br />
2. 5308958 H-589 O-Ring – 6 per package<br />
H-130-A ADJUSTABLE GROUND JOINT TAILPIECE CONNECTION<br />
To accommodate adjustability in a<br />
ground joint connection, <strong>Sloan</strong> developed<br />
the H-130-A adjustable ground joint<br />
tailpiece connection. This is commonly<br />
supplied on valves used in retrofit<br />
applications where an existing ground<br />
joint supply stop (made by either <strong>Sloan</strong><br />
or another manufacturer) is utilized. The<br />
H-130-A tailpiece is supplied as our<br />
“–XD” variation <strong>and</strong> requires a special valve body.<br />
It cannot be used to replace an H-551-A or an H-5 tailpiece.<br />
TO INSTALL THE ADJUSTABLE GROUND JOINT TAILPIECE:<br />
NOTE: flushometer should be st<strong>and</strong>ing straight<br />
<strong>and</strong> not leaning to either side.<br />
Screw threaded end of the tailpiece into the<br />
flushometer body.<br />
Continue turning until tailpiece<br />
matches up to the end of the<br />
existing supply stop.<br />
Tighten the stop coupling to secure<br />
the valve to the supply stop.<br />
Using a flat-jawed wrench, tighten the valve<br />
coupling to secure the tailpiece to the valve.<br />
Continue flushometer installation according<br />
to the instructions packaged with the valve.<br />
NOTE: DO NOT use pipe dope or thread sealant on any connection.<br />
Lubricate O-ring ONLY with water!<br />
O-ring <strong>and</strong> stop ring are available as individual components.<br />
All other items are sold only in H-130-A tailpiece Retrofit Kit<br />
(see table below).<br />
H-127 O-RING –<br />
6 PER PACKAGE<br />
5308973<br />
TAILPIECE RETROFIT KIT<br />
(WHEN USED WITH GROUND JOINT SUPPLY STOP)<br />
Code No. “X” †<br />
Part No.<br />
0308976 4-3/4" (121 mm) H-130-A-1 ‡<br />
0308983 5-3/4" (146 mm) H-130-A-2<br />
0308984 6-3/4" (171 mm) H-130-A-3<br />
0308979 7-3/4" (197 mm) H-130-A-4<br />
VALVE<br />
COUPLING<br />
STOP<br />
COUPLING<br />
TAILPIECE<br />
H-128 STOP RING –<br />
6 PER PACKAGE<br />
5308974<br />
† When used with a <strong>Sloan</strong> ground joint supply stop, the tailpiece can be adjusted to a shorter or longer length<br />
(± 1/2" or 12 mm from the "X" dimension shown). When used with Delany ground joint supply stop, the<br />
tailpiece can be adjusted up to 1" (25 mm) longer from the "X" dimension shown.<br />
‡ Unless otherwise specified, the H-130-A-1 tailpiece is furnished as st<strong>and</strong>ard with all "–XD" variation flushometer<br />
valves.<br />
Showerheads,<br />
<strong>Parts</strong> <strong>and</strong><br />
Accessories
Showerheads,<br />
<strong>Parts</strong> <strong>and</strong><br />
Accessories<br />
Figure A<br />
CENTERLINE<br />
OF FIXTURE<br />
FIN.<br />
FLOOR<br />
ROYAL ® FLUSHOMETER MODELS<br />
(Features high back pressure vacuum breaker)<br />
VBF-72-A1<br />
VBF-73-A2 with 2” (50 mm) offset<br />
TABLE 1 †<br />
102<br />
<strong>Repair</strong> <strong>Parts</strong> <strong>and</strong> <strong>Maintenance</strong> <strong>Guide</strong><br />
Vacuum Breaker Trap Primer<br />
“L” “A” “B” “C”<br />
For Royal ® or Length of Vacuum Centerline of Centerline of<br />
Regal ® flushometer Breaker Flush Supply to Top of Supply to Trap Critical Line to Trap<br />
Code No. Model Connection Bowl Primer Outlet Primer Outlet<br />
VBF-72-A1<br />
3396075 110/111 ‡ 8-1/2” (216 mm) 11-1/2” (292 mm) 7” (178 mm) 2-1/4” (57 mm)<br />
3396076 113/113-1.6 13” (330 mm) 16” (406 mm) 11” (280 mm) 6-1/4” (159 mm)<br />
3396077 115/115-1.6 21” (533 mm) 24” (610 mm) 11” (280 mm) 6-1/4” (159 mm)<br />
3396078 116/116-1.6 24” (610 mm) 27” (696 mm) 11” (280 mm) 6-1/4” (159 mm)<br />
VBF-73-A2 With 2” (50 mm) Offset<br />
3396059 115/115-1.6 22-1/2” (572 mm) 25” (635 mm) 11” (280 mm) 6-1/4” (159 mm)<br />
NOTE: For concealed style VB-75-A Trap Primer consult factory.<br />
† Refer to Figure A for dimensions “A,” “B” <strong>and</strong> “C.” Refer to Figure B for dimensions “L” <strong>and</strong> “C.”<br />
‡ Consult local codes for approval of the use of the VBF-72-A1 trap primer with<br />
flushometer models 110 <strong>and</strong> 111. Some codes require a minimum distance<br />
of 6” (153 mm) between the critical line of the vacuum breaker <strong>and</strong> the trap<br />
primer outlet. In these cases, specify models 113, 115 or 116.<br />
4-3/4” (121 MM)<br />
1” I.P.S.<br />
SUPPLY<br />
(DN 25 MM)<br />
“C”<br />
FIN.<br />
WALL<br />
“B”<br />
2-1/4” MIN.<br />
(57 MM)<br />
“A”<br />
GRAB<br />
BAR<br />
Figure B<br />
2”<br />
(51 MM)<br />
“C”<br />
REGAL ® FLUSHOMETER MODELS<br />
“L”<br />
VBF-72-A2<br />
VBF-73-A2 with 2” (50 mm) offset<br />
The <strong>Sloan</strong> vacuum breaker trap primer provides a<br />
constant water seal in a floor drain. Each time the<br />
flushometer is activated, a small amount of water is<br />
diverted to the floor drain to maintain the water seal. This<br />
seal prevents objectionable sewer gases from escaping<br />
into the air.<br />
“C”<br />
“B”<br />
DISTANCE TO BE<br />
DETERMINED BY<br />
INSTALLER<br />
4-1/4” MIN.<br />
(108 MM)<br />
“A”<br />
VBF-73-A2 WITH 2” (50 mm)<br />
OFFSET AVAILABLE FOR MODELS<br />
115 AND 116 ONLY. (FOR USE<br />
WITH GRAB BARS INCLUDED AS<br />
PART OF THE INSTALLATION.)<br />
CRITICAL LINE<br />
ELBOW<br />
1-1/2” (38 MM) O.D.<br />
VACUUM BREAKER OUTLET<br />
TUBE<br />
5/8” (16 MM)<br />
2-3/4” (70 MM)
1A<br />
1B<br />
2A<br />
8<br />
10<br />
7<br />
6<br />
3<br />
5<br />
4<br />
1A<br />
1B<br />
2B<br />
9A 9B<br />
103<br />
<strong>Repair</strong> <strong>Parts</strong> <strong>and</strong> <strong>Maintenance</strong> <strong>Guide</strong><br />
Vacuum Breaker Trap Primer<br />
PARTS LIST<br />
Item<br />
No. Code No. Part No. Description<br />
1A. 0323304 V-579 Vacuum Breaker Coupling for Royal flushometers<br />
1B. 0323120 V-553-A Vacuum Breaker Coupling Assembly for Regal<br />
flushometers<br />
2A. — VBF-2 1-1/2" (38 mm) x “L” Vacuum Breaker Outlet Tube<br />
(see Table 1 on page 102 for length)<br />
2B. — VBF-4 1-1/2" (38 mm) x “L” Vacuum Breaker Outlet Tube<br />
with 2" (50 mm) Offset (see Table 1 on page 102<br />
for length)<br />
3. 0396067 F-75-AA Assembly Kit for Trap Primer<br />
4. 0306164 F-7 Wall Flange<br />
5. 0396083 F-73-A Tubing Fitting<br />
6. 0396084 F-75-A Elbow Compression Fitting<br />
7. 0396085 F-76 3/8" (9 mm) x 12" (305 mm) Flexible Tubing<br />
8. 0396089 F-88 Water Deflector<br />
9A. 3323182 V- 651-A High Back Pressure Vacuum Breaker <strong>Repair</strong> Kit<br />
(st<strong>and</strong>ard with Royal flushometers)<br />
9B. 3323192 V- 551-A Vacuum Breaker <strong>Repair</strong> Kit (st<strong>and</strong>ard with Regal<br />
flushometers)<br />
10. — VBF-9 Restriction Washer<br />
NOTE: For concealed style VB-75-A Trap Primer consult factory.<br />
Showerheads,<br />
<strong>Parts</strong> <strong>and</strong><br />
Accessories
Showerheads,<br />
<strong>Parts</strong> <strong>and</strong><br />
Accessories<br />
STEP 1 — INSTALL WATER DEFLECTOR AND ELBOW (FIGURE 1)<br />
Insert the smaller end of the black plastic water deflector into the threaded<br />
end of the elbow fitting. The flat end of the elbow fitting will face outward<br />
from the vacuum breaker.<br />
Place several drops of thread sealant on the threads of the elbow fitting.<br />
Insert the elbow fitting <strong>and</strong> water deflector into the threaded hole of the<br />
vacuum breaker tube. Screw the fitting into place. DO NOT overtighten this<br />
connection. The final position of the elbow should allow water flow from the<br />
vacuum breaker in a downward direction.<br />
Figure 1<br />
Figure 2<br />
ELBOW FITTING<br />
VACUUM BREAKER<br />
OUTLET TUBE<br />
VACUUM BREAKER<br />
OUTLET TUBE<br />
WATER<br />
FLOW<br />
WATER DEFLECTOR<br />
1/2” (13 MM) NPT<br />
FEMALE TUBE FITTING<br />
WALL FLANGE<br />
1/4” I.P.S.<br />
ELBOW FITTING<br />
90°<br />
INSTALL<br />
FITTING IN<br />
THIS RANGE<br />
RESTRICTION WASHER<br />
STEP 2 — INSTALL WALL FLANGE (FIGURE 2)<br />
Place wall flange over the 1/2" (13 mm) NPT male pipe used as the trap<br />
primer outlet. Push wall flange until it is flush against the wall. Connect the<br />
1/2" (13 mm) NPT female tube fitting to the pipe. The fitting will help keep<br />
the wall flange in position.<br />
1/2” (13 MM) NPT MALE PIPE<br />
FOR TRAP PRIMER OUTLET<br />
104<br />
<strong>Repair</strong> <strong>Parts</strong> <strong>and</strong> <strong>Maintenance</strong> <strong>Guide</strong><br />
Vacuum Breaker Trap Primer<br />
1-1/2”<br />
(38 MM)<br />
FINISHED WALL<br />
1”<br />
(25 MM) TO<br />
TRAP<br />
CENTERLINE OF<br />
TRAP PRIMER<br />
WATER<br />
DEFLECTOR
STEP 3 — INSTALL VACUUM BREAKER<br />
FLUSH CONNECTION (FIGURE 3)<br />
Slide the spud coupling, nylon slip gasket, rubber<br />
gasket <strong>and</strong> spud flange (all supplied with a<br />
st<strong>and</strong>ard flushometer vacuum breaker) over the<br />
vacuum breaker tube <strong>and</strong> insert the tube into the<br />
fixture spud. Tighten the spud coupling onto the<br />
fixture spud by h<strong>and</strong>.<br />
STEP 4 — INSTALL FLEXIBLE TUBING<br />
(FIGURE 4)<br />
Use the 3/8" (9 mm) diameter flex tubing to<br />
connect the bottom of the elbow fitting with the<br />
restriction washer <strong>and</strong> the tube fitting at the wall<br />
flange. <strong>Sloan</strong> provides a 12" (305 mm) length of<br />
flex tubing. Cut tubing to appropriate length.<br />
Tighten compression fittings at both ends of the<br />
flex tubing. Complete the valve installation<br />
according to the installation instructions included<br />
with your <strong>Sloan</strong> flushometer valve.<br />
CARE AND CLEANING INSTRUCTIONS<br />
DO NOT use abrasive or chemical cleaners to<br />
clean flushometers, they may dull the luster <strong>and</strong><br />
attack the chrome finish. Use ONLY mild soap<br />
<strong>and</strong> water, <strong>and</strong> then wipe dry with a clean towel<br />
or cloth. When cleaning, protect the exposed<br />
flushometer from any splattering of cleaner. Acids<br />
<strong>and</strong> cleaning fluids can discolor or remove<br />
chrome plating.<br />
Figure 3<br />
VACUUM BREAKER TUBE<br />
RUBBER GASKET<br />
SPUD FLANGE<br />
Figure 4<br />
ELBOW FITTING<br />
RESTRICTION<br />
WASHER<br />
VACUUM<br />
BREAKER<br />
OUTLET TUBE<br />
105<br />
<strong>Repair</strong> <strong>Parts</strong> <strong>and</strong> <strong>Maintenance</strong> <strong>Guide</strong><br />
Vacuum Breaker Trap Primer<br />
1/2” (13 MM) NPT FEMALE<br />
TUBE FITTING<br />
3/8” O.D. X 12”<br />
(9 MM X 305 MM) FLEX<br />
TUBING<br />
SPUD COUPLING<br />
NYLON SLIP GASKET<br />
Showerheads,<br />
<strong>Parts</strong> <strong>and</strong><br />
Accessories
Showerheads,<br />
<strong>Parts</strong> <strong>and</strong><br />
Accessories<br />
SMALL VACUUM BREAKER REPAIR KITS<br />
Code No. Part No. Description<br />
For V-100-A & V-100-AA<br />
3322079 V-101-A <strong>Repair</strong> Kit for V-101-A Vacuum Breaker with 1-1/2"<br />
Female IP Inlet <strong>and</strong> 1-1/2" Male IP Outlet<br />
OBSOLETE<br />
For V-300-A<br />
0322151 V-319-A <strong>Repair</strong> Kit for V-300-A Vacuum Breaker includes Item<br />
Nos. 1-3<br />
OBSOLETE<br />
For V-350-A<br />
3322157 V-1000-A <strong>Repair</strong> Kit for V-350-A Vacuum Breaker includes Item<br />
Nos. 1-4<br />
106<br />
<strong>Repair</strong> <strong>Parts</strong> <strong>and</strong> <strong>Maintenance</strong> <strong>Guide</strong><br />
Small Vacuum Breaker<br />
<strong>Repair</strong> Kits<br />
Code No. Part No. Description<br />
For V-360-A & V-370-A<br />
3322284 V-382-A <strong>Repair</strong> Kit for V-360-A & V-370-A 1/4" includes Item<br />
Nos. 1 & 2<br />
3322277 V-362-A <strong>Repair</strong> Kit for V-360-A & V-370-A 3/8" includes Item<br />
Nos. 1 & 2<br />
3322294 V-388-A <strong>Repair</strong> Kit for V-360-A & V-370-A 1/2" includes Item<br />
Nos. 1 & 2<br />
3322302 V-392-A <strong>Repair</strong> Kit for V-360-A & V-370-A 3/4" includes Item<br />
Nos. 1 & 2<br />
NOTE: For suitable replacements, contact factory.<br />
OBSOLETE
3” Push Button For Exposed Royal ® & Crown ®<br />
Item<br />
No. Code No. Part No. Description<br />
<strong>Repair</strong> Kits<br />
3303396 C-64-A Push Button <strong>Repair</strong> Kit contains item nos. 7-11<br />
3303347 C-1000-A Replacement Kit contains item nos. 1,5 & 6<br />
<strong>Repair</strong> <strong>Parts</strong><br />
1-11. 0303351 C-42-A Push Button Assembly<br />
1. * C-42 3” Push Button CP<br />
2. 0301082 A-6 CP Coupling<br />
3-4. 0302109 B-7-A Socket<br />
5. * C-41 Shank Head<br />
6. * C-43 Screw RB<br />
7. * B-8-A Plunger<br />
8. 0303019 C-7 Spring<br />
9. * B-49 Bushing<br />
10. 5302297 B-39 Seal<br />
11. 5301139 A-31 Gasket<br />
*Available in kit only.<br />
Push Button For Concealed Royal ® & Crown ®<br />
Item<br />
No. Code No. Part No. Description<br />
<strong>Repair</strong> Kits<br />
— C-9-A Complete Push Button Assembly. Items 1-11.<br />
Consult factory.<br />
3303398 C-77-A Push Button <strong>Repair</strong> Kit contains item nos. 7-11<br />
<strong>Repair</strong> <strong>Parts</strong><br />
1. 0302248 B-23 CP Wall Flange 2-3/4” O.D.<br />
1. 0302257 B-23 CP Wall Flange 3-1/2” O.D.<br />
2. — B-6/B-6-A In-Wall Sleeve. If required, consult factory.<br />
3. 0302260 B-24 RB Locknut<br />
4. 0301082PO A-6 RB Coupling<br />
5. 0303002 C-2 Index Push Button<br />
6. — B-15-A N/A. Multiple lengths available. Consult factory.<br />
7. * B-8-A Plunger<br />
8. * C-7 Spring<br />
9. * B-41 Bushing<br />
10. — B-85 Permex ® Seal<br />
11. 5301139 A-31 Gasket<br />
*Available in kit only.<br />
107<br />
<strong>Repair</strong> <strong>Parts</strong> <strong>and</strong> <strong>Maintenance</strong> <strong>Guide</strong><br />
Push, Pull, Pedal Push <strong>and</strong><br />
Pedal H<strong>and</strong>le Push Button<br />
3” Push Button For Concealed Royal ® & Crown ®<br />
Item<br />
No. Code No. Part No. Description<br />
<strong>Repair</strong> Kits<br />
— C-43-A 3” Push Button Assembly. Items 1-13.<br />
Consult factory.<br />
3303398 C-70-A Push Button <strong>Repair</strong> Kit contains item nos. 9-13*<br />
3303399 C-77-A Push Button <strong>Repair</strong> Kit contains item nos. 9-13 –<br />
Triple Seal Cone Seal*<br />
3303347 G-1000-A Replacement Kit contains item nos. 1,6 & 7<br />
<strong>Repair</strong> <strong>Parts</strong><br />
1. * C-42 3” Push Button CP<br />
2. 0302248 B-23 CP Wall Flange 2-3/4” O.D.<br />
2. 0302257 B-23 CP Wall Flange 3-1/2” O.D.<br />
3. — B-6/B-6-A In-Wall Sleeve. If required, consult factory.<br />
4. 0302260 B-24 RB Locknut<br />
5. 0301083 A-6 RB Coupling<br />
6. * C-41 Shank Head<br />
7. * C-43 RB Screw<br />
8. — B-15-A N/A. Multiple lengths available. Consult factory.<br />
9. * B-8-A Plunger<br />
10. 0303019 C-7 Spring<br />
11. * B-41 Bushing<br />
12. 5302297 B-39 Seal<br />
13. 5301139 A-31 Gasket<br />
*Available in kit only.<br />
Pull Button For Exposed Royal ® & Crown ® (Seat Action)<br />
Item<br />
No. Code No. Part No. Description<br />
<strong>Repair</strong> Kit<br />
3303393 C-61-A <strong>Repair</strong> Kit contains item nos. 4-9<br />
<strong>Repair</strong> <strong>Parts</strong><br />
1. 0303174 C-25 Socket<br />
2. 5303213 C-29 RB Pin<br />
3. 0303155 C-23 CP Plunger Sleeve<br />
4. * C-28 Spring<br />
5. * C-24 Plunger Stem<br />
6. * C-61 Bushing<br />
7. 5302297 B-39 Seal<br />
8. 5301139 A-31 Gasket<br />
*Available in kit only.<br />
Showerheads,<br />
<strong>Parts</strong> <strong>and</strong><br />
Accessories
Showerheads,<br />
<strong>Parts</strong> <strong>and</strong><br />
Accessories<br />
Pull Button For Concealed Royal ® & Crown ® (Seat Action)<br />
Item<br />
No. Code No. Part No. Description<br />
<strong>Repair</strong> Kit<br />
3303394 C-62-A <strong>Repair</strong> Kit contains item nos. 9-14<br />
<strong>Repair</strong> <strong>Parts</strong><br />
1. 0302248 B-23 CP Wall Flange 2-3/4” O.D.<br />
2. — C-30 In-Wall Sleeve. If required, consult factory.<br />
3. 0302260 B-24 RB Locknut<br />
4. 0301083 A-6 RB Coupling<br />
5. — C-27 Link Available in Multiple Lengths. Consult factory.<br />
6. 5303213 C-29 RB Pin<br />
7. — C-31 Sleeve Available in Multiple Lengths. Consult factory.<br />
8. 0203013 C-48 RB Sleeve <strong>Guide</strong><br />
9. * C-28 Spring<br />
10. * C-32 Plunger Head<br />
11. * C-24 Plunger Stem<br />
12. * C-61 Special Bushing<br />
13. 5302297 B-39 Seal<br />
14. 5301139 A-31 Gasket<br />
*Available in kit only.<br />
Pedal Push Button For Exposed Royal ® & Crown ®<br />
Item<br />
No. Code No. Part No. Description<br />
<strong>Repair</strong> Kit<br />
3302304 B-40-A <strong>Repair</strong> Kit contains item nos. 4-10<br />
<strong>Repair</strong> <strong>Parts</strong><br />
1-10. 0303289 C-33-A Pedal RB Assembly<br />
1. 0303293 C-34 CP Pedal<br />
2. 0301082 A-6 Coupling<br />
3. 5303298 C-35 CP Screw<br />
4. * C-33 CP Socket<br />
5. * C-37 CP Push Button<br />
6. * B-8-A Plunger (Special)<br />
7. 0303019 C-7 Spring<br />
8. * B-49 Bushing<br />
9. 5302297 B-39 Seal<br />
10. 5301140 A-31-P Gasket<br />
*Available in kit only.<br />
108<br />
<strong>Repair</strong> <strong>Parts</strong> <strong>and</strong> <strong>Maintenance</strong> <strong>Guide</strong><br />
Push, Pull, Pedal Push <strong>and</strong><br />
Pedal H<strong>and</strong>le Push Button<br />
Pedal Push Button For Concealed Royal ® & Crown ®<br />
Item<br />
No. Code No. Part No. Description<br />
<strong>Repair</strong> Kit<br />
— C-40-A Complete Pedal Push Button Assembly item nos. 1-14<br />
LDIM required<br />
3303398 C-70-A Push Button <strong>Repair</strong> Kit contains item nos. 10-14<br />
3303399 C-77-A Push Button <strong>Repair</strong> Kit contains item nos. 10-14 –<br />
Triple Seal Cone Seal<br />
<strong>Repair</strong> <strong>Parts</strong><br />
1. 0303293 C-34 CP Pedal<br />
2. 5303298 C-35 CP Screw<br />
3-4. 0303303 C-40 CP Flange w/Set Screw<br />
5. — B-6 In-Wall Sleeve. If required, consult factory.<br />
6. 0302260 B-24 RB Locknut<br />
7. 0301082PO A-6 RB Coupling<br />
8. 0303002 C-2 Index Push Button<br />
9. — B-15-A N/A. Multiple lengths available. Consult factory.<br />
10. * B-8-A Plunger<br />
11. 0303019 C-7 Spring<br />
12. * B-41 Bushing<br />
13. 5302297 B-39 Seal<br />
14. 5301139 A-31 Gasket<br />
*Available in kit only.<br />
OBSOLETE<br />
Pedal H<strong>and</strong>le Push Button For Exposed Royal ® & Crown ®<br />
Item<br />
No. Code No. Part No. Description<br />
<strong>Repair</strong> Kit<br />
3302304 B-40-A <strong>Repair</strong> Kit contains item nos. 4-10<br />
<strong>Repair</strong> <strong>Parts</strong><br />
1-10. 0303290 C-33-A Pedal H<strong>and</strong>le PB Assembly – OBSOLETE<br />
1. 0303295 C-34 CP Pedal H<strong>and</strong>le – OBSOLETE<br />
2. 0301082 A-6 Coupling<br />
3. 5303298 C-35 CP Screw<br />
4. * C-33 CP Socket<br />
5. * C-37 CP Push Button<br />
6. * B-8-A Plunger (Special)<br />
7. 0303019 C-7 Spring<br />
8. * B-49 Bushing<br />
9. 5302297 B-39 Seal<br />
10. 5301140 A-31-P Gasket<br />
*Available in kit only.
OBSOLETE<br />
Pedal H<strong>and</strong>le Push Button For Concealed Royal ® & Crown ®<br />
Item<br />
No. Code No. Part No. Description<br />
<strong>Repair</strong> Kit<br />
— C-40-A Complete Pedal H<strong>and</strong>le Push Button Assembly.<br />
Items 1-14. Consult factory – OBSOLETE<br />
<strong>Repair</strong> <strong>Parts</strong><br />
1. 0303295 C-34 CP Pedal H<strong>and</strong>le – OBSOLETE<br />
2. 5303298 C-35 CP Screw<br />
3-4. 0303303 C-40 CP Flange w/Set Screw<br />
5. — B-6/B-6-A In-Wall Sleeve. If required, consult factory.<br />
6. 0302260 B-24 RB Locknut<br />
7. 0301082PO A-6 RB Coupling<br />
8. 0303002 C-2 Index Push Button<br />
9. — B-15 N/A. Multiple lengths available. Consult factory.<br />
10. * B-8-A Plunger<br />
11. 0303019 C-7 Spring<br />
12. * B-41 Bushing<br />
13. 5302297 B-39 Seal<br />
14. 5301139 A-31 Gasket<br />
*Available in kit only.<br />
“L” Dimension PUSH BUTTON ID CHART (All dimensions in inches)<br />
109<br />
<strong>Repair</strong> <strong>Parts</strong> <strong>and</strong> <strong>Maintenance</strong> <strong>Guide</strong><br />
Push, Pull, Pedal Push <strong>and</strong><br />
Pedal H<strong>and</strong>le Push Button<br />
H<strong>and</strong>le For Concealed Royal ® & Crown ®<br />
Item<br />
No. Code No. Part No. Description<br />
<strong>Repair</strong> Kit<br />
0302390 C-70-A CP ADA-Compliant Triple Seal H<strong>and</strong>le Assembly<br />
<strong>Repair</strong> <strong>Parts</strong><br />
1. 0302248 B-23 CP Wall Flange 2-3/4” O.D.<br />
1. 0302257 B-23 CP Wall Flange 3-1/2” O.D.<br />
2. — B-6/B-6-A In-Wall Sleeve. If required, consult factory.<br />
3. 0302260 B-24 RB Locknut<br />
4. 0301082PO A-6 RB Coupling<br />
5. 0302389 B-74-A CP ADA-Compliant H<strong>and</strong>le<br />
6. — B-15-A N/A. Multiple lengths available. Consult factory.<br />
7. * B-8-A Plunger<br />
8. * C-7 Spring<br />
9. * B-41 Bushing<br />
10. 5302297 B-39 Seal<br />
11. 5301139 A-31 Gasket<br />
*Available in kit only.<br />
Wall Thickness 1 2 3 4 5 6 7 8 9 10 11 12 13 14 15<br />
“L” Dimension 3 3/4 4 3/4 5 3/4 6 3/4 7 3/4 8 3/4 9 3/4 10 3/4 11 3/4 12 3/4 13 3/4 14 3/4 15 3/4 16 3/4 17 3/4<br />
“A” (B-15-A) 1 5/8 2 5/8 3 5/8 4 5/8 5 5/8 6 5/8 7 5/8 8 5/8 9 5/8 10 5/8 11 5/8 12 5/8 13 5/8 14 5/8 15 5/8<br />
Filler Rod<br />
“B” (B-6-A) 2 1/2 3 1/2 4 1/2 5 1/2 6 1/2 7 1/2 8 1/2 9 1/2 10 1/2 11 1/2 12 1/2 13 1/2 14 1/2 15 1/2 16 1/2<br />
Socket Assembly<br />
B-23 Flange<br />
C-2 Pushbutton<br />
Wall Thickness<br />
“B”<br />
“A”<br />
B-15-A<br />
Filler Rod<br />
B-24 Locknut<br />
C-7 Spring<br />
B-6-A Socket Assembly<br />
A-6 Coupling<br />
A-31 Gasket<br />
Notes: 1. “L” Dimension = Wall thickness (to nearest whole inch) + 2 3/4”<br />
2. 1 1/2” Diameter Hole Opening Required Through Wall<br />
B-85 Seal<br />
B-8-A Plunger<br />
B-101 Brass Bushing<br />
Showerheads,<br />
<strong>Parts</strong> <strong>and</strong><br />
Accessories
Showerheads,<br />
<strong>Parts</strong> <strong>and</strong><br />
Accessories<br />
REPAIR KIT AND BUSHING ID CHART<br />
B-101 RB Bushing<br />
Used in C-70-A repair kit & C-77-A<br />
repair kit. For concealed valve Actuators:<br />
B-12-A, C-9-A, C-43-A, B-17-A<br />
Note: Can NOT be used on<br />
Institutional/Prison Lav valves where<br />
an inside thread is required.<br />
B-41 RB Bushing<br />
Used on the C-69-A Assembly for<br />
Institutional/Prison Lav valves. Used in<br />
the C-63-A repair kit.<br />
Note: MAIN USE IS THE INSIDE THREAD.<br />
B-49 RB Bushing<br />
Used only on exposed valves using<br />
C-42-A (3” push button) or C-33-A<br />
(pedal) actuators. Used in C-64-A repair<br />
kit for 3” push button only. C-64-A can<br />
NOT be used to repair C-33-A pedal<br />
valves, use B-40-A.<br />
Note: CAN be used in a h<strong>and</strong>le repair kit<br />
for heavy duty use.<br />
B-40-A Exposed Pedal <strong>Valve</strong><br />
Actuator repair kit.<br />
Thick Wall<br />
Long<br />
Threaded<br />
Shank<br />
C-70-A <strong>Repair</strong> Kit<br />
Thick Wall<br />
The C-70-A repair kit is for concealed<br />
valves using the B-12-A, C-9-A, C-43-A,<br />
C-40-A or B-17-A actuator assembly.<br />
Note: Can NOT be used on<br />
Institutional/Prison Lav valves where<br />
an inside thread is required.<br />
No Inside<br />
Thread<br />
Thick Wall<br />
Long<br />
Threaded<br />
Shank<br />
Long<br />
Threaded<br />
Shank<br />
No Inside<br />
Thread<br />
Has Inside<br />
Threads<br />
110<br />
<strong>Repair</strong> <strong>Parts</strong> <strong>and</strong> <strong>Maintenance</strong> <strong>Guide</strong><br />
Push, Pull, Pedal Push <strong>and</strong><br />
Pedal H<strong>and</strong>le Push Button<br />
C-77-A <strong>Repair</strong> Kit (Royal)<br />
The C-77-A repair Kit is the same as the<br />
C-70-A repair kit only it uses the B-85<br />
Packing Seal (upgrade), not the B-39. It is a<br />
repair kit for concealed valves using<br />
B-12-A, C-9-A, C-43-A or B-17-A actuator<br />
assembly. It is also in the Concealed Royal<br />
Performance repair kit, A-1201-08-A series.<br />
Note: Can NOT be used on<br />
Institutional/Prison Lav valves where<br />
an inside thread is required.<br />
C-63-A <strong>Repair</strong> Kit<br />
Used on the C-69-A Assembly for<br />
Institutional/Prison Lav valves. Used in<br />
the C-63-A repair kit.<br />
Note: MAIN USE IS THE INSIDE THREAD.<br />
C-64-A <strong>Repair</strong> Kit<br />
Used only on exposed valves using<br />
C-42-A (3” push button). Can NOT be<br />
used to repair C-33-A pedal valves, use<br />
B-40-A.<br />
Note: CAN be used as a h<strong>and</strong>le repair kit<br />
for heavy duty use, exposed valves.<br />
Thick Wall<br />
Thick Wall<br />
Thin Wall Thin Wall<br />
Short Threaded<br />
Shank<br />
B-39 Packing<br />
Seal<br />
B101 RB<br />
Bushing<br />
No Inside<br />
Threads<br />
No Inside<br />
Thread<br />
B-39 Packing Seal<br />
No Inside<br />
Threads<br />
Long<br />
Threaded<br />
Shank<br />
B-39 Packing Seal<br />
Short<br />
Threaded<br />
Shank<br />
B-85<br />
Packing<br />
Seal<br />
Has Inside<br />
Threads<br />
Long Threaded<br />
Shank
Complete Flush Connection Assemblies<br />
Chrome Plate Finish for Exposed Installations<br />
Code No. Part No. Description<br />
For Models 110/111<br />
0393007 V-600-AA CP Vacuum Breaker 1-1/2” x 9”<br />
0306146 F-5-AT CP Spud Coupling 1-1/2” x 3”<br />
For Model 113<br />
0393008 V-600-AA CP Vacuum Breaker 1-1/2” x 13-1/2”<br />
0306146 F-5-AT CP Spud Coupling 1-1/2” x 3”<br />
For Model 114<br />
0393011 V-600-AA CP Vacuum Breaker 1-1/2” x 32-1/2”<br />
0306146 F-5-AT CP Spud Coupling 1-1/2” x 3”<br />
For Model 115<br />
0393009 V-600-AA CP Vacuum Breaker 1-1/2” x 21-1/2”<br />
0306146 F-5-AT CP Spud Coupling 1-1/2” x 3”<br />
For Model 116<br />
0393010 V-600-AA CP Vacuum Breaker 1-1/2” x 24-1/2”<br />
0306146 F-5-AT CP Spud Coupling 1-1/2” x 3”<br />
For Model 117<br />
0393009 V-600-AA CP Vacuum Breaker 1-1/2” x 21-1/2”<br />
0306146 F-5-AT CP Spud Coupling 1-1/2” x 3”<br />
For Model 180<br />
0393006 V-600-AA CP Vacuum Breaker 1-1/4” x 9”<br />
0306140 F-5-AU CP Spud Coupling 1-1/4” x 3”<br />
For Model 186<br />
0393004 V-600-AA CP Vacuum Breaker 3/4” x 9”<br />
0306125 F-5-AW CP Spud Coupling 3/4” x 2-1/2”<br />
For Model 300/310<br />
0306060 F-2-AU CP Coupling 1-1/4”<br />
0306146 F-5-AT CP Spud Coupling 1-1/2” x 3”<br />
0306196 F-7 CP Flange w//Prongs 1” x 2-3/4”<br />
0306209 F-7 CP Flange Flat 1-1/4” x 3-1/8”<br />
0306555 F-21-AA Elbow 1-1/2” x 1-1/4” x 4”<br />
0393007 V-600-AA CP Vacuum Breaker 1-1/2” x 9”<br />
0396009 F-43-A CP Outlet & Street El 1”<br />
0396093 F-101 CP Outlet<br />
For Model 320<br />
0301149 A-35 Reducer Bushing 1” NPT x 3/4 NPT<br />
0306052 F-2-AW CP Coupling Assembly 3/4”<br />
0306125 F-5-AW CP Spud Coupling 3/4” x 2-1/2”<br />
0306188 F-7 CP Flange Flat 3/4” x 2-23/32”<br />
0306343 F-15-A CP Elbow Tail Assembly 3/4” x 4”<br />
0393004 V-600-AA Vacuum Breaker 3/4” x 9”<br />
0396009 F-43-A CP Outlet & Street El 1”<br />
0396093 F-101 CP Outlet 1-1/2” x 4-1/2”<br />
111<br />
<strong>Repair</strong> <strong>Parts</strong> <strong>and</strong> <strong>Maintenance</strong> <strong>Guide</strong><br />
Flush Connections <strong>and</strong> Flanges<br />
Complete Flush Connection Assemblies<br />
Chrome Plate Finish for Exposed Installations (continued)<br />
Code No. Part No. Description<br />
For Model 120<br />
0306093 F-2-AT CP Coupling 1-1/2”<br />
0393003 V-600-A CP Vacuum Breaker<br />
0396293 F-109 CP Tube 1-1/2” x 8” x 5” Bend<br />
0306146 F-5-AT CP Spud Coupling 1-1/2” x 3”<br />
For Model 121<br />
0306093 F-2-AT CP Coupling 1-1/2”<br />
0393003 V-600-A CP Vacuum Breaker<br />
0396316 F-109 CP Tube 1-1/2” x 13” x 5” Bend<br />
0306146 F-5-AT CP Spud Coupling 1-1/2” x 3”<br />
For Model 122<br />
0306093 F-2-AT CP Coupling 1-1/2”<br />
0393003 V-600-A CP Vacuum Breaker<br />
0396322 F-109 CP Tube 1-1/2” x 21” x 5” Bend<br />
0306146 F-5-AT CP Spud Coupling 1-1/2” x 3”<br />
For Model 136<br />
0393038 V-600-AA CP Vacuum Breaker 1-1/2” x 36”<br />
0306146 F-5-AT CP Spud Coupling 1-1/2” x 3”<br />
For Model 137<br />
0306093 F-2-AT CP Coupling 1-1/2”<br />
0393003 V-600-A CP Vacuum Breaker<br />
0396339 F-109 CP Tube 1-1/2” x 36” x 5””<br />
0306146 F-5-AT CP Spud Coupling 1-1/2” x 3”<br />
Drip Pocket Flush Connection Assemblies <strong>and</strong> <strong>Parts</strong><br />
DP-4-A Includes:<br />
0330015 DP-4-A Drip Pocket<br />
0330026 DP-1002-A Float & Seat <strong>Repair</strong> Kit<br />
For DP-4-A<br />
0330002 DP-2-A Drip Pocket Wall Support<br />
(Available upon request)<br />
DP-6-A Includes:<br />
0330021 DP-6-A 1-1/2” x 18-1/2” CP Outlet<br />
DP-7-A Includes:<br />
0330002 DP-2-A D.P. Wall Support<br />
0330015 DP-4-A Drip Pocket Assembly<br />
0330021 DP-6-A Drip Pocket Flush Connection<br />
0330004 F-33 Extension Nipple<br />
Use on the following flush valve: 118<br />
Special F-33 Includes:<br />
0330004 F-33 Extension for DP-4-A<br />
DP-4-A<br />
DP-7-A<br />
DP-6-A<br />
Showerheads,<br />
<strong>Parts</strong> <strong>and</strong><br />
Accessories
Showerheads,<br />
<strong>Parts</strong> <strong>and</strong><br />
Accessories<br />
Complete Flush Connection Assemblies<br />
Rough Brass Finish for Concealed Installations<br />
Code No. Part No. Description<br />
For Model 150<br />
0323011 V-500-A RB Vacuum Breaker<br />
0306087 F-2-A RB 1-1/2” Coupling w/S30<br />
0306569 F-22 RB Outlet 1” NPT Female<br />
For Model 152<br />
0323177 V-500-AA RB Vacuum Breaker 1-1/2”<br />
x 22” w/ 3" Score<br />
0206146 F-21 RB 1-1/2” El Double Male Slip<br />
0306091 F-2-A RB 1-1/2” Coupling w/S21<br />
0306619 F-2-AA RB Two Sets F-2-A 1-1/2” Coupling<br />
— F-100 RB Outlet - Specify Size<br />
For Model 153/155<br />
0206146 F-21 RB 1-1/2” El Double Male Slip<br />
0306146 F-5-AT CP Spud Coupling 1-1/2” x 3”<br />
0306237 F-7 CP Flange w/Prongs 1-1/2” x 2-3/4”<br />
0306400 F-15-A CP Elbow 1-1/2” x 4”<br />
0306619 F-2-AA RB Two Sets F-2-A 1-1/2” SJ Coupling<br />
0323176 V-500-AA 1-1/2” x 17-1/2” w/ 3" Score<br />
— F-102 CP Outlet - Specify Size<br />
For Model 154<br />
0206146 F-21 RB 1-1/2” El Double Male Slip<br />
0306091 F-2-A RB 1-1/2” Coupling w/S21<br />
0306146 F-5-AT CP Spud Coupling 1-1/2” x 3”<br />
0306237 F-7 CP Flange 1-1/2” x 2-3/4” w/Prongs<br />
0306619 F-2-AA RB Two Sets F-2-A 1-1/2” SJ Coupling<br />
0323177 V-500-AA RB Vacuum Breaker 1-1/2” x<br />
22 w/ 3" Score<br />
— F-102 CP Outlet - Specify Size<br />
For Model 140<br />
0206146 F-21 RB 1-1/2” El Double Male Slip<br />
0306146 F-5-AT CP Spud Coupling 1-1/2” x 3”<br />
0306237 F-7 CP Flange w/Prongs 1-1/2” x 2-3/4”<br />
0306619 F-2-AA RB Two Sets F-2-A 1-1/2” SJ Coupling<br />
0306688 F-25-A RB Elbow/Tail 1-1/2” x 10” C/E<br />
w/ 3" Score<br />
0323188 V-500-AA RB Vacuum Breaker<br />
1-1/2” x 11-1/2” w/ 3" Score<br />
— F-102 CP Outlet - Specify Size<br />
For Model 142<br />
0206146 F-21 RB 1-1/2” El Double Male Slip<br />
0306146 F-5-AT CP Spud Coupling 1-1/2” x 3”<br />
0306237 F-7 CP Flange w/Prongs 1-1/2” x 2-3/4”<br />
0306400 F-15-A CP Elbow 1-1/2” x 4”<br />
0306619 F-2-AA RB Two Sets F-2-A 1-1/2” SJ Coupling<br />
0306688 F-25-A RB Elbow/Tail 1-1/2” x 10 C/E<br />
w/ 3" Score<br />
0323207 V-500-AA RB Vacuum Breaker 1-1/2” x<br />
6” w/ 3" Score<br />
— F-102 CP Outlet - Specify Size<br />
112<br />
<strong>Repair</strong> <strong>Parts</strong> <strong>and</strong> <strong>Maintenance</strong> <strong>Guide</strong><br />
Flush Connections <strong>and</strong> Flanges<br />
Complete Flush Connection Assemblies<br />
Rough Brass Finish for Concealed Installations (continued)<br />
Code No. Part No. Description<br />
For Model 143<br />
0206146 F-21 RB 1-1/2” El Double Male Slip<br />
0306091 F-2-A RB 1-1/2” Coupling w/S21<br />
0306619 F-2-AA RB Two Sets F-2-A 1-1/2” SJ Coupling<br />
0306688 F-25-A RB Elbow/Tail 1-1/2” x 10”<br />
C/E w/ 3" Score<br />
0323188 V-500-AA RB Vacuum Breaker 1-1/2” x<br />
11-1/2 w/ 3" Score<br />
— F-100 RB Outlet - Specify Size<br />
For Model 144<br />
0206146 F-21 RB 1-1/2” El Double Male Slip<br />
0306091 F-2-A RB 1-1/2” Coupling w/S21<br />
0306619 F-2-AA RB Two Sets F-2-A 1-1/2” SJ Coupling<br />
0306688 F-25-A RB Elbow/Tail 1-1/2” x 10”<br />
C/E w/ 3" Score<br />
0323208 V-500-AA RB Vacuum Breaker 1-1/2” x<br />
7-1/2” w/ 3" Score<br />
— F-100 RB Outlet - Specify Size<br />
For Model 192<br />
0206146 F-21 RB 1-1/2” El Double Male Slip<br />
0306140 F-5-AU CP Spud Coupling<br />
0306237 F-7 CP Flange w/Prongs 1-1/2” x 2-3/4”<br />
0306472 F-15-A CP Elbow/Tail 1-1/2” x 1-1/4” x 4”<br />
0306619 F-2-AA RB Two Sets F-2-A 1-1/2” SJ Coupling<br />
0323188 V-500-AA RB Vacuum Breaker<br />
1-1/2” x 11-1/2” w/ 3" Score<br />
— F-102 CP Outlet -Specify Size<br />
For Model 195<br />
0306054 F-2-AW RB Coupling 3/4”<br />
— F-15-A Specify Size<br />
0323003 V-500-AA RB Vacuum Breaker 3/4” x 10-1/2”<br />
For Model 197<br />
0306125 F-5-AW CP Spud Coupling 3/4” x 2-1/2”<br />
0306186 F-7 CP Flange 3/4” x 2-3/4”<br />
0306375 F-15-A CP Elbow/Tail 3/4” x 5”<br />
0306376 F-15-A CP Elbow/Tail 3/4” x 14”<br />
0323003 V-500-AA RB Vacuum Breaker 3/4” x 10-1/2”<br />
For Model 190<br />
0206146 F-21 RB 1-1/2” El Double Male Slip<br />
0306059 F-2-AU RB Coupling 1-1/4”<br />
0306088 F-2-AT RB Coupling 1-1/2”<br />
0306091 F-2-A RB 1-1/2” Coupling w/S21<br />
0323188 V-500-AA RB Vacuum Breaker<br />
1-1/2” x 11-1/2” w/3" Score<br />
— F-110 Specify Size
Complete Flush Connection Assemblies<br />
Rough Brass Finish for Concealed Installations (continued)<br />
Code No. Part No. Description<br />
For Model 312<br />
0306060 F-2-AU CP Coupling 1-1/4”<br />
0306087 F-2-A RB 1-1/2” Coupling w/S30<br />
0306146 F-5-AT CP Spud Coupling 1-1/2” x 3”<br />
0306209 F-7 CP Flange Flat 1-1/4” x 3-1/8”<br />
0306555 F-21-AA CP Elbow 1-1/2” x 1-1/4” x 4”<br />
0306569 F-22 RB Outlet 1” NPT Female x 1-1/2”<br />
0393007 V-600-AA CP Vacuum Breaker 1-1/2” x 9”<br />
For Model 313<br />
0206146 F-21 RB 1-1/2” El Double Male Slip<br />
0306087 F-2-A RB 1-1/2” Coupling w/S30<br />
0306091 F-2-A RB 1-1/2” Coupling w/S21<br />
0306569 F-22 RB Outlet 1” NPT Female x 1-1/2”<br />
0306619 F-2-AA RB Two Sets F-2-A 1-1/2”<br />
SJ Coupling<br />
0322026 V-79 RB 1” Adapter<br />
0323188 V-500-AA RB Vacuum Breaker<br />
1-1/2” x 11-1/2” w/3” Score<br />
— F-100 RB Outlet<br />
For Model 318<br />
0206146 F-21 RB 1-1/2” El Double Male Slip<br />
0306087 F-2-A RB 1-1/2” Coupling w/S30<br />
0306146 F-5-AT CP Spud Coupling 1-1/2” x 3”<br />
0306237 F-7 CP Flange w/Prongs 1-1/2” x 2-3/4”<br />
0306569 F-22 RB Outlet 1” NPT Female x 1-1/2”<br />
0306619 F-2-AA RB Two Sets F-2-A 1-1/2” SJ Coupling<br />
0322026 V-79 RB 1” Adapter<br />
F-102 CP Outlet - Specify Size<br />
0323188 V-500-AA RB Vacuum Breaker 1-1/2” x 11-1/2”<br />
w/3” Score<br />
For Model 323<br />
0206160 F-22 RB 3/4” Outlet Female<br />
0306054 F-2-AW RB 3/4”<br />
0306087 F-2-A RB 1-1/2” Coupling w/S30<br />
0306366 F-15-A RB Elbow Tail Assembly 3/4” x 11”<br />
0322021 V-79 RB 3/4” Adapter Inlet<br />
0323003 V-500-AA RB Vacuum Breaker 3/4” x 10-1/2”<br />
For Model 343<br />
0206146 F-21 RB 1-1/2” El Double Male Slip<br />
0306059 F-2-AU RB Coupling 1-1/4”<br />
0306087 F-2-A RB 1-1/2” Coupling w/S30<br />
0306091 F-2-A RB 1-1/2” Coupling w/S21<br />
0306569 F-22 RB Outlet 1” NPT Female x 1-1/2”<br />
0322026 V-79 RB 1” Adapter<br />
0323188 V-500-AA RB Vacuum Breaker 1-1/2” x 11-1/2”<br />
w/ 3" Score<br />
— F-110 RB 1-1/2” Flange x 1-1/4” Tube<br />
w/Score<br />
For Model 139<br />
0206146 F-21 RB 1-1/2” El Double Male Slip<br />
0306619 F-2-AA RB Two Sets F-2-A 1-1/2” Coupling<br />
0323312 V-500-AA RB Vacuum Breaker 1-1/2” x 33-1/2”<br />
w/3" Score<br />
0396210 F-102 RB Tube 1-1/2” x 10” w/Score<br />
113<br />
<strong>Repair</strong> <strong>Parts</strong> <strong>and</strong> <strong>Maintenance</strong> <strong>Guide</strong><br />
Flush Connections <strong>and</strong> Flanges<br />
Showerheads,<br />
<strong>Parts</strong> <strong>and</strong><br />
Accessories
Showerheads,<br />
<strong>Parts</strong> <strong>and</strong><br />
Accessories<br />
Couplings <strong>and</strong> Gaskets<br />
Item<br />
No. Code No. Part No. Description<br />
F-2-A<br />
1-3 0306052 F-2-A 3/4” CP Coupling Assembly<br />
0306054 F-2-A 3/4” RB Coupling Assembly<br />
0306077 F-2-A 1” CP Coupling Assembly<br />
0306060 F-2-A 1-1/4” CP Coupling Assembly<br />
0306059 F-2-A 1-1/4” RB Coupling Assembly<br />
0306093 F-2-A 1-1/2” CP Coupling Assembly<br />
0306088 F-2-A 1-1/2” RB Coupling Assembly<br />
3-4 0306092 F-2-A 1-1/2” CP Coupling Assembly<br />
0306087 F-2-A 1-1/2” RB Coupling Assembly<br />
1 5306113 F-5 3/4” SJ Gasket<br />
5306115 F-5 1” SJ Gasket<br />
5322176 VBF-5 1-1/4” SJ Gasket<br />
5322001 VBF-5 1-1/2” SJ Gasket<br />
2 5306055 F-3 3/4” Friction Ring<br />
5306056 F-3 1” Friction Ring<br />
5306057 F-3 1-1/4” Friction Ring<br />
5306058 F-3 1-1/2” Friction Ring<br />
3 * F-2 3/4” CP Coupling<br />
* F-2 3/4” RB Coupling<br />
* F-2 1” CP Coupling<br />
* F-2 1-1/4” CP Coupling<br />
* F-2 1-1/4” RB Coupling<br />
0306045PK F-2 1-1/2” CP Coupling<br />
* F-2 1-1/2” RB Coupling<br />
4 5319086 S-30 1-1/2” Gasket<br />
5 0319079 S-21 1-1/2” Rigid Seat<br />
3-5 0306091 F-2-A 1-1/2” with S-21 Seat<br />
*N/A order appropriate F-2-A<br />
NF-2-A<br />
1 0396264 F-105 1-1/2” x 1-1/4” SJ Gasket<br />
1-3 0314011 NF-2-A 1-1/2” x 1-1/4” SJ Reducing<br />
Coupling Assembly<br />
Spud Coupling Assemblies<br />
F-5-A<br />
1-4 0306125 F-5-A 3/4” CP Spud Coupling Assembly<br />
0306132 F-5-A 1” CP Spud Coupling Assembly<br />
0306140 F-5-A 1-1/4” CP Spud Coupling<br />
Assembly<br />
0306146 F-5-A 1-1/2” CP Spud Coupling<br />
Assembly<br />
1-3 0396516 F-20-A 3/4” Spud Coupling<br />
0306538 F-20-A 1” Spud Coupling<br />
0306524 F-20-A 1-1/4” Spud Coupling<br />
0306526 F-20-A 1-1/2” Spud Coupling<br />
2 5306055 F-3 3/4” Friction Ring<br />
5306056 F-3 1” Friction Ring<br />
5306057 F-3 1-1/4” Friction Ring<br />
5306058 F-3 1-1/2” Friction Ring<br />
3 5306113 F-5 3/4” SJ Gasket<br />
5306115 F-5 1” SJ Gasket<br />
5322176 VBF-5 1-1/4” Gasket<br />
5322001 VBF-5 1-1/2” Gasket<br />
4 0306189 F-7 3/4” Spud Flange<br />
0306197 F-7 1” Spud Flange<br />
0306214 F-7 1-1/4” Spud Flange<br />
0306238 F-7 1-1/2” Spud Flange<br />
Note: 3-1/2” spud flange available in old style only.<br />
1<br />
2<br />
3<br />
4<br />
5<br />
1<br />
2<br />
3<br />
1<br />
2<br />
3<br />
4<br />
114<br />
<strong>Repair</strong> <strong>Parts</strong> <strong>and</strong> <strong>Maintenance</strong> <strong>Guide</strong><br />
Flush Connections <strong>and</strong> Flanges<br />
Wall Flange For Tubing<br />
Code No. Part No. Description<br />
F-7 (2-3/4” O.D. X 5/8” Deep)<br />
0306204 F-7 1-1/4” Tube Flange<br />
0306237 F-7 1-1/2” Tube Flange<br />
Supply Flange For Iron Pipe<br />
F-7 (2-3/4” O.D.)<br />
0306191 F-7 3/4” IPS CP Supply Flange<br />
0306196 F-7 1” IPS CP Supply Flange<br />
0306205 F-7 1-1/4” IPS CP Supply Flange<br />
F-7 (2-3/4” O.D. Flat)<br />
0306167 F-7 1/2” IPS CP Supply Flange<br />
0306188 F-7 3/4” IPS CP Supply Flange<br />
0306201 F-7 1” IPS CP Supply Flange<br />
0306209 F-7 1-1/4” IPS CP Supply Flange<br />
F-45-A<br />
0396019 F-45-A 3/4” Heavy Supply Flange<br />
with Set Screw for IPS<br />
0396020 F-45-A 1” Heavy Supply Flange<br />
with Set Screw for IPS<br />
For additional flanges, see 4.9.1<br />
Outlets<br />
Item Part<br />
No. Code No. No. Description<br />
F-1 (Flanged)<br />
1 5319086 S-30 Gasket<br />
2 0306007 F-1 1-1/2” x 1-1/4” x 6” CP Flanged Outlet<br />
0306009 F-1 1-1/2” x 1-1/4” x 8” CP Flanged Outlet<br />
0306012 F-1 1-1/2” x 1-1/4” x 10” CP Flanged Outlet<br />
0306013 F-1 1-1/2” x 1-1/4” x 12” CP Flanged Outlet<br />
0306031 F-1 1-1/2” x 6” CP Flanged Outlet<br />
0306034 F-1 1-1/2” x 8” CP Flanged Outlet<br />
0306039 F-1 1-1/2” x 10” CP Flanged Outlet<br />
0306044 F-1 1-1/2” x 12” CP Flanged Outlet<br />
F-22<br />
1 5319086 S-30 Gasket<br />
2 0206159 F-22 1/2” IPS RB Female Outlet<br />
0206160 F-22 3/4” IPS RB Female Outlet<br />
0306569 F-22 1” IPS RB Female Outlet<br />
F-22-A<br />
1-2 0306574 F-22-A1-1/4” IPS RB Union Outlet<br />
Assembly<br />
0306575 F-22-A1-1/4” IPS CP Union Outlet<br />
Assembly<br />
1 5319086 S-30 Gasket<br />
F-29-A<br />
1 5319086 S-30 Gasket<br />
2 0306767 F-29-A3/4” x 6” CP Outlet<br />
0306769 F-29-A3/4” x 7-1/2” RB Outlet<br />
0306773 F-29-A3/4” x 8-1/2” CP Outlet<br />
0306791 F-29-A3/4” x 10-1/2” RB Outlet
Outlets (continued)<br />
Code No. Part No. Description<br />
F-101<br />
0396060 F-101 3/4” x 4-1/2” CP Outlet<br />
0396100 F-101 1-1/2” x 6” CP Outlet<br />
0396113 F-101 1-1/2” x 9” CP Outlet<br />
0396119 F-101 1-1/2” x 10-1/2” CP Outlet<br />
0396127 F-101 1-1/2” x 13-1/2” CP Outlet<br />
0396134 F-101 1-1/2” x 18-1/2” CP Outlet<br />
0396142 F-101 1-1/2” x 21-1/2” CP Outlet<br />
0396147 F-101 1-1/2” x 24-1/2” CP Outlet<br />
F-102 (Scored - Both Ends)<br />
0396175 F-102 1-1/4” x 5” RB Outlet,<br />
3-3/4” “L” Dimension<br />
0396176 F-102 1-1/4” x 6” RB Outlet,<br />
4-3/4” “L” Dimension<br />
0396177 F-102 1-1/4” x 7” RB Outlet,<br />
5-3/4” “L” Dimension<br />
0396178 F-102 1-1/4” x 8” RB Outlet,<br />
6-3/4” “L” Dimension<br />
0396179 F-102 1-1/4” x 9” RB Outlet,<br />
7-3/4” “L” Dimension<br />
0396180 F-102 1-1/4” x 10” RB Outlet,<br />
8-3/4” “L” Dimension<br />
0396181 F-102 1-1/4” x 11” RB Outlet,<br />
9-3/4” “L” Dimension<br />
0396182 F-102 1-1/4” x 12” RB Outlet,<br />
10-3/4” “L” Dimension<br />
0396183 F-102 1-1/4” x 13” RB Outlet,<br />
11-3/4” “L” Dimension<br />
0396184 F-102 1-1/4” x 14” RB Outlet,<br />
12-3/4” “L” Dimension<br />
0396185 F-102 1-1/4” x 15” RB Outlet,<br />
13-3/4” “L” Dimension<br />
0396186 F-102 1-1/4” x 16” RB Outlet,<br />
14-3/4” “L” Dimension<br />
0396678 F-102 1-1/2” x 5” RB Outlet,<br />
3-3/4” “L” Dimension<br />
0396674 F-102 1-1/2” x 6” RB Outlet,<br />
4-3/4” “L” Dimension<br />
0396194 F-102 1-1/2” x 7” RB Outlet,<br />
5-3/4” “L” Dimension<br />
0396201 F-102 1-1/2” x 8” RB Outlet,<br />
6-3/4” “L” Dimension<br />
0396206 F-102 1-1/2” x 9” RB Outlet,<br />
7-3/4” “L” Dimension<br />
0396210 F-102 1-1/2” x 10” RB Outlet,<br />
8-3/4” “L” Dimension<br />
0396214 F-102 1-1/2” x 11” RB Outlet,<br />
9-3/4” “L” Dimension<br />
0396217 F-102 1-1/2” x 12” RB Outlet,<br />
10-3/4” “L” Dimension<br />
0396220 F-102 1-1/2” x 13” RB Outlet,<br />
11-3/4” “L” Dimension<br />
0396221 F-102 1-1/2” x 14” RB Outlet,<br />
12-3/4” “L” Dimension<br />
0396224 F-102 1-1/2” x 15” RB Outlet,<br />
13-3/4” “L” Dimension<br />
0396715 F-102 1-1/2” x 16” RB Outlet,<br />
14-3/4” “L” Dimension<br />
115<br />
<strong>Repair</strong> <strong>Parts</strong> <strong>and</strong> <strong>Maintenance</strong> <strong>Guide</strong><br />
Flush Connections <strong>and</strong> Flanges<br />
Outlets (continued)<br />
Code No. Part No. Description<br />
Special F-102 (Scored - One End)<br />
0396163 F-102 1-1/4” x 8” CP Outlet,<br />
3-3/4” “L” Dimension<br />
0396164 F-102 1-1/4” x 9” CP Outlet,<br />
4-3/4” “L” Dimension<br />
0396171 F-102 1-1/4” x 15” CP Outlet,<br />
10-3/4” “L” Dimension<br />
0396669 F-102 1-1/2” x 8” CP Outlet,<br />
3-3/4” “L” Dimension<br />
0396670 F-102 1-1/2” x 9” CP Outlet,<br />
4-3/4” “L” Dimension<br />
0396671 F-102 1-1/2” x 10” CP Outlet,<br />
5-3/4” “L” Dimension<br />
0396679 F-102 1-1/2” x 11” CP Outlet,<br />
6-3/4” “L” Dimension<br />
0396672 F-102 1-1/2” x 12” CP Outlet,<br />
7-3/4” “L” Dimension<br />
0396673 F-102 1-1/2” x 13” CP Outlet,<br />
8-3/4” “L” Dimension<br />
0396713 F-102 1-1/2” x 14” CP Outlet,<br />
9-3/4” “L” Dimension<br />
0396714 F-102 1-1/2” x 15” CP Outlet,<br />
10-3/4” “L” Dimension<br />
0396716 F-102 1-1/2” x 16” CP Outlet,<br />
11-3/4” “L” Dimension<br />
F-201<br />
0396455 F-201 1-1/2” x 1-1/4” x 9” CP Outlet<br />
0396456PK F-201 1-1/2” x 1-1/4” x 11” CP Outlet<br />
0396461 F-201 1-1/2” x 1-1/4” x 11” CP Outlet<br />
0396464 F-201 1-1/2” x 1-1/4” x 21-1/2”<br />
CP Outlet<br />
0396468PK F-201 1-1/2” x 1-1/4” x 10” CP Outlet<br />
Offset Outlet Tubes<br />
0396202 F-66-A 3/4” x 1” Offset x 13-1/4”<br />
0396203 F-67-A 3/4” x 1-1/2” Offset x 13-1/4”<br />
0396204 F-68-A 3/4” x 2” Offset x 13-1/4”<br />
0396530 F-188 1-1/2” x 1” Offset x 13-1/4”<br />
0396532 F-189 1-1/2” x 1-1/2” Offset x 13-1/4”<br />
0396534 F-190 1-1/2” x 2” Offset x 13-1/4”<br />
Designed for use with V-600-A or V-500-A “short” Vacuum Breaker.<br />
Each tube is 13-1/4” in length.<br />
For 3/4” tubes, <strong>and</strong> “short” Vacuum Breaker, use F-2-A Coupling<br />
S-30 Gasket (Code No. 0306092).<br />
For 1-1/2” tubes, <strong>and</strong> “short” Vacuum Breaker, use F-2-A Coupling<br />
with Slip Gasket (Code No. 0306093)<br />
F-31-AA (For High Clearance Offset <strong>and</strong> Rigid Application)<br />
0306919 F-31-AA 1-1/2” x 8-1/4” CP Flanged <strong>and</strong><br />
Coupling Outlet ASM W/1” Offset<br />
0306921 F-31-AA 1-1/2” x 8-1/4” CP Flanged <strong>and</strong><br />
Coupling Outlet ASM W/2” Offset<br />
0306922 F-31-AA 1-1/2” x 9-3/4” CP Flanged <strong>and</strong><br />
Coupling Outlet ASM W/2” Offset<br />
F-182 Flanged Outlet Tube w/Offset<br />
0396525 F-182 1-1/2” x 8” x 1-1/2” Offset<br />
S-30<br />
3”<br />
5-1/2”<br />
Showerheads,<br />
<strong>Parts</strong> <strong>and</strong><br />
Accessories
Showerheads,<br />
<strong>Parts</strong> <strong>and</strong><br />
Accessories<br />
Elbows<br />
Code No. Part No. Description<br />
F-15-A<br />
0306341 F-15-A 3/4” CP SJ Wll with Tail<br />
4-5/8” C to E<br />
0306472 F-15-A 1-1/4” CP SJ Wll with Tail<br />
4-5/8” C to E<br />
0306340 F-15-A 3/4” RB SJ Ell & Tail<br />
F/ 3-3/4” L Dimension<br />
0306344 F-15-A 3/4” RB SJ Ell & Tail<br />
F/ 5-3/4” L Dimension<br />
0306350 F-15-A 3/4” RB SJ Ell & Tail<br />
F/ 6-3/4” L Dimension<br />
0306355 F-15-A 3/4” RB SJ Ell & Tail<br />
F/ 7-3/4” L Dimension<br />
0306358 F-15-A 3/4” RB SJ Ell & Tail<br />
F/ 8-3/4” L Dimension<br />
0306362 F-15-A 3/4” RB SJ Ell & Tail<br />
F/ 9-3/4” L Dimension<br />
0306366 F-15-A 3/4” RB SJ Ell & Tail<br />
F/ 10-3/4” L Dimension<br />
F-21-AA<br />
0306555 F-21-AA 1-1/2” x 1-1/4” CP Ell<br />
with Tail 5 C to E<br />
0306558 F-21-AA 1-1/2” x 1-1/4” CP Ell<br />
with Tail 8 C to E<br />
F-25-A<br />
0306671 F-25-A 1-1/2” RB SJ Ell with Tail 4” C to E<br />
0306678 F-25-A 1-1/2” RB SJ Ell<br />
with Tail 5-1/2” C to E<br />
0306682 F-25-A 1-1/2” RB SJ Ell<br />
with Tail 7-1/2” C to E<br />
0306683 F-25-A 1-1/2” RB SJ Ell<br />
with Tail 8-1/2” C to E<br />
0306687 F-25-A 1-1/2” RB SJ Ell with Tail 9” C to E<br />
0306688 F-25-A 1-1/2” RB SJ Ell<br />
with Tail 9-1/2” C to E<br />
0306710 F-25-A 1-1/2” RB SJ Ell with Tail 14” C to E<br />
0306737 F-25-A 1-1/2” RB SJ Ell<br />
with Tail 18-1/2” C to E<br />
0306719 F-25-A 1-1/2” RB SJ Ell with Tail 20” C to E<br />
F-43-A<br />
0396009 F-43-A 1” CP Outlet A7 Street Ell (Royal ® )<br />
0396010 F-43-A 1” CP Outlet A7 Street Ell (Crown ® )<br />
116<br />
<strong>Repair</strong> <strong>Parts</strong> <strong>and</strong> <strong>Maintenance</strong> <strong>Guide</strong><br />
Flush Connections <strong>and</strong> Flanges<br />
Tube Ends<br />
Code No. Part No. Description<br />
F-109<br />
0396265 F-109 1-1/4” x 5” x 8-1/2” CP<br />
Tube Bend<br />
0396283 F-109 1-1/4” x 5” x 11-1/2” CP<br />
Tube Bend<br />
0396288 F-109 1-1/4” x 5” x 13-1/2” CP<br />
Tube Bend<br />
0396289 F-109 1-1/4” x 5” x 16” CP<br />
Tube Bend<br />
0396290 F-109 1-1/4” x 5” x 21” CP<br />
Tube Bend<br />
0396291 F-109 1-1/4” x 5” x 24” CP<br />
Tube Bend<br />
0396293 F-109 1-1/2” x 5” x 8-1/2” CP<br />
Tube Bend<br />
0396310 F-109 1-1/2” x 5” x 11-1/2” CP<br />
Tube Bend<br />
0396316 F-109 1-1/2” x 5” x 13-1/2” CP<br />
Tube Bend<br />
0396320 F-109 1-1/2” x 5” x 16” CP Tube Bend<br />
0396322 F-109 1-1/2” x 5” x 21” CP Tube Bend<br />
0396326 F-109 1-1/2” x 5” x 24” CP Tube Bend<br />
Miscellaneous<br />
V-75<br />
0322013 V-75 Inlet Adaptor for old style Royal ®<br />
0322015 V-75 Inlet Adaptor for old style Crown ®<br />
Special V-79<br />
0322021 Spl V-79 3/4” RB Inlet Adaptor<br />
0322026 Spl V-79 1” RB Inlet Adaptor
BUMPERS<br />
Item<br />
No. Code No. Part No. Description<br />
1<br />
1-5 0310001 J-1-A Flat Wall Bumper CP - Complete<br />
1-2 5310034 J-2/J-7 Ferrule with White Plastic Bumper<br />
1<br />
1-5 0310004 J-5-A Wall Bumper Extension CP - Complete<br />
1-2 5310034 J-2/J-7 Ferrule with White Plastic Bumper<br />
1<br />
0310018 J-9-A Cover Bumper for Old Style Royal – OBSOLETE<br />
1-2 5310034 J-2/J-7 Ferrule with White Plastic Bumper<br />
1<br />
0310038 J-12-A 1-1/2" Pipe Strap Bumper CP – OBSOLETE<br />
1-2 5310034 J-2/J-7 Ferrule with White Plastic Bumper<br />
1<br />
1-4 0310045 J-13-A Wheel H<strong>and</strong>le Angle Stop Bumper CP - Complete<br />
1-2 5310034 J-2/J-7 Ferrule with White Plastic Bumper<br />
1<br />
1-3 0310054 J-18-A Old Style Screw Driver Stop Bumper CP - Complete<br />
1-2 5310034 J-2/J-7 Ferrule with White Plastic Bumper<br />
3 0310052 J-18 CP Lock Shield<br />
1<br />
2<br />
2<br />
2<br />
2<br />
2 3 4<br />
2 3<br />
2<br />
3 4 5<br />
3 4 5<br />
1-2 5310034 J-2/J-7 Ferrule with White Plastic Bumper<br />
1 0310016PK J-7 CP Ferrule for Plastic Bumper<br />
2 5310003 J-2 White Plastic Bumper<br />
117<br />
<strong>Repair</strong> <strong>Parts</strong> <strong>and</strong> <strong>Maintenance</strong> <strong>Guide</strong><br />
Bumpers, Pipe <strong>and</strong><br />
Tube Supports<br />
PIPE AND TUBE SUPPORTS<br />
Item<br />
No. Code No. Part No. Description<br />
1<br />
0310081 J-112-A 1-1/2" Tube Support with Bumper 5 C/E - Complete<br />
1 0310003 J-2 White Plastic Bumper<br />
0310083 J-212-A 1-1/2" Solid Ring Tube Support CP 5 C/E - Complete<br />
0310087 J-212-A 1-1/2" Solid Ring Tube Support CP 6 C/E - Complete<br />
0310097 J-212-A CP Pipe Support 1” IPS 5 C/E<br />
0310090 J-312-A 1-1/2" Split Ring Tube Support CP 5 C/E - Complete<br />
0310092 J-312-A 1-1/2" Split Tube Pipe Support CP 6 C/E - Complete<br />
0310095 J-312-AV 1" Split Ring Tube Support CP 5 C/E - Complete<br />
Showerheads,<br />
<strong>Parts</strong> <strong>and</strong><br />
Accessories
Showerheads,<br />
<strong>Parts</strong> <strong>and</strong><br />
Accessories<br />
1/2" FLOOR VALVE<br />
Item<br />
No. Code No. Part No. Description<br />
3316042 P-1000-A 1/2" Floor <strong>Valve</strong> <strong>Repair</strong> Kit (Includes Packing, Cotter<br />
Pin, Gasket, Leather Cup <strong>and</strong> Seats – OBSOLETE<br />
OBSOLETE<br />
118<br />
<strong>Repair</strong> <strong>Parts</strong> <strong>and</strong> <strong>Maintenance</strong> <strong>Guide</strong><br />
Floor <strong>Valve</strong>s
SWEAT SOLDER KITS<br />
Item<br />
No. Code No. Part No. Description<br />
H-533-A<br />
1 3308603 H-532 1" Adapter*<br />
1, 2, 5 3308780 H-533-AS Sweat Solder Kit W/Stamped Wall Flange for<br />
1" Supply-Closet & Urinal<br />
1-4 3308794 H-533-AC Sweat Solder Kit W/Cast Wall Flange for<br />
1" Supply-Closet & Urinal<br />
2 — H-534 Casing Tube for 1” Copper<br />
H-534-A<br />
1 3308603 H-532 1" Adapter*<br />
1, 2, 5 3308783 H-534-AS Sweat Solder Kit W/Stamped Wall Flange for<br />
1" Supply-Closet & Urinal<br />
1-4 3308796 H-534-AC Sweat Solder Kit W/Cast Wall Flange for<br />
1" Supply-Closet & Urinal<br />
2 — H-534 Casing Tube for 1” Copper<br />
H-536-A<br />
1 3308607 H-535-A 3/4" Adapter*<br />
1, 2, 5 3308786 H-536-AS Sweat Solder Kit W/Stamped Wall Flange for<br />
3/4" Supply-Closet & Urinal<br />
1-4 3308798 H-536-AC Sweat Solder Kit W/Cast Wall Flange for<br />
3/4" Supply-Closet & Urinal<br />
2 — H-537 Casing Tube for 3/4” Copper<br />
Note: H-532-AS, H-533-AS, H-534-AS, H-535-AS <strong>and</strong> H-536-AS are also identified as suffix YB when furnished<br />
with flush valve.<br />
*Furnished separate for concealed installations.<br />
Item<br />
No. Code No. Part No. Description<br />
H-633-AA<br />
1 3308603 H-532 1” Adapter<br />
1-4 3308782 H-633-AA Sweat Solder Kit for 1” Supply – Urinal 3” Tube<br />
2 — H-534 Casing Tube for 1” Copper<br />
H-634-AA<br />
1 3308603 H-532 1” Adapter<br />
1-4 3308785 H-634-AA Sweat Solder Kit for 1” Supply – Closet 6” Tube<br />
2 — H-534 Casing Tube for 1” Copper<br />
H-636-AA<br />
1 0308607 H-535 3/4" Adapter<br />
1-4 3308788 H-636-AA Sweat Solder Kit for 3/4” Supply – Urinal<br />
2 — H-537 Casing Tube for 3/4” Copper<br />
119<br />
<strong>Repair</strong> <strong>Parts</strong> <strong>and</strong> <strong>Maintenance</strong> <strong>Guide</strong><br />
Sweat Solder Kits<br />
Showerheads,<br />
<strong>Parts</strong> <strong>and</strong><br />
Accessories
Showerheads,<br />
<strong>Parts</strong> <strong>and</strong><br />
Accessories<br />
V-500-AA VACUUM BREAKER FLUSH CONNECTION<br />
Code No. Part No. Description<br />
5323006 V-500-AA CP Vacuum Breaker 1-1/4” x 9”<br />
5323005 V-500-AA CP Vacuum Breaker 3/4” x 9”<br />
5323007 V-500-AA CP Vacuum Breaker 1-1/2 x 9”<br />
0323229 V-500-AA CP Vacuum Breaker 1-1/2” x 22-1/2” w/2” Offset<br />
0323225 V-500-AA CP Vacuum Breaker 1-1/2” x 22-13/16” w/1” Offset<br />
0323227 V-500-AA CP Vacuum Breaker 1-1/2” x 22-5/8” w/1-1/2” Offset<br />
0323230 V-500-AA CP Vacuum Breaker 1-1/2” x 25-1/2” w/2” Offset<br />
0323226 V-500-AA CP Vacuum Breaker 1-1/2” x 25-13/16” w/1” Offset<br />
0323228 V-500-AA CP Vacuum Breaker 1-1/2” x 25-5/8” w/1-1/2” Offset<br />
0323013 V-500-AA CP Vacuum Breaker 1-1/2” x 10-1/2”<br />
0323014 V-500-AA CP Vacuum Breaker 1-1/2” x 13-1/2”<br />
0323017 V-500-AA CP Vacuum Breaker 1-1/2” x 15”<br />
0323015 V-500-AA CP Vacuum Breaker 1-1/2” x 21-1/2”<br />
0323016 V-500-AA CP Vacuum Breaker 1-1/2” x 24-1/2”<br />
0323021 V-500-AA CP Vacuum Breaker 1-1/2” x 26”<br />
0323057 V-500-AA CP Vacuum Breaker 1-1/2” x 32”<br />
0323002 V-500-AA CP Vacuum Breaker 1-1/4” x 10-1/2”<br />
0323018 V-500-AA CP Vacuum Breaker 1-1/4” x 13-1/2”<br />
0323026 V-500-AA CP Vacuum Breaker 1-1/4” x 15”<br />
0323020 V-500-AA CP Vacuum Breaker 1-1/4” x 21-1/2”<br />
0323012 V-500-AA CP Vacuum Breaker 1” x 9”<br />
0323004 V-500-AA CP Vacuum Breaker 3/4” x 10-1/2”<br />
0323210 V-500-AA CP Vacuum Breaker 3/4” x 15”<br />
0323188 V-500-AA RB Vacuum Breaker 1-1/2” x 11-1/2” w/3” Score<br />
0323142 V-500-AA RB Vacuum Breaker 1-1/2” x 13-1/2” w/3” Score<br />
0323176 V-500-AA RB Vacuum Breaker 1-1/2” x 17-1/2” w/3” Score<br />
0323177 V-500-AA RB Vacuum Breaker 1-1/2” x 22” w/3” Score<br />
0323209 V-500-AA RB Vacuum Breaker 1-1/2” x 30-1/2” w/3” Score<br />
0323207 V-500-AA RB Vacuum Breaker 1-1/2” x 6” w/3” Score<br />
0323208 V-500-AA RB Vacuum Breaker 1-1/2” x 7-1/2” w/3” Score<br />
V-600-AA VACUUM BREAKER FLUSH CONNECTION<br />
Code No. Part No. Description<br />
0393029 V-600-AA CP Vacuum Breaker 1-1/2” x 22-1/2” w/2” Offset<br />
0393025 V-600-AA CP Vacuum Breaker 1-1/2” x 22-13/16” w/1” Offset<br />
0393027 V-600-AA CP Vacuum Breaker 1-1/2” x 22-5/8” w/1-1/2” Offset<br />
0393030 V-600-AA CP Vacuum Breaker 1-1/2” x 25-1/2” w/2” Offset<br />
0393026 V-600-AA CP Vacuum Breaker 1-1/2” x 25-13/16” w/1” Offset<br />
0393028 V-600-AA CP Vacuum Breaker 1-1/2” x 25-5/8” w/1-1/2” Offset<br />
0393008 V-600-AA CP Vacuum Breaker 1-1/2” x 13-1/2”<br />
0393031 V-600-AA CP Vacuum Breaker 1-1/2” x 15”<br />
0393009 V-600-AA CP Vacuum Breaker 1-1/2” x 21-1/2”<br />
0393010 V-600-AA CP Vacuum Breaker 1-1/2” x 24-1/2”<br />
0393038 V-600-AA CP Vacuum Breaker 1-1/2” x 36”<br />
3393007 V-600-AA CP Vacuum Breaker 1-1/2” x 9” package<br />
0393039 V-600-AA CP Vacuum Breaker 1-1/4” x 13-1/2”<br />
0393045 V-600-AA CP Vacuum Breaker 1-1/4” x 21-1/2”<br />
3393006 V-600-AA CP Vacuum Breaker 1-1/4” x 9” package<br />
0393046 V-600-AA CP Vacuum Breaker 3/4” x 10-1/2”<br />
0393047 V-600-AA CP Vacuum Breaker 3/4” x 15”<br />
3393004 V-600-AA CP Vacuum Breaker 3/4” x 9” package<br />
120<br />
<strong>Repair</strong> <strong>Parts</strong> <strong>and</strong> <strong>Maintenance</strong> <strong>Guide</strong><br />
Flushometer <strong>Parts</strong><br />
Quick Reference <strong>Guide</strong><br />
F-7 SUPPLY FLANGE<br />
0306167 F-7 CP Flange Flat 1/2” IPS x 2-23/32”<br />
0306188 F-7 CP Flange Flat 3/4” x 2-23/32”<br />
0306238 F-7 CP Flange Spud 1-1/2” x 3” w/Prongs<br />
0306214 F-7 CP Flange Spud 1-1/4” x 3” w/Prongs<br />
0306197 F-7 CP Flange Spud 1” x 2-1/2” w/Prongs<br />
0306189 F-7 CP Flange Spud 3/4” x 2-1/2” w/Prongs<br />
0306205 F-7 CP Flange Supply 1-1/4” x 3”<br />
0306196 F-7 CP Flange Supply 1” x 2-3/4” w/Prongs<br />
0306191 F-7 CP Flange Supply 3/4” x 2-3/4” w/Prongs<br />
0306209 F-7 CP Flange Supply Flat 1-1/4” x 3-1/8”<br />
0306201 F-7 CP Flange Supply Flat 1” x 3-1/8”<br />
0306204 F-7 CP Flange Tube 1-1/4” x 2-3/4” w/Prongs<br />
0306237 F-7 CP Flange Tube 1-1/2” x 2-3/4” w/Prongs<br />
F-15-A ELBOW FLUSH CONNECTION<br />
0306341 F-15-A CP Elbow Tail Assembly SJ 3/4” x 4”<br />
0306362 F-15-A RB Elbow Tail Assembly SJ 3/4” x 10”<br />
0306366 F-15-A RB Elbow Tail Assembly SJ 3/4” x 11”<br />
0306340 F-15-A RB Elbow Tail Assembly SJ 3/4” x 4”<br />
0306344 F-15-A RB Elbow Tail Assembly SJ 3/4” x 6”<br />
0306350 F-15-A RB Elbow Tail Assembly SJ 3/4” x 7”<br />
0306355 F-15-A RB Elbow Tail Assembly SJ 3/4” x 8”<br />
0306358 F-15-A RB Elbow Tail Assembly SJ 3/4” x 9”<br />
F-100 FLARED END FLUSH CONNECTION<br />
Code No. Part No. Description<br />
0396160 F-100 RB Outlet 1-1/2” x 11-1/2” w/3” Score<br />
0396167 F-100 RB Outlet 1-1/2” x 13-1/2” w/3” Score<br />
0396168 F-100 RB Outlet 1-1/2” x 19-1/2” w/3” Score<br />
0396169 F-100 RB Outlet 1-1/2” x 23-1/2” w/3” Score<br />
0396156 F-100 RB Outlet 1-1/2” x 3-1/4” w/3” Score<br />
0396157 F-100 RB Outlet 1-1/2” x 5-1/2” w/3” Score<br />
0396158 F-100 RB Outlet 1-1/2” x 7-1/2” w/3” Score<br />
0396159 F-100 RB Outlet 1-1/2” x 9-1/2” w/3” Score<br />
0396161 F-100 RB Outlet 1-1/2” x 9-1/2” w/9” Score<br />
F-109 TUBE BEND<br />
Code No. Part No. Description<br />
0396310 F-109 CP Tube Outlet 1-1/2” x 11-1/2” x 5” Bends<br />
0396283 F-109 CP Tube Outlet 1-1/4” x 11-1/2” x 5” Bends<br />
0396288 F-109 CP Tube Outlet 1-1/4” x 13-1/2” x 5” Bends<br />
0396293 F-109 CP Tube Outlet 1-1/2” x 8-1/2” x 5” Bends<br />
0396265 F-109 CP Tube Outlet 1-1/4” x 8-1/2” x 5” Bends<br />
0396316 F-109 CP Tube Outlet 1-1/2” x 13” x 5” Bends<br />
0396320 F-109 CP Tube Outlet 1-1/2” x 16” x 5” Bends<br />
0396322 F-109 CP Tube Outlet 1-1/2” x 21” x 5” Bends<br />
0396326 F-109 CP Tube Outlet 1-1/2” x 24” x 5” Bends<br />
0396289 F-109 CP Tube Outlet 1-1/4” x 16” x 5” Bends<br />
0396290 F-109 CP Tube Outlet 1-1/4” x 21” x 5” Bends<br />
0396291 F-109 CP Tube Outlet 1-1/4” x 24” x 5” Bends
EFX-1XX SERIES EFX-2XX SERIES<br />
6D<br />
8<br />
16<br />
17<br />
18<br />
15<br />
10<br />
9<br />
6C<br />
6B<br />
2<br />
11<br />
12<br />
6A<br />
5<br />
14<br />
3A<br />
4<br />
13<br />
1<br />
3B<br />
7<br />
121<br />
<strong>Repair</strong> <strong>Parts</strong> <strong>and</strong> <strong>Maintenance</strong> <strong>Guide</strong><br />
BASYS <br />
Infrared Sensor Activated<br />
PARTS LIST—BASYS FAUCETS<br />
Item<br />
No. Code No. Part No. Description<br />
1. — — Mid Mount Faucet Assembly<br />
— — Mid Mount Faucet Assembly with Mixer<br />
— — High Mount Faucet Assembly<br />
— — High Mount Faucet Assembly with Mixer<br />
2. 3324104 EFX-1002-A 0.5 gpm/1.9 Lpm Multi-Lam Insert (includes<br />
insert, o-ring, 2.5 mm allen key <strong>and</strong> removal tool)<br />
3324103 EFX-1001-A 1.5 gpm/5.7 Lpm Aerated Stream Insert (includes<br />
insert, o-ring, 2.5 mm allen key <strong>and</strong> removal tool)<br />
3324102 EFX-1000-A 1.5 gpm/5.7 Lpm Laminar Stream Insert (includes<br />
insert, o-ring, 2.5 mm allen key <strong>and</strong> removal tool)<br />
3A. 3324122 EFX-15-A 0.5 gpm/1.9 Lpm Solenoid <strong>Valve</strong> Caddy Assembly<br />
– Mid Mount (Green)<br />
3324123 EFX-16-A 1.5 gpm/5.7 Lpm Solenoid <strong>Valve</strong> Caddy Assembly<br />
– Mid Mount (Blue)<br />
3B. 3324124 EFX-17-A 0.5 gpm/1.9 Lpm Solenoid <strong>Valve</strong> Caddy Assembly<br />
– High Mount (Green)<br />
3324125 EFX-18-A 1.5 gpm/5.7 Lpm Solenoid <strong>Valve</strong> Caddy Assembly<br />
– High Mount (Blue)<br />
4. 0324019 EFX-19 Strainer (Filter)<br />
5. 3324128 EFX-7-A Battery Pack Assembly<br />
6A. 3324118 EFX-1-A Crown Assembly<br />
6B. 3324119 EFX-3-A Solar Crown Assembly<br />
6C. 3324120 EFX-4-A Solar Crown with LCD Assembly<br />
6D. 3324121 EFX-5-A LCD Crown Assembly<br />
7. — — Mixer H<strong>and</strong>le Assembly<br />
8. 0324035 EFX-33 H<strong>and</strong>le Cap<br />
9. 0335000 EAF-1 Faucet Mounting Kit (Pedestal)<br />
10. 3325023 EAF-1008 13” (330 mm) Flexible Supply Hoses (2)<br />
11. 3324101 EFX-26-A Trim Plate for 8” Centerset Sink<br />
12. 3324100 EFX-20-A Trim Plate for 4” Centerset Sink<br />
13. 0324027 EFX-27 Plug-in Voltage Adapter (US)<br />
— EFX-28 Plug-in Voltage Adapter (EU)<br />
— EFX-29 Plug-in Voltage Adapter (UK)<br />
0335037 EAF-37 Box Type Voltage Adapter<br />
14. 0335024 EAF-24-A 11-13/16” (300 mm) Extension Cable<br />
0335025 EAF-25-A 47-1/4” (1200 mm) Extension Cable<br />
0335015 EAF-17-A 126” (3200 mm) Extension Cable<br />
15. 0335023 EAF-23-A Splitter<br />
16. 3326009 MIX-60-A Mechanical, Below Deck Mixing <strong>Valve</strong><br />
17. 0326045 MIX-135-A Thermostatic, Below Deck Mixing <strong>Valve</strong><br />
18. 3365461 ETF-617-A Bak-Chek Tee<br />
NOTE: If changing flow rate caddy <strong>and</strong> spray insert must be changed in conjunction.<br />
— in Item No. column = Not shown in illustration<br />
— in Code No. <strong>and</strong> Part No. column = Not sold separately<br />
Electrical Connection for up to Six (6) Faucets Using One (1) Adapter<br />
ADAPTER<br />
DAISY CHAIN<br />
ELECTRICAL CABLE<br />
DAISY CHAIN<br />
ELECTRICAL<br />
CABLE<br />
TO ADDITIONAL<br />
FAUCETS<br />
(6 MAX.)<br />
H<strong>and</strong> Hygiene
H<strong>and</strong> Hygiene<br />
OPERATION<br />
As the user’s h<strong>and</strong>s enter the<br />
beam’s effective range, the beam is<br />
reflected back into the sensor<br />
receiver <strong>and</strong> activates the solenoid<br />
valve allowing water to flow from<br />
the faucet. Water will flow until the<br />
h<strong>and</strong>s are removed or until the<br />
faucet reaches its automatic time<br />
out limit setting.<br />
SET AND FIX TEMPERATURE AND ADJUST HOT LIMIT STOP<br />
Adjust lever to set temperature.<br />
Optional — To fix temperature,<br />
set lever to the desired position,<br />
then remove lever <strong>and</strong> plug hole<br />
with Cap.<br />
Optional Hot Limit Stop<br />
Adjustment — To adjust the<br />
hot/cold mix (factory set at 50/50)<br />
remove the lever.<br />
Check to make sure dot is<br />
in center position before<br />
beginning adjustment.<br />
Faucet may be adjusted in 10º<br />
increments.<br />
2 mm<br />
2 mm<br />
122<br />
<strong>Repair</strong> <strong>Parts</strong> <strong>and</strong> <strong>Maintenance</strong> <strong>Guide</strong><br />
BASYS <br />
Infrared Sensor Activated<br />
Steps to Default IR<br />
Function Activate Function Setting Clic<br />
IR Activation Cover IR clic approximately for 2 sec.<br />
until LED will flash GREEN 1x - then remove<br />
finger from IR clic (Active for 5 sec.)<br />
–– ––<br />
Cleaning IR activation; Cover IR clic 2x - confirmation 2 min. ––<br />
Mode of the function is active by a couple flashes<br />
by the LED; to return to normal operation cover<br />
IR clic 1x or the faucet will automatically return<br />
to normal function after 2 min.<br />
12/24 Line See below. Off Off<br />
Purge 12HR<br />
Feature 24HR<br />
Sensor<br />
Range<br />
Adjustment<br />
See page 123. 6 1-8<br />
Reset IR activation; Cover IR clic 2x; LED will flash 5x Manually ––<br />
Electronics Cover IR clic 1x for 5 sec. until LED<br />
flashes 4x, then remove finger from IR clic<br />
Wait for 20 sec.<br />
(After 10 sec. water will flow for 6 sec.<br />
<strong>and</strong> automatically adjust to environment)<br />
Security Off After 90 seconds (max) of h<strong>and</strong> <strong>and</strong>/or object<br />
within sensor appears permanent, waterflow<br />
will stop <strong>and</strong> will remeasure environment<br />
On ––<br />
Please contact factory for more extensive programming options.<br />
12/24 LINE PURGE FEATURE<br />
This feature will operate the faucet<br />
every 12 or 24 hours since last use,<br />
if not used to prevent stagnant<br />
water conditions.<br />
Default purge duration is<br />
two minutes.<br />
Consult factory regarding<br />
other timing options.<br />
IR activation (see above). Cover IR<br />
clic approximately 24 sec. (ignore<br />
LED indications during this period).<br />
Release when requested program is<br />
reached. (See diagram to right).<br />
Programming mode will time out<br />
after 2 minutes if no changes<br />
are made.<br />
1x 24 sec<br />
+ ...<br />
...1x<br />
...2x<br />
...3x<br />
Deactivate<br />
Activate 12HR<br />
Activate 24HR
Factory setting is appropriate for the majority of applications <strong>and</strong><br />
should not require resetting unless under extreme situations.<br />
IR Activation (see page 122).To<br />
enter programming mode place<br />
finger on IR clic for 2 times then<br />
remove. Light on side of crown<br />
should blink to indicate<br />
programming mode.<br />
Cover IR clic until LED flashes 4x -<br />
hold on until LED flashes 1x to 8x,<br />
from minimum to maximum. See<br />
diagram below. Release when<br />
requested range is reached.<br />
Wait, until LED flashes GREEN.<br />
123<br />
<strong>Repair</strong> <strong>Parts</strong> <strong>and</strong> <strong>Maintenance</strong> <strong>Guide</strong><br />
SENSOR RANGE ADJUSTMENT BATTERY REPLACEMENT<br />
1x 2x<br />
6x - Factory Setting<br />
5x<br />
7x<br />
4x 8x<br />
3x<br />
BASYS <br />
Infrared Sensor Activated<br />
NOTE: Replace Battery when LED1 indicator flashes red each time<br />
faucet is in use or when faucet stops functioning. LED1 is identified by<br />
the battery symbol.<br />
NOTE: Turning off water is not necessary.<br />
Remove crown by loosening hex<br />
screw located on underside of spout<br />
<strong>and</strong> slide crown down <strong>and</strong> lift off.<br />
NOTE: Screw is captive within<br />
faucet body <strong>and</strong> will not fall out.<br />
Remove battery pack assembly by<br />
lifting out of spout.<br />
Open battery pack assembly by<br />
pushing in tabs on side of assembly.<br />
Remove all four (4) AA-cell<br />
batteries from battery pack.<br />
Insert four (4) NEW AA-cell<br />
batteries into battery pack<br />
assembly cartridge.<br />
NOTE: Insure batteries are installed<br />
with proper polarity. The cover of the<br />
case indicates polarity of batteries.<br />
Improper polarity will not harm the<br />
faucet. Improper polarity will cause<br />
the faucet not to operate.<br />
Replace cover of the battery pack<br />
assembly <strong>and</strong> reinsert assembly<br />
into faucet.<br />
Slide on crown <strong>and</strong> secure.<br />
UNLOCK<br />
SPARE<br />
FILTER<br />
LOCK<br />
H<strong>and</strong> Hygiene
H<strong>and</strong> Hygiene<br />
REPLACING THE SOLENOID STRAINER (FILTER)<br />
NOTE: Turning off water is not necessary, due to integrated automatic<br />
stop valve.<br />
Remove crown by loosening hex<br />
screw located on underside of spout<br />
<strong>and</strong> slide crown down <strong>and</strong> lift off.<br />
NOTE: Screw is captive within<br />
faucet body.<br />
Remove battery pack assembly by<br />
lifting out of spout.<br />
Rotate solenoid assembly counterclockwise<br />
through a 45º angle.<br />
Pull solenoid caddy from faucet.<br />
NOTE: STRAINER (FILTER) CAN BE<br />
REMOVED, CLEANED AND<br />
REPLACED AT THIS TIME.<br />
UNLOCK<br />
SPARE<br />
FILTER<br />
124<br />
<strong>Repair</strong> <strong>Parts</strong> <strong>and</strong> <strong>Maintenance</strong> <strong>Guide</strong><br />
BASYS <br />
Infrared Sensor Activated<br />
Insert new solenoid caddy at a<br />
45° angle.<br />
Rotate solenoid caddy clockwise to<br />
align with arrow, locking the unit<br />
<strong>and</strong> opening water path.<br />
Reinsert battery pack assembly.<br />
Slide on crown <strong>and</strong> secure.<br />
SPARE<br />
FILTER<br />
LOCK
REPLACE SPRAY INSERT<br />
NOTE: Turning off water is not necessary, due to integrated<br />
automatic stop valve.<br />
Remove crown by loosening hex<br />
screw located on underside of spout<br />
<strong>and</strong> slide crown down <strong>and</strong> lift off.<br />
NOTE: Screw is captive within<br />
faucet body.<br />
Retrieve spray removal tool located<br />
near the spray insert.<br />
Insert spray removal tool into spray<br />
slot by sliding hook end of key<br />
between faucet spout <strong>and</strong> insert.<br />
Pull insert out of faucet once<br />
hooked.<br />
UNLOCK<br />
125<br />
<strong>Repair</strong> <strong>Parts</strong> <strong>and</strong> <strong>Maintenance</strong> <strong>Guide</strong><br />
BASYS <br />
Infrared Sensor Activated<br />
Install new insert.<br />
NOTE: If changing to a different<br />
flow rate solenoid caddy must be<br />
changed in conjunction.<br />
Return spray removal tool to<br />
storage location.<br />
NOTE: This can only be done once<br />
spray head is installed. This will lock<br />
the spray head in place.<br />
NOTE: If spray head is inserted<br />
incorrectly – key will not lock in<br />
properly. Turn faucet on to push<br />
insert out <strong>and</strong> re-install.<br />
Slide on crown <strong>and</strong> secure.<br />
LOCK<br />
H<strong>and</strong> Hygiene
H<strong>and</strong> Hygiene<br />
UPGRADE FAUCET FUNCTIONALITY<br />
Remove crown by loosening hex<br />
screw located on underside of spout<br />
<strong>and</strong> slide crown down <strong>and</strong> lift off.<br />
NOTE: Screw is captive within<br />
faucet body.<br />
LED DISPLAY DIAGNOSTIC CODES<br />
LED1 LED3<br />
LED2<br />
UNLOCK<br />
126<br />
<strong>Repair</strong> <strong>Parts</strong> <strong>and</strong> <strong>Maintenance</strong> <strong>Guide</strong><br />
BASYS <br />
Infrared Sensor Activated<br />
Place new crown on faucet by<br />
sliding onto spout <strong>and</strong> tightening<br />
hex screw on underside of spout.<br />
NOTE: All electronics are fully<br />
encapsulated in the crown <strong>and</strong> thus<br />
protected from the environment <strong>and</strong><br />
easy to replace or upgrade.<br />
Function LED1 LED2 LED3 Description 1 Description 2<br />
Start Up Boot LED1 <strong>and</strong> LED2 alternate blinking Fast Toggle<br />
Battery Check after Start Up LED1 on for 2 sec, if battery greater than 3.5V<br />
Line Power Check after Start Up LED3 on for 2 sec, if line power greater than 3.5V<br />
IR Adjust Process LED1 blinking while IR adjusts Few seconds<br />
IR Adjust IR LED2 on for 2 sec, if adjustment OK<br />
Battery Low LED1 blinks 3x, if battery is less than warning level Only while in detection mode<br />
Battery Empty<br />
<strong>Valve</strong> Error<br />
LED1 double flashes 3x, if battery is<br />
less than empty level<br />
LED3 double flashes 3x, if valve<br />
current error; flash after the 3rd error,<br />
off after the 3rd good operation<br />
IR Activation LED2 on for 2 sec, if IR-click has been activated<br />
Cleaning Mode LED1 4-in-1 flash, if cleaning mode is activated<br />
LOCK<br />
LEDs BLINKING<br />
LEDs ON<br />
Only while in detection mode<br />
Flashes after the 3rd error, off<br />
after the 3rd good operation<br />
After 5 sec. automatically back to<br />
operating mode<br />
During “Cleaning Mode” is activated<br />
Permanent 4-in-1 flashes
TROUBLESHOOTING GUIDE<br />
1. Red LED in spout does not blink 2 sec after battery installation.<br />
A. Battery placement incorrect or batteries have been discharged.<br />
B. Ensure batteries are installed properly. Check the orientation of each<br />
battery matches the positive (+) <strong>and</strong> negative (–) symbols shown on<br />
the battery compartment.<br />
2. Faucet does not function.<br />
A. Adhesive packaging label affixed over sensor eye.<br />
B. Remove adhesive label from sensor eye.<br />
3. Faucet delivers water in an uncontrolled manner.<br />
A. Faucet is not working properly.<br />
B. Clean sensor window. If continually now working contact<br />
<strong>Sloan</strong>’s Tech Support Department.<br />
4. Faucet does not deliver any water when sensor is activated.<br />
INDICATOR: Solenoid valve produces an audible “CLICK”.<br />
A. Water supply stop(s) closed.<br />
Open water supply stop(s).<br />
B. Strainer is clogged.<br />
Remove, clean, <strong>and</strong> reinstall strainer. Replace strainer,<br />
if needed (refer to page 124).<br />
5. Solenoid valve DOES NOT produce an audible “CLICK”.<br />
A. Batteries low (battery powered models).<br />
Replace batteries (refer to battery replacement on page 123).<br />
B. Power failure (hardwire models).<br />
Check power supply.<br />
6. Faucet delivers only a slow flow or dribble when sensor is<br />
activated.<br />
A. Water supply stop(s) are partially closed.<br />
Completely open water supply stop(s).<br />
7. Faucet does not stop delivering water or continues to drip after<br />
user is no longer detected.<br />
A. Faucet is not working properly.<br />
B. Clean sensor window. If continually now working contact<br />
<strong>Sloan</strong>’s Tech Support Department (see below).<br />
8. LED indicator blinks RED when faucet is in use.<br />
A. Batteries low (battery powered models).<br />
B. Replace batteries (refer to battery replacement on page 123).<br />
9. The water temperature is too hot or too cold on a faucet<br />
connected to hot <strong>and</strong> cold water supply lines.<br />
A. Supply stops are not adjusted properly.<br />
Adjust supply stops.<br />
B. For models with integral side mixing valve–Mixing valve is set<br />
improperly for the water temperature desired.<br />
Rotate mixing valve h<strong>and</strong>le clockwise to decrease water temperature<br />
or counterclockwise to increase water temperature.<br />
C. Inadequate hot water supply.<br />
Adjust supply stops.<br />
127<br />
<strong>Repair</strong> <strong>Parts</strong> <strong>and</strong> <strong>Maintenance</strong> <strong>Guide</strong><br />
BASYS <br />
Infrared Sensor Activated<br />
CARE AND CLEANING<br />
DO NOT USE abrasive or chemical cleaners<br />
(including chlorine bleach) to clean Faucets that<br />
may dull the luster <strong>and</strong> attack the chrome or<br />
special decorative finishes. Use ONLY mild soap<br />
<strong>and</strong> water, then wipe dry with clean cloth or towel.<br />
While cleaning the bathroom tile, protect the<br />
Faucet from any splattering of cleaner. Acids<br />
<strong>and</strong> cleaning fluids will discolor or remove<br />
chrome plating.<br />
When assistance is required, please contact<br />
<strong>Sloan</strong> Technical Support at: 1-888-SLOAN-14 (1-888-756-2614).<br />
H<strong>and</strong> Hygiene
H<strong>and</strong> Hygiene<br />
EFX-3XX SERIES EFX-6XX SERIES<br />
16<br />
17<br />
18<br />
9A<br />
1B<br />
9B<br />
15<br />
6D 6C 6B 6A<br />
8<br />
11<br />
10 12<br />
3<br />
14<br />
4<br />
5<br />
13<br />
1A<br />
7<br />
2<br />
128<br />
<strong>Repair</strong> <strong>Parts</strong> <strong>and</strong> <strong>Maintenance</strong> <strong>Guide</strong><br />
BASYS <br />
Infrared Sensor Activated<br />
PARTS LIST—BASYS FAUCETS<br />
Item<br />
No. Code No. Part No. Description<br />
1A. — — Low Pedestal Faucet Assembly*<br />
— — Low Pedestal Faucet Assembly with Mixer*<br />
1B. — — Low Integrated Base Faucet Assembly†<br />
2. 3324104 EFX-1002-A 0.5 gpm/1.9 Lpm Multi-Lam Spray Head (includes<br />
insert, o-ring, 2.5 mm allen key, <strong>and</strong> removal tool)<br />
3324103 EFX-1001-A 1.5 gpm/5.7 Lpm Aerated Stream Insert (includes<br />
insert, o-ring, 2.5 mm allen key, <strong>and</strong> removal tool)<br />
3324102 EFX-1000-A 1.5 gpm/5.7 Lpm Laminar Stream Insert (includes<br />
insert, o-ring, 2.5 mm allen key, <strong>and</strong> removal tool)<br />
3. — EFX-37 0.5 gpm/1.9 Lpm Solenoid <strong>Valve</strong> Caddy<br />
Assembly — Low (Green)<br />
— EFX-38 1.5 gpm/5.7 Lpm Solenoid <strong>Valve</strong> Caddy<br />
Assembly — Low (Blue)<br />
4. 0324019 EFX-19 Strainer (Filter)<br />
5. 3324118 EFX-23-A Battery Pack Assembly<br />
6A. 3324119 EFX-1-A Crown Assembly<br />
6B. 3324121 EFX-3-A Solar Crown Assembly<br />
6C. 3324120 EFX-4-A Solar Crown with LCD Assembly<br />
6D. 3324121 EFX-5-A LCD Crown Assembly<br />
7. — — Mixer H<strong>and</strong>le Assembly (for EFX-3 IR models only)<br />
8. — EFX-25 H<strong>and</strong>le Cap (for EFX-3 IR models only)<br />
9A. 0335000 EAF-1 Faucet Mounting Kit (for pedestal model only)<br />
9B. — EFX-21-A Faucet Mounting Kit (for integrated base model<br />
only)<br />
10. 3325023 EAF-1008 13” (330 mm) Flexible Supply Hoses (2)<br />
11. 3324101 EFX-26-A Trim Plate for 8” Centerset Sink<br />
12. 3324100 EFX-20-A Trim Plate for 4” Centerset Sink<br />
13. 0324027 EFX-27 Plug-in Adapter (US)<br />
— EFX-28 Plug-in Adapter (EU)<br />
— EFX-29 Plug-in Adapter (UK)<br />
0335037 EAF-37 Box Type Votage Adapter<br />
14. 0335024 EAF-24-A 11-13/16” (300 mm) Extension Cable<br />
0335025 EAF-25-A 47-1/4” (1200 mm) Extension Cable<br />
0335015 EAF-17-A 126” (3200 mm) Extension Cable<br />
15. 0335023 EAF-23-A Splitter<br />
16. 3326009 MIX-60-A Mechanical, Below Deck Mixing <strong>Valve</strong><br />
17. 0326045 MIX-135-A Thermostatic, Below Deck Mixing <strong>Valve</strong><br />
18. 3365461 ETF-617-A Bak-Chek Tee<br />
NOTE: If changing flow rate caddy <strong>and</strong> spray insert must be changed in conjunction.<br />
† Single Supply faucets include Bak-Chek ®<br />
*Integral Base model not available with integral to faucet side mixer; single supply faucets include Bak-Chek ®<br />
— in Item No. column = Not shown in illustration<br />
— in Code No. <strong>and</strong> Part No. column = Not sold separately<br />
Electrical Connection for up to Six (6) Faucets Using One (1) Adapter<br />
ADAPTER<br />
DAISY CHAIN<br />
ELECTRICAL CABLE<br />
DAISY CHAIN<br />
ELECTRICAL<br />
CABLE<br />
TO ADDITIONAL<br />
FAUCETS<br />
(6 MAX.)
OPERATION<br />
As the user’s h<strong>and</strong>s enter the<br />
beam’s effective range, the beam is<br />
reflected back into the sensor<br />
receiver <strong>and</strong> activates the solenoid<br />
valve allowing water to flow from<br />
the faucet. Water will flow until the<br />
h<strong>and</strong>s are removed or until the<br />
faucet reaches its automatic time<br />
out limit setting.<br />
SET AND FIX TEMPERATURE AND ADJUST HOT LIMIT STOP<br />
Adjust lever to set temperature.<br />
OPTIONAL – To fix temperature, set<br />
lever to the desired position, then<br />
remove lever <strong>and</strong> plug hole with<br />
cap.<br />
Optional Hot Limit Stop Adjustment<br />
– To adjust the hot/cold mix (factory<br />
set at 50/50) remove the lever.<br />
Check to make sure dot is in center<br />
position before beginning<br />
adjustment.<br />
Faucet may be adjusted in 10º<br />
increments.<br />
2.5 mm<br />
2.5 mm<br />
2.5 mm<br />
129<br />
<strong>Repair</strong> <strong>Parts</strong> <strong>and</strong> <strong>Maintenance</strong> <strong>Guide</strong><br />
BASYS <br />
Infrared Sensor Activated<br />
Steps to Default IR<br />
Function Activate Function Setting Clic<br />
IR Activation Cover IR clic approximately for 2 sec.<br />
until LED will flash GREEN 1x - then remove<br />
finger from IR clic (Active for 5 sec.)<br />
–– ––<br />
Cleaning IR activation; Cover IR clic 2x - confirmation 2 min. ––<br />
Mode of the function is active by a couple flashes<br />
by the LED; to return to normal operation cover<br />
IR clic 1x or the faucet will automatically return<br />
to normal function after 2 min.<br />
12/24 Line See below. Off Off<br />
Purge 12HR<br />
Feature 24HR<br />
Sensor<br />
Range<br />
Adjustment<br />
See page 130. 6 1-8<br />
Reset IR activation; Cover IR clic 2x; LED will flash 5x Manually ––<br />
Electronics Cover IR clic 1x for 5 sec. until LED<br />
flashes 4x, then remove finger from IR clic<br />
Wait for 20 sec.<br />
(After 10 sec. water will flow for 6 sec.<br />
<strong>and</strong> automatically adjust to environment)<br />
Security Off After 90 seconds (max) of h<strong>and</strong> <strong>and</strong>/or object<br />
within sensor appears permanent, waterflow<br />
will stop <strong>and</strong> will remeasure environment<br />
On ––<br />
Please contact factory for more extensive programming options.<br />
12/24 LINE PURGE FEATURE<br />
This feature will operate the faucet<br />
every 12 or 24 hours since last use,<br />
if not used to prevent stagnant<br />
water conditions.<br />
Default purge duration is two<br />
minutes.<br />
Consult factory regarding other<br />
timing options.<br />
IR activation (see above). Cover IR<br />
clic approximately 24 sec. (ignore<br />
LED indications during this period).<br />
Release when requested program is<br />
reached. (See diagram to right).<br />
Programming mode will time out<br />
after 2 minutes if no changes are<br />
made.<br />
1x 24 sec<br />
+ ...<br />
...1x<br />
...2x<br />
...3x<br />
Deactivate<br />
Activate 12HR<br />
Activate 24HR<br />
H<strong>and</strong> Hygiene
H<strong>and</strong> Hygiene<br />
Wait, until LED flashes GREEN.<br />
1x 2x<br />
6x - Factory Setting<br />
5x 7x<br />
4x 8x<br />
3x<br />
<strong>Repair</strong> <strong>Parts</strong> <strong>and</strong> <strong>Maintenance</strong> <strong>Guide</strong><br />
SENSOR RANGE ADJUSTMENT BATTERY REPLACEMENT<br />
Factory setting is appropriate for the majority of applications <strong>and</strong><br />
should not require resetting unless under extreme situations.<br />
IR Activation (see page 129).To<br />
enter programming mode place<br />
finger on IR clic for 2 times then<br />
remove. Light on side of crown<br />
should blink red to indicate<br />
programming mode.<br />
Cover IR clic until LED flashes 4x -<br />
hold on until LED flashes 1x to 8x,<br />
from minimum to maximum range.<br />
See diagram below. Release when<br />
requested range is reached.<br />
130<br />
BASYS <br />
Infrared Sensor Activated<br />
NOTE: Replace Battery when LED1 indicator flashes red each time<br />
faucet is in use or when faucet stops functioning. LED1 is identified by<br />
the battery symbol.<br />
NOTE: Turning off water is not necessary.<br />
Loosen cover screw <strong>and</strong> remove<br />
cover from battery pack.<br />
Install four (4) AA-size batteries<br />
(supplied) as indicated by the (+)<br />
<strong>and</strong> (–) symbols inside the battery<br />
compartment.<br />
Replace battery pack lid <strong>and</strong> tighten<br />
with screwdriver.<br />
NOTE: Insure batteries are installed<br />
with proper polarity. The cover of the<br />
case indicates polarity of batteries.<br />
Improper polarity will not harm the<br />
faucet. Improper polarity will cause<br />
the faucet not to operate.
REPLACING THE SOLENOID STRAINER (FILTER)<br />
NOTE: Turning off water is not necessary, due to integrated automatic<br />
stop valve.<br />
Remove crown by loosening hex<br />
screw located on underside of spout<br />
<strong>and</strong> slide crown down <strong>and</strong> lift off.<br />
NOTE: Screw is captive within<br />
faucet body.<br />
Rotate solenoid assembly counterclockwise<br />
through a 45º angle.<br />
Pull solenoid caddy from faucet.<br />
NOTE: Strainer can be removed,<br />
cleaned <strong>and</strong> replaced at this time.<br />
Insert new solenoid caddy at a 45°<br />
angle.<br />
Rotate solenoid caddy clockwise to<br />
align with arrow, locking the unit<br />
<strong>and</strong> opening water path.<br />
Slide on crown <strong>and</strong> secure.<br />
131<br />
<strong>Repair</strong> <strong>Parts</strong> <strong>and</strong> <strong>Maintenance</strong> <strong>Guide</strong><br />
BASYS <br />
Infrared Sensor Activated<br />
REPLACE SPRAY INSERT<br />
NOTE: Turning off water is not necessary, due to integrated automatic<br />
stop valve.<br />
Remove crown by loosening hex<br />
screw located on underside of spout<br />
<strong>and</strong> slide crown down <strong>and</strong> lift off.<br />
NOTE: Screw is captive within<br />
faucet body.<br />
Retrieve spray removal tool located<br />
near the spray insert.<br />
Insert spray removal tool into spray<br />
slot by sliding hook end of key<br />
between faucet spout <strong>and</strong> insert.<br />
Pull insert out of faucet once<br />
hooked.<br />
Install new insert.<br />
NOTE: If changing to a different flow<br />
rate solenoid caddy must be<br />
changed in conjunction.<br />
Return spray removal tool to storage<br />
location.<br />
NOTE: This can only be done once<br />
spray head is installed. This will lock<br />
the spray head in place.<br />
NOTE: If spray head is inserted<br />
incorrectly – key will not lock in<br />
properly. Turn faucet on to push<br />
insert out <strong>and</strong> re-install.<br />
Slide on crown <strong>and</strong> secure.<br />
UNLOCK<br />
LOCK<br />
H<strong>and</strong> Hygiene
H<strong>and</strong> Hygiene<br />
UPGRADE FAUCET FUNCTIONALITY<br />
Remove crown by loosening hex<br />
screw located on underside of spout<br />
<strong>and</strong> slide crown down <strong>and</strong> lift off.<br />
NOTE: Screw is captive within<br />
faucet body.<br />
LED DISPLAY DIAGNOSTIC CODES<br />
LED1 LED3<br />
LED2<br />
UNLOCK<br />
132<br />
<strong>Repair</strong> <strong>Parts</strong> <strong>and</strong> <strong>Maintenance</strong> <strong>Guide</strong><br />
BASYS <br />
Infrared Sensor Activated<br />
Place new crown on faucet by<br />
sliding onto spout <strong>and</strong> tightening<br />
hex screw on underside of spout.<br />
NOTE: All electronics are fully<br />
encapsulated in the crown <strong>and</strong> thus<br />
protected from the environment <strong>and</strong><br />
easy to replace or upgrade.<br />
Function LED1 LED2 LED3 Description 1 Description 2<br />
Start Up Boot LED1 <strong>and</strong> LED2 alternate blinking Fast Toggle<br />
Battery Check after Start Up LED1 on for 2 sec, if battery greater than 3.5V<br />
Line Power Check after Start Up LED3 on for 2 sec, if line power greater than 3.5V<br />
IR Adjust Process LED1 blinking while IR adjusts Few seconds<br />
IR Adjust IR LED2 on for 2 sec, if adjustment OK<br />
Battery Low LED1 blinks 3x, if battery is less than warning level Only while in detection mode<br />
Battery Empty<br />
<strong>Valve</strong> Error<br />
LED1 double flashes 3x, if battery is<br />
less than empty level<br />
LED3 double flashes 3x, if valve<br />
current error; flash after the 3rd error,<br />
off after the 3rd good operation<br />
IR Activation LED2 on for 2 sec, if IR-click has been activated<br />
Cleaning Mode LED1 4-in-1 flash, if cleaning mode is activated<br />
LOCK<br />
LEDs BLINKING<br />
LEDs ON<br />
Only while in detection mode<br />
Flashes after the 3rd error, off<br />
after the 3rd good operation<br />
After 5 sec. automatically back to<br />
operating mode<br />
During “Cleaning Mode” is activated<br />
Permanent 4-in-1 flashes
TROUBLESHOOTING GUIDE<br />
1. Red LED in spout does not blink 2 sec after battery installation.1.<br />
Red LED in spout does not blink 2 seconds after battery<br />
installation.<br />
A. Battery placement incorrect or batteries have been discharged.<br />
B. Ensure batteries are installed properly. Check the orientation of each<br />
battery matches the positive (+) <strong>and</strong> negative (–) symbols shown on<br />
the battery compartment.<br />
2. Faucet does not function.<br />
A. Adhesive packaging label affixed over sensor eye.<br />
B. Remove adhesive label from sensor eye.<br />
3. Faucet delivers water in an uncontrolled manner.<br />
A. Faucet is not working properly.<br />
B. Clean sensor window; if problem persists contact <strong>Sloan</strong> Tech Support.<br />
4. Faucet does not deliver any water when sensor is activated.<br />
INDICATOR: Solenoid valve produces an audible “CLICK”.<br />
A. Water supply stop(s) closed.<br />
Open water supply stop(s).<br />
B. Strainer is clogged.<br />
Remove, clean, <strong>and</strong> reinstall strainer. Replace strainer, if needed (refer<br />
to page 131).<br />
5. Solenoid valve DOES NOT produce an audible “CLICK”.<br />
A. Batteries low (battery powered models).<br />
Replace batteries (refer to battery replacement on page 130).<br />
B. Power failure (hardwire models).<br />
Check power supply.<br />
6. Faucet delivers only a slow flow or dribble when sensor is<br />
activated.<br />
A. Water supply stop(s) are partially closed.<br />
Completely open water supply stop(s).<br />
7. Faucet does not stop delivering water or continues to drip after<br />
user is no longer detected.<br />
A. Faucet is not working properly.<br />
B. Clean sensor window; if problem persists contact <strong>Sloan</strong> Tech Support<br />
(see below).<br />
8. LED indicator blinks RED when faucet is in use.<br />
A. Batteries low (battery powered models).<br />
B. Replace batteries (refer to battery replacement on page 130).<br />
9. The water temperature is too hot or too cold on a faucet<br />
connected to hot <strong>and</strong> cold water supply lines.<br />
A. Supply stops are not adjusted properly.<br />
Adjust supply stops.<br />
B. For models with integral side mixing valve–Mixing valve is set<br />
improperly for the water temperature desired.<br />
Rotate mixing valve h<strong>and</strong>le clockwise to decrease water temperature or<br />
counterclockwise to increase water temperature.<br />
C. Inadequate hot water supply.<br />
Adjust supply stops.<br />
133<br />
<strong>Repair</strong> <strong>Parts</strong> <strong>and</strong> <strong>Maintenance</strong> <strong>Guide</strong><br />
BASYS <br />
Infrared Sensor Activated<br />
CARE AND CLEANING<br />
DO NOT USE abrasive or chemical cleaners<br />
(including chlorine bleach) to clean faucets that<br />
may dull the luster <strong>and</strong> attack the chrome or<br />
special decorative finishes. Use ONLY mild soap<br />
<strong>and</strong> water, then wipe dry with clean cloth or towel.<br />
While cleaning the bathroom sink, protect the<br />
faucet from any splattering of cleaner. Acids<br />
<strong>and</strong> cleaning fluids will discolor or remove<br />
chrome plating.<br />
When assistance is required, please contact<br />
<strong>Sloan</strong> Technical Support at: 1-888-SLOAN-14 (1-888-756-2614).<br />
H<strong>and</strong> Hygiene
H<strong>and</strong> Hygiene<br />
EFX-8XX SERIES EFX-8XX SERIES<br />
11<br />
6A 6B<br />
4<br />
3<br />
7<br />
2<br />
1<br />
12<br />
13<br />
14<br />
8<br />
9<br />
10<br />
5<br />
134<br />
<strong>Repair</strong> <strong>Parts</strong> <strong>and</strong> <strong>Maintenance</strong> <strong>Guide</strong><br />
BASYS <br />
Infrared Sensor Activated<br />
PARTS LIST—BASYS FAUCETS<br />
Item<br />
No. Code No. Part No. Description<br />
1. — — Wall Mount Faucet Assembly<br />
2. 3324104 EFX-1002-A 0.5 gpm/1.9 Lpm Multi-Lam Spray Head (includes<br />
insert, o-ring, 2.5 mm allen key, <strong>and</strong> removal tool)<br />
3324103 EFX-1001-A 1.5 gpm/5.7 Lpm Aerated Stream Insert (includes<br />
insert, o-ring, 2.5 mm allen key, <strong>and</strong> removal tool)<br />
3324102 EFX-1000-A 1.5 gpm/5.7 Lpm Laminar Stream Insert (includes<br />
insert, o-ring, 2.5 mm allen key, <strong>and</strong> removal tool)<br />
3. — EFX-1011-A 0.5 gpm/1.9 Lpm Solenoid <strong>Valve</strong> Caddy Assembly<br />
– Wall (Green)<br />
— EFX-1012-A 1.5 gpm/5.7 Lpm Solenoid <strong>Valve</strong> Caddy Assembly<br />
– Wall (Blue)<br />
4. 0324019 EFX-19 Strainer (Filter)<br />
5. — EFX-1013-A Mounting Assembly<br />
6A. — EFX-1009-A Bowed Crown Assembly<br />
6B. — EFX-1010-A Solar Crown Assembly<br />
7. — — CR-P2 Lithium Battery<br />
8. 3326009 MIX-60-A Mechanical, Below Deck Mixing <strong>Valve</strong><br />
9. 0326045 MIX-135-A Thermostatic, Below Deck Mixing <strong>Valve</strong><br />
10. 3365461 ETF-617-A Bak-Chek Tee Assembly<br />
11. 0335023 EAF-23-A Splitter<br />
12. 0335024 EAF-24-A 11-13/16” (300 mm) Extension Cable<br />
0335025 EAF-25-A 47-1/4” (1200 mm) Extension Cable<br />
0335015 EAF-17-A 126” (3200 mm) Extension Cable<br />
13. 0324027 EFX-27 Plug-in Adapter (US)<br />
— EFX-28 Plug-in Adapter (EU)<br />
— EAF-39 Plug-in Adapter (UK)<br />
0335037 EAF-37 Box Mount Adapter<br />
14. — EFX-1014-A Wall Flange<br />
NOTE: If changing flow rate caddy <strong>and</strong> spray insert must be changed in conjunction.<br />
† Single Supply faucets include Bak-Chek ®<br />
*Integral Base model not available with integral to faucet side mixer; single supply faucets include Bak-Chek ®<br />
— in Item No. column = Not shown in illustration<br />
— in Code No. <strong>and</strong> Part No. column = Not sold separately<br />
Electrical Connection for up to Six (6) Faucets Using One (1) Adapter<br />
6 VDC<br />
PLUG-IN<br />
ADAPTER<br />
DAISY CHAIN<br />
ELECTRICAL CABLE<br />
CABLE<br />
BEHIND<br />
THE WALL<br />
DAISY CHAIN<br />
CABLE<br />
BEHIND<br />
THE WALL<br />
TO ADDITIONAL<br />
FAUCETS<br />
(6 MAX.)<br />
NOTE: HARDWIRE FAUCETS SUPPLIED WITH ONE (1) 47” (1.2 m) EXTENSION CABLE.<br />
NOTE: EXTENSION CABLES AVAILABLE SEPARATELY.<br />
NOTE: USE ONLY SLOAN SUPPLIED POLARIZED AND KEYED CABLE ASSEMBLIES.<br />
IMPORTANT: CUTTING AND SPLICING WIRES WILL VOID WARRANTY.<br />
CABLE<br />
BEHIND<br />
THE WALL
OPERATION<br />
As the user’s h<strong>and</strong>s enter the<br />
beam’s effective range, the beam is<br />
reflected back into the sensor<br />
receiver <strong>and</strong> activates the solenoid<br />
valve allowing water to flow from<br />
the faucet. Water will flow until the<br />
h<strong>and</strong>s are removed or until the<br />
faucet reaches its automatic time<br />
out limit setting.<br />
135<br />
<strong>Repair</strong> <strong>Parts</strong> <strong>and</strong> <strong>Maintenance</strong> <strong>Guide</strong><br />
BASYS <br />
Infrared Sensor Activated<br />
Steps to Default IR<br />
Function Activate Function Setting Clic<br />
IR Activation Cover IR clic approximately for 2 sec.<br />
until LED will flash GREEN 1x - then remove<br />
finger from IR clic (Active for 5 sec.)<br />
–– ––<br />
Cleaning IR activation; Cover IR clic 2x - confirmation 2 min. ––<br />
Mode of the function is active by a couple flashes<br />
by the LED; to return to normal operation cover<br />
IR clic 1x or the faucet will automatically return<br />
to normal function after 2 min.<br />
12/24 Line See below. Off Off<br />
Purge 12HR<br />
Feature 24HR<br />
Sensor<br />
Range<br />
Adjustment<br />
See page 136. 6 1-8<br />
Reset IR activation; Cover IR clic 2x; LED will flash 5x Manually ––<br />
Electronics Cover IR clic 1x for 5 sec. until LED<br />
flashes 4x, then remove finger from IR clic<br />
Wait for 20 sec.<br />
(After 10 sec. water will flow for 6 sec.<br />
<strong>and</strong> automatically adjust to environment)<br />
Security Off After 90 seconds (max) of h<strong>and</strong> <strong>and</strong>/or object<br />
within sensor appears permanent, waterflow<br />
will stop <strong>and</strong> will remeasure environment<br />
On ––<br />
Please contact factory for more extensive programming options.<br />
12/24 LINE PURGE FEATURE<br />
This feature will operate the faucet<br />
every 12 or 24 hours since last use,<br />
if not used to prevent stagnant<br />
water conditions.<br />
Default purge duration is two<br />
minutes.<br />
Consult factory regarding other<br />
timing options.<br />
IR activation (see above). Cover IR<br />
clic approximately 24 sec. (ignore<br />
LED indications during this period).<br />
Release when requested program is<br />
reached. (See diagram to right).<br />
Programming mode will time out<br />
after 2 minutes if no changes are<br />
made.<br />
1x 24 sec<br />
+ ...<br />
...1x<br />
...2x<br />
...3x<br />
Deactivate<br />
Activate 12HR<br />
Activate 24HR<br />
H<strong>and</strong> Hygiene
H<strong>and</strong> Hygiene<br />
8x max range (see diagram below)<br />
– release when requested range is<br />
reached.<br />
Wait, until LED flashes GREEN.<br />
2x +<br />
1x 5 sec<br />
1x 2x<br />
6x - Factory Setting<br />
5x 7x<br />
4x 8x<br />
3x<br />
<strong>Repair</strong> <strong>Parts</strong> <strong>and</strong> <strong>Maintenance</strong> <strong>Guide</strong><br />
SENSOR RANGE ADJUSTMENT BATTERY REPLACEMENT<br />
Factory setting is appropriate for the majority of applications <strong>and</strong><br />
should not require resetting unless under extreme situations.<br />
IR Activation (see page 135).To<br />
enter programming mode place<br />
finger on IR clic for 2 times then<br />
remove. Light on side of crown<br />
should blink to indicate<br />
programming mode.<br />
Cover IR clic until LED flashes 4x -<br />
hold on until LED flashes 1x per<br />
minute.<br />
136<br />
BASYS <br />
Infrared Sensor Activated<br />
NOTE: Replace Battery when LED1 indicator flashes red each time<br />
faucet is in use or when faucet stops functioning. LED1 is identified by<br />
the battery symbol.<br />
NOTE: Turning off water is not necessary.<br />
Remove crown by loosening 2 hex<br />
screws located on underside of<br />
spout <strong>and</strong> slide crown down <strong>and</strong><br />
lift off.<br />
NOTE: Screw is captive within<br />
faucet body <strong>and</strong> will NOT fall out.<br />
UNLOCK<br />
LOCK
REPLACING THE SOLENOID STRAINER (FILTER)<br />
NOTE: Turning off water is not necessary, due to integrated automatic<br />
stop valve.<br />
Remove crown by loosening hex<br />
screw located on underside of spout<br />
<strong>and</strong> slide crown down <strong>and</strong> lift off.<br />
NOTE: Screw is captive within<br />
faucet body.<br />
Rotate solenoid assembly counterclockwise<br />
through a 45º angle.<br />
Pull solenoid caddy from faucet.<br />
NOTE: Strainer can be removed,<br />
cleaned <strong>and</strong> replaced at this time.<br />
Insert new solenoid caddy at a<br />
45° angle.<br />
Rotate solenoid caddy clockwise to<br />
align with arrow, locking the unit<br />
<strong>and</strong> opening water path.<br />
Slide on crown <strong>and</strong> secure in<br />
2 places.<br />
137<br />
<strong>Repair</strong> <strong>Parts</strong> <strong>and</strong> <strong>Maintenance</strong> <strong>Guide</strong><br />
BASYS <br />
Infrared Sensor Activated<br />
UNLOCK UNLOCK<br />
LOCK<br />
REPLACE SPRAY INSERT<br />
NOTE: Turning off water is not necessary, due to integrated automatic<br />
stop valve.<br />
Remove crown by loosening hex<br />
screw located on underside of spout<br />
<strong>and</strong> slide crown down <strong>and</strong> lift off.<br />
NOTE: Screw is captive within<br />
faucet body.<br />
Retrieve spray removal tool located<br />
near the spray insert.<br />
Insert spray removal tool into spray<br />
slot by sliding hook end of key<br />
between faucet spout <strong>and</strong> insert.<br />
Pull insert out of faucet once<br />
hooked.<br />
Install new insert.<br />
NOTE: If changing to a different flow<br />
rate solenoid caddy must be<br />
changed in conjunction.<br />
Return spray removal tool to storage<br />
location.<br />
NOTE: This can only be done once<br />
spray head is installed. This will lock<br />
the spray head in place.<br />
NOTE: If spray head is inserted<br />
incorrectly – key will not lock in<br />
properly. Turn faucet on to push<br />
insert out <strong>and</strong> re-install.<br />
Slide on crown <strong>and</strong> secure.<br />
LOCK<br />
H<strong>and</strong> Hygiene
H<strong>and</strong> Hygiene<br />
UPGRADE FAUCET FUNCTIONALITY<br />
Remove crown by loosening hex<br />
screw located on underside of spout<br />
<strong>and</strong> slide crown down <strong>and</strong> lift off.<br />
NOTE: Screw is captive within<br />
faucet body.<br />
LED DISPLAY DIAGNOSTIC CODES<br />
LED1 LED3<br />
LED2<br />
138<br />
<strong>Repair</strong> <strong>Parts</strong> <strong>and</strong> <strong>Maintenance</strong> <strong>Guide</strong><br />
BASYS <br />
Infrared Sensor Activated<br />
Place new crown on faucet by<br />
sliding onto spout <strong>and</strong> tightening<br />
hex screw on underside of spout.<br />
NOTE: All electronics are fully<br />
encapsulated in the crown <strong>and</strong> thus<br />
protected from the environment <strong>and</strong><br />
easy to replace or upgrade.<br />
Function LED1 LED2 LED3 Description 1 Description 2<br />
Start Up Boot LED1 <strong>and</strong> LED2 alternate blinking Fast Toggle<br />
Battery Check after Start Up LED1 on for 2 sec, if battery greater than 3.5V<br />
Line Power Check after Start Up LED3 on for 2 sec, if line power greater than 3.5V<br />
IR Adjust Process LED1 blinking while IR adjusts Few seconds<br />
IR Adjust IR LED2 on for 2 sec, if adjustment OK<br />
Battery Low LED1 blinks 3x, if battery is less than warning level Only while in detection mode<br />
Battery Empty<br />
<strong>Valve</strong> Error<br />
UNLOCK<br />
LED1 double flashes 3x, if battery is<br />
less than empty level<br />
LED3 double flashes 3x, if valve<br />
current error; flash after the 3rd error,<br />
off after the 3rd good operation<br />
IR Activation LED2 on for 2 sec, if IR-click has been activated<br />
Cleaning Mode LED1 4-in-1 flash, if cleaning mode is activated<br />
LEDs BLINKING<br />
LEDs ON<br />
LOCK<br />
Only while in detection mode<br />
Flashes after the 3rd error, off<br />
after the 3rd good operation<br />
After 5 sec. automatically back to<br />
operating mode<br />
During “Cleaning Mode” is activated<br />
Permanent 4-in-1 flashes
TROUBLESHOOTING GUIDE<br />
1. Red LED in spout does not blink 2 seconds after battery<br />
installation.<br />
A. Battery placement incorrect or batteries have been discharged.<br />
B. Ensure batteries are installed properly. Check the orientation of each<br />
battery matches the positive (+) <strong>and</strong> negative (–) symbols shown on<br />
the battery compartment.<br />
2. Faucet does not function.<br />
A. Adhesive packaging label affixed over sensor eye.<br />
B. Remove adhesive label from sensor eye.<br />
3. Faucet delivers water in an uncontrolled manner.<br />
A. Faucet is not working properly.<br />
B. Clean sensor window; if problem persists contact <strong>Sloan</strong> Tech Support<br />
(see below).<br />
4. Faucet does not deliver any water when sensor is activated.<br />
INDICATOR: Solenoid valve produces an audible “CLICK”.<br />
A. Water supply stop(s) closed.<br />
Open water supply stop(s).<br />
B. Strainer is clogged.<br />
Remove, clean, <strong>and</strong> reinstall strainer. Replace strainer, if needed (refer<br />
to page 137).<br />
5. Solenoid valve DOES NOT produce an audible “CLICK”.<br />
A. Batteries low (battery powered models).<br />
Replace batteries (refer to battery replacement on page 136).<br />
B. Power failure (hardwire models).<br />
Check power supply.<br />
6. Faucet delivers only a slow flow or dribble when sensor is<br />
activated.<br />
A. Water supply stop(s) are partially closed.<br />
Completely open water supply stop(s).<br />
7. Faucet does not stop delivering water or continues to drip after<br />
user is no longer detected.<br />
A. Faucet is not working properly.<br />
B. Clean sensor window; if problem persists contact <strong>Sloan</strong> Tech Support<br />
(see below).<br />
8. LED indicator blinks RED when faucet is in use.<br />
A. Batteries low (battery powered models).<br />
B. Replace batteries (refer to battery replacement on page 136).<br />
9. The water temperature is too hot or too cold on a faucet<br />
connected to hot <strong>and</strong> cold water supply lines.<br />
A. Supply stops are not adjusted properly.<br />
Adjust supply stops.<br />
B. For models with integral side mixing valve–Mixing valve is set<br />
improperly for the water temperature desired.<br />
Rotate mixing valve h<strong>and</strong>le clockwise to decrease water temperature or<br />
counterclockwise to increase water temperature.<br />
C. Inadequate hot water supply.<br />
Adjust supply stops.<br />
139<br />
<strong>Repair</strong> <strong>Parts</strong> <strong>and</strong> <strong>Maintenance</strong> <strong>Guide</strong><br />
BASYS <br />
Infrared Sensor Activated<br />
CARE AND CLEANING<br />
DO NOT USE abrasive or chemical cleaners<br />
(including chlorine bleach) to clean faucets that<br />
may dull the luster <strong>and</strong> attack the chrome or<br />
special decorative finishes. Use ONLY mild soap<br />
<strong>and</strong> water, then wipe dry with clean cloth or towel.<br />
While cleaning the bathroom sink, protect the<br />
faucet from any splattering of cleaner. Acids <strong>and</strong><br />
cleaning fluids will discolor or remove chrome<br />
plating.<br />
When assistance is required, please contact<br />
<strong>Sloan</strong> Technical Support at: 1-888-SLOAN-14 (1-888-756-2614).<br />
H<strong>and</strong> Hygiene
H<strong>and</strong> Hygiene<br />
EFX-3XX EFX-6XX<br />
2<br />
1<br />
8B<br />
14 15<br />
11 7<br />
12<br />
13<br />
6<br />
8A<br />
4<br />
9<br />
10<br />
3<br />
5<br />
16<br />
18<br />
140<br />
<strong>Repair</strong> <strong>Parts</strong> <strong>and</strong> <strong>Maintenance</strong> <strong>Guide</strong><br />
BASYS <br />
Capacitance Sensing Activated<br />
PARTS LIST—BASYS FAUCETS<br />
Item<br />
No. Code No. Part No. Description<br />
1. 0324002 EFX-2 St<strong>and</strong>ard Crown<br />
2. 0324036 EFX-36 Control Module Mounting Kit<br />
3. 3324113 EFX-8 Battery Pack<br />
4. 0324013 EFX-13 Solenoid <strong>Valve</strong> Caddy 0.5 gpm (1.9 Lpm)<br />
0329014 EFX-14 Solenoid <strong>Valve</strong> Caddy 1.5 gpm (5.7 Lpm)<br />
5. 0324019 EFX-19 Filter / Strainers<br />
6. 3324105 EFX-1003-A Control Module Assembly – 0.5 gpm (1.9 Lpm)<br />
3324106 EFX-1004-A Control Module Assembly with Turbine –<br />
0.5 gpm (1.9 Lpm)<br />
3324107 EFX-1005-A Control Module Assembly – 1.5 gpm (5.7 Lpm)<br />
3324108 EFX-1006-A Control Module Assembly with Turbine –<br />
1.5 gpm (5.7 Lpm)<br />
7. 0324031 EFX-31 120 VAC/6.75 VDC Plug-in Voltage Adapter<br />
8A. 0335000 EAF-1 Faucet Spout Mounting Kit (Pedestal)<br />
8B. 0324021 EFX-21-A Faucet Spout Mounting Kit (Integrated Base)<br />
9. 3324100 EFX-20-A 4-inch (102 mm) Centerset Base Plate Kit<br />
10. 3324101 EFX-26-A 8-inch (203 mm) Centerset Base Plate Kit<br />
11. 3326009 MIX-60-A Below Deck Mechanical Mixing <strong>Valve</strong><br />
12. 0326045 MIX-135-A Below Deck Thermostatic Mixing <strong>Valve</strong><br />
13. 0324033 ETF-617-A Bak-Chek ® Tee<br />
14. 0324034 EFX-33 Inlet Hose Fitting<br />
15. 3324102 EFX-34 Flexible Supply Hose 18” (45 mm)<br />
16. 3324104 EFX-1002-A 0.5 gpm (1.9 Lpm) Multi-Lam Spray Insert,<br />
includes: insert, o-ring, insert removal tool, <strong>and</strong><br />
hex key<br />
3324103 EFX-1001-A 1.5 gpm (5.7 Lpm) Aerated Stream Insert<br />
includes: insert, o-ring, insert removal tool, <strong>and</strong><br />
hex key<br />
3324102 EFX-1000-A 1.5 gpm (5.7 Lpm) Laminar Stream Insert<br />
includes: insert, o-ring, insert removal tool, <strong>and</strong><br />
hex key<br />
17. 0335023 EAF-23-A Splitter<br />
18. 0335024 EAF-24-A 11-13/16” (300 mm) Extension Cable<br />
0335025 EFX-25-A 47-1/4” (1200 mm) Extension Cable<br />
0335015 EFX-17-A 126” (3200 mm) Extension Cable<br />
NOTE: If changing flow rate, caddy <strong>and</strong> spray insert must be changed in conjunction.<br />
Manufactured by <strong>Sloan</strong> <strong>Valve</strong> <strong>Company</strong> under one or more of the following U.S. Patents: 7,690, 623; 7,069,941;<br />
6,619,320.<br />
— in Item No. column = Not shown in illustration<br />
— in Code No. <strong>and</strong> Part No. column = Not sold separately
OPERATION OF FAUCET<br />
A continuous ambient field is<br />
emitted <strong>and</strong> monitored by the faucet<br />
system. As the user’s h<strong>and</strong>s enter<br />
the effective range the sensor<br />
activates the solenoid valve allowing<br />
tempered water to flow from the<br />
faucet. Water will flow until the<br />
h<strong>and</strong>s are removed or until the<br />
faucet reaches its automatic time<br />
out setting. When h<strong>and</strong>s are moved<br />
away from the faucet, the<br />
capacitance sensor deactivates the<br />
solenoid valve, shutting off the<br />
water flow. The system<br />
automatically resets <strong>and</strong> is ready for<br />
the next user.<br />
BATTERY REPLACEMENT<br />
NOTE: REPLACE BATTERY WHEN<br />
RED BATTERY INDICATOR LED<br />
FLASHES 4 TIMES EACH TIME<br />
FAUCET IS IN USE OR WHEN<br />
FAUCET STOPS FUNCTIONING.<br />
No need to turn off water.<br />
Loosen screw with hex wrench <strong>and</strong><br />
remove cover.<br />
NOTE: IT IS POSSIBLE FOR THE<br />
FAUCET TO ACTIVATE WHEN THE<br />
CAP WIRE OR SOLENOID IS<br />
TOUCHED OR WHEN THE<br />
CONTROL MODULE COVER IS<br />
BEING SCREWED ONTO THE<br />
MANIFOLD.<br />
Slide cover forward <strong>and</strong> lift off.<br />
Remove battery case.<br />
141<br />
<strong>Repair</strong> <strong>Parts</strong> <strong>and</strong> <strong>Maintenance</strong> <strong>Guide</strong><br />
BASYS <br />
Capacitance Sensing Activated<br />
Twist top of battery pack counterclockwise<br />
to open. Remove batteries<br />
<strong>and</strong> replace batteries with four (4)<br />
new “AA” batteries. Twist top of<br />
battery pack clockwise to close.<br />
Replace cover.<br />
H<strong>and</strong> Hygiene
H<strong>and</strong> Hygiene<br />
REPLACE FILTER<br />
Disconnect solenoid wire from<br />
control module.<br />
Turn solenoid caddycounterclockwise<br />
lining up arrows on control module<br />
<strong>and</strong> solenoid caddy assembly.<br />
Remove solenoid caddy assembly<br />
from control module by pulling<br />
straight out.<br />
Remove filter from solenoid caddy<br />
assembly.<br />
142<br />
<strong>Repair</strong> <strong>Parts</strong> <strong>and</strong> <strong>Maintenance</strong> <strong>Guide</strong><br />
BASYS <br />
Capacitance Sensing Activated<br />
Remove new filter from control<br />
module cover.<br />
Snap new filter onto solenoid<br />
caddy assembly.<br />
Insert solenoid caddy assembly into<br />
control module lining up arrows.<br />
Turn solenoid caddy assembly<br />
clockwise 45º.<br />
Reconnect solenoid caddy wire to<br />
control module.
LED DISPLAY DIAGNOSTIC CODES<br />
Function<br />
TROUBLESHOOTING GUIDE<br />
LED1 LED3<br />
LED2<br />
LED1<br />
1. Faucet does not function.<br />
A. Batteries not installed.<br />
Install batteries.<br />
B. Capacitance cable not connected.<br />
Connect cable.<br />
2. Faucet delivers water in an uncontrolled manner.<br />
A. Faucet is not working properly.<br />
Contact <strong>Sloan</strong> Technical Support.<br />
3. Faucet does not deliver any water when Sensor is activated.<br />
Solenoid <strong>Valve</strong> produces an audible “CLICK.”<br />
A. Water supply stop(s) closed.<br />
Open water supply stop(s).<br />
B. Water supply stop strainer(s) clogged.<br />
Remove, clean, <strong>and</strong> reinstall water supply stop strainer(s). Replace<br />
strainer(s), if required.<br />
Solenoid <strong>Valve</strong> DOES NOT produce an audible “CLICK.”<br />
A. Battery low (battery operated models).<br />
Replace battery (refer to Battery Replacement section of guide).<br />
B. Power failure.<br />
Check power supply.<br />
4. Faucet does not stop delivering water or continues to drip after<br />
user is no longer detected.<br />
A. <strong>Valve</strong> is not working properly.<br />
Contact <strong>Sloan</strong> Technical Support.<br />
143<br />
<strong>Repair</strong> <strong>Parts</strong> <strong>and</strong> <strong>Maintenance</strong> <strong>Guide</strong><br />
BASYS <br />
Capacitance Sensing Activated<br />
NOTE: LED1 <strong>and</strong> LED2 are for battery <strong>and</strong><br />
programming related items. LED3 is for<br />
solenoid service.<br />
5. Faucet delivers only a slow flow or dribble when sensor is<br />
activated.<br />
A. Water supply stop(s) are partially closed.<br />
Completely open water supply stop(s).<br />
B. Water supply stop strainer(s) clogged.<br />
Remove, clean, <strong>and</strong> reinstall water supply stop strainer(s). Replace<br />
strainer(s), if required.<br />
C. Spray head is clogged.<br />
Remove, clean, <strong>and</strong> reinstall spray head. Replace spray head, if<br />
required.<br />
D. Faucet is not working properly.<br />
Contact <strong>Sloan</strong> Technical Support.<br />
6. LED indicator blinks when faucet is in use.<br />
A. Battery low (battery operated models).<br />
Replace battery (refer to Battery Replacement section of guide).<br />
7. The water temperature is too hot or too cold on a faucet<br />
connected to hot <strong>and</strong> cold supply lines.<br />
A. Supply stops are not adjusted properly.<br />
Adjust supply stops.<br />
CARE AND CLEANING<br />
Notes<br />
Power Up Success<br />
(Battery Only Models)<br />
Blinks 5x<br />
Blinks 1 every second (5 seconds); for battery power<br />
Power Up Success<br />
(Adapter Models)<br />
Blinks 3-5x Blinks 3-5x<br />
Blinks 1 every second (5 seconds); for adapter power<br />
Low Battery Blinks 4x<br />
Battery power is low;During h<strong>and</strong> detection<br />
Clean Mode<br />
Water Hold<br />
LED3<br />
Once every 2 seconds; Touch faucet body more than<br />
8 seconds, water hold for 2 minutes<br />
Once every 1 second; If water turns on/off 5 times in<br />
20 seconds, faucet turns off for 1 minute<br />
Solenoid Latch Failure Blinks<br />
Two LED blinks; After h<strong>and</strong> removed from detection zone<br />
Cap Sensor Fails to Calibrate<br />
LED2<br />
Blinks<br />
Blinks<br />
Blinks<br />
4 times per second; Before first water burst<br />
Detection for cable is not installed correctly<br />
Ambient Electrical Noise Too High Blinks<br />
4 times per seconds; After first water burst<br />
DO NOT USE abrasive or chemical cleaners (including chlorine bleach) to<br />
clean faucets that may dull the luster <strong>and</strong> attack the chrome or special<br />
decorative finishes. Use ONLY mild soap <strong>and</strong> water, then wipe dry with clean<br />
cloth or towel. While cleaning the bathroom sink, protect the faucet from any<br />
splattering of cleaner. Acids <strong>and</strong> cleaning fluids will discolor or remove<br />
chrome plating.<br />
When assistance is required, please contact<br />
<strong>Sloan</strong> Technical Support at: 1-888-SLOAN-14 (1-888-756-2614).<br />
H<strong>and</strong> Hygiene
H<strong>and</strong> Hygiene<br />
EAF-100 EAF-100-ISM-DPU-IC<br />
144<br />
<strong>Repair</strong> <strong>Parts</strong> <strong>and</strong> <strong>Maintenance</strong> <strong>Guide</strong><br />
Optima i.q. ® EAF-100 *<br />
PARTS LIST—EAF-100 FAUCETS<br />
Item<br />
No. Code No. Part No. Description<br />
1. 0335021 EAF-22 1.5 gpm (5.7 Lpm) Aerator Spray Head<br />
1A. 0335008 EAF-10 2.2 gpm (8.3 Lpm) Aerator Spray Head<br />
1B. 0335010 EAF-12 0.5 gpm (1.9 Lpm) Spray Head<br />
1C. 0335029 EAF-51 0.35 gpm (1.3 Lpm) Spray Head (Multi-Lam)<br />
2A. 0335004 EAF-6-A Throat Plate Assembly<br />
(Plug-in Adapter Models)<br />
2B. 0335005 EAF-7-A Throat Plate Assembly with i.q.-cliq<br />
(Plug-in Adapter Model)<br />
3. 0335009 EAF-11 90-264 VAC/6.75 VDC Plug-In Adapter (US)<br />
4. 0335000 EAF-1 Faucet Mounting Kit<br />
5. 0335007 EAF-9 Strainer (Filter)<br />
6A. 3335010 EAF-1001 Mixer H<strong>and</strong>le Assembly <strong>and</strong> Cartridge<br />
6B. 3335011 EAF-1002 H<strong>and</strong>le <strong>Repair</strong> Kit<br />
7. 3335023 EAF-1008 13” (330 mm) Flexible Supply Hose<br />
8. 3365302 ETF-607-A Trim Plate for 4” Center-set Sink<br />
9. 3365303 ETF-608-A Trim Plate for 8” Center-set Sink<br />
10. 0335001 EAF-2 Solenoid<br />
11. 0335024 EAF-24-A 11-13/16” (300 mm) Extension Cable<br />
0335025 EAF-25-A 47-1/4” (1200 mm) Extension Cable<br />
0335015 EAF-17-A 126” (3200 mm) Extension Cable<br />
12. † — EAF-44-A Power Splitter †<br />
13. 0335037 EAF-37 6 VDC Box Mount Adapter<br />
14. 0335038 EAF-38 90-264 VAC/6.75 VDC Plug-In Adapter (EURO)<br />
15. 0335039 EAF-39 90-264 VAC/6.75 VDC Plug-In Adapter (UK)<br />
† EAF-44 replaces the separate EAF-23-A Splitter Cable <strong>and</strong> EAF-28 Capacitor, which is sold separately.<br />
Electrical Connection for up to Six (6) Faucets<br />
Using One (1) Adapter<br />
(3)<br />
6 VDC PLUG-IN<br />
ADAPTER<br />
(12)<br />
POWER<br />
SPLITTER †<br />
(12)<br />
POWER<br />
SPLITTER †<br />
* EAF-100 faucets introduced in 2011 now require EAF-28-A Capacitor or<br />
EAF-44-A Power Splitter in ganging applications.<br />
(12)<br />
POWER<br />
SPLITTER †<br />
TO ADDITIONAL<br />
FAUCETS<br />
(6 MAX.)
AUTO RANGE ADJUSTMENT<br />
Press button one (1) time, then<br />
immediately step away.<br />
Faucet will run for four (4) seconds<br />
<strong>and</strong> the range will automatically<br />
adjust to its environment.<br />
Wait ten (10) seconds after water<br />
shuts off before using faucet.<br />
If faucet does not function, refer to<br />
the Troubleshooting section of this<br />
instruction manual.<br />
MANUAL RANGE ADJUSTMENT<br />
Note: Use Manual range adjustment only when desired range cannot<br />
be obtained with auto range adjustment shown above.<br />
Push button two (2) times (double click).<br />
Push again for five (5) seconds<br />
until LED flashes four (4) times.<br />
Then release button <strong>and</strong> wait five (5) seconds.<br />
Push <strong>and</strong> hold button in as Faucet continuously cycles through the following<br />
five (5) range settings.<br />
One (1) flash = shortest range<br />
Two (2) flashes = short range<br />
Three (3) flashes = medium range<br />
Four (4) flashes = long range<br />
Five (5) flashes = longest range<br />
Release button at desired setting.<br />
Then water will flow for<br />
four (4) seconds signaling<br />
confirmation of setting. Wait an<br />
additional ten (10) seconds<br />
before using Faucet.<br />
Note: Updated electronics have visible<br />
red <strong>and</strong> green LED. Original electronics<br />
have only red LED aadn range setting<br />
is reversed (1=longest, 8=shortest)<br />
5x<br />
4x<br />
3x<br />
1x<br />
2x<br />
145<br />
<strong>Repair</strong> <strong>Parts</strong> <strong>and</strong> <strong>Maintenance</strong> <strong>Guide</strong><br />
Optima i.q. ® EAF-100<br />
SERVICE OPERATION<br />
Prepare for operation<br />
A. Press the button once.<br />
B. Remove sticker.<br />
C. Water will flow 4 seconds<br />
D. Wait 10 seconds, then the faucet<br />
is ready for use.<br />
If waterflow doesn’t start after<br />
removing the sticker <strong>and</strong> the red<br />
led within the sensor flashes<br />
continue with the following<br />
procedure!!<br />
A. Press the button once.<br />
B. Hold a white sheet of paper 1.5”<br />
(40 mm) in front of sensor until<br />
water flows for 4 seconds<br />
C. Remove paper.<br />
D. Wait 10 seconds, then the faucet<br />
is ready for use.<br />
A<br />
B<br />
C<br />
A<br />
B<br />
C<br />
1x<br />
10 Sec.<br />
1x<br />
10 Sec.<br />
4 Sec.<br />
4 Sec.<br />
H<strong>and</strong> Hygiene
H<strong>and</strong> Hygiene<br />
TROUBLESHOOTING GUIDE<br />
1. Faucet does not function.<br />
A. Adhesive packaging label affixed over sensor eye.<br />
Remove adhesive label from sensor eye.<br />
B. “Permanent Off” activated.<br />
Press button on faucet throat one time.<br />
2. Faucet delivers water in an uncontrolled manner.<br />
A. Faucet is not working properly.<br />
Contact <strong>Sloan</strong> Technical Support at 1-888-SLOAN-14 (1-888-756-2614).<br />
3. Faucet does not deliver any water when sensor is activated.<br />
INDICATOR: Solenoid valve produces an audible “CLICK.”<br />
A. Water supply stop(s) closed.<br />
Open water supply stop(s).<br />
B. Water supply stop strainer(s) clogged.<br />
Clean water supply stop strainer(s).<br />
INDICATOR: Solenoid valve DOES NOT produce an audible “CLICK.”<br />
A. Power failure (EAF-100 Models).<br />
Check power supply.<br />
4. Faucet delivers only a slow flow or dribble when sensor is<br />
activated.<br />
A. Water supply stop(s) are partially closed.<br />
Completely open water supply stop(s).<br />
B. Water supply stop strainer(s) clogged.<br />
Remove, clean, <strong>and</strong> reinstall water supply stop strainer(s). Replace<br />
strainer(s) if required.<br />
C. Aerator is clogged.<br />
Remove, clean, <strong>and</strong> reinstall aerator. Replace aerator if required.<br />
D. Faucet is not working properly.<br />
Contact <strong>Sloan</strong> Technical Support at 1-888-SLOAN-14 (1-888-756-2614).<br />
5. Faucet does not stop delivering water or continues to drip after<br />
user is no longer detected.<br />
A. Faucet is not working properly.<br />
Contact <strong>Sloan</strong> Technical Support at 1-888-SLOAN-14 (1-888-756-2614).<br />
6. i.q.-cliq doesn’t function (-IC models only)<br />
A. Button is not working properly.<br />
Contact <strong>Sloan</strong> Technical Support at 1-888-SLOAN-14 (1-888-756-2614).<br />
7. The water temperature is too hot or too cold on a faucet<br />
connected to hot <strong>and</strong> cold supply lines.<br />
A. Supply stops are not adjusted properly.<br />
Adjust supply stops.<br />
B. For models with integral mixing valve — mixing valve is set improperly<br />
for the water temperature desired.<br />
Rotate mixing valve h<strong>and</strong>le clockwise to decrease water temperature or<br />
counterclockwise to increase water temperature.<br />
146<br />
<strong>Repair</strong> <strong>Parts</strong> <strong>and</strong> <strong>Maintenance</strong> <strong>Guide</strong><br />
Optima i.q. ® EAF-100<br />
CARE AND CLEANING OF CHROME AND SPECIAL FINISHES<br />
DO NOT use abrasive or chemical cleaners<br />
(including chlorine bleach) to clean faucets that<br />
may dull the luster <strong>and</strong> attack the chrome or<br />
special decorative finishes. Use ONLY mild soap<br />
<strong>and</strong> water, then wipe dry with clean cloth or towel.<br />
While cleaning the bathroom tile, protect the faucet from<br />
any splattering of cleaner. Acids <strong>and</strong> cleaning fluids will<br />
discolor or remove chrome plating.<br />
When assistance is required, please contact<br />
<strong>Sloan</strong> Technical Support at: 1-888-SLOAN-14 (1-888-756-2614).
ELF-10 ESF-20 ESF-30<br />
ELF-10 ESF-20<br />
-YR Variation<br />
Surface Mount Sensor Box<br />
OBSOLETE<br />
EL-262-A<br />
Surface Mount Kit<br />
Includes Items 2, 3, 4,<br />
5A <strong>and</strong> 5B<br />
ESF-30<br />
OBSOLETE<br />
OBSOLETE<br />
147<br />
<strong>Repair</strong> <strong>Parts</strong> <strong>and</strong> <strong>Maintenance</strong> <strong>Guide</strong><br />
Optima ® ELF-10/ESF-20/ESF-30<br />
PARTS LIST—ELF-10, ESF-20, AND ESF-30 FAUCETS<br />
Item<br />
No. Code No. Part No. Description<br />
1. 0305161 EL-161 Cover Plate for 2-gang junction box<br />
(4-1/2˝ square)<br />
2. 0305152 EL-152 Cover Plate Screws (use 5/64˝ hex wrench)<br />
3. 0305341 EL-236 Sensor Box (for –YR Variation) – OBSOLETE<br />
4. 0305345 EL-242 Wall Mounting Bracket Plate (for –YR Variation) –<br />
OBSOLETE<br />
5A. 0311048 K-57 Anchor (for –YR Variation) – OBSOLETE<br />
5B. 0311041 K-44 Slotted Wood Screw (for –YR Variation) –<br />
OBSOLETE<br />
6. 0305323 EL-168-A Yoke Assembly includes Yoke, two (2) Screws, <strong>and</strong><br />
two (2) Washers<br />
7. 3305622 EL-1500-LL OPTIMA Lavatory Sensor<br />
3305623 EL-1500-LL-T OPTIMA Lavatory Sensor with 30-second timeout<br />
8. 0365162 ETF-595-A Faucet Spout Assembly (ELF-10)<br />
9. 3365092 ETF-1023-A 0.5 gpm (1.9 Lpm) Spray Head with Key<br />
(male thread)<br />
3365093 ETF-1024-A 2.2 gpm (8.3 Lpm) Aerator Spray Head with Key<br />
(male thread)<br />
3365162 ETF-1029-A 2.2 gpm (8.3 Lpm) Laminar Flow Spray Head with<br />
Key (male thread)<br />
0305927 ETF-435 Replacement Key Only<br />
10. 0305768 EL-310-A Mounting Hardware Kit (ELF-10 <strong>and</strong><br />
ESF-20 only) includes Washer, Locking Nut,<br />
Coupling Nut, Rubber Washer, <strong>and</strong> Washer Cone<br />
11. 0305459 ETF-61 3/8” Male Compression Fitting x 3/8” NPT<br />
12. 3305527 ETF-1004-A 24 VAC Solenoid <strong>Valve</strong> Assembly includes male<br />
Compression Fitting, Input Power Cable, Solenoid<br />
<strong>Valve</strong> with stainless steel seat, <strong>and</strong> quickdisconnect<br />
Terminal Receptacle<br />
— 3305577 ETF-1009-A Solenoid <strong>Valve</strong> <strong>Repair</strong> Kit includes<br />
Replacement Filter<br />
13. 0305784 ETF-178 Aerator Adapter (ESF-20 <strong>and</strong> ESF-30 only;<br />
not required for Shower Spray Head)<br />
14. 0328134 AC-55-A Shower Spray Head Assembly, 2.2 gpm (8.3 Lpm)<br />
15. 0328198 AC-92-A Deck-Mounted Faucet with Gooseneck Spout<br />
(ESF-20) – OBSOLETE<br />
— 0305797 AC-93-A Deck-Mounted Faucet with Surgical Bend<br />
Gooseneck Spout (ESF-20)<br />
16. 0328140 AC-97-A Back-Mounted Faucet with Gooseneck Spout<br />
(ESF-30) – OBSOLETE<br />
— 0305798 AC-94-A Back-Mounted Faucet with Surgical Bend<br />
Gooseneck Spout (ESF-30) – OBSOLETE<br />
17. 3365090 ETF-621-A 2.2 gpm (8.3 Lpm) Aerator Spray Head with Key<br />
(female thread)<br />
— 0305368 EL-262-A Surface Mount Kit includes Items 2, 3, 4, 5A, <strong>and</strong><br />
5B (for–YR Variation) – OBSOLETE<br />
<strong>Sloan</strong> faucets are available in various finishes – contact factory for part numbers.<br />
— = Not shown in illustration<br />
H<strong>and</strong> Hygiene
H<strong>and</strong> Hygiene<br />
TROUBLESHOOTING GUIDE<br />
1. Faucet does not function (RED indicator light does not illuminate<br />
when user steps in front of sensor).<br />
A. No power is supplied to sensor.<br />
Ensure that power is turned “ON”. Check transformer, leads, <strong>and</strong><br />
connections. <strong>Repair</strong> or replace as necessary.<br />
B. Sensor is not operating.<br />
Replace EL-1500-LL or EL-1500-LL-T sensor.<br />
2. Faucet does not function (RED indicator light appears when user<br />
steps in front of sensor BUT solenoid does NOT “CLICK”).<br />
A. Debris is clogging solenoid.<br />
Disassemble, clean, flush, <strong>and</strong> reassemble.<br />
B. Solenoid electrical wiring is not correctly connected.<br />
Check solenoid connections.<br />
C. Solenoid is not working.<br />
Replace ETF-1004-A solenoid.<br />
3. No water is delivered when faucet is activated.<br />
INDICATOR: Solenoid “CLICK” can be heard:<br />
A. Water supply stop(s) may be partially closed.<br />
Open stop(s).<br />
B. Solenoid filter is clogged.<br />
Shut off water supply. Remove, clean, <strong>and</strong> reinstall solenoid filter.<br />
Replace ETF-1009-A solenoid filter if necessary.<br />
4. Very low flow or slow dribble<br />
A. Water supply stop(s) may be partially closed.<br />
Open stop(s).<br />
B. Solenoid filter is clogged.<br />
Shut off water supply. Remove, clean, <strong>and</strong> reinstall solenoid filter.<br />
Replace ETF-1009-A solenoid filter if necessary.<br />
C. Aerator or spray head is clogged.<br />
Remove, clean, <strong>and</strong> reinstall.<br />
D. Debris is clogging solenoid.<br />
Disassemble, clean, flush, <strong>and</strong> reassemble.<br />
148<br />
<strong>Repair</strong> <strong>Parts</strong> <strong>and</strong> <strong>Maintenance</strong> <strong>Guide</strong><br />
Optima ® ELF-10/ESF-20/ESF-30<br />
5. Faucet does not stop delivering water or continues to drip after<br />
user is no longer detected (power is “ON” <strong>and</strong> RED indicator light<br />
is flashing).<br />
A. Non-permanent target is still detected in range of sensor after user<br />
exits range.<br />
Remove non-permanent target. If the target is a new permanent target<br />
(i.e., a new wall or partition), turn 24 VAC power supply “OFF” for<br />
fifteen (15) seconds. Turn power supply “ON”. Allow the sensor to<br />
complete the start-up procedure.<br />
B. Sensor has failed.<br />
Replace EL-1500-LL or EL-1500-LL-T sensor.<br />
6. Faucet does not stop delivering water or continues to drip after<br />
user is no longer detected (even after power supply has been<br />
disconnected).<br />
A. Solenoid <strong>Valve</strong> is installed backward.<br />
Disconnect solenoid. Reconnect solenoid so the water flow is directed<br />
toward the faucet.<br />
B. The solenoid is dirty <strong>and</strong> is not closing properly.<br />
Remove solenoid operator, clean, <strong>and</strong> reassemble.<br />
When assistance is required, please contact<br />
<strong>Sloan</strong> Technical Support at: 1-888-SLOAN-14 (1-888-756-2614).
4A<br />
4B<br />
11<br />
8<br />
OLD-STYLE FAUCETS<br />
ETF-80 faucets manufactured<br />
before 1992 had all their electronic<br />
circuitry located within the body of<br />
the spout.<br />
Replacement parts (including sensor<br />
components) are available in repair<br />
kits ETF-1006-A. – OBSOLETE<br />
2<br />
10<br />
9<br />
4C<br />
3<br />
1B<br />
5<br />
7<br />
1A<br />
6<br />
12<br />
149<br />
<strong>Repair</strong> <strong>Parts</strong> <strong>and</strong> <strong>Maintenance</strong> <strong>Guide</strong><br />
Optima ® ETF-80/ETF-880<br />
PARTS LIST—ETF-80 AND ETF-880 FAUCETS<br />
Item<br />
No. Code No. Part No. Description<br />
1A. 0305613 ETF-250-A Faucet/Sensor Assembly (ETF-80)<br />
0365054 ETF-625-A Faucet/Sensor Assembly (ETF-880)<br />
1B. 3365523 ETF-631-A Sensor Assembly Only (for Faucets manufactured<br />
after 10/2003, identified by an all white <strong>Sloan</strong><br />
name on throat plate) (ETF-80). For ETF-80<br />
faucets prior to 10/2003 (identified by a white<br />
<strong>and</strong> red <strong>Sloan</strong> name on throat plate) sensor<br />
assembly discontinued. Use ETF-250<br />
faucet/sensor assembly.<br />
3365548 ETF-1031 <strong>Repair</strong> Kit Throat Plate <strong>and</strong> Sensor (ETF-880)<br />
2. 3365091 ETF-1021-A 0.5 gpm (1.9 Lpm) Spray Head with Key<br />
(female thread)<br />
3365090 ETF-1022-A 2.2 gpm (8.3 Lpm) Aerator Spray Head with Key<br />
(female thread)<br />
3365161 ETF-1028-A 1.5 gpm (5.7 Lpm) Laminar Flow Spray Head with<br />
Key (female thread)<br />
3365755 ETF-1038-A 0.35 gpm (1.3 Lpm) Multi-Lam Spray Head VR<br />
3. 0305927 ETF-435 Replacement Key ONLY<br />
4A. 3365466 ETF-295-A 4” (102 mm) Centerset Trim Plate Kit for Faucet<br />
(Faucet Only) includes two (2) Nuts, two (2) Hex<br />
Screws, two (2) Flat Washers, Single Hole Cover<br />
Plate, <strong>and</strong> CP Base Plate (ETF-80)<br />
— 3365467 ETF-299-A 4” (102 mm) Centerset Trim Plate Kit for Faucet<br />
with Optional Mixing <strong>Valve</strong> includes two (2) Nuts,<br />
two (2) Hex Screws, two (2) Flat Washers, Dual<br />
Hole Cover Plate, <strong>and</strong> CP Base Plate (ETF-80)<br />
4B. 3365473 ETF-662-A 4" (102 mm) Centerset Trim Plate Kit (CP)<br />
(ETF-880)<br />
4C. 3365024 ETF-510-A 8” (203 mm) Centerset Trim Plate Kit includes<br />
two (2) Finger Nuts, two (2) Washer Gaskets,<br />
two (2) Fender Washers, Base Gasket, Back-up<br />
Spacer <strong>and</strong> CP Single Hole Trim Plate<br />
Assembly (CP) (ETF-880)<br />
5. 0305626 ETF-290-A Faucet Mounting Kit includes Rubber Gasket,<br />
Mounting Washer, Mounting Nut, <strong>and</strong> 4439071<br />
Compression Fitting Connector<br />
6. 0305736 ETF-297 1/4” to 3/8” Compression Fitting Connector<br />
7. 0305849 ETF-370-A 24 VAC Solenoid <strong>Valve</strong> Assembly includes 18”<br />
(457 mm) armored Cable <strong>and</strong> two (2) Terminal<br />
Housings<br />
3305577 ETF-1009-A Solenoid <strong>Valve</strong> <strong>Repair</strong> Kit includes<br />
Replacement Filter, <strong>Guide</strong>, Armature Spring,<br />
Diaphragm <strong>and</strong> Washer<br />
3365676 ETF-437-A Single Solenoid Supply Kit includes, two (2)<br />
Compression Fittings<br />
8. 3365000 ETF-450-A Control Module Assembly includes splashproof<br />
Junction Box <strong>and</strong> Junction Box Mounting Kit<br />
9. 0365534 ETF-233 120V/35VA Plug-In Transformer<br />
10. 0345370 EL-248-40 24V/40 VA Box Mount Transformer<br />
11. 0365001 ETF-458-A Input Power Cable (Transformer to Control Module)<br />
includes Strain Relief <strong>and</strong> two (2) Terminal Crimp<br />
Connectors<br />
12. 3365461 ETF-617-A Bak-Chek ® “T” Assembly<br />
— 3305560 ETF-1006-A <strong>Repair</strong> Kit for old-style ETF-80 Faucets<br />
(manufactured before 1992) includes Hex Screw,<br />
5/64” Hex Wrench, Cable Assembly, Hose Clamp,<br />
5-connector Housing, Key for Spray Heads, Access<br />
Plate/Sensor Assembly, <strong>and</strong> Control Module<br />
Assembly – OBSOLETE<br />
See page 157 for faucet cable extension cords.<br />
— = Not shown in illustration<br />
H<strong>and</strong> Hygiene
H<strong>and</strong> Hygiene<br />
TROUBLESHOOTING GUIDE<br />
1. No water is delivered when faucet is activated.<br />
INDICATOR: If no LED lights illuminate:<br />
A. No electricity is being supplied to faucet.<br />
Ensure that the main power is turned “ON”. Check all transformer,<br />
sensor, solenoid <strong>and</strong> cable connections. Make sure that transformer<br />
is supplying 24 VAC (Volts AC). If no voltage is detected, replace<br />
transformer.<br />
B. There is an electrical system malfunction.<br />
Reset electrical system. Unplug Sensor connection. Disconnect power<br />
to circuit for ten (10) seconds. Reconnect.<br />
INDICATOR: If the GREEN LED illuminates when power is<br />
reconnected:<br />
C. There is a short in the Sensor.<br />
Replace sensor. Refer to individual faucet parts diagram for appropriate<br />
sensor assembly. Note: GREEN LED may illuminate immediately after<br />
sensor disconnection.<br />
D. There is a short in the solenoid or solenoid cable.<br />
Replace ETF-370-A solenoid.<br />
INDICATOR: If the GREEN LED does NOT illuminate when power is<br />
reconnected:<br />
E. There is an electrical system malfunction.<br />
Reset electrical system. Unplug sensor connection. Disconnect power<br />
to circuit for ten (10) seconds. Reconnect.<br />
F. The control module circuit is not working properly.<br />
Replace ETF-450-A control module.<br />
INDICATOR: If GREEN LED illuminates AND changes to RED when<br />
h<strong>and</strong>s are in the sensor’s detection zone AND the RED solenoid LED<br />
illuminates:<br />
G. Water supply stop(s) may be partially closed.<br />
Open stop(s) if closed.<br />
H. Debris is clogging solenoid filter.<br />
Shut off water supply. Remove, clean <strong>and</strong> reinstall solenoid filter.<br />
INDICATOR: If GREEN LED illuminates AND changes to RED when<br />
h<strong>and</strong>s are placed in the sensor’s detection zone AND the RED<br />
solenoid LED flickers with a vibrating/clicking noise heard inside<br />
the module: Note: Applies only to REVISION 2 MODULES.<br />
I. There is a direct short in the solenoid or solenoid cable.<br />
Replace with ETF-370-A solenoid.<br />
INDICATOR: If GREEN/RED LED illuminates AND changes to RED<br />
when h<strong>and</strong>s are NOT located in the sensor’s detection zone BUT the<br />
RED solenoid LED (in upper left corner of circuit) does NOT<br />
illuminate:<br />
J. Sensor range is set too long <strong>and</strong> is detecting the sink.<br />
Reduce sensor detection range.<br />
K. Sensor is not working properly.<br />
Replace sensor. Refer to individual faucet parts diagram for appropriate<br />
sensor assembly.<br />
INDICATOR: If GREEN LED illuminates BUT does NOT change to red<br />
when h<strong>and</strong>s are placed in the sensor’s detection zone:<br />
L. Sensor range is set too short.<br />
Increase sensor detection range.<br />
M. Sensor is not working properly.<br />
Replace sensor. Refer to individual faucet parts diagram for<br />
appropriate sensor assembly.<br />
150<br />
<strong>Repair</strong> <strong>Parts</strong> <strong>and</strong> <strong>Maintenance</strong> <strong>Guide</strong><br />
Optima ® ETF-80/ETF-880<br />
2. Sensing range is too short.<br />
A. Extended range sensitivity is required.<br />
Dip switch number 4 should be in the “DOWN” (Extended range<br />
sensitivity) position. Increase range by adjusting range potentiometer<br />
clockwise (yellow phillips screw in blue base).<br />
B. Faucet has surgical bend gooseneck spout.<br />
For long range use (recommended for surgical bend gooseneck spout<br />
faucet models), remove range jumper from upper right h<strong>and</strong> corner of<br />
circuit board. Adjust range potentiometer. Note: Applies only to<br />
REVISION 2 MODULES.<br />
3. Faucet activates by itself (false triggers).<br />
A. Sensor range is set too long.<br />
Decrease range by adjusting range potentiometer counterclockwise. If<br />
necessary, flip dip switch number 4 into the “UP” (reduced range<br />
sensitivity) position. Check surroundings for factors that contribute to<br />
sensor range detection problems (bright lights, highly reflective<br />
surfaces, sunlight, etc.).<br />
4. Faucet delivers very low flow or just a dribble.<br />
A. Water supply stop(s) may be partially closed.<br />
Open stop(s).<br />
B. Debris is clogging solenoid filter.<br />
Shut off water. Remove, clean, <strong>and</strong> reinstall solenoid filter.<br />
C. Solenoid is worn or not working properly.<br />
Rebuild with ETF-1009-A solenoid repair kit or replace<br />
ETF-370-A solenoid.<br />
D. Debris is clogging faucet aerator or spray head.<br />
Shut off water. Use key if required to remove. Then clean <strong>and</strong> reinstall<br />
aerator or spray head.<br />
5. Faucet does not stop delivering water or continues to drip after<br />
user is no longer detected (even after power to the module has<br />
been disconnected).<br />
A. Solenoid valve is installed backward.<br />
Disconnect solenoid. Reconnect solenoid with water flow towards the<br />
faucet (see arrow on solenoid).<br />
B. Debris is clogging solenoid.<br />
Remove <strong>and</strong> clean solenoid operator. If necessary, rebuild with<br />
ETF-1009-A repair kit.<br />
C. Seat in solenoid valve body is damaged or pitted.<br />
Replace with ETF-370-A solenoid.<br />
When assistance is required, please contact<br />
<strong>Sloan</strong> Technical Support at: 1-888-SLOAN-14 (1-888-756-2614).
ETF-500<br />
New Base Gasket<br />
The new base gasket (in<br />
production since October<br />
1999) is shown at right. An<br />
older base gasket design<br />
did not have the u-shaped<br />
drainage hole.<br />
†† TO MOUNT FAUCET ON A SURFACE<br />
BETWEEN 0.41” (10 MM) AND 1.00”<br />
(25 MM) THICK, USE THE HARDWARE<br />
SHOWN BELOW.<br />
8<br />
7<br />
4<br />
4<br />
4<br />
1B<br />
3B<br />
1A<br />
2<br />
3A<br />
5 6 11 10<br />
5<br />
9<br />
OLDER MOUNTING KIT<br />
12<br />
13<br />
151<br />
<strong>Repair</strong> <strong>Parts</strong> <strong>and</strong> <strong>Maintenance</strong> <strong>Guide</strong><br />
Optima ® ETF-500<br />
PARTS LIST—ETF-500 FAUCET<br />
Item<br />
No. Code No. Part No. Description<br />
1A. 0365778 ETF-772-A-ST Faucet/Sensor Assembly with St<strong>and</strong>ard Gooseneck<br />
Spout<br />
1B. 0365783 ETF-772-A-SU Faucet/Sensor Assembly with Surgical Bend<br />
Gooseneck Spout<br />
2. 0305784 ETF-178 Aerator Adapter for Spray Heads (not required for<br />
AC-55-A Shower Spray Head)<br />
3A. 0365147 ETF-621-A 2.2 gpm (8.3 Lpm) Aerator Spray Head with Key<br />
(female thread)<br />
0365793 ETF-839 0.35 gpm (1.3 Lpm) Multi-Lam Spray Head<br />
0305927 ETF-435 Replacement Key ONLY<br />
3B. 0328134 AC-55-A Shower Spray Head Assembly, 2.2 gpm (8.3 Lpm)<br />
4. 0315060 EBF-110-A Faucet Mounting Kit includes Base Gasket, large<br />
Flat Washer, large Lock Washer, large Nut,<br />
Mounting Spacer, Mounting Stud, small Flat<br />
Washer, small Lock Washer, small Nut, Anti-<br />
Rotation Screw, <strong>and</strong> Compression Fitting<br />
Connector (male)<br />
— 0365152 ETF-591 1/8” NPT Pipe to 3/8” Tube Male Compression<br />
Fitting Connector<br />
5. 3365676 ETF-437-A Single Solenoid Supply Kit includes, two (2)<br />
Compression Fittings, Compression Nut, <strong>and</strong><br />
Ferrule<br />
6. 0305849 ETF-370-A 24 VAC Solenoid <strong>Valve</strong> Assembly includes<br />
18” (457 mm) armored Cable <strong>and</strong> two (2)<br />
Terminal Housings<br />
— 3305577 ETF-1009-A Solenoid <strong>Valve</strong> <strong>Repair</strong> Kit includes<br />
Replacement Filter, <strong>Guide</strong>, Armature Spring,<br />
Diaphragm <strong>and</strong> Washer<br />
7. 3365461 ETF-617-A Bak-Chek ® “T” Assembly<br />
8. 3365000 ETF-450-A Control Module Assembly includes splashproof<br />
Junction Box <strong>and</strong> Junction Box Mounting Kit<br />
9. 0365534 ETF-233 120V/35VA Plug-In Transformer<br />
10. 0345370 EL-248-40 24V/40VA Box Mount Transformer<br />
11. 0365001 ETF-458-A Input Power Cable (Transformer to Control Module)<br />
includes Strain Relief <strong>and</strong> two (2) Terminal<br />
Crimp Connectors<br />
See page 157 for faucet cable extension cords.<br />
— = Not shown in illustration<br />
OLD MOUNTING KIT AND FAUCET SHANK<br />
12. N/A †† EBF-110-A Old Faucet Mounting Kit included 3/8” Water<br />
Supply Tube, Base Gasket, large Flat Washer, large<br />
Lock Washer, large Nut, <strong>and</strong> Compression Fitting<br />
Connector (order Items 4 <strong>and</strong> 13 as replacement<br />
parts)<br />
13. 0365058 †† ETF-547 1/8” NPT Pipe to 3/8” Tube Female Compression<br />
Fitting Connector<br />
The new mounting kit (in production since June 1999; Item 4 shown at left)<br />
includes parts for installation on both thin <strong>and</strong> thick surfaces, an ETF-591<br />
male compression fitting, <strong>and</strong> an anti-rotation screw for installation on sheet<br />
metal surfaces less than 0.41” (10 mm) thick. For surfaces between 0.41”<br />
(10 mm) <strong>and</strong> 1.00” (25 mm) thick, use the mounting spacer <strong>and</strong> mounting<br />
stud hardware. The faucet sensor cable is threaded through a groove on the<br />
side of the shank.<br />
The older mounting kits (Items 12 <strong>and</strong> 13) can be identified by a copper<br />
supply tube attached to the faucet shank, requires an ETF-547 compression<br />
fitting, <strong>and</strong> threads the faucet sensor cable through the interior of the shank.<br />
H<strong>and</strong> Hygiene
H<strong>and</strong> Hygiene<br />
TROUBLESHOOTING GUIDE<br />
1. No water is delivered when faucet is activated.<br />
INDICATOR: If no LED lights illuminate:<br />
A. No electricity is being supplied to faucet.<br />
Ensure that the main power is turned “ON”. Check all transformer,<br />
sensor, solenoid <strong>and</strong> cable connections. Make sure that transformer<br />
is supplying 24 VAC (Volts AC). If no voltage is detected, replace<br />
transformer.<br />
B. There is an electrical system malfunction.<br />
Reset electrical system. Unplug Sensor connection. Disconnect power<br />
to circuit for ten (10) seconds. Reconnect.<br />
INDICATOR: If the GREEN LED illuminates when power is<br />
reconnected:<br />
C. There is a short in the Sensor.<br />
Replace sensor. Refer to individual faucet parts diagram for appropriate<br />
sensor assembly. Note: GREEN LED may illuminate immediately after<br />
sensor disconnection.<br />
D. There is a short in the solenoid or solenoid cable.<br />
Replace ETF-370-A solenoid.<br />
INDICATOR: If the GREEN LED does NOT illuminate when power is<br />
reconnected:<br />
E. There is an electrical system malfunction.<br />
Reset electrical system. Unplug sensor connection. Disconnect power<br />
to circuit for ten (10) seconds. Reconnect.<br />
F. The control module circuit is not working properly.<br />
Replace ETF-450-A control module.<br />
INDICATOR: If GREEN LED illuminates AND changes to RED when<br />
h<strong>and</strong>s are in the sensor’s detection zone AND the RED solenoid LED<br />
illuminates:<br />
G. Water supply stop(s) may be partially closed.<br />
Open stop(s) if closed.<br />
H. Debris is clogging solenoid filter.<br />
Shut off water supply. Remove, clean <strong>and</strong> reinstall solenoid filter.<br />
INDICATOR: If GREEN LED illuminates AND changes to RED when<br />
h<strong>and</strong>s are placed in the sensor’s detection zone AND the RED<br />
solenoid LED flickers with a vibrating/clicking noise heard inside<br />
the module: Note: Applies only to REVISION 2 MODULES.<br />
I. There is a direct short in the solenoid or solenoid cable.<br />
Replace with ETF-370-A solenoid.<br />
INDICATOR: If GREEN/RED LED illuminates AND changes to RED<br />
when h<strong>and</strong>s are NOT located in the sensor’s detection zone BUT the<br />
RED solenoid LED (in upper left corner of circuit) does NOT<br />
illuminate:<br />
J. Sensor range is set too long <strong>and</strong> is detecting the sink.<br />
Reduce sensor detection range.<br />
K. Sensor is not working properly.<br />
Replace sensor. Refer to individual faucet parts diagram for appropriate<br />
sensor assembly.<br />
INDICATOR: If GREEN LED illuminates BUT does NOT change to red<br />
when h<strong>and</strong>s are placed in the sensor’s detection zone:<br />
L. Sensor range is set too short.<br />
Increase sensor detection range.<br />
M. Sensor is not working properly.<br />
Replace sensor. Refer to individual faucet parts diagram for<br />
appropriate sensor assembly.<br />
152<br />
<strong>Repair</strong> <strong>Parts</strong> <strong>and</strong> <strong>Maintenance</strong> <strong>Guide</strong><br />
Optima ® ETF-500<br />
2. Sensing range is too short.<br />
A. Extended range sensitivity is required.<br />
Dip switch number 4 should be in the “DOWN” (Extended range<br />
sensitivity) position. Increase range by adjusting range potentiometer<br />
clockwise (yellow phillips screw in blue base).<br />
B. Faucet has surgical bend gooseneck spout.<br />
For long range use (recommended for surgical bend gooseneck spout<br />
faucet models), remove range jumper from upper right h<strong>and</strong> corner of<br />
circuit board. Adjust range potentiometer. Note: Applies only to<br />
REVISION 2 MODULES.<br />
3. Faucet activates by itself (false triggers).<br />
A. Sensor range is set too long.<br />
Decrease range by adjusting range potentiometer counterclockwise. If<br />
necessary, flip dip switch number 4 into the “UP” (reduced range<br />
sensitivity) position. Check surroundings for factors that contribute to<br />
sensor range detection problems (bright lights, highly reflective<br />
surfaces, sunlight, etc.).<br />
4. Faucet delivers very low flow or just a dribble.<br />
A. Water supply stop(s) may be partially closed.<br />
Open stop(s).<br />
B. Debris is clogging solenoid filter.<br />
Shut off water. Remove, clean, <strong>and</strong> reinstall solenoid filter.<br />
C. Solenoid is worn or not working properly.<br />
Rebuild with ETF-1009-A solenoid repair kit or replace<br />
ETF-370-A solenoid.<br />
D. Debris is clogging faucet aerator or spray head.<br />
Shut off water. Use key if required to remove. Then clean <strong>and</strong> reinstall<br />
aerator or spray head.<br />
5. Faucet does not stop delivering water or continues to drip after<br />
user is no longer detected (even after power to the module has<br />
been disconnected).<br />
A. Solenoid valve is installed backward.<br />
Disconnect solenoid. Reconnect solenoid with water flow towards the<br />
faucet (see arrow on solenoid).<br />
B. Debris is clogging solenoid.<br />
Remove <strong>and</strong> clean solenoid operator. If necessary, rebuild with<br />
ETF-1009-A repair kit.<br />
C. Seat in solenoid valve body is damaged or pitted.<br />
Replace with ETF-370-A solenoid.<br />
When assistance is required, please contact<br />
<strong>Sloan</strong> Technical Support at: 1-888-SLOAN-14 (1-888-756-2614).
3<br />
4B<br />
ETF-610<br />
5<br />
6 7<br />
7<br />
6<br />
12<br />
2<br />
1B<br />
1C<br />
4A<br />
8<br />
3<br />
ETF-600<br />
11<br />
10<br />
2<br />
1A<br />
1C<br />
9<br />
153<br />
<strong>Repair</strong> <strong>Parts</strong> <strong>and</strong> <strong>Maintenance</strong> <strong>Guide</strong><br />
Optima ® ETF-600/ETF-610<br />
PARTS LIST—ETF-600 AND ETF-610 FAUCETS<br />
Item<br />
No. Code No. Part No. Description<br />
1A. 0365086 ETF-543-A Faucet <strong>and</strong> Sensor Assembly (ETF-600)<br />
1B. 0365117 ETF-570-A Pedestal Faucet <strong>and</strong> Sensor Assembly (ETF-610)<br />
1C. 0365070 ETF-542-A Sensor Module Only (for ETF-600 <strong>and</strong> ETF-610<br />
faucets) includes 18” (153 mm) armored Cable,<br />
Shroud, <strong>and</strong> Housing for Sensor Window<br />
2. 3365092 ETF-1023-A 0.5 gpm (1.9 Lpm) Spray Head with Key<br />
(male thread)<br />
3365093 ETF-1024-A 2.2 gpm (8.3 Lpm) Aerator Spray Head with Key<br />
(male thread)<br />
3365162 ETF-1029-A 2.2 gpm (8.3 Lpm) Laminar Flow Spray Head with<br />
Key (male thread)<br />
3365756 ETF-1039-A 0.35 gpm (1.3 Lpm) Multi-Lam Spray Head VR<br />
3. 0305927 ETF-435 Replacement Key Only<br />
4A. 3365088 ETF-546-A Faucet Mounting Kit for ETF-600 includes Base<br />
Gasket, two (2) Slotted Mounting Washers, two<br />
(2) Wing Nuts, <strong>and</strong> Compression Fitting Connector<br />
4B. 0315085 EBF-123-A Faucet Mounting Kit for ETF-610 includes Spacer,<br />
Base Gasket, 1/4” NPSM Hex Nut, Washer, 9/16”<br />
Lock Washer <strong>and</strong> Compression Fitting Connector<br />
5. 0365058 ETF-547 1/8” NPT Pipe to 3/8” Tube Compression Fitting<br />
Connector (female)<br />
6. 3365676 ETF-437-A Single Solenoid Supply Kit includes, two (2)<br />
Compression Fittings, Compression Nut, <strong>and</strong><br />
Ferrule<br />
7. 0305849 ETF-370-A 24 VAC Solenoid <strong>Valve</strong> Assembly includes 18”<br />
(457 mm) armored Cable <strong>and</strong> two (2)<br />
Terminal Housings<br />
— 3305577 ETF-1009-A Solenoid <strong>Valve</strong> <strong>Repair</strong> Kit includes<br />
Replacement Filter, <strong>Guide</strong>, Armature Spring,<br />
Diaphragm <strong>and</strong> Washer<br />
8. 3365000 ETF-450-A Control Module Assembly includes splashproof<br />
Junction Box <strong>and</strong> Junction Box Mounting Kit<br />
9. 0365534 ETF-233 120V/35VA Plug-In Transformer<br />
10. 0345370 EL-248-40 24V/40VA Box Mount Transformer<br />
11. 0365001 ETF-458-A Input Power Cable (Transformer to Control Module)<br />
includes Strain Relief <strong>and</strong> two (2) Terminal<br />
Crimp Connectors<br />
12. 3365461 ETF-617-A Bak-Chek ® “T” Assembly<br />
See page 157 for faucet cable extension cords.<br />
— = Not shown in illustration<br />
H<strong>and</strong> Hygiene
H<strong>and</strong> Hygiene<br />
TROUBLESHOOTING GUIDE<br />
1. No water is delivered when faucet is activated.<br />
INDICATOR: If no LED lights illuminate:<br />
A. No electricity is being supplied to faucet.<br />
Ensure that the main power is turned “ON”. Check all transformer,<br />
sensor, solenoid <strong>and</strong> cable connections. Make sure that transformer<br />
is supplying 24 VAC (Volts AC). If no voltage is detected, replace<br />
transformer.<br />
B. There is an electrical system malfunction.<br />
Reset electrical system. Unplug Sensor connection. Disconnect power<br />
to circuit for ten (10) seconds. Reconnect.<br />
INDICATOR: If the GREEN LED illuminates when power is<br />
reconnected:<br />
C. There is a short in the Sensor.<br />
Replace sensor. Refer to individual faucet parts diagram for appropriate<br />
sensor assembly. Note: GREEN LED may illuminate immediately after<br />
sensor disconnection.<br />
D. There is a short in the solenoid or solenoid cable.<br />
Replace ETF-370-A solenoid.<br />
INDICATOR: If the GREEN LED does NOT illuminate when power is<br />
reconnected:<br />
E. There is an electrical system malfunction.<br />
Reset electrical system. Unplug sensor connection. Disconnect power<br />
to circuit for ten (10) seconds. Reconnect.<br />
F. The control module circuit is not working properly.<br />
Replace ETF-450-A control module.<br />
INDICATOR: If GREEN LED illuminates AND changes to RED when<br />
h<strong>and</strong>s are in the sensor’s detection zone AND the RED solenoid LED<br />
illuminates:<br />
G. Water supply stop(s) may be partially closed.<br />
Open stop(s) if closed.<br />
H. Debris is clogging solenoid filter.<br />
Shut off water supply. Remove, clean <strong>and</strong> reinstall solenoid filter.<br />
INDICATOR: If GREEN LED illuminates AND changes to RED when<br />
h<strong>and</strong>s are placed in the sensor’s detection zone AND the RED<br />
solenoid LED flickers with a vibrating/clicking noise heard inside<br />
the module: Note: Applies only to REVISION 2 MODULES.<br />
I. There is a direct short in the solenoid or solenoid cable.<br />
Replace with ETF-370-A solenoid.<br />
INDICATOR: If GREEN/RED LED illuminates AND changes to RED<br />
when h<strong>and</strong>s are NOT located in the sensor’s detection zone BUT the<br />
RED solenoid LED (in upper left corner of circuit) does NOT<br />
illuminate:<br />
J. Sensor range is set too long <strong>and</strong> is detecting the sink.<br />
Reduce sensor detection range.<br />
K. Sensor is not working properly.<br />
Replace sensor. Refer to individual faucet parts diagram for appropriate<br />
sensor assembly.<br />
INDICATOR: If GREEN LED illuminates BUT does NOT change to red<br />
when h<strong>and</strong>s are placed in the sensor’s detection zone:<br />
L. Sensor range is set too short.<br />
Increase sensor detection range.<br />
M. Sensor is not working properly.<br />
Replace sensor. Refer to individual faucet parts diagram for<br />
appropriate sensor assembly.<br />
154<br />
<strong>Repair</strong> <strong>Parts</strong> <strong>and</strong> <strong>Maintenance</strong> <strong>Guide</strong><br />
Optima ® ETF-600/ETF-610<br />
2. Sensing range is too short.<br />
A. Extended range sensitivity is required.<br />
Dip switch number 4 should be in the “DOWN” (Extended range<br />
sensitivity) position. Increase range by adjusting range potentiometer<br />
clockwise (yellow phillips screw in blue base).<br />
B. Faucet has surgical bend gooseneck spout.<br />
For long range use (recommended for surgical bend gooseneck spout<br />
faucet models), remove range jumper from upper right h<strong>and</strong> corner of<br />
circuit board. Adjust range potentiometer. Note: Applies only to<br />
REVISION 2 MODULES.<br />
3. Faucet activates by itself (false triggers).<br />
A. Sensor range is set too long.<br />
Decrease range by adjusting range potentiometer counterclockwise. If<br />
necessary, flip dip switch number 4 into the “UP” (reduced range<br />
sensitivity) position. Check surroundings for factors that contribute to<br />
sensor range detection problems (bright lights, highly reflective<br />
surfaces, sunlight, etc.).<br />
4. Faucet delivers very low flow or just a dribble.<br />
A. Water supply stop(s) may be partially closed.<br />
Open stop(s).<br />
B. Debris is clogging solenoid filter.<br />
Shut off water. Remove, clean, <strong>and</strong> reinstall solenoid filter.<br />
C. Solenoid is worn or not working properly.<br />
Rebuild with ETF-1009-A solenoid repair kit or replace<br />
ETF-370-A solenoid.<br />
D. Debris is clogging faucet aerator or spray head.<br />
Shut off water. Use key if required to remove. Then clean <strong>and</strong> reinstall<br />
aerator or spray head.<br />
5. Faucet does not stop delivering water or continues to drip after<br />
user is no longer detected (even after power to the module has<br />
been disconnected).<br />
A. Solenoid valve is installed backward.<br />
Disconnect solenoid. Reconnect solenoid with water flow towards the<br />
faucet (see arrow on solenoid).<br />
B. Debris is clogging solenoid.<br />
Remove <strong>and</strong> clean solenoid operator. If necessary, rebuild with<br />
ETF-1009-A repair kit.<br />
C. Seat in solenoid valve body is damaged or pitted.<br />
Replace with ETF-370-A solenoid.<br />
When assistance is required, please contact<br />
<strong>Sloan</strong> Technical Support at: 1-888-SLOAN-14 (1-888-756-2614).
2B<br />
3<br />
3B<br />
ETF-770<br />
Old-Style Faucets ETF-66 <strong>and</strong> ETF-77 faucets<br />
manufactured before 1996 used an EL-350-A<br />
microphone-style sensor with telephone jack<br />
connector <strong>and</strong> an ETF-214-A control module.<br />
13<br />
Optional Trim Plates<br />
6<br />
8<br />
4<br />
OBSOLETE<br />
9<br />
1B<br />
1A<br />
14 15<br />
7<br />
ETF-660<br />
12<br />
10<br />
11<br />
5<br />
2A<br />
155<br />
<strong>Repair</strong> <strong>Parts</strong> <strong>and</strong> <strong>Maintenance</strong> <strong>Guide</strong><br />
Optima ® ETF-660/ETF-770<br />
PARTS LIST—ETF-660 AND ETF-770 FAUCETS<br />
Item<br />
No. Code No. Part No. Description<br />
1A. 0365162 ETF-595-A Lavatory Faucet Assembly (ETF-660)<br />
1B. 0305536 ETF-261-A Deck-Mounted Gooseneck Faucet Assembly<br />
(ETF-770)<br />
2A. 3365092 ETF-1023-A 0.5 gpm (1.9 Lpm) Spray Head with Key<br />
(male thread)<br />
3365093 ETF-1024-A 2.2 gpm (8.3 Lpm) Aerator Spray Head with Key<br />
(male thread)<br />
3365162 ETF-1029-A 2.2 gpm (8.3 Lpm) Laminar Flow Spray Head with<br />
Key (male thread)<br />
0335927 ETF-435 Replacement Key Only for ETF-1023-A Spray<br />
Head <strong>and</strong> ETF-1024-A Aerator Spray Head (NOT<br />
required for F-175-L Laminar Flow Spray Head)<br />
3365756 ETF-1039-A 0.35 gpm (1.3 Lpm) Multi-Lam Spray Head VR<br />
2B. 3365091 ETF-1021-A 0.5 gpm (1.9 Lpm) Spray Head with Key<br />
(female thread)<br />
3365090 ETF-1022-A 2.2 gpm (8.3 Lpm) Aerator Spray Head with Key<br />
(female thread)<br />
3365160 ETF-1027-A 2.2 gpm (8.3 Lpm) Laminar Flow Spray Head with<br />
Key (female thread)<br />
0305927 ETF-435 Replacement Key Only<br />
3365755 ETF-1038-A 0.35 gpm (1.3 Lpm) Multi-Lam Spray Head VR<br />
3. 0305946 EL-3500-A Microphone-style “On-Q” Sensor Assembly<br />
includes O-ring, 18” armored Cable, Microphone<br />
Sensor Cap, Locking Pin, Microphone Sensor<br />
Body, <strong>and</strong> Emitter/Detector Shroud<br />
3B. 0305528 EL-289 Microphone Mounting Kit<br />
4. 0365524 ETF-199 Cock Hole Cover – OBSOLETE<br />
5. 0305513 ETF-271 3/8” Tube Fitting Connector (female)<br />
6. 3365676 ETF-437-A Single Solenoid Supply Kit includes, two (2)<br />
Compression Fittings, Compression Nut, <strong>and</strong><br />
Ferrule<br />
7. 0305849 ETF-370-A 24 VAC Solenoid <strong>Valve</strong> Assembly includes<br />
18” (457 mm) armored Cable <strong>and</strong> two (2)<br />
Terminal Housings<br />
— 3305577 ETF-1009-A Solenoid <strong>Valve</strong> <strong>Repair</strong> Kit includes<br />
Replacement Filter, <strong>Guide</strong>, Armature Spring,<br />
Diaphragm <strong>and</strong> Washer<br />
8. 3365461 ETF-617-A Bak-Chek ® “T” Assembly<br />
9. 3365000 ETF-450-A Control Module Assembly includes splashproof<br />
Junction Box <strong>and</strong> Junction Box Mounting Kit<br />
10. 0365534 ETF-233 120V/35 VA Plug-In Transformer<br />
11. 0345370 EL-248-40 24V/40 VA Box Mount Transformer<br />
12. 0365001 ETF-458-A Input Power Cable (Transformer to Control<br />
Module) includes Strain Relief <strong>and</strong> two (2) Terminal<br />
Crimp Connectors<br />
13. 0305768 EL-310-A Spout Mounting Kit (ETF-770 Only) Includes<br />
Rubber Washer, Steel Washer, Lock Nut, Rubber<br />
Cone Washer, <strong>and</strong> Coupling Nut<br />
14. 3365602 ETF-432-A Optional 8” (203 mm) Centerset Trim Plate Kit,<br />
includes Seal, Washer Fender, Gasket, Finger Nut,<br />
Trim Plate Spacer <strong>and</strong> Dual Hole Trim<br />
Plate Assembly<br />
15. 3365469 ETF-313-A Optional 4” (102 mm) Centerset Trim Plate Kit<br />
includes Trim Plate Spacer <strong>and</strong> Dual Hole Trim<br />
Plate Assembly<br />
See page 157 for faucet cable extension cords.<br />
— = Not shown in illustration<br />
NOTE: For older style ETF-66/77 faucets the replacement EL-350 is discontinued. Replacement is ETF-1019-A<br />
includes EL-3500-A <strong>and</strong> ETF-450-A.<br />
NOTE: For the replacement control module when the older style 3 phone jack module is used, use ETF-492-A.<br />
H<strong>and</strong> Hygiene
H<strong>and</strong> Hygiene<br />
TROUBLESHOOTING GUIDE<br />
1. No water is delivered when faucet is activated.<br />
INDICATOR: If no LED lights illuminate:<br />
A. No electricity is being supplied to faucet.<br />
Ensure that the main power is turned “ON”. Check all transformer,<br />
sensor, solenoid <strong>and</strong> cable connections. Make sure that transformer<br />
is supplying 24 VAC (Volts AC). If no voltage is detected, replace<br />
transformer.<br />
B. There is an electrical system malfunction.<br />
Reset electrical system. Unplug Sensor connection. Disconnect power<br />
to circuit for ten (10) seconds. Reconnect.<br />
INDICATOR: If the GREEN LED illuminates when power is<br />
reconnected:<br />
C. There is a short in the Sensor.<br />
Replace sensor. Refer to individual faucet parts diagram for appropriate<br />
sensor assembly. Note: GREEN LED may illuminate immediately after<br />
sensor disconnection.<br />
D. There is a short in the solenoid or solenoid cable.<br />
Replace ETF-370-A solenoid.<br />
INDICATOR: If the GREEN LED does NOT illuminate when power is<br />
reconnected:<br />
E. There is an electrical system malfunction.<br />
Reset electrical system. Unplug sensor connection. Disconnect power<br />
to circuit for ten (10) seconds. Reconnect.<br />
F. The control module circuit is not working properly.<br />
Replace ETF-450-A control module.<br />
INDICATOR: If GREEN LED illuminates AND changes to RED when<br />
h<strong>and</strong>s are in the sensor’s detection zone AND the RED solenoid LED<br />
illuminates:<br />
G. Water supply stop(s) may be partially closed.<br />
Open stop(s) if closed.<br />
H. Debris is clogging solenoid filter.<br />
Shut off water supply. Remove, clean <strong>and</strong> reinstall solenoid filter.<br />
INDICATOR: If GREEN LED illuminates AND changes to RED when<br />
h<strong>and</strong>s are placed in the sensor’s detection zone AND the RED<br />
solenoid LED flickers with a vibrating/clicking noise heard inside<br />
the module: Note: Applies only to REVISION 2 MODULES.<br />
I. There is a direct short in the solenoid or solenoid cable.<br />
Replace with ETF-370-A solenoid.<br />
INDICATOR: If GREEN/RED LED illuminates AND changes to RED<br />
when h<strong>and</strong>s are NOT located in the sensor’s detection zone BUT the<br />
RED solenoid LED (in upper left corner of circuit) does NOT<br />
illuminate:<br />
J. Sensor range is set too long <strong>and</strong> is detecting the sink.<br />
Reduce sensor detection range.<br />
K. Sensor is not working properly.<br />
Replace sensor. Refer to individual faucet parts diagram for appropriate<br />
sensor assembly.<br />
INDICATOR: If GREEN LED illuminates BUT does NOT change to red<br />
when h<strong>and</strong>s are placed in the sensor’s detection zone:<br />
L. Sensor range is set too short.<br />
Increase sensor detection range.<br />
M. Sensor is not working properly.<br />
Replace sensor. Refer to individual faucet parts diagram for<br />
appropriate sensor assembly.<br />
156<br />
<strong>Repair</strong> <strong>Parts</strong> <strong>and</strong> <strong>Maintenance</strong> <strong>Guide</strong><br />
Optima ® ETF-660/ETF-770<br />
2. Sensing range is too short.<br />
A. Extended range sensitivity is required.<br />
Dip switch number 4 should be in the “DOWN” (Extended range<br />
sensitivity) position. Increase range by adjusting range potentiometer<br />
clockwise (yellow phillips screw in blue base).<br />
B. Faucet has surgical bend gooseneck spout.<br />
For long range use (recommended for surgical bend gooseneck spout<br />
faucet models), remove range jumper from upper right h<strong>and</strong> corner of<br />
circuit board. Adjust range potentiometer. Note: Applies only to<br />
REVISION 2 MODULES.<br />
3. Faucet activates by itself (false triggers).<br />
A. Sensor range is set too long.<br />
Decrease range by adjusting range potentiometer counterclockwise. If<br />
necessary, flip dip switch number 4 into the “UP” (reduced range<br />
sensitivity) position. Check surroundings for factors that contribute to<br />
sensor range detection problems (bright lights, highly reflective<br />
surfaces, sunlight, etc.).<br />
4. Faucet delivers very low flow or just a dribble.<br />
A. Water supply stop(s) may be partially closed.<br />
Open stop(s).<br />
B. Debris is clogging solenoid filter.<br />
Shut off water. Remove, clean, <strong>and</strong> reinstall solenoid filter.<br />
C. Solenoid is worn or not working properly.<br />
Rebuild with ETF-1009-A solenoid repair kit or replace<br />
ETF-370-A solenoid.<br />
D. Debris is clogging faucet aerator or spray head.<br />
Shut off water. Use key if required to remove. Then clean <strong>and</strong> reinstall<br />
aerator or spray head.<br />
5. Faucet does not stop delivering water or continues to drip after<br />
user is no longer detected (even after power to the module has<br />
been disconnected).<br />
A. Solenoid valve is installed backward.<br />
Disconnect solenoid. Reconnect solenoid with water flow towards the<br />
faucet (see arrow on solenoid).<br />
B. Debris is clogging solenoid.<br />
Remove <strong>and</strong> clean solenoid operator. If necessary, rebuild with<br />
ETF-1009-A repair kit.<br />
C. Seat in solenoid valve body is damaged or pitted.<br />
Replace with ETF-370-A solenoid.<br />
When assistance is required, please contact<br />
<strong>Sloan</strong> Technical Support at: 1-888-SLOAN-14 (1-888-756-2614).
4<br />
1A<br />
6<br />
5<br />
8<br />
1C<br />
4<br />
3<br />
2A<br />
13 2B<br />
1B<br />
1C<br />
9<br />
157<br />
<strong>Repair</strong> <strong>Parts</strong> <strong>and</strong> <strong>Maintenance</strong> <strong>Guide</strong><br />
Optima ® ETF-700<br />
PARTS LIST—ETF-700 FAUCET<br />
Item<br />
No. Code No. Part No. Description<br />
1A. 0365108 ETF-472-A Faucet <strong>and</strong> Sensor Assembly with St<strong>and</strong>ard<br />
Gooseneck Spout (ETF-700)<br />
1B. 0365109 ETF-473-A Faucet <strong>and</strong> Sensor Assembly with Surgical Bend<br />
Gooseneck Spout (ETF-700-S)<br />
1C. 0365028 ETF-476-A Sensor Module Only includes 18” (153 mm)<br />
armored Cable, Shroud, <strong>and</strong> Housing for Sensor<br />
Window (ETF-700 <strong>and</strong> ETF-700-S Faucets)<br />
2A. 0365147 ETF-621-A 2.2 gpm (8.3 Lpm) Aerator Spray Head with Key<br />
(female thread)<br />
0365793 ETF-839 0.35 gpm (1.3 Lpm) Multi-Lam Spray Head<br />
2B. 0328134 AC-55-A Shower Spray Head Assembly, 2.2 gpm (8.3 Lpm)<br />
3. 0305784 ETF-178 Adapter for Spray Heads (not required for<br />
AC-55-A Shower Spray Head)<br />
4. 0365110 ETF-503-A Spout Mounting Kit Includes Rubber Washer, Flat<br />
Washer, Lockwasher, Mounting Nut, <strong>and</strong> Union<br />
Compression Fitting<br />
5. 0365057 ETF-530 3/8” x 3/8” Union Compression Fitting (female)<br />
6. 3365676 ETF-437-A Single Solenoid Supply Kit includes, two (2)<br />
Compression Fittings, Compression Nut, <strong>and</strong><br />
Ferrule<br />
7. 0305849 ETF-370-A 24 VAC Solenoid <strong>Valve</strong> Assembly includes<br />
18” (457 mm) armored Cable <strong>and</strong> two (2)<br />
Terminal Housings<br />
— 3305577 ETF-1009-A Solenoid <strong>Valve</strong> <strong>Repair</strong> Kit includes<br />
Replacement Filter, <strong>Guide</strong>, Armature Spring,<br />
Diaphragm <strong>and</strong> Washer<br />
8. 3365461 ETF-617-A Bak-Chek ® “T” Assembly<br />
9. 3365000 ETF-450-A Control Module Assembly includes splashproof<br />
Junction Box <strong>and</strong> Junction Box Mounting Kit<br />
10. 0365534 ETF-233 120V/35VA Plug-In Transformer<br />
11. 0345370 EL-248-40 24V/40VA Box Mount Transformer<br />
12. 0365001 ETF-458-A Input Power Cable (Transformer to Control<br />
Module) includes Strain Relief <strong>and</strong> two (2) Terminal<br />
Crimp Connectors<br />
13. 0305927 ETF-435 Replacement Key Only<br />
14. 3365302 ETF-607-A Trim Plate for 4” Center-set Sink<br />
15. 3365303 ETF-608-A Trim Plate for 8” Center-set Sink<br />
— = Not shown in illustration<br />
Optional Trim Plates FAUCET CABLE EXTENSION CORDS<br />
ETF-80, ETF-500, ETF-600/ETF-610, ETF-660/ETF-770, ETF-700<br />
14 15<br />
7<br />
10<br />
12<br />
11<br />
0365042 ETF-1005-26 Faucet to Control Module Extension Cord;<br />
26 inch (0.7 meter) Length – OBSOLETE<br />
0365861 ETF-1005-36 Faucet to Control Module Extension Cord;<br />
36 inch (0.9 meter) Length<br />
0305862 ETF-1005-72 Faucet to Control Module Extension Cord;<br />
72 inch (1.8 meter) Length – OBSOLETE<br />
0305863 ETF-1005-108 Faucet to Control Module Extension Cord;<br />
108 inch (2.7 meter) Length<br />
0365838 ETF-1003-36 Solenoid to Control Module Extension Cord;<br />
36 inch (0.9 meter) Length<br />
0365053 ETF-1003-48 Solenoid to Control Module Extension Cord;<br />
48 inch (1.2 meter) Length – OBSOLETE<br />
0365839 ETF-1003-72 Solenoid to Control Module Extension Cord;<br />
72 inch (1.8 meter) Length – OBSOLETE<br />
0365840 ETF-1003-108 Solenoid to Control Module Extension Cord;<br />
108 inch (2.7 meter) Length<br />
H<strong>and</strong> Hygiene
H<strong>and</strong> Hygiene<br />
TROUBLESHOOTING GUIDE<br />
1. No water is delivered when faucet is activated.<br />
INDICATOR: If no LED lights illuminate:<br />
A. No electricity is being supplied to faucet.<br />
Ensure that the main power is turned “ON”. Check all transformer,<br />
sensor, solenoid <strong>and</strong> cable connections. Make sure that transformer<br />
is supplying 24 VAC (Volts AC). If no voltage is detected, replace<br />
transformer.<br />
B. There is an electrical system malfunction.<br />
Reset electrical system. Unplug Sensor connection. Disconnect power<br />
to circuit for ten (10) seconds. Reconnect.<br />
INDICATOR: If the GREEN LED illuminates when power is<br />
reconnected:<br />
C. There is a short in the Sensor.<br />
Replace sensor. Refer to individual faucet parts diagram for appropriate<br />
sensor assembly. Note: GREEN LED may illuminate immediately after<br />
sensor disconnection.<br />
D. There is a short in the solenoid or solenoid cable.<br />
Replace ETF-370-A solenoid.<br />
INDICATOR: If the GREEN LED does NOT illuminate when power is<br />
reconnected:<br />
E. There is an electrical system malfunction.<br />
Reset electrical system. Unplug sensor connection. Disconnect power<br />
to circuit for ten (10) seconds. Reconnect.<br />
F. The control module circuit is not working properly.<br />
Replace ETF-450-A control module.<br />
INDICATOR: If GREEN LED illuminates AND changes to RED when<br />
h<strong>and</strong>s are in the sensor’s detection zone AND the RED solenoid LED<br />
illuminates:<br />
G. Water supply stop(s) may be partially closed.<br />
Open stop(s) if closed.<br />
H. Debris is clogging solenoid filter.<br />
Shut off water supply. Remove, clean <strong>and</strong> reinstall solenoid filter.<br />
INDICATOR: If GREEN LED illuminates AND changes to RED when<br />
h<strong>and</strong>s are placed in the sensor’s detection zone AND the RED<br />
solenoid LED flickers with a vibrating/clicking noise heard inside<br />
the module: Note: Applies only to REVISION 2 MODULES.<br />
I. There is a direct short in the solenoid or solenoid cable.<br />
Replace with ETF-370-A solenoid.<br />
INDICATOR: If GREEN/RED LED illuminates AND changes to RED<br />
when h<strong>and</strong>s are NOT located in the sensor’s detection zone BUT the<br />
RED solenoid LED (in upper left corner of circuit) does NOT<br />
illuminate:<br />
J. Sensor range is set too long <strong>and</strong> is detecting the sink.<br />
Reduce sensor detection range.<br />
K. Sensor is not working properly.<br />
Replace sensor. Refer to individual faucet parts diagram for appropriate<br />
sensor assembly.<br />
INDICATOR: If GREEN LED illuminates BUT does NOT change to red<br />
when h<strong>and</strong>s are placed in the sensor’s detection zone:<br />
L. Sensor range is set too short.<br />
Increase sensor detection range.<br />
M. Sensor is not working properly.<br />
Replace sensor. Refer to individual faucet parts diagram for<br />
appropriate sensor assembly.<br />
158<br />
<strong>Repair</strong> <strong>Parts</strong> <strong>and</strong> <strong>Maintenance</strong> <strong>Guide</strong><br />
Optima ® ETF-700<br />
2. Sensing range is too short.<br />
A. Extended range sensitivity is required.<br />
Dip switch number 4 should be in the “DOWN” (Extended range<br />
sensitivity) position. Increase range by adjusting range potentiometer<br />
clockwise (yellow phillips screw in blue base).<br />
B. Faucet has surgical bend gooseneck spout.<br />
For long range use (recommended for surgical bend gooseneck spout<br />
faucet models), remove range jumper from upper right h<strong>and</strong> corner of<br />
circuit board. Adjust range potentiometer. Note: Applies only to<br />
REVISION 2 MODULES.<br />
3. Faucet activates by itself (false triggers).<br />
A. Sensor range is set too long.<br />
Decrease range by adjusting range potentiometer counterclockwise. If<br />
necessary, flip dip switch number 4 into the “UP” (reduced range<br />
sensitivity) position. Check surroundings for factors that contribute to<br />
sensor range detection problems (bright lights, highly reflective<br />
surfaces, sunlight, etc.).<br />
4. Faucet delivers very low flow or just a dribble.<br />
A. Water supply stop(s) may be partially closed.<br />
Open stop(s).<br />
B. Debris is clogging solenoid filter.<br />
Shut off water. Remove, clean, <strong>and</strong> reinstall solenoid filter.<br />
C. Solenoid is worn or not working properly.<br />
Rebuild with ETF-1009-A solenoid repair kit or replace<br />
ETF-370-A solenoid.<br />
D. Debris is clogging faucet aerator or spray head.<br />
Shut off water. Use key if required to remove. Then clean <strong>and</strong> reinstall<br />
aerator or spray head.<br />
5. Faucet does not stop delivering water or continues to drip after<br />
user is no longer detected (even after power to the module has<br />
been disconnected).<br />
A. Solenoid valve is installed backward.<br />
Disconnect solenoid. Reconnect solenoid with water flow towards the<br />
faucet (see arrow on solenoid).<br />
B. Debris is clogging solenoid.<br />
Remove <strong>and</strong> clean solenoid operator. If necessary, rebuild with<br />
ETF-1009-A repair kit.<br />
C. Seat in solenoid valve body is damaged or pitted.<br />
Replace with ETF-370-A solenoid.<br />
When assistance is required, please contact<br />
<strong>Sloan</strong> Technical Support at: 1-888-SLOAN-14 (1-888-756-2614).
2A/2B<br />
3<br />
4<br />
5<br />
4<br />
6<br />
1<br />
10<br />
11<br />
7<br />
8<br />
9<br />
159<br />
<strong>Repair</strong> <strong>Parts</strong> <strong>and</strong> <strong>Maintenance</strong> <strong>Guide</strong><br />
Optima ® ETF-800<br />
PARTS LIST—ETF-800 FAUCET<br />
Item<br />
No. Code No. Part No. Description<br />
1. 0365797 ETF-797-A Faucet Spout <strong>and</strong> Sensor Assembly<br />
2A. 0365378 ETF-687 1.5 gpm/5.7 Lpm Laminar Flow Spray Head<br />
2B. 3365757 ETF-1040-A 0.35 gpm/1.3 Lpm Multi-Lam Spray Head<br />
3. † 0365057 ETF-530 Compression Fitting<br />
4. † 0305459 ETF-61 Compression Fittings (2)<br />
5. 0305847 ETF-370-A 24 VAC Solenoid <strong>Valve</strong> Assembly; Includes<br />
Wire Harness<br />
— 3305577 ETF-1009-A Solenoid <strong>Valve</strong> <strong>Repair</strong> Kit, Includes<br />
Replacement Filter<br />
6. 3365461 ETF-617-A 3/8” Bak-Chek ® Tee Compression Fitting<br />
7. 3306500 ETF-450-A Control Module Assembly<br />
8. 0345370 EL-248-40 Box Mount Transformer<br />
9. 0365534 ETF-233 Plug-In Transformer<br />
10. 0365001 ETF-458-A Power Cable with Strain Relief <strong>and</strong> Crimp<br />
Connectors (Transformer to Control Module)<br />
11. 3326091 MIX-19 Flex Hose<br />
† ETF-798-A Compression Fitting Kit, includes (1) ETF-530, (2) ETF-61 Compression Fittings <strong>and</strong> (4) Mounting<br />
Plate Screws<br />
If further assistance is required, please contact the <strong>Sloan</strong> <strong>Valve</strong> <strong>Company</strong> Installation Engineering Department<br />
at 1-888-SLOAN-14 (1-888-756-2614).<br />
NOTICE: The information contained in this document is subject to change without notice.<br />
H<strong>and</strong> Hygiene
H<strong>and</strong> Hygiene<br />
The OPTIMA ETF-800 Faucet is factory set to activate when h<strong>and</strong>s are<br />
placed 4 to 5 inches (102 to 127 mm) from Sensor. This range should be<br />
satisfactory for most installations.<br />
If range adjustment is required, refer to the following range adjustment<br />
procedures.<br />
TO MAKE A RANGE ADJUSTMENT<br />
The Range Potentiometer <strong>and</strong> Dip Switches are located in Control Module.<br />
Important: Range Potentiometer adjustment screw rotates only 3/4 of a turn;<br />
DO NOT over-rotate.<br />
Make certain that Dip Switch number 4 is in the DOWN position. Using the<br />
small screwdriver provided, adjust Range Potentiometer clockwise until<br />
green (power ON) indicator LED turns red (Faucet is now picking up sink).<br />
Adjust Range Potentiometer back counterclockwise until red LED returns to<br />
green. Range is now at maximum.<br />
In the event the LED remains red with the adjustment at minimum<br />
(counterclockwise) setting, the sensitivity can be further reduced by<br />
switching Dip Switch number 4 to the ON (UP) position.<br />
Cycle Faucet several times to assure that range as adjusted will not<br />
inadvertently pick up IR reflection in lavatory. If IR reflection occurs (green<br />
LED will flicker red), adjust Range Potentiometer counterclockwise very<br />
slightly <strong>and</strong> again cycle Faucet.<br />
Repeat range adjustment counterclockwise until length of range is at bowl<br />
rim of lavatory (plus or minus 1 inch (25 mm)).<br />
TIME OUT ADJUSTMENT<br />
The Faucet Time Out Setting determines the maximum time the Faucet will<br />
run upon continuous activation. This timing can be changed to meet<br />
individual application requirements.<br />
Refer to Table 1 or label on cover of Control Module along with the following<br />
instructions to set the desired Time Out. The Dip Switches used to set the<br />
Time Out are located in the Control Module.<br />
Set the Time Out by configuring the number 1, 2 <strong>and</strong> 3 Dip Switches as<br />
shown in Table 1.<br />
Table 1 — Time Out Settings<br />
Dip Switch Setting<br />
Time Out Switch #1 Switch #2 Switch #3<br />
3 SECONDS UP UP DOWN<br />
6 SECONDS DOWN DOWN UP<br />
12 SECONDS UP DOWN UP<br />
30 SECONDS UP DOWN DOWN<br />
45 SECONDS UP UP UP<br />
1 MINUTE DOWN UP UP<br />
3 MINUTES DOWN DOWN DOWN<br />
20 MINUTES DOWN UP DOWN<br />
Unless otherwise specified, all ETF-800 Faucets leave the factory set with a<br />
30 second Time Out.<br />
Note: The position of Dip Switch #4 (range enhancer setting) does not affect<br />
Faucet Time Outs.<br />
Push Cables into slots at the bottom of the Control Module.<br />
Install Control Module cover using Screws provided.<br />
160<br />
<strong>Repair</strong> <strong>Parts</strong> <strong>and</strong> <strong>Maintenance</strong> <strong>Guide</strong><br />
Optima ® ETF-800<br />
RANGE ADJUSTMENT TEST FAUCET OPERATION<br />
1. A continuous invisible beam of<br />
light is emitted from the OPTIMA ®<br />
Sensor located below the<br />
faucet spout.<br />
2. As the user’s h<strong>and</strong>s enter the<br />
beam’s effective range, the beam<br />
is reflected back into the sensor<br />
receiver <strong>and</strong> activates the<br />
solenoid valve allowing tempered<br />
water to flow from the faucet.<br />
Water will flow until the h<strong>and</strong>s<br />
are removed or until the faucet<br />
reaches its automatic time out<br />
limit setting.<br />
3. When h<strong>and</strong>s are moved away<br />
from the OPTIMA ® Sensor, the<br />
loss of reflected light initiates an<br />
electrical signal that deactivates<br />
the Solenoid <strong>Valve</strong> shutting off<br />
the water flow. The Circuit then<br />
automatically resets <strong>and</strong> is ready<br />
for the next user.
TROUBLESHOOTING GUIDE<br />
Note: Remove Cover from Control Module to check diagnostic lights.<br />
1. No water is delivered when Faucet is activated.<br />
INDICATOR: If no LED lights illuminate:<br />
A. No electricity is being supplied to Faucet.<br />
Ensure that the main power is turned “ON.” Check all Transformer,<br />
Sensor, Solenoid <strong>and</strong> Cable Connections. Make sure that Transformer<br />
is supplying 24 VAC (Volts AC). If no voltage is detected, replace<br />
Transformer.<br />
B. There is an electrical system malfunction.<br />
Reset electrical system. Unplug Sensor Connection. Disconnect power<br />
to circuit for ten (10) seconds. Reconnect.<br />
INDICATOR: If the GREEN LED illuminates when power is<br />
reconnected:<br />
C. There is a short in the Sensor.<br />
Replace Sensor.<br />
Note: GREEN LED may illuminate immediately after Sensor<br />
disconnection.<br />
D. There is a short in the Solenoid or Solenoid Cable.<br />
Replace ETF-370-A Solenoid.<br />
INDICATOR: If the GREEN LED does NOT illuminate when power is<br />
reconnected:<br />
E. There is an electrical system malfunction.<br />
Reset electrical system. Unplug Sensor Connection. Disconnect power<br />
to circuit for ten (10) seconds. Reconnect.<br />
F. The Control Module circuit is not working properly.<br />
Replace ETF-450-A Control Module.<br />
INDICATOR: If GREEN LED illuminates AND changes to RED when<br />
h<strong>and</strong>s are in the Sensor’s detection zone AND the RED Solenoid LED<br />
illuminates:<br />
G. Water supply stop(s) may be partially closed.<br />
Open supply stop(s) completely.<br />
H. Debris is clogging Solenoid Filter.<br />
Shut off water supply. Remove, clean <strong>and</strong> reinstall Solenoid Filter.<br />
INDICATOR: If GREEN LED illuminates AND changes to RED when<br />
h<strong>and</strong>s are placed in the Sensor’s detection zone AND the RED<br />
Solenoid LED flickers with a vibrating/clicking noise heard inside<br />
the module:<br />
I. There is a direct short in the Solenoid or Solenoid Cable.<br />
Replace with ETF-370-A Solenoid.<br />
INDICATOR: If GREEN/RED LED illuminates AND changes to RED<br />
when h<strong>and</strong>s are NOT located in the Sensor’s detection zone BUT the<br />
RED Solenoid LED (in upper left corner of circuit) does NOT<br />
illuminate:<br />
J. Sensor range is set too long <strong>and</strong> is detecting the sink.<br />
Reduce Sensor detection range.<br />
K. Sensor is not working properly.<br />
Replace Sensor.<br />
INDICATOR: If GREEN LED illuminates BUT does NOT change to RED<br />
when h<strong>and</strong>s are placed in the Sensor’s detection zone:<br />
L. Sensor range is set too short.<br />
Increase Sensor detection range.<br />
M. Sensor is not working properly.<br />
Replace Sensor.<br />
161<br />
<strong>Repair</strong> <strong>Parts</strong> <strong>and</strong> <strong>Maintenance</strong> <strong>Guide</strong><br />
Optima ® ETF-800<br />
2. Sensing Range is too short.<br />
A. Extended Range Sensitivity is required.<br />
Dip Switch number 4 should be in the “DOWN” (Extended Range<br />
Sensitivity) position. Increase range by adjusting Range Potentiometer<br />
clockwise (yellow phillips screw in blue base).<br />
3. Faucet activates by itself (false triggers).<br />
A. Sensor range is set too long.<br />
Decrease range by adjusting Range Potentiometer counterclockwise. If<br />
necessary, flip Dip Switch number 4 to the “UP” (Reduced Range<br />
Sensitivity) position. Check surroundings for factors that contribute to<br />
Sensor range detection problems (bright lights, highly reflective<br />
surfaces, sunlight, etc.).<br />
4. Faucet delivers very low flow or just a dribble.<br />
A. Water supply stop(s) may be partially closed.<br />
Open supply stop(s) completely.<br />
B. Debris is clogging Solenoid Filter.<br />
Shut off water. Remove, clean, <strong>and</strong> reinstall Solenoid Filter or replace<br />
Solenoid Filter ETF-1009-A.<br />
C. Solenoid is worn or not working properly.<br />
Rebuild with ETF-1009-A Solenoid <strong>Repair</strong> Kit or replace ETF-370-A<br />
Solenoid.<br />
D. Debris is clogging Faucet Aerator or Spray Head.<br />
Shut off water. Remove Aerator or Spray Head (use Key if required).<br />
Clean <strong>and</strong> reinstall Aerator or Spray Head.<br />
5. Faucet does not stop delivering water or continues to drip after<br />
user is no longer detected (even after power to the Module has<br />
been disconnected).<br />
A. Solenoid <strong>Valve</strong> is installed backward.<br />
Disconnect Solenoid. Reconnect Solenoid with water flow toward<br />
the Faucet (see arrow on Solenoid).<br />
B. Debris is clogging Solenoid.<br />
Remove <strong>and</strong> clean Solenoid Operator. If necessary, rebuild with<br />
ETF-1009-A <strong>Repair</strong> Kit.<br />
C. Seat in Solenoid <strong>Valve</strong> body is damaged or pitted.<br />
Replace with ETF-370-A Solenoid.<br />
CARE AND CLEANING OF CHROME AND SPECIAL FINISHES<br />
DO NOT use abrasive or chemical cleaners (including chlorine bleach) to<br />
clean faucets that may dull the luster <strong>and</strong> attack the chrome or special<br />
decorative finishes. Use ONLY mild soap <strong>and</strong> water, then wipe dry with clean<br />
cloth or towel.<br />
While cleaning the bathroom<br />
tile, protect the faucet from any<br />
splattering of cleaner. Acids <strong>and</strong><br />
cleaning fluids will discolor or<br />
remove chrome plating.<br />
When assistance is required, please contact<br />
<strong>Sloan</strong> Technical Support at: 1-888-SLOAN-14 (1-888-756-2614).<br />
H<strong>and</strong> Hygiene
H<strong>and</strong> Hygiene<br />
16<br />
1A/1B<br />
11<br />
9<br />
3A<br />
3B<br />
3C<br />
3D<br />
4<br />
10<br />
EAF-200 Series Faucet date code 1101 <strong>and</strong><br />
newer. Product revised to make spray head<br />
v<strong>and</strong>al resistant without need for special spray.<br />
EAF-15 only works on product date code 1052<br />
<strong>and</strong> older.<br />
8<br />
5<br />
17<br />
16A<br />
14<br />
2<br />
15<br />
6A<br />
6B<br />
12<br />
19<br />
OBSOLETE<br />
18<br />
7<br />
13<br />
162<br />
<strong>Repair</strong> <strong>Parts</strong> <strong>and</strong> <strong>Maintenance</strong> <strong>Guide</strong><br />
LINO EAF-200<br />
PARTS LIST—EAF-200 FAUCETS<br />
Item<br />
No. Code No. Part No. Description<br />
1A. 0335016 EAF-18-A Faucet Sensor Assembly with i.q.-cliq<br />
1B. 0335017 EAF-19-A Faucet Sensor Assembly without i.q.-cliq<br />
2. 0335027 EAF-27 Cap<br />
3A. 0335012 EAF-15 0.5 gpm (1.9 Lpm) VR Aerator Spray Head –<br />
Pre 03/2011<br />
3B. 0335008 EAF-10 2.2 gpm (8.3 Lpm) Aerator Spray Head<br />
3C. 0335011 EAF-13 2.2 gpm (8.3 Lpm) Laminar Flow Spray Head<br />
3D. 0335029 EAF-51 0.35 gpm (1.3 Lpm) Multi-Laminar Spray Head<br />
4. 0335000 EAF-1 Faucet Mounting Kit<br />
5. 0335007 EAF-9 Strainer (Filter)<br />
6A. 0335019 EAF-1004 Mixer H<strong>and</strong>le Assembly <strong>and</strong> Cartridge<br />
6B. 3335020 EAF-1005 H<strong>and</strong>le <strong>Repair</strong> Kit<br />
7. 3335022 EAF-1007 H<strong>and</strong>le Cap<br />
8. 3335023 EAF-1008 13” (330 mm) Flexible Supply Hose<br />
9. — EAF-44 Power Splitter †<br />
10. 0335024 EAF-24-A 11-13/16” (300 mm) Ext. Cable (Model EAF-200)<br />
0335025 EAF-25-A 47-1/4” (1200 mm) Ext. Cable (Model EAF-200)<br />
0335015 EAF-17-A 126” (3200 mm) Extension Cable (Model EAF-200)<br />
11. 0335001 EAF-2 Solenoid<br />
12. 3365468 ETF-312-A Trim Plate for 4” Centerset Sink<br />
13. 3365024 ETF-510-A Trim Plate for 8” Centerset Sink<br />
14. 0335009 EAF-11 (Model EAF-200) 90-264 VAC/6.75 VDC Plug-In<br />
Adapter (US)<br />
15. 0335028 EAF-28 Capacitor Box (Model EAF-200) – OBSOLETE<br />
16. 3335035 EAF-35-A Faucet Extension Kit<br />
16A. 3335046 EAF-40-A 2-1/4” Faucet Extension Kit. Raises faucet such that<br />
outlet height complies with California Office of<br />
Statewide Health Planning <strong>and</strong> Deveplopment<br />
17. 0335037 EAF-37 6 VDC Box Mount Voltage Adapter<br />
18. 0335038 EAF-38 90-264 VAC/6.75 VDC Plug-In Adapter (EURO)<br />
19. 0335039 EAF-39 90-264 VAC/6.75 VDC Plug-In Adapter (UK)<br />
†EAF-44 replaces the separate EAF-23-A Splitter Cable <strong>and</strong> EAF-28 Capacitor, which is sold separately.<br />
i.q.-cliq SETTINGS<br />
Function Press Button LED Signal<br />
Continuous Run –<br />
2 minute default setting<br />
(adjustable from 1 –<br />
20 minutes)<br />
1 time for 2 seconds 5 short flashes<br />
reset: 1 time or will reset automatically<br />
after 2 minutes<br />
Temporary Off 2 times (double click) 5 short flashes followed<br />
by periodic flashing<br />
reset: 1 time or will reset automatically<br />
after 2 minutes<br />
Auto Set Range 2 times (double click) <strong>and</strong> 5 short flashes followed<br />
Adjustment then 1 time for 5 seconds by 4 short flashes<br />
Electrical Connection for up to Six (6) Faucets Using One (1) Adapter<br />
(14)<br />
6 VDC PLUG-IN<br />
ADAPTER<br />
(9)<br />
POWER<br />
SPLITTER †<br />
(9)<br />
POWER<br />
SPLITTER †<br />
(9)<br />
POWER<br />
SPLITTER †<br />
TO ADDITIONAL<br />
FAUCETS (6 MAX.)
TROUBLESHOOTING GUIDE OPERATION<br />
1. Faucet does not function.<br />
A. "Permanent Off" activated.<br />
Press button on faucet throat one time.<br />
2. Faucet delivers water in an uncontrolled manner.<br />
A. Faucet is not working properly.<br />
Contact <strong>Sloan</strong> Technical Support at<br />
1-888-SLOAN-14 (1-888-756-2614).<br />
3. Faucet does not deliver any water when Sensor is activated.<br />
INDICATOR: Solenoid valve produces an audible “CLICK.”<br />
A. Water supply stop(s) closed.<br />
Open water supply stop(s).<br />
B. Water supply stop strainer(s) clogged.<br />
Remove, clean, <strong>and</strong> reinstall water supply stop strainer(s). Replace<br />
strainer(s) if required.<br />
INDICATOR: Solenoid valve DOES NOT produce an audible “CLICK.”<br />
A. Power failure (EAF-200 Models).<br />
Check power supply.<br />
4. Faucet delivers only a slow flow or dribble when<br />
Sensor is activated.<br />
A. Water supply stop(s) are partially closed.<br />
Completely open water supply stop(s).<br />
B. Water supply stop strainer(s) clogged.<br />
Remove, clean, <strong>and</strong> reinstall water supply stop strainer(s). Replace<br />
strainer(s) if required.<br />
C. Aerator is clogged.<br />
Remove, clean, <strong>and</strong> reinstall Aerator. Replace Aerator if required.<br />
D. Faucet is not working properly.<br />
Contact <strong>Sloan</strong> Technical Support at<br />
1-888-SLOAN-14 (1-888-756-2614).<br />
5. Faucet does not stop delivering water or continues to drip after<br />
user is no longer detected.<br />
A. Faucet is not working properly.<br />
Contact <strong>Sloan</strong> Technical Support at<br />
1-888-SLOAN-14 (1-888-756-2614).<br />
6. The water temperature is too hot or too cold on a faucet<br />
connected to hot <strong>and</strong> cold supply lines.<br />
A. Supply Stops are not adjusted properly.<br />
Adjust Supply Stops.<br />
B. For models with integral mixing valve – Mixing valve is set improperly<br />
for the water temperature desired.<br />
Rotate mixing valve h<strong>and</strong>le clockwise to decrease water temperature or<br />
counterclockwise to increase water temperature.<br />
163<br />
<strong>Repair</strong> <strong>Parts</strong> <strong>and</strong> <strong>Maintenance</strong> <strong>Guide</strong><br />
LINO EAF-200<br />
As the user’s h<strong>and</strong>s enter the beam’s<br />
effective range, the beam is reflected<br />
back into the sensor receiver <strong>and</strong><br />
activates the solenoid valve allowing<br />
water to flow from the faucet. Water<br />
will flow until the h<strong>and</strong>s are removed<br />
or until the faucet reaches its<br />
automatic time out limit setting.<br />
CARE AND CLEANING INSTRUCTIONS<br />
DO NOT use abrasive or chemical cleaners<br />
(including chlorine bleach) to clean faucet that may<br />
dull the luster <strong>and</strong> attack the chrome or special<br />
decorative finishes. Use ONLY mild soap <strong>and</strong> water,<br />
then wipe dry with clean cloth or towel.<br />
While cleaning the bathroom tile, protect the<br />
faucet from any splattering of cleaner. Acids <strong>and</strong><br />
cleaning fluids will discolor or remove chrome plating.<br />
When assistance is required, please contact<br />
<strong>Sloan</strong> Technical Support at: 1-888-SLOAN-14 (1-888-756-2614).<br />
H<strong>and</strong> Hygiene
H<strong>and</strong> Hygiene<br />
1<br />
12<br />
14<br />
3A<br />
3B<br />
3C<br />
3D<br />
9<br />
8<br />
4<br />
EAF-225 Series Faucet date code 1101 <strong>and</strong><br />
newer. Product revised to make spray head<br />
v<strong>and</strong>al resistant without need for special spray.<br />
EAF-15 only works on product date code 1052<br />
<strong>and</strong> older.<br />
5<br />
2<br />
13<br />
6A<br />
6B<br />
7<br />
11<br />
10<br />
164<br />
<strong>Repair</strong> <strong>Parts</strong> <strong>and</strong> <strong>Maintenance</strong> <strong>Guide</strong><br />
Lumino EAF-225<br />
PARTS LIST—EAF-225 FAUCET<br />
Item<br />
No. Code No. Part No. Description<br />
1. — — Faucet Sensor Assembly<br />
— — Faucet Sensor Assembly with i.q.-Click<br />
2. — — Cap with Light Ring<br />
3A. 0335012 EAF-15 0.5 gpm (1.9 Lpm) VR Pressure Compensating Spray<br />
Head – Pre 03/2011<br />
3B. 0335021 EAF-22 1.5 gpm (5.6 Lpm) Pressure Compensating Aerated<br />
Stream<br />
3C. 0335008 EAF-10 2.2 gpm (8.3 Lpm) Aerator Spray Head<br />
3D. 0335011 EAF-13 2.2 gpm (8.3 Lpm) Laminar Flow Spray Head<br />
4. 0335000 EAF-1 Faucet Mounting Kit<br />
5. 0335007 EAF-9 Strainer (Filter)<br />
6A. 3335019 EAF-1004 Mixer H<strong>and</strong>le Assembly <strong>and</strong> Cartridge<br />
6B. 3335020 EAF-1005 H<strong>and</strong>le <strong>Repair</strong> Kit<br />
7. 3335022 EAF-1007 H<strong>and</strong>le Cap<br />
8. 3335023 EAF-1008 13” (330 mm) Flexible Supply Hose<br />
9. 0335024 EAF-24-A 11-13/16” (300 mm) Extension Cable<br />
0335025 EAF-25-A 47-1/4” (1200 mm) Extension Cable<br />
0335015 EAF-17-A 126” (3200 mm) Extension Cable<br />
10. 3365468 ETF-312-A Trim Plate for 4” Centerset Sink<br />
11. 3365024 ETF-510-A Trim Plate for 8” Centerset Sink<br />
12. 0335009 EAF-11 Plug-in Adapter<br />
13. 0335001 EAF-2 Solenoid<br />
14. 0335037 EAF-37 6 VDC Box Mount Voltage Adapter<br />
Note: Multiple Lumino faucets CANNOT be installed with one voltage adapter due to power requirements of light<br />
ring. (1) faucet per (1) EAF-37<br />
i.q.-cliq SETTINGS<br />
Function Press Button LED Signal<br />
Continuous Run – 2 minute 1 time for 2 seconds<br />
default setting (adjustable<br />
from 1 – 20 minutes)<br />
5 short flashes<br />
reset: 1 time or will reset<br />
automatically after<br />
2 minutes<br />
Temporary Off 2 times (double click) 5 short flashes followed by<br />
periodic flashing<br />
reset: 1 time or will reset<br />
automatically after<br />
2 minutes<br />
Auto Set Range Adjustment 2 times (double click) <strong>and</strong> 5 short flashes followed<br />
then 1 time for 5 seconds by 4 short flashes
TROUBLESHOOTING GUIDE OPERATION<br />
1. Faucet does not function.<br />
A. Adhesive packaging label affixed over sensor eye.<br />
Remove adhesive label from sensor eye.<br />
B. "Permanent Off" activated.<br />
Press button on faucet throat one time.<br />
2. Faucet delivers water in an uncontrolled manner.<br />
A. Faucet is not working properly.<br />
Contact <strong>Sloan</strong> Technical Support at<br />
1-888-SLOAN-14 (1-888-756-2614).<br />
3. Faucet does not deliver any water when Sensor is activated.<br />
INDICATOR: Solenoid valve produces an audible “CLICK.”<br />
A. Water supply stop(s) closed.<br />
Open water supply stop(s).<br />
B. Water supply stop strainer(s) clogged.<br />
Remove, clean, <strong>and</strong> reinstall water supply stop strainer(s).Replace<br />
strainer(s) if required.<br />
INDICATOR: Solenoid valve DOES NOT produce an audible “CLICK.”<br />
A. Battery low (battery powered models).<br />
Replace battery.<br />
B. Power failure (EAF-200 Models).<br />
Check power supply.<br />
4. Faucet delivers only a slow flow or dribble when Sensor<br />
is activated.<br />
A. Water supply stop(s) are partially closed.<br />
Completely open water supply stop(s).<br />
B. Water supply stop strainer(s) clogged.<br />
Remove, clean, <strong>and</strong> reinstall water supply stop strainer(s). Replace<br />
strainer(s) if required.<br />
5. Faucet delivers only a slow flow or dribble when Sensor<br />
is activated.<br />
A. Aerator is clogged.<br />
Remove, clean, <strong>and</strong> reinstall Aerator. Replace Aerator if required.<br />
B. Faucet is not working properly.<br />
Contact <strong>Sloan</strong> Technical Support at<br />
1-888-SLOAN-14 (1-888-756-2614).<br />
6. Faucet does not stop delivering water or continues to drip after<br />
user is no longer detected.<br />
A. Faucet is not working properly.<br />
Contact <strong>Sloan</strong> Technical Support at<br />
1-888-SLOAN-14 (1-888-756-2614).<br />
7. LED indicator blinks when faucet is in use.<br />
A. Battery low (battery powered models).<br />
Replace battery.<br />
8. The water temperature is too hot or too cold on a faucet<br />
connected to hot <strong>and</strong> cold supply lines.<br />
A. Supply Stops are not adjusted properly.<br />
Adjust Supply Stops.<br />
B. For models with integral mixing valve — Mixing valve is set improperly<br />
for the water temperature desired.<br />
Rotate mixing valve h<strong>and</strong>le clockwise to decrease water temperature or<br />
counterclockwise to increase water temperature.<br />
165<br />
<strong>Repair</strong> <strong>Parts</strong> <strong>and</strong> <strong>Maintenance</strong> <strong>Guide</strong><br />
Lumino EAF-225<br />
As the user’s h<strong>and</strong>s enter the beam’s<br />
effective range, the beam is reflected<br />
back into the sensor receiver <strong>and</strong><br />
activates the solenoid valve allowing<br />
water to flow from the faucet. Water<br />
will flow until the h<strong>and</strong>s are removed<br />
or until the faucet reaches its<br />
automatic time out limit setting.<br />
CARE AND CLEANING INSTRUCTIONS<br />
DO NOT use abrasive or chemical cleaners<br />
(including chlorine bleach) to clean faucet that may<br />
dull the luster <strong>and</strong> attack the chrome or special<br />
decorative finishes. Use ONLY mild soap <strong>and</strong> water,<br />
then wipe dry with clean cloth or towel.<br />
While cleaning the bathroom tile, protect the<br />
faucet from any splattering of cleaner. Acids <strong>and</strong><br />
cleaning fluids will discolor or remove chrome plating.<br />
When assistance is required, please contact<br />
<strong>Sloan</strong> Technical Support at: 1-888-SLOAN-14 (1-888-756-2614).<br />
H<strong>and</strong> Hygiene
H<strong>and</strong> Hygiene<br />
12<br />
5<br />
7<br />
EAF-700<br />
8<br />
11<br />
1<br />
2<br />
9<br />
4<br />
10<br />
6<br />
3<br />
166<br />
<strong>Repair</strong> <strong>Parts</strong> <strong>and</strong> <strong>Maintenance</strong> <strong>Guide</strong><br />
Optima ® EAF-700<br />
PARTS LIST—EAF-700 FAUCETS<br />
Item<br />
No. Code No. Part No. Description<br />
1. — –– Spout Assembly<br />
2. — –– Integral Side Mixer H<strong>and</strong>le Cap<br />
3. — –– Integral Side Mixer Kit<br />
4. 0335001 EAF-2 Solenoid<br />
5. — –– Sensor Assembly<br />
6. 0335000 EAF-1 Mounting Hardware<br />
7. — EAF-44 Power Splitter<br />
8. 0335024 EAF-24-A 11-13/16” (300 mm) Extension Cable<br />
0335025 EAF-25-A 47-1/4” (1200 mm) Extension Cable<br />
0335015 EAF-17-A 126” (3200 mm) Extension Cable<br />
9. 3335023 EAF-1008 13” (330 mm) Flexible Supply Hose<br />
10. 0335007 EAF-9 Filter/Strainer<br />
11. 0335009 EAF-11-A Plug-in Voltage Adapter, US Plug<br />
12. 3335086 EAF-1014-A Multi-Lam Spray Head Kit 0.5 gpm (1.9 Lpm)<br />
Male Cache TJ<br />
3335087 EAF-1015-A Spray Head Kit 1.5 gpm (5.7 Lpm) Aerated Male<br />
Cache TJ<br />
3335088 EAF-1016-A Spray Head Kit 1.5 gpm (5.7 Lpm) Laminar Male<br />
Cache TJ<br />
Electrical Connection for up to Six (6) Faucets<br />
Using One (1) Adapter<br />
POWER<br />
SPLITTER<br />
ELECTRICAL<br />
CABLE<br />
6 VDC PLUG-IN<br />
ADAPTER<br />
POWER<br />
SPLITTER<br />
ELECTRICAL<br />
CABLE<br />
POWER<br />
SPLITTER<br />
ELECTRICAL<br />
CABLE<br />
TO ADDITIONAL<br />
FAUCETS<br />
(6 MAX.)
167<br />
<strong>Repair</strong> <strong>Parts</strong> <strong>and</strong> <strong>Maintenance</strong> <strong>Guide</strong><br />
Optima ® EAF-700<br />
OPERATION SENSOR RANGE ADJUSTMENT<br />
As the user’s h<strong>and</strong>s enter the beam’s effective range, the beam is reflected<br />
back into the sensor receiver <strong>and</strong> activates the solenoid valve allowing water<br />
to flow from the faucet. Water will flow until the h<strong>and</strong>s of the user are<br />
removed or until the faucet reaches its automatic time out limit setting.<br />
SET AND FIX TEMPERATURE (OPTIONAL)<br />
Step 1<br />
Step 2<br />
HOT LIMIT STOP ADJUSTMENT<br />
Limit the maximum water temperature. Note: this does not take the place of<br />
an ASSE 1070 certified mixing device. But is an added measure to limit<br />
delivery of hot water.<br />
Step 1<br />
Step 2<br />
Step 3<br />
Step 3<br />
Step 4<br />
Step 5<br />
Factory setting is appropriate for the<br />
majority of applications <strong>and</strong> should<br />
not require resetting unless under<br />
extreme situations.<br />
Step 1<br />
Step 2<br />
4x<br />
5 Sec.<br />
2x +<br />
1x5 Sec.<br />
Step 3<br />
1 x ( 1x, 2x,...,5x)<br />
Step 4<br />
Step 5<br />
8x<br />
7x<br />
2x<br />
1x<br />
FACTORY DEFAULT = 6<br />
H<strong>and</strong> Hygiene
H<strong>and</strong> Hygiene<br />
12/24 LINE PURGE FEATURE<br />
This feature will operate the faucet<br />
every 12 or 24 hours since last use,<br />
if not used to prevent stagnant<br />
water conditions.<br />
Default purge duration is<br />
two (2) minutes.<br />
Consult factory regarding other<br />
timing options.<br />
I.Q.-CLICK FEATURE<br />
1. CONTINUOUS RUN<br />
Continuous run of water for<br />
two minutes.<br />
Faucet will operate normally after<br />
two minutes or after pressing<br />
i.q.-click button once.<br />
2. CLEANING MODE<br />
Pause faucet for cleaning for<br />
two (2) minutes.<br />
Faucet will operate normally after<br />
two (2) minutes or after pressing<br />
i.q.-click button once.<br />
1x 24 sec<br />
2 x<br />
1 x 2 Sec.<br />
1 x<br />
2 x<br />
1 x<br />
168<br />
<strong>Repair</strong> <strong>Parts</strong> <strong>and</strong> <strong>Maintenance</strong> <strong>Guide</strong><br />
Optima ® EAF-700<br />
OFF-DELAY (FOLLOW UP TIME)<br />
Duration of time the water runs<br />
after target is removed.<br />
Press the button for approximately<br />
six (6) seconds. Release.<br />
Press again (water flows) <strong>and</strong><br />
release when the desired time of<br />
water flow (0-5 seconds) is<br />
reached.<br />
Sensor will flash once <strong>and</strong> then the<br />
faucet is ready to operate. 1x
TROUBLESHOOTING GUIDE<br />
1. Faucet does not function.<br />
A. Adhesive packaging label affixed over sensor eye.<br />
Remove adhesive label from sensor eye.<br />
B. “Intermittent Off” is activated.<br />
Press button once.<br />
C. Water supply stop(s) closed.<br />
Open water supply stop(s).<br />
D. Battery is “dead”.<br />
Replace battery (refer to Battery Replacement section of guide).<br />
2. Faucet delivers water in an uncontrolled manner.<br />
A. Reflection.<br />
Remove reflective surface.<br />
B. Faucet is not working properly.<br />
Contact <strong>Sloan</strong> Technical Support at<br />
1-888-SLOAN-14 (1-888-756-2614).<br />
3. Faucet does not deliver any water when Sensor is activated.<br />
INDICATOR: Solenoid <strong>Valve</strong> produces an audible “CLICK.”<br />
A. Water supply stop(s) closed.<br />
Open water supply stop(s).<br />
B. Water supply stop strainer(s) clogged.<br />
Remove, clean, <strong>and</strong> reinstall water supply stop strainer(s). Replace<br />
strainer(s), if required.<br />
INDICATOR: Solenoid <strong>Valve</strong> DOES NOT produce an audible “CLICK.”<br />
A. Power failure.<br />
Check power supply.<br />
4. Faucet delivers only a slow flow or dribble when sensor is<br />
activated.<br />
A. Water supply stop(s) are partially closed.<br />
Completely open water supply stop(s).<br />
B. Water supply stop strainer(s) clogged.<br />
Remove, clean, <strong>and</strong> reinstall water supply stop strainer(s). Replace<br />
strainer(s), if required.<br />
C. Spray head is clogged.<br />
Remove, clean, <strong>and</strong> reinstall spray head. Replace spray head,<br />
if required.<br />
D. Faucet is not working properly.<br />
Contact <strong>Sloan</strong> Technical Support at<br />
1-888-SLOAN-14 (1-888-756-2614).<br />
5. Faucet does not stop delivering water or contrinues to drip after<br />
user is no longer detected.<br />
A. Faucet is not working properly.<br />
Contact <strong>Sloan</strong> Technical Support at<br />
1-888-SLOAN-14 (1-888-756-2614).<br />
6. The water temperature is too hot or too cold on a faucet<br />
connected to hot <strong>and</strong> cold supply lines.<br />
A. Supply stops are not adjusted properly.<br />
Adjust supply stops.<br />
169<br />
<strong>Repair</strong> <strong>Parts</strong> <strong>and</strong> <strong>Maintenance</strong> <strong>Guide</strong><br />
Optima ® EAF-700<br />
CARE AND CLEANING<br />
DO NOT USE abrasive or chemical cleaners<br />
(including chlorine bleach) to clean faucets that<br />
may dull the luster <strong>and</strong> attack the chrome or<br />
special decorative finishes. Use ONLY mild soap<br />
<strong>and</strong> water, then wipe dry with clean cloth or<br />
towel. While cleaning the bathroom sink, protect<br />
the faucet from any splattering of cleaner. Acids<br />
<strong>and</strong> cleaning fluids will discolor or remove<br />
chrome plating.<br />
When assistance is required, please<br />
contact <strong>Sloan</strong> Technical Support at:<br />
1-888-SLOAN-14 (1-888-756-2614).<br />
H<strong>and</strong> Hygiene
H<strong>and</strong> Hygiene<br />
2A<br />
2B<br />
10<br />
EAF-150 EAF-150-ISM-DPU-IC<br />
170<br />
<strong>Repair</strong> <strong>Parts</strong> <strong>and</strong> <strong>Maintenance</strong> <strong>Guide</strong><br />
Optima i.q. ® EAF-150<br />
PARTS LIST—EAF-150 FAUCETS<br />
Item<br />
No. Code No. Part No. Description<br />
1A. 0335008 EAF-10 2.2 gpm (8.3 Lpm) Aerator Spray Head<br />
1B. 0335010 EAF-12 0.5 gpm (1.9 Lpm) Spray Head<br />
1C. 0335029 EAF-51 0.35 gpm (1.3 Lpm) Spray Head (Multi-Lam)<br />
2A.0335002 EAF-3-A Throat Plate Assembly (Battery Models)<br />
2B. 0335003 EAF-4-A Throat Plate Assembly with i.q.-cliq <br />
(Battery Model)<br />
3. 3335009 EAF-1000 Battery Replacement Kit<br />
4. 0335000 EAF-1 Faucet Mounting Kit<br />
5. 0335007 EAF-9 Strainer (Filter)<br />
6A. 3335010 EAF-1001 Mixer H<strong>and</strong>le Assembly <strong>and</strong> Cartridge<br />
6B. 3335011 EAF-1002 H<strong>and</strong>le <strong>Repair</strong> Kit<br />
7. 3335023 EAF-1008 13” (330 mm) Flexible Supply Hose<br />
8. 3365302 ETF-607-A Trim Plate for 4” Center-set Sink<br />
9. 3365303 ETF-608-A Trim Plate for 8” Center-set Sink<br />
10. 0335001 EAF-2 Solenoid
AUTO RANGE ADJUSTMENT<br />
Press button one (1) time, then<br />
immediately step away.<br />
Faucet will run for four (4) seconds<br />
<strong>and</strong> the range will automatically<br />
adjust to its environment.<br />
Wait ten (10) seconds after water<br />
shuts off before using faucet.<br />
If faucet does not function, refer to<br />
the Troubleshooting section of this<br />
instruction manual.<br />
MANUAL RANGE ADJUSTMENT<br />
Note: Use Manual range adjustment only when desired range cannot<br />
be obtained with auto range adjustment shown above.<br />
Push button two (2) times (double click).<br />
Push again for five (5) seconds<br />
until LED flashes four (4) times.<br />
Then release button <strong>and</strong> wait five (5) seconds.<br />
Push <strong>and</strong> hold button in as faucet continuously cycles through the following<br />
five (5) range settings.<br />
One (1) flash = shortest range<br />
Two (2) flashes = short range<br />
Three (3) flashes = medium range<br />
Four (4) flashes = long range<br />
Five (5) flashes = longest range<br />
Release button at desired setting.<br />
Then water will flow for<br />
four (4) seconds signaling<br />
confirmation of setting. Wait an<br />
additional ten (10) seconds<br />
before using faucet.<br />
Note: Updated electronics have visible<br />
red <strong>and</strong> green LED. Original electronics<br />
have only red LED <strong>and</strong> range setting is reversed<br />
(1 = longest, 8 = shortest)<br />
5x<br />
4x<br />
3x<br />
1x<br />
2x<br />
171<br />
<strong>Repair</strong> <strong>Parts</strong> <strong>and</strong> <strong>Maintenance</strong> <strong>Guide</strong><br />
Optima i.q. ® EAF-150<br />
BATTERY REPLACEMENT<br />
Replace battery when red LED indicator flashes each time faucet<br />
is in use or when faucet stops functioning.<br />
Step 1<br />
Close supply stop(s).<br />
Step 2<br />
Loosen screw with hex wrench.<br />
Remove throat plate.<br />
Disconnect electrical lead at<br />
connector if required.<br />
Step 3<br />
Remove battery cover using a<br />
No. 1 Phillips head screwdriver.<br />
Remove old battery. Dispose of<br />
properly.<br />
Step 4<br />
Wait three (3) minutes<br />
before inserting new battery.<br />
Step 5<br />
Insert a new 6 volt type CR-P2 lithium battery.<br />
The red LED will flash for one (1) minute.<br />
Reinstall battery cover.<br />
Reconnect electrical lead at connector<br />
if previously disconnected. Reinstall<br />
throat plate.<br />
If LED doesn't flash or if it just lights up,<br />
remove the battery. Wait three (3) minutes,<br />
then reinsert the battery.<br />
If water flows continuously after inserting<br />
the new battery <strong>and</strong> opening the supply<br />
stops, remove the battery. Wait three<br />
(3) minutes, then reinsert the battery.<br />
Step 6<br />
Open supply stops.<br />
H<strong>and</strong> Hygiene
H<strong>and</strong> Hygiene<br />
SERVICE OPERATION<br />
Prepare for operation<br />
A. Press the button once.<br />
B. Remove sticker.<br />
C. Water will flow 4 seconds<br />
D. Wait 10 seconds, then the faucet<br />
is ready for use.<br />
If waterflow doesn’t start after<br />
removing the sticker <strong>and</strong> the red<br />
led within the sensor flashes<br />
continue with the following<br />
procedure!!<br />
A. Press the button once.<br />
B. Hold a white sheet of paper 1.5”<br />
(40 mm) in front of sensor until<br />
water flows for 4 seconds<br />
C. Remove paper.<br />
D. Wait 10 seconds, then the faucet<br />
is ready for use.<br />
A<br />
B<br />
C<br />
A<br />
B<br />
C<br />
1x<br />
10 Sec.<br />
1x<br />
10 Sec.<br />
4 Sec.<br />
4 Sec.<br />
172<br />
<strong>Repair</strong> <strong>Parts</strong> <strong>and</strong> <strong>Maintenance</strong> <strong>Guide</strong><br />
Optima i.q. ® EAF-150<br />
TROUBLESHOOTING GUIDE<br />
1. Faucet does not function.<br />
A. Adhesive packaging label affixed over sensor eye.<br />
Remove adhesive label from sensor eye.<br />
B. “Permanent Off” activated.<br />
Press button on faucet throat one time.<br />
2. Faucet delivers water in an uncontrolled manner.<br />
A. Faucet is not working properly.<br />
Contact <strong>Sloan</strong> Technical Support at 1-888-SLOAN-14 (1-888-756-2614).<br />
3. Faucet does not deliver any water when sensor is activated.<br />
INDICATOR: Solenoid valve produces an audible “CLICK.”<br />
A. Water supply stop(s) closed.<br />
Open water supply stop(s).<br />
B. Water supply stop strainer(s) clogged.<br />
Clean water supply stop strainer(s).<br />
INDICATOR: Solenoid valve DOES NOT produce an audible “CLICK.”<br />
A. Battery low (EAF-150 Models).<br />
Replace battery (refer to battery replacement).<br />
4. Faucet delivers only a slow flow or dribble when sensor is activated.<br />
A. Water supply stop(s) are partially closed.<br />
Completely open water supply stop(s).<br />
B. Water supply stop strainer(s) clogged.<br />
Remove, clean, <strong>and</strong> reinstall water supply stop strainer(s). Replace<br />
strainer(s) if required.<br />
C. Aerator is clogged.<br />
Remove, clean, <strong>and</strong> reinstall aerator. Replace aerator if required.<br />
D. Faucet is not working properly.<br />
Contact <strong>Sloan</strong> Technical Support at 1-888-SLOAN-14 (1-888-756-2614).<br />
5. Faucet does not stop delivering water or continues to drip after<br />
user is no longer detected.<br />
A. Faucet is not working properly.<br />
Contact <strong>Sloan</strong> Technical Support at 1-888-SLOAN-14 (1-888-756-2614).<br />
6. i.q.-cliq doesn’t function (-IC models only)<br />
A. Button is not working properly.<br />
Contact <strong>Sloan</strong> Technical Support at 1-888-SLOAN-14 (1-888-756-2614).<br />
7. The water temperature is too hot or too cold on a faucet<br />
connected to hot <strong>and</strong> cold supply lines.<br />
A. Supply stops are not adjusted properly.<br />
Adjust supply stops.<br />
B. For models with integral mixing valve – mixing valve is set improperly<br />
for the water temperature desired.<br />
Rotate mixing valve h<strong>and</strong>le clockwise to decrease water temperature or<br />
counterclockwise to increase water temperature.<br />
CARE AND CLEANING OF CHROME AND SPECIAL FINISHES<br />
DO NOT use abrasive or chemical cleaners<br />
(including chlorine bleach) to clean faucets that<br />
may dull the luster <strong>and</strong> attack the chrome or<br />
special decorative finishes. Use ONLY mild soap<br />
<strong>and</strong> water, then wipe dry with clean cloth or towel.<br />
While cleaning the bathroom tile, protect the faucet from<br />
any splattering of cleaner. Acids <strong>and</strong> cleaning fluids will<br />
discolor or remove chrome plating.<br />
When assistance is required, please contact<br />
<strong>Sloan</strong> Technical Support at: 1-888-SLOAN-14 (1-888-756-2614).
9<br />
3A<br />
3B<br />
5<br />
8<br />
10<br />
OLD<br />
SOLENOID<br />
10<br />
1<br />
4<br />
FILTER PLUG<br />
PRONGS<br />
OLD FILTER PLUG<br />
CURRENT<br />
SOLENOID<br />
SCREEN FILTER<br />
FILTER PLUG<br />
O-RING<br />
FILTER PLUG<br />
SCREEN FILTER<br />
FILTER PLUG O-RING<br />
FILTER PLUG<br />
CURRENT FILTER PLUG<br />
7<br />
6<br />
173<br />
<strong>Repair</strong> <strong>Parts</strong> <strong>and</strong> <strong>Maintenance</strong> <strong>Guide</strong><br />
Optima Plus ® EBF-85<br />
PARTS LIST—EBF-85 FAUCET<br />
Item<br />
No. Code No. Part No. Description<br />
1. 3315016 EBF-10-A Faucet <strong>and</strong> Sensor Assembly (EBF-85)<br />
— 3315122 EBF-1009-A Fiber Optic Sensor Cable Assembly Only (replaces<br />
EBF-12-A <strong>and</strong> EBF-179-A includes lens holder)<br />
2. 3365091 ETF-1021-A 0.5 gpm (1.9 Lpm) Spray Head with Key<br />
(female thread)<br />
— 3365090 ETF-1022-A 2.2 gpm (8.3 Lpm) Aerator Spray Head with Key<br />
(female thread)<br />
— 3365161 ETF-1028-A 1.5 gpm (5.7 Lpm) Laminar Flow Spray Head with<br />
Key (female thread)<br />
— 3365755 ETF-1038-A 0.35 gpm (1.3 Lpm) Multi-Lam Spray Head VR<br />
— 0305927 ETF-435 Replacement Key ONLY<br />
3A. 3365466 ETF-295-A 4” (102 mm) Centerset Trim Plate Kit for Faucet<br />
(Faucet Only) includes two (2) Nuts, two (2) Hex<br />
Screws, two (2) Flat Washers, Single Hole Cover<br />
Plate, <strong>and</strong> CP Base Plate<br />
3B. 3365467 ETF-299-A 4” (102 mm) Centerset Trim Plate Kit for Faucet<br />
with Optional Mixing <strong>Valve</strong> includes two (2) Nuts,<br />
two (2) Hex Screws, two (2) Flat Washers, Dual<br />
Hole Cover Plate, <strong>and</strong> CP Base Plate<br />
4. 0305626 ETF-290-A Faucet Mounting Kit includes Rubber Gasket,<br />
Mounting Washer, Mounting Nut, <strong>and</strong> Compression<br />
Fitting Connector<br />
5. 0305736 ETF-297 1/4” to 3/8” Compression Fitting Connector<br />
6. 3315111 EBF-11-A Solenoid <strong>Valve</strong> Module Assembly includes Solenoid<br />
Enclosure, Solenoid Body, <strong>and</strong> Filter Cap<br />
— 3315009 EBF-1001-A Solenoid Filter Replacement Kit for old solenoid<br />
includes Filter Screen Assembly <strong>and</strong> O-ring<br />
— 3315028 EBF-1004-A Solenoid Filter Replacement Kit for current<br />
solenoid includes Filter Screen Assembly<br />
<strong>and</strong> O-ring<br />
— 3315051 EBF-1005-A Filter Cap Assembly for old solenoid includes<br />
metal Filter Cover <strong>and</strong> O-ring – OBSOLETE<br />
7. 3315001 EBF-16-A Single Supply Solenoid Kit with Ferrule<br />
Compression Nut<br />
8. 3315014 EBF-25-A Mounting Bracket Kit includes Base Plate, Wall<br />
Bracket Base, Wall Bracket, Mounting Screw, Selftapping<br />
Screw, two (2) Wood Screws plus Washers<br />
<strong>and</strong> Plastic Anchors, two (2) Screws plus Washers<br />
<strong>and</strong> Toggle Nuts, two (2) Screws plus Washers <strong>and</strong><br />
Hollow Wall Anchors<br />
9. 3365461 ETF-617-A Bak-Chek ® “T” Assembly<br />
10. 0315004 EBF-17 3/8” to 1/4” Compression Fitting Connector<br />
— = Not shown in illustration<br />
SOLENOID VALVE CHANGES<br />
The current solenoid (in production since May 1998; part 7 shown on the<br />
left) has MALE inlet <strong>and</strong> outlet connections. The current style filter plug has<br />
a metal filter cap that can be removed with a 5/8” wrench.<br />
The older solenoid valve (shown on the left) can be identified by FEMALE<br />
inlet <strong>and</strong> outlet connections. These require EBF-17 compression fittings<br />
(part 10 shown on the left).<br />
This older style solenoid has either a plastic or a replacement brass filter<br />
cap. Remove the older brass filter cap with a 7/16” or 1/2” hex wrench.<br />
Replace the old style filter cap.<br />
H<strong>and</strong> Hygiene
H<strong>and</strong> Hygiene<br />
TROUBLESHOOTING GUIDE<br />
1. Module emits audible “BEEPs” when activated.<br />
A. Battery power is nearly exhausted.<br />
To ensure proper operation, insert four (4) new C-size alkaline<br />
batteries. Check that the orientation of each battery matches the<br />
positive (+) <strong>and</strong> negative (–) symbols shown in the bottom of the<br />
battery compartment. Reattach battery compartment to control module.<br />
2. Sensor is activated but faucet does not deliver water.<br />
INDICATOR: Module DOES NOT produce audible “BEEPs”.<br />
A. Battery power is fully exhausted.<br />
To ensure proper operation, insert four (4) new C-size alkaline<br />
batteries. Check that the orientation of each battery matches the<br />
positive (+) <strong>and</strong> negative (–) symbols shown in the bottom of the<br />
battery compartment. Reattach battery compartment to control module.<br />
B. Batteries are not installed properly.<br />
Check that the orientation of the batteries match the positive (+) <strong>and</strong><br />
negative (–) symbols shown in the bottom of the battery compartment.<br />
Reattach the battery compartment to the control module.<br />
C. Solenoid valve module is not working properly.<br />
Replace EBF-11-A solenoid valve module.<br />
INDICATOR: Module produces audible “BEEPs” when batteries are<br />
installed <strong>and</strong> after 30-second calibration procedure, but NOT when<br />
a target is placed in the detection zone of the Sensor.<br />
D. Fiber optic cable is not connected correctly to solenoid valve module or<br />
was not connected when batteries were installed.<br />
Reconnect fiber optic cable to solenoid valve module. Open battery<br />
compartment to reset electrical system. Check that the orientation of<br />
each battery matches the positive (+) <strong>and</strong> negative (–) symbols shown<br />
in the bottom of the battery compartment. Reattach the battery<br />
compartment to the control module.<br />
E. Fiber optic cable is not working properly.<br />
Replace EBF-1009-A sensor cable, or EBF-10-A faucet/sensor assembly.<br />
F. Solenoid valve module is not working properly.<br />
Replace EBF-11-A solenoid valve module.<br />
INDICATOR: Module produces audible “BEEPs” when a target is<br />
placed in the detection zone of the sensor <strong>and</strong> solenoid valve<br />
produces an audible “CLICK”, but NO water flows.<br />
G. Water supply to faucet is not open.<br />
Open supply stop(s).<br />
H. Bak-Chek ® is installed backwards.<br />
Reinstall Bak-Chek(s).<br />
I. Solenoid filter is clogged.<br />
Remove, clean, <strong>and</strong> reinsert. Replace with EBF-1001-A or EBF-1004-A<br />
solenoid filter kit if necessary.<br />
J. Aerator or spray head is clogged.<br />
Remove, clean, <strong>and</strong> reinsert.<br />
INDICATOR: Module produces audible “BEEPs” when a target is<br />
placed in the detection zone of the sensor, but solenoid valve does<br />
NOT produce an audible “CLICK” <strong>and</strong> NO water flows.<br />
K. Solenoid valve module is not working properly.<br />
Replace EBF-11-A solenoid valve module.<br />
174<br />
<strong>Repair</strong> <strong>Parts</strong> <strong>and</strong> <strong>Maintenance</strong> <strong>Guide</strong><br />
Optima Plus ® EBF-85<br />
3. Faucet delivers only a slow flow or dribble when sensor is<br />
activated.<br />
A. Water supply valve is partially closed.<br />
Open the supply stop(s) completely.<br />
B. Solenoid filter is clogged.<br />
Remove, clean, <strong>and</strong> reinsert. Replace with EBF-1001-A or EBF-1004-A<br />
solenoid filter if necessary.<br />
C. Aerator or spray head is clogged.<br />
Remove, clean, <strong>and</strong> reinsert.<br />
4. Faucet does not stop delivering water or continues to drip after<br />
user is no longer detected (automatic shut-off fails even when<br />
batteries are removed).<br />
A. Solenoid valve has been connected backwards.<br />
Disassemble solenoid valve compression fittings at the inlet <strong>and</strong> outlet<br />
positions. Water should flow from inlet through the solenoid valve to<br />
outlet according to the direction shown by the arrow on the side of the<br />
solenoid valve. Reconnect the fittings in the correct orientation.<br />
B. Solenoid valve seat is dirty.<br />
Remove, clean, <strong>and</strong> reinsert solenoid filter. Activate faucet several<br />
times to flush out dirt.<br />
C. Solenoid valve is dirty.<br />
Backflush by reversing water flow (opposite to the direction shown<br />
by the arrow on the side of the solenoid valve) through the solenoid<br />
valve. Reconnect the compression fittings in the correct orientation.<br />
Activate faucet.<br />
D. Solenoid valve module is not working properly.<br />
Replace EBF-11-A solenoid valve module.<br />
5. The water temperature is too hot or too cold on a faucet<br />
connected to hot <strong>and</strong> cold supply lines with two Bak-Chek’s.<br />
A. Supply stops are not adjusted properly.<br />
Adjust supply stops.<br />
B. One Bak-Chek is installed backwards.<br />
Reinstall Bak-Chek.<br />
NOTE: For some systems, a thermostatic mixing valve may be required.<br />
Battery replacement<br />
VALVE MODULE<br />
SET SCREW<br />
BATTERY<br />
COMPARTMENT<br />
COUPLING RING<br />
ALIGN ARROWS<br />
AND INSTALL<br />
BATTERY<br />
COMPARTMENT TO<br />
VALVE MODULE<br />
BATTERY<br />
COMPARTMENT
†† TO MOUNT FAUCET ON A SURFACE<br />
BETWEEN 0.41” (10 MM) AND 1.00”<br />
(25 MM) THICK, USE THE HARDWARE<br />
SHOWN BELOW.<br />
New Base Gasket<br />
The new base gasket<br />
(in production since<br />
October 1999) is shown<br />
below. An older base<br />
gasket design did not<br />
have the u-shaped<br />
drainage hole.<br />
4<br />
4<br />
4<br />
7<br />
1B<br />
3B<br />
1A<br />
2<br />
3A<br />
75<br />
86<br />
OLDER MOUNTING KIT<br />
8<br />
6<br />
9<br />
175<br />
<strong>Repair</strong> <strong>Parts</strong> <strong>and</strong> <strong>Maintenance</strong> <strong>Guide</strong><br />
Optima Plus ® EBF-550<br />
PARTS LIST—EBF-550 FAUCET<br />
Item<br />
No. Code No. Part No. Description<br />
1A. 0315224 EBF-222-A-ST Faucet <strong>and</strong> Sensor Assembly with St<strong>and</strong>ard<br />
Gooseneck Spout (EBF-550)<br />
1B. 0315227 EBF-222-A-SU Faucet <strong>and</strong> Sensor Assembly with Surgical Bend<br />
Gooseneck Spout (EBF-550-S)<br />
2. 0305784 ETF-178 Adapter for Spray Heads (not required for<br />
AC-55-A Shower Spray Head)<br />
3A. 0365147 ETF-621 2.2 gpm (8.3 Lpm) Laminar Flow Spray Head with<br />
Key (female thread)<br />
0365793 ETF-839 0.35 gpm (1.3 Lpm) Multi-Lam Spray Head<br />
0305927 ETF-435 Replacement Key ONLY<br />
3B. 0328134 AC-55-A Shower Spray Head Assembly, 2.2 gpm (8.3 Lpm)<br />
4. 0315060 EBF-110-A Faucet Mounting Kit includes Base Gasket, large<br />
Flat Washer, large Lockwasher, large Nut,<br />
Mounting Spacer, Mounting Stud, small Flat<br />
Washer, small Lockwasher, small Nut, Anti-<br />
Rotation Screw, <strong>and</strong> Compression Fitting<br />
Connector (male)<br />
— 0365152 ETF-591 1/8” NPT Pipe to 3/8” Tube Male Compression<br />
Fitting Connector<br />
5. 0365758 ETF-740-A 6 VDC Solenoid Assembly<br />
6. 0365752 ETF-735-A Control Module<br />
7. 3365461 ETF-617-A Bak-Chek ® “T” Assembly<br />
— = Not shown in illustration<br />
For additional information about <strong>Sloan</strong> Mixing<br />
<strong>Valve</strong>s or Trim Plates, consult our Installation<br />
Instructions <strong>and</strong> <strong>Maintenance</strong> <strong>Guide</strong>s.<br />
OLD MOUNTING KIT AND FAUCET SHANK<br />
8. N/A †† EBF-110-A Old Faucet Mounting Kit included 3/8” Water<br />
Supply Tube, Base Gasket, large Flat Washer, large<br />
Lock Washer, large Nut, <strong>and</strong> Compression Fitting<br />
Connector (order Items 4 <strong>and</strong> 10 as replacement<br />
parts)<br />
9. 0365058 †† ETF-547 1/8” NPT Pipe to 3/8” Tube Female Compression<br />
Fitting Connector<br />
The new mounting kit (in production since June 1999; Item 4 shown at left)<br />
includes parts for installation on both thin <strong>and</strong> thick surfaces, an ETF-591<br />
male compression fitting, <strong>and</strong> an anti-rotation screw for installation on sheet<br />
metal surfaces less than 0.41” (10 mm) thick. For surfaces between 0.41”<br />
(10 mm) <strong>and</strong> 1.00” (25 mm) thick, use the mounting spacer <strong>and</strong> mounting<br />
stud hardware. The faucet sensor cable is threaded through a groove on the<br />
side of the shank.<br />
The older mounting kits (Items 9 <strong>and</strong> 10) can be identified by a copper<br />
supply tube attached to the faucet shank, requires an ETF-547 compression<br />
fitting, <strong>and</strong> threads the faucet sensor cable through the interior of the shank.<br />
The current parts breakdown shown on the<br />
left has been in production since September<br />
2008. For earlier EBF-650/615 faucet<br />
models, please refer to the parts breakdown<br />
below <strong>and</strong> right or consult your nearest<br />
<strong>Sloan</strong> representative.<br />
Note: earlier faucet models are not<br />
compatible with the current models.<br />
13<br />
12<br />
13<br />
PARTS PRIOR TO SEPTEMBER 2008<br />
11. 0315104 EBF-60-A Control Module assembly<br />
12. 0315254 EBF-1011-A Solenoid replacement kit<br />
13. 3315029 EBF-113-A Single solenoid supply compression nut kit<br />
14. 3315018 EBF-79-A Mounting hardware kit<br />
11<br />
14<br />
H<strong>and</strong> Hygiene
H<strong>and</strong> Hygiene<br />
TROUBLESHOOTING GUIDE<br />
1. Sensor LED does not function (Sensor indicator light does not<br />
flash during initial 10 minute set-up mode).<br />
A. There is no visible indicator light. Normal operation.<br />
This is a normal operating feature of the faucet.<br />
OLD STYLE SENSOR INDICATOR LIGHTS NEW STYLE SENSOR INDICATOR LIGHT<br />
2. Faucet does not deliver any water when Sensor is activated.<br />
INDICATOR: Solenoid valve produces audible “CLICK.”<br />
A. Water supply stop(s) closed.<br />
Open supply stop(s) completely.<br />
INDICATOR: Solenoid valve DOES NOT produce an audible “CLICK.”<br />
B. Solenoid Lead is not properly connected to the Control Module.<br />
Disconnect <strong>and</strong> reconnect Solenoid Lead to the Control Module.<br />
C. No battery or Transformer (optional) power is being supplied to Sensor.<br />
Ensure that the batteries are installed properly. Check that the<br />
orientation of each battery matches the positive (+) <strong>and</strong> negative (—)<br />
symbols shown on the bottom of the battery compartment. Reinsert the<br />
Batteries into the Control Module. Transformer (optional) is unplugged<br />
or wall receptacle has no power.<br />
LOCKING<br />
TABS<br />
SCREWS (2)<br />
OPTIONAL<br />
PLUG-IN<br />
TRANSFORMER<br />
FOUR (4)<br />
NEW AA-SIZE<br />
ALKALINE<br />
BATTERIES<br />
D. Sensor Cable is not properly connected to the Control Module.<br />
Disconnect <strong>and</strong> reconnect Sensor Cable to the Control Module.<br />
E. Sensor range is set at minimum distance.<br />
Increase Sensor range. Refer to Range Adjustment in your<br />
installation instructions.<br />
F. Control Module assembly is not working properly.<br />
Replace Control Module assembly.<br />
3. Faucet delivers only a slow flow or dribble when Sensor<br />
is activated.<br />
A. Water supply stop(s) partially closed.<br />
Open supply stop(s) completely.<br />
B. Solenoid Filter is clogged.<br />
Remove, clean <strong>and</strong> reinstall Filter. Turn off water supply at supply<br />
stop(s). Activate Faucet to relieve system pressure. Remove Water<br />
Supply Line from Inlet Side of Solenoid <strong>Valve</strong>. Remove Cap, Water Line<br />
Fitting, Gasket, Filter Housing <strong>and</strong> Filter from Solenoid <strong>Valve</strong> Housing.<br />
Slide Filter off Filter Housing. Clean Filter using fresh tap water only. If<br />
necessary, use a small brush to clean. Use caution while cleaning to<br />
prevent damage to Filter. If any Filter components are damaged,<br />
replace as necessary. Examine the Gasket for wear or damage; replace<br />
if necessary. Reinstall Filter on Filter Housing. Install Filter Housing,<br />
Gasket, Water Line Fitting <strong>and</strong> Cap onto Solenoid <strong>Valve</strong> Housing.<br />
Tighten Cap securely. Reinstall Water supply Line to Inlet Side of<br />
Solenoid <strong>Valve</strong>.<br />
176<br />
<strong>Repair</strong> <strong>Parts</strong> <strong>and</strong> <strong>Maintenance</strong> <strong>Guide</strong><br />
Optima Plus ® EBF-550<br />
C. Aerator is clogged.<br />
Remove, clean <strong>and</strong> reinstall Aerator.<br />
INLET SIDE OF SOLENOID VALVE HOUSING<br />
FILTER<br />
FILTER HOUSING<br />
4. Faucet does not stop delivering water or continues to drip after<br />
user is no longer detected (automatic shut-off fails even when<br />
batteries are removed).<br />
A. Solenoid <strong>Valve</strong> has been connected backwards.<br />
Disconnect Solenoid <strong>Valve</strong> compression fittings at both the inlet <strong>and</strong><br />
outlet positions. The water should flow from inlet through the Solenoid<br />
<strong>Valve</strong> to the outlet according to the direction of the arrow shown on the<br />
side of the Solenoid <strong>Valve</strong>. Reconnect the compression fittings in the<br />
correct orientation.<br />
B. Solenoid <strong>Valve</strong> is dirty.<br />
Backflush by reversing water flow (opposite to the direction shown by<br />
the arrow on the side of the Solenoid <strong>Valve</strong>) through the Solenoid <strong>Valve</strong>.<br />
Reconnect the compression fittings in the correct orientation.<br />
Activate faucet.<br />
C. Solenoid <strong>Valve</strong> Module is not working properly.<br />
Replace Solenoid <strong>Valve</strong> Module.<br />
5. The water temperature is too hot or too cold on a faucet<br />
connected to hot <strong>and</strong> cold supply lines with Bak-Chek ® Tee.<br />
A. Supply stops are not adjusted properly.<br />
Adjust supply stops.<br />
NOTE: For some systems, a Thermostatic Mixing <strong>Valve</strong><br />
may be required.<br />
6. The Red LED turns on in the control module (below deck).<br />
A. One (or more) of the batteries is “dead”.<br />
To ensure proper operation, insert four (4) new AA-size Alkaline<br />
batteries. Check that the orientation of each battery matches the<br />
positive (+) <strong>and</strong> negative (–) symbols shown on the bottom of the<br />
battery compartment. Reinsert Batteries into the Control Module.<br />
B: Upon start-up mode the control module circuitry also tests the<br />
batteries <strong>and</strong> the Red LED turns on if the battery voltage is low, no<br />
Red LED light indicates normal battery voltage.<br />
C. If reset (initiates start up mode) button is<br />
pressed, the battery voltage is checked.<br />
If voltage is too low, product is stopped<br />
from operating <strong>and</strong> Red LED will turn on.<br />
No Red LED light indicates normal<br />
battery voltage.<br />
WATER LINE FITTING<br />
GASKET<br />
7. The Green LED initially turns on in<br />
the control module (below deck)<br />
during start up mode, then will not<br />
appear again.<br />
INDICATOR: For the 1st ten minutes of operation (batteries inserted<br />
or reset button pressed) the Green LED will turn on when there is a<br />
target present (h<strong>and</strong>s in front of sensor). After ten minutes, the<br />
Green LED will no longer turn on.<br />
A. This is a normal operating feature of the faucet.<br />
CAP<br />
LED<br />
RESET<br />
BUTTON
3<br />
4B<br />
EBF-615 EBF-650<br />
10B<br />
10E<br />
EBF-615<br />
7<br />
10A<br />
20<br />
2<br />
1<br />
4A<br />
6<br />
11<br />
13 12<br />
3<br />
EBF-650<br />
10D<br />
10C<br />
8<br />
19<br />
2<br />
1<br />
9<br />
177<br />
<strong>Repair</strong> <strong>Parts</strong> <strong>and</strong> <strong>Maintenance</strong> <strong>Guide</strong><br />
Optima Plus ® EBF-615/EBF-650<br />
PARTS LIST—EBF-615 AND EBF-650 FAUCETS<br />
Item<br />
No. Code No. Part No. Description<br />
1. 0365400 ETF-749-A Sensor Only<br />
2. 3365092 ETF-1023-A 0.5 gpm (1.9 Lpm) Spray Head with<br />
Key (male thread)<br />
3365093 ETF-1024-A 2.2 gpm (8.3 Lpm) Aerator Spray Head<br />
with Key (male thread)<br />
3365162 ETF-1029-A 2.2 gpm (8.3 Lpm) Laminar Flow (male thread)<br />
3365756 ETF-1039-A 0.35 gpm (1.3 Lpm) Multi-Lam Spray Head VR<br />
3. 0305927 ETF-435 Replacement Key Only for ETF-1023-A<br />
0.5 gpm (1.9 Lpm) Spray Head <strong>and</strong> ETF-1024-A<br />
2.2 gpm (8.3 Lpm) Aerator Spray Head<br />
4A. 3365088 ETF-546-A Faucet Mounting Kit for EBF-650 includes Base<br />
Gasket, two (2) Slotted Mounting Washers, two (2)<br />
Wing Nuts <strong>and</strong> ETF-547 Compression Fitting<br />
Connector<br />
4B. 0315085 EBF-123-A Faucet Mounting Kit for EBF-615 includes Base<br />
Gasket, Spacer, Washer, 9/16” Lockwasher,<br />
1/4” NPSM Hex Nut <strong>and</strong> ETF-547 Compression<br />
Fitting Connector<br />
5. 0365058 ETF-547 1/8” NPT Pipe to 3/8” Tube Compression<br />
Fitting Connector (female)<br />
6. 3365461 ETF-617-A 3/8” Bak-Chek ® Tee Compression Fitting<br />
7. 0365758 ETF-740-A 6 VDC Solenoid <strong>Valve</strong> Assembly<br />
7A. 0365774 ETF-742-A Solenoid with armored cable <strong>and</strong> wire only<br />
(no valve assembly<br />
8. 0365752 ETF-735-A Control Module<br />
9. 0362006 SFP-6 110 VAC/6 VDC Plug-In Adapter<br />
OPTIONAL TRIM PLATES<br />
10A. 3365302 ETF-607-A 4” (102 mm) Centerset Trim plate for EBF-625<br />
10B. 3365303 ETF-608-A 8" (204 mm) Centerset Trim Plate for EBF-625<br />
10C. 3326012 MIX-101-A 4” (102 mm) Centerset Trim plate for EBF-625<br />
with optional mixing <strong>Valve</strong><br />
10D. 3326017 MIX-106-A 8” (204 mm) Centerset Trim plate for EBF-625<br />
10E. 3365119 ETF-578-A 8” (204 mm) Centerset Trim plate for EBF-655<br />
OPTIONAL MIXING VALVES<br />
11. 3326009 MIX-60-A Below Deck Mechanical Water Mixing<br />
<strong>Valve</strong> (BDM Variation)<br />
12. 0326045 MIX-135-A Below Deck Thermostatic Water Mixing<br />
<strong>Valve</strong> (BDT Variation)<br />
13. 3326018 MIX-110-AA Optimix ® Deck Mounted Water Mixing<br />
<strong>Valve</strong> (only available for EBF-615 faucets)<br />
For parts prior to September 2008 refer to page 179.<br />
H<strong>and</strong> Hygiene
H<strong>and</strong> Hygiene<br />
TROUBLESHOOTING GUIDE<br />
1. Sensor LED does not function (Sensor indicator light does not<br />
flash during initial 10 minute set-up mode).<br />
A. There is no visible indicator light. Normal operation.<br />
This is a normal operating feature of the faucet.<br />
2. Faucet does not deliver any water when Sensor is activated.<br />
INDICATOR: Solenoid valve produces audible “CLICK.”<br />
A. Water supply stop(s) closed.<br />
Open supply stop(s) completely.<br />
INDICATOR: Solenoid valve DOES NOT produce an audible “CLICK.”<br />
B. Solenoid Lead is not properly connected to the Control Module.<br />
Disconnect <strong>and</strong> reconnect Solenoid Lead to the Control Module.<br />
C. No battery or Adapter (optional) power is being supplied to Sensor.<br />
Ensure that the batteries are installed properly. Check that the<br />
orientation of each battery matches the positive (+) <strong>and</strong> negative (—)<br />
symbols shown on the bottom of the battery compartment. Reinsert the<br />
Batteries into the Control Module. Adapter (optional) is unplugged or<br />
wall receptacle has no power.<br />
LOCKING<br />
TABS<br />
OLD STYLE SENSOR INDICATOR LIGHTS NEW STYLE SENSOR INDICATOR LIGHT<br />
SCREWS (2)<br />
OPTIONAL<br />
PLUG-IN<br />
TRANSFORMER<br />
FOUR (4)<br />
NEW AA-SIZE<br />
ALKALINE<br />
BATTERIES<br />
D. Sensor Cable is not properly connected to the Control Module.<br />
Disconnect <strong>and</strong> reconnect Sensor Cable to the Control Module.<br />
E. Sensor range is set at minimum distance.<br />
Increase Sensor range. Refer to Step 9, Range Adjustment in your<br />
installation instructions.<br />
F. Control Module assembly is not working properly.<br />
Replace Control Module assembly.<br />
3. Faucet delivers only a slow flow or dribble when Sensor<br />
is activated.<br />
A. Water supply stop(s) partially closed.<br />
Open supply stop(s) completely.<br />
B. Solenoid Filter is clogged.<br />
Remove, clean <strong>and</strong> reinstall Filter. Turn off water supply at supply<br />
stop(s). Activate Faucet to relieve system pressure. Remove Water<br />
Supply Line from Inlet Side of Solenoid <strong>Valve</strong>. Remove Cap, Water Line<br />
Fitting, Gasket, Filter Housing <strong>and</strong> Filter from Solenoid <strong>Valve</strong> Housing.<br />
Slide Filter off Filter Housing. Clean Filter using fresh tap water only. If<br />
necessary, use a small brush to clean. Use caution while cleaning to<br />
prevent damage to Filter. If any Filter components are damaged,<br />
replace as necessary. Examine the Gasket for wear or damage; replace<br />
if necessary. Reinstall Filter on Filter Housing. Install Filter Housing,<br />
Gasket, Water Line Fitting <strong>and</strong> Cap onto Solenoid <strong>Valve</strong> Housing.<br />
Tighten Cap securely. Reinstall Water supply Line to Inlet Side of<br />
Solenoid <strong>Valve</strong>.<br />
178<br />
<strong>Repair</strong> <strong>Parts</strong> <strong>and</strong> <strong>Maintenance</strong> <strong>Guide</strong><br />
Optima Plus ® EBF-615/EBF-650<br />
C. Aerator is clogged.<br />
Remove, clean <strong>and</strong> reinstall Aerator.<br />
INLET SIDE OF SOLENOID VALVE HOUSING<br />
FILTER<br />
FILTER HOUSING<br />
4. Faucet does not stop delivering water or continues to drip after<br />
user is no longer detected (automatic shut-off fails even when<br />
batteries are removed).<br />
A. Solenoid <strong>Valve</strong> has been connected backwards.<br />
Disconnect Solenoid <strong>Valve</strong> compression fittings at both the inlet <strong>and</strong><br />
outlet positions. The water should flow from inlet through the Solenoid<br />
<strong>Valve</strong> to the outlet according to the direction of the arrow shown on the<br />
side of the Solenoid <strong>Valve</strong>. Reconnect the compression fittings in the<br />
correct orientation.<br />
B. Solenoid <strong>Valve</strong> is dirty.<br />
Backflush by reversing water flow (opposite to the direction shown by<br />
the arrow on the side of the Solenoid <strong>Valve</strong>) through the Solenoid <strong>Valve</strong>.<br />
Reconnect the compression fittings in the correct orientation.<br />
Activate faucet.<br />
C. Solenoid <strong>Valve</strong> Module is not working properly.<br />
Replace Solenoid <strong>Valve</strong> Module.<br />
5. The water temperature is too hot or too cold on a faucet<br />
connected to hot <strong>and</strong> cold supply lines with Bak-Chek Tee.<br />
A. Supply stops are not adjusted properly.<br />
Adjust supply stops.<br />
NOTE: For some systems, a Thermostatic Mixing <strong>Valve</strong><br />
may be required.<br />
6. The Red LED turns on in the control module (below deck).<br />
A. One (or more) of the batteries is “dead”.<br />
To ensure proper operation, insert four (4) new AA-size Alkaline<br />
batteries. Check that the orientation of each battery matches the<br />
positive (+) <strong>and</strong> negative (–) symbols shown on the bottom of the<br />
battery compartment. Reinsert Batteries into the Control Module.<br />
B: Upon start-up mode the control module circuitry also tests the<br />
batteries <strong>and</strong> the Red LED turns on if the battery voltage is low, no<br />
Red LED light indicates normal battery voltage.<br />
C. If reset (initiates start up mode) button is<br />
pressed, the battery voltage is checked.<br />
If voltage is too low, product is stopped<br />
from operating <strong>and</strong> Red LED will turn on.<br />
No Red LED light indicates normal<br />
battery voltage.<br />
WATER LINE FITTING<br />
GASKET<br />
7. The Green LED initially turns on in<br />
the control module (below deck)<br />
during start up mode, then will not<br />
appear again.<br />
INDICATOR: For the 1st ten minutes of operation (batteries inserted<br />
or reset button pressed) the Green LED will turn on when there is a<br />
target present (h<strong>and</strong>s in front of sensor). After ten minutes, the<br />
Green LED will no longer turn on.<br />
A. This is a normal operating feature of the faucet.<br />
CAP<br />
LED<br />
RESET<br />
BUTTON
3<br />
4A<br />
8A<br />
8C<br />
8E<br />
9<br />
10<br />
EBF-625 EBF-655<br />
EBF-625<br />
7<br />
1A 1B<br />
2 3<br />
2<br />
1B 1B<br />
5C<br />
5C<br />
11<br />
EBF-655<br />
5B<br />
8B<br />
8D<br />
5A<br />
6<br />
4B<br />
179<br />
<strong>Repair</strong> <strong>Parts</strong> <strong>and</strong> <strong>Maintenance</strong> <strong>Guide</strong><br />
Optima Plus ® EBF-625/EBF-655<br />
PARTS LIST—EBF-625 AND EBF-655 FAUCETS<br />
(Known as EBF-615-/EBF-650 Prior to September 2008)<br />
Item<br />
No. Code No. Part No. Description<br />
1A. 0315083 EBF-120-A Pedestal Faucet Spout <strong>and</strong> Sensor assembly<br />
(EBF-625)<br />
1B. — EBF-81-A Faucet Spout <strong>and</strong> Sensor assembly (EBF-655)<br />
2. 3365092 ETF-1023-A 0.5 gpm (1.9 lpm) Spray head with Key<br />
3365093 ETF-1024-A 2.2 gpm (8.3 lpm) aerator Spray head with Key<br />
3365756 ETF-1039-A 0.35 gpm (1.3 Lpm) Multi-Lam Spray Head VR<br />
— F-175-L 2.2 gpm (8.3 lpm) laminar Flow Spray head<br />
3. 0305927 ETF-435 Replacement Key only for ETF-1023-A <strong>and</strong><br />
ETF-1024-A<br />
4A. 0315085 EBF-123-A Faucet mounting Kit for EBF-625<br />
4B. 3365088 ETF-546-A Faucet mounting Kit for EBF-655<br />
5A. 0365058 ETF-547 1/8” NPT pipe to 3/8” Tube Compression Fitting<br />
Connection<br />
5B. 3365461 ETF-617 3/8” Bak-Chek Tee Compression Fitting<br />
5C. 3315029 EBF-113-A Single Solenoid Supply Kit<br />
6. 0315104 EBF-60-A Control module assembly<br />
7. 3315018 EBF-79-A Mounting hardware Kit for Control module<br />
assembly<br />
8A. 3365302 ETF-607-A 4” (102 mm) Centerset Trim plate for EBF-625<br />
8B. 3326012 MIX-101-A 4” (102 mm) Centerset Trim plate for EBF-625<br />
with optional mixing <strong>Valve</strong><br />
8C. 3365303 ETF-608-A 8” (204 mm) Centerset Trim plate for EBF-625<br />
8D. 3326017 MIX-106-A 8” (204 mm) Centerset Trim plate for EBF-625<br />
8E. 3365119 ETF-578-A 8” (204 mm) Centerset Trim plate for EBF-655<br />
— 0315040PK EBF-80-A Sensor replacement Kit<br />
— 0315254 EBF-1011-A Solenoid replacement Kit<br />
— 3315028 EBF-1004-A Solenoid Filter replacement Kit (includes Filter<br />
Screen <strong>and</strong> o-ring)<br />
OPTIONAL MIXING VALVES<br />
9. 3326009 MIX-60-A Below Deck Mechanical Water Mixing<br />
<strong>Valve</strong> (BDM Variation)<br />
10. 0326045 MIX-135-A Below Deck Thermostatic Water Mixing<br />
<strong>Valve</strong> (BDT Variation)<br />
11. 3326018 MIX-110-AA Optimix ® Deck Mounted Water Mixing<br />
<strong>Valve</strong> (only available for EBF-625 faucets)<br />
NOTE: The information contained in this document is subject to change without notice.<br />
— in Item No. column = Not shown in illustration<br />
— in Code No. <strong>and</strong> Part No. column = Not sold separately<br />
H<strong>and</strong> Hygiene
H<strong>and</strong> Hygiene<br />
TROUBLESHOOTING GUIDE<br />
1. Faucet does not stop delivering water or continues to drip after<br />
user is no longer detected (automatic shut-off fails even when<br />
batteries are removed).<br />
A. Solenoid valve has been connected backwards.<br />
Disassemble solenoid valve compression fittings at both the inlet <strong>and</strong><br />
outlet positions. The water should flow from inlet through the solenoid<br />
valve to the outlet according to the direction of the arrow shown on the<br />
side of the solenoid valve. Reconnect the compression fittings in the<br />
correct orientation.<br />
B. Solenoid valve is dirty.<br />
Back-flush by reversing water flow (opposite to the direction shown by<br />
the arrow on the side of the solenoid valve) through the solenoid valve.<br />
Reconnect the compression fittings in the correct orientation. Activate<br />
faucet.<br />
C. Solenoid valve module is not working properly.<br />
Replace EBF-1011-A Solenoid valve module.<br />
2. Sensor troubleshooting LED does not function (red indicator light<br />
does not flash during<br />
set-up procedure).<br />
A. No battery power is<br />
being supplied to<br />
sensor.<br />
Ensure that the<br />
SENSOR<br />
INDICATOR<br />
LIGHTS<br />
batteries are installed properly. Check that the orientation of each<br />
battery matches the positive (+) <strong>and</strong> negative (-) symbols shown on the<br />
bottom of the battery compartment. Reinsert the battery compartment<br />
into the control module.<br />
B. Insufficient battery power is being supplied to sensor.<br />
One (or more) of the batteries is “dead”. To ensure proper operation,<br />
insert four (4) new “C” cell alkaline batteries. Check that the orientation<br />
of each battery matches the positive (+) <strong>and</strong> negative (-) symbols<br />
shown on the bottom of the battery compartment. Reinsert the battery<br />
compartment into the control module.<br />
C. Sensor cable is not properly inserted.<br />
Disconnect <strong>and</strong> reconnect sensor cable to the control module.<br />
D. Sensor range is set at minimum distance. Increase sensor range.<br />
Use a small philips screwdriver to turn the potentiometer screw (white<br />
screw in blue base) clockwise.<br />
E. Control module assembly is not working properly.<br />
Replace EBF-60-A control module assembly.<br />
3. The water temperature is too hot or too cold on faucet connected<br />
to hot <strong>and</strong> cold water supply lines with two Bak-Chek.<br />
A. Supply stops are not adjusted properly.<br />
Adjust supply stops.<br />
NOTE: A thermostatic mixing valve may be required on some systems.<br />
4. Faucet does not deliver any water when sensor is activated.<br />
INDICATOR: Solenoid valve produces audible “CLICK.” Water supply<br />
valve is closed.<br />
A. Open the water supply.<br />
INDICATOR: Solenoid valve DOES NOT produce an audible “CLICK.”<br />
A. Disconnect <strong>and</strong> reconnect solenoid lead to the control module, if<br />
solenoid lead is not properly connected to the control module. Batteries<br />
are not installed properly. Check that the orientation of each battery<br />
matches the positive (+) <strong>and</strong> negative (-) symbols shown on the bottom<br />
of the battery compartment. Reinsert the battery compartment into the<br />
control module. The troubleshooting LED should flash RED when a user<br />
is detected.<br />
180<br />
<strong>Repair</strong> <strong>Parts</strong> <strong>and</strong> <strong>Maintenance</strong> <strong>Guide</strong><br />
Optima Plus ® EBF-625/EBF-655<br />
5. Faucet delivers only a slow flow or dribble when sensor is<br />
activated.<br />
A. Water supply valve is partially closed.<br />
Completely open the supply stop(s).<br />
B. Solenoid filter is clogged.<br />
Remove, clean, <strong>and</strong> reinsert.<br />
Replace EBF-1004-A solenoid filter kit, if necessary.<br />
C. Aerator or spray head is clogged.<br />
Remove, clean, <strong>and</strong> reinsert.<br />
BATTERY REPLACEMENT<br />
The <strong>Sloan</strong> Optima Plus EBF-625<br />
<strong>and</strong> EBF-655 battery powered,<br />
sensor activated lavatory faucets<br />
are furnished with four (4) “C” cell<br />
alkaline batteries that provide up to<br />
two (2) years of operation (8000<br />
cycles per month). A flashing LED<br />
signal indicates that battery power<br />
will be depleted within one (1)<br />
month. Replace batteries with four<br />
(4) new “C” cell alkaline batteries.<br />
Remove the cover of the control module by unscrewing the four (4) cover<br />
screws located at the center of each side.<br />
Remove the battery compartment from the control module by gently pulling<br />
straight out with a firm grip. Spread the ends of the battery retainer <strong>and</strong><br />
remove it from the battery compartment. Remove the old batteries <strong>and</strong><br />
insert four (4) fresh “C” cell alkaline batteries into the battery compartment<br />
until locked into place.<br />
NOTE: Battery retainer MUST be installed as shown. If installed upsidedown,<br />
it will not install into the control module. Reinsert the battery<br />
compartment into the control module as shown.<br />
Place cover over the control module <strong>and</strong> use the four (4) screws provided to<br />
attach it. Cover can be installed in only orientation.<br />
IMPORTANT: Install ALL four (4) cover screws for proper installation.<br />
CLEAN SCREEN FILTER<br />
Before cleaning the screen filter,<br />
turn off water supply at the supply<br />
stop(s). Activate the faucet to relieve<br />
any pressure in the system.<br />
Unscrew the filter plug <strong>and</strong> remove<br />
it from the solenoid valve housing.<br />
Carefully pull the screen filter with<br />
attached rubber seals out from the<br />
solenoid valve housing.<br />
Install four “C” cell batteries as indicated by<br />
the (+) <strong>and</strong> (-) symbols at bottom of battery<br />
compartment. Install battery retainer.<br />
Then install battery<br />
compartment into<br />
control module<br />
as shown.<br />
BATTERY<br />
RETAINER<br />
IF FILTER COMPONENTS ARE<br />
DAMAGED, ORDER FILTER<br />
REPLACEMENT<br />
KIT EBF-1004-A<br />
SOLENOID<br />
VALVE<br />
HOUSING<br />
CONTROL<br />
MODULE<br />
Clean the screen filter using fresh tap water only. If necessary, use a small<br />
brush to clean. Use caution while cleaning to prevent damage to the<br />
solenoid screen filter. If any filter components are damaged, order Filter<br />
Replacement Kit (EBF-1004-A).<br />
Carefully replace the screen filter into the groove of the solenoid valve<br />
housing. Examine the filter plug o-ring for wear or damage; replace if<br />
necessary. If necessary, lubricate the filter plug o-ring with water to keep it<br />
in place in the groove of the filter plug. Screw the filter plug into the solenoid<br />
valve housing.<br />
Turn on the water supply at the supply stop(s). Activate the faucet to purge<br />
any air from the system lines. Check for leaks <strong>and</strong> repair, as necessary.<br />
When assistance is required, please contact<br />
<strong>Sloan</strong> Technical Support at: 1-888-SLOAN-14 (1-888-756-2614).<br />
BATTERY<br />
COMPARTMENT<br />
BATTERY<br />
COMPARTMENT<br />
SCREEN FILTER<br />
FILTER PLUG<br />
WITH O-RING
8<br />
Optional Trim Plate Kits<br />
9<br />
1A<br />
15<br />
5 5<br />
3<br />
2A<br />
4<br />
76<br />
87<br />
1B<br />
6<br />
15<br />
2B<br />
181<br />
<strong>Repair</strong> <strong>Parts</strong> <strong>and</strong> <strong>Maintenance</strong> <strong>Guide</strong><br />
Optima Plus ® EBF-750<br />
PARTS LIST—EBF-750 FAUCET<br />
Item<br />
No. Code No. Part No. Description<br />
1A. 0315076 EBF-140-A Faucet/Sensor Assembly with St<strong>and</strong>ard Gooseneck<br />
Spout (EBF-750)<br />
1B. 0315097 EBF-141-A Faucet/Sensor Assembly with Surgical Bend<br />
Gooseneck Spout (EBF-750-S)<br />
2A. 3365147 ETF-621-A 2.2 gpm (8.3 Lpm) Aerator Spray Head with Key<br />
(female thread)<br />
0365793 ETF-839 0.35 gpm (1.3 Lpm) Multi-Lam Spray Head<br />
2B.0328134 AC-55-A Shower Spray Head Assembly, 2.2 gpm (8.3 Lpm)<br />
3. 0305784 ETF-178 Adapter for Spray Heads (not required for<br />
AC-55-A Shower Spray Head)<br />
4. 0305927 ETF-435 Replacement Key Only<br />
5. 0365110 ETF-503-A Spout Mounting Kit includes Rubber Gasket, Flat<br />
Washer, Lockwasher, Mounting Nut, <strong>and</strong> Union<br />
Compression Fitting<br />
6. 0365758 ETF-740-A 6 VDC Solenoid Assembly<br />
7. 0365752 ETF-735-A Control Module<br />
8. 3365461 ETF-617-A Bak-Chek ® “T” Assembly<br />
9. 3365302 ETF-607-A Optional 4” (102 mm) Centerset Trim Plate Kit<br />
includes Trim Plate Spacer <strong>and</strong> Single Hole Trim<br />
Plate Assembly<br />
For additional information about <strong>Sloan</strong> Mixing<br />
<strong>Valve</strong>s or Trim Plates, consult our Installation<br />
Instructions <strong>and</strong> <strong>Maintenance</strong> <strong>Guide</strong>s.<br />
The current parts breakdown shown on the<br />
left has been in production since September<br />
2008. For earlier EBF-650/615 faucet<br />
models, please refer to the parts breakdown<br />
below <strong>and</strong> right or consult your nearest<br />
<strong>Sloan</strong> representative.<br />
Note: earlier faucet models are not<br />
compatible with the current models.<br />
PARTS PRIOR TO SEPTEMBER 2008<br />
11. 0315104 EBF-60-A Control Module assembly<br />
12. 0315254 EBF-1011-A Solenoid replacement kit<br />
13. 3315029 EBF-113-A Single solenoid supply compression nut kit<br />
14. 3315018 EBF-79-A Mounting hardware kit<br />
15. — EBF-236-A Sensor Replacement Kit ONLY includes Sensor<br />
Housing <strong>and</strong> Cable Assembly<br />
— = Not shown in illustration<br />
13<br />
12<br />
13<br />
11<br />
14<br />
H<strong>and</strong> Hygiene
H<strong>and</strong> Hygiene<br />
TROUBLESHOOTING GUIDE<br />
1. Sensor LED does not function (Sensor indicator light does not<br />
flash during initial 10 minute set-up mode).<br />
A. There is no visible indicator light. Normal operation.<br />
This is a normal operating feature of the faucet.<br />
OLD STYLE SENSOR INDICATOR LIGHTS NEW STYLE SENSOR INDICATOR LIGHT<br />
2. Faucet does not deliver any water when Sensor is activated.<br />
INDICATOR: Solenoid valve produces audible “CLICK.”<br />
A. Water supply stop(s) closed.<br />
Open supply stop(s) completely.<br />
INDICATOR: Solenoid valve DOES NOT produce an audible “CLICK.”<br />
B. Solenoid Lead is not properly connected to the Control Module.<br />
Disconnect <strong>and</strong> reconnect Solenoid Lead to the Control Module.<br />
C. No battery or Transformer (optional) power is being supplied to Sensor.<br />
Ensure that the batteries are installed properly. Check that the<br />
orientation of each battery matches the positive (+) <strong>and</strong> negative (—)<br />
symbols shown on the bottom of the battery compartment. Reinsert the<br />
Batteries into the Control Module. Transformer (optional) is unplugged<br />
or wall receptacle has no power.<br />
LOCKING<br />
TABS<br />
SCREWS (2)<br />
OPTIONAL<br />
PLUG-IN<br />
TRANSFORMER<br />
FOUR (4)<br />
NEW AA-SIZE<br />
ALKALINE<br />
BATTERIES<br />
D. Sensor Cable is not properly connected to the Control Module.<br />
Disconnect <strong>and</strong> reconnect Sensor Cable to the Control Module.<br />
E. Sensor range is set at minimum distance.<br />
Increase Sensor range. Refer to Range Adjustment in your<br />
installation instructions.<br />
F. Control Module assembly is not working properly.<br />
Replace Control Module assembly.<br />
3. Faucet delivers only a slow flow or dribble when Sensor<br />
is activated.<br />
A. Water supply stop(s) partially closed.<br />
Open supply stop(s) completely.<br />
B. Solenoid Filter is clogged.<br />
Remove, clean <strong>and</strong> reinstall Filter. Turn off water supply at supply<br />
stop(s). Activate Faucet to relieve system pressure. Remove Water<br />
Supply Line from Inlet Side of Solenoid <strong>Valve</strong>. Remove Cap, Water Line<br />
Fitting, Gasket, Filter Housing <strong>and</strong> Filter from Solenoid <strong>Valve</strong> Housing.<br />
Slide Filter off Filter Housing. Clean Filter using fresh tap water only. If<br />
necessary, use a small brush to clean. Use caution while cleaning to<br />
prevent damage to Filter. If any Filter components are damaged,<br />
replace as necessary. Examine the Gasket for wear or damage; replace<br />
if necessary. Reinstall Filter on Filter Housing. Install Filter Housing,<br />
Gasket, Water Line Fitting <strong>and</strong> Cap onto Solenoid <strong>Valve</strong> Housing.<br />
Tighten Cap securely. Reinstall Water supply Line to Inlet Side of<br />
Solenoid <strong>Valve</strong>.<br />
182<br />
<strong>Repair</strong> <strong>Parts</strong> <strong>and</strong> <strong>Maintenance</strong> <strong>Guide</strong><br />
Optima Plus ® EBF-750<br />
C. Aerator is clogged.<br />
Remove, clean <strong>and</strong> reinstall Aerator.<br />
INLET SIDE OF SOLENOID VALVE HOUSING<br />
FILTER<br />
FILTER HOUSING<br />
4. Faucet does not stop delivering water or continues to drip after<br />
user is no longer detected (automatic shut-off fails even when<br />
batteries are removed).<br />
A. Solenoid <strong>Valve</strong> has been connected backwards.<br />
Disconnect Solenoid <strong>Valve</strong> compression fittings at both the inlet <strong>and</strong><br />
outlet positions. The water should flow from inlet through the Solenoid<br />
<strong>Valve</strong> to the outlet according to the direction of the arrow shown on the<br />
side of the Solenoid <strong>Valve</strong>. Reconnect the compression fittings in the<br />
correct orientation.<br />
B. Solenoid <strong>Valve</strong> is dirty.<br />
Backflush by reversing water flow (opposite to the direction shown by<br />
the arrow on the side of the Solenoid <strong>Valve</strong>) through the Solenoid <strong>Valve</strong>.<br />
Reconnect the compression fittings in the correct orientation.<br />
Activate faucet.<br />
C. Solenoid <strong>Valve</strong> Module is not working properly.<br />
Replace Solenoid <strong>Valve</strong> Module.<br />
5. The water temperature is too hot or too cold on a faucet<br />
connected to hot <strong>and</strong> cold supply lines with Bak-Chek ® Tee.<br />
A. Supply stops are not adjusted properly.<br />
Adjust supply stops.<br />
NOTE: For some systems, a Thermostatic Mixing <strong>Valve</strong><br />
may be required.<br />
6. The Red LED turns on in the control module (below deck).<br />
A. One (or more) of the batteries is “dead”.<br />
To ensure proper operation, insert four (4) new AA-size Alkaline<br />
batteries. Check that the orientation of each battery matches the<br />
positive (+) <strong>and</strong> negative (–) symbols shown on the bottom of the<br />
battery compartment. Reinsert Batteries into the Control Module.<br />
B: Upon start-up mode the control module circuitry also tests the<br />
batteries <strong>and</strong> the Red LED turns on if the battery voltage is low, no<br />
Red LED light indicates normal battery voltage.<br />
C. If reset (initiates start up mode) button is<br />
pressed, the battery voltage is checked.<br />
If voltage is too low, product is stopped<br />
from operating <strong>and</strong> Red LED will turn on.<br />
No Red LED light indicates normal<br />
battery voltage.<br />
WATER LINE FITTING<br />
GASKET<br />
7. The Green LED initially turns on in<br />
the control module (below deck)<br />
during start up mode, then will not<br />
appear again.<br />
INDICATOR: For the 1st ten minutes of operation (batteries inserted<br />
or reset button pressed) the Green LED will turn on when there is a<br />
target present (h<strong>and</strong>s in front of sensor). After ten minutes, the<br />
Green LED will no longer turn on.<br />
A. This is a normal operating feature of the faucet.<br />
CAP<br />
LED<br />
RESET<br />
BUTTON
1A/1B<br />
4<br />
3A<br />
3B<br />
3C<br />
3D<br />
5<br />
9 11<br />
6<br />
13 14<br />
EAF-275 Series Faucet date code 1101 <strong>and</strong><br />
newer. Product revised to make spray head<br />
v<strong>and</strong>al resistant without need for special spray.<br />
EAF-15 only works on product date code 1052<br />
<strong>and</strong> older.<br />
2<br />
7A<br />
7B<br />
8<br />
12A/ 12B<br />
183<br />
<strong>Repair</strong> <strong>Parts</strong> <strong>and</strong> <strong>Maintenance</strong> <strong>Guide</strong><br />
<strong>Sloan</strong> SOLIS ® EAF-275<br />
PARTS LIST—EAF-275 FAUCET<br />
Item<br />
No. Code No. Part No. Description<br />
1A. 0335013 EAF-14-A Faucet Sensor Assembly without i.q.-cliq <br />
1B. 0335014 EAF-16-A Faucet Sensor Assembly with i.q.-cliq <br />
2. 3335021 EAF-1006 Cap <strong>and</strong> Solar Cell Assembly<br />
3A. 0335012 EAF-15 0.5 gpm (1.9 Lpm) VR Aerator Spray Head –<br />
Pre 03/2011<br />
3B. 0335008 EAF-10 2.2 gpm (8.3 Lpm) Aerator Spray Head<br />
3C. 0335011 EAF-13 2.2 gpm (8.3 Lpm) Laminar Flow Spray Head<br />
3D. 0335029 EAF-51 0.35 gpm (1.3 Lpm) Multi-Laminar Spray Head<br />
4. 3335018 EAF-1003 Battery Replacement Kit<br />
5. 0335000 EAF-1 Faucet Mounting Kit<br />
6. 0335007 EAF-9 Strainer (Filter)<br />
7A. 3335019 EAF-1004 Mixer H<strong>and</strong>le Assembly <strong>and</strong> Cartridge<br />
7B. 3335020 EAF-1005 H<strong>and</strong>le <strong>Repair</strong> Kit<br />
8. 3335022 EAF-1007 H<strong>and</strong>le Cap<br />
9. 3335023 EAF-1008 13” (330 mm) Flexible Supply Hose<br />
10. 0335001 EAF-2 Solenoid<br />
11. 3365468 ETF-312-A Trim Plate for 4” Center-set Sink<br />
12A. 3365024 ETF-510-A Trim Plate for 8” Center-set Sink<br />
12B. 3362022 SFP-22-A Use when needing 8” for EAF-35-A extension<br />
13. 3335035 EAF-35-A Faucet Extension Kit<br />
14. 3335046 EAF-40-A 2-1/4” Faucet Extension Kit. Raises faucet such<br />
that outlet height complies with California Office of<br />
Statewide Health Planning <strong>and</strong> Deveplopment<br />
H<strong>and</strong> Hygiene
H<strong>and</strong> Hygiene<br />
Replace battery when red LED indicator flashes each time faucet is in use or<br />
when faucet stops functioning.<br />
Step 1<br />
Close supply stop(s).<br />
Step 2<br />
Loosen screw with hex wrench.<br />
Remove cap.<br />
Step 3<br />
Move battery retainer tab away from battery.<br />
Remove old battery.<br />
Dispose of properly.<br />
Step 4<br />
Wait three (3) minutes before<br />
inserting new battery.<br />
Step 5<br />
Insert a new 6 Volt Type CR-P2 lithium<br />
battery. The red LED will flash for<br />
one (1) minute.<br />
Reinstall battery cover.<br />
If LED doesn't flash or if it just lights<br />
up, remove the Battery. Wait three<br />
(3) minutes, then reinsert the Battery.<br />
Step 6<br />
Open supply stops.<br />
If water flows continuously after inserting the new battery <strong>and</strong> opening<br />
the supply stops, remove the battery. Wait three (3) minutes, then reinsert<br />
the battery.<br />
When assistance is required, please contact<br />
<strong>Sloan</strong> Technical Support at: 1-888-SLOAN-14 (1-888-756-2614).<br />
184<br />
<strong>Repair</strong> <strong>Parts</strong> <strong>and</strong> <strong>Maintenance</strong> <strong>Guide</strong><br />
<strong>Sloan</strong> SOLIS ® EAF-275<br />
BACK-UP BATTERY REPLACEMENT TROUBLESHOOTING GUIDE<br />
1. Faucet does not function.<br />
A. Adhesive packaging label affixed over sensor eye.<br />
Remove adhesive label from sensor eye.<br />
B. “Permanent Off” activated.<br />
Press button on faucet throat one time.<br />
2. Faucet delivers water in an uncontrolled manner.<br />
A. Faucet is not working properly.<br />
Contact <strong>Sloan</strong> Technical Support at<br />
1-888-SLOAN-14 (1-888-756-2614).<br />
3. Faucet does not deliver any water when sensor is activated.<br />
INDICATOR: Solenoid valve produces an audible “CLICK.”<br />
A. Water supply stop(s) closed.<br />
Open water supply stop(s).<br />
B. Water supply stop strainer(s) clogged.<br />
Clean water supply stop strainer(s).<br />
INDICATOR: Solenoid valve DOES NOT produce an audible “CLICK.”<br />
A. Battery low.<br />
Replace battery (refer to battery replacement).<br />
4. Faucet delivers only a slow flow or dribble when sensor is<br />
activated.<br />
A. Water supply stop(s) are partially closed.<br />
Completely open water supply stop(s).<br />
B. Water supply stop strainer(s) clogged.<br />
Remove, clean, <strong>and</strong> reinstall water supply stop strainer(s). Replace<br />
strainer(s) if required.<br />
C. Aerator is clogged.<br />
Remove, clean, <strong>and</strong> reinstall aerator. Replace aerator if required.<br />
D. Faucet is not working properly.<br />
Contact <strong>Sloan</strong> Technical Support at<br />
1-888-SLOAN-14 (1-888-756-2614).<br />
5. Faucet does not stop delivering water or continues to drip after<br />
user is no longer detected.<br />
A. Solenoid <strong>Valve</strong> is not working properly.<br />
Contact <strong>Sloan</strong> Technical Support at<br />
1-888-SLOAN-14 (1-888-756-2614).<br />
6. LED indicator blinks when faucet is in use.<br />
A. Battery low.<br />
Replace battery (refer to battery replacement).<br />
7. The water temperature is too hot or too cold on a faucet<br />
connected to hot <strong>and</strong> cold supply lines.<br />
A. Supply stops are not adjusted properly.<br />
Adjust supply stops.<br />
B. For models with integral mixing valve – mixing valve is set improperly<br />
for the water temperature desired.<br />
Rotate mixing valve h<strong>and</strong>le clockwise to decrease water temperature or<br />
counterclockwise to increase water temperature.<br />
CARE AND CLEANING OF CHROME AND SPECIAL FINISHES<br />
DO NOT use abrasive or chemical cleaners (including<br />
chlorine bleach) to clean faucets that may dull the<br />
luster <strong>and</strong> attack the chrome or special decorative<br />
finishes. Use ONLY mild soap <strong>and</strong> water, then wipe dry<br />
with clean cloth or towel.<br />
While cleaning the bathroom tile, protect the faucet<br />
from any splattering of cleaner. Acids <strong>and</strong> cleaning<br />
fluids will discolor or remove chrome plating.
OBSOLETE<br />
OBSOLETE<br />
185<br />
<strong>Repair</strong> <strong>Parts</strong> <strong>and</strong> <strong>Maintenance</strong> <strong>Guide</strong><br />
Optima Plus ® ERF-885 – OBSOLETE<br />
PARTS LIST—EAF-880 FAUCET<br />
Item<br />
No. Code No. Part No. Description<br />
1. 0361000 ERF-1-A Faucet Spout <strong>and</strong> Sensor Assembly<br />
(ERF-885) – OBSOLETE<br />
2. 3365091 ETF-1021-A 0.5 gpm (1.9 Lpm) Spray Head with<br />
Key (male thread)<br />
3. 0305927 ETF-435 Replacement Key Only for ETF-234,<br />
0.5 gpm (1.9 Lpm) Spray Head<br />
4. 0305626 ETF-290-A Faucet Mounting Kit includes Base Gasket, Flange<br />
Nut <strong>and</strong> ETF-297 Compression Fitting Connector<br />
5A. 0305737 ETF-297 1/4” to 3/8” Tube Compression Fitting Connector<br />
5B. 3315001 EBF-16-A Single Solenoid Supply Kit includes<br />
two (2) Compression Nuts <strong>and</strong><br />
two (2) Compression Sleeves<br />
6. 3365461 ETF-617-A 3/8” Bak-Chek ® Tee Compression Fitting<br />
7. ERF-2-A Control Module Assembly includes Base<br />
Enclosure, Cover Enclosure, two (2) Gaskets,<br />
Solenoid Body, Solenoid Enclosure <strong>and</strong> Solenoid<br />
Filter Plug – OBSOLETE<br />
7A. 3315254 EBF-1011-A Solenoid Replacement Kit includes Solenoid Body,<br />
Solenoid Enclosure <strong>and</strong> Solenoid Filter Plug<br />
8. 3315018 EBF-79-A Mounting Hardware Kit for Control Module<br />
Assembly includes four (4) Anchor Nuts, four (4)<br />
Toggle Nuts, four (4) Mounting Screws for Base<br />
Plate, four (4) Flat Washers, four (4) Anchors, <strong>and</strong><br />
four (4) Metal Screws<br />
— 3315028 EBF-1004-A Solenoid Filter Replacement Kit (not shown)<br />
includes Filter Screen Assembly <strong>and</strong> O-ring<br />
— 0315034 EBF-50 Control Module Replacement Gasket (two required)<br />
TRIM PLATES<br />
9A. 3365473 ETF-662-A 4" (102 mm) Centerset Single-hole Trim Plate Kit<br />
(St<strong>and</strong>ard)<br />
9B. 3365024 ETF-510-A 8" (204 mm) Centerset Single-hole Trim Plate Kit<br />
(Optional)<br />
OPTIONAL MIXING VALVES<br />
10. 3326009 MIX-60-A Below Deck Mechanical Water Mixing<br />
<strong>Valve</strong> (BDM Variation)<br />
11. 0326045 MIX-135-A Below Deck Thermostatic Water Mixing<br />
<strong>Valve</strong> (BDT Variation)<br />
12. 3326018 MIX-110-AA Optimix ® Deck Mounted Water Mixing <strong>Valve</strong><br />
— = Not shown in illustration<br />
H<strong>and</strong> Hygiene
H<strong>and</strong> Hygiene<br />
TROUBLESHOOTING GUIDE<br />
1. Control Module troubleshooting beeper does not function (no<br />
audio “beeps” sound during faucet initialization, battery install or<br />
after reset button is pressed).<br />
A. No battery power is being supplied to Control Module.<br />
Ensure that the batteries are installed properly into the Control Module.<br />
Check that the orientation of each battery matches the positive (+) <strong>and</strong><br />
negative (-) symbols shown on the bottom of the Battery Compartment.<br />
Reinsert the Battery Compartment into the Control Module. Make sure<br />
the Battery Connector is securely attached to the Battery<br />
Compartment. An audio “beep” should sound 6 times.<br />
B. Insufficient battery power is being supplied to Control Module.<br />
One (or more) of the batteries is “dead”. To ensure proper operation,<br />
insert four (4) new C-size Alkaline batteries. Check that the orientation<br />
of each battery matches the positive (+) <strong>and</strong> negative (-) symbols<br />
shown on the bottom of the Battery Compartment. Reinsert the Battery<br />
Compartment into the Control Module. Make sure the Battery<br />
Connector is securely attached to the Battery Compartment. An audio<br />
“beep” should sound 6 times.<br />
2. Faucet does not deliver any water when Sensor is activated.<br />
INDICATOR: Solenoid valve produces audible “CLICK.”<br />
A. Water supply valve is closed.<br />
Open supply stop(s) completely.<br />
INDICATOR: Solenoid valve DOES NOT produce an audible “CLICK.”<br />
B. Solenoid lead is not properly connected to the Control Module.<br />
Disconnect <strong>and</strong> reconnect Solenoid lead to the Control Module.<br />
C. Batteries are not installed properly.<br />
Check that the orientation of each battery matches the positive (+) <strong>and</strong><br />
negative (-) symbols shown on the bottom of the Battery Compartment.<br />
Reinsert the Battery Compartment into the Control Module. Make sure<br />
the Battery Connector is securely attached to the Battery<br />
Compartment. An audio “beep” should sound 6 times.<br />
3. Faucet delivers only a slow flow or dribble when Sensor is<br />
activated.<br />
A. Water supply valve is partially closed.<br />
Open supply stop(s) completely.<br />
B. Solenoid Filter is clogged.<br />
Remove, clean, <strong>and</strong> reinsert. Replace EBF-1004-A Solenoid Filter Kit if<br />
necessary.<br />
C. Aerator or Spray Head is clogged.<br />
Remove, clean, <strong>and</strong> reinsert.<br />
186<br />
<strong>Repair</strong> <strong>Parts</strong> <strong>and</strong> <strong>Maintenance</strong> <strong>Guide</strong><br />
Optima Plus ® ERF-885<br />
4. Faucet does not stop delivering water or continues to drip after<br />
user is no longer detected (automatic shut-off fails even when<br />
batteries are removed).<br />
A. Solenoid <strong>Valve</strong> has been connected backwards.<br />
Disassemble Solenoid <strong>Valve</strong> compression fittings at both the inlet <strong>and</strong><br />
outlet positions. The water should flow from inlet through the Solenoid<br />
<strong>Valve</strong> to the outlet according to the direction of the arrow shown on the<br />
side of the Solenoid <strong>Valve</strong>. Reconnect the compression fittings in the<br />
correct orientation.<br />
B. Solenoid <strong>Valve</strong> is dirty.<br />
Backflush by reversing water flow (opposite to the direction shown by<br />
the arrow on the side of the Solenoid <strong>Valve</strong>) through the Solenoid <strong>Valve</strong>.<br />
Reconnect the compression fittings in the correct orientation. Activate<br />
faucet.<br />
C. Solenoid <strong>Valve</strong> Module is not working properly.<br />
Replace Solenoid <strong>Valve</strong> Module.<br />
5. The water temperature is too hot or too cold on a faucet<br />
connected to hot <strong>and</strong> cold supply lines with Bak-Chek ® Tee.<br />
A. Supply stops are not adjusted properly.<br />
Adjust supply stops.<br />
NOTE: For some systems, a thermostatic mixing valve may be required.<br />
CARE AND CLEANING OF CHROME AND SPECIAL FINISHES<br />
DO NOT use abrasive or chemical cleaners (including chlorine bleach) to<br />
clean faucets as they may dull the luster <strong>and</strong> attack the chrome or special<br />
decorative finishes. Use ONLY soap <strong>and</strong> water, then wipe dry with clean<br />
cloth or towel.<br />
While cleaning the bathroom tile, the faucet should be protected from any<br />
splattering of cleaner. Acids <strong>and</strong> cleaning fluids will discolor or remove<br />
chrome plating.<br />
When assistance is required, please contact<br />
<strong>Sloan</strong> Technical Support at: 1-888-SLOAN-14 (1-888-756-2614).
1A/1B<br />
4<br />
10<br />
3A<br />
3B<br />
3C<br />
3D<br />
5<br />
13 14<br />
EAF-250 Series Faucet date code 1101 <strong>and</strong><br />
newer. Product revised to make spray head<br />
v<strong>and</strong>al resistant without need for special spray.<br />
EAF-15 only works on product date code 1052<br />
<strong>and</strong> older.<br />
6<br />
9<br />
2<br />
7A<br />
7B<br />
8<br />
12A/12B<br />
11<br />
187<br />
<strong>Repair</strong> <strong>Parts</strong> <strong>and</strong> <strong>Maintenance</strong> <strong>Guide</strong><br />
LINO EAF-250<br />
PARTS LIST—EAF-250 FAUCETS<br />
Item<br />
No. Code No. Part No. Description<br />
1A. 0335019 EAF-21-A Faucet Sensor Assembly without i.q.-cliq 1B. 0335018 EAF-20-A Faucet Sensor Assembly with i.q.-cliq 2. 0335027 EAF-27 Cap<br />
3A. 0335012 EAF-15 0.5 gpm (1.9 Lpm) VR Aerator Spray Head –<br />
Pre 03/2011<br />
3B. 0335008 EAF-10 2.2 gpm (8.3 Lpm) Aerator Spray Head<br />
3C. 0335011 EAF-13 2.2 gpm (8.3 Lpm) Laminar Flow Spray Head<br />
3D. 0335029 EAF-51 0.35 gpm (1.3 Lpm) Multi-Laminar Spray Head<br />
4. 3335018 EAF-1003 Battery Replacement Kit<br />
5. 0335000 EAF-1 Faucet Mounting Kit<br />
6. 0335007 EAF-9 Strainer (Filter)<br />
7A. 0335019 EAF-1004 Mixer H<strong>and</strong>le Assembly <strong>and</strong> Cartridge<br />
7B. 3335020 EAF-1005 H<strong>and</strong>le <strong>Repair</strong> Kit<br />
8. 3335022 EAF-1007 H<strong>and</strong>le Cap<br />
9. 3335023 EAF-1008 13” (330 mm) Flexible Supply Hose<br />
10. 0335001 EAF-2 Solenoid<br />
11. 3365468 ETF-312-A Trim Plate for 4” Centerset Sink<br />
— 0362011 SFP-11-A Use when needing 4” for EAF-35-A extension<br />
12A. 3365024 ETF-510-A Trim Plate for 8” Centerset Sink<br />
12B. 3362022 SFP-22-A Use when needing 8” for EAF-35-A extension<br />
13. 3335035 EAF-35-A Faucet Extension Kit<br />
14 . 3335046 EAF-40-A 2-1/4” Faucet Extension Kit. Raises faucet such<br />
that outlet height complies with California Office of<br />
Statewide Health Planning <strong>and</strong> Deveplopment<br />
— = Not shown in illustration<br />
i.q.-cliq SETTINGS<br />
Function Press Button LED Signal<br />
Continuous Run – 2 minute 1 time for 2 seconds<br />
default setting (adjustable<br />
from 1 – 20 minutes)<br />
5 short flashes<br />
reset: 1 time or will reset<br />
automatically after<br />
2 minutes<br />
Temporary Off 2 times (double click) 5 short flashes followed by<br />
periodic flashing<br />
reset: 1 time or will reset<br />
automatically after<br />
2 minutes<br />
Auto Set Range Adjustment 2 times (double click) <strong>and</strong> 5 short flashes followed<br />
then 1 time for 5 seconds by 4 short flashes<br />
H<strong>and</strong> Hygiene
H<strong>and</strong> Hygiene<br />
TROUBLESHOOTING GUIDE OPERATION<br />
1. Faucet does not function.<br />
A. "Permanent Off" activated.<br />
Press button on faucet throat one time.<br />
2. Faucet delivers water in an uncontrolled manner.<br />
A. Faucet is not working properly.<br />
Contact <strong>Sloan</strong> Technical Support at<br />
1-888-SLOAN-14 (1-888-756-2614).<br />
3. Faucet does not deliver any water when Sensor is activated.<br />
INDICATOR: Solenoid valve produces an audible “CLICK.”<br />
A. Water supply stop(s) closed.<br />
Open water supply stop(s).<br />
B. Water supply stop strainer(s) clogged.<br />
Remove, clean, <strong>and</strong> reinstall water supply stop strainer(s).<br />
Replace strainer(s) if required.<br />
INDICATOR: Solenoid valve DOES NOT produce an audible “CLICK.”<br />
A. Battery low (battery powered models).<br />
Replace battery (refer to Battery Replacement on page 184).<br />
4. Faucet delivers only a slow flow or dribble when<br />
Sensor is activated.<br />
A. Water supply stop(s) are partially closed.<br />
Completely open water supply stop(s).<br />
B. Water supply stop strainer(s) clogged.<br />
Remove, clean, <strong>and</strong> reinstall water supply stop strainer(s).<br />
Replace strainer(s) if required.<br />
C. Aerator is clogged.<br />
Remove, clean, <strong>and</strong> reinstall Aerator. Replace Aerator if required.<br />
D. Faucet is not working properly.<br />
Contact <strong>Sloan</strong> Technical Support at<br />
1-888-SLOAN-14 (1-888-756-2614).<br />
5. Faucet does not stop delivering water or continues to drip after<br />
user is no longer detected.<br />
A. Faucet is not working properly.<br />
Contact <strong>Sloan</strong> Technical Support at<br />
1-888-SLOAN-14 (1-888-756-2614).<br />
6. LED indicator blinks when faucet is in use.<br />
A. Battery low (battery powered models).<br />
Replace battery (refer to Battery Replacement on page 184).<br />
7. The water temperature is too hot or too cold on a faucet<br />
connected to hot <strong>and</strong> cold supply lines.<br />
A. Supply Stops are not adjusted properly.<br />
Adjust Supply Stops.<br />
B. For models with integral mixing valve – Mixing valve is set improperly<br />
for the water temperature desired.<br />
Rotate mixing valve h<strong>and</strong>le clockwise to decrease water temperature or<br />
counterclockwise to increase water temperature.<br />
188<br />
<strong>Repair</strong> <strong>Parts</strong> <strong>and</strong> <strong>Maintenance</strong> <strong>Guide</strong><br />
LINO EAF-250<br />
As the user’s h<strong>and</strong>s enter the beam’s<br />
effective range, the beam is reflected<br />
back into the sensor receiver <strong>and</strong><br />
activates the solenoid valve allowing<br />
water to flow from the faucet. Water<br />
will flow until the h<strong>and</strong>s are removed<br />
or until the faucet reaches its<br />
automatic time out limit setting.<br />
CARE AND CLEANING INSTRUCTIONS<br />
DO NOT use abrasive or chemical cleaners<br />
(including chlorine bleach) to clean faucet that may<br />
dull the luster <strong>and</strong> attack the chrome or special<br />
decorative finishes. Use ONLY mild soap <strong>and</strong> water,<br />
then wipe dry with clean cloth or towel.<br />
While cleaning the bathroom tile, protect the<br />
faucet from any splattering of cleaner. Acids <strong>and</strong><br />
cleaning fluids will discolor or remove chrome plating.<br />
When assistance is required, please contact<br />
<strong>Sloan</strong> Technical Support at: 1-888-SLOAN-14 (1-888-756-2614).
10<br />
5<br />
EAF-750<br />
9<br />
1<br />
2<br />
7<br />
8<br />
4<br />
6<br />
3<br />
189<br />
<strong>Repair</strong> <strong>Parts</strong> <strong>and</strong> <strong>Maintenance</strong> <strong>Guide</strong><br />
Optima Plus ® EAF-750<br />
PARTS LIST—EAF-750 FAUCETS<br />
Item<br />
No. Code No. Part No. Description<br />
1. — –– Spout Assembly<br />
2. — –– Integral Side Mixer H<strong>and</strong>le Cap<br />
3. — –– Integral Side Mixer Kit<br />
4. 0335001 EAF-2 Solenoid<br />
5. — –– Sensor Assembly<br />
6. 0335000 EAF-1 Mounting Hardware<br />
7. 3335023 EAF-1008 13” (330 mm) Flexible Supply Hose<br />
8. 0335007 EAF-9 Filter/Strainer<br />
9. 0335048 EAF-48 Battery Box<br />
10. 3335086 EAF-1014-A Multi-Lam Spray Head Kit 0.5 gpm (1.9 Lpm)<br />
Male Cache TJ<br />
3335087 EAF-1015-A Spray Head Kit 1.5 gpm (5.7 Lpm) Aerated Male<br />
Cache TJ<br />
3335088 EAF-1016-A Spray Head Kit 1.5 gpm (5.7 Lpm) Laminar Male<br />
Cache TJ<br />
H<strong>and</strong> Hygiene
H<strong>and</strong> Hygiene<br />
As the user’s h<strong>and</strong>s enter the beam’s effective range, the beam is reflected<br />
back into the sensor receiver <strong>and</strong> activates the solenoid valve allowing water<br />
to flow from the faucet. Water will flow until the h<strong>and</strong>s of the user are<br />
removed or until the faucet reaches its automatic time out limit setting.<br />
190<br />
<strong>Repair</strong> <strong>Parts</strong> <strong>and</strong> <strong>Maintenance</strong> <strong>Guide</strong><br />
Optima Plus ® EAF-750<br />
OPERATION SENSOR RANGE ADJUSTMENT<br />
SET AND FIX TEMPERATURE (OPTIONAL)<br />
Step 1<br />
Step 2<br />
HOT LIMIT STOP ADJUSTMENT<br />
Step 3<br />
Limit the maximum water temperature. Note: this does not take the place of<br />
an ASSE 1070 certified mixing device. But is an added measure to limit<br />
delivery of hot water.<br />
Step 1<br />
Step 2<br />
Step 3<br />
Step 4<br />
Step 5<br />
Factory setting is appropriate for the<br />
majority of applications <strong>and</strong> should<br />
not require resetting unless under<br />
extreme situations.<br />
Step 1<br />
Step 2<br />
4x<br />
5 Sec.<br />
2x +<br />
1x5 Sec.<br />
Step 3<br />
1 x ( 1x, 2x,...,5x)<br />
12/24 LINE PURGE FEATURE<br />
This feature will operate the faucet<br />
every 12 or 24 hours since last use,<br />
if not used to prevent stagnant<br />
water conditions.<br />
Default purge duration is<br />
two (2) minutes.<br />
Consult factory regarding other<br />
timing options.<br />
Step 4<br />
Step 5<br />
8x<br />
7x<br />
2x<br />
1x<br />
FACTORY DEFAULT = 6<br />
1x 24 sec<br />
2 x
I.Q.-CLICK FEATURE<br />
1. CONTINUOUS RUN<br />
Continuous run of water for<br />
two minutes.<br />
Faucet will operate normally after<br />
two minutes or after pressing<br />
i.q.-click button once.<br />
2. CLEANING MODE<br />
Pause faucet for cleaning for<br />
two (2) minutes.<br />
Faucet will operate normally after<br />
two (2) minutes or after pressing<br />
i.q.-click button once.<br />
OFF-DELAY (FOLLOW UP TIME)<br />
Duration of time the water runs<br />
after target is removed.<br />
Press the button for approximately<br />
six (6) seconds. Release.<br />
Press again (water flows) <strong>and</strong><br />
release when the desired time of<br />
water flow (0-5 seconds) is<br />
reached.<br />
Sensor will flash once <strong>and</strong> then the<br />
faucet is ready to operate. 1x<br />
1 x 2 Sec.<br />
1 x<br />
2 x<br />
1 x<br />
191<br />
<strong>Repair</strong> <strong>Parts</strong> <strong>and</strong> <strong>Maintenance</strong> <strong>Guide</strong><br />
Optima Plus ® EAF-750<br />
BATTERY REPLACEMENT<br />
Note: Replace battery when red LED<br />
indicator flashes each time faucet is<br />
in use or when faucet stops<br />
functioning.<br />
No need to turn off water.<br />
Loosen screw with hex wrench <strong>and</strong><br />
remove cap. Slide cover<br />
forward <strong>and</strong> lift off.<br />
Remove battery.<br />
Replace batteries with new “CR-P2”<br />
lithium battery.<br />
Replace cover.<br />
Activate faucet by pressing i.q. cliq<br />
one (1) time, then immediately step<br />
away.<br />
Faucet will operate for<br />
four (4) seconds.<br />
Wait 10 seconds <strong>and</strong> then the<br />
faucet is ready for operation.<br />
0 V 6 V<br />
1x<br />
H<strong>and</strong> Hygiene
H<strong>and</strong> Hygiene<br />
TROUBLESHOOTING GUIDE<br />
1. Faucet does not function.<br />
A. Adhesive packaging label affixed over sensor eye.<br />
Remove adhesive label from sensor eye.<br />
B. “Intermittent Off” is activated.<br />
Press button once.<br />
C. Water supply stop(s) closed.<br />
Open water supply stop(s).<br />
D. Battery is “dead”.<br />
Replace battery (refer to Battery Replacement section of guide).<br />
2. Faucet delivers water in an uncontrolled manner.<br />
A. Reflection.<br />
Remove reflective surface.<br />
B. Faucet is not working properly.<br />
Contact <strong>Sloan</strong> Technical Support.<br />
3. Faucet does not deliver any water when Sensor is activated.<br />
INDICATOR: Solenoid <strong>Valve</strong> produces an audible “CLICK.”<br />
A. Water supply stop(s) closed.<br />
Open water supply stop(s).<br />
B. Water supply stop strainer(s) clogged.<br />
Remove, clean, <strong>and</strong> reinstall water supply stop strainer(s). Replace<br />
strainer(s), if required.<br />
INDICATOR: Solenoid <strong>Valve</strong> DOES NOT produce an audible “CLICK.”<br />
A. Battery low (battery powered models).<br />
Replace battery (refer to Battery Replacement section of guide).<br />
4. Faucet delivers only a slow flow or dribble when sensor is<br />
activated.<br />
A. Water supply stop(s) are partially closed.<br />
Completely open water supply stop(s).<br />
B. Water supply stop strainer(s) clogged.<br />
Remove, clean, <strong>and</strong> reinstall water supply stop strainer(s). Replace<br />
strainer(s), if required.<br />
C. Spray head is clogged.<br />
Remove, clean, <strong>and</strong> reinstall spray head. Replace spray head,<br />
if required.<br />
D. Faucet is not working properly.<br />
Contact <strong>Sloan</strong> Technical Support.<br />
5. Faucet does not stop delivering water or contrinues to drip after<br />
user is no longer detected.<br />
A. Faucet is not working properly.<br />
Contact <strong>Sloan</strong> Technical Support.<br />
6. LED indicator blinks when faucet is in use.<br />
A. Battery low (battery powered models).<br />
Replace battery (refer to Battery Replacement section of guide).<br />
7. The water temperature is too hot or too cold on a faucet<br />
connected to hot <strong>and</strong> cold supply lines.<br />
A. Supply stops are not adjusted properly.<br />
Adjust supply stops.<br />
192<br />
<strong>Repair</strong> <strong>Parts</strong> <strong>and</strong> <strong>Maintenance</strong> <strong>Guide</strong><br />
Optima Plus ® EAF-750<br />
CARE AND CLEANING<br />
DO NOT USE abrasive or chemical cleaners<br />
(including chlorine bleach) to clean faucets that<br />
may dull the luster <strong>and</strong> attack the chrome or<br />
special decorative finishes. Use ONLY mild soap<br />
<strong>and</strong> water, then wipe dry with clean cloth or<br />
towel. While cleaning the bathroom sink, protect<br />
the faucet from any splattering of cleaner. Acids<br />
<strong>and</strong> cleaning fluids will discolor or remove<br />
chrome plating.<br />
When assistance is required, please<br />
contact <strong>Sloan</strong> Technical Support at:<br />
1-888-SLOAN-14 (1-888-756-2614).
2C<br />
2D<br />
9<br />
SF-2100<br />
SF-2150<br />
11<br />
1A<br />
12A<br />
3<br />
4 7<br />
12<br />
12B<br />
12C<br />
SF-2200<br />
SF-2250<br />
FOR<br />
SF-2100/2150<br />
5A/5B<br />
8<br />
13<br />
6<br />
2A<br />
2B<br />
2E<br />
1B<br />
FOR<br />
SF-2200/2250<br />
10A/10B<br />
193<br />
<strong>Repair</strong> <strong>Parts</strong> <strong>and</strong> <strong>Maintenance</strong> <strong>Guide</strong><br />
SF-2100/SF-2150<br />
SF-2200/SF-2250<br />
PARTS LIST—SF-2100/SF-2150/SF-2200/SF-2250<br />
Item<br />
No. Code No. Part No. Description<br />
1A. — — Pedestal Faucet Assembly w/Outlet (Models<br />
SF-2100 <strong>and</strong> SF-2150)<br />
1B. — — Gooseneck Faucet Assembly w/Outlet<br />
(Models SF-2200 <strong>and</strong> SF-2250)<br />
— 0362004 SFP-4 Mounting Hardware Kit, Pedestal Faucet (Models<br />
SF-2100/SF-2150): includes Items 2A, 2B, 2C,<br />
2D <strong>and</strong> 2E<br />
— 0362005 SFP-5 Mounting Hardware Kit, Gooseneck Faucet<br />
(Models SF-2200/2250): includes Items 2A,<br />
2B <strong>and</strong> 2E<br />
2A. — — Gasket<br />
2B. — — Metal Retainer<br />
2C. — — Threaded Studs (Models SF-2100/2150)<br />
2D. — — Retainer Nuts (Models SF-2100/2150)<br />
2E. — — Screws <strong>and</strong> Anchors for Control Module (all models)<br />
3. 0362006 SFP-6 110 VAC/6 VDC Plug-In Adapter (US)<br />
(Models SF-2100 <strong>and</strong> SF-2200<br />
4. — Batteries, 4 AA-size (all models)<br />
5A. 0362040 SFP-40-A Control Module with Adjustable Button<br />
(6 pin connector)<br />
5B. 0362008 SFP-8 Control Module (Old Style 4 pin connector)*<br />
6. 0362010 SFP-10 Flex Hose, Control Module to Spout (all models)<br />
7. — — Inlet adapter – 1/2" NPSM to 3/8" Compression<br />
Connection (not supplied with most<br />
international models)<br />
8. 0362011 SFP-11 4” Trim Plate with Spacer (all models)<br />
9. 0362030 SFP-30A Faucet Extension Kit (Models SF-2100/2150)<br />
10A. 0362041 SFP-41-A Sensor Assembly (6 pin connector)<br />
10B. 0362034 SFP-34 Sensor Assembly (Old Style 4 pin connector)*<br />
11. 3365461 ETF-617-A 3/8” Bak-Chek ® Tee Compression Fitting<br />
* IMPORTANT: <strong>Sloan</strong> added the range adjustment feature in August 2008 for faucets made prior to August 2008<br />
use the following replacement parts: SFP-34 <strong>and</strong> SFP-8<br />
NOT SHOWN SEPARATELY<br />
— 0335029 EAF-51 0.35 gpm/1.3 Lpm spray head (Models: SF-2100/2150)<br />
— 0335012 EAF-15 0.5 gpm/1.9 Lpm v<strong>and</strong>al resistant spray head<br />
(Models: SF-2100/2150)<br />
— 3362000 SFP-1000 0.35 gpm/1.3 Lpm v<strong>and</strong>al resistant spray head<br />
(Models: SF-2100/2150)<br />
— 0362012 SFP-12 Gooseneck Spout w/Outlet (Models SF-2200/2250)<br />
— 0362013 SFP-13 0.5 gpm/1.9 Lpm spray head (Models: SF-2100/2150)<br />
— 0362014 SFP-14 Spray head for Gooseneck Faucet<br />
(Models SF-2200/2250)<br />
— 0362023 SFP-23 2.2 gpm/8.3 Lpm Aerator (Models: SF-2100/2150)<br />
— 0362024 SFP-24 2.2 gpm/8.3 Lpm v<strong>and</strong>al resistant aerator<br />
(Models: SF-2100/2150)<br />
— 0362020 SFP-26 220 VAC/6 VDC Plug-In Adapter (ASIA)<br />
— 0362025 SFP-25 220 VAC/6 VDC Plug-In Adapter (EURO)<br />
— 0362026 SFP-20 220 VAC/6 VDC Plug-In Adapter (UK)<br />
— 3362022 SFP-22-A 8” Trim Plate<br />
ACCESSORIES<br />
12. 0362035 SFP-35-A 100-240 VAC/6 VDC Gang Adapter Kit, includes 12A,<br />
12B <strong>and</strong> 12C<br />
12A. 0362016 SFP-36-A 100-240 VAC/6 VDC Plug-In Adapter<br />
12B. 0362018 SFP-38 Cable Splitter, 51”/1300 mm (5 included in kit)<br />
12C. 0362017 SFP-37 Cable Extension, 51”/1300 mm<br />
REPAIR PARTS<br />
13. 0362015 SFP-15 Strainer (located in water inlet of control module)<br />
— in Item No. column = Not shown in illustration<br />
— in Code No. <strong>and</strong> Part No. column = Not sold separately<br />
H<strong>and</strong> Hygiene
H<strong>and</strong> Hygiene<br />
1. Faucet delivers water in an uncontrolled manner.<br />
A. Faucet is not working properly.<br />
Contact <strong>Sloan</strong> Technical Support at<br />
1-888-SLOAN-14 (1-888-756-2614).<br />
2. Faucet does not deliver any water when Sensor is activated.<br />
INDICATOR: Solenoid valve produces an audible “CLICK.”<br />
A. Water supply stop(s) closed. Open water supply stop(s).<br />
B. Water strainer in control module is clogged. Close supply stops <strong>and</strong><br />
remove water inlet line at control module. Remove, clean <strong>and</strong> reinstall<br />
strainer <strong>and</strong> water inlet line. Replace strainer if required.<br />
INDICATOR: Solenoid valve DOES NOT produce an audible “CLICK.”<br />
A. Batteries low (battery powered models). Replace batteries.<br />
B. Power failure (adapter powered models). Check power supply.<br />
3. Faucet delivers only a slow flow or dribble when Sensor is<br />
activated.<br />
A. Water supply stop(s) are partially closed. Completely open water<br />
supply stop(s).<br />
B. Water strainer in control module is clogged. Close supply stops <strong>and</strong><br />
remove water inlet line at control module. Remove, clean <strong>and</strong> reinstall<br />
strainer <strong>and</strong> water inlet line. Replace strainer if required.<br />
C. Aerator is clogged. Remove, clean, <strong>and</strong> reinstall aerator. Replace<br />
aerator if required.<br />
D. Faucet is not working properly.<br />
Contact <strong>Sloan</strong> Technical Support at<br />
1-888-SLOAN-14 (1-888-756-2614).<br />
4. Faucet does not stop delivering water or continues to drip after<br />
user is no longer detected.<br />
A. Faucet is not working properly.<br />
Contact <strong>Sloan</strong> Technical Support at<br />
1-888-SLOAN-14 (1-888-756-2614).<br />
5. The water temperature is too hot or too cold on a Faucet<br />
connected to hot <strong>and</strong> cold supply lines.<br />
A. Supply Stops are not adjusted properly. Adjust Supply Stops.<br />
<strong>Repair</strong> <strong>Parts</strong> <strong>and</strong> <strong>Maintenance</strong> <strong>Guide</strong><br />
SF-2100/SF-2150<br />
SF-2200/SF-2250<br />
TROUBLESHOOTING GUIDE CARE AND CLEANING INSTRUCTIONS<br />
194<br />
DO NOT use abrasive or chemical cleaners (including chlorine bleach) to<br />
clean faucet that may dull the luster <strong>and</strong> attack the chrome or special<br />
decorative finishes. Use ONLY mild soap <strong>and</strong> water, then wipe dry with clean<br />
cloth or towel. While cleaning the bathroom tile, protect the faucet from any<br />
splattering of cleaner. Acids <strong>and</strong> cleaning fluids will discolor or remove<br />
chrome plating.<br />
When assistance is required, please contact<br />
<strong>Sloan</strong> Technical Support at: 1-888-SLOAN-14 (1-888-756-2614).
4<br />
10A<br />
3<br />
2<br />
5A/5B<br />
10<br />
2A<br />
2B<br />
2C<br />
10B<br />
10C<br />
7<br />
9<br />
1<br />
11<br />
2D<br />
6<br />
8A/8B<br />
195<br />
<strong>Repair</strong> <strong>Parts</strong> <strong>and</strong> <strong>Maintenance</strong> <strong>Guide</strong><br />
SF-2300/SF-2350<br />
PARTS LIST—SF-2300/SF-2350<br />
Item<br />
No. Code No. Part No. Description<br />
1. — — Faucet Assembly w/Outlet<br />
2. — SFP-16 Mounting Hardware Kit: includes<br />
Items 2A, 2B, 2C <strong>and</strong> 2D<br />
2A. — — Compression Fitting<br />
2B. — — Washers (2)<br />
2C. — — Wing Nuts (2)<br />
2D. — — Screws <strong>and</strong> Anchors for Control Module<br />
3. 0362006 SFP-6 110 VAC/6 VDC Plug-In Adapter (US)<br />
(Model SF-2300 only)<br />
4. — — Batteries, 4 AA-size (all models)<br />
5A. 0362040 SFP-40-A Control Module with Adjustable Button<br />
(6 pin connector)<br />
5B. 0362008 SFP-8 Control Module (Old Style 4 pin connector)*<br />
6. 0362010 SFP-10 Flex Hose, Control Module to Spout<br />
7. — — Inlet adapter – 1/2" NPSM to 3/8" Compression<br />
Connection (not supplied with most<br />
international models)<br />
8A. 0362041 SFP-41-A Sensor Assembly (6 pin connector)<br />
8B. 0362034 SFP-34 Sensor Assembly (Old Style 4 pin connector)*<br />
9. 3365461 ETF-617-A 3/8” Bak-Chek ® Tee Compression Fitting<br />
* IMPORTANT: <strong>Sloan</strong> added the range adjustment feature in August 2008 for faucets made prior to August 2008<br />
use the following replacement parts: SFP-34 <strong>and</strong> SFP-8<br />
NOT SHOWN SEPARATELY<br />
— 0335029 EAF-51 0.35 gpm/1.3 Lpm spray head<br />
— 0335012 EAF-15 0.5 gpm/1.9 Lpm v<strong>and</strong>al resistant spray head<br />
— 3362000 SFP-1000 0.35 gpm/1.3 Lpm v<strong>and</strong>al resistant spray head<br />
— 0362013 SFP-13 0.5 gpm/1.9 Lpm Spray head<br />
— 0362023 SFP-23 2.2 gpm/8.3 Lpm Aerator<br />
— 0362024 SFP-24 2.2 gpm/8.3 Lpm v<strong>and</strong>al resistant aerator<br />
— 0362020 SFP-26 220 VAC/6 VDC Plug-In Adapter (ASIA)<br />
— 0362025 SFP-25 220 VAC/6 VDC Plug-In Adapter (EURO)<br />
— 0362026 SFP-20 220 VAC/6 VDC Plug-In Adapter (UK)<br />
ACCESSORIES<br />
10. 0362035 SFP-35-A 100-240 VAC/6 VDC Gang Adapter Kit, includes 10A,<br />
10B <strong>and</strong> 10C<br />
10A. 0362016 SFP-36-A 100-240 VAC/6 VDC Plug-In Adapter<br />
10B. 0362018 SFP-38 Cable Splitter, 51”/1300 mm (5 included in kit)<br />
10C. 0362017 SFP-37 Cable Extension, 51”/1300 mm<br />
REPAIR PARTS<br />
11. 0362015 SFP-15 Strainer (located in water inlet of control module)<br />
H<strong>and</strong> Hygiene
H<strong>and</strong> Hygiene<br />
— in Item No. column = Not shown in illustration<br />
— in Code No. <strong>and</strong> Part No. column = Not sold separately<br />
1. Faucet delivers water in an uncontrolled manner.<br />
A. Faucet is not working properly.<br />
Contact <strong>Sloan</strong> Technical Support at<br />
1-888-SLOAN-14 (1-888-756-2614).<br />
2. Faucet does not deliver any water when Sensor is activated.<br />
INDICATOR: Solenoid valve produces an audible “CLICK.”<br />
A. Water supply stop(s) closed. Open water supply stop(s).<br />
B. Water strainer in control module is clogged. Close supply stops <strong>and</strong><br />
remove water inlet line at control module. Remove, clean <strong>and</strong> reinstall<br />
strainer <strong>and</strong> water inlet line. Replace strainer if required.<br />
INDICATOR: Solenoid valve DOES NOT produce an audible “CLICK.”<br />
A. Batteries low (battery powered models). Replace batteries.<br />
B. Power failure (adapter powered models). Check power supply.<br />
3. Faucet delivers only a slow flow or dribble when Sensor is<br />
activated.<br />
A. Water supply stop(s) are partially closed. Completely open water<br />
supply stop(s).<br />
B. Water strainer in control module is clogged. Close supply stops <strong>and</strong><br />
remove water inlet line at control module. Remove, clean <strong>and</strong> reinstall<br />
strainer <strong>and</strong> water inlet line. Replace strainer if required.<br />
C. Aerator is clogged. Remove, clean, <strong>and</strong> reinstall aerator. Replace<br />
aerator if required.<br />
D. Faucet is not working properly.<br />
Contact <strong>Sloan</strong> Technical Support at<br />
1-888-SLOAN-14 (1-888-756-2614).<br />
4. Faucet does not stop delivering water or continues to drip after<br />
user is no longer detected.<br />
A. Faucet is not working properly.<br />
Contact <strong>Sloan</strong> Technical Support at<br />
1-888-SLOAN-14 (1-888-756-2614).<br />
5. The water temperature is too hot or too cold on a Faucet<br />
connected to hot <strong>and</strong> cold supply lines.<br />
A. Supply Stops are not adjusted properly. Adjust Supply Stops.<br />
196<br />
<strong>Repair</strong> <strong>Parts</strong> <strong>and</strong> <strong>Maintenance</strong> <strong>Guide</strong><br />
SF-2300/SF-2350<br />
CARE AND CLEANING INSTRUCTIONS<br />
DO NOT use abrasive or chemical cleaners (including chlorine bleach) to<br />
clean faucet that may dull the luster <strong>and</strong> attack the chrome or special<br />
decorative finishes. Use ONLY mild soap <strong>and</strong> water, then wipe dry with clean<br />
cloth or towel. While cleaning the bathroom tile, protect the faucet from any<br />
splattering of cleaner. Acids <strong>and</strong> cleaning fluids will discolor or remove<br />
chrome plating.<br />
When assistance is required, please contact<br />
<strong>Sloan</strong> Technical Support at: 1-888-SLOAN-14 (1-888-756-2614).
2<br />
2A<br />
2B<br />
2C<br />
2D<br />
2E<br />
11A<br />
5A/5B<br />
9<br />
11<br />
11B<br />
8<br />
6<br />
11C<br />
4<br />
12<br />
3<br />
1<br />
7<br />
10A/10B<br />
197<br />
<strong>Repair</strong> <strong>Parts</strong> <strong>and</strong> <strong>Maintenance</strong> <strong>Guide</strong><br />
SF-2400/SF-2450<br />
PARTS LIST—SF-2400/SF-2450<br />
Item<br />
No. Code No. Part No. Description<br />
1. — — Pedestal Faucet Assembly w/Outlet<br />
(Models SF-2400/SF-2450/<br />
2. 0362004 SFP-4 Mounting Hardware Kit,<br />
(Models SF-2100/SF-2150/SF-2400/<br />
SF-2450) includes Items: 2A, 2B, 2C, 2D <strong>and</strong> 2E<br />
2A. — — Beveled Gasket<br />
2B. — — Metal Retainer<br />
2C. — — Threaded Studs (2)<br />
2D. — — Retainer Nuts (2)<br />
2E. — — Screws <strong>and</strong> Anchors for Control Module<br />
3. 0362006 SFP-6 110 VAC/6 VDC Plug-In Adapter (US)<br />
4. — — Batteries-AA size (4)<br />
5A. 0362040 SFP-40-A Control Module with Adjustable Button<br />
(6 pin connector)<br />
5B. 0362008 SFP-8 Control Module (Old Style 4 pin connector)*<br />
6. — — Inlet adapter – 1/2" NPSM to 3/8" Compression<br />
Connection (not supplied with most<br />
international models)<br />
7. 0362010 SFP-10 Flex Hose, Control Module to Spout<br />
8. 0362011 SFP-11 Trim Plate w/ Spacer (not supplied with most<br />
international models)<br />
9. 3365461 ETF-617-A 3/8” Bak-Chek ® Tee Compression Fitting<br />
10A. 0362041 SFP-41-A Sensor Assembly (6 pin connector)<br />
10B. 0362034 SFP-34 Sensor Assembly (Old Style 4 pin connector)*<br />
* IMPORTANT: <strong>Sloan</strong> added the range adjustment feature in August 2008 for faucets made prior to August 2008<br />
use the following replacement parts: SFP-34 <strong>and</strong> SFP-8<br />
NOT SHOWN SEPARATELY<br />
— 0335029 EAF-51 0.35 gpm/1.3 Lpm spray head<br />
— 0335012 EAF-15 0.5 gpm/1.9 Lpm v<strong>and</strong>al resistant spray head<br />
— 3362000 SFP-1000 0.35 gpm/1.3 Lpm v<strong>and</strong>al resistant spray head<br />
— 0362013 SFP-13 0.5 gpm/1.9 Lpm Spray head<br />
— 0362023 SFP-23 2.2 gpm/8.3 Lpm Aerator<br />
— 0362024 SFP-24 2.2 gpm/8.3 Lpm v<strong>and</strong>al resistant aerator<br />
— 0362020 SFP-26 220 VAC/6 VDC Plug-In Adapter (ASIA)<br />
— 0362025 SFP-25 220 VAC/6 VDC Plug-In Adapter (EURO)<br />
— 0362026 SFP-20 220 VAC/6 VDC Plug-In Adapter (UK)<br />
— 0362022 SFP-22 8” Trim Plate<br />
ACCESSORIES<br />
11. 0362035 SFP-35-A 100-240 VAC/6 VDC Gang Adapter Kit, includes 11A,<br />
11B <strong>and</strong> 11C<br />
11A. 0362016 SFP-36-A 100-240 VAC/6 VDC Plug-In Adapter<br />
11B. 0362018 SFP-38 Cable Splitter, 51”/1300 mm (5 included in kit)<br />
11C. 0362017 SFP-37 Cable Extension, 51”/1300 mm<br />
REPAIR PARTS<br />
12. 0362015 SFP-15 Strainer (located in water inlet of control module)<br />
— in Item No. column = Not shown in illustration<br />
— in Code No. <strong>and</strong> Part No. column = Not sold separately<br />
H<strong>and</strong> Hygiene
H<strong>and</strong> Hygiene<br />
1. Faucet delivers water in an uncontrolled manner.<br />
A. Faucet is not working properly.<br />
Contact <strong>Sloan</strong> Technical Support at<br />
1-888-SLOAN-14 (1-888-756-2614).<br />
2. Faucet does not deliver any water when Sensor is activated.<br />
INDICATOR: Solenoid valve produces an audible “CLICK.”<br />
A. Water supply stop(s) closed. Open water supply stop(s).<br />
B. Water strainer in control module is clogged. Close supply stops <strong>and</strong><br />
remove water inlet line at control module. Remove, clean <strong>and</strong> reinstall<br />
strainer <strong>and</strong> water inlet line. Replace strainer if required.<br />
INDICATOR: Solenoid valve DOES NOT produce an audible “CLICK.”<br />
A. Batteries low (battery powered models). Replace batteries.<br />
B. Power failure (adapter powered models). Check power supply.<br />
3. Faucet delivers only a slow flow or dribble when Sensor is<br />
activated.<br />
A. Water supply stop(s) are partially closed. Completely open water<br />
supply stop(s).<br />
B. Water strainer in control module is clogged. Close supply stops <strong>and</strong><br />
remove water inlet line at control module. Remove, clean <strong>and</strong> reinstall<br />
strainer <strong>and</strong> water inlet line. Replace strainer if required.<br />
C. Aerator is clogged. Remove, clean, <strong>and</strong> reinstall aerator. Replace<br />
aerator if required.<br />
D. Faucet is not working properly.<br />
Contact <strong>Sloan</strong> Technical Support at<br />
1-888-SLOAN-14 (1-888-756-2614).<br />
4. Faucet does not stop delivering water or continues to drip after<br />
user is no longer detected.<br />
A. Faucet is not working properly.<br />
Contact <strong>Sloan</strong> Technical Support at<br />
1-888-SLOAN-14 (1-888-756-2614).<br />
5. The water temperature is too hot or too cold on a Faucet<br />
connected to hot <strong>and</strong> cold supply lines.<br />
A. Supply Stops are not adjusted properly. Adjust Supply Stops.<br />
198<br />
<strong>Repair</strong> <strong>Parts</strong> <strong>and</strong> <strong>Maintenance</strong> <strong>Guide</strong><br />
SF-2400/SF-2450<br />
TROUBLESHOOTING GUIDE CARE AND CLEANING INSTRUCTIONS<br />
DO NOT use abrasive or chemical cleaners (including chlorine bleach) to<br />
clean faucet that may dull the luster <strong>and</strong> attack the chrome or special<br />
decorative finishes. Use ONLY mild soap <strong>and</strong> water, then wipe dry with clean<br />
cloth or towel. While cleaning the bathroom tile, protect the faucet from any<br />
splattering of cleaner. Acids <strong>and</strong> cleaning fluids will discolor or remove<br />
chrome plating.<br />
When assistance is required, please contact<br />
<strong>Sloan</strong> Technical Support at: 1-888-SLOAN-14 (1-888-756-2614).
Description<br />
<strong>Sloan</strong> offers a variety of Trim Plate Kits for use with OPTIMA ®<br />
<strong>and</strong> OPTIMA Plus ® Faucets<br />
8 Inch Trim Plates For 8” (203 mm) Centerset Sink<br />
ETF-432-A For use with ETF-660 <strong>and</strong> ETF-770 faucets<br />
ETF-433-A For use with ETF-660 <strong>and</strong> ETF-770<br />
faucets with ADM (MIX-110-A-2)<br />
ETF-510-A For use with EAF-200/250/275, ELF-10,<br />
ESF-20, ETF-80, ETF-880, EBF-85,<br />
EBF-187 <strong>and</strong> ERF-885 faucets<br />
4 Inch Trim Plates For 4” (102 mm) Centerset Sink<br />
ETF-295-A<br />
For use with ETF-80 <strong>and</strong><br />
EBF-85 faucets<br />
ETF-299-A<br />
For use with ETF-80 <strong>and</strong> EBF-85<br />
faucets with soap/faucet combination<br />
ETF-312-A<br />
For use with EAF-200/250/275,<br />
ELF-10, ESF-20 <strong>and</strong> EBF-187 faucets<br />
ETF-313-A<br />
For use with ETF-660 <strong>and</strong><br />
ETF-770 faucets<br />
ETF-578-A For use with ETF-600, EBF-650 <strong>and</strong><br />
EBF-655 faucets<br />
ETF-608-A For use with ETF-610, ETF-700,<br />
EBF-615, EBF-625 <strong>and</strong><br />
EBF-750 faucets<br />
MIX-104-A For use with ELF-10, ESF-20, ETF-80,<br />
ETF-880, EBF-85 <strong>and</strong> EBF-187 faucets<br />
with ADM (MIX-110-A-5)<br />
ETF-314-A<br />
For use with ETF-660 <strong>and</strong> ETF-770<br />
faucets with ADM (MIX-110-A-1)<br />
ETF-607-A<br />
For use with ETF-610, ETF-700,<br />
EBF-625 <strong>and</strong> EBF-750 faucets<br />
199<br />
<strong>Repair</strong> <strong>Parts</strong> <strong>and</strong> <strong>Maintenance</strong> <strong>Guide</strong><br />
Optima ® Faucet Trim Plates<br />
Specifications<br />
Trim Plates are Chrome Plated Brass <strong>and</strong> are available for both<br />
4” (102 mm) <strong>and</strong> 8” (203 mm) Centerset sinks.<br />
ETF-640-A<br />
For use with ESD-30880 <strong>and</strong> ESD-35187<br />
faucets with soap/faucet combination<br />
ETF-662-A<br />
For use with ETF-880 faucets<br />
MIX-101-A<br />
For use with ELF-10, ESF-20, ETF-80,<br />
ETF-880, EBF-85 <strong>and</strong> EBF-187 faucets<br />
with ADM (MIX-110-A-3 <strong>and</strong> MIX-110-A-4)<br />
MIX-106-A For use with ETF-610, ETF-700, EBF-615,<br />
EBF-625 <strong>and</strong> EBF-750 faucets with ADM<br />
(MIX-110-A-6)<br />
SFP-22<br />
For use with SF-2100/2200/2400, EAF-100, EAF-150 faucets<br />
<strong>and</strong> EAF-35-A with 8” centerset<br />
101/4”<br />
(261 mm)<br />
EFX-26-A<br />
For use with EFX-1XX, 2XX, 3XX, 8” baseplate<br />
with gasket<br />
SFP-11<br />
For use with SF-2100/2200/2400 faucets<br />
EAF-100, EAF150 <strong>and</strong> 200 series, all models<br />
53/4”<br />
(147 mm)<br />
EFX-20-A<br />
For use with EFX-1XX, 2XX, 3XX,<br />
4” baseplate with gasket<br />
21/2”<br />
(63 mm)<br />
21/2”<br />
(63 mm)<br />
H<strong>and</strong> Hygiene
H<strong>and</strong> Hygiene<br />
BASYS EFX-9/EFX-10<br />
Part No. Code No. Flow Rate<br />
EFX-1002-A 3324104 0.5 gpm (1.9 Lpm)<br />
Spray Insert Kit<br />
w/Key <strong>and</strong><br />
Hex Key<br />
EFX-10001-A 3324103 1.5 gpm (5.7 Lpm)<br />
Spray Insert Kit<br />
w/Key <strong>and</strong><br />
Hex Key<br />
EFX-1000-A 3324122 1.5 gpm (5.7 Lpm)<br />
LAM<br />
ETF-80/ETF-880/ETF-770 – EBF-85/EBF-187 – SF-2200/SF-2250<br />
(THREAD SIZE 55/64”-27)<br />
Part No. Code No. Flow Rate<br />
ETF-839<br />
Multi-Laminar<br />
Female Thread<br />
VR w/Key<br />
0365793 0.35 gpm (1.3 Lpm)<br />
ETF-1021-A 3365091 0.5 gpm (1.9 Lpm)<br />
Multi-Laminar Spray<br />
Female Thread<br />
VR w/Key<br />
ETF-1022-A 3365090 2.2 gpm (8.3 Lpm)<br />
AER<br />
Female Thread<br />
VR w/Key<br />
ETF-1027-A 3365160 2.2 gpm (8.3 Lpm)<br />
LAM<br />
Female Thread<br />
VR w/Key<br />
ETF-1028-A 3365161 1.5 gpm (5.6 Lpm)<br />
LAM<br />
Female Thread<br />
VR w/Key<br />
ETF-1038-A 3365755 0.35 gpm (1.3 Lpm)<br />
Multi-Laminar<br />
Female Thread<br />
VR w/Key<br />
SFP-14 0362014 2.2 gpm (8.3 Lpm)<br />
LAM<br />
Female Thread<br />
Key: LAM – Laminar<br />
AER – Aerated<br />
VR – V<strong>and</strong>al Resistant<br />
JR – Junior<br />
200<br />
<strong>Repair</strong> <strong>Parts</strong> <strong>and</strong> <strong>Maintenance</strong> <strong>Guide</strong><br />
<strong>Sloan</strong> Faucet Spout End<br />
Devices Chart<br />
ETF-600/ETF-610/ETF-660 – EBF-615/EBF-625/<br />
EBF-650/EBF-655 – ELF-10 (THREAD SIZE 15/16”-27)<br />
EAF-10<br />
AER<br />
Male Thread<br />
0335008 2.2 gpm (8.3 Lpm)<br />
ETF-688 0365395 1.5 gpm (5.6 Lpm)<br />
LAM<br />
Male Thread<br />
VR w/Key<br />
ETF-1023-A 3365092 0.5 gpm (1.9 Lpm)<br />
Multi-Laminar Spray<br />
Male Thread<br />
VR w/Key<br />
ETF-1024-A 3365093 2.2 gpm (8.3 Lpm)<br />
AER<br />
Male Thread<br />
VR w/Key<br />
ETF-1029-A 3365162 2.2 gpm (8.3 Lpm)<br />
LAM<br />
Male Thread<br />
VR w/Key<br />
ETF-1039-A 3365756 0.35 gpm (1.3 Lpm)<br />
Multi-Laminar<br />
Male Thread<br />
VR w/Key<br />
ETF-1040-A 3365757 0.35 gpm (1.3 Lpm)<br />
Multi-Laminar<br />
Male Thread<br />
VR w/Key
EAF SERIES - SF-2100/SF-2150/SF-2300/SF-2350/SF-2400/SF-2450<br />
(THREAD SIZE M24)<br />
Part No. Code No. Flow Rate<br />
EAF-12 0335010 0.5 gpm (1.9 Lpm)<br />
Multi-Laminar Spray<br />
Metric Male Thread<br />
EAF-13 0335011 2.2 gpm (8.3 Lpm)<br />
LAM<br />
Metric Male Thread<br />
EAF-15 0335012 0.5 gpm (1.9 Lpm)<br />
Multi-Laminar<br />
Metric Male Thread<br />
VR w/Key<br />
EAF-22 0335021 1.5 gpm (5.6 Lpm)<br />
AER<br />
Metric Male Thread<br />
EAF-51 0335029 0.35 gpm (1.3 Lpm)<br />
Multi-Laminar<br />
Metric Male Thread<br />
SFP-13 0362013 0.5 gpm (1.9 Lpm)<br />
Multi-Laminar Spray<br />
Metric Male Thread<br />
SFP-23 0362023 2.2 gpm (8.3 Lpm)<br />
AER<br />
Metric Male Thread<br />
SFP-24 0362024 2.2 gpm (8.3 Lpm)<br />
AER<br />
Metric Male Thread<br />
VR w/Key<br />
SFP-1000 3362000 0.35 gpm (1.3 Lpm)<br />
Multi-Laminar<br />
Metric Male Thread<br />
VR w/Key<br />
Key: LAM – Laminar<br />
AER – Aerated<br />
VR – V<strong>and</strong>al Resistant<br />
JR – Junior<br />
201<br />
<strong>Repair</strong> <strong>Parts</strong> <strong>and</strong> <strong>Maintenance</strong> <strong>Guide</strong><br />
<strong>Sloan</strong> Faucet Spout End<br />
Devices Chart<br />
SLOANSTONE EW-72000/73000 SERIES<br />
(THREAD SIZE 13/16”-27)<br />
Part No. Code No. Flow Rate<br />
ETF-1037-A 3365747 1.0 gpm (3.8 Lpm)<br />
Multi-Laminar Spray<br />
JR Male Thread<br />
VR w/Key<br />
ETF-500/ETF-700 SERIES – ETF-800 – ESF-20/ESF-30/ESF-40<br />
(THREAD SIZE 3/4”-27)<br />
ETF-621<br />
LAM<br />
JR Female Thread<br />
0365147 2.2 gpm (8.3 Lpm)<br />
ETF-687 0365387 1.5 gpm (5.6 Lpm)<br />
LAM<br />
JR Female Thread<br />
ETF-801 0365420 0.5 gpm (1.9 Lpm)<br />
Multi-Laminar Spray<br />
JR Female Thread<br />
INSERT ONLY<br />
ETF-689<br />
LAM<br />
Spray Head Insert<br />
0365381 1.5 gpm (5.6 Lpm)<br />
ETF-843 0365437 0.5 gpm (1.9 Lpm)<br />
Multi-Laminar<br />
Spray Head Insert<br />
VANDAL RESISTANT SPRAY HEAD REMOVAL KEY<br />
Part No. Code No.<br />
ETF-435 0305927PK<br />
Regular/JR Size<br />
VR Removal Key<br />
ETF-731<br />
Regular/JR Size<br />
0365736<br />
VR Removal Key<br />
OBSOLETE<br />
H<strong>and</strong> Hygiene
H<strong>and</strong> Hygiene<br />
1<br />
202<br />
<strong>Repair</strong> <strong>Parts</strong> <strong>and</strong> <strong>Maintenance</strong> <strong>Guide</strong><br />
SJS-1750 Deck-Mount Foam<br />
Soap Dispenser<br />
PARTS LIST—SENSOR-ACTIVATED, DECK-MOUNT<br />
FOAM SOAP DISPENSER<br />
Item<br />
No. Code No. Part No. Description<br />
— 5700751 SJS-1751 Sensor Deck-Mount Foam Soap<br />
— 5700752 SJS-1751-1 Sensor Deck-Mount Foam Soap with Moisturizers<br />
— 5700754 SJS-1751-3 Sensor Deck-Mount Foam Soap Green Seal<br />
(Fragrance Free)<br />
— 5700755 SJS-1751-4 Sensor Deck-Mount Foam Soap Green Seal (Rose)<br />
1. 7000027 SJS-5-A Soap Dispenser Nozzle
TROUBLESHOOTING GUIDE<br />
1. Unit does not operate.<br />
A. Check operation switch is on.<br />
B. Check power plug is securely inserted into the outlet.<br />
2. Soap does not dispense.<br />
A. Soap bottle needs replacing.<br />
B. Check soap dispensing nozzle for clog.<br />
C. Check h<strong>and</strong> sensor.<br />
3. Liquid soap is not in foam state.<br />
A. Check mesh is mounted in the foam-dispensing nozzle.<br />
CLEANING THE HAND SENSOR<br />
Clean the h<strong>and</strong> sensor periodically (about once a month) according to the<br />
following procedure:<br />
Press the operation switch to OFF (the operation light goes off).<br />
Gently wipe the h<strong>and</strong> sensor area with a cloth moistened with warm<br />
water.<br />
Press the operation switch to ON (the operation light goes on).<br />
Make sure that the nozzle properly dispenses foam soap.<br />
NOTE: Do not leave water drops on the h<strong>and</strong> sensor area. Remaining water<br />
drops may cause malfunction.<br />
CLEANING FOAM SOAP DISPENSER<br />
If the tip of the soap nozzle is clogged, the dispensing capability may fail or<br />
function partially. Clean the nozzle according to the following procedure:<br />
Press the operation switch to OFF (the operation light goes off).<br />
Remove the foam soap dispensing nozzle <strong>and</strong> then the internal mesh.<br />
Wash it with lukewarm water.<br />
Turn ON the operation switch (the operation light goes on). Check the<br />
foam soap spraying state.<br />
Repeat as needed.<br />
When assistance is required, please contact<br />
<strong>Sloan</strong> Technical Support at: 1-888-SLOAN-14 (1-888-756-2614).<br />
203<br />
<strong>Repair</strong> <strong>Parts</strong> <strong>and</strong> <strong>Maintenance</strong> <strong>Guide</strong><br />
SJS-1750 Deck-Mount Foam<br />
Soap Dispenser<br />
H<strong>and</strong> Hygiene
H<strong>and</strong> Hygiene<br />
VIEW WITHOUT COVER<br />
BOTTOM VIEW OF COVER<br />
1<br />
2<br />
3<br />
4<br />
5<br />
6<br />
7<br />
8<br />
9<br />
204<br />
<strong>Repair</strong> <strong>Parts</strong> <strong>and</strong> <strong>Maintenance</strong> <strong>Guide</strong><br />
Surface Mounted<br />
Electronic H<strong>and</strong> Dryers<br />
PARTS LIST—SURFACE MOUNTED ELECTRONIC HAND DRYERS<br />
Item<br />
No. Code No. Part No. Description<br />
1. 0305427 EHD-93 Mounting Hardware (Not Shown) – OBSOLETE<br />
2. 0305438 EHD-127 Lock Washer (4 Required) – OBSOLETE<br />
3. 0305437 EHD-17 Cover Screw (4 Required) – OBSOLETE<br />
4. — EHD-214-A Chassis Assembly, 120 VAC – OBSOLETE<br />
0305540 EHD-215-A Chassis Assembly, 208 VAC/240 VAC –<br />
OBSOLETE<br />
5. 0366002 EHD-182-A Power Board Assembly, 120 VAC<br />
0366003 EHD-183-A Power Board Assembly, 208 VAC/240 VAC<br />
6. — EHD-216-A Blower Assembly, 120 VAC – OBSOLETE<br />
0305541 EHD-217-A Blower Assembly, 208 VAC/240 VAC – OBSOLETE<br />
7. 0305401 EHD-11-A Heater Assembly, 120 VAC – OBSOLETE<br />
0305441 EHD-14-A Heater Assembly, 208 VAC/240 VAC – OBSOLETE<br />
8. 0366004 EHD-184-A Exhaust Grille/Fiber Optic Cable Sub-Assembly<br />
9. 0305709 EHD-204-A1 Cover Assembly, White – OBSOLETE<br />
0305711 EHD-204-A3 Cover Assembly, Almond – OBSOLETE<br />
0305712 EHD-204-A4 Cover Assembly, Gray – OBSOLETE<br />
ELECTRONIC HAND DRYER FIBER OPTIC UPGRADE KITS<br />
For 120 VAC h<strong>and</strong> dryers<br />
EHD-1006-A repair kit (Code No. 3366007)<br />
Includes EHD-182-A power board assembly, EHD-184-A grille/fiber optic<br />
cable subassembly, <strong>and</strong> EHD-227 wiring diagram label – OBSOLETE<br />
For 208/240 VAC h<strong>and</strong> dryers<br />
EHD-1007-A repair kit (Code No. 3366008)<br />
Includes EHD-183-A power board assembly, EHD-184-A grille/fiber optic<br />
cable subassembly, <strong>and</strong> EHD-178 wiring diagram label – OBSOLETE
TROUBLESHOOTING GUIDE<br />
FOR NEW EHD HAND DRYER MODELS MANUFACTURED SINCE JUNE<br />
1999 (MODELS WITH FIBER OPTIC ADAPTIVE SENSOR)<br />
Note: Each power board has two (2) LED’s: A green power indicator <strong>and</strong> a<br />
red sensor indicator. Electrical power must be supplied to h<strong>and</strong> dryer for<br />
indicator lights to function.<br />
If none of the solutions shown below works, the power board<br />
may need to be reset; disconnect then reconnect electrical power<br />
<strong>and</strong> retest.<br />
1. No air is supplied when h<strong>and</strong>s are placed in sensor’s<br />
detection zone.<br />
Remove cover <strong>and</strong> check LED indicator lights on the power board.<br />
A. If green LED does NOT illuminate:<br />
1. Power is not being supplied to dryer; check all electrical<br />
connections <strong>and</strong> main power supply.<br />
2. Power board has failed; replace power board.<br />
B. If a green LED illuminates first <strong>and</strong> then red LED illuminates when<br />
h<strong>and</strong>s are placed in the sensor’s beam:<br />
1. Blower motor is not connected properly; check blower motor leads<br />
for secure connection.<br />
2. Power board has failed; replace power board.<br />
3. Blower motor has failed; replace blower motor.<br />
C. If green LED illuminates first, but red LED does NOT illuminate when<br />
h<strong>and</strong>s are placed in the sensor’s beam:<br />
1. Power board or power board detection circuit is not working;<br />
replace power board.<br />
D. If only the red LED illuminates (green LED does NOT illuminate when<br />
h<strong>and</strong>s are removed from the sensor’s beam):<br />
1. Power board or power board self-calibration circuit is not working;<br />
replace power board.<br />
2. Optima fiber optic cable has failed; replace fiber optic cable.<br />
205<br />
<strong>Repair</strong> <strong>Parts</strong> <strong>and</strong> <strong>Maintenance</strong> <strong>Guide</strong><br />
Surface Mounted<br />
Electronic H<strong>and</strong> Dryers<br />
2. Only unheated air is supplied when h<strong>and</strong>s are placed<br />
in the sensor’s beam.<br />
A. Heater is not properly connected; check heater leads for<br />
secure connection.<br />
B. Heater assembly is defective; replace heater assembly.<br />
3. Air cycles intermittently on <strong>and</strong> off.<br />
A. Optima sensor blocked or out of position; clear obstruction <strong>and</strong> make<br />
sure that it is positioned properly in exhaust grille.<br />
B. The power board’s range feature is not functioning properly; replace<br />
power board.<br />
4. Dryer runs continuously (will not stop).<br />
A. Disconnect Optima fiber optic cable from fiber optic connector on the<br />
power board.<br />
1. If dryer continues to operate, the power board has failed; replace<br />
power board.<br />
2. If dryer stops operating, the Optima fiber optic cable is not<br />
working; replace fiber optic cable.<br />
H<strong>and</strong> Hygiene
Vitreous<br />
Fixtures<br />
8<br />
Left H<strong>and</strong>le Dual Flush<br />
1 2<br />
3<br />
5 5<br />
12<br />
10<br />
7A 7B<br />
9<br />
4<br />
11<br />
6<br />
206<br />
<strong>Repair</strong> <strong>Parts</strong> <strong>and</strong> <strong>Maintenance</strong> <strong>Guide</strong><br />
Gravity Tank Toilet Series<br />
ST-9000 SERIES PARTS GRAVITY TWO PIECE TANK TOILET<br />
Item<br />
No. Code No. Part No. Description<br />
1. 0319145 ST-36-A H<strong>and</strong>le Assembly<br />
2. 0319148 ST-37-A Dual-Flush Button Assembly<br />
3. — — Tank Assembly Lid<br />
4. — — Dual-Flush Tank Assembly Lid<br />
5. 0319142 ST-15-A-1.6 Fill <strong>Valve</strong> Assembly – 1.6 gpf or Dual-Flush<br />
0319140 ST-15-A-1.28 Fill <strong>Valve</strong> Assembly 1.28 gpf<br />
6. 0319132 ST-23-A Dual-Flush <strong>Valve</strong> Assembly<br />
7A. 0319172 ST-48 Flapper with Chain<br />
7B. 0319131 ST-19-A-1.28 Single-Flush <strong>Valve</strong> Assembly<br />
0319154 ST-19-A-1.6 Single-Flush <strong>Valve</strong> Assembly<br />
8. 2109010 ST-9010-A 1.28 gpf (4.6 Lpf) LH Tank Assembly<br />
(includes items 1, 3, 5, 7, 8, 10)<br />
2109013 ST-9013-A 1.6 gpf (6.0 Lpf) LH Tank Assembly<br />
(includes items 1, 3, 5, 7, 8, 10)<br />
2109110 ST-9110-A 1.28 gpf (4.6 Lpf) RH Tank Assembly<br />
(includes items 1, 3, 5, 7, 8, 10)<br />
2109113 ST-9113-A 1.6 gpf (6.0 Lpf) RH Tank Assembly<br />
(includes items 1, 3, 5, 7, 8, 10)<br />
9. 2109012 ST-9012-A 1.6/1.1 gpf (6.0/4.2 Lpf) Tank Assembly<br />
(includes items 2, 4-6, 10)<br />
10. — — Gasket<br />
11. 2109000 ST-9000-A 1.28 gpf (4.6 Lpf) Gravity Closet<br />
(includes item 12)<br />
2109002 ST-9002-A 1.6/1.1 gpf (6.0/4.2 Lpf) Gravity Closet<br />
(includes item 12)<br />
2109003 ST-9003-A 1.6 gpf (6.0 Lpf) Gravity Closet<br />
(includes item 12)<br />
2109020 ST-9020-A 1.28 gpf (4.6 Lpf) ADA Gravity Closet<br />
(includes item 12)<br />
2109023 ST-9023-A 1.6 gpf (6.0 Lpf) ADA Gravity Closet<br />
(includes item 12)<br />
12. 0319181 ST-60-A Gravity Closet Mounting Kit (includes no. 10)<br />
Key:<br />
LH - Left H<strong>and</strong><br />
RH - Right H<strong>and</strong>
TROUBLESHOOTING GUIDE<br />
1. Poor Flush.<br />
A. Adjust the tank water level to the marked water line on overflow tube.<br />
B. Make sure water supply valve is fully open.<br />
C. Clear any obstructions from bowl rim holes/trapway <strong>and</strong> in-line filter.<br />
Ream out debris in bowl rim holes.<br />
D. Clean bowl, auger trap, auger drain to clear blockage.<br />
E. For dual flush, make sure the push button rods are in place <strong>and</strong> are<br />
activating the dual flush assembly. Adjust as needed.<br />
2. Tank takes a long time to fill.<br />
A. Make sure water supply valve is fully open.<br />
B. Clean any residue from the inlet valve, in-line filter, dual flush<br />
cartridge assembly or supply line. Flush the lines to clear any debris.<br />
C. Check water pressure supply, operating range is 20-80 PSI.<br />
3. Water level too high or too low.<br />
A. Adjust the float adjustment screw or float cup.<br />
4. Fill valve fails to shut off or fails to fill tank.<br />
A. Verify water supply is on.<br />
B. Filter screen is clogged. Clean filter screen.<br />
C. Verify refill hose is not obstructed or kinked.<br />
5. Noisy tank water refill.<br />
A. Adjust the water supply line if water pressure is too high.<br />
B. Clean any residue from the inlet valve or supply line. Flush the lines to<br />
clear any debris.<br />
6. Bowl water continues to flow or tank refill water won’t shut off.<br />
A. Flapper is not seating properly. Adjust chain slack between flapper<br />
<strong>and</strong> flapper valve.<br />
B. Flush h<strong>and</strong>le extension is being restricted. <strong>Repair</strong> or replace flush<br />
h<strong>and</strong>le assembly.<br />
C. Clean area of debris <strong>and</strong> check for any wearing around the flapper or<br />
dual flush valve seat on opening to allow seal.<br />
D. For dual flush, adjust the push button rods for proper slack, so the fill<br />
valve seal is not held off the flush valve.<br />
7. H<strong>and</strong>le/dual flush button does not activate plunger.<br />
A. Adjust chain linkage.<br />
B. Check arm for breakage. Replace if necessary.<br />
C. For dual flush, check push button rods for breakage or adjustment.<br />
207<br />
<strong>Repair</strong> <strong>Parts</strong> <strong>and</strong> <strong>Maintenance</strong> <strong>Guide</strong><br />
Gravity Tank Toilet Series<br />
8. If the water rises in bowl during the flush <strong>and</strong> stays there, or<br />
drains slowly.<br />
A. Ensure that the chain connected to flapper is adjusted properly. Too<br />
much slack will result in the flapper closing too soon, not enough<br />
slack will result in not seating properly <strong>and</strong> leaking. There should be<br />
enough slack to allow the flapper to seat properly.<br />
B. Check the plumbing system venting. Fill a basin near the location of<br />
the toilet <strong>and</strong> open the drain. If the water drains quickly with no<br />
visible problem, there is no venting problem. If there is a venting<br />
problem the sluggish/poor performance is not a fixture problem.<br />
C. Make sure the surface level in tank bowl is correct. Adjust if necessary.<br />
9. Leaking tanks.<br />
A. Check flapper <strong>and</strong> flapper seat in tank for warping or degradation.<br />
Many cleaning chemicals commonly used in tanks contain chlorine<br />
that attacks these parts causing warping <strong>and</strong> degradation.<br />
B. Check tank for cracks. If cracked, the tank must be replaced.<br />
C. Check tank bolts. Rubber washers may be corroded or bolts may be<br />
loose. Replace or tighten as necessary.<br />
NOTE: be careful not to overtighten nuts on tank as this may result in<br />
cracking the tank.<br />
D. Check for condensation. Very cold water can generate condensation<br />
in high temperature <strong>and</strong> humid areas in unlined tanks.<br />
10. Cleaning <strong>and</strong> <strong>Maintenance</strong><br />
Clean your toilet’s bowl <strong>and</strong> your china lavatory at least once a week<br />
using only recommended cleaners (such as Waterfree urinal cleaner<br />
SJS-19). If you live in a hard water area, you should make certain that<br />
the holes under the rim are kept clean <strong>and</strong> maintained for proper bowl<br />
performance. Use a long-h<strong>and</strong>led brush to clean the rim holes. Make<br />
sure to periodically clean the in-line filter located in the water inlet of the<br />
water supply valve.<br />
CAUTION: Do not use in-tank cleaners. Products containing chlorine<br />
(calcium hypochlorite) can seriously damage the fittings in your tank.<br />
This damage can cause leakage <strong>and</strong> property damage.<br />
When assistance is required, please contact<br />
<strong>Sloan</strong> Technical Support at: 1-888-SLOAN-14 (1-888-756-2614).<br />
Vitreous<br />
Fixtures
Vitreous<br />
Fixtures<br />
1<br />
3<br />
2<br />
208<br />
<strong>Repair</strong> <strong>Parts</strong> <strong>and</strong> <strong>Maintenance</strong> <strong>Guide</strong><br />
Wall Hung Closets Series<br />
ST-2000 WALL HUNG SERIES<br />
Item<br />
No. Code No. Part No. Description<br />
1. 2102050 ST-2050-A HET Top Spud 1.28 gpf (4.8 Lpf) Wall Hung<br />
Closet<br />
2102052 ST-2052-A HET Top Spud 1.6/1.1 gpf (6.0/4.2 Lpf) Wall<br />
Hung Closet<br />
2102053 ST-2053-A Top Spud 1.6 gpf (6.0 Lpf) Wall Hung Closet<br />
2. 2102060 ST-2060-A HET Rear Spud 1.28 gpf (4.8 Lpf) Wall Hung<br />
Closet<br />
2102063 ST-2063-A Rear Spud 1.6 gpf (6.0 Lpf) Wall Hung Closet<br />
3. 2112053 ST-2053-A-BPL Top Spud 1.6 gpf (6.0 Lpf) Bedpan Lug Wall<br />
Hung Closet
TROUBLESHOOTING GUIDE<br />
1. Water does not shut off in bowl.<br />
A. Malfunctioning flushometer.<br />
Contact <strong>Sloan</strong> Technical Support at<br />
1-888-SLOAN-14 (1-888-756-2614).<br />
B. Supply pressure too low. Minimum flowing pressure must be 25 PSI.<br />
Adjust supply pressure.<br />
2. Water is leaking from bottom of toilet.<br />
A. Toilet is not properly mounted on wall. Tighten toilet mount nuts.<br />
B. Toilet is not properly mounted on wall. Replace wall gasket seal<br />
between wall <strong>and</strong> toilet.<br />
3. Toilet emits odor.<br />
A. Plugged vent line. Remove or clear obstruction in vent line.<br />
4. Poor or sluggish flush.<br />
A. Supply pressure too low. Water supply must be able to provide 18 gpm<br />
at 25 psi.<br />
B. Partially clogged trapway <strong>and</strong>/or drain pipe <strong>and</strong>/or vent. Remove or<br />
clear obstruction in vent line.<br />
IMPORTANT INFORMATION<br />
1. Do not use harsh or caustic chemicals such as drain opening types in<br />
this system. These products will damage the vitreous finish.<br />
2. Do not permit foreign objects (i.e., paper towels, paper cups, sanitary<br />
napkins, etc.) to be flushed through the toilet.<br />
3. The toilet must be regularly cleaned. See CARE AND CLEANING for<br />
details.<br />
209<br />
<strong>Repair</strong> <strong>Parts</strong> <strong>and</strong> <strong>Maintenance</strong> <strong>Guide</strong><br />
Wall Hung Closets Series<br />
CARE AND CLEANING<br />
<strong>Sloan</strong>'s toilets should be cleaned regularly for maximum sanitary <strong>and</strong><br />
operational performance. As with any plumbing product consistency is<br />
important to achieve efficiency <strong>and</strong> general cleanliness. Before you begin to<br />
clean a toilet, gather all the needed materials including personal protection<br />
equipment, such as gloves <strong>and</strong> eyewear.<br />
What You'll Need:<br />
Goggles/safety glasses<br />
Toilet Brush<br />
Gloves<br />
Cleanser for inside the bowl<br />
Cleanser for outside the bowl<br />
Paper towels or cloth<br />
Inside Toilet Bowl:<br />
Add your choice of powder, liquid or gel cleanser to the bowl. Try to apply<br />
the cleaner as close to the toilet rim as possible to prevent diluted cleanser.<br />
Begin cleaning the bowl from the top down. Always begin scrubbing under<br />
the rim first. Look under the rim to get all the stains <strong>and</strong> grime scrubbed<br />
away. Next scrub the bowl. Finally scrub the drain at the bottom of the bowl.<br />
Flush the toilet with the lid down.<br />
Outside Toilet:<br />
Using a disinfectant/detergent cleaner, mixed either in a spray bottle or in a<br />
bucket (according to label instructions), spray or wipe down all the hard<br />
surfaces outside of the bowl paying close attention to high touch areas like<br />
the toilet seat <strong>and</strong> flushometer. NOTE: DO NOT use abrasive or chemical<br />
cleaners (including chlorine) to clean flushometers that may dull the<br />
luster <strong>and</strong> attack the chrome or special decorative finishes. Use<br />
ONLY mild soap <strong>and</strong> water, then wipe dry with a clean towel or<br />
cloth. If cleaning the fixture with an abrasive or chemical cleaner<br />
protect the flushometer from any splattering of cleaner. Acids <strong>and</strong><br />
cleaning fluids will discolor or remove the finish. The toilet seat should<br />
never be neglected. It is the part of the toilet that comes into actual contact<br />
with people, <strong>and</strong> it needs to be cleaned thoroughly. Raise the seat. Spray the<br />
seat, inside lid (if applicable) <strong>and</strong> the rim of the toilet with cleanser. Wipe<br />
down the lid, seat <strong>and</strong> hinges at the back of the toilet seat.<br />
Wipe Up Spills:<br />
Wipe up any spills that may have splashed or occurred during cleaning.<br />
Service Tip:<br />
Checking for water leaks around toilet fixtures can be difficult to locate the<br />
source. Place paper towels around suspected area. It is best to start at the<br />
top of the fixture since gravity will cause the water leak to run downward.<br />
When assistance is required, please contact<br />
<strong>Sloan</strong> Technical Support at: 1-888-SLOAN-14 (1-888-756-2614).<br />
Vitreous<br />
Fixtures
Vitreous<br />
Fixtures<br />
1<br />
3<br />
2<br />
210<br />
<strong>Repair</strong> <strong>Parts</strong> <strong>and</strong> <strong>Maintenance</strong> <strong>Guide</strong><br />
Floor Mount Closets Series<br />
ST-2000 FLOOR MOUNT SERIES<br />
Item<br />
No. Code No. Part No. Description<br />
1. 2102000 ST-2000-A HET Top Spud 1.28 gpf (4.8 Lpf) Floor Mount<br />
Closet<br />
2102002 ST-2002-A HET Top Spud 1.6/1.1 gpf (6.0/4.2 Lpf) Floor<br />
Mount Closet<br />
2102003 ST-2003-A Top Spud 1.6 gpf (6.0 Lpf) Floor Mount Closet<br />
2102020 ST-2020-A HET Top Spud 1.28 gpf (4.8 Lpf) ADA Floor<br />
Mount Closet<br />
2102022 ST-2022-A HET Top Spud 1.6/1.1 gpf (6.0/4.2 Lpf) ADA<br />
Floor Mount Closet<br />
2102023 ST-2023-A Top Spud 1.6 gpf (6.0 Lpf) ADA Floor Mount<br />
Closet<br />
2. 2102010 ST-2010-A HET Rear Spud 1.28 gpf (4.8 Lpf) Floor Mount<br />
Closet<br />
2102012 ST-2012-A HET Rear Spud 1.6/1.1 gpf (6.0/4.2 Lpf) Floor<br />
Mount Closet<br />
2102013 ST-2013-A Rear Spud 1.6 gpf (6.0 Lpf) Floor Mount Closet<br />
2102030 ST-2030-A HET Rear Spud 1.28 gpf (4.8 Lpf) ADA Floor<br />
Mount Closet<br />
2102032 ST-2032-A HET Rear Spud 1.6/1.1 gpf (6.0/4.2 Lpf) ADA<br />
Floor Mount Closet<br />
2102033 ST-2033-A Rear Spud 1.6 gpf (6.0 Lpf) ADA Floor Mount<br />
Closet<br />
3. 2112023 ST-2023-A-BPL Top Spud 1.6 gpf (6.0 Lpf) Bedpan Lug Floor<br />
Mount Closet
TROUBLESHOOTING GUIDE<br />
1. Water does not shut off in bowl.<br />
A. Malfunctioning flushometer.<br />
Contact <strong>Sloan</strong> Technical Support at<br />
1-888-SLOAN-14 (1-888-756-2614).<br />
B. Supply pressure too low. Minimum flowing pressure must be 25 PSI.<br />
Adjust supply pressure.<br />
2. Water is leaking from bottom of toilet.<br />
A. Toilet is not properly mounted on floor. Tighten toilet mount nuts.<br />
B. Toilet is not properly mounted on floor. Replace floor gasket seal<br />
between floor <strong>and</strong> toilet.<br />
3. Toilet emits odor.<br />
A. Plugged vent line. Remove or clear obstruction in vent line.<br />
4. Poor or sluggish flush.<br />
A. Supply pressure too low. Water supply must be able to provide 18 gpm<br />
at 25 psi.<br />
B. Partially clogged trapway <strong>and</strong>/or drain pipe <strong>and</strong>/or vent. Remove or<br />
clear obstruction in vent line.<br />
IMPORTANT INFORMATION<br />
1. Do not use harsh or caustic chemicals such as drain opening types in<br />
this system. These products will damage the vitreous finish.<br />
2. Do not permit foreign objects (i.e., paper towels, paper cups, sanitary<br />
napkins, etc.) to be flushed through the toilet.<br />
3. The toilet must be regularly cleaned. See CARE AND CLEANING for<br />
details.<br />
211<br />
<strong>Repair</strong> <strong>Parts</strong> <strong>and</strong> <strong>Maintenance</strong> <strong>Guide</strong><br />
Floor Mount Closets Series<br />
CARE AND CLEANING<br />
<strong>Sloan</strong>'s toilets should be cleaned regularly for maximum sanitary <strong>and</strong><br />
operational performance. As with any plumbing product consistency is<br />
important to achieve efficiency <strong>and</strong> general cleanliness. Before you begin to<br />
clean a toilet, gather all the needed materials including personal protection<br />
equipment, such as gloves <strong>and</strong> eyewear.<br />
What You'll Need:<br />
Goggles/safety glasses<br />
Toilet Brush<br />
Gloves<br />
Cleanser for inside the bowl<br />
Cleanser for outside the bowl<br />
Paper towels or cloth<br />
Inside Toilet Bowl:<br />
Add your choice of powder, liquid or gel cleanser to the bowl. Try to apply<br />
the cleaner as close to the toilet rim as possible to prevent diluted cleanser.<br />
Begin cleaning the bowl from the top down. Always begin scrubbing under<br />
the rim first. Look under the rim to get all the stains <strong>and</strong> grime scrubbed<br />
away. Next scrub the bowl. Finally scrub the drain at the bottom of the bowl.<br />
Flush the toilet with the lid down.<br />
Outside Toilet:<br />
Using a disinfectant/detergent cleaner, mixed either in a spray bottle or in a<br />
bucket (according to label instructions), spray or wipe down all the hard<br />
surfaces outside of the bowl paying close attention to high touch areas like<br />
the toilet seat <strong>and</strong> flushometer. NOTE: DO NOT use abrasive or chemical<br />
cleaners (including chlorine) to clean flushometers that may dull the<br />
luster <strong>and</strong> attack the chrome or special decorative finishes. Use<br />
ONLY mild soap <strong>and</strong> water, then wipe dry with a clean towel or<br />
cloth. If cleaning the fixture with an abrasive or chemical cleaner<br />
protect the flushometer from any splattering of cleaner. Acids <strong>and</strong><br />
cleaning fluids will discolor or remove the finish. The toilet seat should<br />
never be neglected. It is the part of the toilet that comes into actual contact<br />
with people, <strong>and</strong> it needs to be cleaned thoroughly. Raise the seat. Spray the<br />
seat, inside lid (if applicable) <strong>and</strong> the rim of the toilet with cleanser. Wipe<br />
down the lid, seat <strong>and</strong> hinges at the back of the toilet seat.<br />
Wipe Up Spills:<br />
Wipe up any spills that may have splashed or occurred during cleaning.<br />
Service Tip:<br />
Checking for water leaks around toilet fixtures can be difficult to locate the<br />
source. Place paper towels around suspected area. It is best to start at the<br />
top of the fixture since gravity will cause the water leak to run downward.<br />
When assistance is required, please contact<br />
<strong>Sloan</strong> Technical Support at: 1-888-SLOAN-14 (1-888-756-2614).<br />
Vitreous<br />
Fixtures
Vitreous<br />
Fixtures<br />
1<br />
3<br />
2<br />
212<br />
<strong>Repair</strong> <strong>Parts</strong> <strong>and</strong> <strong>Maintenance</strong> <strong>Guide</strong><br />
St<strong>and</strong>ard Urinals Series<br />
SU-1000 SERIES STANDARD URINALS<br />
Item<br />
No. Code No. Part No. Description<br />
1. 1101000 SU-1000-A HEU Top Spud 0.125 gpf (0.5 Lpf) St<strong>and</strong>ard<br />
Urinal<br />
1101002 SU-1002-A HEU Top Spud 0.25 gpf (1.0 Lpf) St<strong>and</strong>ard Urinal<br />
1101005 SU-1005-A HEU Top Spud 0.5 gpf (1.9 Lpf) St<strong>and</strong>ard Urinal<br />
1101006 SU-1006-A Top Spud 1.0 gpf (3.8 Lpf) St<strong>and</strong>ard Urinal<br />
2. 1101010 SU-1010-A HEU Rear Spud 0.125 gpf (0.5 Lpf) St<strong>and</strong>ard<br />
Urinal<br />
1101012 SU-1012-A HEU Rear Spud 0.25 gpf (1.0 Lpf) St<strong>and</strong>ard<br />
Urinal<br />
1101015 SU-1015-A HEU Rear Spud 0.5 gpf (1.9 Lpf) St<strong>and</strong>ard Urinal<br />
1101016 SU-1016-A Rear Spud 1.0 gpf (3.8 Lpf) St<strong>and</strong>ard Urinal<br />
ACCESSORIES<br />
3. 5700919 SJS-9000-9 Urinal Screen - Fresh Outdoor Scent<br />
5700920 SJS-9000-10 Urinal Screen - Fresh Linen Scent<br />
5700921 SJS-9000-11 Urinal Screen - Odor Neutralizer
TROUBLESHOOTING GUIDE<br />
1. Water does not shut off in urinal.<br />
A. Malfunctioning flushometer.<br />
Contact <strong>Sloan</strong> Technical Support at<br />
1-888-SLOAN-14 (1-888-756-2614).<br />
B. Supply pressure too low. Minimum flowing pressure must be 25 PSI.<br />
Adjust supply pressure.<br />
2. Water is leaking from edge of urinal on wall.<br />
A. Urinal is not properly mounted on wall. Tighten urinal mount nuts.<br />
B. Urinal is not properly mounted on wall. Replace wall gasket seal<br />
between wall <strong>and</strong> urinal.<br />
3. Urinal emits odor.<br />
A. Plugged vent line. Remove or clear obstruction in vent line.<br />
4. Poor or sluggish flush.<br />
A. Supply pressure too low. Water supply must be able to provide 18 gpm<br />
at 25 psi.<br />
B. Partially clogged trapway <strong>and</strong>/or drain pipe <strong>and</strong>/or vent. Remove or<br />
clear obstruction in vent line.<br />
IMPORTANT INFORMATION<br />
1. Do not use harsh or caustic chemicals such as drain opening types in<br />
this system. These products will damage the vitreous finish.<br />
2. Do not permit foreign objects (i.e., paper towels, cigarette butts, etc.) to<br />
be flushed through the urinal.<br />
3. The urinal must be regularly cleaned. See CARE AND CLEANING for<br />
details.<br />
213<br />
<strong>Repair</strong> <strong>Parts</strong> <strong>and</strong> <strong>Maintenance</strong> <strong>Guide</strong><br />
St<strong>and</strong>ard Urinals Series<br />
CARE AND CLEANING<br />
<strong>Sloan</strong>'s urinals should be cleaned regularly for maximum sanitary <strong>and</strong><br />
operational performance. As with any plumbing product consistency is<br />
important to achieve efficiency <strong>and</strong> general cleanliness. Before you begin to<br />
clean a urinal, gather all the needed materials including personal protection<br />
equipment, such as gloves <strong>and</strong> eyewear.<br />
What You'll Need:<br />
Goggles/safety glasses<br />
Brush<br />
Gloves<br />
Cleanser for inside the urinal<br />
Cleanser for outside the urinal<br />
Paper towels or cloth<br />
Urinal Screen:<br />
Prior to cleaning, remove urinal screen. After cleaning place screen back in<br />
urinal or replace with new screen.<br />
Inside Urinal:<br />
Add your choice of powder, liquid or gel cleanser to the urinal. Try to apply<br />
the cleaner as close to the urinal surface as possible to prevent backsplash.<br />
Begin cleaning the urinal from the top down. Always begin scrubbing from<br />
the top of the urinal. Look under the rim to get all the stains <strong>and</strong> grime<br />
scrubbed away. Next scrub the urinal. Finally scrub the drain at the bottom<br />
of the urinal. Flush the urinal.<br />
Outside Urinal:<br />
Using a disinfectant/detergent cleaner, mixed either in a spray bottle or in a<br />
bucket (according to label instructions), spray or wipe down all the hard<br />
surfaces outside of the urinal paying close attention to high touch areas like<br />
the urinal edge <strong>and</strong> flushometer. NOTE: DO NOT use abrasive or<br />
chemical cleaners (including chlorine) to clean flushometers that<br />
may dull the luster <strong>and</strong> attack the chrome or special decorative<br />
finishes. Use ONLY mild soap <strong>and</strong> water, then wipe dry with a clean<br />
towel or cloth. If cleaning the fixture with an abrasive or chemical<br />
cleaner protect the flushometer from any splattering of cleaner.<br />
Acids <strong>and</strong> cleaning fluids will discolor or remove the finish. The<br />
urinal edge rim should never be neglected. It is the part of the urinal that<br />
comes into actual contact with people, <strong>and</strong> it needs to be cleaned<br />
thoroughly. Spray inside the urinal <strong>and</strong> the rim of the urinal with cleanser.<br />
Wipe down the urinal.<br />
Wipe Up Spills:<br />
Wipe up any spills that may have splashed or occurred during cleaning.<br />
Service Tip:<br />
Checking for water leaks around toilet fixtures can be difficult to locate the<br />
source. Place paper towels around suspected area. It is best to start at the<br />
top of the fixture since gravity will cause the water leak to run downward.<br />
When assistance is required, please contact<br />
<strong>Sloan</strong> Technical Support at: 1-888-SLOAN-14 (1-888-756-2614).<br />
Vitreous<br />
Fixtures
Vitreous<br />
Fixtures<br />
1<br />
3<br />
2<br />
214<br />
<strong>Repair</strong> <strong>Parts</strong> <strong>and</strong> <strong>Maintenance</strong> <strong>Guide</strong><br />
Retrofit Urinals Series<br />
SU-1200 SERIES RETROFIT URINALS<br />
Item<br />
No. Code No. Part No. Description<br />
1. 1101200 SU-1200-A HEU Top Spud 0.125 gpf (0.5 Lpf) Retrofit Urinal<br />
1101202 SU-1202-A HEU Top Spud 0.25 gpf (1.0 Lpf) Retrofit Urinal<br />
1101205 SU-1205-A HEU Top Spud 0.5 gpf (1.9 Lpf) Retrofit Urinal<br />
2. 1101210 SU-1210-A HEU Rear Spud 0.125 gpf (0.5 Lpf) Retrofit Urinal<br />
1101212 SU-1212-A HEU Rear Spud 0.25 gpf (1.0 Lpf) Retrofit Urinal<br />
1101215 SU-1215-A HEU Rear Spud 0.5 gpf (1.9 Lpf) Retrofit Urinal<br />
ACCESSORIES<br />
3. 5700919 SJS-9000-9 Urinal Screen - Fresh Outdoor Scent<br />
5700920 SJS-9000-10 Urinal Screen - Fresh Linen Scent<br />
5700921 SJS-9000-11 Urinal Screen - Odor Neutralizer
TROUBLESHOOTING GUIDE<br />
1. Water does not shut off in urinal.<br />
A. Malfunctioning flushometer.<br />
Contact <strong>Sloan</strong> Technical Support at<br />
1-888-SLOAN-14 (1-888-756-2614).<br />
B. Supply pressure too low. Minimum flowing pressure must be 25 PSI.<br />
Adjust supply pressure.<br />
2. Water is leaking from edge of urinal on wall.<br />
A. Urinal is not properly mounted on wall. Tighten urinal mount nuts.<br />
B. Urinal is not properly mounted on wall. Replace wall gasket seal<br />
between wall <strong>and</strong> urinal.<br />
3. Urinal emits odor.<br />
A. Plugged vent line. Remove or clear obstruction in vent line.<br />
4. Poor or sluggish flush.<br />
A. Supply pressure too low. Water supply must be able to provide 18 gpm<br />
at 25 psi.<br />
B. Partially clogged trapway <strong>and</strong>/or drain pipe <strong>and</strong>/or vent. Remove or<br />
clear obstruction in vent line.<br />
IMPORTANT INFORMATION<br />
1. Do not use harsh or caustic chemicals such as drain opening types in<br />
this system. These products will damage the vitreous finish.<br />
2. Do not permit foreign objects (i.e., paper towels, cigarette butts, etc.) to<br />
be flushed through the urinal.<br />
3. The urinal must be regularly cleaned. See CARE AND CLEANING for<br />
details.<br />
215<br />
<strong>Repair</strong> <strong>Parts</strong> <strong>and</strong> <strong>Maintenance</strong> <strong>Guide</strong><br />
Retrofit Urinals Series<br />
CARE AND CLEANING<br />
<strong>Sloan</strong>'s urinals should be cleaned regularly for maximum sanitary <strong>and</strong><br />
operational performance. As with any plumbing product consistency is<br />
important to achieve efficiency <strong>and</strong> general cleanliness. Before you begin to<br />
clean a urinal, gather all the needed materials including personal protection<br />
equipment, such as gloves <strong>and</strong> eyewear.<br />
What You'll Need:<br />
Goggles/safety glasses<br />
Brush<br />
Gloves<br />
Cleanser for inside the urinal<br />
Cleanser for outside the urinal<br />
Paper towels or cloth<br />
Urinal Screen:<br />
Prior to cleaning, remove urinal screen. After cleaning place screen back in<br />
urinal or replace with new screen.<br />
Inside Urinal:<br />
Add your choice of powder, liquid or gel cleanser to the urinal. Try to apply<br />
the cleaner as close to the urinal surface as possible to prevent backsplash.<br />
Begin cleaning the urinal from the top down. Always begin scrubbing from<br />
the top of the urinal. Look under the rim to get all the stains <strong>and</strong> grime<br />
scrubbed away. Next scrub the urinal. Finally scrub the drain at the bottom<br />
of the urinal. Flush the urinal.<br />
Outside Urinal:<br />
Using a disinfectant/detergent cleaner, mixed either in a spray bottle or in a<br />
bucket (according to label instructions), spray or wipe down all the hard<br />
surfaces outside of the urinal paying close attention to high touch areas like<br />
the urinal edge <strong>and</strong> flushometer. NOTE: DO NOT use abrasive or<br />
chemical cleaners (including chlorine) to clean flushometers that<br />
may dull the luster <strong>and</strong> attack the chrome or special decorative<br />
finishes. Use ONLY mild soap <strong>and</strong> water, then wipe dry with a clean<br />
towel or cloth. If cleaning the fixture with an abrasive or chemical<br />
cleaner protect the flushometer from any splattering of cleaner.<br />
Acids <strong>and</strong> cleaning fluids will discolor or remove the finish. The<br />
urinal edge rim should never be neglected. It is the part of the urinal that<br />
comes into actual contact with people, <strong>and</strong> it needs to be cleaned<br />
thoroughly. Spray inside the urinal <strong>and</strong> the rim of the urinal with cleanser.<br />
Wipe down the urinal.<br />
Wipe Up Spills:<br />
Wipe up any spills that may have splashed or occurred during cleaning.<br />
Service Tip:<br />
Checking for water leaks around toilet fixtures can be difficult to locate the<br />
source. Place paper towels around suspected area. It is best to start at the<br />
top of the fixture since gravity will cause the water leak to run downward.<br />
When assistance is required, please contact<br />
<strong>Sloan</strong> Technical Support at: 1-888-SLOAN-14 (1-888-756-2614).<br />
Vitreous<br />
Fixtures
Vitreous<br />
Fixtures<br />
1<br />
3<br />
2<br />
4<br />
216<br />
<strong>Repair</strong> <strong>Parts</strong> <strong>and</strong> <strong>Maintenance</strong> <strong>Guide</strong><br />
Vitreous China Lavatories<br />
STANDARD UNDERMOUNT LAVATORY<br />
Item<br />
No. Code No. Part No. Description<br />
1. 3873001 SS-3001 St<strong>and</strong>ard Undermount Lavatory 19-1/2” x 17-1/2”<br />
outside, 17” x 14” Inside dimension<br />
STANDARD DROP IN LAVATORY<br />
2. 3873002 SS-3002 St<strong>and</strong>ard Drop In Lavatory 20” x 16-3/4”,<br />
4” centerset<br />
STANDARD WALL HUNG LAVATORY<br />
3. 3873003 SS-3003 St<strong>and</strong>ard Wall Hung Lavatory 21” x 19-1/4” with<br />
4” Backsplash, 4” centerset<br />
3873103 SS-3103 St<strong>and</strong>ard Wall Hung Lavatory 21” x 19-1/4” with<br />
4” Backsplash, 1 Hole<br />
3873803 SS-3803 St<strong>and</strong>ard Wall Hung Lavatory 21” x 19-1/4” with<br />
4” Backsplash, 8” centerset<br />
ADA WHEELCHAIR WALL HUNG LAVATORY<br />
4. 3873804 SS-3804 ADA Wheelchair Wall Hung Lavatory 20” X 27”,<br />
8” centerset<br />
CARE AND CLEANING<br />
Clean lavatory with a cleaner safe for vitreous china. Spray <strong>and</strong> wipe clean<br />
using soft cloth. Soft abrasive cleaners may be used to remove stains.<br />
When assistance is required, please contact<br />
<strong>Sloan</strong> Technical Support at: 1-888-SLOAN-14 (1-888-756-2614).
ITEM NO. 1 — DOUBLE STATION LAVATORY BASIN HOLE PATTERNS<br />
4 2<br />
5<br />
217<br />
<strong>Repair</strong> <strong>Parts</strong> <strong>and</strong> <strong>Maintenance</strong> <strong>Guide</strong><br />
<strong>Sloan</strong>Stone ® ELS-62000<br />
DOUBLE STATION SENSOR ACTIVATED SOLID SURFACE<br />
LAVATORY SYSTEM PARTS<br />
Item<br />
No. Code No. Part No. Description<br />
1. SEE TABLE BELOW Double Station Lavatory Basin Assembly<br />
2. — ELC-41 Screw, Machine Truss Head 1/4-20 (6)<br />
3. — EW-122 Mounting Bracket (2)<br />
4. — EW-127 Velcro Strip (Hook)<br />
5. — ETF-725-A Grid Strainer Assembly (2)<br />
6. — EW-105 Plastic Cabinet for Double Station Lavatory<br />
— EW-98 Light Duty Buffing Pad (Not Shown)<br />
— EW-108 General Duty Buffing Pad (Not Shown)<br />
— Consult factory for replacement part.<br />
Hole Pattern — A B C D<br />
Part Number ELS-9-A-XXX ELS-9-A-XXX-A ELS-9-A-XXX-B ELS-9-A-XXX-C ELS-9-A-XXX-D<br />
Basin Hole Pattern<br />
3<br />
6<br />
1<br />
Sink Systems
Sink Systems<br />
ITEM NO. 1 — TRIPLE STATION LAVATORY BASIN HOLE PATTERNS<br />
4<br />
218<br />
<strong>Repair</strong> <strong>Parts</strong> <strong>and</strong> <strong>Maintenance</strong> <strong>Guide</strong><br />
<strong>Sloan</strong>Stone ® ELS-63000<br />
TRIPLE STATION SENSOR ACTIVATED SOLID SURFACE<br />
LAVATORY SYSTEM PARTS<br />
Item<br />
No. Code No. Part No. Description<br />
1. SEE TABLE BELOW Triple Station Lavatory Basin Assembly<br />
2. — ELC-41 Screw, Machine Truss Head 1/4-20 (6)<br />
3. — EW-122 Mounting Bracket (4)<br />
4. — EW-127 Velcro Strip (Hook)<br />
5. — ETF-725-A Grid Strainer Assembly (2)<br />
6. — EW-123 Plastic Cabinet for Triple Station Lavatory<br />
— EW-98 Light Duty Buffing Pad (Not Shown)<br />
— EW-108 General Duty Buffing Pad (Not Shown)<br />
— Consult factory for replacement part.<br />
Hole Pattern — A B C D<br />
Part Number<br />
Basin Hole<br />
Pattern<br />
ELS-11-A-XXX ELS-11-A-XXX-A ELS-11-A-XXX-B ELS-11-A-XXX-C ELS-11-A-XXX-D<br />
5<br />
2<br />
3<br />
6<br />
1
4<br />
5<br />
ITEM NO. 8 – DOUBLE STATION LAVATORY BASIN HOLE PATTERNS<br />
2<br />
7<br />
11<br />
219<br />
<strong>Repair</strong> <strong>Parts</strong> <strong>and</strong> <strong>Maintenance</strong> <strong>Guide</strong><br />
<strong>Sloan</strong>Stone ® ELS-72000<br />
DOUBLE STATION SENSOR ACTIVATED SOLID SURFACE<br />
LAVATORY SYSTEM PARTS<br />
Item<br />
No. Code No. Part No. Description<br />
1. — EW-20-A Cabinet Weldment, 2 Station<br />
2. 0387099 EW-99 U-Type Nut St<strong>and</strong>ard 1/4-20 Thread (6)<br />
3. — EW-60 End Cap Right – Machined<br />
4. — EW-52 End Cap Left – Machined<br />
5. — EW-15 Screw, Pan Head 1/4-20 x 1/2” Long (SEMS)<br />
6. — EW-16 Screw, Pan Head 1/4-20 x 1” Long (SEMS) (4)<br />
7. 0387006 EW-25 Front Panel, 2 Station<br />
8. SEE TABLE BELOW Double Station Lavatory Basin Assembly<br />
9. — ETF-725-A Grid Strainer Assembly (2)<br />
10. — EW-15 Screw, Pan Head 1/4-20 x 1/2” Long (SEMS)<br />
11. — EW-61 Overflow Cover Plate (2)<br />
— EW-98 Light Duty Buffing Pad (not shown)<br />
0387099 EW-99 U-Type Nut Std. 1/4”-20 Thread<br />
— Consult factory for replacement part.<br />
Hole Pattern — A B C D<br />
Part Number ELS-12-A-XX ELS-12-A-XX-A ELS-12-A-XX-B ELS-12-A-XX-C ELS-12-A-XX-D<br />
Basin Hole Pattern<br />
1<br />
6<br />
8<br />
9<br />
10<br />
3<br />
Sink Systems
Sink Systems<br />
6<br />
4<br />
ITEM NO. 10 – TRIPLE STATION LAVATORY BASIN HOLE PATTERNS<br />
9<br />
2<br />
13<br />
220<br />
<strong>Repair</strong> <strong>Parts</strong> <strong>and</strong> <strong>Maintenance</strong> <strong>Guide</strong><br />
<strong>Sloan</strong>Stone ® ELS-73000<br />
TRIPLE STATION SENSOR ACTIVATED SOLID SURFACE<br />
LAVATORY SYSTEM PARTS<br />
Item<br />
No. Code No. Part No. Description<br />
1. — EW-30-A Cabinet Weldment, 3 Station<br />
2. — EW-50 Front Panel Support – Machined<br />
3. — EW-36 Screw, Pan Head #8-32 x 7/16” Long (SEMS) (2)<br />
4. 0387099 EW-99 U-Type Nut St<strong>and</strong>ard 1/4-20 Thread (6)<br />
5. — EW-60 End Cap Right – Machined<br />
6. — EW-52 End Cap Left – Machined<br />
7. — EW-16 Screw, Pan Head 1/4-20 x 1” Long (SEMS) (4)<br />
8. — EW-15 Screw, Pan Head 1/4-20 x 1/2” Long (SEMS) (2)<br />
9. 0387035 EW-35 Front Panel, 3 Station (2)<br />
10. SEE TABLE BELOW Triple Station Lavatory Basin Assembly<br />
11. — ETF-725-A Grid Strainer Assembly (2)<br />
12. — EW-15 Screw, Pan Head 1/4-20 x 1/2” Long (SEMS) (8)<br />
13. — EW-61 Overflow Cover Plate (2)<br />
— EW-98 Light Duty Buffing Pad (not shown)<br />
— EW-108 Heavy Duty Buffing Pad (not shown)<br />
— Consult factory for replacement part.<br />
Hole Pattern — A B C D<br />
Part Number<br />
Basin Hole<br />
Pattern<br />
ELS-13-A-XX ELS-13-A-XX-A ELS-13-A-XX-B ELS-13-A-XX-C ELS-13-A-XX-D<br />
3<br />
11<br />
1<br />
10<br />
7<br />
8<br />
12<br />
5
PARTS LIST—EW-42000 SINK<br />
Item<br />
No. Code No. Part No. Description<br />
1. — — Solid Surface Basin<br />
2. — — Solid Surface Top Cover<br />
3. — — Front Panels<br />
Front Panels (LP)<br />
4. — — Strainer Assembly<br />
5. — — Actuator Assembly<br />
6. — — Electronic <strong>Valve</strong> Assembly<br />
7. — — Filler Tray/Soap Tray<br />
8. — — Cabinet (LP)<br />
Cabinet (St<strong>and</strong>ard)<br />
Cabinet (Floor Mounted)<br />
9. — — Power Supply Hardware Kit<br />
3<br />
6<br />
1<br />
4<br />
5<br />
9<br />
221<br />
<strong>Repair</strong> <strong>Parts</strong> <strong>and</strong> <strong>Maintenance</strong> <strong>Guide</strong><br />
<strong>Sloan</strong>Stone ® EW-42000<br />
2<br />
Item<br />
No. Code No. Part No. Description<br />
7<br />
8<br />
MIXING VALVE<br />
0326045 MIX-135-A Below Deck Thermostatic Water Mixing <strong>Valve</strong><br />
(BDT Variation)<br />
REPAIR KITS<br />
3305622 EL-1500-LL Sensor – Lav<br />
3305527 ETF-1004-A Solenoid<br />
3305577 ETF-1009-A Solenoid <strong>Valve</strong> <strong>Repair</strong> Kit<br />
— Consult factory for replacement part.<br />
— Consult factory for replacement part.<br />
Sink Systems
Sink Systems<br />
PARTS LIST—EW-43000 SINK<br />
Item<br />
No. Code No. Part No. Description<br />
1. — — Solid Surface Basin<br />
2. — — Solid Surface Top Cover<br />
3. — — Front Panels<br />
Front Panels (LP)<br />
4. — — Strainer Assembly<br />
5. — — Actuator Assembly<br />
6. — — Electronic <strong>Valve</strong> Assembly<br />
7. — — Left Side Closure Panel<br />
8. — — Right Side Closure Panel<br />
9. — — Filler Tray/Soap Tray<br />
10. — — Cabinet (LP)<br />
Cabinet (St<strong>and</strong>ard)<br />
Cabinet (Floor Mounted)<br />
11. — — Power Supply Hardware Kit<br />
7<br />
5<br />
11<br />
10<br />
222<br />
<strong>Repair</strong> <strong>Parts</strong> <strong>and</strong> <strong>Maintenance</strong> <strong>Guide</strong><br />
<strong>Sloan</strong>Stone ® EW-43000<br />
Item<br />
No. Code No. Part No. Description<br />
9<br />
6<br />
2<br />
3<br />
MIXING VALVE<br />
0326045 MIX-135-A Below Deck Thermostatic Water Mixing <strong>Valve</strong> (BDT<br />
Variation)<br />
REPAIR KITS<br />
3305622 EL-1500-LL Sensor – Lav<br />
3305527 ETF-1004-A Solenoid<br />
3305577 ETF-1009-A Solenoid <strong>Valve</strong> <strong>Repair</strong> Kit<br />
— Consult factory for replacement part.<br />
— Consult factory for replacement part.<br />
4<br />
1<br />
8
TROUBLESHOOTING GUIDE<br />
1. No water flows when sensor is activated<br />
Ensure that main power supply is turned “ON.” Check receptacle,<br />
transformer, solenoid, leads <strong>and</strong> connections.<br />
INDICATOR: If Sensor LED does not blink:<br />
A. Control module circuit board is faulty; replace.<br />
B. Sensor is faulty; replace sensor module.<br />
INDICATOR: If Sensor LED blinks when user is sensed:<br />
A. Supply Stop(s) may be closed; open Supply Stop(s).<br />
B. Debris may be in Solenoid filter; remove, clean <strong>and</strong> reinstall.<br />
2. Very low flow or slow dribble<br />
A. Supply Stop(s) may be closed; open Supply Stop(s).<br />
B. Debris is in solenoid, won’t close properly; remove operator <strong>and</strong> clean.<br />
Reassemble in the same manner.<br />
C. Debris may be in Solenoid filter; remove, clean <strong>and</strong> reinstall.<br />
D. Debris is in spray head; remove, clean <strong>and</strong> reinstall.<br />
3. Continues to run (even after power to faucet has been<br />
disconnected)<br />
A. Solenoid valve is installed backwards; install correctly.<br />
B. Debris is in solenoid, won’t close properly; remove operator <strong>and</strong> clean.<br />
Reassemble in the same manner.<br />
SOLENOID SCREEN FILTER CLEANING<br />
A. Before cleaning the Screen Filter, turn off the water supply at supply<br />
stop(s).<br />
B. Activate the Spray Head to relieve any pressure in the system.<br />
C. Unscrew the Filter Cap <strong>and</strong> remove it from the Solenoid <strong>Valve</strong><br />
Housing.<br />
D. Carefully remove the Screen Filter from the Solenoid <strong>Valve</strong> Housing.<br />
E. Clean the Screen Filter using fresh tap water only. If necessary, use a<br />
small brush to clean. Use caution while cleaning to prevent damage to<br />
Screen Filter.<br />
F. Examine the Copper Washer for wear or damage; replace if necessary.<br />
Carefully replace the Screen Filter into the Filter Cap. Screw the Filter<br />
Cap with Copper Washer into the Solenoid <strong>Valve</strong> Housing <strong>and</strong> tighten<br />
securely to prevent leaks.<br />
G. Turn on the water supply at the supply stop(s). Activate the Spray<br />
Head to purge any air from the system lines. Check for leaks <strong>and</strong><br />
repair as necessary.<br />
COPPER WASHER<br />
SOLENOID VALVE<br />
SCREEN FILTER<br />
FILTER CAP<br />
223<br />
<strong>Repair</strong> <strong>Parts</strong> <strong>and</strong> <strong>Maintenance</strong> <strong>Guide</strong><br />
<strong>Sloan</strong>Stone ® EW-40000 Series<br />
<strong>Sloan</strong>Stone ® Solid Surface Care<br />
For normal cleaning, use warm, soapy water or conventional ammonia<br />
based liquid glass cleaner.<br />
For dry stains, allow the soapy water or glass cleaner some time to<br />
remoisturize the area, then wipe the stain off.<br />
To renew the surface after deep scratches or stains, use green, then<br />
maroon, <strong>and</strong> finally white 3M Scotch-Brite® pads to return the deck to a<br />
smooth 1200 grit wet-s<strong>and</strong>ed finish.<br />
If the dry stain is neither water-based nor oil-based, gently scrape the stain<br />
off with a plastic material (i.e. a plastic knife), <strong>and</strong> then proceed with the<br />
aforementioned normal cleaning procedures.<br />
Wipe the entire surface evenly with a mild abrasive cleanser for regular<br />
maintenance.<br />
Stainless Steel Care<br />
Important: When cleaning stainless steel, always rub in the same direction<br />
of the stainless steel finish lines, never across. After cleaning, always<br />
thoroughly rinse with water <strong>and</strong> dry all cleaned stainless steel areas to<br />
prevent buildup of mineral deposits.<br />
Clean stainless steel surfaces often using warm, soapy water.<br />
For more stubborn deposits, use baking soda, borax or any of several nonabrasive<br />
commercial cleansing agents. Do not leave chlorides found in most<br />
cleansing agents for extended periods of time on the surfaces as they may<br />
attack stainless steel. If an abrasive cleaning tool is needed, always use<br />
stainless steel wool, stainless steel pads, or stainless steel brushes. Do not<br />
use ordinary steel wool, pads or brushes because the have a tendency to<br />
break apart <strong>and</strong> leave small particles which will rust on the stainless steel<br />
surfaces, giving the appearance that the stainless steel surfaces themselves<br />
are rusting. Do not use strong acidic or caustic cleaners or cleansers<br />
because they may also attack the stainless steel surfaces. Maintain a<br />
regular cleaning schedule.<br />
When assistance is required, please contact<br />
<strong>Sloan</strong> Technical Support at: 1-888-SLOAN-14 (1-888-756-2614).<br />
Sink Systems
Sink Systems<br />
EW-62000 Double Station<br />
Sensor Activated<br />
12<br />
10<br />
8<br />
11<br />
9<br />
5<br />
3<br />
1<br />
13<br />
4<br />
6<br />
2<br />
7<br />
224<br />
<strong>Repair</strong> <strong>Parts</strong> <strong>and</strong> <strong>Maintenance</strong> <strong>Guide</strong><br />
<strong>Sloan</strong>Stone ® EW-62000/EW-62050<br />
Series with Soap Dispenser with Filler Cap<br />
PARTS LIST—EW-62000/EW-62050<br />
Item<br />
No. Code No. Part No. Description<br />
1. — EW-122 Mounting Bracket (2)<br />
2. — EW-129 Basin<br />
3. — ELC-41 Screw, Machine Truss Head 1/4-20 (6)<br />
4. — EW-135-A Head<br />
— EW-142-A Head with Manual Soap Dispenser †<br />
5. — EW-37 Screw, Truss Head 1/4-20 x 1-1/2” Long (4)<br />
6. — EW-130-A Cover<br />
— EW-138-A Cover with Fill Cap ‡<br />
7. — EW-115 Cover Attachment Screw<br />
8. — ESD-241 Fill Cap for Soap Reservoir ‡<br />
9. — ESD-242 Sleeve for Fill Cap ‡<br />
10. — ESD-243 Jam Nut for Fill Cap Sleeve ‡<br />
11. — ETF-725-A Grid Strainer Assembly (2)<br />
12. — EW-127 Velcro ® Strip (Hook)<br />
13. — EW-105 Plastic Cabinet<br />
3326091 MIX-19 Supply Hose (Not Shown)<br />
0387096 EW-96 T-H<strong>and</strong>led Wrench (Not Shown)<br />
— EW-128 Velcro ® Strip (Loop) (Not Shown)<br />
0346061 ESD-249 Fill Cap Spanner (Not Shown) ‡<br />
— EW-98 Light Duty Buffing Pad (Not Shown)<br />
— EW-108 General Purpose Buffing Pad (Not Shown)<br />
— EW-141 Spacers (Not Shown) †<br />
A. 0362018 SFP-38 Cable Splitter<br />
B. 0362017 SFP-37 Cable Extension<br />
C. 0362016 SFP-36 Transformer<br />
3326009 MIX-60-A Below Deck Mechanical Mixing <strong>Valve</strong> (Not Shown)<br />
† Included on models with Soap Dispenser<br />
‡ Included on models with Fill Cap<br />
— Consult factory for replacement part.<br />
4”<br />
(102 mm)<br />
51”<br />
(1300 mm)<br />
71”<br />
(1800 mm)<br />
A B C
EW-62000 Double Station<br />
Sensor Activated<br />
3<br />
4<br />
5<br />
2<br />
ELECTRONIC COMPONENT PARTS<br />
Item<br />
No. Code No. Part No. Description<br />
1 — EW-113 Component Mounting Plate, 2 Station<br />
2 — EW-119 Sensor Housing<br />
3 — EW-100-A Sensor Base Plate Assembly<br />
4 — EW-112 Spout Adapter<br />
5 — EW-140 Washer, 9/16”<br />
6 — MIX-69 Hex Nut<br />
7 — EW-14 Nut #8-32 (KEPS)<br />
8 3365747 ETF-1037-A Spray Head 0.5 gpm (1.9 Lpm) V<strong>and</strong>al Proof<br />
9 0362041 SFP-41-A Sensor with Range Adjustment Kit<br />
10 — EW-120 Sensor Backing Piece<br />
11 0362040 SFP-40 Control Box with Button<br />
12 — EW-116 Push-In Clip<br />
13 — SFP-45-A Inlet Adapter Kit<br />
9<br />
11<br />
7<br />
12<br />
13<br />
15<br />
23<br />
25<br />
225<br />
<strong>Repair</strong> <strong>Parts</strong> <strong>and</strong> <strong>Maintenance</strong> <strong>Guide</strong><br />
<strong>Sloan</strong>Stone ® EW-62000/EW-62050<br />
Series with Soap Dispenser with Filler Cap<br />
1<br />
8<br />
6<br />
14<br />
16<br />
Item<br />
No. Code No. Part No. Description<br />
14 — EW-26 Tube Support 3/8”<br />
15 — ETF-209 Compression Nut<br />
16 — ETF-208 Ferrule<br />
17 — EW-118 Shut-Off <strong>Valve</strong><br />
18 — ETF-61 Male Connector<br />
19 — EW-19 Compression Tee Fitting 3/8” Tube<br />
20 — EW-89-1 Tube, 3/8” 1.56” (40 mm) Long<br />
21 — EW-89-6 Tube, 3/8” 8.19” (208 mm) Long<br />
22 — EW-89-7 Tube, 3/8” 17.50” (445 mm) Long<br />
23 — EW-89-10 Tube, 3/8” 24.75” (629 mm) Long<br />
24 — ETF-198 Tie Wrap<br />
25 — EW-18 Compression Elbow Fitting 3/8” Tube<br />
— ELC-17 Bond Tape (Not Shown)<br />
3326009 MIX-60-A Below Deck Mechanical Mixing <strong>Valve</strong> (Not Shown)<br />
— Consult factory for replacement part.<br />
10<br />
20<br />
19<br />
22<br />
21<br />
17<br />
24<br />
18<br />
Sink Systems
Sink Systems<br />
EW-63000 Triple Station<br />
Sensor Activated<br />
8<br />
10<br />
12<br />
9<br />
11<br />
5<br />
3<br />
6<br />
1<br />
13<br />
4<br />
2<br />
7<br />
226<br />
<strong>Repair</strong> <strong>Parts</strong> <strong>and</strong> <strong>Maintenance</strong> <strong>Guide</strong><br />
<strong>Sloan</strong>Stone ® EW-63000/EW-63050<br />
Series with Soap Dispenser with Filler Cap<br />
PARTS LIST — EW-63000/EW-63050 SINKS<br />
Item<br />
No. Code No. Part No. Description<br />
1. — EW-122 Mounting Bracket (4)<br />
2. — EW-134 Basin<br />
3. — ELC-41 Screw, Machine Truss Head 1/4-20 (8)<br />
4. — EW-136-A Head<br />
— EW-143-A Head with Manual Soap Dispenser †<br />
5. — EW-37 Screw, Truss Head 1/4-20 x 1-1/2” Long (5)<br />
6. — EW-137-A Cover<br />
— EW-139-A Cover with Fill Cap ‡<br />
7. — EW-115 Cover Attachment Screw (2)<br />
8. — ESD-241 Fill Cap for Soap Reservoir ‡<br />
9. — ESD-242 Sleeve for Fill Cap ‡<br />
10. — ESD-243 Jam Nut for Fill Cap Sleeve ‡<br />
0346063 ETF-255-A Manual Soap Pump Assembly<br />
11. — ETF-725-A Grid Strainer Assembly (2)<br />
12. — EW-127 Velcro ® Strip (Hook)<br />
13. — EW-123 Plastic Cabinet<br />
3326091 MIX-19 Supply Hose (Not Shown)<br />
0387096 EW-96 T-H<strong>and</strong>led Wrench (Not Shown)<br />
— EW-128 Velcro ® Strip (Loop) (Not Shown)<br />
0346061 ESD-249 Fill Cap Spanner (Not Shown) ‡<br />
— EW-98 Light Duty Buffing Pad (Not Shown)<br />
— EW-108 General Purpose Buffing Pad (Not Shown)<br />
— EW-141 Spacers (Not Shown) †<br />
A. 0362018 SFP-38 Cable Splitter<br />
B. 0362017 SFP-37 Cable Extension<br />
C. 0362016 SFP-36 Transformer<br />
3326009 MIX-60-A Below Deck Mechanical Mixing <strong>Valve</strong> (Not Shown)<br />
† Included on models with Soap Dispenser<br />
‡ Included on models with Fill Cap<br />
— Consult factory for replacement part.<br />
4”<br />
(102 mm)<br />
51”<br />
(1300 mm)<br />
71”<br />
(1800 mm)<br />
A B C
EW-63000 Triple Station<br />
Sensor Activated<br />
5<br />
3<br />
4<br />
11<br />
9<br />
12<br />
13<br />
ELECTRONIC COMPONENT PARTS<br />
7<br />
2<br />
Item<br />
No. Code No. Part No. Description<br />
1. — EW-117 Component Mounting Plate, 3 Station<br />
2. — EW-119 Sensor Housing<br />
3. — EW-100-A Sensor Base Plate Assembly<br />
4. — EW-112 Spout Adapter<br />
5. — EW-140 Washer, 9/16”<br />
6. — MIX-69 Hex Nut<br />
7. — EW-14 Nut #8-32 (KEPS)<br />
8. 3365747 ETF-1037-A Spray Head 0.5 gpm (1.9 Lpm) V<strong>and</strong>al Proof<br />
9. 0362041 SFP-41-A Sensor with Range Adjustment Kit<br />
10. — EW-120 Sensor Backing Piece<br />
11. 0362040 SFP-40 Control Box with Button<br />
12. — EW-116 Push-In Clip<br />
13. — SFP-45-A Inlet Adapter Kit<br />
14. — EW-26 Tube Support 3/8”<br />
15<br />
26<br />
25<br />
21<br />
227<br />
<strong>Repair</strong> <strong>Parts</strong> <strong>and</strong> <strong>Maintenance</strong> <strong>Guide</strong><br />
<strong>Sloan</strong>Stone ® EW-63000/EW-63050<br />
Series with Soap Dispenser with Filler Cap<br />
19<br />
8<br />
24<br />
6<br />
14<br />
16<br />
1<br />
Item<br />
No. Code No. Part No. Description<br />
15. — ETF-209 Compression Nut<br />
16. — ETF-208 Ferrule<br />
17. — EW-118 Shut-Off <strong>Valve</strong><br />
18. — ETF-61 Male Connector<br />
19. — EW-19 Compression Tee Fitting 3/8” Tube<br />
20. — EW-89-1 Tube, 3/8” 1.56” (40 mm) Long<br />
21. — EW-89-5 Tube, 3/8” 6.75” (172 mm) Long<br />
22. — EW-89-6 Tube, 3/8” 8.19” (208 mm) Long<br />
23. — EW-89-7 Tube, 3/8” 17.50” (445 mm) Long<br />
24. — EW-89-9 Tube, 3/8” 25.75” (654 mm) Long<br />
25. — EW-89-10 Tube, 3/8” 24.75” (629 mm) Long<br />
26. — EW-18 Compression Elbow Fitting 3/8” Tube<br />
27. — ETF-198 Tie Wrap<br />
— ELC-17 Bond Tape (Not Shown)<br />
3326009 MIX-60-A Below Deck Mechanical Mixing <strong>Valve</strong> (Not Shown)<br />
— Consult factory for replacement part.<br />
10<br />
20<br />
23<br />
17<br />
27<br />
18<br />
22<br />
Sink Systems
Sink Systems<br />
TROUBLESHOOTING GUIDE<br />
1. Spray Head does not deliver any water when Sensor is activated.<br />
INDICATOR: Solenoid valve produces an audible “CLICK.”<br />
A. Water supply stop(s) closed. Open water supply stop(s).<br />
B. Water strainer in control module is clogged. Close supply stops <strong>and</strong><br />
remove water inlet line at control module. Remove, clean <strong>and</strong> reinstall<br />
strainer <strong>and</strong> water inlet line. Replace strainer if required.<br />
INDICATOR: Solenoid valve DOES NOT produce an audible “CLICK.”<br />
A. Batteries low (battery powered models). Replace batteries.<br />
B. Power failure (transformer powered models). Check power supply.<br />
2. Spray Head delivers only a slow flow or dribble when Sensor is<br />
activated.<br />
A. Water supply stop(s) are partially closed. Completely open water supply<br />
stop(s).<br />
B. Water strainer in control module is clogged. Close supply stops <strong>and</strong><br />
remove water inlet line at control module. Remove, clean <strong>and</strong> reinstall<br />
strainer <strong>and</strong> water inlet line. Replace strainer if required.<br />
C. Aerator is clogged. Remove, clean, <strong>and</strong> reinstall aerator. Replace<br />
aerator if required.<br />
D. <strong>Valve</strong> is defective. Contact <strong>Sloan</strong> Technical Support<br />
3. Spray Head does not stop delivering water or continues to drip<br />
after user is no longer detected.<br />
A. <strong>Valve</strong> is defective. Contact <strong>Sloan</strong> Technical Support<br />
4. The water temperature is too hot or too cold when connected to<br />
hot <strong>and</strong> cold supply lines.<br />
A. Mixing <strong>Valve</strong> is not adjusted properly. Adjust Mixing <strong>Valve</strong>.<br />
5. Solenoid <strong>Valve</strong> does not produce an audible “CLICK” after<br />
plugging transformer into live receptacle (transformer powered<br />
models).<br />
A. Unplug Transformer from receptacle. Wait one minute. Check that all<br />
connections to Control Modules are properly made. Plug Transformer<br />
back into live receptacle.<br />
228<br />
<strong>Repair</strong> <strong>Parts</strong> <strong>and</strong> <strong>Maintenance</strong> <strong>Guide</strong><br />
<strong>Sloan</strong>Stone ® EW-62000/<br />
EW-63000 Series<br />
<strong>Sloan</strong>Stone ® Solid Surface Care<br />
For normal cleaning, use warm, soapy water or conventional ammonia<br />
based liquid glass cleaner.<br />
For dry stains, allow the soapy water or glass cleaner some time to<br />
remoisturize the area, then wipe the stain off.<br />
To renew the surface after deep scratches or stains, use green, then<br />
maroon, <strong>and</strong> finally white 3M Scotch-Brite ® pads to return the deck to a<br />
smooth 1200 grit wet-s<strong>and</strong>ed finish.<br />
If the dry stain is neither water-based nor oil-based, gently scrape the stain<br />
off with a plastic material (i.e. a plastic knife), <strong>and</strong> then proceed with the<br />
aforementioned normal cleaning procedures.<br />
Wipe the entire surface evenly with a mild abrasive cleanser for regular<br />
maintenance.<br />
Stainless Steel Care<br />
Important: When cleaning stainless steel, always rub in the same direction<br />
of the stainless steel finish lines, never across. After cleaning, always<br />
thoroughly rinse with water <strong>and</strong> dry all cleaned stainless steel areas to<br />
prevent buildup of mineral deposits.<br />
Clean stainless steel surfaces often using warm, soapy water.<br />
For more stubborn deposits, use baking soda, borax or any of several nonabrasive<br />
commercial cleansing agents. Do not leave chlorides found in most<br />
cleansing agents for extended periods of time on the surfaces as they may<br />
attack stainless steel. If an abrasive cleaning tool is needed, always use<br />
stainless steel wool, stainless steel pads, or stainless steel brushes. Do not<br />
use ordinary steel wool, pads or brushes because the have a tendency to<br />
break apart <strong>and</strong> leave small particles which will rust on the stainless steel<br />
surfaces, giving the appearance that the stainless steel surfaces themselves<br />
are rusting. Do not use strong acidic or caustic cleaners or cleansers<br />
because they may also attack the stainless steel surfaces. Maintain a<br />
regular cleaning schedule.<br />
When assistance is required, please contact<br />
<strong>Sloan</strong> Technical Support at: 1-888-SLOAN-14 (1-888-756-2614).
2<br />
7<br />
3<br />
13<br />
12<br />
1<br />
9<br />
32<br />
8 11<br />
22<br />
25<br />
21<br />
28<br />
20<br />
23 17 19 10 18 15 14<br />
5<br />
29<br />
31<br />
6<br />
4<br />
30<br />
24<br />
16<br />
26<br />
27<br />
229<br />
<strong>Repair</strong> <strong>Parts</strong> <strong>and</strong> <strong>Maintenance</strong> <strong>Guide</strong><br />
<strong>Sloan</strong>Stone ® EW-72000<br />
with Soap Dispenser with Filler Cap<br />
PARTS LIST — EW-72000 SINK<br />
Item<br />
No. Code No. Part No. Description<br />
1. — EW-46 Electronics Enclosure 2 Station Machined<br />
2. — EW-41 Large Latch (2)<br />
3. — EW-27 Screw, Flat Head #10-24 x 1/2” Long (4)<br />
4. — EW-75-A Sensor Plate Assembly (2)<br />
5. — EW-8 Spacer, #8 x 1” Long (4)<br />
6. — EW-13 Mounting Clamp for ETF-370-A Solenoid (4)<br />
7. 0387012 EW-9 Screw, Truss Head #8-32 x 1-1/2” Long (4)<br />
8. 0365249 ETF-61 Male Connector (2)<br />
9. 0305849PK ETF-370-A Solenoid <strong>Valve</strong> Assembly<br />
10. — EW-19 Compression Tee Fitting 3/8" Tube<br />
11. — EW-89 Tube, 3/8" x 3-5/8”<br />
12. — EW-89 Tube, 3/8" x 1-7/8”<br />
13. — EW-18 Compression Elbow Fitting, 3/8" Tube<br />
14. — EW-5 Mounting Bracket for Shut-off <strong>Valve</strong><br />
15. — EW-74 Panel Mount Ball <strong>Valve</strong> - 3/8" Compression<br />
Fitting<br />
16. — EW-36 Screw, Pan Head #8-32 x 7/16” Long (SEMS) (2)<br />
17. — EW-89 Tube, 3/8" x 25-1/4”<br />
18. — EW-89 Tube, 3/8" x 3-7/8”<br />
19. — ETF-450-A Splash Proof Junction Box Assembly<br />
20. — EW-28 Screw, Round Head #8-32 x 1/2” Long (4)<br />
21. † — ESD-255-A Manual Soap Pump Assembly<br />
22. † — ESD-245-A Manual Soap Reservoir Assembly<br />
23. — EW-37 Screw, Truss Head 1/4-20 x 1-1/2” (4)<br />
— EW-26 Tube Support 3/8" (5) (not shown)<br />
0326045PK MIX-135-A Thermostatic Mixing <strong>Valve</strong> (Below Deck)<br />
(not shown)<br />
— EW-87 Flexible Supply Hose, 2 Station (not shown)<br />
— EW-82-A Wiring Harness, 2 Station (not shown)<br />
0365534PK ETF-233 Transformer Plug Type 120V/35VA (not shown)<br />
0365736 ETF-731 V<strong>and</strong>al Proof Key, St<strong>and</strong>ard <strong>and</strong> Junior<br />
(not shown)<br />
24. 0387096 EW-96 T-H<strong>and</strong>le Hex Wrench, 7/32"<br />
25. — EW-48-X Cover, Electronics Enclosure, 2 Station Machined<br />
26. — EW-42 Large Encased Receiver (2)<br />
27. — EW-27 Screw, Flat Head #10-24 x 1/2” Long (4)<br />
28. ‡ — ESD-242 Sleeve for Fill Cap<br />
29. ‡ — ESD-241 Fill Cap for Soap Reservoir<br />
30. ‡ — EW-11 Gasket - Fill Cap Sleeve (Manual Soap Reservoir)<br />
31. ‡ — ESD-243 Jam Nut for Fill Cap Sleeve<br />
‡ 0346061 ESD-249 Fill Cap Spanner (not shown)<br />
32. 3365757 ETF-1037-A Spray Head CP 0.5 gpm-VP Junior Size Male<br />
Thread with Key<br />
† Included on models with Soap Dispenser.<br />
‡ Included on models with Fill Cap.<br />
— Consult factory for replacement part.<br />
Sink Systems
Sink Systems<br />
CABINET AND BASIN ASSEMBLY PARTS<br />
Item<br />
No. Code No. Part No. Description<br />
1. — EW-20-A Cabinet Weldment, 2 Station<br />
2. 0387099 EW-99 U-Type Nut St<strong>and</strong>ard 1/4-20 Thread (6)<br />
3. — EW-60 End Cap Right – Machined<br />
4. — EW-52 End Cap Left – Machined<br />
5. — EW-15 Screw, Pan Head 1/4-20 x 1/2” Long (SEMS)<br />
6. — EW-16 Screw, Pan Head 1/4-20 x 1” Long (SEMS)<br />
7. — EW-25 Front Panel, 2 Station<br />
4<br />
5<br />
2<br />
7<br />
11<br />
230<br />
<strong>Repair</strong> <strong>Parts</strong> <strong>and</strong> <strong>Maintenance</strong> <strong>Guide</strong><br />
<strong>Sloan</strong>Stone ® EW-72000<br />
with Soap Dispenser with Filler Cap<br />
Item<br />
No. Code No. Part No. Description<br />
8. — EW-44 Basin 2-Station Machined<br />
9. — ETF-725-A Grid Strainer Assembly (2)<br />
10. — EW-15 Screw, Pan Head 1/4-20 x 1/2” Long (SEMS)<br />
11. — EW-61 Overflow Cover Plate (2)<br />
— EW-98 Light Duty Buffing Pad (not shown)<br />
— EW-108 Heavy Duty Buffing Pad (not shown)<br />
— Consult factory for replacement part.<br />
1<br />
6<br />
8<br />
9<br />
10<br />
3
24<br />
2<br />
1<br />
7<br />
13<br />
9<br />
31<br />
23<br />
8<br />
19<br />
22<br />
14<br />
21<br />
29<br />
30<br />
5<br />
28<br />
27<br />
11<br />
6 10<br />
4<br />
17<br />
15 18 16<br />
25<br />
26<br />
3<br />
20<br />
231<br />
<strong>Repair</strong> <strong>Parts</strong> <strong>and</strong> <strong>Maintenance</strong> <strong>Guide</strong><br />
<strong>Sloan</strong>Stone ® EW-73000<br />
with Soap Dispenser with Filler Cap<br />
TRIPLE STATION SENSOR ACTIVATED SOLID SURFACE<br />
LAVATORY SYSTEM PARTS<br />
Item<br />
No. Code No. Part No. Description<br />
1. — EW-56 Electronics Enclosure 3 Station Machined<br />
2. — EW-41 Large Latch (2)<br />
3. — EW-27 Screw, Flat Head #10-24 x 1/2” Long (4)<br />
4. — EW-75-A Sensor Plate Assembly (3)<br />
5. — EW-8 Spacer, #8 x 1” Long (6)<br />
6. — EW-13 Mounting Clamp for ETF-370-A Solenoid (6)<br />
7. 0387012 EW-9 Screw, Truss Head #8-32 x 1-1/2” Long (6)<br />
8. 0365249 ETF-61 Male Connector (6)<br />
9. 0305849PK ETF-370-A Solenoid <strong>Valve</strong> Assembly (3)<br />
10. — EW-89 Tube, 3/8" x 3-5/8”<br />
11. — EW-89 Tube, 3/8" x 1-7/8”<br />
12. — EW-19 Compression Tee Fitting 3/8" Tube (2)<br />
13. — EW-18 Compression Elbow Fitting, 3/8" Tube<br />
14. — EW-89 Tube, 3/8" x 25-1/4”<br />
15. — EW-89 Tube, 3/8" x 3-7/8”<br />
16. — EW-5 Mounting Bracket for Shut-off <strong>Valve</strong><br />
17. — EW-36 Screw, Pan Head #8-32 x 7/16” Long (SEMS) (2)<br />
18. — EW-74 Panel Mount Ball <strong>Valve</strong> - 3/8" Compression Fitting<br />
19. — ETF-450-A Splash Proof Junction Box Assembly (3)<br />
20. — EW-28 Screw, Round Head #8-32 x 1/2” Long (6)<br />
21.† 0346063 ESD-255-A Manual Soap Pump Assembly (2)<br />
22.† 0346062 ESD-245-A Manual Soap Reservoir Assembly (2)<br />
23. — EW-37 Screw, Truss Head 1/4-20 x 1-1/2” (6) (not shown)<br />
— EW-26 Tube Support 3/8" (7) (not shown)<br />
0326045PK MIX-135-A Thermostatic Mixing <strong>Valve</strong> (Below Deck) (not shown)<br />
— EW-92-A Wiring Harness, 3 Station (not shown)<br />
0365534PK ETF-233 Transformer Plug Type 120V/35VA (not shown)<br />
0365736 ETF-731 V<strong>and</strong>al Proof Key, St<strong>and</strong>ard <strong>and</strong> Junior (not shown)<br />
— EW-97 Flexible Supply Hose, 3 Station (not shown)<br />
0387096 EW-96 T-H<strong>and</strong>le Hex Wrench, 7/32"<br />
24. — EW-58-X Cover, Electronics Enclosure, 3 Station Machined<br />
25. — EW-42 Large Encased Receiver (2)<br />
26. — EW-27 Screw, Flat Head #10-24 x 1/2” Long (4)<br />
27. ‡— ESD-242 Sleeve for Fill Cap<br />
28. ‡— ESD-241 Fill Cap for Soap Reservoir (2)<br />
29. ‡— EW-11 Gasket for Fill Cap Sleeve (2)<br />
30 ‡ — ESD-243 Jam Nut for Fill Cap Sleeve (2)<br />
‡ 0346061 ESD-249 Fill Cap Spanner (not shown)<br />
32. 3365757 ETF-1037-A Spray Head CP 0.5 gpm-VP Junior Size Male<br />
Thread with Key<br />
† Included on models with Soap Dispenser.<br />
‡ Included on models with Fill Cap.<br />
— Consult factory for replacement part.<br />
Sink Systems
Sink Systems<br />
CABINET AND BASIN ASSEMBLY PARTS<br />
Item<br />
No. Code No. Part No. Description<br />
1. — EW-30-A Cabinet Weldment, 3 Station<br />
2. — EW-50 Front Panel Support – Machined<br />
3. — EW-36 Screw, Pan Head #8-32 x 7/16” Long (SEMS) (2)<br />
4. 0387099 EW-99 U-Type Nut St<strong>and</strong>ard 1/4-20 Thread (8)<br />
5. — EW-60 End Cap Right – Machined<br />
6. — EW-52 End Cap Left – Machined<br />
7. — EW-16 Screw, Pan Head 1/4-20 x 1” Long (SEMS) (4)<br />
8. — EW-15 Screw, Pan Head 1/4-20 x 1/2” Long (SEMS) (2)<br />
6<br />
4<br />
9<br />
2<br />
13<br />
232<br />
<strong>Repair</strong> <strong>Parts</strong> <strong>and</strong> <strong>Maintenance</strong> <strong>Guide</strong><br />
<strong>Sloan</strong>Stone ® EW-73000<br />
with Soap Dispenser with Filler Cap<br />
Item<br />
No. Code No. Part No. Description<br />
9. — EW-35 Front Panel, 3 Station (2)<br />
10. — EW-54 Triple Station Lavatory Basin Assembly<br />
11. — ETF-725-A Grid Strainer Assembly (2)<br />
12. — EW-15 Screw, Pan Head 1/4-20 x 1/2” Long (SEMS) (8)<br />
13. — EW-61 Overflow Cover Plate (2)<br />
— EW-98 Light Duty Buffing Pad (not shown)<br />
— EW-108 Heavy Duty Buffing Pad (not shown)<br />
— Consult factory for replacement part.<br />
3<br />
11<br />
1<br />
10<br />
7<br />
8<br />
12<br />
5
EWF-42000<br />
Double Station<br />
11A<br />
11B<br />
11C<br />
6<br />
4<br />
5<br />
2<br />
EWF-44000<br />
Quadruple Station<br />
8<br />
9<br />
EWF-43000<br />
Triple Station<br />
1A<br />
1B<br />
1C<br />
3A<br />
3B<br />
3C<br />
10A<br />
10B<br />
10C<br />
7A<br />
7B<br />
7C<br />
233<br />
<strong>Repair</strong> <strong>Parts</strong> <strong>and</strong> <strong>Maintenance</strong> <strong>Guide</strong><br />
<strong>Sloan</strong>Stone ® EWF-40000 Series<br />
EWF-42000, EWF-43000 AND EWF-44000 PARTS<br />
Item<br />
No. Code No. Part No. Description<br />
1A. — — Actuator Housing Assembly Cover (double station)<br />
1B. — — Actuator Housing Assembly Cover (triple station)<br />
1C. — — Actuator Housing Assembly Cover (quadruple station)<br />
2. — — Sensor<br />
3A. — — Actuator Housing Assembly (double station)<br />
3B. — — Actuator Housing Assembly (triple station)<br />
3C. — — Actuator Housing Assembly (quadruple station)<br />
4. — — Spray Head<br />
5. — — Strainer<br />
6. — — 1½” Drain Spud<br />
7A. — — Solid Surface Basin (double station)<br />
7B. — — Solid Surface Basin (triple station)<br />
7C. — — Solid Surface Basin (quadruple station)<br />
8. — — Washer<br />
9. — — Locknut<br />
10A. — — Pedestal (double station)<br />
10B. — — Pedestal (triple station)<br />
10C. — — Pedestal (quadruple station)<br />
11A. — — Solid Surface Access Cover (double station)<br />
11B. — — Solid Surface Access Cover (triple station)<br />
11C. — — Solid Surface Access Cover (quadruple station)<br />
MIXING VALVE<br />
0326045 MIX-135-A Below Deck Thermostatic Water Mixing <strong>Valve</strong> (BDT<br />
Variation)<br />
REPAIR KITS<br />
3305622 EL-1500-LL Sensor – Lavatory<br />
3305527 ETF-1004-A Solenoid<br />
3305577 ETF-1009-A Solenoid <strong>Valve</strong> <strong>Repair</strong> Kit<br />
— Consult factory for replacement part.<br />
— Consult factory for replacement part.<br />
Sink Systems
Sink Systems<br />
TROUBLESHOOTING GUIDE<br />
1. No water flows when sensor is activated<br />
Ensure that main power supply is turned “ON.” Check receptacle,<br />
transformer, solenoid, leads <strong>and</strong> connections.<br />
INDICATOR: If Sensor LED does not blink:<br />
A. Control module circuit board is faulty; replace.<br />
B. Sensor is faulty; replace sensor module.<br />
INDICATOR: If Sensor LED blinks when user is sensed:<br />
A. Supply Stop(s) may be closed; open Supply Stop(s).<br />
B. Debris may be in Solenoid filter; remove, clean <strong>and</strong> reinstall.<br />
2. Very low flow or slow dribble<br />
A. Supply Stop(s) may be closed; open Supply Stop(s).<br />
B. Debris is in solenoid, won’t close properly; remove operator <strong>and</strong> clean.<br />
Reassemble in the same manner.<br />
C. Debris may be in Solenoid filter; remove, clean <strong>and</strong> reinstall.<br />
D. Debris is in spray head; remove, clean <strong>and</strong> reinstall.<br />
3. Continues to run (even after power to faucet has been<br />
disconnected)<br />
A. Solenoid valve is installed backwards; install correctly.<br />
B. Debris is in solenoid, won’t close properly; remove operator <strong>and</strong> clean.<br />
Reassemble in the same manner.<br />
SOLENOID SCREEN FILTER CLEANING<br />
A. Before cleaning the Screen Filter, turn off the water supply at supply<br />
stop(s).<br />
B. Activate the Spray Head to relieve any pressure in the system.<br />
C. Unscrew the Filter Cap <strong>and</strong> remove it from the Solenoid <strong>Valve</strong> Housing.<br />
D. Carefully remove the Screen Filter from the Solenoid <strong>Valve</strong> Housing.<br />
E. Clean the Screen Filter using fresh tap water only. If necessary, use a<br />
small brush to clean. Use caution while cleaning to prevent damage to<br />
Screen Filter.<br />
F. Examine the Copper Washer for wear or damage; replace if necessary.<br />
Carefully replace the Screen Filter into the Filter Cap. Screw the Filter Cap<br />
with Copper Washer into the Solenoid <strong>Valve</strong> Housing <strong>and</strong> tighten securely<br />
to prevent leaks.<br />
G. Turn on the water supply at the supply stop(s). Activate the Spray Head to<br />
purge any air from the system lines. Check for leaks <strong>and</strong> repair as<br />
necessary.<br />
SOLENOID VALVE<br />
COPPER WASHER<br />
SCREEN FILTER<br />
FILTER CAP<br />
234<br />
<strong>Repair</strong> <strong>Parts</strong> <strong>and</strong> <strong>Maintenance</strong> <strong>Guide</strong><br />
<strong>Sloan</strong>Stone ® EWF-40000 Series<br />
<strong>Sloan</strong>Stone ® Solid Surface Care<br />
For normal cleaning, use warm, soapy water or conventional ammonia<br />
based liquid glass cleaner.<br />
For dry stains, allow the soapy water or glass cleaner some time to<br />
remoisturize the area, then wipe the stain off.<br />
To renew the surface after deep scratches or stains, use green, then<br />
maroon, <strong>and</strong> finally white 3M Scotch-Brite ® pads to return the deck to a<br />
smooth 1200 grit wet-s<strong>and</strong>ed finish.<br />
If the dry stain is neither water-based nor oil-based, gently scrape the stain<br />
off with a plastic material (i.e. a plastic knife), <strong>and</strong> then proceed with the<br />
aforementioned normal cleaning procedures.<br />
Wipe the entire surface evenly with a mild abrasive cleanser for regular<br />
maintenance.<br />
Stainless Steel Care<br />
Important: When cleaning stainless steel, always rub in the same direction<br />
of the stainless steel finish lines, never across. After cleaning, always<br />
thoroughly rinse with water <strong>and</strong> dry all cleaned stainless steel areas to<br />
prevent buildup of mineral deposits.<br />
Clean stainless steel surfaces often using warm, soapy water.<br />
For more stubborn deposits, use baking soda, borax or any of several nonabrasive<br />
commercial cleansing agents. Do not leave chlorides found in most<br />
cleansing agents for extended periods of time on the surfaces as they may<br />
attack stainless steel. If an abrasive cleaning tool is needed, always use<br />
stainless steel wool, stainless steel pads, or stainless steel brushes. Do not<br />
use ordinary steel wool, pads or brushes because the have a tendency to<br />
break apart <strong>and</strong> leave small particles which will rust on the stainless steel<br />
surfaces, giving the appearance that the stainless steel surfaces themselves<br />
are rusting. Do not use strong acidic or caustic cleaners or cleansers<br />
because they may also attack the stainless steel surfaces. Maintain a<br />
regular cleaning schedule.<br />
When assistance is required, please contact<br />
<strong>Sloan</strong> Technical Support at: 1-888-SLOAN-14 (1-888-756-2614).
ELB-51000<br />
Single Station<br />
ELB-52000<br />
Double Station<br />
5<br />
7<br />
4<br />
6<br />
1<br />
3<br />
5<br />
235<br />
<strong>Repair</strong> <strong>Parts</strong> <strong>and</strong> <strong>Maintenance</strong> <strong>Guide</strong><br />
ELB-50000 Bio-Deck Series<br />
SENSOR ACTIVATED BIO-DECK LAVATORY SYSTEM PARTS<br />
Item<br />
No. Code No. Part No. Description<br />
1. — ELB-51000 Bio-Deck Surface – Single Station<br />
2. — ELB-52000 Bio-Deck Surface – Double Station<br />
3. 0387384 ELB-3 Right Mounting Bracket (Optional)<br />
4. 0387385 ELB-4 Left Mounting Bracket (Optional)<br />
5. 0387260 SS-7 Vitreous China Undermount Sink<br />
6. 0365036 ETF-460-A Grid Strainer Assembly<br />
7. — ELB-7-A Mounting Hardware includes ¼” Fender Washer <strong>and</strong><br />
¼” x 1” Sheet Metal Screw<br />
— Consult factory for replacement part.<br />
4<br />
6<br />
4<br />
5<br />
2<br />
3<br />
Sink Systems
Sink Systems<br />
TROUBLESHOOTING GUIDE<br />
Refer to appropriate faucet pages in <strong>Maintenance</strong> <strong>Guide</strong>.<br />
1. No water flows when sensor is activated<br />
Ensure that main power supply is turned “ON.” Check receptacle,<br />
transformer, batteries (battery powered models), solenoid, leads <strong>and</strong><br />
connections.<br />
INDICATOR: If Sensor LED does not blink:<br />
A. Control module circuit board is faulty; replace.<br />
B. Sensor is faulty; replace sensor module.<br />
INDICATOR: If Sensor LED blinks when user is sensed:<br />
A. Supply Stop(s) may be closed; open Supply Stop(s).<br />
B. Debris may be in Solenoid filter; remove, clean <strong>and</strong> reinstall.ß<br />
2. Very low flow or slow dribble<br />
A. Supply Stop(s) may be closed; open Supply Stop(s).<br />
B. Debris is in solenoid, won’t close properly; remove operator <strong>and</strong><br />
clean. Reassemble in the same manner.<br />
C. Debris may be in Solenoid filter; remove, clean <strong>and</strong> reinstall.<br />
D. Debris is in aerator; remove, clean <strong>and</strong> reinstall.<br />
3. Continues to run (even after power to faucet has been<br />
disconnected)<br />
A. Solenoid valve is installed backwards; install correctly.<br />
B. Debris is in solenoid, won’t close properly; remove operator <strong>and</strong><br />
clean. Reassemble in the same manner.<br />
Solenoid Screen Filter Cleaning<br />
A. Before cleaning the Screen Filter, turn<br />
off the water supply at supply stop(s).<br />
B. Activate the Faucet to relieve any<br />
pressure in the system.<br />
C. Unscrew the Filter Cap <strong>and</strong> remove it<br />
from the Solenoid <strong>Valve</strong> Housing.<br />
D. Carefully remove the Screen Filter<br />
from the Solenoid <strong>Valve</strong> Housing.<br />
E. Clean the Screen Filter using fresh tap<br />
water only. If necessary, use a small brush to clean.<br />
For Transformer Models*<br />
SCREEN FILTER<br />
COPPER WASHER<br />
SOLENOID<br />
VALVE<br />
FILTER CAP<br />
Use caution while cleaning to prevent damage to Screen Filter.<br />
F. Examine the Copper Washer or O-ring for wear or damage; replace if<br />
necessary. Carefully replace the Screen Filter into Filter Cap. Screw the<br />
Filter Cap with Copper Washer or O-ring into Solenoid <strong>Valve</strong> Housing <strong>and</strong><br />
tighten securely to prevent leaks.<br />
G. Turn on the water supply at the supply stop(s). Activate the Faucet<br />
to purge any air from the system lines. Check for leaks <strong>and</strong> repair<br />
as necessary.<br />
236<br />
<strong>Repair</strong> <strong>Parts</strong> <strong>and</strong> <strong>Maintenance</strong> <strong>Guide</strong><br />
ELB-50000 Bio-Deck Series<br />
Surface Care<br />
For normal cleaning, use warm, soapy water or conventional ammonia<br />
based liquid glass cleaner.<br />
For dry stains, allow the soapy water or glass cleaner some time to<br />
remoisturize the area, then wipe the stain off.<br />
To renew the surface after deep scratches or stains, use green, then<br />
maroon, <strong>and</strong> finally white 3M Scotch-Brite ® pads to return the deck to a<br />
smooth 1200 grit wet-s<strong>and</strong>ed finish.<br />
If the dry stain is neither water-based nor oil-based, gently scrape the stain<br />
off with a plastic material (i.e. a plastic knife), <strong>and</strong> then proceed with the<br />
aforementioned normal cleaning procedures.<br />
Wipe the entire surface evenly with a mild abrasive cleanser for regular<br />
maintenance.<br />
Stainless Steel Care<br />
Important: When cleaning stainless steel, always rub in the same direction<br />
of the stainless steel finish lines, never across. After cleaning, always<br />
thoroughly rinse with water <strong>and</strong> dry all cleaned stainless steel areas to<br />
prevent buildup of mineral deposits.<br />
Clean stainless steel surfaces often using warm, soapy water.<br />
For more stubborn deposits, use baking soda, borax or any of several nonabrasive<br />
commercial cleansing agents. Do not leave chlorides found in most<br />
cleansing agents for extended periods of time on the surfaces as they may<br />
attack stainless steel. If an abrasive cleaning tool is needed, always use<br />
stainless steel wool, stainless steel pads, or stainless steel brushes. Do not<br />
use ordinary steel wool, pads or brushes because the have a tendency to<br />
break apart <strong>and</strong> leave small particles which will rust on the stainless steel<br />
surfaces, giving the appearance that the stainless steel surfaces themselves<br />
are rusting. Do not use strong acidic or caustic cleaners or cleansers<br />
because they may also attack the stainless steel surfaces. Maintain a<br />
regular cleaning schedule.<br />
When assistance is required, please contact<br />
<strong>Sloan</strong> Technical Support at: 1-888-SLOAN-14 (1-888-756-2614).
ELC-41000<br />
Single Station<br />
ELC-42000<br />
Double Station<br />
ELC-43000<br />
Triple Station<br />
ELC-44000<br />
Quadruple Station<br />
5<br />
4<br />
1<br />
3<br />
1<br />
3<br />
237<br />
<strong>Repair</strong> <strong>Parts</strong> <strong>and</strong> <strong>Maintenance</strong> <strong>Guide</strong><br />
<strong>Sloan</strong>Stone ® ELC-40000 Series<br />
SENSOR OPERATED SOLID SURFACE LAVATORY SYSTEM PARTS<br />
Item<br />
No. Code No. Part No. Description<br />
1. — — Solid Surface Basin (single)<br />
— — Solid Surface Basin (double)<br />
— — Solid Surface Basin (triple)<br />
— — Solid Surface Basin (quadruple)<br />
2. — — Faucet (Model Varies)<br />
3. — — Strainer Assembly<br />
4. 0387384 ELB-3 Right Mounting Bracket (Optional)<br />
5. 0387385 ELB-4 Left Mounting Bracket (Optional)<br />
— Consult factory for replacement part.<br />
— Consult factory for replacement part.<br />
1<br />
3<br />
1<br />
3<br />
2<br />
2<br />
2<br />
2<br />
Sink Systems
Sink Systems<br />
TROUBLESHOOTING GUIDE<br />
Refer to appropriate faucet pages in <strong>Maintenance</strong> <strong>Guide</strong>.<br />
1. No water flows when sensor is activated<br />
Ensure that main power supply is turned “ON.” Check receptacle,<br />
transformer, batteries (battery powered models), solenoid, leads <strong>and</strong><br />
connections.<br />
INDICATOR: If Sensor LED does not blink:<br />
A. Control module circuit board is faulty; replace.<br />
B. Sensor is faulty; replace sensor module.<br />
INDICATOR: If Sensor LED blinks when user is sensed:<br />
A. Supply Stop(s) may be closed; open Supply Stop(s).<br />
B. Debris may be in Solenoid filter; remove, clean <strong>and</strong> reinstall.ß<br />
2. Very low flow or slow dribble<br />
A. Supply Stop(s) may be closed; open Supply Stop(s).<br />
B. Debris is in solenoid, won’t close properly; remove operator <strong>and</strong><br />
clean. Reassemble in the same manner.<br />
C. Debris may be in Solenoid filter; remove, clean <strong>and</strong> reinstall.<br />
D. Debris is in aerator; remove, clean <strong>and</strong> reinstall.<br />
3. Continues to run (even after power to faucet has been<br />
disconnected)<br />
A. Solenoid valve is installed backwards; install correctly.<br />
B. Debris is in solenoid, won’t close properly; remove operator <strong>and</strong><br />
clean. Reassemble in the same manner.<br />
Solenoid Screen Filter Cleaning<br />
A. Before cleaning the Screen Filter, turn<br />
off the water supply at supply stop(s).<br />
B. Activate the Faucet to relieve any<br />
pressure in the system.<br />
C. Unscrew the Filter Cap <strong>and</strong> remove it<br />
from the Solenoid <strong>Valve</strong> Housing.<br />
D. Carefully remove the Screen Filter<br />
from the Solenoid <strong>Valve</strong> Housing.<br />
E. Clean the Screen Filter using fresh tap<br />
water only. If necessary, use a small<br />
brush to clean.<br />
For Transformer Models*<br />
SCREEN FILTER<br />
COPPER WASHER<br />
SOLENOID<br />
VALVE<br />
FILTER CAP<br />
Use caution while cleaning to prevent damage to Screen Filter.<br />
F. Examine the Copper Washer or O-ring for wear or damage; replace if<br />
necessary. Carefully replace the Screen Filter into Filter Cap. Screw the<br />
Filter Cap with Copper Washer or O-ring into Solenoid <strong>Valve</strong> Housing <strong>and</strong><br />
tighten securely to prevent leaks.<br />
G. Turn on the water supply at the supply stop(s). Activate the Faucet<br />
to purge any air from the system lines. Check for leaks <strong>and</strong> repair<br />
238<br />
<strong>Repair</strong> <strong>Parts</strong> <strong>and</strong> <strong>Maintenance</strong> <strong>Guide</strong><br />
<strong>Sloan</strong>Stone ® ELC-40000 Series<br />
as necessary.<br />
<strong>Sloan</strong>Stone ® Solid Surface Care<br />
For normal cleaning, use warm, soapy water or conventional ammonia<br />
based liquid glass cleaner.<br />
For dry stains, allow the soapy water or glass cleaner some time to<br />
remoisturize the area, then wipe the stain off.<br />
To renew the surface after deep scratches or stains, use green, then<br />
maroon, <strong>and</strong> finally white 3M Scotch-Brite® pads to return the deck to a<br />
smooth 1200 grit wet-s<strong>and</strong>ed finish.<br />
If the dry stain is neither water-based nor oil-based, gently scrape the stain<br />
off with a plastic material (i.e. a plastic knife), <strong>and</strong> then proceed with the<br />
aforementioned normal cleaning procedures.<br />
Wipe the entire surface evenly with a mild abrasive cleanser for regular<br />
maintenance.<br />
Stainless Steel Care<br />
Important: When cleaning stainless steel, always rub in the same direction<br />
of the stainless steel finish lines, never across. After cleaning, always<br />
thoroughly rinse with water <strong>and</strong> dry all cleaned stainless steel areas to<br />
prevent buildup of mineral deposits.<br />
Clean stainless steel surfaces often using warm, soapy water.<br />
For more stubborn deposits, use baking soda, borax or any of several nonabrasive<br />
commercial cleansing agents. Do not leave chlorides found in most<br />
cleansing agents for extended periods of time on the surfaces as they may<br />
attack stainless steel. If an abrasive cleaning tool is needed, always use<br />
stainless steel wool, stainless steel pads, or stainless steel brushes. Do not<br />
use ordinary steel wool, pads or brushes because the have a tendency to<br />
break apart <strong>and</strong> leave small particles which will rust on the stainless steel<br />
surfaces, giving the appearance that the stainless steel surfaces themselves<br />
are rusting. Do not use strong acidic or caustic cleaners or cleansers<br />
because they may also attack the stainless steel surfaces. Maintain a<br />
regular cleaning schedule.<br />
When assistance is required, please contact<br />
<strong>Sloan</strong> Technical Support at: 1-888-SLOAN-14 (1-888-756-2614).
6<br />
4<br />
5<br />
7<br />
239<br />
<strong>Repair</strong> <strong>Parts</strong> <strong>and</strong> <strong>Maintenance</strong> <strong>Guide</strong><br />
<strong>Sloan</strong>Stone ® ELC-81000<br />
SINGLE STATION SOLID SURFACE LAVATORY ASSEMBLY PARTS<br />
Item<br />
No. Code No. Part No. Description<br />
1. — ELC-21 Drain Deck, Single Station<br />
ELC-40-A Deck <strong>and</strong> Grid Strainer Sub-assembly (1 Station)<br />
2. — ELC-41 Fasteners, 1/4-20 x 1/2” Truss Head<br />
3. — ELC-20-A Cabinet, Single Station<br />
4. — ELC-58 Access Panel<br />
5. — ELC-34 P-Trap, 1-1/2”<br />
6. — ELC-46-1 Finger Guard, 4-3/8” Long<br />
7. — ELC-46-2 Finger Guard, 13-1/2” Long<br />
— EW-98 Light Duty Buffing Pad (not shown)<br />
— EW-108 General Purpose Buffing Pad (not shown)<br />
— EW-101 Terminal (not shown)<br />
— Consult factory for replacement part.<br />
1<br />
2<br />
6<br />
2<br />
3<br />
Sink Systems
Sink Systems<br />
2<br />
8<br />
XCW<br />
OPTION<br />
4<br />
7B<br />
STANDARD<br />
9<br />
2<br />
6<br />
5<br />
240<br />
<strong>Repair</strong> <strong>Parts</strong> <strong>and</strong> <strong>Maintenance</strong> <strong>Guide</strong><br />
<strong>Sloan</strong>Stone ® ELC-82000<br />
DOUBLE STATION SOLID SURFACE LAVATORY ASSEMBLY PARTS<br />
Item<br />
No. Code No. Part No. Description<br />
1B. — ELC-42 Drain Deck, Double Station<br />
— ELC-62-A Deck <strong>and</strong> Grid Strainer Sub-assembly,<br />
(2 Station) (St<strong>and</strong>ard)<br />
— ELC-50-A Deck <strong>and</strong> Grid Strainer Sub-assembly, (2 Station)<br />
(XCW Option)<br />
2. — ELC-41 Fasteners, 1/4-20 x 1/2” Truss Head<br />
3. — ELC-45-A Cabinet, Double Station<br />
4. — ELC-58 Access Panel<br />
5. — ELC-34 P-Trap, 1-1/2”<br />
6. — ELC-39 Drain Baffle Tee, 1-1/2”<br />
7A. — ELC-60-1 Waste Arm, 1-1/4” Inlet / 1-1/2” Outlet / 30” Long<br />
7B. — ELC-60-2 Waste Arm, 1-1/4” Inlet / 1-1/2” Outlet / 7” Long<br />
8. — ELC-46-1 Finger Guard, 4-3/8” Long<br />
9. — ELC-46-2 Finger Guard, 13-1/2” Long<br />
— EW-98 Light Duty Buffing Pad (not shown)<br />
— EW-108 General Purpose Buffing Pad (not shown)<br />
— EW-101 Terminal (not shown)<br />
— Consult factory for replacement part.<br />
7A<br />
1<br />
8<br />
9<br />
8<br />
3
2<br />
XCW<br />
OPTION<br />
9 10<br />
4<br />
STANDARD<br />
7<br />
9<br />
8<br />
241<br />
<strong>Repair</strong> <strong>Parts</strong> <strong>and</strong> <strong>Maintenance</strong> <strong>Guide</strong><br />
<strong>Sloan</strong>Stone ® ELC-83000<br />
10<br />
SINGLE STATION SOLID SURFACE LAVATORY ASSEMBLY PARTS<br />
Item<br />
No. Code No. Part No. Description<br />
1. — ELC-31 Drain Deck, Triple Station<br />
— ELC-35-A Deck <strong>and</strong> Grid Strainer Sub-assembly, (3 Station)<br />
(St<strong>and</strong>ard)<br />
— ELC-63-A Deck <strong>and</strong> Grid Strainer Sub-assembly, (3 Station)<br />
(XCW Option)<br />
2. — ELC-41 Fasteners, 1/4-20 x 1/2” Truss Head<br />
3. — ELC-30-A Cabinet, Triple Station<br />
4. — ELC-58 Access Panel<br />
5. — ELC-34 P-Trap, 1-1/2”<br />
6. — ELC-39 Drain Baffle Tee, 1-1/2”<br />
7. — ELC-60-1 Waste Arm, 1-1/4” Inlet / 1-1/2” Outlet / 30” Long<br />
8. — ELC-61 Waste Tee, 1-1/2”<br />
9. — ELC-46-1 Finger Guard, 4-3/8” Long<br />
10. — ELC-46-2 Finger Guard, 13-1/2” Long<br />
— EW-98 Light Duty Buffing Pad (not shown)<br />
— EW-108 General Purpose Buffing Pad (not shown)<br />
— EW-101 Terminal (not shown)<br />
— Consult factory for replacement part.<br />
6<br />
5<br />
1<br />
7<br />
9<br />
10<br />
9<br />
3<br />
Sink Systems
Sink Systems<br />
CARE AND CLEANING<br />
<strong>Sloan</strong>Stone ® Solid Surface Care<br />
For normal cleaning, use warm, soapy water or conventional ammonia<br />
based liquid glass cleaner.<br />
For dry stains, allow the soapy water or glass cleaner some time to<br />
remoisturize the area, then wipe the stain off.<br />
To renew the surface after deep scratches or stains, use green, then<br />
maroon, <strong>and</strong> finally white 3M Scotch-Brite® pads to return the deck to a<br />
smooth 1200 grit wet-s<strong>and</strong>ed finish.<br />
If the dry stain is neither water-based nor oil-based, gently scrape the stain<br />
off with a plastic material (i.e. a plastic knife), <strong>and</strong> then proceed with the<br />
aforementioned normal cleaning procedures.<br />
Wipe the entire surface evenly with a mild abrasive cleanser for regular<br />
maintenance.<br />
Stainless Steel Care<br />
Important: When cleaning stainless steel, always rub in the same direction<br />
of the stainless steel finish lines, never across. After cleaning, always<br />
thoroughly rinse with water <strong>and</strong> dry all cleaned stainless steel areas to<br />
prevent buildup of mineral deposits.<br />
Clean stainless steel surfaces often using warm, soapy water.<br />
For more stubborn deposits, use baking soda, borax or any of several nonabrasive<br />
commercial cleansing agents. Do not leave chlorides found in most<br />
cleansing agents for extended periods of time on the surfaces as they may<br />
attack stainless steel. If an abrasive cleaning tool is needed, always use<br />
stainless steel wool, stainless steel pads, or stainless steel brushes. Do not<br />
use ordinary steel wool, pads or brushes because the have a tendency to<br />
break apart <strong>and</strong> leave small particles which will rust on the stainless steel<br />
surfaces, giving the appearance that the stainless steel surfaces themselves<br />
are rusting. Do not use strong acidic or caustic cleaners or cleansers<br />
because they may also attack the stainless steel surfaces. Maintain a<br />
regular cleaning schedule.<br />
When assistance is required, please contact<br />
<strong>Sloan</strong> Technical Support at: 1-888-SLOAN-14 (1-888-756-2614).<br />
242<br />
<strong>Repair</strong> <strong>Parts</strong> <strong>and</strong> <strong>Maintenance</strong> <strong>Guide</strong><br />
<strong>Sloan</strong>Stone ® ELC-80000 Series
NOTE: Cartridge Assembly can be rotated 90 degrees to<br />
adapt to the installation by removing the 4 screws holding<br />
the Cartridge Cover. Disconnect the Tank Cover level<br />
sensor wires from circuit board (remember what terminal<br />
the wires came from, you will need to reconnect them).<br />
Remove the Cartridge Assembly by removing the four (4)<br />
screws on the sides. Reposition the housing as needed<br />
<strong>and</strong> reassemble. Route the Level Sensor Wires through<br />
the slots in the Cartridge <strong>and</strong> Cover.<br />
9<br />
7<br />
6<br />
11<br />
5<br />
2<br />
1<br />
243<br />
<strong>Repair</strong> <strong>Parts</strong> <strong>and</strong> <strong>Maintenance</strong> <strong>Guide</strong><br />
<strong>Sloan</strong> ® AQUS ® HMA-7000<br />
PARTS LIST—SLOAN ® AQUS ®<br />
Item<br />
No. Code No. Part No. Description<br />
1. — HMA-1-A Collection Tank Assembly. Tank Assembly, 2<br />
Access Caps, Basket Screen, 12 VDC Power<br />
Adapter, O-Rings, ½” Polyethylene Tube (12 feet),<br />
Pump Cartridge Assembly, Tank Pad, Pan Head<br />
Screw<br />
— HMA-1-A-EU Collection Tank Assembly (Europe). Tank Assembly,<br />
2 Access Caps, Basket Screen, 12 VDC Power<br />
Adapter (Europe), O-Rings, ½” Polyethylene Tube<br />
(12 feet), Pump Cartridge Assembly (Europe), Tank<br />
Pad, Pan Head Screw<br />
— HMA-1-A-UK Collection Tank Assembly. (United Kingdom) Tank<br />
Assembly, 2 Access Caps, Basket Screen, 12 VDC<br />
Power Adapter (United Kingdom), O-Rings, ½”<br />
Polyethylene Tube (12 feet), Pump Cartridge<br />
Assembly (United Kingdom), Tank Pad, Pan Head<br />
Screw<br />
2. — Three (3) 3” Toilet Bowl Cleaner Tablets with<br />
Bleach (Purchased Separately)<br />
3. — HMA-60-A Toilet Tank Installation Kit. Water Inlet Assembly<br />
(Tube Fitting Attached), Level Sensor Assembly, Lid<br />
Support, Flow Restricter<br />
4. — HMA-55-A Drain Installation Starter Kit. Baffle Tee PVC, 2 L-<br />
Bend PVC Pipes, Straight PVC, 1½” Slip Joint<br />
Washer, 1½” Slip Nut (US)<br />
— — Optional Wall Molding (Not sold by <strong>Sloan</strong> <strong>Valve</strong>.<br />
Can be found at your local hardware store)<br />
5. — — Filter Basket<br />
6. — — Cartridge Cover<br />
7. — — Cartridge Assembly<br />
8. — — Fill <strong>Valve</strong> Adapter with Flow Restrictor<br />
9. — — 12 Volt DC Power Supply<br />
10. — — Level Sensor Assembly<br />
11. — — Cap O-ring<br />
— Consult factory for replacement part.<br />
3<br />
8<br />
10<br />
4<br />
Sink Systems
Sink Systems<br />
TROUBLESHOOTING GUIDE<br />
1. Connections inside vanity will not fit.<br />
A. Wall drain is either not 18” off finished floor <strong>and</strong>/ or wall drain is not<br />
12” off wall cabinet shelf.<br />
B. If wall drain is too low, either cut opening in vanity floor to recess<br />
reservoir or use shallow P-Trap or alternative PVC parts.<br />
C. If wall drain is too high, shim the tank higher.<br />
2. Pump is noisy.<br />
Under normal operation, the sound is no louder than an icemaker or<br />
electric shaver.<br />
To check if pump is failing, turn water on in sink for 2-3 minutes.<br />
Flush toilet. Has noise level reduced?<br />
YES Continue normal operations.<br />
NO Possible pump failure.<br />
3. Pump runs too long, too short or intermittently.<br />
This indicates a circuit board timer failure. Call for service.<br />
Contact information found on front of guide.<br />
4. Toilet bowl water is discolored or contains bubbles.<br />
Colored liquids, such as coffee or cola, poured down sink will transfer to<br />
bowl. To clear, rinse water down drain <strong>and</strong> flush toilet. Don’t pour<br />
anything down drain except water. Heavy usage of h<strong>and</strong> soaps/detergents<br />
can result in bubbles. Flush a few times to dilute soaps.<br />
5. Reused water is not filling tank.<br />
A. If system is unplugged, replug into wall outlet.<br />
B. If switch on has failed, call for service.<br />
C. If pump isn’t running; flush toilet several times to allow pump to prime,<br />
or call for service.<br />
D. If hose is clogged, call for service.<br />
DO NOT pour drain unclogging products down sink. These products may<br />
damage system.<br />
6. Toilet will not flush.<br />
Fresh water supply is off. Turn on supply.<br />
7. Toilet tank is slow to refill.<br />
Pump is intended to provide effective reused water supply at a distance<br />
of less than 25 feet with a 4-foot head pressure. As distance exceeds<br />
15 feet, fill takes longer.<br />
8. Water is backing up into the sink.<br />
There’s a clog in P-trap or waste line downstream from vanity tank.<br />
DO NOT pour unclogging products down drain. These products may<br />
damage system. Call plumber to clear obstruction.<br />
9. There’s an unpleasant odor.<br />
Chlorine tablets have dissolved <strong>and</strong> reservoir has grown odor-causing<br />
bacteria.<br />
A. Turn water on in sink <strong>and</strong> pour a capful of chlorine bleach down drain<br />
to shock odor.<br />
B. Replace tablets.<br />
244<br />
<strong>Repair</strong> <strong>Parts</strong> <strong>and</strong> <strong>Maintenance</strong> <strong>Guide</strong><br />
<strong>Sloan</strong> ® AQUS ® HMA-7000<br />
ANNUAL MAINTENANCE REQUIREMENTS<br />
Replace Cleansing Tablets<br />
Replace the cleansing tablets annually. Remove tablet dispenser cap, insert<br />
three (3) 3” toilet bowl cleaner tablets with bleach <strong>and</strong> resecure the<br />
dispenser cap.<br />
CLEAN FILTER SCREEN<br />
The filter basket should be removed, rinsed <strong>and</strong> reinstalled annually. The<br />
basket is secured in place under the lower cap. Remove the filter access<br />
cap <strong>and</strong> pull the basket straight up from the Collection Tank. After the<br />
screen has been rinsed of any residue. Replace cap <strong>and</strong> secure.<br />
When assistance is required, please contact<br />
<strong>Sloan</strong> Technical Support at: 1-888-SLOAN-14 (1-888-756-2614).
PRODUCT VARIATION SUFFIXES<br />
FLUSHOMETERS<br />
SOLENOID ACTIVATED VALVES<br />
ES 120 VAC or 24 VAC<br />
ESM Solenoid with special connector for use with<br />
MicroPlumb ® Control Systems only<br />
ES-S OPTIMA ® sensor-activated valves<br />
HW Hardwire<br />
ES-SM OPTIMA ® sensor-activated valves with Surface<br />
Mount Sensor<br />
SMO Side Mount Operator<br />
SMOOTH Side Mount Operator Over The H<strong>and</strong>le<br />
TMO True Mechanical Override<br />
CONTROL STOPS<br />
E Straight Stop Variation<br />
F Screwdriver Stop Variation<br />
K Wheel H<strong>and</strong>le Stop Variation<br />
GJ Ground Joint Stop<br />
BUMPERS<br />
YO Angle Stop Bumper<br />
YG Angle Stop Extended Bumper<br />
YH Single Wall Bumper<br />
YI Double Wall Bumper<br />
YN Flush Tube Bumper<br />
HANDLES & PUSH BUTTONS<br />
ADA ADA Compliant H<strong>and</strong>le<br />
FW Fixture Wall Actuator<br />
HL-3 3” Metal Oscillating Push Button on<br />
front of valve<br />
J Metal Oscillating H<strong>and</strong>le<br />
L Metal Index Push Button<br />
L-3 3” Metal Oscillating Push Button<br />
MBFW Metal Button Fixture Wall Actuator<br />
MBPM Metal Button Panel Mount<br />
MP Metal Partition Actuator<br />
OR Override Button<br />
SG Sanigard<br />
SW Side Wall Mounted Actuator<br />
YA Nickel-Silver Finish Variation<br />
YW Combination Pedal-H<strong>and</strong>le<br />
PIPE SUPPORTS<br />
YJ Split Ring Pipe Support Variation<br />
YK Solid Ring Pipe Support Variation<br />
YL Solid Ring w/Seat Bumper Variation<br />
VACUUM BREAKERS & FLUSH CONNECTIONS<br />
XYV <strong>Valve</strong> Less Vacuum Breaker<br />
O Offset Vacuum Breaker<br />
T 1-1/2” Flush Connection<br />
U 1-1/4” Flush Connection<br />
V 1” Flush Connection<br />
W 3/4” Flush Connection<br />
TP Trap Primer<br />
AFD Anti-Food Device<br />
FLUSHOMETERS (continued)<br />
SWEAT KITS & ADAPTERS<br />
YB Sweat Adapter, Stamped Wall Flange &<br />
Casing Tube<br />
YBYC Sweat Adapter, Cast Set Screw Wall Flange &<br />
Casing Tube<br />
YC Cast Set Screw Wall Flange for iron pipe<br />
Z Locking Ring for Zurn Flush <strong>Valve</strong> Bodies<br />
WB For installation with <strong>Sloan</strong> Easy Access<br />
Wall Box<br />
SWB Small Wall Box<br />
DIAPHRAGMS<br />
VARIATIONS<br />
DFB Dual-Filtered Bypass Diaphragm<br />
DBP Dual-Bypass Diaphragm<br />
FAUCETS<br />
VARIATIONS<br />
-4 Trim Plate for 4” Centerset Sink<br />
-8 Trim Plate for 8” Centerset Sink<br />
ADM Above Deck Mechanical Mixing <strong>Valve</strong><br />
B Box Mount, Box Transformer<br />
BDM Below Deck Mechanical Mixing <strong>Valve</strong><br />
BDT Below Deck Thermostatic Mixing <strong>Valve</strong><br />
C Laminar Spray Head<br />
DPU Drain Pop Up<br />
H Shower Spray Head<br />
IC Optma ® i.q.-cliq feature<br />
ISM Integral Spout Mixer<br />
LT Less Transformer<br />
P Plug-in Transformer<br />
S Surgical Bend Spout<br />
FINISHES (may not apply to all products)<br />
CP Chrome Plate<br />
RB Rough Brass (Flushometer)<br />
WHT White (H<strong>and</strong> Dryer)<br />
PVDSF Satin (Chrome/PVD Finish)<br />
PVDPN* Polished Nickel (Chrome/PVD Finish<br />
PWCBK* Black (Powder Coated)<br />
PVDBN Brushed Nickel (Chrome/PVD Finish)<br />
PVDPB Polished Brass (Chrome/PVD Finish)<br />
PWCSC* Satin Copper (Powder Coated)<br />
PVDSB* Satin Brass (Chrome/PVD Finish)<br />
PVDGP* Gold (PVD Finish)<br />
PWCPC* Polished Copper (Powder Coated)<br />
VFABZ* Antique Bronze (Vintage Finishes)<br />
VFCBZ* Coco Bronze (Vintage Finishes)<br />
VFVRD* Verdi (Vintage Finishes)<br />
245<br />
SINKS<br />
VARIATIONS (40000/50000 Series)<br />
AB Angle Bracket<br />
ADM Above Deck Mechanical Mixing <strong>Valve</strong><br />
BDT Below Deck Thermostatic Mixing <strong>Valve</strong><br />
DS Drain Shroud<br />
ESD Electronic Soap Dispenser<br />
FA Integrated Front Apron<br />
FL Floor Mounted<br />
FM Floor Mount Kit<br />
JVC Juvenile Height Cabinet<br />
LS Left Side Splash<br />
MSD Manual Soap Dispenser<br />
RS Ride Side Splash<br />
SINK COLORS (40000 Series)<br />
AH Ash<br />
AM Amber<br />
IN Indigo<br />
JD Jade<br />
JT Jet<br />
PL Pearl<br />
SL Slate<br />
SS S<strong>and</strong><br />
TP Taupe<br />
SINK COLORS (60000/70000/80000 Series)<br />
WH White<br />
CO Cameo<br />
BO Bone<br />
PH Peach<br />
AL Almond<br />
SH Shell<br />
PE Pea<br />
BI Biscuit<br />
MWH Matrix White<br />
MSI Matrix Silver<br />
MPI Matrix Pink<br />
MJA Matrix Jade<br />
MLG Matrix Light Gray<br />
MDG Matrix Dark Gray<br />
MGR Matrix Green<br />
MBR Matrix Brown<br />
MBO Matrix Bone<br />
MFR Matrix Frost<br />
MLB Matrix Light Blue<br />
MSA Matrix S<strong>and</strong><br />
MDB Matrix Dark Blue<br />
MDU Matrix Dusk<br />
MKH Matrix Khaki<br />
MSU Matrix Summit<br />
WNT Walnut/Riverstone<br />
*Minimum Order Quantity, please contact local <strong>Sloan</strong><br />
representative for information
<strong>Sloan</strong> Sales Representatives<br />
Alabama<br />
Will & Pierce Agency<br />
6612 Pine Hill Road<br />
Daphne, AL 36526<br />
251/621-1550<br />
jsullivan@will<strong>and</strong>pierce.com<br />
Alaska<br />
Alaska Winter Inc.<br />
3901 Spenard Road<br />
Anchorage, AK 99517<br />
907/248-0000<br />
www.akwinter.com<br />
Arizona<br />
Southwestern Mechanical<br />
Sales Co.<br />
1440 W. San Pedro Street<br />
Gilbert, AZ 85233<br />
480/813-1313<br />
www.swmech.com<br />
Southwestern Mechanical<br />
Sales Co.<br />
4771 S. Overl<strong>and</strong> Drive<br />
Tucson, AZ 85714<br />
520/884-1414<br />
Arkansas<br />
C. A. Riner Co., Inc.<br />
7620 Hardin Drive<br />
N. Little Rock, AR 72117<br />
501/834-1400<br />
www.cariner.com<br />
California – South<br />
Delco Sales<br />
1930 Raymer Avenue<br />
Fullerton, CA 92833<br />
714/888-2444<br />
sales@delcosales.com<br />
California – North<br />
Kliman Sales Inc.<br />
1245 N. 5th Street<br />
San Jose, CA 95112<br />
408/275-1784<br />
www.klimansales.com<br />
Kliman Sales Inc.<br />
8560 23rd Avenue<br />
Sacramento, CA 95826<br />
916/379-0784<br />
www.klimansales.com<br />
Colorado<br />
Marshall-Rodeno Associated<br />
5700 E. 39th Avenue<br />
Denver, CO 80207<br />
800/824-3675<br />
www.marshallrodeno.com<br />
Connecticut<br />
Yost Associates<br />
224 Eastern Boulevard<br />
Glastonbury, CT 06033<br />
860/659-0301<br />
sphilbrook@<br />
yostassociates.com<br />
Delaware<br />
Robert Burns Assoc., Inc.<br />
4009-B Market Street<br />
Aston, PA 19014<br />
610/497-1722<br />
District of Columbia<br />
The Joyce Agency<br />
8442 Alban Road<br />
Springfield, VA 22150<br />
800/291-9298 or<br />
703/866-3111<br />
www.thejoyceagency.com<br />
Florida<br />
Engineered Concepts<br />
917 N.W. 31st Avenue<br />
Pompano Beach, FL 33069<br />
800/273-5522<br />
www.eng-concepts.com<br />
Georgia – South<br />
Bradford Sales Co., Inc.<br />
119 Jackson Street, Ste. 107<br />
Vidalia, GA 30474<br />
912/537-3448<br />
johnnydavis@<br />
bradfordsalesco.com<br />
Georgia – North<br />
Bradford Sales Co., Inc.<br />
2700 Bankers Indl Drive<br />
Atlanta, GA 30360<br />
770/448-3400<br />
mikefair@bellsouth.net<br />
Hawaii<br />
Delco Sales<br />
111 S<strong>and</strong> Isl<strong>and</strong><br />
Access Road I-10<br />
Honolulu, HI 96819<br />
808/842-7900<br />
sales@delcosales.com<br />
Idaho – Southwest<br />
Braley-Gray & Associates<br />
900 E. Overl<strong>and</strong> Road<br />
Meridian, ID 83642<br />
208/898-9410<br />
davep@braleygray.com<br />
Idaho – North<br />
Suntoya Corporation<br />
3820 East Boone<br />
Spokane, WA 99202<br />
509/534-1516<br />
www.suntoya.com<br />
Idaho – Southeast<br />
R. E. Fitzpatrick Sales, Inc.<br />
4109 West Nike Drive<br />
West Jordan, UT 84088<br />
801/282-0700<br />
sales@fitzpatricksales.com<br />
Illinois – North<br />
REPCO Associates, Inc.<br />
1775 W. Armitage Court<br />
Addison, IL 60101<br />
630/932-9900<br />
brian@repcoassociates.com<br />
Illinois – Central<br />
Ziel-Carlson, Inc.<br />
215 – 43rd Street<br />
Moline, IL 61265<br />
309/762-3700<br />
zc-inc@qconline.com<br />
Ziel-Carlson, Inc.<br />
317 S. Missouri<br />
Morton, IL 61550<br />
309/635-4152<br />
zc-inc@qconline.com<br />
Illinois – South<br />
American Sales Co.<br />
920 Palm Street<br />
St. Louis, MO 63147<br />
314/231-6114<br />
amersales@sbcglobal.net<br />
Indiana<br />
Aspinall Associates<br />
6840 Hillsdale Court<br />
Indianapolis, IN 46250<br />
317/849-5757<br />
www.aspinall.com<br />
Iowa<br />
Service Reps, Inc.<br />
15030 “A” Circle<br />
Omaha, NE 68144<br />
402/333-2095<br />
www.servicerepsinc.com<br />
Kansas<br />
Hebco Inc.<br />
4304 S. Washington<br />
Independence, MO 64055<br />
913/491-5126<br />
hebco100@kc.rr.com<br />
Kentucky – East<br />
BBN Sales, Inc.<br />
3737 Spring Grove Avenue<br />
Cincinnati, OH 45223<br />
513/681-9999<br />
bbnsales@cinci.rr.com<br />
Louisiana<br />
Superior Products, Inc.<br />
2911 S. Ruby Avenue<br />
Gonzales, LA 70737<br />
225/644-9773<br />
glapour@superiorbrem.com<br />
Maine<br />
J. H. Pokorny Associates, LLC<br />
1502 Providence Highway<br />
Suite 4<br />
Norwood, MA 02062<br />
781/762-2661<br />
www.jhpokorny.net<br />
Maryl<strong>and</strong><br />
The Joyce Agency<br />
8442 Alban Road<br />
Springfield, VA 22150<br />
800/291-9298 or<br />
703/866-3111<br />
www.thejoyceagency.com<br />
Massachusetts – East<br />
J. H. Pokorny Associates, LLC<br />
1502 Providence Highway<br />
Suite 4<br />
Norwood, MA 02062<br />
781/762-2661<br />
www.jhpokorny.net<br />
Massachusetts – West<br />
Yost Associates<br />
224 Eastern Boulevard<br />
Glastonbury, CT 06033<br />
860/659-0301<br />
sphilbrook@<br />
cyostassociates.com<br />
Michigan – East<br />
Diversified Spec. Sales, Inc.<br />
13261 Northend Avenue<br />
Oak Park, MI 48237<br />
248/398-2400<br />
www.diversifiedspec.com<br />
Michigan – West<br />
Diversified Spec. Sales, Inc.<br />
931 West River Center Drive<br />
Comstock Park, MI 49321<br />
616/785-9000<br />
www.diversifiedspec.com<br />
Michigan – Upper Peninsula<br />
Badgerl<strong>and</strong> Trading<br />
of Wisconsin<br />
2415 S. 170th Street<br />
New Berliln, WI 53151<br />
262/827-3177<br />
dan@badgerl<strong>and</strong>trading.com<br />
Minnesota<br />
Hamel Associates, Inc.<br />
4230 W. 76th Street<br />
Edina, MN 55435<br />
952/835-5570<br />
www.hamelrep.com<br />
Mississippi<br />
Will & Pierce Agency<br />
6612 Pine Hill Road<br />
Daphne, AL 36526<br />
251/621-1550<br />
jsullivan@will<strong>and</strong>pierce.com<br />
Missouri – East<br />
American Sales Co.<br />
920 Palm Street<br />
St. Louis, MO 63147<br />
314/231-6114<br />
amersales@sbcglobal.net<br />
Missouri – West<br />
Hebco Inc.<br />
4304 S. Washington<br />
Independence, MO 64055<br />
913/491-5126<br />
hebco100@kc.rr.com<br />
Montana<br />
Clapper Co., Inc.<br />
5528 Holiday Avenue<br />
Billings, MT 59101<br />
406/252-9385<br />
www.clapperco.com<br />
Nebraska – East<br />
Service Reps, Inc.<br />
15030 “A” Circle<br />
Omaha, NE 68144<br />
402/333-2095<br />
www.servicerepsinc.com<br />
Nevada – North<br />
R. E. Fitzpatrick Sales, Inc.<br />
4109 West Nike Drive<br />
West Jordan, UT 84088<br />
801/282-0700<br />
kevin@fitzpatricksales.com<br />
Nevada – South & West<br />
Southwestern Mechanical<br />
Sales Co.<br />
3191 Builders Avenue<br />
Las Vegas, NV 89101<br />
702/368-2561<br />
www.swmech.com<br />
New Hampshire<br />
J. H. Pokorny Associates, LLC<br />
1502 Providence Highway<br />
Suite 4<br />
Norwood, MA 02062<br />
781/762-2661<br />
www.jhpokorny.net<br />
New Jersey – North<br />
Maloney & Curcio, Inc.<br />
1601-1611 Pennsylvania Ave.<br />
Linden, NJ 07036<br />
908/486-0900<br />
New Jersey – South<br />
Robert Burns Assoc, Inc.<br />
4009-B Market Street<br />
Aston, PA 19014<br />
610/497-1722<br />
New Mexico<br />
M&M Sales, Inc.<br />
3415 Vassar Drive N.E.<br />
Albuquerque, NM 87107<br />
505/884-1733<br />
john@m<strong>and</strong>msales.com<br />
New York – New York<br />
Edwards, Platt & Deely Inc.<br />
368 Wy<strong>and</strong>anch Avenue<br />
North Babylon, NY 11703<br />
631/253-0600<br />
www.epdreps.com<br />
New York – Lower<br />
Edwards, Platt & Deely Inc.<br />
368 Wy<strong>and</strong>anch Avenue<br />
North Babylon, NY 11703<br />
631/253-0600<br />
www.epdreps.com<br />
New York – Upper<br />
WMS Sales, Inc.<br />
9580 County Road<br />
Clarence Center, NY 14032<br />
716/741-9575<br />
www.wmssales.com<br />
North Carolina<br />
Smith & Stevenson<br />
4935 Chastain Avenue<br />
Charlotte, NC 28217<br />
704/525-3388<br />
postoffice@<br />
smith<strong>and</strong>stevenson.com<br />
<strong>Sloan</strong> Headquarters 10500 Seymour Avenue Franklin Park, IL 60131<br />
Phone: 800-9-VALVE-9 (982-5839) Fax: 800-447-8329 Web: www.sloanvalve.com<br />
North Dakota<br />
Hamel Associates, Inc.<br />
4230 W. 76th Street<br />
Edina, MN 55435<br />
952/835-5570<br />
www.hamelrep.com<br />
Ohio – Northeast<br />
ADCO Sales, Inc.<br />
29333 Clayton Avenue<br />
Wickliffe, OH 44092<br />
440/944-7500<br />
adcosales@sbcglobal.net<br />
Ohio – Central & South<br />
BBN Sales, Inc.<br />
3737 Spring Grove Avenue<br />
Cincinnati, OH 45223<br />
513/681-9999<br />
bbnsales@cinci.rr.com<br />
Ohio – Northwest<br />
Diversified Spec. Sales, Inc.<br />
13261 Northend Avenue<br />
Oak Park, MI 48237<br />
248/398-2400<br />
www.diversifiedspec.com<br />
Oklahoma<br />
Pannell Associates Sales Co.<br />
5411 S. 101st East Avenue<br />
Tulsa, OK 74146<br />
918/664-7732<br />
clp@pascoreps.com<br />
Pannell Associates Sales Co.<br />
3824 N. Meridian, Suite 106<br />
Oklahoma City, OK 73112<br />
405/948-7732<br />
jay@pascoreps.com<br />
Oregon<br />
Braley-Gray & Associates<br />
2150 N. Lewis Avenue<br />
Portl<strong>and</strong>, OR 97227<br />
503/249-6972<br />
sales@braleygray.com<br />
Pennsylvania – West<br />
J. B. O’Connor Co., Inc.<br />
P. O. Box 12927<br />
Pittsburgh, PA 15241<br />
724/745-5300<br />
www.jboconnor.com<br />
Pennsylvania – Far North<br />
WMS Sales, Inc.<br />
9580 County Road<br />
Clarence Center, NY 14032<br />
716/741-9575<br />
www.wmssales.com<br />
Pennsylvania – East<br />
Robert Burns Assoc., Inc.<br />
4009-B Market Street<br />
Aston, PA 19014<br />
610/497-1722<br />
Robert Burns Assoc., Inc.<br />
574 Hi-View Drive<br />
Lititz, PA 17543<br />
717/203-8828<br />
Rhode Isl<strong>and</strong><br />
Yost Associates<br />
224 Eastern Boulevard<br />
Glastonbury, CT 06033<br />
860/659-0301<br />
sphilbrook@<br />
yostassociates.com<br />
South Carolina<br />
Smith & Stevenson<br />
4935 Chastain Avenue<br />
Charlotte, NC 28217<br />
704/525-3388<br />
postoffice@<br />
smith<strong>and</strong>stevenson.com<br />
South Dakota<br />
Hamel Associates, Inc.<br />
4230 W. 76th Street<br />
Edina, MN 55435<br />
952/835-5570<br />
www.hamelrep.com<br />
Tennessee – East<br />
BBN/Tenn Sales, Inc.<br />
3531 Papermill Drive<br />
Knoxville, TN 37909<br />
865/637-7666<br />
bbntennsales@bellsouth.net<br />
Tennessee – Central & West<br />
Mendell Sales<br />
304-C Hill Avenue<br />
Nashville, TN 37210<br />
615/291-6331<br />
Texas – North<br />
Dillard Associates<br />
3145 National Circle<br />
Garl<strong>and</strong>, TX 75041<br />
972/278-2000<br />
sales@dillardassoc.com<br />
www.dillardassoc.com<br />
Texas – South<br />
Dillard Associates<br />
6100 Tri County Pkwy<br />
Schertz, TX 78154<br />
210/824-4881<br />
cfink@dillardassoc.com<br />
Stephen & Stephenson, Inc.<br />
4626 Windfern Drive<br />
Houston, TX 77041<br />
713/227-7254<br />
dferguson@<br />
stephenstephenson.com<br />
Texas – El Paso<br />
M&M Sales, Inc.<br />
1006-B Wall Street<br />
El Paso, TX 79915<br />
915/772-0393<br />
carol@m<strong>and</strong>msales.com<br />
Utah<br />
R. E. Fitzpatrick Sales, Inc.<br />
4109 West Nike Drive<br />
West Jordan, UT 84088<br />
801/282-0700<br />
kevin@fitzpatricksales.com<br />
Vermont<br />
J. H. Pokorny Associates, LLC<br />
1502 Providence Hwy.<br />
Suite 4<br />
Norwood, MA 02062<br />
781/762-2661<br />
www.jhpokorny.net<br />
Virginia – North<br />
The Joyce Agency<br />
8442 Alban Road<br />
Springfield, VA 22150<br />
800/291-9298 or<br />
703/866-3111<br />
www.thejoyceagency.com<br />
Virginia – Central<br />
W. G. Lesemann & Associates<br />
11182 Hopson Road, Ste. A<br />
Ashl<strong>and</strong>, VA 23005<br />
804/752-6301<br />
info@wglesemann.com<br />
Virginia – West<br />
BBN/Tenn Sales, Inc.<br />
3531 Papermill Drive<br />
Knoxville, TN 37909<br />
865/637-7666<br />
bbntennsales@bellsouth.net<br />
Washington – Northwest<br />
Stone-Drew/Ashe &<br />
Jones, Inc.<br />
710 South Lucile Street<br />
Seattle, WA 98108<br />
206/763-2850<br />
www.alliancesalesnw.com<br />
Washington – East<br />
Suntoya Corporation<br />
3820 East Boone<br />
Spokane, WA 99202<br />
509/534-1516<br />
www.suntoya.com<br />
Washington – Southwest<br />
Braley-Gray & Associates<br />
2150 N. Lewis Avenue<br />
Portl<strong>and</strong>, OR 97227<br />
503/249-6972<br />
sales@braleygray.com<br />
Braley-Gray & Associates<br />
2818 East 2nd Street<br />
Vancouver, WA 98661<br />
360/693-9900<br />
www.braleygray.com<br />
West Virginia –<br />
Far Northeast<br />
The Joyce Agency<br />
8442 Alban Road<br />
Springfield, VA 22150<br />
800/291-9298 or<br />
703/866-3111<br />
www.thejoyceagency.com<br />
West Virginia – Central<br />
J. B. O’Connor Co., Inc.<br />
P. O. Box 12927<br />
Pittsburgh, PA 15241<br />
724/745-5300<br />
www.jboconnor.com<br />
West Virginia – Far South<br />
BBN/Tenn Sales, Inc.<br />
3531 Papermill Drive<br />
Knoxville, TN 37909<br />
865/637-7666<br />
bbntennsales@bellsouth.net<br />
Wisconsin – South & East<br />
Badgerl<strong>and</strong> Trading<br />
of Wisconsin<br />
2415 S. 170th Street<br />
New Berlin, WI 53151<br />
262/827-3177<br />
dan@badgerl<strong>and</strong>trading.com<br />
Wisconsin – Northwest<br />
Hamel Associates, Inc.<br />
4230 W. 76th Street<br />
Edina, MN 55435<br />
952/835-5570<br />
www.hamelrep.com<br />
Wyoming – Southwest<br />
R. E. Fitzpatrick Sales, Inc.<br />
4109 West Nike Drive<br />
West Jordan, UT 84088<br />
801/282-0700<br />
kevin@fitzpatricksales.com<br />
Wyoming – North<br />
Clapper Co., Inc.<br />
5528 Holiday Avenue<br />
Billings, MT 59101<br />
406/252-9385<br />
www.clapperco.com<br />
Canada<br />
R. G. Dobbin Sales Ltd.<br />
51 Terecar Drive, Unit 2<br />
Vaughan, ON L4L 0B5<br />
800/565-8515 or<br />
905/264-5465<br />
www.dobbinsales.com<br />
info@dobbinsales.com<br />
Mexico<br />
<strong>Sloan</strong> de Mexico<br />
S. de R.L. de C.V.<br />
Carretera a los Pinos Km.-1<br />
Ramos Arizpe, Coahuila<br />
Mexico, CP 25900<br />
(52) 844/488 0669,<br />
(52) 844/488 0299<br />
guillermo.montemayor@<br />
sloan.com.mx<br />
Puerto Rico<br />
J. A. Short, Inc.<br />
P. O. Box 190951<br />
Hato Rey, PR 00919-0951<br />
787-633-4247<br />
jashort@jashortinc.com<br />
© SLOAN VALVE COMPANY, 2012 SLV6529.5 PRINTED IN U.S.A.


