
Create successful ePaper yourself
Turn your PDF publications into a flip-book with our unique Google optimized e-Paper software.
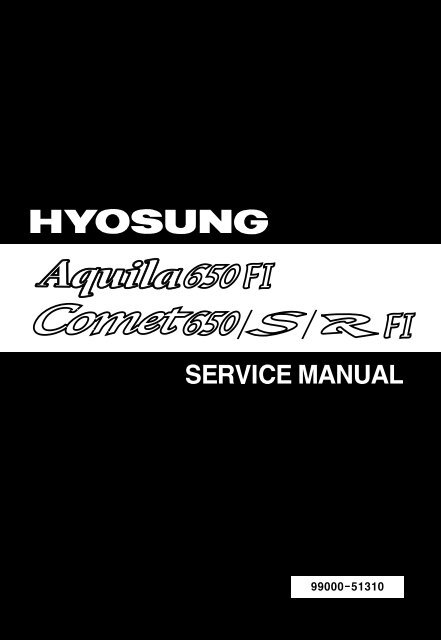
<strong>SERVICE</strong> <strong>MANUAL</strong><br />
99000-51310
FOREWORD<br />
This manual contains an introductory description on<br />
HYOSUNG &<br />
and procedures for its inspection / service and<br />
overhaul of its main components.<br />
It covers the differences from Carbure type and<br />
please refer to the service manual of 『<br />
(99000-51210)』, 『 &<br />
(99000-94910)』and 『 (99000-94810)』<br />
for others which are not covered in this manual.<br />
Other information considered as generally known is<br />
not included.<br />
Read GENERAL INFORMATION section to<br />
familiarize yourself with outline of the vehicle and<br />
MAINTENANCE and other sections to use as a guide<br />
for proper inspection and service.<br />
This manual will help you know the vehicle better so<br />
that you can assure your customers of your optimum<br />
and quick service.<br />
�� This manual has been prepared on the basis<br />
of the latest specification at the time of<br />
publication.<br />
If modification has been made since then,<br />
difference may exist between the content of<br />
this manual and the actual vehicle.<br />
�� Illustrations in this manual are used to show<br />
the basic principles of operation and work<br />
procedures.<br />
They may not represent the actual vehicle<br />
exactly in detail.<br />
WARNING<br />
This manual is intended for those who have<br />
enough knowledge and skills for servicing<br />
HYOSUNG vehicles. Without such knowledge and<br />
skills, you should not attempt servicing by relying<br />
on this manual only.<br />
Instead, please contact your nearby authorized<br />
HYOSUNG motorcycle dealer.<br />
� COPYRIGHT S&T Motors Co., Ltd.<br />
GROUP INDEX<br />
GENERAL INFORMATION 1<br />
FI SYSTEM DIAGNOSIS<br />
FUEL SYSTEM AND THROTTLE BODY 4-2<br />
ELECTRICAL SYSTEM<br />
4-1<br />
6<br />
SERVICING INFORMATION 8
HOW TO USE THIS <strong>MANUAL</strong><br />
TO LOCATE WHAT YOU ARE<br />
LOOKING FOR:<br />
1. The text of this manual is divided into sections.<br />
2. As the title of these sections are listed on the previous<br />
page as GROUP INDEX, select the section where you are looking<br />
for.<br />
3. Holding the manual as shown at the right will allow you to find<br />
the first page of the section easily.<br />
4. On the first page of each section, its contents are listed. Find<br />
the item and page you need.<br />
SYMBOL<br />
Listed in the table below are the symbols indicating instructions and other information necessary for servicing and<br />
meaning associated with them respectively.<br />
SYMBOL DEFINITION<br />
SYMBOL<br />
DEFINITION<br />
Torque control required.<br />
Data beside it indicates specified torque.<br />
Apply oil.<br />
Use engine oil unless otherwise specified.<br />
Apply SUPER GREASE “A”.<br />
Apply SUPER GREASE “C”.<br />
Apply SILICONE GREASE.<br />
Apply MOLY PASTE.<br />
Apply BOND “1215”.<br />
Use fork oil.<br />
2<br />
Apply THREAD LOCK “1324”.<br />
Apply or use brake fluid.<br />
Measure in voltage range.<br />
Measure in resistance range.<br />
Measure in current range.<br />
Measure in continuity test range.<br />
Use special tool.<br />
Use engine coolant.
ABBREVIATIONS USED IN THIS <strong>MANUAL</strong><br />
A<br />
ABDC : After Bottom Dead Center<br />
AC : Alternating Current<br />
API : American Petroleum Institute<br />
ATDC : After Top Dead Center<br />
B<br />
BBDC : Before Bottom Dead Center<br />
BDC : Bettom Dead Center<br />
BTDC : Before Top Dead Center<br />
D<br />
DC : Direct Current<br />
DOHC : Double Over Head Camshaft<br />
E<br />
ECU : Engine Control Unit,<br />
FI Control Unit<br />
F<br />
FI : Fuel Injection, Fuel Injector<br />
FP : Fuel Pump<br />
G<br />
GP Switch : Gear Position Switch<br />
I<br />
IAP Sensor : Intake Air Pressure Sensor<br />
(IAPS)<br />
IAT Sensor : Intake Air Temperature Sensor<br />
(IATS)<br />
IG : Ignition<br />
ISC Solenoid : Idle Speed Control Solenoid<br />
3<br />
L<br />
LCD : Liquid Crystal Display<br />
LED : Light Emitting Diode<br />
LH : Left Hand<br />
M<br />
Max : Maximum<br />
Min : Minimum<br />
O<br />
O2 Sensor : Oxygen Sensor (O2S)<br />
R<br />
RH : Right Hand<br />
S<br />
SAE : Society of Automotive Engineers<br />
SAV Solenoid : Secondary Air Valve Solenoid<br />
T<br />
TDC : Top Dead Center<br />
TO Sensor : Tip Over Sensor (TOS)<br />
TP Sensor : Throttle Position Sensor (TPS)<br />
W<br />
WT Sensor : Water Temperature Sensor<br />
(WTS)
WIRE COLOR<br />
B : Black Gr : Gray Sb : Light blue<br />
L : Blue Lg : Light green W : White<br />
Br : Brown O : Orange Y : Yellow<br />
G : Green R : Red<br />
BL : Black with Blue tracer BBr : Black with Brown tracer<br />
BG : Black with Green tracer BO : Black with Orange tracer<br />
BR : Black with Red tracer BW : Black with White tracer<br />
BY : Black with Yellow tracer LB : Blue with Black tracer<br />
LG : Blue with Green tracer LR : Blue with Red tracer<br />
LW : Blue with White tracer LY : Blue with Yellow tracer<br />
BrB : Brown with Black tracer BrW : Brown with White tracer<br />
GB : Green with Black tracer GR : Green with Red tracer<br />
GY : Green with Yellow tracer GrB : Gray with Black tracer<br />
GrR : Gray with Red tracer GrW : Gray with White tracer<br />
OB : Orange with Black tracer OL : Orange with Blue tracer<br />
OG : Orange with Green tracer OR : Orange with Red tracer<br />
OW : Orange with White tracer OY : Orange with Yellow tracer<br />
RB : Red with Black tracer RW : Red with White tracer<br />
WB : White with Black tracer WL : White with Blue tracer<br />
WR : White with Red tracer YB : Yellow with Black tracer<br />
YL : Yellow with Blue tracer YG : Yellow with Green tracer<br />
YR : Yellow with Red tracer<br />
4
GENERAL INFORMATION<br />
CONTENTS<br />
SPECIFICATIONS( & )………………………… 6 (1-8-1)<br />
SPECIFICATIONS( & ) …………………… 8 (1-9-1)<br />
5<br />
1
1-8-1 GENERAL INFORMATION<br />
SPECIFICATIONS ( & )<br />
◉ DIMENSIONS AND MASS<br />
Overall length<br />
Overall width<br />
Overall height<br />
Wheelbase<br />
Ground clearance<br />
Mass<br />
◉ ENGINE<br />
ITEM<br />
ITEM<br />
Type<br />
Number of cylinder<br />
Bore<br />
Stroke<br />
Piston displacement<br />
Fuel system<br />
Starter system<br />
Lubrication system<br />
◉ TRANSMISSION<br />
ITEM<br />
Clutch<br />
Transmission<br />
Gearshift pattern<br />
Final reduction<br />
Gear ratio, 1st<br />
2nd<br />
3rd<br />
4th<br />
5th<br />
6th<br />
Drive belt / chain<br />
2,430 mm (95.7 in)<br />
840 mm (33.1 in)<br />
1,155 mm (45.5 in)<br />
1,665 mm (65.6 in)<br />
160 mm (6.3 in)<br />
220 kg (485 lbs)<br />
Four-stroke, DOHC, Liquid-cooled<br />
V-2 cylinder<br />
81.5 mm (3.21 in)<br />
62.0 mm (2.44 in)<br />
647 ㎤ (39.5 in 3 )<br />
Fuel Injection<br />
Electric starter<br />
Wet sump<br />
Wet multi-plate type<br />
5-speed constant mesh<br />
1-down, 4-up<br />
2.79<br />
2.46<br />
1.78<br />
1.38<br />
1.13<br />
0.96<br />
-<br />
Poly chain belt<br />
6<br />
2,060 mm (81.1 in)<br />
740 mm (29.1 in)<br />
1,090 mm (42.9 in)<br />
1,435 mm (56.5 in)<br />
150 mm (5.9 in)<br />
205 kg (451 lbs)<br />
←<br />
←<br />
←<br />
←<br />
←<br />
←<br />
←<br />
←<br />
←<br />
6-speed constant mesh<br />
1-down, 5-up<br />
2.93<br />
2.46<br />
1.60<br />
1.32<br />
1.13<br />
0.96<br />
0.85<br />
RK525XSO 108 links
◉ CHASSIS<br />
ITEM<br />
Front suspension<br />
Rear suspension<br />
Steering angle<br />
Caster<br />
Trail<br />
Front brake<br />
Rear brake<br />
Front tire size<br />
Rear tire size<br />
Front fork stroke<br />
◉ ELECTRICAL<br />
ITEM<br />
Ignition type<br />
Ignition timing<br />
Spark plug<br />
Battery<br />
Main<br />
Fuse<br />
Head lamp<br />
HI<br />
Head lamp<br />
LO<br />
Turn signal lamp<br />
Brake / Tail lamp<br />
Illumination lamp<br />
License plate lamp<br />
High beam indicator lamp<br />
Turn signal indicator lamp(right & left)<br />
Neutral indicator lamp<br />
Fuel indicator lamp<br />
Coolant temperature indicator lamp<br />
“FI”(Fuel Injection) check lamp<br />
◉ CAPACITIES<br />
ITEM<br />
Fuel tank<br />
Engine oil, oil change<br />
with filter change<br />
overhaul<br />
Front fork oil capacity(One side)<br />
Telescopic type<br />
Swingarm type<br />
35°(right & left)<br />
35°<br />
160 mm (6.3 in)<br />
Double disk brake<br />
Disk brake<br />
120/70 - ZR 18 59W<br />
180/55 - ZR 17 73W<br />
130 mm (5.12 in)<br />
ECU<br />
5°B.T.D.C.at 1,500 rpm<br />
CR8E<br />
12 V 12 Ah (MF)<br />
30 A<br />
15 A<br />
12 V - 60 W ×1<br />
12 V - 55 W ×1<br />
12 V - 10 W × 4<br />
LED type<br />
-<br />
12 V - 5 W × 1<br />
LED type<br />
LED type<br />
LED type<br />
LED type (Level type)<br />
LED type (Level type)<br />
LED type<br />
16.0 ℓ<br />
3,000 ㎖<br />
3,200 ㎖<br />
3,400 ㎖<br />
420 cc<br />
NOTE<br />
The specifications are subject to change without notice.<br />
7<br />
GENERAL INFORMATION 1-8-2<br />
←<br />
←<br />
30°(right & left)<br />
25.5°<br />
85 mm (3.35 in)<br />
←<br />
←<br />
120/60 - ZR 17 55W<br />
160/60 - ZR 17 69W<br />
120 mm (4.72 in)<br />
←<br />
←<br />
←<br />
←<br />
←<br />
←<br />
12 V - 60 W ×1<br />
12 V - 55 W ×1<br />
12 V - 10 W × 4<br />
12 V - 21 / 5 W × 1<br />
LED type<br />
12 V - 5 W × 1<br />
LED type<br />
LED type<br />
LED type<br />
LED type (Level type)<br />
LED type (Level type)<br />
LED type<br />
17.0 ℓ<br />
←<br />
←<br />
←<br />
380 cc
1-9-1 GENERAL INFORMATION<br />
SPECIFICATIONS ( & )<br />
◉ DIMENSIONS AND MASS<br />
ITEM<br />
Overall length<br />
Overall width<br />
Overall height<br />
Wheelbase<br />
Ground clearance<br />
Mass<br />
◉ ENGINE<br />
ITEM<br />
Type<br />
Number of cylinder<br />
Bore<br />
Stroke<br />
Piston displacement<br />
Fuel system<br />
Starter system<br />
Lubrication system<br />
◉ TRANSMISSION<br />
ITEM<br />
Clutch<br />
Transmission<br />
Gearshift pattern<br />
Final reduction<br />
Gear ratio, 1st<br />
2nd<br />
3rd<br />
4th<br />
5th<br />
6th<br />
Drive chain<br />
(Standard type)<br />
2,060 mm (81.1 in)<br />
740 mm (29.1 in)<br />
1,125 mm (44.3 in)<br />
1,435 mm (56.5 in)<br />
150 mm (5.9 in)<br />
215 kg (474 lbs)<br />
(Standard type)<br />
Four-stroke, DOHC, Liquid-cooled<br />
V-2 cylinder<br />
81.5 mm (3.21 in)<br />
62.0 mm (2.44 in)<br />
647 ㎤ (39.5 in 3 )<br />
Fuel Injection<br />
Electric starter<br />
Wet sump<br />
Wet multi-plate type<br />
6-speed constant mesh<br />
1-down, 5-up<br />
2.93<br />
2.46<br />
1.60<br />
1.32<br />
1.13<br />
0.96<br />
0.85<br />
RK525XSO 108 links<br />
8<br />
(Sport type)<br />
←<br />
655 mm (25.8 in)<br />
←<br />
←<br />
←<br />
←<br />
(Sport type)<br />
←<br />
←<br />
←<br />
←<br />
←<br />
←<br />
←<br />
←<br />
(Standard type) (Sport type)<br />
←<br />
←<br />
←<br />
←<br />
←<br />
←<br />
←<br />
←<br />
←<br />
←<br />
←<br />
←<br />
←<br />
←<br />
←<br />
130 mm (5.1 in)<br />
220 kg (485 lbs)<br />
←<br />
←<br />
←<br />
←<br />
←<br />
←<br />
←<br />
←<br />
←<br />
←<br />
←<br />
←<br />
←<br />
←<br />
←<br />
←<br />
←<br />
←<br />
←
◉ CHASSIS<br />
ITEM<br />
Front suspension<br />
Rear suspension<br />
Steering angle<br />
Caster<br />
Trail<br />
Front brake<br />
Rear brake<br />
Front tire size<br />
Rear tire size<br />
Front fork stroke<br />
◉ ELECTRICAL<br />
ITEM<br />
Ignition type<br />
Ignition timing<br />
Spark plug<br />
Battery<br />
Main<br />
Fuse<br />
Head lamp<br />
HI<br />
Head lamp<br />
LO<br />
Turn signal lamp<br />
Brake / Tail lamp<br />
Illumination lamp<br />
License plate lamp<br />
High beam indicator lamp<br />
Turn signal indicator lamp(right & left)<br />
Neutral indicator lamp<br />
Fuel indicator lamp<br />
Coolant temperature indicator lamp<br />
“FI”(Fuel Injection) check lamp<br />
◉ CAPACITIES<br />
ITEM<br />
Fuel tank<br />
Engine oil, oil change<br />
with filter change<br />
overhaul<br />
Front fork oil capacity(One side)<br />
Telescopic type<br />
Swingarm type<br />
27°(right & left)<br />
25.5°<br />
74 mm (2.91 in)<br />
Double disk brake<br />
Disk brake<br />
120/60 - ZR 17 55W<br />
160/60 - ZR 17 69W<br />
120 mm (4.72 in)<br />
NOTE<br />
The specifications are subject to change without notice.<br />
(Standard type) (Sport type)<br />
ECU<br />
5°B.T.D.C.at 1,500 rpm<br />
CR8E<br />
12 V 12 Ah (MF)<br />
30 A<br />
15 A<br />
12 V - H1 : 55 W ×1<br />
12 V - H3 : 55 W ×1<br />
12 V - 10 W × 4<br />
12 V - 21/5 W × 1<br />
LED type<br />
12 V - 5 W × 1<br />
LED type<br />
LED type<br />
LED type<br />
LED type (Level type)<br />
LED type (Level type)<br />
LED type<br />
9<br />
←<br />
←<br />
←<br />
←<br />
←<br />
←<br />
←<br />
←<br />
←<br />
←<br />
(Standard type) (Sport type)<br />
17.0 ℓ<br />
3,000 ㎖<br />
3,200 ㎖<br />
3,400 ㎖<br />
380 cc<br />
←<br />
←<br />
←<br />
←<br />
←<br />
←<br />
←<br />
←<br />
←<br />
←<br />
←<br />
←<br />
←<br />
←<br />
←<br />
←<br />
←<br />
←<br />
(Standard type) (Sport type)<br />
←<br />
←<br />
←<br />
←<br />
←<br />
GENERAL INFORMATION 1-9-2<br />
←<br />
←<br />
←<br />
←<br />
←<br />
←<br />
←<br />
←<br />
←<br />
←<br />
←<br />
←<br />
←<br />
←<br />
←<br />
←<br />
←<br />
←<br />
←<br />
←<br />
←<br />
←<br />
←<br />
←<br />
←<br />
←<br />
←<br />
←<br />
←<br />
←<br />
←<br />
←<br />
←
FI SYSTEM DIAGNOSIS<br />
CONTENTS<br />
PRECAUTIONS IN SERVICING ……………………………………… 12 (4-1-1)<br />
FI SYSTEM TECHNICAL FEATURES ……………………………… 16 (4-1-5)<br />
SELF-DIAGNOSIS FUNCTION ……………………………………… 22 (4-1-11)<br />
FI SYSTEM TROUBLESHOOTING ………………………………… 25 (4-1-14)<br />
CUSTOMER COMPLAINT ANALYSIS………………………………… 25 (4-1-14)<br />
SELF-DIAGNOSTIC PROCEDURES ………………………………… 27 (4-1-16)<br />
SELF-DIAGNOSIS RESET PROCEDURE …………………………… 27 (4-1-16)<br />
MALFUNCTION CODE AND DEFECTIVE CONDITION …………… 28 (4-1-17)<br />
“C12””PICK-UP COIL CIRCUIT MALFUNCTION …………………… 30 (4-1-19)<br />
““C14””TP SENSOR CIRCUIT MALFUNCTION ……………………… 31 (4-1-20)<br />
““C15””WT SENSOR CIRCUIT MALFUNCTION ……………………… 34 (4-1-23)<br />
““C17””oorr““C18””IAP SENSOR CIRCUIT MALFUNCTION …………… 36 (4-1-25)<br />
““C21””IAT SENSOR CIRCUIT MALFUNCTION ……………………… 38 (4-1-27)<br />
““C22””OXYGEN SENSOR CIRCUIT MALFUNCTION ……………… 40 (4-1-29)<br />
““C23””TO SENSOR CIRCUIT MALFUNCTION ……………………… 41 (4-1-30)<br />
““C24””oorr““C25””IGNITION COIL MALFUNCTION …………………… 42 (4-1-31)<br />
““C31””GP SWITCH CIRCUIT MALFUNCTION ……………………… 43 (4-1-32)<br />
““C32””oorr““C33””FUEL INJECTOR CIRCUIT MALFUNCTION ……… 44 (4-1-33)<br />
““C41””FUEL PUMP RELAY CIRCUIT MALFUNCTION ……………… 46 (4-1-35)<br />
SENSORS ………………………………………………………………… 47 (4-1-36)<br />
11<br />
4 -1
4-1-1 FI SYSTEM DIAGNOSIS<br />
PRECAUTIONS IN SERVICING<br />
When handling the component parts or servicing the<br />
FI system, observe the following points for the safety<br />
of the system.<br />
◉ ELECTRICAL PARTS<br />
▣ CONNECTOR / COUPLER<br />
● When connecting a connector, be sure to push it<br />
in until a click is felt.<br />
● With a lock type coupler, be sure to release the<br />
lock when disconnecting, and push it in fully till the<br />
works when connecting it.<br />
● When disconnecting the coupler, be sure to hold<br />
the coupler body and do not pull the lead wires.<br />
● Inspect each terminal on the connector / coupler<br />
for looseness or bending.<br />
● Inspect each terminal for corrosion and<br />
contamination.<br />
The terminals must be clean and free of any<br />
foreign material which could impede proper<br />
terminal contact.<br />
● Inspect each lead wire circuit for poor connection<br />
by shaking it by hand lightly. If any abnormal<br />
condition is found, repair or replace.<br />
● When taking measurements at electrical<br />
connectors using a tester probe, be sure to insert<br />
the probe from the wire harness side (backside) of<br />
the connector / coupler.<br />
12
● When connecting meter probe from the terminal<br />
side of the coupler (connection from harness side<br />
not being possible), use extra care not to force<br />
and cause the male terminal to bend or the female<br />
terminal to open.<br />
Connect the probe as shown to avoid opening of<br />
female terminal.<br />
Never push in the probe where male terminal is<br />
supposed to fit.<br />
● Check the male connector for bend and female<br />
connector for excessive opening. Also check the<br />
coupler for locking (looseness), corrosion, dust,<br />
etc.<br />
◉ FUSE<br />
● When a fuse blows, always investigate the cause<br />
to correct it and then replace the fuse.<br />
● Do not use a fuse of a different capacity.<br />
● Do not use wire or any other substitute for the<br />
fuse.<br />
◉ ECU / VARIOUS SENSORS<br />
● Since each component is a high-precision part,<br />
great care should be taken not to apply any sharp<br />
impacts during removal and installation.<br />
● Be careful not to touch the electrical terminals of<br />
the ECU.<br />
The static electricity from your body may damage<br />
this part.<br />
13<br />
FI SYSTEM DIAGNOSIS 4-1-2
4-1-3 FI SYSTEM DIAGNOSIS<br />
● When disconnecting and connecting the ECU,<br />
make sure to turn “OFF” the ignition switch, or<br />
electronic parts may get damaged.<br />
● Battery connection in reverse polarity is strictly<br />
prohibited.<br />
Such a wrong connection will damage the<br />
components of the FI system instantly when<br />
reverse power is applied.<br />
● Removing any battery terminal of a running<br />
engine is strictly prohibited.<br />
The moment such removal is made, damaging<br />
counter electromotive force will be applied to the<br />
ECU which may result in serious damage.<br />
● Before measuring voltage at each terminal, check<br />
to make sure that battery voltage is 11V or higher.<br />
Terminal voltage check at low battery voltage will<br />
lead to erroneous diagnosis.<br />
14<br />
INCORRECT
● Never connect an ohmmeter to the ECU with its<br />
coupler connected. If attempted, damage to ECU<br />
or sensors may result.<br />
● Be sure to use a specified voltmeter / ohmmeter.<br />
Otherwise, accurate measurements may not be<br />
obtained and personal injury may result.<br />
◉ USING TESTERS<br />
● Use well-charged batteries in the tester.<br />
● Be sure to set the tester to the correct testing<br />
range.<br />
▣ USING THE TESTER<br />
● Incorrectly connecting the � and � probes may<br />
cause the inside of the tester to burnout.<br />
● If the voltage and current are not known, make<br />
measurements using the highest range.<br />
● After using the tester, turn the power off.<br />
15<br />
FI SYSTEM DIAGNOSIS 4-1-4
4-1-5 FI SYSTEM DIAGNOSIS<br />
FI SYSTEM TECHNICAL FEATURES<br />
◉ INJECTION TIME (INJECTION VOLUME)<br />
The factors to determine the injection time include the basic fuel injection time, which is calculated on the basis of<br />
intake air pressure, engine speed and throttle opening angle, and various compensations.<br />
These compensations are determined according to the signals from various sensors that detect the engine and<br />
driving conditions.<br />
Intake Air Pressure Sensor<br />
(IAP Sensor)<br />
Pick-up coil<br />
Throttle Position Sensor<br />
(TP Sensor)<br />
Various Sensors<br />
Injectors<br />
Intake air pressure signal<br />
Engine speed signal<br />
Throttle opening signal<br />
Various signals<br />
Injection signal<br />
16<br />
ECU<br />
Basic<br />
fuel<br />
injection<br />
time<br />
Compensation<br />
Ultimate<br />
fuel<br />
injection<br />
time
◉ COMPENSATION OF INJECTION TIME (VOLUME)<br />
17<br />
FI SYSTEM DIAGNOSIS 4-1-6<br />
The following different signals are output from the respective sensors for compensation of the fuel injection time<br />
(volume).<br />
SIGNAL DESCRIPTION<br />
WATER COOLANT TEMPERATURE<br />
SENSOR SIGNAL<br />
INTAKE AIR TEMPERATURE SENSOR<br />
SIGNAL<br />
BATTERY VOLTAGE SIGNAL<br />
ENGINE RPM SIGNAL<br />
STARTING SIGNAL<br />
ACCELERATION SIGNAL /<br />
DECELERATION SIGNAL<br />
◉ INJECTION STOP CONTROL<br />
TIP OVER SENSOR SIGNAL<br />
(FUEL CUT-OFF)<br />
OVER-REV. LIMITER SIGNAL<br />
When engine coolant temperature is low, injection time (volume)<br />
is increased.<br />
When intake air temperature is low, injection time (volume) is<br />
increased.<br />
ECU operates on the battery voltage and at the same time, it<br />
monitors the voltage signal for compensation of the fuel injection<br />
time (volume). A longer injection time is needed to adjust<br />
injection volume in the case of low voltage.<br />
At high speed, the injection time (volume) is increased.<br />
When starting engine, additional fuel is injected during cranking<br />
engine.<br />
During acceleration, the fuel injection time (volume) is increased<br />
in accordance with the throttle opening speed and engine rpm.<br />
During deceleration, the fuel injection time (volume) is<br />
decreased.<br />
SIGNAL DESCRIPTION<br />
When the motorcycle tips over, the tip over sensor sends a<br />
signal to the ECU. Then, this signal cuts OFF current supplied to<br />
the fuel pump, fuel injector and ignition coil.<br />
The fuel injectors stop operation when engine rpm reaches rev.<br />
limit rpm.
4-1-7 FISYSTEM DIAGNOSIS<br />
◉ FI SYSTEM PARTS LOCATION ( )<br />
1<br />
9<br />
2<br />
① Speedometer<br />
② Fuel pump relay<br />
③ Fuel injector, NO.1<br />
④ TP sensor<br />
⑤ IAT sensor<br />
3 4<br />
8<br />
5<br />
6<br />
18<br />
7<br />
ECU<br />
⑥ Fuel injector, NO.2<br />
⑦ GP switch<br />
⑧ Pick-up coil<br />
⑨ Ignition coil, NO.1
⑩ TO sensor<br />
⑪ Ignition coil, NO.2<br />
⑫ IAP sensor, NO.2<br />
ECU<br />
15<br />
10<br />
12 13<br />
11<br />
19<br />
14<br />
⑬ IAP sensor, NO.1<br />
⑭ WT sensor<br />
⑮ Oxygen sensor<br />
FISYSTEM DIAGNOSIS 4-1-8
4-1-9 FISYSTEM DIAGNOSIS<br />
◉ FI SYSTEM PARTS LOCATION ( )<br />
1<br />
8<br />
① Speedometer<br />
② Fuel injector, NO.1<br />
③ TP sensor<br />
④ Fuel injector, NO.2<br />
2<br />
3 4<br />
7<br />
20<br />
6<br />
5<br />
ECU<br />
⑤ IAT sensor<br />
⑥ GP switch<br />
⑦ Pick-up coil<br />
⑧ Ignition coil, NO.1
9<br />
10<br />
⑨ Fuel pump relay<br />
⑩ TO sensor<br />
⑪ Ignition coil, NO.2<br />
⑫ IAP sensor, NO.1<br />
ECU<br />
15<br />
11<br />
12 13<br />
21<br />
14<br />
⑬ IAP sensor, NO.2<br />
⑭ WT sensor<br />
⑮ Oxygen sensor<br />
FISYSTEM DIAGNOSIS 4-1-10
4-1-11 FI SYSTEM DIAGNOSIS<br />
SELF-DIAGNOSIS FUNCTION<br />
The self-diagnosis function is incorporated in the ECU. The function has two modes, “USER MODE” and “DEALER<br />
MODE”. The user can only be notified by the LCD(DISPLAY) panel ① and the “FI” check lamp “ ” ② . To check<br />
the function of the individual FI system devices, the dealer mode is prepared. In this check, the special tool is<br />
necessary to read the code of the malfunction items.<br />
◉ USER MODE<br />
“NO”<br />
“YES”<br />
MALFUNCTION<br />
Engine can start<br />
Engine can not<br />
start<br />
*1<br />
When one of the signals is not received by ECU, the fail-safe circuit works and injection is not stopped. In this case,<br />
“FI” and speedometer are indicated in the LCD panel and motorcycle can run.<br />
*2<br />
The injection signal is stopped, when the crankshaft position sensor signal, tip over sensor signal, #1/#2 ignition<br />
signals, #1/#2 injector signals, fuel pump relay signal or ignition switch signal is not sent to ECU. In this case, “FI” is<br />
indicated in the LCD panel. Motorcycle does not run.<br />
“CHEC” : The LCD panel indicates “CHE” when no communication signal from the ECU is received for 3 seconds.<br />
For example, The ignition switch is turned “ON” position, and the engine stop switch is turned “OFF” position. In this<br />
case, the speedometer does not receive any signal from ECU, and the panel indicates “CHE”.<br />
If “CHE” is indicated, the LCD does not indicate the trouble code. It is necessary to check the wiring harness<br />
between ECU and speedometer couplers.<br />
The possible cause of this indication is as follows, Engine stop switch is in “OFF” position. Ignition fuse is burnt.<br />
②<br />
①<br />
LCD (DISPLAY)<br />
INDICATION ①<br />
“FI” CHECK LAMP<br />
INDICATION ②<br />
INDICATION<br />
MODE<br />
Speedometer - -<br />
Speedometer<br />
and<br />
“FI” letters<br />
*1<br />
“FI” letters<br />
*2<br />
22<br />
“FI” check lamp<br />
comes on.<br />
“FI” check lamp comes<br />
on and blinks.<br />
①<br />
Each 2 sec.<br />
Speedometer or “FI”<br />
is indicated.<br />
“FI” is indicated<br />
continuously.<br />
②
◉ DEALER MODE<br />
23<br />
FI SYSTEM DIAGNOSIS 4-1-12<br />
The defective function is memorized in the ECU. Use the special tool’s coupler to connect to the dealer mode<br />
coupler. (Refer to page 4-1-16) The memorized malfunction code is displayed on LCD (DISPLAY) panel.<br />
Malfunction means that the ECU does not receive signal from the devices. These affected devices are indicated in<br />
the code form.<br />
�<br />
Mode select switch : 09900-27000<br />
�<br />
�<br />
�<br />
CAUTION<br />
�� Do not disconnect the ECU lead wire couplers, before checking the malfunction code, or the malfunction<br />
code memory is erased and the malfunction code can not be checked.<br />
�� Confirm the malfunction code after turn the ignition switch “ON” position or cranking the engine for few<br />
seconds.<br />
MALFUNCTION<br />
“NO”<br />
“YES”<br />
LCD (DISPLAY)<br />
INDICATION ��<br />
“FI” CHECK LAMP<br />
INDICATION ��<br />
INDICATION<br />
MODE<br />
C00 -<br />
C**code is indicated<br />
from small numeral to<br />
large one.<br />
“FI” check lamp<br />
goes off.<br />
For each 2 sec.,<br />
code is indicated.
4-1-13 FI SYSTEM DIAGNOSIS<br />
CODE<br />
C00<br />
C12<br />
C14<br />
C15<br />
C17<br />
C18<br />
C21<br />
C22<br />
C23<br />
C24<br />
C25<br />
C31<br />
C32<br />
C33<br />
C41<br />
None<br />
Pick-up coil<br />
Throttle position sensor (TPS)<br />
Water temperature sensor (WTS)<br />
Intake air pressure sensor (IAPS), NO.1<br />
Intake air pressure sensor (IAPS), NO.2<br />
Intake air temperature sensor (IATS)<br />
Oxygen sensor (O2S)<br />
Tip over sensor (TOS)<br />
IG coil, NO.1<br />
IG coil, NO.2<br />
Gear position switch (GP switch)<br />
Fuel injector, NO.1<br />
Fuel injector, NO.2<br />
Fuel pump relay<br />
MALFUNCTION PART REMARKS<br />
In the LCD (DISPLAY) panel, the malfunction code is indicated from small code to large code.<br />
24<br />
No defective part<br />
For NO.1 cylinder<br />
For NO.2 cylinder<br />
For NO.1 cylinder<br />
For NO.2 cylinder<br />
For NO.1 cylinder<br />
For NO.2 cylinder
FI SYSTEM TROUBLESHOOTING<br />
CUSTOMER COMPLAINT ANALYSIS<br />
25<br />
FI SYSTEM DIAGNOSIS 4-1-14<br />
Record details of the problem (failure, complaint) and how it occurred as described by the customer. For this<br />
purpose, use of such an inspection form will facilitate collecting information to the point required for proper analysis<br />
and diagnosis.<br />
▣ EXAMPLE : CUSTOMER PROBLEM INSPECTION FORM<br />
User name : Model : VIN :<br />
Date of issue : Date Reg. Date of problem : Mileage :<br />
“FI” Check lamp<br />
Malfunction display / code<br />
(LCD)<br />
� Always ON � Sometimes ON � Always OFF � Good condition<br />
� No code � Malfunction code ( )<br />
PROBLEM SYMPTOMS<br />
� Difficult Starting � Poor Driveability<br />
� No cranking � Hesitation on acceleration<br />
� No initial combustion � Back fire / � After fire<br />
� No combustion � Lack of power<br />
� Poor starting at � Surging<br />
(� cold � warm � always) � Abnormal knocking<br />
� Other � Engine rpm jumps briefly<br />
� Other<br />
� Poor Idling � Engine Stall when<br />
� Poor fast Idle � Immediately after start<br />
� Abnormal idling speed � Throttle valve is opened<br />
(� High � Low) ( rpm) � Throttle valve is closed<br />
� Unstable � Load is applied<br />
� Hunting ( rpm. to rpm) � Other<br />
� Other<br />
� OTHERS :
4-1-15 FI SYSTEM DIAGNOSIS<br />
Weather<br />
Temperature<br />
Frequency<br />
Road<br />
Engine condition<br />
MOTORCYCLE / ENVIRONMENTAL CONDITION WHEN PROBLEM OCCURS<br />
Environmental condition<br />
Motorcycle condition<br />
� � � � � �<br />
� � � � �<br />
� � �<br />
�<br />
� � � � �<br />
� � �<br />
Fair Cloudy Rain Snow Always Other<br />
Hot Warm Cool Cold ( °F / °C) Always<br />
Always Sometimes ( times / day, month) Only once<br />
Under certain condition<br />
Urban Suburb Highway Mountainous (� Uphill Downhill)<br />
Tarmacadam Gravel Other<br />
Motorcycle condition<br />
� � � � �<br />
� � �<br />
Cold Warming up phase Warmed up Always Other at starting<br />
Immediately after start Racing without load Engine speed ( rpm)<br />
� � �<br />
� � �<br />
�<br />
�<br />
During driving : Constant speed Accelerating Decelerating<br />
Right hand corner Left hand corner At stop<br />
Motorcycle speed when problem occurs ( km/h, Mile/h)<br />
Other<br />
NOTE<br />
The above form is a standard sample. If should be modified according to conditions characteristic of each<br />
market.<br />
26
SELF-DIAGNOSTIC PROCEDURES<br />
Don’t disconnect couplers from ECU, battery cable<br />
from battery, ECU ground wire harness from engine<br />
or main fuse before confirming malfunction code<br />
(self-diagnostic trouble code) stored in memory.<br />
Such disconnection will erase memorized information<br />
in ECU memory.<br />
Malfunction code stored in ECU memory can be<br />
checked by the special tool.<br />
To check malfunction code, read SELF-DIAGNOSIS<br />
FUNCTION “DEALER MODE” (Refer to page<br />
4-1-12, 13) carefully to have good understanding as<br />
to what functions are available and how to use it.<br />
Be sure to read “PRECAUTIONS for Electrical Circuit<br />
Service” (Refer to page 4-1-1) before inspection and<br />
observe what is written there.<br />
● Remove the seat.<br />
● Connect the special tool to the dealer mode<br />
coupler at the wiring harness, and the ignition<br />
switch is set to “ON” position.<br />
● Turn the special tool’s switch “ON” position and<br />
check the malfunction code to determine the<br />
malfunction part.<br />
Mode select switch : 09900-27000<br />
NOTE<br />
The dealer mode coupler is located under the<br />
seat.<br />
SELF-DIAGNOSIS RESET PROCEDURE<br />
● After repairing the trouble, turn the ignition switch<br />
“OFF” position and turn “ON” position again.<br />
● If C00(LCD INDICATION ① ) is indicates, the<br />
malfunction codes are cleared.<br />
● Disconnect the special tool from the dealer mode<br />
coupler.<br />
27<br />
FI SYSTEM DIAGNOSIS 4-1-16<br />
①<br />
①
4-1-17 FI SYSTEM DIAGNOSIS<br />
MALFUNCTION CODE AND DEFECTIVE CONDITION<br />
MALFUNCTION<br />
CODE<br />
C00 NO FAULT -<br />
C12 Pick-up coil<br />
C14<br />
C15<br />
C17 / C18<br />
C21<br />
C22<br />
C23<br />
DETECTED ITEM<br />
Throttle position sensor<br />
(TPS)<br />
Water temperature<br />
sensor (WTS)<br />
Intake air pressure<br />
sensor (IAPS),<br />
NO.1 / NO.2<br />
Intake air temperature<br />
sensor (IATS)<br />
Oxygen sensor (O2S)<br />
Tip over sensor (TOS)<br />
The signal does not reach ECU for more than 2 sec. after<br />
receiving the IAP signal.<br />
Pick-up coil wiring and mechanical parts.<br />
(Pick-up coil, lead wire coupler connection)<br />
The sensor should produce following voltage.<br />
0.2 V � sensor voltage � 4.8 V<br />
Without the above range for 5 sec. and more, C14 is indicated.<br />
Throttle position sensor, lead wire / coupler connection.<br />
The sensor voltage should be the following.<br />
0.2 V � sensor voltage � 4.6 V<br />
Without the above range for 5 sec. and more, C15 is indicated.<br />
Water temperature sensor, lead wire / coupler connection.<br />
The sensor should produce following voltage.<br />
0.2 V � sensor voltage � 4.8 V<br />
Without the above range for 5 sec. and more, C17 or C18 is<br />
indicated.<br />
Intake air pressure sensor, lead wire / coupler connection.<br />
The sensor voltage should be the following.<br />
0.2 V � sensor voltage � 4.6 V<br />
Without the above range for 5 sec. and more, C21 is indicated.<br />
Intake air temperature sensor, lead wire / coupler connection.<br />
The oxygen sensor signal is input in ECU since then 180 sec.<br />
after the engine run.<br />
When this is the case, ECU not receive the signal, C22 is<br />
indicated.<br />
Oxygen sensor, lead wire / coupler connection.<br />
The sensor voltage should be the following for more than 5 sec.<br />
after ignition switch turns “ON” position.<br />
0.2 V � sensor voltage � 4.6 V<br />
Without the above value for 5 sec. and more, C23 is indicated.<br />
Tip over sensor, lead wire / coupler connection.<br />
28<br />
DETECTED FAILURE CONDITION<br />
CHECK FOR
MALFUNCTION<br />
CODE<br />
C24 / C25<br />
C31<br />
C32 / C33<br />
C41<br />
DETECTED ITEM<br />
Ignition coil (IG coil),<br />
NO.1 / NO.2<br />
Gear position switch<br />
(GP switch)<br />
Fuel injector, NO.1 / NO.2<br />
Fuel pump relay<br />
29<br />
FI SYSTEM DIAGNOSIS 4-1-18<br />
DETECTED FAILURE CONDITION<br />
CHECK FOR<br />
Ignition signal is interrupted continuous by 32 times or more<br />
when ECU confirm ignition surge at each combustion chamber,<br />
C24 or C25 is indicated.<br />
Ignition coil, wiring / coupler connection, power supply from the<br />
battery.<br />
It judges from gear position voltage, engine speed and throttle<br />
position by ECU, when the gear position voltage is 0.1 V and<br />
less.<br />
Gear position switch, wiring / coupler connection, gearshift cam<br />
etc.<br />
Injector signal is interrupted continuous by 16 times or more<br />
when ECU confirm injector running surge at each combustion<br />
chamber, C32 or C33 is indicated.<br />
Injector, wiring / coupler connection, power supply to the<br />
injector.<br />
Voltage is applied continuous over 5 sec., battery voltage � 5 V<br />
when fuel pump relay is “OFF” position or battery voltage � 5 V<br />
when fuel pump relay is “ON” position.<br />
Fuel pump relay, connecting lead wire, power source to fuel<br />
pump relay, fuel injector.
4-1-19 FI SYSTEM DIAGNOSIS<br />
“C12” PICK-UP COIL CIRCUIT MALFUNCTION<br />
▣ INSPECTION<br />
DETECTED CONDITION POSSIBLE CAUSE<br />
The signal does not reach ECU for more than 2 sec.<br />
after receiving the IAP signal.<br />
◈ Step 1<br />
1) Remove the frame cover.<br />
2) Turn the ignition switch “OFF” position.<br />
3) Check the pick-up coil coupler ① for loose or poor<br />
contacts. If OK, then measure the pick-up coil<br />
resistance.<br />
4) Disconnect the pick-up coil coupler ① and<br />
measure the resistance.<br />
Pick-up coil resistance<br />
110 ~ 140 Ϊ<br />
(G - L)<br />
5) If OK, then check the continuity between each<br />
terminal and ground.<br />
Pick-up coil continuity<br />
∞ Ϊ (Infinity)<br />
(G - Ground)<br />
(L - Ground)<br />
Tester knob indication : Resistance (Ϊ )<br />
Are the resistance and continuity OK?<br />
YES<br />
NO<br />
● L or G wire open or shorted to<br />
ground, or poor ③ or ⑮ connection.<br />
● If wire and connection are OK,<br />
intermittent trouble or faulty ECU.<br />
● Recheck each terminal and wire<br />
harness for open circuit and poor<br />
connection.<br />
● Loose or poor contacts on the pickup<br />
coil coupler or ECU coupler.<br />
● Replace the pick-up coil with a new<br />
one.<br />
30<br />
● Metal particles or foreign materiel being attached<br />
on the pick-up coil and rotor tip.<br />
● Pick-up coil circuit open or short.<br />
● Pick-up coil malfunction.<br />
● ECU malfunction.<br />
ECU Coupler<br />
①<br />
③<br />
⑮
“C14” TP SENSOR CIRCUIT MALFUNCTION<br />
▣ INSPECTION<br />
DETECTED CONDITION POSSIBLE CAUSE<br />
Output voltage is out of the specified range.<br />
0.2 V � Sensor voltage � 4.8 V<br />
◈ Step 1<br />
1) Turn the ignition switch “OFF” position.<br />
2) Check the TP sensor coupler for loose or poor<br />
contacts.<br />
If OK, then measure the TP sensor input voltage.<br />
3) Disconnect the TP sensor coupler.<br />
4) Turn the ignition switch “ON” position.<br />
5) Measure the voltage at the OB wire and ground.<br />
6) If OK, then measure the voltage at the OB wire<br />
and GR wire.<br />
TP sensor input<br />
voltage<br />
YES<br />
NO<br />
Go to Step 2.<br />
4.5 ~ 5.5 V<br />
( � OB- � Ground )<br />
( � OB- � GR )<br />
Tester knob indication : Voltage ( )<br />
Is the voltage OK?<br />
● Loose or poor contacts on the<br />
ECU coupler.<br />
● Open or short circuit in the OB<br />
wire or GR wire.<br />
31<br />
● TP sensor circuit open or short.<br />
● TP sensor malfunction.<br />
● ECU malfunction.<br />
FI SYSTEM DIAGNOSIS 4-1-20
4-1-21 FI SYSTEM DIAGNOSIS<br />
◈ Step 2<br />
1) Remove the frame cover.<br />
2) Turn the ignition switch “OFF” position.<br />
3) Disconnect the TP sensor coupler.<br />
4) Check the continuity between � and ground.<br />
TP sensor continuity<br />
∞ Ϊ (Infinity)<br />
(� - Ground)<br />
5) If OK, then measure the TP sensor resistance<br />
(between � and �).<br />
6) Turn the throttle grip and measure the resistance.<br />
㏀<br />
㏀<br />
TP sensor resistance<br />
Throttle valve is closed Approx. 1.28<br />
Throttle valve is opened Approx. 4.37<br />
Tester knob indication : Resistance (㏀ )<br />
Are the resistance and continuity OK?<br />
YES<br />
NO<br />
Go to Step 3.<br />
● Reset the TP sensor position<br />
correctly.<br />
● Replace the TP sensor with a<br />
new one.<br />
32<br />
Ground
◈ Step 3<br />
1) Connect the TP sensor coupler.<br />
2) Insert the needle pointed probes to the lead wire<br />
coupler.<br />
3) Turn the ignition switch “ON” position.<br />
Measure the TP sensor output voltage at the<br />
coupler (between � LY and � GR) by turning the<br />
throttle grip.<br />
TP sensor output voltage<br />
Throttle valve is closed Approx. 1.12 V<br />
Throttle valve is opened Approx. 4.26 V<br />
Is the voltage OK?<br />
YES<br />
NO<br />
Tester knob indication : Voltage ( )<br />
● OB, LY or GR wire open or<br />
shorted to ground, or poor � , ⑤ ,<br />
or 59<br />
connection.<br />
● If wire and connection are OK,<br />
intermittent trouble or faulty ECU.<br />
● Recheck each terminal and wire<br />
harness for open circuit and poor<br />
connection.<br />
If check result is not satisfactory,<br />
replace TP sensor with a new one.<br />
33<br />
59<br />
FI SYSTEM DIAGNOSIS 4-1-22<br />
ECU Coupler<br />
⑤<br />
�
4-1-23 FI SYSTEM DIAGNOSIS<br />
“C15” WT SENSOR CIRCUIT MALFUNCTION<br />
▣ INSPECTION<br />
DETECTED CONDITION POSSIBLE CAUSE<br />
Output voltage is out of the specified range.<br />
0.2 V � Sensor voltage � 4.6 V<br />
◈ Step 1<br />
1) Turn the ignition switch “OFF” position.<br />
2) Check the WT sensor coupler for loose or poor<br />
contacts.<br />
If OK, then measure the WT sensor voltage at the<br />
wire side coupler.<br />
3) Disconnect the coupler and turn the ignition switch<br />
“ON” position.<br />
4) Measure the voltage between Br wire terminal and<br />
ground.<br />
5) If OK, then measure the voltage between Br wire<br />
terminal and BW wire terminal.<br />
WT sensor voltage<br />
YES<br />
NO<br />
Go to Step 2.<br />
4.5 ~ 5.5 V<br />
( � Br- � Ground )<br />
( � Br- � BW )<br />
Tester knob indication : Voltage ( )<br />
Is the voltage OK?<br />
● Loose or poor contacts on the<br />
ECU coupler.<br />
● Open or short circuit in the Br<br />
wire or BW wire.<br />
34<br />
● WT sensor circuit open or short.<br />
● WT sensor malfunction.<br />
● ECU malfunction.
◈ Step 2<br />
1) Turn the ignition switch “OFF” position.<br />
2) Measure the WT sensor resistance.<br />
☞ Refer to the service manual 『<br />
(99000-51210)』page 5-7<br />
☞ Refer to the service manual 『<br />
(99000-94810)』page 5-7<br />
Engine Coolant Temp.<br />
0 ℃ (32 ℉)<br />
20 ℃ (68 ℉)<br />
40 ℃ (104 ℉)<br />
60 ℃ (140 ℉)<br />
80 ℃ (176 ℉)<br />
Is the resistance OK?<br />
YES<br />
NO<br />
WT sensor resistance<br />
Resistance (To ECU)<br />
Approx. 5.790 ㏀<br />
Approx. 2.450 ㏀<br />
Approx. 1.148 ㏀<br />
Approx. 0.586 ㏀<br />
Approx. 0.322 ㏀<br />
Tester knob indication : Resistance (㏀ )<br />
● Br or BW wire open or shorted to<br />
ground, or poor ⑬ or 59<br />
connection.<br />
● If wire and connection are OK,<br />
intermittent trouble or faulty ECU.<br />
● Recheck each terminal and wire<br />
harness for open circuit and poor<br />
connection.<br />
Replace the WT sensor with a new<br />
one.<br />
35<br />
59<br />
FI SYSTEM DIAGNOSIS 4-1-24<br />
ECU Coupler<br />
⑬
4-1-25 FI SYSTEM DIAGNOSIS<br />
“C17” or “C18” IAP SENSOR CIRCUIT MALFUNCTION<br />
▣ INSPECTION<br />
DETECTED CONDITION<br />
IAP sensor voltage is out of the specified range.<br />
0.2 V � Sensor voltage � 4.8 V<br />
NOTE :<br />
Note that atmospheric pressure varies depending on<br />
weather conditions as well as altitude.<br />
Take that into consideration when inspecting voltage.<br />
◈ Step 1<br />
1) Remove the fuel tank.<br />
2) Turn the ignition switch “OFF” position.<br />
3) Check the IAP sensor NO.1 coupler ① and NO.2<br />
coupler ② for loose or poor contacts. If OK, then<br />
measure the IAP sensor input voltage.<br />
4) Disconnect the IAP sensor coupler NO.1 ③ and<br />
NO.2 ④ .<br />
5) Turn the ignition switch “ON” position.<br />
6) Measure the voltage at the OB wire and ground. If<br />
OK, then measure the voltage at the OB wire and<br />
GR wire.<br />
IAP sensor input<br />
voltage<br />
YES<br />
NO<br />
4.5 ~ 5.5 V<br />
( � OB - � Ground )<br />
( � OB - � GR )<br />
Tester knob indication : Voltage ( )<br />
Is the voltage OK?<br />
Go to Step 2.<br />
● Loose or poor contacts on the<br />
ECU coupler.<br />
● Open or short circuit in the OB<br />
wire or GR wire.<br />
36<br />
POSSIBLE CAUSE<br />
● Clogged vacuum passage between throttle body<br />
and IAP sensor.<br />
● Air being drawn from vacuum passage between<br />
throttle body and IAP sensor.<br />
● IAP sensor circuit open or shorted to ground.<br />
● IAP sensor malfunction.<br />
● ECU malfunction.<br />
①<br />
③<br />
④<br />
②
◈ Step 2<br />
1) Connect the IAP sensor coupler NO.1 ① and<br />
NO.2 ② .<br />
2) Insert the needle pointed probes to the lead wire<br />
coupler.<br />
3) Start the engine at idle speed.<br />
4) Measure the IAP sensor output voltage at the wire<br />
side coupler (between BL and GR wires).<br />
IAP sensor<br />
output voltage<br />
Is the voltage OK?<br />
YES<br />
NO<br />
Output voltage<br />
(Input voltage 5 V, ambient temp. 25 °C, 77 °F)<br />
ALTITUDE<br />
(Reference)<br />
Approx. 2.7 V<br />
at idle speed<br />
( � BL - � GR )<br />
Tester knob indication : Voltage ( )<br />
● OB, BL(NO.1), BY(NO.2) or GR<br />
wire open or shorted to ground,<br />
or poor � , � (NO.1), � (NO.2)<br />
or 59<br />
connection.<br />
● If wire and connection are OK,<br />
intermittent trouble or faulty ECU.<br />
● Recheck each terminal and wire<br />
harness for open circuit and poor<br />
connection.<br />
If check result is not satisfactory,<br />
replace IAP sensor with a new one.<br />
ATMOSPHERIC<br />
PRESSURE<br />
(ft) (m) (mmHg) kPa (V)<br />
0<br />
0<br />
760 100<br />
Approx.<br />
2 000 610 707<br />
94<br />
3.7 ~ 3.9<br />
2 001 611 707<br />
94<br />
Approx.<br />
5 000 1 524 634<br />
85<br />
3.3 ~ 3.7<br />
5 001 1 525 634<br />
85<br />
Approx.<br />
8 000 2 438 567<br />
76<br />
3.0 ~ 3.3<br />
8 001 2 439 567<br />
76<br />
Approx.<br />
10 000 3 048 526<br />
70<br />
2.7 ~ 3.0<br />
37<br />
①<br />
59<br />
OUTPUT<br />
VOLTAGE<br />
FI SYSTEM DIAGNOSIS 4-1-26<br />
� �<br />
ECU Coupler<br />
�<br />
②
4-1-27 FI SYSTEM DIAGNOSIS<br />
“C21” IAT SENSOR CIRCUIT MALFUNCTION<br />
▣ INSPECTION<br />
DETECTED CONDITION POSSIBLE CAUSE<br />
Output voltage is out of the specified range.<br />
0.2 V � Sensor voltage � 4.6 V<br />
◈ Step 1<br />
1) Remove the fuel tank.<br />
2) Turn the ignition switch “OFF” position.<br />
3) Check the IAT sensor coupler for loose or poor<br />
contacts.<br />
If OK, then measure the IAT sensor voltage at the<br />
wire side coupler.<br />
4) Disconnect the coupler and turn the ignition switch<br />
“ON” position.<br />
5) Measure the voltage between GW wire terminal<br />
and ground.<br />
6) If OK, then measure the voltage between GW wire<br />
terminal and GR wire terminal.<br />
IAT sensor voltage<br />
YES<br />
NO<br />
Go to Step 2.<br />
4.5 ~ 5.5 V<br />
( � GW - � Ground )<br />
( � GW - � GR )<br />
Tester knob indication : Voltage ( )<br />
Is the voltage OK?<br />
● Loose or poor contacts on the<br />
ECU coupler.<br />
● Open or short circuit in the GW<br />
wire or GR wire.<br />
38<br />
● IAT sensor circuit open or short.<br />
● IAT sensor malfunction.<br />
● ECU malfunction.<br />
GW<br />
GR
◈ Step 2<br />
1) Turn the ignition switch “OFF” position.<br />
2) Measure the IAT sensor resistance.<br />
Intake Air Temp.<br />
0 ℃ (32 ℉)<br />
80 ℃ (176 ℉)<br />
Is the resistance OK?<br />
YES<br />
NO<br />
IAT sensor resistance<br />
● GW or GR wire open or shorted<br />
to ground, or poor ⑪ or 59<br />
connection.<br />
● If wire and connection are OK,<br />
intermittent trouble or faulty ECU.<br />
● Recheck each terminal and wire<br />
harness for open circuit and poor<br />
connection.<br />
Replace the IAT sensor with a new<br />
one.<br />
NOTE<br />
Resistance<br />
Approx. 5.4 ~ 6.6 ㏀<br />
Approx. 0.29 ~ 0.39 ㏀<br />
Tester knob indication : Resistance (㏀ )<br />
IAT sensor resistance measurement method is<br />
the same way as that of the WT sensor.<br />
☞☞ Refer to the service manual 『『<br />
(99000-51210)』』page 5-7<br />
☞☞ Refer to the service manual 『『<br />
(99000-94810)』』page 5-7<br />
39<br />
59<br />
FI SYSTEM DIAGNOSIS 4-1-28<br />
ECU Coupler<br />
⑪
4-1-29 FI SYSTEM DIAGNOSIS<br />
“C22” OXYGEN SENSOR CIRCUIT MALFUNCTION<br />
DETECTED CONDITION<br />
Oxygen sensor signal is not input in ECU since then<br />
more than 180 sec. after the engine run.<br />
▣ INSPECTION<br />
1) Remove the seat.<br />
2) Turn the ignition switch “OFF” position.<br />
3) Check the Oxygen sensor coupler for loose or<br />
poor contacts.<br />
Is OK?<br />
YES<br />
NO<br />
● B or GR wire open or shorted to<br />
ground, or poor ⑨ or 59 connection.<br />
(Sensor)<br />
● OB or B wire open or shorted to<br />
ground, or poor � or 44 connention.<br />
(Heater)<br />
● If wire and connection are OK,<br />
intermittent trouble or faulty ECU.<br />
● Recheck each terminal and wire<br />
harness for open circuit and poor<br />
connection.<br />
Replace the Oxygen sensor.<br />
40<br />
POSSIBLE CAUSE<br />
● Oxygen sensor, Oxygen sensor heater circuit open<br />
or short.<br />
● Oxygen sensor, Oxygen sensor heater malfunction.<br />
● ECU malfunction.<br />
59<br />
44<br />
ECU Coupler<br />
�<br />
⑨
“C23” TO SENSOR CIRCUIT MALFUNCTION<br />
▣ INSPECTION<br />
Is the resistance OK?<br />
YES<br />
NO<br />
DETECTED CONDITION POSSIBLE CAUSE<br />
Output voltage is out of the specified range.<br />
0.2 V � Sensor voltage � 4.6 V<br />
◈ Step 1<br />
1) Remove the seat.<br />
2) Turn the ignition switch “OFF” position.<br />
3) Check the TO sensor coupler for loose or poor<br />
contacts.<br />
If OK, then measure the TO sensor resistance.<br />
4) Remove the TO sensor.<br />
5) Measure the resistance between B wire and GR<br />
wire terminals.<br />
TO sensor resistance<br />
Go to step 2<br />
19.1 ~ 19.7 ㏀<br />
(B - GR)<br />
Tester knob indication : Resistance (㏀ )<br />
Replace the TO sensor with a new<br />
one.<br />
41<br />
FI SYSTEM DIAGNOSIS 4-1-30<br />
● TO sensor circuit short or leaned more than 60。.<br />
● TO sensor malfunction.<br />
● ECU malfunction.
4-1-31 FI SYSTEM DIAGNOSIS<br />
◈ Step 2<br />
1) Connect the TO sensor coupler.<br />
2) Insert the needle pointed probe to the lead wire<br />
coupler.<br />
3) Turn the ignition switch “ON” position.<br />
4) Measure the voltage at the wire side coupler<br />
between OB and GR wires of the TO sensor at<br />
horizontal.<br />
TO sensor voltage<br />
Also, measure the voltage when leaning of the<br />
motorcycle.<br />
5) Measure the voltage when it is leaned more than<br />
65。, left and right, from the horizontal level.<br />
TO sensor voltage<br />
Is the voltage OK?<br />
YES<br />
NO<br />
0.4 ~ 1.4 V<br />
at normal condition<br />
( � OB - � GR )<br />
3.7 ~ 4.4 V<br />
at leaned more than 65。<br />
( � OB - � GR )<br />
Tester knob indication : Voltage ( )<br />
● OB, B or GR wire open or<br />
shorted to ground, or poor � , ④<br />
or 59 connection.<br />
● If wire and connection are OK,<br />
intermittent trouble or faulty ECU.<br />
● Recheck each terminal and wire<br />
harness for open circuit and poor<br />
connection.<br />
● Loose or poor contacts on the<br />
ECU coupler.<br />
● Open or short circuit in the OB<br />
wire or GR wire.<br />
● Replace the TO sensor with a<br />
new one.<br />
“C24” or “C25” IGNITION COIL MALFUNCTION<br />
� Refer to the IGNITION COIL for details.<br />
[Refer to the service manual 『 (99000-51210)』page 6-5,<br />
Refer to the service manual 『 (99000-94810)』page 6-5]<br />
42<br />
59<br />
ECU Coupler<br />
�<br />
④
“C31” GP SWITCH CIRCUIT MALFUNCTION<br />
DETECTED CONDITION POSSIBLE CAUSE<br />
No Gear Position switch voltage<br />
● GP switch circuit open or short.<br />
Switch voltage is out of the specified range.<br />
● GP switch malfunction.<br />
Switch Voltage � 0.1 V<br />
● ECU malfunction.<br />
▣ INSPECTION<br />
◈ Step 1<br />
1) Remove the frame cover.<br />
2) Turn the ignition switch “OFF” position.<br />
3) Check the GP switch coupler for loose or poor<br />
contacts.<br />
If OK, then measure the GP switch resistance.<br />
4) Support the motorcycle with a jack.<br />
5) Turn the side-stand to up-right position.<br />
6) Make sure the engine stop switch is in the “ ”<br />
position.<br />
7) Insert the needle pointed probes to the GP switch<br />
coupler.<br />
8) Turn the ignition switch “ON” position.<br />
9) Measure the resistance at the wire side coupler<br />
between GL wire and BW wire, when shifting the<br />
gearshift lever from 1st to Top.<br />
GP switch resistance 100 Ϊ ~ 2.0 ㏀<br />
(GL - BW)<br />
Tester knob indication : Resistance (㏀ )<br />
Is the resistance OK?<br />
YES<br />
NO<br />
● GL wire open or shorted to<br />
ground, or poor ⑫ connection.<br />
● If wire and connection are OK,<br />
intermittent trouble or faulty ECU.<br />
● Recheck each terminal and wire<br />
harness for open circuit and poor<br />
connection.<br />
Open or short circuit in the GL wire.<br />
43<br />
FI SYSTEM DIAGNOSIS 4-1-32<br />
ECU Coupler<br />
⑫
4-1-33 FISYSTEM DIAGNOSIS<br />
“C32” or “C33” FUEL INJECTOR CIRCUIT MALFUNCTION<br />
▣ INSPECTION<br />
DETECTED CONDITION POSSIBLE CAUSE<br />
Injector signal is interrupted continuous by 16 times<br />
or more when ECU confirm injector running surge at<br />
each combustion chamber.<br />
◈ Step 1<br />
1) Remove the fuel tank and frame cover.<br />
2) Turn the ignition switch “OFF” position.<br />
3) Check the injector couplers NO.1 ① and NO.2 ②<br />
for loose or poor contacts.<br />
If OK, then measure the injector resistance.<br />
4) Disconnect the injector couplers NO.1 ① and<br />
NO.2 ② and measure the resistance between<br />
terminals.<br />
Injector resistance 11.0 ~ 13.0 Ϊ at 20℃ (68℉)<br />
(① - ② )<br />
5) If OK, then check the continuity between injector<br />
terminals and ground.<br />
Injector continuity ∞ Ϊ (Infinity)<br />
(① - Ground)<br />
Are the resistance and continuity OK?<br />
YES<br />
NO<br />
Tester knob indication : Resistance ( Ϊ )<br />
Go to Step 2<br />
Replace the Injector with a new<br />
one.<br />
44<br />
● Injector circuit open or short.<br />
● Injector malfunction.<br />
● ECU malfunction.<br />
①<br />
②
◈ Step 2<br />
1) Turn the ignition switch “ON” position.<br />
2) Measure the injector voltage between YR(NO.1),<br />
RB(NO.2) wire and ground.<br />
Injector voltage<br />
NOTE<br />
Injector voltage can be detected only 3<br />
seconds after ignition switch is turned “ON”<br />
position.<br />
YES<br />
NO<br />
Tester knob indication : Voltage ( )<br />
Is the voltage OK?<br />
● YR(NO.1), RB(NO.2) wire open or<br />
shorted to ground, or poor � (NO.1),<br />
36<br />
Battery voltage<br />
( � YR[NO.1] - � Ground )<br />
( � RB[NO.2] - � Ground )<br />
(NO.2) connection.<br />
● If wire and connection are OK,<br />
intermittent trouble or faulty ECU.<br />
● Recheck each terminal and wire<br />
harness for open circuit and poor<br />
connection.<br />
● Inspect the fuel pump or fuel<br />
pump relay. (Refer to page 4-2-5)<br />
45<br />
36<br />
�<br />
FISYSTEM DIAGNOSIS 4-1-34<br />
ECU Coupler
4-1-35 FISYSTEM DIAGNOSIS<br />
“C41” FUEL PUMP RELAY CIRCUIT MALFUNCTION<br />
▣ INSPECTION<br />
◈ Step 1<br />
1) Remove the frame cover.<br />
2) Turn the ignition switch “OFF” position.<br />
3) Check the fuel pump relay coupler for loose or<br />
poor contacts.<br />
If OK, then check the insulation and continuity.<br />
Refer to page 4-2-5 for details.<br />
Is the Fuel pump relay OK?<br />
DETECTED CONDITION POSSIBLE CAUSE<br />
Voltage is applied continuous over 5 sec., battery<br />
voltage � 5 V when fuel pump relay is “OFF” position<br />
or battery voltage � 5 V when fuel pump relay is<br />
“ON” position.<br />
YES<br />
NO<br />
● GW wire open or shorted to<br />
ground, or poor 58 connection.<br />
● If wire and connection are OK,<br />
intermittent trouble or faulty ECU.<br />
● Recheck each terminal and wire<br />
harness for open circuit and poor<br />
connection.<br />
● Inspect the fuel injectors. (Refer to<br />
page 4-1-33)<br />
Replace the fuel pump relay with a<br />
new one.<br />
46<br />
● Fuel pump relay circuit open or short.<br />
● Fuel pump relay malfunction.<br />
● ECU malfunction.<br />
58<br />
ECU Coupler
SENSORS<br />
◉ PICK-UP COIL INSPECTION<br />
The pick-up coil ① is installed in the magneto cover.<br />
◉ PICK-UP COIL REMOVAL AND<br />
INSTALLATION<br />
● Remove the magneto cover.<br />
● Install the magneto cover in the reverse order of<br />
removal.<br />
◉ IAP SENSOR INSPECTION<br />
The intake air pressure (IAP) sensor NO.1 ② and<br />
NO.2 ③ is installed at the side of the air cleaner.<br />
(Refer to page 4-1-25)<br />
◉ IAP SENSOR REMOVAL AND<br />
INSTALLATION<br />
● Remove the fuel tank.<br />
● Remove the IAP sensor from the downside of air<br />
cleaner.<br />
● Install the IAP sensor in the reverse order of<br />
removal.<br />
◉ TP SENSOR INSPECTION<br />
The throttle position (TP) sensor ④ is installed at the<br />
left side of the throttle body. (Refer to page 4-1-20)<br />
◉ TP SENSOR REMOVAL AND<br />
INSTALLATION<br />
CAUTION<br />
Never remove the TP sensor.<br />
◉ WT SENSOR INSPECTION<br />
The water temperature (WT) sensor ⑤ is installed at<br />
the rear side of the thermostat case.<br />
(Refer to page 4-1-23)<br />
◉ WT SENSOR REMOVAL AND<br />
INSTALLATION<br />
● Remove the WT sensor.<br />
● Install the WT sensor in the reverse order of<br />
removal.<br />
WT sensor : 18 N∙m (1.8 kgf∙m)<br />
47<br />
②<br />
④<br />
FISYSTEM DIAGNOSIS 4-1-36<br />
⑤<br />
①<br />
③
4-1-37 FISYSTEM DIAGNOSIS<br />
◉ IAT SENSOR INSPECTION<br />
The intake air temperature (IAT) sensor ① is<br />
installed at the downside of the air cleaner case.<br />
(Refer to page 4-1-27)<br />
◉ IAT SENSOR REMOVAL AND<br />
INSTALLATION<br />
● Remove the fuel tank.<br />
● Remove the IAT sensor from the air cleaner case.<br />
● Install the IAT sensor in the reverse order of<br />
removal.<br />
◉ TO SENSOR INSPECTION,<br />
REMOVAL AND INSTALLATION<br />
The tip over (TO) sensor ② is located in the upside<br />
of the battery. (Refer to page 4-1-30)<br />
● Romove the fuel tank.<br />
● Remove the TO sensor from the frame.<br />
● Install the TO sensor in the reverse order of<br />
removal.<br />
48<br />
①<br />
②
FUEL SYSTEM AND THROTTLE BODY<br />
CONTENTS<br />
FUEL SYSTEM …………………………………………………………… 50 (4-2-1)<br />
REMOVAL AND DISASSEMBLY………………………………………… 52 (4-2-3)<br />
REASSEMBLY AND INSTALLATION …………………………………… 53 (4-2-4)<br />
FUEL PRESSURE INSPECTION ………………………………………… 54 (4-2-5)<br />
FUEL PUMP RELAY INSPECTION ……………………………………… 54 (4-2-5)<br />
FUEL MESH FILTER INSPECTION AND CLEANING ………………… 55 (4-2-6)<br />
FUEL LEVEL GAUGE INSPECTION …………………………………… 55 (4-2-6)<br />
THROTTLE BODY……………………………………………………… 56 (4-2-7)<br />
REMOVAL ………………………………………………………………… 57 (4-2-8)<br />
CLEANING ………………………………………………………………… 58 (4-2-9)<br />
INSPECTION ……………………………………………………………… 58 (4-2-9)<br />
INSTALLATION …………………………………………………………… 58 (4-2-9)<br />
49<br />
4 -2
4-2-1 FUEL SYSTEM AND THROTTLE BODY<br />
FUEL SYSTEM<br />
50
51<br />
FUEL SYSTEM AND THROTTLE BODY 4-2-2
4-2-3 FUEL SYSTEM AND THROTTLE BODY<br />
REMOVAL AND DISASSEMBLY<br />
● Remove the seat. ( )<br />
● Remove the front seat. ( )<br />
● Remove the fuel tank mounting bolts and fuel tank<br />
bracket mounting bolt. ( )<br />
● Remove the fuel tank mounting bolts and take off<br />
the hooks. ( )<br />
● Disconnect the fuel level gauge coupler ① .<br />
● Remove the fuel pump coupler ② .<br />
● Remove the fuel injector hose ③ and return hose<br />
④ .<br />
CAUTION<br />
After disconnecting the fuel injector hose ③ ,<br />
insert a blind plug into the end to stop fuel<br />
leakage.<br />
52<br />
①<br />
②<br />
③ ④
● Remove the fuel tank rearward.<br />
CAUTION<br />
As gasoline leakage may occur in this operation,<br />
keep away from fire and sparks.<br />
● Remove the fuel pump assembly ① by removing<br />
its mounting bolts diagonally.<br />
WARNING<br />
�� Gasoline is highly flammable and explosive.<br />
�� Keep heat, spark and flame away.<br />
● Remove the fuel gauge ② .<br />
REASSEMBLY AND INSTALLATION<br />
Reassembly and installation the fuel tank in the<br />
reverse order of remval and disassembly.<br />
● When installing the fuel pump assembly, first<br />
tighten all the fuel pump assembly mounting bolts<br />
lightly in diagonal stages, and then tighten them<br />
in the above tightening order.<br />
NOTE<br />
Apply a small quantity of the THREAD LOCK<br />
“1324” to the thread portion of the fuel pump<br />
mounting bolt.<br />
THREAD LOCK “1324”<br />
53<br />
②<br />
FUEL SYSTEM AND THROTTLE BODY 4-2-4<br />
①
4-2-5 FUEL SYSTEM AND THROTTLE BODY<br />
FUEL PRESSURE INSPECTION<br />
● Remove the seat.<br />
● Place a rag under the fuel injector hose.<br />
● Disconnect the fuel injector hose from the fuel<br />
delivery pipe.<br />
● Install the special tool between the fuel tank and<br />
fuel delivery pipe.<br />
Fuel pump pressure gauge<br />
: 09915-54510<br />
Turn the ignition switch “ON” position and check the<br />
fuel pressure.<br />
Fuel pressure<br />
Approx. 3.4 ~ 3.7 kgf/cm 2<br />
(333 ~ 363 kPa, 48.4 ~ 52.6 psi)<br />
If the fuel pressure is lower than the specification,<br />
inspect the following items :<br />
* Fuel hose leakage<br />
* Clogged fuel filter<br />
* Pressure regulator<br />
* Fuel pump<br />
If the fuel pressure is higher than the specification,<br />
inspect the following items :<br />
* Fuel pump check valve<br />
* Pressure regulator<br />
WARNING<br />
● Before removing the special tool, turn the<br />
ignition switch to “OFF” position and release<br />
the fuel pressure slowly.<br />
● Gasoline is highly flammable and explosive.<br />
Keep heat, sparks and flame away.<br />
FUEL PUMP RELAY INSPECTION<br />
Fuel pump relay is located the left side of the frame.<br />
● Remove the frame cover.<br />
● Remove the fuel pump relay ① .<br />
54<br />
①
First, check the insulation between ① and ②<br />
terminals with pocket tester. Then apply 12 volts to<br />
③ and ④ terminals, � to ③ and � to ④ , and check<br />
the continuity between ① and ② .<br />
If there is no continuity, replace it with a new one.<br />
FUEL MESH FILTER INSPECTION<br />
AND CLEANING<br />
● If the fuel mesh filter is clogged with sediment or<br />
rust, fuel will not flow smoothly and loss in engine<br />
power may result.<br />
● Blow the fuel mesh filter with compressed air.<br />
NOTE<br />
If the fuel mesh filter is clogged with many<br />
sediment or rust, replace the fuel filter cartridge<br />
with a new one.<br />
FUEL LEVEL GAUGE INSPECTION<br />
● Measure resistance between the terminals when<br />
float is at the position instead below.<br />
Fuel float position Resistance between terminals<br />
F<br />
Approx. 90 ~ 100 Ϊ<br />
1/2<br />
E<br />
Approx. 38 Ϊ<br />
Approx. 4 ~ 10 Ϊ<br />
● If the resistance measured is out of the<br />
specification, replace the gauge with a new one.<br />
● Fuel level meter inspection.<br />
55<br />
①<br />
FUEL SYSTEM AND THROTTLE BODY 4-2-6<br />
②<br />
③<br />
④
4-2-7 FUEL SYSTEM AND THROTTLE BODY<br />
THROTTLE BODY<br />
56
REMOVAL<br />
● Remove the fuel tank.<br />
● Remove the air cleaner box.<br />
● Disconnect the fuel hose.<br />
● Remove the all coupler to related the throttle<br />
body.<br />
● Loosen the throttle body clamp screws.<br />
● Disconnect the throttle cables from their drum.<br />
● Dismount the throttle body assembly.<br />
CAUTION<br />
�� Be careful not to damage the throttle cable<br />
bracket when dismounting or remounting the<br />
throttle body assembly.<br />
�� After disconnecting the throttle cables, do not<br />
snap the throttle valve from full open to full<br />
close. It may cause damage to the throttle<br />
valve and throttle body.<br />
57<br />
FUEL SYSTEM AND THROTTLE BODY 4-2-8
4-2-9 FUEL SYSTEM AND THROTTLE BODY<br />
CLEANING<br />
WARNING<br />
Some throttle body cleaning chemicals,<br />
especially dip-type soaking solutions, are very<br />
corrosive and must be handled carefully. Always<br />
follow the chemical manufacturer’s instructions<br />
on proper use, handling and storage.<br />
● Clean all passageways with a spray-type throttle<br />
body cleaner and blow dry with compressed air.<br />
CAUTION<br />
Do not use wire to clean passageways. Wire can<br />
damage passageways. If the components cannot<br />
be cleaned with a spray cleaner it may be<br />
necessary to use a dip-type cleaning solution and<br />
allow them to soak. Always follow the chemical<br />
manufacturer’s instructions for proper use and<br />
cleaning of the throttle body components. Do not<br />
apply throttle body cleaning chemicals to the<br />
rubber and plastic materials.<br />
INSPECTION<br />
● Check following items for any damage or clogging.<br />
* O-ring * Secondary throttle valve<br />
* Throttle shaft bushing and seal<br />
* Injector cushion seal<br />
* Throttle valve * Vacuum hose<br />
Check fuel injector filter for evidence of dirt and<br />
contamination. If present, clean and check for<br />
presence of dirt in the fuel lines and fuel tank.<br />
CAUTION<br />
Never operate the idle screw ① to avoid<br />
variations of the carburetion setting.<br />
INSTALLATION<br />
Installation is in the reverse order of removal. Pay<br />
attention to the following points :<br />
● Connect the throttle cable to the throttle cable<br />
drum.<br />
● Adjust the throttle cable play with the cable<br />
adjusters.<br />
58<br />
①
ELECTRICAL SYSTEM<br />
CONTENTS<br />
LOCATION OF ELECTRICAL COMPONENTS ………………… 60 (6-1)<br />
IGNITION SYSTEM ……………………………………………………… 62 (6-3)<br />
CHARGING SYSTEM …………………………………………………… 63 (6-7)<br />
59<br />
6
6-1 ELECTRICAL SYSTEM<br />
LOCATION OF ELECTRICAL COMPONENTS<br />
① Ignition coil NO.1<br />
② Main fuse (30A)<br />
③ Head lamp fuse (15A)<br />
⑭<br />
①<br />
②<br />
③<br />
④<br />
⑤<br />
⑥ ⑦ ⑧<br />
④ Cooling fan motor relay<br />
⑤ Head lamp relay<br />
⑥ Regulator / Rectifier<br />
⑦ Side stand relay<br />
⑧ Main relay<br />
60<br />
⑨ Fuel pump relay<br />
⑩ Turn signal relay<br />
⑪ Battery<br />
⑫ ECU<br />
⑬ TO sensor<br />
⑭ TP sensor ⑮ IAT sensor � Magneto<br />
� Pick-up coil<br />
� GP switch<br />
⑨<br />
⑮<br />
⑩<br />
⑫<br />
�<br />
�<br />
�<br />
⑬<br />
⑪
� SAV solenoid � IAP sensor NO.2<br />
� Ignition coil NO.2<br />
� Oxygen sensor<br />
� � �<br />
�<br />
�<br />
61<br />
�<br />
� ISC solenoid<br />
� Fuel injector NO.1 � Fuel injector NO.2<br />
ELECTRICAL SYSTEM 6-2<br />
�
6-3 ELECTRICAL SYSTEM<br />
IGNITION SYSTEM<br />
Ft. IGNITION COIL<br />
Rr. IGNITION COIL<br />
ECU<br />
ENGINE STOP S/W<br />
G<br />
62<br />
L<br />
Y<br />
Y<br />
Y<br />
IG. S/W<br />
REG<br />
REC<br />
FUSE<br />
BATTERY<br />
12V 12Ah
6-10 ELECTRICAL SYSTEM<br />
▣ REGULATOR / RECTIFIER<br />
● Disconnect the regulator / rectifier couplers.<br />
● Using the pocket tester, measure the resistance<br />
between the terminals in the following table.<br />
If the resistance checked is incorrect, replace the<br />
regulator / rectifier.<br />
Tester probe<br />
��<br />
①<br />
②<br />
③<br />
④<br />
⑤<br />
①<br />
∞<br />
∞<br />
1�2<br />
∞<br />
�� Tester probe<br />
②<br />
∞<br />
∞<br />
1�2<br />
∞<br />
③<br />
∞<br />
∞<br />
1�2<br />
∞<br />
Pocket tester : 09900-25002<br />
④<br />
∞<br />
∞<br />
∞<br />
∞<br />
Unit : MΪ<br />
⑤<br />
1�2<br />
1�2<br />
1�2<br />
2�5<br />
Tester knob indication : Resistance (MΪ )<br />
64<br />
②<br />
①<br />
③<br />
④<br />
⑤
SERVICING INFORMATION<br />
CONTENTS<br />
TROUBLESHOOTING ………………………………………………… 66 (8-1-1)<br />
SPECIAL TOOLS ……………………………………………………… 75 (8-9)<br />
TIGHTENING TORQUE ……………………………………………… 76 (8-12)<br />
<strong>SERVICE</strong> DATA ………………………………………………………… 77 (8-18)<br />
WIRING DIAGRAM ( …………………………………………………… )<br />
80 (8-30-1)<br />
WIRING DIAGRAM ( …………………………………………………… )<br />
82 (8-30-3)<br />
WIRING DIAGRAM ( …………………………………………………… & )<br />
84 (8-30-5)<br />
65<br />
8
8-1-1 SERVICING INFORMATION<br />
TROUBLESHOOTING<br />
◉ MALFUNCTION CODE AND DEFECTIVE CONDITION<br />
MALFUNCTION<br />
CODE<br />
C00 NO FAULT -<br />
C12 Pick-up coil<br />
C14<br />
C15<br />
C17 / C18<br />
C21<br />
C22<br />
C23<br />
DETECTED ITEM<br />
Throttle position sensor<br />
(TPS)<br />
Water temperature<br />
sensor (WTS)<br />
Intake air pressure<br />
sensor (IAPS),<br />
NO.1 / NO.2<br />
Intake air temperature<br />
sensor (IATS)<br />
Oxygen sensor (O2S)<br />
Tip over sensor (TOS)<br />
The signal does not reach ECU for more than 2 sec. after<br />
receiving the IAP signal.<br />
Pick-up coil wiring and mechanical parts.<br />
(Pick-up coil, lead wire coupler connection)<br />
The sensor should produce following voltage.<br />
0.2 V � sensor voltage � 4.8 V<br />
Without the above range for 5 sec. and more, C14 is indicated.<br />
Throttle position sensor, lead wire / coupler connection.<br />
The sensor voltage should be the following.<br />
0.2 V � sensor voltage � 4.6 V<br />
Without the above range for 5 sec. and more, C15 is indicated.<br />
Water temperature sensor, lead wire / coupler connection.<br />
The sensor should produce following voltage.<br />
0.2 V � sensor voltage � 4.8 V<br />
Without the above range for 5 sec. and more, C17 or C18 is<br />
indicated.<br />
Intake air pressure sensor, lead wire / coupler connection.<br />
The sensor voltage should be the following.<br />
0.2 V � sensor voltage � 4.6 V<br />
Without the above range for 5 sec. and more, C21 is indicated.<br />
Intake air temperature sensor, lead wire / coupler connection.<br />
The oxygen sensor signal is input in ECU since then 180 sec.<br />
after the engine run.<br />
When this is the case, ECU not receive the signal, C22 is<br />
indicated.<br />
Oxygen sensor, lead wire / coupler connection.<br />
The sensor voltage should be the following for more than 5 sec.<br />
after ignition switch turns “ON” position.<br />
0.2 V � sensor voltage � 4.6 V<br />
Without the above value for 5 sec. and more, C23 is indicated.<br />
Tip over sensor, lead wire / coupler connection.<br />
66<br />
DETECTED FAILURE CONDITION<br />
CHECK FOR
MALFUNCTION<br />
CODE<br />
C24 / C25<br />
C31<br />
C32 / C33<br />
C41<br />
DETECTED ITEM<br />
Ignition coil (IG coil),<br />
NO.1 / NO.2<br />
Gear position switch<br />
(GP switch)<br />
Fuel injector, NO.1 / NO.2<br />
Fuel pump relay<br />
67<br />
SERVICING INFORMATION 8-1-2<br />
DETECTED FAILURE CONDITION<br />
CHECK FOR<br />
Ignition signal is interrupted continuous by 32 times or more<br />
when ECU confirm ignition surge at each combustion chamber,<br />
C24 or C25 is indicated.<br />
Ignition coil, wiring / coupler connection, power supply from the<br />
battery.<br />
It judges from gear position voltage, engine speed and throttle<br />
position by ECU, when the gear position voltage is 0.1 V and<br />
less.<br />
Gear position switch, wiring / coupler connection, gearshift cam<br />
etc.<br />
Injector signal is interrupted continuous by 16 times or more<br />
when ECU confirm injector running surge at each combustion<br />
chamber, C32 or C33 is indicated.<br />
Injector, wiring / coupler connection, power supply to the<br />
injector.<br />
Voltage is applied continuous over 5 sec., battery voltage � 5 V<br />
when fuel pump relay is “OFF” position or battery voltage � 5 V<br />
when fuel pump relay is “ON” position.<br />
Fuel pump relay, connecting lead wire, power source to fuel<br />
pump relay, fuel injector.
8-1-3 SERVICING INFORMATION<br />
◉ ENGINE<br />
Complaint Symptom and possible causes Remedy<br />
Engine will not<br />
start or is hard to<br />
start.<br />
Compression too low<br />
1. Tappet clearance out of adjustment.<br />
2. Worn valve guides or poor seating of valves.<br />
3. Mistimed valves.<br />
4. Excessively worn piston rings.<br />
5. Worn-down cylinder bore.<br />
6. Starter motor cranks too slowly.<br />
7. Poor seating of spark plugs.<br />
Plug not sparking<br />
1. Fouled spark plugs.<br />
2. Wet spark plugs.<br />
3. Defective ignition coils.<br />
4. Open or short in high-tension cord.<br />
5. Defective pick-up coil.<br />
6. Defective ECU.<br />
7. Open-circuited wiring connections.<br />
No fuel reaching the intake manifold<br />
1. Clogged fuel filter or fuel hose.<br />
2. Defective fuel pump.<br />
3. Defective fuel pressure regulator.<br />
4. Defective fuel injector.<br />
5. Defective fuel pump relay.<br />
6. Defective ECU.<br />
7. Open-circuited wiring connections.<br />
Incorrect fuel/air mixture<br />
1. TP sensor out of adjustment.<br />
2. Defective fuel pump.<br />
3. Defective fuel pressure regulator.<br />
4. Defective TP sensor.<br />
5. Defective pick-up coil.<br />
6. Defective IAP sensor.<br />
7. Defective ECU.<br />
8. Defective WT sensor.<br />
9. Defective IAT sensor.<br />
68<br />
Adjust.<br />
Repair or replace.<br />
Adjust.<br />
Replace.<br />
Replace.<br />
See electrical section.<br />
Retighten.<br />
Clean.<br />
Clean and dry.<br />
Replace.<br />
Replace.<br />
Replace.<br />
Replace.<br />
Repair or replace.<br />
Clean or replace.<br />
Replace.<br />
Replace.<br />
Replace.<br />
Replace.<br />
Replace.<br />
Check and repair.<br />
Adjust.<br />
Replace.<br />
Replace.<br />
Replace.<br />
Replace.<br />
Replace.<br />
Replace.<br />
Replace.<br />
Replace.
69<br />
SERVICING INFORMATION 8-1-4<br />
Complaint Symptom and possible causes Remedy<br />
Engine idles poorly. 1. Tappet clearance out of adjustment.<br />
2. Poor seating of valves.<br />
3. Defective valve guides.<br />
4. Worn down camshafts.<br />
5. Too wide spark plug gaps.<br />
6. Defective ignition coils.<br />
7. Defective pick-up coil.<br />
8. Defective ECU.<br />
9. Defective TP sensor.<br />
10. Defective fuel pump.<br />
11. Imbalanced throttle valve or SAV solenoid.<br />
12. Damaged or cracked vacuum hose.<br />
Engine stalls often<br />
Incorrect fuel / air mixture<br />
1. Defective IAP sensor or circuit.<br />
2. Clogged fuel filter.<br />
3. Defective fuel pump.<br />
4. Defective fuel pressure regulator.<br />
5. Defective WT sensor.<br />
6. Defective thermostat.<br />
7. Defective IAT sensor.<br />
8. Damaged or cracked vacuum hose.<br />
Fuel injector improperly operating<br />
1. Defective fuel injectors.<br />
2. No injection signal from ECU.<br />
3. Open or short circuited wiring connection.<br />
4. Defective battery or low battery voltage.<br />
Control circuit or sensor improperly operating<br />
1. Defective ECU.<br />
2. Defective fuel pressure regulator.<br />
3. Defective TP sensor.<br />
4. Defective IAT sensor.<br />
5. Defective pick-up coil.<br />
6. Defective WT sensor.<br />
7. Defective fuel pump relay.<br />
Engine internal parts improperly operating<br />
1. Fouled spark plugs.<br />
2. Defective pick-up coil or ECU.<br />
3. Clogged fuel hose.<br />
4. Tappet clearance out of adjustment.<br />
Adjust.<br />
Replace or repair.<br />
Replace.<br />
Replace.<br />
Adjust or replace.<br />
Replace.<br />
Replace.<br />
Replace.<br />
Replace.<br />
Replace.<br />
Adjust.<br />
Replace.<br />
Repair or replace.<br />
Clean or replace.<br />
Replace.<br />
Replace.<br />
Replace.<br />
Replace.<br />
Replace.<br />
Replace.<br />
Replace.<br />
Repair or replace.<br />
Repair or replace.<br />
Replace or recharge.<br />
Replace.<br />
Replace.<br />
Replace.<br />
Replace.<br />
Replace.<br />
Replace.<br />
Replace.<br />
Clean.<br />
Replace.<br />
Clean.<br />
Adjust.
8-1-5 SERVICING INFORMATION<br />
Complaint Symptom and possible causes Remedy<br />
Noisy engine. Excessive valve chatter<br />
1. Too large tappet clearance.<br />
2. Weakened or broken valve springs.<br />
3. Worn tappet or cam surface.<br />
4. Worn and burnt camshaft journal.<br />
Noise seems to come from piston<br />
1. Worn down pistons or cylinders.<br />
2. Combustion chambers fouled with carbon.<br />
3. Worn piston pins or piston pin bore.<br />
4. Worn piston rings or ring grooves.<br />
Noise seems to come from cam chain<br />
1. Stretched chain.<br />
2. Worn sprockets.<br />
3. Tension adjuster not working.<br />
Noise seems to come from clutch<br />
1. Worn splines of countershaft or hub.<br />
2. Worn teeth of clutch plates.<br />
3. Distorted clutch plates, driven and drive.<br />
4. Worn clutch release bearing.<br />
5. Weakened clutch dampers.<br />
Noise seems to come from crankshaft<br />
1. Rattling bearings due to wear.<br />
2. Worn and burnt big-end bearings.<br />
3. Worn and burnt journal bearings.<br />
Noise seems to come from transmission<br />
1. Worn or rubbing gears.<br />
2. Worn splines.<br />
3. Worn bearings.<br />
4. Worn or rubbing primary gears.<br />
Noise seems to come from water pump<br />
1. Too much play on pump shaft bearing.<br />
2. Worn or damaged impeller shaft.<br />
3. Worn or damaged mechanical seal.<br />
4. Contact between pump case and impeller.<br />
70<br />
Adjust.<br />
Replace.<br />
Replace.<br />
Replace.<br />
Replace.<br />
Clean.<br />
Replace.<br />
Replace.<br />
Replace.<br />
Replace.<br />
Repair or replace.<br />
Replace.<br />
Replace.<br />
Replace.<br />
Replace.<br />
Replace the primary driven gear.<br />
Replace.<br />
Replace.<br />
Replace.<br />
Replace.<br />
Replace.<br />
Replace.<br />
Replace.<br />
Replace.<br />
Replace.<br />
Replace.<br />
Replace.
71<br />
SERVICING INFORMATION 8-1-6<br />
Complaint Symptom and possible causes Remedy<br />
Engine runs poorly<br />
in high speed range.<br />
Defective engine internal / electrical parts<br />
1. Weakened valve springs.<br />
2. Worn camshafts.<br />
3. Valve timing out of adjustment.<br />
4. Too narrow spark plug gaps.<br />
5. Ignition not advanced sufficiently due to poorly working timing<br />
advance circuit.<br />
6. Defective ignition coils.<br />
7. Defective pick-up coil.<br />
8. Defective ECU.<br />
9. Clogged fuel hose, resulting in inadequate fuel supply to injector.<br />
10. Defective fuel pump.<br />
11. Defective TP sensor.<br />
12. Defective SAV solenoid.<br />
13. Clogged air cleaner element.<br />
Defective air flow system<br />
1. Clogged air cleaner element.<br />
2. Defective throttle valve.<br />
3. Sucking air from throttle body joint.<br />
4. Defective ECU.<br />
Defective control circuit or sensor<br />
1. Low fuel pressure.<br />
2. Defective TP sensor.<br />
3. Defective IAT sensor.<br />
4. Defective pick-up coil.<br />
5. Defective IAP sensor.<br />
6. Defective ECU.<br />
7. TP sensor out of adjustment.<br />
8. Defective SAV solenoid.<br />
Replace.<br />
Replace.<br />
Adjust.<br />
Adjust.<br />
Replace ECU.<br />
Replace.<br />
Replace.<br />
Replace.<br />
Clean and prime.<br />
Replace.<br />
Replace.<br />
Replace.<br />
Clean.<br />
Clean or replace.<br />
Adjust or replace.<br />
Repair or replace.<br />
Replace.<br />
Repair or replace.<br />
Replace.<br />
Replace.<br />
Replace.<br />
Replace.<br />
Replace.<br />
Adjust.<br />
Replace.
8-1-7 SERVICING INFORMATION<br />
Complaint Symptom and possible causes Remedy<br />
Engine lacks<br />
power.<br />
Engine overheats.<br />
Defective engine internal / electrical parts<br />
1. Loss of tappet clearance.<br />
2. Weakened valve springs.<br />
3. Valve timing out of adjustment.<br />
4. Worn piston rings or cylinders.<br />
5. Poor seating of valves.<br />
6. Fouled spark plugs.<br />
7. Incorrect spark plugs.<br />
8. Clogged injectors.<br />
9. TP sensor out of adjustment.<br />
10. Clogged air cleaner element.<br />
11. Sucking air from throttle valve or vacuum hose.<br />
12. Too much engine oil.<br />
13. Defective fuel pump or ECU.<br />
14. Defective pick-up coil and ignition coils.<br />
Defective control circuit or sensor<br />
1. Low fuel pressure.<br />
2. Defective TP sensor.<br />
3. Defective IAT sensor.<br />
4. Defective pick-up coil.<br />
5. Defective IAP sensor.<br />
6. Defective ECU.<br />
7. TP sensor out of adjustment.<br />
8. Defective SAV solenoid.<br />
9. Defective GP switch.<br />
Defective engine internal parts<br />
1. Heavy carbon deposit on piston crowns.<br />
2. Not enough oil in the engine.<br />
3. Defective oil pump or clogged oil circuit.<br />
4. Sucking air from intake pipes.<br />
5. Use incorrect engine oil.<br />
6. Defective cooling system.<br />
Lean fuel / air mixture<br />
1. Short-circuited IAP sensor / lead wire.<br />
2. Short-circuited IAT sensor / lead wire.<br />
3. Sucking air from intake pipe joint.<br />
4. Defective fuel injectors.<br />
5. Defective WT sensor.<br />
6. Defective cooling system.<br />
The other factors<br />
1. Ignition timing too advanced due to defective timing advance<br />
system (WT sensor, pick-up coil, GP switch and ECU).<br />
2. Drive belt / chain is too tight.<br />
72<br />
Adjust.<br />
Replace.<br />
Adjust.<br />
Replace.<br />
Repair.<br />
Clean or replace.<br />
Adjust or replace.<br />
Clean.<br />
Adjust.<br />
Clean.<br />
Retighten or replace.<br />
Drain out excess oil.<br />
Replace.<br />
Replace.<br />
Repair or replace.<br />
Replace.<br />
Replace.<br />
Replace.<br />
Replace.<br />
Replace.<br />
Adjust.<br />
Replace.<br />
Replace.<br />
Clean.<br />
Add oil.<br />
Replace or clean.<br />
Retighten or replace.<br />
Change.<br />
See radiator section.<br />
Repair or replace.<br />
Repair or replace.<br />
Repair or replace.<br />
Replace.<br />
Replace.<br />
Consult radiator section.<br />
Replace.<br />
Adjust.
73<br />
SERVICING INFORMATION 8-1-8<br />
Complaint Symptom and possible causes Remedy<br />
Dirty or heavy<br />
exhaust smoke.<br />
Slipping clutch.<br />
Dragging clutch.<br />
Transmission will<br />
not shift.<br />
Transmission will<br />
not shift back.<br />
Transmission<br />
jumps out of<br />
gear.<br />
1. Too much engine oil in the engine.<br />
2. Worn piston rings or cylinders.<br />
3. Worn valve guides.<br />
4. Cylinder wall scored or scuffed.<br />
5. Worn valves stems.<br />
6. Defective stem seals.<br />
7. Worn side rails.<br />
1. Weakened clutch springs.<br />
2. Worn or distorted pressure plates.<br />
3. Distorted clutch plates or pressure plates.<br />
1. Some clutch springs weakened while others are not.<br />
2. Distorted pressure plates or clutch plates.<br />
1. Broken gearshift cam.<br />
2. Distorted gearshift forks.<br />
3. Worn gearshift pawl.<br />
1. Broken return spring on shift shaft.<br />
2. Rubbing or sticky shift shaft.<br />
3. Distorted or worn gearshift forks.<br />
1. Worn shifting gears on driveshaft or countershaft.<br />
2. Distorted or worn gearshift forks.<br />
3. Weakened stopper spring on gearshift stopper.<br />
Check with inspection window,<br />
drain out excess oil.<br />
Replace.<br />
Replace.<br />
Replace.<br />
Replace.<br />
Replace.<br />
Replace.<br />
Replace.<br />
Replace.<br />
Replace.<br />
Replace.<br />
Replace.<br />
Replace.<br />
Replace.<br />
Replace.<br />
Replace.<br />
Repair or replace<br />
Replace.<br />
Replace.<br />
Replace.<br />
Replace.
8-5 SERVICING INFORMATION<br />
◉ ELECTRICAL<br />
Complaint Symptom and possible causes Remedy<br />
No sparking or<br />
poor sparking.<br />
Spark plug soon<br />
become fouled<br />
with carbon.<br />
Spark plug<br />
become fouled<br />
too soon.<br />
Spark plug<br />
electrodes<br />
overheat or burn.<br />
Magneto charge,<br />
but charging<br />
rate is below the<br />
specification.<br />
Magneto<br />
overcharges.<br />
Magneto does not<br />
charge.<br />
Unstable charging.<br />
Starter switch is<br />
not effective.<br />
1. Defective ignition coils or spark plug caps.<br />
2. Defective spark plugs.<br />
3. Defective pick-up coil.<br />
4. Defective ECU.<br />
5. Defective TO sensor.<br />
6. Open-circuited wiring connections.<br />
1. Mixture too rich.<br />
2. Idling speed set too high.<br />
3. Incorrect gasoline.<br />
4. Dirty element in air cleaner.<br />
5. Spark plugs too cold.<br />
1. Worn piston rings.<br />
2. Pistons or cylinders worn.<br />
3. Excessive clearance of valve stems in valve guides.<br />
4. Worn stem oil seal.<br />
1. Spark plugs too hot.<br />
2. The engine overheats.<br />
3. Spark plugs loose.<br />
4. Mixture too lean.<br />
1. Lead wires tend to get shorted or open-circuited or loosely<br />
connected at terminals.<br />
2. Grounded or open-circuited stator coils of magneto.<br />
3. Defective regulator / rectifier.<br />
4. Defective cell plates in the battery.<br />
1. Internal short - circuit in the battery.<br />
2. Resistor element in the regulator / rectifier damaged or defective.<br />
3. Regulator / rectifier poorly grounded.<br />
1. Open - or short - circuited lead wirse, or loose lead connections.<br />
2. Short - circuited, grounded or open stator coil.<br />
3. Short - circuited or punctured regulator / rectifier.<br />
1. Lead wire insulation frayed due to vibration resulting in<br />
intermittent shorting.<br />
2. Magneto internally shorted.<br />
3. Defective regulator / rectifier.<br />
1. Battery run down.<br />
2. Defective switch contacts.<br />
3. Brushes not seating properly on commutator in starter motor.<br />
4. Defective starter relay / ignition interlock switch.<br />
5. Defective main fuse.<br />
74<br />
Replace.<br />
Replace.<br />
Replace.<br />
Replace.<br />
Replace.<br />
Check and repair.<br />
Inspect FI system.<br />
Adjust fast idle or throttle<br />
stop screw.<br />
Change.<br />
Clean or replace.<br />
Replace by hot type plug.<br />
Replace.<br />
Replace.<br />
Replace.<br />
Replace.<br />
Replace by cold type plug.<br />
Tune up.<br />
Retighten.<br />
Adjust carburetor.<br />
Repair or retighten.<br />
Replace.<br />
Replace.<br />
Replace the battery.<br />
Replace the battery.<br />
Replace.<br />
Clean and tighten ground<br />
connection.<br />
Repair or replace or retighten.<br />
Replace.<br />
Replace.<br />
Repair or replace<br />
Replace.<br />
Replace.<br />
Recharge or replace.<br />
Replace.<br />
Repair or replace.<br />
Replace.<br />
Replace.
SPECIAL TOOLS<br />
Special tools Part Number∙Part Name∙Description<br />
09900-27000<br />
Mode select switch<br />
Inspect FI system sensor.<br />
09915-54510<br />
Fuel pump pressure gauge<br />
Measure fuel pressure of fuel pump.<br />
75<br />
SERVICING INFORMATION 8-9
8-12 SERVICING INFORMATION<br />
TIGHTENING TORQUE<br />
◉ FI SYSTEM PARTS<br />
Water sensor (WT sensor)<br />
Fuel injector bolt<br />
ITEM<br />
76<br />
N∙m<br />
18<br />
6 ~ 8<br />
kg∙m<br />
1.8<br />
0.6 ~ 0.8
<strong>SERVICE</strong> DATA<br />
◉ FI SENSORS<br />
ITEM<br />
Pick-up coil resistance<br />
IAP sensor input voltage<br />
IAP sensor output voltage<br />
TP sensor input voltage<br />
TP sensor resistance<br />
TP sensor output voltage<br />
IAT sensor voltage<br />
IAT sensor resistance<br />
TO sensor voltage<br />
TO sensor resistance<br />
GP switch resistance<br />
Oxygen sensor heater voltage<br />
◉ THROTTLE BODY<br />
I.D. No.<br />
Bore size<br />
Idle rpm<br />
Throttle cable play<br />
ITEM<br />
Closed<br />
Opened<br />
Closed<br />
Opened<br />
◉ FUEL INJECTOR + FUEL PUMP<br />
ITEM<br />
Fuel injector resistance<br />
Fuel injector voltage<br />
Fuel pressure<br />
77<br />
110 ~ 140 Ϊ<br />
4.5 ~ 5.5 V<br />
Approx. 2.7 V at idle speed<br />
4.5 ~ 5.5 V<br />
Approx. 1.28 ㏀<br />
Approx. 4.37 ㏀<br />
Approx. 1.12 V<br />
Approx. 4.26 V<br />
4.5 ~ 5.5 V<br />
Refer to page 39 (4-1-28)<br />
0.4 ~ 1.4 V at normal condition<br />
(3.7 ~ 4.4 V at leaned more than 65。)<br />
19.1 ~ 19.7 ㏀<br />
100 Ϊ ~ 2.0 ㏀<br />
Battery voltage<br />
SERVICING INFORMATION 8-18<br />
SPECIFICATION NOTE<br />
SPECIFICATION NOTE<br />
HP948211<br />
39<br />
1,400 ~ 1,600 rpm<br />
0.5 ~ 1.0 mm (0.02 ~ 0.04 in)<br />
SPECIFICATION NOTE<br />
11.0 ~ 13.0 Ϊ at 20℃ (68℉)<br />
Battery voltage<br />
Approx. 3.4 ~ 3.7 kgf/cm2 (333 ~ 363 kPa, 48.4 ~ 52.6 psi)
8-19 SERVICING INFORMATION<br />
◉ THERMOSTAT + COOLING FAN + COOLANT<br />
Thermostat valve operating temperature<br />
Thermostat valve lift<br />
WT sensor voltage<br />
WT sensor resistance (To ECU)<br />
Cooling fan thermo-switch operating<br />
temperature<br />
Engine coolant type<br />
Engine coolant capacity<br />
ITEM STANDARD LIMIT<br />
Valve opening<br />
Valve full open<br />
Valve closing<br />
㏀<br />
㏀<br />
㏀<br />
㏀<br />
㏀<br />
Over 8mm (0.32 in) / 100℃ (212℉)<br />
4.5 ~ 5.5 V<br />
0℃ (32℉)<br />
Approx. 5.790<br />
20℃ (68℉)<br />
Approx. 2.450<br />
40℃ (104℉)<br />
Approx. 1.148<br />
60℃ (140℉)<br />
Approx. 0.586<br />
80℃ (176℉)<br />
Approx. 0.322<br />
OFF→ON<br />
Approx. 95℃ (203℉)<br />
ON→OFF<br />
Approx. 88℃ (190℉)<br />
Reserve tank side<br />
Radiator side<br />
Engine side<br />
78<br />
88℃ (190℉)<br />
100℃ (212℉)<br />
83℃ (181℉)<br />
Use an antifreeze/coolant compatible with<br />
aluminum radiator, mixed with distilled water only,<br />
at the ratio of 50 : 50<br />
300 ㎖<br />
370 ㎖<br />
480 ㎖
◉ ELECTRICAL<br />
Ignition timing<br />
Spark plug<br />
Spark performance<br />
Ignition coil primary peak voltage<br />
Ignition coil resistance<br />
Magneto coil resistance<br />
ITEM STANDARD<br />
BTDC 5�/ 1,500 rpm<br />
Magneto no-load voltage<br />
Battery standard charging voltage<br />
Battery<br />
Fuse size<br />
Type<br />
Gap<br />
Hot type<br />
Standard type<br />
Cold type<br />
Primary<br />
Secondary<br />
Pick-up coil<br />
Charging coil<br />
Type<br />
Capacity<br />
Standard<br />
electrolyte S.G.<br />
Main<br />
Head lamp<br />
79<br />
CR8E<br />
0.7 ~ 0.8 (0.028 ~ 0.032)<br />
CR7E<br />
CR8E<br />
CR9E<br />
Over 8mm (0.32)<br />
150 V and more<br />
3.5 ~ 5.5 Ϊ<br />
20 ~ 31 ㏀<br />
110 ~ 140 Ϊ<br />
0.2 ~ 0.4 Ϊ<br />
Over 70 V / 5,000 rpm<br />
13.5 ~ 15.0 V / 5,000 rpm<br />
STX14-BS<br />
12V 12Ah<br />
1.320 at 20℃ (68℉)<br />
30A<br />
15A<br />
SERVICING INFORMATION 8-20<br />
Unit : mm (in)<br />
NOTE<br />
G-L<br />
Y-Y
8-30-1 SERVICING INFORMATION<br />
WIRING DIAGRAM ( )<br />
80
81<br />
SERVICING INFORMATION 8-30-2
8-30-3 SERVICING INFORMATION<br />
WIRING DIAGRAM ( )<br />
82
83<br />
SERVICING INFORMATION 8-30-4
8-30-5 SERVICING INFORMATION<br />
WIRING DIAGRAM ( &<br />
84<br />
)
85<br />
SERVICING INFORMATION 8-30-6
MEMO
MEMO
Prepared by<br />
1st Ed. JUN. 2008.<br />
Manual No. 99000-51310<br />
Printed in Korea
S&T Motors Co., Ltd.