"F" linear encoder manual - Fagor Automation
"F" linear encoder manual - Fagor Automation
"F" linear encoder manual - Fagor Automation
You also want an ePaper? Increase the reach of your titles
YUMPU automatically turns print PDFs into web optimized ePapers that Google loves.
<strong>Fagor</strong> <strong>Automation</strong> S. Coop.<br />
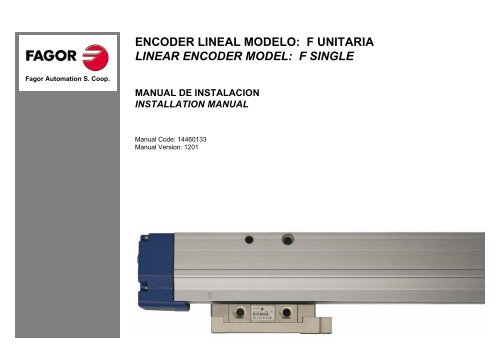
ENCODER LINEAL MODELO: F UNITARIA<br />
LINEAR ENCODER MODEL: F SINGLE<br />
MANUAL DE INSTALACION<br />
INSTALLATION MANUAL<br />
Manual Code: 14460133<br />
Manual Version: 1201
Página<br />
1<br />
2<br />
3<br />
4<br />
5 - 8<br />
Contenido<br />
Contenidos<br />
Dimensiones<br />
Posibilidades de montaje<br />
Tolerancias de montaje<br />
Montaje<br />
Page<br />
1<br />
2<br />
3<br />
4<br />
5 - 8<br />
DIN EN 100 OFF<br />
ON<br />
F unitaria - Page 1 / 8<br />
Contents<br />
Contents<br />
Dimensions<br />
Mounting possibilities<br />
Mountig tolerances<br />
Mounting<br />
CONTENIDOS - CONTENTS
mm<br />
Tolerancing ISO 8015<br />
ISO 2768 - m H<br />
< 6 mm: ± 0.2 mm<br />
+2.5<br />
85 -0.5<br />
+2.5<br />
79 -0.5<br />
62 ±1.5<br />
2.5 ±1.5<br />
INCREMENTAL Io<br />
0.05<br />
0.1 G<br />
10 ±1.5<br />
Io CODIFICADO / CODED Io<br />
30.5<br />
38<br />
1ª Io<br />
1st Io<br />
1ª Io<br />
1st Io<br />
7<br />
25<br />
76<br />
65 33<br />
25<br />
40<br />
90<br />
4,75<br />
25<br />
4,75<br />
n x 200 ±0.15<br />
F unitaria - Page 2 / 8<br />
CM + 287,5<br />
CM + 226,5<br />
200 ±0.15 200 ±0.15<br />
9,5<br />
20 50 50 50<br />
50,1 50,2<br />
CM<br />
5 100 100<br />
0.3 A<br />
q x 50<br />
50,3<br />
100<br />
r x 100<br />
DIMENSIONES - DIMENSIONS<br />
0.3 G<br />
168,5<br />
25<br />
A<br />
30.5<br />
CM = Curso de medición<br />
CM = Measuring length<br />
G = Guía máquina<br />
G = Machine guideway
Montar con los labios de estanqueidad no<br />
orientados a posibles fuentes de contaminación.<br />
Es posible orientar la salida del conector a<br />
ambos lados.<br />
Mount it with the sealing lips facing away<br />
from contaminating elements.<br />
The connector exit may be oriented at both<br />
ends..<br />
A<br />
F unitaria - Page 3 / 8<br />
A: Entradas de aire.<br />
B: Tensor del fleje.<br />
POSIBILIDADES DE MONTAJE - MOUNTING POSSIBILITIES<br />
Si se monta la regla verticalmente y no se<br />
instala ningún equipo de aire, conviene quitar<br />
el tornillo de entrada de aire inferior.<br />
A: Air intakes.<br />
B: Tape tensor..<br />
A<br />
When mounting the scale vertically and no air<br />
filter is installed, remove the bottom air intake<br />
screw..<br />
B
l<br />
±1.5<br />
62<br />
0.5<br />
0.1 G<br />
0.03<br />
0.1 G<br />
Posibilidades de montaje y tolerancias.<br />
10 ±1.5<br />
45 ±1.5<br />
Las marcas triangulares de la regla definen el inicio y el final del curso de medición.<br />
0.5<br />
F unitaria - Page 4 / 8<br />
Mounting possibilities and tolerances.<br />
TOLERANCIAS DE MONTAJE - MOUNTING TOLERANCES<br />
±0.3<br />
79<br />
15 ±1.5<br />
25<br />
The triangle marks of the scale indicate the beginning and end of the measuring length.<br />
0.1<br />
0.1 G<br />
G = Guía máquina<br />
G = Machine guideway
2.5 ±1.5<br />
Aflojar los tornillos para posicionar la cabeza<br />
en la zona de montaje.<br />
Los soportes fijan la distancia de separación<br />
(2.5 mm) entre la cabeza y la regla.<br />
Loosen the screws to position the reader<br />
head in the mounting area.<br />
The supports set the 2.5 mm gap between<br />
the reader head and the scale.<br />
F unitaria - Page 5 / 8<br />
Realizar los agujeros para amarrar la regla.<br />
El agujero del pasador se realizará más tarde.<br />
El área marcada estará libre de pintura.<br />
Premontar la regla y la cabeza lectora. Premount the scale and the reader head.<br />
12 min.<br />
10 min.<br />
DIN 433<br />
M5x50<br />
DIN 912<br />
Pa = 5 Nm<br />
M6x35<br />
DIN 912<br />
Pa = 5 Nm<br />
M6<br />
DIN 555<br />
50<br />
M6<br />
M6<br />
CM + 287<br />
95<br />
23<br />
MONTAJE - MOUNTING<br />
M5<br />
Make the holes to secure the scale.<br />
The hole for the dowel pin will be made later.<br />
The marked area must be free of paint.<br />
L<br />
M5x(L+10)<br />
DIN 912<br />
Pa = 4 Nm
0.3 G<br />
A<strong>linear</strong> la regla .<br />
Terminar de apretar los tornillos de la regla y<br />
la cabeza.<br />
La figura muestra la zona en la que se ha de<br />
palpar con el reloj.<br />
G = Guía máquina<br />
G = Machine guideway<br />
Align the scale .<br />
Finish tirghtening the screws of the scale and<br />
the reader head.<br />
The drawing shows the area that must be dial<br />
indicated.<br />
Quitar los soportes de la cabeza. Remove the reader head supports.<br />
F unitaria - Page 6 / 8<br />
Mecanizar a la vez la regla y la bancada a<br />
diámetro 6H7.<br />
Montar el pasador de la regla.<br />
Ø6 H7<br />
MONTAJE - MOUNTING<br />
14 min.<br />
DIN 7979-C 6x60 St<br />
Machine the scale and the bed to a diameter<br />
of 6H7 at the same time.<br />
Mount the dowel pin of the scale.
En ambientes muy contaminantes conviene<br />
proteger la regla.<br />
Utilizar juntas de estanqueidad para evitar filtraciones.<br />
Unidades de Filtro de Aire <strong>Fagor</strong><br />
<strong>Fagor</strong> Air Filter Units<br />
Modelos AI-400 Models<br />
AI-500<br />
In very polluted environments, the scale<br />
should be protected.<br />
Use seals to prevent filtration..<br />
Pa = 1 Nm<br />
Para IP-64<br />
For IP-64<br />
1 bar<br />
10 l/min.<br />
Existe la posibilidad de presurizar la cabeza lectora y la regla para minimizar la entrada de<br />
contaminación desde el exterior.<br />
<strong>Fagor</strong> suministra unidades de aire expecíficas a tal efecto.<br />
F unitaria - Page 7 / 8<br />
Realizar una comprobación de la correcta<br />
deriva a tierra de la regla.<br />
DIN ISO 8573-1<br />
Tamaño de particula<br />
Particle size - (Class 1) - Max. 0.1µm<br />
Punto de rocio<br />
Dewpoint - (Class 4) - (7 bar) 3ºC<br />
Contenido residual de aceite<br />
Residual oil content - (Class 1) - 0.01 mg/m³<br />
MONTAJE - MOUNTING<br />
Check for proper scale grounding.<br />
There is a possibility to pressurize the reader head and the scale to minimize contamination<br />
from the outside.<br />
<strong>Fagor</strong> supplies the air units for that.<br />
< 1
1<br />
La regla viene calibrada.<br />
De todas formas, <strong>Fagor</strong> recomienda compensar mediante un Interferómetro Laser los posibles<br />
errores causados durante el montaje de la regla.<br />
Control<br />
F unitaria - Page 8 / 8<br />
2<br />
Allen (3 mm)<br />
MONTAJE - MOUNTING<br />
The scale is already calibrated.<br />
However, <strong>Fagor</strong> recommends to use a Laser Interferometer to compensate for possible errors<br />
originated while installing the scale.<br />
3
FAGOR AUTOMATION S. COOP.<br />
Bª San Andrés Nº 19<br />
Apdo de correos 144<br />
20500 Arrasate/Mondragón<br />
Spain<br />
Web: www.fagorautomation.com<br />
Email: info@fagorautomation.es<br />
Tel.: (34) 943 719200<br />
Fax: (34) 943 791712
<strong>Fagor</strong> <strong>Automation</strong> S. Coop.<br />
ENCODER LINEAL MODELO: F MODULAR<br />
LINEAR ENCODER MODEL: F MODULAR<br />
MANUAL DE INSTALACION<br />
INSTALLATION MANUAL<br />
Manual Code: 14460134<br />
Manual Version: 1201
Página<br />
1<br />
2<br />
3<br />
4<br />
5 - 12<br />
Contenido<br />
Contenidos<br />
Dimensiones<br />
Posibilidades de montaje<br />
Tolerancias de montaje<br />
Montaje<br />
Page<br />
1<br />
2<br />
3<br />
4<br />
5 - 12<br />
DIN EN 100 OFF<br />
ON<br />
F modular - Page 1 / 12<br />
Contents<br />
Contents<br />
Dimensions<br />
Mounting possibilities<br />
Mountig tolerances<br />
Mounting<br />
CONTENIDOS - CONTENTS
mm<br />
Tolerancing ISO 8015<br />
ISO 2768 - m H<br />
< 6 mm: ± 0.2 mm<br />
+2.5<br />
85 -0.5<br />
+2.5<br />
79 -0.5<br />
62 ±1.5<br />
2.5 ±1.5<br />
INCREMENTAL Io<br />
0.05<br />
0.1 G<br />
10 ±1.5<br />
Io CODIFICADO / CODED Io<br />
30.5<br />
38<br />
1ª Io<br />
1st Io<br />
1ª Io<br />
1st Io<br />
7<br />
25<br />
76<br />
65 33<br />
25<br />
40<br />
90<br />
4,75<br />
25<br />
4,75<br />
20 50 50 50<br />
50,1 50,2<br />
5 100 100<br />
F modular - Page 2 / 12<br />
CM x 287,5<br />
CM x 226,5<br />
1398 m x 1400 L (1268,5-1468,5-1668,5-...-2468,5)<br />
n x 200<br />
±0.15<br />
200 200 ±0.15 200 ±0.15<br />
9,5<br />
CM<br />
0.3 A<br />
q x 50<br />
50,3<br />
±0.15 82<br />
86,5<br />
100<br />
r x 100<br />
0.3 G<br />
DIMENSIONES - DIMENSIONS<br />
25<br />
A<br />
30.5<br />
CM = Curso de medición<br />
CM = Measuring length<br />
G = Guía máquina<br />
G = Machine guideway
Montar con los labios de estanqueidad no<br />
orientados a posibles fuentes de contaminación.<br />
Es posible orientar la salida del conector a<br />
ambos lados.<br />
Mount it with the sealing lips facing away<br />
from contaminating elements.<br />
The connector exit may be oriented at both<br />
ends.<br />
A<br />
F modular - Page 3 / 12<br />
A: Entradas de aire.<br />
B: Tensor de fleje.<br />
POSIBILIDADES DE MONTAJE - MOUNTING POSSIBILITIES<br />
Si se monta la regla verticalmente y no se<br />
instala ningún equipo de aire, conviene quitar<br />
el tornillo de entrada de aire inferior.<br />
A: Air intakes.<br />
B: Tape tensor.<br />
A<br />
When mounting the scale vertically and no air<br />
filter is installed, remove the bottom air intake<br />
screw..<br />
B
l<br />
±1.5<br />
62<br />
0.5<br />
Posibilidades de montaje y tolerancias.<br />
0.1 G<br />
0.03<br />
0.1 G<br />
10 ±1.5<br />
45 ±1.5<br />
Las marcas triangulares de la regla definen el inicio y el final del curso de medición.<br />
0.5<br />
±0.3<br />
79<br />
15 ±1.5<br />
25<br />
F modular - Page 4 / 12<br />
Mounting possibilities and tolerances.<br />
TOLERANCIAS DE MONTAJE - MOUNTING TOLERANCES<br />
0.1<br />
0.1 G<br />
máx. 9.5<br />
Junta entre módulos<br />
Gasket between modules<br />
G = Guía máquina<br />
G = Machine guideway<br />
The triangle marks of the scale indicate the beginning and end of the measuring length.<br />
2
50<br />
M6<br />
Realizar los agujeros para amarrar la regla.<br />
Los agujeros de los pasadores se realizarán<br />
más tarde.<br />
El área marcada estará libre de pintura.<br />
CM + 287<br />
Montar los módulos de la regla y a<strong>linear</strong>los.<br />
Utilizar el calzo separador de 4 mm entre módulos.<br />
95<br />
23<br />
M5<br />
Make the holes to secure the scale.<br />
The holes for the dowel pins will be made<br />
later.<br />
The marked area must be free of paint.<br />
F modular - Page 5 / 12<br />
Quitar las tapas y la cinta protectora de los<br />
módulos.<br />
Mount the scale modules and lign them up.<br />
Use the 4 mm separator wedge between modules.<br />
MONTAJE - MOUNTING<br />
Remove the end caps and the protective tape<br />
of the modules.<br />
12 min.<br />
DIN 433<br />
M5x50<br />
DIN 912<br />
Pa = 5 Nm
0.3 G<br />
La figura muestra la zona en la que se ha de<br />
palpar con el reloj.<br />
The drawing shows the area to be dial<br />
indicated .<br />
F modular - Page 6 / 12<br />
Mecanizar a la vez la regla y la bancada a<br />
diámetro 6H7.<br />
Montar los dos pasadores a ambos lados de<br />
la regla.<br />
Quitar las tapas. Remove the end caps. Preparar el fleje.<br />
No tocar la parte grabada.<br />
0.03<br />
G = Guía máquina<br />
G = Machine guideway<br />
Ø6 H7<br />
MONTAJE - MOUNTING<br />
14 min.<br />
DIN 7979-C 6x60 St<br />
Machine the scale and the bed to a diameter<br />
of 6H7 at the same time.<br />
Mount the two dowel pins at both ends of the<br />
scale.<br />
Prepare the tape.<br />
Do not touch the engraved side.
El fleje se introducirá<br />
en la ranura.<br />
Insert the tape<br />
into the slot.<br />
1<br />
Introducir el fleje FO-OOO en la regla desde el módulo Mod-K-Fi. Insert the FO-OOO tape into the scale from the Mod-K-Fi module.<br />
Meter el tensor y enganchar el fleje.<br />
Tirar del tensor hacia afuera y pretensarlo <strong>manual</strong>mente mediante el tornillo hasta el tope.<br />
Click<br />
OK<br />
NO<br />
2<br />
F modular - Page 7 / 12<br />
Insert the tensor and engage the tape.<br />
Pull at the tensor and tension it all the way by hand using the screw.<br />
1<br />
2<br />
OK<br />
3<br />
MONTAJE - MOUNTING<br />
NO
1º<br />
1st<br />
2º<br />
2nd<br />
Introducir los labios uno a uno según el orden indicado.<br />
Cortar los labios a la medida y levantarlos.<br />
Engrasar los labios con la grasa suministrada.<br />
Aflojar los tornillos del embalaje de la cabeza.<br />
Loosen the packing screws of the reader<br />
head.<br />
F modular - Page 8 / 12<br />
Insert the lips one by one in the order shown.<br />
Cut the lips to size and lift them up.<br />
Lubricate the lips with the supplied grease.<br />
Introducir la cabeza por cualquiera de los dos<br />
extremos de la regla.<br />
MONTAJE - MOUNTING<br />
Grasa<br />
Grease<br />
Insert the reader head through any of the two<br />
ends of the scale.
2.5 ±1.5<br />
Fijar la cabeza lectora.<br />
Los soportes fijan la distancia de separación (2.5 mm) entre la cabeza y la regla.<br />
F modular - Page 9 / 12<br />
Secure the reader head.<br />
The supports set the 2.5 mm gap between the reader head and the scale.<br />
Quitar los soportes de la cabeza. Remove the reader head supports. Poner las tapas. Mount the end caps.<br />
10 min.<br />
Pa < 0.8 Nm<br />
M6x35<br />
DIN 912<br />
Pa = 5 Nm M6<br />
M6<br />
DIN 555<br />
Labios<br />
Lips<br />
M5x(L+10)<br />
DIN 912<br />
Pa = 4 Nm<br />
MONTAJE - MOUNTING<br />
L
En ambientes muy contaminantes conviene<br />
proteger la regla.<br />
Utilizar juntas de estanqueidad para evitar filtraciones.<br />
Unidades de Filtro de Aire <strong>Fagor</strong><br />
<strong>Fagor</strong> Air Filter Units<br />
Modelos AI-400 Models<br />
AI-500<br />
In very polluted environments, the scale<br />
should be protected.<br />
Use seals to prevent filtration.<br />
Pa = 1 Nm<br />
Para IP-64<br />
For IP-64<br />
1 bar<br />
10 l/min.<br />
Existe la posibilidad de presurizar la cabeza lectora y la regla para minimizar la entrada de<br />
contaminación desde el exterior.<br />
<strong>Fagor</strong> suministra unidades de aire expecíficas a tal efecto.<br />
F modular - Page 10 / 12<br />
Realizar una comprobación de la correcta<br />
deriva a tierra de la regla.<br />
DIN ISO 8573-1<br />
Tamaño de particula<br />
Particle size - (Class 1) - Max. 0.1µm<br />
Punto de rocio<br />
Dewpoint - (Class 4) - (7 bar) 3ºC<br />
Contenido residual de aceite<br />
Residual oil content - (Class 1) - 0.01 mg/m³<br />
MONTAJE - MOUNTING<br />
Check for proper scale grounding.<br />
There is a possibility to pressurize the reader head and the scale to minimize contamination<br />
from the outside.<br />
<strong>Fagor</strong> supplies the air units for that.<br />
< 1
Se debe ajustar el fleje con un Interferómetro Laser (recomendable) o bien <strong>manual</strong>mente.<br />
Ajustar el fleje <strong>manual</strong>mente<br />
1<br />
1. Quitar el tapón que da acceso al tensor del fleje.<br />
2. Situar la cabeza lectora en el extremo izquierdo aproximádamente y preseleccionar<br />
con el valor 0 el Visualizador.<br />
3. Desplazar la cabeza lectora hacia el extremo derecho y anotar la lectura<br />
mostrada por el visualizador “L”.<br />
4. Preseleccionar en esta posición con el valor 0 el Visualizador.<br />
5. Girar el tensor del fleje hasta que el visualizador muestre el valor obtenido mediante la<br />
fórmula: (L+90) x 0,00012.<br />
6. Utilizar la fórmula (L+D+90) x 0,00012 si en el extremo izquierdo no hemos posicionado la<br />
cabeza en el triángulo.<br />
7. Poner el tapón.<br />
Nota: Tanto el valor de L, como el valor obtenido, se deben expresar en milímetros.<br />
7<br />
5<br />
3 mm Allen<br />
L<br />
0000.000<br />
F modular - Page 11 / 12<br />
Use a Laser interferometer (recommended) to adjust the tape or do it <strong>manual</strong>ly.<br />
Adjusting the tape <strong>manual</strong>ly<br />
2<br />
D<br />
L<br />
MONTAJE - MOUNTING<br />
1. Remove the cap to access the tape tensor.<br />
2. Place the reader head approximately at the left end and preset the DRO to 0.<br />
3. Slide the reader head towards the right end and write down the DRO reading “L”.<br />
4. Preset the DRO to 0 in this position.<br />
5. Turn the tape tensor until the DRO displays the value obtained with the formula:<br />
(L+90) x 0,00012.<br />
6. Use the formula (L+D+90) x 0.00012 if at the left end you have not positioned the reader<br />
head in the triangle.<br />
7. Put the cap back on.<br />
Note: Both the L value and the one obtained must be given in mm.<br />
3<br />
4<br />
5<br />
6<br />
6<br />
L<br />
0000.000<br />
(L+90)x0.00012<br />
(L+D+90)x0.00012<br />
0000.000
Ajustar el fleje mediante un Interferómetro Laser Adjust the tape with a Laser Interferometer.<br />
1<br />
1<br />
Tras calibrar la regla, bloquear el tensor. After calibrating the scale, lock the tensor.<br />
2<br />
Allen (3 mm)<br />
Pa = 5 Nm<br />
3<br />
Control<br />
F modular - Page 12 / 12<br />
2<br />
Allen (3 mm)<br />
MONTAJE - MOUNTING<br />
3
FAGOR AUTOMATION S. COOP.<br />
Bª San Andrés Nº 19<br />
Apdo de correos 144<br />
20500 Arrasate/Mondragón<br />
Spain<br />
Web: www.fagorautomation.com<br />
Email: info@fagorautomation.es<br />
Tel.: (34) 943 719200<br />
Fax: (34) 943 791712


