miditech Pianobox II
miditech Pianobox II
miditech Pianobox II

Erfolgreiche ePaper selbst erstellen
Machen Sie aus Ihren PDF Publikationen ein blätterbares Flipbook mit unserer einzigartigen Google optimierten e-Paper Software.
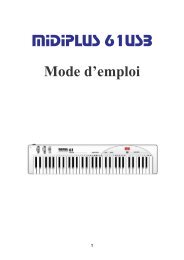
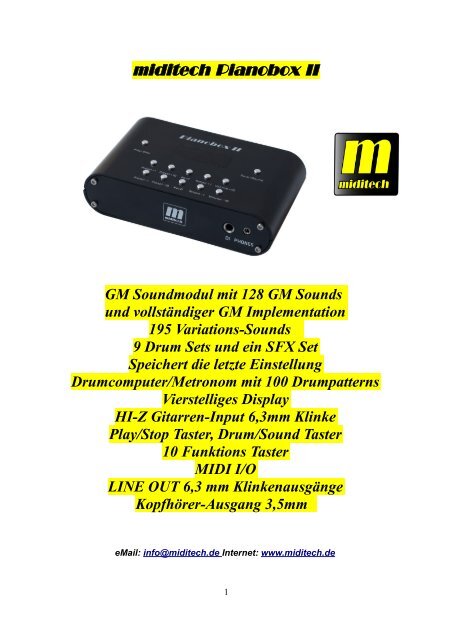
<strong>miditech</strong> <strong>Pianobox</strong> <strong>II</strong><br />
GM Soundmodul mit 128 GM Sounds<br />
und vollständiger GM Implementation<br />
195 Variations-Sounds<br />
9 Drum Sets und ein SFX Set<br />
Speichert die letzte Einstellung<br />
Drumcomputer/Metronom mit 100 Drumpatterns<br />
Vierstelliges Display<br />
HI-Z Gitarren-Input 6,3mm Klinke<br />
Play/Stop Taster, Drum/Sound Taster<br />
10 Funktions Taster<br />
MIDI I/O<br />
LINE OUT 6,3 mm Klinkenausgänge<br />
Kopfhörer-Ausgang 3,5mm<br />
eMail: info@<strong>miditech</strong>.de Internet: www.<strong>miditech</strong>.de<br />
1
Bedienungsanleitung<br />
Vielen Dank, das Sie sich für die Miditech <strong>Pianobox</strong> <strong>II</strong> entschieden haben. Die <strong>Pianobox</strong> stellt<br />
Ihnen zum günstigen Preis ein GM Soundmodul und 100 Drumpatterns zur Verfügung.<br />
Angeschlossen an ein Masterkeyboard können Sie mit der <strong>Pianobox</strong> <strong>II</strong> direkt spielen! Die 10<br />
Funktionstaster ermöglichen eine leichte Sound- und Pattern-Auswahl. Oder schliessen Sie Ihre<br />
Gitarre an den Gitarreneingang an, und spielen Sie zu einem der 100 Drumpatterns, die in der<br />
<strong>Pianobox</strong> <strong>II</strong> gespeichert sind. Das Tempo ist dabei frei wählbar. Die modernen Patterns aus allen<br />
Stilrichtungen ermöglichen ein vielfältiges Spielen, oder auch nur den Einsatz als Metronom.<br />
Über MIDI angeschlossen, verbessert die <strong>Pianobox</strong> <strong>II</strong> den Klang eines älteren Keyboards oder<br />
Synthesizers. An einen Computer angeschlossen kann die <strong>Pianobox</strong> <strong>II</strong> ein Software-Wavetable<br />
ersetzen und so MIDIfiles „zum Leben erwecken“! Und das in echter Hifi-Qualität!<br />
Oder, schliessen Sie ein Keyboard und eine Gitarre gleichzeitig an, und lassen sich von den<br />
Drumpatterns begleiten.<br />
Im Verlauf dieser Bedienungsanleitung werden wir einige Hinweise zur Bedienung und Funktionen<br />
der <strong>Pianobox</strong> <strong>II</strong> geben.<br />
Technische Daten der <strong>Pianobox</strong> <strong>II</strong>:<br />
● Einfacher Anschluss an Keyboards, Masterkeyboards oder den Computer über MIDI<br />
● 16 Bit/48 kHz DA Wandler<br />
● Kopfhörer-Ausgang, 32Ω, 65mW, 20Hz- 20kHz, thd 0.1%<br />
● Line Out, 10kΩ, 1V, 20Hz- 20kHz, thd 0.01%<br />
● Direct Input für Gitarre/Bass 10kΩ, 20Hz- 20kHz<br />
● DC Netzteil im Lieferumfang, 9 V, 1 Ampere, plus aussen<br />
● regelbarer Kopfhörer Ausgang<br />
Anschluss und Bedienelemente<br />
Das Gehäuse der <strong>Pianobox</strong> <strong>II</strong> ist eindeutig beschriftet!<br />
Sie finden auf der Frontseite den HI-Z Gitarren-Eingang und daneben den Kopfhörer-Ausgang.<br />
2
Auf der Rückseite sind der Anschluss für das Netzteil, MIDI In- und Output, der Power On/Off<br />
Schalter sowie die LINE Outs und Lautstärkeregelung.<br />
Auf der Oberseite sind die Bedienelemente, 10 Taster, Play/Sound und Drum/Sound Taster und das<br />
vierstellige Display, das die angewählte Funktion und deren Parameter sichtbar macht.<br />
Die 10 Funktionstaster sind jeder für eine bestimmte Funktion der <strong>Pianobox</strong> <strong>II</strong> verantwortlich, mit<br />
jeder einzelnen wird eine bestimmte Funktion greifbar. Dabei gibt es zwei Ebenen, die Drum-Ebene<br />
und die Sound-Ebene.<br />
Anschluß der <strong>Pianobox</strong> <strong>II</strong> an ein Keyboard, Masterkeyboard oder Computer<br />
Der Anschluss der <strong>Pianobox</strong> <strong>II</strong> an ein Keyboard oder Masterkeyboard erfolgt über den MIDI IN mit<br />
3
einem herkömmlichen Standard MIDI Kabel. Verbinden Sie den MIDI OUT des Keyboards mit<br />
dem MIDI IN der <strong>Pianobox</strong> <strong>II</strong>. Der Anschluss an den Computer muss über ein sogenanntes MIDI to<br />
USB Interface erfolgen. Verbinden Sie auch hier den MIDI OUT des Interfaces mit dem MIDI IN<br />
der <strong>Pianobox</strong> <strong>II</strong>.<br />
Zur Stromversorgung schliessen Sie die <strong>Pianobox</strong> <strong>II</strong> mit dem mitgelieferten Netzteil am Stromnetz<br />
an.<br />
Der LINE OUT der <strong>Pianobox</strong> <strong>II</strong> sind herkömmliche 6,3mm Klinkenbuchsen, verbinden Sie diese<br />
über ein LINE Kabel mit Ihrem Verstärker.<br />
HI-Z Instrument DI Eingang (Mono-Klinke 6,3 mm)<br />
An diesen Klinken-Eingang können Sie Instrumente mit hoher Impedanz, z.B. E-Gitarren und E-<br />
Bässe anschliessen. Das Signal wird zur <strong>Pianobox</strong> <strong>II</strong> dazugemischt, Sie können gleichzeitig auch<br />
den Drumcomputer und die Sounds über MIDI mit einem Keyboard spielen.<br />
Line Ausgänge (2x Mono-Klinke 6,3 mm)<br />
Diese führen zusammen mit dem Kopfhörer Out das gleiche Ausgangs-Signal. Verbinden Sie diese<br />
Ausgänge über ein Stereokabel mit einem Eingang Ihres Verstärkers.<br />
Kopfhörer-Ausgang (Stereo-Mini-Klinke 3,5 mm)<br />
Hier schliessen Sie Ihren Kopfhörer an, mit dem Drehregler auf der Rückseite können Sie die<br />
Lautstärke des Kopfhörer-Ausgangs und des MAIN Outs gleichzeitig regeln.<br />
Bedienung der <strong>Pianobox</strong> <strong>II</strong><br />
Die 10 Funktionstaster der <strong>Pianobox</strong> <strong>II</strong> sind zusätzlich mit der Funktion beschriftet. Grundsätzlich<br />
wird mit dem Drum/Sound Taster zwischen dem Drum-Modus und dem Sound-Modus hin und<br />
hergeschaltet. Im Drum-Modus ist die erste Ziffer im Display ein „d“, im Sound Modus ein „S“.<br />
Danach steht die Parameter-Nummer als dreistellige Ziffer.<br />
Sound-Modus im Überblick:<br />
Schalten Sie mit Drum/Sound in den Sound Modus, bis ein „S“ im Display erscheint.<br />
1.Preset +1 – hier wird die Sound-Programm Nummer in einzelnen Schritten addiert<br />
Darstellung: S für Sound und danach die Programm-Nummer, also S.xxx<br />
2.Preset +10 – hier wird die Sound-Programm Nummer in 10er Schritten addiert<br />
Darstellung: S für Sound und danach die Programm-Nummer, also S.xxx<br />
3.RevT – hier wird der Hallraum/-typ eingestellt. Es sind 8 Typen wählbar<br />
Darstellung: P für den Hallraum und danach die Nummer, also z.B. P.008<br />
4.Tempo +1 - Im Sound-Modus wird hier die Lautstärke des Sound-Programms in<br />
einzelnen Schritten addiert<br />
Darstellung: L für die Lautstärke und danach die Nummer, also z.B. L.127<br />
5.Volume +10 - Im Sound-Modus wird hier die Lautstärke des Sound-Programms in<br />
10er Schritten addiert<br />
Darstellung: L für die Lautstärke und danach die Nummer, also z.B. L.127<br />
4
6.Preset -1 – hier wird die Sound-Programm Nummer in einzelnen Schritten subtrahiert<br />
Darstellung: S für Sound und danach die Programm-Nummer, also S.xxx<br />
7.Preset -10 – hier wird die Sound-Programm Nummer in 10er Schritten subtrahiert<br />
Darstellung: S für Sound und danach die Programm-Nummer, also S.xxx<br />
8.RevD – hier wird der Hallraum/-typ anteilig von 0-127 als Wert eingestellt.<br />
Darstellung: e für den Effekt-Anteil und danach die Nummer, also z.B. e.110<br />
9.Tempo -1 - Im Sound-Modus wird hier die Lautstärke des Sound-Programms in<br />
einzelnen Schritten subtrahiert<br />
Darstellung: L für die Lautstärke und danach die Nummer, also z.B. L.127<br />
10.Volume -10 - Im Sound-Modus wird hier die Lautstärke des Sound-Programms in<br />
10er Schritten subtrahiert<br />
Darstellung: L für die Lautstärke und danach die Nummer, also z.B. L.127<br />
Drum-Modus im Überblick:<br />
Schalten Sie mit Drum/Sound in den Drum Modus, bis ein „d“ im Display erscheint.<br />
1.Preset +1 – hier wird die Drum Pattern Nummer in einzelnen Schritten addiert<br />
Darstellung: d für Drum Pattern und danach die Nummer, also d.xxx<br />
2.Preset +10 – hier wird die Drum Programm Nummer in 10er Schritten addiert<br />
Darstellung: d für Drum Pattern und danach die Nummer, also d.xxx<br />
3.RevT – hier wird der Hallraum/-typ eingestellt. Es sind 8 Typen wählbar<br />
Darstellung: P für den Hallraum und danach die Nummer, also z.B. P.008<br />
4.Tempo +1 - Im Drum-Modus wird hier das Tempo des Drum Patterns<br />
in einzelnen Schritten addiert<br />
Darstellung: t für das Tempo und danach die Nummer, also z.B. t.112<br />
5.Volume +10 - Im Drum-Modus wird hier die Lautstärke des Drum Patterns in<br />
10er Schritten addiert<br />
Darstellung: L für die Lautstärke und danach die Nummer, also z.B. L.127<br />
6.Preset -1 – hier wird die Drum Pattern Nummer in einzelnen Schritten subtrahiert<br />
Darstellung: d für Drum Pattern und danach die Nummer, also d.xxx<br />
7.Preset -10 – hier wird die Drum Pattern Nummer in 10er Schritten subtrahiert<br />
Darstellung: d für Drum Pattern und danach die Nummer, also d.xxx<br />
8.RevD – hier wird der Hallraum/-typ anteilig von 0-127 als Wert eingestellt.<br />
Darstellung: e für den Effekt-Anteil und danach die Nummer, also z.B. e.110<br />
9.Tempo -1 - Im Drum-Modus wird hier das Tempo des Drum Patterns<br />
in einzelnen Schritten subtrahiert<br />
Darstellung: t für das Tempo und danach die Nummer, also z.B. t.112<br />
10.Volume -10 - Im Drum-Modus wird hier die Lautstärke des Drum-Patterns in 10er<br />
Schritten subtrahiert<br />
Darstellung: L für die Lautstärke und danach die Nummer, also z.B. L.127<br />
5
Arbeiten mit der <strong>Pianobox</strong> <strong>II</strong><br />
Wie spielt die <strong>Pianobox</strong> <strong>II</strong> ein Drumpattern?<br />
Der PLAY/STOP Taster startet die Wiedergabe des angewählten Styles, ein Druck auf den gleichen<br />
Taster stoppt die Wiedergabe wieder. Die erste LED blinkt im Takt des Patterns.<br />
Was ist der Sound und Drum Modus?<br />
Mit dem Drum/Sound Taster wird zwischen dem Drumbox und dem Soundbox Modus hin und<br />
hergeschaltet.<br />
Das Einstellen eines Parameters:<br />
Im Sound-Modus wird die Soundprogramm-Nummer immer über die Preset Tasten eingestellt. Das<br />
Display zeigt immer die aktuelle Auswahl. Mit den Drumpatterns geht das genauso. Eine Soundund<br />
Drum-Pattern-Liste finden Sie am Ende dieser Anleitung.<br />
Der Halltyp und der Anteil des Halls werden mit Tastenkombinationen eingestellt: Halten Sie die<br />
Taste RevD gedrückt, das Display zeigt P.XXX. Nun können Sie mit Preset +/- das Hallprogramm<br />
anwählen. Zum Einstellen des Hallanteils gehen Sie genauso vor: Halten Sie die Taste RevT<br />
gedrückt und stellen Sie mit Preset +/- den gewünschten Hallanteil von 1-127 ein.<br />
Mögliche Hallräume sind: 1= Room1, 2= Room2, 3= Room3, 4=Hall 1, 5= Hall 2, 6= Plate,<br />
7= Delay, 8= Pan Delay<br />
Im Drum Modus stellt man mit den Tasten Tempo +1/Tempo -1 das Tempo des eingestellten<br />
Patterns ein. Im Sound Modus dienen diese beiden Taster um die Lautstärke +1/-1 einzustellen.<br />
Die Lautstärke eines Sounds oder Patterns wird über die Volume +10/-10 Taster eingestellt.<br />
Wie speichert man das letzte Preset?<br />
Durch halten der Taste PLAY/STOP wird die aktuelle Einstellung mit Programm-Nummer,<br />
Hallanteil etc. gespeichert. Dieses bleibt auch beim Ausschalten der <strong>Pianobox</strong> <strong>II</strong> erhalten.<br />
Wie initialisiert man die <strong>Pianobox</strong> <strong>II</strong>?<br />
Halten Sie den Drum/Sound Taster beim Einschalten gedrückt. Die <strong>Pianobox</strong> <strong>II</strong> wird auf die<br />
Werkseinstellungen zurückgesetzt, alle gespeicherten Sounds und Einstellungen werden gelöscht.<br />
Wie erreicht man die zusätzlichen Variations-Sounds und Drumsets der <strong>Pianobox</strong> <strong>II</strong>?<br />
Mit einem externen MIDI Sequenzer oder Masterkeyboard haben Sie die Möglichkeit, mit Standard<br />
GM Befehlen die zusätzlichen Sound-Variationen und Drumsets der <strong>Pianobox</strong> anzusprechen.<br />
Über das Senden der zugehörigen Bank Select und Program Change Befehle lesen Sie bitte im<br />
Handbuch Ihres Sequenzers oder Masterkeyboards nach.<br />
Weitere Informationen zu Erweiterungen, Updates und anderen Produkten der Firma Miditech<br />
finden Sie im Internet unter: http://www.<strong>miditech</strong>.de !<br />
6
Liste der <strong>Pianobox</strong> GM Sounds<br />
1 Acoustic Grand Piano 34 Electric Bass (finger)<br />
2 Bright Acoustic Piano 35 Electric Bass (pick)<br />
3 Electric Grand Piano 36 Fretless Bass<br />
4 Honky-tonk Piano 37 Slap Bass 1<br />
5 Electric Piano 1 38 Slap Bass 2<br />
6 Electric Piano 2 39 Synth Bass 1<br />
7 Harpsichord 40 Synth Bass 2<br />
8 Clavi 41 Violin<br />
9 Celesta 42 Viola<br />
10 Glockenspiel 43 Cello<br />
11 Music Box 44 Contrabass<br />
12 Vibraphone 45 Tremolo Strings<br />
13 Marimba 46 Pizzicato Strings<br />
14 Xylophone 47 Orchestral Harp<br />
15 Tubular Bells 48 Timpani<br />
16 Dulcimer 49 String Ensemble 1<br />
17 Organ 50 String Ensemble 2<br />
18 Percussive Organ 51 Synth Strings 1<br />
19 Rock Organ 52 Synth Strings 2<br />
20 Church Organ 53 Voice Aahs<br />
21 Reed Organ 54 Voice Oohs<br />
22 Accordion 55 Synth Voice<br />
23 Harmonica 56 Orchestra Hit<br />
24 Tango Accordion 57 Trumpet<br />
25 Acoustic Guitar (nylon) 58 Trombone<br />
26 Acoustic Guitar (steel) 59 Tuba<br />
27 Electric Guitar (jazz) 60 Muted Trumpet<br />
28 Electric Guitar (clean) 61 French horn<br />
29 Electric Guitar (muted) 62 Brass Section<br />
30 Overdriven Guitar 63 Synth Brass 1<br />
31 Distortion Guitar 64 Synth Brass 2<br />
32 Guitar harmonics 65 Soprano Sax<br />
33 Acoustic Bass 66 Alto Sax<br />
7
67 Tenor Sax 101 FX 5 (brightness)<br />
68 Baritone Sax 102 FX 6 (goblins)<br />
69 Oboe 103 FX 7 (echoes)<br />
70 English Horn 104 FX 8 (sci-fi)<br />
71 Bassoon 105 Sitar<br />
72 Clarinet 106 Banjo<br />
73 Piccolo 107 Shamisen<br />
74 Flute 108 Koto<br />
75 Recorder 109 Kalimba<br />
76 Pan Flute 110 Bagpipe<br />
77 Blown Bottle 111 Fiddle<br />
78 Shakuhachi 112 Shanai<br />
79 Whistle 113 Tinkle Bell<br />
80 Ocarina 114 Agogo Bells<br />
81 Lead 1 (square) 115 Steel Drums<br />
82 Lead 2 (sawtooth) 116 Woodblock<br />
83 Lead 3 (calliope) 117 Taiko Drum<br />
84 Lead 4 (chiff) 118 Melodic Tom<br />
85 Lead 5 (charang) 119 Synth Drum<br />
86 Lead 6 (voice) 120 Reverse Cymbal<br />
87 Lead 7 (fifths) 121 Guitar Fret Noise<br />
88 Lead 8 (bass + lead) 122 Breath Noise<br />
89 Pad 1 (new age) 123 Seashore<br />
90 Pad 2 (warm) 124 Bird Tweet<br />
91 Pad 3 (polysynth) 125 Telephone Ring<br />
92 Pad 4 (choir) 126 Helicopter<br />
93 Pad 5 (bowed) 127 Applause<br />
94 Pad 6 (metallic) 128 Gunshot<br />
95 Pad 7 (halo)<br />
96 Pad 8 (sweep)<br />
97 FX 1 (rain)<br />
98 FX 2 (soundtrack)<br />
99 FX 3 (crystal)<br />
100 FX 4 (atmosphere)<br />
8
Liste der Drumpatterns<br />
1 Ballad 01 26 Funk 01<br />
2 Ballad 02 27 Funk 02<br />
3 Ballad 03 28 Funk 03<br />
4 Ballad 04 29 Groove 01<br />
5 Ballad 05 30 Groove 02<br />
6 Ballad 06 31 Groove 03<br />
7 Bossa 01 32 Groove 04<br />
8 Bossa 02 33 Groove 05<br />
9 Bossa 03 34 Groove 06<br />
10 Bossa 04 35 Groove 07<br />
11 Bossa 05 36 Groove 08<br />
12 ChaCha 37 Jazz 01<br />
13 Country 01 38 Jazz 02<br />
14 Country 02 39 Jazz 03<br />
15 Country 03 40 Latin 01<br />
16 Country 04 41 Latin 02<br />
17 Country 05 42 Latin 03<br />
18 Dance 01 43 Latin 04<br />
19 Dance 02 44 Latin 05<br />
20 Disco 01 45 Latin 06<br />
21 Disco 02 46 Latin 07<br />
22 Disco 03 47 Latin 08<br />
23 Disco 04 48 Latin 09<br />
24 Disco 05 49 Pop 01<br />
25 Disco 06 50 Pop 02<br />
10
51 Pop 03 76 Rock 13<br />
52 Pop 04 77 Samba 01<br />
53 Pop 05 78 Samba 02<br />
54 Pop 06 79 Samba 03<br />
55 Pop 07 80 Samba 04<br />
56 Pop 08 81 Samba 05<br />
57 Pop 09 82 Samba 06<br />
58 Pop 10 83 Soul 01<br />
59 Pop 11 84 Soul 02<br />
60 Pop 12 85 Soul 03<br />
61 Reggae 01 86 Soul 04<br />
62 Reggae 02 87 Soul 05<br />
63 Reggae 03 88 Soul 06<br />
64 Rock 01 89 Soul 07<br />
65 Rock 02 90 Soul 08<br />
66 Rock 03 91 Swing 01<br />
67 Rock 04 92 Swing 02<br />
68 Rock 05 93 Swing 03<br />
69 Rock 06 94 Swing 04<br />
70 Rock 07 95 Swing 05<br />
71 Rock 08 96 Swing 06<br />
72 Rock 09 97 Swing 07<br />
73 Rock 10 98 Swing 08<br />
74 Rock 11 99 Waltz 01<br />
75 Rock 12 100 Waltz 02<br />
Änderungen der technischen Daten und des Designs sind möglich<br />
Für Druckfehler wird keine Haftung übernommen<br />
11
<strong>miditech</strong> <strong>Pianobox</strong> <strong>II</strong><br />
Owner´s manual<br />
GM soundmodule with 128 GM sounds<br />
and full GM implementation<br />
195 variation-sounds<br />
9 drum sets and one SFX set<br />
Stores the last setting<br />
Drumcomputer/metronom with 100 drumpatterns<br />
LED display<br />
HI-Z guitar-input TRS jack 6,3mm<br />
PLAY/STOP button, Drum/Sound button<br />
10 function buttons<br />
MIDI I/O<br />
LINE OUT TRS jack 6,3 mm<br />
Headphone output TRS jack 3,5mm<br />
eMail: info@<strong>miditech</strong>.de Internet: www.<strong>miditech</strong>.de<br />
12
PREFACE<br />
Congratulations on purchasing the Miditech <strong>Pianobox</strong> <strong>II</strong> GM sound module. With this module<br />
you will be able to discover the wonderful world of Music, with a set of complete musical<br />
instruments and many drumpatterns in this little black box.<br />
Connect your <strong>Pianobox</strong> <strong>II</strong> to a Masterkeyboard, and you will be able to play easily different<br />
sounds, or use it for playback GM files from a Computer or sequenzer. If you are a guitar player,<br />
you can use the Direct Input to connect your guitar, and practice songs and riffs by using the<br />
<strong>Pianobox</strong> <strong>II</strong> drumpatterns as a drumcomputer. Many different modern styles are available.<br />
This manual is written to help you become familiar with the features of the Miditech <strong>Pianobox</strong><br />
<strong>II</strong>. Please read the manual carefully to discover all the features of your <strong>Pianobox</strong> <strong>II</strong>. After<br />
reading the manual, you will have a clear understanding of how to use the <strong>Pianobox</strong> <strong>II</strong>, use its<br />
drumpatterns and sounds. At the end of this manual you will find a list of the 100 implemented<br />
drumpatterns.<br />
Technical Spezifications of the <strong>Pianobox</strong> <strong>II</strong>:<br />
● Easy to use with keyboards, masterkeyboards, or computer with MIDI.<br />
● 16 Bit/48 kHz DA converter<br />
● Adjustable headphone out 32Ω, 65mW, 20Hz- 20kHz, thd 0.1%<br />
● Line Out, 10kΩ, 1V, 20Hz- 20kHz, thd 0.01%<br />
● Direct Input for guitar/bass 10kΩ, 20Hz- 20kHz<br />
● Including AC adaptor 9 V, 1 Ampere<br />
Connections and user panel:<br />
On the front of the <strong>Pianobox</strong> <strong>II</strong> you will find the DI (direct input) for guitar/bass and the headphone<br />
out. Please connect your guitar or headphone here.<br />
13
On the rear panel of the <strong>Pianobox</strong> <strong>II</strong> you will find the LINE Out to connect the <strong>Pianobox</strong> to an<br />
amplifier. Beside the LINE Outs there is the volume leveler, which controls the volume of the LINE<br />
Outs and the headphone out at the same time. In the middle, there is the MIDI I/O, please connect<br />
your keyboard here with a standard MIDI cable. The MIDI Out from the keyboard must be<br />
connected to the MIDI In of the <strong>Pianobox</strong> <strong>II</strong>.On the right side there is the power switch and the<br />
connection for the AC power adaptor. Please connect the power adaptor here, the <strong>Pianobox</strong> <strong>II</strong> needs<br />
1000mA and a positive polarity at the outside of the connection.<br />
On the top of the <strong>Pianobox</strong> <strong>II</strong>, you see the display, the Play/Stop and the Drum/Sound button. And<br />
below this the 10 function buttons.<br />
14
How to use the <strong>Pianobox</strong> <strong>II</strong><br />
The basic buttons of the <strong>Pianobox</strong> <strong>II</strong> are the Drum/Sound button and the Play/Stop button. The<br />
Drum/Sound button switches between the basic modes: Drumbox and Soundmodule.<br />
In drum mode, the display shows a „d“, in sound mode, a „s“. After this you can switch between the<br />
sounds or drumpatterns with the Preset +1/-1 and Preset +10/-10 buttons.<br />
The Play/Stop button plays the drumpatterns of the <strong>Pianobox</strong> <strong>II</strong>. Press button PLAY to start playing<br />
style, press the same button for STOP, when the drum playing the first LED dot shall blink<br />
according the beat.<br />
You can set one of the reverb types by holding RevT. Then you can choose between the reverb<br />
types wit Preset +1 and Preset -1. This reverb types are possible: 1= Room1, 2= Room2, 3= Room3,<br />
4=Hall 1, 5= Hall 2, 6= Plate, 7= Delay, 8= Pan Delay<br />
The display shows a „P“ for this reverb programs.<br />
To choose the value of the reverb, hold RevD in the same combination with Preset +1/-1.<br />
Possible values are between 0 and 127.<br />
To adjust the volume level of the drumpatterns or the Pinobox <strong>II</strong> sounds, please use the Volume<br />
+10/-10 buttons.<br />
This is an overview of the 10 function buttons and what the display is showing:<br />
Sound-Mode overview:<br />
Please switch with the Drum/Sound button in the sound mode, the display shows a „S“.<br />
1.Preset +1 – this button switches the sound program number in one step up<br />
display: „S“ for sound and then the program-number, e.g. S.xxx<br />
2.Preset +10 – this button switches the sound program number in 10 step up<br />
display: „S“ for sound and then the program-number, e.g. S.xxx<br />
3.RevT – with this button you can choose a reverb type. In the <strong>Pianobox</strong> <strong>II</strong> there are 8<br />
reverb types usable.<br />
display: „P“ for the reverb type and then the type number, e.g. P.008<br />
4.Tempo +1 - In sound-mode the Tempo +1 button controls the volume +1<br />
display: „L“ for the volume level and then the number, e.g. L.127<br />
5.Volume +10 - In sound-mode this button controls the volume +10 step up<br />
display: „L“ for the volume level and then the number, e.g. L.127<br />
6.Preset -1 – this button switches the sound program number in one step down<br />
display: „S“ for sound and then the program-number, e.g. S.xxx<br />
7.Preset -10 – this button switches the sound program number in 10 step down<br />
display: „S“ for sound and then the program-number, e.g. S.xxx<br />
8.RevD – with this button you can choose a reverb type parameter.<br />
display: „e“ for the effect power from 0-127, e.g. e.110<br />
9.Tempo -1 - In sound-mode the Tempo -1 button controls the volume -1<br />
display: „L“ for the volume level and then the number, e.g. L.127<br />
10.Volume -10 - In sound-mode this button controls the volume +10 step down<br />
display: „L“ for the volume level and then the number, e.g. L.127<br />
15
Drum-Mode overview:<br />
Please switch with the Drum/Sound button in the drum mode, the display shows a „d“.<br />
1.Preset +1 – this button switches the drum pattern program number in one step up<br />
display: „d“ for drum and then the program-number, e.g. d.xxx<br />
2.Preset +10 – this button switches the drum pattern program number in 10 step up<br />
display: „d“ for drum and then the program-number, e.g. d.xxx<br />
3.RevT – with this button you can choose a reverb type. In the <strong>Pianobox</strong> <strong>II</strong> there are 8<br />
reverb types usable.<br />
display: „P“ for the reverb type and then the type number, e.g. P.008<br />
4.Tempo +1 - in drum-mode this button controls the tempo of the pattern in 1 step up<br />
display: „t“ for drum tempo and then the number, e.g. t.112<br />
5.Volume +10 - in drum-mode this button controls the volume +10 step up<br />
display: „L“ for the volume level and then the number, e.g. L.127<br />
6.Preset -1 – this button switches the drum pattern program number in one step down<br />
display: „d“ for drum and then the program-number, e.g. d.xxx<br />
7.Preset -10 – this button switches the drum pattern program number in 10 step down<br />
display: „d“ for drum and then the program-number, e.g. d.xxx<br />
8.RevD – with this button you can choose a reverb type parameter.<br />
display: „e“ for the effect power from 0-127, e.g. e.110<br />
9.Tempo -1 - in drum-mode this button controls the tempo of the pattern in 1 step down<br />
display: „t“ for drum tempo and then the number, e.g. t.112<br />
10.Volume -10 - in drum-mode this button controls the volume -10 step down<br />
display: „L“ for the volume level and then the number, e.g. L.127<br />
Because the <strong>Pianobox</strong> <strong>II</strong> is fully GM compatible, you can send normal GM bank select and program<br />
change orders with a sequenzer or a masterkeyboard. Yo you will reach the additional sounds and<br />
drumsets.<br />
16
List of the <strong>Pianobox</strong> GM sounds<br />
1 Acoustic Grand Piano 34 Electric Bass (finger)<br />
2 Bright Acoustic Piano 35 Electric Bass (pick)<br />
3 Electric Grand Piano 36 Fretless Bass<br />
4 Honky-tonk Piano 37 Slap Bass 1<br />
5 Electric Piano 1 38 Slap Bass 2<br />
6 Electric Piano 2 39 Synth Bass 1<br />
7 Harpsichord 40 Synth Bass 2<br />
8 Clavi 41 Violin<br />
9 Celesta 42 Viola<br />
10 Glockenspiel 43 Cello<br />
11 Music Box 44 Contrabass<br />
12 Vibraphone 45 Tremolo Strings<br />
13 Marimba 46 Pizzicato Strings<br />
14 Xylophone 47 Orchestral Harp<br />
15 Tubular Bells 48 Timpani<br />
16 Dulcimer 49 String Ensemble 1<br />
17 Organ 50 String Ensemble 2<br />
18 Percussive Organ 51 Synth Strings 1<br />
19 Rock Organ 52 Synth Strings 2<br />
20 Church Organ 53 Voice Aahs<br />
21 Reed Organ 54 Voice Oohs<br />
22 Accordion 55 Synth Voice<br />
23 Harmonica 56 Orchestra Hit<br />
24 Tango Accordion 57 Trumpet<br />
25 Acoustic Guitar (nylon) 58 Trombone<br />
26 Acoustic Guitar (steel) 59 Tuba<br />
27 Electric Guitar (jazz) 60 Muted Trumpet<br />
28 Electric Guitar (clean) 61 French horn<br />
29 Electric Guitar (muted) 62 Brass Section<br />
30 Overdriven Guitar 63 Synth Brass 1<br />
31 Distortion Guitar 64 Synth Brass 2<br />
32 Guitar harmonics 65 Soprano Sax<br />
33 Acoustic Bass 66 Alto Sax<br />
17
67 Tenor Sax 101 FX 5 (brightness)<br />
68 Baritone Sax 102 FX 6 (goblins)<br />
69 Oboe 103 FX 7 (echoes)<br />
70 English Horn 104 FX 8 (sci-fi)<br />
71 Bassoon 105 Sitar<br />
72 Clarinet 106 Banjo<br />
73 Piccolo 107 Shamisen<br />
74 Flute 108 Koto<br />
75 Recorder 109 Kalimba<br />
76 Pan Flute 110 Bagpipe<br />
77 Blown Bottle 111 Fiddle<br />
78 Shakuhachi 112 Shanai<br />
79 Whistle 113 Tinkle Bell<br />
80 Ocarina 114 Agogo Bells<br />
81 Lead 1 (square) 115 Steel Drums<br />
82 Lead 2 (sawtooth) 116 Woodblock<br />
83 Lead 3 (calliope) 117 Taiko Drum<br />
84 Lead 4 (chiff) 118 Melodic Tom<br />
85 Lead 5 (charang) 119 Synth Drum<br />
86 Lead 6 (voice) 120 Reverse Cymbal<br />
87 Lead 7 (fifths) 121 Guitar Fret Noise<br />
88 Lead 8 (bass + lead) 122 Breath Noise<br />
89 Pad 1 (new age) 123 Seashore<br />
90 Pad 2 (warm) 124 Bird Tweet<br />
91 Pad 3 (polysynth) 125 Telephone Ring<br />
92 Pad 4 (choir) 126 Helicopter<br />
93 Pad 5 (bowed) 127 Applause<br />
94 Pad 6 (metallic) 128 Gunshot<br />
95 Pad 7 (halo)<br />
96 Pad 8 (sweep)<br />
97 FX 1 (rain)<br />
98 FX 2 (soundtrack)<br />
99 FX 3 (crystal)<br />
100 FX 4 (atmosphere)<br />
18
List of the drumpatterns<br />
1 Ballad 01 26 Funk 01<br />
2 Ballad 02 27 Funk 02<br />
3 Ballad 03 28 Funk 03<br />
4 Ballad 04 29 Groove 01<br />
5 Ballad 05 30 Groove 02<br />
6 Ballad 06 31 Groove 03<br />
7 Bossa 01 32 Groove 04<br />
8 Bossa 02 33 Groove 05<br />
9 Bossa 03 34 Groove 06<br />
10 Bossa 04 35 Groove 07<br />
11 Bossa 05 36 Groove 08<br />
12 ChaCha 37 Jazz 01<br />
13 Country 01 38 Jazz 02<br />
14 Country 02 39 Jazz 03<br />
15 Country 03 40 Latin 01<br />
16 Country 04 41 Latin 02<br />
17 Country 05 42 Latin 03<br />
18 Dance 01 43 Latin 04<br />
19 Dance 02 44 Latin 05<br />
20 Disco 01 45 Latin 06<br />
21 Disco 02 46 Latin 07<br />
22 Disco 03 47 Latin 08<br />
23 Disco 04 48 Latin 09<br />
24 Disco 05 49 Pop 01<br />
25 Disco 06 50 Pop 02<br />
20
51 Pop 03 76 Rock 13<br />
52 Pop 04 77 Samba 01<br />
53 Pop 05 78 Samba 02<br />
54 Pop 06 79 Samba 03<br />
55 Pop 07 80 Samba 04<br />
56 Pop 08 81 Samba 05<br />
57 Pop 09 82 Samba 06<br />
58 Pop 10 83 Soul 01<br />
59 Pop 11 84 Soul 02<br />
60 Pop 12 85 Soul 03<br />
61 Reggae 01 86 Soul 04<br />
62 Reggae 02 87 Soul 05<br />
63 Reggae 03 88 Soul 06<br />
64 Rock 01 89 Soul 07<br />
65 Rock 02 90 Soul 08<br />
66 Rock 03 91 Swing 01<br />
67 Rock 04 92 Swing 02<br />
68 Rock 05 93 Swing 03<br />
69 Rock 06 94 Swing 04<br />
70 Rock 07 95 Swing 05<br />
71 Rock 08 96 Swing 06<br />
72 Rock 09 97 Swing 07<br />
73 Rock 10 98 Swing 08<br />
74 Rock 11 99 Waltz 01<br />
75 Rock 12 100 Waltz 02<br />
Design and specifications subject to change without notice.<br />
No liability for printing mistakes<br />
21