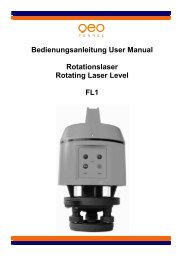
Bedienungsanleitung Users' manual Maxi-Liner FL 60
Bedienungsanleitung Users' manual Maxi-Liner FL 60
Bedienungsanleitung Users' manual Maxi-Liner FL 60

Erfolgreiche ePaper selbst erstellen
Machen Sie aus Ihren PDF Publikationen ein blätterbares Flipbook mit unserer einzigartigen Google optimierten e-Paper Software.
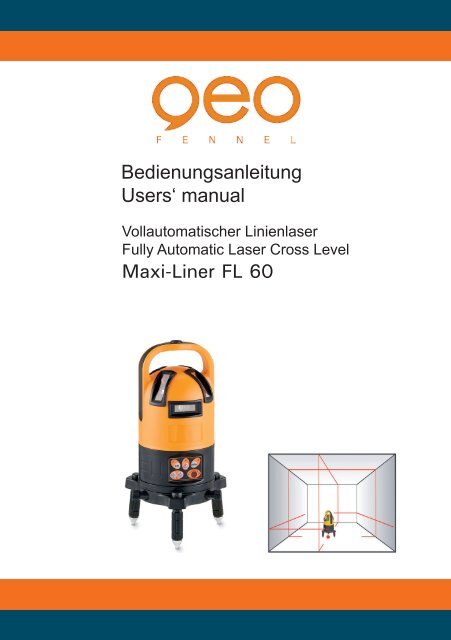
<strong>Bedienungsanleitung</strong><br />
Users‘ <strong>manual</strong><br />
Vollautomatischer Linienlaser<br />
Fully Automatic Laser Cross Level<br />
<strong>Maxi</strong>-<strong>Liner</strong> <strong>FL</strong> <strong>60</strong>
BEDIENELEMENTE<br />
1) Laseraustrittsfenster (6 Stück)<br />
2) Batteriefach<br />
3) Verschlussschraube<br />
4) Ladebuchse<br />
5) Bodenstativ mit 5/8“-Anschluss für Stativ<br />
6) Höhenverstellbarer Fuß<br />
7) Dosenlibelle<br />
8) Feintrieb<br />
9) Bedienfeld<br />
10) Handgriff<br />
11) Drehbarer 3<strong>60</strong>°-Teilkreis<br />
LIEFERUMFANG<br />
<strong>Maxi</strong>-<strong>Liner</strong> <strong>FL</strong> <strong>60</strong>, Empfänger, Akku, Ladege-<br />
rät, magnetische Zieltafel, Laserbrille, Kunst-<br />
stoffkoffer, <strong>Bedienungsanleitung</strong><br />
FUNKTIONEN UND MERKMALE<br />
Der <strong>Maxi</strong>-<strong>Liner</strong> <strong>FL</strong> <strong>60</strong> ist ein elektronisch<br />
selbstnivellierender Linienlaser. Der Einsatz<br />
von elektronischen Libellen ermöglicht eine<br />
hohe Genauigkeit von nur ± 1 mm auf 10 m.<br />
FEATURES<br />
1) Laser emitting window (6 pieces)<br />
2) Battery compartment<br />
3) Lock screw<br />
4) Socket for charger<br />
5) Floor tripod with 5/8“ thread for use on<br />
a tripod<br />
6) Adjustable foot screw<br />
7) Circular bubble<br />
8) Tangent screw<br />
9) Keypad<br />
10) Handle<br />
11) Rotatable 3<strong>60</strong>° circle<br />
KIT CONSISTS OF<br />
<strong>Maxi</strong>-<strong>Liner</strong> <strong>FL</strong> <strong>60</strong>, receiver, rechargable<br />
batteries, power supply, magnetic target,<br />
laser glasses, hard case, users‘ <strong>manual</strong><br />
FUNCTIONS AND FEATURES<br />
<strong>Maxi</strong>-<strong>Liner</strong> <strong>FL</strong> <strong>60</strong> is an electronic self-levelling<br />
line laser. By use of electronic vials it is pos-<br />
sible to reach a high accuracy of ± 1 mm at<br />
10 metres.<br />
2
1) 4 vertikale Linien im rechten Winkel zuein-<br />
ander plus 2 horizontale Linien mit jeweils<br />
130° Austrittswinkel ergeben 5 Laserkreuze<br />
2) Lotkreuz zur Decke und Lotpunkt zum Boden<br />
3) Automatische TILT-Funktion<br />
4) Einsatz mit Empfänger FR 55<br />
5) Optisches Signal, wenn außerhalb der To-<br />
leranz<br />
6) Verstellbarer 3<strong>60</strong>°-Teilkreis und Seitenfeintrieb<br />
7) Integriertes Bodenstativ<br />
8) 5/8“-Anschluss für Baustativ<br />
TECHNISCHE DATEN<br />
Selbstnivellierbereich ± 3°<br />
Genauigkeit ± 1 mm / 10 m<br />
Arbeitsbereich<br />
ohne Empfänger Ø 20 m*<br />
mit Empfänger Ø 80 m*<br />
Austrittswinkel Hz-Linien 2 x 130°<br />
Stromversorgung NiMH / alternativ<br />
Alkaline-Batterien<br />
Ladegerät dient als<br />
Netzgerät ja<br />
Laserdiode / Laserklasse 635 nm / 2M<br />
Temperaturbereich -10°C bis + 40°C<br />
*abhängig von Raumhelligkeit<br />
Technische Änderungen vorbehalten.<br />
3<br />
STROMVERSORGUNG<br />
Der Laser kann mit NiMH-Akku und alternativ<br />
mit handelsüblichen Alkaline-Einwegbatterien<br />
betrieben werden.<br />
NiMH-Akkupack<br />
Der Laser ist mit einem wiederaufladbaren<br />
NiMH-Akkupack ausgestattet. Ladegerät mit<br />
Netz und Ladebuchse “4” am Gerät verbin-<br />
den.<br />
Der Ladezustand wird an der kleinen Lampe<br />
bei der Ladebuchse angezeigt:<br />
Permanentes rotes Licht zeigt an, dass der<br />
Akkupack geladen wird.<br />
Permanentes grünes Licht zeigt an, dass der<br />
Ladevorgang abgeschlossen ist.<br />
1) 4 vertical lines at 90° to each other + 2<br />
ho rizontal lines with 130° fan angle each<br />
= 5 laser crosses<br />
2) Plumb up laser cross and plumb down laser<br />
beam<br />
3) Automatic TILT-function<br />
4) Use with receiver FR 55<br />
5) Automatic shut-off when out of level<br />
6) Adjustable 3<strong>60</strong>° circle and tangent screw<br />
7) Integrated floor tripod<br />
8) 5/8“-thread for connection to builders‘<br />
tripod<br />
TECHNICAL DATA<br />
Self-levelling range ± 3°<br />
Accuracy ± 1 mm / 10 m<br />
Working range<br />
without receiver Ø 20 m*<br />
with receiver Ø 80 m*<br />
Fan angle Hz-lines 2 x 130°<br />
Power supply NiMH /<br />
Alkaline batteries<br />
Charger = power supply yes<br />
Laser diode / Laser class 635 nm / 2M<br />
Temperature range -10°C to + 40°C<br />
*depending on surrounding and average light conditions<br />
Subject to technical changes without notice.<br />
BATTERY AND CHARGER<br />
Both the standard NiMH battery or 8 x AA<br />
Alkaline batteries can be used.<br />
NiMH battery pack<br />
<strong>FL</strong> <strong>60</strong> comes with NiMH rechargeable battery<br />
pack.<br />
Connect the AC/DC converter with socket<br />
“4”.<br />
Permanent red light (at laser) indicates that<br />
batteries are being charged.<br />
Permanent green light (at laser) indicates that<br />
batteries are fully charged.
Die Ladezeit beträgt ca. 7 Stunden.<br />
Die max. Betriebsdauer mit voll geladenem<br />
Akku beträgt ca. 12 Std.<br />
Wenn ein neuer Akkupack das erste mal gela-<br />
den wird, empfehlen wir eine Ladezeit von<br />
ca. 12 Stunden!<br />
Wenn die kleine Lampe während des Be-<br />
triebes zu blinken beginnt, muß der Akku<br />
geladen oder müssen die Batterien ersetzt<br />
werden.<br />
8 x AA Alkaline-Einwegbatterien<br />
Der Laser kann alternativ mit Alkalinebatterien<br />
betrieben werden.<br />
Die max. Betriebsdauer mit neuen Batterien<br />
beträgt ca. 24 Std. (abhängig von der Qualität<br />
der Batterien). Verschluss „3“ aufschrauben<br />
und Akkupack herausnehmen. Batteriefach<br />
aus Koffer entnehmen.<br />
Alkalinebatterien gemäß Zeichnung im Inneren<br />
des Batteriefaches einlegen (korrekte Polarität<br />
beachten!).<br />
Während der Verwendung von Alkalinebatte-<br />
rien ist die Ladefunktion unterbrochen.<br />
BEDIENFELD<br />
1) Knopf AN/AUS<br />
2) TILT-Funktion<br />
3) Knopf AN/AUS für Empfängerbetrieb<br />
4) Knopf Auswahl H1,V1,V2,D<br />
5) Knopf Auswahl H2,V3,V4,D<br />
6) Anzeigelampen Kalibrierung<br />
Nicht erläutert in dieser Anleitung.<br />
Bei Dejustage des Gerätes kontaktieren Sie<br />
bitte Ihren Händler.<br />
Charging time is approx. 7 hours.<br />
The working time with fully charged battery<br />
pack is approx. 12 hrs.<br />
First time charging: If a new battery pack<br />
must be charged we recommend a charging<br />
time of 12 hours!<br />
If power indicator lamp at control panel is<br />
blinking the batteries have to be recharged.<br />
8 x AA Alkaline batteries<br />
<strong>FL</strong> <strong>60</strong> can be used with Alkaline batteries<br />
alternatively.<br />
The working time with new alkaline batteries<br />
is up to 24 hrs (depending on quality of batte-<br />
ries). Unscrew lock screw “3” and remove<br />
NiMH compartment. Take battery compart-<br />
ment for alkaline batteries and put in 8 x AA<br />
Alkaline batteries according to description<br />
inside of the battery compartment (take care<br />
of correct polarity!)<br />
Whilst use of Alkaline batteries the recharging<br />
function is disabled.<br />
KEYPAD<br />
1) ON/OFF button<br />
2) TILT-Function<br />
3) ON/OFF switch for use with receiver FR 55<br />
4) Selection button H1,V1,V2,D<br />
5) Selection button H2,V3,V4,D<br />
6) Indicator lamps calibration procedure - not<br />
mentioned in this <strong>manual</strong>. For authorized<br />
dealers only.<br />
4
GERÄT EINSCHALTEN<br />
Knopf “1” drücken, um das Gerät einzuschal-<br />
ten. Knopf “1” erneut drücken, um das Gerät<br />
wieder auszuschalten.<br />
Direkt nach dem Einschalten beginnt der La-<br />
ser, sich selbst zu nivellieren (Laserlinien blin-<br />
ken). Wenn die Nivellierung abgeschossen ist,<br />
leuchten die Linien kontinuierlich. Je nach<br />
Schräglage des Gerätes kann die Selbstnivel-<br />
lierung bis zu 30 Sek. dauern.<br />
Wenn keine Selbstjustage erfolgt, wurde das<br />
Gerät außerhalb des Selbstnivellierbereiches<br />
aufgestellt (Linien blinken).<br />
Gerät dann auf eine waagerechtere Ebene<br />
stellen.<br />
Wenn die Lampe “1” während des Betriebes<br />
zu blinken beginnt, muss der Akku geladen<br />
oder müssen die Batterien ersetzt werden.<br />
5<br />
GERÄT AUFSTELLEN<br />
1) Auf Stativ: <strong>FL</strong> <strong>60</strong> direkt mit der 5/8“-Stativ-<br />
anzugsschraube befestigen.<br />
2) Auf dem Boden: Gerät mit dem Bodenstativ<br />
hinstellen.<br />
Gegebenenfalls Dosenlibelle im Handgriff<br />
mit Hilfe der 3 höhenverstellbaren Füße<br />
Nr. 6 einspielen.<br />
WICHTIG: Die minimale Genauigkeit von<br />
± 1 mm auf 10 Meter wird nur erreicht,<br />
wenn die Dosenlibelle exakt zentriert ist!<br />
SWITCHING THE UNIT ON / OFF<br />
Press button “1” to switch the unit on.<br />
Press button “1” again to switch the unit off.<br />
After switching the unit on flashing laser<br />
beams indicate that automatic self-levelling<br />
procedure is working. Self-levelling procedure<br />
may take up to 30 seconds.<br />
When laser lines stop flashing the self-level-<br />
ling procedure is completed.<br />
If not the laser was set up out of self-levelling<br />
range.<br />
In this case please set up instrument on more<br />
even surface.<br />
If power indicator lamp at control panel is<br />
blinking during use of instrument the batteries<br />
have to be recharged/alkaline batteries ex-<br />
changed.<br />
SET UP THE LASER<br />
1) On a tripod: Connect <strong>FL</strong> <strong>60</strong> with 5/8“-retai-<br />
ning bolt of builders‘ tripod.<br />
2) On the floor: Put <strong>FL</strong> <strong>60</strong> with floor tripod to<br />
the ground. If necessary centre circular bub-<br />
ble in head of instrument by means of height<br />
adjustable foot screws no. 6.<br />
Important: The minimal accuracy of<br />
± 1 mm/10 m can be reached only if cir-<br />
cular bubble is centered!
•<br />
•<br />
AUSWAHL VON LASERLINIEN<br />
Nach dem Einschalten des Gerätes leuchten<br />
alle Laserlinien. Die Linien können teilweise<br />
ausgeschaltet werden, z.B. um Energie zu<br />
sparen.<br />
Auswahlknopf Nr. 4 = H1,V1,V2,D<br />
Auswahlknopf Nr. 5 = H2,V3,V4,D<br />
TILT-FUNKTION<br />
Der <strong>FL</strong> <strong>60</strong> ist mit einer automatischen Tilt-<br />
Funktion ausgestattet. Ohne diese würde sich<br />
das Gerät bei Lageveränderungen automa-<br />
tisch nachnivellieren. Bei einer großen Lage-<br />
veränderung (z.B. unbeabsichtigtes Verstellen<br />
eines Stativbeines) kommt es so zu einer Ver-<br />
änderung der Bezugshöhe.<br />
Dies wird durch die Tilt-Funktion verhindert<br />
– das Gerät schaltet dann auch innerhalb des<br />
Selbstnivellierbereiches ab:<br />
Gerät einschalten und Selbstnivellierungsvor-<br />
gang abwarten. Nach ca. 30 Sek. wird die<br />
TILT-Funktion automatisch aktiviert.<br />
Die rote LED zeigt an, dass die TILT-<br />
Funktion aktiviert ist.<br />
Wenn das Gerät nun aus seiner Lage<br />
gebracht wird, erfolgt keine automa-<br />
tische Nachstellung (Linien blinken).<br />
Zum Deaktivieren der Tilt-Funktion 1x Knopf<br />
“TILT” drücken.<br />
SELECTION OF LASER LINES<br />
After switching <strong>FL</strong> <strong>60</strong> on all laser lines are<br />
activated. The lines can be switched off part-<br />
ly (to save energy if not all are needed):<br />
Press selection button no. 4 = H1,V1,V2,D<br />
Press selection button no. 5 = H2,V3,V4,D<br />
TILT ALARM FUNCTION<br />
<strong>FL</strong> <strong>60</strong> <strong>Maxi</strong> <strong>Liner</strong> is equipped with an automa-<br />
tic TILT-function. If level of a laser level is<br />
disturbed the instrument will readjust itself<br />
(within the self-levelling range). If level is<br />
disturbed at large range (for example if posi-<br />
tion of tripod leg has changed by mistake) a<br />
height offset will be caused.<br />
This will be avoided by the TILT-function.<br />
The instrument will shut off even within the<br />
self-levelling range:<br />
Approx. 30 sec. after <strong>FL</strong> <strong>60</strong> has been<br />
switched on the TILT-function will be acti-<br />
vated automatically.<br />
The red LED indicates that TILT-func-<br />
tion is activated. If now the level is dis-<br />
turbed the unit will not readjust itself<br />
(the lines are blinking).<br />
To deactivate TILT-Function press TILT-<br />
button again.<br />
6
VERSTELLARER 3<strong>60</strong>°-TEILKREIS UND<br />
FEINTRIEB<br />
<strong>FL</strong> <strong>60</strong> ist mit einem 3<strong>60</strong>°-Teilkreis ausge-<br />
rüstet (Nr. 11).<br />
Das Gerät kann grob per Hand gedreht wer-<br />
den<br />
oder fein mit dem Feintrieb Nr. 8<br />
ÜBERPRÜFUNG DER GENAUIGKEIT<br />
Die Genauigkeit des Gerätes sollte überprüft<br />
werden:<br />
- in regelmäßigen Zeitabständen;<br />
- vor wichtigen Messungen;<br />
- wenn das Gerät gestürzt ist.<br />
Dabei wie folgt vorgehen: Wand<br />
1) Gerät auf einem Stativ montieren und 20 m<br />
von einer Wand entfernt aufstellen. Das Ge-<br />
rät mit der X-Achse zur Wand ausrichten<br />
(siehe Markierungen oben auf dem Gerät).<br />
2) Gerät einschalten und warten bis Selbstni-<br />
vellierung erfolgt ist.<br />
3) Da, wo die Laserlinie an der Wand zu sehen<br />
ist, einen Strich machen und mit “A” mar-<br />
kieren.<br />
7<br />
ROTATABLE CIRCLE AND TANGENT<br />
SCREW<br />
<strong>FL</strong> <strong>60</strong> is equipped with a 3<strong>60</strong>° rotatable<br />
circle (no. 11).<br />
The laser can be rotated by hand<br />
or carefully by use of the tangent screw no. 8<br />
INSTRUMENT ACCURACY SELF-CHECK<br />
After having used the laser for a certain pe-<br />
riod of time, before starting a large project or<br />
after the unit dropped, the user needs to self-<br />
check the instruments accuracy with the<br />
following method:<br />
Wall<br />
1) Set up the instrument on a tripod 20 m far<br />
away from an indoor wall, and let X-axis<br />
(please note mark on top of the laser) face<br />
against the wall;<br />
2) Press power switch and wait until self-level-<br />
ling procedure is completed.<br />
3) Mark “A” on the laser line on the wall.
4) Gerät um 90° drehen und da, wo die Laser-<br />
linie an der Wand zu sehen ist, erneut einen<br />
Strich machen und mit „B“ markieren.<br />
Gerät noch 2 x um 90° drehen und “C” und<br />
“D” entsprechend markieren.<br />
5) Die Differenz „h“ zwischen dem höchsten<br />
und dem niedrigsten Punkt aus “A”, “B”,<br />
“C” und “D” ermitteln.<br />
6) Wenn die Höhendifferenz “h” ≤ 2 mm ist,<br />
ist die Genauigkeit des Gerätes in Ordnung.<br />
Wenn die Höhendifferenz größer als 2 mm<br />
ist, kontaktieren Sie bitte Ihren Händler.<br />
4) Rotate the instrument by 90° and mark “B”,<br />
“C”, “D” respectively on the wall.<br />
5) Measure the distance “h” between the high-<br />
est and the lowest point among “A”, “B”,<br />
“C”, “D”.<br />
6) If “h” ≤ 2 mm the accuracy is good. If “h”<br />
is more than 2 mm please contact your<br />
local dealer.<br />
8
OPTIONALES ZUBEHÖR OPTIONAL ACCESSORIES<br />
Aluminiumstativ<br />
Aluminium tripod<br />
FS 23<br />
Länge / Length<br />
105 -170 cm<br />
Gewicht / Weight<br />
3,8 kg<br />
Art.-Nr./Ref. no.152<br />
Wand- und Deckenhalter /<br />
Wall and Ceiling Mount<br />
WH1<br />
Zur Befestigung des Lasers<br />
an Wand- oder Deckenprofi-<br />
len. Ideal im Innenausbau,<br />
z.B. zum Abhängen von Dek-<br />
ken.<br />
To fix the laser on a wall or<br />
ceiling. E.g. to make out<br />
drop ceiling, ...<br />
Art.-Nr./Ref. no. 290<strong>60</strong>0<br />
9<br />
Kurbelstativ<br />
Elevating tripod<br />
FS 30-M<br />
Länge / Length<br />
65 - 200 cm<br />
Gewicht / Weight<br />
5,2 kg<br />
Art.-Nr./Ref. no. 158<br />
Kurbelstativ / Elevating tripod FS 10<br />
Arbeitsbereich / Working range 53 -163 cm<br />
(inkl. 30 cm langer Mittelsäule) / (incl. 30 cm<br />
centre column)<br />
Drehbarer Stativkopf / Rotating head<br />
Eingebaute Dosenlibelle / Circular bubble<br />
Inkl. Tragetasche / With carrying bag<br />
Art.-Nr./Ref. no. 302000<br />
Kurbelstativ<br />
Elevating tripod<br />
FS 30-L<br />
Länge / Length<br />
90 - 285 cm<br />
Gewicht / Weight<br />
8,2 kg<br />
Art.-Nr./Ref. no 156<br />
Kurbelstativ<br />
Elevating tripod<br />
FS 30-XL<br />
Klemmsäule / Floor-to-Ceiling-Pillar KS 3<br />
Einbeinstativ / 1-leg-tripod<br />
wird zwischen Boden und Decke festge-<br />
klemmt / to be fixed between floor and<br />
ceiling<br />
5 Teilstücke / 5 sections<br />
max. Länge / max. length 3,40 m<br />
inkl. Adapter für / incl. adapter for 5/8“<br />
& 1/4“<br />
Lieferung inkl. Tasche / with carrying<br />
bag<br />
Art.-Nr./Ref. no. 520100<br />
Länge / Length<br />
166 - 380 cm<br />
Gewicht / Weight<br />
15,6 kg<br />
Art.-Nr./Ref. no 159
EMPFÄNGER FR 55 MIT HALTEKLAMMER<br />
Zur Verlängerung des Arbeitsbereiches kann<br />
der <strong>FL</strong> <strong>60</strong> mit dem Empfänger FR 55 einge-<br />
setzt werden.<br />
Knopf “pulse”<br />
am Gerät drücken. Der <strong>FL</strong> <strong>60</strong> ist nun auf Emp-<br />
fängerbetrieb umgeschaltet (die Laserlinien<br />
sind dann etwas schwächer sichtbar).<br />
1) Libelle 8) Lautsprecher<br />
2) Empfangsfenster 9) LED / Pfeil<br />
3) Ton an/aus 10) LED / Punkt<br />
4) An-/Aus-Schalter 11) LED / Pfeil<br />
5) Libelle 12) „0“-Linie<br />
6) Display 13) 1/4“-Gewinde<br />
7) „0“Linie f. Klammer<br />
14) Batteriefach<br />
EINLEGEN DER BATTERIEN<br />
Batteriedeckel “14” öffnen.<br />
1 x 9 V AA Batterien gemäß dem Installati-<br />
onssymbol (auf der Rückseite) einlegen und<br />
dabei auf korrekte Polarität achten.<br />
Deckel schließen.<br />
Um die Batterielebensdauer zu verlängern,<br />
schaltet sich der Empfänger nach ca. 10 Mi-<br />
nuten ohne Anwendung automatisch ab.<br />
RECEIVER FR 55 WITH CLAMP<br />
To prolong the working range <strong>FL</strong> <strong>60</strong> can be<br />
used with FR 55 receiver.<br />
Press button<br />
at <strong>FL</strong> <strong>60</strong>. Receiver FR 55 now can detect the<br />
signal of <strong>FL</strong> <strong>60</strong> (visibility of the laser beams is<br />
a bit weaker in this mode).<br />
1) Vial 8) Loudspeaker<br />
2) Receiving window 9) LED / arrow<br />
3) Sound on/off 10) LED / point<br />
4) On/Off switch 11) LED / arrow<br />
5) Vial 12) Zero indication line<br />
6) Display 13) 1/4“-mounting hole<br />
7) Zero indication line 14) Battery compartment<br />
INSTALLATION OF BATTERIES<br />
Open the battery compartment cover “14”.<br />
Put in 1 x 9 V battery according to installati-<br />
onsymbol (take care of correct polarity!).<br />
Close cover.<br />
In order to save battery power the receiver<br />
will automatically turn off if it has not recei-<br />
ved laser scanning signal for 10 minutes.<br />
10
11<br />
Halteklammer für Nivellierlatte<br />
Der Empfänger kann in Verbindung<br />
mit der Halteklammer an einer Ni-<br />
vellierlatte befestigt werden. Dafür<br />
die Klammer gem. Bild S10 an den<br />
FR 55 anschrauben.<br />
Erläuterung der Symbole im Display<br />
1) Empfänger an/aus<br />
2) Batteriezustandsanzeige<br />
3) Empfangsindikator<br />
4) Ton an/aus<br />
5) Empfangsposition Laserstrahl<br />
Empfang des Laserstrahls<br />
und entsprechende Anzeige<br />
im Display/LED<br />
A Empfänger nach unten be-<br />
wegen<br />
Akustisches Signal:<br />
schneller Piepton<br />
B Empfänger nach oben be-<br />
wegen<br />
Akustisches Signal:<br />
langsamer Piepton<br />
C Korrekte Bezugshöhe<br />
Akustisches Signal:<br />
Dauerton<br />
WICHTIG<br />
Den Empfänger langsam<br />
auf und ab bewegen, um den<br />
Laserstrahl zu empfangen!<br />
Display<br />
LED<br />
Clamp for levelling staff<br />
If required mount FR 55 to clamp<br />
as per picture on page 10.<br />
Symbols at display<br />
1) Power indicator<br />
2) Low battery indicator<br />
3) Fine/coarse detection indicator<br />
4) Sound indicator<br />
5) Detected position indicator<br />
Detection of laser signal<br />
A Move the receiver down<br />
Acoustic signal:<br />
ultra short frequent beep<br />
B Move the receiver up<br />
Acoustic signal:<br />
short frequent beep<br />
C On level<br />
Acoustic signal:<br />
continuous beep<br />
IMPORTANT<br />
Move receiver FR 55 up and<br />
down carefully to detect<br />
the laser beam.
•<br />
•<br />
•<br />
•<br />
•<br />
•<br />
•<br />
•<br />
•<br />
•<br />
•<br />
•<br />
•<br />
Optionales Zubehör<br />
Umgang und Pflege<br />
Messinstrumente generell bitte sorgsam be-<br />
handeln.<br />
Nach Benutzung mit weichem Tuch reinigen<br />
(ggfs. Tuch etwas in Wasser tränken). Wenn<br />
das Gerät feucht war, sorgsam trocknen.<br />
Erst in den Koffer oder die Tasche packen,<br />
wenn es absolut trocken ist.<br />
Transport nur in Originalbehälter oder- tasche.<br />
SICHERHEITSHINWEISE<br />
Bestimmungsgemäße Verwendung<br />
Das Gerät sendet einen sichtbaren Laserstrahl<br />
aus, um z.B. folgende Messaufgaben durchzu-<br />
führen: Ermittlung von Höhen; rechten Win-<br />
keln, Ausrichtung von horizontalen und verti-<br />
kalen Bezugsebenen sowie Lotpunkten.<br />
Warn- und Sicherheitshinweise<br />
Bitte richten Sie sich nach den Anweisungen<br />
der <strong>Bedienungsanleitung</strong>.<br />
Anleitung vor Benutzung des Gerätes lesen.<br />
Blicken Sie niemals in den Laserstrahl, auch<br />
nicht mit optischen Instrumenten. Es besteht<br />
die Gefahr von Augenschäden.<br />
Laserstrahl nicht auf Personen richten.<br />
Die Laserebene soll sich über der Augenhöhe<br />
von Personen befinden.<br />
Niemals das Gehäuse öffnen. Reparaturen nur<br />
vom autorisierten Fachhändler durchführen<br />
lassen.<br />
Keine Warn- oder Sicherheitshinweise entfer-<br />
nen.<br />
Lasergerät nicht in Kinderhände gelangen<br />
lassen.<br />
Gerät nicht in explosionsgefährdeter Umge-<br />
bung betreiben.<br />
Care and cleaning<br />
• Please handle measuring instruments with<br />
care.<br />
• Clean with soft cloth only after any use. If<br />
necessary damp cloth with some water: If<br />
instrument is wet clean and dry it carefully.<br />
• Pack it up only if it is perfectly dry.<br />
• Transport in original container / case only.<br />
•<br />
•<br />
•<br />
•<br />
•<br />
•<br />
•<br />
•<br />
•<br />
SAFETY INSTRUCTIONS<br />
I ntended use of instrument<br />
The instrument emits a visible laser beam in<br />
order to carry out the following measuring<br />
tasks (depending on instrument): Setting up<br />
heights, horizontal and vertical planes, right<br />
angles and plumbing points.<br />
Safety instructions:<br />
Please follow up instructions given in opera-<br />
tors’ <strong>manual</strong>.<br />
Do not stare into beam. Laser beam can lead<br />
to eye injury. A direct look into the beam<br />
(even from greater distance) can cause da-<br />
mage to your eyes.<br />
Do not aim laser beam at persons or animals.<br />
The laser plane should be set up above eye<br />
level of persons.<br />
Use instrument for measuring jobs only.<br />
Do not open instrument housing. Repairs<br />
should be carried out by authorized work-<br />
shops only. Please contact your local dealer.<br />
Do not remove warning labels or safety<br />
instructions.<br />
Keep instrument away from children.<br />
Do not use instrument in explosive environ-<br />
ment.<br />
12
Umstände, die das Messergebnis verfälschen<br />
können<br />
• Messungen durch Glas- oder Plastikscheiben;<br />
• verschmutzte Laseraustrittsfenster;<br />
• Sturz oder starker Stoß. Bitte Genauigkeit<br />
überprüfen.<br />
• Große Temperaturveränderungen: Wenn das<br />
Gerät aus warmer Umgebung in eine kalte<br />
oder umgekehrt gebracht wird, vor Benutzung<br />
einige Minuten warten.<br />
•<br />
•<br />
•<br />
Laserklassifizierung<br />
Das Gerät entspricht der Lasersicherheits-<br />
klasse 2M gemäß der Norm DIN EN <strong>60</strong>825-<br />
1:2003-10.<br />
Das Gerät darf ohne weitere Sicherheitsmaß-<br />
nahmen eingesetzt werden.<br />
Das Auge ist bei zufälligem, kurzzeitigem Hi-<br />
neinsehen in den Laserstrahl durch den Lid-<br />
schlussreflex geschützt.<br />
Laserwarnschilder der Klasse 2M sind gut<br />
sichtbar am Gerät angebracht.<br />
13<br />
Specific reasons for erroneous measuring<br />
results<br />
• Measurements through glass or plastic windows;<br />
• Dirty laser emitting windows.<br />
• After instrument has been dropped or hit.<br />
Please check accuracy.<br />
• Large fluctuation of temperature: If instrument<br />
will be used in cold areas after it has<br />
been stored in warm areas (or the other way<br />
round) please wait some minutes before carrying<br />
out measurements.<br />
•<br />
•<br />
•<br />
Laser classification<br />
The instrument is a laser class 2M laser pro-<br />
duct according to DIN IEC <strong>60</strong>825-1:2003-10.<br />
It is allowed to use unit without further safe-<br />
ty precautions.<br />
Eye protection is normally secured by aver-<br />
sion responses and the blink reflex.<br />
Laser class 2M warning labels on the laser<br />
instrument.
Elektromagnetische Verträglichkeit<br />
• Es kann nicht generell ausgeschlossen werden,<br />
dass das Gerät andere Geräte stört<br />
(z.B. Navigationseinrichtungen);<br />
• durch andere Geräte gestört wird (z.B. elektromagnetische<br />
Strahlung bei erhöhter Feldstärke<br />
z.B. in der unmittelbaren Nähe von<br />
Industrieanlagen oder Rundfunksendern).<br />
•<br />
•<br />
•<br />
CE-Konformität<br />
Das Gerät hat das CE-Zeichen gemäß den<br />
Normen EN 61326:1997, EN 55022,<br />
EN 61000-4-2/-3.<br />
Garantie<br />
Die Garantiezeit beträgt zwei (2) Jahre, be-<br />
ginnend mit dem Verkaufsdatum.<br />
Die Garantie erstreckt sich nur auf Mängel<br />
wie Material-oder Herstellungsfehler, sowie<br />
die Nichterfüllung zugesicherter Eigenschaf-<br />
ten,<br />
Ein Garantieanspruch besteht nur bei bestim-<br />
mungsgemäßer Verwendung. Mechanischer<br />
Verschleiß und äußerliche Zerstörung durch<br />
Gewaltanwendung und Sturz unterliegen nicht<br />
der Garantie. Der Garantieanspruch erlischt,<br />
wenn das Gehäuse geöffnet wurde. Der Her-<br />
steller behält sich vor, im Garantiefall die<br />
schadhaften Teile instand zusetzen bzw. das<br />
Gerät gegen ein gleiches oder ähnliches (mit<br />
gleichen technischen Daten) auszutauschen.<br />
Ebenso gilt das Auslaufen der Batterie<br />
nicht als Garantiefall.<br />
Electromagnetic acceptability (EMC)<br />
• It cannot be completely excluded that this<br />
instrument will disturb other instruments<br />
(e.g. navigation systems);<br />
• will be disturbed by other instruments (e.g.<br />
intensive electromagnetic radiation nearby<br />
industrial facilities or radio transmitters).<br />
CE-Conformity<br />
Instrument has CE-mark according to<br />
EN 61326:1997, EN 55022,<br />
EN 61000-4-2/-3.<br />
Warranty<br />
• This product is warranted by the manufacturer<br />
to the original purchaser to be free from<br />
defects in material and workmanship under<br />
normal use for a period of two (2) years from<br />
the date of purchase.<br />
• During the warranty period, and upon proof<br />
of purchase, the product will be repaired or<br />
replaced (with the same or similar model at<br />
manufacturers option), without charge for<br />
either parts or labour.<br />
•<br />
In case of a defect please contact the dealer<br />
where you originally purchased this product.<br />
The warranty will not apply to this product if<br />
it has been misused, abused or altered.<br />
Without limiting the foregoing, leakage of the<br />
battery, bending or dropping the unit are<br />
presumed to be defects resulting from misuse<br />
or abuse.<br />
14
•<br />
•<br />
•<br />
•<br />
•<br />
•<br />
Haftungsausschluss<br />
Der Benutzer dieses Produktes ist angehalten,<br />
sich exakt an die Anweisungen der Bedie-<br />
nungsanleitung zu halten. Alle Geräte sind vor<br />
der Auslieferung genauestens überprüft wor-<br />
den. Der Anwender sollte sich trotzdem vor<br />
jeder Anwendung von der Genauigkeit des<br />
Gerätes überzeugen.<br />
Der Hersteller und sein Vertreter haften nicht<br />
für fehlerhafte oder absichtlich falsche Ver-<br />
wendung sowie daraus eventuell resultierende<br />
Folgeschäden und entgangenen Gewinn.<br />
Der Hersteller und sein Vertreter haften nicht<br />
für Folgeschäden und entgangenen Gewinn<br />
durch Naturkatastrophen wie z.B. Erdbeben,<br />
Sturm, Flut, usw. sowie Feuer, Unfall, Ein-<br />
griffe durch Dritte oder einer Verwendung<br />
außerhalb der üblichen Einsatzbereiche.<br />
Der Hersteller und sein Vertreter haften nicht<br />
für Schäden und entgangenen Gewinn durch<br />
geänderte oder verlorene Daten, Unterbre-<br />
chung des Geschäftsbetriebes usw., die durch<br />
das Produkt oder die nicht mögliche Verwen-<br />
dung des Produktes verursacht wurden.<br />
Der Hersteller und sein Vertreter haften nicht<br />
für Schäden und entgangenen Gewinn resul-<br />
tierend aus einer nicht anleitungsgemäßen<br />
Be dienung.<br />
Der Hersteller und sein Vertreter haften nicht<br />
für Schäden, die durch unsachgemäße Ver-<br />
wendung oder in Verbindung mit Produkten<br />
anderer Hersteller verursacht wurden.<br />
15<br />
Exceptions from responsibility<br />
• The user of this product is expected to follow<br />
the instructions given in operators’ <strong>manual</strong>.<br />
Although all instruments left our warehouse<br />
in perfect condition and adjustment the user<br />
is expected to carry out periodic checks of<br />
the product’s accuracy and general performance.<br />
• The manufacturer, or its representatives,<br />
assumes no responsibility of results of a faulty<br />
or intentional usage or misuse including<br />
any direct, indirect, consequential damage,<br />
and loss of profits.<br />
• The manufacturer, or its representatives,<br />
assumes no responsibility for consequential<br />
damage, and loss of profits by any disaster<br />
(earthquake, storm, flood etc.), fire, accident,<br />
or an act of a third party and/or a usage in<br />
other than usual conditions.<br />
• The manufacturer, or its representatives,<br />
assumes no responsibility for any damage,<br />
and loss of profits due to a change of data,<br />
loss of data and interruption of business etc.,<br />
caused by using the product or an unusable<br />
product.<br />
• The manufacturer, or its representatives,<br />
assumes no responsibility for any damage,<br />
and loss of profits caused by usage other<br />
than explained in the users‘ <strong>manual</strong>.<br />
•<br />
The manufacturer, or its representatives,<br />
assumes no responsibility for damage caused<br />
by wrong movement or action due to connecting<br />
with other products.
geo-FENNEL GmbH<br />
Kupferstraße 6<br />
D-34225 Baunatal<br />
Tel. +49 561 49 21 45<br />
Fax +49 561 49 72 34<br />
Email: info@geo-fennel.de<br />
www.geo-fennel.de<br />
Technische Änderungen vorbehalten.<br />
All instruments subject to technical changes.<br />
10/2007