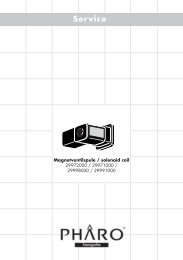
Service - Hansgrohe
Service - Hansgrohe
Service - Hansgrohe

Erfolgreiche ePaper selbst erstellen
Machen Sie aus Ihren PDF Publikationen ein blätterbares Flipbook mit unserer einzigartigen Google optimierten e-Paper Software.
<strong>Service</strong><br />
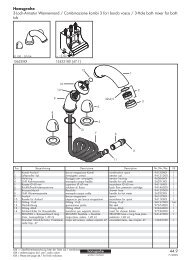
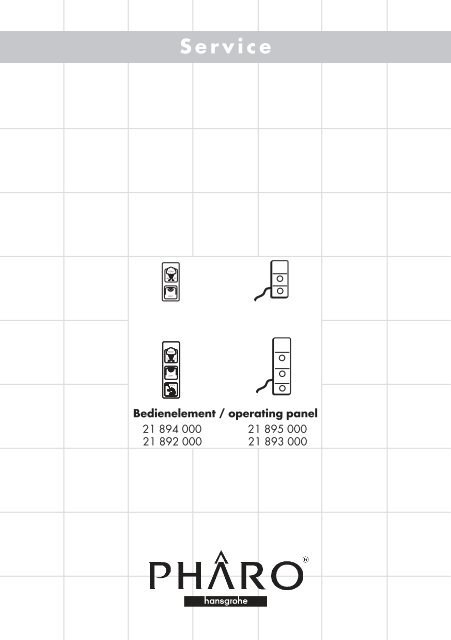
Bedienelement / operating panel<br />
21 894 000 21 895 000<br />
21 892 000 21 893 000
Dampfdusche Serie 500<br />
2<br />
Seite 2-7<br />
Steam shower series 500<br />
page 2-7<br />
Dampfdusche Serie 600<br />
Seite 8-16<br />
Steam shower series 600<br />
page 8-16
1<br />
Energiezufuhr unterbrechen<br />
turn off energy<br />
3
2<br />
3<br />
4<br />
Kabel lösen und aus Schaltkasten herausziehen.<br />
Remove wires in the switch box and pull it<br />
out from the box.<br />
Tastatur mit spitzem Messer lösen und Kabel<br />
herausziehen.<br />
remove the keyboard by a sharp knife<br />
Achtung! Beim Herausziehen muss ein Zugdraht<br />
am Stecker befestigt werden, damit das<br />
neu einzuziehende Kabel mit dem Hilfsdraht in<br />
der Funktionssäule nach oben gezogen werden<br />
kann.<br />
Attention! There has to be fixed an auxiliary<br />
wire on the plug. So as to pull the new wire by<br />
the auxiliary wire upwards through the function<br />
pillar.
4 5<br />
alt / old neu / new<br />
6 7<br />
Folie auf Tastatur kleben<br />
fix the foil at the keyboard<br />
5
8a<br />
21893000<br />
Kabel einführen und Tastatur im Schaltkasten<br />
anschließen.<br />
Put the wire inside and connect the keybord with<br />
the switch box<br />
6<br />
1 braun brown<br />
2 schwarz black<br />
3 weiß white<br />
8 rot red<br />
9 violett violet<br />
10 orange orange<br />
13 grün green
8b<br />
21895000<br />
Kabel einführen und Tastatur im Schaltkasten<br />
anschließen.<br />
Put the wire inside and connect the keybord with<br />
the switch box<br />
9<br />
1 braun brown<br />
2 schwarz black<br />
3 weiß white<br />
8 rot red<br />
9 violett violet<br />
10 orange orange<br />
13 grün green<br />
Bedienelement einklicken<br />
fix the operating panel<br />
7
1<br />
8<br />
!<br />
Wasser- und Energiezufuhr<br />
unterbrechen<br />
turn off water and<br />
energy<br />
Schutzmatte<br />
protectionmat!
3<br />
4<br />
2<br />
9
5<br />
6<br />
10<br />
A<br />
Die beiden linken, dann die beiden<br />
rechten Schrauben lockern. Danach die<br />
beiden linken und dann die beiden<br />
rechten Schrauben herausdrehen.<br />
Nicht über Kreuz !<br />
Glasschreibe entfernen<br />
Light at first the left than the right screws.<br />
After that remove first the left than the<br />
right screws. Never crosswise!<br />
Detail A<br />
Dichtungsring<br />
seal ring<br />
Glasschutzhülse<br />
glass protection hull<br />
Befestigungsschraube<br />
mounting screw<br />
Abdeckkappe<br />
Inbusschraube<br />
cover cap of the<br />
screw
Steckverbindung lösen / remove the plug connection<br />
Tastatur mit spitzem Messer lösen und<br />
Kabel herausziehen.<br />
remove the keyboard by a sharp knife<br />
Achtung! Bei DD650 muß beim<br />
Herausziehen ein Zugdraht am Stecker<br />
befestigt werden, damit das neu einzuziehende<br />
Kabel mit dem Hilfsdraht in<br />
der Funktionssäule nach oben gezogen<br />
werden kann.<br />
Attention! At DD650 there has to be<br />
fixed an auxiliary wire on the plug. So<br />
as to pull the new wire by the auxiliary<br />
wire upwards through the function pillar.<br />
7<br />
8<br />
11
9 10<br />
11<br />
12<br />
alt / old neu / new<br />
Folie auf Tastatur kleben<br />
fix the foil at the keyboard<br />
Kabel einführen und Stecker verbinden<br />
put the wire inside and connect the plug
Bedienelement einklicken<br />
fix the operating panel<br />
Glasscheibe ausrichten, gegen umlaufende Gummidichtung drücken - die beiden rechten<br />
Schrauben lockler eindrehen, dann die beiden linken Schrauben eindrehen.<br />
Wichtig: Keinesfalls über Kreuz eindrehen!<br />
Unter Druck gegen die Scheibe zuerst die beiden rechten Schrauben abwechselnd bis<br />
zum Anschlag festdrehen, dann die beiden linken Schrauben abwechselnd bis zum<br />
Anschlag festdrehen.<br />
Straighten the glass pane, press it against the circulating rubber seal - fix both right screws<br />
gently, after that fix both left scrwes gently. Important: Never crosswise!<br />
Press against the glass pane and tighten first both right screws alternately, than thighten<br />
alternately both left screws to the stop.<br />
A<br />
Detail A<br />
Dichtungsring<br />
seal ring<br />
Glasschutzhülse<br />
glass protection hull<br />
Befestigungsschraube<br />
mounting screw<br />
12<br />
13<br />
Abdeckkappe<br />
Inbusschraube<br />
cover cap of the<br />
screw<br />
13
14<br />
14<br />
Dampfdusche an die Wand rücken<br />
pull the shower cabin to the wall
15 16<br />
17<br />
15
16<br />
18<br />
Schutzmatte<br />
protectionmat<br />
Strom- und Wasserzufuh<br />
wieder herstellen<br />
switch on water and energy<br />
!
D Oberflächenpflege:<br />
Oberflächen mit <strong>Hansgrohe</strong> Reiniger-Set Best. Nr. 90921<br />
oder einem flüssigen Haushaltsreiniger / Seifenlauge reinigen.<br />
(Verdünnungsvorschrift beachten)<br />
Kalkablagerungen mit <strong>Hansgrohe</strong> Schnellentkalker Best.<br />
Nr. 90900 entfernen.<br />
Nach der Reinigung immer mit klarem Wasser<br />
nachspülen und mit einem Tuch polieren.<br />
Bei säurehaltigen Reinigungsmittel nur Produkte mit<br />
<strong>Hansgrohe</strong>-Empfehlung (wie z. B. biff Bad Universalreiniger<br />
oder biff Supra Bad-Reinigungskonzentrat von<br />
Henkel) benutzen.<br />
Keine sonstigen säurehaltigen Reinigungsmittel,<br />
Scheuermittel oder Essigreiniger verwenden.<br />
Schäden, die durch unsachgemäße Behandlung<br />
entstehen, unterliegen nicht unserer Gewährleistung.<br />
E<br />
F<br />
GB<br />
I<br />
Conseils d'entretien:<br />
Nettoyer les surfaces avec un produit d'entretien ménager<br />
ou un savon liquide.<br />
Eliminer les dépôts calcaires avec le détartrant <strong>Hansgrohe</strong><br />
Réf. 90905, rincer à l'eau claire et polir avec un chiffon<br />
doux.<br />
Ne pas utiliser un produit d'entretien à base d'acide ou<br />
de poudre à récurer.<br />
Les détériorations imputables à un mauvais entretien ne<br />
peuvent être pris en considération par notre garantie.<br />
Cleaning instructions:<br />
Clean with a liquid domestic cleaner or with soap<br />
suds.<br />
Remove any lime deposits using <strong>Hansgrohe</strong>'s<br />
Decalcifying Agent, order no. 90900.<br />
Afterwards rinse with clear water and polish with a<br />
cloth.<br />
Do not use any cleaning agents containing acid or<br />
scouring agents.<br />
Damage caused by improper treatment is not subject<br />
to our guarantee.<br />
Istruzioni per il trattamento:<br />
Pulire con un detersivo liquido o con acqua e sapone.<br />
Depositi calcarei possono essere trattati con il liquido<br />
anticalcareo di <strong>Hansgrohe</strong>, art.90900. Dopo il trattamento<br />
pulire con un panno morbido bagnato.<br />
Non utilizzare detersivi contenenti acidi o detersivi in<br />
polvere.<br />
Non rispondiamo per danni causati da trattamenti non<br />
conformi alle nostre indicazioni.<br />
NL<br />
DK<br />
P<br />
Limpieza:<br />
Las superficies pueden limpiarse con productos de<br />
limpieza líquidos o con agua jabonosa. (Tener en cuenta<br />
las instrucciones de uso del fabricante de detergentes.)<br />
Eliminar las adhesiones calcáreas con el descalcificador<br />
rápido de <strong>Hansgrohe</strong> ref. 90900.<br />
A continuación aclarar con abundante agua y pulir con<br />
una gamuza.<br />
No utilizar productos de limpieza que contengan ácidos,<br />
vinagre o que sean abrasivos.<br />
No nos responsabilizaremos si los desperfectos se<br />
producen a causa de un manejo inadecuado.<br />
Reinigingsaanwijzingen:<br />
Het produkt met een vloeibaar huishoudelijk<br />
reinigingsmiddel of zachte zeep schoonmaken.<br />
Eventuele kalkafzetting met <strong>Hansgrohe</strong><br />
snelontkalkingsmiddel (best. nr. 90900) verwijderen.<br />
Daarna met schoon water goed naspoelen en met een<br />
doek droogwrijven.<br />
Geen zuurhoudende reinigingsmiddelen of<br />
schuurmiddelen gebruiken.<br />
Beschadigingen, die door ondeskundig onderhoud zijn<br />
ontstaan vallen niet onder de garantie bepalingen.<br />
Rengøring:<br />
Overfladen renholdes med flydende husholdnings<br />
rengøringsmidler eller med sæbelud.<br />
Undgå syreholdige rengøringsmidler, eddikesyre eller<br />
slibemidler.<br />
Skyl efter med rent vand og få den skinnende overflade<br />
igen ved at efterpolere med en tør klud.<br />
Skader forårsaget ved hårdhændet eller ukorrekt<br />
behandling omfattes ikke af vore garantibetingelser.<br />
Instruções de Limpeza:<br />
Limpe com um detergente líquido não abrasivo ou sabão<br />
líquido.<br />
Remova os depósitos calcários com o Descalcificador<br />
<strong>Hansgrohe</strong> Refª. 90900.<br />
Passe por água abundantemente e limpe com um pano<br />
macio ou camurça.<br />
Não utilize produtos de limpeza à base de ácidos,<br />
vinagre ou que sejam abrasivos.<br />
A deterioração imputável a má conservação não é<br />
abrangida pela nossa garantia.<br />
17
20<br />
<strong>Hansgrohe</strong> · Postfach 1145 · D-77761 Schiltach · Telefon +49 (0) 78 36/51-1282 · Telefax +49 (0) 7836/511440<br />
E-Mail: info@hansgrohe.com · Internet: www.hansgrohe.com<br />
05/2004<br />
9.09429.01