PDF-Download der Bedienungsanleitung - Audio Design GmbH
PDF-Download der Bedienungsanleitung - Audio Design GmbH
PDF-Download der Bedienungsanleitung - Audio Design GmbH
Sie wollen auch ein ePaper? Erhöhen Sie die Reichweite Ihrer Titel.
YUMPU macht aus Druck-PDFs automatisch weboptimierte ePaper, die Google liebt.
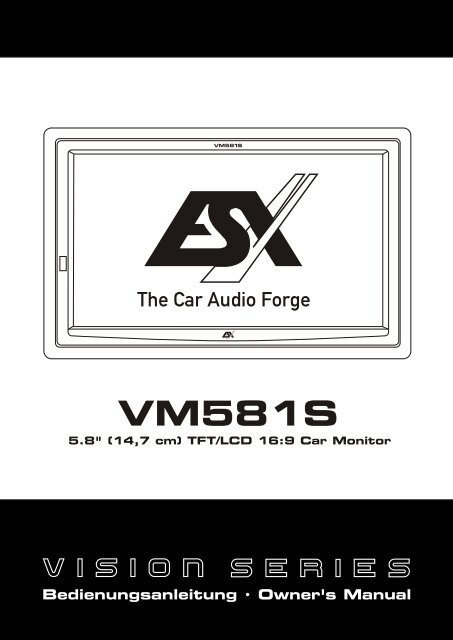
VM581S<br />
5.8" (14,7 cm) TFT/LCD 16:9 Car Monitor<br />
<strong>Bedienungsanleitung</strong> · Owner's Manual
Inhaltsverzeichnis<br />
Sicherheitshinweise<br />
Anschluss-Diagramm 4<br />
Installation<br />
Basisfunktionen: Monitor & Fernbedienung 6<br />
Basisfunktionen: OSD Menü 7<br />
Fehlerbehebung 8<br />
OWNER'S MANUAL in english on Page 9<br />
MODE D'EMPLOI en français www.audiodesign.de/french<br />
Technische Daten<br />
5.8” (14,7 cm) TFT/LCD 16:9 Auto Monitor<br />
Installation freistehend o<strong>der</strong> in Kopfstütze<br />
Auflösung 1200 x 234 px<br />
Auflösung RGB 480 x 234 px<br />
Kontrast Verhältnis 300:1<br />
Lumineszenz 350cd/m2<br />
Ansichtswinkel Vertikal 160°, Horizontal 160°<br />
PAL/NTSC Auto Modus<br />
OSD Bildschirmkontrollanzeige<br />
Infrarot Funktion (für separat erhältlichen IR-Kopfhörer ESX VM1HP)<br />
Vollfunktions-Fernbedienung<br />
Separate Verteiler-Box<br />
2 AV-Signal-Eingänge & 1 AV Signal-Ausgang<br />
Standfuß & Kabelsatz<br />
2<br />
2<br />
3<br />
5
Sicherheitshinweise<br />
Bitte lesen Sie vorliegende <strong>Bedienungsanleitung</strong> gut durch, bevor Sie<br />
das Gerät installieren und benutzen. Bewahren Sie die <strong>Bedienungsanleitung</strong><br />
für eine etwaige spätere Benutzung auf.<br />
VERKEHR<br />
Der Fahrer sollte das Gerät während <strong>der</strong> Fahrt nicht bedienen, bzw. bildgebende<br />
Medien abspielen, die den Fahrer vom Verkehrsgeschehen ablenken könnten.<br />
EINBAUORT<br />
Alle TV-Einbauten im Auto müssen so erfolgen, dass sie sich außerhalb des Sichtfeldes<br />
des Fahrers befinden. Achten Sie darauf, dass <strong>der</strong> Bildschirm von Heizungs-<br />
und Lüftungsauslässen genügend Abstand hat. Vermeiden Sie direkte Sonneneinstrahlung<br />
am Einbauort. Bauen Sie das Gerät nie an Stellen ein, an denen es die<br />
Airbags o<strong>der</strong> gar die Fahrzeuglenkung behin<strong>der</strong>t. Das Gerät muss so installiert<br />
werden, dass es im Falle eines Unfalls nicht zur Gefahr wird.<br />
INSTALLATION<br />
Die besten Einbauten werden von qualifiziertem Fachpersonal o<strong>der</strong> geschulten<br />
Technikern durchgeführt.<br />
REINIGUNG<br />
Benutzen Sie zum Reinigen des Geräts ein weiches Tuch und wenn nötig etwas<br />
destilliertes Wasser. Entfernen Sie vor <strong>der</strong> Reinigung die Verkabelung. Benutzen<br />
Sie keine Reinigungsmittel. Ein trockenes Tuch reicht in den meisten Fällen völlig<br />
aus.<br />
FLÜSSIGKEITEN<br />
Falls <strong>der</strong> Bildschirm mit Flüssigkeit in Berührung kommt, stoppen Sie das Fahrzeug<br />
und schalten den Motor aus. Wischen Sie dann den Bildschirm mit einem Tuch ab<br />
und versuchen die Flüssigkeit vorsichtig zu entfernen. Schalten Sie das Gerät nicht<br />
ein, bevor es trocken ist bzw. bei einem Defekt beim Fachhändler in Reparatur war.<br />
BETRIEB MIT ABGESTELLTEM MOTOR<br />
Der Betrieb des Bildschirms bei abgestelltem Motor führt über längere Zeit zur<br />
Entladung <strong>der</strong> Fahrzeugbatterie.<br />
2<br />
3
Anschluss-Diagramm<br />
2<br />
Kabel mit DIN-Stecker des Monitors<br />
Stecker mit Kabelsatz<br />
Rot Zündung<br />
Gelb Batterie +12V<br />
Schwarz Masse<br />
Cinch gelb<br />
Cinch weiß<br />
Cinch rot<br />
<strong>Audio</strong> / Video Signal 2 <strong>Audio</strong> / Video Signal 1<br />
Monitor 1<br />
4<br />
Cinch rot<br />
Cinch weiß<br />
Cinch gelb<br />
Cinch rot<br />
Cinch weiß<br />
Cinch gelb<br />
Optionaler Monitor 2<br />
HINWEIS:<br />
Bitte achten Sie beim Anschließen<br />
<strong>der</strong> einzelnen Komponenten auf<br />
korrekte Polung <strong>der</strong> Kabel, bzw. auf<br />
die richtigen Kennfarben <strong>der</strong> Cinch-<br />
Stecker.
Installation<br />
Methode 1: Installation mit Standfuß<br />
2<br />
D<br />
Befestigen Sie zunächst<br />
den Standfuss an einer<br />
geeigneten Stelle, z.B.<br />
auf dem Armaturenbrett<br />
mit Hilfe <strong>der</strong> beiliegenden<br />
Schrauben. Achten Sie<br />
beim Bohren darauf, dass<br />
Sie keine Kabel o<strong>der</strong><br />
an<strong>der</strong>e Bauteile des<br />
Fahrzeugs beschädigen.<br />
B<br />
A<br />
Entfernen Sie vorsichtig den<br />
Einbauramen des Monitors.<br />
Schieben Sie dann den<br />
Monitor an <strong>der</strong> Einschubhalterung<br />
hinten (A) auf die<br />
Fixierplatte des Standfußes<br />
(B). Achten Sie dabei auf die<br />
korrekte Führung <strong>der</strong> Fixierplatte<br />
in <strong>der</strong> Einschubhalterung<br />
und verkanten Sie<br />
diese nicht.<br />
Methode 2: Installation in <strong>der</strong> Kopfstütze<br />
Hier empfielt sich <strong>der</strong><br />
Einbau mit Einbaurahmen<br />
(A). Machen Sie sich<br />
zunächst Gedanken, wo<br />
die beiliegende Verteilerbox<br />
im Auto installiert<br />
werden soll, beson<strong>der</strong>s<br />
wenn ein zweiter Monitor<br />
installiert werden soll.<br />
Sorgen Sie für ausreichende<br />
Kabellängen.<br />
A<br />
C<br />
Schneiden Sie dann eine ausreichende<br />
Einbauöffnung (B)<br />
in die Kopfstütze. Als Vorlage<br />
kann das innere Maß des<br />
Einbaurahmens genom-men<br />
werden. Ziehen Sie dann das<br />
Anschlusskabel des Monitors<br />
durch die gro§e<br />
Öffnung (C) und führen das<br />
Kabel durch die hohle Führungsstrebe<br />
nach unten raus.<br />
5<br />
B<br />
C<br />
Ziehen Sie nun die Rändelschraube<br />
(C) des Standfußes<br />
fest, nach dem Sie die<br />
gewünschte Position des<br />
Monitors durch Verschieben<br />
ermittelt haben. Der Ansichtswinkel<br />
des Monitors kann mit<br />
Hilfe <strong>der</strong> Stellschraube (D)<br />
eingestellt werden.<br />
D<br />
Je nach Autotyp, sollte <strong>der</strong><br />
Einbaurahmen (D) mit den<br />
Führungsstreben im Innern <strong>der</strong><br />
Stütze fest verschraubt werden.<br />
Setzen Sie dann vorsichtig den<br />
Monitor in den Einbaurahmen<br />
ein. Dannach kann die<br />
komplette Stütze wie<strong>der</strong> in den<br />
Sitz geschoben werden und <strong>der</strong><br />
Monitor an die Verteilerbox<br />
angeschlossen werden.
Basis-Funktionen<br />
2<br />
1 2<br />
1<br />
2<br />
3<br />
Monitor<br />
Fernbedienung<br />
4<br />
5<br />
6<br />
7<br />
8<br />
9<br />
6<br />
1. Infrarot-Sensor für Fernbedienung<br />
2. Operationsanzeige<br />
1. Ein- und Ausschalter<br />
2. Bild spiegeln o<strong>der</strong> drehen<br />
3. Aktiviert das Picture Preset-Menü<br />
4. Stummschaltung<br />
5. Schaltet zwischen<br />
Video Eingangssignal 1 o<strong>der</strong> 2 um<br />
6. Lautstärke<br />
7. Helligkeit<br />
8. Farbe<br />
9. Kontrast
Basis-Funktionen<br />
Picture Preset Menü<br />
Über die Taste “ “ an <strong>der</strong> Fernbedienung gelangen Sie in das Menü für die voreingestellten Bildschirm-<br />
Einstellungen. Durch mehrfaches Drücken dieser Taste können Sie zwischen folgenden Presets wählen:<br />
STANDARD:<br />
Neutrale Helligkeit und normaler Kontrast.<br />
SOFT:<br />
Abgedunkelt mit warmen Farben<br />
VIVID:<br />
Mittlere Helligkeit und Kontrast<br />
LIGHT:<br />
Hohe Helligkeit und Kontrast<br />
MEMORY:<br />
Hier können Sie Ihre eigene Bild-Einstellung abspeichern.<br />
Drücken Sie “ “ o<strong>der</strong> “ “ auf <strong>der</strong> Fernbedienung um die gewünschte Einstellung zu wählen.<br />
Wird das Gerät von <strong>der</strong> Stromversorgung getrennt, geht diese Einstellung verloren.<br />
2<br />
7
Fehlerbehebung<br />
STROMVERSORGUNG<br />
Für den Betrieb des Produkts ist eine 12 Volt-Stromversorgung mit negativem Masse-Anschluss vorgesehen.<br />
Falscher Anschluss o<strong>der</strong> nicht ausreichende Stromversorgung kann die Funktionalität erheblich<br />
beeinträchtigen.<br />
REPARATUREN<br />
Nehmen Sie selbst keine Reparaturen vor, son<strong>der</strong>n lassen Sie das Gerät nur von fachkundigen Technikern<br />
o<strong>der</strong> geschultem Personal einbauen und reparieren.<br />
BESCHÄDIGUNGEN<br />
Schützen Sie den Monitor vor Herabfallen, Stößen, Schlägen und Gewalteinwirkung jeglicher Art. Falls <strong>der</strong><br />
Bildschirm aus einem dieser Gründe defekt sein sollte erlischt die Garantieleistung ab Werk.<br />
CHECK-LISTE<br />
1. Das Gerät kann bei einer Umgebungstemperatur von -20°C- +80°C betrieben<br />
werden. Im Sommer können die Temperaturen im Fahrzeug bis zu 100°C betragen.<br />
2. Wenn es in ihrem Auto extrem heiß o<strong>der</strong> kalt ist sollte ihre Lüftung die Temperatur<br />
im Auto auf die für den Betrieb zulässige Umgebungstemperatur bringen.<br />
3. Die optimale Bildqualität haben Sie, wenn Sie direkt vor dem Bildschirm sitzen.<br />
Von <strong>der</strong> Bildmitte des Monitors ist ein Winkel von +/- 30°C ideal.<br />
2<br />
Fehler Mögliche Ursachen Fehlerbehebung<br />
Schwarzer Bildschirm<br />
o<strong>der</strong> Operationsanzeige<br />
leuchtet nicht<br />
Kein Bild,<br />
aber die Operationsanzeige<br />
leuchtet<br />
Kein Farb-Bild<br />
Pixelfehler o<strong>der</strong> schwarze<br />
horizontal verlaufende Linien<br />
auf dem Display<br />
1. Keine 12 Volt Spannung<br />
2. Das Anschlusskabel des Monitors hat<br />
sich gelöst o<strong>der</strong> ist defekt<br />
1. Kein Video-Signal<br />
2. Das Anschlusskabel des Monitors hat<br />
sich gelöst o<strong>der</strong> ist defekt<br />
3. Helligkeits- und Kontrast-Einstellungen<br />
2. sind zu gering eingestellt<br />
1. Kein Farb-Bild vom Video-Player<br />
2. Das Anschlusskabel des Monitors hat<br />
sich gelöst o<strong>der</strong> ist defekt<br />
3. Farbeinstellungen sind falsch<br />
1. Dies ist ein prinzipbedingter "Fehler" <strong>der</strong><br />
sich im Bereich <strong>der</strong> üblichen Toleranzen für<br />
TFT/LCD-Monitore bewegt<br />
Unscharfes Bild 1. Schlechte Qualität <strong>der</strong> Signalquelle<br />
2. Helligkeits- und Kontrast-Einstellungen<br />
2. sind zu gering eingestellt<br />
8<br />
1. Überprüfen Sie ob das Gerät einge-<br />
1. schaltet ist und ob die Stromzufuhr<br />
1. richtig angeschlossen ist<br />
2. Überprüfen/Ersetzen Sie das Kabel<br />
1. Überprüfen Sie das Ausgangssignal<br />
1. Ihres Videogerätes bzw.<br />
die Eingangsquelle AV1 / AV2<br />
2. Überprüfen/Ersetzen Sie das Kabel<br />
3. Erhöhen Sie Helligkeit/Kontrast<br />
1. Überprüfen Sie das Ausgangssignal<br />
1. Ihres Videogerätes<br />
2. Überprüfen/Ersetzen Sie das Kabel<br />
3.<br />
Gehen Sie in das Menü um die<br />
Werkseinstellungen zurück zu setzen.<br />
–<br />
1. Ersetzen Sie die aktuelle Disk gegen eine<br />
mit besserer Qualität<br />
2. Erhöhen Sie das Helligkeits-<br />
1. Kontrastverhältnis
Table of Content<br />
Saftey Advice<br />
Wiring Diagram 4<br />
Installation<br />
Basic Functions: Monitor & Remote 6<br />
Basic Functions: OSD Menu 7<br />
Trouble Shooting 8<br />
Specifications<br />
5.8” (14,7 cm) TFT/LCD 16:9 Car Monitor<br />
Stand-alone or Headrest Installation<br />
Resolution 1200 x 234 px<br />
Resolution RGB 480 x 234 px<br />
Contrast Ratio 300:1<br />
Brightness 350cd/m2<br />
Viewing Angle Vertical 160°, Horizontal 160°<br />
PAL/NTSC Auto Mode<br />
On Screen Display Control<br />
Infrared Function (for the separate available IR-Headphones ESX VM1HP)<br />
Full Function Remote Control<br />
Separate Distribution-Box<br />
2 AV-Signal-Inputs & 1 AV-Signal-Output<br />
Mounting Stand & Cable Kit<br />
2<br />
9<br />
3<br />
5
Safety Advice<br />
Before you start with the installion, Please read this Operation Manual<br />
carefully.<br />
Keep this Operation Manual for later use.<br />
TRAFFIC<br />
The Driver should never operate these products while the vehicle is in motion!<br />
Installation of all TV monitors must be out of the driver`s field of vision.<br />
BUILD-IN POSITION<br />
Installation of all TV monitors must be out of the driver`s field of vision. This product<br />
should never be placed near or over an heat vent. Make sure to keep products away<br />
from direct sunlight at the build in position. Do not mount the product where it will<br />
obstruct the deployement of the airbag or in an area where it would affect the<br />
vehicular control. Also be careful to avoid mounting the product, where it can become<br />
hazardous during sudden stops or in the event of an accident.<br />
INSTALLATION<br />
Quality installations are best performed by qualified and certified installers.<br />
CLEANING THE SCREEN<br />
Use only a damp cloth to clean the screen and use only purified water on the cloth<br />
wiring out all excess water prior to wiping the screen. Do not use any cleaners or<br />
chemicals to clean the screen. In most cases a dry cloth will do!<br />
LIQUIDS<br />
If there is any liquid on these products, pull your vehicle to the roadside and turn-the<br />
key off to disconnect or wipe the products with a towel. Do not operate the equipment<br />
until all liquids have either evaporated or you have the monitor was inspected at the<br />
service center by a qualified technician.<br />
WATCHING THE MONITOR WITHOUT ENGINE RUNNING<br />
Watching the Monitor for an extended period of time without engine running may<br />
deplete the vehicle`s battery charge.<br />
2<br />
10
Wiring-Diagram<br />
2<br />
Cabel with DIN-Plug of the Monitor<br />
Plug with Cable<br />
Red Ignition<br />
Yellow Battery +12V<br />
Black Ground<br />
RCA-Cable yellow<br />
RCA-Cable white<br />
RCA-Cable red<br />
<strong>Audio</strong> / Video Signal 2 <strong>Audio</strong> / Video Signal 1<br />
Monitor 1<br />
11<br />
RCA-Cable red<br />
RCA-Cable white<br />
RCA-Cable yellow<br />
RCA-Cable red<br />
RCA-Cable white<br />
RCA-Cable yellow<br />
Optional Monitor 2<br />
CAUTION:<br />
Please observe the right polarity of<br />
the cables and the right colours of<br />
the RCA-Plugs.
Installation<br />
Method 1: Installation with Stand<br />
2<br />
D<br />
Mount at first the stand at<br />
an appropriate position.<br />
f.i. on the dashboard with<br />
the supplied screws.<br />
Observe by any means,<br />
that you don't damage<br />
wires, cables or other preinstalled<br />
parts of the<br />
vehicle.<br />
B<br />
At first remove carefully the<br />
mounting frame of the<br />
monitor's rearside. Then slide<br />
the monitor's mounting slot<br />
(A) on the fixing plate (B)<br />
from the mounting stand.<br />
Ensure thereby a propper<br />
alignment of the fixing plate<br />
in the mounting slot and<br />
don't tilt.<br />
Method 2: Installation in Headrest<br />
Thereby a installation with<br />
the mounting frame (A) is<br />
suggested. At first<br />
consi<strong>der</strong> the right position<br />
of the separate A/V distribution<br />
box, especially<br />
when a additional second<br />
Monitor should be<br />
installed. Ensure for<br />
suffizient lengths of all<br />
cables and wires.<br />
A<br />
C<br />
Cut out a sufficient mounting<br />
hole in the headrest (B). Use<br />
the inner dimensions of the<br />
mounting frame as draft. Then<br />
lead the A/V-Cable from the<br />
Monitor through the big hole<br />
(C) in the mounting frame and<br />
through the hollow attachment<br />
bar of the headrest.<br />
A<br />
12<br />
B<br />
C<br />
Adduct the knurled head screw<br />
(C) of the stand, after you have<br />
found the right position by<br />
sliding around. The viewing<br />
angle of the Monitor could be<br />
adjusted by the setscrew (D).<br />
D<br />
Depending of the type of your<br />
car, you should fix the<br />
mounting frame (D) with the<br />
attachment bars on the<br />
inside.Then insert carefully the<br />
Monitor in the mounting frame.<br />
After all, slide the headrest<br />
back into the seat and connect<br />
the Monitor's A/V Cable with<br />
the distribution box.
Basic Functions<br />
2<br />
1 2<br />
1<br />
2<br />
3<br />
Monitor<br />
Remote Control<br />
4<br />
5<br />
6<br />
7<br />
8<br />
9<br />
13<br />
1. Infrared-Sensor for Remote<br />
2. Operation LED<br />
1. Power on/off<br />
2. Display Overturn<br />
3. Activates Picture Preset Menu<br />
4. Mute <strong>Audio</strong>signal<br />
5. Selector for Video<br />
Input-Signal 1 or 2<br />
6. Volume<br />
7. Brightness<br />
8. Color<br />
9. Contrast
Basic Functions<br />
Picture Preset Menu<br />
With the button “ “ on the remote you activate the Picture Preset Menu.<br />
By pushing this button you can choose between the following Picture-Preset-Settings:<br />
STANDARD:<br />
Normal brightness and contrast.<br />
SOFT:<br />
Darker and warmer colors.<br />
VIVID:<br />
Mid brightness and contrast.<br />
LIGHT:<br />
High brightness and contrast.<br />
MEMORY:<br />
This setting stores your own picture settings.<br />
Adjust the settings with “ “ or “ “.<br />
After disconnecting the device from the power supply, this setting is erased.<br />
2<br />
14
Trouble Shooting<br />
POWER<br />
This product is designed for operation with a 12 Volt DC, negative ground vehicle.<br />
Too low voltage or wrong polarity may cause malfunctions.<br />
SERVICE<br />
Do not try and service these products yourself, seek only a qualified service center or factory service center.<br />
DAMAGES<br />
Be careful not to drop or apply undue pressure to the frontpanel of your video monitor.<br />
If the screen cracks due to misuse your warranty will be void!<br />
CHECK-POINTS<br />
1. The operating temperature of this product is limited to -20°C- +80°C.<br />
1. Your vehicle can reach temperatures up to 100°C in the summertime.<br />
2. From time to time when your vehicle extremely hot or cold you must allow<br />
1. for your air conditioner or heater to cool or heat the vehicle to operating<br />
1. temperatures to return to normal operating ranges are achieved.<br />
3. Your optimum picture quality is achieved when you are directly in front<br />
1. of monitor (+/- 30°C).<br />
2<br />
Symptoms Probable Causes Solution<br />
Black Screen and<br />
Operation LED is not illuminated<br />
Black Screen but<br />
Operation LED is illuminated<br />
No Color<br />
Little regular light<br />
spots and color spots on the<br />
screen or black horizontal line<br />
in the picture<br />
1. No 12 voltage<br />
2. The A/V cable of the monitor is loose or is<br />
damaged<br />
1. No Video-Signal<br />
2. The A/V cable of the monitor is loose or is<br />
damaged<br />
3. Brightness or Contrast ratio is<br />
too low<br />
1. No Color Signal from Video Source<br />
2. The A/V cable of the monitor is loose or is<br />
damaged<br />
3. Color settings are wrong<br />
1. This is a principally "Symptom" in the usual<br />
range for manufacturing standards of<br />
LCD/TFT monitors.<br />
Unclear Picture 1. Bad Quality of the Video Source<br />
2. Brightness or Contrast ratio is<br />
too low<br />
15<br />
1. Check if power is on or the connection is<br />
unstable<br />
2. Check the A/V cable<br />
1. Check output signal of the Video Source<br />
2. Check or replace A/V cable<br />
3. Increase Brightness or Contrast ratio<br />
1. Check output signal of the Video Source<br />
2. Check or replace A/V cable<br />
3. Reset to factory settings via the OSD-Menu<br />
–<br />
1. Replace or change the disk<br />
2. Increase Brightness or Contrast ratio
Distribution:<br />
<strong>Audio</strong> <strong>Design</strong> <strong>GmbH</strong><br />
Am Breilingsweg 3<br />
76709 Kronau / Germany<br />
Tel. +49(0)7253/9465-0, Fax 9465-10<br />
www.audiodesign.de


