Gebrauchs- und Montageanleitung - Harvia
Gebrauchs- und Montageanleitung - Harvia
Gebrauchs- und Montageanleitung - Harvia

Erfolgreiche ePaper selbst erstellen
Machen Sie aus Ihren PDF Publikationen ein blätterbares Flipbook mit unserer einzigartigen Google optimierten e-Paper Software.
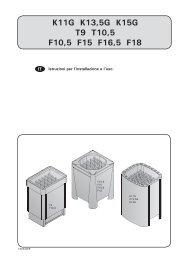
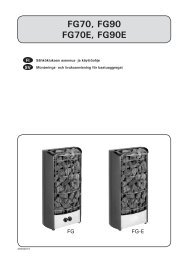
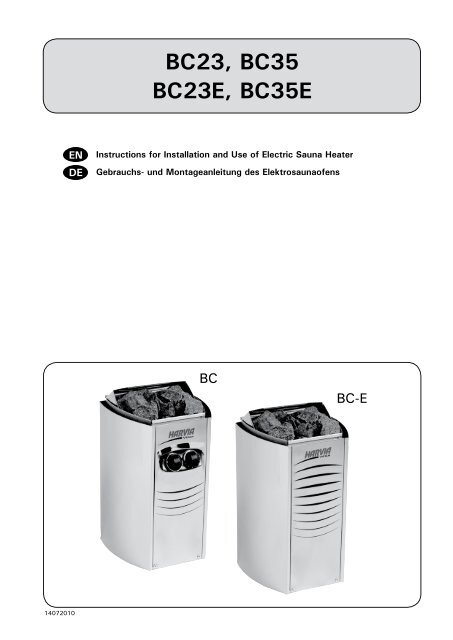
BC23, BC35<br />
BC23E, BC35E<br />
Instructions for Installation and Use of Electric Sauna Heater<br />
<strong>Gebrauchs</strong>- <strong>und</strong> <strong>Montageanleitung</strong> des Elektrosaunaofens<br />
BC<br />
BC-E<br />
14072010
EN<br />
These instructions for installation and use are<br />
intended for the owner or the person in charge of<br />
the sauna, as well as for the electrician in charge<br />
of the electrical installation of the heater. After<br />
completing the installation, the person in charge<br />
of the installation should give these instructions to<br />
the owner of the sauna or to the person in charge<br />
of its operation. Please read the instructions for use<br />
carefully before using the heater.<br />
The heater is designed for the heating of a sauna<br />
room to bathing temperature. It is not to be used<br />
for any other purpose.<br />
Congratulations on your choice!<br />
Guarantee:<br />
• The guarantee period for heaters and control<br />
equipment used in saunas by families is two (2)<br />
years.<br />
• The guarantee period for heaters and control<br />
equipment used in saunas by building residents<br />
is one (1) year.<br />
• The guarantee does not cover any faults<br />
resulting from failure to comply with<br />
installation, use or maintenance instructions.<br />
• The guarantee does not cover any faults<br />
resulting from the use of stones not<br />
recommended by the heater manufacturer.<br />
DE<br />
Diese Montage- <strong>und</strong> <strong>Gebrauchs</strong>anleitung richtet<br />
sich an den Besitzer der Sauna oder an die für die<br />
Pflege der Sauna verantwortliche Person, sowie an<br />
den für die Montage des Saunaofens zuständigen<br />
Elektromonteur. Wenn der Saunaofen montiert ist,<br />
wird diese Montage- <strong>und</strong> <strong>Gebrauchs</strong>anleitung an den<br />
Besitzer der Sauna oder die für die Pflege der Sauna<br />
verantwortliche Person übergeben. Lesen Sie vor<br />
Inbetriebnahme des Ofens die Bedienungsanleitung<br />
sorgfältig durch.<br />
Der Ofen dient zum Erwärmen von Saunakabinen<br />
auf Saunatemperatur. Die Verwendung zu anderen<br />
Zwecken ist verboten.<br />
Wir beglückwünschen Sie zu Ihrer guten Wahl!<br />
Garantie:<br />
• Die Garantiezeit für in Familiensaunen<br />
verwendete Saunaöfen <strong>und</strong> Steuergeräte<br />
beträgt zwei (2) Jahre.<br />
• Die Garantiezeit für Saunaöfen <strong>und</strong><br />
Steuergeräte, die in öffentlichen Saunen in<br />
Privatgebäuden verwendet werden, beträgt ein<br />
(1) Jahr.<br />
• Die Garantie deckt keine Defekte ab, die<br />
durch fehlerhafte Installation <strong>und</strong> Verwendung<br />
oder Missachtung der Wartungsanweisungen<br />
entstanden sind.<br />
• Die Garantie kommt nicht für Schäden auf,<br />
die durch Verwendung anderer als vom Werk<br />
empfohlener Saunaofensteine entstehen.<br />
Contents<br />
1. INSTRUCTIONS FOR USE...............................................3<br />
1.1. Piling of the Sauna Stones......................................3<br />
1.1.1. Maintenance................................................3<br />
1.2. Heating of the Sauna.............................................4<br />
1.3. Using the Heater...................................................4<br />
1.3.1. Heater On....................................................4<br />
1.3.2. Pre-setting Time (timed switch-on)..................4<br />
1.3.3. Heater Off....................................................5<br />
1.3.4. Setting the Temperature................................5<br />
1.4. Throwing Water on Heated Stones..........................5<br />
1.5. Instructions for Bathing .........................................6<br />
1.6. Warnings.............................................................6<br />
1.7. Troubleshooting....................................................6<br />
2. SAUNA ROOM.............................................................. 8<br />
2.1. Sauna Room Structure...........................................8<br />
2.1.1. Blackening of the sauna walls.........................8<br />
2.2. Sauna Room Ventilation.........................................9<br />
2.3. Heater Output.......................................................9<br />
2.4. Sauna Room Hygiene.............................................9<br />
3. INSTRUCTIONS FOR INSTALLATION............................. 10<br />
3.1. Before Installation............................................... 10<br />
3.2. Fastening the Heater on a Wall............................. 11<br />
3.3. Electrical Connections.......................................... 12<br />
3.3.1. Electric Heater Insulation Resistance.............. 12<br />
3.4. Installation of the Control Unit and Sensors (BC-E).. 12<br />
3.5. Resetting the Overheat Protector.......................... 13<br />
3.6. Replacing the Heating Elements ........................... 13<br />
ELECTRICAL CONNECTIONS (Norway, Belgium)............ 15<br />
4. SPARE PARTS............................................................ 16<br />
Inhalt<br />
1. BEDIENUNGSANLEITUNG...............................................3<br />
1.1. Aufschichten der Saunaofensteine...........................3<br />
1.1.1. Wartung......................................................3<br />
1.2. Erhitzen der Saunakabine.......................................4<br />
1.3. Benutzung des Ofens.............................................4<br />
1.3.1. Ofen ein......................................................4<br />
1.3.2. Vorwahlzeit (zeitgesteuertes Einschalten).........4<br />
1.3.3. Ofen aus......................................................5<br />
1.3.4. Einstellen der Temperatur...............................5<br />
1.4. Aufguss...............................................................5<br />
1.5. Anleitungen zum Saunen........................................6<br />
1.6. Warnungen...........................................................6<br />
1.7. Störungen............................................................6<br />
2. SAUNAKABINE............................................................. 8<br />
2.1. Struktur der Saunakabine.......................................8<br />
2.1.1. Schwärzung der Saunawände.........................8<br />
2.2. Belüftung der Saunakabine.....................................9<br />
2.3. Leistungsabgabe des Ofens ...................................9<br />
2.4. Hygiene der Saunakabine.......................................9<br />
3. INSTALLATIONSANLEITUNG........................................ 10<br />
3.1. Vor der Montage................................................. 10<br />
3.2. Befestigung des Saunaofens an der Wand............... 11<br />
3.3. Elektroanschlüsse................................................ 12<br />
3.3.1. Isolationswiderstand des Elektrosaunaofens... 12<br />
3.4. Anschluß des Steuergerätes <strong>und</strong> der Fühler (BC-E)... 12<br />
3.5. Zurückstellen der Überhitzungsschutzes................. 13<br />
3.6. Ersetzen von Heizelementen................................. 13<br />
ELECTRICAL CONNECTIONS (Norway, Belgium)............ 15<br />
4. ERSATZTEILE............................................................. 16<br />
2
EN<br />
DE<br />
1. INSTRUCTIONS FOR USE 1. BEDIENUNGSANLEITUNG<br />
1.1. Piling of the Sauna Stones<br />
The piling of the sauna stones has a great effect on<br />
the functioning of the heater (figure 1).<br />
Important information on sauna stones:<br />
• The stones should be 5–10 cm in diameter.<br />
• Use solely angular split-face sauna stones that<br />
are intended for use in a heater. Peridotite,<br />
olivine-dolerite and olivine are suitable stone<br />
types.<br />
• Neither light, porous ceramic “stones“ nor soft<br />
soapstones should be used in the heater. They<br />
do not absorb enough heat when warmed up.<br />
This can result in damage in heating elements.<br />
• Wash off dust from the stones before piling<br />
them into the heater.<br />
Please note when placing the stones:<br />
• Do not drop stones into the heater.<br />
• Do not wedge stones between the heating<br />
elements.<br />
• Place the stones sparsely to ensure that air can<br />
circulate between them.<br />
• Pile the stones so that they support each other<br />
instead of lying their weight on the heating<br />
elements.<br />
• Do not form a high pile of stones on top of the<br />
heater.<br />
• No such objects or devices should be placed<br />
inside the heater stone space or near the heater<br />
that could change the amount or direction of<br />
the air flowing through the heater.<br />
1.1. Aufschichten der Saunaofensteine<br />
Die Schichtung der Ofensteine hat eine große Auswirkung<br />
auf die Effizienz des Ofens (Abb. 1).<br />
Wichtige Informationen zu Saunaofensteinen:<br />
• Die Steine sollten einen Durchmesser von<br />
5–10 cm haben.<br />
• Verwenden Sie nur spitze Saunasteine mit rauer<br />
Oberfläche, die für die Verwendung in Saunaöfen<br />
vorgesehen sind. Geeignete Gesteinsarten<br />
sind Peridodit, Olivin-Dolerit <strong>und</strong> Olivin.<br />
• Im Saunaofen sollten weder leichte poröse<br />
„Steine“ aus Keramik noch weiche Specksteine<br />
verwendet werden. Sie absorbieren beim<br />
Erhitzen nicht genügend Wärme, was zu einer<br />
Beschädigung der Heizelemente führen kann.<br />
• Die Steine sollten vor dem Aufschichten von<br />
Steinstaub befreit werden.<br />
Beachten Sie beim Platzieren der Steine Folgendes:<br />
• Lassen Sie die Steine nicht einfach in den Ofen<br />
fallen.<br />
• Vermeiden Sie ein Verkeilen von Steinen<br />
zwischen den Heizelementen.<br />
• Schichten Sie die Steine in lockerer Anordnung, so<br />
dass Luft zwischen ihnen hindurchströmen kann.<br />
• Schichten Sie die Steine so aufeinander, dass<br />
sie nicht gegen die Heizelemente drücken.<br />
• Schichten Sie die Steine oben auf dem Ofen<br />
nicht zu einem hohen Stapel auf.<br />
• In der Steinkammer oder in der Nähe des<br />
Saunaofens dürfen sich keine Gegenstände<br />
oder Geräte befinden, die die Menge oder die<br />
Richtung des durch den Saunaofen führenden<br />
Luftstroms ändern.<br />
Figure 1. Piling of the sauna stones<br />
Abbildung 1. Aufschichtung der Saunaofensteine<br />
1.1.1. Maintenance<br />
Due to large variation in temperature, the sauna<br />
stones disintegrate in use. Rearrange the stones at<br />
least once a year or even more often if the sauna<br />
is in frequent use. At the same time, remove any<br />
pieces of stones from the bottom of the heater and<br />
replace any disintegrated stones with new ones. By<br />
doing this, the heating capability of the heater stays<br />
optimal and the risk of overheating is avoided.<br />
1.1.1. Wartung<br />
Aufgr<strong>und</strong> der großen Wärmeänderungen werden die<br />
Saunasteine spröde <strong>und</strong> brüchig. Die Steine sollten<br />
mindestens einmal jährlich neu aufgeschichtet werden,<br />
bei regelmäßigem Gebrauch öfter. Bei dieser<br />
Gelegenheit entfernen Sie bitte auch Staub <strong>und</strong> Gesteinssplitter<br />
aus dem unteren Teil des Saunaofens<br />
<strong>und</strong> ersetzen beschädigte Steine. Hierdurch bleibt<br />
die Heizleistung des Ofens optimal, <strong>und</strong> das Risiko<br />
der Überhitzung wird vermieden.<br />
3
EN<br />
1.2. Heating of the Sauna<br />
When operating the heater for the first time, both the<br />
heater and the stones emit smell. To remove the smell,<br />
the sauna room needs to be efficiently ventilated.<br />
If the heater output is suitable for the sauna room,<br />
it will take about an hour for a properly insulated<br />
sauna to reach the required bathing temperature (<br />
2.3.). The sauna stones normally reach the bathing<br />
temperature at the same time as the sauna room.<br />
A suitable temperature for the sauna room is about<br />
65–80 °C.<br />
1.3. Using the Heater<br />
Before switching the heater on always check that<br />
there isn’t anything on top of the heater or inside<br />
the given safety distance. 1.6.<br />
• Heater models BC23 and BC35 are equipped<br />
with a timer and a thermostat. The timer is<br />
for setting the on-time for the heater and the<br />
thermostat is for setting a suitable temperature.<br />
1.3.1.–1.3.4.<br />
• Heater models BC23E and BC35E are<br />
controlled from a separate control unit. See the<br />
instructions for use of the selected control unit<br />
model.<br />
DE<br />
1.2. Erhitzen der Saunakabine<br />
Beim ersten Erwärmen sondern sich von Saunaofen<br />
<strong>und</strong> Steinen Gerüche ab. Um diese zu beseitigen,<br />
muss die Saunakabine gründlich gelüftet werden.<br />
Bei einer für die Saunakabine angemessenen Ofenleistung<br />
ist eine isolierte Sauna innerhalb von einer<br />
St<strong>und</strong>e auf die erforderliche Saunatemperatur aufgeheizt<br />
( 2.3.). Die Saunaofensteine erwärmen sich gewöhnlicherweise<br />
in derselben Zeit auf Aufgusstemperatur<br />
wie die Saunakabine. Die passende Temperatur<br />
in der Saunakabine beträgt etwa 65 bis 80 °C.<br />
1.3. Benutzung des Ofens<br />
Bitte überprüfen Sie, bevor Sie den Ofen anschalten,<br />
dass keine Gegenstände auf dem Ofen oder in<br />
unmittelbarer Nähe des Ofens liegen. 1.6.<br />
• Die Ofenmodelle BC23 <strong>und</strong> BC35 sind mit<br />
einer Zeitschaltuhr <strong>und</strong> einem Thermostat<br />
ausgestattet. Die Zeitschaltuhr regelt die<br />
Einschaltzeit des Ofens <strong>und</strong> das Thermostat die<br />
Temperatur. 1.3.1.–1.3.4.<br />
• Die Ofenmodelle BC23E <strong>und</strong> BC35E werden mit<br />
einem separaten Steuergerät bedient. Beachten<br />
Sie die mitgelieferte Bedienungsanleitung der<br />
Steuerung.<br />
Figure 2. Timer switch<br />
Abbildung 2. Schalter der Zeitschaltuhr<br />
Figure 3. Thermostat switch<br />
Abbildung 3. Thermostatschalter<br />
1.3.1. Heater On<br />
Turn the timer switch to the ”on” section<br />
(section A in figure 2, 0–4 hours). The<br />
heater starts heating immediately.<br />
1.3.2. Pre-setting Time (timed switch-on)<br />
Turn the timer switch to the ”pre-setting”<br />
section (section B in figure 2, 0–8 hours).<br />
The heater starts heating when the timer<br />
has turned the switch back to the ”on”<br />
section. After this, the heater will be on for about<br />
four hours.<br />
Example: You want to go walking for three hours<br />
and have a sauna bath after that. Turn the timer<br />
switch to the "pre-setting" section at number 2.<br />
The timer starts. After two hours, the heater<br />
starts heating. Because it takes about one hour for<br />
the sauna to be heated, it will be ready for bathing<br />
after about three hours, that is, when you come<br />
back from your walk.<br />
4<br />
1.3.1. Ofen ein<br />
Stellen Sie den Schalter der Zeitschaltuhr<br />
in den Abschnitt ”ein” (Abschnitt A in<br />
Abb. 2, 0–4 St<strong>und</strong>en). Der Ofen beginnt<br />
sofort zu heizen.<br />
1.3.2. Vorwahlzeit (zeitgesteuertes Einschalten)<br />
Stellen Sie den Schalter der Zeitschaltuhr<br />
in den Abschnitt ”Vorwahl” (Abschnitt B in<br />
Abb. 2, 0–8 St<strong>und</strong>en). Der Ofen beginnt<br />
zu heizen, wenn die Zeitschaltuhr den<br />
Schalter zurück in den Abschnitt “ein“ gedreht hat.<br />
Danach bleibt der Ofen etwa vier St<strong>und</strong>en lang an.<br />
Beispiel: Sie möchten drei St<strong>und</strong>en lang spazieren<br />
gehen <strong>und</strong> danach ein Saunabad nehmen. Stellen<br />
Sie den Schalter der Zeitschaltuhr in den Abschnitt<br />
”Vorwahl” auf Nummer 2.<br />
Die Zeitschaltuhr beginnt zu laufen. Nach zwei St<strong>und</strong>en<br />
beginnt der Ofen zu heizen. Da es etwa eine St<strong>und</strong>e<br />
dauert, bis die Sauna erhitzt ist, wird sie nach etwa<br />
drei St<strong>und</strong>en für das Saunabad bereit sein, also dann,<br />
wenn Sie von Ihrem Spaziergang zurückkehren.
EN<br />
1.3.3. Heater Off<br />
The heater switches off, when the timer<br />
turns the switch back to zero. You can<br />
switch the heater off at any time by turning<br />
the timer switch to zero yourself.<br />
Switch the heater off after bathing. Sometimes it<br />
may be advisable to leave the heater on for a while<br />
to let the wooden parts of the sauna dry properly.<br />
NOTE! Always check that the heater has switched<br />
off and stopped heating after the timer has turned<br />
the switch to zero.<br />
1.3.4. Setting the Temperature<br />
The purpose of the thermostat (figure 3) is to keep<br />
the temperature in the sauna room on a desired<br />
level. By experimenting, you can find the setting<br />
that suits you best.<br />
Begin experimenting at the maximum position. If,<br />
during bathing, the temperature rises too high, turn<br />
the switch counter-clockwise a little. Note that even<br />
a small difference within the maximum section will<br />
change the temperature of the sauna considerably.<br />
1.4. Throwing Water on Heated Stones<br />
The air in the sauna room becomes dry when warmed<br />
up. Therefore, it is necessary to throw water on the<br />
heated stones to reach a suitable level of humidity in<br />
the sauna. The effect of heat and steam on people<br />
varies – by experimenting, you can find the levels of<br />
temperature and humidity that suit you best.<br />
NOTE! The maximum volume of the ladle is 0.2<br />
litres. If an excessive amount of water is poured on<br />
the stones, only part of it will evaporate and the rest<br />
may splash as boiling hot water on the bathers. Never<br />
throw water on the stones when there are people near<br />
the heater, because hot steam may burn their skin.<br />
NOTE! The water to be thrown on the heated<br />
stones should meet the requirements of clean<br />
household water (table 1). Only special aromas<br />
designed for sauna water may be used. Follow the<br />
instructions given on the package.<br />
DE<br />
1.3.3. Ofen aus<br />
Der Ofen wird ausgeschaltet, wenn die<br />
Zeitschaltuhr den Schalter zurück auf null<br />
gedreht hat. Sie können den Ofen jederzeit<br />
selbst ausschalten, indem Sie den<br />
Schalter der Zeitschaltuhr auf null stellen.<br />
Schalten Sie den Ofen nach dem Saunabad aus.<br />
Manchmal ist es ratsam, den Ofen noch eine Weile<br />
weiter laufen zu lassen, um die Holzteile der Sauna<br />
richtig trocknen zu lassen.<br />
ACHTUNG! Vergewissern Sie sich stets, dass der<br />
Ofen ausgeschaltet ist <strong>und</strong> nicht mehr heizt, wenn<br />
die Zeitschaltuhr den Schalter zurück auf null gedreht<br />
hat.<br />
1.3.4. Einstellen der Temperatur<br />
Zweck des Thermostats (Abb. 3) ist es, die Temperatur<br />
in der Saunakabine auf der gewünschten Höhe<br />
zu halten. Durch Ausprobieren können Sie ermitteln,<br />
welche Einstellung für Sie am besten geeignet ist.<br />
Beginnen Sie mit der höchsten Einstellung. Wenn<br />
die Temperatur während des Saunabades zu hoch<br />
ansteigt, drehen Sie den Schalter ein Stück gegen<br />
den Uhrzeigersinn. Beachten Sie, dass im oberen<br />
Temperaturbereich auch kleine Änderungen die<br />
Temperatur in der Sauna beträchtlich beeinflussen.<br />
1.4. Aufguss<br />
Die Saunaluft trocknet bei Erwärmung aus, daher<br />
sollte zur Erlangung einer angenehmen Luftfeuchtigkeit<br />
auf die heißen Steine des Saunaofens Wasser<br />
gegossen werden. Die Auswirkungen von Hitze <strong>und</strong><br />
Dampf sind von Mensch zu Mensch unterschiedlich<br />
– durch Ausprobieren finden Sie die Temperatur<strong>und</strong><br />
Luftfeuchtigkeitswerte, die für Sie am besten<br />
geeignet sind.<br />
ACHTUNG! Die Kapazität der Saunakelle sollte<br />
höchstens 0,2 l betragen. Auf die Steine sollten keine<br />
größeren Wassermengen auf einmal gegossen<br />
werden, da beim Verdampfen sonst kochend heißes<br />
Wasser auf die Badenden spritzen könnte. Achten Sie<br />
auch darauf, daß Sie kein Wasser auf die Steine gießen,<br />
wenn sich jemand in deren Nähe befindet. Der<br />
heiße Dampf könnte Brandw<strong>und</strong>en verursachen.<br />
ACHTUNG! Als Aufgusswasser sollte nur Wasser<br />
verwendet werden, das die Qualitätsvorschriften für<br />
Haushaltswasser erfüllt (Tabelle 1). Im Aufgusswasser<br />
dürfen nur für diesen Zweck ausgewiesene Duftstoffe<br />
verwendet werden. Befolgen Sie die Anweisungen<br />
auf der Packung.<br />
Water property<br />
Wassereigenschaft<br />
Effect<br />
Wirkung<br />
Humus concentration<br />
Colour, taste, precipitates<br />
Humusgehalt<br />
Farbe, Geschmack, Ablagerungen<br />
Iron concentration<br />
Colour, odour, taste, precipitates<br />
Eisengehalt<br />
Farbe, Geruch, Geschmack, Ablagerungen<br />
Hardness: most important substances are Precipitates<br />
manganese (Mn) and lime, i.e. calcium (Ca). Ablagerungen<br />
Wasserhärte: Die wichtigsten Stoffe sind<br />
Mangan (Mn) <strong>und</strong> Kalk, d.h. Kalzium (Ca).<br />
Chlorinated water<br />
Health risk<br />
Gechlortes Wasser<br />
Ges<strong>und</strong>heitsschädlich<br />
Seawater<br />
Rapid corrosion<br />
Salzwasser<br />
Rasche Korrosion<br />
Table 1. Water quality requirements<br />
Tabelle 1. Anforderungen an die Wasserqualität<br />
Recommendation<br />
Empfehlung<br />
EN<br />
1.5. Instructions for Bathing<br />
• Begin by washing yourself.<br />
• Stay in the sauna for as long as you feel comfortable.<br />
• Forget all your troubles and relax.<br />
• According to established sauna conventions,<br />
you must not disturb other bathers by speaking<br />
in a loud voice.<br />
• Do not force other bathers from the sauna by<br />
throwing excessive amounts of water on the<br />
stones.<br />
• Cool your skin down as necessary. If you are in<br />
good health, you can have a swim if a swimming<br />
place or pool is available.<br />
• Wash yourself after bathing.<br />
• Rest for a while and let your pulse go back to<br />
normal. Have a drink of fresh water or a soft<br />
drink to bring your fluid balance back to normal.<br />
1.6. Warnings<br />
• Staying in the hot sauna for long periods of<br />
time makes the body temperature rise, which<br />
may be dangerous.<br />
• Keep away from the heater when it is hot. The<br />
stones and outer surface of the heater may<br />
burn your skin.<br />
• Keep children away from the heater.<br />
• Do not let young, handicapped or ill people<br />
bathe in the sauna on their own.<br />
• Consult your doctor about any health-related<br />
limitations to bathing.<br />
• Consult your child welfare clinic about taking<br />
little babies to the sauna.<br />
• Be very careful when moving in the sauna, as<br />
the platform and floors may be slippery.<br />
• Never go to a hot sauna if you have taken alcohol,<br />
strong medicines or narcotics.<br />
• Never sleep in a hot sauna.<br />
• Sea air and a humid climate may corrode the<br />
metal surfaces of the heater.<br />
• Do not hang clothes to dry in the sauna, as this<br />
may cause a risk of fire. Excessive moisture<br />
content may also cause damage to the electrical<br />
equipment.<br />
1.7. Troubleshooting<br />
Note! All service operations must be done by professional<br />
maintenance personnel.<br />
The heater does not heat.<br />
• Check that the fuses to the heater are in good<br />
condition.<br />
• Check that the connecting cable is connected<br />
( 3.3.).<br />
• Turn the timer switch to the “on” section<br />
( 1.3.1.).<br />
• Turn the thermostat to a higher setting<br />
( 1.3.4.).<br />
• Check that the overheat protector has not gone<br />
off. The timer works but the heater does not<br />
heat. ( 3.5.)<br />
DE<br />
1.5. Anleitungen zum Saunen<br />
• Waschen Sie sich vor dem Saunen.<br />
• Bleiben Sie in der Sauna, solange Sie es als<br />
angenehm empfinden.<br />
• Vergessen Sie jeglichen Stress, <strong>und</strong> entspannen<br />
Sie sich.<br />
• Zu guten Saunamanieren gehört, daß Sie Rücksicht<br />
auf die anderen Badenden nehmen, indem<br />
Sie diese nicht mit unnötig lärmigem Benehmen<br />
stören.<br />
• Verjagen Sie die anderen auch nicht mit zu<br />
vielen Aufgüssen.<br />
• Lassen Sie Ihre erhitzte Haut zwischendurch abkühlen.<br />
Falls Sie ges<strong>und</strong> sind, <strong>und</strong> die Möglichkeit<br />
dazu besteht, gehen Sie auch schwimmen.<br />
• Waschen Sie sich nach dem Saunen.<br />
• Ruhen Sie sich aus, bis Sie sich ausgeglichen<br />
fühlen. Trinken Sie klares Wasser oder einen<br />
Softdrink, um Ihren Flüssigkeitshaushalt zu<br />
stabilisieren.<br />
1.6. Warnungen<br />
• Ein langer Aufenthalt in einer heißen Sauna<br />
führt zum Ansteigen der Körpertemperatur,<br />
was gefährlich sein kann.<br />
• Achtung vor dem heißen Saunaofen. Die Steine<br />
sowie das Gehäuse werden sehr heiß <strong>und</strong> können<br />
die Haut verbrennen.<br />
• Halten Sie Kinder vom Ofen fern.<br />
• Kinder, Gehbehinderte, Kranke <strong>und</strong> Schwache<br />
dürfen in der Sauna nicht alleingelassen werden.<br />
• Ges<strong>und</strong>heitliche Einschränkungen bezogen auf<br />
das Saunen müssen mit dem Arzt besprochen<br />
werden.<br />
• Über das Saunen von Kleinkindern sollten Sie<br />
sich in der Mütterberatungsstelle beraten lassen.<br />
• Gehen Sie nicht in die Sauna, wenn Sie unter<br />
dem Einfluß von Narkotika (Alkohol, Medikamenten,<br />
Drogen usw.) stehen.<br />
• Schlafen Sie nie in einer erhitzten Sauna.<br />
• Meer- <strong>und</strong> feuchtes Klima können die Metalloberflächen<br />
des Saunaofens rosten lassen.<br />
• Benutzen Sie die Sauna wegen der Brandgefahr<br />
nicht zum Kleider- oder Wäschetrocknen,<br />
außerdem können die Elektrogeräte durch die<br />
hohe Feuchtigkeit beschädigt werden.<br />
1.7. Störungen<br />
Achtung! Alle Wartungsmaßnahmen müssen von<br />
qualifiziertem technischem Personal durchgeführt<br />
werden.<br />
Der Ofen wärmt nicht.<br />
• Vergewissern Sie sich, dass die Sicherungen<br />
des Ofens in gutem Zustand sind.<br />
• Überprüfen Sie, ob das Anschlusskabel<br />
eingesteckt ist ( 3.3.).<br />
• Stellen Sie den Schalter der Zeitschaltuhr in<br />
den Abschnitt ”ein” ( 1.3.1.).<br />
• Stellen Sie das Thermostat auf eine höhere<br />
Einstellung ( 1.3.4.).<br />
• Überprüfen Sie, ob der Überhitzungsschutz<br />
ausgelöst wurde. Die Zeitschaltuhr läuft, aber<br />
der Ofen wärmt nicht. ( 3.5.)<br />
6
EN<br />
The sauna room heats slowly. The water thrown<br />
on the sauna stones cools down the stones<br />
quickly.<br />
• Check that the fuses to the heater are in good<br />
condition.<br />
• Check that all heating elements glow when the<br />
heater is on.<br />
• Turn the thermostat to a higher setting<br />
( 1.3.4.).<br />
• Check that the heater output is sufficient<br />
( 2.3.).<br />
• Check the sauna stones ( 1.1.). Too tightly<br />
piled stones, the settling of stones with time<br />
or wrong stone type can hinder the air flow<br />
through the heater, which results in reduced<br />
heating efficiency.<br />
• Check that the sauna room ventilation has been<br />
arranged correctly ( 2.2.).<br />
The sauna room heats quickly, but the<br />
temperature of the stones remain insufficient.<br />
Water thrown on the stones runs through.<br />
• Turn the thermostat to a lower setting<br />
( 1.3.4.).<br />
• Check that the heater output is not too high<br />
( 2.3.).<br />
• Check that the sauna room ventilation has been<br />
arranged correctly ( 2.2.).<br />
Panel or other material near the heater blackens<br />
quickly.<br />
• Check that the requirements for safety<br />
distances are fulfilled ( 3.1.).<br />
• Check the sauna stones ( 1.1.). Too tightly<br />
piled stones, the settling of stones with<br />
time or wrong stone type can hinder the air<br />
flow through the heater, which may result in<br />
overheating of surro<strong>und</strong>ing materials.<br />
• Also see section 2.1.1.<br />
The heater emits smell.<br />
• See section 1.2.<br />
• The hot heater may emphasize odours mixed<br />
in the air that are not, however, caused by the<br />
sauna or the heater. Examples: paint, glue, oil,<br />
seasoning.<br />
The heater makes noise.<br />
• BC: The timer is a mechanical device and it<br />
makes a ticking so<strong>und</strong> when it is functioning<br />
normally. If the timer ticks even when the<br />
heater is switched off, check the timer’s<br />
wiring.<br />
• Occasional bangs are most likely caused by<br />
stones cracking due to heat.<br />
• The thermal expansion of heater parts can<br />
cause noises when the heater warms up.<br />
DE<br />
Die Saunakabine erhitzt sich zu langsam. Das auf<br />
die Saunaofensteine geworfene Wasser kühlt die<br />
Steine schnell ab.<br />
• Vergewissern Sie sich, dass die Sicherungen<br />
des Ofens in gutem Zustand sind.<br />
• Vergewissern Sie sich, dass bei<br />
eingeschaltetem Ofen alle Heizelemente glühen.<br />
• Stellen Sie das Thermostat auf eine höhere<br />
Einstellung ( 1.3.4.).<br />
• Überprüfen Sie, ob die Ofenleistung<br />
ausreichend ist ( 2.3.).<br />
• Überprüfen Sie die Saunaofensteine ( 1.1.).<br />
Eine zu feste Stapelung der Steine, das<br />
Absetzen der Steine mit der Zeit <strong>und</strong> falsche<br />
Steinsorten können den Luftstrom durch den<br />
Ofen behindern, was zu einer verminderten<br />
Heizleistung führt.<br />
• Vergewissern Sie sich, dass die Belüftung der<br />
Saunakabine korrekt eingerichtet wurde ( 2.2.).<br />
Die Saunakabine erwärmt sich schnell, aber die<br />
Temperatur der Steine ist unzureichend. Das auf<br />
die Steine geworfene Wasser läuft durch.<br />
• Stellen Sie das Thermostat auf eine niedrigere<br />
Einstellung ( 1.3.4.).<br />
• Überprüfen Sie, ob die Ofenleistung nicht zu<br />
hoch ist ( 2.3.).<br />
• Vergewissern Sie sich, dass die Belüftung der<br />
Saunakabine korrekt eingerichtet wurde ( 2.2.).<br />
Panele <strong>und</strong> andere Materialien neben dem Ofen<br />
werden schnell schwarz.<br />
• Überprüfen Sie, ob die Anforderungen für<br />
Sicherheitsabstände eingehalten werden<br />
( 3.1.).<br />
• Überprüfen Sie die Saunaofensteine ( 1.1.).<br />
Eine zu feste Stapelung der Steine, das<br />
Absetzen der Steine mit der Zeit <strong>und</strong> falsche<br />
Steinsorten können den Luftstrom durch den<br />
Ofen behindern, was zu einer Überhitzung der<br />
umliegenden Materialien führen kann.<br />
• Siehe auch Abschnitt 2.1.1.<br />
Der Ofen gibt Gerüche ab.<br />
• Siehe Abschnitt 1.2.<br />
• Ein heißer Ofen kann Gerüche in der Luft<br />
verstärken, die jedoch nicht durch die Sauna<br />
oder den Ofen selbst verursacht wurden.<br />
Beispiele: Farbe, Klebstoff, Öl, Würzmittel.<br />
Der Ofen verursacht Geräusche.<br />
• BC: Die Zeitschaltuhr ist ein mechanisches<br />
Gerät <strong>und</strong> verursacht daher ein tickendes<br />
Geräusch, wenn sie normal funktioniert.<br />
Ertönt das Ticken, obwohl der Ofen nicht<br />
eingeschaltet ist, untersuchen Sie die<br />
Anschlüsse der Zeitschaltuhr.<br />
• Plötzliche Knall-Geräusche entstehen manchmal<br />
durch Steine, die aufgr<strong>und</strong> der Hitze platzen.<br />
• Die Ausdehnung der Ofenteile wegen der Hitze<br />
kann bei der Erwärmung des Ofens Geräusche<br />
verursachen.<br />
7
EN<br />
DE<br />
2. SAUNA ROOM 2. SAUNAKABINE<br />
2.1. Sauna Room Structure 2.1. Struktur der Saunakabine<br />
A<br />
F<br />
E<br />
B<br />
D<br />
A<br />
G<br />
C<br />
Figure 4.<br />
Abbildung 4.<br />
A. Insulation wool, thickness 50–100 mm. The<br />
sauna room must be insulated carefully so that<br />
the heater output can be kept moderately low.<br />
B. Moisture protection, e.g. aluminium paper.<br />
Place the glossy side of the paper towards the<br />
sauna. Tape the seams with aluminium tape.<br />
C. Vent gap of about 10 mm between the moisture<br />
protection and panel (recommendation).<br />
D. Low mass 12–16 mm thick panel board. Before<br />
starting the panelling, check the electric wiring<br />
and the reinforcements in the walls required by<br />
the heater and benches.<br />
E. Vent gap of about 3 mm between the wall and<br />
ceiling panel.<br />
F. The height of the sauna is usually 2100–2300 mm.<br />
The minimum height depends on the heater (see<br />
table 2). The space between the upper bench<br />
and ceiling should not exceed 1200 mm.<br />
G. Use floor coverings made of ceramic materials<br />
and dark joint grouts. Particles disintegrating<br />
from the sauna stones and impurities in the<br />
sauna water may stain and/or damage sensitive<br />
floor coverings.<br />
NOTE! Check from the fire authorities which parts<br />
of the firewall can be insulated. Flues which are in<br />
use must not be insulated.<br />
NOTE! Light protective covers which are installed<br />
directly to the wall or ceiling may be a fire risk.<br />
2.1.1. Blackening of the sauna walls<br />
It is perfectly normal for the wooden surfaces of the<br />
sauna room to blacken in time. The blackening may<br />
be accelerated by<br />
• sunlight<br />
• heat from the heater<br />
• protective agents on the walls (protective<br />
agents have a poor heat resistance level)<br />
• fine particles disintegrating from the sauna<br />
stones which rise with the air flow.<br />
8<br />
A. Isolierwolle, Stärke 50–100 mm. Die Saunakabine<br />
muss sorgfältig isoliert werden, damit der<br />
Ofen nicht zu viel Leistung erbringen muss.<br />
B. Feuchtigkeitsschutz, z.B. Aluminiumpapier. Die<br />
glänzende Seite des Papiers muss zur Sauna<br />
zeigen. Nähte mit Aluminiumband abdichten.<br />
C. Etwa 10 mm Luft zwischen Feuchtigkeitsschutz<br />
<strong>und</strong> Täfelung (Empfehlung).<br />
D. Leichtes, 12–16 mm starkes Täfelbrett. Vor<br />
Beginn der Täfelung elektrische Verkabelung<br />
<strong>und</strong> für Ofen <strong>und</strong> Bänke benötigte Verstärkungen<br />
in den Wänden überprüfen.<br />
E. Etwa 3 mm Luft zwischen Wand <strong>und</strong> Deckentäfelung.<br />
F. Die Höhe der Sauna ist normalerweise 2100–<br />
2300 mm. Die Mindesthöhe hängt vom Ofen<br />
ab (siehe Tabelle 2). Der Abstand zwischen<br />
oberer Bank <strong>und</strong> Decke sollte höchstens<br />
1200 mm betragen.<br />
G. Bodenabdeckungen aus Keramik <strong>und</strong> dunkle<br />
Zementschlämme verwenden. Aus den Saunasteinen<br />
entweichende Partikel <strong>und</strong> Verunreinigungen<br />
im Wasser können sensible Böden<br />
verfärben oder beschädigen.<br />
ACHTUNG! Fragen Sie die Behörden, welcher Teil<br />
der feuerfesten Wand isoliert werden kann. Rauchfänge,<br />
die benutzt werden, dürfen nicht isoliert werden.<br />
ACHTUNG! Leichte, direkt an Wand oder Decke angebrachte<br />
Schutzabdeckungen sind ein Brandrisiko.<br />
2.1.1. Schwärzung der Saunawände<br />
Es ist ganz normal, wenn sich die Holzoberflächen<br />
einer Sauna mit der Zeit verfärben. Die Schwärzung<br />
wird beschleunigt durch<br />
• Sonnenlicht<br />
• Hitze des Ofens<br />
• Täfelungsschutz an den Wänden (mit geringem<br />
Hitzewiderstand)<br />
• Feinpartikel, die aus den zerfallenden Saunasteinen<br />
in die Luft entweichen.
EN<br />
2.2. Sauna Room Ventilation<br />
The air in the sauna room should change six times<br />
per hour. Figure 5 illustrates different sauna room<br />
ventilation options.<br />
DE<br />
2.2. Belüftung der Saunakabine<br />
Die Saunaluft sollte sechsmal pro St<strong>und</strong>e ausgetauscht<br />
werden. Abb. 5 zeigt verschiedene Optionen<br />
der Saunabelüftung.<br />
360°<br />
min. 1000 mm<br />
D<br />
180°<br />
min.<br />
500 mm<br />
min.<br />
500 mm<br />
B<br />
Figure 5.<br />
Abbildung 5.<br />
A. Supply air vent location. If mechanical exhaust<br />
ventilation is used, place the supply air vent<br />
above the heater. If gravity exhaust ventilation<br />
is used, place the supply air vent below or next<br />
to the heater. The diameter of the supply air<br />
pipe must be 50–100 mm. BC-E: Do not place<br />
the supply air vent so that the air flow cools<br />
the temperature sensor (see the temperature<br />
sensor installation instructions in the control<br />
unit installation instructions)!<br />
B. Exhaust air vent. Place the exhaust air vent<br />
near the floor, as far away from the heater as<br />
possible. The diameter of the exhaust air pipe<br />
should be twice the diameter of the supply air<br />
pipe.<br />
C. Optional vent for drying (closed during heating<br />
and bathing). The sauna can also be dried by<br />
leaving the door open after bathing.<br />
D. If the exhaust air vent is in the washroom, the<br />
gap <strong>und</strong>erneath the sauna door must be at<br />
least 100 mm. Mechanical exhaust ventilation<br />
is mandatory.<br />
2.3. Heater Output<br />
When the walls and ceiling are covered with panels<br />
and insulation behind the panels is adequate, the heater<br />
output is defined according to the volume of the<br />
sauna. Non-insulated walls (brick, glass block, glass,<br />
concrete, tile, etc.) increase the need for heater output.<br />
Add 1,2 m³ to the volume of the sauna for each<br />
non-insulated wall square meter. For example, a 10 m³<br />
sauna room with a glass door equals the output requirement<br />
of about a 12 m³ sauna room. If the sauna<br />
room has log walls, multiply the sauna's volume by<br />
1,5. Choose the correct heater output from table 2.<br />
2.4. Sauna Room Hygiene<br />
Bench towels should be used during bathing to prevent<br />
sweat from getting onto the benches.<br />
The benches, walls and floor of the sauna should<br />
be washed thoroughly at least every six months.<br />
Use a scrubbing brush and sauna detergent.<br />
Wipe dust and dirt from the heater with a damp<br />
cloth. Remove lime stains from the heater using a<br />
10% citric acid solution and rinse.<br />
A. Luftzufuhr. Bei mechanischer Entlüftung Luftzufuhr<br />
über dem Ofen anbringen. Bei Schwerkraftentlüftung<br />
Luftzufuhr unter oder neben<br />
dem Ofen anbringen. Der Durchmesser des<br />
Luftzufuhrrohres muss 50–100 mm betragen.<br />
BC-E: Luftzufuhr nicht so anbringen, dass sie<br />
den Temperaturfühler abkühlt (zur Anbringung<br />
des Temperaturfühlers siehe Installationsanweisungen<br />
des Steuergeräts)!<br />
B. Entlüftung. Entlüftung in Bodennähe anbringen,<br />
so weit weg vom Ofen wie möglich. Der Durchmesser<br />
des Entlüftungsrohres sollte doppelt so<br />
groß sein wie bei der Luftzufuhr.<br />
C. Optionale Lüftung zum Trocknen (während<br />
Heizung <strong>und</strong> Bad geschlossen). Die Sauna kann<br />
auch durch die offene Tür getrocknet werden.<br />
D. Wenn die Entlüftung im Waschraum liegt,<br />
muss die Lücke unter der Saunatür mindestens<br />
100 mm betragen. Mechanische Entlüftung ist<br />
Pflicht.<br />
2.3. Leistungsabgabe des Ofens<br />
Wenn Wand <strong>und</strong> Decke vertäfelt <strong>und</strong> ausreichend<br />
isoliert sind, richtet sich die Leistungsabgabe des<br />
Ofens nach dem Volumen der Sauna. Nicht isolierte<br />
Wände (Stein, Glasbausteine, Glas, Beton, Kacheln)<br />
erhöhen die benötigte Ofenleistung. Jeder Quadratmeter<br />
nicht isolierter Wand entspricht 1,2 m³ mehr<br />
Saunavolumen. Eine 10 m³ große Saunakabine mit<br />
Glastür z.B. entspricht in der Leistungsabgabe einer<br />
12 m³ großen Sauna. Bei Balkenwänden Saunavolumen<br />
mit 1,5 multiplizieren. Korrekte Leistungsabgabe<br />
des Ofens aus Tabelle 2 wählen.<br />
2.4. Hygiene der Saunakabine<br />
Liegetücher benutzen, um die Bänke vor Schweiß<br />
zu schützen.<br />
Bänke, Wände <strong>und</strong> Boden der Sauna mindestens<br />
alle sechs Monate waschen. Bürste <strong>und</strong> Saunareinigungsmittel<br />
verwenden.<br />
Staub <strong>und</strong> Schmutz vom Ofen mit feuchtem Tuch<br />
abwischen. Kalkablagerungen am Ofen mit 10 %<br />
Zitronensäure entfernen <strong>und</strong> spülen.<br />
9
EN<br />
DE<br />
3. INSTRUCTIONS FOR INSTALLATION<br />
3.1. Before Installation<br />
Before installing the heater, study the instructions<br />
for installation. Check the following points:<br />
• Is the output and type of the heater suitable for<br />
the sauna room? The cubic volumes given in<br />
table 2 should be followed.<br />
• Is the supply voltage suitable for the heater?<br />
• The location of the heater fulfils the minimum<br />
requirements concerning safety distances given<br />
in fig. 6 and table 2.<br />
It is absolutely necessary to install the heater according<br />
to these values. Neglecting them causes<br />
a risk of fire. Only one electrical heater may be<br />
installed in the sauna room.<br />
3. INSTALLATIONSANLEITUNG<br />
3.1. Vor der Montage<br />
Bevor Sie den Saunaofen installieren, lesen Sie die<br />
<strong>Montageanleitung</strong> <strong>und</strong> überprüfen Sie folgende Dinge:<br />
• Ist der zu montierende Saunaofen in Leistung<br />
<strong>und</strong> Typ passend für die Saunakabine? Die<br />
Rauminhaltswerte in Tabelle 2 dürfen weder<br />
über noch unterschritten werden.<br />
• Ist die Netzspannung für den Saunaofen geeignet?<br />
• Der Montageort des Ofens erfüllt die in Abbildung<br />
6 <strong>und</strong> Tabelle 2 angegebenen Sicherheitsmindestabstände.<br />
Diese Abstände müssen unbedingt eingehalten<br />
werden, da ein Abweichen Brandgefahr verursacht.<br />
In einer Sauna darf nur ein Saunaofen installiert<br />
werden.<br />
Heater<br />
Ofen<br />
Model and<br />
dimensions/<br />
Modell <strong>und</strong> Maße<br />
Output<br />
Leistung<br />
Sauna room<br />
Saunakabine<br />
Cubic vol.<br />
Rauminhalt<br />
Height<br />
Höhe<br />
Electrical connections<br />
Elektroanschlüsse<br />
400 V 2N~ 230 V 1N~<br />
Connecting cable<br />
Anschlusskabel<br />
Fuse<br />
Sicherung<br />
Connecting cable<br />
Anschlusskabel<br />
Fuse<br />
Sicherung<br />
To sensor (BC-E)<br />
An Fühler (BC-E)<br />
Width/Breite 280 mm<br />
2.3.<br />
See fig. 7. The measurements apply to the connecting<br />
Depth/Tiefe<br />
cable only!<br />
• BC 295 mm<br />
Siehe Abbildung 7. Die Messungen beziehen sich<br />
• BC-E 270 mm<br />
ausschließlich auf das Anschlusskabel!<br />
Height/Höhe 505 mm<br />
Weight/Gewicht 7 kg<br />
Stones/Steine<br />
min. max. min.<br />
max. 12 kg<br />
kW m³ m³ mm mm² A mm² A mm²<br />
BC23/BC23E 2,3 1,3 2,5 1700 4 x 1,5 2 x 10 3 x 1,5 1 x 10 4 x 0,25<br />
BC35/BC35E 3,5 2 4,5 1700 4 x 1,5 2 x 10 3 x 2,5 1 x 16 4 x 0,25<br />
Table 2. Installation details<br />
Tabelle 2. Montageinformationen<br />
A min. B min.<br />
BC23/BC23E 10 20<br />
BC35/BC35E 20 30<br />
B<br />
min. 900<br />
A<br />
100<br />
min. 10<br />
min. 10<br />
min. 20<br />
A<br />
min. 20<br />
min. 10<br />
min. 10<br />
80–200<br />
min. 20<br />
Figure 6. Safety distances (all dimensions in millimeters)<br />
Abbildung 6. Sicherheitsmindestabstände (alle Abmessungen in Millimetern)<br />
10
EN<br />
3.2. Fastening the Heater on a Wall<br />
See figure 7.<br />
1. Fasten the wall-mounting rack on the wall by<br />
using the screws which come with the rack.<br />
NOTE! There must be a support, e.g. a board,<br />
behind the panel, so that the fastening screws<br />
can be screwed into a thicker wooden material<br />
than the panel. If there are no boards behind<br />
the panel, the boards can also be fastened on<br />
the panel.<br />
2. Make sure the clip fastens in the hole properly.<br />
3. Lift the heater to the rack on the wall so that<br />
the fastening hooks of the lower part of the<br />
rack go behind the edge of the heater body.<br />
Lock the edge of the heater onto the rack by a<br />
screw.<br />
DE<br />
3.2. Befestigung des Saunaofens an der Wand<br />
Siehe Abbildung 7.<br />
1. Befestigen Sie das Montagegestell mit den<br />
dazu gelieferten Schrauben an der Wand.<br />
ACHTUNG! An den Stellen, an denen die<br />
Befestigungsschrauben angebracht werden,<br />
muss sich hinter den Paneelen als Stütze z.B.<br />
ein Brett befinden, in dem die Schrauben fest<br />
sitzen. Falls sich hinter den Paneelen keine<br />
Bretter befinden, können diese auch vor den<br />
Paneelen angebracht werden.<br />
2. Versichere, dass die Befestigungs-Ösen richtig<br />
dafür vorgesehene Aufhängung sitzen.<br />
3. Heben Sie den Saunaofen so auf das Gestell an<br />
der Wand, daß die Befestigungshaken unten am<br />
Gestell hinter den Rand des Saunaofenrumpfes<br />
kommen. Schrauben Sie den oberen Rand des<br />
Saunaofens am Montagegestell fest.<br />
1.<br />
X 220<br />
2. 3.<br />
180<br />
6 x<br />
A<br />
150<br />
450<br />
230<br />
80–200<br />
max. 500<br />
B<br />
X min.<br />
BC23/BC23E 40<br />
BC35/BC35E 50<br />
Figure 7. Fastening the heater on a wall (all dimensions in millimeters)<br />
Abbildung 7. Befestigung des Saunaofens an der Wand (alle Abmessungen in Millimetern)<br />
A. Junction box<br />
B. Connecting cable<br />
A. Klemmdose<br />
B. Anschlußkabel<br />
11
EN<br />
3.3. Electrical Connections<br />
The heater may only be connected to the electrical<br />
network in accordance with the current regulations<br />
by an authorised, professional electrician.<br />
• The heater is semi-stationarily connected to the<br />
junction box (figure 7: A) on the sauna wall.<br />
The junction box must be splash-proof, and<br />
its maximum height from the floor must not<br />
exceed 500 mm.<br />
• The connecting cable (figure 7: B) must be of<br />
rubber cable type H07RN-F or its equivalent.<br />
NOTE! Due to thermal embrittlement, the use<br />
of PVC-insulated wire as the connecting cable<br />
of the heater is forbidden.<br />
• If the connecting and installation cables are<br />
higher than 1000 mm from the floor in the<br />
sauna or inside the sauna room walls, they<br />
must be able to endure a minimum temperature<br />
of 170 °C when loaded (for example, SSJ).<br />
Electrical equipment installed higher than<br />
1000 mm from the sauna floor must be<br />
approved for use in a temperature of 125 °C<br />
(marking T125).<br />
• In addition to supply connectors, the BC heaters<br />
are equipped with a connector (P), which makes<br />
the control of the electric heating possible<br />
(figure 9). Voltage control is transmitted from<br />
the heater when it is switched on. The control<br />
cable for electrical heating is brought directly<br />
into the junction box of the heater, and from<br />
there to the terminal block of the heater along<br />
a rubber cable with the same cross-section<br />
area as that of the connecting cable.<br />
3.3.1. Electric Heater Insulation Resistance<br />
When performing the final inspection of the electrical<br />
installations, a “leakage” may be detected when<br />
measuring the heater’s insulation resistance. The<br />
reason for this is that the insulating material of the<br />
heating elements has absorbed moisture from the<br />
air (storage, transport). After operating the heater<br />
for a few times, the moisture will be removed from<br />
the heating elements.<br />
Do not connect the power feed for the heater<br />
through the RCD (residual current device)!<br />
3.4. Installation of the Control Unit and<br />
Sensors (BC-E)<br />
The control unit includes detailed instructions for<br />
fastening the unit on the wall. Install the temperature<br />
sensor on the wall of the sauna room above the<br />
heater. It should be installed on the lateral centre<br />
line of the heater, 100 mm downwards from the<br />
ceiling. Figure 6.<br />
Do not place the supply air vent so that the air<br />
flow cools the temperature sensor. Figure 5.<br />
DE<br />
3.3. Elektroanschlüsse<br />
Der Anschluss des Saunaofens an das Stromnetz darf<br />
nur von einem zugelassenen Elektromonteur unter Beachtung<br />
der gültigen Vorschriften ausgeführt werden.<br />
• Der Saunaofen wird halbfest an die Klemmdose<br />
(Abb. 7: A) an der Saunawand befestigt. Die<br />
Klemmdose muß spritzwasserfest sein <strong>und</strong> darf<br />
höchstens 500 mm über dem Fußboden angebracht<br />
werden.<br />
• Als Anschlusskabel (Abb. 7: B) wird ein Gummikabel<br />
vom Typ H07RN-F oder ein entsprechendes<br />
Kabel verwendet. ACHTUNG! PVCisolierte<br />
Kabel dürfen wegen ihrer schlechten<br />
Hitzebeständigkeit nicht als Anschlusskabel des<br />
Saunaofens verwendet werden.<br />
• Falls der Anschluss oder die Montagekabel<br />
höher als in 1000 mm Höhe über dem Boden<br />
in die Sauna oder die Saunawände münden,<br />
müssen sie belastet mindestens eine Temperatur<br />
von 170 °C aushalten (z.B. SSJ). Elektrogeräte,<br />
die höher als 1000 mm vom Saunaboden<br />
angebracht werden, müssen für den Gebrauch<br />
bei 125 °C Umgebungstemperatur zugelassen<br />
sein (Vermerk T125).<br />
• Die BC-Saunaöfen sind zusätzlich zum Netzanschluss<br />
mit einer Klemme (P) ausgestattet,<br />
welche die Möglichkeit zur Steuerung der Elektroheizung<br />
bietet (Abb. 9). Der Ofen übernimmt<br />
mit dem Einschalten die Spannungsregelung.<br />
Das Steuerungskabel für die Elektroheizung<br />
wird direkt zur Klemmdose des Saunaofens<br />
gelegt <strong>und</strong> von dort aus durch ein Gummikabel<br />
der gleichen Stärke weiter zur Reihenklemme<br />
des Saunaofens geleitet.<br />
3.3.1. Isolationswiderstand des Elektrosaunaofens<br />
Bei der Endkontrolle der Elektroinstallationen kann<br />
bei der Messung des Isolationswiderstandes ein<br />
“Leck” auftreten, was darauf zurückzuführen ist, daß<br />
Feuchtigkeit aus der Luft in das Isolationsmaterial<br />
der Heizwiderstände eingetreten ist (bei Lagerung<br />
<strong>und</strong> Transport). Die Feuchtigkeit entweicht aus den<br />
Widerständen nach zwei Erwärmungen.<br />
Schalten Sie den Netzstrom des Elektrosaunaofens<br />
nicht über den Fehlerstromschutzschalter ein!<br />
3.4. Anschluß des Steuergerätes <strong>und</strong> der<br />
Fühler (BC-E)<br />
In Verbindung mit dem Steuergerät werden genauere<br />
Anweisungen zu dessen Befestigung an der Wand<br />
gegeben. Der Temperaturfühler wird an der Saunawand<br />
oberhalb des Saunaofens, 100 mm unterhalb<br />
der Decke auf der Achse in Breitenrichtung des Saunaofens<br />
angefracht. Abbildung 6.<br />
Luftzufuhr nicht so anbringen, dass sie den<br />
Temperaturfühler abkühlt. Abbildung 5.<br />
12
EN<br />
3.5. Resetting the Overheat Protector<br />
If the temperature of the sauna room becomes dangerously<br />
high, the overheat protector will permanently<br />
cut off the supply of the heater. The overheat<br />
protector can be reset after the heater has cooled<br />
down.<br />
BC<br />
The reset button is located in located inside the<br />
heater’s connection box (figure 8). Only persons<br />
authorised to carry out electrical installations can<br />
reset the overheat protector.<br />
Prior to pressing the button, the cause of the fault<br />
must be fo<strong>und</strong>.<br />
• Are the stones crumbled and pressed together?<br />
• Has the heater been on for a long time while<br />
unused?<br />
• Is the sensor of the thermostat out of place or<br />
broken?<br />
• Has the heater been banged or shaken?<br />
BC-E<br />
See the installation instructions for control unit.<br />
DE<br />
3.5. Zurückstellen der Überhitzungsschutzes<br />
Wenn die Temperatur in der Saunakabine gefährlich<br />
stark ansteigt, unterbricht der Überhitzungsschutz<br />
die Stromzufuhr zum Ofen permanent. Der Überhitzungsschutz<br />
kann nach Abkühlen des Ofens zurückgesetzt<br />
werden.<br />
BC<br />
Der Rücksetzungsknopf befindet sich im Anschlussgehäuse<br />
des Ofens (Abb. 8). Nur eine zu<br />
Elektroinstallationen befugte Person darf diese Arbeit<br />
ausführen.<br />
Vor Betätigung des Knopfes muß die Ursache der<br />
Fehlfunktion festgestellt werden:<br />
• Sind die Steine im Saunaofen verkeilt oder spröde?<br />
• War der Saunaofen lange angeschaltet <strong>und</strong><br />
wurde nicht benutzt?<br />
• Ist der Thermostatfühler an einem falschen<br />
Platz oder defekt?<br />
• War der Saunaofen starken Stößen ausgesetzt?<br />
BC-E<br />
Siehen Sie <strong>Gebrauchs</strong>- <strong>und</strong> <strong>Montageanleitung</strong> des<br />
Steuergeräts.<br />
Figure 8.<br />
Abbildung 8.<br />
Reset button for overheat protector<br />
Rücksetzknopf des Überhitzungsschutzes<br />
3.6. Replacing the Heating Elements<br />
Replacing the heating elements can be done when<br />
the heater remains attached to the wall:<br />
1. Switch off the fuses<br />
2. Empty stones from the heater<br />
3. Remove timer and thermostat knobs from the<br />
front panel<br />
4. Unfasten the front panel (3 screws)<br />
5. Unfasten the cables and water protection plate<br />
6. Fastening of the heating elements appears and<br />
they can be replaced.<br />
3.6. Ersetzen von Heizelementen<br />
Heizelemente können ersetzt werden, ohne den<br />
Ofen von der Wand zu nehmen:<br />
1. Schalten Sie die Sicherungen aus.<br />
2. Leeren Sie die Steine aus dem Ofen.<br />
3. Entfernen Sie die Knöpfe der Zeitschaltuhr<br />
<strong>und</strong> des Thermostats vom Bedienfeld an der<br />
Vorderseite des Ofens.<br />
4. Lösen Sie das Bedienfeld (3 Schrauben).<br />
5. Lösen Sie die Kabel <strong>und</strong> die Wasserschutzplatte.<br />
6. Die Befestigung der Heizelemente ist nun zu<br />
sehen, wenn diese ersetzt werden können.<br />
13
EN<br />
DE<br />
BC23<br />
BC35<br />
BC23E<br />
BC35E<br />
1 2<br />
1 2 3<br />
a1<br />
a1<br />
a1<br />
N L1 L2<br />
b0 M<br />
b0<br />
b0<br />
N<br />
b<br />
a<br />
b<br />
a<br />
b<br />
a<br />
P<br />
CONTROL OF HEATING<br />
OPTIONALE STEUERUNG<br />
FÜR ZUSATZHEIZUNG<br />
a1<br />
a1<br />
a1<br />
N L1 L2<br />
b0 M<br />
b0<br />
b0<br />
N<br />
b<br />
a<br />
b<br />
a<br />
b<br />
a<br />
P<br />
CONTROL OF HEATING<br />
OPTIONALE STEUERUNG<br />
FÜR ZUSATZHEIZUNG<br />
N L1 L2<br />
400 V 2N~<br />
N L1 L2<br />
N L1 L2<br />
400 V 2N~<br />
N L1 L2<br />
400 V 2N~ 400 V 2N~<br />
N L1 L2 N P<br />
N L1 L2 N P<br />
230 V 1N~<br />
230 V 1N~<br />
230 V 1N~ 230 V 1N~<br />
Figure 10. Electrical connections of<br />
heater BC-E<br />
Abbildung 10. Elektroanschlüsse des<br />
Saunaofens BC-E<br />
YELLOW/GELB<br />
RED/ROT<br />
Figure 9. Electrical connections of heater BC<br />
Abbildung 9. Elektroanschlüsse des Saunaofens BC<br />
400 V 2N~ 230 V 1N~<br />
K1 U2 N<br />
N<br />
N<br />
L1 L2 L3<br />
W V<br />
U<br />
1 2 3 4 1 2 3 4<br />
K1 U2 N N N L1 L2 L3 W V U<br />
PE<br />
C90/C150<br />
BLUE/BLAU<br />
WHITE/WEIß<br />
RED/ROT<br />
YELLOW/GELB<br />
PE<br />
C90/C150<br />
BLUE/BLAU<br />
WHITE/WEIß<br />
RED/ROT<br />
YELLOW/GELB<br />
(SSJ)<br />
3 x 1,5 mm 2 (SSJ)<br />
3 x 1,5 mm 2 3 x 1,5 mm 2<br />
RESIDUAL CURRENT<br />
DEVICE<br />
FEHLERSTROM-<br />
SCHUTZSCHALTER<br />
LIGHT<br />
LICHT<br />
max. 100 W<br />
-t<br />
ntc<br />
SENSOR<br />
FÜHLER<br />
RESIDUAL CURRENT<br />
DEVICE<br />
FEHLERSTROM-<br />
SCHUTZSCHALTER<br />
LIGHT<br />
LICHT<br />
max. 100 W<br />
-t<br />
ntc<br />
SENSOR<br />
FÜHLER<br />
3 x 1,5 mm 2 4<br />
POWER SUPPLY<br />
HAUPTZENTRALE<br />
4<br />
CONTROL OF<br />
HEATING<br />
OPTIONALE STEUERUNG<br />
FÜR ZUSATZHEIZUNG<br />
POWER SUPPLY<br />
HAUPTZENTRALE<br />
3<br />
3<br />
CONTROL OF<br />
HEATING<br />
OPTIONALE STEUERUNG<br />
FÜR ZUSATZHEIZUNG<br />
400 V/230 V 3N~<br />
BC23E<br />
BC35E<br />
400 V/230 V 3N~<br />
BC23E<br />
BC35E<br />
N L1 L2<br />
400 V<br />
2N~<br />
N L1 L2<br />
230 V<br />
1N~<br />
N L1 L2 L3<br />
4<br />
N L1 L2 L3<br />
3<br />
FUSES<br />
SICHERUNGEN<br />
JUNCTION BOX<br />
KLEMMDOSE<br />
FUSES<br />
SICHERUNGEN<br />
JUNCTION BOX<br />
KLEMMDOSE<br />
SWITCH FOR ALL-POLE DISCONNECTION<br />
SCHALTER FÜR ALLPOLIGE ABSCHALTUNG<br />
Figure 11. Electrical connections of control unit C90/C150 and heater BC-E<br />
Abbildung 11. Elektroanschlüsse das Steuergerät C90/C150 <strong>und</strong> des Saunaofens BC-E<br />
14
ELECTRICAL CONNECTIONS (Norway, Belgium)
4. SPARE PARTS 4. ERSATZTEILE<br />
1 ZSB-770 (x 2) 1150 W/230 V (BC23/E)<br />
2 ZSB-770 (x 3) 1150 W/230 V (BC35/E)<br />
3 ZSK-510<br />
(BC)<br />
4 ZSB-125<br />
5 ZSK-520<br />
(BC)<br />
6 ZSB-115<br />
1<br />
2<br />
3<br />
4<br />
5<br />
6