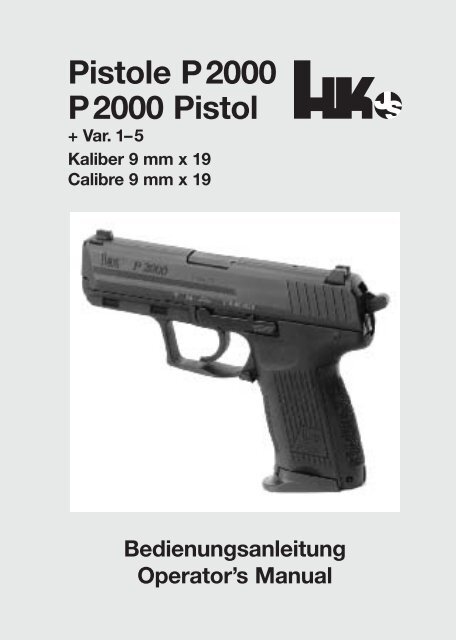
Pistole P2000 P2000 Pistol - Frankonia
Pistole P2000 P2000 Pistol - Frankonia
Pistole P2000 P2000 Pistol - Frankonia

Sie wollen auch ein ePaper? Erhöhen Sie die Reichweite Ihrer Titel.
YUMPU macht aus Druck-PDFs automatisch weboptimierte ePaper, die Google liebt.
<strong><strong>Pistol</strong>e</strong> <strong>P2000</strong><br />
<strong>P2000</strong> <strong>Pistol</strong><br />
+ Var. 1–5<br />
Kaliber 9 mm x 19<br />
Calibre 9 mm x 19<br />
Bedienungsanleitung<br />
Operator’s Manual
m Vor Gebrauch der <strong><strong>Pistol</strong>e</strong><br />
Sicherheitshinweise lesen!<br />
m Before handling the pistol, read<br />
and mind the safety instructions<br />
<strong><strong>Pistol</strong>e</strong> <strong>P2000</strong><br />
+ Variante 1–5<br />
<strong>P2000</strong> <strong>Pistol</strong><br />
+ Variants 1–5<br />
Kaliber 9 mm x 19<br />
Calibre 9 mm x 19<br />
Deutsch, Seite 4–32<br />
English, page 35–64<br />
3
4<br />
<strong><strong>Pistol</strong>e</strong> <strong>P2000</strong><br />
mit Magazin für 16 Patronen,<br />
Griffrücken -L-
Inhaltsverzeichnis<br />
Seite<br />
m Sicherheitshinweise zum Umgang mit <strong><strong>Pistol</strong>e</strong>n. . . . . . . . . . . . . . . . 6<br />
Vorbemerkung . . . . . . . . . . . . . . . . . . . . . . . . . . . . . . . . . . . . . . . . . . . . . . . 8<br />
Beschreibung . . . . . . . . . . . . . . . . . . . . . . . . . . . . . . . . . . . . . . . . . . . . . . . . 9<br />
Technische Daten . . . . . . . . . . . . . . . . . . . . . . . . . . . . . . . . . . . . . . . . . . . 12<br />
Baugruppenübersicht . . . . . . . . . . . . . . . . . . . . . . . . . . . . . . . . . . . . . . . . 13<br />
Bedienelemente, Bezeichnungen. . . . . . . . . . . . . . . . . . . . . . . . . . . . . . . 14<br />
Funktion . . . . . . . . . . . . . . . . . . . . . . . . . . . . . . . . . . . . . . . . . . . . . . . . . . . 16<br />
Prüfungen . . . . . . . . . . . . . . . . . . . . . . . . . . . . . . . . . . . . . . . . . . . . . . . . . . 17<br />
Prüfen vor Gebrauch . . . . . . . . . . . . . . . . . . . . . . . . . . . . . . . . . . . . . . . . . . 17<br />
Prüfen nach Gebrauch . . . . . . . . . . . . . . . . . . . . . . . . . . . . . . . . . . . . . . . . 17<br />
Funktionsprüfung Verschluss mit Griffstück . . . . . . . . . . . . . . . . . . . . . . . . 17<br />
Funktionsprüfung Abzugs- und Sicherungseinrichtung . . . . . . . . . . . . . . . 17<br />
Prüfen des Schlagbolzens auf Gängigkeit . . . . . . . . . . . . . . . . . . . . . . . . . 17<br />
Handhabung und Bedienung . . . . . . . . . . . . . . . . . . . . . . . . . . . . . . . . . . 18<br />
Grundsätze der Handhabung und Bedienung . . . . . . . . . . . . . . . . . . . . . . 18<br />
Vorbereiten zum Schießen. . . . . . . . . . . . . . . . . . . . . . . . . . . . . . . . . . . . . . 18<br />
Laden der <strong><strong>Pistol</strong>e</strong>. . . . . . . . . . . . . . . . . . . . . . . . . . . . . . . . . . . . . . . . . . . . . 18<br />
Schießen mit Direktabzug . . . . . . . . . . . . . . . . . . . . . . . . . . . . . . . . . . . . . 19<br />
Schießen mit Spannabzug . . . . . . . . . . . . . . . . . . . . . . . . . . . . . . . . . . . . . 19<br />
Schießhaltung . . . . . . . . . . . . . . . . . . . . . . . . . . . . . . . . . . . . . . . . . . . . . . . 19<br />
Magazin entnehmen . . . . . . . . . . . . . . . . . . . . . . . . . . . . . . . . . . . . . . . . . . 20<br />
Erneutes Laden bei leergeschossenem Magazin . . . . . . . . . . . . . . . . . . . . 20<br />
Entspannen . . . . . . . . . . . . . . . . . . . . . . . . . . . . . . . . . . . . . . . . . . . . . . . . . 21<br />
Entladen der <strong><strong>Pistol</strong>e</strong> . . . . . . . . . . . . . . . . . . . . . . . . . . . . . . . . . . . . . . . . . . 21<br />
Füllen und Entleeren des Magazins . . . . . . . . . . . . . . . . . . . . . . . . . . . . . . 22<br />
Pflege . . . . . . . . . . . . . . . . . . . . . . . . . . . . . . . . . . . . . . . . . . . . . . . . . . . . . 23<br />
Pflegemittel und Geräte. . . . . . . . . . . . . . . . . . . . . . . . . . . . . . . . . . . . . . . . 23<br />
Pflegearbeiten . . . . . . . . . . . . . . . . . . . . . . . . . . . . . . . . . . . . . . . . . . . . . . . 23<br />
Normalreinigung . . . . . . . . . . . . . . . . . . . . . . . . . . . . . . . . . . . . . . . . . . . . . 23<br />
Hauptreinigung . . . . . . . . . . . . . . . . . . . . . . . . . . . . . . . . . . . . . . . . . . . . . . 23<br />
Zerlegen der <strong><strong>Pistol</strong>e</strong> . . . . . . . . . . . . . . . . . . . . . . . . . . . . . . . . . . . . . . . . . 24<br />
Zusammenbauen der <strong><strong>Pistol</strong>e</strong> . . . . . . . . . . . . . . . . . . . . . . . . . . . . . . . . . . 26<br />
Griffrücken auswechseln . . . . . . . . . . . . . . . . . . . . . . . . . . . . . . . . . . . . . 27<br />
Störungen und Fehler, Ursachen, Beseitigung. . . . . . . . . . . . . . . . . . . . 28<br />
Visier, Justierung . . . . . . . . . . . . . . . . . . . . . . . . . . . . . . . . . . . . . . . . . . . . 29<br />
Seitenjustierung . . . . . . . . . . . . . . . . . . . . . . . . . . . . . . . . . . . . . . . . . . . . . 29<br />
Höhenjustierung . . . . . . . . . . . . . . . . . . . . . . . . . . . . . . . . . . . . . . . . . . . . . 29<br />
Teileliste . . . . . . . . . . . . . . . . . . . . . . . . . . . . . . . . . . . . . . . . . . . . . . . . . . . 30<br />
Explosionsdarstellung . . . . . . . . . . . . . . . . . . . . . . . . . . . . . . . . . . . . . . . . 31<br />
Teileliste Varianten . . . . . . . . . . . . . . . . . . . . . . . . . . . . . . . . . . . . . . . . . . . . 32<br />
5
6<br />
m Sicherheitshinweise zum Umgang mit <strong><strong>Pistol</strong>e</strong>n<br />
- Beim Umgang mit <strong><strong>Pistol</strong>e</strong>n ist<br />
besondere Vorsicht notwendig,<br />
da Lage und Richtung der <strong><strong>Pistol</strong>e</strong><br />
sehr leicht verändert werden<br />
können.<br />
- Lesen Sie diese Anleitung vor<br />
Benutzung der <strong><strong>Pistol</strong>e</strong> gründlich<br />
durch. Benutzen Sie die<br />
<strong><strong>Pistol</strong>e</strong> erst dann, wenn Sie die<br />
Anleitung verstanden haben.<br />
- Beachten Sie alle Hinweise zur<br />
Handhabung und Bedienung.<br />
Nichtbeachtung kann Gefahr<br />
für Leib und Leben verursachen.<br />
- Unterlassen Sie den Umgang<br />
mit der <strong><strong>Pistol</strong>e</strong>, sofern Sie zuvor<br />
Alkohol, Drogen oder Medikamente<br />
zu sich genommen<br />
haben oder sich körperlich unwohl<br />
fühlen.<br />
- Vor der Benutzung, bei Störungen<br />
und vor dem Reinigen ist<br />
zu prüfen, ob<br />
- die <strong><strong>Pistol</strong>e</strong> entladen ist<br />
(Patronenlager frei),<br />
- das Rohr frei ist von<br />
Fremdkörpern und<br />
- das Magazin leer ist.<br />
- Bei der Übergabe oder Übernahme<br />
der <strong><strong>Pistol</strong>e</strong> muss der<br />
Verschluss immer geöffnet<br />
sein.<br />
- Die <strong><strong>Pistol</strong>e</strong> ist grundsätzlich so<br />
zu behandeln, als sei sie geladen<br />
und feuerbereit.<br />
- Zielen Sie beim Hantieren oder<br />
Üben mit der <strong><strong>Pistol</strong>e</strong> nie auf<br />
Personen. <strong><strong>Pistol</strong>e</strong> stets in eine<br />
sichere Richtung halten.<br />
- Berühren Sie beim Laden und<br />
Entladen, beim Ziehen und<br />
sonstigem Handhaben niemals<br />
den Abzug. Der Abzugsfinger<br />
ist grundsätzlich am Abzugbügel<br />
außen anzulegen. Der<br />
Abzug darf nur betätigt werden,<br />
wenn die <strong><strong>Pistol</strong>e</strong> zum Ziel<br />
zeigt.<br />
- Beim Handhaben, Zerlegen,<br />
Reinigen und Zusammenbauen<br />
darf keine Gewalt angewendet<br />
werden.<br />
- Zerlegen Sie die <strong><strong>Pistol</strong>e</strong> nur soweit,<br />
wie in dieser Anleitung<br />
auf Seite 24/25 beschrieben.<br />
- Tragen Sie beim Schießen immer<br />
eine Schutzbrille.<br />
Beim Schießen sind Ihre Augen<br />
durch Splitter oder ausgeworfene<br />
sowie von Wänden<br />
zurückprallende Patronenhülsen<br />
gefährdet.<br />
- Tragen Sie beim Schießen immer<br />
einen Gehörschutz.<br />
- Verwenden Sie nur fachgerecht<br />
laborierte und unbeschädigte<br />
Patronen mit dem richtigen<br />
Kaliber.<br />
- Beachten Sie, dass beim<br />
Schießen der Verschluss der<br />
<strong><strong>Pistol</strong>e</strong> mit hoher Geschwindigkeit<br />
zurückläuft.
- Halten Sie deshalb beim Schießen<br />
die <strong><strong>Pistol</strong>e</strong> so, dass sich<br />
Ihre Hände nicht im Bereich des<br />
Verschlussweges befinden, um<br />
Verletzungen zu vermeiden.<br />
- Vorsicht! Halten Sie beim<br />
Schießen immer den Mündungsbereich<br />
frei.<br />
- Verwahren Sie die <strong><strong>Pistol</strong>e</strong> getrennt<br />
von der Munition. Unbefugte<br />
(insbesondere Kinder)<br />
dürfen keinen Zugriff zur <strong><strong>Pistol</strong>e</strong><br />
erhalten.<br />
- Die ausgereifte Konstruktion<br />
der <strong><strong>Pistol</strong>e</strong> bietet größtmögliche<br />
Handhabungssicherheit.<br />
- Die <strong><strong>Pistol</strong>e</strong> besitzt eine Fallsicherung,<br />
die den Zweck hat,<br />
eine unbeabsichtigte Schussauslösung<br />
bei Stoß oder Fall<br />
zu verhindern. Dadurch ist ein<br />
Höchstmaß an Fallsicherheit<br />
geboten.<br />
- Außergewöhnliche Belastungen,<br />
wie harte Stöße oder Fallbeanspruchung<br />
können die Sicherheit<br />
beeinträchtigen. Nach<br />
solch außergewöhnlichen Vorkommnissen<br />
ist die <strong><strong>Pistol</strong>e</strong><br />
vom Hersteller bzw. durch waffentechnisches<br />
Personal zu<br />
überprüfen.<br />
- Heckler & Koch übernimmt<br />
keine Haftung für Vorfälle,<br />
die auf Nichtbeachtung dieser<br />
Anleitung, falsche Handhabung,<br />
Fahrlässigkeit, unsachgemäße<br />
Behandlung,<br />
unbefugten Teileaustausch<br />
oder sonstige Eingriffe in die<br />
<strong><strong>Pistol</strong>e</strong> zurückzuführen sind.<br />
- Diese Bedienungsanleitung ist<br />
Teil der <strong><strong>Pistol</strong>e</strong> und muss bei<br />
der Weitergabe der <strong><strong>Pistol</strong>e</strong> immer<br />
mitgegeben werden.<br />
Zubehör<br />
- Achten Sie bei der Verwendung<br />
von Holstern darauf,<br />
dass sich das Holster nach der<br />
Beschaffenheit der <strong><strong>Pistol</strong>e</strong> zu<br />
richten hat und nicht umgekehrt<br />
die <strong><strong>Pistol</strong>e</strong> nach dem<br />
Holster.<br />
- Achten Sie darauf, dass die <strong><strong>Pistol</strong>e</strong><br />
im Holster jederzeit so<br />
gehalten und gesichert wird,<br />
dass ein Herausfallen der <strong><strong>Pistol</strong>e</strong><br />
ausgeschlossen ist.<br />
- Unterziehen Sie Ihr Holster einer<br />
ständigen Kontrolle, da sowohl<br />
das Alter, Waffenöl sowie<br />
Körperwärme und längerer Gebrauch<br />
des Holsters dessen<br />
Eigenschaften negativ beeinflussen<br />
können.<br />
- Bei schnellen unkontrollierten<br />
Bewegungen, im Laufschritt<br />
sowie bei allen Bewegungen,<br />
bei denen die <strong><strong>Pistol</strong>e</strong> eine starke<br />
Beschleunigung erfährt, ist<br />
der sichere Sitz der Waffe im<br />
Holster besonders zu überwachen,<br />
da die <strong><strong>Pistol</strong>e</strong> im Verhältnis<br />
zum Holster eine erheblich<br />
größere Masse aufweist.<br />
7
Vorbemerkung<br />
1. Einwandfreie Funktion und<br />
lange Lebensdauer der <strong><strong>Pistol</strong>e</strong><br />
können nur durch ordnungsgemäße<br />
Handhabung,<br />
Bedienung und Pflege unter<br />
Beachtung der in dieser Anleitung<br />
enthaltenen Anweisungen<br />
sichergestellt werden.<br />
2. Die Angaben „rechts“, „links“,<br />
„vorne“ und „hinten“ sind<br />
bezogen auf die Lage der <strong><strong>Pistol</strong>e</strong><br />
in Schussrichtung gesehen.<br />
3. Jede Beschreibung von <strong><strong>Pistol</strong>e</strong>nteilen<br />
und jede Arbeit ist<br />
im allgemeinen nur einmal<br />
aufgeführt. Je nach Umfang<br />
wird deshalb ggf. auf bereits<br />
vorhandene Beschreibung<br />
von <strong><strong>Pistol</strong>e</strong>nteilen und Arbeiten<br />
in anderen Abschnitten<br />
hingewiesen.<br />
4. Soweit keine besonderen Einbauhinweise<br />
gegeben werden,<br />
erfolgt das Zusammenbauen<br />
in umgekehrter Reihenfolge<br />
des Zerlegens.<br />
5. Verwenden Sie nur Original<br />
HK-Ersatzteile.<br />
Bei Verwendung anderer Teile<br />
erlischt die Gewährleistung.<br />
Bei Bestellung von Ersatzteilen<br />
geben Sie bitte Positionsund<br />
Identnummer, sowie die<br />
Benennung der erforderlichen<br />
Teile an.<br />
6. Bitte teilen Sie Änderungsbzw.<br />
Ergänzungsvorschläge<br />
zu dieser Beschreibung der<br />
Firma Heckler & Koch GmbH<br />
mit.<br />
8
Beschreibung<br />
Die <strong><strong>Pistol</strong>e</strong> <strong>P2000</strong>, Kaliber 9 mm<br />
x 19, ist ein verriegelter Rückstoßlader<br />
mit automatischer<br />
Schlagbolzen- und Hahnsicherung.<br />
Nach jeder Schussabgabe<br />
wird selbsttätig nachgeladen bis<br />
das Magazin leer ist. Danach<br />
wird der Verschluss in geöffneter<br />
Stellung gefangen.<br />
Der beidseitig zu bedienende<br />
Magazinhalter und die ebenfalls<br />
beidseitig außenliegenden Verschlussfanghebel<br />
erlauben einen<br />
schnellstmöglichen Magazinwechsel.<br />
Hinten am Griffstück<br />
ist die Entspannklinke so<br />
angeordnet, dass sie sowohl von<br />
Rechts- wie Linksschützen gleichermaßen<br />
leicht und instinktiv<br />
mit dem Daumen der Schießhand<br />
betätigt werden kann.<br />
Eine optimale Handlage ergibt<br />
der ideale Griffwinkel zusammen<br />
mit den vier unterschiedlich<br />
hohen, austauschbaren Griffrücken.<br />
Damit lässt sich für jede<br />
Handgröße eine perfekte Verbindung<br />
der Hand zur Waffe herstellen.<br />
Das Griffstück ist aus<br />
hochwertigem, faserverstärkten<br />
Polymerkunststoff gefertigt. Vorne<br />
am Griffstück sind Aufnahmen<br />
für Zielgeräte integriert. Ein offenes<br />
Balkenvisier mit Kontrastpunkten<br />
ermöglicht eine schnelle<br />
und genaue Zielerfassung.<br />
Es sind Magazine für 13 oder 16<br />
Patronen verfügbar.<br />
Ein modulares Abzugs- und Entspannsystem<br />
ermöglicht es, unterschiedliche<br />
Abzugssysteme<br />
und Ausstattungen darzustellen.<br />
<strong><strong>Pistol</strong>e</strong> <strong>P2000</strong><br />
Ausstattungsmöglichkeiten<br />
Modell<br />
Schlaghebel mit Sporn<br />
Schlaghebel ohne Sporn<br />
<strong>P2000</strong> P p P P p P<br />
<strong>P2000</strong> (V1) p P P p P P<br />
<strong>P2000</strong> (V2) p P P p P P<br />
<strong>P2000</strong> (V3) P p P p P<br />
<strong>P2000</strong> (V4) p P P p P P<br />
Abzug teilgespannt<br />
Mit Entspannung<br />
Ohne Entspannung<br />
Abzugsmodus<br />
Single/Double Action (SA/DA)<br />
Abzugsmodus<br />
Combat Defence Action (CDA)<br />
<strong>P2000</strong> (V5) P P P<br />
Abzugsmodus<br />
Double Action Only (DAO)<br />
P Modellausstattung<br />
p Option<br />
9
Modulare Abzugsvarianten:<br />
<strong>P2000</strong> – Sicherheitsabzug mit<br />
verdecktem Spannstück im<br />
Schlaghebel mit Sporn zum<br />
Schießen von SA/DA. Zentrale<br />
Entspannklinke.<br />
Hinweis: Weitere optionale Ausstattungsmöglichkeiten<br />
siehe<br />
Seite 9.<br />
<strong>P2000</strong><br />
<strong>P2000</strong> (V1) – Sicherheitsabzug<br />
mit verdecktem Spannstück im<br />
Schlaghebel ohne Sporn. Gleichbleibende<br />
Abzugskraft (Combat<br />
Defence Action 20 N) vom ersten<br />
bis zum letzten Schuss.<br />
Ohne Entspannung.<br />
<strong>P2000</strong> (V2) – wie <strong>P2000</strong> (V1), jedoch<br />
Abzugskraft CDA 32,5 N.<br />
<strong>P2000</strong> (V4) – wie <strong>P2000</strong> (V1), jedoch<br />
Abzugskraft CDA 27,5 N.<br />
<strong>P2000</strong> (V5) Spannabzug (DAO),<br />
Abzugskraft 35 N.<br />
<strong>P2000</strong> (V3) – Konventioneller<br />
SA/DA-Abzug und Schlaghebel<br />
mit Sporn (ähnlich P10). Zentrale<br />
Entspannklinke.<br />
<strong>P2000</strong> (V1, V2, V4, V5)<br />
10<br />
<strong>P2000</strong> (V3)<br />
(Schlaghebel gespannt)
Austauschbare Griffrücken<br />
Vier unterschiedlich hohe, leicht<br />
austauschbare Griffrücken ermöglichen<br />
eine perfekte Anpassung<br />
der Waffe an verschiedene<br />
Handgrößen.<br />
S M L XL<br />
Griffrücken<br />
Magazinboden<br />
Zwei verschieden hohe Magazinböden sind verfügbar.<br />
<strong>P2000</strong> – Magazinboden hoch und niedrig<br />
11
Technische Daten<br />
Maße: <strong>P2000</strong> <strong>P2000</strong> (V1) <strong>P2000</strong> (V2) <strong>P2000</strong> (V3) <strong>P2000</strong> (V4) <strong>P2000</strong> (V5)<br />
Kaliber 9 mm x 19 9 mm x 19 9 mm x 19 9 mm x 19 9 mm x 19 9 mm x 19<br />
Gesamtlänge 179 mm 174 mm 174 mm 179 mm 174 mm 174 mm<br />
Gesamtbreite 34 mm 34 mm 34 mm 34 mm 34 mm 34 mm<br />
Gesamthöhe,<br />
Magazinboden hoch 138 mm 138 mm 138 mm 138 mm 138 mm 138 mm<br />
Magazinboden niedrig 128 mm 128 mm 128 mm 128 mm 128 mm 128 mm<br />
Rohrlänge 93 mm 93 mm 93 mm 93 mm 93 mm 93 mm<br />
Dralllänge 250 mm 250 mm 250 mm 250 mm 250 mm 250 mm<br />
Visierlinie 141,5 mm 141,5 mm 141,5 mm 141,5 mm 141,5 mm 141,5 mm<br />
Gewichte:<br />
<strong><strong>Pistol</strong>e</strong> mit leerem<br />
Magazin ca. 700 g ca. 700 g ca. 700 g ca. 700 g ca. 700 g ca. 700 g<br />
Magazin, leer (13) ca. 80 g ca. 80 g ca. 80 g ca. 80 g ca. 80 g ca. 80 g<br />
Magazin, leer (16) ca. 104 g ca. 104 g ca. 104 g ca. 104 g ca. 104 g ca. 104 g<br />
Sonstige Daten:<br />
Abzugskraft<br />
– Waffe teilgespannt ca. 20 N ca. 20 N ca. 32,5 N –– ca. 27,5 N ––<br />
– Waffe gespannt –– –– –– ca. 20 N –– ––<br />
– Waffe entspannt ca. 50 N — ** — ** ca. 50 N –– ca. 35 N<br />
Abzugsweg<br />
– teilgespannt *** ca.13,5 mm ca.13,5 mm ca.13,5 mm –– ca.13,5 mm ––<br />
– gespannt –– –– –– ca.7 mm<br />
– ungespannt ca.13,5 mm — — ca.13,5 mm — ca.13,5 mm<br />
Magazin für 13 Patronen 13 Patronen 13 Patronen 13 Patronen 13 Patronen 13 Patronen<br />
Magazin oder 16 Patronen 16 Patronen 16 Patronen 16 Patronen 16 Patronen 16 Patronen<br />
Visier<br />
Offenes Balkenvisier mit Kontrastpunkten<br />
Rohrprofil<br />
6-fach Polygon<br />
Geschossenergie - E0 - ca. 500 Joule *<br />
*** Referenzmunition gemäß Technischer Richtlinien<br />
*** Im Falle eines Anzündversagers lässt sich über die Double Action-Funktion – auch bei <strong>P2000</strong> V1,<br />
V2 + V4 (CDA) – der Schlaghebel über den Abzug erneut spannen und auslösen.<br />
*** Für schnelle Schussfolgen muss der Abzug nicht bis in die Ausgangsposition entlastet werden.<br />
Es genügt eine Entlastung des Abzugs um ca. 7 mm um den nächsten Schuss abzugeben.<br />
12
Baugruppenübersicht<br />
1<br />
2<br />
3<br />
4<br />
1 Verschluss, vollst.<br />
2 Rohr mit Schließfeder, vollst.<br />
3 Griffstück, vollst. mit<br />
Verschlussfanghebel<br />
4 Magazin, vollst.<br />
13
Bedienelemente, Bezeichnungen<br />
1 2 3 4 5 6<br />
7<br />
9 8<br />
1 Verschluss<br />
2 Beschusszeichen<br />
3 Kaliberbezeichnung<br />
4 Seriennummer<br />
5 Verschlussfanghebel<br />
6 Schlaghebel<br />
7 Entspannklinke<br />
8 Magazinhalter<br />
9 Abzug<br />
14
10 11 12 13<br />
16 15 14<br />
17<br />
10 Visier<br />
11 Auszieher<br />
12 Rohr<br />
13 Korn<br />
14 Aufnahmen für Zusatzgeräte<br />
15 Abzugbügel<br />
16 Griffstück<br />
17 Magazin<br />
15
Funktion<br />
<strong><strong>Pistol</strong>e</strong> <strong>P2000</strong>,<br />
geladen und entspannt<br />
16<br />
Durch Zurückziehen des Abzugs werden<br />
Spannklinke und/oder Schlaghebel<br />
ausgelöst und schlagen ab.<br />
Das Zünden der Patrone erfolgt durch<br />
den Schlag des Schlagbolzens auf das<br />
Zündhütchen.<br />
Nach dem Zünden der Patrone erhält<br />
die formschlüssig verriegelte Rohr-<br />
/Verschlussgruppe als Reaktion auf die<br />
Geschossbewegung einen Impuls und<br />
bewegt sich noch verriegelt gegen die<br />
Schließfederkraft nach hinten. Nach einem<br />
kurzen gemeinsamen Rücklaufweg<br />
von Rohr und Verschluss wird die<br />
Verriegelung zwischen Rohr und Verschluss<br />
aufgehoben. Das Rohr kippt<br />
ab, bedingt durch die Steuerflächen an<br />
Rohransatz und Schließfederführung.<br />
Der Verschluss läuft allein zurück, zieht<br />
und wirft die Patronenhülse aus und<br />
spannt das Spannstück bzw. den<br />
Schlaghebel (V3). Der Rücklauf wird<br />
durch die Anschlaghülse begrenzt und<br />
gedämpft.<br />
Nach Ende des Rücklaufs drückt die gespannte<br />
Schließfeder den Verschluss<br />
wieder nach vorne. Eine Patrone wird<br />
aus dem Magazin mitgenommen und in<br />
das Patronenlager eingeführt.<br />
Kurz vor Ende des Verschlussvorlaufs<br />
wird das Rohr über die Steuerfläche der<br />
Schließfederführung nach oben gedrückt<br />
und mit dem Verschluss verriegelt.
Prüfungen<br />
Prüfen vor Gebrauch<br />
Stellen Sie sicher, dass die <strong><strong>Pistol</strong>e</strong><br />
vor Gebrauch<br />
- entladen ist (Patronenlager frei),<br />
- das Rohr frei ist von Fremdkörpern.<br />
Prüfen Sie die <strong><strong>Pistol</strong>e</strong> vor Gebrauch<br />
auf Gängigkeit und Funktion.<br />
Prüfen nach Gebrauch<br />
Stellen Sie sicher, dass die <strong><strong>Pistol</strong>e</strong><br />
nach Gebrauch<br />
- entladen ist (Patronenlager frei),<br />
- das Rohr frei ist von Fremd-<br />
- körpern.<br />
- das Magazin leer ist.<br />
Funktionsprüfung Verschluss mit<br />
Griffstück<br />
- Magazin entnehmen<br />
- Verschluss bis zum Anschlag zurückziehen.<br />
Nach dem Loslassen muss der Verschluss<br />
durch die Schließfeder wieder<br />
in seine vordere Stellung gebracht<br />
werden.<br />
- Entspannklinke nach unten drücken.<br />
Spannstück/Schlaghebel muss sich<br />
aus der gespannten Stellung lösen<br />
und entspannen.<br />
- Leeres Magazin einsetzen.<br />
- Verschluss bis zum Anschlag zurückziehen.<br />
Der Verschluss muss vom Verschlussfanghebel<br />
in hinterer Stellung<br />
gehalten werden.<br />
- Verschlussfanghebel nach unten<br />
drücken.<br />
Die Schließfeder muss den Verschluss<br />
wieder in seine vordere Stellung<br />
bringen.<br />
Funktionsprüfung Abzugs- und<br />
Sicherungseinrichtung<br />
- Verschluss bis zum Anschlag zurückziehen<br />
und wieder schließen.<br />
- Abzug betätigen.<br />
Der Schlaghebel muss auslösen und<br />
nach vorne schnellen.<br />
– Schlaghebel nach vorne drücken.<br />
Der Schlaghebel muss frei sein und<br />
den Schlagbolzen eindrücken können.<br />
- Verschluss bis zum Anschlag zurückziehen<br />
und wieder schließen.<br />
Vor Erreichen des Schlagbolzens<br />
muss der Schlaghebel durch die<br />
Fangklinke hinterstellt werden.<br />
Prüfen des Schlagbolzens auf<br />
Gängigkeit und Sicherung<br />
- Verschluss abnehmen wie auf Seite<br />
24 beschrieben.<br />
- Schlagbolzensicherung ganz eindrücken,<br />
dann Schlagbolzen mittels<br />
Putzstange ganz nach vorne<br />
drücken.<br />
Der Schlagbolzenvorstand muss<br />
1,8 -0,25 mm betragen.<br />
Schlagbolzen und Schlagbolzensicherung<br />
müssen anschließend<br />
leichtgängig in ihre Ausgangslage<br />
zurückfedern.<br />
Der Schlagbolzen darf bei nicht eingedrückter<br />
Schlagbolzensicherung<br />
nicht in Zündposition kommen.<br />
Ist der Schlagbolzenvorstand zu gering<br />
oder der Schlagbolzen schwergängig,<br />
so muss die Schlagbolzenführung<br />
gereinigt werden.<br />
Hinweis: Diese Prüfung erfolgt nur<br />
durch waffentechnisches Personal<br />
(Waffenmechaniker).<br />
17
Handhabung und Bedienung<br />
Grundsätze der Handhabung<br />
und Bedienung<br />
Die <strong><strong>Pistol</strong>e</strong> ist immer so zu handhaben,<br />
als sei sie geladen und<br />
feuerbereit. Nach dem Durchladen<br />
ist die <strong><strong>Pistol</strong>e</strong> immer teilgespannt,<br />
die V3 gespannt und<br />
die V5 nicht gespannt.<br />
Verboten ist insbesondere:<br />
- Spielerisches Handhaben mit<br />
der <strong><strong>Pistol</strong>e</strong>, besonders das<br />
Zielen auf Personen.<br />
- Anwendung von Gewalt beim<br />
Hantieren, beim Zerlegen und<br />
Reinigen.<br />
Hinweise:<br />
Die <strong><strong>Pistol</strong>e</strong> <strong>P2000</strong>, Kal. 9 mm x 19<br />
ist für alle Munitionstypen entsprechend<br />
SAAMI und C.I.P. freigegeben.<br />
- Nach außergewöhnlichen Belastungen<br />
wie Stoß- oder<br />
Fallbeanspruchungen ist die<br />
<strong><strong>Pistol</strong>e</strong> unverzüglich durch waffentechnisches<br />
Personal (Waffenmechaniker)<br />
zu überprüfen.<br />
Vorbereiten zum Schießen<br />
- Rohr mit trockenem Reinigungsdocht<br />
(handelsübliches<br />
Reinigungsgerät) entölen und<br />
prüfen, ob es frei von Fremdkörpern<br />
ist.<br />
- Verschluss und Entspannhebel<br />
auf Funktion prüfen.<br />
- Magazin auf richtiges Einrasten<br />
prüfen.<br />
Laden der <strong><strong>Pistol</strong>e</strong><br />
- Gefülltes Magazin in das Griffstück<br />
einführen, bis der Magazinhalter<br />
einrastet. Die <strong><strong>Pistol</strong>e</strong><br />
ist teilgeladen.<br />
- Verschluss bis zum Anschlag<br />
zurückziehen und wieder vorschnellen<br />
lassen.<br />
Die <strong><strong>Pistol</strong>e</strong> ist geladen und<br />
teilgespannt bzw. die V3 gespannt<br />
und die V5 nicht gespannt.<br />
Ladeanzeige<br />
Befindet sich eine Patrone im<br />
Patronenlager, so wird dies<br />
durch den mit einer roten Markierung<br />
versehenen Auszieher<br />
an der rechten Verschlussseite<br />
sicht- und fühlbar angezeigt.<br />
18
Schießen mit Direktabzug (SA)<br />
Die <strong><strong>Pistol</strong>e</strong> ist geladen und teilgespannt<br />
oder der Schlaghebel<br />
(V3) gespannt.<br />
Zum Schießen<br />
- Abzug betätigen.<br />
Spannstück und Schlaghebel<br />
werden freigegeben und die im<br />
Patronenlager befindliche Patrone<br />
wird durch den Schlagbolzen<br />
gezündet.<br />
Schießhaltung<br />
Die beste und stabilste Schießhaltung<br />
beim Schießen mit<br />
Faustfeuerwaffen mit der Aussicht<br />
auf bestmögliche Treffergebnisse<br />
wird im beidhändigen<br />
Anschlag erzielt.<br />
Schießen mit Spannabzug (DA)<br />
Beim Schießen mit Spannabzug<br />
ist der Schlaghebel vor dem<br />
Schießen nicht gespannt (<strong><strong>Pistol</strong>e</strong><br />
<strong>P2000</strong> V5) oder zuvor entspannt<br />
(<strong>P2000</strong> V3). Ausnahme<br />
<strong>P2000</strong> V1, V2 + V4 (CDA). Hier ist<br />
das Spannstück permanent<br />
gespannt. Bei einem Anzündversager<br />
kann über die DA-<br />
Funktion der Schlaghebel erneut<br />
gespannt und ausgelöst werden.<br />
Durch Betätigen des Abzugs<br />
werden zuerst Spannstück und/<br />
oder Schlaghebel gespannt und<br />
anschließend ausgelöst.<br />
Rechtsschütze, beidhändiger<br />
Anschlag<br />
Linksschütze, beidhändiger<br />
Anschlag<br />
19
Magazin entnehmen<br />
Der Magazinhalter befindet sich<br />
unterhalb des Abzugbügels am<br />
Griffstück.<br />
Er kann von Rechts- und Linksschützen<br />
bevorzugt mit dem<br />
Zeigefinger oder mit dem Daumen<br />
der Schießhand betätigt<br />
werden.<br />
Magazinhalter betätigen mit<br />
dem Zeigefinger der Schießhand<br />
Erneutes Laden bei leergeschossenem<br />
Magazin<br />
Nach Abgabe des letzten<br />
Schusses wird der Verschluss<br />
durch den Verschlussfanghebel<br />
in hinterer Stellung gehalten.<br />
Zum Laden<br />
- Magazinhalter nach unten<br />
drücken und leeres Magazin<br />
entnehmen.<br />
- Gefülltes Magazin einführen,<br />
bis der Magazinhalter einrastet.<br />
- Verschlussfanghebel nach unten<br />
drücken (siehe Bild).<br />
Der Verschluss wird freigegeben<br />
und schnellt durch die Kraft der<br />
Schließfeder nach vorne. Dabei<br />
wird eine Patrone zugeführt.<br />
Die <strong><strong>Pistol</strong>e</strong> ist geladen.<br />
Verschlussfanghebel nach unten<br />
drücken<br />
Magazinhalter betätigen mit<br />
dem Daumen der Schießhand<br />
20
Entspannen<br />
Nach dem Durchladen oder<br />
nach Abgabe eines Schusses<br />
bleibt das Spannstück oder der<br />
Schlaghebel (V3) gespannt.<br />
Die <strong><strong>Pistol</strong>e</strong> ist mit der Entspannklinke<br />
zu entspannen.<br />
Zum Entspannen<br />
- Entspannhebel nach unten drücken<br />
bis Spannstück/Schlaghebel<br />
entspannt (siehe Bild).<br />
Dabei wird der Schlaghebel<br />
von der Fangklinke hinterstellt<br />
und kann den Schlagbolzen<br />
nicht berühren.<br />
Entladen der <strong><strong>Pistol</strong>e</strong><br />
- Magazinhalter nach unten drücken<br />
und Magazin entnehmen.<br />
- Verschluss bis zum Anschlag<br />
zurückziehen. Dabei wird die<br />
Patrone ausgeworfen.<br />
- Verschlussfanghebel nach oben<br />
drücken.<br />
- Prüfen und sicherstellen, dass<br />
das Patronenlager frei ist.<br />
- Verschluss durch Niederdrücken<br />
des Verschlussfanghebels<br />
freigeben und vorschnellen<br />
lassen.<br />
- <strong><strong>Pistol</strong>e</strong>n <strong>P2000</strong> und <strong>P2000</strong> V3,<br />
grundsätzlich mit der Entspannklinke<br />
entspannen.<br />
- <strong><strong>Pistol</strong>e</strong>n V1, V2 und V3 bleiben<br />
permanent teilgespannt.<br />
Entspannen<br />
21
Füllen und Entleeren des<br />
Magazins<br />
Zum Füllen des Magazins<br />
- Magazin umfassen und<br />
- Patronen mit dem Patronenboden<br />
voraus unter die Magazinlippen<br />
schieben.<br />
Kontrollöffnungen an der Rückseite<br />
des Magazins ermöglichen<br />
die Füllstandskontrolle.<br />
Zum Entleeren des Magazins<br />
Patronen nach vorne aus dem<br />
Magazin schieben und aufnehmen.<br />
Magazin füllen<br />
Magazin füllen mit Magazinfüller<br />
Hinweis:<br />
Es stehen Magazine für 13 Patronen und für 16 Patronen zur Verfügung.<br />
Beschädigte, verbeulte oder verschmutzte Patronen dürfen nicht in<br />
das Magazin eingefüllt werden.<br />
22
Pflege<br />
Die <strong>P2000</strong> lässt sich ohne Werkzeug<br />
in die Hauptbaugruppen zerlegen.<br />
Pflegemittel und Geräte<br />
Zum Reinigen und Pflegen der<br />
<strong><strong>Pistol</strong>e</strong> werden verwendet:<br />
- handelsübliches Waffenreinigungsgerät<br />
für Kaliber 9 mm,<br />
- Reinigungsdochte und Putzlappen,<br />
- chlor- und säurefreie Reinigungs-<br />
und Konservierungsmittel.<br />
Reinigen Sie nicht mit<br />
- Metallgegenständen,<br />
- Kunststoffen, z. B. Nylon, Perlon<br />
o. ä.,<br />
- Wasser.<br />
Pflegearbeiten<br />
Hinweis: Regelmäßige Reinigung<br />
und Pflege sowie Inspektion erhalten<br />
die Funktionssicherheit und<br />
erhöhen die Lebensdauer der <strong><strong>Pistol</strong>e</strong>.<br />
Normalreinigung<br />
Die Normalreinigung ist nach jedem<br />
Schießen durchzuführen.<br />
- Prüfen und sicherstellen, dass<br />
das Patronenlager frei ist.<br />
- <strong><strong>Pistol</strong>e</strong> zerlegen wie auf Seite<br />
24/25 beschrieben.<br />
- Verschmutzte Teile und Flächen<br />
an Griffstück und Verschluss mit<br />
Reinigungsbürste und Putzlappen<br />
reinigen und anschließend<br />
leicht einölen.<br />
- Rohr mit ölgetränkter Reinigungsbürste<br />
mehrfach durchziehen,<br />
danach mit sauberen Reinigungsdochten<br />
durchziehen und<br />
anschließend innen und außen<br />
leicht einölen.<br />
- Magazin und Zubringer reinigen<br />
und leicht einölen.<br />
- <strong><strong>Pistol</strong>e</strong> wieder zusammenbauen<br />
wie auf Seite 26 beschrieben.<br />
- Nach dem Reinigen und Zusammenbauen<br />
<strong><strong>Pistol</strong>e</strong> auf Gängigkeit<br />
und einwandfreie Funktion<br />
prüfen.<br />
Hauptreinigung<br />
Eine Hauptreinigung ist nach größeren<br />
Schusszahlen oder wenn<br />
die <strong><strong>Pistol</strong>e</strong> widrigen Umweltbedingungen<br />
ausgesetzt war, wie<br />
folgt durchzuführen:<br />
- Normalreinigung durchführen,<br />
zusätzlich<br />
- Magazin zerlegen und Magazingehäuse<br />
innen sowie die Außenflächen<br />
des Zubringers reinigen<br />
und leicht einölen.<br />
Zum Zerlegen des Magazins Einsatz<br />
im Magazinboden eindrücken,<br />
Magazinboden nach vorne<br />
abziehen und Magazinteile entnehmen.<br />
- Schlagbolzen auf Gängigkeit<br />
prüfen und ggf. Schlagbolzenführung<br />
reinigen.<br />
- Nach dem Reinigen und Zusammenbauen<br />
<strong><strong>Pistol</strong>e</strong> auf Gängigkeit<br />
und einwandfreie Funktion<br />
prüfen.<br />
Hinweis: Die Hauptreinigung erfolgt<br />
nur durch waffentechnisches<br />
Personal (Waffenmechaniker).<br />
23
Zerlegen der <strong><strong>Pistol</strong>e</strong><br />
Zum Reinigen wird die <strong><strong>Pistol</strong>e</strong> in<br />
Baugruppen zerlegt.<br />
Vor dem Zerlegen ist sicherzustellen,<br />
dass das Magazin leer<br />
und das Patronenlager frei ist.<br />
Die <strong><strong>Pistol</strong>e</strong> wird ohne Werkzeug<br />
zerlegt und zusammengebaut.<br />
Jede Gewaltanwendung ist zu<br />
vermeiden.<br />
Die <strong><strong>Pistol</strong>e</strong> darf nicht weiter<br />
zerlegt werden als nachfolgend<br />
beschrieben.<br />
- Magazin entnehmen,<br />
- Verschluss bis zum Anschlag<br />
nach hinten ziehen und prüfen,<br />
ob das Patronenlager frei ist,<br />
- Verschluss nach vorne gleiten<br />
lassen,<br />
- <strong><strong>Pistol</strong>e</strong> so in die Hand nehmen,<br />
dass der Daumen die Griffstückhinterseite<br />
umfasst und<br />
die Finger auf der Verschlussoberseite<br />
liegen,<br />
- Verschluss nach hinten ziehen,<br />
bis die Aussparung für den<br />
Verschlussfanghebel (links am<br />
Verschluss) mit dem vorderen<br />
Ende des Verschlussfanghebels<br />
übereinstimmt (siehe<br />
Bild).<br />
Lage der Aussparung zum Verschlussfanghebel<br />
24
- Mit der anderen Hand die Achse<br />
des Verschlussfanghebels<br />
(siehe Bild) von rechts eindrücken<br />
und Verschlussfanghebel<br />
nach links herausziehen.<br />
Lage Achse Verschlussfanghebel<br />
- Verschluss nach vorne vom<br />
Griffstück abnehmen (siehe<br />
Bild).<br />
Verschluss abnehmen<br />
- Schließfeder, vollst. etwas nach<br />
vorne drücken, nach oben anheben<br />
und aus dem Verschluss<br />
entnehmen (siehe Bild).<br />
- Rohr anheben, nach vorne<br />
schieben und nach hinten aus<br />
dem Verschluss herausnehmen.<br />
Hinweis: Verschlussfanghebel<br />
rechts muss nicht ausgebaut<br />
werden.<br />
Schließfeder, vollst. entnehmen<br />
25
Zusammenbauen der<br />
<strong><strong>Pistol</strong>e</strong><br />
- Rohr in den Verschluss einlegen<br />
und nach hinten schieben,<br />
bis es mit dem Verschluss verriegelt.<br />
- Schließfeder, vollst. in den Verschluss<br />
unter das Rohr einsetzen.<br />
Dabei das vordere Ende der<br />
Schließfederführung gegen den<br />
Druck der Schließfeder durch<br />
die Bohrung an der Vorderseite<br />
des Verschlusses schieben.<br />
- Schließfederführung an der<br />
Vorderseite der Steuerfläche<br />
des Rohres abstützen (Lage<br />
Schließfederführung - Rohr<br />
siehe Bild).<br />
- Griffstück von hinten in die<br />
Führungsnuten des Verschlusses<br />
einschieben (siehe Bild),<br />
bis die Aussparung für den Verschlussfanghebel<br />
mit der Achsenbohrung<br />
übereinstimmt.<br />
- Verschlussfanghebel von links<br />
in das Griffstück eindrücken.<br />
- Nach dem Zusammenbauen<br />
<strong><strong>Pistol</strong>e</strong> auf Gängigkeit und einwandfreie<br />
Funktion prüfen.<br />
Schließfederführung einsetzen<br />
Lage Schließfederführung-Rohr<br />
Griffstück einschieben<br />
26
Griffrücken auswechseln<br />
Vier unterschiedlich hohe Griffrücken<br />
erlauben eine optimale<br />
Anpassung an verschiedene<br />
Handgrößen. Zum Wechseln des<br />
Griffrückens Spannstift nach der<br />
Seite mittels Durchtreiber x 2,8<br />
mm austreiben.<br />
Achtung, der Griffrücken steht<br />
unter Federdruck der Schlagfeder.<br />
Den einzuwechselnden Griffrücken<br />
von unten nach oben in<br />
die Führung im Griffstück aufschieben.<br />
Die auf der Schlagstange<br />
geführte Schlagfeder ist<br />
dabei im Gegenlager am Griffrücken<br />
geführt.<br />
Griffrücken gegen den Federdruck<br />
der Schlagfeder in die<br />
Endposition hochdrücken und<br />
Spannstift seitlich eintreiben.<br />
Griffrücken auswechseln<br />
27
m Störungen und Fehler, Ursachen, Beseitigung<br />
Bei auftretenden Störungen ist die <strong><strong>Pistol</strong>e</strong><br />
solange als geladen zu betrachten, bis der<br />
tatsächliche Zustand festgestellt ist.<br />
Bei der Beseitigung von Störungen sind die<br />
Sicherheitsmaßnahmen dieser Beschreibung<br />
zu beachten.<br />
Störung, Fehler Ursache Beseitigung<br />
Patrone wird nicht Munitionsfehler (Versager) Entladen und prüfen, ob Rohr frei ist.<br />
gezündet<br />
Nicht abgefeuerte Patrone nicht<br />
wieder verwenden.<br />
Schlagbolzen schwergängig <strong><strong>Pistol</strong>e</strong> zur Instandsetzung abgeben<br />
Schlagbolzen beschädigt<br />
<strong><strong>Pistol</strong>e</strong> zur Instandsetzung abgeben<br />
oder gebrochen<br />
Schlaghebelfeder defekt<br />
<strong><strong>Pistol</strong>e</strong> zur Instandsetzung abgeben<br />
Verschluss hat nach Hülse klemmt im Patronenlager, Entladen, dabei Verschluss<br />
dem Schuss nicht weil sie deformiert oder das zurückziehen, damit Hülse<br />
geöffnet Patronenlager verschmutzt ist ausgezogen wird; ggf. Patronen-<br />
Munitionsfehler<br />
lager reinigen<br />
Hülse wird nicht Verschlussrücklauf zu gering Entladen, dabei Verschluss<br />
ausgeworfen<br />
zurückziehen und Hülse entfernen.<br />
Gängigkeit prüfen und ggf.<br />
Patronenlager reinigen<br />
Falsche Munitionslaborierung Andere Munition verwenden<br />
Auszieher, Auszieherfeder<br />
<strong><strong>Pistol</strong>e</strong> zur Instandsetzung<br />
oder Auswerfer beschädigt abgeben<br />
Patrone wird nicht Patronenlager verschmutzt Entladen und reinigen<br />
eingeführt Patrone deformiert Patrone auswechseln<br />
Schließfeder defekt<br />
<strong><strong>Pistol</strong>e</strong> zur Instandsetzung abgeben<br />
Patrone wird nicht Magazinfeder defekt Magazin zur Instandsetzung abgeben<br />
zugeführt<br />
Magazin oder Magazinlippen<br />
beschädigt<br />
Magazin auswechseln<br />
Verschluss bleibt Magazinfeder defekt <strong><strong>Pistol</strong>e</strong> zur Instandsetzung abgeben<br />
nach dem letzten Verschlussrücklauf zu gering Gängigkeit prüfen und<br />
Schuss nicht<br />
ggf. Patronenlager reinigen<br />
geöffnet<br />
Verschlussfanghebel beschädigt <strong><strong>Pistol</strong>e</strong> zur Instandsetzung abgeben<br />
Falsche Munitionslaborierung Andere Munition verwenden<br />
Formfeder für Verschlussfang- <strong><strong>Pistol</strong>e</strong> zur Instandsetzung abgeben<br />
hebel defekt<br />
Trefferlage nach Korn oder Visier verschoben <strong><strong>Pistol</strong>e</strong> zur Instandsetzung abgeben<br />
der Seite verändert<br />
Trefferlage nach Korn oder Visier beschädigt <strong><strong>Pistol</strong>e</strong> zur Instandsetzung abgeben<br />
der Höhe verändert Andere Munitionssorte <strong><strong>Pistol</strong>e</strong> zur Instandsetzung abgeben<br />
Hinweis: Die Beseitigung von Störungen erfolgt grundsätzlich nur durch waffentechnisches<br />
Personal (Waffenmechaniker).<br />
28
Visier, Justierung<br />
Die Visierung besteht aus einem<br />
Visier mit Rechteckkimme und<br />
Balkenkorn.<br />
Sie ist mit dauerhaften Kontrastpunkten<br />
versehen und ermöglicht<br />
dem Schützen eine schnelle<br />
Zielerfassung auch bei ungünstigen<br />
Lichtverhältnissen.<br />
Seitenjustierung<br />
Das Justieren nach der Seite erfolgt<br />
durch seitliches Verschieben<br />
des Visiers und/oder des<br />
Korns mittels Hammer und Korntreiber.<br />
Höhenjustierung<br />
Das Justieren nach der Höhe erfolgt<br />
durch Auswechseln des<br />
Korns mit anderer Kornhöhe.<br />
Die jeweilige Kornhöhe ist auf<br />
der Unterseite des Korns eingraviert.<br />
Hinweis: Bei Veränderung der<br />
Kornhöhe um 0,2 mm beträgt<br />
die Höhenabweichung der Treffpunktlage<br />
auf 25 m Zielentfernung<br />
ca. 3,6 cm.<br />
29
Teileliste <strong>P2000</strong><br />
Pos. Benennung. . . . . . . . . . . . . . . . Ident-Nr.<br />
Baugruppe Rohr<br />
1 Rohr. . . . . . . . . . . . . . . . . . . . . 218550<br />
– Schließfeder, vollst. (2–5) . . . . . 209258<br />
2 Schließfederführung. . . . . . . . . 209307<br />
3 Anschlaghülse . . . . . . . . . . . . . 215932<br />
4 Schließfeder. . . . . . . . . . . . . . . 215852<br />
5 Stützscheibe zur Schließfeder<br />
. . . . . . . . . . . . . . . . . . . . 215831<br />
Baugruppe Verschluss<br />
– Verschluss, vollst. (6–16) . . . . . 209257<br />
6 Verschluss . . . . . . . . . . . . . . . . 209293<br />
7 Korn (5,9 mm) . . . . . . . . . . . . . 209300<br />
7.1 Korn (6,1 mm) . . . . . . . . . . . . . 209301<br />
7.2 Korn (6,3 mm) . . . . . . . . . . . . . 209302<br />
7.3 Korn (6,5 mm) . . . . . . . . . . . . . 209303<br />
7.4 Korn (6,7 mm) . . . . . . . . . . . . . 209304<br />
7.5 Korn (6,9 mm) . . . . . . . . . . . . . 209305<br />
8 Visier . . . . . . . . . . . . . . . . . . . . 209284<br />
9 Dornbolzen zum Auszieher . . . . 209294<br />
10 Auszieherfeder . . . . . . . . . . . . . 218315<br />
11 Auszieher . . . . . . . . . . . . . . . . . 218314<br />
12 Spannstift (3 x) . . . . . . . . . . . . 980838<br />
13 Schlagbolzenfeder . . . . . . . . . . 215822<br />
14 Schlagbolzen . . . . . . . . . . . . . . 209295<br />
15 Druckfeder zur Fallsicherung . . 209296<br />
16 Fallsicherung . . . . . . . . . . . . . . 209313<br />
(Schlagbolzensicherung)<br />
Baugruppe Griffstück<br />
– Griffstück, vollst. (17–42) . . . . . 209256<br />
17 Griffstück . . . . . . . . . . . . . . . . . 209259<br />
18 Abzugachse . . . . . . . . . . . . . . . 214154<br />
19 Abzug . . . . . . . . . . . . . . . . . . . 209263<br />
20 Schenkelfeder zum Abzug . . . . 209266<br />
21 Blattfeder zur Auslöseklinke<br />
und Fangklinke. . . . . . . . . . . . . 214167<br />
22 Druckfeder zum Steuerbolzen . 209270<br />
23 Steuerbolzen zur Abzugstange . 209269<br />
24 Abzugstange . . . . . . . . . . . . . . 209260<br />
25 Schlaghebelachse . . . . . . . . . . 209272<br />
26 Auslöse- und Entspannklinke . . 209261<br />
27 Fangklinke . . . . . . . . . . . . . . . . 209273<br />
28 Steuerhebel . . . . . . . . . . . . . . . 209274<br />
29 Zylinderstift . . . . . . . . . . . . . . . 214101<br />
30 Unterbrecher . . . . . . . . . . . . . . 209271<br />
31 Schlaghebel mit Sporn . . . . . . . 209262<br />
32 Spannstück . . . . . . . . . . . . . . . 209265<br />
Pos. Benennung. . . . . . . . . . . . . . . . Ident-Nr.<br />
33 Schenkelfeder zum Schlaghebel 209275<br />
34 Schlagstange . . . . . . . . . . . . . . 209312<br />
35 Schlagfeder . . . . . . . . . . . . . . . 214695<br />
36 Griffrücken -M- (Standard) . . . 209264<br />
36.1 Griffrücken -S- . . . . . . . . . . . . 209253<br />
36.2 Griffrücken -L- . . . . . . . . . . . . 209254<br />
36.3 Griffrücken -XL- . . . . . . . . . . . 209255<br />
37 Spannstift. . . . . . . . . . . . . . . . . 980761<br />
38 Druckfeder zum Magazinhalter<br />
. . . . . . . . . . . . . . . . . . . . 215929<br />
39 Magazinhalter . . . . . . . . . . . . . 214818<br />
40 Formfeder zum Verschlussfanghebel.<br />
. . . . . . . . . . . . . . . . 214171<br />
41 Verschlussfanghebel . . . . . . . . 209267<br />
42 Verschlussfanghebel, rechts . . 209268<br />
Baugruppe Magazin (13 Patronen)<br />
– Magazin, vollst. (43–47) . . . . . . 209251<br />
43 Magazingehäuse . . . . . . . . . . . 209309<br />
44 Zubringer . . . . . . . . . . . . . . . . . 215836<br />
45 Magazinfeder . . . . . . . . . . . . . . 214212<br />
46 Bodenhalter . . . . . . . . . . . . . . . 209311<br />
47 Magazinboden, hoch . . . . . . . . 209314<br />
Baugruppe Magazin (16 Patronen)<br />
– Magazin, vollst. (48–51) . . . . . . 209813<br />
48 Magazingehäuse . . . . . . . . . . . 209814<br />
44 Zubringer . . . . . . . . . . . . . . . . . 215836<br />
49 Magazinfeder . . . . . . . . . . . . . . 215118<br />
50 Bodenhalter . . . . . . . . . . . . . . . 209815<br />
51 Magazinboden, hoch . . . . . . . . 209816<br />
Teileliste <strong>P2000</strong> (V1, V2, V3, V4, V5)<br />
siehe Seite 32.<br />
30
<strong><strong>Pistol</strong>e</strong> <strong>P2000</strong><br />
Explosionsdarstellung<br />
31
Teileliste <strong>P2000</strong> (V1)<br />
(soweit abweichend von <strong>P2000</strong>)<br />
– Griffstück, vollst. . . . . . . . . . . . 209346<br />
17 Griffstück . . . . . . . . . . . . . . . . 209318<br />
26a Auslöseklinke. . . . . . . . . . . . . . 209320<br />
31a Schlaghebel ohne Sporn . . . . . 209321<br />
Teileliste <strong>P2000</strong> (V2)<br />
(soweit abweichend von <strong>P2000</strong>)<br />
– Verschluss, vollst. . . . . . . . . . . 209938<br />
15 Druckfeder zur Fallsicherung . . 209962<br />
– Griffstück, vollst. . . . . . . . . . . . 209317<br />
17 Griffstück . . . . . . . . . . . . . . . . 209318<br />
20 Schenkelfeder zum Abzug . . . . 219441<br />
26a Auslöseklinke. . . . . . . . . . . . . . 209320<br />
31a Schlaghebel ohne Sporn . . . . . 209321<br />
Teileliste <strong>P2000</strong> (V3)<br />
(soweit abweichend von <strong>P2000</strong>)<br />
– Griffstück, vollst. . . . . . . . . . . . 209326<br />
31b Schlaghebel mit Sporn . . . . . . . 209327<br />
(32 + 33 entfällt)<br />
Teileliste <strong>P2000</strong> (V4)<br />
(soweit abweichend von <strong>P2000</strong>)<br />
– Griffstück, vollst. . . . . . . . . . . . 207363<br />
17 Griffstück . . . . . . . . . . . . . . . . 209318<br />
20 Schenkelfeder zum Abzug . . . . 207348<br />
26a Auslöseklinke. . . . . . . . . . . . . . 209320<br />
31a Schlaghebel ohne Sporn . . . . . 209321<br />
Teileliste <strong>P2000</strong> (V5)<br />
(soweit abweichend von <strong>P2000</strong>)<br />
– Verschluss, vollst. . . . . . . . . . . 209697<br />
13 Schlagbolzenfeder . . . . . . . . . . 207696<br />
– Griffstück, vollst. . . . . . . . . . . . 207037<br />
17 Griffstück . . . . . . . . . . . . . . . . 209318<br />
20 Schenkelfeder zum Abzug . . . . 215679<br />
21 Blattfeder zur Fangklinke . . . . 215691<br />
26b Buchse (Auslöseklinke enftällt). 207038<br />
31c Schlaghebel ohne Sporn . . . . . 207036<br />
(32 + 33 entfällt)<br />
35 Schlagfeder . . . . . . . . . . . . . . . 207673<br />
32
m Before handling the pistol, read<br />
and mind the safety instructions<br />
<strong>P2000</strong> <strong>Pistol</strong><br />
+ Variants 1–5<br />
Calibre 9 mm x 19<br />
35
36<br />
<strong>P2000</strong> <strong>Pistol</strong><br />
with magazine for 16 cartridges<br />
-L-back strap
TABLE OF CONTENTS<br />
Page<br />
m Safety Notes for the handling of pistols . . . . . . . . . . . . . . . . . . . . . 38<br />
Preliminary note . . . . . . . . . . . . . . . . . . . . . . . . . . . . . . . . . . . . . . . . . . . . 40<br />
Description . . . . . . . . . . . . . . . . . . . . . . . . . . . . . . . . . . . . . . . . . . . . . . . . . 41<br />
Technical Data . . . . . . . . . . . . . . . . . . . . . . . . . . . . . . . . . . . . . . . . . . . . . 44<br />
Component overview . . . . . . . . . . . . . . . . . . . . . . . . . . . . . . . . . . . . . . . . 45<br />
Operating controls, designations . . . . . . . . . . . . . . . . . . . . . . . . . . . . . . 46<br />
Function . . . . . . . . . . . . . . . . . . . . . . . . . . . . . . . . . . . . . . . . . . . . . . . . . . . 48<br />
Checking. . . . . . . . . . . . . . . . . . . . . . . . . . . . . . . . . . . . . . . . . . . . . . . . . . . 49<br />
Checking before use . . . . . . . . . . . . . . . . . . . . . . . . . . . . . . . . . . . . . . . . . 49<br />
Checking after use . . . . . . . . . . . . . . . . . . . . . . . . . . . . . . . . . . . . . . . . . . . 49<br />
Functional test of slide with receiver . . . . . . . . . . . . . . . . . . . . . . . . . . . . . 49<br />
Functional test of the trigger with safety. . . . . . . . . . . . . . . . . . . . . . . . . . . 49<br />
Handling and operation. . . . . . . . . . . . . . . . . . . . . . . . . . . . . . . . . . . . . . . 50<br />
Principles of handling and operation . . . . . . . . . . . . . . . . . . . . . . . . . . . . . 50<br />
Preparation for firing . . . . . . . . . . . . . . . . . . . . . . . . . . . . . . . . . . . . . . . . . . 50<br />
Loading of the pistol . . . . . . . . . . . . . . . . . . . . . . . . . . . . . . . . . . . . . . . . . . 50<br />
Firing with Single Action trigger . . . . . . . . . . . . . . . . . . . . . . . . . . . . . . . . . 51<br />
Firing with Double Action trigger . . . . . . . . . . . . . . . . . . . . . . . . . . . . . . . . 51<br />
Firing position . . . . . . . . . . . . . . . . . . . . . . . . . . . . . . . . . . . . . . . . . . . . . . . 51<br />
Removal of magazine . . . . . . . . . . . . . . . . . . . . . . . . . . . . . . . . . . . . . . . . . 52<br />
Reloading when magazine is empty . . . . . . . . . . . . . . . . . . . . . . . . . . . . . 52<br />
Decocking . . . . . . . . . . . . . . . . . . . . . . . . . . . . . . . . . . . . . . . . . . . . . . . . . . 53<br />
Unloading of pistol . . . . . . . . . . . . . . . . . . . . . . . . . . . . . . . . . . . . . . . . . . . 53<br />
Filling and emptying of the magazine . . . . . . . . . . . . . . . . . . . . . . . . . . . . 54<br />
Maintenance . . . . . . . . . . . . . . . . . . . . . . . . . . . . . . . . . . . . . . . . . . . . . . . 55<br />
Cleaning material and kits . . . . . . . . . . . . . . . . . . . . . . . . . . . . . . . . . . . . . 55<br />
Cleaning works . . . . . . . . . . . . . . . . . . . . . . . . . . . . . . . . . . . . . . . . . . . . . . 55<br />
Normal cleaning . . . . . . . . . . . . . . . . . . . . . . . . . . . . . . . . . . . . . . . . . . . . . 55<br />
Main cleaning . . . . . . . . . . . . . . . . . . . . . . . . . . . . . . . . . . . . . . . . . . . . . . . 55<br />
Disassembly of the pistol . . . . . . . . . . . . . . . . . . . . . . . . . . . . . . . . . . . . 56<br />
Assembly of the pistol . . . . . . . . . . . . . . . . . . . . . . . . . . . . . . . . . . . . . . . 58<br />
Replacement of backstrap . . . . . . . . . . . . . . . . . . . . . . . . . . . . . . . . . . . . 59<br />
Trouble shooting chart . . . . . . . . . . . . . . . . . . . . . . . . . . . . . . . . . . . . . . . 60<br />
Sights, Adjustment . . . . . . . . . . . . . . . . . . . . . . . . . . . . . . . . . . . . . . . . . . 61<br />
Windage adjustment . . . . . . . . . . . . . . . . . . . . . . . . . . . . . . . . . . . . . . . . . . 61<br />
Height adjustment . . . . . . . . . . . . . . . . . . . . . . . . . . . . . . . . . . . . . . . . . . . 61<br />
Parts list . . . . . . . . . . . . . . . . . . . . . . . . . . . . . . . . . . . . . . . . . . . . . . . . . . . 62<br />
Exploded view . . . . . . . . . . . . . . . . . . . . . . . . . . . . . . . . . . . . . . . . . . . . . . 63<br />
Variant Parts List . . . . . . . . . . . . . . . . . . . . . . . . . . . . . . . . . . . . . . . . . . . . 64<br />
37
38<br />
m Safety Notes for the handling of pistols<br />
- When handling pistols, special<br />
caution is necessary, as position<br />
and direction of the pistol<br />
can be changed very easily.<br />
- Carefully read this operation<br />
manual before handling the<br />
pistol. Only use the pistol if you<br />
have understood this manual.<br />
- Observe all notes regarding<br />
handling and operation. Disregarding<br />
can cause danger to<br />
life and limb.<br />
- Do not handle the pistol in<br />
case you have consumed alcohol,<br />
drugs or medications, or<br />
if you feel physically unwell.<br />
- Before handling, in case of<br />
troubles and before cleaning it<br />
has to be checked whether<br />
the pistol is unloaded<br />
(cartridge chamber free)<br />
the barrel is free of obstructions<br />
and<br />
the magazine is empty.<br />
- When giving or taking the pistol,<br />
the slide must always be<br />
open.<br />
- Always treat the pistol as if it<br />
were loaded and ready to fire.<br />
- Never point the pistol at anyone<br />
during handling or practice.<br />
Always point the weapon into a<br />
safe direction.<br />
- Keep your finger off the trigger<br />
while loading, unloading, drawing<br />
or otherwise handling the<br />
pistol. Always place the trigger<br />
finger along the outside of the<br />
trigger guard. The trigger may<br />
only be operated when your<br />
sights are aimed at the target.<br />
- Never use force when handling,<br />
disassembling, cleaning<br />
and reassembling the pistol.<br />
- Disassemble the pistol only as<br />
far as described in this manual.<br />
- Always wear protective goggles<br />
when firing. When firing<br />
your eyes are endangered by<br />
ejected cartridge cases or cartridge<br />
cases bounced off walls.<br />
- Always wear hearing protection<br />
when using the pistol.<br />
- Only use factory loaded cartridges<br />
of the correct calibre.<br />
- Mind that during firing the pistol’s<br />
slide moves back with a<br />
high velocity.<br />
Hold the pistol in such a way<br />
that your hands are away from<br />
the rearward moving slide in order<br />
to avoid injury.<br />
CAUTION: Do not grasp over<br />
the muzzle and mind that the<br />
muzzle area is free when firing.<br />
- Store the pistol separately<br />
from the ammunition and<br />
beyond the reach of unauthorized<br />
persons (especially children).<br />
- The proven design of the pistol<br />
ensures maximum safety for<br />
the shooter.
The <strong>P2000</strong> is equipped with a<br />
drop safety in order to prevent<br />
accidental shots when the pistol<br />
is dropped or receives a blow.<br />
This provides an utmost degree<br />
of drop safety.<br />
- Extraordinary conditions as<br />
e.g. bad shocks or heavy<br />
drops may adversely affect the<br />
safety. After such events the<br />
pistol must be checked by the<br />
manufacturers.<br />
- Heckler & Koch do not assume<br />
any liability for events<br />
due to disregarding this manual,<br />
wrong handling, negligence,<br />
improper treatment,<br />
unauthorized part exchange<br />
and other manipulations on<br />
the pistol.<br />
- This operator’s manual is included<br />
in the scope of supply of<br />
the pistol and always has to be<br />
passed on along with the pistol.<br />
holster with your hand when<br />
you have to run or in case you<br />
carry out fast and uncontrolled<br />
movements. The pistol’s mass<br />
is relatively high as compared<br />
to the holster mass, which<br />
might cause the pistol to drop<br />
out of the holster in such cases.<br />
Accessories:<br />
- If you use holsters, mind that<br />
the holster must suit the pistol<br />
and not vice versa.<br />
- Mind that at all times the pistol<br />
is secured in the holster in<br />
such a way that it will not drop<br />
out under any circumstances.<br />
- Always check your holster, as<br />
ageing material, weapon oil,<br />
body temperature or extended<br />
use of the holster may adversely<br />
affect its characteristics.<br />
- Always secure the pistol in the<br />
39
Preliminary Note:<br />
1. Perfect functioning and long<br />
service life of the <strong>P2000</strong> can<br />
only be ensured by a correct<br />
handling, operation and maintenance<br />
subject to the instructions<br />
of this manual.<br />
2. The indications “right”, “left”,<br />
“at the front” or “at the back”<br />
are related to the pistol held<br />
into the direction of fire.<br />
3. Each description of pistol<br />
parts and each work is in general<br />
only specified once.<br />
Therefore, according to the<br />
extent, there is a reference to<br />
already existing descriptions<br />
of pistol parts and works in<br />
other sections.<br />
4. Unless there are particular disassembly<br />
notes, assembly<br />
always takes place in the reverse<br />
order of disassembly.<br />
5. Use only original HK spare<br />
parts<br />
Otherwise the HK liability will<br />
no longer be valid.<br />
When ordering spare parts<br />
please address item and<br />
ident. numbers as well as the<br />
designations.<br />
6. Please inform Heckler &<br />
Koch GMBH about all modifications<br />
desirable resp. supplementary<br />
suggestions to<br />
this manual.<br />
40
Description<br />
The <strong>P2000</strong> pistol, cal. 9 mm x 19,<br />
is a recoil operated weapon with<br />
a locked breech and automatic<br />
hammer and firing pin safety. After<br />
each shot fired, a fresh round<br />
is loaded into the chamber until<br />
the magazine is empty. After<br />
that, the slide is locked in the<br />
open position.<br />
The ambidextrous magazine releases<br />
and slide catches allow<br />
the fastest possible magazine<br />
change. At the rear of the receiver,<br />
the decocking latch is arranged<br />
in such a way that both right<br />
and lefthanded shooters can<br />
operate it equally easily and instinctively<br />
using the thumb of<br />
the firing hand.<br />
Optimum hand position is ensured<br />
by the ideal grip angle together<br />
with the four exchangeable<br />
back strap inserts of different<br />
<strong>P2000</strong> <strong>Pistol</strong><br />
Equipment<br />
possibilities<br />
Model<br />
Hammer with spur<br />
Hammer without spur<br />
Trigger partially cocked<br />
<strong>P2000</strong> P p P P p P<br />
<strong>P2000</strong> (V1) p P P p P P<br />
<strong>P2000</strong> (V2) p P P p P P<br />
<strong>P2000</strong> (V3) P p P p P<br />
<strong>P2000</strong> (V4) p P P p P P<br />
heights. These enable a perfect<br />
connection of hand to weapon<br />
for each hand size. The receiver<br />
is made of high grade, fibre-reinforced<br />
polymer plastics. The<br />
forward part of the receiver carries<br />
integrated supports for aiming<br />
units. An open, rectangular<br />
rear sight notch with contrast<br />
points allows fast and accurate<br />
target acquisition. Magazines for<br />
13 cartridges and for 16 cartridges<br />
are available.<br />
The modular trigger and decocking<br />
latch system allows the<br />
selection of a variety of trigger<br />
systems and operating controls.<br />
With decocking latch<br />
<strong>P2000</strong> (V5) P P P<br />
Without decocking latch<br />
Trigger mode<br />
Single/Double Action (SA/DA)<br />
Trigger mode<br />
Combat Defence Action (CDA)<br />
Trigger mode<br />
Double Action Only (DAO)<br />
P Standard<br />
p Option<br />
41
Modular Trigger Variants<br />
<strong>P2000</strong> – Safety trigger with concealed<br />
cocking piece in the<br />
hammer with spur for firing in<br />
the SA/DA modes. Central decocking<br />
latch.<br />
Note: Further optional equipment<br />
possibilities see page 9.<br />
<strong>P2000</strong><br />
<strong>P2000</strong> (V1) – Safety trigger with<br />
concealed cocking piece in the<br />
hammer without spur. Constant<br />
trigger pull (Combat Defence<br />
Action 20 N) from the first round<br />
to the last. No decocking.<br />
<strong>P2000</strong> (V2) – like <strong>P2000</strong> (V1) but<br />
CDA trigger pull 32.5 N.<br />
<strong>P2000</strong> (V4) – like <strong>P2000</strong> (V1) but<br />
CDA trigger pull 27.5 N.<br />
<strong>P2000</strong> (V5) – Double Action<br />
Only trigger (DAO), trigger pull<br />
35 N.<br />
<strong>P2000</strong> (V3) – Conventional<br />
SA/DA trigger and hammer with<br />
spur (similar to P10). Central decocking<br />
latch.<br />
<strong>P2000</strong> (V1, V2, V4, V5)<br />
P 2000 (V3) (hammer cocked)<br />
42
Exchangeable back straps<br />
Four easily exchangeable back<br />
strap inserts of different heights<br />
enable a perfect adaptation of the<br />
weapon to differing hand sizes.<br />
Replacement of the back strap<br />
inserts may be carried out by<br />
ordnance personnel only.<br />
S M L XL<br />
Back straps<br />
Magazine floor plates<br />
Two magazine floor plates of different heights are available<br />
<strong>P2000</strong> magazine floor plates high and low<br />
43
Technical Data<br />
Dimensions: <strong>P2000</strong> <strong>P2000</strong> (V1) <strong>P2000</strong> (V2) <strong>P2000</strong> (V3) <strong>P2000</strong> (V4) <strong>P2000</strong> (V5)<br />
Calibre 9 mm x 19 9 mm x 19 9 mm x 19 9 mm x 19 9 mm x 19 9 mm x 19<br />
Overall length 179 mm 174 mm 174 mm 179 mm 174 mm 174 mm<br />
Overall width 34 mm 34 mm 34 mm 34 mm 34 mm 34 mm<br />
Overall height<br />
Magazine floor plate,<br />
high 138 mm 138 mm 138 mm 138 mm 138 mm 138 mm<br />
Magazine floor plate,<br />
low 128 mm 128 mm 128 mm 128 mm 128 mm 128 mm<br />
Barrel length 93 mm 93 mm 93 mm 93 mm 93 mm 93 mm<br />
Twist, right hand 250 mm 250 mm 250 mm 250 mm 250 mm 250 mm<br />
Sight radius 141,5 mm 141,5 mm 141,5 mm 141,5 mm 141,5 mm 141,5 mm<br />
Weights:<br />
<strong>Pistol</strong> with empty<br />
magazine<br />
Magazine, empty (13)<br />
Magazine, empty (16)<br />
approx. 700 g approx. 700 g approx. 700 g approx. 700 g approx. 700 g approx. 700 g<br />
approx. 80 g approx. 80 g approx. 80 g approx. 80 g approx. 80 g approx. 80 g<br />
approx. 104 g approx. 104 g approx. 104 g approx. 104 g approx. 104 g approx. 104 g<br />
Other Data:<br />
Trigger pull<br />
– Weapon partially<br />
cocked approx. 20 N approx. 20 N approx. 32,5 N –– approx. 27,5 N ––<br />
– Weapon cocked –– –– –– approx. 20 N –– ––<br />
– Weapon decocked approx. 50 N — ** — ** approx. 50 N –– approx. 35 N<br />
Trigger travel<br />
– Weapon partially<br />
cocked *** approx. 13,5 mm approx. 13,5 mm approx. 13,5 mm –– approx. 13,5 mm ––<br />
– Weapon cocked –– –– –– approx. 7 mm<br />
– Weapon decocked approx. 13,5 mm — — approx. 13,5 mm — approx. 13,5 mm<br />
Magazinesfor 13 Cartridges13 Cartridges13 Cartridges13 Cartridges13 Cartridges13 Cartridges<br />
Magazinesor 16 Cartridges16 Cartridges16 Cartridges16 Cartridges16 Cartridges16 Cartridges<br />
Sights<br />
Open rectangular notch rear sight with contrast points<br />
Barrel profile Six-sided polygon<br />
Bullet energy - E0 - Approx. 500 Joule *<br />
*** Reference ammunition acc. to technical guidelines<br />
*** In the event of a misfire, the hammer may be cocked and released newly via the trigger by Double<br />
Action function also with P 2000 V1, V2 + V4 (CDA).<br />
*** For strings of rapid fire, it is not necessary to release the trigger to the starting position. It will be sufficient<br />
to release the trigger approx. 7 mm to fire the next shot.<br />
44
Component overview:<br />
1<br />
2<br />
3<br />
4<br />
1 Slide, compl.<br />
2 Barrel with recoil spring,<br />
compl.<br />
3 Receiver, compl. with slide<br />
catches<br />
4 Magazine, compl.<br />
45
Operating Controls, Designations<br />
1 2 3 4 5 6<br />
7<br />
9 8<br />
1 Slide<br />
2 Proof firing stamp<br />
3 Calibre designation<br />
4 Weapon serial number<br />
5 Slide release<br />
6 Hammer<br />
7 Decocking latch<br />
8 Magazine release<br />
9 Trigger<br />
46
10 11 12 13<br />
16 15 14<br />
17<br />
10 Rear sight<br />
11 Extractor<br />
12 Barrel<br />
13 Front sight<br />
14 Mounting rail for aiming units<br />
15 Trigger guard<br />
16 Receiver<br />
17 Magazine<br />
47
Function<br />
<strong>P2000</strong> <strong>Pistol</strong><br />
loaded and decocked<br />
48<br />
Pulling back the trigger actuates the<br />
cocking latch and the hammer, causing<br />
them to strike forward.<br />
The cartridge is ignited by the hammer<br />
striking the primer.<br />
Upon ignition of the cartridge, as a<br />
reaction to bullet movement the force-locked<br />
barrel-slide group receives<br />
an impulse and, still locked, moves<br />
backwards against the force of<br />
the recoil spring. After a short joint<br />
recoil travel of barrel and slide the<br />
barrel is unlocked from the slide.<br />
The barrel tilts due to the control surfaces<br />
on the barrel shoulder and recoil<br />
spring guide.<br />
The slide recoils on its own, extracts<br />
and ejects the spent case, cocks the<br />
cocking piece and hammer (V3). The<br />
recoil is limited and dampened by<br />
the stop sleeve.<br />
Upon completion of the recoil, the<br />
compressed recoil spring pushes<br />
the slide forwards again. A cartridge<br />
is taken along from the magazine<br />
and introduced into the chamber.<br />
During forward movement of the slide,<br />
the hammer also returns forward<br />
to its rest position.<br />
A short time before the end of the<br />
forward travel of the slide, the barrel<br />
is pushed upwards via the control<br />
surfaces of the recoil spring guide<br />
and locked to the slide.
Checking<br />
Checking before use:<br />
Before use, make sure the weapon is<br />
- Unloaded (Cartridge chamber free)<br />
- That the barrel is free of obstructions.<br />
Before use, check the pistol for proper<br />
condition and trouble-free functioning.<br />
Checking after use:<br />
After use, make sure that the pistol<br />
is:<br />
- Unloaded (Cartridge chamber free)<br />
- That the barrel is free of obstructions.<br />
- That the magazine is empty.<br />
Functional tests of slide with receiver:<br />
- Remove magazine<br />
- Retract slide as far as it will go.<br />
After release the slide has to be returned<br />
to its forward most position<br />
by the recoil spring.<br />
- Depress decocking latch.<br />
Cocking piece/hammer have to be<br />
released from the cocked position<br />
and have to be decocked.<br />
- Insert empty magazine.<br />
- Retract slide as far as it will go.<br />
The slide release has to lock the slide<br />
in its open position.<br />
- Depress the slide release.<br />
The slide has to be returned to its<br />
forward most position by the recoil<br />
spring.<br />
Functional test of the trigger and<br />
safety mechanism:<br />
- Retract slide as far as it will go and<br />
close it again.<br />
- Pull the trigger.<br />
The hammer has to be released and<br />
snap forwards.<br />
- Push hammer forwards.<br />
The hammer has to be free and<br />
capable of depressing the firing pin.<br />
- Retract slide as far as it will go and<br />
close it again.<br />
The hammer has to be blocked by<br />
the catch before it reaches the firing<br />
pin.<br />
Check of firing pin for smooth<br />
running and safety<br />
- Remove slide as described on<br />
page 56.<br />
- Depress firing pin block as far as it<br />
will go, then push firing pin forwards<br />
as far as it will go using the<br />
cleaning rod.<br />
Firing pin protrusion has to be<br />
1.8 mm -0.25 mm.<br />
The firing pin and firing pin block<br />
then have to elastically return to their<br />
initial position.<br />
As long as the firing pin block has<br />
not been depressed, the firing pin<br />
may not reach the firing position.<br />
In case of insufficient firing pin protrusion<br />
or difficult firing pin movement,<br />
the firing pin guide will have to<br />
be cleaned.<br />
Note: This check is carried out by<br />
ordnance personnel only.<br />
49
Handling and operation<br />
Principles of handling and<br />
operation<br />
Always treat the pistol as if it<br />
were loaded and ready to fire.<br />
After the slide has been worked,<br />
the pistol is at all times partially<br />
cocked, the V3 is cocked and V5<br />
is not cocked.<br />
In particular the following is<br />
prohibited:<br />
- Playing with the pistol, especially<br />
aiming at persons.<br />
- Using force when handling, disassembling<br />
and cleaning.<br />
Notes:<br />
- The <strong>P2000</strong> <strong>Pistol</strong> cal. 9 mm x<br />
19 has been approved for the<br />
ammunition types according to<br />
C.I.P. and SAAMI.<br />
- The pistol must immediately be<br />
checked by the ordnance personnel<br />
(weapons mechanics)<br />
in case it has been subjected<br />
to extraordinary conditions like<br />
e.g. shocks or heavy drops.<br />
Preparations for firing:<br />
- De-oil barrel with a dry pullthrough<br />
(commercial cleaning<br />
kit) and check whether it is free<br />
of obstructions.<br />
- Check slide and decocking lever<br />
for proper functioning.<br />
- Check magazine for proper engagement.<br />
Loading of the pistol:<br />
- Insert a filled magazine into the<br />
receiver until the magazine release<br />
engages. The pistol is<br />
partially loaded.<br />
- Retract slide as far as it will go,<br />
then let it return forwards<br />
again.<br />
The pistol is loaded and partially<br />
cocked, V3 is cocked and<br />
V5 is not cocked.<br />
Loaded chamber indicator<br />
If there is a cartridge in the<br />
chamber this is indicated by a<br />
red mark on the extractor on the<br />
right side of the weapon visibly<br />
and so it can be felt.<br />
50
Firing with Single Action<br />
trigger (SA)<br />
The pistol is loaded and partially<br />
cocked or the hammer<br />
(V3) is cocked.<br />
For firing:<br />
- Pull the trigger.<br />
The cocking piece and hammer<br />
are released and the cartridge in<br />
the chamber is ignited by the firing<br />
pin.<br />
Firing position<br />
The best and most stable firing<br />
position in shooting with handguns<br />
and the one promising the<br />
highest hit probability is the twohanded<br />
firing position:<br />
Firing with the Double Action<br />
trigger (DA)<br />
During firing with the Double Action<br />
trigger, the hammer is not<br />
cocked prior to firing of the shot.<br />
(<strong>P2000</strong> (V5) <strong>Pistol</strong> or <strong>P2000</strong> (V3)<br />
previously decocked). Exceptions:<br />
<strong>P2000</strong> (V1), (V2) + (V4)<br />
(CDA). With these, the cocking<br />
piece is permanently cocked.<br />
Should a round fail to ignite, the<br />
firing pin would be capable of<br />
being re-cocked and released<br />
via the DA function. In doing so,<br />
upon trigger operation the<br />
cocking piece and hammer<br />
would first be cocked and then<br />
released.<br />
Pulling the trigger will first cock<br />
the cocking piece and/or hammer<br />
and then release them.<br />
Right handed shooter, two handed<br />
firing position<br />
Left handed shooter, two-handed<br />
firing position<br />
51
Removal of magazine:<br />
The magazine release is located<br />
in the receiver below the trigger<br />
guard. Both right and left handed<br />
shooters may operate it preferably<br />
using the index finger or<br />
thumb of the firing hand.<br />
Reloading when magazine is<br />
empty<br />
After firing of the last shot, the<br />
slide is held open by the slide release.<br />
For loading:<br />
- Press the magazine release<br />
downwards and remove the<br />
empty magazine.<br />
- Insert filled magazine until the<br />
magazine release engages,<br />
- Press the slide release downwards<br />
(see figure).<br />
The slide is released and snaps<br />
forwards driven by the recoil<br />
spring. A cartridge will thus be<br />
fed into the chamber.<br />
The pistol is loaded.<br />
Operation of magazine release<br />
using the index finger of the firing<br />
hand<br />
Press slide release downwards.<br />
52<br />
Operation of magazine release<br />
using the thumb of the firing<br />
hand
Decocking<br />
After a round has been chambered<br />
or fired, the cocking piece or<br />
hammer (V3) remains cocked.<br />
The pistol is to be decocked<br />
using the decocking latch.<br />
For decocking<br />
- Depress decocking latch until<br />
cocking piece /hammer is decocked<br />
(see fig.).<br />
In the process the hammer is<br />
blocked by the catch and cannot<br />
reach the firing pin.<br />
Unloading the pistol<br />
- Depress the magazine release<br />
and remove the magazine.<br />
- Retract slide as far as it will go,<br />
this ejects the cartridge from<br />
the chamber.<br />
- Press the slide release upwards<br />
and lock slide open.<br />
- Make sure there is no cartridge<br />
left in the chamber.<br />
- Release the slide by depressing<br />
the slide release or by<br />
slightly retracting the slide and<br />
letting it snap forwards.<br />
- <strong>P2000</strong> and <strong>P2000</strong> (V3) are on<br />
principle to be decocked using<br />
the decocking latch.<br />
- <strong>P2000</strong> (V1), (V2) and (V3) permanently<br />
remain partially<br />
cocked.<br />
Decock<br />
53
Filling and emptying of magazine<br />
For filling of magazine:<br />
- Hold magazine in one hand<br />
and<br />
- Slide the cartridges base first<br />
under the magazine lips.<br />
The contents of the magazine<br />
may be checked via inspection<br />
openings in the rear of the magazine.<br />
For unloading push cartridges<br />
out of the magazine forwards<br />
and catch them in your hand.<br />
Filling of magazine<br />
Filling of magazine using magazine<br />
filler<br />
Note:<br />
There are magazines available for 13 and for 16 cartridges.<br />
Damaged, buckled or corroded cartridges may not be filled into the<br />
magazine.<br />
54
Care and Maintenance<br />
The P 2000 may be disassembled<br />
into its subassemblies without<br />
the use of tools.<br />
Cleaning agents and kits<br />
For cleaning and maintenance of<br />
the pistol the following will be required:<br />
- Commercial weapon cleaning<br />
kit for cal. 9 mm<br />
- Pull throughs and rags<br />
- Chlorine and acid free cleaning<br />
and preserving agents.<br />
Do not clean with:<br />
- Objects made of metal<br />
- Plastics, e.g. Nylon, perlon, or<br />
similar<br />
- Water.<br />
Cleaning work<br />
Note: Regular checking, cleaning<br />
and maintenance will preserve<br />
the functional reliability<br />
and increase the service life of<br />
the pistol.<br />
Normal cleaning<br />
Normal cleaning should be<br />
performed after each firing.<br />
- Check the weapon and make<br />
sure there is no cartridge in the<br />
chamber.<br />
- Disassemble the pistol as described<br />
on pages 56/57.<br />
- Clean fouled parts and surfaces<br />
on receiver and slide using<br />
cleaning brush and rag and<br />
then oil lightly.<br />
- Several times run an oil soaked<br />
cleaning brush through the<br />
barrel, then use clean pull<br />
throughs and then oil slightly<br />
internally and externally.<br />
- Clean magazine and follower<br />
and then oil slightly.<br />
- Reassemble the pistol as described<br />
on page 58.<br />
- After cleaning and reassembly<br />
check pistol for proper condition<br />
and trouble-free functioning.<br />
Main Cleaning<br />
Main cleaning will be required<br />
after a large number of rounds<br />
have been fired or if the pistol<br />
has been exposed to adverse<br />
environmental conditions.<br />
- Carry out normal cleaning, in<br />
addition<br />
- Disassemble the magazine,<br />
and clean and lightly oil magazine<br />
tube inside as well as external<br />
surfaces of the follower.<br />
For magazine disassembly depress<br />
locking plate into magazine<br />
floor plate, slide magazine<br />
floor plate off forwards and remove<br />
magazine components.<br />
- Check firing pin for smooth<br />
running and if required clean firing<br />
pin guide.<br />
- After cleaning and reassembly<br />
check pistol for smooth running<br />
and proper functioning.<br />
Note: Main cleaning to be performed<br />
by ordnance personnel<br />
(weapons mechanics) only.<br />
55
Disassembly of the pistol<br />
For cleaning the pistol is disassembled<br />
into subassemblies.<br />
Before disassembly make<br />
sure that the magazine is<br />
empty and that the cartridge<br />
chamber is free of any ammunition.<br />
The pistol is disassembled and<br />
assembled without any tool. The<br />
use of force is prohibited.<br />
The pistol must not be disassembled<br />
further than described<br />
below.<br />
- Remove the magazine<br />
- Retract the slide as far as it will<br />
go and check that the chamber<br />
is free of any ammunition.<br />
- Then let the slide return forward<br />
again.<br />
- Hold the pistol so that the<br />
thumb grasps the rear side of<br />
the grip and the remaining fingers<br />
are on the upper side of<br />
the slide.<br />
- Withdraw slide until slide release<br />
recess (on left side of slide)<br />
coincides with the forward end<br />
of the slide release (see figure).<br />
Position of recess with respect<br />
to slide release<br />
56
- With the other hand depress<br />
slide release axle (see figure)<br />
from the right and pull out slide<br />
release to the left.<br />
Position of Slide release axle<br />
- Remove slide from receiver<br />
forwards (see figure).<br />
Remove slide<br />
- Push recoil spring complete<br />
forwards slightly, lift upwards<br />
and remove from slide (see figure).<br />
- Lift barrel, push forward and<br />
remove from slide to the rear.<br />
Note: Slide release, right need<br />
not be disassembled.<br />
Remove recoil spring, compl.<br />
57
Assembly of the pistol<br />
- Insert barrel into the slide and<br />
push to the rear until it locks<br />
with the slide.<br />
- Insert recoil spring compl. into<br />
the slide below the barrel<br />
In doing so pass the forward end<br />
of the recoil spring guide<br />
through the bore at forward end<br />
of slide against the pressure of<br />
the recoil spring.<br />
- Support recoil spring guide on<br />
front side of control surface of<br />
barrel (Position of recoil spring<br />
guide-barrel see figure).<br />
- From the rear insert the receiver<br />
into the guide grooves of<br />
the slide (see figure) until the<br />
recess for the slide release<br />
coincides with the axle bore.<br />
- From the left depress slide release<br />
into the receiver.<br />
- After assembly check pistol for<br />
smooth running and troublefree<br />
operation.<br />
Place recoil spring guide rod on<br />
top of the barrel<br />
Position of recoil spring guide<br />
rod in relation to barrel<br />
Slide in the receiver<br />
58
Replacement of backstrap<br />
insert<br />
Four backstrap inserts of different<br />
heights allow an optimum<br />
adaptation to different hand sizes.<br />
In order to replace the<br />
backstrap insert, drift out clamping<br />
pin laterally using a Ø 2.8<br />
mm drift punch.<br />
Attention: The backstrap is under<br />
the spring tension of the<br />
hammer spring.<br />
Slide the backstrap insert to be<br />
installed up into receiver guide<br />
from below. The hammer spring<br />
guided on the hammer strut is<br />
guided in the support inside the<br />
backstrap.<br />
Slide up backstrap insert into<br />
the final position against the<br />
pressure of the hammer spring<br />
and laterally drive in clamping<br />
pin.<br />
Replacement of backstrap insert<br />
59
m Trouble shooting chart<br />
If troubles occur, the pistol is to be<br />
considered as loaded until the<br />
trouble has been found out and cleared.<br />
When eliminating troubles the<br />
safety measures of this manual must<br />
be observed.<br />
Trouble Cause Elimination<br />
Cartridge is not ignited Ammunition fault (Failure to ignite) Unload and check whether barrel is<br />
clear. Do not use unfired cartridge again.<br />
Firing pin movement difficult. Take pistol to maintenance shop<br />
Firing pin damaged or broken Take pistol to maintenance shop<br />
Hammer spring defective<br />
Take pistol to maintenance shop<br />
Slide did not stay Cartridge stuck in the chamber Unload. Pull back slide so that the<br />
open after the shot. because it is deformed or cartridge is extracted and ejected.<br />
cartridge chamber dirty.<br />
If required clean cartridge chamber<br />
Ammunition fault<br />
Cartridge case not Insufficient slide recoil Unload. Pull back slide so that the carejected<br />
tridge is extracted and ejected. Check<br />
smooth running. If required clean cartridge<br />
chamber<br />
Wrong ammunition load<br />
Use other ammunition<br />
Extractor, extractor spring or ejector Take pistol to maintenance shop<br />
damaged.<br />
Cartridge not chambered Cartridge chamber fouled Unload and clean<br />
Cartridge deformed<br />
Replace cartridge<br />
Recoil spring lame<br />
Take pistol to maintenance shop<br />
Cartridge not fed Follower spring lame Take magazine to maintenance shop<br />
Magazine or magazine lips damaged Replace magazine<br />
Slide does not stay open Follower spring lame Take magazine to maintenance shop<br />
after the last shot Insufficient slide recoil Check smooth running, if required<br />
clean cartridge chamber<br />
Slide release damaged<br />
Take pistol to maintenance shop<br />
Wrong ammunition load<br />
Use other ammunition<br />
Shaped spring for slide release Take pistol to maintenance shop<br />
defective<br />
Point of impact shifted Front or rear sight displaced Take pistol to maintenance shop<br />
laterally<br />
Point of impact shifted Front or rear sight damaged Take pistol to maintenance shop<br />
vertically Other type of ammunition Take pistol to maintenance shop<br />
Note: Stoppages are on principle only eliminated by ordnance personnel<br />
(weapon mechanics).<br />
60
Sights, Adjustment<br />
The sights consist of a rear sight<br />
with rectangular notch and front<br />
sight.<br />
They are fitted with durable contrast<br />
points and enable a fast<br />
target acquisition for the shooter<br />
even under unfavourable lighting<br />
conditions.<br />
Windage adjustment<br />
Windage adjutment is carried<br />
out by lateral shifting of the rear<br />
and/or front sights using a hammer<br />
and sight-punsh.<br />
Height adjustment<br />
Height adjustment is carried out<br />
by replacing the front sight with<br />
one of a different height.<br />
The corresponding height is engraved<br />
on the underside of he<br />
front sight.<br />
Note: A change in the front sight<br />
height of 0.2 mm will shift the<br />
point of impact approx. 3.6 cm<br />
at a range of 25 meters.<br />
61
62<br />
Parts List <strong>P2000</strong><br />
Item Designation . . . . . . . . . . . . . . . Id. No.<br />
Barrel Assembly<br />
1 Barrel. . . . . . . . . . . . . . . . . . . . 218550<br />
– Recoil spring compl. (2-5) . . . . 209258<br />
2 Recoil spring guide rod . . . . . . 209307<br />
3 Stop sleeve . . . . . . . . . . . . . . . 215932<br />
4 Recoil spring . . . . . . . . . . . . . . 215852<br />
5 Recoil spring stop disc . . . . . . 215831<br />
Slide Assembly<br />
– Slide, compl. (6–16) . . . . . . . . 209257<br />
6 Slide. . . . . . . . . . . . . . . . . . . . . 209293<br />
7 Front sight (5,9 mm) . . . . . . . . 209286<br />
7.1 Front sight (6,1 mm) . . . . . . . . 209287<br />
7.2 Front sight (6,3 mm) . . . . . . . . 209288<br />
7.3 Front sight (6,5 mm) . . . . . . . . 209289<br />
7.4 Front sight (6,7 mm) . . . . . . . . 209290<br />
7.5 Front sight (6,9 mm) . . . . . . . . 209291<br />
8 Rear sight . . . . . . . . . . . . . . . . 209284<br />
9 Extractor bolt . . . . . . . . . . . . . . 209294<br />
10 Extractor spring . . . . . . . . . . . . 218315<br />
11 Extractor . . . . . . . . . . . . . . . . . 209939<br />
12 Clamping sleeve . . . . . . . . . . . 980838<br />
13 Firing pin spring . . . . . . . . . . . . 215822<br />
14 Firing pin . . . . . . . . . . . . . . . . . 209295<br />
15 Compression spring for drop<br />
safety catch . . . . . . . . . . . . . . . 209296<br />
16 Drop safety catch. . . . . . . . . . . 209313<br />
(Firing pin safety)<br />
Receiver Assembly<br />
– Receiver, compl. (17–42) . . . . . 209256<br />
17 Receiver. . . . . . . . . . . . . . . . . . 209259<br />
18 Trigger axle . . . . . . . . . . . . . . . 214154<br />
19 Trigger . . . . . . . . . . . . . . . . . . 209263<br />
20 Elbow spring for trigger . . . . . . 209266<br />
21 Leaf spring for release catch<br />
and catch. . . . . . . . . . . . . . . . . 214167<br />
22 Compression spring for<br />
control bolt. . . . . . . . . . . . . . . . 209270<br />
23 Control bolt for sear . . . . . . . . . 209269<br />
24 Sear . . . . . . . . . . . . . . . . . . . . . 209260<br />
25 Hammer axle . . . . . . . . . . . . . 209272<br />
26 Release catch . . . . . . . . . . . . . 209261<br />
27 Catch . . . . . . . . . . . . . . . . . . . . 209273<br />
28 Control lever. . . . . . . . . . . . . . . 209274<br />
29 Cylindrical pin . . . . . . . . . . . . . 214101<br />
30 Disconnector . . . . . . . . . . . . . . 209271<br />
31 Hammer with spur . . . . . . . . . . 209262<br />
32 Cocking piece . . . . . . . . . . . . . 209265<br />
Item Designation . . . . . . . . . . . . . . . Id. No.<br />
33 Elbow spring for hammer . . . . 209275<br />
34 Hammer spring rod . . . . . . . . . 209312<br />
35 Hammer spring . . . . . . . . . . . . 214695<br />
36 Back strap -M- (Standard) . . . 209264<br />
36.1 Back strap -S- . . . . . . . . . . . . 209253<br />
36.2 Back strap -L- . . . . . . . . . . . . . 209254<br />
36.3 Back strap -XL- . . . . . . . . . . . . 209255<br />
37 Clamping pin . . . . . . . . . . . . . . 980761<br />
38 Compression spring for<br />
magazine release. . . . . . . . . . . 215929<br />
39 Magazine release. . . . . . . . . . . 214818<br />
40 Form spring for slide release . . 214171<br />
41 Slide release . . . . . . . . . . . . . . 209267<br />
42 Slide release, right . . . . . . . . . 209268<br />
Magazine Assembly (13 cartridges)<br />
– Magazine compl. (43-47) . . . . . 209251<br />
43 Magazine housing . . . . . . . . . . 209309<br />
44 Follower . . . . . . . . . . . . . . . . . . 215836<br />
45 Follower spring . . . . . . . . . . . . 214212<br />
46 Locking plate . . . . . . . . . . . . . . 209311<br />
47 Magazine floor plate, high . . . . 209314<br />
Magazine Assembly (16 cartridges)<br />
– Magazine compl. (44, 48-51) . . 209813<br />
48 Magazine housing . . . . . . . . . . 209814<br />
44 Follower . . . . . . . . . . . . . . . . . 215836<br />
49 Follower spring . . . . . . . . . . . . 215118<br />
50 Locking plate . . . . . . . . . . . . . . 209815<br />
51 Magazine floor plate, high . . . . 209816<br />
Variant Parts List <strong>P2000</strong> (V1, V2, V3, V4, V5)<br />
see page 64.
<strong>P2000</strong> <strong>Pistol</strong><br />
Exploded view<br />
63
Variant Parts List<br />
<strong>P2000</strong> (V1)<br />
(as far as different from <strong>P2000</strong>)<br />
Item Designation . . . . . . . . . . . . . . . Id. No.<br />
– Receiver, compl. . . . . . . . . . . . 209346<br />
17 Receiver . . . . . . . . . . . . . . . . . 209318<br />
26a Release catch . . . . . . . . . . . . . 209320<br />
31a Hammer without a spur . . . . . . 209321<br />
Parts List <strong>P2000</strong> (V2)<br />
(as far as different from <strong>P2000</strong>)<br />
– Receiver, compl. . . . . . . . . . . . 209317<br />
– Slide, compl. . . . . . . . . . . . . . . 209938<br />
15 Compression spring for<br />
firing pin block . . . . . . . . . . . . . 209962<br />
17 Receiver . . . . . . . . . . . . . . . . . 209318<br />
20 Elbow spring for trigger . . . . . . 219441<br />
26a Release catch . . . . . . . . . . . . . 209320<br />
31a Hammer without a spur . . . . . . 209321<br />
Parts List <strong>P2000</strong> (V3)<br />
(as far as different from <strong>P2000</strong>)<br />
– Receiver, compl. . . . . . . . . . . . 209326<br />
31b Hammer with spur . . . . . . . . . . 209327<br />
(32 + 33 deleted)<br />
Parts List <strong>P2000</strong> (V4)<br />
(as far as different from <strong>P2000</strong>)<br />
– Receiver, compl. . . . . . . . . . . . 207363<br />
17 Receiver . . . . . . . . . . . . . . . . . 209318<br />
20 Elbow spring for trigger . . . . . . 207348<br />
26a Release catch . . . . . . . . . . . . . 209320<br />
31a Hammer without a spur . . . . . . 209321<br />
Parts List <strong>P2000</strong> (V5)<br />
(as far as different from <strong>P2000</strong>)<br />
– Slide, compl. . . . . . . . . . . . . . . 207697<br />
13 Firing pin spring . . . . . . . . . . . 207696<br />
15 Compression spring for<br />
firing pin block . . . . . . . . . . . . . 209296<br />
– Receiver, compl. . . . . . . . . . . . 207037<br />
17 Receiver . . . . . . . . . . . . . . . . . 209318<br />
20 Elbow spring for trigger . . . . . . 217979<br />
21 Leaf spring for catch . . . . . . . . 215691<br />
26b Bushing (release catch deleted) . 207038<br />
31c Hammer without a spur . . . . . . 207036<br />
(32 + 33 deleted)<br />
35 Firing pin spring . . . . . . . . . . . . 207673<br />
64
Heckler & Koch<br />
Jagd- und Sportwaffen GmbH<br />
Postfach 1329<br />
D-78722 Oberndorf/N.<br />
Telephone: +49 (0) 74 23/79-0<br />
Telefax: +49 (0) 74 23/79 22 80<br />
E-mail: hkinfoboard@heckler-koch.de<br />
http://www.heckler-koch.de<br />
© Copyright 2003 Ident-Nr. 984 069<br />
Änderungen vorbehalten HK 1c - 1104 / RAL<br />
Subject to modifications Printed in the Federal Republic of Germany<br />
OD 1104