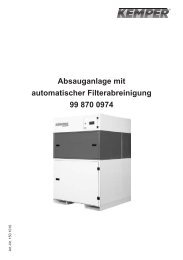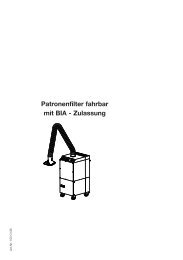
AU - Absauganlage stationär KEMPER Truck-/ Car extraction ...
AU - Absauganlage stationär KEMPER Truck-/ Car extraction ...
AU - Absauganlage stationär KEMPER Truck-/ Car extraction ...

Sie wollen auch ein ePaper? Erhöhen Sie die Reichweite Ihrer Titel.
YUMPU macht aus Druck-PDFs automatisch weboptimierte ePaper, die Google liebt.
Application and operation<br />
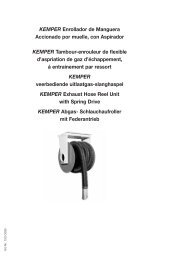
The <strong>KEMPER</strong> <strong>Truck</strong>-/ <strong>Car</strong> <strong>extraction</strong> set is used to extract exhaust gases during the truck emission test. The unit is equipped<br />
with an oil and temperature resistant exhaust hose as well as with an exhaust funnel, which is adjustable in height and inclination.<br />
The cast silumin fan, which is vibration isolated mounted on a wall bracket, extracts exhaust gases and secondary air and<br />
leads it outside by means of the extracted air set.<br />
Safety Instructions<br />
Caution:<br />
When using electrical devices, the following basic safety instructions must be followed in order to prevent shock, injury or fire!<br />
Read and follow these instructions before using the filter unit!<br />
• Keep this installation and operating manual near the filter unit.<br />
• Do not use the unit to extract easily flammable, explosive or aggressive substances.<br />
• Only use original spare parts.<br />
• Installation and start-up of components should only be carried out by an authorised electrician.<br />
• Protect the unit from dampness and wetness.<br />
• Protect the electrical cable from heat, oil and sharp edges.<br />
Installation<br />
• Connect the wall bracket with the provided connection material at a height of ca. 2 m to a stable wall.<br />
• Please exchange 4 of the 8 M6 bolts, which connect the fan lid on the <strong>extraction</strong> side to the fan housing, with the provided<br />
rubber metal elements.<br />
• Now please put the fan (see illustration) on top of the wall bracket and fasten it with the serrated washers and M6 nuts.<br />
• Push the reducer Ø 250 mm/ 200 mm into the blow out piece of the fan and fasten it with the provided bolts.<br />
• Push the exhaust hose with the hose clamp over the blow out piece Ø 200 mm and fasten it.<br />
• Screw the aluminium casted adaptor to the blow out piece of the fan.<br />
• Now you can mount the flange and the blow out piece for the connection of the exhaust pipe.<br />
• Connect to this blow out piece the flexible aluminium exhaust pipe and the blow out piece with bird protection grid by means of<br />
a hose clamp. Guide the blow out piece through a corresponding hole in the exterior wall outside.<br />
• Connect the exhaust funnel and the blow out piece of the fan to the exhaust hose by means of the provided hose clamps.<br />
• Connect the motor protection switch at a desired height to the wall and have it as well as the fan connected to the power<br />
supply by an authorised electrician. Please note the information on the type lable and the rotation direction of the fan!<br />
4<br />
English