Installation Manual - CertainTeed
Installation Manual - CertainTeed
Installation Manual - CertainTeed

You also want an ePaper? Increase the reach of your titles
YUMPU automatically turns print PDFs into web optimized ePapers that Google loves.
<strong>CertainTeed</strong> WeatherBoards<br />
<strong>Installation</strong> <strong>Manual</strong>
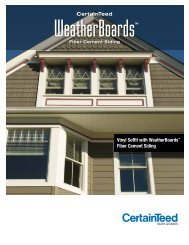
<strong>CertainTeed</strong> WeatherBoards Fiber Cement Siding <strong>Installation</strong> <strong>Manual</strong><br />
Table of Contents<br />
Glossary ............................................................................2<br />
Top 10 Fiber Cement <strong>Installation</strong> Tips ..............................4<br />
Section 1: Before You Begin ...........................................6<br />
First Steps to a Successful Project ...............................6<br />
Section 2: Estimating .....................................................7<br />
Siding ..........................................................................7<br />
Soffit .............................................................................7<br />
Porch Ceiling ................................................................7<br />
Trim ..............................................................................8<br />
Estimating Form .........................................................10<br />
Coverage Chart .........................................................11<br />
Section 3: Safety ..........................................................12<br />
Ventilation ...................................................................12<br />
Ladders .......................................................................12<br />
Tools ...........................................................................13<br />
Fastening Tools ..........................................................13<br />
Personal Protective Equipment (PPE) ........................13<br />
Air Compressors ........................................................14<br />
Section 4: Storage and Handling .................................14<br />
Section 5: Tools and Accessories ................................15<br />
Cutting & Drilling ........................................................15<br />
Fastening ...................................................................17<br />
Alignment ...................................................................17<br />
Accessories ...............................................................17<br />
Aluminum Molding & Trim ..........................................17<br />
Backflashing ..............................................................17<br />
Section 6: Cutting .........................................................18<br />
Personal Protective Equipment (PPE) .......................18<br />
Cutting Tools and Blades ...........................................18<br />
Requirements ............................................................18<br />
Section 7: Fastening .....................................................19<br />
Nails ...........................................................................19<br />
Screws .......................................................................19<br />
Acceptable Fastening Alternatives ............................20<br />
Fastening to Structural Materials ...............................20<br />
Fastening Requirements for Atypical Walls ...............22<br />
Structural Insulated Panels .........................................22<br />
Concrete Masonry (CMU)<br />
or Poured Concrete Walls .......................................23<br />
Structural Rainscreens<br />
(Steel Studs/Steel Furring Strips) ..........................24<br />
Non-structural Rainscreens ........................................24<br />
Insulated Concrete Forms ..........................................25<br />
Fastening Requirements for Weatherboards<br />
Fiber Cement Siding ..............................................26<br />
Section 8: Wall Preparation and Sheathing ..................27<br />
Sheathings ..................................................................27<br />
New Construction .......................................................28<br />
Remodeling ................................................................28<br />
Stucco .........................................................................28<br />
Concrete Block (CMU) and Poured<br />
Concrete Walls ......................................................28<br />
Flashing ......................................................................29<br />
CertaFlash BA around Windows ................................29<br />
Section 9: Trim ..............................................................30<br />
Fascia, Band and Frieze Boards, and Rakes .............31<br />
Section 10: Lap Siding ..................................................32<br />
Before You Begin ........................................................32<br />
Blind Fastening ...........................................................33<br />
Face Fastening ...........................................................33<br />
<strong>Installation</strong> ...................................................................34<br />
Butt and End Joint Application ...................................36<br />
Creating Laced (Prairie-Style) Corners .......................38<br />
Section 11: Shapes Siding ............................................38<br />
Before You Begin ........................................................38<br />
Perfection Shingles .....................................................39<br />
Random Square Straight Edge and<br />
Staggered Edge ....................................................39<br />
Individual Shakes ........................................................42<br />
Octagons and Half-Rounds ........................................44<br />
Section 12: Vertical Siding .............................................47<br />
Before You Begin ........................................................47<br />
Installing Panels ..........................................................48<br />
Section 13: Soffit ...........................................................50<br />
Before You Begin ........................................................50<br />
Ventilation....................................................................51<br />
<strong>Installation</strong> ...................................................................52<br />
Section 14: Porch Ceiling Panels ..................................52<br />
Section 15: Finishing .....................................................54<br />
Caulking ......................................................................54<br />
Painting .......................................................................55<br />
Staining ......................................................................55<br />
Section 16: Care and Maintenance ...............................55<br />
Periodic Maintenance and Care .................................55<br />
Washing ......................................................................56<br />
Protecting Fiber Cement Siding .................................56<br />
Recaulking ..................................................................56<br />
Touch-ups ...................................................................57<br />
Mildew .........................................................................57<br />
Refinishing ..................................................................57<br />
Efflorescence ..............................................................58<br />
1
<strong>CertainTeed</strong> WeatherBoards Fiber Cement Siding <strong>Installation</strong> <strong>Manual</strong><br />
Glossary<br />
Because this manual was written for building<br />
professionals, we have freely used the language and<br />
jargon of the siding industry. To avoid confusion, we<br />
thought it a good idea to share our understanding of each<br />
of these terms with you.<br />
Back Sealing/Back Priming—Applying a sealer or<br />
primer to the back of a cladding material. This practice is<br />
not recommended with <strong>CertainTeed</strong> Fiber Cement.<br />
Backflashing—A durable, non-corrosive material used<br />
to flash water away from the butt joints of lap siding.<br />
Band Board—A decorative piece of horizontal trim<br />
placed between two floors along the rim joist.<br />
Beaded—A narrow, half-round molding at the base of a<br />
lap siding panel.<br />
Blind Nailing—Fastening through the top edge of lap<br />
siding so that the fastener head will be covered by the<br />
next course of siding.<br />
Butt end/Joint—A joint created by placing edges of lap<br />
siding end-to-end without overlapping.<br />
Casing—Molding of various widths used to trim door and<br />
window openings at the jambs; also referred to as lineal,<br />
window, or door surround.<br />
Contraction—Commonly refers to building products<br />
contracting due to heat loss or moisture leaving the<br />
product, especially as outside temperature changes.<br />
Course—A row of siding panels running the width of<br />
the house.<br />
Dormer—A gabled extension built out from a sloping roof<br />
to accommodate a vertical window.<br />
Drip Cap—A horizontal flashing placed over exterior<br />
door or window frames to divert rainwater.<br />
Dutchlap—Refers to a drop-style panel that was<br />
popularized by early American settlers in the seaboard<br />
states; lap siding panel with a horizontal bevel at the top<br />
of the panel that sits just below the bottom of the next<br />
course of siding.<br />
Eave—The overhang of a pitched roof at the bottom<br />
edge, usually consisting of a fascia board, a soffit for a<br />
closed cornice, and appropriate moldings.<br />
2<br />
Expansion—Commonly refers to building products<br />
expanding due to heat build-up or moisture entering the<br />
product, especially as outside temperature changes.<br />
Exposure—The width of the exposed face of each panel<br />
of siding; also referred to as reveal.<br />
Face—The side of the siding, trim, or soffit that is<br />
exposed to view after the product has been installed.<br />
Face Nailing—Fastening through both the overlapping<br />
and the overlapped panel; the fastener head will be<br />
visible.<br />
Fascia—A flat, horizontal band that covers the rafter tails<br />
and runs along the bottom edge of the roof line.<br />
Flashing—A thin, impervious material, usually metal,<br />
placed around openings to prevent water penetration or<br />
to direct the flow of water over the cladding.<br />
Frieze—The horizontal trimboard connecting the top of<br />
the siding with the soffit.<br />
Furring/Furring Strip— Long, thin strips of wood or<br />
other materials used to build out the fastening surface of<br />
a wall; commonly used to correct imperfections in wall<br />
surfaces, to establish a rainscreen, or to re-establish<br />
a structural fastening surface on the exterior of nonstructural<br />
products such as foam insulation.<br />
Gable—The triangle formed on the side or the front of a<br />
building by a sloping roof.<br />
Hot-dip Galvanized—The process of dipping metal into<br />
molten zinc to apply a protective coating that prevents<br />
corrosion; hot-dipped galvanized iron and steel are<br />
corrosion resistant.<br />
H-channel Joint—When installing vertical siding or<br />
soffit materials, used to conceal the edges; with lap<br />
siding, H-channel or joint covers are used to cover the<br />
butt ends/joints where they come together (mainly for<br />
aesthetic purposes).<br />
Joint Flashing—A durable, non-reactive material placed<br />
behind a butt end/joint to help shed water; commonly<br />
made of finished metal or #15 felt.
<strong>CertainTeed</strong> WeatherBoards Fiber Cement Siding <strong>Installation</strong> <strong>Manual</strong><br />
Keyway—A recess or groove in a manufactured shake or<br />
shingle siding panel.<br />
Lap—Where two siding panels join horizontally, one over<br />
the other.<br />
Lineal—Molding of various widths used to trim door and<br />
window openings at the jambs; also referred to as casing,<br />
window, or door surround.<br />
Miter Cut—A beveled cut, usually 45°, made at the end<br />
of a piece of molding or board that is used to form a<br />
mitered joint.<br />
MSF—1,000 sq. ft. of material; due to a 1-1/4" overlap<br />
(or 15% “loss” for lap), the actual coverage of 1,000 sq. ft.<br />
for lap siding is 850 sq. ft.<br />
O.C.—On center; a measurement of the distance<br />
between the centers of two repeating members in a<br />
structure, usually studs.<br />
OSB—Oriented Strand Board.<br />
Panel Projection—The distance that the bottom edge of<br />
the siding projects from the wall.<br />
Profile—The contour or outline of a siding panel as<br />
viewed from the side.<br />
Rainscreen Wall—A method of constructing walls in<br />
which the cladding is separated from a membrane by an<br />
airspace that allows pressure equalization to prevent rain<br />
from being forced in. It consists of an exterior cladding,<br />
a cavity that is typically created through the use of<br />
furring strips behind the cladding, and an inner wall that<br />
incorporates a weather-resistant barrier.<br />
Rake—Trim members of a gable roof that run parallel to<br />
the roof slope from the eave to the ridge.<br />
Rigid Sheathing—Plywood, OSB, or foam sheathing.<br />
Rim Joist—The board that the rest of the joists are nailed<br />
to. It runs the entire perimeter of the house.<br />
Rip Cut—A cut made along the grain, usually lengthwise<br />
on a board.<br />
Kick-Out Diverter Flashing—A flashing piece located<br />
where sloped roofs meet vertical walls; designed to divert<br />
water into a gutter.<br />
Sealant—A waterproof filler and sealer that is used in<br />
building and repair to make a surface watertight.<br />
Sheathing—Sheets of plywood, exterior gypsum board,<br />
or other material nailed to the outside face of studs as a<br />
base for exterior siding.<br />
Shim—A building material, usually wood, used to even<br />
a surface.<br />
Skirtboard—Treated lumber or PVC trimboard installed<br />
horizontally; used as a transition from foundation to siding<br />
or as a starter strip.<br />
Soffit—The underside of an overhanging eave.<br />
Square—Unit of measure for siding; equal to 100 square<br />
feet of exposure (e.g. a 10-ft. by 10-ft. wall section = 100<br />
square feet = 1 Square).<br />
Starter Strip—An accessory used under the first course<br />
of siding to provide a consistent panel angle.<br />
Structural Member—A support that is a constituent part<br />
of any structure or building.<br />
Structural Sheathing—The layer of boards, wood or<br />
fiber materials applied to the outer studs, joists, and<br />
rafters of a building to strengthen the structure and serve<br />
as a base for an exterior cladding.<br />
Substrate—A layer of material applied over the studs at<br />
the exterior walls of a building.<br />
Weather-Resistant Barrier—A building membrane<br />
that protects building materials from exterior wind and<br />
water penetration.<br />
Z-flashing—A piece of flashing bent into the shape of<br />
a “z” and used to divert water from horizontal joints over<br />
window trim, band boards, panel intersections, and other<br />
vertical surfaces.<br />
NOTE: When the terms “recommend” and “should”<br />
are used in this manual, the step is optional for<br />
installing fiber cement. However, it is included<br />
because the step represents best practice.<br />
When the terms “required” and “must” are used, the<br />
step is a necessary part of the installation process<br />
and must be adhered to.<br />
3
<strong>CertainTeed</strong> WeatherBoards Fiber Cement Siding <strong>Installation</strong> <strong>Manual</strong><br />
Top 10 Fiber Cement <strong>Installation</strong> Tips<br />
4<br />
1<br />
Before You<br />
Begin<br />
2<br />
Storage &<br />
Handling<br />
3<br />
Flashing<br />
4<br />
Sheathing<br />
& Wraps<br />
5<br />
Fasteners<br />
6<br />
Clearances<br />
DO DON’T<br />
XXReview this manual in its entirety and all applicable<br />
building codes prior to installation.<br />
XXWear appropriate safety equipment —dust mask<br />
or respirator, eye protection, hard hat, and cutresistant<br />
gloves as appropriate.<br />
XXKeep siding covered, off the ground on a clean,<br />
flat, and level surface that is protected from direct<br />
exposure to weather.<br />
XXCarry lap siding by its narrow edge.<br />
XXUse durable, non-corrosive flashing that is nonreactive<br />
with fiber cement.<br />
XXMaintain 1/4" clearance between the bottom of the<br />
fiber cement and horizontal flashing.<br />
XXInstall lap siding and vertical siding to structural<br />
framing when using non-structural sheathing,<br />
builder board, foam-type sheathings, and<br />
gypsum board.<br />
XXSee the recommendations on page 22 before<br />
installing fiber cement siding over Structural<br />
Insulated Panels thicker than 1".<br />
XXInstall Individual Shakes over wall construction<br />
with framing spaced no more than 24" o.c. and a<br />
minimum of 7/16" OSB or 1/2" plywood sheathing.<br />
XXApply siding over a weather-resistant barrier in<br />
accordance with local building code. <strong>CertainTeed</strong><br />
CertaWrap qualifies as a weather-resistant barrier<br />
that meets local building code requirements.<br />
XXUse non-corrosive, double hot-dipped galvanized<br />
or stainless steel nails.<br />
XXHold back siding a minimum of 6" above the<br />
finished grade.<br />
XXAllow a minimum of 1"–2" above roof lines,<br />
porches, decks, etc.<br />
XXLeave 1/8" gap between siding and trim<br />
surrounding windows and doors.<br />
XXDo not install questionable product. If<br />
you have questions about the product,<br />
contact <strong>CertainTeed</strong> Consumer<br />
Service Group at 800-999-3654.<br />
XXDo not install wet siding.<br />
XXDo not use uncoated aluminum or<br />
metal materials.<br />
XXDo not caulk “Z” flashing at horizontal<br />
openings.<br />
XXDo not fasten fiber cement siding<br />
over non-structural sheathing<br />
thicker than 1" without re-establishing<br />
a structural fastening surface.<br />
XXDo not use D-head nails, staples,<br />
finishing nails and/or construction<br />
adhesives to install fiber<br />
cement siding.<br />
XXDo not install fiber cement directly<br />
in contact with surfaces that collect<br />
water.<br />
XXDo not install fiber cement products<br />
tight against trim.
<strong>CertainTeed</strong> WeatherBoards Fiber Cement Siding <strong>Installation</strong> <strong>Manual</strong><br />
7<br />
Cutting<br />
8<br />
Butt Joints<br />
9<br />
Fastening<br />
10<br />
Painting<br />
& Caulking<br />
DO DON’T<br />
XXUse appropriate personal protective<br />
equipment (PPE).<br />
XXRefer to page 18 for details.<br />
XXCut fiber cement outdoors when possible.<br />
XXUse a polycrystalline diamond-tipped fiber cement<br />
blade for circular, miter, and table saws.<br />
XXWhen using a circular saw or mechanical shears,<br />
cut fiber cement siding face down.<br />
XXWhen using a chop saw cut the siding face up.<br />
XXIf WeatherBoards Fiber Cement Lap Siding<br />
with <strong>CertainTeed</strong> ColorMax ® Finish is covered by<br />
protective film, leave the film on the siding until it<br />
is nailed to the substrate; then remove it before<br />
applying the next course.<br />
XXIf protective foam is inserted between siding<br />
panels, remove it before cutting or installing<br />
fiber cement panels.<br />
XXRe-seal cut ends with 100% acrylic latex primer<br />
or paint.<br />
XXInstall all butt ends/joints in contact with<br />
one another.<br />
XXUse durable, non-corrosive backflashing that is<br />
non-reactive with fiber cement at all butt joints.<br />
XXNails must penetrate a minimum of 1-1/4" into<br />
structural framing.<br />
XXFasten only to structural rated sheathing like<br />
7/16" OSB or 1/2" plywood.<br />
XXKeep fasteners proud to the surface of material.<br />
XXNail 1" down from the top of the board when<br />
blind nailing.<br />
XXNail 3/4" up from the bottom when face nailing.<br />
XXUse high quality 100% acrylic latex paint or stain.<br />
XXUse high quality, exterior grade, color matched<br />
or paintable caulk or sealant that meets ASTM<br />
standard C-920 and is compatible with both fiber<br />
cement siding and the trim materials.<br />
XXBe sure to caulk wherever the siding meets the trim<br />
and around non-self-flashing penetrations and all<br />
windows and doors.<br />
XXDo not score and snap fiber cement.<br />
XXDo not cut fiber cement without<br />
proper ventilation.<br />
XXNever leave a gap at a butt joint.<br />
XXDo not use uncoated aluminum or<br />
metal materials with fiber cement<br />
siding.<br />
XXDo not counter sink or<br />
angle fasteners.<br />
XXNever apply oil-based paint<br />
or stains.<br />
XXDo not caulk the bottom of<br />
the horizontal joint that is<br />
above “Z” flashing.<br />
5
<strong>CertainTeed</strong> WeatherBoards Fiber Cement Siding <strong>Installation</strong> <strong>Manual</strong><br />
Section 1: Before You Begin<br />
Please read the instructions completely. The installation<br />
techniques in this manual describe and illustrate the<br />
steps involved in installing WeatherBoards Fiber<br />
Cement siding, soffit, and trim. Their purpose is to provide<br />
detailed information and how-to tips that will simplify<br />
the installation process. <strong>CertainTeed</strong> will not accept<br />
any liability or responsibility under its written warranty<br />
for product failure caused by application that does not<br />
meet the requirements for proper installation. These<br />
requirements are outlined throughout this book.<br />
Before you begin any siding project, you need to be<br />
aware of building code requirements in the geographic<br />
areas where you are working, and how the codes relate<br />
to the instructions given in this manual and by the siding<br />
manufacturer. You must always observe the requirements<br />
of local building codes because they represent the legal<br />
requirements for an installation in a given jurisdiction.<br />
However, most local codes are based on the national<br />
model building codes. Model codes themselves do not<br />
have the force of law until they are adopted by a state or<br />
local jurisdiction. In the United States, the primary source<br />
of model codes is the International Code Council<br />
(www.iccsafe.org), which publishes the International<br />
Building Code (IBC) and International Residential Code<br />
(IRC). In Canada, the primary model code is the National<br />
Building Code (NBC), published by the National Research<br />
Council of Canada (www.nrc-cnrc.gc.ca).<br />
No instruction manual can anticipate all the questions<br />
or conditions that might arise during installation.<br />
Recognizing this, we’ve focused on the tools and<br />
techniques used to complete typical installations. If you<br />
encounter an installation situation not covered in this<br />
manual, we suggest you contact <strong>CertainTeed</strong>’s Sales<br />
Support Group at 800-233-8990.<br />
6<br />
First Steps to a Successful Project<br />
Before installing any material, inspect it for breakage,<br />
foreign objects, surface defects, correct product, correct<br />
color, and color consistency. In addition, check for wet or<br />
saturated product. Do not install questionable product!<br />
If you find a siding defect, contact <strong>CertainTeed</strong>’s<br />
Consumer Service Group immediately at 800-999-3654.<br />
If you elect to install questionable product and a<br />
manufacturing defect is not found to be the source<br />
of the problem, any claim may not be honored.<br />
Before you begin to work with fiber cement siding, it<br />
is important that you and the members of your crew<br />
have read and understand the information in this<br />
guide, particularly:<br />
XXSafety XXStorage and Handling<br />
XXCutting and Fastening<br />
XXWall Preparation<br />
Also, review the instructions for the particular siding<br />
product you will install (Lap, Vertical, or Shapes) and<br />
assemble the right tools, fasteners, and accessories<br />
before you begin.<br />
An important note about <strong>CertainTeed</strong> warranties:<br />
Failure to comply with <strong>CertainTeed</strong> installation instructions<br />
and/or applicable building codes may affect product<br />
performance and void the product warranty. Please refer<br />
to ICC-ES ESR-1668 and other technical information<br />
available at www.certainteed.com
<strong>CertainTeed</strong> WeatherBoards Fiber Cement Siding <strong>Installation</strong> <strong>Manual</strong><br />
Section 2: Estimating<br />
Siding<br />
Use the illustrations and formulas below and enter totals on the estimating form in this section.<br />
These formulas apply for both horizontal and vertical installations.<br />
NOTE: Depending on the pitch of the roof, gables and more cut-up areas will produce a higher scrap rate.<br />
Rectangular wall surfaces<br />
Measure height (excluding gables).<br />
Measure width (including doors and windows).<br />
Repeat for remaining walls.<br />
Triangular gable end surfaces<br />
Measure height at center (add 1' to allow for<br />
waste). Measure width and divide by half.<br />
Repeat for remaining gables.<br />
Upper wall of gambrel house<br />
Divide the upper wall of a gambrel house.<br />
Then use these formulas:<br />
Repeat for remaining gambrel surfaces.<br />
Dormer sides<br />
Measure the height of the dormer (add 1' to<br />
allow for waste). Use these formulas:<br />
Repeat for all dormers.<br />
Soffit<br />
Measure width of eave to be covered.<br />
Measure length of eave.<br />
Repeat for remaining eaves.<br />
Porch Ceiling<br />
Measure length of porch area to be covered.<br />
Measure width of porch.<br />
______________ x ______________ = ______________<br />
(height) (width) (surface area)<br />
______________ x ______________ = ______________<br />
(height) (1/2 width) (surface area)<br />
1/2 (B+C) x H = ____________<br />
+<br />
(1/2 C) x D = ________________<br />
Add to get total area:<br />
___________________________<br />
______________ x ______________ = ______________<br />
(1/2 height) (1/2 width) (surface area,<br />
1 side)<br />
____________________ x 2 = _______________________<br />
(surface area, 1 side) (total dormer surface area)<br />
______________ x ______________ = ______________<br />
(length) (width) (surface area)<br />
______________ x ______________ = ______________<br />
(length) (width) (surface area)<br />
7
<strong>CertainTeed</strong> WeatherBoards Fiber Cement Siding <strong>Installation</strong> <strong>Manual</strong><br />
Trim<br />
Insert the number of lineal feet or the number of pieces<br />
8<br />
Front<br />
Left<br />
Right<br />
Rear<br />
Front<br />
Left<br />
Right<br />
Rear<br />
Front<br />
Left<br />
Right<br />
Rear<br />
Front<br />
Left<br />
Right<br />
Rear<br />
Front<br />
Left<br />
Right<br />
Rear<br />
7/16" (actual) Trim/Fascia<br />
3-1/2" 5-1/2" 7-1/4" 9-1/4" 11-1/4"<br />
4/4" (nominal) Trim<br />
2" 3" 4" 6" 8" 10" 12"<br />
5/4" (nominal) Trim<br />
3" 4" 5" 6" 8" 10" 12"<br />
Restoration Millwork Exterior Trim<br />
Front<br />
Left<br />
Right<br />
Rear<br />
5/4" x 4"<br />
5/4" x 4"<br />
J-Pocket 5/4" x 6"<br />
One-Piece Corners<br />
5/4" x 6"<br />
J-Pocket<br />
Inside<br />
Corner<br />
5/8" (nominal) Trimboards<br />
4" 6" 8" 10" 12"<br />
1" (nominal) Trimboards<br />
4" 6" 8" 10" 12" 16"
<strong>CertainTeed</strong> WeatherBoards Fiber Cement Siding <strong>Installation</strong> <strong>Manual</strong><br />
Front<br />
Left<br />
Right<br />
Rear<br />
Front<br />
Left<br />
Right<br />
Rear<br />
Front<br />
Left<br />
Right<br />
Rear<br />
Front<br />
Left<br />
Right<br />
Rear<br />
Front<br />
Left<br />
Right<br />
Rear<br />
5/4" (nominal) Trimboards<br />
4" 4" J-Pocket 6" 6" J-Pocket 8" 10" 12" 16"<br />
Decorative Trim Boards<br />
Brickmould J-Channel #49 Crown #47 Crown #45 Crown<br />
Rams Crown Base Cap Rake Quarter Round Drip Cap<br />
Shingle Mould Bed Mould Lattice Sill Nose Sill<br />
356 Casing RB3 Casing Back Band<br />
Adhesives<br />
Bond & Fill ® TrimTight<br />
Adjustable<br />
Back Band Skirtboard<br />
9
<strong>CertainTeed</strong> WeatherBoards Fiber Cement Siding <strong>Installation</strong> <strong>Manual</strong><br />
Estimating Form<br />
10<br />
Siding 1 Walls ft 2<br />
Gable ends ft 2<br />
Dormer sides ft 2<br />
Upper gambrel walls ft 2<br />
Total wall surface area ft 2 (A)<br />
Areas not to be covered Garage doors/sliding glass doors ft 2 x .5 = (B)<br />
Subtract B from A for total net surface area ft 2<br />
Soffit ft 2<br />
Porch ft 2<br />
Ceiling ft 2<br />
Fasteners Nail gun nails coils<br />
Hand nails lbs<br />
Screws lbs<br />
1 If you are using multiple profiles on the same project (e.g., Shapes, lap siding, and vertical panels), you will have to calculate the amount of siding to<br />
be used for each profile separately.
<strong>CertainTeed</strong> WeatherBoards Fiber Cement Siding <strong>Installation</strong> <strong>Manual</strong><br />
Coverage Chart<br />
This chart indicates the number of pieces of WeatherBoards Fiber Cement siding you will need.<br />
It does not include waste, and all numbers have been rounded up.<br />
LAPS SHAPES PANELS<br />
5-1/4" 6-1/4" 7-1/4" 8-1/4" 9-1/4" 12"<br />
8-1/4”<br />
Perfection<br />
Shingles<br />
Random<br />
Sq. Edge<br />
12"<br />
Random<br />
Sq. Edge 16",<br />
Random Sq.<br />
Staggered Edge,<br />
Half-Rounds<br />
& Octagons 4' x 8' 4' x 9' 4' x 10'<br />
Overlap 1.25 1.25 1.25 1.25 1.25 1.25 1.25 7.00 9.00 — — —<br />
Exposure 4.00 5.00 6.00 7.00 8.00 10.75 7.00 5.00 7.00 — — —<br />
Squares*<br />
1 25 20 17 15 13 10 15 60 43 4 3 3<br />
2 50 40 34 29 25 19 29 120 86 7 6 5<br />
3 75 60 50 43 38 28 43 180 129 10 9 8<br />
4 100 80 67 58 50 38 58 240 172 13 12 10<br />
5 125 100 84 72 63 47 72 300 215 16 14 13<br />
6 150 120 100 86 75 56 86 360 258 19 17 15<br />
7 175 140 117 100 88 66 100 420 300 22 20 18<br />
8 200 160 134 115 100 75 115 480 343 25 23 20<br />
9 225 180 150 129 113 84 129 540 386 29 25 23<br />
10 250 200 167 143 125 93 43 600 429 32 28 25<br />
11 275 220 184 158 138 103 158 660 472 35 31 28<br />
12 300 240 200 172 150 112 172 720 515 38 34 30<br />
13 325 260 217 186 163 121 186 780 558 41 37 33<br />
14 350 280 234 200 175 131 200 840 600 44 39 35<br />
15 375 300 250 215 188 140 215 900 643 47 42 38<br />
16 400 320 267 229 200 149 229 960 686 50 45 40<br />
17 425 340 284 243 213 159 243 1,020 729 54 48 43<br />
18 450 360 300 258 225 168 258 1,080 772 57 50 45<br />
19 475 380 317 272 238 177 272 1,140 815 60 53 48<br />
20 500 400 334 286 250 186 286 1,200 858 63 56 50<br />
21 525 420 350 300 263 196 300 1,260 900 66 59 53<br />
22 550 440 367 315 275 205 315 1,320 943 69 62 55<br />
23 575 460 384 329 288 214 329 1,380 986 72 64 58<br />
24 600 480 400 343 300 224 343 1,440 1,029 75 67 60<br />
25 625 500 417 358 313 233 358 1,500 1,072 79 70 63<br />
* 1SQ = 100 ft²<br />
11
<strong>CertainTeed</strong> WeatherBoards Fiber Cement Siding <strong>Installation</strong> <strong>Manual</strong><br />
Section 3: Safety<br />
Ventilation<br />
When fiber cement is cut or drilled, it will create dust.<br />
This dust may contain crystalline silica, which can pose a<br />
health risk. To ensure adequate ventilation, work outdoors<br />
or use mechanical ventilation to reduce potential exposure<br />
to below OSHA Permissible Exposure Limits (PELs).<br />
IDEAL: Cut outdoors and use cutting tools that minimize dust.<br />
If ventilation is not adequate to limit exposure, wear<br />
a NIOSH-approved disposable respirator (N95) or air<br />
purifying cartridge respirator fitted with N (non-oil), P,<br />
or R series filters.<br />
12<br />
CUTTING INDOORS: Play it safe by providing<br />
good ventilation and wearing a respirator.<br />
For more information on OSHA Permissible Exposure<br />
Limits, go to www.osha.gov/SLTC/pel/ More information<br />
about Respiratory Protection is available at www.osha.<br />
gov/SLTC/respiratoryprotection/index.html<br />
Ladders<br />
New OSHA Fall Protection regulations are in effect.<br />
STD 03-11-002 compliance guidance for residential<br />
construction was issued on Dec. 6, 2010, and went<br />
into effect June 16, 2011. For more information, visit<br />
www.OSHA.gov or consult your local state OSHA plan.<br />
XXMaintain ladders free of oil, grease, and other<br />
slipping hazards.<br />
XXDo not load ladders beyond their maximum intended<br />
load nor beyond their manufacturer’s rated capacity.<br />
XXUse ladders only for their designed purpose.<br />
XXUse ladders only on stable and level surfaces unless<br />
secured to prevent accidental movement.<br />
XXDo not use ladders on slippery surfaces unless<br />
secured or provided with slip-resistant feet to prevent<br />
accidental movement. Do not use slip-resistant feet as<br />
a substitute for exercising care when placing, lashing or<br />
holding a ladder up on slippery surfaces.<br />
XXSecure ladders placed in areas such as passageways,<br />
doorways, or driveways, or where they can be<br />
displaced by workplace activities or traffic to prevent<br />
accidental movement. Or use a barricade to keep<br />
traffic or activity away from the ladder.<br />
XXKeep areas clear around the top and bottom<br />
of ladders.<br />
XXDo not move, shift, or extend ladders while in use.<br />
XXUse ladders equipped with nonconductive side rails<br />
if the worker or the ladder could contact exposed<br />
energized electrical equipment.<br />
XXFace the ladder when moving up or down.<br />
XXUse at least one hand to grasp the ladder<br />
when climbing.<br />
XXDo not carry objects or loads that could cause<br />
loss of balance and falling.<br />
XXDo not use ladders as a horizontal work platform.
<strong>CertainTeed</strong> WeatherBoards Fiber Cement Siding <strong>Installation</strong> <strong>Manual</strong><br />
Tools<br />
One of the most important things you can do to make<br />
the job go smoothly is to make sure that all tools are in<br />
good shape and everyone understands how to use<br />
them properly.<br />
XXMaintain all hand tools and equipment in a safe<br />
condition and check regularly for defects. Do not<br />
use broken or damaged tools.<br />
XXUse double insulated tools or ensure that all tools are<br />
grounded. Protect all power tools with ground fault<br />
circuit interrupters (GFCI). Plug into GFCI-protected<br />
generators or use GFCI extension cords.<br />
XXEquip all power saws with blade guards and turn<br />
them off when they are not in use.<br />
XXBefore you or your crew use pneumatic or poweractivated<br />
tools, make sure everyone has been<br />
trained and checked out on their proper use.<br />
XXShear-type tools will cause little dust emissions.<br />
However, using polycrystalline diamond-tipped and<br />
carbide-tipped blades will create dust.<br />
Tools for Fastening<br />
XXA pneumatic nail gun designed for siding applications<br />
is faster than hand nailing. When using a pneumatic<br />
nailer for installing fiber cement siding to wood, adjust<br />
the air pressure to meet job site conditions, typically<br />
80–85 psi.<br />
Big Sky Adapter<br />
IDEAL: Pneumatic Nailers<br />
Do not use framing nail guns to apply fiber cement<br />
because they will over drive nails. Do not use finishing<br />
nail guns or staplers.<br />
XXFiber cement siding can be hand nailed. Do not over<br />
drive the nail; seat the bottom of the nail head<br />
flush with the surface of the nail. When hand nailing<br />
face-nailed rake-angle cuts, you may have to predrill<br />
the holes.<br />
XXWe recommend using a Big Sky adapter<br />
(www.bigskyadapter.com) to maintain proper<br />
nail placement when blind nailing.<br />
Personal Protective Equipment (PPE)<br />
OSHA requires that workers wear applicable personal<br />
protective equipment.<br />
XXFalling debris is a hazard when installing siding and<br />
accessories. All workers and visitors should wear hard<br />
hats while they are on the jobsite.<br />
XXWhen cutting or nailing siding and accessories, wear<br />
cut-resistant gloves and ANSI Z87-approved eye<br />
protection or face shields.<br />
XXWear sturdy shoes or boots to prevent or minimize<br />
foot injuries.<br />
Wear Safety Equipment<br />
Work safely and use the proper precautions.<br />
More information about personal protective<br />
equipment is available at www.osha.gov/SLTC/<br />
personalprotectiveequipment<br />
Consult the WeatherBoards Material Safety Data Sheet<br />
(MSDS) on our website www.certainteed.com and a<br />
qualified industrial hygienist for further health and safety<br />
information related to this product.<br />
13
<strong>CertainTeed</strong> WeatherBoards Fiber Cement Siding <strong>Installation</strong> <strong>Manual</strong><br />
Air Compressors<br />
Air compressors can be very dangerous and cause<br />
serious injury if used improperly, so before you begin<br />
to use your air compressor, set it up properly to ensure<br />
safe operation.<br />
XXLocate the air compressor in an area that is free and<br />
clear from dust and debris. Excessive dust and debris<br />
will clog the filter and may even damage the internal<br />
components of the compressor.<br />
XXLimit the length of hose and the number of splits<br />
between the compressor and the nail gun.<br />
XXSet the air pressure regulator on the air compressor to<br />
the appropriate PSI setting and test the pressure for<br />
over/under driving the fastener on a scrap piece.<br />
NOTE: Always turn the air compressor off and<br />
drain the air out of the tank before connecting or<br />
disconnecting air tools. Failure to do this may<br />
result in serious injury.<br />
Section 4: Storage<br />
and Handling<br />
WeatherBoards Fiber Cement must be kept covered<br />
and stored off the ground, on a clean, flat, and level<br />
surface. Before it is installed, fiber cement should also<br />
be protected from direct exposure to the weather.<br />
<strong>CertainTeed</strong> recommends that pallets be stored in a<br />
garage, under a protected area or under a tarp because<br />
fiber cement siding that is wet can become heavy and<br />
more flexible, making it difficult to carry and install. Also,<br />
the joints between the panels can swell or shrink if fiber<br />
cement gets wet before it is installed. If WeatherBoards<br />
Fiber Cement siding becomes wet, it must dry completely<br />
prior to installation.<br />
NOTE: Do not install fiber cement material that is<br />
wet. Installing wet or saturated boards may result<br />
in the butt or end joints shrinking or swelling after<br />
installation.<br />
Proper Storage<br />
WeatherBoards Fiber Cement siding is coated with<br />
our FiberTect ® Sealing System to protect against<br />
moisture. However, even with this sealer, the product<br />
can become saturated if not protected during storage.<br />
If fiber cement becomes saturated, do not install it<br />
until it dries out thoroughly.<br />
14<br />
Proper Storage: Store covered, on pallets.<br />
XXDo not store fiber cement siding or trim directly on<br />
the ground. If a covered area such as a garage is not<br />
available on the jobsite, place pallets on wood blocks<br />
to allow air flow underneath the pallet.<br />
XXIf palletized fiber cement is to be placed on a<br />
damp surface, place a vapor barrier on the ground<br />
underneath the pallet.<br />
XXUse the plastic bonnet provided to keep the product<br />
dry and prevent moisture from settling on the siding. If<br />
you expect snow or rain, cover the bonnet with a tarp.<br />
Improper Storage<br />
XXIf the siding is packaged with slip sheeting, ensure that<br />
the slip sheeting stays between the boards to protect<br />
against marring the surface, boards sticking together,<br />
and moisture.<br />
NOTE: Pay particular attention to the top two or<br />
three rows of siding on the pallet, as these boards<br />
are more likely than others to absorb moisture.<br />
For best results, we suggest you not install the top<br />
two or three rows of siding on a pallet until you are<br />
absolutely certain that they are dry.<br />
NOTE: Wet boards are visibly darker in color, while<br />
dry boards are a lighter grey tone.<br />
NOTE: Many issues can be traced back to storage<br />
and handling issues. Best practice is to put an<br />
additional layer of plastic or a tarp over the pallets<br />
when they are on site.
<strong>CertainTeed</strong> WeatherBoards Fiber Cement Siding <strong>Installation</strong> <strong>Manual</strong><br />
Proper Handling<br />
XXAlways carry fiber cement boards by holding the<br />
narrow edge.<br />
Proper Handling<br />
Pick up the boards from the center; carry by the narrow edge.<br />
XXIf handled incorrectly, the surface of prefinished boards<br />
will scratch.<br />
XXDo not slide boards when removing them from the<br />
pallet as sliding one board against the other will mar<br />
the surface of the board below. Always pick up the<br />
boards from the center.<br />
Improper Handling: When carrying fiber cement boards,<br />
support the product along its length.<br />
XXAlways use corner protectors when banding fiber<br />
cement siding or trim.<br />
XXThe outside face of <strong>CertainTeed</strong> WeatherBoards Fiber<br />
Cement Cedar Lap siding with ColorMax ® finish is<br />
covered with a patented protective film. To prevent<br />
surface damage prior to installation, do not remove this<br />
film before cutting or fastening.<br />
Section 5: Tools<br />
and Accessories<br />
Some tools are better than others for cutting, drilling,<br />
and fastening fiber cement siding. Listed below are<br />
our recommendations for the best tools for use with<br />
WeatherBoards Fiber Cement siding.<br />
Cutting & Drilling<br />
Mechanical shears create virtually no dust.<br />
XXShears—Shears produce less dust than high-speed<br />
tools. They cut with relatively little effort, less noise,<br />
and virtually no dust. The cut is not as smooth as the<br />
cut of a polycrystalline diamond-tipped blade, but it is<br />
acceptable. Manufacturers include:<br />
◆ PacTool<br />
◆ Makita ®<br />
◆ DeWalt ®<br />
◆ Malco ®<br />
Corner Protectors<br />
Reduce the risk of<br />
marring the surface.<br />
15
<strong>CertainTeed</strong> WeatherBoards Fiber Cement Siding <strong>Installation</strong> <strong>Manual</strong><br />
Fiber cement shears typically have a flat side and a<br />
bevel side; consult the shear’s user guide for proper<br />
cutting technique. When using shears, take care to avoid<br />
delamination of the product layers at the edges.<br />
XXGuillotine Shears—Guillotine shears can cut cleanly,<br />
without distorting the edges of the siding.<br />
16<br />
Bullet Tools<br />
EZ Shear #113<br />
Malco Fiber Cement<br />
Angle Cutter<br />
Cuts panels and trim up<br />
to 1" thick x 20" wide<br />
Cuts panels up to 5/16"<br />
thick x 11" wide<br />
Best Practice: For minimal dust and a clean cut, use a circular<br />
saw equipped with a polycrystalline diamond-tipped blade.<br />
XXCircular Saws—Circular saws create dust and, for<br />
that reason, should be used in outdoor, well-ventilated<br />
areas. Manufacturers include:<br />
Porter-Cable ® 743K<br />
Hitachi C7YAH 7-1/4"<br />
Makita ® 5057KB 7-1/4"<br />
Ridgid ® R3401 5"<br />
XXSaw Blades—<strong>CertainTeed</strong> recommends polycrystalline<br />
diamond-tipped blades to cut fiber cement<br />
siding because they outperform carbide-tipped blades.<br />
Fiber cement dulls carbide-tipped blades faster<br />
than polycrystalline diamond-tipped blades. You can<br />
expect to use five or more carbide-tipped blades per<br />
average residential installation, whereas polycrystalline<br />
diamond-tipped blades will perform satisfactorily for<br />
five to six residential installations.<br />
Exception: Use a carbide-tipped blade to cut 5/4<br />
and 4/4 fiber cement trim.<br />
Manufacturers include:<br />
Irwin ® Marathon ® PCD-7-1/4 -10" -12"<br />
Malco ® 7-1/4" –10"–12"<br />
Hitachi 7-1/4"–10"–12"<br />
DeWalt ® 7-1/4"<br />
Tenryu Board Pro -7-1/4"–10"–12"<br />
Bosch 7-1/4"–10"<br />
NOTE: Do not cut wood with a polycrystalline<br />
diamond-tipped blade because wood will dull<br />
the blade.<br />
XXMiter Saw—When equipped with a polycrystalline<br />
diamond-tipped blade, a miter saw will cut up to five<br />
pieces of fiber cement siding at a time.<br />
XXJig Saws—Jig saws equipped with polycrystalline<br />
diamond-tipped blades are typically used to cut service<br />
openings, curves, radii, and other irregular shapes.<br />
XXHEPA Filter Vacuum Attachments for Power Saws—<br />
When cutting fiber cement, we highly recommend<br />
using power saws equipped with HEPA filter vacuum<br />
attachments. When attached directly to power tools,<br />
vacuums equipped with HEPA filters minimize the<br />
amount of respirable dust the operator is exposed to.<br />
Manufacturer’s include:<br />
◆ Fein – Turbo 2<br />
◆ Porter-Cable<br />
◆ Festool<br />
X<br />
X Drills—Masonry bits work best when drilling holes in<br />
fiber cement siding and trim.
<strong>CertainTeed</strong> WeatherBoards Fiber Cement Siding <strong>Installation</strong> <strong>Manual</strong><br />
Fastening<br />
XXPneumatic Nailers—Siding and roofing nailers<br />
can be used to fasten WeatherBoards Fiber Cement<br />
siding. They should not be used to fasten fiber<br />
cement trim. Use finish nail guns to install trim.<br />
Manufacturers include:<br />
◆ Max ◆ Hitachi<br />
◆ Makita ® ◆ Stanley Bostich ®<br />
Do not use framing nailers even if the nail is a full head<br />
because you will not be able to regulate the pressure well<br />
enough to avoid overdriving the nails.<br />
XXFastening to Metal—Fiber cement siding can<br />
be attached to metal framing with any of the<br />
following tools:<br />
◆ Impact Screw gun ◆ Aerofast Pins<br />
◆ Drywall Screw gun ◆ Simplicity Tool Alignment Clip<br />
◆ ET&F pins ◆ Max Tool<br />
XXHammer—If you hand nail fiber cement siding, use a<br />
smooth-faced hammer. Waffle-headed hammers can<br />
mark the face of the siding.<br />
XXNail Placement Adapter—<br />
The adapter provides<br />
consistent placement of<br />
the nail one inch down<br />
from the top of the siding<br />
to the center of the nail<br />
while still allowing the depth<br />
adjustment to function<br />
properly. The adapter helps eliminate high and low<br />
nail problems and the warranty issues that can result.<br />
<strong>CertainTeed</strong> recommends using a Big Sky Adapter.<br />
Alignment<br />
XXAlignment tools ensure a consistent 1-1/4" overlap and<br />
allow one-person installation of fiber cement panels.<br />
Examples include:<br />
◆ PacTool Gecko Gauge #1<br />
◆ Bear Clips<br />
◆ Malco ® Facing Gauge<br />
◆ SoloSider Adjustable Gauge<br />
◆ Simplicity Tool Alignment Clip<br />
◆ Malco ® Overlap Gauge<br />
Accessories<br />
The right accessories can improve the overall quality of<br />
the siding project and make the job go faster. Some of the<br />
accessories <strong>CertainTeed</strong> recommends include:<br />
XXButt Joint Cover (H-covers)—A joint cover is a<br />
piece of metal that fits over the joint between fiber<br />
cement siding panels. Joint covers add additional<br />
weatherproofing to the siding and increase its<br />
aesthetic appearance.<br />
XXH-channel—This receiving channel can be used to<br />
conceal the edges of vertical siding panels at the joint.<br />
XXOff-stud Joiner—Off-stud joiners are used to create<br />
a solid backing behind the joint when the joint is not<br />
located over a stud. They hold the bottom edge of the<br />
siding panel in line and provide a seamless appearing<br />
joint. Manufacturers include Simplicity Tool.<br />
Aluminum Moldings/Trim<br />
Moldings and trim can define corners and transitions from<br />
one plane to another, or between dissimilar materials.<br />
Manufacturers include:<br />
◆ Easytrim Reveals (Strongly Recommended)<br />
◆ Fry Reglet<br />
◆ Tamlyn<br />
◆ AMF and Associates<br />
Note: Do not use uncoated aluminum or metal<br />
materials with fiber cement siding.<br />
Backflashing<br />
A flashing strip installed behind the butt joint of lap<br />
siding, extending 3" to the left and right of the joint<br />
and 1" over the top of the previous course of siding.<br />
Examples include:<br />
XXBear Skin<br />
XXSimplicity Tool Junction Flashing<br />
XXPainted Aluminum Trim Coil<br />
X X#15<br />
felt<br />
17
<strong>CertainTeed</strong> WeatherBoards Fiber Cement Siding <strong>Installation</strong> <strong>Manual</strong><br />
Section 6: Cutting<br />
Installing fiber cement siding requires carpentry skills<br />
and knowledge that are unique to this material. There<br />
are two key techniques to the way the material is cut<br />
and fastened. Also, good wall preparation is extremely<br />
important to a quality job, so much so that we have<br />
devoted a full section to it starting on page 27.<br />
Personal Protective Equipment<br />
When fiber cement is cut or drilled, it will create dust.<br />
This dust may contain crystalline silica, which can pose<br />
a health risk. Using the recommended cutting tools and<br />
blades can greatly reduce the amount of dust generated<br />
when cutting fiber cement. To minimize dust, use cutting<br />
tools equipped with a dust collector, and never use water<br />
when cutting. Ensure adequate ventilation by working<br />
outdoors or by using mechanical ventilation to reduce<br />
potential exposure below applicable exposure limits.<br />
If ventilation is not adequate to limit exposure, wear<br />
a NIOSH-approved disposable respirator (N95) or air<br />
purifying cartridge respirator fitted with N (non-oil), P, or R<br />
series filters. Finally, always wear safety goggles and dust<br />
protection equipment when operating cutting tools.<br />
Cutting Tools and Blades<br />
18<br />
Good<br />
Better<br />
Best<br />
Recommended Tools and Blades<br />
Power miter saw with polycrystalline<br />
diamond-tipped blade<br />
XXCreates more dust than a circular<br />
saw with a polycrystalline diamondtipped<br />
blade<br />
Circular saw with carbide-tipped blade<br />
XXBecomes dull faster and creates more<br />
dust than polycrystalline diamondtipped<br />
blade<br />
Circular saw with polycrystalline diamondtipped<br />
blade<br />
X<br />
X Creates less dust than miter saws and<br />
carbide-tipped blades<br />
Requirements<br />
XXCut fiber cement board face down when using a<br />
circular saw or mechanical shears. Cover the saw table<br />
with a piece of carpet or soft cover to avoid scratching<br />
the face of the siding.<br />
Proper Cutting Setup<br />
Use good support and position the siding face down when<br />
using a circular saw or mechanical shears.<br />
XXCut fiber cement board face up when using a chop/<br />
miter saw.<br />
XXWhen cutting fiber cement, support the board along its<br />
length and near the cut.<br />
XXTo avoid breakage, use extra care when you cut near<br />
the edge.<br />
Leave Protective Film on Cedar Lap Siding with <strong>CertainTeed</strong><br />
ColorMax ® Finishing System until board is installed.
<strong>CertainTeed</strong> WeatherBoards Fiber Cement Siding <strong>Installation</strong> <strong>Manual</strong><br />
XXHandle narrow and notched pieces carefully to avoid<br />
breakage.<br />
XXWhen cutting beaded siding profile, start the cut<br />
against the bead.<br />
XXWhen cutting <strong>CertainTeed</strong> WeatherBoards Fiber<br />
Cement Cedar Lap Siding with <strong>CertainTeed</strong> ColorMax ®<br />
finish, leave the protective film in place until the siding<br />
is nailed to the substrate; then remove it before<br />
applying the next course.<br />
NOTE: Always re-seal<br />
all field-cut edges with<br />
100% acrylic latex paint<br />
or primer before installing<br />
fiber cement.<br />
Section 7. Fastening<br />
Fiber Cement should be fastened to studs or solid<br />
framing a maximum of 24" on center (o.c.). In some<br />
instances, there may not be a stud or framing member<br />
available to fasten into—such as along a rake, inside or<br />
outside corners, or at a window or door opening. In these<br />
areas, the fiber cement must be fastened to a structuralrated<br />
sheathing. Refer to the “Basic Fastening Schedule”<br />
for applications in wind zones up to 110 mph<br />
(≤30 ft. high, Exposure B).<br />
Building codes and regulations vary throughout the<br />
country. In some specific situations, fastening into other<br />
structural materials may be acceptable. Refer to local<br />
building codes and/or ICC-ES Report ESR-1668 found<br />
on www.certainteed.com for alternative applications or<br />
wind conditions.<br />
All fasteners must be corrosion-resistant, double hotdipped<br />
galvanized or stainless steel. Do not use electrogalvanized<br />
nails because they corrode faster, especially<br />
in coastal areas.<br />
NOTE: Basic fastening schedule appears on<br />
page 26.<br />
Nails<br />
XX<strong>CertainTeed</strong> recommends non-corrosive, double hotdipped,<br />
galvanized or stainless steel siding nails. Do<br />
not use electro-galvanized nails.<br />
XXOther non-corrosive nails may be acceptable; refer to<br />
local building codes.<br />
XXColor-matched, double hot-dipped, galvanized nails<br />
for face nailing siding and trim with <strong>CertainTeed</strong><br />
ColorMax ® finish are available from Maze Nails<br />
(www.mazenails.com).<br />
Screws<br />
XXMust be non-corrosive and designed for use<br />
with fiber cement.<br />
XXScrew type is determined by application and/<br />
or wall design<br />
XXScrew head diameter should be equal to or greater<br />
than 0.375".<br />
The following suppliers manufacture screws specifically<br />
designed for use with fiber cement siding:<br />
XXGrabber ® : www.grabberman.com<br />
XXITW Buildex: www.itwbuildex.com<br />
XXPrime Source ® : www.pro-twist.com<br />
XXSimpson-Strong-Tie Quik Drive ® :<br />
www.strongtie.com<br />
NOTE: For ICC reports, refer to www.certainteed.com<br />
19
<strong>CertainTeed</strong> WeatherBoards Fiber Cement Siding <strong>Installation</strong> <strong>Manual</strong><br />
Acceptable Fastening Alternatives Fastening to Structural Materials<br />
20<br />
Phillips<br />
Robertson<br />
Type 17<br />
Self Drilling<br />
Winged Self Drilling<br />
Screw Driver<br />
Drill Point/Tip<br />
Screw Shape<br />
Flat/Counter Sunk/Bugle<br />
Fastening to Wood<br />
The maximum stud spacing allowed is 24". Refer to<br />
local building codes for structural requirements.<br />
Nails must penetrate a minimum of 1-1/4" into the<br />
structural framing. The minimum penetration may include<br />
the thickness of the structural sheathing (7/16" OSB or<br />
1/2" plywood).<br />
If you use screws, a minimum of 3/4" must penetrate the<br />
structural framing. Some screws may require more than<br />
3/4” penetration to resist lateral loads—refer to the screw<br />
manufacturer for requirements.<br />
You can hand nail WeatherBoards Fiber Cement.<br />
However, fiber cement is harder than wood, so be sure<br />
the nails are well set before driving them. It may be<br />
necessary to predrill the holes at the corners to prevent<br />
the edges from breaking.<br />
Wood<br />
framed<br />
wall<br />
Insulation<br />
Concrete<br />
slab<br />
1-1/4"<br />
Fastening to Wood<br />
Fiber<br />
cement<br />
siding<br />
Exterior wall sheathing<br />
1-1/4"<br />
Weather-resistant barrier<br />
2" starter<br />
Finished grade
<strong>CertainTeed</strong> WeatherBoards Fiber Cement Siding <strong>Installation</strong> <strong>Manual</strong><br />
Fastening to Metal Framing<br />
Fiber cement siding can be installed over metal framing.<br />
Fiber cement must be attached to the metal framing<br />
members. Screws must penetrate into the metal framing<br />
a minimum of 1/4" or three threads.<br />
Self-tapping, corrosive-resistant, ribbed bugle-head<br />
screws specifically designed for use with fiber cement<br />
siding are recommended.<br />
You may also use corrosion-resistant pneumatic pins<br />
to fasten the siding to metal framing. Consult the pin<br />
manufacturer for application instructions.<br />
Metal<br />
framing<br />
Insulation<br />
Concrete<br />
slab<br />
Fastening to Metal<br />
Fiber<br />
cement<br />
siding<br />
1-1/4"<br />
Weather-resistant barrier<br />
2" fiber cement starter<br />
1-1/4" Exterior wall sheathing<br />
Finished grade<br />
Determining Approved Heights for Installing<br />
Fiber Cement Siding<br />
<strong>CertainTeed</strong> does not limit the height at which<br />
WeatherBoards Fiber Cement siding can be installed.<br />
Rather, the allowable height is constrained by:<br />
XXNational, state, and local building codes, as adopted<br />
by the local jurisdiction<br />
XXThe design windload that is specific to the project and<br />
location for the cladding<br />
XXThe construction assemblies and systems for the<br />
specific project<br />
XXThe allowable windload capacity of the siding product<br />
to be installed<br />
To determine allowable heights, consult with your<br />
local code official or governing body and follow the<br />
requirements listed in ICC-ES Report ESR-1668, CCMC<br />
Evaluation Report 12987-R at certainteed.com<br />
21
<strong>CertainTeed</strong> WeatherBoards Fiber Cement Siding <strong>Installation</strong> <strong>Manual</strong><br />
Fastening Requirements for<br />
Atypical Walls<br />
Non-vertical Walls<br />
WeatherBoards Fiber Cement can be installed on nonvertical<br />
walls when the walls are no more than 30° off the<br />
vertical, or no less than a 60° angle, measured from the<br />
plane of the ground, and the wall is not a functional roof<br />
above occupied space. The top of the wall cannot be<br />
higher than 30' above grade. Because of different windload<br />
requirements, your local building code may stipulate<br />
a lower height. Use the lesser of the two heights.<br />
1. Install an underlayment of #15 (minimum) felt or<br />
waterproofing membrane.<br />
2. Cap the uppermost edge of the top siding course to<br />
prevent the water from getting behind the siding.<br />
3. Flash all accessories to shed water away from<br />
the substrate.<br />
22<br />
No<br />
less<br />
than<br />
60°<br />
Lap Siding<br />
(up to 8-1/4")<br />
Lap Siding<br />
(9-1/4")<br />
Vertical Siding<br />
1-1/4"<br />
1"<br />
30"<br />
Alternative Wall Systems<br />
WeatherBoards Fiber Cement siding may be applied<br />
over alternative wall systems such as Structural<br />
Insulated Panels (SIP), Insulated Concrete Forms (ICF),<br />
and Rainscreen Systems. Fastening requirements for<br />
the siding depend on the specific wall system design.<br />
Fastening fiber cement onto alternative wall systems<br />
must be in accordance with local building codes.<br />
Refer to the specific wall system manufacturer for<br />
cladding recommendations.<br />
Structural Insulated Panels<br />
Fiber Cement Siding Allowable Wind Load<br />
Structural Insulated Panels (SIP) are a manufactured wall<br />
system, so follow the manufacturer’s instructions for the<br />
application of the SIP and cladding.<br />
The siding attachment methods and their allowable<br />
windload capacities below are based on testing in<br />
accordance with ASTM E330 (wind load) and ASTM<br />
D1037 (fastener withdrawal and pull through). The SIP<br />
system must be capable of supporting the imposed loads<br />
from the siding, including dead load and wind loads.<br />
Fastener Fastening Method Allowable Wind Pressure<br />
1-3/4" roofing nails, double<br />
HD galvanized; 3/8" head<br />
1-3/4" roofing nails, double<br />
HD galvanized; 3/8" head<br />
1-3/4" roofing nails, double<br />
HD galvanized; 3/8" head<br />
6d 2" siding nails; double<br />
HD galvanized<br />
6d 2" siding nails; double<br />
HD galvanized<br />
Blind nailed 8" o.c.<br />
Blind nailed 12" o.c.<br />
Blind nailed 8" o.c.<br />
Face nailed 12" o.c.<br />
6" o.c. around edges; 12" o.c.<br />
each way in the filed<br />
40.44 psf; 125 mph in “B”<br />
exposures up to 30'<br />
27.0 psf, 105 mph in “B”<br />
exposures up to 30'<br />
32.22 psf; 110 mph in “B”<br />
exposures up to 30'<br />
24.4 psf; 100 mph in “B”<br />
exposures up to 30'<br />
18.67 psf; 85 mph in “B”<br />
exposures up to 30'
<strong>CertainTeed</strong> WeatherBoards Fiber Cement Siding <strong>Installation</strong> <strong>Manual</strong><br />
Concrete Masonry (CMU) or Poured Concrete Walls<br />
Consult applicable building codes before installing WeatherBoards Fiber Cement siding on CMU or a concrete wall.<br />
The CMU or concrete wall must be able to resist all loads transferred from the siding. Also, comply with the requirements<br />
listed in the most recent version of this manual. The recommended fastening methods are listed below. 1<br />
1 Wall preparation recommendations for CMU and Poured Concrete Walls can be found on page 28.<br />
Pressure Treated Furring<br />
(1" x 3" min.)<br />
Fastened 12" o.c.<br />
Pressure Treated Furring<br />
(1" x 3" min.)<br />
Fastened 8" o.c.<br />
Recommended Fasteners for CMU and Concrete Walls 2<br />
Fastener Fastening Method Allowable Wind Pressure<br />
1-1/4" roofing nails, double<br />
HD galvanized; 3/8" head<br />
1-1/4" roofing nails, double<br />
HD galvanized; 3/8" head<br />
Blind nailed into furring<br />
Blind nailed into furring<br />
2 See page 25 for recommended fasteners to install fiber cement over furring.<br />
Insulation<br />
Concrete slab<br />
Concrete<br />
masonry<br />
unit or<br />
wall<br />
1-1/2"<br />
min.<br />
Fiber cement siding<br />
1-1/4"<br />
Weather-resistant barrier<br />
Continuous metal flashing<br />
Peel & stick flashing<br />
2" Starter<br />
Final grade<br />
Fastening to Concrete Masonry or Poured Concrete Walls<br />
1-1/4"<br />
2X Furring strips<br />
20.0 psf, 90 mph in “B”<br />
exposures up to 30'<br />
39.0 psf, 125 mph in “B”<br />
exposures up to 30'<br />
23
<strong>CertainTeed</strong> WeatherBoards Fiber Cement Siding <strong>Installation</strong> <strong>Manual</strong><br />
Structural Rainscreens<br />
(Steel Studs/Steel Furring Strips)<br />
Rainscreen systems are designed to promote airflow and<br />
moisture management behind exterior cladding products.<br />
They must be designed by an architect, designer or<br />
project engineer. Non-structural lathe/furring strips are<br />
used as a spacer to establish the rainscreen and are not<br />
intended to substitute as a framing member for direct<br />
attachment of fiber cement siding.<br />
Steel furring strips must be applied to steel framing<br />
members. Spacing between lathe/furring strips must<br />
not exceed 24".<br />
When incorporating <strong>CertainTeed</strong> WeatherBoards Fiber<br />
Cement siding into a rainscreen system, adhere to the<br />
following recommendations:<br />
XXThe rainscreen system must be designed to ensure<br />
that all appropriate windload and anchoring<br />
requirements are met.<br />
XXUse 20 gauge (minimum) steel furring. Steel furring<br />
strips must be applied to steel framing members in<br />
such a manner that they provide equivalent loadbearing<br />
capability.<br />
XXAlign all steel furring strips at framing member locations;<br />
lathe/furring strip horizontal spacing must not<br />
exceed 24".<br />
XXBase the selection of fasteners on the thickness of any<br />
non-structural material(s) between the fiber cement<br />
siding product and the framing member. Use standard<br />
fiber cement siding fasteners to attach the cladding<br />
24<br />
through the non-structural lathe/furring strips and<br />
any other non-structural materials to the structure.<br />
(Refer to the latest <strong>CertainTeed</strong> WeatherBoards Fiber<br />
Cement siding ICC-ES Evaluation Report for fastener<br />
recommendations and fastening requirements.)<br />
XXThe combined thickness of non-structural materials<br />
(e.g. insulated sheathing, non-structural lathe/furring<br />
strips, etc) between steel furring and exterior cladding<br />
may not exceed 1" in thickness. (Lathe/furring strip<br />
thickness requirements may vary; check with your<br />
local code official or governing body for the building<br />
requirements in your area.)<br />
XXAdhere to all flashing, cutting and sealing requirements<br />
outlined in the most current version of this manual.<br />
Non-structural Rainscreens<br />
Rainscreen systems are designed to promote airflow and<br />
moisture management behind exterior cladding products.<br />
When incorporating <strong>CertainTeed</strong> WeatherBoards Fiber<br />
Cement siding into a rainscreen system, adhere to the<br />
following recommendations and install all products in<br />
accordance with all national, state, and local building<br />
codes. Be sure to check with your local code official or<br />
governing body for the building requirements in your area.<br />
To attach fiber cement siding over non-structural furring<br />
strips such as wood lathe/furring, treated plywood, or<br />
alternative furring strips such as Trimline Flow-Thru<br />
Furring Strips:<br />
XXAlign all lathe/furring strips vertically at framing member<br />
locations. Horizontal spacing for lathe/furring strips<br />
must not exceed 24". Failure to fasten the lathe/furring<br />
strips and the siding at framing member locations may<br />
cause the siding to crack and/or wave.<br />
X<br />
X Base fastener selection on the thickness of nonstructural<br />
material(s) between the fiber cement siding<br />
product and the framing member. Use standard<br />
fiber cement siding fasteners to attach the cladding<br />
through the non-structural lathe/furring strips and any<br />
other non-structural materials to the structure, and<br />
refer to the latest <strong>CertainTeed</strong> WeatherBoards Fiber<br />
Cement siding ICC-ES Evaluation Report for fastener<br />
recommendations and fastening requirements.
<strong>CertainTeed</strong> WeatherBoards Fiber Cement Siding <strong>Installation</strong> <strong>Manual</strong><br />
XXThe combined thickness of the non-structural materials<br />
(insulated sheathing, non-structural lathe/furring strips,<br />
etc.) between framing members and exterior cladding<br />
must not exceed 1". Requirements for the thickness<br />
of lathe/furring strip may vary, so check with your<br />
local code official or governing body for the building<br />
requirements in your area.<br />
XXFor best results, apply lathe/furring strips directly over<br />
weather-resistant-barrier-clad structural sheathing that<br />
is attached to framing members.<br />
XXAdhere to all flashing, cutting, and sealing requirements<br />
outlined in the most current version of this manual.<br />
NOTE: Horizontal installation of furring strips may<br />
be required when installing fiber cement shake<br />
products. Using solid furring strips is discouraged in<br />
this type of installation. The ultimate responsibility<br />
for water management and diversion is the<br />
responsibility of the rainscreen system designer.<br />
Insulated Concrete Forms<br />
Typically, an Insulated Concrete Form (ICF) wall system<br />
relies on a plastic strip to provide the attachment<br />
point for exterior cladding. Since ICF wall systems<br />
are manufactured proprietary designs, only the<br />
ICF manufacturer can determine if the system can<br />
accommodate the applied loads created by attaching<br />
fiber cement siding.<br />
We can provide information on the weight of the siding<br />
material and the types of fasteners used with fiber cement<br />
siding, but it is up to you to contact the ICF manufacturer<br />
to determine how best (if possible) to attach the fiber<br />
cement siding to the specific ICF system.<br />
Recommended Fasteners to Install Fiber Cement Siding over Furring 1<br />
Product Furring Fastener Fastening Method<br />
Lap Siding Wood 1-1/4", 11 ga. roofing nail Blind nailed into 1 x 4 furring<br />
Vertical Siding Wood 2" 6d siding nail<br />
Lap Siding Steel<br />
Vertical Siding Steel<br />
6" along the edges; 12"<br />
in the field into the furring<br />
Pins Must penetrate furring 1/4"<br />
Screws Must penetrate furring 3 full turns<br />
Pins Must penetrate furring 1/4"<br />
Screws Must penetrate furring 3 full turns<br />
1 Wall construction must allow full penetration of the fastener through the furring.<br />
25
<strong>CertainTeed</strong> WeatherBoards Fiber Cement Siding <strong>Installation</strong> <strong>Manual</strong><br />
26<br />
Basic Fastening Schedule 1,2 Wall Framing 5<br />
Product Fastener 3 Fastening 4 Method Type Spacing<br />
Vertical Siding<br />
≤ 9-1/4"<br />
Lap Siding<br />
> 9-1/4"<br />
Lap Siding<br />
Shapes Siding<br />
Individual<br />
Shakes<br />
Soffit<br />
Porch Ceiling<br />
6d siding nail<br />
(0.095 x 0.235 HD x 2" long)<br />
6d siding nail<br />
(0.095 x 0.235 HD x 2" long)<br />
6d siding nail<br />
(0.095 x 0.235 HD x 2" long)<br />
Roofing nail<br />
(0.120 x 0.375 HD x 1-3/4" long)<br />
Ribbed bugle-head screws 6,7<br />
(#8 x 1-5/8" x 0.375" HD)<br />
Roofing nail<br />
(0.120 x 0.375 HD x 1-3/4" long)<br />
8d siding nail<br />
(0.095 x 0.235 HD x 2-1/2" long)<br />
6d ring shank siding nail<br />
(0.095 x 0.235 HD x 2" long)<br />
Roofing nail<br />
(0.120 x 0.375 HD x 1-3/4" long)<br />
6d siding nail<br />
(0.095 x 0.235 HD x 2" long)<br />
6d siding nail<br />
(0.095 x 0.235 HD x 2" long)<br />
1 Wind Design: 110mph, Exposure B, ≤30ft Ht.,<br />
Dp = -29.1psf (2009 IRC/IBC)<br />
2 Refer to Building Code or ESR-1668 for applicable<br />
requirements or other wind conditions.<br />
Fastening Requirements for Weatherboards Fiber Cement Siding<br />
3 Fasteners must be corrosion resistant (HD Galvanized<br />
or Stainless Steel).<br />
4 1-1/4” min. fastener penetration into framing unless<br />
indicated otherwise in these instructions.<br />
6" edges, 12" in the<br />
field into framing<br />
6" edges, 12" in the<br />
field into furring<br />
Blind nailed<br />
into framing<br />
Blind nailed<br />
into framing<br />
Blind nailed<br />
into framing<br />
Blind nailed<br />
into framing<br />
Face nailed<br />
into framing<br />
Blind nailed<br />
into sheathing<br />
Blind nailed<br />
into sheathing<br />
Face nailed 12" o.c.<br />
into framing<br />
6" edges, 6" field<br />
into framing<br />
Wood studs 2x4 min. 16" o.c. max.<br />
Wood furring 2x4 min. 16" o.c. max.<br />
Wood studs 2x4 min. 16" o.c. max.<br />
Wood studs 2x4 min. 24" o.c. max.<br />
Metal studs<br />
3.625" x 1.375" 16 ga.<br />
Wood studs 2x4 with<br />
7/16" OSB sheathing<br />
16" o.c. max.<br />
8" o.c. max.<br />
Wood studs 2x4 min. 24" o.c. max.<br />
Wood studs 2x4 with<br />
7/16" OSB sheathing<br />
Wood studs 2x4 with<br />
7/16" OSB sheathing<br />
24" o.c. max.<br />
24" o.c. max.<br />
Wood framing 2x4 min. 24" o.c. max.<br />
Wood framing 2x4 min. 24" o.c. max.<br />
5 Wall framing, furring, and/or structural sheathing must be designed<br />
in accordance with local building codes and code compliance<br />
documentation to ensure it can withstand all applicable loads,<br />
including wind loads and dead loads of the siding.<br />
6 Wall construction must allow full penetration.<br />
7 Screws designed for fiber cement siding.
<strong>CertainTeed</strong> WeatherBoards Fiber Cement Siding <strong>Installation</strong> <strong>Manual</strong><br />
Section 8:<br />
Wall Preparation<br />
and Sheathing<br />
Before installing WeatherBoards Fiber Cement Siding,<br />
review and comply with all local building codes and<br />
regulations regarding wall construction, including the<br />
proper use of framing (24" o.c. max.), weather-resistant<br />
barriers, flashings, and other building materials<br />
and systems.<br />
If the sheathing is thicker than 1", consult the recommendations<br />
below for installing fiber cement siding over<br />
continuous insulation systems.<br />
Plywood<br />
or OSB<br />
sheathing<br />
Double wall<br />
construction<br />
Weatherresistant<br />
barrier<br />
Starter<br />
strip<br />
Single wall<br />
construction<br />
Lateral<br />
brace<br />
6" above<br />
finished<br />
grade<br />
Double and Single Wall Construction<br />
Weatherresistant<br />
barrier<br />
XXFiber cement siding should be applied over a rigid<br />
sheathing that provides a smooth, flat surface that is no<br />
more than 1" thick. Siding is an exterior cladding. It is<br />
not a complete weather-resistant barrier, so be sure to<br />
flash around all openings.<br />
XXDo not install siding over questionable wall construction.<br />
Irregularities in framing may become visible in the<br />
finished application. To minimize the effect of uneven<br />
walls, shim the wall as necessary.<br />
XXIn accordance with best building practices, there<br />
should be a gap between dissimilar materials.<br />
Fiber cement should be separated from other<br />
materials such as brick, stone, wood, and metal.<br />
A 1/8" gap is recommended. Always caulk between<br />
siding and dissimilar materials.<br />
XXSiding is not a structural component of the wall. In<br />
single-wall construction, lateral bracing is required<br />
between the studs.<br />
XXNon-structural materials such as underlayments, foam<br />
board, or lathe/furring strips may not exceed 1" in<br />
thickness without re-establishing a structural nailable<br />
substrate (see below for details).<br />
Sheathings<br />
Structural<br />
For best results, WeatherBoards Fiber Cement should<br />
be installed over plywood, OSB, or comparable structural<br />
sheathing. Fiber cement siding can be installed over<br />
braced wood or steel studs in accordance with local<br />
building codes.<br />
Non-structural<br />
Installing fiber cement siding over non-structural<br />
sheathing, builder board, foam-type sheathings, and<br />
gypsum board, such as <strong>CertainTeed</strong>‘s GlasRoc ®<br />
Sheathing, is also acceptable if the siding boards are<br />
fastened to structural framing. Non-structural sheathing<br />
thickness in excess of 1" creates a condition where<br />
WeatherBoards Fiber Cement siding products cannot be<br />
properly attached to the existing structural surface (e.g.<br />
framing members, steel studs, or structural sheathing).<br />
The easiest way to meet the fastening requirements for<br />
<strong>CertainTeed</strong> WeatherBoards Fiber Cement siding is to<br />
install 3/4" structural sheathing over the non-structural<br />
sheathing. However, the wall assembly must be designed<br />
in such a way that the re-established structural fastening<br />
surface (e.g. OSB, plywood, lathe strips, or 1x or 2x<br />
framing lumber) is sufficient to meet the requirements of<br />
ICC-ES Evaluation Report ESR-1668.<br />
27
<strong>CertainTeed</strong> WeatherBoards Fiber Cement Siding <strong>Installation</strong> <strong>Manual</strong><br />
<strong>CertainTeed</strong> does not provide instructions for wall<br />
design or assembly that specifically relates to the<br />
fastening requirements for re-establishing a structural<br />
fastening surface. However, FastenMaster ® provides<br />
two documents to assist in successfully re-establishing<br />
a structural fastening system over non-structural<br />
sheathing. These reports must be used in combination<br />
with ICC-ES Evaluation Report ESR-1668 to determine<br />
attachment requirements.<br />
XXTechnical Evaluation Report (TER No. 1009-01) Use<br />
of FastenMaster HeadLok Fasteners to Attach<br />
Cladding and/or Furring to Wood Framing through<br />
Foam Sheathing<br />
XXTechnical Bulletin: Attaching Exterior Wall Covering<br />
Assemblies with Foam Sheathing to Steel Wall Framing<br />
NOTE: The ICC report requirements for framing<br />
type must be adhered to so as to meet the minimum<br />
requirements for fastening fiber cement siding.<br />
New Construction<br />
Fasten the sheathing securely to the studs according<br />
to local code requirements. Then apply CertaWrap<br />
Housewrap and Tape to the wall to establish a weatherresistant<br />
barrier. (<strong>Installation</strong> instructions for CertaWrap<br />
are available at www.certainteed.com)<br />
Remodeling<br />
If you are covering old siding, there are three ways to<br />
prepare the surface of the building for the new siding.<br />
1. Strip off the old siding and level the wall. If there is felt<br />
under the old siding, either nail it securely to the wall<br />
28<br />
or strip it off completely. If there is no solid sheathing<br />
under the siding, you will have to install it.<br />
OR<br />
2. Apply rigid sheathing over the old siding. Nail it securely<br />
and evenly, taking care to bridge the low spots.<br />
OR<br />
3. Nail vertical furring on top of the old siding. Apply rigid<br />
sheathing to the furring.<br />
Stucco<br />
If you are applying siding to stucco, you will have to<br />
create an even, solid surface to attach the siding to.<br />
1. Carefully chip the high spots off the stucco. Be careful<br />
not to crack the stucco.<br />
2. Fasten 1" x 4" furring strips, 16" on center, over the<br />
stucco. Use ring-shanked nails or screws, and<br />
attach the fasteners to the studs according to<br />
local code requirements.<br />
Concrete Block (CMU) and Poured<br />
Concrete Walls<br />
WeatherBoards Fiber Cement Lap siding may be installed<br />
over concrete masonry or poured concrete walls. When<br />
you install fiber cement over concrete walls, you must<br />
first install 1" x 3" furring strips. Furring is not mandatory<br />
over concrete block (CMU) walls, but <strong>CertainTeed</strong><br />
recommends it. The suitability and methods of attaching<br />
exterior cladding products must comply with all applicable<br />
national, state, and local building codes. Always check<br />
with your local building inspector for the applicable codes.<br />
Recommended Fastening Methods for Installing Fiber Cement Lap Siding<br />
over Concrete Block (CMU) or Poured Concrete Walls<br />
Spacing Fastener Fastening Method 2 Allowable Wind Load 1<br />
12" o.c.<br />
8" o.c.<br />
1-1/4" roofing nail, double HD<br />
galvanized with 3/8" head<br />
1-1/4" roofing nail, double HD<br />
galvanized with 3/8" head<br />
Blind nailed into furring 20.0 psf, 90 mph<br />
Blind nailed into furring 39.0 psf, 125 mph<br />
1 Based on “B” exposures up to 30' in accordance with 2009 IBC/IRC, Wall Zone 5, Effective Wind Area 10, Importance Factor 1.0.<br />
2 Selection of furring and attachment to the CMU or concrete wall must be in accordance with applicable building codes and be able to resist all loads<br />
transferred from the siding.
<strong>CertainTeed</strong> WeatherBoards Fiber Cement Siding <strong>Installation</strong> <strong>Manual</strong><br />
Flashing<br />
<strong>CertainTeed</strong> highly recommends the use of flashing to<br />
ensure a long-lasting, weather-resistant installation.<br />
XXInstall CertaWrap flashing tape around all doors,<br />
windows, rake boards, and other areas where<br />
needed. Refer to installation instructions at<br />
www.certainteed.com for more information.<br />
XXApply drip cap, Z-flash, water diverter, and butt end/<br />
joint flashing as appropriate.<br />
XXProvide a 1/4" clearance<br />
between the bottom of<br />
WeatherBoards Fiber<br />
Cement products and<br />
the horizontal flashing.<br />
Caulk should not be<br />
used at this location.<br />
XXWeatherproof all horizontal joints on a building sided<br />
with vertical siding with non-corrosive “Z” flashing.<br />
Example of Roof Kickout<br />
Weather-resistant<br />
barrier<br />
Step flashing<br />
Kickout flashing<br />
Self-adhering<br />
membrane<br />
Typical flashing for a roof kickout<br />
NOTE: Do not caulk the bottom of the horizontal<br />
joint that is above the “Z” flashing.<br />
NOTE: Do not use uncoated aluminum or metal<br />
materials with fiber cement siding.<br />
1/4" gap<br />
DO NOT<br />
CAULK<br />
Self-adhering<br />
eaves<br />
membrane<br />
Drip Edge<br />
CertaFlash BA <br />
around Windows<br />
To install CertaFlash around a<br />
rectangular opening:<br />
1. Make diagonal cuts in the<br />
weather-resistant barrier at<br />
the upper corners of the top<br />
(head) of the rough opening.<br />
Gently lift and tape the flap<br />
temporarily in place.<br />
2. Cut a piece of CertaFlash<br />
Flex flashing for the bottom<br />
(sill) that is 12" longer than the<br />
width of the rough opening.<br />
Remove the backer from the<br />
flashing and begin applying<br />
one end to the jamb of the<br />
rough opening 6" above the<br />
sill. (NOTE: the tape will extend<br />
over the exterior edge of the jamb.) Applying even<br />
pressure to the tape with your hands, work your way<br />
down the jamb, across the sill, and up the opposite<br />
jamb, finishing 6" above the sill. Flex the overhanging<br />
tape down onto the weather-resistant barrier in<br />
weatherboards fashion, again applying even pressure<br />
to ensure adhesion.<br />
3. Before installing the<br />
window, apply a continuous<br />
bead of sealant to the<br />
interior of the window’s<br />
mounting flange. Install the<br />
window according to the<br />
manufacturer’s instructions.<br />
29
<strong>CertainTeed</strong> WeatherBoards Fiber Cement Siding <strong>Installation</strong> <strong>Manual</strong><br />
4. Cut two strips of BA flashing<br />
for the sides (jambs) of the<br />
window. Jamb flashing tape<br />
should extend a minimum<br />
of 3" above the top of the<br />
jambs of the window unit and<br />
a minimum of 1" beyond the<br />
bottom flashing tape installed<br />
in step #2, covering the<br />
width of the previously installed flashing at the base.<br />
Slowly peel release paper off as you press the flashing<br />
in place. Ensure the flashing covers all nails and<br />
mounting slots on the window’s mounting flange.<br />
5. Cut BA flashing for the top<br />
(head) of the opening so it<br />
will extend beyond both ends<br />
of the jamb flashing Ensure<br />
the flashing covers all nails<br />
and mounting slots on the<br />
window’s mounting flange.<br />
6. Finally, lay weather resistant<br />
barrier over the head flashing.<br />
Apply CertaTape over both<br />
diagonal cuts.<br />
Section 9: Trim<br />
For best results with WeatherBoards Fiber Cement siding,<br />
we recommend you install either WeatherBoards Fiber<br />
Cement Trim or Restoration Millwork ® Exterior Trim. For<br />
installation instructions, refer to http://www.certainteed.<br />
com/resources/rm003.pdf or ask your building products<br />
supplier for the Restoration Millwork <strong>Installation</strong><br />
Guide (RM003).<br />
Other trims may also be used in conjunction with<br />
WeatherBoards Fiber Cement Siding. Refer to the trim<br />
manufacturer for compatibility and installation instructions.<br />
30<br />
NOTE: <strong>CertainTeed</strong> recommends 4/4" (5/4" nominal)<br />
trim for all lap and Shapes fiber cement siding, and<br />
3/4" (4/4" nominal) trim for vertical siding<br />
and veneers.<br />
Before You Begin<br />
Before you install the trim, review and comply with all<br />
local building codes and regulations regarding wall<br />
construction, including the proper use of framing,<br />
weather-resistant barriers, flashing, and other building<br />
materials and systems. Also, review the general cutting,<br />
fastening, and wall preparation instructions in this guide.<br />
Some important reminders:<br />
XXStore trim up off the ground on a clean, flat surface<br />
in a garage or other protected area.<br />
XXUse corner protectors when banding fiber cement trim.<br />
XXDo not install wet trim.<br />
XXLift and carry trim on the edges.<br />
XXKeep the fiber cement trim at least 6" above the<br />
finished grade and 1" above surfaces where water<br />
may collect (roofs, steps, decks, walks, and hardsurface<br />
driveways).<br />
Cutting<br />
XXUse a circular saw equipped with a carbide<br />
tipped blade. DO NOT use a polycrystalline<br />
diamond tip blade.<br />
XXCut fiber cement in a well ventilated area, and<br />
use cutting tools equipped with a dust collector.<br />
XXWear safety glasses and appropriate dust<br />
protection equipment.<br />
NOTE: Seal all field-cut edges with 100% acrylic<br />
latex paint. Do not paint the back of the trim.<br />
Caulk<br />
XXCaulk must comply with ASTM C920 (grade NS, class 25).<br />
X<br />
X Use a high performance, paintable low-modulus<br />
elastomeric sealant applied in accordance with the<br />
caulk manufacturer’s instructions.
<strong>CertainTeed</strong> WeatherBoards Fiber Cement Siding <strong>Installation</strong> <strong>Manual</strong><br />
Fastening<br />
XXNails: Corrosion resistant or stainless steel, 16 ga.<br />
finish nails. Nail length must allow penetration of at<br />
least 1" into solid wood.<br />
XXScrews: Corrosion resistant or stainless steel.<br />
Trim Size<br />
Fastening Schedule<br />
XXDrive the fastener perpendicular to the surface of<br />
the trim.<br />
XXPenetrate the framing at least 1".<br />
Number of<br />
Fasteners Spacing<br />
4" wide or less 2 12" to 16" o.c.<br />
5" wide or more 3 12" to 16" o.c.<br />
XXAlways nail from one end to the other. Never nail from<br />
both ends to the middle—it will stress the trim board.<br />
XXDrive the fastener flush with the trim.<br />
XXWhen you install trim over lap siding, always nail<br />
through the trim and the underlying siding. Be sure to<br />
nail on the high points—or overlap—into the framing.<br />
XXDo not over drive the fasteners. When a fastener is<br />
driven below the surface of the trim, its holding power<br />
is reduced and it creates an entryway for moisture.<br />
XXIrregularities in framing may be visible in the finished<br />
application. To minimize the effect of uneven walls,<br />
shim the wall as necessary.<br />
XXIf you are hand nailing, it may be necessary to predrill<br />
to help prevent the corners from breaking. Position<br />
fasteners no closer than 1" from the side edges of the<br />
trim and no closer than 2" from the end.<br />
XXFor trim 4" wide or less, fasten in an alternate<br />
position to both sides of the piece, spaced no<br />
more than 12" to 16" o.c.<br />
XXFor trim 4" wide or more, but less than 5" wide, apply<br />
two fasteners, one on each side of the piece, spaced<br />
no more than 12" to 16" o.c.<br />
XXTrim wider than 5" requires three fasteners.<br />
Paint/Primer<br />
Use a 100% acrylic latex paint or primer applied<br />
according to the paint manufacturer’s recommendations.<br />
Windows and Doors:<br />
XXSquare or miter-cut the trim boards.<br />
XXNail trim flush to the window or door.<br />
Outside Corners:<br />
When assembling a traditional corner from two pieces,<br />
fasten the trim to the substrate, studs or blocking every<br />
12" to 16".<br />
Fascia, Band and Frieze Boards,<br />
and Rakes<br />
To install 7/16" fiber cement fascia:<br />
XXInstall the fascia over a wood substrate.<br />
XXButt the ends of the fascia and nail it every 12" to 16".<br />
XX7/16" fascia can also be installed as band boards,<br />
frieze boards, and rakes.<br />
Fascia (wood<br />
substrate)<br />
Trim<br />
Rake board<br />
Band board<br />
“Z” flashing (leave<br />
1/4" gap above)<br />
Trim<br />
Install trim over wood substrate.<br />
31
<strong>CertainTeed</strong> WeatherBoards Fiber Cement Siding <strong>Installation</strong> <strong>Manual</strong><br />
Band Boards:<br />
XXInstall 7/16” fiber cement trim over furring strips with the<br />
32<br />
appropriate flashing.<br />
XXButt the ends of the trim and nail every 12" to 16".<br />
Rakes and Frieze Boards:<br />
XXButt the ends of the trim and nail through the trim<br />
substrate and siding into the framing or into a wood<br />
substrate every 12" to 16".<br />
XXLeave 1/8" between the siding and the trim when you<br />
install the siding.<br />
XXCaulk between the siding and the trim.<br />
Section 10:<br />
Lap Siding<br />
Before you install the siding, review and comply with<br />
all local building codes and regulations regarding wall<br />
construction including the proper use of framing, weatherresistant<br />
barriers, flashings, and other building materials<br />
and systems.<br />
Before You Begin<br />
Review the general cutting, fastening, and wall<br />
preparation instructions in Sections 6, 7, and 8.<br />
Remember:<br />
XXInstall WeatherBoards Fiber Cement lap siding over a<br />
flat, vertical wall surface.<br />
XXCut the siding face down with mechanical shears<br />
or a circular saw. Cut face up with a chop or miter<br />
saw. When cutting siding face down, cover the saw<br />
table with a carpet or other soft material to prevent<br />
scratching the surface of the siding.<br />
XX<strong>CertainTeed</strong> WeatherBoards Fiber Cement Cedar<br />
Lap Siding with ColorMax ® finish: When cutting,<br />
leave the protective film on the siding until it is<br />
nailed to the substrate; then remove it before<br />
applying the next course.<br />
XXBeaded Board: When cutting a beaded siding profile,<br />
start the cut against the bead.<br />
XXPrime, paint or caulk all field-cut edges of siding.<br />
Do not prime or paint the back of the siding panel.<br />
Refer to instructions on butt joints and trim locations<br />
for specific requirements.<br />
XXBe sure to install all siding with the proper textured,<br />
sealed, or painted surface facing out.<br />
XXDo not over drive the fasteners. When a fastener<br />
is driven below the surface of the siding, its<br />
holding power is reduced and it creates an<br />
entryway for moisture.<br />
XXIrregularities in framing may be visible in the finished<br />
application. To minimize the effect of uneven walls,<br />
shim the wall as necessary.<br />
XXIf you are hand nailing or using screws, it may be<br />
necessary to predrill corners to help prevent breakage.<br />
Clearances<br />
Fiber Cement siding should be installed to meet local<br />
building code clearance requirements between the<br />
bottom edge of the siding and adjacent finished grade.<br />
Maintain 1" minimum clearance between fiber cement<br />
products and steps, decks, and driveways and 6" above<br />
the finished grade.<br />
Where roofs and vertical surfaces meet, flashing and<br />
counter flashing must be provided according to the<br />
roofing manufacturer’s instructions. Maintain a minimum<br />
of 1" clearance between the roofing and the bottom edge<br />
of the fiber cement or other vertical surface.<br />
Determining the Appropriate Fastening Style—<br />
Face or Blind.<br />
Determine if the siding will be blind fastened or face<br />
fastened. While blind fastening makes for a more<br />
aesthetically pleasing finished look, lap siding that is<br />
wider than 9-1/4" must be face fastened. Other factors<br />
that determine fastening style include wind load,<br />
exposure, wall construction, and type of fastener.<br />
Refer to the “Basic Fastening Schedule” on page 26<br />
for more information or to ICC-ES-ESR-1668 report at<br />
www.certainteed.com.
<strong>CertainTeed</strong> WeatherBoards Fiber Cement Siding <strong>Installation</strong> <strong>Manual</strong><br />
Blind Fastening<br />
1. Make sure the panel overlaps 1-1/4"; leave a gap<br />
of 1/8" from all trim before fastening. Always caulk<br />
between the siding and the trim.<br />
2. Place the fastener 1" from the top of the panel and no<br />
closer than 3/8" from the edge.<br />
3. Nails must penetrate a minimum of 1-1/4" into the<br />
structural framing; screws require a minimum 3/4"<br />
penetration. Penetration may include thickness of<br />
structural rated sheathing (OSB or plywood). Some<br />
screws may require more than 3/4" penetration to<br />
resist lateral loads—refer to the screw manufacturer<br />
for requirements.<br />
4. Do not over drive the fasteners. Seating them below<br />
the surface of the siding reduces their holding power<br />
and creates an entryway for moisture. Do not place<br />
fasteners in the center, unsupported area of the siding.<br />
5. If you are hand nailing or using screws, it may be<br />
necessary to predrill to help prevent the corners<br />
from breaking.<br />
6. Fasten from one end of the panel to the other.<br />
1-1/4"<br />
overlap<br />
1"<br />
Blind Fastening Detail<br />
1-1/4" min<br />
Structural<br />
sheathing<br />
Weatherresistant<br />
barrier<br />
Face Fastening<br />
1. Make sure the panel overlaps 1-1/4"; leave a gap<br />
of 1/8" from all trim before fastening. Always caulk<br />
between the siding and the trim.<br />
2. Place the fastener 3/4" from the bottom of the<br />
overlapping panel. This will help ensure that the<br />
fastener penetrates both courses of siding. Place the<br />
fasteners no closer than 3/8" from the butt edge.<br />
3. Nails must penetrate a minimum of 1-1/4" into the<br />
structural framing; screws require 3/4" penetration.<br />
Penetration may include thickness of structural rated<br />
sheathing (OSB or plywood).<br />
4. Do not over drive the fasteners. Seating fasteners<br />
below the surface of the siding reduces their holding<br />
power and creates an entryway for moisture. Do not<br />
place fasteners in the center, unsupported area of<br />
the siding.<br />
5. If you are hand nailing or using screws, it may be<br />
necessary to predrill to help prevent the corners<br />
from breaking.<br />
6. Fasten from one end of the panel to the other.<br />
1-1/4"<br />
overlap<br />
3/4"<br />
1-1/4" min<br />
Face Fastening Detail<br />
Structural sheathing<br />
Weather-resistant barrier<br />
33
<strong>CertainTeed</strong> WeatherBoards Fiber Cement Siding <strong>Installation</strong> <strong>Manual</strong><br />
<strong>Installation</strong><br />
Mark a Starting Chalk Line<br />
Establish a straight, level reference line to guide the<br />
positioning of the starter strip and the first course<br />
of siding.<br />
34<br />
equal<br />
Chalk line Bottom edge of<br />
siding at least 6"<br />
above final grade<br />
Establish a Chalk Line<br />
Starter<br />
strip<br />
1. Find the lowest point of the sheathing(s) and make a<br />
mark that is 1" above the lowest corner. The bottom<br />
edge of the siding will be 2-1/4" below the mark you<br />
just made. Make sure this point is high enough to<br />
ensure that the bottom edge of the siding is installed<br />
at least 6" above the finished grade or 1" above<br />
surfaces where water may collect.<br />
2. From this mark, snap a level chalk line to the opposite<br />
end of the wall.<br />
3. Repeat the procedure around the entire house.<br />
Aligning the Starter Strip<br />
You must use a starter strip with lap siding. Except when<br />
using vinyl undersill trim as a starter, the starter strip must<br />
be a minimum of 2" wide and 1/4" to 5/16" thick.<br />
Align the top of the starter strip with the chalk line<br />
and fasten.<br />
Good<br />
Recommended Starter Strip Options<br />
for Fiber Cement Siding<br />
Fiber cement siding ripped to 2"<br />
(minimum); all field-cut edges re-sealed<br />
with primer or paint<br />
Better <strong>CertainTeed</strong> Vinyl Carpentry undersill trim<br />
Best Restoration Millwork PVC skirtboard<br />
NOTE: Do not use treated plywood or pressure<br />
treated lattice as a starter strip. These tend to<br />
delaminate and do not remain flat.<br />
Restoration Millwork ® Skirtboard<br />
Instead of a starter strip, you can also use Restoration<br />
Millwork skirtboard as a starter course for WeatherBoards<br />
Lap siding and Perfection Shingles. Skirtboard is<br />
preferable to a starter strip because it can be installed at<br />
or below grade and it provides the minimum 6" clearance<br />
requirement to the finished grade for fiber cement siding.<br />
Fasten the skirtboard the same way you would install a<br />
trimboard:<br />
XXMake sure the skirtboard is level.<br />
XXFasteners must penetrate a minimum of 1-1/2" through<br />
a flat, solid wood substrate into a framing member.<br />
XXApply skirtboard over framing no greater than 16" on<br />
center. If framing members are greater than 16" on<br />
center, provide additional bracing for fastening.
<strong>CertainTeed</strong> WeatherBoards Fiber Cement Siding <strong>Installation</strong> <strong>Manual</strong><br />
NOTE: Check local code requirements for<br />
recommended height of skirtboard above the<br />
finished grade.<br />
XXFastener heads should be flush<br />
with the surface of the skirtboard or<br />
slightly indented and no closer than<br />
3/4" from the end and edges of the<br />
board.<br />
XXUse two fasteners per framing<br />
member for 6" skirtboard and three<br />
fasteners per framing member for<br />
8" skirtboard.<br />
XXPosition the first course of lap siding<br />
so that the bottom edge hangs a<br />
minimum of 1/4" over the top of the<br />
skirtboard.<br />
XXAllow 1/4" per 18' of skirtboard for<br />
expansion and contraction<br />
(1/8" at each end).<br />
XXUse scarf joints to minimize seams and allow<br />
expansion and contraction.<br />
XXVinyl building products expand and contract as<br />
the temperature changes. You must allow for this<br />
movement when you fasten Restoration Millwork.<br />
You can minimize the movement by observing proper<br />
fastening techniques along the entire<br />
length of the skirtboard.<br />
A<br />
1/4"<br />
Overlap<br />
XXGlue scarf joints between the pieces to help control<br />
separation caused by expansion and contraction.<br />
Gluing the joints moves the expansion and contraction<br />
out to the end.<br />
Installing the First Course<br />
XXUsing the starter strip or skirtboard as a guide, position<br />
the bottom edge of the first course of lap siding so that<br />
the bottom edge hangs 1/4" below the bottom of the<br />
starter strip or overlaps the skirtboard a minimum 1/4".<br />
XXLeave a 1/8" gap between the siding and the trim or<br />
other materials to allow for structural movement.<br />
Always caulk between the siding and the trim<br />
NOTE: When installing fiber cement siding into a<br />
J-channel or other receiving channel, ensure that<br />
all cut edges have been re-sealed with primer or<br />
paint prior to insertion; do not caulk between the<br />
siding and the channel, either before or after siding<br />
installation as this may restrict water movement<br />
around the opening. Make sure all corners are<br />
properly flashed.<br />
Installing Subsequent Courses<br />
XXOverlap all lap siding 1-1/4".<br />
XXStagger the butt end/joints at least 32" to avoid<br />
noticeable patterns.<br />
32" Lap Stagger Pattern for minimum waste and staggered butt end/joints.<br />
Cut and stagger the points as indicated.<br />
A<br />
144"<br />
112"<br />
80"<br />
48"<br />
16"<br />
B<br />
B<br />
0"<br />
32"<br />
64"<br />
96"<br />
128"<br />
Total<br />
144"<br />
144"<br />
144"<br />
144"<br />
144"<br />
A<br />
B<br />
Studs 16"– 24"<br />
o.c. max<br />
A<br />
B<br />
A<br />
B 32"<br />
A<br />
64"<br />
96"<br />
128"<br />
16"<br />
48"<br />
80"<br />
112"<br />
144"<br />
35
<strong>CertainTeed</strong> WeatherBoards Fiber Cement Siding <strong>Installation</strong> <strong>Manual</strong><br />
Butt and End Joint Application<br />
There are three ways to fasten butt and end joints:<br />
1. Into solid framing<br />
2. Into structural sheathing<br />
3. With an off-stud joiner<br />
Butt End/Joints Fastened into Solid Framing<br />
or Structural Sheathing<br />
Butt end/joints should be installed with factory-sealed<br />
or factory-prefinished ends butted together in moderate<br />
contact. We recommend that butt end/joints be fastened<br />
into a stud or framing member. If no stud or framing<br />
member is available, butt end/joints may be fastened into<br />
structural-rated sheathing.<br />
When installing WeatherBoards lap siding, you must<br />
install butt joints using either backflashing, joint covers,<br />
or H-covers. Consult local code for butt joint treatment<br />
requirements in your area. Backflashing should be<br />
constructed of a durable, non-corrosive material that is<br />
compatible with fiber cement. Do not attempt to flash<br />
behind end or butt joints with housewrap—housewrap<br />
will not direct water away from the wall. Flashing size<br />
should be a minimum of 6" wide (3" to the left and right<br />
of the joint) and extend at least 1" over the top of the<br />
previous course. Examples of butt end/joint flashing<br />
materials include:<br />
X X#15<br />
felt<br />
XXTrim coil (painted or PVC coated)<br />
XXBear Skin Joint Flashing<br />
Joint<br />
flashing<br />
extends<br />
3" to left<br />
and right<br />
of joint and<br />
overlaps<br />
the previous<br />
course by 1"<br />
Butt End/Joint Application: Fastening to structural sheathing<br />
36<br />
Structural sheathing<br />
Overlap<br />
flashing 1"<br />
Overlap boards<br />
1- 1/4"<br />
Nail 1" from<br />
board top;<br />
nail 1" from<br />
butt edge<br />
and 3" from<br />
butt edge<br />
Some flashing manufacturers, including Simplicity Tool<br />
and ProTrim, make joint flashing products that do not<br />
extend 1" over the top of the siding. They rest on top of<br />
the lap. These products are also acceptable.<br />
If you choose to use a non-factory end at a butt joint, the<br />
side edges must be re-sealed with 100% acrylic latex<br />
paint or primer prior to installation.<br />
NOTE: Fiber cement siding should be fastened to<br />
framing. If no stud is available, place two fasteners<br />
2" apart into structural rated sheathing (7/16" OSB<br />
or 1/2" plywood).<br />
Fastening to Stud or Framing Member: Place one<br />
fastener 1" below the top of the board and no closer than<br />
3/8" from the butt edge into the stud.<br />
Fastening to Structural Sheathing: Place one fastener<br />
1" below the top of the board and 1" from the butt edge.<br />
Place another fastener 3" from the butt edge.<br />
Butt End/Joint Application<br />
Studs 16"– 24"<br />
o.c. max<br />
Joint<br />
flashing<br />
extends<br />
3" above<br />
board and<br />
3" to left<br />
and right<br />
of joint<br />
Overlap<br />
flashing 1"<br />
Overlap<br />
boards 1- 1/4"<br />
Fastening to stud or framing member<br />
NOTE: It is never acceptable to leave a gap of any<br />
size at a butt end/joint.<br />
Nail 1"<br />
from<br />
board<br />
top
<strong>CertainTeed</strong> WeatherBoards Fiber Cement Siding <strong>Installation</strong> <strong>Manual</strong><br />
Butt End/Joint Covers<br />
Lap siding butt joint covers, or H-covers, may be used<br />
for aesthetic purposes and are available in different sizes<br />
and designs. If you choose to use a joint cover, use the<br />
correct size for the siding that you are installing. Follow<br />
the specific joint cover manufacturer’s instructions.<br />
Regardless of joint cover design:<br />
XXUncoated metal joint covers are not acceptable.<br />
XXAll field-cut edges at butt joints must be re-sealed with<br />
100% acrylic latex paint or primer prior to installation.<br />
XXFlash butt and end joints with durable, non-corrosive<br />
material that is compatible with fiber cement.<br />
Flashing<br />
(recommended)<br />
Weatherresistant<br />
barrier<br />
H-channel<br />
Fasten within 1/2"<br />
from top of cover<br />
Butt End/Joint Covers<br />
Structural<br />
sheathing<br />
Butt joint<br />
cover with<br />
wrap-<br />
around<br />
lower lip<br />
hook<br />
Do not caulk fiber cement butt joints/edges.<br />
Applying caulk to the butt joint is ineffective because<br />
the gap is not large enough to accommodate the<br />
sealant. Also, on prefinished products, caulk may leave<br />
an unsightly looking finish. Spreading or feathering the<br />
sealant into a thin film will create a noticeably different<br />
appearance, and it can remove the needed thickness<br />
required to withstand UV exposure and joint movement.<br />
Joints Where Solid Framing or Structural<br />
Sheathing Are NOT PRESENT<br />
If boards cannot be joined into solid framing or structural<br />
sheathing, you must use an off-stud joiner behind the<br />
joint. Off-stud joiners are available in different sizes.<br />
Choose the joiner that is the correct size for the siding you<br />
are installing.<br />
1. Insert the off-stud joiner onto the butt end of the siding.<br />
Align the center of the joiner with the end of the siding.<br />
2. Insert the edge of the next panel of siding into the<br />
other side of the joiner.<br />
3. Make sure both butt edges of the board are either<br />
factory-sealed or sealed after a cut. Then butt the<br />
ends of boards together.<br />
Non-structural<br />
sheathing<br />
Off-stud Joiners<br />
NOTE: Do not fasten the off-stud joiner to the wall.<br />
37
<strong>CertainTeed</strong> WeatherBoards Fiber Cement Siding <strong>Installation</strong> <strong>Manual</strong><br />
Laced (Prairie-Style) Corners<br />
Laced or prairie-style corners, which are frequently used<br />
on single-story homes, emphasize the horizontal lines<br />
of the siding. Laced corners are created by mating each<br />
successive course of siding with its counterpart on the<br />
adjoining wall. Traditionally, this involved fitting each<br />
course of siding, marking the overlap, and removing the<br />
marked piece to make the sloped cut corresponding to<br />
the bevel of the opposite course. The end of every other<br />
piece of siding is left exposed, so the panel must be<br />
carefully sealed to prevent it from absorbing moisture.<br />
Note that accurate coursing is essential, because<br />
there’s no intervening corner board to conceal any slight<br />
irregularities in alignment.<br />
38<br />
Laced Corners<br />
To create a laced (or prairie-style) corner:<br />
XXFlash all corners. <strong>CertainTeed</strong> recommends installing<br />
prefinished metal flashing that extends a minimum of<br />
10" on each side.<br />
XXInstall the first board flush with the corner of<br />
the sheathing.<br />
XXInstall the board on the intersecting wall so that it<br />
overlaps the width of the previous board.<br />
XXReverse this pattern on the next course of siding.<br />
XXAs you work your way up the wall, alternate the<br />
pattern, so the joint lines between the corner<br />
boards are staggered.<br />
XXSeal the exposed edges of the siding so that they do<br />
not absorb moisture.<br />
NOTE: Do not use prefinished product to create<br />
laced corners.<br />
Section 11 :<br />
Shapes Siding<br />
Before you install the siding, review and comply with<br />
all local building codes and regulations regarding wall<br />
construction including the proper use of sheathings,<br />
framing, weather-resistant barriers, flashings and other<br />
building materials and systems.<br />
Before You Begin<br />
Review the general cutting, fastening, and wall<br />
preparation instructions in the Cutting, Fastening, and<br />
Wall Preparation sections. Some important reminders:<br />
XXCut WeatherBoards Fiber Cement Shapes face down<br />
with mechanical shears or a circular saw. To prevent<br />
marring the surface of the siding, cover the saw table<br />
with a carpet or other soft material.<br />
XXPrime, paint or caulk all field-cut edges of siding.<br />
Do not prime or paint the back of the panel.<br />
Refer to instructions on butt joints and trim<br />
locations for specific requirements.<br />
XXBe sure to install all siding with the proper textured,<br />
sealed, or painted surface facing out.<br />
XXDo not over drive the fasteners. When a fastener is<br />
driven below the surface of the siding, its holding<br />
power is reduced.<br />
XXIrregularities in framing may be visible in the finished<br />
application. To minimize the effect of uneven walls,<br />
shim the wall as necessary.<br />
XXIf you are hand nailing, it may be necessary to predrill<br />
to help prevent the corners from breaking.<br />
NOTE: Because of the random nailing pattern, all<br />
panels except Perfection Shingles must be installed<br />
over structural rated sheathing. Fasteners may<br />
or may not hit framing/stud locations. Minimum<br />
structural sheathings are 7/8" OSB or 1/2" plywood.
<strong>CertainTeed</strong> WeatherBoards Fiber Cement Siding <strong>Installation</strong> <strong>Manual</strong><br />
Perfection Shingles<br />
Perfection Shingles are installed identically to lap siding<br />
with the exception of the following:<br />
To achieve a random pattern, Perfection Shingles must<br />
be installed with every other course rotated 180°.<br />
Studs 16"– 24" o.c. max<br />
Random Square Straight Edge<br />
and Staggered Edge<br />
Random Square Straight Edge and Staggered Edge<br />
panels are produced in three different panels. Each of<br />
these panels has a distinct pattern and is identified by<br />
the number of V-notches cut into the side of the panel.<br />
1. To ensure a random look, the panels must be installed<br />
in the order shown on page 40.<br />
2. The panels should be installed over wall construction<br />
with framing spacing 16" to 24" o.c. (max) and a<br />
minimum of 7/16" OSB or 1/2" plywood sheathing.<br />
1. Install the 1st course as described for lap siding.<br />
2. When you install the 2nd course, rotate the panel<br />
180° and fasten.<br />
3. Install the 3rd course with the panel in the same<br />
direction as the first, and so on.<br />
<strong>Installation</strong> Sequence for Perfection Shingles<br />
Identifying V-Notches<br />
3. Random Square Straight Edge and Staggered<br />
Edge siding must be installed only over a flat,<br />
vertical wall surface.<br />
4. When a window or doorway breaks a course,<br />
continue the application as if the opening were not<br />
there to ensure the random look is maintained.<br />
NOTE: For all shapes other than Perfection<br />
Shingles, <strong>CertainTeed</strong> recommends using<br />
minimum 1" trim.<br />
Pattern 1 Pattern 2<br />
Pattern 3<br />
One V-notch Two V-notches Three V-notches<br />
Rotated 180°<br />
(upside down)<br />
7" exposure<br />
Rotated 180°<br />
(upside down)<br />
39
<strong>CertainTeed</strong> WeatherBoards Fiber Cement Siding <strong>Installation</strong> <strong>Manual</strong><br />
Trimboard<br />
Starter Strip<br />
To ensure that the keyways are fully backed by fiber<br />
cement, install the first course of Random Square Straight<br />
Edge and Staggered Edge siding over a full starter course<br />
of 8-1/4" lap siding. If you are transitioning from less than<br />
8-1/4" lap siding to Shapes siding, use 8-1/4" lap siding<br />
as your starter course at that transition. If you are<br />
starting the wall with Random Square Straight Edge<br />
or Staggered Edge siding, place a starter strip under<br />
the 8-1/4" starter course.<br />
You can use fiber cement, vinyl utility trim, or skirtboard<br />
as a starter strip. It must be at least 2" wide and 1/4"<br />
to 5/16" thick.<br />
When starting the installation at ground level, establish<br />
a straight, level reference line (chalk line) to guide the<br />
positioning of the starter strip and the siding starter<br />
course (minimum 8-1/4" lap siding).<br />
Find the lowest point of the sheathing(s) and make a<br />
mark that is 1" above the lowest corner. The bottom edge<br />
of the siding will be 2-1/4" below the mark you just made.<br />
Make sure this point is high enough to ensure that the<br />
siding is installed at least 6" above the finished grade or<br />
1" above surfaces where water may collect.<br />
40<br />
1<br />
2<br />
1<br />
1/8" gap for caulking<br />
16"<br />
3<br />
3<br />
16"<br />
Panels are offset 16"<br />
2<br />
Nailing Guide for Random Square Siding<br />
2<br />
1<br />
Do not nail in this area<br />
3<br />
3<br />
1. From this mark, snap a level chalk line to the opposite<br />
end of the wall.<br />
2. Repeat the procedure around the entire house.<br />
3. Using the chalk line as a guide, attach a starter strip.<br />
Starter Course<br />
Using the starter strip as a guide, attach the starter course<br />
so that the bottom edge will project at least 1/4" below the<br />
bottom edge of the starter strip.<br />
XXPlace the fastener 1" from the top of the panel and no<br />
closer than 3/8" from the edge.<br />
XXFasteners must penetrate a minimum of 1-1/4" into the<br />
structural framing.<br />
XXDo not over drive the fasteners. Seating them below<br />
the surface of the siding reduces their holding power.<br />
Do not place fasteners in the center, unsupported<br />
area of the siding.<br />
XXIf you are hand nailing, it may be necessary to predrill<br />
to help prevent the corners from breaking.<br />
XXFasten from one end of the panel to the other.<br />
Nail 1"<br />
above<br />
every<br />
other<br />
keyway
<strong>CertainTeed</strong> WeatherBoards Fiber Cement Siding <strong>Installation</strong> <strong>Manual</strong><br />
First Course<br />
First Panel<br />
1. Start at the left side of the wall.<br />
2. Remove a bit of the left edge of the panels so that<br />
the entire panel butts up flush against the trim.<br />
3. Place the first nail 1" above the top of the keyways<br />
and no closer than 3/8" from the edge of the panel.<br />
This will ensure the nails are concealed.<br />
6" cornerboard<br />
16"<br />
Panels are offset 16"<br />
Second, Third and Subsequent Panels<br />
1. Match up the corresponding panel V notches (1 to 1,<br />
2 to 2, 3 to 3). Attach the corresponding panels to the<br />
wall in the same manner as the first panel.<br />
2. Continue this sequence to the end of the wall.<br />
Second Course<br />
To ensure a random pattern, start the second course<br />
using a #3 panel. Determine the starting point for a #3<br />
panel by measuring 16" from the left side of the #1 panel<br />
on the first course and make a mark. Panels should be<br />
stair-stepped up the wall on 16" offsets.<br />
1. Install the #3 panel from the mark to the right.<br />
2. To achieve the proper exposure, measure up from<br />
the top of the panel or up from the bottom of the<br />
panel and make a mark. Align this mark with the top of<br />
the panels installed on the wall on the first course.<br />
4. Continue nailing 1" above every other keyway.<br />
Finish the panel with a nail at the right edge.<br />
<strong>Installation</strong> Sequence for Random Square Siding<br />
NOTE: Leave a 1/8" gap between the siding and<br />
the trim or other materials to allow for structural<br />
movement. Always caulk between the siding and the<br />
trim. Do not caulk between siding and any built-in<br />
receiving channels located at or around windows.<br />
Always prime or paint any cut edges that are<br />
inserted into a window J-channel.<br />
Weather-<br />
resistant<br />
barrier<br />
18"<br />
8"<br />
8" max<br />
reveal<br />
7/16"<br />
sheathing<br />
DO NOT NAIL<br />
IN THIS AREA<br />
1/4" gap<br />
between shakes<br />
Position nails to<br />
secure through<br />
previous courses,<br />
not above<br />
Nail 1"<br />
from edge<br />
6" trimboard<br />
Nail 9"<br />
from<br />
bottom<br />
9"<br />
41
<strong>CertainTeed</strong> WeatherBoards Fiber Cement Siding <strong>Installation</strong> <strong>Manual</strong><br />
3. Refer to the following guidelines for the specific<br />
product exposures:<br />
42<br />
a. Random Square Straight Edge 5" Exposure:<br />
Measure up 5" from the bottom of the panel or<br />
measure up 5" from the top of the panel and make<br />
a mark on the wall.<br />
b. Random Square Straight Edge 7" Exposure:<br />
Measure up 7" from the bottom of the panel or<br />
measure up 7" from the top of the panel and<br />
make a mark on the wall.<br />
c. Random Square Staggered Edge:<br />
Measure up 7" from the top of the panel.<br />
3. Install the panels by matching up the identifying<br />
V-notches (1 to 1, 2 to 2, 3 to 3) in the recommended<br />
sequence, continuing from left to right horizontally<br />
across the wall.<br />
4. Backfill the space on the left side of the #3 panel to<br />
the cornerboard with a #2 panel (cut to fit).<br />
Third Course<br />
To continue the random pattern, start the third course<br />
with a #2 panel and follow the same procedures as the<br />
second course.<br />
Fourth and Subsequent Courses<br />
Starting with the 4th course, repeat the same installation<br />
procedure as for courses 1, 2 and 3.<br />
1. Please refer to the illustrations on page 41 for<br />
course layout.<br />
2. Keep in mind the sequence is: 1, 3, 2, 1, 3, 2, 1<br />
diagonally up the wall at 16" offset.<br />
3. Be sure to leave a 1/8" gap between the siding and the<br />
trim or other materials to allow for structural movement.<br />
Always caulk between the siding and the trim.<br />
4. When a window or doorway breaks a course, continue<br />
the application as if the opening were not there.<br />
NOTE: When installing Random Square Shapes in<br />
gable ends, proceed using the same methods as<br />
described above.<br />
Individual Shakes<br />
Before you install Individual Shakes, review and ensure<br />
compliance with all local building codes and regulations<br />
regarding the selection and proper use of sheathings,<br />
weather-resistant barriers, flashings, and other building<br />
materials and systems.<br />
Individual Shakes must be installed over wall construction<br />
with framing spacing 16" to 24" o.c. (max.) and a<br />
minimum of 7/16" OSB or 1/2" plywood sheathing.<br />
Fastening Requirements<br />
Use double hot-dipped galvanized or stainless steel<br />
fasteners. Do not use electro-galvanized fasteners<br />
because they corrode faster, especially in coastal<br />
areas. Permissible fasteners include:<br />
6d siding nail 0.113" x 0.281" HD x 2" long<br />
6d roofing nail 0.120" x 0.375" HD x 1-3/4" long<br />
ribbed bugle-head<br />
fiber cement screws<br />
Weather-resistant<br />
barrier<br />
Trim<br />
1/4" gap<br />
between<br />
shakes<br />
1/8" gap<br />
for caulk<br />
8" max<br />
reveal<br />
6" min<br />
Leave a minimum<br />
1-1/2" between keyways on<br />
successive courses<br />
Position nails to secure through<br />
previous courses, not above<br />
#8 -18, 1-5/8" x 0.375" HD<br />
7/16" sheathing<br />
Individual Shakes <strong>Installation</strong><br />
24"<br />
o.c max<br />
9-1/4"<br />
starter<br />
course<br />
2"<br />
starter<br />
strip
<strong>CertainTeed</strong> WeatherBoards Fiber Cement Siding <strong>Installation</strong> <strong>Manual</strong><br />
Starter Strip<br />
You can use fiber cement, vinyl utility trim, or PVC skirtboard<br />
as a starter strip. It must be at least 2" wide and<br />
1/4" to 5/16" thick. When starting installation at ground<br />
level, establish a straight, level reference line (chalk line)<br />
to guide the positioning of the starter strip and the shake<br />
starter course.<br />
1. Find the lowest point of the sheathing and make a<br />
mark that is 1" above the lowest point. The bottom<br />
edge of the siding will be 2-1/4" below the mark you<br />
just made. Make sure this point is high enough to<br />
ensure that the shakes are installed at least 6" above<br />
the finished grade or 1" above surfaces where water<br />
may collect.<br />
2. From this mark, snap a level chalk line to the opposite<br />
end of the wall.<br />
3. Repeat around the entire house.<br />
4. Using the chalk line as a guide, attach a starter strip.<br />
Starter Course<br />
To ensure that the keyways are fully backed by fiber<br />
cement, install the first course of Individual Shakes<br />
over a full starter course of 9-1/4" lap siding. If you are<br />
transitioning from less than 9-1/4" lap siding to Individual<br />
Shakes, use 9-1/4" lap siding as your starter course at<br />
the transition. If you are starting the wall with Individual<br />
Shakes, place a starter strip under the starter course.<br />
Weather-resistant<br />
barrier<br />
2" starter strip<br />
Sheathing<br />
Starter Strip “Z” Flashing Detail<br />
Shake<br />
9-1/4"<br />
starter course<br />
1/4" gap<br />
2" leg flashing<br />
Trim<br />
Using the starter strip as a guide, attach the starter course<br />
so that the bottom edge will project at least 1/4" below the<br />
bottom edge of the starter strip.<br />
XXPlace the fastener 1" from the top of the panel and no<br />
closer than 3/8" from the edge.<br />
XXFasteners must penetrate a minimum of 1-1/4" into the<br />
structural framing.<br />
XXDo not over drive the fasteners. Seating them below<br />
the surface of the siding reduces their holding power.<br />
Do not place fasteners in the center, unsupported<br />
area of the siding.<br />
XXIf you are hand nailing, it may be necessary to predrill<br />
to help prevent the corners from breaking.<br />
XXFasten from one end of the panel to the other.<br />
First Course of Individual Shakes<br />
1. Install the first shake with the bottom edge slightly<br />
below the starter course. Be sure to maintain a 1/8"<br />
gap at all trim locations. Always caulk between the<br />
siding and the trim.<br />
2. Place fasteners 1" from the side edges and 9" up from<br />
the bottom of the shake.<br />
3. Continue installing shakes in a random manner, mixing<br />
the 6-1/4", 8-1/4", and 12" shake sizes. Maintain a 1/4"<br />
keyway gap between shakes.<br />
NOTE: Use the edge of a shake or a piece of 1/4"<br />
plywood as a jig to maintain even spacing between<br />
individual shakes.<br />
Second and Subsequent Courses<br />
1. Select and position the shake 8" up from the bottom<br />
of the previous course and such that course-to-course<br />
keyway spacing is no closer than 1-1/2".<br />
2. Place fasteners 1" from the side edges and 9" up from<br />
the bottom of the shake. Fasteners must penetrate the<br />
top of the shakes of the previous course.<br />
3. Continue installing shakes in a random manner,<br />
mixing the 6-1/4", 8-1/4", and 12" shake sizes to<br />
maintain the 1/4" keyway gaps and 1-1/2" minimum<br />
keyway spacing.<br />
43
<strong>CertainTeed</strong> WeatherBoards Fiber Cement Siding <strong>Installation</strong> <strong>Manual</strong><br />
4. Individual Shakes are designed and installed to create<br />
a straight-edge, 8" exposure finished application.<br />
Alternative applications, such as staggered edge,<br />
can be achieved with the Individual Shakes following<br />
the basic steps noted earlier. However, the exposure<br />
should never be less than 6-1/2" and the fastening<br />
location should be kept 9" from the bottom.<br />
44<br />
Weatherresistant<br />
barrier<br />
18"<br />
8"<br />
8" max<br />
reveal<br />
7/16"<br />
sheathing<br />
DO NOT NAIL<br />
IN THIS AREA<br />
1/4" gap<br />
between shakes<br />
Position nails to<br />
secure through<br />
previous courses,<br />
not above<br />
Nail 1"<br />
from edge<br />
Second Course and Subsequent Courses<br />
NOTE: Fasteners must penetrate through the<br />
shakes of previous courses.<br />
Nail 9"<br />
from<br />
bottom<br />
NOTE: Stagger must have no greater than an 8"<br />
and no less than a 6-1/2" reveal.<br />
9"<br />
Octagons and Half-Rounds<br />
Octagons and Half-Rounds panels are made in a single<br />
design. There are eight 6"-wide tabs per panel. The<br />
panels must be installed over 7/16" OSB or 1/2" plywood<br />
(minimum) sheathing with framing spacing 16" to 24" o.c.<br />
Starter Strip<br />
You can use fiber cement, vinyl utility trim, or PVC skirtboard<br />
as a starter strip. It must be at least 2" wide<br />
and 1/4" to 5/16" thick.<br />
When starting installation at ground level, establish a<br />
straight, level reference line (chalk line) to guide the<br />
positioning of the starter strip and the siding starter<br />
course (minimum 8-1/4" lap siding).<br />
1. Find the lowest point of the sheathing(s) and make a<br />
mark that is 1" above the lowest corner. The bottom<br />
edge of the siding will be 2-1/4" below the mark you<br />
just made. Make sure this point is high enough to<br />
ensure that the siding is installed at least 6" above<br />
the finished grade or 1" above surfaces were water<br />
may collect.<br />
2. From this mark, snap a level chalk line to the opposite<br />
end of the wall.<br />
3. Repeat the procedure around the entire house.<br />
4. Using the chalk line as a guide, attach a starter strip.<br />
Starter Course<br />
To ensure that the keyways are fully backed by fiber<br />
cement, install the first course of Octagons or Half-<br />
Rounds siding over a full starter course of 8-1/4" lap<br />
siding. If you are transitioning from less than 8-1/4" lap<br />
siding to Shapes siding, use 8-1/4" lap siding as your<br />
starter course at that transition. If you are starting the wall<br />
with Octagons or Half-Rounds siding, place a starter strip<br />
under the 8-1/4" starter course.
<strong>CertainTeed</strong> WeatherBoards Fiber Cement Siding <strong>Installation</strong> <strong>Manual</strong><br />
Using the starter strip as a guide, attach the starter course so that the bottom edge will project at least 1/4" below the<br />
bottom edge of the starter strip.<br />
21"<br />
7"<br />
Positioning and Nailing Guide for Octagons and Half-Rounds<br />
XXPlace the fastener 1" above the top of the keyway and<br />
no closer than 3/8" from the edge.<br />
XXFasteners must penetrate a minimum of 1-1/4" into the<br />
structural framing.<br />
XXDo not over drive the fasteners. Seating them below<br />
the surface of the siding reduces their holding power.<br />
Do not place fasteners in the center, unsupported<br />
area of the siding.<br />
XXIf you are hand nailing, it may be necessary to<br />
predrill to help prevent the corners from breaking.<br />
XXFasten from one end of the panel to the other.<br />
Vertical edges of odd-numbered<br />
courses will fall on studs<br />
Center of tab Keyway<br />
16" o.c.<br />
Keyways Line Up with Center of Tab<br />
1.0"<br />
Installing Octagons and Half-Rounds<br />
on Walls with Gable Ends<br />
For best appearance, gable installations should end<br />
with a single Half-Round or Octagon at the peak.<br />
1. Measure the height of the gable/wall (in inches).<br />
2. Divide the height of the gable/wall by 7".<br />
3. If the answer is an even number, center the first<br />
course of Half-Rounds or Octagons on a keyway.<br />
4. If the answer is an odd number, center the first<br />
course on a Half-Round or Octagon.<br />
First Course<br />
1. Drop a plumb line to find the center of the gable.<br />
2. Locate the first piece relative to the centerline of the<br />
gable/wall. The panel may be positioned anywhere<br />
along its length, as long as the keyway or shingle<br />
face is centered.<br />
45
<strong>CertainTeed</strong> WeatherBoards Fiber Cement Siding <strong>Installation</strong> <strong>Manual</strong><br />
46<br />
Drop a<br />
plumb line to<br />
find center<br />
of gable<br />
Finding the Center of Gable<br />
3. Starting from the left side of the panel, place the first<br />
nail 1" above top of keyways and no closer than 3/8"<br />
from the edge of the panel. This will ensure the nails<br />
are concealed. Continue nailing 1" above every other<br />
keyway. Finish the panel with a nail at the right edge.<br />
Center<br />
Center the Panel on the Gable<br />
4. Finish installing the first course to the right and left<br />
sides, leaving 1/8" gaps between the trim and the<br />
side of the first and last panels.<br />
5. Always caulk between the siding and the trim.<br />
Second Course<br />
1. Starting at the left side, locate the first full panel<br />
installed on the first course.<br />
2. Offset the 2nd course 21" (3-1/2 tabs) from the first full<br />
piece. This horizontal shift will vertically align the center<br />
of each tab on the 2nd course with the keyways of the<br />
1st course.<br />
3. To achieve proper exposure, you can measure up<br />
7" from the top of the panel and make a mark on the<br />
wall. Then place the top of the next course/panel on<br />
the mark that you made and nail. Or measure down 7"<br />
from the top of the next panel and make a mark on the<br />
edge of the panel. Then align the mark on the edge of<br />
the panel with the top of the installed course and nail.<br />
4. Fasten the panel as directed for the first course.<br />
NOTE: Make sure the tops of the keyways are<br />
concealed by the overlapping panel before<br />
fastening the siding.<br />
Subsequent Courses in Wall Areas<br />
1. Install the 3rd, 5th, and all other odd courses in<br />
the same horizontal position as the 1st course.<br />
Leave a 7" exposure.<br />
2. Install the 4th, 6th, and all other even courses in<br />
the same horizontal position as the 2nd course.<br />
Leave a 7" exposure.<br />
3. When a window or doorway breaks a course, continue<br />
the application as if the opening did not exist.
<strong>CertainTeed</strong> WeatherBoards Fiber Cement Siding <strong>Installation</strong> <strong>Manual</strong><br />
Subsequent Courses in Gable Areas<br />
1. Make a rake angle template for gable:<br />
a. Hold a short piece of siding along the starter<br />
strip against the left edge of the gable.<br />
b. Hold a second piece of siding against the trim<br />
at the rake angle of the gable.<br />
c. Use this template as a guide when you cut the<br />
panels to fit the gable.<br />
Short piece of<br />
lap siding or<br />
scrap<br />
Trace the<br />
angle of<br />
the rake<br />
Short piece of Half-Round or<br />
Octagon siding<br />
Tracing the Angles of the Rake<br />
Starter strip<br />
2. Run a pencil along the edge of the template piece,<br />
transferring the rake angle to the piece of siding.<br />
3. Use the rake angle template to trim the starting panel<br />
of the subsequent courses.<br />
4. Install the 2nd and subsequent courses according to<br />
the directions previously shown.<br />
5. Face nail the final piece at the top of the gable and the<br />
small pieces required to fill in at the rake angle.<br />
NOTE: When estimating for materials, allow for a<br />
much higher scrap rate on gables than for a<br />
straight wall.<br />
Section 12:<br />
Vertical Siding<br />
Before you install the siding, review and comply with<br />
all local building codes and regulations regarding wall<br />
construction including the proper use of sheathings,<br />
framing, weather-resistant barriers, flashings, and other<br />
building materials and systems.<br />
Before You Begin<br />
Review the general cutting, fastening, and wall<br />
preparation instructions in the Cutting, Fastening,<br />
and Wall Preparation sections (pages 18–29).<br />
Some important reminders:<br />
XXCut WeatherBoards Fiber Cement siding face down<br />
with mechanical shears or a circular saw. Cover the<br />
saw table with carpet or another soft material to avoid<br />
marring the surface of the siding.<br />
XXPrime, paint or caulk all field-cut edges of siding.<br />
Do not prime or paint the back of the siding panel.<br />
Refer to instructions on butt joints and trim locations<br />
for specific requirements.<br />
XXBe sure to install all siding with the proper textured,<br />
sealed, or painted surface facing out.<br />
XXDo not over drive the fasteners. When a fastener is<br />
driven below the surface of the siding, its holding<br />
power is reduced.<br />
XXIrregularities in framing may be visible in the finished<br />
application. To minimize the effect of uneven walls,<br />
shim the wall as necessary.<br />
XXIf you are hand nailing, it may be necessary to predrill<br />
the panel to help prevent the corners from breaking.<br />
47
<strong>CertainTeed</strong> WeatherBoards Fiber Cement Siding <strong>Installation</strong> <strong>Manual</strong><br />
XXWeatherBoards Fiber Cement Vertical siding (panels)<br />
may be installed only over a flat, vertical wall surface.<br />
XXAll edges of vertical panels must be backed by framing<br />
or solid blocking for attachment.<br />
XXVertical panels can be hung horizontally providing the<br />
fastening schedule and flashing are followed.<br />
NOTE: Do not use vertical siding as soffit. Fiber<br />
cement siding is heavier than vinyl siding and can<br />
become a safety hazard if it is used overhead.<br />
NOTE: See page 26 for recommended fasteners for<br />
Fiber Cement Vertical siding.<br />
Mark a Starting Chalk Line<br />
Establish a straight, level reference line to guide the<br />
positioning of the panel.<br />
1. Find the lowest point of the sheathing(s) and make<br />
a mark that is 1" above the lowest corner. Make sure<br />
this point is high enough to ensure that the siding<br />
is installed at least 6" above the finished grade or 1"<br />
above surfaces were water may collect.<br />
2. From this mark, snap a level chalk line to the<br />
opposite end of the wall.<br />
3. Repeat the procedure around the entire house.<br />
NOTE: Do not install a starter strip or skirtboard.<br />
Aluminum Trim Systems<br />
In recent years the use of WeatherBoards Fiber Cement<br />
siding in conjunction with third-party reveal trim systems<br />
(such as Easytrim Reveals) has been increasing,<br />
especially in light commercial construction. These trim<br />
systems provide a unique aesthetic appearance to<br />
projects, providing clean, visually attractive surfaces with<br />
crisp horizontal and vertical panel transitions.<br />
Follow all the instructions for the third-party reveal<br />
system, as long as these instructions do not reduce<br />
the performance of <strong>CertainTeed</strong> WeatherBoards Fiber<br />
Cement siding. Also, ensure that the installation of the<br />
reveal system does not in any way negatively affect the<br />
performance of the WeatherBoards Fiber Cement siding,<br />
as this may void the product warranty.<br />
48<br />
<strong>CertainTeed</strong> has reviewed the application of our products<br />
with the following trim reveal systems:<br />
1. Easy Trim Reveals (highly recommended);<br />
www.easytrimreveals.com; 877-973-8746<br />
2. Tamlyn; www.tamlyn.com; 281-499-9604<br />
3. Fry Reglet; www.fryreglet.com; 800-237-9773<br />
XXEstablishing a structural fastening surface sufficient to<br />
meet the requirements outlined in this manual is the<br />
responsibility of the property owner, architect/designer,<br />
general contractor and/or installer.<br />
XXInstall all products in compliance with all national, state,<br />
and local building codes. Be sure to check with your<br />
local code official or governing body for the building<br />
requirements in your area.<br />
XXDesign the wall assembly to ensure that all appropriate<br />
windload and anchoring requirements are met. Consult<br />
the latest version of the ICC-ES Evaluation Report ESR-<br />
1668 for guidance on approved fasteners.<br />
XXThe installation must meet all the installation<br />
requirements listed in the most recent version of<br />
this manual.<br />
Installing the Panels<br />
1. Use the chalk line as a guide.<br />
2. Leave a 1/8" gap between the siding and the trim to<br />
allow for structural movement. Always caulk between<br />
the siding and the trim.<br />
3. Fasten the siding at all stud locations.<br />
4. Do not fasten closer than 2" from the corners in<br />
either direction.<br />
5. Place fasteners no closer than 3/8" from edge.
<strong>CertainTeed</strong> WeatherBoards Fiber Cement Siding <strong>Installation</strong> <strong>Manual</strong><br />
6"<br />
Fastening Vertical Siding<br />
6. Space fasteners a maximum of 6" o.c. on all edges<br />
and 12" o.c. at intermediate framing members. Refer to<br />
ICC-ES ESR-1668 for specific fastening requirements.<br />
7. Paint all field-cut edges.<br />
8. Butt all vertical panel joints together. Do not caulk<br />
vertical joints.<br />
Nail 3/8" from<br />
side edge<br />
Batten<br />
Batten<br />
12"<br />
3/8" min. from edges<br />
Vertical Butted Panel Joint<br />
9. Install “Z” flashing and leave a 1/4" gap between<br />
horizontal panels. Do not caulk horizontal joints.<br />
6"<br />
2"<br />
Caulk butt joint<br />
or batten edges<br />
Insulation<br />
Concrete<br />
slab<br />
1/4"<br />
Attaching Vertical Siding to Wood<br />
Panel Stacking Detail<br />
Fiber<br />
cement<br />
siding<br />
Exterior wall<br />
sheathing<br />
Weatherresistant<br />
barrier<br />
Final grade<br />
1/4" gap<br />
DO NOT CAULK<br />
Use "Z" flashing<br />
49
<strong>CertainTeed</strong> WeatherBoards Fiber Cement Siding <strong>Installation</strong> <strong>Manual</strong><br />
Board and Batten Application<br />
WeatherBoards Fiber Cement siding can also be<br />
applied in a board and batten style. You can use<br />
wood, fiber cement, composite lumber, or cellular<br />
PVC as battens. If you install battens cut from fiber<br />
cement, paint or stain the cut edges.<br />
To install fiber cement battens:<br />
XXPaint or stain cut edges.<br />
XXUse double dipped HD corrosion resistant nails<br />
(min. 0.113" ga, 9/32" head).<br />
XXEnsure that nails penetrate through the siding and at<br />
least 1" into solid wood.<br />
XXPosition fasteners no closer than 1" from the sides of<br />
the batten and no closer than 2" from the end.<br />
XXFor battens 3-1/2" wide or less, fasten on alternate<br />
sides of the batten, spaced no more than 24" o.c.<br />
XXFor battens 4" wide or more, apply two fasteners,<br />
one on each side of the batten, spaced no<br />
more than 16" o.c.<br />
XXApply caulk either at the butt joint or at both batten<br />
edges. Caulking the butt joint increases aesthetics<br />
while reducing potential long-term maintenance.<br />
50<br />
Nail 3/8" from<br />
side edge<br />
Batten<br />
Board and Batten Joint<br />
NOTE: DO NOT seal the back of fiber<br />
cement battens.<br />
Caulk butt joint<br />
or batten edges<br />
NOTE: Vertical panels can be hung horizontally<br />
provided you flash the joints and follow the<br />
fastening schedule.<br />
Section 13: Soffit<br />
Before you install fiber cement soffit, review and comply<br />
with all local building codes and regulations regarding<br />
wall construction, including the proper use of sheathings,<br />
framing, weather-resistant barriers, flashings, and other<br />
building materials and systems.<br />
NOTE: Do not use vertical siding as soffit—<br />
it is too heavy.<br />
Before You Begin<br />
Review the general cutting, fastening, and wall<br />
preparation instructions in the Cutting, Fastening,<br />
and Wall Preparation sections (pages 18–29).<br />
Remember:<br />
Soffit<br />
XXCut fiber cement soffit face down with mechanical<br />
shears or a circular saw. Cover the saw table with<br />
carpet or another soft material to avoid marring the<br />
surface of the soffit.<br />
XXPrime or paint all field-cut edges of fiber cement soffit.<br />
Do not prime or paint the back of the soffit panel.<br />
Refer to instructions on butt joints and trim locations<br />
for specific requirements.<br />
XXBe sure to install all soffit with the proper textured,<br />
sealed, or painted surface facing out.<br />
XXDo not over drive the fasteners. When a fastener is<br />
driven below the surface of the soffit, its holding power<br />
is reduced.<br />
XXIrregularities in framing may be visible in the finished<br />
application. To minimize the effect of uneven walls,<br />
shim the wall as necessary.<br />
XXIf you are hand nailing, it may be necessary to predrill<br />
to help prevent the corners from breaking.
<strong>CertainTeed</strong> WeatherBoards Fiber Cement Siding <strong>Installation</strong> <strong>Manual</strong><br />
Ventilation<br />
Proper attic ventilation is important for any home. The<br />
2009 International Building Code (IBC) Section 1203<br />
Ventilation furnishes a basic guide for determining proper<br />
ventilation for any home. The information provided here<br />
may under certain circumstances not result in enough<br />
ventilation. Therefore, the calculation provided should be<br />
used only as a guide.<br />
The IBC guideline requires that any attic or space<br />
between the top floor, ceiling, and roof must be ventilated.<br />
It requires one square foot of ventilation area for every 300<br />
square feet of attic space, provided at least 50% of the<br />
required ventilating area has already been provided by<br />
gable and vents or ridge vents.<br />
Eave 2'-0"<br />
Eave 2'-0"<br />
30'-0"<br />
Total Attic Area Calculation<br />
40'-0"<br />
Determining Soffit Ventilation (Example)<br />
1. Determine the local code requirement for total<br />
attic ventilation:<br />
◆ 1:300 requires 1 sq. ft. of ventilation for every 300<br />
sq. ft. of attic space.<br />
2. Determine the total area of the attic (sq. ft.)<br />
to be ventilated (see illustration):<br />
◆ 40 ft. x 30 ft. = 1,200 sq. ft.<br />
3. Total free area of ventilation required for the attic:<br />
◆ 1,200 sq. ft. /300 = 4.0 sq. ft.<br />
4. Convert square feet into square inches (sq. in.):<br />
◆ 4.0 sq. ft. x 144 = 576 sq. in.<br />
5. Factor in the location of vents:<br />
◆ 50% at ridge, roof vent or gable vent =<br />
576 x.50 = 288 sq. in.<br />
50% at soffit/eave = 576 x .50 = 288 sq. in.<br />
6. Determine the total soffit ventilation area required:<br />
◆ Area of the soffit available for ventilation =<br />
80 lineal feet.<br />
◆ Ventilation area required per lineal foot of soffit =<br />
288 sq. in. / 80 lin. ft. = 3.6 sq. in / lin. ft.<br />
7. Determine the amount of vented soffit required.<br />
The NFA information for <strong>CertainTeed</strong> products<br />
is available at certainteed.com/resources/<br />
soffitspecsheet.pdf<br />
8. Divide the required net free determined for the eave<br />
locations by the net free area of the soffit product.<br />
9. Install the required amount of vented soffit accordingly.<br />
51
<strong>CertainTeed</strong> WeatherBoards Fiber Cement Siding <strong>Installation</strong> <strong>Manual</strong><br />
<strong>Installation</strong><br />
1. WeatherBoards Fiber Cement soffit should be applied<br />
to structural framing members spaced no more than<br />
24" o.c. with the longest dimension perpendicular to<br />
the framing.<br />
Fascia<br />
Subfascia (wood)<br />
Nailer board<br />
52<br />
Vent Soffit to Outside of Eaves<br />
2. Nail a 2"x 2" (minimum) nailer board along the wall,<br />
with the bottom edge of the nailer board level with<br />
the bottom edge of the fascia.<br />
3. At every butt joint of the soffit, back up the joint with 2x<br />
framing going from the fascia back to the wall. If the<br />
soffit corners are going to be mitered, nail 2x blocking<br />
from the corner of the fascia to the corner of the wall.<br />
4. If you are going to use H-channel at the mitered<br />
corners, nail the H-channel to the 2x blocking and<br />
slide the cut soffit into it. Cut the soffit 1/8" shorter than<br />
the H-channel to allow for expansion and contraction.<br />
<strong>Installation</strong><br />
Venting to outside of eaves<br />
Vented soffit panel<br />
Shim<br />
1. Cut WeatherBoards Fiber Cement soffit panels face<br />
down with mechanical shears or a circular saw.<br />
2. Prime or paint the cut edges before installing the soffit.<br />
Do not prime or paint the back of the soffit.<br />
3. Use double hot-dipped galvanized or stainless steel<br />
6d or 8d nails (1/4" head minimum).<br />
4. Fasten the soffit 3/4" from the side edge, 3/8" from the<br />
butt end, and 2" from the corner. Space the fasteners<br />
every 12" along both the front and back edge. The butt<br />
ends should be in contact, fastened at corresponding<br />
ends, and supported by framing.<br />
Section 14: Porch<br />
Ceiling Panels<br />
WeatherBoards Porch Ceiling panels are specifically<br />
designed to be used in porch and/or ceiling applications.<br />
The panel size is 1/4" x 4' x 8'. Before you install the Porch<br />
Ceiling Panels, review and comply with all local building<br />
codes and regulations regarding wall construction<br />
including the proper use of sheathings, framing, weatherresistant<br />
barriers, flashings, and other building materials<br />
and systems.<br />
Before You Begin<br />
Review the general cutting, fastening, and wall<br />
preparation instructions in the Cutting, Fastening,<br />
and Wall Preparation sections.<br />
Remember:<br />
XXCut WeatherBoards Fiber Cement Porch Ceiling panels<br />
face down with mechanical shears or a circular saw.<br />
Cover the saw table with carpet or another soft material<br />
to avoid marring the surface of the panel.<br />
XXPrime, paint, or caulk all field-cut edges. Do not prime<br />
or paint the back of the panel. Refer to instructions on<br />
butt joints and trim locations for specific requirements.<br />
XXBe sure to install all panels with the proper textured,<br />
sealed, or painted surface facing out.<br />
XXDo not over drive the fasteners. When a fastener is<br />
driven below the surface of the panel, its holding<br />
power is reduced.<br />
XXIrregularities in framing may be visible in the finished<br />
application. To minimize the effect of uneven walls,<br />
shim the wall as necessary.<br />
XXIf you are hand nailing, it may be necessary to predrill<br />
the panel to help prevent the corners from breaking.<br />
XXA double stud at panel joints is recommended for<br />
easier installation.
<strong>CertainTeed</strong> WeatherBoards Fiber Cement Siding <strong>Installation</strong> <strong>Manual</strong><br />
Preparation<br />
XXPorch Ceiling Panels must be installed over solid<br />
wood or steel framing spaced no more than 24"<br />
o.c. Additional framing may be required for proper<br />
fastening. Be sure all edges are supported by framing.<br />
24" o.c.<br />
max<br />
6"<br />
Porch Ceiling Panel <strong>Installation</strong><br />
XXFor easier installation, we recommend a double stud at<br />
panel joints.<br />
XXFor 2x wood framing, use 6d nails (min.) spaced 6" on<br />
center at panel edges and field framing members.<br />
Do not use finishing nails.<br />
XXFor light gauge steel frame construction, use<br />
#8 x 0.385" head diameter x 1-1/4" long (min.)<br />
ribbed bugle head fiber cement screws spaced<br />
6" o.c. at panel edges and field framing members.<br />
6"<br />
<strong>Installation</strong><br />
Position fasteners no closer than 3/8" from panel edges<br />
and 2" away from corners.<br />
6"<br />
3/8"<br />
Fastening Porch Ceiling Panels<br />
Position fasteners no closer than 3/8" from panel<br />
edges and 2" away from corners.<br />
Install panels with all edges butted in moderate contact.<br />
Panels can be installed with or without battens.<br />
Butted Panel Joint<br />
2"<br />
Butted Panel Joint with Batten<br />
2"<br />
53
<strong>CertainTeed</strong> WeatherBoards Fiber Cement Siding <strong>Installation</strong> <strong>Manual</strong><br />
Section 15: Finishing<br />
Caulking<br />
Use a high quality, exterior-grade caulk or sealant. For 4/4<br />
and 5/4 trim, use caulk that complies with either ASTM<br />
C834 (latex) or ASTM C920 (urethane). The caulk or<br />
sealant should be color matched or paintable. It should<br />
be compatible with both fiber cement siding and the<br />
materials used for the trim. Check the gloss and texture of<br />
the caulk to make sure it is compatible with the paint.<br />
To ensure that caulks and sealants stay in place, we<br />
recommend using materials that remain flexible. The<br />
labels of these materials will be clearly marked with a<br />
phrase similar to “permanently flexible.”<br />
Before you begin to caulk, remove any dust or debris.<br />
Caulk wherever siding meets the trim, at non-self-flashing<br />
penetrations, and around all windows and doors. Do not<br />
caulk areas where fiber cement siding has been inserted<br />
into J-channel or another pocket or accessory.<br />
54<br />
Caulk between Siding and Trim<br />
XXLeave a 1/8" gap between the siding and the trim.<br />
XXCaulk at all end joints around windows, doors, and the<br />
corners of the house.<br />
XXCaulk around exterior penetrations such as dryer vents,<br />
exterior lighting fixtures, pipes, electrical and cable<br />
openings, and water spigots.<br />
XXDo not caulk the bottom of the horizontal joints<br />
above the Z-flashing<br />
XXBefore inserting field-cut edges into a pocket or<br />
accessory, prime or paint the edge. Do not caulk.<br />
XXCaulk edge joints at upper frieze boards and<br />
band boards.<br />
Always follow the caulk manufacturer’s directions.<br />
Do not caulk fiber cement siding butt joints/edges.<br />
It is never acceptable to leave a gap of any size at a butt<br />
end/joint. Butt end/joints should be installed with factorysealed<br />
or factory-prefinished ends butted together in<br />
moderate contact. <strong>CertainTeed</strong> recommends (but does<br />
not require) the use of a butt end/joint flashing made of<br />
a durable, non-corrosive material that is compatible with<br />
fiber cement siding (e.g. #15 felt, trim coil, Bear Skin joint<br />
flashing). Check if local code requires backflashing at the<br />
butt joint.<br />
Do not caulk. Applying caulk to the butt joint is<br />
ineffective because the gap is not large enough to<br />
accommodate the sealant. Also, on prefinished products,<br />
caulk may leave an unsightly looking finish. Spreading<br />
or feathering the sealant into a thin film will create a<br />
noticeably different appearance, and it can remove the<br />
needed thickness required to withstand UV exposure<br />
and joint movement.<br />
If the architect, designer, installer, project manager,<br />
contractor, property owner, code official or other entity<br />
involved with determining the method of installation<br />
on a project determines that spacing the butt joints<br />
and applying caulk is an acceptable practice during<br />
installation, such practice will not affect the eligibility<br />
of the WeatherBoards Fiber Cement siding product<br />
installed on the project for warranty coverage with<br />
regards to product defect, provided that the caulking of<br />
the butt joints does not inflict, cause, or otherwise create<br />
a condition where this practice was, is, or becomes<br />
the cause of product failure.<br />
NOTE: Do not use caulk to seal nail holes.
<strong>CertainTeed</strong> WeatherBoards Fiber Cement Siding <strong>Installation</strong> <strong>Manual</strong><br />
Painting<br />
All WeatherBoards Fiber Cement Siding, Soffit, and Trim is<br />
sealed with <strong>CertainTeed</strong>’s FiberTect ® Sealer/Primer. When<br />
the edges of field-cut fiber cement siding meet up with<br />
trim boards, the edges must be coated with a high-quality<br />
100% acrylic latex paint or primer, and caulked.<br />
In all other locations, field-cut edges should be coated<br />
with a high-quality 100% acrylic latex paint or primer, but<br />
NOT caulked.<br />
WeatherBoards Fiber Cement Siding, Soffit and Trim<br />
must be allowed to breathe. Do not prime, paint, or stain<br />
the back side. Some “spill-over” from primer, paint, or<br />
stain on the back is normal.<br />
You should apply a finish coat within 24 months<br />
of installation. On 4/4 and 5/4 fiber cement trim,<br />
apply a finish coat within 6 months of installation.<br />
Use a high-quality, 100% acrylic latex paint. Before<br />
applying the finish coat, always follow the paint<br />
manufacturer’s recommendations for surface<br />
preparation and paint application.<br />
NOTE: Never apply oil-based paints or stains to<br />
fiber cement siding, soffit, or trim.<br />
Staining<br />
For a stained look, we highly recommend that you<br />
purchase WeatherBoards Fiber Cement Prefinished with<br />
Stain. This will give the best overall appearance and<br />
performance of the product. If you do elect to field-apply<br />
stain to primed fiber cement, we recommend that the<br />
stain be applied before installation and with the fiber<br />
cement in a horizontal, flat position. A small sampling of<br />
material should be stained and evaluated for satisfactory<br />
appearance before staining all material needed for<br />
the job.<br />
Section 16: Care<br />
and Maintenance<br />
While WeatherBoards Fiber Cement siding remains a<br />
remarkably low maintenance product, the suggestions<br />
and recommendations below should be followed to<br />
achieve long-term satisfaction.<br />
Periodic Maintenance and Care<br />
The siding should be inspected periodically with the<br />
following routine maintenance performed as necessary:<br />
XXRe-fasten any loose siding.<br />
XXCut back any trees or shrubs that touch the siding.<br />
XXReplace any caulking that has hardened, cracked or<br />
lost its seal.<br />
XXFill any small holes that may appear in the siding with<br />
high quality acrylic caulk or cementicious patch.<br />
XXCorrect the drainage in any spots where water is<br />
retained in contact with the siding. Long term contact<br />
with water may result in discoloration.<br />
XXAvoid regularly wetting the siding with lawn sprinklers<br />
since water in many locales contains rust or minerals<br />
which may discolor the siding’s surface, shorten the<br />
life of the paint job, and encourage the growth of<br />
mildew and fungus.<br />
NOTE: If the product has been finished/ painted in<br />
the field, please refer to your paint manufacturer’s<br />
recommendations for care and maintenance.<br />
NOTE: If the product has been pre-finished with<br />
<strong>CertainTeed</strong> ColorMax ® Finish, refer to the<br />
directions provided in this document.<br />
55
<strong>CertainTeed</strong> WeatherBoards Fiber Cement Siding <strong>Installation</strong> <strong>Manual</strong><br />
Washing<br />
Depending on locale and climate conditions, the siding<br />
may be subject to occasional accumulations of dirt.<br />
To keep the siding attractive, we recommend periodic<br />
washing (every 6 to 12 months). Use tap water to which a<br />
moderate amount of household cleaner has been added.<br />
Apply the solution with a cloth, sponge, or soft brush<br />
(as a car wash brush). Less streaking will result if the<br />
siding is washed from bottom to top. Immediately follow<br />
all washing by rinsing thoroughly with plain water from<br />
a garden hose. Never use harsh cleaners, abrasives, or<br />
strong solvents because they may damage the paint or<br />
surface. If the dirt does not wash off, it may be mildew<br />
or a fungus growth.<br />
NOTE: We do not recommend power washing fiber<br />
cement siding as it can cause moisture intrusion,<br />
damage, and/or discoloration.<br />
Protecting Fiber Cement Siding<br />
Moisture Management and Gutters<br />
Water management is key to protecting every part of<br />
your home, including your siding. Each area of the<br />
country is affected by moisture, whether it’s an<br />
occasional thunderstorm, high levels of rainfall or<br />
heavy snow accumulations.The resulting moisture has<br />
potential to cause damage if not managed effectively.<br />
We recommend protecting your home from rainfall with<br />
gutters and downspouts. Divert or remove heavy snow<br />
accumulations that may stand against the siding for<br />
extended periods of time. And you should always be sure<br />
that your drainage system is free of debris and working<br />
properly.<br />
Shrubbery<br />
Proper moisture management also involves managing<br />
your landscape. Plants hold moisture, so any trees or<br />
shrubs that are close to your home should be trimmed<br />
periodically. Plants should not come into contact with your<br />
siding. Also, sprinkler systems should be adjusted to not<br />
saturate areas near your home.<br />
56<br />
Clearances<br />
Maintain required clearances and drainage slopes to<br />
ensure that moisture is diverted away from your siding<br />
at roof lines and ground level. Proper clearances include<br />
1 inch from concrete, roof lines, patios, etc., and 6<br />
inches from the finished grade. Landscaping should not<br />
reach the siding.<br />
Recaulking<br />
It is normal for building products located on the exterior<br />
of a home to expand and contract with temperature<br />
changes. To ensure a successful siding installation,<br />
you must allow for this movement during installation.<br />
While <strong>CertainTeed</strong> WeatherBoards Fiber Cement siding<br />
does not experience the same rate of expansion and<br />
contraction as many other building products (such<br />
as wood), over time you may notice movement of the<br />
siding, specifically at the butt end/joints. This issue<br />
is mainly an aesthetic issue and should not create a<br />
condition that would cause long-term product failure.<br />
If you are dissatisfied with the appearance of the butt<br />
end/joint locations and wish to address them,<br />
<strong>CertainTeed</strong> recommends that you apply<br />
H-covers at the joint locations.<br />
NOTE: Refer to your sealant manufacturer’s<br />
specifications to determine if they allow the<br />
caulking of fiber cement siding butt joints/<br />
edges, what their minimum and maximum gap<br />
requirements are, and/or how this practice may<br />
affect the warranty for the caulking.<br />
To ensure that caulks and sealants stay in place, we<br />
recommend using materials that remain flexible. The<br />
labels of these materials will be clearly marked with a<br />
phrase similar to “permanently flexible.” For best results,<br />
use a high quality, exterior-grade caulk or sealant that<br />
meets ASTM C834 (latex caulk) or ASTM C920 (urethane<br />
caulk). The caulk or sealant should be color matched<br />
or paintable. It should be compatible with both fiber<br />
cement siding and the materials used for the trim. Check<br />
the gloss and texture of the caulk to make sure it is<br />
compatible with the paint.
<strong>CertainTeed</strong> WeatherBoards Fiber Cement Siding <strong>Installation</strong> <strong>Manual</strong><br />
Before you begin to caulk, remove any dust or debris.<br />
Caulk wherever siding meets the trim vertically at the<br />
corners and around windows and doors. Do not caulk<br />
where the siding is installed into J-channel or a pocket/<br />
accessory. Follow the caulk manufacturer’s application<br />
instructions.<br />
Touch-ups<br />
Before You Begin<br />
XXCheck the color, amounts, and accessories in<br />
the touch-up kit.<br />
XXMix the paint well.<br />
XXDo not allow touch-up paint to freeze.<br />
XXThe paint and the panel, as well as the ambient air<br />
temperature must be 50° F or above.<br />
XXTest the color on the sample piece or hidden area of<br />
siding/trim before applying.<br />
Applicators<br />
Use a paint pen applicator or 1" foam brush to<br />
touch-up any nicks or scratches that have occurred<br />
during installation.<br />
Use paper funnels to fill the pen applicator and<br />
4 oz. blotter.<br />
Use a shoe polish/bingo type applicator and sponge<br />
tip to seal end cuts. Do not use on the board face.<br />
Use the paint pen applicator only to touch up areas that<br />
are smaller than a dime. We recommend that you<br />
replace panels with areas of damage that are<br />
larger than a dime.<br />
Mildew<br />
Mildew is an airborne fungus that attaches to and grows<br />
on various surfaces, including paint. It often gives a<br />
streaked appearance that looks like dirt on a painted<br />
surface. A simple test to confirm the presence of mildew<br />
is to place a drop of common household bleach on the<br />
stained area. Mildew will bleach out in 1 to 2 minutes;<br />
dirt will not.<br />
Other fungus growth, such as molds, are more easily<br />
recognized since they are thicker and denser and range<br />
in color from green to brown to black.<br />
Mildew and fungus must be killed and removed whenever<br />
they are detected, but especially before repainting since<br />
they will continue to grow through a new paint job. To<br />
remove them, use the following solution:<br />
1. 1/3 cup detergent containing NO ammonia<br />
2. 1 quart Clorox<br />
3. 3 quarts warm water<br />
Wear rubber gloves and goggles when applying the<br />
solution. Protect any shrubbery with a plastic drop<br />
cloth. As mildew spores can soon settle on the cleaned<br />
surface and renew their growth, a mildew resistant paint<br />
specifically recommended by your paint supplier as<br />
suitable for fiber cement siding should be applied as soon<br />
as the cleaned surface dries.<br />
Refinishing<br />
Exterior wall finishes weather most rapidly on those<br />
portions of the building that receive the greatest exposure<br />
to sun and moisture. Areas receiving maximum exposure<br />
generally will need finishing sooner than other areas.<br />
The frequency of refinishing will depend on the climate<br />
and exposure; the type, quality, and color of the paint;<br />
the method of application; and number of coats of paint.<br />
Specifically, refinishing is indicated if: the surface is<br />
discolored and blotchy; the coating is cracked, peeling<br />
or scaling; or the coating appears thin or porous and is<br />
chalked to the point where it no longer protects or hides<br />
the surface.<br />
57
<strong>CertainTeed</strong> WeatherBoards Fiber Cement Siding <strong>Installation</strong> <strong>Manual</strong><br />
Surface Preparation<br />
The degree and type of required surface preparation<br />
depends on the condition of the old finish. Loose paint<br />
material should be removed by sanding and scraping.<br />
The surface should be cleaned before painting as<br />
described in the Washing section. If the old surface is<br />
sound, re-priming is typically not necessary.<br />
Use only top quality, exterior type, acrylic latex primers.<br />
Confirm the compatibility of your primer and finish coats<br />
with your paint supplier. <strong>CertainTeed</strong> recommends l00%<br />
acrylic latex primer and paint system, using only the<br />
highest grade paints. Check with your paint supplier for<br />
compatibility with fiber cement siding.<br />
Efflorescence<br />
What Is It?<br />
Efflorescence is a naturally occurring, white, powdery<br />
deposit that can appear on cement-based building<br />
materials (including bricks, cement walls, grout, and fiber<br />
cement). It is the result of a process in which moisture<br />
draws salt crystals to the surface, evaporates, and<br />
leaves a chalky substance behind.<br />
Efflorescence occurs when all three of the following<br />
conditions exist:<br />
1. Water-soluble salts are present in the building material.<br />
2. There is enough moisture in the wall to turn the salts<br />
into a soluble solution.<br />
3. There is a path for the soluble salts to get to<br />
the surface.<br />
Efflorescence may also be a sign of water intrusion<br />
behind the siding. Make certain that all openings are<br />
properly flashed and there is no water intrusion due to<br />
over-driven nails.<br />
58<br />
What Can Be Done about It?<br />
While some efflorescence may weather away naturally on<br />
its own, it is best to take steps to treat it using one of the<br />
methods described.<br />
Vinegar and Water Solution<br />
Efflorescence can be removed with a dilute solution of<br />
household white vinegar and water. The dilution ratio is<br />
20 to 50% vinegar in water by volume. For most cases<br />
of efflorescence, a 25% solution works well.<br />
For best results, follow these cleaning instructions:<br />
1. Spray all plants and vegetation with water before<br />
and after application of the vinegar/water solution.<br />
2. Protect areas that will not be cleaned.<br />
3. Wet the surfaces to be cleaned with water and let<br />
stand for 5 to 10 minutes. Flood the entire surface<br />
area to be cleaned with vinegar and water solution.<br />
4. Allow the solution to sit on the surface for 10 minutes.<br />
5. Rinse the treated area with water from the top down.<br />
For extra tough efflorescence, a second application or<br />
light scrubbing may be required. Use a soft bristled brush<br />
or sponge and lightly scrub the area. Do not aggressively<br />
scrub as this may damage the surface of the painted<br />
product. Rinse thoroughly with water and allow the area<br />
to air dry. If necessary, repeat these steps until you’ve<br />
reached the desired outcome.<br />
House Washes<br />
Commercially produced house wash solutions that may<br />
also be used to safely treat efflorescence are available.<br />
Follow the manufacturer’s instructions to ensure that the<br />
product is suitable for use on fiber cement.<br />
Complete product details, including technical information,<br />
installation guidelines and warranties, are available at<br />
certainteed.com or at 800-233-8990.
<strong>CertainTeed</strong> WeatherBoards Fiber Cement Siding <strong>Installation</strong> <strong>Manual</strong><br />
Notes<br />
59
<strong>CertainTeed</strong> WeatherBoards Fiber Cement Siding <strong>Installation</strong> <strong>Manual</strong><br />
Notes<br />
60
ASK ABOUT OUR OTHER CERTAINTEED PRODUCTS AND SYSTEMS:<br />
ExTERIOR: Roofing • Siding • WindoWS • fence • Railing • tRim • decking • foundationS • PiPe<br />
INTERIOR: inSulation • gyPSum • ceilingS<br />
certainteed corporation<br />
P.o. Box 860<br />
Valley forge, Pa 19482<br />
Scan for our latest WeatherBoards Fiber Cement <strong>Installation</strong> video.<br />
Professional: 800-233-8990<br />
consumer: 800-782-8777<br />
www.certainteed.com<br />
code no. fc017, © 06/12 certainteed corporation, Printed in u.S.a.