

50 Cent Bulletproof - GamesRadar
50 Cent Bulletproof - GamesRadar
50 Cent Bulletproof - GamesRadar

You also want an ePaper? Increase the reach of your titles
YUMPU automatically turns print PDFs into web optimized ePapers that Google loves.
ps2/xbox<br />
iiiY<br />
Y<br />
strategy guide<br />
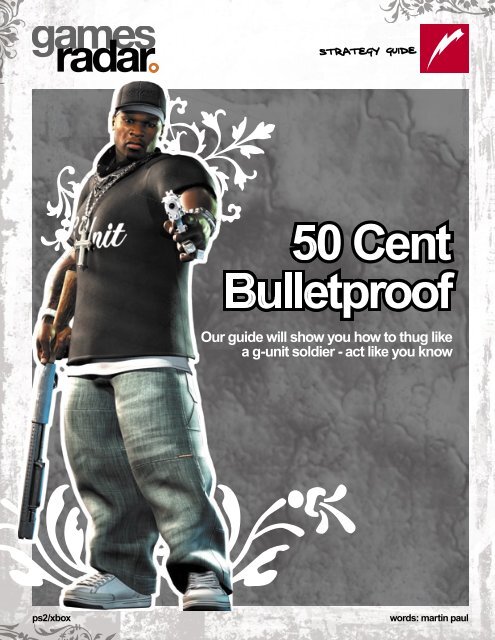
<strong>50</strong> <strong>Cent</strong><br />
<strong>Bulletproof</strong><br />
Our guide will show you how to thug like<br />
a g-unit soldier - act like you know<br />
words: martin paul
strategy guide<br />
getting started<br />
03<br />
04<br />
04<br />
05<br />
05<br />
the candy shop<br />
14<br />
15<br />
16<br />
16<br />
16<br />
ryder music: the characters<br />
controls<br />
weapons<br />
counter-kills<br />
fi ddy’s hood<br />
special features<br />
music shop<br />
video shop<br />
arcade mode<br />
cheats<br />
<strong>50</strong> <strong>Cent</strong> <strong>Bulletproof</strong><br />
www.gamesradar.com<br />
walkthrough<br />
06<br />
07<br />
08<br />
08<br />
09<br />
10<br />
10<br />
11<br />
12<br />
13<br />
chasing the dog<br />
picnic in the woods<br />
spider webs<br />
chinese take out<br />
hijacked subway<br />
not what, who!<br />
gone fi shin’<br />
bagged and tagged<br />
rat trap<br />
eyes on the prize<br />
02<br />
contents
strategy guide<br />
Getting Started<br />
RYDER MUSIC:<br />
THE CHARACTERS<br />
<strong>50</strong> CENT AKA FIDDY<br />
If you don’t know who this cat is, then<br />
we seriously suggest you stop reading<br />
this guide. What made you buy this<br />
game in the fi rst place?<br />
LLOYD BANKS<br />
Banks is the locksmith of the G-Unit<br />
posse. During certain Missions, Fiddy<br />
will need Banks’ help to pick locks for<br />
security gates, doors, or safes.<br />
YOUNG BUCK<br />
Young Buck rolls with Fiddy on<br />
missions and supports him.<br />
<strong>50</strong> <strong>Cent</strong> <strong>Bulletproof</strong><br />
TONY YAYO<br />
Yayo is the explosives man of the G-<br />
Unit posse. During certain Missions,<br />
Fiddy will need Yayo’s help to arm<br />
bombs or explosives in order to<br />
complete objectives. Never leave<br />
home without your Yayo, know what I<br />
mean?<br />
MCVICAR AKA EMINEM<br />
Eminem makes his very fi rst<br />
videogame appearance as corrupt<br />
detective McVicar. Throughout<br />
the course of the game, Em will<br />
give out crucial info to Fiddy and<br />
will sometimes join him in certain<br />
missions. For a price.<br />
GRIZZ AKA DR. DRE<br />
It’s the one and only D-R-E. At the<br />
beginning of the game, Grizz will be<br />
www.gamesradar.com<br />
the one to get Fiddy back on his feet<br />
after being shot 9 times.<br />
Grizz can be found in the alley across<br />
the subway entrance and will be the<br />
one to provide any fi repower that<br />
Fiddy will need before each mission. If<br />
you got the paper, of course.<br />
As an aside, by the second Mission,<br />
Grizz will have a special assignment<br />
for Fiddy that will take the entire game<br />
to complete. More on this sidequest in<br />
the walkthrough.<br />
IMPORTANT NOTE<br />
G-Unit, McVicar, and Grizz are<br />
bulletproof. When they assist you on<br />
missions, you do not need to worry<br />
about their health. They will stay with<br />
you all the way and never die.<br />
WHEN G-UNIT, MCVICAR, AND GRIZZ<br />
ASSIST YOU ON A MISSION, YOU DON’T<br />
NEED TO PROTECT THEM<br />
03<br />
getting started<br />
ryder music: the characters
strategy guide<br />
DOC FRIDAY<br />
After Fiddy is shot, Doc patches him<br />
up and sets him on his way. You won’t<br />
deal with Doc too much but some of<br />
his demands are quite ridiculous.<br />
BUGS<br />
Bugs is a paraplegic man that runs<br />
the pawn shop down the street from<br />
Fiddy’s apartment. He will assist<br />
you (by radio) on most missions and<br />
reveal info that Fiddy needs on certain<br />
occasions.<br />
POPCORN<br />
Popcorn can be found inside the torn<br />
down theater across the street from<br />
Fiddy’s apartment. For a hefty price,<br />
you can purchase Counter-Kill attacks<br />
from him.<br />
BOOKER<br />
Booker is a bum that lives in an alley<br />
next to Fiddy’s apartment. Although<br />
homeless, he still provides vital info<br />
towards Fiddy’s agenda.<br />
THE HO’S<br />
Across the street from the torn down<br />
theater are two stank hoes that work<br />
the beat.<br />
DJ WHOO KID<br />
Across from the Pawn Shop you’ll fi nd<br />
DJ Whoo Kid. If you gots the paper,<br />
you can purchase exclusive Fiddy and<br />
G-Unit music tracks and music videos<br />
from the back of DJ’s car.<br />
CONTROLS<br />
The following controls are for the PS2<br />
version of the game.<br />
DURING MISSIONS<br />
Square Button Counter-Kill attack/<br />
Action button/<br />
Take cover<br />
X Button Jump<br />
Circle Button Grab enemy<br />
or item<br />
Triangle Button Evasion/<br />
Dual wield<br />
weapons<br />
L1 Button Crouch<br />
L2 Button Use painkillers<br />
L3 Button Not used<br />
R1 Button Fire weapon<br />
R2 Button Inventory switch<br />
R3 Button Not used<br />
Left Analog Move character<br />
Right Analog Camera/Aim<br />
<strong>50</strong> <strong>Cent</strong> <strong>Bulletproof</strong><br />
WHEN GRABBING ENEMY<br />
Square Button Disarm enemy<br />
Circle Button Kill enemy<br />
Triangle Button Interrogate<br />
WHEN TAKING COVER<br />
Left Analog Move left or<br />
right to peek from<br />
corners<br />
L1 Button Crouch<br />
R1 Button Fire weapon from<br />
cover<br />
Triangle Button Dive to other<br />
corner<br />
THE AIMING RETICLE<br />
(ALL WEAPONS)<br />
When Fiddy’s aiming reticle turns red,<br />
it means the enemy will take massive<br />
damage when shot. When the circle<br />
in the reticle decreases, it means<br />
a higher chance of a one-hit kill. If<br />
the circle in the reticle fl atlines while<br />
targeting an enemy’s head (you’ll hear<br />
a sound cue), Fiddy will automatically<br />
do a slow motion bullet-time kill.<br />
Note 1: When a Counter-Kill is being<br />
performed, you can manually move<br />
the camera in any direction.<br />
Note 2: When Fiddy is back at his<br />
neighborhood after a mission, all the<br />
controls above are disabled. The only<br />
thing Fiddy can do is talk to people or<br />
enter and exit a building.<br />
Note 3: When Fiddy kills an enemy,<br />
the STEAL option appears (with a<br />
meter underneath it). Press and hold<br />
www.gamesradar.com<br />
the Square Button and Fiddy will<br />
search the body for cash. When the<br />
meter is fi lled, a wallet or a credit card<br />
will pop up from the body. Grab it to<br />
increase your paper.<br />
Note 4: If Fiddy successfully performs<br />
a bullet-time kill, the amount of cash to<br />
steal from the dead body increases by<br />
<strong>50</strong>0%, no joke.<br />
DIFFICULTY LEVELS<br />
Playa Very Easy<br />
Hustler Easy<br />
Thug Normal<br />
Gangsta Hard<br />
G-Unit Soldier Very Hard<br />
There isn’t much difference between<br />
the various diffi culty levels. There are<br />
no special bonuses for beating Very<br />
Hard mode.<br />
WEAPONS<br />
Fiddy can use everything from gats<br />
to bazookas. Here’s the complete list<br />
of weapons and how much they cost<br />
from Grizz.<br />
AUTOMATICS<br />
Mp-5 $<strong>50</strong>00<br />
Mac $4000<br />
ASSAULT RIFLES<br />
AK-47 $1<strong>50</strong>0<br />
Blaze ???<br />
Old Vet $2000<br />
04<br />
getting started<br />
controls • weapons
strategy guide<br />
HAND GUNS<br />
Bulldog $3000<br />
Nine $600<br />
Saturday Night Special $800<br />
Scavenger $800<br />
Gat $1200<br />
Buster $2000<br />
Phantom (w/ silencer) $2<strong>50</strong>0<br />
SHOTGUNS<br />
Painkiller $1<strong>50</strong>0<br />
Pumpgun $1200<br />
Sawed-Off $900<br />
LAUNCHERS<br />
Hornet ???<br />
Li’l Smokey $3000<br />
Big Smokey $<strong>50</strong>00<br />
Bazooka $10000<br />
SNIPER RIFLES<br />
Ghost Dawg $8000<br />
ARMOR<br />
Level 1 $2000<br />
Level 2 $4000<br />
Level 3 $8000<br />
NOTE: When Fiddy completes a<br />
mission, all the weapons he had<br />
equipped are placed on the gun rack<br />
in his apartment.<br />
COUNTER-KILLS<br />
Fiddy can use Counter-Kills whenever<br />
an enemy is at close quarters. Press<br />
the Triangle Button and he will<br />
automatically do the attack. Once<br />
Grizz introduces Popcorn to Fiddy,<br />
Popcorn will sell the rest of the<br />
Counter-Kill attacks for $4000 each.<br />
There are three levels of Counter-Kill<br />
level You cannot choose which move<br />
Fiddy performs, but is based partly on<br />
what weapon the enemy is holding.<br />
LEVEL 1 KILLS<br />
Dead Can’t Talk<br />
Stay Down<br />
Gunz Come Out<br />
Ski Mask Way<br />
Gangsta Shit<br />
G’d Up<br />
Bloodhound<br />
LEVEL 2 KILLS<br />
Undercut<br />
Heat<br />
Stuntin’<br />
Wanksta<br />
Like My Style<br />
Closed Casket<br />
<strong>50</strong> <strong>Cent</strong> <strong>Bulletproof</strong><br />
Back Down<br />
The Hit<br />
Repercussions<br />
Grand Slam<br />
Empty’n Clips<br />
Getting’ Low<br />
Open Wide<br />
LEVEL 3 KILLS<br />
Guillotine<br />
Bad News<br />
Stomp<br />
Beg For Mercy<br />
Gettin’ Mine<br />
FIDDY’S HOOD<br />
After each completed mission, Fiddy<br />
returns to his ‘hood for a little peace<br />
and quiet. In this block are a few<br />
places to remember:<br />
FIDDY’S APARTMENT<br />
In his apartment, you can view all the<br />
special video content on his plasma<br />
TV. In his bedroom you’ll fi nd the<br />
gun rack where Fiddy’s weapons are<br />
stored.<br />
THE LIQUOR STORE<br />
Fiddy’s apartment is right above the<br />
liquor Store. Although you can’t go in<br />
there, a lot of objectives happen out<br />
in front.<br />
THE PAWN SHOP<br />
The pawn shop is across the street<br />
from the liquor store. Go there<br />
whenever the objective says to do so<br />
to meet with Bugs.<br />
www.gamesradar.com<br />
THE RIALTO THEATER<br />
Also across the street from the liquor<br />
store is the movie theater.<br />
Inside there, you will fi nd Popcorn and<br />
purchase all the Counter-Kill<br />
moves for Fiddy’s arsenal.<br />
THE CHINESE RESTAURANT<br />
The restaurant is next door to the<br />
theater. You can’t go inside, but<br />
parked in the alley next to it is Grizz’s<br />
van. Always go to Grizz if you need<br />
fi repower or have one of his medals.<br />
THE SUBWAY<br />
Next to the theater is the subway<br />
entrance. Enter the subway to begin<br />
Fiddy’s next mission.<br />
05<br />
getting started<br />
counter-kills • fi ddy’s hood
strategy guide<br />
Walkthrough<br />
MISSION 1:<br />
CHASING THE DOG<br />
PROTECT BANKS/FIND THE EXIT<br />
Go forward and let Banks pick the<br />
lock. Cover him until he gets the door<br />
open. On the right side of the area is a<br />
metal fence. Shoot the electrical box to<br />
open the gate and head for the corner.<br />
There you’ll fi nd the Li’l Smokey<br />
grenade launcher. Follow Banks up the<br />
stairs and look for the door with the<br />
green exit sign to get out.<br />
DISABLE THE LASERS<br />
There are four sets of lasers. Shoot<br />
at the laser’s base to cripple it. The<br />
fourth set of lasers near the fence is<br />
tricky to disable. You’ll need to go up<br />
the stairs; head left, and jump down<br />
from above. From there you can<br />
disable it.<br />
OPTIONAL OBJECTIVE:<br />
SECRET ROOM<br />
As soon as the level begins, turn right<br />
to see a door. Use the CALL BANKS<br />
<strong>50</strong> <strong>Cent</strong> <strong>Bulletproof</strong><br />
option to make him pick it open. Once<br />
that’s done, go up to the roof to fi nd<br />
some cash and extra heavy fi repower.<br />
PROTECT YAYO WHILE HE<br />
PLANTS BOMB/EXIT ROOFTOP<br />
At the top of the stairs on the roof is a<br />
door with a green light above it. Use<br />
the CALL YAYO option to have him<br />
plant a bomb. Once that’s done, head<br />
down the stairs and EXIT.<br />
FIND DELUXE LAUNDRY<br />
Head down the alleyway while cappin’<br />
those masked marauders. Enter<br />
doorways to fi nd extra ammo and<br />
armor if needed. Continue down the<br />
alley until you reach the street. Enter<br />
Deluxe Laundry and head for the EXIT<br />
inside.<br />
RESTORE POWER/ACTIVATE LIFT<br />
CONTROLS/EXIT LAUNDRY<br />
Enter the large power room and look<br />
for the door that says “DANGER HIGH<br />
VOLTAGE<br />
KEEP OUT”<br />
and enter.<br />
CALL BANKS AND YAYO<br />
TO HELP PICK LOCKS<br />
AND BLOW STUFF UP<br />
Look for the<br />
switch inside<br />
and activate<br />
it. Now go<br />
up the stairs<br />
to the railing<br />
and look<br />
for the next switch you need to fl ip to<br />
activate the lift controls. Once the lift<br />
is activated, make your way up to the<br />
EXIT door.<br />
www.gamesradar.com<br />
MORE HEAVY FIREPOWER<br />
After jumping down, turn left to see a<br />
small bonfi re and some crates. Jump<br />
to the little crevice behind the crates<br />
to fi nd another Lil’ Smokey grenade<br />
launcher.<br />
FIND FREIGHT ELEVATOR<br />
Make your way around to the open<br />
gate and jump down. Head for the<br />
fence and crouch to get underneath to<br />
the other side.<br />
OPTIONAL ROOM<br />
As you head for the freight elevator,<br />
look for the door with the blue glow on<br />
it. Enter to fi nd a car shop and some<br />
extra goodies, if you need them.<br />
Keep shooting everyone and keep<br />
your distance from the grenade<br />
launching man. Head around the<br />
corner to fi nd a little area with a green<br />
light. The elevator is there. Call the<br />
elevator to fi nish the objective.<br />
DEFEAT K-DOG’S KIDNAPPERS<br />
Shoot to kill. Once everyone here is<br />
dead, a cutscene occurs.<br />
BOSS BATTLE: VON SYKES<br />
Equip your best weapon and shoot at<br />
him until he bites it. Use evasive rolls<br />
and take cover. Defeat Von Sykes to<br />
complete the mission and watch a<br />
cutscene.<br />
06<br />
walkthrough<br />
chasing the dog
strategy guide<br />
After the shooting incident, get back<br />
on your feet. Buy some meds from<br />
Doc if you got the paper because this<br />
will be the only time you see him in<br />
person. Once you’re done, EXIT the<br />
room to Fiddy’s Neighborhood. Before<br />
the next level, complete the following<br />
objectives.<br />
` Go see bugs at the pawn shop<br />
` Check the streets for Grizz<br />
` Follow grizz to see Popcorn at<br />
the theater<br />
` Go see Booker in the alley<br />
` Go see McVicar parked by the<br />
liquor store<br />
` Get a weapon from the back of<br />
Grizz’s van<br />
` Take the subway to the<br />
safehouse<br />
MISSION 2:<br />
PICNIC IN THE WOODS<br />
GET TO THE SAFEHOUSE<br />
The opening of this level looks<br />
complicated at fi rst, but it’s not. There<br />
are two paths Fiddy and Banks can<br />
take: the mountain path to the left or<br />
the fallen tree bridge path to the right.<br />
Both paths lead to the same place, so<br />
take your pick. Watch out for ledges<br />
with extra ammo and armor. Head up<br />
the hill to trigger the next area. Make<br />
your way down to the Ornate Gardens<br />
area blasting everyone in your way.<br />
Hidden paths in this area lead to more<br />
ammo and weapons, if you need<br />
supplies.<br />
THE SECURITY GATE<br />
Make your way to the gate entrance<br />
and use the CALL BANKS option to<br />
have him pick the lock. Cover him until<br />
he’s done and then run for the open<br />
doorway at the end of the path. Use<br />
the CALL ELEVATOR option (wait for<br />
Banks) and head up.<br />
FIND ELEVATOR TO SAFEHOUSE/<br />
FIND THE SECURITY ROOM<br />
The elevator to the safe house is on<br />
the left side but is not powered. You<br />
need to power it up to continue. Head<br />
down the hallways and look for a<br />
locked Security Room. To unlock it,<br />
you’ll see two step pads on each side<br />
of the door. Have Fiddy stand on one<br />
of them and the CALL BANKS option<br />
will appear. Call on Banks and he’ll<br />
step on the other one so the door will<br />
unlock. Go inside and press the button<br />
on the wall to activate the elevator<br />
<strong>50</strong> <strong>Cent</strong> <strong>Bulletproof</strong><br />
door. Now head for<br />
the elevator inside<br />
the wine cellar room<br />
and CALL it. Wait for<br />
Banks to go up.<br />
GRIZZ’S MEDAL<br />
Go into the living<br />
room fi rst and look for the grand piano.<br />
Grizz’s Medal is inside the piano. Grab<br />
it and continue on.<br />
FIND K-DOG/FIND FOUR SAFES<br />
In this safe house are various<br />
rooms: kitchen, movie theater room,<br />
bathrooms, bedrooms, library room,<br />
and the armory room. The library<br />
room is across the living room (and is<br />
quite tricky to see). The<br />
movie theater is across<br />
the kitchen on the other<br />
side. Remember this.<br />
Head for the bedroom<br />
area to trigger a<br />
cutscene.<br />
FIND K-DOG’S STUFF<br />
After the cutscene, exit<br />
the bathroom and kill<br />
everybody in the way.<br />
In the bedroom are two<br />
doors. The door on<br />
the right leads to the<br />
armory room and the<br />
door on the left goes<br />
back outside to the<br />
living room. Go into the<br />
armory room (the door<br />
on the right) to fi nd lots<br />
of ammo and K-Dog’s<br />
www.gamesradar.com<br />
LOOK INSIDE THE<br />
GRAND PIANO FOR<br />
GRIZZ’S MEDAL<br />
stuff on the table. Grab it to fi nish the<br />
objective.<br />
FIND K-DOG’S PHONE<br />
Exit the Armory and go back to the<br />
room with K-Dog’s dead body to<br />
trigger a cutscene and fi nish the<br />
objective. Once that’s done, it’s safecracking<br />
time.<br />
07<br />
walkthrough<br />
picnic in the woods
strategy guide<br />
UNLOCK 4 SAFES<br />
There are four safes in the house.<br />
When you fi nd one, use the CALL<br />
BANKS option and he’ll pick it open.<br />
Grab the paper inside to fi nish the<br />
objectives.<br />
Safe #1: It’s inside the room where<br />
K-Dog’s body is. Look for a keypad<br />
on the wall across his body and the<br />
ACTIVATE PAINTING option will<br />
appear. Press the button and the<br />
painting on the other end of the room<br />
will open up and reveal a safe. Call<br />
Banks and let him open it.<br />
Safe #2: The safe is in the room<br />
before the armory room. Look for the<br />
safe on the wall between rooms and<br />
let BANKS pick it open.<br />
Safe #3: The safe is in the bedroom<br />
across from the armory room exit. Go<br />
inside the bedroom and fi nd the safe<br />
on the wall in the closet.<br />
Safe #4: This one is really tricky to<br />
fi nd. Go back to the Living Room and<br />
head to the library room on the side.<br />
On the bookshelf is a large goldcolored<br />
book laying fl at. Get close to it<br />
and the ACTIVATE GOLD RECORDS<br />
option will appear. Press the button<br />
and then head for the movie theater<br />
room. The safe will be behind the gold<br />
records frame. Call Banks to have him<br />
hack the safe.<br />
CONTACT BUGS VIA G-UNIT<br />
MOBILE TO HACK SECURITY UNIT<br />
In the library room is a sort of<br />
keypad device. Get close to it and<br />
the CONTACT BUGS option will<br />
appear. Go to the PAUSE SCREEN,<br />
choose COMMUNICATIONS, then<br />
CONTACTS, and then choose BUGS<br />
to complete this objective.<br />
EXIT SAFEHOUSE<br />
Head for the newly opened door next<br />
to the kitchen (crouch to get there) to<br />
fi nish this part of the level.<br />
HEAD BACK TO THE HOOD<br />
Make a run back to the security gate<br />
outside the safe house to complete<br />
the mission. When you’re back in the<br />
‘hood, go see Grizz and give him his<br />
medal. He gives you $20,000 per<br />
medal. Go see Bugs at the pawn shop,<br />
then take the subway to the junkyard<br />
for the next mission.<br />
<strong>50</strong> <strong>Cent</strong> <strong>Bulletproof</strong><br />
USE COVER AND SHOOT<br />
THE GAS CANISTERS TO<br />
INJURE SPIDER<br />
MISSION 3:<br />
SPIDER WEBS<br />
FIND SPIDER<br />
Work your way around the junkyard<br />
while killing all in your path. Look<br />
for empty buses to fi nd ammo and<br />
weapons if you need supplies. Work<br />
your way around the junkyard until<br />
a cutscene occurs. With McVicar<br />
helping you out from here, make<br />
your way around the junkyard until a<br />
cutscene occurs.<br />
GRIZZ’S MEDAL<br />
To Fiddy’s left side are a stack<br />
of school buses. Look up to fi nd<br />
Grizz’s Medal on top of one of the<br />
roofs. Look for the bus on the other<br />
side of the area with a car on its<br />
side making a sort of walkway to<br />
the top. Head up there and get that<br />
medal.<br />
TAKE OUT ALL THE BIKERS TO<br />
ENTER THE CHOP SHOP<br />
To trigger the next part, kill all the<br />
bikers until a cutscene occurs.<br />
FIND THE METH LAB/FIND<br />
DOC’S INGREDIENTS<br />
When the door opens, head<br />
inside and go to the back of the<br />
www.gamesradar.com<br />
room. Look for the white box with the<br />
blue glowing light and the PICK UP<br />
SPECIAL INGREDIENTS option will<br />
appear. Grab it. Now go to car lift on<br />
the left (the one without a car on it)<br />
and press the lever. Get on the lift and<br />
press the ACTIVATE LIFT button to go<br />
down to the meth lab. The game will<br />
autosave, cueing you for a boss battle.<br />
BOSS BATTLE: SPIDER<br />
Use cover and shoot at the gas<br />
canisters. Each explosion will injure<br />
Spider. Repeat until he’s dead. Once<br />
you’ve killed him, the mission is<br />
complete. Back home, go see Booker<br />
in the alley. Then go see Bugs at the<br />
pawn shop. Finally, take the subway<br />
to Chinatown for the next mission.<br />
MISSION 4:<br />
CHINESE TAKE OUT<br />
AVOID BEING DETECTED<br />
There is a 99% chance that you will<br />
defi nitely mess up this objective, so if<br />
you blow it don’t even worry about it.<br />
Just keep shooting.<br />
GRIZZ’S MEDAL<br />
The medal is on top of the refrigerator<br />
in the kitchen. Jump on the counter to<br />
08<br />
walkthrough<br />
spider webs • chinese take out
strategy guide<br />
grab it. In the kitchen is a door with a<br />
red light. Remember where that door<br />
is for later.<br />
FIND WU-JANG’S OFFICE/RECIPE<br />
BOOK<br />
If you were seen while in stealth mode,<br />
blast those wannabe gangsters out of<br />
the way and head for the second fl oor.<br />
Enter the room on the other end of the<br />
second fl oor to fi nd a locked door. This<br />
opens a new objective. Now head for<br />
the third fl oor.<br />
FIND KEYCARD<br />
At the third fl oor, enter Wu-Jang’s<br />
offi ce. After the cutscene, kill the<br />
person in the room but don’t go out<br />
just yet. To the left of Wu’s offi ce is a<br />
sort of lounge room. The keycard is on<br />
the table to the right and the Recipe<br />
Book is on the shelf.<br />
FIND SECURITY ROOM AND<br />
DESTROY EVIDENCE<br />
Go back to the locked door on the<br />
second fl oor and use the keycard.<br />
Grab the goodies inside and destroy<br />
all the TV monitors and VCRs<br />
completely to fi nish this objective.<br />
Before you leave the room, be sure to<br />
unlock the door to the basement (the<br />
red button). Now exit and head for the<br />
door in the kitchen (with the red light<br />
above it) to get to the basement.<br />
Head down to the basement. Find<br />
the elevator to the garage. Find the<br />
elevators and then exit to the save<br />
point to fi nish this part of the level.<br />
FIGHT GANG TO FIND WU-JANG/<br />
FIND THE ELEVATOR<br />
Keep killing enemies until a cutscene<br />
occurs. After the cutscene, enter the<br />
elevator those gangsters exited from<br />
and CALL it. Exit the elevator and<br />
kill more gangsters until Wu-Jang<br />
appears.<br />
BOSS BATTLE: WU-JANG/SEARCH<br />
WU-JANG’S VAN<br />
Wu-Jang is a wuss and relies on<br />
the Li’l Shorty grenade launcher to<br />
help him out. Take cover and shoot<br />
at him when he isn’t fi ring. Once his<br />
dumb ass is dead, search his van to<br />
complete the mission.<br />
<strong>50</strong> <strong>Cent</strong> <strong>Bulletproof</strong><br />
MISSION 5:<br />
HIJACKED SUBWAY<br />
GET TO THE SUBWAY CAR/<br />
PROTECT BYSTANDERS<br />
Since most of this mission is in close<br />
quarters, Fiddy can do back to back<br />
Counter-Kills. There are only two<br />
civilians to protect. Don’t worry about<br />
the mercenaries killing them, just don’t<br />
misfi re your weapon. Make it all the<br />
way to the other end of the train to<br />
fi nish this part of the level.<br />
FIND THE LOCKED SUBWAY EXIT<br />
Kill all the mercenaries you can until<br />
the room is completely empty. But<br />
don’t exit just yet.<br />
GRIZZ’S MEDAL<br />
The medal is in the subway car on the<br />
other side near where Fiddy started<br />
the mission (just further down from the<br />
subway exit). You’ll have to do a tricky<br />
jump to get into the car but once you’re<br />
inside, the medal will be at the far end<br />
of the railcar. Now jump over the tile<br />
railing and head up the stairs. Shoot<br />
the lock and exit.<br />
FIND THE STEEL DOORS/FIND<br />
THREE BOMB PIECES<br />
Bugs phones in and informs you that<br />
you need three bomb pieces. Follow<br />
these instructions to fi nd them without<br />
getting lost.<br />
www.gamesradar.com<br />
BOMB PIECE #1<br />
Go forward to the area with the large<br />
sewer pool and head for the open<br />
doorway in the corner (don’t go near<br />
the stairs yet.) Turn right to fi nd an<br />
open room with a red light. The fi rst<br />
piece is on the shelf.<br />
BOMB PIECE #2<br />
Head to the other open doorway next<br />
to the stairs (don’t go up the stairs yet.)<br />
Go around the corridor to fi nd another<br />
room with a red light. Grab the bomb<br />
piece on the shelf.<br />
BOMB PIECE #3<br />
There are two ways to get the third<br />
piece. Go back to the room with the<br />
stairs (now go up the stairs.) and fi nd<br />
the third piece on a shelf or enter the<br />
turbine room near the red light room<br />
and look for the lift. Activate it and go<br />
up. At the top, go down the corridor<br />
until you reach the area at the top of<br />
the stairs. Find the third piece there.<br />
CALL YAYO TO HELP CONSTRUCT<br />
BOMB<br />
Call Yayo from the pause menu and<br />
he’ll send you a confusing-looking<br />
diagram which doesn’t seem to make<br />
any sense. From there, Fiddy can arm<br />
the bomb on the steel doors. Move<br />
away when it blows. Blast any more<br />
enemies in your way and exit the area<br />
to a save point.<br />
09<br />
walkthrough<br />
hijacked subway
strategy guide<br />
TURN OFF THE INDUSTRIAL FAN<br />
To turn off the fan, head down the<br />
walkway and jump down to the bottom<br />
area. Make a left to the turbine room<br />
and look for a switch on the left side.<br />
Deactivate the fan to continue.<br />
GRIZZ’S MEDAL<br />
The medal is on top of the electrical<br />
box in the room next to the turbine<br />
room. To get it, fi rst turn off the<br />
industrial fan. Head up the ramp where<br />
the fan was blowing and look for an<br />
open window you can see the medal<br />
through. Jump on the window ledge<br />
and then to the pipes on the left side<br />
(so that you don’t have to leap to the<br />
medal). Grab the medal and continue<br />
back up to the stairs.<br />
FIND LIFTS TO THE EXIT<br />
Fiddy has to reach the stairs on the<br />
other end of the area. Wait for the<br />
trains to pass before moving or you will<br />
die. Make it across to the stairs and<br />
head up. Find another set of stairs and<br />
go down. Look for the lift switch and<br />
activate it to bring the lift down to you.<br />
Take the lift up and make your way to<br />
the other side. Cross the large ramp to<br />
fi nd the lifts.<br />
RESTORE POWER TO THE LIFTS<br />
Go around the corner to the very end.<br />
Find the electrical box and activate the<br />
power. Go back to the lifts and go up<br />
either one to a save point.<br />
BOSS BATTLE: MASKED LEADER<br />
Use the Old Vet and blast the Masked<br />
Leader back to Hell. He isn’t that hard<br />
to defeat so use as much cover as you<br />
can fi nd and keep fi ring at him. You will<br />
get him eventually. Once he’s dead,<br />
the mission is complete. Take the<br />
subway back to the projects.<br />
MISSION 6:<br />
NOT WHAT, WHO.<br />
GRIZZ’S MEDAL<br />
First, blast all the enemies you can<br />
fi nd. Once they’re toast, go down the<br />
stairs from where you started the<br />
mission and head outside. Go around<br />
the corner to fi nd the medal sitting<br />
there. Grab it and continue back to<br />
the top.<br />
FIND A WAY ACROSS THE<br />
BUILDING<br />
Jump through the left room and you’ll<br />
see a collapsed fl oor. Jump on the<br />
<strong>50</strong> <strong>Cent</strong> <strong>Bulletproof</strong><br />
fallen concrete to reach the top fl oor.<br />
Blast everyone in your way. There’s<br />
another collapsed fl oor past the<br />
bathroom area where you emerged,<br />
with a bridge to go down. You’ll fi nd<br />
extra ammo and armor. At the end of<br />
the building is a bridge to cross to the<br />
other side but you cannot go through.<br />
Go to the window to the left and shoot<br />
the air conditioner to bring the platform<br />
down. Cross over the platform to reach<br />
the save point and trigger the next<br />
scene.<br />
FIND AND PROTECT YAYO<br />
This objective is kinda tedious. Yayo<br />
can’t be killed, so it’s technically not<br />
necessary to “protect” him. Anyway,<br />
make your way around the building<br />
and look for another collapsed<br />
fl oor. Jump up to the top and head<br />
for the area with the large bonfi re.<br />
Unfortunately, Fiddy can’t see the<br />
action so head for the door and look<br />
for another door that’s been barred<br />
up with wood. Shoot down the wood<br />
to get into another room with a<br />
collapsed fl oor. Jump down to the<br />
bottom fl oor and shoot everyone on<br />
the ground until Yayo completes his<br />
next objective. Once Yayo is done,<br />
he’ll go around to the other side of the<br />
building. Look for the low passageway.<br />
You’ll have to crouch to exit the room.<br />
You’ll hook up with Yayo again, and<br />
he’ll blow up the wall. Make a jump for<br />
the other side to reach a save point.<br />
www.gamesradar.com<br />
FIND PETRA<br />
Make your way down the building and<br />
fi nd the gated fence. Use the CALL<br />
YAYO option to have him blow up the<br />
fence. Go up the stairs to the second<br />
fl oor.<br />
FIND THE EVIDENCE<br />
Go to the second fl oor and look for a<br />
door down the hall. The CALL YAYO<br />
option will appear, so use it and let him<br />
blow up the door. Go inside the room<br />
and grab all the goodies. On the wall<br />
is a safe. Open it and get the dossier<br />
fi le. Now go to the third fl oor. Use the<br />
CALL YAYO option and let him blow<br />
the gate at the top. Blast everyone that<br />
comes at you and continue around the<br />
corner to fi nd Petra.<br />
BOSS BATTLE: PETRA<br />
Petra is a menace with the Li’l Shorty<br />
grenade launcher. Taking cover will be<br />
diffi cult since he launches grenades<br />
with crazy accuracy from the other end<br />
of the building. Every few seconds,<br />
he’ll stop to move around. When he<br />
stops moving get a shot in using the<br />
Ghost Dawg. Stay on the top fl oor.<br />
Continue this tactic and let Yayo<br />
handle the guys on the ground. Once<br />
that snitch is dead, the mission is<br />
complete. Once you’re back home, go<br />
see Booker in the alley. Then take the<br />
subway to the Docklands for the next<br />
mission.<br />
010<br />
walkthrough<br />
not what, who! • gone fi shin’
strategy guide<br />
MISSION 7: GONE FISHIN’<br />
FIND THE LADDER TO EXIT VIA<br />
SKYLIGHT<br />
The skylight exit is located on top of<br />
the warehouse where Fiddy starts the<br />
mission but Fiddy has to go around<br />
two warehouses and jump from<br />
platform to platform to get there. Climb<br />
the platforms to the top and work your<br />
way around both warehouses. Young<br />
Buck will stay in the fi rst warehouse,<br />
so you’ll need to be on your feet when<br />
approaching the second warehouse.<br />
There are no tricky jumps to make or<br />
any hidden routes when climbing the<br />
scaffoldings. Just make your way to<br />
the top to fi nd the ladder and the save<br />
point.<br />
FIND REMOTE CRANE SENSORS<br />
The remote sensors are in the crate in<br />
front of Fiddy when the level starts. Go<br />
up to it and pick them up. Now Fiddy<br />
has to place three of these sensors on<br />
three individual non-stacked orangecolored<br />
containers.<br />
FIND CRATES TO ATTACH LIFT<br />
BEACONS<br />
Each container has a four-arrowed<br />
logo on the front doors to distinguish<br />
which one you’re looking for. Since<br />
most of the containers look the same,<br />
fi nding the orange ones will be tricky.<br />
To fi nd the fi rst container, go forward<br />
and you’ll see it blocking the way.<br />
Place a sensor on its door and the<br />
crane will move it out of the way. Keep<br />
going forward (avoid climbing any<br />
<strong>50</strong> <strong>Cent</strong> <strong>Bulletproof</strong><br />
scaffoldings.) The second container is<br />
hidden in a corner. This is the hardest<br />
one to fi nd. Container #3 is further<br />
down from #2. Place the sensor on it<br />
and the crane will lift it away.<br />
GRIZZ’S MEDAL<br />
After container #3 is hauled away,<br />
there will be one more orange<br />
container behind it. Place a sensor<br />
on it (you’ll have to wait for the crane<br />
to return) and once its gone, grab the<br />
medal from underneath it.<br />
FIND STACKED CRATES TO EXIT<br />
Once all three containers have been<br />
hauled away, work your way to the<br />
back of the deck to fi nd that all three<br />
orange containers have been stacked<br />
to make a walkway. Make your way<br />
up to fi nd the save point and the boss<br />
battle.<br />
BOSS BATTLE: O’HARE<br />
This sucka only uses dual Macs so he<br />
should be no problem for you. Equip<br />
your heaviest fi repower and make<br />
your way up the stairs. Once you ice<br />
him, the mission is complete. Back at<br />
home, go see McVicar by the liquor<br />
store. Then take the subway to the<br />
City Morgue for the next mission.<br />
www.gamesradar.com<br />
MISSION 8:<br />
BAGGED AND TAGGED<br />
Vasquez’s body is in a gurney across<br />
from Fiddy. Scope him out. Remember<br />
that Fiddy can also grab the gurney<br />
for protection. First, grab all the<br />
Painkillers in the room and answer all<br />
your calls.<br />
GRIZZ’S MEDAL<br />
Find Grizz’s Medal before doing any<br />
objectives. Exit the room and make a<br />
left into the hallway. Make another left<br />
at the end and look for the door that<br />
says “EMPLOYEES ONLY”. Enter the<br />
room and fi nd the medal in the back.<br />
Now go back to the room you started<br />
in with Vasquez’s body.<br />
FIND THREE MEDICAL SUPPLY<br />
BOXES<br />
Do this objective fi rst. Make a right<br />
turn when you exit. You’ll see a sign<br />
above one door that says “BODY<br />
LOCKER”. (There are some Painkillers<br />
in here, too.) Further down from this<br />
door is a hallway to the left with a<br />
door. Enter the door to fi nd some<br />
extra goodies and Box #1. Now exit<br />
this room, and head down the hallway<br />
back toward the lobby. Near the lobby<br />
011<br />
walkthrough<br />
bagged and tagged<br />
O’HARE ONLY USES DUAL MACS<br />
SO HE SHOULD BE EASY TO KILL
strategy guide<br />
is a storage room. Inside you’ll fi nd<br />
more goodies and Box #2. Exit the<br />
storage room and look for another<br />
door marked STORAGE ROOM (it<br />
also has an EMPLOYEES ONLY sign<br />
next to it.) Enter the second storage<br />
room to fi nd Box #3.<br />
FIND VASQUEZ’S STOMACH<br />
CONTENTS<br />
The item you need is in a plastic bag.<br />
Go through the last door at the far end<br />
of the Morgue. Go inside and grab the<br />
item and then exit to trigger the next<br />
objective.<br />
PROTECT MATT/GET VASQUEZ’S<br />
BODY TO THE INCINERATOR<br />
If Matt dies, the mission is over, so<br />
<strong>50</strong> <strong>Cent</strong> <strong>Bulletproof</strong><br />
protect him at all costs. Quickly head<br />
back to the room with Vasquez’s<br />
body (bring Matt with you.) Equip<br />
some automatics and blast everyone<br />
between you and Vasquez’s body.<br />
Don’t stay in one area trying to protect<br />
Matt: stay mobile. Once inside the<br />
room with Vasquez’s body, head for<br />
the door in the corner and the CALL<br />
MATT option will appear. Let him<br />
open the door while you protect him<br />
from the attacking thugs. Once he<br />
opens the door, grab the gurney with<br />
the body and take it through to the<br />
elevator where Matt is waiting. CALL<br />
and then ACTIVATE the elevator.<br />
When the doors open, drag the gurney<br />
to the next room to complete the<br />
Vasquez objective.<br />
FIND THE EXIT<br />
Follow Matt to the boiler room and<br />
enter when he opens it. Look for the<br />
sewer grill, open it, and jump in to<br />
reach the save point.<br />
FIND THE PRIMARY VALVE<br />
Use the tunnels on the right to emerge<br />
to the next area. Watch out for the<br />
baddie with the Li’l Smokey grenade<br />
launcher. Cap him and then take out<br />
the rest of his buddies (but NOT with<br />
the Li’l Smokey.) Find the door near<br />
the exit and you’ll get a call from Bugs.<br />
FIND 4 OUTLET PIPES<br />
There are four separate sealed pipes<br />
on the walls of the sewer. They are<br />
indicated by signs next to them that<br />
read “WARNING HIGH PRESSURE<br />
VALVE.” Equip the Li’l Smokey and<br />
www.gamesradar.com<br />
toss a grenade into each one to<br />
release the pressure. Once all four<br />
are opened, you can access the<br />
locked door. Enter the door and go up<br />
the stairs. Look for the valve and the<br />
TURN VALVE option will appear. Turn<br />
it to drain the water and reveal the exit.<br />
OPTIONAL: FIND THE SECRET<br />
ROOM<br />
Although the game says to blast open<br />
4 valve pipes, there are actually fi ve<br />
valve pipes. The fi fth pipe is in the<br />
middle of the sewer. Get as close<br />
as possible to the fi fth pipe from the<br />
nearest cage. Launch a grenade into<br />
it to open it up. After Fiddy drains the<br />
exit, look for the entrance to the secret<br />
room by heading into the tunnel across<br />
the valve room. Look for a large open<br />
hole that Fiddy can drop into. At the<br />
bottom of the hole are some extra<br />
armor and ammo. Go up the stairs<br />
and shoot the lock to open the door.<br />
Now head down the stairs towards<br />
the exit to complete the mission. After<br />
the Morgue mission, Grizz will not<br />
be at his van. Go see Popcorn about<br />
Vasquez’s stomach contents, then<br />
go see Alexa at the crib to talk about<br />
opium. Grizz returns after you speak<br />
to Alexa. When you’re ready, take<br />
the subway to Little Italy for the next<br />
mission.<br />
MISSION 9: RAT TRAP<br />
TAKE OUT THE MOB (PART 1)<br />
First things fi rst, bust caps ‘til a<br />
cutscene occurs.<br />
012<br />
walkthrough<br />
rat trap
strategy guide<br />
RETRIEVE THE ACCOUNTS<br />
After the cutscene, kill the two guards<br />
blocking the door and grab the<br />
accounts on the desk.<br />
RETRIEVE YOUR GEAR<br />
With a little help from Grizz, fi nd your<br />
gear in the room at the very end of<br />
the hall. Go to the area with the meat<br />
locker and search for the door with<br />
a blue light on top of it. Your gear’s<br />
inside a crate on a table.<br />
GRIZZ’S MEDAL<br />
When searching for your gear, go into<br />
the meat locker with all the hanging<br />
meat. The medal is in one of the large<br />
trash bins. Jump on the table, then into<br />
the trash bin to grab it.<br />
FIND THE EXIT<br />
Once you got your gear, get outta<br />
Dodge. The door is just around the<br />
corner from where you found your<br />
gear. Go through the door for a save<br />
point.<br />
FIND KEYCARD A / SECURITY<br />
PANEL A<br />
Head into the next area but stay on<br />
the bottom fl oor. Look for the double<br />
<strong>50</strong> <strong>Cent</strong> <strong>Bulletproof</strong><br />
doors with the green light and enter<br />
(it’s another meat locker). The keycard<br />
is in the back of the room. Now exit<br />
the room and take the stairs up. Go to<br />
the door with the red light and use the<br />
keycard.<br />
FIND KEYCARD B / FIND SECURITY<br />
PANEL B<br />
Take the stairs up and use the exit<br />
on the left side. Look for the lift panel<br />
and activate it to go down to the<br />
butcher area. The keycard is on top<br />
of a dumpster. Grab it and go back<br />
up. Head to the right side and use the<br />
keycard on the panel door across the<br />
way. Go down the stairs to reach a<br />
save point.<br />
EXIT DOWNSTAIRS / TAKE OUT<br />
THE MOB (PART 2)<br />
Go inside the door and go down the<br />
green stairs to the next room. Kill<br />
everyone in the room to trigger a<br />
cutscene.<br />
BOSS BATTLE: CAPIDILUPO<br />
This is the guy who killed your homie<br />
and now its time for revenge. Pack the<br />
Old Vet and use the explosive barrels<br />
to deal out more damage. Take cover<br />
SHOOT AT EXPLOSIVE BARRELS TO<br />
DEAL MORE DAMAGE TO ENEMIES<br />
www.gamesradar.com<br />
whenever possible, and kill Capidilupo<br />
to complete the mission. Back home,<br />
take the time to equip Fiddy with all the<br />
heavy fi repower you can afford. You’ll<br />
need it in the next mission.<br />
MISSION 10:<br />
EYES ON THE PRIZE<br />
TAKE OUT THE MASKED<br />
ASSAILANTS / FIND THE REAR<br />
ELEVATOR<br />
The G-G-G-G-Unit boys got your<br />
back now. Before you head into the<br />
dragon’s mouth, turn around and go<br />
around the corner to fi nd some heavy<br />
fi repower. Grab the bazooka and do<br />
some damage. Head to the middle of<br />
the ship and kill all the masked fools<br />
until the doors on the right and left<br />
side fi nally open up, then go inside. At<br />
the back of the room you’ll fi nd the rear<br />
elevator.<br />
GET G-UNIT TO THE REAR<br />
ELEVATOR<br />
Head to the back of the room and<br />
use the CALL BANKS option to have<br />
him hack the panel that says LIFT<br />
CONTROL SYSTEM. Once that’s<br />
done let Banks, Yayo, and Buck into<br />
the elevator but don’t go in with them.<br />
Let them fi nish their objective alone.<br />
Find the front elevator and wait for<br />
G-Unit to activate it. Once it’s ready,<br />
call it.<br />
GET TO THE UPPER DECK / GET<br />
TO THE CARGO LIFT<br />
Unfortunately, this part of the level<br />
requires precise platforming. Take the<br />
exit on the right side and jump on top<br />
of the container. Jump from container<br />
to container until you reach the ship’s<br />
deck. Take out all the masked guys on<br />
the deck and head for the Lift Control<br />
Button near the huge lift. ACTIVATE it<br />
to bring up G-Unit.<br />
FIND THE LIFT CONTROL SYSTEM<br />
/ EXIT TO THE ELEVATOR<br />
Across from the large lift is the<br />
elevator room. The LIFT CONTROL<br />
PANEL is on the left side. Use the<br />
CALL BANKS option to have him hack<br />
it. Once it’s open, go into the elevator.<br />
When you exit you’ll be at a save point.<br />
FIND THE LIFT CONTROL SYSTEM<br />
/ TAKE THE LIFT TO THE SHIP’S<br />
HOLD<br />
This level is exactly the same as the<br />
previous level. Jump from container<br />
to container but DO NOT jump to the<br />
013<br />
walkthrough<br />
eyes on the prize
strategy guide<br />
bottom just yet (get Grizz’s Medal<br />
fi rst.) There are two locations for the<br />
LIFT CONTROL PANEL. Go to the<br />
closer one, just across from where the<br />
level starts. Use the CALL BANKS<br />
option to have him hack it. Once that’s<br />
done, use the lift and head down (you<br />
don’t need to wait for G-Unit).<br />
GRIZZ’S MEDAL<br />
Before you jump down to the deck,<br />
look for a blue container with Grizz’s<br />
Medal on top of it. You’ll need to<br />
perform a tricky jump to get it. Once<br />
you have it, continue on with the level.<br />
There are four entrances. The two<br />
entrances on the right side of the lift<br />
control panel are the ones that are<br />
important. Keep going until you fi nd<br />
Muhammed.<br />
BOSS BATTLE: MUQTADA<br />
MUHAMMED<br />
Equip the Old Vet to easily dispatch<br />
Muqtada. Once that’s done, head for<br />
the locked door on the other side to<br />
fi nd Spinosa. There’s a save point<br />
before the fi nal boss battle<br />
BOSS BATTLE: SPINOSA<br />
Enough talk. Equip the heaviest<br />
fi repower you got and blast away.<br />
Defeat Spinosa to fi nish the level and<br />
the game. You are now offi cially a<br />
G-Unit Soldier. You can replay any<br />
of the missions if you want to fi nd the<br />
rest of Grizz’s Medals or if you want<br />
to pick up extra money. Simply go to<br />
the subway, choose a location, and be<br />
sure to roll strapped.<br />
<strong>50</strong> <strong>Cent</strong> <strong>Bulletproof</strong><br />
The Candy Shop<br />
SPECIAL FEATURES<br />
Once you get access to Fiddy’s<br />
apartment, walk up to the blue glowing<br />
spot in front of the TV to view all the<br />
special features in the game. All the<br />
Special Feature content is already<br />
unlocked from the start of the game.<br />
Special features must be viewed in<br />
Fiddy’s apartment.<br />
www.gamesradar.com<br />
THE FEATURES<br />
Get Rich Or Die Tryin’ Trailer 1<br />
Get Rich Or Die Tryin’ Trailer 2<br />
Formula <strong>50</strong> Ad 1<br />
Formula <strong>50</strong> Ad 2<br />
Formula <strong>50</strong> Ad 3<br />
Formula <strong>50</strong> Ad 4<br />
<strong>50</strong> <strong>Cent</strong>: Behind The Scenes Part 1<br />
<strong>50</strong> <strong>Cent</strong>: Behind The Scenes Part 2<br />
<strong>50</strong> <strong>Cent</strong>: Behind The Scenes Part 3<br />
Tony Yayo Interview Part 1<br />
Tony Yayo Interview Part 2<br />
014<br />
the candy<br />
shop<br />
special features<br />
SPECIAL FEATURES MUST BE VIEWED IN<br />
FIDDY’S APARTMENT
strategy guide<br />
MUSIC SHOP<br />
Go to the salesman across the street<br />
from the pawn shop to buy hot tracks<br />
from various albums. You cannot view<br />
the purchased music videos in Fiddy’s<br />
apartment or in the main menu; it has<br />
to be done in the pause menu. All of<br />
the music videos in this collection are<br />
the censored versions. Here are the<br />
prices per song:<br />
BULLETPROOF SOUNDTRACK<br />
TRACKS: $15,000<br />
Don’t Make Me<br />
Grew Up<br />
Hit Your Ass Up<br />
Hole In Yo Back<br />
I Run NY<br />
I Warned You<br />
I’m A Rider<br />
Maybe We Crazy<br />
Pimp Pt. 2<br />
Simply The Best<br />
Southside G-Unit<br />
When You Hear That<br />
Why Ask Why<br />
GET RICH OR DIE TRYIN’ ALBUM<br />
TRACKS: $1,000<br />
What Up Gansgta<br />
Heat<br />
If I Can’t<br />
Bloodhound<br />
Back Down<br />
Like My Style<br />
Poor Lil Rich<br />
Gotta Make It To Heaven<br />
U Not Like Me<br />
Life’s On The Line<br />
<strong>50</strong> <strong>Cent</strong> <strong>Bulletproof</strong><br />
THE MASSACRE ALBUM TRACKS:<br />
$1,000<br />
Get In My Car<br />
Ski Mask Way<br />
A Baltimore Love Thing<br />
Ryder Music<br />
Just A Lil Bit<br />
Gunz Come Out<br />
Position Of Power<br />
God Gave Me Style<br />
So Amazing<br />
BEG FOR MERCY ALBUM TRACKS<br />
(FROM G-UNIT): $1,000<br />
My Buddy<br />
I’m So Hood<br />
Salute U<br />
Smile<br />
Eye For An Eye<br />
Baby U Got<br />
G’d Up<br />
Gangsta Shit<br />
THE HUNGER FOR MORE ALBUM<br />
TRACKS (BY LLOYD BANKS):<br />
$1,000<br />
Ain’t No Click<br />
Playboy<br />
Warrior<br />
I’m So Fly<br />
If You So Gangsta<br />
STRAIGHT OUTTA CASHVILLE<br />
ALBUM TRACKS (BY YOUNG<br />
BUCK): $1,000<br />
Bonafi de Hustler<br />
Let Me In<br />
Shorty Wanna Ride<br />
Look At Me Now<br />
Do It Like Me<br />
www.gamesradar.com<br />
EVERY MAIN<br />
CHARACTER<br />
AND<br />
DEFEATED<br />
BOSS IS<br />
AVAILABLE<br />
TO PLAY IN<br />
ARCADE<br />
MODE<br />
THOUGHTS OF A PREDICATE<br />
FELON ALBUM TRACKS (BY TONY<br />
YAYO): $1,000<br />
Live By The Gun<br />
So Seductive<br />
ALL INSTRUMENTALS FROM THE<br />
BULLETPROOF SOUNDTRACK:<br />
$12,<strong>50</strong>0<br />
ALL INSTRUMENTALS FROM <strong>50</strong><br />
CENT AND G-UNIT: $<strong>50</strong>0<br />
ALL ACTION SOUNDS: $2<strong>50</strong>0<br />
ALL AMBIENT SOUNDS: $2<strong>50</strong>0<br />
015<br />
the candy<br />
shop<br />
music shop
strategy guide<br />
VIDEO SHOP<br />
ALL THE MUSIC VIDEOS ARE<br />
$10,000 EACH:<br />
I’m So Fly<br />
In Da Club<br />
Just A Lil Bit<br />
Let Me In<br />
P.I.M.P.<br />
Poppin’ Them Thangs<br />
Shorty Wanna Ride<br />
So Seductive<br />
Stunt 101<br />
Wanksta<br />
Smile<br />
My Buddy<br />
Look At Me Now/Bonafi de Hustler<br />
Ain’t No Click<br />
© Future US Inc. “All Rights Reserved”<br />
<strong>50</strong> <strong>Cent</strong> <strong>Bulletproof</strong><br />
ARCADE MODE<br />
Arcade Mode is unlocked soon after<br />
completing the fi rst mission. Each<br />
level that Fiddy completes in Story<br />
Mode is unlocked in Arcade Mode (20<br />
levels total). The point of the game is<br />
to kill a given number of enemies per<br />
area in the fastest time and get the<br />
highest score. All the main characters<br />
and defeated bosses from the game<br />
are playable. Each character has a<br />
specifi c weapon he starts with. Other<br />
weapons and ammo can be picked up<br />
during gameplay. You gain points for<br />
headshots, Counter-Kills, regular kills,<br />
and stealing money. Blast your way to<br />
the high score.<br />
www.gamesradar.com<br />
CHEATS<br />
Press start to pause game, select<br />
“OPTIONS,” select “CODES,” select<br />
“ENTER CODES,” then type the code.<br />
` INVINCIBILITY<br />
(BULLETPROOF MODE)<br />
ny’sfi nestyo<br />
` MORE POWERFUL GUNS<br />
(MIKE MODE)<br />
The hub is broken<br />
` EXCLUSIVE MUSIC TRACKS<br />
<strong>50</strong>bpexclusives<br />
` SO SEDUCTIVE SONG<br />
Killa1<br />
` EMPTY N’ CLIPS COUNTER KILL<br />
workout<br />
` ACTION 26<br />
orangejuice<br />
` VIDEO: MY BUDDY<br />
sayhellotomylittlefriend<br />
` VIDEO: SO SEDUCTIVE<br />
yayoshome<br />
` BLOODHOUND COUNTERKILL<br />
gunrunner<br />
016<br />
the candy<br />
shop<br />
video shop • arcade mode • cheats<br />
END