GARDENA® - BricoShop.ro
GARDENA® - BricoShop.ro
GARDENA® - BricoShop.ro

Create successful ePaper yourself
Turn your PDF publications into a flip-book with our unique Google optimized e-Paper software.
®<br />
GARDENA<br />
D Gebrauchsanweisung<br />
Elekt<strong>ro</strong>-Rasenlüfter<br />
GB Operating Instructions<br />
Electric Lawn Rake<br />
F Mode d’emploi<br />
Aérateur électrique<br />
NL Gebruiksaanwijzing<br />
Elektrische gazonbeluchter<br />
S Bruksanvisning<br />
Elektrisk Gräsmatteluftare<br />
I Istruzioni per l’uso<br />
Arieggiatore elettrico<br />
E Manual de instrucciones<br />
Aireador de césped eléctrico<br />
P Instruções de utilização<br />
Arejador de relva eléctrico<br />
DK Brugsanvisning<br />
Elektrisk Plænelufter<br />
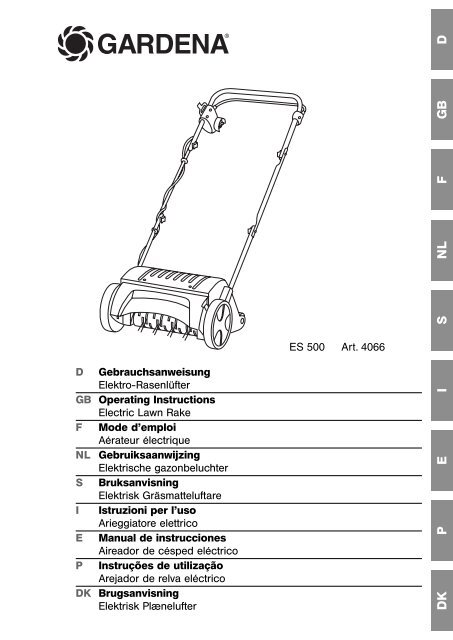
ES 500 Art. 4066<br />
D<br />
GB<br />
F<br />
NL<br />
S<br />
I<br />
E<br />
P<br />
DK
GARDENA Electric Lawn Aerator ES 500<br />
Welcome to the Garden of GARDENA...<br />
Contents<br />
Intended use<br />
Please note<br />
2. For Your Safety<br />
v Please observe the notes on safety on the Electric Lawn Scarifier.<br />
Warning !<br />
V Read instruction<br />
handbook!<br />
Danger! Risk of injury!<br />
V Keep bystanders<br />
away!<br />
Please read these operating instructions carefully and observe<br />
the notes given. Use these instructions to familiarise yourself with<br />
the Electric Lawn Scarifier, its correct use and the notes on safety.<br />
For safety reasons, children under the age of 16 as well as persons<br />
not familiar with these operating instructions should not<br />
use this Electric Lawn Scarifier.<br />
v Please keep these operating instructions in a safe place.<br />
1. Where to Use Your GARDENA Electric Lawn Scarifier . . . . . . 11<br />
2. For Your Safety . . . . . . . . . . . . . . . . . . . . . . . . . . . . . . . . . . . . . . . . . . . . . . . 11<br />
3. Function . . . . . . . . . . . . . . . . . . . . . . . . . . . . . . . . . . . . . . . . . . . . . . . . . . . . . . . 13<br />
4. Assembly . . . . . . . . . . . . . . . . . . . . . . . . . . . . . . . . . . . . . . . . . . . . . . . . . . . . . 13<br />
5. Operation . . . . . . . . . . . . . . . . . . . . . . . . . . . . . . . . . . . . . . . . . . . . . . . . . . . . . 14<br />
6. Maintenance . . . . . . . . . . . . . . . . . . . . . . . . . . . . . . . . . . . . . . . . . . . . . . . . . . 15<br />
7. T<strong>ro</strong>uble-Shooting . . . . . . . . . . . . . . . . . . . . . . . . . . . . . . . . . . . . . . . . . . . . . . 16<br />
8. Storing Your Electric Lawn scarifier . . . . . . . . . . . . . . . . . . . . . . . . . . . 17<br />
9. Accessories . . . . . . . . . . . . . . . . . . . . . . . . . . . . . . . . . . . . . . . . . . . . . . . . . . . 18<br />
10. Technical Data . . . . . . . . . . . . . . . . . . . . . . . . . . . . . . . . . . . . . . . . . . . . . . . . 18<br />
11. Service . . . . . . . . . . . . . . . . . . . . . . . . . . . . . . . . . . . . . . . . . . . . . . . . . . . . . . . . 18<br />
1. Where to Use Your GARDENA Electric Lawn Scarifier<br />
The GARDENA Electric Lawn Scarifier ES 500 is designed for<br />
aerating lawns and grassy areas in private domestic and hobby<br />
gardens. It is not designed for use in public facilities, parks, sporting<br />
g<strong>ro</strong>unds, on <strong>ro</strong>ads, in agriculture or forestry.<br />
Compliance with these instructions p<strong>ro</strong>vided by GARDENA is a<br />
prerequisite for using the Electric Lawn Scarifier correctly.<br />
Attention! To prevent injury, the Electric Lawn Scarifier<br />
must not be used for trimming bushes, hedges and shrubs.<br />
In addition, the Electric Lawn Scarifier must not be used for<br />
levelling irregularities in the soil.<br />
Sharp p<strong>ro</strong>ngs can cause<br />
injury!<br />
V Unplug f<strong>ro</strong>m the mains<br />
before maintenance or<br />
if the mains lead is<br />
damaged.<br />
V Keep mains connection<br />
lead away f<strong>ro</strong>m the<br />
lawn scarifier.<br />
11<br />
GB
GB<br />
12<br />
Checks before each use:<br />
v Inspect the Electric Lawn Scarifier before<br />
each use.<br />
v Do not use the Electric Lawn Scarifier if<br />
safety devices (starter lever, safety interlock,<br />
rear flap, housing) are damaged or<br />
worn.<br />
v Never operate the unit with the safety<br />
devices by-passed or missing.<br />
v Note: Ensure that all nuts, bolts and screws<br />
are tight and that the Lawn Scarifier is in<br />
good working order.<br />
v Inspect the area to be aerated before beginning<br />
work.<br />
v Check the working area for foreign objects<br />
(e.g. stones, branches, string) and remove<br />
if necessary.<br />
P<strong>ro</strong>per use / Responsibility:<br />
Danger! Risk of injury!<br />
The Lawn Scarifier can cause serious<br />
injuries!<br />
V Keep hands and feet away f<strong>ro</strong>m the<br />
aerator cylinder.<br />
You are responsible for the safety of the working<br />
area.<br />
v Only use the Electric Lawn Scarifier for the<br />
purposes specified in these instructions.<br />
v Only work when visibility is good.<br />
v During use do not tip the unit and do not<br />
open the rear flap.<br />
v Familiarise yourself with the sur<strong>ro</strong>undings<br />
of your working area. Check for possible<br />
risks which might be not audible due to<br />
the noise of the machine.<br />
v Wear sturdy shoes and long t<strong>ro</strong>users to<br />
p<strong>ro</strong>tect your legs.<br />
v Ensure you keep your feet a safe distance<br />
f<strong>ro</strong>m the moving parts.<br />
v Make sure that there are no other people<br />
(especially children) or animals anywhere<br />
near the working area.<br />
v Always push the Lawn Scarifier at a walking<br />
pace.<br />
v Operating position: Ensure that you have a<br />
secure foothold when working.<br />
v Be particularly careful if you change<br />
direction on a slope.<br />
Attention! Take extra care when walking<br />
backwards. You may stumble!<br />
v Do not use the Lawn Scarifier if it is raining<br />
or in moist, wet conditions.<br />
v Do not work close to the edge of swimming<br />
pools or garden ponds with the lawn<br />
scarifier.<br />
v Please observe any local restrictions relating<br />
to noise levels.<br />
Electrical safety:<br />
v Keep the extension cable away f<strong>ro</strong>m the<br />
aerator cylinder!<br />
v Never use the Electric Lawn Scarifier when<br />
it is raining.<br />
v Please observe the prescribed local quiet<br />
times.<br />
v The connecting/extension cable must be<br />
checked regularly for damage and signs of<br />
wear and tear.<br />
v Disconnect the mains plug immediately if<br />
the connecting /extension cable is damaged<br />
or severed.<br />
The coupling socket for the extension cable<br />
must be waterp<strong>ro</strong>of for p<strong>ro</strong>tection f<strong>ro</strong>m water<br />
splashes or the connection sockets for extension<br />
cables must be made of rubber or be<br />
encased in rubber.<br />
Extension cables must meet the requirements<br />
of DIN VDE 0620.<br />
v Only use app<strong>ro</strong>ved extension cables with<br />
an adequate cable c<strong>ro</strong>ss-section. Ask your<br />
electrician.<br />
Attachment fittings must be used for extension<br />
cables.<br />
For portable units, which are used outdoors,<br />
we recommend to use a residual-current<br />
device having a residual-current rating<br />
≤ 30 mA. In Switzerland use of a residualcurrent<br />
device is obligatory.
Interruptions of work:<br />
Never leave the Electric Lawn Scarifier<br />
unattended at the working area.<br />
v If you interrupt your work store the unit in a<br />
safe place. Disconnect the mains plug!<br />
v When you interrupt work in order to go to<br />
another working area, always switch off the<br />
Electric Lawn Scarifier during transport. Put<br />
the wear compensation lever in the transport<br />
position.<br />
3. Function<br />
Correct aerating:<br />
4. Assembly<br />
Assembling the handle:<br />
If you come into contact with an<br />
obstruction during aerating:<br />
1. Turn off the Electric Lawn Scarifier.<br />
2. Remove the obstruction.<br />
3. Check the Lawn Scarifier for damage and<br />
have it repaired if necessary.<br />
The Lawn Scarifier can be used for removing matting and moss in<br />
the lawn and thatch.<br />
To maintain a well-cared-for lawn we recommend aerating every<br />
4 - 6 weeks depending on the state of your lawn.<br />
v First of all, mow your lawn to the length you require.<br />
We particularly recommend this if the grass has g<strong>ro</strong>wn tall<br />
(e.g. while you were away on holiday).<br />
Recommendation: the shorter you mow your lawn, the easier it<br />
is to aerate, thus lessening the strain on the Lawn Scarifier and<br />
increasing the lifetime of the aerator cylinder.<br />
Staying too long in one place with the machine running or scarifying<br />
when the g<strong>ro</strong>und is wet or too dry can damage the turf.<br />
v For good results, guide the Lawn Scarifier at an app<strong>ro</strong>priate<br />
speed in strips as straight as possible ac<strong>ro</strong>ss your lawn.<br />
To avoid leaving any gaps during aerating, the strips should touch.<br />
v Always guide the Lawn Scarifier at an even speed depending<br />
on the type of g<strong>ro</strong>und.<br />
v When working on inclines always stand diagonally to the incline<br />
in a sturdy, safe stance. Do not work on extremely steep slopes.<br />
Danger of tripping!<br />
To prevent tripping take particular care when moving backwards<br />
and when pulling the Lawn Scarifier.<br />
When aerating areas of very mossy lawn we recommend re-sowing<br />
the lawn after aerating. This helps the areas of lawn which<br />
were replaced by moss to regenerate quicker.<br />
V Do not place the connecting cable 8 under strain<br />
A during assembly.<br />
1. Insert the two lower sections of the upright 5 (with the end with<br />
the <strong>ro</strong>und hole) in the mountings in the motor casing 6 and<br />
secure with the c<strong>ro</strong>sshead screws 9.<br />
13<br />
GB
GB<br />
5. Operation<br />
Connecting to power sypply:<br />
Starting<br />
Lawn Scarifier:<br />
B<br />
14<br />
0<br />
8<br />
0 A<br />
1 2<br />
7<br />
3<br />
5<br />
4 2<br />
C<br />
7<br />
6<br />
9<br />
3<br />
1<br />
2. Insert the two locking bolts 1 f<strong>ro</strong>m outside th<strong>ro</strong>ugh the holes<br />
in the two central sections 2 of the upright and secure to the<br />
lower sections of the upright 5 with two wing nuts 4.<br />
3. Screw the upper part of the upright with starting handle 3 to<br />
the central sections of the upright 2 with two more locking<br />
bolts 1 and the wing nuts 4.<br />
This completes the assembly of the hanle.<br />
Warning: Fit the upper section of the upright with starting<br />
handle 3 in such a way that the plug 7 with the power<br />
cable 8 is on the right side (in direction of movement) (see<br />
fig.).<br />
4. Attach connection cable 8 to the handle with the two cable<br />
clips 0.<br />
1. Push connector of extension cable 0 on to the plug 7.<br />
2. Draw a loop of the extension cable 0 th<strong>ro</strong>ugh the cable strain<br />
relief device A 1 and suspend in position 2.<br />
This prevents inadvertent disconnection of the plug and socket<br />
connection.<br />
3. Insert extension cable 0 into a mains socket.<br />
Danger of injury if the Lawn Scarifier does not switch off<br />
automatically!<br />
V Do not remove or bridge safety devices fitted to the Aerator<br />
(e.g. by tying the starting lever to the upper handle)!<br />
Danger! The Scarifier does not stop immediately after<br />
A the motor has been switched off:<br />
V Never lift, tip or carry the Scarifier with the motor<br />
running!<br />
V Never start on solid g<strong>ro</strong>und (e.g. asphalt).<br />
V Always maintain the safety distance between the<br />
aerator cylinder and the user as defined by the<br />
guide handle.<br />
1. Place Lawn Scarifier on flat grass surface.<br />
2. Keep safety interlock B pressed down and pull starting lever C<br />
on the upper handle 3. The Lawn Scarifier starts.<br />
3. Release safety interlock B.<br />
When in operation, the extension cable 0 must always be<br />
guided in the direction you are working and to the side of<br />
the area to be worked on.<br />
Always work away f<strong>ro</strong>m the connection cable.
6. Maintenance<br />
Cleaning Lawn Scarifier:<br />
Adjusting for wear:<br />
D<br />
Blockage P<strong>ro</strong>tection: If the aerator cylinder is blocked, e.g.<br />
by a foreign body, immediately release the starting lever. If the<br />
blockage lasts longer than 10 seconds and the starting lever has<br />
not been released, blockage p<strong>ro</strong>tection is activated. In this case<br />
immediately release the starting lever. The Lawn Scarifier can<br />
be switched on again after cooling down for app<strong>ro</strong>x. 1 minute.<br />
Danger of injury!<br />
A If blockage p<strong>ro</strong>tection is activated and the starting<br />
lever is not released, the Lawn Scarifier starts again<br />
automatically after app<strong>ro</strong>x. 1 minute.<br />
Danger! The aerator cylinder can cause injuries!<br />
A V Prior to maintenance, unplug f<strong>ro</strong>m the mains and<br />
wait until the Scarifier drum has stopped.<br />
V Wear working gloves for performing maintenance.<br />
The Lawn Scarifier should be cleaned after each time it is used.<br />
Risk of injury and physical damage!<br />
A V Do not clean Lawn Scarifier under running water<br />
(particularly under high pressure).<br />
V Do not use hard or pointed objects for cleaning<br />
the Lawn Scarifier.<br />
v Remove grass and deposits f<strong>ro</strong>m wheels, aerator cylinder<br />
and housing.<br />
The Lawn Scarifier is subject to wear in use due to the way in<br />
which it works. The more intensively the Lawn Scarifier is used,<br />
the greater the wear on the spring tines.<br />
Hard or very dry g<strong>ro</strong>und accelerates wear as does excessive use<br />
of the Lawn Scarifier.<br />
If the results of your work with the Lawn Scarifier become increasingly<br />
worse due to wear of the spring tines, the aerator cylinder<br />
can be adjusted twice.<br />
The aerator cylinder has 4 adjustment positions:<br />
• Transport position<br />
• Aerating position 1 :<br />
• Aerating position 2 :<br />
If the springs are worn (the scarifier <strong>ro</strong>ller is lowered by 3 mm).<br />
• Setting 3 :<br />
Second setting for worn springs (the scarifier <strong>ro</strong>ller is lowered<br />
by a further 3 mm).<br />
Push wear compensation lever D gently away f<strong>ro</strong>m the housing<br />
and move to the position required.<br />
Note: Wear adjustment is not used for height adjustment.<br />
Adjustment of the aerator cylinder without visible wear can<br />
cause damage to the aerator cylinder or overload the motor.<br />
15<br />
GB
GB<br />
7. T<strong>ro</strong>uble-Shooting<br />
Replacing spring tines:<br />
G<br />
16<br />
E<br />
F<br />
I<br />
H J<br />
L K J<br />
Danger! The aerator cylinder can cause injuries !<br />
A V Prior to rectifying faults, unplug f<strong>ro</strong>m the mains<br />
and wait until the aerator cylinder has stopped.<br />
V Wear working gloves when rectifying faults.<br />
If the aerator cylinder is not yet worn but individual springs have<br />
b<strong>ro</strong>ken, these must be replaced. Only original GARDENA replacement<br />
springs may be used.<br />
• Replacement spring tines for Electric Aerator<br />
GARDENA ES 500 Art. 4094<br />
1. Unscrew two screws E on the underside of the housing.<br />
2. Lift aerator cylinder F at an angle 1 and pull away the drive<br />
shaft 2.<br />
3. Pull bearing shell G off the aerator cylinder F.<br />
4. Unscrew and remove screw H and draw out bearing bolt I.<br />
5. Remove cover plate J and spring elements K f<strong>ro</strong>m the spring<br />
element holder L.<br />
6. Push new spring elements K and cover plate J on the spring<br />
element holder L.<br />
The bores on the cover plate J and the spring element holder<br />
L must lie on top of each other.<br />
7. Push in bearing bolt I in such a way that all 3 bores (bearing<br />
bolt I, cover plate J and spring element holder L) are on<br />
top of each other.<br />
8. Screw in screw H.<br />
9. Push aerator cylinder F on to the drive shaft.<br />
10. Put bearing shell G on the aerator cylinder F.<br />
11. Screw bearing shell G on to the lower side of the housing with<br />
the screw E without tightening too much.<br />
P<strong>ro</strong>blem Possible Cause Remedy<br />
Abnormal noise. Foreign bodies on the aerator 1. Switch off the scarifier,<br />
Clattering in the unit cylinder are hitting the Aerator. remove the mains plug f<strong>ro</strong>m<br />
Whistling sound Foreign bodies blocking<br />
the aerator cylinder.<br />
the socket and wait until the<br />
cylinder has stopped <strong>ro</strong>tating.<br />
2. Remove foreign bodies.<br />
3. Check Scarifier<br />
immediately.
P<strong>ro</strong>blem Possible Cause Remedy<br />
Whistling sound Cogged belt slipping. v Contact<br />
GARDENA Service.<br />
Motor will not start Faulty cable. v Check cable.<br />
The conductor c<strong>ro</strong>ss-section of<br />
the extension cable is possibly<br />
too low.<br />
v Contact your electrician.<br />
Motor cuts out because Blocked by foreign bodies. 1. Switch off the motor, reblocking<br />
p<strong>ro</strong>tection has move the mains plug f<strong>ro</strong>m<br />
been activated the socket and wait until<br />
the Scarifier has stopped<br />
<strong>ro</strong>tating.<br />
2. Remove foreign bodies.<br />
3. After app<strong>ro</strong>x. 1 minute<br />
switch on the Scarifier.<br />
Aerating depth too large (aerator 1. Leave motor to cool down.<br />
cylinder has been adjusted for 2. Set adjustment for wear<br />
wear without wear to the knives). correctly.<br />
The grass is too tall. v Mow the lawn before<br />
aerating (see 3. Function<br />
“Correct Aerating”).<br />
Aerating results are not Wear to the spring tines. v Adjust aerator cylinder<br />
satisfactory (see Maintenance).<br />
Cog belt faulty. v Contact<br />
GARDENA Service.<br />
Lawn has g<strong>ro</strong>wn too tall. v Mow the lawn before using<br />
the Aerator.<br />
If you have any p<strong>ro</strong>blem with your Electric Aerator, please contact our Customer Service.<br />
8. Storing Your Electric Aerator<br />
Storage:<br />
Transport:<br />
Disposal:<br />
(in accordance with<br />
RL2002/96/EC)<br />
To save space the Lawn Scarifier can be folded up by<br />
releasing the wing nuts.<br />
Take care during this p<strong>ro</strong>cess that the cable does not<br />
become trapped.<br />
v Store the Aerator in a dry, closed <strong>ro</strong>om to which children<br />
cannot gain access.<br />
1. Switch off motor, unplug f<strong>ro</strong>m the mains and wait until the<br />
aerator cylinder stops.<br />
2. Move the wear compensation to the transport position and<br />
raise the aerator when transporting it over sensitive surfaces,<br />
e.g. tiles.<br />
The device must not be added to the normal household waste,<br />
it must be disposed of in accordance with local regulations.<br />
17<br />
GB
GB<br />
9. Accessories<br />
GARDENA Collecting bag for Electric Lawn Scarifier ES 500 Art. No. 4065<br />
10. Technical Data<br />
Motor power consumption 500 W<br />
Mains voltage 230 V<br />
Mains frequency 50/60 Hz<br />
Working speed of the aerator cylinder 2,250 r.p.m.<br />
Aerating width 30 cm<br />
Wear adjustments 3 x 3 mm<br />
Working area related emission characteristic value L pA 1) 77 dB (A)<br />
Working area related noise level L WA 2) 89 dB (A)<br />
Vibrations a vhw 1) ≤ 2.5 m/s 2<br />
Measuring method according to 1) EN 60335-1 2) Directive 2000/14/EC<br />
11. Service<br />
Warranty<br />
18<br />
GARDENA guarantees this p<strong>ro</strong>duct for 2 years (starting f<strong>ro</strong>m the<br />
date of purchase). This guarantee covers all serious defects of<br />
the unit that can be p<strong>ro</strong>ved to be material or manufacturing faults.<br />
Under warranty we will either replace the unit or repair it free of<br />
charge if the following conditions apply:<br />
• The unit must have been handled p<strong>ro</strong>perly and in keeping<br />
with the requirements of the operating instructions.<br />
• Neither the purchaser or a non-authorised third party have<br />
attempted to repair the unit.<br />
The wearing parts, scarifier springs, are excluded f<strong>ro</strong>m the<br />
warranty.<br />
This manufacturer’s guarantee does not affect the user’s existing<br />
warranty claims against the dealer/seller.<br />
If a fault occurs with your Electric Aerator, please return the<br />
faulty unit together with a copy of the receipt and a description<br />
of the fault, with postage paid to one of the GARDENA Service<br />
Centres listed on the back of these operating instructions.
D P<strong>ro</strong>dukthaftung Wir weisen ausdrücklich darauf hin, dass wir nach dem P<strong>ro</strong>dukthaftungsgesetz<br />
nicht für durch unsere Geräte hervorgerufene Schäden einzustehen<br />
haben, sofern diese durch unsachgemäße Reparatur verursacht<br />
oder bei einem Teileaustausch nicht unsere Original GARDENA Teile oder<br />
von uns freigegebene Teile verwendet werden und die Reparatur nicht<br />
vom GARDENA Service oder dem autorisierten Fachmann durchgeführt<br />
wird. Entsprechendes gilt für Ergänzungsteile und Zubehör.<br />
G P<strong>ro</strong>duct Liability We expressly point out that, in accordance with the p<strong>ro</strong>duct liability law,<br />
we are not liable for any damage caused by our units if it is due to imp<strong>ro</strong>per<br />
repair or if parts exchanged are not original GARDENA parts<br />
or parts app<strong>ro</strong>ved by us, and, if the repairs were not carried out by a<br />
GARDENA Service Centre or an authorised specialist. The same applies<br />
to spare parts and accessories.<br />
F<br />
N<br />
S<br />
I<br />
Responsabilité Nous vous signalons expressément que GARDENA n’est pas responsable<br />
des dommages causés par ses appareils, dans la mesure où ces<br />
dommages seraient causés suite à une réparation non conforme, dans la<br />
mesure où, lors d’un échange de pièces, les pièces d’origine GARDENA<br />
n’auraient pas été utilisées, ou si la réparation n’a pas été effectuée par<br />
le Service Après-Vente GARDENA ou l’un des Centres SAV agréés<br />
GARDENA. Ceci est également valable pour tout ajout de pièces et d’accessoires<br />
autres que ceux préconisés par GARDENA.<br />
P<strong>ro</strong>ductaansprakelijkheid Wij wijzen er nadrukkelijk op, dat wij op g<strong>ro</strong>nd van de wet aansprakelijkheid<br />
voor p<strong>ro</strong>ducten niet aansprakelijk zijn voor schade ontstaan door onze<br />
apparaten, indien deze door onvakkundige reparatie ve<strong>ro</strong>orzaakt zijn, of er<br />
bij het uitwisselen van onderdelen geen gebruik gemaakt werd van onze<br />
originele GARDENA onderdelen of door ons vrijgegeven onderdelen en de<br />
reparatie niet door de GARDENA technische dienst of de bevoegde vakman<br />
uitgevoerd werd. Ditzelfde geldt voor extra-onderdelen en accessoires.<br />
P<strong>ro</strong>duktansvar Tillverkaren är inte ansvarig för skada som orsakats av p<strong>ro</strong>dukten om<br />
skadan be<strong>ro</strong>r på att p<strong>ro</strong>dukten har reparerats felaktigt eller om, vid reparation<br />
eller utbyte, andra än Original GARDENA reservdelar har använts.<br />
Samma sak gäller för kompletteringsdelar och tillbehör.<br />
Responsabilità Si rende espressamente noto che, conformemente alla legislazione sulla<br />
del p<strong>ro</strong>dotto responsabilità del p<strong>ro</strong>dotto, non si risponde di danni causati da nostri articoli<br />
se originati da riparazioni eseguite non correttamente o da sostituzioni<br />
di parti effettuate con materiale non originale GARDENA o comunque da<br />
noi non app<strong>ro</strong>vato e, in ogni caso, qualora l’intervento non venga eseguito<br />
da un cent<strong>ro</strong> assistenza GARDENA o da personale specializzato autorizzato.<br />
Lo stesso vale per le parti complementari e gli accessori.<br />
E Responsabilidad Advertimos que conforme a la ley de responsabilidad de p<strong>ro</strong>ductos no nos<br />
de p<strong>ro</strong>ductos responsabilizamos de daños causados por nuest<strong>ro</strong>s aparatos, siempre<br />
y cuando dichos daños hayan sido originados por arreglos o reparaciones<br />
indebidas, por recambios con piezas que no sean piezas originales<br />
GARDENA o bien piezas autorizadas por nosot<strong>ro</strong>s, así como en aquellos<br />
casos en que la reparación no haya sido efectuada por un Servicio Técnico<br />
GARDENA o por un técnico autorizado. Lo mismo es aplicable para<br />
las piezas complementarias y accesorios.<br />
P<br />
K<br />
Responsabilidade Queremos salientar que segundo a lei da responsabilidade do fabricante,<br />
sobre o p<strong>ro</strong>duto nós não nos responsabilizaremos por danos causados pelo nosso equipamento,<br />
quando estes ocorram em decorrência de reparações inadequadas<br />
ou da substituição de peças por peças não originais da GARDENA, ou peças<br />
não autorizadas. A responsabilidade tornar-se-à nula também depois<br />
de reparações realizadas por oficinas não autorizadas pela GARDENA.<br />
Esta restrição valerá também para peças adicionais e acessórios.<br />
P<strong>ro</strong>duktansvar Vi gør udtrykkeligt opmærksom på at i henhold til p<strong>ro</strong>duktansvarsloven<br />
er vi ikke ansvarlige for skader forårsaget af vores udstyr, hvis det skyldes<br />
uautoriserede reparationer eller hvis dele er skiftet ud og der ikke er anvendt<br />
originale GARDENA dele eller dele godkendt af os, eller hvis reparationerne<br />
ikke er udført af GARDENA-service eller en autoriseret fagmand.<br />
Det samme gælder for ekstra udstyr og tilbehør.
D EU-Konformitätserklärung<br />
MaschinenVe<strong>ro</strong>rdnung (9. GSGVO) / EMVG / Niedersp. RL<br />
Der Unterzeichnete GARDENA Manufacturing GmbH, Hans-Lorenser-Str. 40,<br />
D-89079 Ulm, bestätigt, dass die nachfolgend bezeichneten Geräte in der von<br />
uns in Verkehr gebrachten Ausführung die Anforderungen der harmonisierten<br />
EU-Richtlinien, EU-Sicherheitsstandards und p<strong>ro</strong>duktspezifischen Standards<br />
erfüllen. Bei einer nicht mit uns abgestimmten Änderung der Geräte verliert<br />
diese Erklärung ihre Gültigkeit.<br />
G<br />
EU Certificate of Conformity<br />
The undersigned GARDENA Manufacturing GmbH, Hans-Lorenser-Str. 40,<br />
D-89079 Ulm, hereby certifies that, when leaving our factory, the units indicated<br />
below are in accordance with the harmonised EU guidelines, EU standards<br />
of safety and p<strong>ro</strong>duct specific standards. This certificate becomes void if the<br />
units are modified without our app<strong>ro</strong>val.<br />
F<br />
Certificat de conformité aux directives eu<strong>ro</strong>péennes<br />
Le constructeur, soussigné : GARDENA Manufacturing GmbH, Hans-Lorenser-<br />
Str. 40, D-89079 Ulm, déclare qu’à la sortie de ses usines le matériel neuf<br />
désigné ci-dessous était conforme aux prescriptions des directives eu<strong>ro</strong>péennes<br />
énoncées ci-après et conforme aux règles de sécurité et autres règles<br />
qui lui sont applicables dans le cadre de l’Union eu<strong>ro</strong>péenne. Toute modification<br />
portée sur ce p<strong>ro</strong>duit sans l’accord express de GARDENA supprime<br />
la validité de ce certificat.<br />
N EU-overeenstemmingsverklaring<br />
Ondergetekende GARDENA Manufacturing GmbH, Hans-Lorenser-Str. 40,<br />
D-89079 Ulm, bevestigt, dat de volgende genoemde apparaten in de door ons<br />
in de handel gebrachte uitvoering voldoen aan de eis van, en in overeenstemming<br />
zijn met de EU-richtlijnen, de EU-veiligheidsstandaard en de voor het p<strong>ro</strong>duct<br />
specifieke standaard. Bij een niet met ons afgestemde verandering aan<br />
de apparaten verliest deze verklaring haar geldigheid.<br />
S<br />
EU Tillverkarintyg<br />
Undertecknad firma GARDENA Manufacturing GmbH, Hans-Lorenser-Str. 40,<br />
D-89079 Ulm, intygar härmed att nedan nämnda p<strong>ro</strong>dukter överensstämmer<br />
med EU:s direktiv, EU:s säkerhetsstandard och p<strong>ro</strong>duktspecifikation. Detta<br />
intyg upphör att gälla om p<strong>ro</strong>dukten ändras utan vårt tillstånd.<br />
I<br />
Dichiarazione di conformità alle norme UE<br />
La sottoscritta GARDENA Manufacturing GmbH, Hans-Lorenser-Str. 40,<br />
D-89079 Ulm, certifica che il p<strong>ro</strong>dotto qui di seguito indicato, nei modelli da noi<br />
commercializzati, è conforme alle direttive armonizzate UE nonché agli standard<br />
di sicurezza e agli standard specifici di p<strong>ro</strong>dotto. Qualunque modifica<br />
apportata al p<strong>ro</strong>dotto senza nostra specifica autorizzazione invalida la presente<br />
dichiarazione.<br />
E<br />
Declaración de conformidad de la UE<br />
El que subscribe GARDENA Manufacturing GmbH, Hans-Lorenser-Str. 40,<br />
D-89079 Ulm, declara que la presente mercancía, objeto de la presente declaración,<br />
cumple con todas las normas de la UE, en lo que a normas técnicas,<br />
de homologación y de seguridad se refiere. En caso de realizar cualquier<br />
modificación en la presente mercancía sin nuestra previa autorización, esta<br />
declaración pierde su validez.<br />
P<br />
Certificado de conformidade da UE<br />
Os abaixo mencionados GARDENA Manufacturing GmbH, Hans-Lorenser-<br />
Str. 40, D-89079 Ulm, por este meio certificam que ao sair da fábrica o<br />
aparelho abaixo mencionado está de acordo com as directrizes harmonizadas<br />
da UE, padrões de segurança e de p<strong>ro</strong>dutos específicos. Este certificado ficará<br />
nulo se a unidade for modificada sem a nossa ap<strong>ro</strong>vação.<br />
K<br />
EU Overensstemmelse certificat<br />
Undertegnede GARDENA Manufacturing GmbH, Hans-Lorenser-Str. 40,<br />
D-89079 Ulm bekræfter hermed, at enheder listet herunder, ved afsendelse<br />
fra fabrikken, er i overensstemmelse med harmoniserede EU retningslinier,<br />
EU sikkerhedsstandarder og p<strong>ro</strong>duktspecifikationsstandarder. Dette certifikat<br />
træder ud af kraft hvis enhederne er ændret uden vor godkendelse.<br />
Bezeichnung des Gerätes: Elekt<strong>ro</strong>-Rasenlüfter<br />
Description of the unit: Electric Lawn Rake<br />
Désignation du matériel : Aérateur électrique<br />
Omschrijving van het apparaat: Elektrische gazonbeluchter<br />
P<strong>ro</strong>duktbeskrivning: Elektrisk Gräsmatteluftare<br />
Descrizione del p<strong>ro</strong>dotto: Arieggiatore elettrico<br />
Descripción de la mercancía: Aireador de césped eléctrico<br />
Descrição do aparelho: Arejador de relva eléctrico<br />
Beskrivelse af enhederne: Elektrisk Plænelufter<br />
Typ: Art.-Nr.:<br />
Type: Art. No.:<br />
Type : Référence :<br />
Typ: Art. nr.:<br />
Typ: ES 500 Art.nr. : 4066<br />
Modello: Art. :<br />
Tipo: Art. Nº:<br />
Tipo: Art. Nº:<br />
Type: Varenr. :<br />
EU-Richtlinien:<br />
EU directives:<br />
Directives eu<strong>ro</strong>péennes :<br />
EU-richtlijnen:<br />
EU direktiv:<br />
Direttive UE:<br />
Normativa UE:<br />
Directrizes da UE:<br />
EU Retningslinier :<br />
98/37/EG<br />
89/336/EG<br />
73/23/EG<br />
93/68/EG<br />
2000/14/EG<br />
Schall-Leistungspegel: gemessen / garantiert<br />
Noise level: measured / guaranteed<br />
Puissance acoustique : mesurée / garantie<br />
Geluidsniveau: gemeten / gegarandeerd<br />
Ljudnivå: uppmätt / garanterad<br />
Livello rumo<strong>ro</strong>sità: testato / garantito<br />
Nivel sono<strong>ro</strong>: medido / garantizado<br />
Nível de ruido: medido / garantido<br />
Lydtryksniveau: afmålt / garanti<br />
89 dB (A) /91 dB (A)<br />
Anbringungsjahr der CE-Kennzeichnung:<br />
Year of CE marking:<br />
Date d’apposition du marquage CE :<br />
Installatiejaar van de CE-aanduiding:<br />
CE-Märkningsår : 2004<br />
Anno di rilascio della certificazione CE:<br />
Colocación del distintivo CE:<br />
Ano de marcação pela CE:<br />
CE-Mærkningsår :<br />
Ulm, den 01.07.2004<br />
Peter Lameli<br />
Technische Leitung<br />
Ulm, 01.07.2004 Technical Dept. Manager<br />
Fait à Ulm, le 01.07.2004 Direction technique<br />
Ulm, 01-07-2004 Hoofd technische dienst<br />
Ulm, 2004.07.01. Technical Director<br />
Ulm, 01.07.2004 Direzione Tecnica<br />
Ulm, 01.07.2004 Dirección Técnica<br />
Ulm, 01.07.2004 Director Técnico<br />
Ulm, 01.07.2004 Teknisk direktør
Deutschland<br />
GARDENA Manufacturing GmbH<br />
Service Center<br />
Hans-Lorenser-Str. 40<br />
89079 Ulm<br />
P<strong>ro</strong>duktfragen: (07 31) 490-123<br />
Reparaturen: (07 31) 490-290<br />
Argentina<br />
Argensem S.A.<br />
Calle Colonia Japonesa s/n<br />
(1625) Loma Verde<br />
Escobar, Buenos Aires<br />
Australia<br />
Nylex Consumer P<strong>ro</strong>ducts<br />
50-70 Stanley Drive<br />
Somerton<br />
Victoria, 3062<br />
Austria<br />
GARDENA Österreich Ges. m.b.H.<br />
Stettnerweg 11-15<br />
2100 Korneuburg<br />
Belgium<br />
MARKT (Belgium) NV/SA<br />
Sterrebeekstraat 163<br />
1930 Zaventem<br />
Brazil<br />
Palash Comércio e<br />
Importação Ltda.<br />
Rua Helena, 285 cjto 12<br />
Vila Olimpia - 04552-050<br />
São Paulo<br />
Bulgaria<br />
DENEX LTD.<br />
2 Luis Ahalier Str. - 7th floor<br />
Sofia 1404<br />
Canada<br />
GARDENA Canada Ltd.<br />
100 Summerlea Road<br />
Brampton, Ontario<br />
Canada L6T 4X3<br />
Chile<br />
Antonio Martinic Y CIA. LTDA.<br />
Gilberto Fuenzalida 185 Loc.<br />
Las Condes - Santiago de Chile<br />
Costa Rica<br />
Compania Exim<br />
Eu<strong>ro</strong>ibe<strong>ro</strong>americana S.A.<br />
Av. 12 bis Calle 16 y 18,<br />
Bodegas Keith y Ramirez<br />
San José<br />
Cyprus<br />
FARMOKIPIKI LTD<br />
P.O. Box 7098<br />
74, Digeni Akrita Ave.<br />
1641 Nicosia<br />
Czech Republic<br />
GARDENA spol. s.r.o.<br />
Шнpskб 20a, и.p. 1153<br />
62700 Brno<br />
Denmark<br />
GARDENA Danmark A/S<br />
Naverland 8<br />
2600 Glostrup<br />
Finland<br />
Habitec Oy<br />
Martinkyläntie 52<br />
01720 Vantaa<br />
France<br />
GARDENA France<br />
Service Après-Vente<br />
BP 57080<br />
95948 ROISSY CDG Cedex<br />
Great Britain<br />
GARDENA UK Ltd.<br />
27-28 Brenkley Way<br />
Blezard Business Park<br />
Seaton Burn<br />
Newcastle upon Tyne NE13 6DS<br />
Greece<br />
Ag<strong>ro</strong>kip G. Psomadopoulos & Co.<br />
33 A, Ifestou str. – 194 00<br />
Industrial Area Ko<strong>ro</strong>pi<br />
Athens<br />
Hungary<br />
GARDENA Magya<strong>ro</strong>rszág Kft.<br />
Késmárk utca 22<br />
1158 Budapest<br />
Iceland<br />
Heimilistaeki hf<br />
Saetun 8<br />
P.O. Box 5340<br />
125 Reykjavik<br />
Republic of Ireland<br />
Michael McLoughlin & Sons<br />
Hardware Limited<br />
Long Mile Road<br />
Dublin 12<br />
Italy<br />
GARDENA Italia S.p.A.<br />
Via Donizetti 22<br />
20020 Lainate (Mi)<br />
Japan<br />
KAKUICHI Co. Ltd.<br />
Yamato Bldg., 5-3-1, Kojimachi<br />
Chiyoda-ku, Tokyo 102<br />
Luxembourg<br />
Magasins Jules Neuberg<br />
Grand Rue 30<br />
Case Postale No. 12<br />
Luxembourg 2010<br />
Netherlands<br />
GARDENA Nederland B.V.<br />
Postbus 50176<br />
1305 AD ALMERE<br />
Neth. Antilles<br />
Jonka Enterprises N.V.<br />
Sta. Rosa Weg 196<br />
P.O. Box 8200<br />
Curaçao<br />
New Zealand<br />
NYLEX<br />
New Zealand Limited<br />
22 Saleyards Road Otahuhu<br />
Private Bag 94001<br />
SAMC Manukau<br />
Norway<br />
GARDENA Norge A/S<br />
Postboks 214<br />
2013 Skjetten<br />
Poland<br />
GARDENA Polska Sp. z o.o.<br />
Szymanów 9 d<br />
05-532 Baniocha<br />
Portugal<br />
GARDENA Portugal Lda.<br />
Recta da Granja do Marquês<br />
Edif. GARDENA<br />
Algueirão<br />
2725-596 Mem Martins<br />
Russia / Россия<br />
АО АМИДА ТТЦ<br />
ул. Моcфилмовcкая 66<br />
117330 Моcква<br />
Singapore<br />
Hy - Ray Enterprises<br />
Block 1002 Toa Payoh<br />
Industrial Park<br />
#07-1433 /1435 /1451<br />
Singapore 319074<br />
Slowenia / C<strong>ro</strong>atia<br />
Silk d.o.o. Trgovina<br />
B<strong>ro</strong>dišče 15<br />
1236 Trzin<br />
South Africa<br />
GARDENA South Africa (Pty.) Ltd.<br />
P.O. Box 11534<br />
Vorna Valley 1686<br />
Spain<br />
GARDENA IBÉRICA S.L.U.<br />
C/ Basauri, nº 6<br />
La Florida<br />
28023 Madrid<br />
Sweden<br />
GARDENA Norden AB<br />
Box 9003<br />
20039 Malmö<br />
Switzerland<br />
GARDENA AG<br />
Bitziberg 1<br />
8184 Bachenbülach<br />
Ukraine / Украина<br />
АОЗТ АЛЬЦЕСТ<br />
ул. Гайдара 50<br />
г. Киев 01033<br />
Turkey<br />
GARDENA /Dost Diþ Ticaret<br />
Mümessillik A.Þ.<br />
Yeþilbaðlar Mah. Baþkent<br />
Cad. No. 26<br />
Pendik - Ýstanbul<br />
USA<br />
GARDENA<br />
3085 Shawnee Drive<br />
Winchester, VA 22604<br />
4066-20.960.03/0041<br />
© GARDENA Manufacturing GmbH<br />
D-89070 Ulm<br />
http://www.gardena.com