Connecting Your Windows XP Professional PC to the University ...
Connecting Your Windows XP Professional PC to the University ...
Connecting Your Windows XP Professional PC to the University ...

You also want an ePaper? Increase the reach of your titles
YUMPU automatically turns print PDFs into web optimized ePapers that Google loves.
s<br />
Information Services<br />
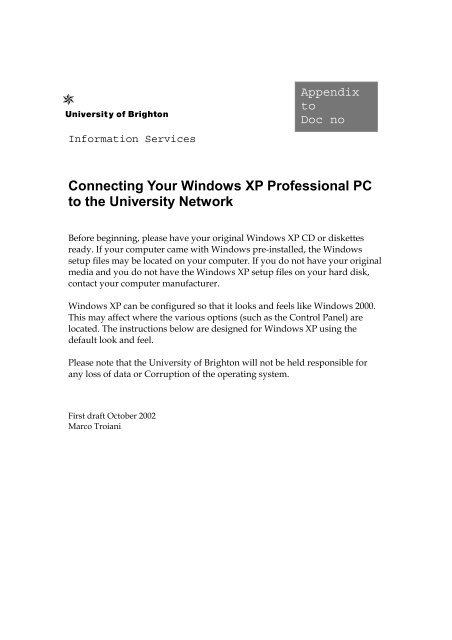
<strong>Connecting</strong> <strong>Your</strong> <strong>Windows</strong> <strong>XP</strong> <strong>Professional</strong> <strong>PC</strong><br />
<strong>to</strong> <strong>the</strong> <strong>University</strong> Network<br />
Before beginning, please have your original <strong>Windows</strong> <strong>XP</strong> CD or diskettes<br />
ready. If your computer came with <strong>Windows</strong> pre-installed, <strong>the</strong> <strong>Windows</strong><br />
setup files may be located on your computer. If you do not have your original<br />
media and you do not have <strong>the</strong> <strong>Windows</strong> <strong>XP</strong> setup files on your hard disk,<br />
contact your computer manufacturer.<br />
<strong>Windows</strong> <strong>XP</strong> can be configured so that it looks and feels like <strong>Windows</strong> 2000.<br />
This may affect where <strong>the</strong> various options (such as <strong>the</strong> Control Panel) are<br />
located. The instructions below are designed for <strong>Windows</strong> <strong>XP</strong> using <strong>the</strong><br />
default look and feel.<br />
Please note that <strong>the</strong> <strong>University</strong> of Brigh<strong>to</strong>n will not be held responsible for<br />
any loss of data or Corruption of <strong>the</strong> operating system.<br />
First draft Oc<strong>to</strong>ber 2002<br />
Marco Troiani<br />
Appendix<br />
<strong>to</strong><br />
Doc no
<strong>Connecting</strong> <strong>Your</strong> <strong>Windows</strong> <strong>XP</strong> <strong>Professional</strong> <strong>PC</strong> <strong>to</strong> <strong>the</strong> <strong>University</strong> Network<br />
Step 1:<br />
Begin by opening <strong>the</strong> <strong>Windows</strong> <strong>XP</strong> Control Panel. Click <strong>the</strong> Start but<strong>to</strong>n, <strong>the</strong>n select<br />
Control Panel.<br />
Step 2:<br />
Click on <strong>the</strong> icon labelled Network and Internet Connections.<br />
1
<strong>University</strong> of Brigh<strong>to</strong>n Information Services<br />
Step 3:<br />
Click <strong>the</strong> Icon labelled Network Connections <strong>to</strong> display all Network Connections.<br />
Step 4:<br />
Right click <strong>the</strong> icon labelled Local Area Connection <strong>to</strong> configure your network<br />
connection. (Note: If you do not see this icon, your Network Interface Card may be<br />
improperly installed.)<br />
2
Step 5:<br />
<strong>Connecting</strong> <strong>Your</strong> <strong>Windows</strong> <strong>XP</strong> <strong>Professional</strong> <strong>PC</strong> <strong>to</strong> <strong>the</strong> <strong>University</strong> Network<br />
Select Internet Pro<strong>to</strong>col (TCP/IP) and click on Properties.<br />
Step 6:<br />
Select Obtain an IP address au<strong>to</strong>matically<br />
3
<strong>University</strong> of Brigh<strong>to</strong>n Information Services<br />
4<br />
and <strong>the</strong>n select Use <strong>the</strong> following DNS Server Addresses<br />
Primary DNS Server: 194.83.112.10<br />
Secondary DNS Server: 194.83.112.20<br />
Step 7:<br />
Then click on Advanced but<strong>to</strong>n. The following dialog box should appear:
<strong>Connecting</strong> <strong>Your</strong> <strong>Windows</strong> <strong>XP</strong> <strong>Professional</strong> <strong>PC</strong> <strong>to</strong> <strong>the</strong> <strong>University</strong> Network<br />
Select <strong>the</strong> WINS tab and enter <strong>the</strong> following by clicking <strong>the</strong> Add but<strong>to</strong>n<br />
WINS Addresses for Eastbourne:<br />
194.83.125.150<br />
194.83.112.15<br />
WINS Addresses for all o<strong>the</strong>r sites:<br />
194.83.116.3<br />
194.83.112.15<br />
Make sure that NetBIOS setting is set <strong>to</strong> Enable NetBIOS over TCP-IP. Then Click OK<br />
<strong>to</strong> finish.<br />
5
<strong>University</strong> of Brigh<strong>to</strong>n Information Services<br />
Step 8:<br />
Click OK again <strong>to</strong> close <strong>the</strong> Internet Pro<strong>to</strong>col (TCP/IP) Settings dialog box and click<br />
Close <strong>to</strong> close <strong>the</strong> Local Area Connection Properties dialog box.<br />
<strong>Windows</strong> may copy some files and <strong>the</strong>n ask <strong>to</strong> restart your computer. Click Yes <strong>to</strong> do<br />
so.<br />
Step 9: Changing Computer Name<br />
Select Advanced Menu and click Network Identification.<br />
Select <strong>the</strong> Computer Name tab and <strong>the</strong>n click Change but<strong>to</strong>n<br />
6
<strong>Connecting</strong> <strong>Your</strong> <strong>Windows</strong> <strong>XP</strong> <strong>Professional</strong> <strong>PC</strong> <strong>to</strong> <strong>the</strong> <strong>University</strong> Network<br />
Enter your User ID for <strong>the</strong> Computer name<br />
7
<strong>University</strong> of Brigh<strong>to</strong>n Information Services<br />
If you haven't been given a specific Workgroup name <strong>to</strong> use, enter Halls in<strong>to</strong> <strong>the</strong><br />
workgroup box. Then click OK and again.<br />
Step 10: Configuring Internet Explorer 6<br />
Launch Internet Explorer. Select <strong>the</strong> Tools Menu and Then Click Internet Options.<br />
8
<strong>Connecting</strong> <strong>Your</strong> <strong>Windows</strong> <strong>XP</strong> <strong>Professional</strong> <strong>PC</strong> <strong>to</strong> <strong>the</strong> <strong>University</strong> Network<br />
The following dialog box will appear<br />
Then Click <strong>the</strong> Connections Tab and <strong>the</strong>n LAN Settings but<strong>to</strong>n<br />
The Local Area Network Settings dialog box will appear:<br />
9
<strong>University</strong> of Brigh<strong>to</strong>n Information Services<br />
Then tick Use Au<strong>to</strong>matic Configuration Script box and enter <strong>the</strong> following for <strong>the</strong><br />
address:<br />
http://www.brigh<strong>to</strong>n.ac.uk/proxy.pac<br />
Then click OK and again.<br />
10