Create successful ePaper yourself
Turn your PDF publications into a flip-book with our unique Google optimized e-Paper software.
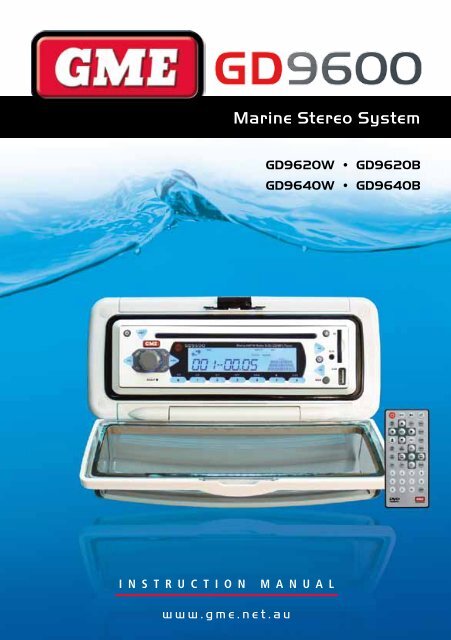
<strong>Marine</strong> <strong>Stereo</strong> <strong>System</strong><br />
I N s t r u c t I o N m a N u a l<br />
w w w . g m e . n e t . a u<br />
GD9620W • GD9620B<br />
GD9640W • GD9640B
FEAturEs . . . . . . . . . . . . . . . . . . . . . . . . . . . . . . . . . . 2<br />
AccEssoriEs suPPliED . . . . . . . . . . . . . . . . . . . . . . . 2<br />
introDuction . . . . . . . . . . . . . . . . . . . . . . . . . . . . . 3<br />
•<br />
•<br />
•<br />
•<br />
•<br />
•<br />
•<br />
•<br />
•<br />
•<br />
•<br />
•<br />
Product Description and model Designators . . . . . 3<br />
control locAtions. . . . . . . . . . . . . . . . . . . . . . . . . 4<br />
instAllAtion . . . . . . . . . . . . . . . . . . . . . . . . . . . . . . 5<br />
installation Precautions . . . . . . . . . . . . . . . . . . . . 5<br />
Handling compact Discs . . . . . . . . . . . . . . . . . . . 5<br />
moisture condensation . . . . . . . . . . . . . . . . . . . . 5<br />
Flush mounting . . . . . . . . . . . . . . . . . . . . . . . . . . 6<br />
removing clear Front cover . . . . . . . . . . . . . . . . . 7<br />
Electrical Wiring . . . . . . . . . . . . . . . . . . . . . . . . . . 7<br />
Fuse replacement . . . . . . . . . . . . . . . . . . . . . . . . 8<br />
oPErAtion . . . . . . . . . . . . . . . . . . . . . . . . . . . . . . . . 9<br />
General Functions . . . . . . . . . . . . . . . . . . . . . . . . 9<br />
radio operation. . . . . . . . . . . . . . . . . . . . . . . . . . 9<br />
fEaTurES<br />
Am/Fm radio, DVD/cD Player<br />
mP3 via cD/usB/sD card and auxiliary input<br />
4 x 45 Watt power output<br />
conformally coated PcBs for harsh<br />
marine environment.<br />
rugged and waterproof case, made using high<br />
impact uV protected plastics.<br />
Waterproof to iP56<br />
Backlit lcD screen<br />
infrared remote control<br />
iPod* connectivity via optional<br />
interconnect cable<br />
Portable mP3 player input<br />
optional wired remote<br />
Available in black or white<br />
*iPod is a trademark of Apple computer inc., registered in the u.s.<br />
and other countries.<br />
CONTENTS<br />
cD/mP3/DVD operation . . . . . . . . . . . . . . . . . . . 10<br />
AuXiliArY inPuts & outPuts . . . . . . . . . . . . . . . . . 12<br />
Front Panel inputs . . . . . . . . . . . . . . . . . . . . . . . 12<br />
rear outputs and inputs . . . . . . . . . . . . . . . . . . 13<br />
rEmotE control . . . . . . . . . . . . . . . . . . . . . . . . . . 13<br />
remote control Functions . . . . . . . . . . . . . . . . . 13<br />
BAttErY rEPlAcEmEnt . . . . . . . . . . . . . . . . . . . . . 13<br />
oPtionAl AccEssoriEs . . . . . . . . . . . . . . . . . . . . . . 14<br />
GD9600 trouBlE sHootinG GuiDE . . . . . . . . . . . . 15<br />
sPEciFicAtions . . . . . . . . . . . . . . . . . . . . . . . . . . . . 15<br />
WArrAntY . . . . . . . . . . . . . . . . . . . . . . . . . back page<br />
GmE AFtEr sAlEs sErVicE . . . . . . . . . . . . . back page<br />
gme stroNgly recommeNds that you keep thIs maNual<br />
IN a safe place for future refereNce<br />
aCCESSOriES SuppliED<br />
the GD9600 is supplied with the following<br />
standard accessories:<br />
• main unit<br />
• remote control Handset (rcW9600)<br />
• usB adaptor<br />
• Dc/speaker cable harness<br />
• Flush mount support kit and template<br />
• spare flush mount screw caps (4)<br />
• owner’s manual<br />
Please immediately contact your point of purchase if any of<br />
these components are missing.<br />
PAG E 2 i n s t r u c t i o n m A n uA l G D 9 6 0 0 s E r i E s
iNTrODuCTiON<br />
congratulations on the purchase of the GmE GD9600<br />
series marine stereo system, arguably the finest marine<br />
audio product available today. Your GD9600 has been<br />
designed with both the music buff and boat owner in mind.<br />
the GD9600 series has been developed by utilising<br />
a combination of the very latest in digital electronic<br />
technology and the design expertise gained by GmE<br />
engineers over several decades of marine product<br />
development. With all circuitry conformally coated, exposed<br />
metalwork protected against the harsh marine environment<br />
and contained in a uV stabilised water resistant<br />
polycarbonate housing, the GD9600 will ensure many years<br />
of reliable service.<br />
Ever attentive to customer needs, GmE offers the GD9600<br />
in two discrete configurations. For the smaller vessel where<br />
exposure to the elements is greater, the fully enclosed<br />
GD9640 is ideal, for larger cruisers or yachts where<br />
bulkhead installation is the preferred option, the GD9620<br />
is the perfect solution.<br />
the GD9600 has all the attributes expected in a superior<br />
stereo system, furthermore, the industry first inclusions of<br />
sD and usB inputs and iPod® compatibility, will ensure the<br />
GD9600 is destined to become the standard by which all<br />
marine stereo systems are measured.<br />
read this instruction booklet carefully, drop in your<br />
favourite music selection, sit back and enjoy the<br />
sounds that cannot fail to impress even the most<br />
critical audiophile.<br />
product descrIptIoN aNd model desIgNators<br />
the GD9600 series is available in the following formats:<br />
gd9620W (White) and gd9620B (Black)<br />
Designed for flush mounting into bulkheads or dashboards<br />
where the rear case of the product is not exposed to any<br />
water ingress or moisture. the GD9620 has a semi open<br />
rear case to permit heat dissipation generated by operating<br />
the system at high volumes for extended periods of time.<br />
gd9640W (White) and gd9640B (Black)<br />
Designed with a fully enclosed waterproof marine housing<br />
to enable installation on open boats or in areas where<br />
occasional water exposure is possible. the GD9640 utilises<br />
GmE’s unique ‘Big Gun’ custom heat dissipater to avoid<br />
any overheating or component damage in situations of<br />
prolonged use at high volumes or in areas of high<br />
ambient temperatures.<br />
type of disc recorded material size of disc<br />
DVD<br />
VCD<br />
sound and moving<br />
pictures<br />
sound and moving<br />
pictures<br />
12 cm<br />
12 cm<br />
MP3/WMA sound only 12 cm<br />
MPEG4*/DIVX*<br />
sound and moving<br />
pictures<br />
12 cm<br />
CD sound and still pictures 12 cm<br />
Note: the unit is compatible with dVd, dVd +/-r, Vcd 1.0/2.0/3.0, sVcd, cd, cd-r, cd-rW and Jpeg<br />
G D 9 6 0 0 s E r i E s i n s t r u c t i o n m A n uA l PAG E 3
1<br />
3<br />
13<br />
9<br />
5<br />
1 Power on/off<br />
2 Volume control<br />
3 select<br />
4 loudness<br />
5 mute<br />
6 clock/time selector<br />
7 mode switch<br />
8 loc/DX selector<br />
9 stereo/mono<br />
10 Band selector<br />
11 tuning/selecting tracks<br />
2<br />
8 10<br />
4<br />
15<br />
CONTrOl lOCaTiONS<br />
14<br />
PAG E 4 i n s t r u c t i o n m A n uA l G D 9 6 0 0 s E r i E s<br />
16<br />
20<br />
12 Eject<br />
17<br />
13 Auto music search<br />
14 EQ settings (Flat, classic, rock + PoP)<br />
15 reset Button<br />
16 lcD Display<br />
17 cD slot<br />
18 Auxiliary input<br />
19 usB input<br />
20 Preset memory Keys and cD/mP3 functions.<br />
21 sD card input<br />
6<br />
7<br />
11<br />
12 21<br />
19<br />
18
iNSTallaTiON<br />
INstallatIoN precautIoNs<br />
if you are connecting your GD9600 for the first time or have<br />
just reconnected your boat battery and you are experiencing<br />
problems with the unit’s operation, we suggest you try<br />
resetting the unit. the reset button is located under the<br />
volume face panel. Gently press the reset button with a<br />
paper clip or similar object.<br />
the preset station memories and clock time are retained<br />
only while the yellow ‘memory 12 V+’ lead is connected<br />
(see Electrical Wiring section). if the battery is disconnected<br />
or switched off at the master switch, or the unit is removed<br />
from the vessel, the station memories will be lost and the<br />
clock will need to be reset.<br />
haNdlINg compact dIscs<br />
• Handle the cD/DVD by it’s edge, avoid touching the<br />
disc surface.<br />
• store your discs away from direct<br />
sunlight or heat sources. Keeping<br />
the disc in it’s original case will<br />
help to avoid damage.<br />
reset Button<br />
• clean the disc with a soft cloth<br />
from the centre to the outer edge,<br />
(see diagram) rather than in a<br />
circular motion. Do not use solvents.<br />
moIsture coNdeNsatIoN<br />
Your GD9600 uses optical laser technology. occasionally<br />
damp or humid conditions may cause condensation to<br />
appear on the lenses inside the unit. should this occur, the<br />
unit might not operate correctly. simply eject the disc and<br />
leave the unit turned on for a while until the<br />
moisture evaporates.<br />
locatIoN<br />
the GD9600 is available in a range of mounting<br />
configurations to enable it to be installed in the most<br />
convenient position. GmE recommends that the unit should<br />
be mounted in a position that is free from direct sunlight<br />
and excessive vibration.<br />
GD9620 Flush mounted<br />
GD9640 on-Dash mounted<br />
GD9640 overhead mounted<br />
note. the GD9600 should not be mounted at angles<br />
greater than 30° above or below the horizontal.<br />
flush mouNtINg - gd9620<br />
the GD9620 can be neatly flush mounted into a panel or<br />
bulkhead so that just the controls and the protective cover<br />
are visible.<br />
using the template provided, select a suitable location on a<br />
panel or bulkhead. Examine behind the panel to determine<br />
the best method of support. if the thickness of the panel is<br />
not sufficient to support the unit, it will be necessary to use<br />
the strap supplied (see following diagrams).<br />
G D 9 6 0 0 s E r i E s i n s t r u c t i o n m A n uA l PAG E 5<br />
30 o<br />
30 o
ear centre screw with spacers<br />
screw<br />
strap<br />
screw<br />
* use the rubber mounting gasket supplied. Place the gasket<br />
between the plastic housing and the mounting surface. this will<br />
improve the contact between the mounting surface and<br />
stereo housing.<br />
Bracket mouNtINg - gd9640<br />
Flush mount<br />
support strap<br />
1. Attach the GD9640 to the mounting bracket using the<br />
two gimbal knobs.<br />
2. temporarily position the GD9640 in the desired location<br />
and roughly mark the location of the bracket edges.<br />
now, remove the unit from the bracket and reposition<br />
the bracket at the desired location to mark the<br />
mounting hole positions.<br />
3. screw or bolt the bracket into position. the mounting<br />
method will depend on the material to which the<br />
bracket is being attached.<br />
4. refit the GD9640 into the bracket and adjust to the<br />
desired angle before tightening the gimbal knobs.<br />
5. complete the antenna lead and electrical wiring<br />
as described later.<br />
For overhead mounting, the GmE logos on the side of<br />
each bracket can be rotated as shown right.<br />
Press from<br />
back<br />
rubber gasket<br />
turn<br />
screw<br />
screw<br />
flush mouNtINg - gd9640<br />
Although the GD9640 is a bracket mounted unit, it can be<br />
flush mounted by following the disassembly<br />
instructions below.<br />
1. remove the 4 screws from each cable clamp<br />
panel at rear.<br />
2. remove the screw from the centre of the heat<br />
dissipater and remove.<br />
3. remove the 4 screw caps and 4 screws from the front<br />
case and slide the unit out completely.<br />
Your GD9640 can now be flush mounted. replacement<br />
screw caps have been provided to cover the exposed<br />
screw heads.<br />
* note rubber mounting gasket not supplied with<br />
GD9640 unit.<br />
PAG E 6 i n s t r u c t i o n m A n uA l G D 9 6 0 0 s E r i E s
emoVINg the clear coVer<br />
if your GD9600 will be mounted in a dry protected location<br />
away from the possibility of water ingress, the front clear<br />
cover can be permanently removed<br />
1. remove the 4 screws from the top and bottom inside<br />
edge of the mount frame as shown above. remove<br />
top latch assembly and clear cover..<br />
screw caps<br />
Fill strips<br />
2. Fit replacement fill strips as supplied into top and<br />
bottom frame edges.<br />
3. mount your unit into the bulkhead. use the screw caps<br />
supplied to cover screw heads.<br />
electrIcal WIrINg<br />
dc connections<br />
screw caps<br />
caution: the gd9600 is designed for vessels with a<br />
12 Volt negative ground electrical system only!<br />
Referring to the wiring diagram below:<br />
1. connect the Yellow wire directly to the positive terminal<br />
of the vessel’s battery, or to a point that has +12 Volts<br />
available at all times. this lead maintains the memories<br />
within the GD9600 and is the main power source for<br />
the unit.<br />
2. connect the rED wire to the vessels +12 V supply via<br />
an appropriate isolating switch or circuit breaker. this<br />
lead enables the radio to be switched on and oFF.<br />
Alternatively, this wire can be connected directly to the<br />
battery’s positive terminal and the GD9600 switched<br />
on and oFF using it’s own controls.<br />
3. connect the BlAcK wire to the battery’s negative<br />
terminal or to the common negative bus in the electrical<br />
system<br />
BLACK<br />
BLUE<br />
Important: Your GD9600 is able to maintain it’s<br />
memories when it is switched off using the pWr button by<br />
drawing power directly from your battery via the YElloW<br />
‘mEmorY 12 V+’ lead. Although the memory backup<br />
current is very small (about 20 mA) it may eventually<br />
discharge your battery if left connected indefinitely. the<br />
time taken to completely discharge your battery could vary<br />
depending on its Amp-hour rating and battery condition.<br />
if you do not run your boat’s motor regularly or your battery<br />
is not kept charged between outings (e.g. solar or wind<br />
charger), we recommend you disconnect the YElloW lead<br />
each time you secure or trail your boat. this is easily done<br />
by connecting the YElloW ‘mEmorY 12 V+’ lead via a<br />
master switch, which can be switched off after each outing.<br />
this will mean you will lose all your preset station memories<br />
and clock settings.<br />
the blue wire on the wiring loom supplies 12 Volts when the<br />
GD9600 is switched on and can be used to turn on an external<br />
device, like the GmE GA9800 marine amplifier, or enable the<br />
back light on the GmE rcu9200 wired remote.<br />
G D 9 6 0 0 s E r i E s i n s t r u c t i o n m A n uA l PAG E 7
caution: the gd9600 is a four-speaker system that<br />
requires 2 separate wires for each speaker.<br />
A range of GmE speakers are available from your local<br />
GmE retailer.<br />
speaker connections<br />
When connecting the speakers, observe the correct polarity<br />
as shown in the diagram below. incorrect polarity will result<br />
in a reduction of bass response and stereo effect. the use<br />
of speakers with an impendance of less than 4 ohms is not<br />
recommended, as they will cause excessive loading of the<br />
GD9600’s output circuit and may result with the<br />
radio overheating.<br />
Left Front<br />
Left Rear<br />
+<br />
+<br />
- -<br />
BROWN<br />
BLACK<br />
BLACK<br />
GREY<br />
BROWN<br />
BLACK<br />
REAR LEFT - GREEN/BLACK<br />
REAR LEFT + GREEN<br />
FRONT LEFT - WHITE/BLACK<br />
FRONT LEFT + WHITE<br />
AUX2<br />
IN<br />
DVD<br />
OUT<br />
+ +<br />
- -<br />
FRONT RIGHT + GREY<br />
FRONT RIGHT - GREY/BLACK<br />
REAR RIGHT + PURPLE<br />
REAR RIGHT - PURPLE/BLACK<br />
ANTENNA CONNECTOR<br />
YELLOW: VIDEO IN<br />
RED: AUDIO IN R<br />
WHITE: AUDIO IN L<br />
BLACK: DIGITAL COAXIAL AUDIO OUT<br />
RED: AUDIO OUT REAR R<br />
WHITE: AUDIO OUT REAR L<br />
RED: AUDIO OUT FRONT R<br />
WHITE: AUDIO OUT FRONT L<br />
YELLOW: VIDEO OUT<br />
WHITE<br />
BLACK<br />
Right Front<br />
Right Rear<br />
WIRED REMOTE<br />
CONNECTION<br />
iPOD INPUT<br />
VIA OPTIONAL LEAD<br />
connect all four speakers as shown in the previous diagram.<br />
Adjust the Fader control for the required front/rear balance.<br />
if you wish to connect only two speakers, connect these to<br />
the rear speaker wires. the remaining speaker wires should<br />
be insulated to ensure they cannot short circuit together or<br />
to the vessel’s 12 Volt or negative electrical Bus. if using only<br />
two speakers, adjust the Fader control to the rear speakers.<br />
antenna connections<br />
connect an Am/Fm marine antenna to the antenna<br />
socket which extends from the rear of the GD9600. For<br />
information on a suitable antenna, contact your nearest<br />
GmE branch or marine retailer.<br />
Wired remote control<br />
the GD9600 has 1 additional fly lead at the rear enabling<br />
a GmE wired remote (rcu9200) to be connected. one or<br />
more additional 5 meter leads (lEo24) can also be inserted<br />
if required up to a maximum of 15 meters.<br />
ipod® connectivity<br />
the GD9600 has a 2nd fly lead which, when connected with<br />
an lEo23 (optional 1.1 meter lead), enables an iPod® to<br />
be connected directly to the stereo. limited functions of the<br />
iPod® can be accessed via the GD9600, including the<br />
selection of albums and songs. Access to displaying the<br />
iPod® library on the GD9600 is not available however the<br />
iPod library and all functions can be viewed on the iPod.<br />
reset Button<br />
When the installation is complete, press the reset<br />
button on th face using a paper clip or similar object (see<br />
‘instAllAtion PrEcAutions’ on page 4). this will ensure<br />
the GD9600 is ready to operate for the first time. if at any<br />
time the controls do not seem to work (after replacing the<br />
vessel’s battery for example), press the reset button to<br />
reset the microcomputer inside the GD9600.<br />
fuse replacemeNt<br />
if any of the fuses blow, replace them with a standard<br />
30 mm 3 AG type of the same rating, if the fuse blows a<br />
second time contact your retailer.<br />
the following fuse ratings are used:<br />
-Yellow ‘memory 12 V +’ lead: 15 Amp.<br />
-red ‘ignition switch Acc’ lead: 1 Amp.<br />
PAG E 8 i n s t r u c t i o n m A n uA l G D 9 6 0 0 s E r i E s
geNeral fuNctIoNs<br />
1 power oN/off<br />
OpEraTiON<br />
to turn the GD9600 oN, press the pWr Button. the unit<br />
will resume the mode and settings that were selected when<br />
last turned oFF.<br />
While the GD9600 is switched on, briefly press the power<br />
button to change the brightness of the back lighting. there<br />
are three levels of back lighting available.<br />
to turn the GD9600 off, press and hold the pWr button<br />
again. note that when the GD9600 is turned off the clock<br />
is displayed without the backlight.<br />
2 audio/Volume control<br />
the Volume, Bass, treble, Balance and Fader controls are<br />
selected electronically. the default setting is the<br />
Volume control.<br />
to select an alternative control, press the sel button 3<br />
until the desired function is displayed on the lcD. Each<br />
press cycles to the next function in sequence. Adjustment of<br />
the selected control function is made using the large<br />
rotary knob . 2<br />
4 loudness<br />
Pressing the lou button will provide a low frequency<br />
(bass lift) boost to the audio output. to indicate selection<br />
a ‘louD’ flag will be illuminated on the lcD. Pressing the<br />
lou button again will de-select the loudness function.<br />
5 mute<br />
Pressing the mut button will temporarily silence the<br />
audio output. A flashing ‘mutE’ is displayed on the lcD to<br />
indicate the gd9600 has been muted. Pressing the mut<br />
button again will restore the previously selected audio level.<br />
6 clock<br />
to display the current time, briefly press the clock button.<br />
After 5 seconds the display will automatically return to it’s<br />
original status. the time is shown in 12 or 24 hour format.<br />
While the clock is displayed, press and hold the clock<br />
button for about 1 second to adjust the time. the Hours<br />
will flash. rotate the volume control left or right to set the<br />
hours. Briefly press the clock button again. the minutes<br />
will flash. rotate the volume control left or right to set the<br />
minutes. Press the clock button again to exit the<br />
setting mode.<br />
7 mode<br />
Pressing the mod button will select the GD9600 operating<br />
mode. tunEr, cD or AuX modes are sequentially selected<br />
as mod is pressed. if a usB mEmorY sticK or sD cArD<br />
is insErtED, ‘usB’ or ‘cArD’ will also appear in the<br />
the mode list. When the gd9600 is switched on it will<br />
automatically return to the modeit was in when<br />
switched oFF.<br />
8 local/distance control (radIo mode only)<br />
Pressing the loc button selects an internal attenuator<br />
which will help to reduce the interference and distortion<br />
often associated with very strong local radio transmissions.<br />
A ‘loc on’ or ‘loc oFF’ message is briefly displayed on<br />
the lcD to indicate selection or deselection of the local<br />
Distance control.<br />
9 stereo/mono selector<br />
Pressing the st button while on the Fm Band, selects either<br />
mono or stereo reception. the unit will momentarily display<br />
‘mono’ or ‘stErEo’ when toggling the st button. the st<br />
flag is displayed when the GD9600 is in the stereo mode.<br />
selecting mono improves reception when Fm signals are<br />
weak or noisy, by disabling stereo detection.<br />
select stereo for normal listening on Fm radio bands, a<br />
symbol is displayed when stereo signals are<br />
being received.<br />
radIo operatIoN<br />
country selection<br />
When power is first applied, the GD9600 will default to the<br />
European frequency bands. to toggle between European<br />
and usA band sets:<br />
1. With the radio on, press and hold the memory ‘3’ key<br />
AnD press the power key.<br />
2. the radio will display ‘Goodbye’ and switch off.<br />
3. switch the radio on again using the power key. usA<br />
or Europe will be momentarily displayed to indicate the<br />
selected band.<br />
notE: if all power is disconnected from the GD9600,<br />
the unit defaults to European frequency bands<br />
when reconnected.<br />
notE: the differences between bands is listed in the<br />
specifications at the rear of the manual.<br />
G D 9 6 0 0 s E r i E s i n s t r u c t i o n m A n uA l PAG E 9
10 Band selector<br />
to select the radio band (Am1, Am2, Fm1, Fm2 or Fm3)<br />
sequentially press the BNd button until the required band<br />
is selected.<br />
11 tuning/selecting tracks/chapters<br />
manual tuning<br />
to tune the radio manually, momentarily press the or<br />
button to select the desired frequency. Each press will<br />
step the frequency by 50 kHz.<br />
automatic tuning (seek)<br />
Press and hold either the or buttons for 3 seconds.<br />
the GD9600 will stop seeking when a strong, clear station<br />
is detected.<br />
12<br />
storing of stations in memory<br />
once the desired station has been selected, press and hold<br />
one of the six pre-set station memory locations on the front<br />
panel for 3 seconds. the corresponding button number will<br />
appear on the lcD indicating that the selected station is<br />
now programmed into the GD9600 memory.<br />
13 auto programming of radio stations (ams)<br />
select the required band<br />
Press and hold the ams button for 3 seconds; the GD9600<br />
will now commence searching the band for radio stations.<br />
As each station is located it is automatically stored in the<br />
next available pre-set memory location. the new stations<br />
will replace any stations previously stored in that band.<br />
the scanning will continue untill all pre-set memory<br />
locations are filled in each band.<br />
manually selecting the pre-set station memories<br />
Briefly press the desired station memory 1 - 6. the GD9600<br />
will jump immediately to that station and the memory<br />
number will appear on the lcD.<br />
14 preset equaliser (p-eQ)<br />
the GD9600 has four preset Graphic Equaliser settings to<br />
enhance your audio listing pleasure. to select the P-EQ<br />
mode, press the EQ 14 button sequentially to select and<br />
display either FlAt, clAssic rocK or PoP modes.<br />
note: the trEBlE and BAss audio settings cannot be<br />
adjusted when the P-EQ mode is selected.<br />
cd/mp3/dVd operatIoN<br />
Warning: Do not insert discs containing anything other<br />
than cD, DVD or mP3 files into the disc slot. the cD/DVD<br />
mechanism contains precision laser components which<br />
could easily be damaged by inserting foreign objects.<br />
Important: Because of the wide dynamic range offered<br />
by cD/DVD systems, the difference in volume level between<br />
very soft sounds and very loud sounds can be quite high.<br />
For this reason we recommend that you avoid turning the<br />
volume level up to loud when listening to very soft music or<br />
tracks with no audio level, otherwise a sudden change to<br />
very loud music could damage your speakers.<br />
Inserting the cd/dVd<br />
remove the cD/DVD from it’s case and insert the disc, label<br />
up, into the front panel aperture. the cD/DVD mechanism<br />
will automatically draw the disc into the player and start<br />
playing track 1 or chapter 1 if it is a DVD.<br />
A disc symbol is displayed on the lcD whenever<br />
there is a cD/DVD in the player. the symbol will simulate<br />
rotation whenever the disc is playing.<br />
12 ejecting a cd/dVd<br />
Press the eJect button to stop the cD/DVD playing and<br />
automatically eject the disc.<br />
11 fast forward/reverse<br />
to advance through the present track or chapter at high<br />
speed, press and hold the button. the elapsed playing<br />
time will be displayed and will advance rapidly. release the<br />
button to continue playing at the normal speed.<br />
to reverse through the present track at high speed, press<br />
and hold the button. the elapsed time on the display<br />
will decrease rapidly. release the button to continue<br />
playing the present track at the normal speed.<br />
stop<br />
Press the stop button, (numeric button #5 on the<br />
front panel).<br />
to return to the normal play mode press play, (numeric<br />
button #1 or on the remote control).<br />
11 step to the Next track or dVd chapter<br />
to step immediately to the next track, press the button<br />
once. the next selected track will begin playing, press the<br />
button to advance to the start of successive tracks.<br />
PAG E 1 0 i n s t r u c t i o n m A n uA l G D 9 6 0 0 s E r i E s
to step immediately to the start of the track currently being<br />
played, press the button once. the current track will<br />
immediately restart. Press the button repeatedly to<br />
locate the start of previous tracks.<br />
11 pause<br />
to pause playing the cD/DVD, press the button once.<br />
the disc symbol on the lcD will stop rotating when the<br />
pause function has been selected.<br />
Press the button again to resume playing the cD/DVD.<br />
repeat play<br />
to continually play the current track or chapter, press the<br />
rpt button (numeric button #3 on the front panel). Press<br />
once to repeat the current track. Press again to repeat<br />
the current directory (mp3’s) or album (audio cD). Press<br />
again to turn the repeat function off. A ‘rPt’ flag will be<br />
illuminated on the lcD when in the repeat mode.<br />
random play<br />
to play tracks on the cD in a random order, press the rdm<br />
button (numeric button #4 on the front panel). A ‘rDm’ flag<br />
will be illuminated on the lcD when in the random mode.<br />
Press the rdm button again to return to the normal mode.<br />
Note: the rDm function is not operational when<br />
playing DVDs.<br />
Intro-scan<br />
the intro-scan feature plays the first 10 seconds of each<br />
track allowing you to identify the songs on the cD.<br />
to select intro-scan press the INt button (numeric button<br />
#2 on the front panel), the lcD will display int, track<br />
number and elapsed time.<br />
Press the INt button again to return to the normal mode.<br />
Note: intro – scan does not operate in DVD, mP3 or<br />
WmA formats.<br />
osd (on screen display)<br />
Press the osd button (numeric button #6 on the front<br />
panel) to display track, chapter, Elapsed time and other<br />
information on the monitor.<br />
mp3 functions<br />
mP3 (mPEG-1 layer 3) is a format for the compression of<br />
audio files to approximately 8% of their original size. this<br />
permits a large number of files to be stored on a cD-r,<br />
cD-rW, sD card or usB memory stick.<br />
unique remote control functions<br />
there are a number of functions on the GD9600 that are<br />
only accessible through the remote control handset.<br />
Zoom (dVd mode only)<br />
the GD9600 has 6 Zoom settings, to enter the Zoom<br />
mode, press the Zoom button on the remote control, the<br />
sequentially move to either x2, x3, x4 or 1/2, 1/3 or Zoom<br />
mode the cursor keys may be used to pan around<br />
the picture.<br />
subtitles (dVd mode only)<br />
Press the suBtItle button on the remote control to<br />
display subtitles.<br />
set up<br />
to enter the sEt uP mode, Press the stop button, then<br />
press the set up button on the remote control.<br />
use the / keys to select sYstEm sEt uP, lAnGuAGE<br />
sEt uP, AuDio sEt uP, ViDEo sEt uP or DiGitAl sEt uP.<br />
then use the / / / keys to navigate around the<br />
sub-menu to select and change operating parameters.<br />
multi angle (dVd mode only)<br />
Press the aNgle button on the remote control to view the<br />
DVD content from a different angle.<br />
Note: not All DVDs support this feature.<br />
slow motion (dVd mode only)<br />
Press the sloW button on the remote control to slow the<br />
DVD viewing speed. there are 6 speeds available, continue<br />
pressing the sloW button to access the different speeds.<br />
pBc title (dVd mode only)<br />
Press the pBc button to access the menu, then use the<br />
/ / / keys to navigate around the screen and<br />
select options.<br />
Numeric keys<br />
in rADio mode – Press any one of the 1 to 6 numEric<br />
KEYs to select a pre-set radio station.<br />
in the cD mode – Press any one of the numEric KEYs to<br />
select a track.<br />
goto<br />
the Goto function allows the operator to select specific<br />
tracks or chapters from the disc.<br />
Press the goto button on the remote control; use the<br />
/ keys to move the highlighted cursor to the required<br />
field, then using the numeric keypad modify the selected<br />
field to the track or chapter required, press eNter to<br />
confirm selection.<br />
G D 9 6 0 0 s E r i E s i n s t r u c t i o n m A n uA l PAG E 1 1
precautions for cd-r and cd-rW discs<br />
the GD9600 will not play a cD/DVD that has not been<br />
finalised, please refer to the instruction manual of the<br />
software or the recorder you are using to write these cDs<br />
for the finalisation process.<br />
to ensure a more reliable playback, please follow GmE<br />
recommendations:<br />
• use cD-rWs with a speed of 1x to 4x and write with a<br />
speed of 1x to 2x.<br />
• use cD-rs with a speed of 1x to 8x and write with a<br />
speed of 1x to 2x.<br />
• Do not play cD-rWs that have been written to more<br />
than 5 times.<br />
Note: if a disc contains audio cD data and mP3 files, the<br />
GD9600 will only play which ever is first on the disc. if the<br />
first track on the disc is an mP3 file, the unit will only play<br />
the mP3 files from the disc, and will ignore all other files<br />
and vice versa.<br />
precautions for mp3<br />
the format of the disc must be iso9660 level 1 or 2, or<br />
Joliet or romeo in the expansion format.<br />
When naming an mP3 file, ensure the file extension is ‘.mp3’<br />
the GD9600 will not recognise a non mP3 file even though<br />
the name extension is ‘.mp3’.<br />
configuration menu<br />
Press and hold the sel key to enter the configuration menu<br />
then briefly press the sel key to cycle through the available<br />
configuration options. rotate the Volume knob to change<br />
the selected option. Press BNd to exit the menu or simply<br />
wait a few seconds for it to time-out.<br />
function options description<br />
Volume last, Default set preset on<br />
volume level<br />
AVol level 00 - 47 set Preset Vol for<br />
Default above<br />
clock on, off Enables clock<br />
on display whn<br />
switched off<br />
clock format 12, 24 sets 12 or 24 hr<br />
clock display<br />
auXiliarY iNpuTS & OuTpuTS<br />
to maximise the owner’s listening flexibility and pleasure<br />
the GD9600 has several auxiliary inputs and outputs.<br />
froNt paNel INputs<br />
there are standard usB and sD card inputs located on the<br />
front panel.<br />
usB<br />
the usB input accepts usB flash memory drives loaded<br />
with mP3 files. max usB memory size that can be used is<br />
16GB. When using the usB input we recommend using the<br />
usB adapter AD003 supplied as a standard accessory with<br />
your GD9600. this allows the transparent front cover to be<br />
fully closed to avoid any possibility of water ingress.<br />
When the usB input is in use, ‘usB’ is added to the options<br />
on the moD button.<br />
note: the usB input is not designed to be connected<br />
to the usB port of a external mP3 player. External mP3<br />
players should be connected to the AuX input via an audio<br />
interface cable.<br />
sd card<br />
the sD card slot accepts sD and sDHc memory cards up<br />
to 16 GB.<br />
When the sD card slot is in use, ‘cArD’ is added to the<br />
options on the moD button.<br />
aux Input<br />
the GD9600 has a 2.5 mm stereo jack low level (1 Volt<br />
peak to peak) audio input socket on the front panel.<br />
owners may use this input for external audio sources that<br />
they wish to play through the vessel’s stereo system.<br />
GmE offers a custom interface cable for a personel mP3<br />
player connection; Part # lE68. When using this cable, it<br />
is necessary to use the portable device functions to control<br />
play.<br />
coNNectINg aN ipod*<br />
the GD9600 can be connected directly to an iPod via the<br />
optional lE023 iPod interface lead. the interface lead<br />
connects to the iPod fly lead at the rear of the GD9600 and<br />
provides a direct connection to the interface socket on the<br />
iPod. the cable is compatible with the current iPod nano,<br />
classic, touch and iPhone models.<br />
When an iPod is connected the GD9600 displays iPoD.<br />
Album and song selections can be made from the GD9600<br />
or directly from the iPod itself. Any selections will be<br />
displayed on the iPod screen.<br />
to make individual selections from the GD9600 controls<br />
press the ams button. ‘menu’ is displayed on the GD9600.<br />
PAG E 1 2 i n s t r u c t i o n m A n uA l G D 9 6 0 0 s E r i E s
During this time, press the ams button to step back<br />
through the iPod screen menus, rotate the Volume control<br />
to highlight items on the iPod screen and press BNd<br />
to make a selection. to exit the GD9600’s iPod ‘menu’<br />
function press sel or wait a few seconds and the menu will<br />
time-out. normal ams, Volume and BNd functions<br />
will resume.<br />
to select another song press or to step forward or<br />
back through the song list.<br />
the iPod battery will be charged while it is connected to<br />
the GD9600.<br />
rear outputs aNd INputs<br />
the GD9600 has Audio outputs plus Video inputs and<br />
outputs. these inputs and outputs are clearly labelled and<br />
colour coded, they are also identified in the wiring diagram<br />
shown on page 8 of this manual.<br />
rEMOTE CONTrOl<br />
A standard accessory with the GmE GD9600 is a a wireless<br />
remote control (rcW9600). the remote will permit the control<br />
of all major GD9600 functions from a distance of up to<br />
3 metres.<br />
Ensure plastic battery protection tab is removed from the<br />
handset before initial operation.<br />
simply point the remote handset at the GD9600 and select<br />
the required option on the keypad.<br />
remote coNtrol fuNctIoNs<br />
mode<br />
Power<br />
Band/system<br />
Enter<br />
Eject<br />
Program<br />
Playing<br />
repeat Play<br />
random Play<br />
tuning/<br />
selecting<br />
tracks/FF/<br />
rewind<br />
PBc menu<br />
on-screen<br />
Display<br />
number buttons<br />
BND<br />
SYS<br />
AMS<br />
RPT<br />
LOC<br />
RDM<br />
MODE<br />
ENTER<br />
ST<br />
PROG<br />
TITLE SUB-T<br />
VOL+<br />
SET-UP<br />
ANGLE SLOW<br />
ZOOM<br />
SEEK- SEL SEEK+<br />
PBC OSD VOL- AUDIO<br />
1 2 3 4<br />
5 6 7 8<br />
9 0 10+<br />
GOTO<br />
RCW9600<br />
Pause/Play<br />
mute<br />
menu Display<br />
subtitle<br />
set-up<br />
Angle<br />
slow-motion<br />
Play<br />
Zoom<br />
Volume<br />
sound<br />
characteristics<br />
Audio<br />
Go to<br />
Button<br />
cautions<br />
• the remote control handset is not waterproof and should<br />
be kept well away from both fresh and salt water at all<br />
times.<br />
• the remote control should not be left in direct sunlight<br />
for prolonged periods, excessive sunlight and heat<br />
could cause damage to the keypad resulting in incorrect<br />
operation or non function.<br />
BaTTErY rEplaCEMENT<br />
should the working range of remote control handset<br />
reduce, or functions fail to operate correctly. the battery<br />
should be replaced:<br />
1. turn remote over, insert thumb nail between grooves<br />
on the battery cover latch and slide to the right, pull out<br />
the battery tray.<br />
2. replace the battery,<br />
(type cr 2025 or equivalent),<br />
with the positive side facing upwards.<br />
3. slide the battery tray back into the handset.<br />
G D 9 6 0 0 s E r i E s i n s t r u c t i o n m A n uA l PAG E 1 3
there are a number of high quality GmE accessories<br />
available to enhance your marine entertainment experience.<br />
these accessories are available through your local GmE<br />
retailer, should you have any difficulty in obtaining any<br />
GmE accessory, please call or email your local GmE sales<br />
office (within Australia and new Zealand). contact details<br />
are listed on the back page of this manual.<br />
international customers should also refer to the back page<br />
for details of your local importer or visit:<br />
www.gme.net.au<br />
sPK001 and sPK002 speakers<br />
sPK005 and sPK006 box speakers<br />
sPK007 6 x 9 speaker rcu9200 wired remote lE68 AuX input cable<br />
sPK008 wake board speaker<br />
and sPK010 marine subwoofer<br />
OpTiONal aCCESSOriES<br />
• marine speakers<br />
• comprehensive range of marine Antennas<br />
• interface cable for mP3 devices<br />
• rcu9200 - Wired remote control for stereo<br />
• lE024 - Wired remote 5m Extension cable<br />
• lE023 - iPod* connectivity lead 1.1m long<br />
*iPod is a trademark of Apple computer inc., registered in the u.s.<br />
and other countries.<br />
From time to time GmE may introduce new and additional<br />
products to the range or discontinue existing accessories.<br />
Details of any changes may be found at our website:<br />
www.gme.net.au<br />
lE023 iPod interface cable lE024 rcu interface cable (5m)<br />
GA9800 - GmE marine Amplifier<br />
Am/Fm Antennas<br />
PAG E 1 4 i n s t r u c t i o n m A n uA l G D 9 6 0 0 s E r i E s
GD9600 TrOuBlE ShOOTiNG GuiDE<br />
symptom c ause solutIoN<br />
no Power. Vessel’s battery switch is not on. check master switch if fitted.<br />
Error messages displayed on lcD or<br />
functions not operating.<br />
one of the fuses is blown. replace the damaged fuse with the<br />
correct value.<br />
microprocessor lock up. Press reset Button.<br />
Poor radio reception. Damaged or incorrect type of antenna. check antenna and replace<br />
if necessary.<br />
cD/DVD cannot be loaded. there is already a cD in the player. remove disc, then insert new disc.<br />
cD/DVD is upside down. insert correct way up.<br />
cD/DVD is damaged or dirty. clean or try another disc.<br />
cD/DVD has moisture on it. Dry disc and retry.<br />
cD/DVD reader has moisture on lens. leave player on for an hour or so<br />
and retry.<br />
fm radIo<br />
SpECifiCaTiONS*<br />
audIo amplIfIer<br />
Frequency range: 87.5 - 108 mHz (Eu./Aust./n.Z.)<br />
Audio output: (4 channels x 45 W Peak =<br />
87.5 - 107.9 mHz (u.s.A.)<br />
180 W Peak) @ 10% tHD.<br />
Frequency step: 50 kHz<br />
speaker impedance: 4 ohm<br />
intermediate Frequency: 10.7 mHz<br />
Frequency response: 40 Hz - 18 kHz<br />
sensitivity (30 dB s/n): 13 dBuV (typical)<br />
Bass Adjustment range: +/- 8 dB @ 100 kHz<br />
channel separation: >22 dB<br />
treble Adjustment<br />
station memories: 18<br />
range: +/- 10 dB @ 10 kHz<br />
am radIo<br />
dVd player<br />
Frequency range: 522 - 1620 mHz (Eu./Aust./n.Z.)<br />
530 - 1710 mHz (u.s.A.)<br />
Aspect ratio: 4:3 letter box<br />
4:3 Pan scan or 16:9<br />
Frequency step: 9 kHz (Eu./Aust./n.Z.)<br />
Video output level: 1.00 Volt Peak to Peak<br />
10 kHz (u.s.A.)<br />
( 75 ohms impedance )<br />
intermediate Frequency: 455 kHz<br />
Horizontal resolution: 500<br />
sensitivity (20 dB s/n): 25 dBuV<br />
Video system: Auto/PAl/ntsc<br />
station memories: 12<br />
geNeral<br />
compact dIsc mechaNIsm<br />
Dc supply input: 11 – 16 Volts negative Ground<br />
mechanism: Auto loading<br />
memory Back-up: External Back-up memory Wire<br />
signal to noise ratio: 65 dB<br />
Back-up current: Approximately 20 mA<br />
Format: 8 times oversampling<br />
overall size: 232 mm (W) x 97 mm (H) x<br />
Environmental: Anti-vibration/Anti-shock<br />
200 mm (D)<br />
Weight: Approx 1.75 kg<br />
supply current: 7 Ampere (max.)<br />
*all specifications are typical and subject to change without notice or obligation.<br />
G D 9 6 0 0 s E r i E s i n s t r u c t i o n m A n uA l PAG E 1 5
WarraNTY<br />
GmE limit this warranty to the original purchaser of<br />
the equipment.<br />
GmE warrant this product to be free from defects in<br />
material and workmanship for a period of twelve (12)<br />
months from the date of purchase from their<br />
authorised retailer.<br />
should the product require servicing during this period, all<br />
labour and parts used to effect repairs will be supplied free<br />
of charge. GmE reserve the right to determine whether<br />
damage has been occasioned by accident, misuse or<br />
improper installation whereby the warranty would be<br />
void, including:<br />
Equipment which has been damaged due to:<br />
(a) incorrect or reverse polarity connection to a battery or<br />
power supply.<br />
(b) connection to incorrect supply voltage.<br />
(c) Effects of water or moisture penetration.<br />
(d) non-factory modifications.<br />
(e) use of incorrect replacement fuse.<br />
Procedure to be followed by claimant: in the event of a<br />
defect occurring during the twelve (12) month warranty<br />
period, the original purchaser may return the defective unit<br />
along with suitable proof of purchase date (i.e. receipt,<br />
docket, credit card slip etc.) and a full description of the<br />
defect to any authorised retailer.<br />
All freight charges incurred for transportation by the retailer<br />
or GmE are the purchaser’s responsibility.<br />
the retailer will forward the unit to the closest authorised<br />
GmE service Depot in your particular area.<br />
<strong>GME</strong> afTEr SalES SErviCE<br />
Your GmE GD9600 is especially designed for the<br />
environment encountered in marine installations. the use of<br />
all solid state circuitry, careful design and rigorous testing,<br />
result in high reliability. should failure occur however, GmE<br />
maintain a fully equipped service facility and spare parts<br />
stock to meet the customer’s requirements long after expiry<br />
of the warranty period.<br />
Warning: Extreme care should be taken when connecting<br />
any external device to your GD9600 rear inputs or outputs.<br />
GmE strongly recommends that all connections should be<br />
carried out by a suitably qualified technician.<br />
A division of standard communications pty. ltd.<br />
Head Office: Sydney- locked Bag 2086, north ryde, nsW 1670, Australia. tel: +61 (0)2 9844 6666 Fax : +61 (0)2 9844 6600<br />
melBourNe adelaIde perth BrIsBaNe sydNey aucklaNd<br />
7 micro circuit 14 Phillips street unit 1 unit 1 unit B unit 2, 24 Bishop Dunn Pl.<br />
DAnDEnonG stH 3175 tHEBArton 5031 10-12 Harvard Way 89-101 Factory road 22-24 college street East tamaki<br />
tel: (03) 9798 0988 tel: (08) 8234 2633 cAnninG VAlE 6155 oXlEY 4075 GlADEsVillE 2111 manukau, 2013 nZ<br />
Fax: (03) 9798 0177 Fax: (08) 8234 5138 tel: (08) 9455 5744 tel: (07) 3278 6444 tel: (02) 9879 8888 tel: (09) 274 0955<br />
Fax: (08) 9455 3110 Fax: (07) 3278 6555 Fax: (02) 9816 4722 Fax: (09) 274 0959<br />
For customers outside Australia and new Zealand please contact your local GmE distributor or email: export@gme.net.au<br />
www.gme.net.au<br />
PAG Part number: E 1 6 310507 Drawing number: 45283-2 i n s t r u c t i o n m A n uA l G D 9 6 0 0 s E r i E s


