Download the Freyja pattern – free! - Knitting Iceland
Download the Freyja pattern – free! - Knitting Iceland
Download the Freyja pattern – free! - Knitting Iceland

You also want an ePaper? Increase the reach of your titles
YUMPU automatically turns print PDFs into web optimized ePapers that Google loves.
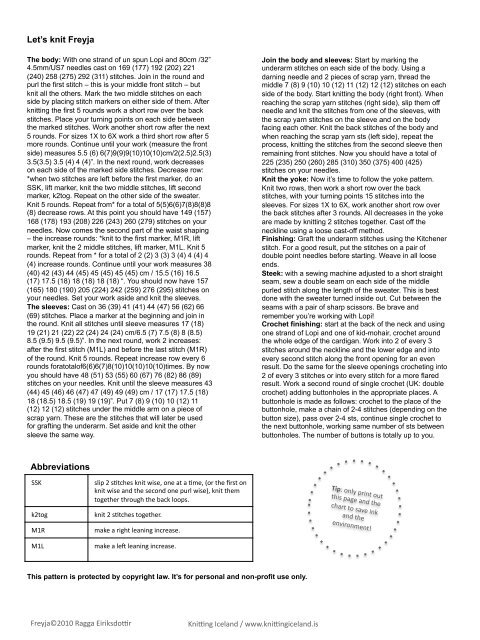
Let’s knit <strong>Freyja</strong><br />
The body: With one strand of un spun Lopi and 80cm /32”<br />
4.5mm/US7 needles cast on 169 (177) 192 (202) 221<br />
(240) 258 (275) 292 (311) stitches. Join in <strong>the</strong> round and<br />
purl <strong>the</strong> first stitch <strong>–</strong> this is your middle front stitch <strong>–</strong> but<br />
knit all <strong>the</strong> o<strong>the</strong>rs. Mark <strong>the</strong> two middle stitches on each<br />
side by placing stitch markers on ei<strong>the</strong>r side of <strong>the</strong>m. After<br />
knitting <strong>the</strong> first 5 rounds work a short row over <strong>the</strong> back<br />
stitches. Place your turning points on each side between<br />
<strong>the</strong> marked stitches. Work ano<strong>the</strong>r short row after <strong>the</strong> next<br />
5 rounds. For sizes 1X to 6X work a third short row after 5<br />
more rounds. Continue until your work (measure <strong>the</strong> front<br />
side) measures 5.5 (6) 6(7)9(9)9(10)10(10)cm/2(2.5)2.5(3)<br />
3.5(3.5) 3.5 (4) 4 (4)”. In <strong>the</strong> next round, work decreases<br />
on each side of <strong>the</strong> marked side stitches. Decrease row:<br />
*when two stitches are left before <strong>the</strong> first marker, do an<br />
SSK, lift marker, knit <strong>the</strong> two middle stitches, lift second<br />
marker, k2tog. Repeat on <strong>the</strong> o<strong>the</strong>r side of <strong>the</strong> sweater.<br />
Knit 5 rounds. Repeat from* for a total of 5(5)6(6)7(8)8(8)8<br />
(8) decrease rows. At this point you should have 149 (157)<br />
168 (178) 193 (208) 226 (243) 260 (279) stitches on your<br />
needles. Now comes <strong>the</strong> second part of <strong>the</strong> waist shaping<br />
<strong>–</strong> <strong>the</strong> increase rounds: *knit to <strong>the</strong> first marker, M1R, lift<br />
marker, knit <strong>the</strong> 2 middle stitches, lift marker, M1L. Knit 5<br />
rounds. Repeat from * for a total of 2 (2) 3 (3) 3 (4) 4 (4) 4<br />
(4) increase rounds. Continue until your work measures 38<br />
(40) 42 (43) 44 (45) 45 (45) 45 (45) cm / 15.5 (16) 16.5<br />
(17) 17.5 (18) 18 (18) 18 (18) “. You should now have 157<br />
(165) 180 (190) 205 (224) 242 (259) 276 (295) stitches on<br />
your needles. Set your work aside and knit <strong>the</strong> sleeves.<br />
The sleeves: Cast on 36 (39) 41 (41) 44 (47) 56 (62) 66<br />
(69) stitches. Place a marker at <strong>the</strong> beginning and join in<br />
<strong>the</strong> round. Knit all stitches until sleeve measures 17 (18)<br />
19 (21) 21 (22) 22 (24) 24 (24) cm/6.5 (7) 7.5 (8) 8 (8.5)<br />
8.5 (9.5) 9.5 (9.5)”. In <strong>the</strong> next round, work 2 increases:<br />
after <strong>the</strong> first stitch (M1L) and before <strong>the</strong> last stitch (M1R)<br />
of <strong>the</strong> round. Knit 5 rounds. Repeat increase row every 6<br />
rounds foratotalof6(6)6(7)8(10)10(10)10(10)times. By now<br />
you should have 48 (51) 53 (55) 60 (67) 76 (82) 86 (89)<br />
stitches on your needles. Knit until <strong>the</strong> sleeve measures 43<br />
(44) 45 (46) 46 (47) 47 (49) 49 (49) cm / 17 (17) 17.5 (18)<br />
18 (18.5) 18.5 (19) 19 (19)”. Put 7 (8) 9 (10) 10 (12) 11<br />
(12) 12 (12) stitches under <strong>the</strong> middle arm on a piece of<br />
scrap yarn. These are <strong>the</strong> stitches that will later be used<br />
for grafting <strong>the</strong> underarm. Set aside and knit <strong>the</strong> o<strong>the</strong>r<br />
sleeve <strong>the</strong> same way.<br />
Abbreviations<br />
SSK slip 2 sFtches knit wise, one at a Fme, (or <strong>the</strong> first on<br />
knit wise and <strong>the</strong> second one purl wise), knit <strong>the</strong>m<br />
toge<strong>the</strong>r through <strong>the</strong> back loops.<br />
k2tog knit 2 sFtches toge<strong>the</strong>r.<br />
M1R make a right leaning increase.<br />
M1L make a leQ leaning increase.<br />
This <strong>pattern</strong> is protected by copyright law. It’s for personal and non-profit use only.<br />
<strong>Freyja</strong>©2010 Ragga Eiriksdo4r<br />
Kni4ng <strong>Iceland</strong> / www.kni4ngiceland.is<br />
Join <strong>the</strong> body and sleeves: Start by marking <strong>the</strong><br />
underarm stitches on each side of <strong>the</strong> body. Using a<br />
darning needle and 2 pieces of scrap yarn, thread <strong>the</strong><br />
middle 7 (8) 9 (10) 10 (12) 11 (12) 12 (12) stitches on each<br />
side of <strong>the</strong> body. Start knitting <strong>the</strong> body (right front). When<br />
reaching <strong>the</strong> scrap yarn stitches (right side), slip <strong>the</strong>m off<br />
needle and knit <strong>the</strong> stitches from one of <strong>the</strong> sleeves, with<br />
<strong>the</strong> scrap yarn stitches on <strong>the</strong> sleeve and on <strong>the</strong> body<br />
facing each o<strong>the</strong>r. Knit <strong>the</strong> back stitches of <strong>the</strong> body and<br />
when reaching <strong>the</strong> scrap yarn sts (left side), repeat <strong>the</strong><br />
process, knitting <strong>the</strong> stitches from <strong>the</strong> second sleeve <strong>the</strong>n<br />
remaining front stitches. Now you should have a total of<br />
225 (235) 250 (260) 285 (310) 350 (375) 400 (425)<br />
stitches on your needles.<br />
Knit <strong>the</strong> yoke: Now it’s time to follow <strong>the</strong> yoke <strong>pattern</strong>.<br />
Knit two rows, <strong>the</strong>n work a short row over <strong>the</strong> back<br />
stitches, with your turning points 15 stitches into <strong>the</strong><br />
sleeves. For sizes 1X to 6X, work ano<strong>the</strong>r short row over<br />
<strong>the</strong> back stitches after 3 rounds. All decreases in <strong>the</strong> yoke<br />
are made by knitting 2 stitches toge<strong>the</strong>r. Cast off <strong>the</strong><br />
neckline using a loose cast-off method.<br />
Finishing: Graft <strong>the</strong> underarm stitches using <strong>the</strong> Kitchener<br />
stitch. For a good result, put <strong>the</strong> stitches on a pair of<br />
double point needles before starting. Weave in all loose<br />
ends.<br />
Steek: with a sewing machine adjusted to a short straight<br />
seam, sew a double seam on each side of <strong>the</strong> middle<br />
purled stitch along <strong>the</strong> length of <strong>the</strong> sweater. This is best<br />
done with <strong>the</strong> sweater turned inside out. Cut between <strong>the</strong><br />
seams with a pair of sharp scissors. Be brave and<br />
remember you’re working with Lopi!<br />
Crochet finishing: start at <strong>the</strong> back of <strong>the</strong> neck and using<br />
one strand of Lopi and one of kid-mohair, crochet around<br />
<strong>the</strong> whole edge of <strong>the</strong> cardigan. Work into 2 of every 3<br />
stitches around <strong>the</strong> neckline and <strong>the</strong> lower edge and into<br />
every second stitch along <strong>the</strong> front opening for an even<br />
result. Do <strong>the</strong> same for <strong>the</strong> sleeve openings crocheting into<br />
2 of every 3 stitches or into every stitch for a more flared<br />
result. Work a second round of single crochet (UK: double<br />
crochet) adding buttonholes in <strong>the</strong> appropriate places. A<br />
buttonhole is made as follows: crochet to <strong>the</strong> place of <strong>the</strong><br />
buttonhole, make a chain of 2-4 stitches (depending on <strong>the</strong><br />
button size), pass over 2-4 sts, continue single crochet to<br />
<strong>the</strong> next buttonhole, working same number of sts between<br />
buttonholes. The number of buttons is totally up to you.<br />
Tip: only print out<br />
this page and <strong>the</strong><br />
chart to save ink<br />
and <strong>the</strong><br />
environment!