ACL TightRope RT for Femoral Fixation - Canmed Ortopedi Medikal
ACL TightRope RT for Femoral Fixation - Canmed Ortopedi Medikal
ACL TightRope RT for Femoral Fixation - Canmed Ortopedi Medikal

You also want an ePaper? Increase the reach of your titles
YUMPU automatically turns print PDFs into web optimized ePapers that Google loves.
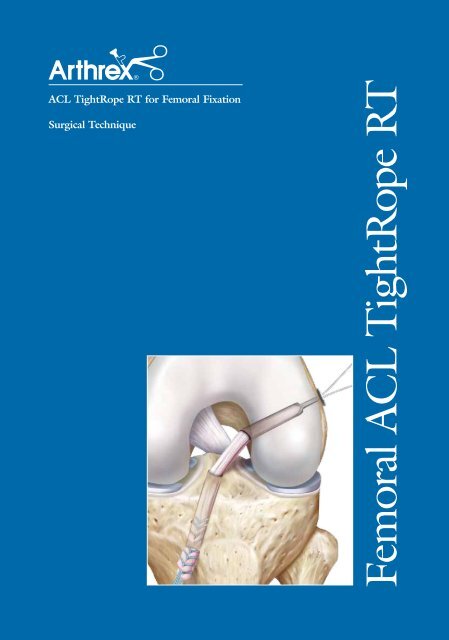
<strong>ACL</strong> <strong>TightRope</strong> <strong>RT</strong> <strong>for</strong> <strong>Femoral</strong> <strong>Fixation</strong><br />
Surgical Technique<br />
<strong>Femoral</strong> <strong>ACL</strong> <strong>TightRope</strong> <strong>RT</strong>
Moving <strong>ACL</strong> fixation in a new direction . . .<br />
<strong>ACL</strong> <strong>TightRope</strong> <strong>RT</strong><br />
<strong>ACL</strong> <strong>TightRope</strong><br />
The <strong>ACL</strong> <strong>TightRope</strong> has revolutionized cortical fixation by allowing intraoperative adjustability of cortical fixation while<br />
providing a stiff, strong construct due to the proprietary four-point locking system. The <strong>ACL</strong> <strong>TightRope</strong> <strong>RT</strong> provides<br />
another option which allows the surgeon to adjust the implant by pulling tensioning strands in the same direction of graft<br />
advancement. This innovation eliminates the need to retrieve shortening strands from the joint and allows the surgeon to<br />
pull in line with graft advancement.<br />
1<br />
FlipCutter<br />
The femoral socket can be prepared in in a retrograde<br />
fashion using the FlipCutter ® and the RetroConstruction<br />
Guide System or an antegrade fashion with a RetroButton ®<br />
Pin II and Low Profile Reamers.<br />
Note intraosseous length during tunnel prep and mark that<br />
distance on the <strong>ACL</strong> <strong>TightRope</strong> <strong>RT</strong> implant.<br />
Medial Portal
2 3<br />
Pass the blue passing suture and white tensioning<br />
strands together through the femur. The blue passing<br />
suture is used to advance the button, while tension is<br />
kept on the white tensioning strands to prevent slack<br />
from <strong>for</strong>ming and bunching up in the tunnel.<br />
Pull the button through the femur. A line on the<br />
implant marked at the intraosseous length is helpful<br />
to signal that the button has exited the femur.<br />
4 4a 4b<br />
Hold slight tension on the tibial tails of the graft<br />
during graft advancement. To advance the graft, pull<br />
on the tensioning strands one at a time, alternating<br />
approximately 4 cm on each side. A mark on the graft<br />
made at a distance of the femoral socket is helpful in<br />
signaling the graft is fully seated. Once the graft is fully<br />
seated, pull firmly back on the graft to check fixation.<br />
Note: If desired, advance the graft just shy of the full<br />
length of the socket. This will allow retensioning of the<br />
graft after tibial fixation has been completed.<br />
Fix the tibial side of the graft. If desired, and space has been left on the femoral side, retension shortening strands on the<br />
femur. Cut shortening strands with a closed-end arthroscopic FiberWire cutter. <strong>ACL</strong> <strong>TightRope</strong> <strong>RT</strong> is also ideal <strong>for</strong> All-<br />
Inside <strong>ACL</strong> Reconstruction (4a) since it facilitates incremental graft advancement and tensioning after tibial fixation has been<br />
completed. <strong>ACL</strong> <strong>TightRope</strong> <strong>RT</strong> may also be used on the tibial side with the GraftLink procedure (4b). See technique guide<br />
LT0157 <strong>for</strong> details.
Ordering In<strong>for</strong>mation<br />
Implant:<br />
<strong>ACL</strong> <strong>TightRope</strong> <strong>RT</strong> AR-1588<strong>RT</strong><br />
Instruments:<br />
For FlipCutter Technique:<br />
RetroConstruction Drill Guide Set AR-1510S<br />
Stepped Drill Sleeve AR-1204FDS<br />
FlipCutter, 6 mm AR-1204F-60<br />
FlipCutter, 6.5 mm AR-1204F-65<br />
FlipCutter, 7 mm AR-1204F-70<br />
FlipCutter, 7.5 mm AR-1204F-75<br />
FlipCutter, 8 mm AR-1204F-80<br />
FlipCutter, 8.5 mm AR-1204F-85<br />
FlipCutter, 9 mm AR-1204F-90<br />
FlipCutter, 9.5 mm AR-1204F-95<br />
FlipCutter, 10 mm AR-1204F-100<br />
FlipCutter, 10.5 mm AR-1204F-105<br />
FlipCutter, 11 mm AR-1204F-110<br />
FlipCutter, 11.5 mm AR-1204F-115<br />
FlipCutter, 12 mm AR-1204F-120<br />
FlipCutter, 13 mm AR-1204F-130<br />
For Medial Portal Technique:<br />
Transportal <strong>ACL</strong> Guide (TPG), 4 mm AR-1800-04<br />
Transportal <strong>ACL</strong> Guide (TPG), 5 mm AR-1800-05<br />
Transportal <strong>ACL</strong> Guide (TPG), 6 mm AR-1800-06<br />
Transportal <strong>ACL</strong> Guide (TPG), 7 mm AR-1800-07<br />
Transportal <strong>ACL</strong> Guide (TPG), 8 mm AR-1800-08<br />
Low Profile Reamer, 5 mm AR-1405LP<br />
Low Profile Reamer, 6 mm AR-1406LP<br />
Low Profile Reamer, 7 mm AR-1407LP<br />
Low Profile Reamer, 7.5 mm AR-1407LP-50<br />
Low Profile Reamer, 8 mm AR-1408LP<br />
Low Profile Reamer, 8.5 mm AR-1408LP-50<br />
Low Profile Reamer, 9 mm AR-1409LP<br />
Low Profile Reamer, 9.5 mm AR-1409LP-50<br />
Low Profile Reamer, 10 mm AR-1410LP<br />
Low Profile Reamer, 10.5 mm AR-1410LP-50<br />
Low Profile Reamer, 11 mm AR-1411LP<br />
RetroButton Drill Pin II AR-1595<br />
Accessories:<br />
Suture Retriever AR-12540<br />
FiberWire Cutter AR-12250<br />
Graft Sizing Block AR-1886<br />
This description of technique is provided as an educational tool and clinical aid to assist properly licensed medical professionals<br />
in the usage of specific Arthrex products. As part of this professional usage, the medical professional must use<br />
their professional judgment in making any final determinations in product usage and technique.<br />
In doing so, the medical professional should rely on their own training and experience and should conduct<br />
a thorough review of pertinent medical literature and the product’s Directions For Use.<br />
U.S. PATENT NO. 6,716,234 and PATENT PENDING<br />
© 2011, Arthrex Inc. All rights reserved. LT0159A