
You also want an ePaper? Increase the reach of your titles
YUMPU automatically turns print PDFs into web optimized ePapers that Google loves.
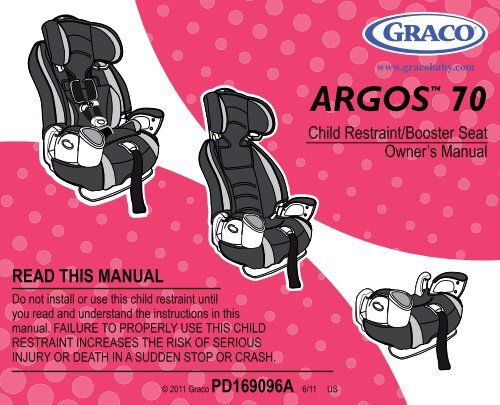
<strong>READ</strong> <strong>THIS</strong> <strong>MANUAL</strong><br />
Do not install or use this child restraint until<br />
you read and understand the instructions in this<br />
manual. FAILURE TO PROPERLY USE <strong>THIS</strong> CHILD<br />
RESTRAINT INCREASES THE RISK OF SERIOUS<br />
INJURY OR DEATH IN A SUDDEN STOP OR CRASH.<br />
© 2011 <strong>Graco</strong> PD169096A 6/11 US<br />
ARGOS 70<br />
Child Restraint/Booster Seat<br />
Owner’s Manual
Table of Contents Table of Contents (cont.)<br />
1.0 Warnings to Parents and Other<br />
Users .....................4-5<br />
2.0 Registration Information .........6<br />
2.1 Register Your Child Restraint .6<br />
2.2 For Recall Information. ......6<br />
2.3 If You Need Help ...........7<br />
3.0 Useful Information .............7<br />
3.1 Certification...............7<br />
3.2 Child Restraint Useful Life. ...7<br />
3.3 Second Hand Child Restraint .7<br />
4.0 Features...................8-9<br />
5.0 Assembling the Child<br />
Restraint .................10-13<br />
6.0 WARNINGS ..............14-15<br />
7.0 Height and Weight Limitations . . .16<br />
7.1 WITH Built-in Harness......16<br />
7.2 WITHOUT Built-in Harness . .17<br />
7.3 WITHOUT Back Support. ...18<br />
8.0 Choosing an Appropriate Vehicle<br />
Seat Location ...............19<br />
8.1 Vehicle Seat Location<br />
Requirements ............19<br />
8.2 Vehicle Seat Belt<br />
Requirements ............20<br />
8.3 SAFE Vehicle Seat Belt<br />
Systems ................20<br />
8.4 For Built-in Harness Only . .21<br />
8.5 WITH or WITHOUT Built-in<br />
Harness................22<br />
8.6 To Install Locking Clip .....23<br />
8.7 UNSAFE Vehicle Belt<br />
Systems . ............24-25<br />
9.0 LATCH .....................26<br />
9.1 What is LATCH?.......26-27<br />
9.2 LATCH System...........28<br />
10.0 Using Child Restraint WITH<br />
Built-in Harness ...........29-31<br />
11.0 Securing the Child Restraint<br />
in Your Vehicle ...............32<br />
11.1 Using a Child Restraint WITH a<br />
Built-in Harness ..........32<br />
11.2 With a Vehicle Lap or<br />
Lap/shoulder belt ......32-33<br />
11.3 With LATCH ..........34-35<br />
12.0 Securing Your Child in the<br />
Child Restraint ............36-38<br />
13.0 Adjust Head Support/Harness<br />
Straps......................39<br />
14.0 Check Harness System ........40<br />
15.0 Harness Removal ..........41-45<br />
16.0 Using Your Child Restraint WITHOUT<br />
Built-in Harness ...........46-48<br />
17.0 Securing Child & Booster Seat in<br />
Vehicle . ....................49<br />
18.0 Adjusting Head Support in<br />
Booster Mode ................50<br />
19.0 Removing Back Support . ...51-53<br />
2 3<br />
20.0 Securing Child in Vehicle Belt<br />
with Shoulder Belt<br />
Positioning Clip . ..........54-57<br />
21.0 Using the Tether ..............58<br />
21.1 Storing LATCH and Tether. .59<br />
22.0 Airplane Use ................60<br />
23.0 Accessories.................61<br />
23.1 Body Support and Harness<br />
Covers.................61<br />
24.0 Recline Foot ................62<br />
25.0 Care and Maintenance . .......63<br />
26.0 To Remove Head Support and<br />
Seat Covers..............64-65<br />
27.0 Replacement Parts, Warranty<br />
and Owners Manual Storage . ...68
1.0 Warnings to Parents and Other Users<br />
NEVER PLACE <strong>THIS</strong> CHILD RESTRAINT IN A VEHICLE<br />
SEATING LOCATION THAT HAS A FRONT AIR BAG. If an air<br />
bag inates, it can hit the child and child restraint with great force<br />
and cause serious injury or death to your child. Refer to your<br />
vehicle owner’s manual for information about side air bags and<br />
child restraint installation.<br />
Failure to properly use this child restraint increases the risk of serious injury or death in a sharp<br />
turn, sudden stop or crash. Your child’s safety depends on you installing and using this child<br />
restraint correctly.<br />
Even if using this child restraint seems easy to gure out on your own, it is very important to <strong>READ</strong><br />
THE OWNER’S <strong>MANUAL</strong> and the vehicle owner’s manual.<br />
Your child’s safety depends on:<br />
1. Choosing the correct mode of use for the child restraint depending on your child’s size.<br />
2. Inserting the harness straps (if needed) in the proper slots for your child.<br />
3. Selecting a suitable location for the child restraint in your vehicle.<br />
4. Properly routing the vehicle seat belt or LATCH.<br />
5. Properly securing the child restraint in the vehicle using a seat belt designed to restrain<br />
both the child restraint and your child or by using LATCH. Many seat belts are NOT safe to use<br />
with this child restraint, even though they can easily be threaded through or around the child<br />
restraint!<br />
6. Properly securing your child in the child restraint.<br />
4 5
2.0 Registration Information<br />
Model Number:<br />
Manufactured in:<br />
Purchase Date:<br />
2.1 Register Your Child Restraint<br />
Please ll in the above information. The model number and manufactured in (date) can be found on<br />
a label on the child restraint. Fill out the prepaid registration postcard attached to the harness and<br />
mail it today.<br />
Child restraints could be recalled for safety reasons. You must register this restraint to be reached<br />
in a recall. Send your name, address, and the restraint’s model number and manufacturing date to:<br />
2.3 If You Need Help<br />
Please contact our Customer Service Department with any questions you may have concerning<br />
parts, use, or maintenance. When you contact us, please have your product’s model and<br />
manufactured in (date) ready so that we may help you efciently. These numbers can be found<br />
on a label on the child restraint.<br />
USA: 1-800-345-4109 or www.gracobaby.com<br />
3.0 Useful Information<br />
3.1 Certication<br />
3.2 Child Restraint Useful Life<br />
<strong>THIS</strong> CHILD RESTRAINT<br />
CONFORMS to all<br />
STOP using child restraint and throw it away after the date<br />
MOLDED into the child restraint.<br />
applicable Federal Motor<br />
<strong>Graco</strong> Children’s Products Inc.<br />
150 Oaklands Blvd. Exton, PA, 19341<br />
or call 1-800-345-4109<br />
or register online at:<br />
http://www.gracobaby.com/carseatregistration<br />
Vehicle Safety Standards<br />
and is certied for use in<br />
motor vehicles.<br />
It is certied for use in<br />
Aircraft only when used with<br />
Look for the date<br />
molded into the seat<br />
in the location shown.<br />
2.2 For Recall Information<br />
the built-in harness. When<br />
Call the U.S. Government’s Vehicle Safety Hotline at: 1-888-327-4236<br />
(TTY:1-800-424-9153), or go to http://www.NHTSA.gov or contact <strong>Graco</strong>:<br />
1-800-345-4109 or www.gracobaby.com<br />
6<br />
used as a booster without<br />
the harness, this restraint<br />
is not certied for use in<br />
aircraft.<br />
3.3 Second Hand Child Restraint<br />
<strong>Graco</strong> Children’s Products Inc. advises against loaning or passing<br />
along a child restraint.<br />
7
4.0 Features<br />
The locking clip is stored<br />
on the back of the child<br />
restraint. You will need<br />
to use it with certain<br />
types of vehicle seat<br />
belts.<br />
United States Federal<br />
Motor Vehicle Safety<br />
Standards have dened<br />
a new system for<br />
installing child restraints<br />
in vehicles. The system<br />
is called LATCH (Lower<br />
Anchors and Tethers<br />
for CHildren). LATCH<br />
may ONLY be used<br />
IN PLACE of vehicle belt<br />
if vehicle is equipped<br />
with LATCH anchor<br />
points. Please refer to<br />
vehicle owners manual<br />
for LATCH locations in<br />
vehicles.<br />
8 9
5.0 Assembling the Child Restraint<br />
Adult assembly required.<br />
KEEP GUTTERS CLEAR<br />
1. Lay child restraint flat on back. Grab seat pad<br />
fabric in sitting area to expose the gutters .<br />
MAKE SURE all hands, fingers and other objects<br />
are clear of the gutters.<br />
2. MAKE sure the harness straps are securely<br />
attached within the “T”-shaped slots around the<br />
arms as shown .<br />
With your other hand, raise seat back so that<br />
both arms LOCK into the gutters .<br />
Harness Strap<br />
A r m<br />
<br />
T-slot<br />
KEEP GUTTERS CLEAR<br />
<br />
<br />
3. Arms should CLICK into the gutters.<br />
Seat assembly should appear as shown .<br />
10 11<br />
CLICK!
4. Attach 4 elastic loops from the seat pad under<br />
the seat exactly as shown in .<br />
5. Pull elastic loop on the seat pad through the<br />
vehicle belt guide on side of seat and attach to<br />
hook as shown . Repeat on other side.<br />
<br />
<br />
6. The assembly is now complete.<br />
12 13
6.0 WARNINGS<br />
NO CHILD RESTRAINT CAN GUARANTEE<br />
PROTECTION FROM INJURY. However,<br />
proper use of this child restraint reduces the<br />
risk of serious injury or death to your child.<br />
DO NOT INSTALL OR USE <strong>THIS</strong> CHILD<br />
RESTRAINT UNTIL YOU <strong>READ</strong> AND<br />
UNDERSTAND THE INSTRUCTIONS IN <strong>THIS</strong><br />
<strong>MANUAL</strong> AND IN YOUR VEHICLE OWNER’S<br />
<strong>MANUAL</strong>. DO NOT let others install or use the<br />
child restraint unless they understand how to<br />
use it.<br />
FAILURE TO PROPERLY USE <strong>THIS</strong> CHILD<br />
RESTRAINT INCREASES THE RISK OF<br />
SERIOUS INJURY OR DEATH IN A SHARP<br />
TURN, SUDDEN STOP OR CRASH. Your child<br />
can be injured in a vehicle even if you are not<br />
in a crash. Sudden braking and sharp turns<br />
can injure your child if the child restraint is not<br />
properly installed or if your child is not properly<br />
secured in the child restraint.<br />
DO NOT use locking clip in booster mode.<br />
According to accident statistics,<br />
CHILDREN ARE SAFER WHEN PROPERLY<br />
RESTRAINED IN REAR VEHICLE<br />
SEATING POSITIONS, RATHER THAN<br />
FRONT SEATING POSITIONS. For a<br />
vehicle with a front passenger air bag, refer to<br />
your vehicle owner’s manual as well as these<br />
instructions for child restraint installation.<br />
NEVER LEAVE YOUR CHILD<br />
UNATTENDED.<br />
NEVER LEAVE A CHILD RESTRAINT<br />
UNSECURED IN YOUR VEHICLE. An<br />
unsecured child restraint can be thrown around<br />
and may injure occupants in a sharp turn,<br />
sudden stop or crash. Remove it or make sure<br />
that it is securely belted in the vehicle. If not<br />
using LATCH and tether, make sure LATCH<br />
and tether connectors are properly stored on<br />
back of seat.<br />
REPLACE THE CHILD RESTRAINT AFTER<br />
AN ACCIDENT OF ANY KIND. An accident<br />
can cause damage to the child restraint that<br />
you cannot see.<br />
DO NOT MODIFY YOUR CHILD<br />
RESTRAINT or use any accessories or parts<br />
supplied by other manufacturers.<br />
NEVER USE CHILD RESTRAINT IF IT HAS<br />
DAMAGED OR MISSING PARTS. Do not use<br />
a cut, frayed or damaged child restraint<br />
harness, LATCH belt or vehicle seat belt.<br />
14 15<br />
THE CHILD RESTRAINT CAN BECOME<br />
VERY HOT IF LEFT IN THE SUN. Contact with<br />
these parts can burn your child’s skin. Always<br />
touch the surface of any metal or plastic parts<br />
before putting your child in the child restraint.<br />
NEVER GIVE <strong>THIS</strong> CHILD RESTRAINT to<br />
someone else without also giving them this<br />
manual.<br />
NEVER USE A SECOND-HAND CHILD<br />
RESTRAINT or a child restraint whose history<br />
you do not know.<br />
DO NOT USE <strong>THIS</strong> child restraint without<br />
properly assembling it.
7.0 Height and Weight Limitations<br />
FAILURE TO USE CHILD RESTRAINT IN A MANNER APPROPRIATE FOR YOUR CHILD’S<br />
SIZE MAY INCREASE THE RISK OF SERIOUS INJURY OR DEATH. Instructions for the use of<br />
this child restraint differ greatly depending on the size of your child. Be sure you are using the child<br />
restraint in the correct mode and with the correct features for your child.<br />
7.1 WITH Built-In Harness<br />
Your child must meet all requirements:<br />
Weight: 20 to 70 lbs (mass between 9 and 31.8 kg)<br />
Height: 27 to 52 inches (69 and 132 cm) in height<br />
At least one year old and can sit upright unassisted<br />
The harness straps must be EVEN with or just<br />
ABOVE the child’s shoulders.<br />
7.2 WITHOUT Built-in Harness<br />
Your child must meet all requirements:<br />
Weight: 30 to 100 lbs<br />
(mass between 13.6 and 45 kg)<br />
Height: 38 to 57 inches<br />
(96 and 145 cm) in height<br />
Approximately 3-10 years of age<br />
The shoulder belt MUST lie across child’s<br />
shoulder as shown and the lap portion of the<br />
belt is positioned low on the child’s hips.<br />
Child’s ears are BELOW top of head support.<br />
If tops of ears are above top of head support,<br />
child is too large for seat.<br />
If child is between 30 and 70 lbs (13.6 and<br />
31.8 kg) and shoulders are below the<br />
shoulder belt guides, we highly recommend<br />
use of the built-in harness for as long as<br />
possible (up to 70 lbs (31.8 kg).<br />
16 17
7.3 WITHOUT Back Support<br />
Your child must meet all requirements:<br />
Weigh between 40 and 120 lbs.<br />
(mass between 18 and 54.4 kg),<br />
and are between 40 and 57 inches<br />
(101 and 145 cm) in height,<br />
Approximately 4-10 years of age<br />
The shoulder belt MUST lie across child’s<br />
shoulder as shown and the lap portion of the<br />
belt is positioned low on the child’s hips.<br />
When sitting on the booster seat, your child’s<br />
ears should be below the top of the vehicle seat<br />
cushion / head support.<br />
Your <strong>Graco</strong> booster seat can be used with or<br />
without the back support as long as all<br />
requirements are met.<br />
8.0 Choosing an Appropriate Vehicle Seat Location<br />
8.1 Vehicle Seat Location Requirements<br />
IMPROPER PLACEMENT OF THE CHILD RESTRAINT<br />
INCREASES THE RISK OF SERIOUS INJURY OR DEATH.<br />
Some seating positions in your vehicle may not be safe for this child restraint. Some vehicles do<br />
not have any seating positions that can be used safely with the child restraint. If you are not sure<br />
where to place the child restraint in your vehicle, consult your vehicle owner’s manual or call<br />
<strong>Graco</strong> Children’s Products Inc.,1-800-345-4109.<br />
Children are safer when properly<br />
restrained in rear vehicle seating positions.<br />
Whenever possible secure the child restraint in<br />
the center position of the seat directly behind<br />
the front seats. However, this position is<br />
sometimes equipped with a lap belt only and<br />
cannot be used when this child restraint is<br />
used without the built-in harness.<br />
18 19<br />
The vehicle seat must face forward.<br />
Do not use child restraints on rear-facing or<br />
side-facing vehicle seats.
8.2 Vehicle Seat Belt Requirements<br />
MANY SEAT BELT SYSTEMS ARE NOT SAFE TO USE<br />
WITH THE CHILD RESTRAINT. THE VEHICLE SEAT BELT<br />
MUST BE DESIGNED TO HOLD THE CHILD RESTRAINT<br />
TIGHTLY AT ALL TIMES. Pay careful attention to these systems; some of the seat belts that<br />
are not safe to use look very much like seat belts that are safe to use. If you are unsure,<br />
consult your vehicle owner’s manual or call <strong>Graco</strong> Children’s Products Inc., 1-800-345-4109.<br />
8.3 SAFE Vehicle Seat Belt Systems<br />
THE FOLLOWING BELT SYSTEMS CAN BE USED WITH YOUR CHILD RESTRAINT, IF the<br />
seat location meets all other requirements of these instructions and those in your vehicle owner's<br />
manual. LATCH can be used in place of the following vehicle belt systems if your vehicle is<br />
equipped with LATCH anchor points. Please refer to vehicle owners manual for LATCH locations.<br />
8.4 For Built-in Harness Only<br />
Lap Belts - Manually Adusted<br />
When buckled, the belt is tightened<br />
manually by pulling on the excess belt.<br />
Lap Belts with Automatic Locking<br />
Retractor (ALR)<br />
The automatic locking retractor will not<br />
permit the lap belt to lengthen once it is<br />
buckled. Tighten the belt by feeding the belt<br />
back into the retractor while pushing down<br />
hard on the child restraint.<br />
20 21
8.5 With OR Without Built-in Harness<br />
Combination LapShoulder Belt with<br />
Locking Latch Plate<br />
Once it is buckled, this type of belt has a<br />
latchplate that will not allow the lap portion<br />
of the belt to loosen. Belt is tightened by<br />
pulling hard on the shoulder portion of the<br />
vehicle belt while pushing down hard on<br />
the child restraint.<br />
Combination LapShoulder Belt with<br />
Sliding Latch Plate This belt has a<br />
latchplate that slides freely along the belt.<br />
This belt MUST be converted to prevent<br />
movement of the lap portion of the belt. You<br />
must use the locking clip provided with the<br />
child restraint, unless your vehicle's seat<br />
belt can be converted in another way as<br />
described in your vehicle owner's manual.<br />
When using booster seat WITHOUT the<br />
built-in harness, locking clip is NOT<br />
to be used.<br />
8.6 To Install Locking Clip<br />
1. Tighten the buckled belt by pushing down hard on the child restraint and pulling hard on the<br />
shoulder belt.<br />
2. While pushing down on seat, pinch the two straps together behind the buckle tongue. Unbuckle<br />
the belt without allowing it to slip.<br />
3. Attach locking clip to lap and shoulder belts as shown .<br />
4. Re buckle belt. Check that lap belt does not move<br />
by pulling hard. If belt loosens or lengthens, repeat<br />
procedure.<br />
Remove locking clip when not using child restraint. Store<br />
under it’s tab on the rear of seat.<br />
Test installation to see if child restraint is secure.<br />
If not secure, additional belt tightening may be required:<br />
<br />
Unbuckle vehicle seat belt.<br />
Hold belts together and remove locking clip.<br />
12” (1.25 cm)<br />
Locking clip<br />
Shorten length of lap belt portion slightly by pulling belt<br />
through latch plate. Re-attach locking clip.<br />
Buckle vehicle seat belt. Press child restraint further down<br />
into vehicle seat cushion to help buckle vehicle seat belt. Test<br />
installation to see if child restraint is secure. If not secure,<br />
repeat above steps until secure.<br />
22 23
8.7 UNSAFE Vehicle Belt Systems<br />
DO NOT USE ANY OF THE FOLLOWING SYSTEMS TO SECURE THE CHILD RESTRAINT.<br />
LATCH can be used IN PLACE OF the following unsafe belt systems if your vehicle is equipped<br />
with LATCH anchor points. Please refer to the vehicle owners manual for LATCH locations.<br />
NEVER USE unsafe belt systems.<br />
Lap Belts with Emergency<br />
Locking Retractor (ELR)<br />
This lap belt stays loose and can move<br />
until it locks in a crash or sudden stop.<br />
Combination LapShoulder Belt with<br />
Retractor<br />
Each strap has a retractor at one end and<br />
is attached to the latch plate at the other<br />
end.<br />
Passive Restraint - Lap or Shoulder Belt<br />
Mounted on Door<br />
Passive Restraint -<br />
Lap Belt with Motorized Shoulder Belt<br />
DO NOT use vehicle belts that are<br />
attached to the door in any way or that<br />
move along a track to automatically<br />
surround the passenger when the door is<br />
closed.<br />
Lap Belts Forward of Seat Crease<br />
Vehicle seat belts located forward of<br />
seat crease may not securely hold child<br />
restraint. Check vehicle owner’s manual or<br />
see vehicle dealer for car seat installation<br />
requirements.<br />
If approved for use with child restraint,<br />
install child restraint and check for secure<br />
installation by pulling child restraint front<br />
to back. If child restraint slides forward,<br />
DO NOT use these seat belts.<br />
24 25
9.0 LATCH<br />
9.1 What is LATCH?<br />
United States Federal Motor Vehicle Safety Standards have defined a new<br />
system for installing child restraints in vehicles. The system is called LATCH.<br />
LATCH stands for: Lower Anchors and Tethers for CHildren.<br />
LATCH in the vehicle consists of a top tether anchor point and two lower anchor<br />
points.<br />
Some vehicle owner manuals use the term ISOFIX to identify the new child<br />
restraint anchor system. This child restraint with LATCH can also be used in<br />
vehicle seating positions equipped with ISOFIX.<br />
Newer vehicles have one or more seating positions with LATCH anchor points.<br />
If vehicle is equipped with LATCH, the vehicle lower anchor points may be<br />
visible at the vehicle seat crease. If not visible, they may be marked with this<br />
symbol .<br />
CHECK vehicle owner’s manual for vehicle top tether anchor locations. They<br />
may be identified using one of the anchor symbols as shown .<br />
ONLY use LATCH on a child restraint in a seating position recommended by<br />
vehicle manufacturer.<br />
NOTE: Some vehicle manufacturers have lower maximum weight ratings for<br />
LATCH anchors, so you must consult your vehicle owner’s manual or call the<br />
vehicle manufacturer to confirm the limits on your vehicle’s LATCH anchors.<br />
Use vehicle belt (not LATCH connectors) for installations with children<br />
weighing more than 48 pounds (21.7 kg).<br />
See your vehicle<br />
owner’s manual for<br />
exact locations, anchor<br />
identification, and<br />
requirements for use<br />
with a child restraint.<br />
Vehicle<br />
Seat Crease<br />
Vehicle Lower<br />
Anchor Points<br />
26 27<br />
Vehicle Top Tether<br />
Anchor Points<br />
Typical seat in a<br />
passenger vehicle.<br />
Other vehicle types<br />
may have different<br />
LATCH locations.
9.2 LATCH System<br />
LATCH consists of a permanently<br />
attached lower anchor belt and a top<br />
tether strap.<br />
ONLY use LATCH in a seating<br />
position recommended by vehicle<br />
manufacturer.<br />
Vehicle Top Tether<br />
Anchor Point<br />
Vehicle Lower<br />
Anchor Points<br />
LATCH lower vehicle anchor points<br />
are defined as 11 inches from the<br />
center of one LATCH anchor to the<br />
center of another LATCH anchor.<br />
If allowed by your Vehicle Owners<br />
Manual, the center seating position<br />
maybe used if the anchor spacing is<br />
11” or greater.<br />
Child Restraint<br />
Top Tether<br />
10.0 Using Child Restraint WITH Built-in Harness<br />
FAILURE TO PROPERLY ADJUST THE HARNESS STRAPS<br />
FOR YOUR CHILD INCREASES THE RISK OF SERIOUS<br />
INJURY OR DEATH IN THE EVENT OF A SHARP TURN,<br />
SUDDEN STOP OR CRASH. Snugly adjust the belts provided with this child restraint around your<br />
child. A snug strap should not allow any slack. It lies in a relatively straight line without sagging. It<br />
does not press on the child’s flesh or push the child’s body into an unnatural position.<br />
1. Loosen the harness straps by lifting the<br />
harness adjuster lever at front of seat near<br />
the adjustment strap and pulling the straps<br />
toward you .<br />
2. Open harness clip .<br />
Lower<br />
Anchor Belt<br />
28 29
3. Unbuckle harness straps .<br />
4. Check the crotch strap: Choose the<br />
position that is closest to but not under<br />
your child.<br />
To change crotch strap position, push crotch<br />
belt up through the bottom of the child<br />
restraint and grab it from the top to pull out .<br />
Reinsert crotch strap in the desired position.<br />
Make sure crotch strap is not twisted when<br />
reinserting into slot. Pull up on it to make sure<br />
it is secure.<br />
<br />
<br />
<br />
5. Pull on harness to make sure it is secure .<br />
REMEMBER to check the shoulder straps and<br />
crotch strap position as your child grows and<br />
reposition them depending on your child’s size.<br />
The harness straps must be even with or just<br />
above the shoulders.<br />
30 31
11.0 Securing the Child Restraint in Your Vehicle<br />
4. Tighten vehicle seat belt<br />
FAILURE TO PROPERLY SECURE THE CHILD RESTRAINT IN<br />
THE VEHICLE INCREASES THE CHILD’S RISK OF<br />
SERIOUS INJURY OR DEATH IN THE EVENT OF A SHARP<br />
Push down hard with your knee or free hand<br />
in the middle of the child restraint .<br />
Then pull and tighten the vehicle belt.<br />
TURN, SUDDEN STOP OR CRASH. Carefully follow these instructions and those in your vehicle For more information on how to tighten the<br />
owner’s manual to be sure your child restraint is properly positioned and held tightly at all times.<br />
belt for your seat belt system, see Section 8.0<br />
Choosing an Appropriate Vehicle Seat Location,<br />
p.19, or your vehicle owner’s manual.<br />
11.1 Using a Child Restraint WITH a Built-in Harness 5. If a vehicle top tether anchor is available,<br />
11.2 With a Vehicle Lap or Lap/shoulder Belt:<br />
Lower anchors must be stored when using vehicle belt.<br />
See Section 21.1, Storing LATCH, page 59.<br />
secure the tether to hold seat in place.<br />
See Section 21.0 Using the Tether, page 58.<br />
When not using the tether, hook it on the tether<br />
storage bar on the rear of the seat, see page 59.<br />
1. Place the child restraint firmly against the back of a<br />
forward-facing vehicle seat.<br />
6. Safety Check for Secure Installation<br />
Perform this test every time you drive with your child.<br />
Twist and pull child restraint forward and to<br />
2. Thread the seat belt through the belt slot openings:<br />
both sides to make sure the vehicle belt does not<br />
For Lap/Shoulder belt<br />
lengthen or loosen and the child restraint does not<br />
easily move. The child restraint should not move<br />
side to side or forward more than 1 inch (2.5 cm). .If<br />
For Lap-only belt<br />
child restraint is loose or not secure, repeat procedure<br />
3. Buckle the vehicle belt. The vehicle belt should not be<br />
twisted.<br />
32<br />
OR find another location for the child restraint, see<br />
Section 8.0 Choosing an Appropriate Vehicle Seat<br />
Location, p. 19.<br />
33
11.3 With LATCH<br />
Use vehicle belt (not LATCH connectors) for<br />
installations with children weighing more than<br />
48 pounds (21.7 kg). NOTE: Some vehicle<br />
manufacturers have lower maximum weight<br />
ratings for LATCH anchors, so you must<br />
consult your vehicle owner’s manual or call the<br />
vehicle manufacturer to confirm the limits on your<br />
vehicle’s LATCH anchors.<br />
1. Unhook LATCH from storage bars on the<br />
sides of the seat. For ease of installation, extend<br />
LATCH to its maximum length.<br />
2. Place the child restraint firmly against the back<br />
of a forward-facing vehicle seat.<br />
3. Hook LATCH Connectors to vehicle lower<br />
anchors . Pull firmly on Connectors<br />
to be sure they are attached. Belt must<br />
lay flat and not be twisted.<br />
4. Tighten LATCH by pushing down hard on<br />
child restraint and pulling the adjustment belt .<br />
<br />
6. NEVER put two LATCH connectors on<br />
one vehicle LATCH anchor unless specifically<br />
allowed by the vehicle manufacturer .<br />
7. All LATCH seating positions have<br />
tether anchors. Secure the top of the seat<br />
using the tether strap. See Section 21.0 Using<br />
the Tether, page 58.<br />
<br />
8. Safety Check for Secure Installation<br />
Perform this test every time you drive with<br />
your child.<br />
Twist and pull child restraint forward and to<br />
both sides to make sure the LATCH belt does<br />
not lengthen or loosen and the child restraint<br />
does not easily move. The child restraint<br />
should not move side to side or forward more<br />
<br />
than 1 inch (2.5 cm). .If child restraint is<br />
loose or not secure, repeat procedure OR find<br />
another location for the child restraint, see<br />
Section 8.0 Choosing an Appropriate Vehicle<br />
5. If you need to remove LATCH to readjust,<br />
push button on LATCH buckle to loosen strap.<br />
34<br />
Seat Location, p. 19.<br />
35
12.0 Securing Your Child in the Child Restraint<br />
FAILURE TO PROPERLY SECURE YOUR CHILD IN THE CHILD<br />
RESTRAINT INCREASES THE RISK OF SERIOUS INJURY OR<br />
DEATH IN THE EVENT OF A SHARP TURN, SUDDEN STOP<br />
OR CRASH. In a crash, the child restraint provides NO protection for your child unless the harness<br />
straps are properly secured. Follow these instructions carefully to properly secure your child.<br />
ADJUST THE HARNESS SYSTEM SNUGLY<br />
EVERY TIME you place your child in the child<br />
restraint.<br />
Avoid bulky clothing.<br />
1. Place child in child restraint with child’s back flat<br />
against back of child restraint.<br />
2. Place harness straps over child’s shoulders<br />
and insert tongues into buckle until they click<br />
into place .<br />
CHECK that straps are not twisted.<br />
CHECK that harness is securely latched by pulling up<br />
on straps.<br />
DO NOT use child restraint if harness does not latch.<br />
<br />
CLICK!<br />
3. Fasten harness clip . Position harness clip<br />
at middle of child’s chest, level with<br />
armpits.<br />
4. Tighten the harness straps by pulling the<br />
adjustment strap on the front of the seat .<br />
36 37
5. The harness straps must be even with or<br />
ust above the shoulders .<br />
To adjust head support/harness strap height<br />
see page 39.<br />
6. Make sure straps are flat and snug<br />
against child’s shoulders and thighs.<br />
You should not be able to pinch the<br />
harness straps. A snug strap should not allow<br />
any slack. It lies in a relatively straight line<br />
without sagging. It does not press on the child’s<br />
flesh or push the child’s body into an unnatural<br />
position.<br />
CHECK that child’s ears are BELOW top of<br />
head support. If tops of ears are above top of<br />
head support, child is too large for harnessed<br />
use.<br />
<br />
<br />
13.0 Adjusting Head Support/Harness Straps<br />
When using with built-in harness always<br />
use one of the bottom 4 height positions.<br />
<br />
BEFORE adjusting the head support height,<br />
have your child lean forward slightly.<br />
Squeeze the red adjustment handle on<br />
top of seat and pull head support up until it<br />
snaps into one of the bottom 4 height<br />
positions .<br />
To lower, squeeze red adjustment handle<br />
and push down.<br />
CHECK to make sure it is securely snapped<br />
into one of the bottom 4 height positions by<br />
pulling up on head support.<br />
The harness straps must be even with or<br />
just above the shoulders as shown by dotted<br />
line .<br />
38 39
14.0 Check Harness System<br />
20 to 70 lbs (mass between 9 and 31.8 kg)<br />
and at least one year old.<br />
Harness straps/head support must be at or just<br />
above shoulders.<br />
To adjust head support/harness strap height see<br />
page 39.<br />
To prevent serious injury or death:<br />
<br />
<br />
<br />
<br />
<br />
<br />
<br />
15.0 Harness Removal<br />
To use without built in harness:<br />
1. Remove harness straps.<br />
Open harness clip and harness buckle .<br />
2. Face the rear of the seat and remove the<br />
belt straps from metal junction plate as<br />
shown .<br />
3. Remove crotch strap by pushing the strap<br />
retainer on bottom of seat, up through slot.<br />
40 41
4. Grab the crotch strap buckle and pull it<br />
completely out .<br />
5. Pull on the adjustment strap on the front<br />
of the seat to lock the metal junction plate into<br />
place.<br />
<br />
6. Grab hold of the shoulder straps and pull<br />
them out of their slots on the seat pad.<br />
Remove body support and crotch pad. <br />
<br />
7. On the rear of the seat, detach 2 lower seat<br />
pad elastic straps from hooks as shown in .<br />
8. Also detach the elastic straps that are<br />
threaded through the vehicle belt guides on the<br />
sides of the seat as shown in . Repeat on<br />
other side.<br />
9. Pull the seat pad out of the way to reveal the<br />
red buttons as shown in the seating area .<br />
Slide the buttons to release the back support<br />
from the base and lower it into a flat position.<br />
Hold the back support to avoid it from falling<br />
back and hitting something.<br />
42 43
10. Remove harness straps from arms as<br />
shown in .<br />
Store the body support, harness covers, crotch<br />
pad cover and harness straps<br />
in safe place for future use.<br />
Harness Strap<br />
Arm<br />
T-slot<br />
<br />
12. Tuck seat pad in between the gap of the<br />
back support and seat area of the booster seat<br />
to allow 2 elastic straps to show at the rear of<br />
the seat.<br />
13. Attach 2 seat pad elastic straps onto the<br />
hooks on the rear of the child restraint as<br />
shown in .<br />
14. Pull elastic strap on the seat pad through<br />
the vehicle belt guide on side of seat and<br />
attach to hook as shown.<br />
Repeat on other side .<br />
11. Move seat pad fabric out of the way then<br />
<br />
raise seat back so that both arms LOCK into<br />
the gutters .<br />
You should hear a CLICK when the arms lock<br />
Reverse instructions to reinstall harness.<br />
into the gutters.<br />
See Section 10.0, page 29-31 for the correct<br />
MAKE sure to keep the gutters clear of any<br />
path for the harness.<br />
obstructions. KEEP<br />
GUTTERS CLEAR<br />
44 45
16.0 Using Your Child Restraint WITHOUT Built-in Harness<br />
FAILURE TO PROPERLY SECURE YOUR CHILD IN THE CHILD<br />
RESTRAINT INCREASES THE RISK OF SERIOUS INJURY OR<br />
DEATH IN THE EVENT OF A SHARP TURN, SUDDEN STOP OR<br />
CRASH. In a crash, the child restraint provides NO protection for your child unless the vehicle lap/<br />
shoulder belt is properly secured. Follow these instructions carefully to properly secure your child.<br />
WARNING: Use only the vehicle lap and<br />
shoulder belt system when restraining the child<br />
in the booster seat. LATCH will not secure your<br />
child in the booster seat .<br />
Vehicle belts MUST lay flat against child and<br />
MUST not be twisted.<br />
NEVER use a vehicle lap-only belt across front<br />
of child .<br />
<br />
<br />
DO NOT use shoulder belt loose<br />
or positioned under arm .<br />
DO NOT place shoulder belt behind child’s<br />
back .<br />
Lap portion of lap/shoulder belt MUST be low<br />
and snug on hips, just touching thighs.<br />
DO NOT allow child to slide<br />
down in booster seat .<br />
If child will not keep vehicle belt properly<br />
positioned, DO NOT use this booster seat.<br />
Use a different child restraint system.<br />
DO NOT position vehicle belt over top of the<br />
armrests .<br />
INCORRECT<br />
46 47<br />
<br />
INCORRECT<br />
<br />
INCORRECT INCORRECT<br />
<br />
<br />
INCORRECT
Vehicle seat headrest should not create a<br />
gap between vehicle seat and booster seat<br />
. The front of booster seat MUST NOT<br />
hang over front of vehicle seat .<br />
<br />
INCORRECT INCORRECT<br />
<br />
17.0 Securing Child & Booster Seat in Vehicle<br />
Use only the vehicle lap and shoulder belt system<br />
when restraining the child in the booster seat.<br />
1. Place booster seat firmly against the back of<br />
a forward-facing vehicle seat equipped with a<br />
lap/shoulder belt only.<br />
2. Place child in booster seat with child’s back<br />
flat against back of booster seat.<br />
3. Position lap/shoulder belt through shoulder<br />
belt guide not underneath shoulder belt<br />
guide . Belt should pass over vehicle belt<br />
guide . Fasten buckle and pull up on the<br />
shoulder belt to tighten.<br />
4. If shoulder belt lies across child’s neck,<br />
head or face, redirect belt over shoulder by<br />
adjusting the head support setting, See page<br />
50, Adjusting Head Support in Booster Mode.<br />
5. The shoulder belt MUST lie across child’s<br />
shoulders in red zone as shown .<br />
48 49
18.0 Adjusting Head Support in Booster Mode<br />
BEFORE adjusting the head support height,<br />
have your child lean forward slightly.<br />
Squeeze the red adjustment handle on<br />
top of seat and pull back support up until it<br />
snaps into one of the 5 height positions .<br />
To lower, squeeze red adjustment handle<br />
and push down.<br />
CHECK to make sure it is securely snapped<br />
into one of the 5 height positions by pulling<br />
up on head support.<br />
The shoulder belt guides must be even with<br />
or just above the shoulders as shown by<br />
dotted line .<br />
<br />
<br />
<br />
19.0 Removing Back Support<br />
To use booster seat WITHOUT back<br />
support, remove harness straps if attached<br />
(see section 15.0 Harness Removal, p.41-45)<br />
then continue with the following steps:<br />
1. Detach 2 lower elastic straps from rear of<br />
seat as shown .<br />
2. Detach elastic strap from the hooks on the<br />
seat pad as shown. Repeat on other side .<br />
50 51
3. Pull the seat pad out of the way to reveal<br />
red buttons as shown in . Slide the buttons<br />
to release the back support from the base and<br />
lower it into a flat position.<br />
When removing back support, you must<br />
support the back support when sliding the red<br />
buttons that disengage the back support from<br />
the base. Make sure all hands, fingers and<br />
other objects are not behind the back support<br />
when removing it.<br />
4. Move seat pad fabric out of the way and<br />
squeeze red buttons together to release back<br />
support from seat. Pull seat and back support<br />
apart .<br />
<br />
<br />
5. Once back support is separated , store<br />
back support with all the harness straps, head<br />
support, body support and crotch pad cover in<br />
safe place.<br />
6. Reattach the elastic straps at the back of the<br />
seat and through the vehicle belt guide on<br />
the sides of seat as shown.<br />
7. Seat is ready to install.<br />
To reattach back support if needed, reverse steps<br />
from p. 53 to p. 51.<br />
52 53
20.0 Securing Child in Vehicle with Shoulder Belt<br />
Positioning Clip<br />
The shoulder belt MUST lie across child’s<br />
shoulders in red zone as shown .<br />
If shoulder belt lies outside this zone, the<br />
shoulder belt positioning clip MUST be used.<br />
To attach clip to booster seat:<br />
1. Insert the loop end of strap through the slot<br />
on rear of seat exactly where shown .<br />
There is a slot on each side of booster seat,<br />
the shoulder belt positioning clip MUST be<br />
attached through the slot closest to where the<br />
vehicle shoulder belt lies across the child.<br />
<br />
<br />
2. Pass the clip and the strap through the loop<br />
end as shown and pull strap up.<br />
3. NOTE: Free end of strap should face<br />
front of seat.<br />
54 55
4. Slide the vehicle shoulder belt onto the clip as shown and pull free end of strap down to<br />
tighten clip against the child’s shoulder.<br />
The lap portion MUST pass through the vehicle belt guide and be positioned low on the hips.<br />
The belt MUST NOT be twisted.<br />
<br />
Shoulder belt<br />
positioning clip<br />
Shoulder belt<br />
positioning clip<br />
<br />
5. Lap portion of lap/shoulder belt MUST be low and<br />
snug on hips, just touching thighs.<br />
DO NOT allow child to slide down in booster seat .<br />
REAR VIEW OF CHILD<br />
SITTING IN SEAT<br />
CORRECT<br />
56 57<br />
<br />
INCORRECT
21.0 Using the Tether<br />
All LATCH seating positions have tether anchors. Always use tether if a vehicle tether anchor is<br />
available, check your vehicle owner’s manual for the tether anchor location(s). If your vehicle is<br />
not equipped with a tether anchor, it may be possible to install one. Contact your vehicle<br />
dealership for the proper anchor location and installation.<br />
You may purchase tether anchor parts kit by calling <strong>Graco</strong> Customer Service at 1-800-345-4109.<br />
1. Check that tether is securely attached to<br />
child restraint.<br />
2. Fasten tether clip to anchor point .<br />
3. Tighten adjustment belt to remove any slack .<br />
4. To loosen, push button while pulling on the belt<br />
as shown .<br />
<br />
<br />
<br />
21.1 Storing Lower Anchors and Tether (LATCH)<br />
1. For ease of storing, extend LATCH to its<br />
maximum length.<br />
2. Locate the storage bars on back of<br />
child restraint .<br />
3. Fasten ends of tether and lower anchors<br />
onto their respective storage bars as shown<br />
.<br />
4. Tether and lower anchors storage should<br />
look like this when complete .<br />
58 59<br />
<br />
Tether<br />
Lower<br />
anchors<br />
Storage bars located<br />
on each side at the<br />
back of the seat<br />
<br />
Lower<br />
anchors
22.0 Airplane Use<br />
This restraint is certified for use in Motor Vehicles.<br />
It is certified for use in Aircraft ONLY when used with the built-in harness.<br />
When used as a booster WITHOUT the harness, this restraint is NOT CERTIFIED for aircraft use<br />
because aircraft seats do not have a shoulder belt.<br />
Important points to remember:<br />
1. Airlines have some restrictions about the use of child restraints.<br />
2. Install your car seat on an airplane in the same way it is installed in an automobile with a lap<br />
belt (see Section 11.1, Using Child Restraint WITH a Built-in Harness, p. 32).<br />
3. Check that the airplane seat belt holds the child restraint securely in place at all times.<br />
23.0 Accessories (on certain models ONLY)<br />
23.1 Body Support & Harness Covers<br />
To prevent ejection in sudden stop or crash:<br />
Never allow body support to bunch or fold behind child.<br />
Make sure that harness covers do not interfere with<br />
placement of the chest clip at armpit level.<br />
Body support is not to be used by children over 35lbs.<br />
60 61
24.0 Recline Foot<br />
Your child restraint has 3 recline positions: adjust<br />
recline foot before installing child restraint.<br />
1. To recline seat, pull recline handle out and<br />
tilt seat back to extend foot as shown .<br />
2. To set seat to upright position, pull recline<br />
handle out and tilt seat forward to retract<br />
foot .<br />
<br />
<br />
<br />
<br />
<br />
<br />
25.0 Care and Maintenance<br />
Continuous use of child restraint may cause damage to vehicle seat. Use a child restraint mat,<br />
towel or thin blanket to protect upholstery.<br />
Metal and plastic parts: clean with mild soap and cool water. No bleach or detergents.<br />
Harness straps and LATCH straps: spot clean with damp sponge. Do not immerse the straps in<br />
water. Doing so may weaken the straps.<br />
Buckle should fasten with a “click”, if not, rinse buckle with warm water. DO NOT USE SOAPS<br />
or LUBRICANTS. DO NOT use household detergents. Never lubricate buckle.<br />
If buckle or harness adjuster sticks or will not remain tight, check for foreign objects such as<br />
food, dirt, etc. Remove objects with tweezers and/or clean with a cotton swab. If you cannot get<br />
the harness to remain tight with the buckle securely locked, do not use this child restraint.<br />
62 63
26.0 To Remove Head Support and Seat Covers<br />
HEAD SUPPORT COVER: clean with a damp<br />
sponge using mild soap and cool water. If<br />
necessary, cover may be removed for<br />
cleaning.<br />
1. Remove harness and crotch straps (see<br />
Section 15.0, Harness Removal, p.41-45).<br />
2. Remove elastic loops from head support as<br />
indicated in .<br />
3. Remove head support cover as shown.<br />
4. Machine wash cover in cold water on<br />
delicate cycle and drip-dry. DO NOT USE<br />
BLEACH.<br />
5. To put the head support cover back on,<br />
reverse preceding instructions.<br />
<br />
SEAT COVER: clean with a damp sponge<br />
using mild soap and cool water. If necessary,<br />
cover may be removed for cleaning.<br />
1. Remove harness and crotch straps (see<br />
Section 15.0, Harness Removal, p.41-45).<br />
2. Remove elastic loops from seat as indicated<br />
in .<br />
3. Remove seat cover as shown.<br />
4. Machine wash cover in cold water on<br />
delicate cycle and drip-dry. DO NOT USE<br />
BLEACH.<br />
5. To put the seat cover back on, reverse<br />
preceding instructions.<br />
64 65<br />
<br />
Hook and loop<br />
attachment tape<br />
Hook and loop<br />
attachment tape
Notes Notes<br />
66 67
27.0 Replacement Parts, Warranty and Owner’s<br />
Manual Storage<br />
To purchase parts or accessories or for warranty information in the United States,<br />
please contact us at the following:<br />
www.gracobaby.com<br />
or<br />
1-800-345-4109<br />
Your Owner’s Manual can be stored on<br />
the bottom of the seat inside the slot in the<br />
footrest as shown.<br />
68