CADD External Power Source - Smiths Medical
CADD External Power Source - Smiths Medical
CADD External Power Source - Smiths Medical
Create successful ePaper yourself
Turn your PDF publications into a flip-book with our unique Google optimized e-Paper software.
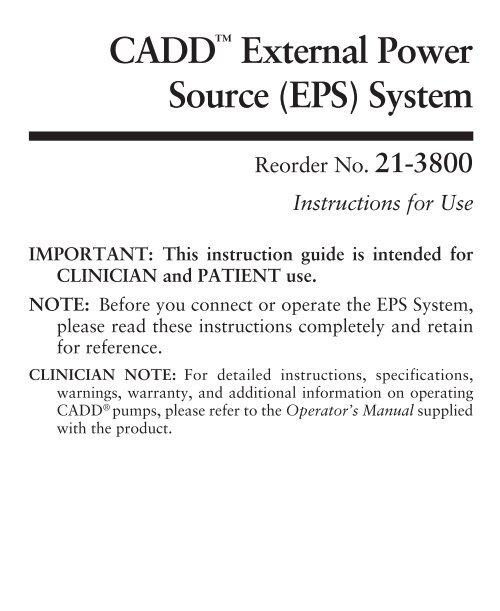
<strong>CADD</strong> <br />
<strong>External</strong> <strong>Power</strong><br />
<strong>Source</strong> (EPS) System<br />
Reorder No. 21-3800<br />
Instructions for Use<br />
IMPORTANT: This instruction guide is intended for<br />
CLINICIAN and PATIENT use.<br />
NOTE: Before you connect or operate the EPS System,<br />
please read these instructions completely and retain<br />
for reference.<br />
CLINICIAN NOTE: For detailed instructions, specifications,<br />
warnings, warranty, and additional information on operating<br />
<strong>CADD</strong> ® pumps, please refer to the Operator’s Manual supplied<br />
with the product.<br />
1
Table of Contents<br />
Introduction to the <strong>CADD</strong> <strong>External</strong> <strong>Power</strong> <strong>Source</strong> (EPS)<br />
System ............................................................................... 3<br />
Description of the EPS System ................................................. 3<br />
Charging the <strong>Power</strong> Pack ......................................................... 5<br />
Connecting the <strong>Power</strong> Pack to the <strong>CADD</strong>-Prizm ® Pump ......... 8<br />
Connecting the <strong>Power</strong> Pack and Battery Adapter to<br />
<strong>CADD</strong>-1 ® , <strong>CADD</strong>-PCA ® , <strong>CADD</strong>-PLUS ® , and <strong>CADD</strong>-TPN ®<br />
pumps ............................................................................... 9<br />
Detaching the Battery Adapter from the <strong>Power</strong> Pack ............... 11<br />
EPS System Troubleshooting Chart .......................................... 12<br />
Warnings ................................................................................. 16<br />
Battery Maintenance ................................................................ 18<br />
System Specifications (Nominal) .............................................. 19<br />
Limited Warranty .................................................................... 23<br />
SYMBOLS<br />
2<br />
CAUTION: Federal (USA) law restricts this<br />
device to sale by or on the order of a physician.<br />
Collect Separately
Introduction to the <strong>CADD</strong> <strong>External</strong> <strong>Power</strong> <strong>Source</strong> (EPS)<br />
System<br />
The <strong>CADD</strong> <strong>External</strong> <strong>Power</strong> <strong>Source</strong> (EPS) System is designed to<br />
provide an alternative source of power for the following pumps:<br />
<strong>CADD</strong>-1 ® , <strong>CADD</strong>-PCA ® , <strong>CADD</strong>-PLUS ® , <strong>CADD</strong>-TPN ® , and<br />
<strong>CADD</strong>-Prizm ® ambulatory infusion pumps.<br />
Description of the EPS System<br />
The following EPS System components are used with all pumps:<br />
• <strong>Power</strong> pack with replaceable battery. The power pack<br />
contains a rechargeable battery that can be replaced.<br />
However, the replaceable battery is not intended to be<br />
changed by the patient or the clinician.<br />
Charge the battery using the Battery Refresh Cycle before<br />
first use, every 30 days while in regular use, at least once<br />
every 6 months while in storage, or if the battery shows<br />
signs of reduced capacity. The Battery Refresh Cycle<br />
button is located on the top of the power pack. See the<br />
Battery Maintenance section for more information.<br />
CAUTION: Failure to recharge or refresh the battery during<br />
prolonged storage may cause deep battery discharge,<br />
leading to premature battery replacement in the power<br />
pack.<br />
3
• AC adapter. The AC adapter has three prongs that plug<br />
into an AC wall outlet. You will use the AC adapter to<br />
recharge the power pack. You may also use the AC<br />
adapter with the power pack to run the pump.<br />
The AC adapter can also be plugged directly into the<br />
<strong>CADD</strong>-Prizm ® pump to provide power from the wall<br />
outlet.<br />
In addition, the following components are used with all pumps<br />
except the <strong>CADD</strong>-Prizm ® pump:<br />
• Battery adapter. The battery adapter fits into the pump’s<br />
battery compartment in place of a 9-volt battery. The<br />
battery adapter connects the pump to the power pack.<br />
• Notched battery door. The notched battery door covers the<br />
pump’s battery compartment. The notch provides an<br />
opening for the battery adapter cable.<br />
4
Charging the <strong>Power</strong> Pack<br />
Before each use, recharge the power pack as described below.<br />
Within the charging temperature range [10°C to 35°C (50°F to<br />
95°F)], the power pack will become fully charged in approximately<br />
7 hours or less.<br />
NOTE: Use the Battery Refresh Cycle to discharge and recharge<br />
the power pack automatically (see the “Battery Maintenance”<br />
section.):<br />
• before first use<br />
• every 30 days while in regular use<br />
• at least once every 6 months while in storage<br />
To charge the power pack<br />
1. Attach the AC adapter connector to the power pack INPUT<br />
connector. (Figure 1)<br />
NOTE: The power pack may remain attached to the pump during<br />
charging. Running the pump while charging the power pack<br />
will not drain power from the power pack.<br />
2. Plug the AC adapter’s 3-prong plug into an AC wall outlet.<br />
CAUTION: Do not remove the grounding prong of the AC<br />
adapter or use a 2-prong adapter with the AC adapter.<br />
5
Attach AC adapter<br />
connector to<br />
power pack<br />
6<br />
Connector Grip<br />
POWER PACK<br />
INPUT<br />
↓ OUTPUT<br />
Observe indicator<br />
lights<br />
3/23/99 D. Zurn<br />
«EPS IFU, Cone AC & PPack»<br />
Plug AC adapter into AC<br />
wall outlet<br />
Figure 1. Attaching the AC adapter to the power pack INPUT<br />
connector. (Your AC adapter and power pack may or<br />
may not be supplied with the connector grips shown.)
Charging the <strong>Power</strong> Pack (continued)<br />
3. Observe the power pack’s indicator lights:<br />
• The charging (amber) indicator light shows the power pack<br />
is charging.<br />
Charging<br />
indicator<br />
(amber)<br />
• You may use the power pack when the ready (green)<br />
indicator light comes on.<br />
Ready<br />
indicator<br />
(green)<br />
• If neither light is on, check the connections and AC outlet.<br />
(Refer to the Troubleshooting Chart for more information<br />
about the indicator lights).<br />
7
Connecting the <strong>Power</strong> Pack to the <strong>CADD</strong>-Prizm ® Pump<br />
Before connecting the power pack to the <strong>CADD</strong>-Prizm ® pump,<br />
make sure the pump contains a good 9-volt battery.<br />
1. Open the <strong>Power</strong> jack cover<br />
on the side of the pump.<br />
<strong>Power</strong> jack<br />
2. Line up the red mark on the<br />
power pack’s output<br />
connector with the red mark<br />
on the pump. Push the<br />
connector forward until it<br />
stops. Do not twist or turn<br />
the connector. Grasp the<br />
connector directly behind<br />
the flared portion and pull<br />
lightly to assure that the<br />
connector is securely<br />
attached.<br />
CAUTION: Failure to push the connector all the way forward<br />
may result in an intermittent connection, and the connector<br />
may dislodge, causing a loss of power.<br />
3. Watch for the message “<strong>Power</strong> Pack Good” on the pump’s<br />
display. Then you can continue programming or operating the<br />
pump.<br />
CAUTION: If the <strong>CADD</strong>-Prizm ® pump is mounted on an IV<br />
pole, do not allow the power pack to hang as this may result<br />
in damage to the power pack.<br />
8
Connecting the <strong>Power</strong> Pack and Battery Adapter to<br />
<strong>CADD</strong>-1 ® , <strong>CADD</strong>-PCA ® , <strong>CADD</strong>-PLUS ® , and <strong>CADD</strong>-TPN ® pumps<br />
NOTE: The battery adapter should not be connected to the<br />
power pack while the battery adapter is being inserted or<br />
removed from the pump’s battery compartment.<br />
CAUTION: Do not attach the battery adapter connector directly<br />
to the AC adapter connector, since no alarm will sound to<br />
alert you if either the pump becomes disconnected from the<br />
AC outlet, or if a power outage occurs.<br />
1. Push down and hold the battery release<br />
button while sliding the door off.<br />
2. Insert the battery adapter into the pump’s<br />
battery compartment, bottom end first.<br />
3. Place the notched battery<br />
door (supplied with<br />
the battery adapter)<br />
halfway over the battery<br />
compartment, and press<br />
the battery adapter into<br />
12/18/96 D. Zurn<br />
Battery Adapter 12/96<br />
the compartment by pushing down on top<br />
of the door with your thumb. Make sure the<br />
battery adapter cable extends through the<br />
notch in the battery door.<br />
4. Slide the door closed. Ensure that the door<br />
is latched by trying to remove the door<br />
without pressing the release button.<br />
9<br />
11/26/96<br />
D. Zurn<br />
«Open<br />
Locking<br />
Door<br />
11/96»<br />
12/18/96 D. Zurn<br />
Close Notched<br />
Door 12/96
IMPORTANT: If a gap is present anywhere between the battery<br />
door and the pump housing, the door is not properly latched.<br />
5. Connect the power pack OUTPUT cable connector to the<br />
battery adapter connector:<br />
• Grasp the battery adapter connector in one hand. Grasp the<br />
flared grip of the power pack OUTPUT connector in the<br />
other hand.<br />
• Align the red dots on the connectors.<br />
• Push the connectors together using a steady, straight force<br />
until you feel a definite stop. DO NOT use a twisting or<br />
turning motion, or misalign the connectors.<br />
CAUTION: To avoid damaging the connectors or cables, do not<br />
use excessive force or instruments, such as pliers, to attach the<br />
connectors.<br />
10<br />
Align red dots on connectors<br />
12/4/98 D. Zurn<br />
«Align Dots Cone 12/98»
6. The pump will now begin the power up sequence, which<br />
consists of a series of beeps. After that, you will be ready to<br />
program or start the pump.<br />
NOTE: If you wish to recharge the power pack during an infusion,<br />
you may connect the AC adapter to the power pack and<br />
plug the AC adapter into a wall outlet. See Charging the<br />
<strong>Power</strong> Pack for instructions on attaching the AC adapter.<br />
Detaching the Battery Adapter from the <strong>Power</strong> Pack<br />
CAUTION: To avoid damaging the connectors or cables, do not<br />
use excessive force or instruments, such as pliers, to detach the<br />
connectors.<br />
1. Make sure the pump is stopped.<br />
2. Grasp the battery adapter connector with one hand.<br />
3. Grasp the flared grip of the power pack OUTPUT connector<br />
with the other hand.<br />
4. Pull the sliding collar back using a steady, straight pull. DO<br />
NOT use a twisting or turning motion.<br />
5. Separate the connectors.<br />
12/4/98 D. Zurn<br />
«Detach Cone 12/98»<br />
11
EPS System Troubleshooting Chart<br />
PROBABLE<br />
PROBLEM CAUSE SOLUTION<br />
The power<br />
pack is<br />
beeping<br />
(single beep<br />
every few<br />
seconds) and<br />
the amber<br />
LED is<br />
flashing.<br />
12<br />
The battery in the<br />
power pack has<br />
reached a low<br />
charge.<br />
Note: When the<br />
beeping starts, the<br />
pump will continue<br />
to run for<br />
approximately 30<br />
minutes. Then, the<br />
pump will sound a<br />
low battery alarm.<br />
<strong>CADD</strong>-Prizm ® pump:<br />
• Attach the AC adapter to the power<br />
pack and plug the AC adapter into a<br />
wall outlet. This stops the beeping and<br />
begins recharging the power pack; or<br />
• Disconnect the power pack. The<br />
backup 9 volt battery will continue to<br />
power the pump. Recharge the power<br />
pack.<br />
Other <strong>CADD</strong> ® pumps:<br />
• Attach the AC adapter to the power<br />
pack and plug the AC adapter into a<br />
wall outlet. This stops the beeping and<br />
begins recharging the power pack; or,<br />
• Stop the pump. Disconnect the<br />
battery adapter from the power pack,<br />
then remove the battery adapter from<br />
the pump.<br />
To continue your infusion, you may<br />
insert a fresh 9-volt alkaline or lithium<br />
battery into the pump.<br />
Note: If none of the above solutions<br />
work, and the power pack continues<br />
beeping, call your clinician.
EPS System Troubleshooting Chart (continued)<br />
PROBABLE<br />
PROBLEM CAUSE SOLUTION<br />
With the AC<br />
adapter<br />
attached,<br />
neither of the<br />
indicator<br />
lights come<br />
on.<br />
Connectors<br />
are difficult to<br />
attach.<br />
• The AC adapter<br />
connector is not<br />
properly attached<br />
to the power pack<br />
INPUT connector.<br />
• The AC wall outlet<br />
is not receiving<br />
power.<br />
• The connectors<br />
may have twisted<br />
or turned while<br />
being attached.<br />
• The connector<br />
pins of the power<br />
pack OUTPUT<br />
connector and/or<br />
the AC adapter may<br />
be bent.<br />
• Detach the connectors and reattach<br />
them according to the instructions in<br />
this guide. Do not twist or turn the<br />
connectors while attaching. Make sure<br />
the red dots of the connectors align.<br />
• Make certain there is power to the AC<br />
wall outlet.<br />
• If neither solution works, call your<br />
clinician.<br />
• Align the red dots and refer to the<br />
instructions on attaching the connectors.<br />
• Look at the connector pins. They<br />
should appear straight. If the pins are<br />
bent, call your clinician.<br />
WARNING: The EPS System should not<br />
be used if the connector pins are bent or<br />
damaged in any way.<br />
13
EPS System Troubleshooting Chart (continued)<br />
PROBABLE<br />
PROBLEM CAUSE SOLUTION<br />
With the AC<br />
adapter<br />
attached, the<br />
charging<br />
(amber)<br />
indicator light<br />
does not go<br />
off when<br />
expected.<br />
14<br />
• The power pack is<br />
too hot or too cold.<br />
• The battery in the<br />
power pack may not<br />
have been recharged<br />
sufficiently.<br />
• The battery in the<br />
power pack may need<br />
to be replaced.<br />
• Make sure the air temperature is<br />
within the charging temperature<br />
range. Allow the power pack to warm<br />
up or cool down if necessary.<br />
• Continue to recharge the power<br />
pack. If the charging indicator light<br />
remains on, the power pack’s battery<br />
needs to be replaced. Call your<br />
clinician.<br />
If you need to begin your infusion,<br />
do the following:<br />
<strong>CADD</strong>-Prizm ® pump<br />
• Make sure a good 9 volt battery is<br />
installed and begin your infusion; or,<br />
• Attach the AC adapter to the<br />
pump’s <strong>Power</strong> jack and plug the AC<br />
adapter into a wall outlet.<br />
Other <strong>CADD</strong> ® pumps<br />
• Insert a fresh 9-volt alkaline or<br />
lithium battery into the pump and<br />
begin your infusion.
EPS System Troubleshooting Chart (continued)<br />
PROBABLE<br />
PROBLEM CAUSE SOLUTION<br />
The AC adapter<br />
and/or the<br />
power pack<br />
feels too hot to<br />
touch.<br />
Amber light is<br />
flashing with<br />
no alarm.<br />
This may indicate a<br />
damaged AC adapter.<br />
NOTE: The AC adapter<br />
and/or power pack can<br />
become warm, especially<br />
during discharging. This<br />
is normal.<br />
Accidentally pressed the<br />
Battery Refresh Cycle<br />
button.<br />
Remove the AC adapter from the<br />
AC wall outlet; then contact your<br />
clinician.<br />
Unplug the AC adapter from the<br />
power pack to stop discharging.<br />
If desired, refer to instructions<br />
for recharging the power pack.<br />
15
Warnings<br />
To avoid serious personal injury, it is essential to observe the<br />
following warnings:<br />
• Do not use the system in the presence of flammable anesthetics<br />
or explosive gases.<br />
• Do not destroy the power pack by incineration. It may<br />
explode.<br />
• Do not allow the two battery contacts of a battery adapter<br />
that is connected to a charged power pack to simultaneously<br />
touch a piece of metal (coin or paper clip, for<br />
instance).<br />
• Do not use any of the EPS System components if they have<br />
been damaged, if wires become exposed due to wear, or if<br />
the connector pins are bent or damaged in any way. Fire,<br />
shock, or other hazard may result.<br />
• Do not remove the grounding prong of the AC adapter or use<br />
a 2-prong adapter with the AC adapter.<br />
• Do not use an extension cord to provide power to the AC<br />
adapter.<br />
• Do not place the cables where they may be subject to<br />
damage.<br />
• Do not use tools, instruments, or excessive force to detach<br />
the power pack, battery adapter, or AC adapter connectors.<br />
• Do not expose the EPS System components to rain, water,<br />
or moisture. Shock or other hazard may result.<br />
16
• Do not immerse the EPS System components in liquid.<br />
Clean only with a damp cloth.<br />
• Do not power the pump using the AC Adapter without the<br />
power pack (except the <strong>CADD</strong>-Prizm ® pump).<br />
• Do not use the AC adapter or any other component of the<br />
EPS System with any device or <strong>CADD</strong> ® pump not previously<br />
specified. Use only products or components with the<br />
EPS System that are recommended by <strong>Smiths</strong> <strong>Medical</strong> MD,<br />
Inc.<br />
• Do not use other AC adapters with the EPS System. Using<br />
AC adapters from other companies can damage the battery<br />
adapter, power pack, and the pump, and could be hazardous.<br />
• Do not remove the cover or back of any part of the EPS<br />
System without specific written instructions from <strong>Smiths</strong><br />
<strong>Medical</strong> MD, Inc. Except for the replacement battery, there<br />
are no user-serviceable parts.<br />
17
Battery Maintenance<br />
If the power pack shows signs of reduced capacity (for example,<br />
more frequent low battery alarms occur or run time is reduced),<br />
use the Battery Refresh Cycle feature to restore battery capacity.<br />
Normally, only one full cycle is needed; however, you may need to<br />
complete one or two additional cycles to fully restore battery<br />
capacity. You may also use the Battery Refresh Cycle periodically<br />
(for example, every 30 days) during use to maintain battery<br />
capacity. After using the Battery Refresh Cycle, recharging time<br />
will be extended.<br />
To use the Battery Refresh Cycle<br />
1. Attach the AC Adapter to the power pack INPUT connector.<br />
Plug the AC adapter into an AC wall outlet. Do not attach the<br />
power pack to a pump.<br />
NOTE: The AC adapter must remain plugged into the wall outlet<br />
and power pack throughout the entire cycle.<br />
2. Press the Battery Refresh Cycle button on the face of the<br />
power pack and place the power pack on a table. The amber<br />
light will flash while the battery is discharging.<br />
3. When the power pack is completely discharged (approximately<br />
8 hours for a fully charged battery), the amber light<br />
will stop flashing and will remain lit. The power pack will<br />
immediately begin recharging.<br />
4. Allow the power pack to recharge until the ready (green)<br />
indicator light comes on.<br />
18
System Specifications (Nominal)<br />
General<br />
Operating Temperature Range: +2°C to 40°C (36°F to 104°F).<br />
Charging/Battery Refresh Cycle Temperature Range: 10°C to<br />
35°C (50°F to 95°F). Because of the nature of rechargeable<br />
batteries, the power pack may not become charged if it is<br />
recharged at temperatures outside this range. Charging at these<br />
extreme temperatures may shorten the life of the batteries.<br />
Storage Temperature Ranges:<br />
Less than 30 days -20°C to 50°C (-4°F to 122°F)<br />
30 to 90 days -20°C to 40°C (-4°F to 104°F)<br />
Greater than 90 days -20°C to 30°C (-4°F to 86°F)<br />
Humidity: 10% to 90% R.H. noncondensing.<br />
<strong>Power</strong> Pack<br />
Charging Time: Charge before each use until the ready (green)<br />
indicator light comes on (approximately 7 hours or less within<br />
the charging temperature range). Use the Battery Refresh<br />
Cycle: before first use; every 30 days during regular use; at<br />
least once every 6 months when in storage; if the battery<br />
shows signs of reduced capacity, or periodically during use<br />
(e.g. every 30 days). After using the Battery Refresh Cycle,<br />
recharging time will be extended. NOTE: It is not possible to<br />
overcharge the power pack.<br />
CAUTION: Failure to recharge or refresh the battery during<br />
prolonged storage may cause deep battery discharge, leading<br />
to premature battery replacement in the power pack.<br />
19
Input: 20–35 volts, 500 mA maximum, 10 w maximum.<br />
Output: 10 volts DC during normal operating conditions and<br />
Low Battery Alarm condition; 5.6 volts DC during Low<br />
Battery Shutdown condition.<br />
Low Battery Alarm: During a low battery condition, the power<br />
pack will emit an intermittent beep if connected to the battery<br />
adapter or <strong>CADD</strong>-Prizm ® pump, and the amber LED will<br />
flash.<br />
Low Battery Shutdown Sequence: <strong>CADD</strong>-Prizm ® Pump<br />
1. When the power pack reaches a low charge, either the<br />
pump sounds an alarm and displays a message, or the<br />
power pack begins beeping, or both.<br />
2. The pump continues to function for approximately 30<br />
minutes.<br />
3. When the power pack reaches a depleted state, it can no<br />
longer support pump operation. The pump sounds an<br />
alarm, displays a message, and becomes powered by the<br />
9-volt backup battery.<br />
Low Battery Shutdown Sequence: All Other <strong>CADD</strong> ® Pumps<br />
1. The power pack begins beeping to alert the user that the<br />
internal battery has reached a low charge.<br />
2. The pump continues to function for approximately<br />
30 more minutes.<br />
3. At the end of approximately 30 minutes, the power pack<br />
can no longer support the pump’s operation. The power<br />
pack continues to beep. The pump begins a two-toned<br />
beeping, the words LO BAT appear on the pump display,<br />
and the pump ceases to operate.<br />
20
The power pack will continue beeping until<br />
• The power pack is connected to the AC adapter and the AC<br />
adapter is plugged into a wall outlet; or,<br />
• The battery adapter is disconnected from the power pack<br />
or <strong>CADD</strong>-Prizm ® pump; or,<br />
• The internal battery is depleted to a voltage no longer<br />
capable of operating the power pack’s circuitry.<br />
NOTE: Depleting the power pack charge to a point where the<br />
low battery alarm no longer sounds may severely limit the<br />
performance of the power pack.<br />
Size: 16.0 cm × 9.7 cm × 3.6 cm (6.3 in × 3.8 in × 1.4 in).<br />
Weight: Approximately 625 g (22 oz).<br />
Input Connector: 3-pin, integral, self-latching, female connector.<br />
Output Cord: 30-cm (10-in), 3 conductor, shielded cable with 3pin,<br />
in-line, self-latching, male connector with strain relief.<br />
Battery: Replaceable nickel metal hydride battery. Instructions for<br />
changing the battery are provided with the replacement battery.<br />
AC Adapter<br />
Input: 105 to 130 volts AC; 57 to 63 Hz.<br />
Output: Dual output. 10 volts DC at 300 mA; 24 volts DC at 500<br />
mA.<br />
Size: 8.5 cm × 6.8 cm × 5.6 cm (3.4 in × 2.7 in × 2.2 in).<br />
Weight: 630 g (22 oz).<br />
Output Cord: 2.7-m (9-ft), 24 ga/3 conductor, shielded cable, with<br />
3-pin, in-line, self-latching, male connector with strain relief.<br />
21
Battery Adapter<br />
Size: 4.8 cm × 2.6 cm × 1.9 cm (1.9 in × 1.0 in × 0.75 in).<br />
Weight: 25 g (0.9 oz).<br />
Input Cord: 30-cm (10-in), 3 conductor, shielded cable, with 3pin,<br />
in-line self-latching female connector with strain relief.<br />
Output Connector: Two male 9-volt battery contacts.<br />
22
Limited Warranty<br />
Warranty: <strong>Smiths</strong> <strong>Medical</strong> MD, Inc. (“Manufacturer”) warrants to the Original<br />
Purchaser that all parts and components of the <strong>External</strong> <strong>Power</strong> <strong>Source</strong> (“EPS”)<br />
System that are manufactured by or for the Manufacturer (the “System”), excepting<br />
those items indicated below, shall be free from defects in materials and workmanship<br />
under normal use, if used in accordance with the EPS System Instructions for Use, for<br />
a period of one (1) year from the actual date of sale to the Original Purchaser. THERE<br />
ARE NO OTHER WARRANTIES.<br />
Exceptions: This warranty does not cover normal wear and tear and maintenance<br />
items, and specifically excludes Medication Cassettes, extension sets, or any other<br />
accessory items or equipment used with the System. The nickel metal hydride (NiMH)<br />
rechargeable battery purchased either with the System at the time of its original<br />
purchase or as a subsequent replacement is subject to the terms of this Limited<br />
Warranty, but is warranted only for a period of ninety (90) days from the actual date<br />
of sale.<br />
Warranty Procedures: Subject to the conditions of and upon compliance with this<br />
Limited Warranty, the Manufacturer will repair or replace at its option without<br />
charge (except for a minimal charge for postage and handling) any System (not<br />
including accessories) that is defective if a claim is made during such one-year period.<br />
DO NOT send any System or component in to the Manufacturer for warranty repair<br />
without specific forwarding information from the Customer Service Department.<br />
Conditions: The following conditions, limitations and exclusions apply to the<br />
Manufacturer’s obligations under this warranty:<br />
A. Voiding of Warranty: This warranty is null and void if the System, or any part or<br />
component thereof, has been (1) repaired by someone other than the Manufacturer<br />
or its authorized agent; (2) altered so that its stability or reliability is<br />
affected; (3) misused; or, (4) damaged by negligence or accident. Misuse includes,<br />
but is not limited to, use not in compliance with the Instructions for Use of the<br />
System or use with non-approved accessories.<br />
B. Limitations and Exclusions: Repair or replacement of the System or any component<br />
part is the EXCLUSIVE remedy offered by the Manufacturer. All recommendations,<br />
information and descriptive literature supplied by the Manufacturer<br />
with respect to the System are believed to be accurate and reliable, but do not<br />
constitute warranties. No agent, representative, or employee of the Manufacturer<br />
23
has authority to bind the Manufacturer to any representation or warranty,<br />
expressed or implied. THERE IS NO WARRANTY OF MERCHANTABIL-<br />
ITY OR FITNESS OF THE SYSTEM FOR ANY PARTICULAR PURPOSE.<br />
THE MANUFACTURER DISCLAIMS RESPONSIBILITY FOR THE SUIT-<br />
ABILITY OF THE SYSTEM FOR A PARTICULAR MEDICAL TREAT-<br />
MENT OR FOR ANY MEDICAL COMPLICATIONS RESULTING FROM<br />
THE USE OF THE SYSTEM. THE MANUFACTURER SHALL NOT BE<br />
RESPONSIBLE FOR ANY INCIDENTAL DAMAGES OR CONSEQUEN-<br />
TIAL DAMAGES TO PROPERTY, LOSS OF PROFITS, OR LOSS OF USE<br />
CAUSED BY ANY DEFECT OR MALFUNCTION OF THE SYSTEM.<br />
This warranty gives the Original Purchaser specific legal rights, and the Original<br />
Purchaser may have other legal rights that may vary from state to state.<br />
24
<strong>CADD</strong>, <strong>CADD</strong>-1, <strong>CADD</strong>-PCA, <strong>CADD</strong>-PLUS, <strong>CADD</strong>-TPN and <strong>CADD</strong>-Prizm are<br />
registered trademarks of the <strong>Smiths</strong> <strong>Medical</strong> family of companies. The symbol<br />
® indicates the trademark is registered in the U.S. Patent and Trademark Office<br />
and certain other countries.<br />
<strong>Smiths</strong> <strong>Medical</strong> MD, Inc.<br />
St. Paul, MN 55112 U.S.A.<br />
1.800.426.2448<br />
www.smiths-medical.com<br />
© 2004 <strong>Smiths</strong> <strong>Medical</strong> family of companies.<br />
All rights reserved<br />
28<br />
2004-11<br />
40-3580-01G


