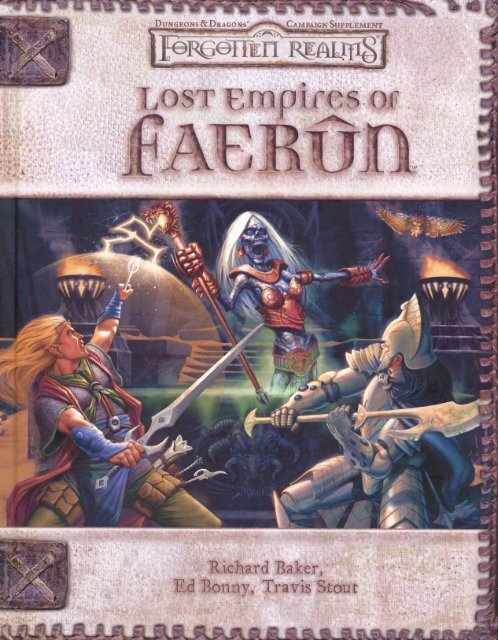
D&D 3.5e - Forgotten Realms - Lost Empires of Faerun.pdf
D&D 3.5e - Forgotten Realms - Lost Empires of Faerun.pdf
D&D 3.5e - Forgotten Realms - Lost Empires of Faerun.pdf

Create successful ePaper yourself
Turn your PDF publications into a flip-book with our unique Google optimized e-Paper software.
LOST EMPIRES OF FAERÛN WEB ENHANCEMENT<br />
<strong>Lost</strong> <strong>Empires</strong> <strong>of</strong> Faerûn details the ancient past <strong>of</strong> the<br />
FORGOTTEN REALMS Campaign Setting—its magic,<br />
its greatness, and its failures. The book also <strong>of</strong>fers<br />
invaluable tips for making a campaign world’s past relevant to current<br />
events.<br />
Secrets <strong>of</strong> Imaskar is a short D&D adventure for four 6th-level<br />
player characters (PCs). This short adventure uses feats, spells, monsters,<br />
and historical elements from ancient Imaskar. The action<br />
takes place in far eastern Mulhorand, at the edge <strong>of</strong> the Raurin<br />
Desert. In other campaign worlds, this adventure can be placed any<br />
place where the ruins <strong>of</strong> an ancient empire might be found. As<br />
always, feel free to adapt the material presented here as you see fit<br />
to make it work with your campaign.<br />
Design: Robert Wiese<br />
Based on Materials by: Richard Baker, Ed Bonny, Travis Stout<br />
Editing: Penny Williams<br />
Cartography: Dennis Kauth and Rob Lazzaretti<br />
Typesetting: Nancy Walker<br />
Web Production: Julia Martin<br />
Web Development: Mark A. Jindra<br />
Graphic Design: Robert Campell, Cynthia Fliege, Dee Barnett<br />
Based on the original DUNGEONS & DRAGONS® game by E. Gary Gygax and<br />
Dave Arneson and on the new edition <strong>of</strong> the DUNGEONS & DRAGONS game<br />
designed by Jonathan Tweet, Monte Cook, Skip Williams, Richard Baker,<br />
and Peter Adkison.<br />
D&D, DUNGEONS & DRAGONS, FORGOTTEN REALMS, and DUNGEON<br />
MASTER are registered trademarks owned by Wizards <strong>of</strong> the Coast, Inc.<br />
Secrets <strong>of</strong> imaskar<br />
An Adventure for Four<br />
6th-Level Player Characters<br />
Additional Credits<br />
1<br />
Preparation<br />
You (the DM) need the D&D core rulebooks—the Player’s Handbook,<br />
the Dungeon Master’s Guide, and the Monster Manual—as<br />
well as the FORGOTTEN REALMS Campaign Setting and <strong>Lost</strong> <strong>Empires</strong><br />
<strong>of</strong> Faerûn—to run this adventure. The information presented here<br />
utilizes the D&D v.3.5 rules.<br />
To get started, print out the adventure, including the map. Read<br />
through the scenario at least once to familiarize yourself with the<br />
situation, threats, and major NPCs (particularly their motivations).<br />
Text that appears in shaded boxes is player information that you can<br />
read aloud or paraphrase for the players at the proper times. Monster<br />
and NPC statistics are provided with each encounter, either in<br />
abbreviated form or as references to the appropriate pages in Monster<br />
Manual or <strong>Lost</strong> <strong>Empires</strong> <strong>of</strong> Faerûn.<br />
Some material used in this adventure comes from Complete Warrior<br />
and Magic <strong>of</strong> Faerûn. If you don’t have the book in question,<br />
replace the element with a similar one from a book you do have.<br />
The RPGA and d20 logo are trademarks owned by Wizards <strong>of</strong> the Coast,<br />
Inc. All Wizards characters, character names, and the distinctive likenesses<br />
there<strong>of</strong> are trademarks owned by Wizards <strong>of</strong> the Coast, Inc. This material<br />
is protected under the copyright laws <strong>of</strong> the United States <strong>of</strong> America.<br />
Any reproduction or unauthorized use <strong>of</strong> the material or artwork<br />
contained herein is prohibited without the express written permission <strong>of</strong><br />
Wizards <strong>of</strong> the Coast, Inc. This product is a work <strong>of</strong> fiction. Any similarity<br />
to actual people, organizations, places, or events is purely coincidental.<br />
This Wizards <strong>of</strong> the Coast game product contains no Open Game Content.<br />
No portion <strong>of</strong> this work may be reproduced in any form without written<br />
permission. To learn more about the Open Gaming License and the d20<br />
System License, please visit www.wizards.com/d20.<br />
©2005 Wizards <strong>of</strong> the Coast, Inc. All rights reserved. Made in the U.S.A.<br />
Visit our website at www.wizards.com/forgottenrealms
Adventure<br />
Background<br />
Mulhorandi and Imaskari ruins dot the landscape in and around<br />
the area known as the Raurin Desert, which was once the seat <strong>of</strong><br />
the mighty Imaskar Empire. One such ruin, the fort <strong>of</strong> Maskana,<br />
lies on the southern edge <strong>of</strong> the Plains <strong>of</strong> Purple Dust, a little<br />
closer to the Dragonsword Mountains than to the Giant’s Belt.<br />
This Mulhorandi fortress was built just before the fall <strong>of</strong> the<br />
Imaskar Empire, to guard the Mulhorandi against incursions by<br />
their former masters. Eventually the danger <strong>of</strong> such attacks<br />
passed, and the fortress fell into disuse and then ruin. Over the<br />
centuries, the ruined fortress has been thoroughly explored by<br />
adventurers, scholars, and looters, who ferreted out whatever<br />
secrets it may once have held. Now the site is nothing more than<br />
a curiosity to most.<br />
But one secret <strong>of</strong> Maskana remains undiscovered. The Mulhorandi<br />
ruin was built atop an older Imaskari fortress that had<br />
fallen into disuse centuries earlier. The ancient Mulhorandi<br />
wanted to keep track <strong>of</strong> this location because it contained a<br />
number <strong>of</strong> permanent extradimensional spaces that they hoped to<br />
utilize someday. But in the chaos <strong>of</strong> the uprising, the old ruins<br />
were forgotten.<br />
The ruin is decorated with Mulhorandi pictographs in an almost<br />
aggressive way, as if the people who built it wanted to leave no room<br />
for Imaskari influence. One <strong>of</strong> these drawings, however, contains an<br />
oddity that has gone undiscovered until recently. An explorer named<br />
Jarval Keth recognized one <strong>of</strong> the symbols, which had always been<br />
assumed to be Mulhorandi, as the work <strong>of</strong> the Imaskari. Excitedly,<br />
he returned to Gheldaneth to investigate further. There he ran afoul<br />
<strong>of</strong> Tyaral, a cleric <strong>of</strong> the dead god Bhaal, who sought a source <strong>of</strong><br />
power to help revive his deity. Upon hearing <strong>of</strong> the ancient Imaskari<br />
image, Tyaral captured Jarval Keth and tortured him until he<br />
revealed all he knew. Then Tyaral set <strong>of</strong>f for the ruin to investigate<br />
the explorer’s story.<br />
Unbeknownst to Tyaral, Jarval Keth has escaped confinement,<br />
stowed away on a ship sailing west, and made his way to the area<br />
where the heroes are resting between adventures. Upon noticing<br />
that he was gone, Sithena Tinzon, Tyaral’s chief inquisitor and<br />
torturer, immediately set <strong>of</strong>f in pursuit with three minions.<br />
Through her powers <strong>of</strong> persuasion, she learned which ship Keth<br />
had boarded. By hiring a faster one, she reached Keth’s destination<br />
ahead <strong>of</strong> him. Now she lies in wait to kill Keth as soon as he<br />
surfaces.<br />
Adventure<br />
Synopsis<br />
Just as Jarval Keth makes contact with the PCs, forces loyal to<br />
Tyaral attack the explorer. Whether he dies in the encounter or not,<br />
Keth passes on a clue about his find. If the PCs wish to investigate,<br />
they must travel east to Mulhorand and investigate the strange pictograph<br />
that Keth described. At Maskana, they find the secret door<br />
into the older Imaskari ruin, fight several ancient creatures, and<br />
confront Tyaral just as he unearths an ancient Imaskari artifact<br />
that has lain hidden for centuries.<br />
<strong>Lost</strong> <strong>Empires</strong> <strong>of</strong> Faerûn Web Enhancement<br />
2<br />
Adventure Hooks<br />
As DM, you know best how to involve your PCs in an adventure.<br />
Though this one comes to the PCs in the person <strong>of</strong> Jarval Keth, you<br />
can use one <strong>of</strong> the following suggestions to draw them into the<br />
action.<br />
• The PCs have heard rumors <strong>of</strong> ancient Imaskari magic buried<br />
beneath the sands <strong>of</strong> the Raurin Desert.<br />
• Jarval Keth is a distant relative <strong>of</strong> a PC and charges the group<br />
with uncovering the truth <strong>of</strong> his find.<br />
• An old enemy <strong>of</strong> Tyaral hires the PCs to investigate his activities.<br />
Beginning the<br />
Adventure<br />
Secrets <strong>of</strong> Imaskar begins as an event-based scenario and ends with<br />
the exploration <strong>of</strong> a keyed site. The adventure begins wherever the<br />
PCs are currently based. The events proceed more smoothly if they<br />
are near the Sea <strong>of</strong> Fallen Stars, but you can make the necessary<br />
adaptations for any area <strong>of</strong> Faerûn.<br />
A. Death in a<br />
Faraway Land (EL 7)<br />
Sithena Tinzon finds Jarval Keth as soon as he encounters the PCs.<br />
Ideally, this encounter should take place at night on the docks or in<br />
an alley.<br />
The night is dark, and Selûne’s face is hidden behind clouds, casting<br />
the narrow streets <strong>of</strong> the port district into deep shadow. Suddenly,<br />
a man stumbles forward out <strong>of</strong> the night. He is still some<br />
distance away when four humanoid figures move toward him in a<br />
menacing manner. The man starts to run, and the terror on his<br />
face becomes clearer as he moves closer. “The purple fort in the<br />
east hides the secrets <strong>of</strong> Imaskar’s past glories behind the crescent<br />
and the fox,” he gasps. “Don’t let them succeed. . . .” Before the<br />
man can utter another word, his attackers are upon him.<br />
The villains attack as soon as Keth utters the word “succeed.”<br />
Creatures: Sithena Tinzon and her three minions are all Mulhorandi<br />
(Mulan) humans, as is Jarval Keth.<br />
Sithena is proud and cruel. She started life in the streets and doesn’t<br />
want to return there. In her youth, she embraced the worship <strong>of</strong><br />
Bhaal to ensure that she could treat others with the same cruelty<br />
that she herself had been treated. She earnestly desires not to fail<br />
Tyaral—not because she is afraid <strong>of</strong> him, but because she wants to<br />
advance in power, and he is her means to that goal.<br />
Because <strong>of</strong> the torture he has endured at Sithena’s hands, Jarval<br />
Keth is mentally deranged and unable to communicate coherently.<br />
He goes <strong>of</strong>f on tangents easily, forgets important points, and speaks<br />
in vague phrases. Only a heal spell can restore his sanity at this<br />
point.
D Jarval Keth: Male human (Mulan) expert 4; CR 3; Medium<br />
humanoid; HD 4d6–4; hp 13; Init +1; Spd 30 ft.; AC 11, touch 11,<br />
flat-footed 10; Base Atk +3; Grp +3; Atk or Full Atk +3 melee (1d3,<br />
unarmed strike); AL LG; SV Fort +2, Ref +2, Will +6; Str 10, Dex<br />
12, Con 8, Int 16, Wis 14, Cha 13.<br />
Skills and Feats: Decipher Script +10, Gather Information +4,<br />
Knowledge (arcana) +10, Knowledge (architecture and engineering)<br />
+10, Knowledge (geography) +10, Knowledge (history) +10, Knowledge<br />
(Mulhorand local) +10, Knowledge (religion) +10, Search +12,<br />
Survival +9; Great Fortitude, Investigator, Track.<br />
Possessions: None <strong>of</strong> value.<br />
D Sithena Tinzon: Female human (Mulan) rogue 2/cleric 4 <strong>of</strong><br />
Bhaal; CR 6; Medium humanoid; HD 2d6 plus 4d8; hp 25; Init +6;<br />
Spd 20 ft.; AC 20, touch 11, flat-footed 19; Base Atk +4; Grp +5; Atk<br />
or Full Atk +6 melee (1d8+1, masterwork heavy mace) or +6 ranged<br />
(1d8/19–20, light crossbow); SA rebuke undead 6/day, (+3, 2d6+7,<br />
4th), sneak attack +1d6; SQ trapfinding; AL LE; SV Fort +5, Ref<br />
+7, Will +7; Str 12, Dex 14, Con 10, Int 12, Wis 15, Cha 16.<br />
Skills and Feats: Balance –1, Bluff +10, Diplomacy +16, Heal +6,<br />
Intimidate +14, Jump –14, Knowledge (Mulhorand local) +6,<br />
Knowledge (religion) +5, Search +6, Sense Motive +7, Spot +7,<br />
Tumble +2*, Use Magic Device +8, Use Rope +7; Improved Initiative,<br />
Persuasive, Servant <strong>of</strong> the Fallen**, Spell Focus (divination).<br />
* Cannot tumble in her armor.<br />
**New feat from <strong>Lost</strong> <strong>Empires</strong> <strong>of</strong> Faerûn.<br />
Sneak Attack (Ex): Sithena deals 1d6 extra points <strong>of</strong> damage on<br />
any successful attack against flat-footed or flanked targets, or<br />
against a target that has been denied its Dexterity bonus for any<br />
reason. This damage also applies to ranged attacks against targets up<br />
to 30 feet away. Creatures with concealment, creatures without discernible<br />
anatomies, and creatures immune to extra damage from<br />
critical hits are all immune to sneak attacks. Sithena may choose to<br />
deliver nonlethal damage with her sneak attack, but only when using<br />
a weapon designed for that purpose, such as a sap (blackjack).<br />
Trapfinding (Ex): Sithena can find, disarm, or bypass traps with<br />
a DC <strong>of</strong> 20 or higher. She can use the Search skill to find, and the<br />
Disable Device skill to disarm, magic traps (DC 25 + the level <strong>of</strong> the<br />
spell used to create it). If her Disable Device result exceeds the trap’s<br />
DC by 10 or more, she discovers how to bypass the trap without triggering<br />
or disarming it.<br />
Cleric Spells Prepared (caster level 4th): 0—cure minor wounds<br />
(2), detect magic, light, resistance; 1st—command (DC 13), cure light<br />
wounds, doom (DC 13), faith healing (Magic <strong>of</strong> Faerûn), inflict light<br />
wounds D (DC 13); 2nd—cure moderate wounds, death knell D<br />
(DC 14), sound burst (DC 14), zone <strong>of</strong> truth (DC 14).<br />
D: Domain spell. Deity: Bhaal. Domains: Death (death touch<br />
1/day, damage 4d6), Destruction (smite 1/day, +4 on attack, extra +4<br />
damage).<br />
Possessions: +1 full plate armor, masterwork heavy mace, light<br />
crossbow with 20 bolts, cloak <strong>of</strong> resistance +1, wand <strong>of</strong> cure light<br />
wounds, wand <strong>of</strong> ray <strong>of</strong> resurgence MF , silver holy symbol <strong>of</strong> Bhaal,<br />
religious robes, 104 gp.<br />
D Thugs (3): Male or female human (Mulan) warrior 2; CR 1;<br />
Medium humanoid; HD 2d8+4; hp 13; Init +1; Spd 20 ft.; AC 17,<br />
touch 11, flat-footed 16; Base Atk +2; Grp +4; Atk or Full Atk +5<br />
melee (2d4+3/18–20, masterwork falchion) or +3 ranged<br />
(1d8/19–20, light crossbow); AL NE; SV Fort +5, Ref +3, Will +1;<br />
Str 15, Dex 13, Con 14, Int 10, Wis 12, Cha 8.<br />
Skills and Feats: Climb +2, Intimidate +2, Jump –10, Ride +6,<br />
Swim –3; Dodge, Lightning Reflexes.<br />
Possessions: +1 breastplate, masterwork light shield, masterwork<br />
falchion, light crossbow with 10 bolts, travel clothes, 2 potions <strong>of</strong><br />
cure light wounds<br />
Tactics: Sithena Tinzon and her minions reach the PCs just after<br />
Keth blurts out his garbled message, and they attack him<br />
<strong>Lost</strong> <strong>Empires</strong> <strong>of</strong> Faerûn Web Enhancement<br />
3<br />
immediately. They have no reason to attack the PCs unless they try<br />
to intervene. Sithena uses death knell on Keth as soon as he falls<br />
unconscious.<br />
Development: If Keth dies, Tinzon tries to cut <strong>of</strong>f his head,<br />
intending to take it back to Mulhorand with her. If the PCs manage<br />
to slay the attackers, they can easily discern that all four are Mulhorandi<br />
by searching their personal possessions. If Keth survives this<br />
encounter and his sanity is restored, he can reveal the information<br />
he knows (see Adventure Background), and he asks the PCs to<br />
accompany him to the ruins and help him explore his new find.<br />
Troubleshooting: If your PCs are not interested in going to Mulhorand<br />
to investigate this lead, Tyaral soon discovers what happened<br />
to Sithena. He decides to make an example <strong>of</strong> those who slew his<br />
trusted lieutenant, so he sends wave after wave <strong>of</strong> attackers to kill<br />
the PCs. If you choose this method, you may have to alter the end<br />
<strong>of</strong> the adventure a bit by giving Tyaral a fortified position and some<br />
minions at the ruins <strong>of</strong> Maskana.<br />
B. Finding the Path<br />
The PCs’ trip to Mulhorand proceeds without incident provided that<br />
Sithena Tinzon is dead. If she escaped, she attacks them again—<br />
either on the way or upon their arrival, as you choose.<br />
Jarval Keth did not tell the PCs where to start their search; he<br />
described only their final goal. Since the central section <strong>of</strong> Mulhorand<br />
is sparsely populated with rural folk, the characters’ best<br />
chance <strong>of</strong> learning any helpful information in his absence is in one<br />
<strong>of</strong> the coastal cities. The most likely choices are Skuld and Gheldaneth,<br />
but the PCs might also want to visit Neldorid.<br />
In any <strong>of</strong> these cities, the PCs can learn about the general history<br />
<strong>of</strong> the region (as described in <strong>Lost</strong> <strong>Empires</strong> <strong>of</strong> Faerûn) and the locations<br />
<strong>of</strong> known ruins. Plenty <strong>of</strong> records exist on both topics, so finding<br />
the locations <strong>of</strong> the six known ruined forts in the Plains <strong>of</strong><br />
Purple Dust region (and <strong>of</strong> at least fifteen other suspected ruin sites)<br />
is an easy task (Gather Information DC 10). Acquiring any other<br />
information requires considerable digging. Anyone the PCs ask about<br />
such an issue directs them to the Great University at Gheldaneth<br />
(see encounter C).<br />
C. The Great<br />
University at<br />
Gheldaneth<br />
The best source <strong>of</strong> information about Maskana is Gheldaneth, where<br />
Jarval Keth performed his research before he was abducted. Gheldaneth<br />
is the site <strong>of</strong> the Great University, which houses detailed historical<br />
records and other materials relating to ancient Mulhorand.<br />
It was here that Jarval Keth performed his follow-up research after<br />
finding the Imaskari image.<br />
PCs who manage to talk to someone at the university about Keth<br />
(Diplomacy DC 20 because they are not members) discover that he<br />
was interested in specific Imaskari images and was poring over old<br />
records <strong>of</strong> them before he disappeared. If they request the materials<br />
that he was studying and peruse them carefully (Search DC 15), they<br />
can find the ancient Imaskari representations <strong>of</strong> crescent moons and<br />
foxes, and even compare them to Mulhorandi images <strong>of</strong> the same<br />
subjects. The Imaskari and Mulhorandi representations are very
similar, but slight differences make them distinct from one another.<br />
Careful perusal <strong>of</strong> these records combined with knowledge <strong>of</strong> the<br />
area (Gather Information or Knowledge [Mulhorand local] DC 18)<br />
also reveals which ruin Keth must have visited most recently.<br />
D. The Mean Drunk<br />
(EL 5)<br />
Mulhorand is a class-based society, and tensions flare readily<br />
between people <strong>of</strong> different social standing. Adventurers rank near<br />
the bottom, at about the same level as grave robbers, and the bureaucrats<br />
tend to treat them accordingly. While the PCs are in a tavern<br />
one night, they are accosted by a drunken bureaucrat who wants to<br />
vent some aggression he has built up over family problems.<br />
Upon entering the establishment, the PCs see a group <strong>of</strong> bureaucrats<br />
drinking liberally, as if in celebration. They don’t want company—especially<br />
that <strong>of</strong> adventurers and foreigners—so they rudely<br />
rebuff any PCs who try to join them. As the evening progresses, the<br />
bureaucrats become more and more drunk, and their mood slowly<br />
changes from happy to angry. Read or paraphrase the following<br />
aloud when the confrontation occurs, adapting the text as needed if<br />
the PCs actually hail from Mulhorand.<br />
“Grave-robbing foreigners, that’s what you are!” says one <strong>of</strong> the<br />
drunken men in a loud voice. “You heard me! My slave is better<br />
than you are, you filthy outlander!” Three other men gather<br />
behind the speaker, but whether they intend to support him or<br />
restrain him is not clear.<br />
The speaker, Anheris, is angry and frustrated with life. Because <strong>of</strong><br />
his dour mood, he is determined to provoke a fight, even though he<br />
knows he’s likely to spend the night in jail for it. Once combat<br />
begins, Anheris’s three companions join in on his side.<br />
Creatures: Anheris and his friends are normal Mulan humans.<br />
Anheris is a bureaucrat in the temple <strong>of</strong> Anhur, and the family troubles<br />
he is having right now have put him in a bad mood. He doesn’t<br />
hate the PCs specifically; they are just convenient targets for his<br />
wrath.<br />
D Anheris: Male human (Mulan) expert 3; CR 2; Medium<br />
humanoid; HD 3d6+3; hp 13; Init +2; Spd 30 ft.; AC 12, touch 12,<br />
flat-footed 10; Base Atk +2; Grp +2; Atk or Full Atk +2 melee (1d3,<br />
unarmed strike); AL LG; SV Fort +2, Ref +3, Will +4; Str 10,<br />
Dex 14, Con 12, Int 15, Wis 13, Cha 8.<br />
Skills and Feats: Appraise +2 (+4 when appraising woodworking),<br />
Bluff +5, Craft (woodworking) +11, Diplomacy +9, Intimidate +1,<br />
Knowledge (history) +8, Knowledge (Mulhorand local) +8, Knowledge<br />
(religion) +8, Listen +7, Sense Motive +7, Spot +7; Dodge,<br />
Improved Unarmed Strike, Skill Focus (Craft [woodworking]).<br />
Possessions: None <strong>of</strong> importance.<br />
D Anheris’s Friends (3): Male and female human (Mulan)<br />
expert 2; CR 1; Medium humanoid; HD 2d6+2; hp 9; Init +0;<br />
Spd 30 ft.; AC 10, touch 10, flat-footed 10; Base Atk +1; Grp +1; Atk<br />
or Full Atk +1 melee (1d3, unarmed strike); AL LG; SV Fort +1,<br />
Ref +0, Will +4; Str 10, Dex 11, Con 12, Int 12, Wis 12, Cha 11.<br />
Skills and Feats: Appraise +6 (+8 when appraising woodworking),<br />
Bluff +5, Craft (woodworking) +9, Diplomacy +2, Intimidate +2,<br />
Jump +5, Knowledge (Mulhorand local) +6, Listen +8, Search +6,<br />
Spot +8; Alertness, Skill Focus (Craft [woodworking]).<br />
Possessions: None <strong>of</strong> importance.<br />
Development: If this encounter takes place in Gheldaneth,<br />
Anheris has information <strong>of</strong> value to the PCs. Should they win the<br />
battle without killing the woodworker, they can interrogate him.<br />
<strong>Lost</strong> <strong>Empires</strong> <strong>of</strong> Faerûn Web Enhancement<br />
4<br />
A good line <strong>of</strong> questioning coupled with a DC 20 Intimidate check<br />
or a DC 15 Diplomacy check reveals that Anheris saw Jarval Keth<br />
hanging around the temples trying to talk with the priests. He<br />
doesn’t know the subject <strong>of</strong> these discussions, but he’s sure the man<br />
was up to no good. In addition, on the day that Keth disappeared,<br />
Anheris saw him in the company <strong>of</strong> a man who had a very pale,<br />
almost skull-like face. Jarval seemed uncomfortable in the man’s<br />
company, but he didn’t call for any help.<br />
Asking about Keth at the temples he visited produces no new<br />
information. The priests know only that Keth was interested in<br />
Imaskari religious imagery, and they didn’t have any samples available.<br />
They all recommended that he try the Great University.<br />
E. Guide Through<br />
the Wilderness<br />
When the PCs are ready to travel into the desert in search <strong>of</strong> the<br />
ruin that Keth visited, they may want to hire a guide to lead them.<br />
They don’t really need one, but if they have not traveled in this<br />
region before, they may want to take the precaution <strong>of</strong> hiring one,<br />
since getting lost in this country is quite dangerous. Most guides<br />
won’t venture into the Plains <strong>of</strong> Purple Dust at all, but a DC 15<br />
Diplomacy or Gather Information check produces the name <strong>of</strong> a<br />
man who is willing to take them there.<br />
Creatures: Museris, a guide who regularly braves the Plains <strong>of</strong><br />
Purple Dust, is a normal human (Mulan) male. Though he is the son<br />
<strong>of</strong> a soldier, he chose not to enter the army himself because he disagreed<br />
with the pharoah’s plans for expansion. Instead, he traveled<br />
north to Aglarond, where he learned about the wilderness. After<br />
returning to Mulhorand, he spent years learning how to survive in<br />
the dusty deserts <strong>of</strong> his homeland, and now he makes his living<br />
exploring ruins and ancient sites where others fear to tread and guiding<br />
clients through places <strong>of</strong> danger. He charges 100 gp per week,<br />
plus expenses.<br />
Museris is practical and competent, but he always thinks he is<br />
right and tends to belittle the opinions <strong>of</strong> others—until they are<br />
proven right. He is not afraid <strong>of</strong> traveling into the desert, but he has<br />
explored the ruin that the PCs are interested in and is sure that nothing<br />
<strong>of</strong> interest remains there.<br />
If the PCs are attacked while in the company <strong>of</strong> their guide,<br />
Museris fights beside them until his life is really threatened. At that<br />
point, he retreats, but he won’t leave the PCs to die.<br />
D Museris: Male human (Mulan) ranger 4; CR 4; Medium<br />
humanoid; HD 4d8+8; hp 30; Init +2; Spd 30 ft., AC 17, touch 12,<br />
flat-footed 15; Base Atk +4; Grp +5; Atk or Full Atk +3 melee<br />
(1d8+1/18–20, Large masterwork scimitar) and +4 melee<br />
(1d6/19–20, masterwork short sword) or +6 ranged (1d8+1/3,<br />
composite longbow [+1 Str bonus]); SQ animal companion (light<br />
horse), favored enemy humans +2, wild empathy +3; AL CG; SV<br />
Fort +6, Ref +6, Will +1; Str 13, Dex 14, Con 15, Int 11, Wis 11,<br />
Cha 8.<br />
Skills and Feats: Hide +8, Knowledge (geography) +7, Knowledge<br />
(nature) +9, Listen +7, Move Silently +8, Spot +7, Survival +10;<br />
Endurance B , Monkey Grip*, Skill Focus (Survival), Track B , Two-<br />
Weapon Fighting B , Weapon Focus (scimitar).<br />
*Feat from Complete Warrior.<br />
Animal Companion (Ex): Museris has a light horse as an animal<br />
companion. The companion’s abilities and characteristics are summarized<br />
on page 273 <strong>of</strong> the Monster Manual.<br />
Animal Companion Benefits (Ex): Museris and his horse enjoy<br />
the link and share spells special qualities.
Link (Ex): Museris can handle his horse as a free action. He also<br />
gains a +4 circumstance bonus on all wild empathy checks and<br />
Handle Animal checks made regarding his horse.<br />
Share Spells (Ex): Museris may have any spell he casts on himself<br />
also affect his animal companion if the latter is within 5 feet at<br />
the time. He may also cast a spell with a target <strong>of</strong> “You” on his<br />
animal companion.<br />
Favored Enemy (Ex): Museris gains a +2 bonus on his Bluff,<br />
Listen, Sense Motive, Spot, and Survival checks when using these<br />
skills against humans. He gains the same bonus on weapon damage.<br />
Possessions: +1 chain shirt, masterwork falchion, masterwork<br />
short sword, composite longbow (+1 Str bonus) with 20 arrows,<br />
wand <strong>of</strong> cure light wounds (31 charges), wand <strong>of</strong> endure elements<br />
(24 charges), two weeks’ rations for self and horse, tent, cooking<br />
equipment, maps <strong>of</strong> Mulhorand.<br />
F. The Ruins,<br />
Top Level<br />
The trip to the ruins can be without incident, or you can present the<br />
PCs with random desert and plains encounters along the way.<br />
The ruin known as Maskana was once a Mulhorandi outpost built<br />
into the side <strong>of</strong> a flat hill at the edge <strong>of</strong> the Plains <strong>of</strong> Purple Dust.<br />
An Imaskari fortress once covered the whole hilltop, but the Mulhorandi<br />
destroyed it early in their uprising, tearing it down to the<br />
very ground. The former slaves then built their own fortress against<br />
the side <strong>of</strong> the hill, facing east toward the Imaskari capital city. The<br />
reason for its placement was tw<strong>of</strong>old: to guard against the Imaskari,<br />
and to block access to the hidden sublevel <strong>of</strong> the ruined Imaskari<br />
fortress. One <strong>of</strong> the fort’s towers rose above the hilltop, providing a<br />
good view <strong>of</strong> the surrounding area. Eventually, this fortress fell into<br />
disuse, and the Plains <strong>of</strong> Purple Dust wore it away to ruin.<br />
Walls<br />
Crumbling walls no more than 3 feet high mark where Maskana’s<br />
outer walls once stood. Hewn purple stones from these walls have<br />
fallen into the central courtyard, where they now lie half-buried in<br />
the dust. The interior structures, built in haste from wood rather<br />
than stone, have disintegrated completely.<br />
The only wall that now stands more than 3 feet high is the back<br />
one, which is braced against the hillside. All <strong>of</strong> the interior wall surfaces<br />
are covered with faded religious and cultural imagery common<br />
to the Mulhorandi <strong>of</strong> ancient times. These symbols are all recognized<br />
as Mulhorandi today, even though many <strong>of</strong> them have several<br />
variants. (For example, at least four fox depictions, each a little different<br />
from the others, decorate the walls, and all are thought to be<br />
Mulhorandi.). A successful DC 30 Search check (or DC 20 for PCs<br />
who have spent time researching symbols at the Great University)<br />
is required to locate the Imaskari fox-and-crescent image that Jarval<br />
Keth found. A character can take 20 on these checks, but doing so<br />
requires an hour <strong>of</strong> searching rather than the usual 2 minutes<br />
because <strong>of</strong> the chaotic nature <strong>of</strong> the ruins. The symbol in question is<br />
on the back wall among various Mulhorandi symbols placed here to<br />
ward against threats from the old Imaskari ruins within the hill.<br />
The Imaskari symbol stands for the Artificers’ Guild and marks the<br />
secret door leading into the hill (encounter F1).<br />
Nothing else <strong>of</strong> interest remains in the ruins <strong>of</strong> the Mulhorandi<br />
fortress, since they were explored and looted long ago.<br />
<strong>Lost</strong> <strong>Empires</strong> <strong>of</strong> Faerûn Web Enhancement<br />
5<br />
F1. The Secret Way<br />
into Old Imaskar<br />
The secret door into the Imaskari sublevel is marked on the map.<br />
The Search DC to locate it is 30 for a character who has already<br />
found the Imaskari image or 40 for one who has not.<br />
A character who has found the secret door must make a DC 25<br />
Search check to locate the opening mechanism because fallen stones<br />
have concealed the trigger stone from view. The DC is 40 for a character<br />
who doesn’t know the secret door is there. Taking 20 on this<br />
check also requires a full hour.<br />
F2. The Desert Creature<br />
(EL 6)<br />
While the PCs are searching the ruins, some creatures <strong>of</strong> the ancient<br />
desert enter the area in search <strong>of</strong> food.<br />
Creatures: The four giant whip scorpions that have come here to<br />
hunt are covered in purple dust, so they look like bizarre, purple<br />
scorpions. These creatures live in colonies in the Plains <strong>of</strong> Purple<br />
Dust, where they harry travelers and serve as snacks for the dragons<br />
dwelling there.<br />
D Giant Whip Scorpions (4): hp 30 each; see <strong>Lost</strong> <strong>Empires</strong> <strong>of</strong><br />
Faerûn, page 160.<br />
Tactics: The giant whip scorpions attack immediately because<br />
they are hungry. Like any other mindless creatures, they simply<br />
attack anything that appears edible until it is dead, and then they<br />
eat it if no other obvious dangers are threatening them. They may<br />
attempt to drag a dead PC into the desert where they can consume<br />
the corpse in peace, since they have no reason to fight all the PCs<br />
once they have secured a meal.<br />
G. The Ruins,<br />
Lower Level<br />
The secret door opens on a hallway leading into darkness. This section<br />
<strong>of</strong> the ruins appears much older than the surface structures and<br />
is in fact about 3,500 years old. The walls are built <strong>of</strong> purple stones<br />
hewn in the same manner as those in other Imaskari ruins, and they<br />
are in excellent condition because they have been spared the rigors<br />
<strong>of</strong> weather for all these centuries. The corridor is unlit, and the temperature<br />
is a constant 51 degrees Fahrenheit. All spaces within this<br />
underground complex are 10 feet high unless otherwise specified in<br />
a particular area description.<br />
This sublevel once lay beneath an Imaskari fortress atop the hill.<br />
The belowground portion was an Imaskari research facility where<br />
artificers investigated the abilities <strong>of</strong> unusual creatures. These<br />
researchers made use <strong>of</strong> several permanent extradimensional spaces<br />
within the normally constructed rooms. Thus, some <strong>of</strong> the rooms in<br />
the complex are larger than they appear and radiate strong transmutation<br />
magic.<br />
G1. Storage<br />
Mounted on stands in this chamber are four suits <strong>of</strong> banded armor<br />
and five suits <strong>of</strong> splint mail that belonged to the defenders <strong>of</strong> the<br />
fortress that once stood above these ruins. The armor is in good
<strong>Lost</strong> <strong>Empires</strong> <strong>of</strong> Faerûn Web Enhancement<br />
6
condition without a speck <strong>of</strong> rust, but it is not <strong>of</strong> any special quality.<br />
A historian might pay double the book value for these pieces because<br />
<strong>of</strong> their age and origin.<br />
G2. Barracks<br />
On the map, this room appears to measure 20 feet by 30 feet, but<br />
in fact it is 70 feet by 120 feet. Read or paraphrase the following<br />
when the PCs enter.<br />
More than fifty bunk beds, all in perfect condition, fill the<br />
chamber, aligned in perfect rows. A trunk stands at the foot <strong>of</strong><br />
each bed.<br />
This area once served as the barracks for the fortress’s troops. All<br />
the trunks are empty.<br />
G3. The Eternal Guardians<br />
(EL 8)<br />
All areas marked 3 on the map have the same general description,<br />
regardless <strong>of</strong> their shapes. These rooms served as personal quarters<br />
for various Imaskari artificers, but their former occupants cleaned<br />
them out long ago. Only the comfortable beds remain, and those<br />
have decayed with age.<br />
The Imaskari had plans to return to the fortress as soon as the<br />
slave uprising was put down, so they set some guardians in these<br />
rooms to protect them from unwanted intruders before abandoning<br />
the place. Unfortunately, the original occupants never got the<br />
chance to return.<br />
Creatures: Each <strong>of</strong> these rooms is now home to a helmed horror.<br />
D Helmed Horrors (3): hp 94 each; see <strong>Lost</strong> <strong>Empires</strong> <strong>of</strong> Faerûn,<br />
page 172.<br />
Tactics: The helmed horrors have been programmed to attack<br />
anyone they see who does not bear the emblem <strong>of</strong> the Imaskari artificers.<br />
All such emblems that were known to exist were destroyed<br />
after the uprising, and none are left within these ruins.<br />
G4. Crawling Pool (EL 4)<br />
The artificers who worked here and the soldiers who guarded them<br />
used this room as a communal bathing pool. Read or paraphrase the<br />
following when the PCs enter.<br />
A pool <strong>of</strong> water occupies the center <strong>of</strong> this chamber. In the<br />
far corners lie a couple <strong>of</strong> skeletons that are missing their<br />
hands.<br />
The skeletons are the remains <strong>of</strong> slaves who revolted and were killed.<br />
The pool is 3 feet deep. Anyone who looks into its clear water sees<br />
immediately that it is full <strong>of</strong> hands.<br />
Creatures: The hands are actually crawling claws that were<br />
dumped here when their masters left.<br />
D Crawling Claw Swarms (2): hp 30 each; see <strong>Lost</strong> <strong>Empires</strong> <strong>of</strong><br />
Faerûn, page 163.<br />
Tactics: The swarms jump out <strong>of</strong> the water and attack anyone<br />
within 3 feet <strong>of</strong> the water’s edge.<br />
G5. Empty Room<br />
This room is completely empty. Evidently, the Imaskari artificers<br />
did not want to leave any clues as to its true purpose. The room<br />
<strong>Lost</strong> <strong>Empires</strong> <strong>of</strong> Faerûn Web Enhancement<br />
7<br />
actually measures 40 feet by 90 feet, rather than the dimensions<br />
shown on the map. The door is in the center <strong>of</strong> the wall.<br />
G6. Sliding Wall Trap (EL 6)<br />
This wide hallway was designed as a trap to slow down invaders and<br />
keep them from reaching the main laboratory until the artificers<br />
could cast their preparation spells.<br />
Trap: Whenever three creatures enter the hallway, extra wall sections<br />
slide down and close <strong>of</strong>f the two exits. Then the two walls farthest<br />
apart (the east and west walls) begin to slide toward each other<br />
at a rate <strong>of</strong> 5 feet per round. The trap can be bypassed easily by<br />
allowing only one or two people in the hallway at a time. All the<br />
walls are made <strong>of</strong> purple stone.<br />
a Compacting Room Trap: CR 6; mechanical; proximity trigger;<br />
automatic reset; walls move together (12d6, crush); multiple targets<br />
(all targets in the room); never miss; Search DC 20; Disable Device<br />
DC 22. Market Price: 23,400 gp.<br />
s Moving Walls: 5 ft. thick, hardness 8, hp 270.<br />
s Blocking Walls: 6 in. thick, hardness 8, hp 90.<br />
G7. Lounge<br />
This room was once a lounge and study area for the artificers, but it<br />
is mostly empty now. The only remaining furnishings are a moldy<br />
couch in the center <strong>of</strong> the room and a bookcase on the east wall that<br />
holds only dust.<br />
G8. Main Laboratory<br />
This room served as the artificers’ main laboratory. It appears to<br />
measure 30 feet by 40 feet, but the permanent extradimensional<br />
space within it extends the dimensions to the north and east, making<br />
its actual size 90 feet by 120 feet. The pillar pattern does not repeat,<br />
and the room has no other exits other than those shown on the map.<br />
The larger part <strong>of</strong> the room is full <strong>of</strong> tables and lab benches, some<br />
equipped with racks for vials and flasks. Drawers in the benches hold<br />
strange tools and a vast quantity <strong>of</strong> blank parchment. Feel free to<br />
stock this part <strong>of</strong> the room with any items you would like to introduce<br />
into your campaign.<br />
The stairs in the corner <strong>of</strong> the room lead down half a flight to<br />
area G9. This area is visible through the “wall” next to the stairs,<br />
which is a standard portcullis. A Mulan human male (Tyaral) traces<br />
an image on the wall <strong>of</strong> area G9 (see below).<br />
Development: Tyaral can hear the PCs enter area G8, but he is<br />
too caught up in his activities to take any action the first round. In<br />
the second round after their entry, he begins casting his preparatory<br />
spells (see the Tactics section <strong>of</strong> area G9).<br />
G9. The Zealot (EL 9)<br />
This small room once housed the library used by the artificers working<br />
in the laboratory above. Only empty shelves are left now, since<br />
the artificers valued these books too much to leave any behind when<br />
they departed. Unbeknownst to them, however, more senior artificers<br />
had hidden an important Imaskari artifact in a secret compartment<br />
in the wall. Since the artificers <strong>of</strong> this fortress did not know it<br />
was there, they served as the perfect guards for it.<br />
Tyaral and the two flameskulls that accompany him have already<br />
found their way into this room, having avoided two <strong>of</strong> the helmed<br />
horror guards in the other chambers. The priest has been exploring
the complex for a week now, and he has at last found the secret<br />
compartment that conceals the artifact.<br />
When the PCs first arrive, he is muttering a spell that he hopes<br />
will unlock the secret door. It does so on the following round, allowing<br />
him a good view <strong>of</strong> the artifact that lies inside. At that point, he<br />
notices the PCs and begins preparing to fight them. Tyaral’s only<br />
escape route from the complex is the one he used to enter, and he<br />
must get past the PCs to use it. Tyaral has no intention <strong>of</strong> leaving<br />
without the artifact.<br />
Creatures: Tyaral is a Mulan human consumed with the desire to<br />
bring back his dead god, Bhaal. He was a priest <strong>of</strong> Bhaal at the time<br />
the god was murdered, and that event unhinged his mind. Tyaral<br />
knows he needs powerful magic to effect the return <strong>of</strong> a god, so he<br />
has been collecting all he can find.<br />
D Tyaral: Male human (Mulan) cleric 8 <strong>of</strong> Bhaal; CR 8; Medium<br />
humanoid; HD 8d8+8; hp 44; Init +0; Spd 20 ft.; AC 20, touch 11,<br />
flat-footed 20; Base Atk +6; Grp +5; Atk +6 melee (1d8–1, masterwork<br />
heavy mace); Full Atk +6/+1 melee (1d8–1, masterwork heavy<br />
mace); SA rebuke undead 9/day (+4, 2d6+10, 8th); AL LE; SV Fort<br />
+7, Ref +4, Will +10; Str 8, Dex 10, Con 12, Int 15, Wis 18, Cha 14.<br />
Skills and Feats: Concentration +12, Diplomacy +10, Jump –18,<br />
Knowledge (arcana) +12, Knowledge (religion) +12, Knowledge (the<br />
planes) +12, Spellcraft +10; Extra Turning, Lightning Reflexes,<br />
Servant <strong>of</strong> the Fallen*, Spell Focus (necromancy).<br />
*New feat from <strong>Lost</strong> <strong>Empires</strong> <strong>of</strong> Faerûn.<br />
Cleric Spells Prepared (caster level 8th): 0—detect magic (2),<br />
guidance (2), read magic (2); 1st—command (DC 15), comprehend<br />
languages, cure light wounds, deathwatch, doom (DC 16), inflict light<br />
wounds D (DC 16); 2nd—bull’s strength, cure moderate wounds, death<br />
knell D (DC 17), hold person (DC 16), summon monster II; 3rd—<br />
bestow curse (DC 18), contagion D (DC 18), searing light, speak with<br />
dead (DC 18), summon monster III; 4th—cure critical wounds,<br />
death ward D (DC 19), divination, divine power.<br />
D: Domain spell. Deity: Bhaal. Domains: Death (death touch<br />
1/day, damage 8d6), Destruction (smite 1/day, +4 on attack, extra +8<br />
damage).<br />
Possessions: +1 full plate armor, ring <strong>of</strong> protection +1, masterwork<br />
heavy mace, divine scroll <strong>of</strong> summon monster III, pearl <strong>of</strong> power<br />
(2nd-level spell), travel clothing, silver holy symbol <strong>of</strong> Bhaal, backpack,<br />
bedroll, adventuring equipment, 12 pp.<br />
D Flameskulls (2): hp 28; see <strong>Lost</strong> <strong>Empires</strong> <strong>of</strong> Faerûn, page 168.<br />
Tactics: If Tyaral somehow becomes aware <strong>of</strong> the PCs’ presence<br />
before they reach area G8, he casts deathwatch to warn him <strong>of</strong> their<br />
approach before returning to his business. If he notices them in area<br />
G8, he casts divine power and then bull’s strength to give himself an<br />
additional +7 bonus on his attack and damage rolls. He uses spells in<br />
melee when they seem appropriate and knows which sorts <strong>of</strong> characters<br />
are likely to be more vulnerable than others to particular<br />
spells (that is, he knows that fighter-types are likely to fail Will<br />
saves, and wizard-types are likely to fail Fortitude saves). He spontaneously<br />
casts inflict wounds spells in combat whenever he feels<br />
that his other spells would not be useful, and he uses death knell on<br />
downed PCs to gain extra hit points.<br />
The two flameskulls attack until destroyed, preferably from a<br />
distance.<br />
Development: Once Tyaral is dead, go to Concluding the<br />
Adventure.<br />
Treasure: In addition to his own equipment, Tyaral now has the<br />
artifact from the secret compartment. Its nature is up to you, but<br />
the Seventh Imaskarcana—a fabled artifact <strong>of</strong> ancient Imaskar that<br />
resembles a large, golden key—is an appropriate choice. The Seventh<br />
Imaskarcana holds the entire body <strong>of</strong> Imaskari knowledge about<br />
<strong>Lost</strong> <strong>Empires</strong> <strong>of</strong> Faerûn Web Enhancement<br />
8<br />
creating permanent extradimensional spaces, and it also has additional<br />
powers that are left to your discretion. See page 158 <strong>of</strong> <strong>Lost</strong><br />
<strong>Empires</strong> <strong>of</strong> Faerûn to aid in your design <strong>of</strong> this artifact. If you<br />
prefer a less powerful item, simply select an appropriate one from<br />
the list <strong>of</strong> ancient magic items in Chapter 10 <strong>of</strong> <strong>Lost</strong> <strong>Empires</strong> <strong>of</strong><br />
Faerûn.<br />
G10. Downward Stairs<br />
These stairs lead downward to an area that was once a lower level <strong>of</strong><br />
the complex. In the centuries that this place has lain empty, however,<br />
the stairway has collapsed, and no clear path to this level currently<br />
exists.<br />
Concluding the<br />
Adventure<br />
Once Tyaral is dead, the adventure is over. The church <strong>of</strong> Bhaal has<br />
lost a major power, and the dead god’s return has been immeasurably<br />
delayed. If Jarval Keth is still alive, he undertakes a serious study <strong>of</strong><br />
the underground Imaskari complex, perhaps hiring the PCs as<br />
guards while he does so.<br />
Further Adventures<br />
The artifact that Tyaral discovered in this complex has probably<br />
been sought by powerful wizards and clerics for centuries. If it falls<br />
into the PCs’ hands, they immediately become targets for those who<br />
wish to retrieve it. They can either decipher its powers and try to<br />
make use <strong>of</strong> it themselves, or sell it to someone who is unlikely to<br />
misuse it.<br />
Tyaral can become a recurring villain whether he escaped alive<br />
or not. Since he serves Bhaal, the dead god <strong>of</strong> murder, he might<br />
well return as a vengeful undead spirit even if the PCs managed to<br />
kill him.<br />
The PCs might also wish to come back to the complex when they<br />
have gained more power and try to unearth the stairway leading<br />
down (area 10). That area is left for you to develop as you wish,<br />
using material on Imaskar from <strong>Lost</strong> <strong>Empires</strong> <strong>of</strong> Faerûn.<br />
About the Author<br />
Robert Wiese is a veteran <strong>of</strong> the RPGA <strong>of</strong>fices, where he worked for<br />
seven years. He has written more than sixty adventure scenarios for<br />
the club, a couple <strong>of</strong> articles for Polyhedron, and the LIVING FORCE<br />
Campaign Guide (with Morrie Mullins). He also got the LIVING<br />
GREYHAWK and LIVING FORCE campaigns <strong>of</strong>f the ground and into<br />
the hands <strong>of</strong> the wonderful members to develop. Now he works at<br />
the University <strong>of</strong> Nevada at Reno in the Biochemistry Department,<br />
proving that you never can tell where you’ll end up.