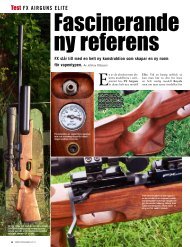
instruction manual - FX Airguns
instruction manual - FX Airguns
instruction manual - FX Airguns

You also want an ePaper? Increase the reach of your titles
YUMPU automatically turns print PDFs into web optimized ePapers that Google loves.
w w w . f x a i r g u n s . c o m w w w . f x a i r g u n s . c o m w w w . f x a i r g u n s . c o m<br />
FAGERLID • SE-548 92 HOVA • SWEDEN<br />
INFO@<strong>FX</strong>AIRGUNS.COM • WWW. <strong>FX</strong>AIRGUNS.COM<br />
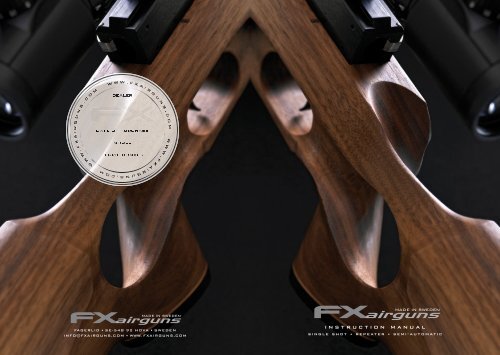
<strong>instruction</strong> <strong>manual</strong><br />
single shot • repeater • semi-automatic
CONTENTS Page<br />
1 WARRANTY 4<br />
2 WARNINGS 4<br />
3 GENERAL INSTRUCTIONS 4<br />
4 OPERATING INSTRUCTIONS 5<br />
4.1 Charging the Rifle 5<br />
4.2 Safety Operation 6<br />
4.3 Loading Magazine 6<br />
4.4 Cocking and Loading 9<br />
4.5 Air tubes 12<br />
4.6 Power adjuster 13<br />
5 SETTINGS 14<br />
5.1 Trigger adjustment 14<br />
5.2 Recoil pad adjustment 15<br />
5.3 Cheek piece adjustment 16<br />
5.4 Reloading adjustment 16<br />
6 SPECIAL FEATURES 17<br />
6.1 Magazine holder 17<br />
6.2 Weaver style rail 17<br />
7 MAINTENANCE 17<br />
7.1 Replacement of O-rings 17<br />
7.2 Lubricant 18<br />
7.3 Cleaning 18<br />
7.4 Storage 18<br />
7.5 Trouble Shooting 19<br />
8 ACCESSORIES 20<br />
3
1 WARRANTY<br />
All <strong>FX</strong> <strong>Airguns</strong> carry a One Year Warranty against faulty workmanship and defective<br />
materials. Contact the dealer from which you purchased the gun if it becomes<br />
necessary.<br />
If the rifle develops a defect within the warranty period, contact the dealer from<br />
whom it was purchased. The guarantee does not cover any damage caused by<br />
tampering with the rifle.<br />
This rifle should only be disassembled by factory-authorized repairmen.<br />
2 WARNING!<br />
Never attempt to disassemble this rifle while it is charged !<br />
Failure to obey this <strong>instruction</strong> could result in personal injury or<br />
damage to the gun !<br />
• Never fire the rifle when it empty of air or when air cylinder is removed!<br />
• Never point the rifle at anyone, or allow anyone to point a rifle at you!<br />
• Treat every rifle as if it is loaded even if you know it is not loaded!<br />
• Always carry the rifle so that the direction of the muzzle is under control,<br />
even if you stumble.<br />
• Always be sure of your target and what lies behind it before firing your rifle.<br />
• Never leave a loaded rifle unattended.<br />
• Beware of targets that tend to cause ricochets.<br />
• It is recommended that eye protection is worn when charging the cylinder.<br />
• Always use caution when operating this rifle.<br />
• Learn and obey the laws in your location.<br />
• Be responsible in your use of this weapon!<br />
• Never fill the rifle with anything else other than regular air!<br />
3 GENERAL INSTRUCTIONS<br />
• The <strong>FX</strong> Rifles should be fitted with a scope or alternate optic sights before use.<br />
• Before using your rifle, read and abide by the basic safety rules.<br />
• We recommend the use of our own <strong>FX</strong> Pellets<br />
4 OPERATING INSTRUCTIONS<br />
4.1 ChARGING ThE RIFLE<br />
A quick connector is supplied with the rifle and is threaded with a 1/8” thread.<br />
Make sure that the thread is the same at the charging source then attach the quick<br />
connector at your charging source.<br />
Make sure that the fill probe and filler hole are clear from any dirt. Feel free to use<br />
lubricant on the o-rings to increase their life.<br />
Note: Use any lubricants in moderation.<br />
FilIbrobe Type MkI:<br />
Insert the fill probe into the rifle filler hole located at the end of the air tube.<br />
Revolution and Gladiator Pump Action have their filling holes hidden under<br />
the front piece of the stock and have to have the cocking mechanism in<br />
the rear position to have the filler hole visible.<br />
Quick Connector MkII:<br />
Push the connector over the male connector located nearby the manometer.<br />
Close ventilation screw on the charging source.<br />
Charge the rifle to its Maximum level which is 220 bars for our singleshot<br />
and repeater rifles and 200 bar on the semi automatic rifles.<br />
Always check the pressure on the charging source, they have in most cases a<br />
more reliable gauge and the gauge on the rifle is more of an indicator to see if you<br />
need to charge or not.<br />
If a hand pump is used the water trap must be opened at regular Intervals during<br />
the pumping cycle.<br />
If you want to uncock the rifle after filling your Revolution and Gladiator<br />
Pump Action: Simply squeeze the trigger at the same time as you keep one hand<br />
on the cocking bolt/pump action and gently move it to the front position while still<br />
keeping the finger squeezing the trigger.<br />
Independence:<br />
Hold the rifle firmly with one hand approximately where the manometer is located.<br />
Use the other hand to operate the pump lever until you reach wanted pressure or<br />
see points above. It’s also equipped with a safety valve that will release over 220bar.<br />
WARNING: Only dry air should be used! Under no circumstances should oxygen<br />
or any other gas be used to fill the airtubes! This could result in a serious explosion!<br />
4 5
4.2 SAFETY<br />
Push the safety lever to the rear position to engage the safety. To obtain firing<br />
position, push the safety lever to its forward position.<br />
Location of safety lever:<br />
Right side: All except Monsoon. (Typhoon and T12 uses the cocking bolt as safety<br />
in its rear and down position).<br />
Left Side: Monsoon<br />
Uncocking the rifle/inactivate trigger system:<br />
Pull the cocking lever to its rear position squeeze the trigger at the same time as<br />
you keep one hand on the cocking bolt/pump action and gently move it to the front<br />
position while still keeping the finger squeezing the trigger.<br />
WARNING: Like all other mechanical devices, safety mechanisms can be negatively<br />
affected by wear, abuse, dirt or corrosion. Never assume that it is a foolproof<br />
way of preventing a accidental discharge and always follow the safety code when<br />
handling an air rifle.<br />
4.3 LOAdING ThE MAGAzINE<br />
General:<br />
The magazine is designed to fit only one way into the rifle. When viewed from the<br />
rear the magazine rotates clockwise.<br />
8 Revolver magazines:<br />
Removal:<br />
Push the safety to its safe mode and/or pull the cocking lever to its rear position.<br />
Then slide the magazine release pin backwards. The magazine can then be removed<br />
from the slot.<br />
Insertion:<br />
For first time use, position the magazine in the rifle without pellets to understand<br />
its function.<br />
• Push the safety to its safe position and pull the cocking lever until it locks.<br />
• Slide the magazine release pin backwards.<br />
• Insert the magazine into the slot and while you put pressure on the magazine<br />
with your finger, you push the magazine pin forward.<br />
• While putting pressure on the magazine, push the magazine release pin forward.<br />
• Rotate the magazine clockwise until you feel it index with the magazine index spring.<br />
Loading pellets:<br />
Load pellets from the rear of the magazine, pushing them through the retainer “O” ring<br />
until the skirts are in line with the bottom of the magazine face.<br />
Be careful not to squeeze or damage the pellet as this could affect accuracy.<br />
Once loaded, insert the magazine back into the slot. Push the cocking lever to its<br />
forward position. This will chamber a pellet into the barrel and you are ready to fire<br />
when safety is off.<br />
do Not Close the Cocking Lever Until You Are Ready to Fire the Rifle!<br />
For uncocking the rifle see: Point 4.2<br />
6 7
Spring tensioned magazines:<br />
Removal:<br />
Push the safety to its safe mode and/or pull the cocking lever to its rear position.<br />
The magazine can now be removed from the slot.<br />
Note: On <strong>FX</strong> Biathlon you need to pull the thumb-return button rearwards until you<br />
feel a click. When magazine is removed just give the sidelever a pull and it will release.<br />
For uncocking the rifle see: Point 4.2<br />
Insertion:<br />
For first time use, position the magazine in the rifle without pellets to understand its<br />
function.You cannot push the cocking lever to front position when magazine is empty.<br />
Push the safety to its safe mode and/or pull the cocking lever to its rear position.<br />
Insert the magazine into the slot.<br />
Note: On <strong>FX</strong> Biathlon you need to pull the thumb-return button rearwards until you<br />
feel a click. When magazine is inserted just give the sidelever a pull and it will release.<br />
Loading pellets:<br />
Load pellets by pushing the transparent lid counter clockwise until it stops.<br />
Keep a firm grip on the lid in the end position.<br />
• Put one pellet in the open slot from the<br />
rear side of the magazine, the tip of the<br />
pellet shall be pointing out of the hole.<br />
• The back of the pellet should now be<br />
seen thru the transparent lid.<br />
• This pellet will lock magazine spring.<br />
• Be careful not to squeeze or damage the<br />
pellet as this could affect accuracy.<br />
• Now turn the magazine so that the<br />
transparent lid is facing you.<br />
• Turn the lid clockwise one slot at the time<br />
and fill in remaining pellets from the<br />
transparent side.<br />
• Lock lid at starting position<br />
WARNING:<br />
Do not use pellets with more weight than<br />
16 Grains / 1.030 Gram on the Monsoon<br />
4.4 COCkING ANd LOAdING<br />
Single shot actions:<br />
• Pull the cocking lever/handle backward as far as possible without hesitation.<br />
• Insert a pellet of appropriate caliber into the barrel breech or simply lay the pellet<br />
in the pellet tray (Typhoon) as shown in the picture.<br />
be careful not to squeeze or damage the pellet as this could affect accuracy.<br />
• Push the cocking lever/handle forward as far as possible. This chambers a pellet<br />
into the barrel and you are ready to fire. The rifle is now cocked and ready to fire.<br />
The Typhoon rifle is delivered with a useful pellet trey that will make it easier to<br />
load pellets, this is easy to apply and remove. It is simply held in place by two<br />
rubber retainers and you easily attach it by sliding it in to position.<br />
Magazine loaded rifles:<br />
• Pull the cocking lever/handle backward as far as possible without hesitation.<br />
• Trigger will engage and the magazine will line up a pellet with the barrel.<br />
• Push the cocking lever/handle forward as far as possible. This chambers a pellet<br />
Into the barrel and you are ready to fire.<br />
• Repeat above to fire more rounds.<br />
8 9
If you’re not pulling the cocking lever/bolt all the way back the trigger wont<br />
engage and you will end up with a pellet in the barrel but won’t be able to fire.<br />
If this happens, remove magazine and fire the round that is located in the barrel.<br />
Then start from the beginning.<br />
Do not repeat cocking without firing ! each time you cycle you will chamber a<br />
pellet into the barrel.<br />
Semi-Auto actions:<br />
• Pull the cocking lever/handle backward as long as possible without hesitation.<br />
• Trigger will engage and the magazine will line up a pellet with the barrel.<br />
• Push the cocking lever/handle forward as far as possible, this chambers a pellet<br />
into the barrel and you are ready to fire.<br />
• When magazine is empty the magazine is designed so it will stop reloading<br />
automatically.<br />
If you’re not pulling the cocking lever/bolt all the way back the trigger wont<br />
Engage and you will end up with a pellet in the barrel but won’t be able to fire.<br />
If this happens, remove magazine and fire the round that is located in the barrel.<br />
Then start from the beginning.<br />
10 11
4.5 AIR TUbES<br />
Removal:<br />
Not possible for all rifles, see specification for your model.<br />
Front air tube:<br />
Grab the tube and unscrew it counter-clocwise. This shall be done with a minimum of<br />
100 bar inside the air tube otherwise the air tube will separate from its tube end caps.<br />
There will be a small air escape from the air trapped in between air tube and rifle.<br />
Rear air tube:<br />
The same procedure as for the front air tube but if your rifle is equipped with both<br />
front and rear tube you need to unscrew them little by little. If you turn just one whole<br />
rotation on each tube at a time both valves will close at the same time and you will<br />
have no pressure loss. If you just unscrew one bottle at a time, air from the other air<br />
tube will blow out thru the rifle.<br />
Attaching: (only 8 shot actions and Revolution)<br />
Front air tube:<br />
Just grab the air tube and start to screw it on to the rifle clockwise. Be careful so<br />
that you don’t damage the thread.<br />
Rear air tube:<br />
The same procedure as for the front air tube but if your rifle is equipped with both<br />
Front and rear air tube you need to screw one of them on first. When you feel that<br />
the valve touches the base, you attach the other air tube fully and then go back and<br />
tighten the first air tube.<br />
4.6 Poweradjuster<br />
Not available for all models, see specification for your model.<br />
Located at the left side of the action is the power adjuster. Adjustable in 3 steps.<br />
Note: Only two steps in some of the high powered versions.<br />
There is an approximately difference in each stage of 50 m/s or 165 ft/s on a rifle<br />
with maximum settings.<br />
1. Forward Position Low<br />
2. Middle Position Medium<br />
3. Rearward Position High<br />
Be sure that the adjuster wheel is<br />
positive in one of the three<br />
detents before firing the rifle!<br />
Note: If the power adjuster hasn’t been used for a while it may need some force to<br />
move for the first time.You might notice a little air blowing out at the power adjuster<br />
when shooting, this is fully acceptable and doesn’t affect the power or accuracy.<br />
12 13
5 SETTINGS<br />
5.1 TRIGGER AdjUSTMENTS<br />
Single shot and repeater actions:<br />
A<br />
A. First Stage, Length of pull<br />
Turning Clockwise will reduce the amount of first stage travel.<br />
Turning Counter-Clockwise will increase the amount of first stage travel.<br />
WARNING: Turning Clockwise too much will eliminate the 2nd stage and prevent<br />
sear engagement.<br />
Tool required: 1,5 mm Hex Key (allen key)<br />
b. Second Stage, Resistance of pull<br />
Turning Clockwise increases the resistance of the second stage.<br />
Turning Counter-Clockwise decreases the resistance of the second stage.<br />
Factory setting of the resistance is 0,5-0,8 kg of the trigger pull.<br />
Tool required : Slotted screwdriver (early models) 2 mm Hex Key (later models)<br />
C. Safety Catch Adjustment<br />
Should be adjusted to prevent trigger from being pulled while in the safe position.<br />
Should be positioned as far out as possible.<br />
WARNING: Failure to adjust this screw after altering the trigger can result in a<br />
non-functioning safety.<br />
B<br />
C<br />
5.2 RECOIL PAd AdjUSTMENT<br />
Model 16051: Loosen the screw in the middle (seen on the picture) to be able to<br />
move the recoil pad. Tighten screw when recoil pad is in desired position.<br />
Tool required: Slotted Screwdriver<br />
Model 11526: There are two hex/ allen screws hidden in the recoil pad that have to<br />
be loosened to be able to move the recoil pad. Tighten screw when recoil pad is in<br />
desired position.<br />
Note: Cyclone with synthetic stock has this recoil pad but it is not adjustable.<br />
Tool required: 1,5 mm Hex Key (allen key)<br />
Tool required: 3 mm Hex Key (allen key)<br />
14 15
5.3 ChEEk PIECE AdjUSTMENT<br />
5.4 RELOAdING AdjUSTMENT<br />
Cutlas and Gladiator:<br />
You might need to adjust the auto return spring force after a while or if you use non<br />
<strong>FX</strong> Pellets.<br />
To increase the force of the spring turn the turn the hex screw clockwise.<br />
To reduce the force of the spring turn the turn the hex screw counter clockwise.<br />
Sidelever will not reach all the way to closed position and you have to close the last<br />
bit by hand if the tension on the spring is too small.<br />
Sidelever will bounce out from the stock and you have to close the last bit by hand<br />
if there is too much tension on the spring.<br />
Correct setting: The handle on the sidelever should stay in closed position.<br />
Tool required: 5 mm Hex Key (allen key)<br />
Rifles with rear bottles only:<br />
Loosen the hex/allen key located in the<br />
top of the bottle cover/cheek piece and<br />
you are able to adjust both length and<br />
angle. Tighten screw when bottle cover/<br />
cheek piece is in desired position.<br />
Tool required: 5 mm Hex Key (allen key)<br />
Revolution calibre 5.5:<br />
If you attach a silencer to your Revolution<br />
you must reduce the reloading power.<br />
This is done by releasing the reloading<br />
pressure on the Hex/allen screw shown<br />
on next page. You can see the screw in<br />
the air escape hole on the side of the rifle<br />
and you are able to adjust this 6 whole<br />
rotations from bottom and out.<br />
6 SPECIAL FEATURES<br />
7 MAINTENANCE<br />
7.1 REPLACEMENT OF O-RINGS<br />
Too much reloading pressure: Trigger<br />
system will wear out faster. Too little<br />
reloading pressure: rifle won’t cycle.<br />
Tool required: 2,5 mm Hex Key (allen key)<br />
6.1 MAGAzINE hOLdER<br />
Storm and Cutlas with Synthetic Stock:<br />
On the side of the stock there is a<br />
cylindrical chamber that you can put<br />
several spare magazines. They are simply<br />
held to place by their own o-ring. In need<br />
of a magazine just push them out from one<br />
side to the other.<br />
6.2 ACCESSORY RAIL<br />
Cutlas with Synthetic Stock:<br />
In the front end of the stock there is an<br />
accessory rail where you are able to<br />
Attach, lamps, bipods and other accessories<br />
(weaver style rail).<br />
Fillprobe:<br />
After a period of time, the O-rings on the fillprobe will need to be replaced. The<br />
need for this will become noticeable if air is heard leaking from the nozzle while<br />
charging the rifle. Always be sure to replace both O-rings.<br />
16 17
8 shot magazines:<br />
After a period of time it might become necessary to replace the O-ring that retains<br />
the pellets in the magazine. The need for this will become noticeable when the rifle’s<br />
bolt becomes difficult to cycle or if pellets fall thru when loading the magazine.<br />
7.2 LUbRICANT<br />
General:<br />
Keep the rifle clean and wipe it off with regular gunoil and a cloth occasionally.<br />
Fillprobe:<br />
Apply a thin layer of suitable mineral based oil occasionally or when dried out.<br />
8 shot magazines:<br />
Apply a thin layer of suitable mineral based oil occasionally or when dried out.<br />
Cocking bolt and sidelever sliding surface:<br />
Apply a thin layer of Fuchs Renolit RHF-1 grease or a standard multipurpose<br />
grease occasionally or when dried out.<br />
WARNING: Never use grease or spray oil in the moving parts inside the gun.<br />
This can result in unstable power and also leakage. Do not over lubricate!<br />
7.3 CLEANING<br />
General:<br />
Keep the rifle clean and wipe it off with regular gunoil and a cloth occasionally<br />
barrel:<br />
We recommend that you use cleaning pellets occasionally. You can shot them thru<br />
the barrel without the risk of damaging the barrel.<br />
WARNING: Never use sharp chemicals or water to clean the rifle.<br />
7.4 STORAGE<br />
General: Store in a place that is dry and dark. Store with a pressure between<br />
50-200 bar in the rifle.<br />
WARNING:<br />
• Keep away from spaces with high humidity as steel parts might corrode.<br />
• Keep away from bright sunlight as this shortens the life of the o-rings.<br />
• Never store the rifle loaded with pellets.<br />
7.5 TROUbLE ShOOTING<br />
This info only covers the most common malfunctions.<br />
Leakage:<br />
Problem Solution<br />
Air leaks out thru the barrel. Main valve needs replacement<br />
Air leaks out thru charging hole Inlet valve needs replacement<br />
Sounds like air escapes from gauge Gauge needs replacement<br />
None of above Contact you dealer<br />
Precision:<br />
Problem Probable cause Solution<br />
Precision Pellets Try different pellets<br />
Malfunction:<br />
Magazine Check magazine for malfunction, replace if needed.<br />
Silencer Remove and try without<br />
Barrel breech o-ring Check o-ring in barrel breech, replace if needed.<br />
Barrel support Remove and try without<br />
Low pressure Charge the rifle<br />
None of above Contact you dealer<br />
Problem Probable cause Solution<br />
Trigger wont engage Worn trigger parts Try adjusting, replace if needed.<br />
Rifle wont fire Empty of air, or as point 1 Charge the rifle<br />
Magazine is not rotating Index lever might be bent Index lever needs to be replaced.<br />
Rear bottle is wobbling Bottle mount has loosened Mount needs to be tighten a.s.a.p.<br />
Rifle wont auto reload Pellet leftovers<br />
On my Semi Auto<br />
Worn trigger parts Try adjusting, replace if needed<br />
Low pressure Charge the rifle<br />
Remove end cap and clean out.<br />
The air chamber and also return<br />
pipe on the revolution.<br />
Too much pressure Shoot a couple of rounds with<br />
just air to get the pressure down<br />
None of above Contact your dealer<br />
18 19
8 ACCESSORIES<br />
NEW!<br />
NEW!<br />
Foresight Mount<br />
For mounting of diopter sight on<br />
<strong>FX</strong> Rifles and others.<br />
Compensator function.<br />
Adjustable clockwise<br />
Connection foresight: 11 mm dovetail<br />
Connection to Rifle: ½” thread<br />
Weight: 170 g<br />
Smoothtwist Pellets<br />
Available in Calibre 5,5 (.22) weight<br />
1,030 g (16 grains) and 1,17g (18 grains)<br />
20<br />
barrel support<br />
Requires newer version air<br />
cylinder with raised section on<br />
end cap. Available for standard<br />
(14 mm). barrel and shrouded<br />
versions (16 mm). Replacement<br />
end cap is required if an older<br />
version of cylinder. Is to be used<br />
with barrel support.<br />
barrel support<br />
Suits all rifles with a barrel of<br />
14 mm in diameter and a tube<br />
diameter of 33 mm.<br />
Scopemounts<br />
Sport Utility Rings have a unique wrap around<br />
design, are available in 1 inch diameters, fits any<br />
scope size (low, medium or high) and comes in<br />
matte black.<br />
Cleaning pellets<br />
Recommended for all <strong>FX</strong> guns. Outstanding cleaning<br />
without damage to the barrel. Available in 4,5 (.177)<br />
and 5,5 (.22).<br />
<strong>FX</strong> Pellets<br />
High performance domed (round tip) air rifle pellets.<br />
Recommended for all <strong>FX</strong> products.<br />
Calibre: 5,52 (.22) weight 1,030 grams (16 grains)<br />
Calibre: 4,52 (.177) weight 0,547 grams (8,44 grains)<br />
NEW!<br />
<strong>FX</strong> Optics 6-18x44 SFIR<br />
Objective Lens Diameter 44 mm<br />
Diopter Adjustment Range -2,0 / -2,0<br />
Reticle Illuminated Red<br />
Parallax 10 yds-infinity - wheel adjusted<br />
Body Tube Diamter 30 mm<br />
Total Length 335 mm<br />
Total Weight 750 g<br />
Lens Coating Fully Multi Coated<br />
Addition<br />
Shrouded barrel and barrelsupport.<br />
Available as addition on some of the<br />
<strong>FX</strong> rifles.<br />
<strong>FX</strong> optics 3-12x44 ir/ao<br />
Objective Lens Diameter 44 mm<br />
Diopter Adjustment Range -2.0 / +2.0<br />
Reticle Illuminated Red<br />
Parallax 30 yds-infinity<br />
Body Tube Diamater 25.4 mm<br />
Total Length 412 mm<br />
Total Weight 500 g<br />
Lens Coating Fully Multi-coated<br />
Single Scoped Rifle Case<br />
Contoured recessed latches. Padlock tabs for added security Strong and ribbed construction.<br />
Inner dimension: 121x27x7 cm.<br />
21
8 ACCESSORIES<br />
NEW!<br />
Pump accessories<br />
Various adapters DIN to 1/8”. External<br />
moisture trap, easy to service and clean,<br />
1/8” connections.<br />
Four stage turbopump<br />
The new Turbo Pump is equipped with a<br />
patented 4 stage system. It has a unique<br />
gearing system that gives you the opportunity<br />
to gear down when it gets rough. It<br />
allows the user to choose if they want high<br />
volume (300 cc) with lower pressure<br />
Or low volume (200 cc) with higher pressure.<br />
Features: Pressure gauge, moisture trap,<br />
particle filter (replaceable), and bleed valve.<br />
Unique Gearing system.<br />
Three stage pump<br />
The easiest most convenient and affordable<br />
way to charge your airguns Patented<br />
three way system gives you 200 bar with<br />
ease. Maximum fill pressure 250 bar.<br />
Features: Pressure gauge, moisture<br />
trap, particle filter (replaceable), and<br />
bleed valve.<br />
Connections: DIN or Kevlar hose 0,5 m<br />
with 1/8” thread.<br />
Fillprobe adaptor MkII > MkI<br />
For easy swap between later model of<br />
quick charging connector and early model<br />
connector.<br />
Made of Hardened steel<br />
<strong>FX</strong> Airtubes<br />
Available for all guns with removable airtube.<br />
Front tubes<br />
240cc - 500 mm • 185 cc - 390 mm<br />
150cc - 320 mm • 65cc - 140 mm<br />
45cc - 100 mm<br />
Rear bottles:<br />
500 cc and 400 cc<br />
Maximum fill pressure 220 bar.<br />
Gauge assembly<br />
This gauge suits all our front<br />
airtubes.<br />
You can use it with or without<br />
barrel support.<br />
Tube clamp<br />
Allows easy addition of a sling,<br />
strap, bipod or other accessory<br />
without any modification to the<br />
fore end of the stock. Suitable<br />
for all airtubess with a diameter<br />
of 33 mm.<br />
Tube extension<br />
Add this to your existing airtube<br />
for additional volume.<br />
Approximately 5- 10 more shots<br />
at high power. 45cc - 100 mm.<br />
Muzzle Flip<br />
Suits all <strong>FX</strong> Rifles with<br />
½” thread on the muzzle.<br />
Mounted as standard on<br />
the Verminator<br />
Charging kit<br />
Complete charging device for your scuba tank.<br />
Features: Pressure gauge, particle filter (replaceable),<br />
and bleed valve. Connections: Kevlar hose<br />
0,5 m with 1/8” thread / <strong>FX</strong> Fill probe and DIN in<br />
scuba end.<br />
Typhoon magazine<br />
A multishot solution for<br />
the singelshot Typhoon,<br />
Manually rotated.<br />
With room for 10 pellets,<br />
available in caliber 4,5<br />
(.177) and 5,5 (.22).<br />
Also suits Tornado<br />
(JPN) and Logun Solo.<br />
<strong>FX</strong> Magazines<br />
Spare magazines in calibre 4,5 (.177) and 5,5<br />
(.22). State type of gun when ordering.<br />
22 23