Sail Trimming Guide for the Beneteau 43 - Neil Pryde Sails
Sail Trimming Guide for the Beneteau 43 - Neil Pryde Sails
Sail Trimming Guide for the Beneteau 43 - Neil Pryde Sails

Create successful ePaper yourself
Turn your PDF publications into a flip-book with our unique Google optimized e-Paper software.
INTERNATIONAL DESIGN AND TECHNICAL OFFICE<br />
<strong>Sail</strong> <strong>Trimming</strong> <strong>Guide</strong> <strong>for</strong><br />
<strong>the</strong> <strong>Beneteau</strong> <strong>43</strong><br />
June 2008<br />
© <strong>Neil</strong> <strong>Pryde</strong> <strong>Sail</strong>s International<br />
1681 Barnum Avenue<br />
Strat<strong>for</strong>d, CONN 06614<br />
Phone: 203-375-2626 • Fax: 203-375-2627<br />
Email: admin@neilprydesails.com<br />
Web: www.neilprydesails.com<br />
All material herein<br />
Copyright 2008-2009 <strong>Neil</strong> <strong>Pryde</strong> <strong>Sail</strong>s International<br />
All Rights Reserved
HEADSAIL OVERVIEW:<br />
The <strong>Beneteau</strong> <strong>43</strong> built in <strong>the</strong> USA and supplied with <strong>Neil</strong> <strong>Pryde</strong> <strong>Sail</strong>s is equipped with a 140% headsail that is 511sf / 47.5m2 in<br />
area and is fitted to a Profurl C420 furling unit.<br />
The following features are built into this headsail:<br />
• The size is optimized to sheet correctly to <strong>the</strong> factory track when fully deployed and when reefed.<br />
• <strong>Neil</strong> <strong>Pryde</strong> Multi-Track Foam Luff System, which allows <strong>for</strong> smooth and correctly shaped sails when reefed. (See <strong>the</strong><br />
Technical brief on our website <strong>for</strong> details on this system)<br />
• Reef ‘buffer’ patches are fitted at both head and tack, which are designed to distribute <strong>the</strong> loads on <strong>the</strong> sail when reefed.<br />
• Reefing marks located on <strong>the</strong> starboard side of <strong>the</strong> tack buffer patch provide a visual mark <strong>for</strong> setting up pre-determined<br />
reefing locations. These are located 600mm/2.0ft, 1200mm /3.93ft and 1800mm/ 5.9ft aft of <strong>the</strong> tack.<br />
• A telltale ‘window’ at <strong>the</strong> leading edge of <strong>the</strong> sail located about<br />
14% of <strong>the</strong> luff length above <strong>the</strong> tack of <strong>the</strong> sail and is designed<br />
to allow <strong>the</strong> helmsperson to easily see <strong>the</strong> wind flowing around<br />
<strong>the</strong> leading edge of <strong>the</strong> sail when sailing close-hauled. The telltales<br />
are red and green, so that one can quickly identify <strong>the</strong><br />
leeward and wea<strong>the</strong>r telltales.<br />
• A draft stripe <strong>for</strong> quick sail shape/depth reference.<br />
There are several points to understand:<br />
• We used <strong>the</strong> outer shroud where it intersects <strong>the</strong> deck at <strong>the</strong> aft<br />
side of <strong>the</strong> shroud as our ‘zero’ point in measuring <strong>the</strong> car<br />
location aft along <strong>the</strong> track. To ensure accuracy we suggest<br />
measuring both sides when determining <strong>the</strong> location of <strong>the</strong> cars.<br />
• The <strong>for</strong>ward end of <strong>the</strong> car has a button-stop that is lifted up to<br />
disengage <strong>the</strong> pin that holds <strong>the</strong> car in place. When moving <strong>the</strong><br />
car, always move <strong>the</strong> ‘lazy’ sheet, so that <strong>the</strong>re is no load on <strong>the</strong><br />
jib sheet or car when making adjustments. Lift <strong>the</strong> pin and slide<br />
<strong>the</strong> car <strong>for</strong>ward or aft.<br />
• There are evenly spaced holes on <strong>the</strong> genoa track <strong>for</strong>e and aft<br />
and on 100mm centers. The adjustment pin on <strong>the</strong> car will lock<br />
into <strong>the</strong>se holes.<br />
• Our measurements correspond to marks at <strong>the</strong> <strong>for</strong>ward end of <strong>the</strong><br />
car.<br />
Why Mark The Lead Position:<br />
You will find that once <strong>the</strong> initial trim settings are made to <strong>the</strong> genoa lead<br />
(car) position (which is critical to good per<strong>for</strong>mance) <strong>the</strong> cars will not<br />
require much movement <strong>for</strong>e and aft <strong>for</strong> different conditions. However, as<br />
one reefs <strong>the</strong> headsail smaller and smaller, <strong>the</strong> sail moves <strong>for</strong>ward and <strong>the</strong><br />
clew elevates slightly as a result. This changing dynamic requires that <strong>the</strong><br />
genoa lead position be adjusted to ensure proper trim when sailing with<br />
this now smaller sail. In marking <strong>the</strong> location of <strong>the</strong> cars so that <strong>the</strong>y<br />
coincide with <strong>the</strong> reefing marks at <strong>the</strong> tack of <strong>the</strong> genoa you will take <strong>the</strong><br />
guesswork out of setting <strong>the</strong> leads when reefing. The lazy genoa car can<br />
quickly and easily be moved <strong>for</strong>ward to <strong>the</strong> pre-marked location and <strong>the</strong>n<br />
during a slow tack <strong>the</strong> genoa is reefed to <strong>the</strong> coinciding mark at <strong>the</strong> tack.<br />
The sail trim will be properly set on <strong>the</strong> new tack. When measuring <strong>the</strong><br />
lead positions (as described below) you need to mark <strong>the</strong> track at <strong>the</strong><br />
<strong>for</strong>ward edge of <strong>the</strong> genoa car. You can do this with permanent marker,<br />
tape or some sort of self-adhesive ‘dots’. The marks should be on <strong>the</strong><br />
deck as track mounted tape/marks can be rubbed off by <strong>the</strong> car.<br />
Measuring aft from <strong>the</strong> shroud base<br />
The Deck Mark is located on deck and at <strong>for</strong>ward end of <strong>the</strong><br />
genoa car. Note <strong>the</strong> lifting button is at <strong>the</strong> front of <strong>the</strong> car and<br />
partially hidden by <strong>the</strong> genoa sheet<br />
The headsail furled with <strong>the</strong> furling mark pointing aft. Note <strong>the</strong><br />
counter clockwise rotation of <strong>the</strong> sail. The U.V. Cover is on <strong>the</strong><br />
STARBOARD side and should always be furled in this direction.<br />
Page 2 2
MARKING THE LEAD POSTION:<br />
Full Size:<br />
When your genoa is completely unfurled <strong>for</strong> sailing, <strong>the</strong> <strong>for</strong>ward edge of <strong>the</strong><br />
genoa car should be 8’-8” / 2642mm aft of <strong>the</strong> outer shroud. This will be your<br />
‘all-purpose’ lead position. See picture to middle right.<br />
• This will be appropriate <strong>for</strong> wind strengths of 7-12 knots true wind.<br />
• <strong>Sail</strong>ing in less than 7 knots of true wind move <strong>the</strong> lead position<br />
<strong>for</strong>ward to 8’-4” / 2539mm aft of <strong>the</strong> shroud, making <strong>the</strong> genoa<br />
fuller and powerful <strong>for</strong> <strong>the</strong>se conditions.<br />
• In more than 12 knots of wind, you may move <strong>the</strong> lead aft one hole<br />
(de-powering <strong>the</strong> sail slightly) or begin to consider reefing <strong>the</strong><br />
headsail.<br />
• The genoa should be sheeted so that <strong>the</strong>re is sufficient tension on <strong>the</strong><br />
sail to bring <strong>the</strong> leech to between 2”-8” / 50-205mm from <strong>the</strong> tip of<br />
<strong>the</strong> lower spreader and <strong>the</strong> sail should be between 3”-8” / 75-205mm<br />
outside <strong>the</strong> shroud base. The sail will be inside <strong>the</strong> upper spreader as<br />
shown in <strong>the</strong> photo at right.<br />
First Reef Mark:<br />
With <strong>the</strong> genoa furled to <strong>the</strong> first reefing mark and <strong>the</strong> mark facing aft, <strong>the</strong><br />
lead car should be moved <strong>for</strong>ward until it is 6’-8”/2033mm aft of <strong>the</strong> outer<br />
shroud.<br />
Second Reef Mark:<br />
With <strong>the</strong> genoa furled to <strong>the</strong> second and deepest ‘reefing’ mark, <strong>the</strong> lead car<br />
should be moved <strong>for</strong>ward until it is 5’-1”/1548mm aft of <strong>the</strong> outer shroud.<br />
Third Reef Mark:<br />
With <strong>the</strong> genoa furled to <strong>the</strong> second reefing mark, <strong>the</strong> lead car should be<br />
moved <strong>for</strong>ward until it is 3’-5”/1048mm aft of <strong>the</strong> outer shroud.<br />
Conditions that require this third reef will be quite windy and depending on<br />
your com<strong>for</strong>t level you might use this reef from 16 knots on up. This position<br />
will keep <strong>the</strong> foot of <strong>the</strong> sail quite tight, flattening <strong>the</strong> shape <strong>for</strong> good breezy<br />
per<strong>for</strong>mance.<br />
Leech trim, close hauled and with full size sail<br />
Track location <strong>for</strong> <strong>the</strong> full size genoa and <strong>the</strong> “AP” setting.<br />
Note <strong>the</strong> light air setting just <strong>for</strong>ward of this.<br />
Genoa Notes:<br />
Generally, sail trim is a bit of science, a bit of feel and a bit common sense.<br />
As a basic rule, we like to say that if it looks right, it probably is. Your <strong>Neil</strong><br />
<strong>Pryde</strong> sails are designed, tuned, and tested <strong>for</strong> each specific model and as<br />
such, you will be able to achieve proper trim using this guide.<br />
Occasionally, you might find that <strong>the</strong> leech flutters a bit. If this happens, it’s<br />
usually that <strong>the</strong> sheet tension is not tight enough (you need to winch <strong>the</strong> sail<br />
in a bit tighter). However, if <strong>the</strong> boat becomes over-powered (healing<br />
Car location when reefed to first mark.<br />
excessively), you should consider reefing <strong>the</strong> sail at this time. Assuming you<br />
have <strong>the</strong> leads in <strong>the</strong> right location and <strong>the</strong> sheet tension is correct, but <strong>the</strong> sail still has a bit of flutter, you should adjust <strong>the</strong><br />
leechline to keep <strong>the</strong> leech from fluttering.<br />
The photo on <strong>the</strong> next page shows <strong>the</strong> leechline pocket opened to reveal <strong>the</strong> leechline, snubbing eyes, cleat and <strong>the</strong> ‘tail’ pocket.<br />
The snubbing eyes help to take <strong>the</strong> load from <strong>the</strong> line making cleating and un-cleating an easy task. The ‘tail pocket is on <strong>the</strong><br />
inside of <strong>the</strong> leechline cover and you can put <strong>the</strong> excess leechline tail into this pocket be<strong>for</strong>e closing <strong>the</strong> cover. To adjust, take up<br />
<strong>the</strong> line by pulling downward just above <strong>the</strong> eyelets, taking up <strong>the</strong> slack in <strong>the</strong> line just below <strong>the</strong> cleat. Pull <strong>the</strong> line until <strong>the</strong><br />
flutter stops. Cleat <strong>the</strong> line and insert <strong>the</strong> tail into <strong>the</strong> pocket and close <strong>the</strong> flap.<br />
Page 3 3
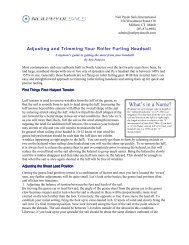
Reefing Notes:<br />
Reefing <strong>the</strong> mainsail, headsail or both in combination allows <strong>the</strong> skipper to keep <strong>the</strong><br />
trim of <strong>the</strong> boat in a more upright mode. This is a safer, more com<strong>for</strong>table and faster<br />
way to sail in strong breezes. In addition, reefing <strong>the</strong> sails importantly affects <strong>the</strong><br />
balance of <strong>the</strong> boat and can increase or decrease <strong>the</strong> amount of wea<strong>the</strong>r helm that<br />
develops at <strong>the</strong> wheel. The timing and sequence of reefing is up to <strong>the</strong> skipper of <strong>the</strong><br />
boat to consider and will vary from skipper to skipper, as some conditions or<br />
preference in how <strong>the</strong> boat is sailed in reefing conditions are variable. With this in<br />
mind, <strong>the</strong> following points are general observations.<br />
1. The ‘balance’ of helm is regulated through mast rake, <strong>for</strong>e and aft. This will<br />
be preset during <strong>the</strong> initial commissioning.<br />
a. More mast rake aft will move <strong>the</strong> sailplan center of ef<strong>for</strong>t aft, in<br />
effect putting more loads on <strong>the</strong> sails aft of <strong>the</strong><br />
keel. This will <strong>the</strong>n in turn ‘pivot’ <strong>the</strong> boat around<br />
<strong>the</strong> keel, bringing <strong>the</strong> bow into <strong>the</strong> wind.<br />
Leechline, cleat and ‘tail’ pocket<br />
b. Mast rake <strong>for</strong>ward and <strong>the</strong> opposite is true, <strong>the</strong><br />
balance moves <strong>for</strong>ward and <strong>the</strong> boat will gain<br />
neutral or lee helm.<br />
2. Wea<strong>the</strong>r helm is desirable in all sailing yachts. It keeps <strong>the</strong> bow into <strong>the</strong> wind while sailing upwind and<br />
improves your VMG to wea<strong>the</strong>r.<br />
a. In 10 to 12 knots of wind with <strong>the</strong> sails fully deployed we expect to have <strong>the</strong> helm just slightly<br />
above neutral or with a small amount of helm. This means in releasing <strong>the</strong> wheel, <strong>the</strong> boat will<br />
(depending on wind, sea conditions and boat trim) slowly come into <strong>the</strong> wind.<br />
3. As you reef <strong>the</strong> sails, you are also going to affect <strong>the</strong> balance or center of ef<strong>for</strong>t on <strong>the</strong> sailplan.<br />
a. Reefing <strong>the</strong> genoa will reduce <strong>the</strong> area of this sail and in turn moves <strong>the</strong> center of ef<strong>for</strong>t aft,<br />
increasing helm.<br />
b. Reefing <strong>the</strong> mainsail first, will move <strong>the</strong> center of ef<strong>for</strong>t <strong>for</strong>ward and decrease <strong>the</strong><br />
wea<strong>the</strong>r helm.<br />
With <strong>the</strong>se points in mind, we generally recommend that in <strong>the</strong> case of <strong>the</strong> B<strong>43</strong>, <strong>the</strong> mainsail should be<br />
reefed to <strong>the</strong> first reef in <strong>the</strong> classic mainsail or just be<strong>for</strong>e <strong>the</strong> top-most batten with <strong>the</strong> PBF mainsail<br />
(both giving about an equal area reduction) when first shortening sail. We have located a reefing mark<br />
on <strong>the</strong> port side of <strong>the</strong> mainsail at <strong>the</strong> tack that indicates this reef position. This amount of sail<br />
reduction will ensure a balanced helm as <strong>the</strong> breeze initially builds. In 15 knots true wind, you will<br />
need <strong>the</strong> mainsail reefed and <strong>the</strong> genoa reefed to <strong>the</strong> first reef mark and though you may be<br />
somewhat underpowered initially, as sailors we find it safer to assume <strong>the</strong> wind will continue to<br />
build and it is always more prudent to reef earlier than later. Should <strong>the</strong> wind decrease, increasing<br />
<strong>the</strong> sail area is easily accomplished by deploying <strong>the</strong> genoa so it can be full sized again.<br />
Assuming <strong>the</strong> breeze continues to build into <strong>the</strong> upper teens, it is important to have a sense of<br />
how much wea<strong>the</strong>r helm you have. If you find yourself fighting to keep <strong>the</strong> bow down (<strong>the</strong><br />
boat continually wanting to come up hard into <strong>the</strong> wind) <strong>the</strong>n you need to reduce <strong>the</strong> mainsail<br />
area ei<strong>the</strong>r by furling <strong>the</strong> mainsail in-mast additionally or going to <strong>the</strong> second reef in <strong>the</strong><br />
Classic mainsail. This will establish <strong>the</strong> balance back to <strong>the</strong> helm and also decrease <strong>the</strong> total<br />
net sail area, making <strong>the</strong> boat more upright and com<strong>for</strong>table.<br />
CAUTION!<br />
tah<br />
t o s d e l ur f eb<br />
ts<br />
um<br />
l i a sn<br />
i aM<br />
ts<br />
am<br />
e ht<br />
e di<br />
sn<br />
i si<br />
en<br />
i l s i h t<br />
Failuretodosowilcauseprematurebreak-<br />
. es<br />
u n i to<br />
n s i l i as<br />
n ai m e ht<br />
ne<br />
h w<br />
downof<strong>the</strong>sailclothduetosunlightdamage,<br />
Note: Furling Label is on Starboard!<br />
Furling Mark at tack on Port<br />
whichisnotcoveredbywaranty.<br />
1. Furling mainsails offer <strong>the</strong> user infinite reefing positions as compared to fixed<br />
reefing points found on traditional mainsails. The only exception to this is that<br />
when reefed, <strong>the</strong> sail should not be reefed with a batten partially in or out of<br />
<strong>the</strong> mast. When reefed <strong>the</strong> nearest batten to <strong>the</strong> mast should be all <strong>the</strong> way in<br />
our all <strong>the</strong> way out.<br />
2. Typically reefing <strong>the</strong> mainsail so that <strong>the</strong> uppermost batten is just behind <strong>the</strong><br />
Page 4 4
mast will reduce <strong>the</strong> area of <strong>the</strong> mainsail by 30-35%, reefing to <strong>the</strong> second highest batten will reduce <strong>the</strong> area by 65-<br />
75%. (this compares to 25 and 45% on <strong>the</strong> Classic mainsails)<br />
3. Given this reduction, we recommend a starting place <strong>for</strong> <strong>the</strong> first reef to be about three quarters of <strong>the</strong> way to <strong>the</strong><br />
uppermost batten and <strong>the</strong> second reef half way between <strong>the</strong> uppermost and second batten and this is <strong>the</strong> approximate<br />
reduction when reef to <strong>the</strong> mark at <strong>the</strong> tack of <strong>the</strong> sail.<br />
MAINSAIL TRIM:<br />
The following points on mainsail trim apply both to <strong>the</strong> Furling and Classic mainsail, as <strong>the</strong> concepts are <strong>the</strong> same. Mainsail trim<br />
falls into two categories, upwind and downwind.<br />
Upwind<br />
1. Upwind in up to about 8 knots true wind <strong>the</strong> traveler can be brought<br />
to wea<strong>the</strong>r of centerline. This ensures that <strong>the</strong> boom will be close<br />
centerline and <strong>the</strong> leech of <strong>the</strong> sail in a powerful upwind mode.<br />
2. The outhaul should be eased 2” / 50mm at <strong>the</strong> stopper, easing <strong>the</strong><br />
foot of <strong>the</strong> mainsail away from <strong>the</strong> boom about 8”/200mm<br />
3. Mainsheet tension should be tight enough to have <strong>the</strong> uppermost tell<br />
tail on <strong>the</strong> leech streaming aft about 50% of <strong>the</strong> time in <strong>the</strong> 7-12 true<br />
wind range. For those with furling mainsails <strong>the</strong> action of furling and<br />
unfurling <strong>the</strong> sail can play havoc with keeping <strong>the</strong> telltales on <strong>the</strong><br />
sail and you may need to replace <strong>the</strong>m from time to time.<br />
You will find that <strong>the</strong> upper tell tail will stall and fold over to <strong>the</strong><br />
wea<strong>the</strong>r side of <strong>the</strong> sail about 50% of <strong>the</strong> time in 7-12 knots.<br />
However, if <strong>the</strong> top tell tail is folding over to leeward, <strong>the</strong> mainsheet<br />
tension is too loose and it needs to be brought in tighter.<br />
4. In 8-12 knots <strong>the</strong> outhaul should be brought in ½ of light air setting<br />
and <strong>the</strong> traveller lowered to half <strong>the</strong> distance to centerline.<br />
5. With <strong>the</strong> mainsheet tension set, <strong>the</strong> boom-vang should be tensioned<br />
until it is just snug.<br />
6. In over 12 knots, <strong>the</strong> upper tell tail should be flowing almost all <strong>the</strong><br />
time.<br />
7. As <strong>the</strong> wind builds above <strong>the</strong> 12-knot range you will need to depower<br />
<strong>the</strong> boat to keep her on her lines and to reduce wea<strong>the</strong>r helm.<br />
Start by getting <strong>the</strong> outhaul all <strong>the</strong> way on and <strong>the</strong>n let <strong>the</strong> traveler<br />
down in additional 3" /76mm increments until <strong>the</strong> boat balances. If<br />
<strong>the</strong> action of lowering <strong>the</strong> traveler to balance <strong>the</strong> helm causes <strong>the</strong><br />
mainsail to backwind, this means it is time to consider reefing <strong>the</strong><br />
mainsail.<br />
Reef mark on mainsail<br />
Downwind<br />
1. With <strong>the</strong> boom-vang set as outlined above <strong>the</strong> mainsail will have close to <strong>the</strong> right trim <strong>for</strong> downwind sailing.<br />
2. As soon as <strong>the</strong> sails are eased and sailing lower downwind angles (even as little as 3 0 ) ease <strong>the</strong> traveler down in 3"<br />
increments until <strong>the</strong> boat balances and drives well.<br />
3. Bearing off 12 0 Mainsail outhaul eased <strong>for</strong> light air upwind trim<br />
and deeper, <strong>the</strong> traveler should be all <strong>the</strong> way out and at this point start to ease <strong>the</strong> mainsheet. The leech<br />
tension should correct assuming <strong>the</strong> boom-vang was tightened as above. At this point all your telltales will be flowing<br />
aft.<br />
4. With a battened mainsail (Classic), one normally keeps <strong>the</strong> top batten parallel to <strong>the</strong> boom while off <strong>the</strong> wind. Achieve<br />
this with <strong>the</strong> boom vang keeping <strong>the</strong> leech adjusted and <strong>the</strong> telltales flowing aft. Obviously, without <strong>the</strong> battens (furling<br />
mainsails) you will need to eyeball it. If <strong>the</strong> top batten or sail is falling off to leeward from this position, tighten <strong>the</strong><br />
vang to bring it back in line with <strong>the</strong> boom.<br />
With <strong>the</strong> leech trimmed this way, both tell tails should fly aft 95% of <strong>the</strong> time.<br />
Page 5 5
SAIL CARE:<br />
Both mainsails and headsails will get dirty with time and use. A primary source is air pollution which deposits filth on <strong>the</strong><br />
standing rigging. The sails in turn will pick this up when <strong>the</strong>y come in contact with shrouds, mast and spreaders. This obviously<br />
affects <strong>the</strong> headsail to a greater degree as it is dragged across <strong>the</strong> rigging with each tack and gybe. We recommend a yearly<br />
cleaning ei<strong>the</strong>r on your own or through a commercial sail cleaner or sail loft.<br />
Roller Furling Mainsails are equipped with a small label on <strong>the</strong> starboard clew of <strong>the</strong> sail. This is designed as a ‘marker’ that will<br />
indicate when <strong>the</strong> mainsail is furled inside <strong>the</strong> mast enough so that <strong>the</strong> U.V. cover on both sides of <strong>the</strong> sail will protect <strong>the</strong> sail. It<br />
is imperative that <strong>the</strong> sail be furled so that <strong>the</strong> label is clearly inside <strong>the</strong> mast, thus protecting <strong>the</strong> sailcloth from harmful U.V.<br />
which will damage <strong>the</strong> sailcloth quickly.<br />
Furling Label on starboard side of mainsail clew patch<br />
Mainsail with label furled inside mast and sail furled correctly.<br />
Mainsail with label and sail exposed; INCORRECTLY furled<br />
Page 6 6