VCT Flooring Installation - com. install procedures/tile - Mohawk Group
VCT Flooring Installation - com. install procedures/tile - Mohawk Group
VCT Flooring Installation - com. install procedures/tile - Mohawk Group

Create successful ePaper yourself
Turn your PDF publications into a flip-book with our unique Google optimized e-Paper software.
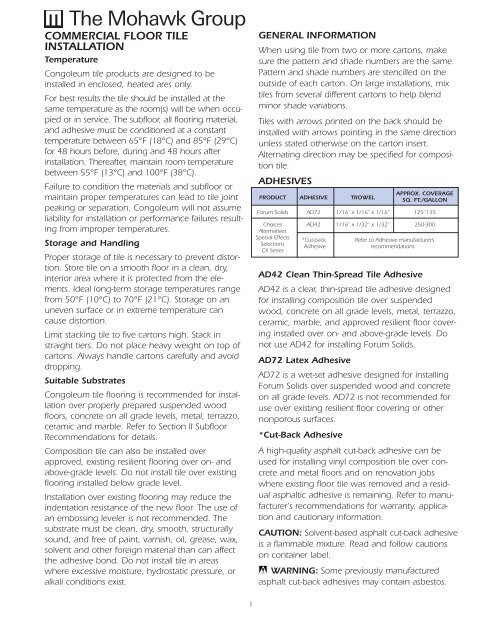
COMMERCIAL FLOOR TILE<br />
INSTALLATION<br />
Temperature<br />
Congoleum <strong>tile</strong> products are designed to be<br />
<strong>install</strong>ed in enclosed, heated ares only.<br />
For best results the <strong>tile</strong> should be <strong>install</strong>ed at the<br />
same temperature as the room(s) will be when occupied<br />
or in service. The subfloor, all flooring material,<br />
and adhesive must be conditioned at a constant<br />
temperature between 65°F (18°C) and 85°F (29°C)<br />
for 48 hours before, during and 48 hours after<br />
<strong>install</strong>ation. Thereafter, maintain room temperature<br />
between 55°F (13°C) and 100°F (38°C).<br />
Failure to condition the materials and subfloor or<br />
maintain proper temperatures can lead to <strong>tile</strong> joint<br />
peaking or separation. Congoleum will not assume<br />
liability for <strong>install</strong>ation or performance failures resulting<br />
from improper temperatures.<br />
Storage and Handling<br />
Proper storage of <strong>tile</strong> is necessary to prevent distortion.<br />
Store <strong>tile</strong> on a smooth floor in a clean, dry,<br />
interior area where it is protected from the elements.<br />
Ideal long-term storage temperatures range<br />
from 50°F (10°C) to 70°F (21°C). Storage on an<br />
uneven surface or in extreme temperature can<br />
cause distortion.<br />
Limit stacking <strong>tile</strong> to five cartons high. Stack in<br />
straight tiers. Do not place heavy weight on top of<br />
cartons. Always handle cartons carefully and avoid<br />
dropping.<br />
Suitable Substrates<br />
Congoleum <strong>tile</strong> flooring is re<strong>com</strong>mended for <strong>install</strong>ation<br />
over properly prepared suspended wood<br />
floors, concrete on all grade levels, metal, terrazzo,<br />
ceramic and marble. Refer to Section II Subfloor<br />
Re<strong>com</strong>mendations for details.<br />
Composition <strong>tile</strong> can also be <strong>install</strong>ed over<br />
approved, existing resilient flooring over on- and<br />
above-grade levels. Do not <strong>install</strong> <strong>tile</strong> over existing<br />
flooring <strong>install</strong>ed below grade level.<br />
<strong>Installation</strong> over existing flooring may reduce the<br />
indentation resistance of the new floor. The use of<br />
an embossing leveler is not re<strong>com</strong>mended. The<br />
substrate must be clean, dry, smooth, structurally<br />
sound, and free of paint, varnish, oil, grease, wax,<br />
solvent and other foreign material than can affect<br />
the adhesive bond. Do not <strong>install</strong> <strong>tile</strong> in areas<br />
where excessive moisture, hydrostatic pressure, or<br />
alkali conditions exist.<br />
1<br />
GENERAL INFORMATION<br />
When using <strong>tile</strong> from two or more cartons, make<br />
sure the pattern and shade numbers are the same.<br />
Pattern and shade numbers are stencilled on the<br />
outside of each carton. On large <strong>install</strong>ations, mix<br />
<strong>tile</strong>s from several different cartons to help blend<br />
minor shade variations.<br />
Tiles with arrows printed on the back should be<br />
<strong>install</strong>ed with arrows pointing in the same direction<br />
unless stated otherwise on the carton insert.<br />
Alternating direction may be specified for <strong>com</strong>position<br />
<strong>tile</strong>.<br />
ADHESIVES<br />
PRODUCT ADHESIVE TROWEL<br />
AD42 Clean Thin-Spread Tile Adhesive<br />
AD42 is a clear, thin-spread <strong>tile</strong> adhesive designed<br />
for <strong>install</strong>ing <strong>com</strong>position <strong>tile</strong> over suspended<br />
wood, concrete on all grade levels, metal, terrazzo,<br />
ceramic, marble, and approved resilient floor covering<br />
<strong>install</strong>ed over on- and above-grade levels. Do<br />
not use AD42 for <strong>install</strong>ing Forum Solids.<br />
AD72 Latex Adhesive<br />
AD72 is a wet-set adhesive designed for <strong>install</strong>ing<br />
Forum Solids over suspended wood and concrete<br />
on all grade levels. AD72 is not re<strong>com</strong>mended for<br />
use over existing resilient floor covering or other<br />
nonporous surfaces.<br />
*Cut-Back Adhesive<br />
APPROX. COVERAGE<br />
SQ. FT./GALLON<br />
Forum Solids AD72 1/16” x 1/16” x 1/16” 125-`135<br />
Choices<br />
Alternatives<br />
AD42 1/16” x 1/32” x 1/32” 250-300<br />
Special Effects<br />
Selections<br />
CX Series<br />
*Cut-back<br />
Adhesive<br />
Refer to Adhesive manufacturer’s<br />
re<strong>com</strong>mendations<br />
A high-quality asphalt cut-back adhesive can be<br />
used for <strong>install</strong>ing vinyl <strong>com</strong>position <strong>tile</strong> over concrete<br />
and metal floors and on renovation jobs<br />
where existing floor <strong>tile</strong> was removed and a residual<br />
asphaltic adhesive is remaining. Refer to manufacturer's<br />
re<strong>com</strong>mendations for warranty, application<br />
and cautionary information.<br />
CAUTION: Solvent-based asphalt cut-back adhesive<br />
is a flammable mixture. Read and follow cautions<br />
on container label.<br />
WARNING: Some previously manufactured<br />
asphalt cut-back adhesives may contain asbestos.
In preparation for new floor <strong>tile</strong>, residual cut-back<br />
adhesive must be scraped to a thin, smooth film<br />
following re<strong>com</strong>mended work practices in accordance<br />
with local, state, and federal regulations.<br />
See Warning Statement on inside cover.<br />
Precautions<br />
The use of the correct adhesive and proper application<br />
is critical for quality, trouble-free <strong>install</strong>ation.<br />
Excessive amounts of adhesive will result in<br />
telegraphing or exudation (oozing) between the<br />
<strong>tile</strong> in service depending upon the type of adhesive<br />
used; whereas, insufficient coverage, caused by<br />
spreading too thin or using worn trowels, will prevent<br />
proper adhesion of the <strong>tile</strong>.<br />
Some concrete floors are excessively porous and<br />
absorptive. Premature set-up of the adhesives is<br />
first-hand evidence of excessive absorptivity (i.e.,<br />
when adhesive sets up in less open time than specified<br />
on the label). This condition can be corrected<br />
by priming the subfloor with the required adhesive<br />
(using a straightedge steel trowel for application of<br />
the adhesive). The prime coat should be as thin as<br />
possible.<br />
ROOM LAYOUT<br />
IMPORTANT: Avoid positioning <strong>tile</strong> seams directly<br />
over the underlayment joints or seams in the old<br />
floor covering.<br />
There are two basic <strong>tile</strong> layouts: square and diagonal.<br />
Two or more colors from the same or coordinating<br />
product lines can also be mixed or matched<br />
to create decorative borders and special effects.<br />
Square Layout<br />
• Place a mark in the center of the floor at each<br />
end of the room. Snap a chalk line down the<br />
center of the floor to connect the marks (AB).<br />
• Find the center of the line and snap a second<br />
chalk line (CD) at a right angle using the 3', 4',<br />
5' method to form a right angle (Figure 1).<br />
A B<br />
C<br />
D<br />
Fig. 1. Square layout<br />
2<br />
Starting at the center of the room, lay a row of<br />
loose <strong>tile</strong>s along the chalk lines to one end wall<br />
and one sidewall. If the distance between the edge<br />
of the last full <strong>tile</strong> and the wall is less than a half<br />
<strong>tile</strong>, establish a new center line(s) one-half the<br />
dimension of a full <strong>tile</strong> away (Figure 2).<br />
When <strong>install</strong>ing <strong>tile</strong> in irregular shaped rooms,<br />
check the size of the last <strong>tile</strong> along all walls and<br />
adjust the centerlines if necessary to achieve the<br />
best layout.<br />
A B<br />
Fig. 2. Adjust the center line(s).<br />
Diagonal Layout<br />
• Lay out the center and perpendicular lines as previously<br />
covered under Square Layout.<br />
• Place a mark on each line, an equal distance<br />
away from the center point (E, F, G, H).<br />
• Using a slightly larger measurement, swing an<br />
arc on both sides of each line from points E, F, G,<br />
H. Snap diagonal chalk lines at the point where<br />
the marks intersect (Figure 3). If done correctly,<br />
the chalk lines will intersect the center point.<br />
Fig. 3. Diagonal layout.<br />
If the layout includes a border, adjust the size of the<br />
border to allow half <strong>tile</strong>s to be used at the edge of<br />
the field <strong>tile</strong>s. When using two different colors, i.e.<br />
checkerboard design, it will be necessary to adjust<br />
C<br />
D
the layout to allow the same colored <strong>tile</strong> to be used<br />
at the edge of the field.<br />
To adjust the layout, snap new diagonal chalk lines<br />
one-half the distance of a full <strong>tile</strong> away from the<br />
original lines (Figure 4). It may also be necessary to<br />
adjust the size of the border.<br />
The chalk lines on both square and diagonal layouts<br />
will serve as guidelines for positioning the <strong>tile</strong> and<br />
adhesive application.<br />
Fig. 4. Adjust the layout to allow the same colored<br />
<strong>tile</strong> to be used at edge of the field.<br />
INSTALLATION PROCEDURES<br />
COMPOSITION TILE (ALTERNATIVES, CHOICES,<br />
CX SERIES, SELECTIONS, AND SPECIAL<br />
EFFECTS)<br />
Prepare the subfloor and determine the layout as<br />
previously described.<br />
Use AD42 Adhesive for <strong>install</strong>ing the listed products.<br />
Spread the adhesive with a 1/16" x 1/32" x 1/32"<br />
semicircular notch trowel. Adhesive can be spread<br />
over one-half of the floor provided it can be covered<br />
with <strong>tile</strong> in approximately 6 hours. Periodically<br />
check trowel for wear, particularly on concrete<br />
floors. Worn trowels should be re-notched or<br />
replaced.<br />
Allow the adhesive to dry to a tack before starting<br />
to <strong>install</strong> <strong>tile</strong>. The adhesive is dry when opaque<br />
color has changed to translucent amber and the<br />
adhesive does not transfer to the finger when<br />
pressed into it lightly. Drying time varies with temperature<br />
and humidity. A typical set-up time is 45-60<br />
minutes.<br />
Tiles should be laid starting at the center of the<br />
room, working towards the wall. The border <strong>tile</strong>s<br />
should be scribed to the wall, cut and fitted in<br />
place after the field <strong>tile</strong>s have been <strong>install</strong>ed.<br />
3<br />
Set the <strong>tile</strong>s into position. Position each <strong>tile</strong> tightly<br />
against the edges of the previously <strong>install</strong>ed <strong>tile</strong>s<br />
before pressing down firmly. Do not slide <strong>tile</strong>s into<br />
position.<br />
Immediately upon <strong>com</strong>pletion, roll the entire floor<br />
diagonally to the joints in both directions with a<br />
minimum 100-pound, three-section roller.<br />
Remove any adhesive that gets on the face of the<br />
<strong>tile</strong> with a clean, white cloth dampened with mineral<br />
spirits or lighter fluid.<br />
CAUTION: Mineral spirits and lighter fluid are<br />
extremely flammable. Read and follow cautions on<br />
container label.<br />
Reroll the entire floor after one to two hours.<br />
Do not wash or apply polish to the floor for a minimum<br />
of 48 hours after <strong>install</strong>ation.<br />
FORUM SOLIDS<br />
Prepare the subfloor and determine the layout as<br />
previously described. Use AD72 Latex Adhesive for<br />
<strong>install</strong>ing Forum Solids.<br />
Either of the following starting locations may be<br />
selected when <strong>install</strong>ing <strong>tile</strong> in wet-set adhesive.<br />
1.Start <strong>install</strong>ing <strong>tile</strong> at the center of the room working<br />
out toward the walls (Figure 5).<br />
2.An alternate method to starting at the center of<br />
the room involves shifting the center lines out<br />
toward the walls furthest from the doorway<br />
(Figure 6). Position the new lines 2' to 3' from the<br />
wall depending on your reach and the <strong>tile</strong> layout.<br />
This method will help to reduce <strong>tile</strong> shifting<br />
and eliminate the need to work on freshly laid<br />
<strong>tile</strong>.<br />
Spread the adhesive with a 1/16" x 1/16" x 1/16"<br />
square notched trowel. Do not apply AD72<br />
Adhesive to an area larger than can be <strong>tile</strong>d in<br />
approximately 20 minutes. After spreading the<br />
adhesive, wait for it to be<strong>com</strong>e tacky before<br />
<strong>install</strong>ing the <strong>tile</strong>, but DO NOT allow the adhesive<br />
to skin over. (This waiting time can vary according<br />
to humidity and porosity of the subfloor.) Skinnedover<br />
adhesive must be scraped up and replaced<br />
with fresh adhesive.<br />
Install <strong>tile</strong> according to room layout. Position each<br />
<strong>tile</strong> lightly against the previously laid <strong>tile</strong> with corners<br />
lined up and press firmly into adhesive. Avoid<br />
sliding <strong>tile</strong> into position to prevent adhesive from<br />
squeezing up between <strong>tile</strong>s. Periodically check to<br />
be sure at least 95% of the adhesive pattern has<br />
transferred to the back of the <strong>tile</strong>.
Fig. 5.<br />
Fig. 6.<br />
Remove adhesive smears from <strong>tile</strong> surface and<br />
joints immediately with a clean, white cloth and<br />
soapy water. Dried adhesive can be removed with<br />
a cloth dampened with mineral spirits or light fluid.<br />
CAUTION: Mineral spirits and lighter fluid are<br />
extremely flammable. Read and follow cautions on<br />
container label.<br />
Roll the <strong>install</strong>ed flooring diagonally to <strong>tile</strong> joints in<br />
both directions with a minimum 100-pound, three<br />
section, steel roller immediately after <strong>com</strong>pleting<br />
each section.<br />
Reroll the entire floor after one or two hours. Use a<br />
steel hand roller to level raised corners or edges.<br />
Do not wash or apply polish to the floor for a minimum<br />
of 72 hours. Restrict heavy or rolling traffic for<br />
24 hours.<br />
CUTTING AND FITTING<br />
Cut and fit border <strong>tile</strong>s after <strong>install</strong>ing field <strong>tile</strong>s.<br />
Exception: Cut and fit border <strong>tile</strong> immediately<br />
before adhesive skins over when <strong>install</strong>ing Forum<br />
Solids <strong>tile</strong> in wet-set adhesive (AD72) to avoid shifting.<br />
As an alternate method, dry fit <strong>tile</strong> prior to<br />
spreading adhesive.<br />
4<br />
Straight Walls<br />
1.Place <strong>tile</strong> to be cut, hereafter called Tile A, precisely<br />
over the <strong>tile</strong> in the row closest to the wall.<br />
2.Lay another <strong>tile</strong>, hereafter called Tile B, tight<br />
against the wall and directly over Tile A,<br />
(Figure 7).<br />
TILE B<br />
Fig. 7. Fitting to straight walls.<br />
TILE A<br />
3.Using the edge of Tile B, as a guide, mark Tile A<br />
with a pencil.<br />
4.Cut along the pencil line or score along the line<br />
with a utility knife and snap off the excess trim<br />
material.<br />
5.Place the <strong>tile</strong> into position with the cut edge<br />
along the wall and press firmly.<br />
6.Where arrows are marked on the back of the <strong>tile</strong>,<br />
the <strong>tile</strong> should be <strong>install</strong>ed with the arrows facing<br />
in the same direction, unless specifically instructed<br />
to do otherwise.<br />
Irregular Walls/Obstacles<br />
Use direct scribing or pattern scribing to fit <strong>tile</strong> to<br />
irregular shapes.<br />
Direct Scribe<br />
1.Place <strong>tile</strong> to be cut, hereafter called Tile A, along<br />
the wall, overlapping the last whole <strong>tile</strong>.<br />
2.Place a mark along the back edge of Tile A<br />
(Figure 8).<br />
3.Set dividers to the distance between the mark<br />
and the edge of the <strong>tile</strong> (Figure 9).<br />
4.Reposition the <strong>tile</strong> and scribe (Figure 10).<br />
5.Heat the <strong>tile</strong> from the back before cutting.
Fig. 8. Fig. 11.<br />
Fig. 9.<br />
Fig. 10.<br />
Pattern Scribing<br />
TIP: Cover adhesive with wax paper to avoid adhesive<br />
transfer if scribing felt is used. Remove wax<br />
paper before <strong>install</strong>ing the <strong>tile</strong>.<br />
1.Cut a piece of scribing felt the exact size of the <strong>tile</strong>.<br />
2.Position the felt in the area to be fit and trim<br />
approximately 1/4" (6.4 mm) short of the walls.<br />
3.Scribe the felt with dividers and extend reference<br />
lines (Figure 11).<br />
5<br />
4.Remove the felt and reposition it accurately on a<br />
piece of <strong>tile</strong>. Transcribe the marks (Figure 12).<br />
Heat the back of the <strong>tile</strong> before cutting.<br />
Fig. 12.<br />
Diagonal Layout<br />
Make a square template out of rigid sheet flooring<br />
or other rigid material. Use the exact dimensions of<br />
the <strong>tile</strong> when measured diagonally from corner to<br />
corner. (The diagonal dimension of a 12" x 12" <strong>tile</strong><br />
is approximately 17".)<br />
Follow the steps for fitting straight walls on square<br />
layouts, using the templates in place of Tile B<br />
(Figure 13).<br />
Fig. 13.
Radiator legs should never rest directly on the <strong>tile</strong>;<br />
they must be set on small pieces of metal having<br />
the same thickness as the <strong>tile</strong>. The metal should be<br />
6<br />
inserted prior to <strong>install</strong>ation in a hole cut or<br />
punched in the <strong>tile</strong>. NOTE: Tile cuts easier and is<br />
less likely to break when heated.<br />
The <strong>Mohawk</strong> <strong>Group</strong>, 500 TownPark Lane, Suite 400, Kennesaw, GA 30144, 800-554-6637 Customer Service 800-622-6228 www.mohawkgroup.<strong>com</strong><br />
®