

Map Reading Booklet - Ordnance Survey Leisure
Map Reading Booklet - Ordnance Survey Leisure
Map Reading Booklet - Ordnance Survey Leisure

Create successful ePaper yourself
Turn your PDF publications into a flip-book with our unique Google optimized e-Paper software.
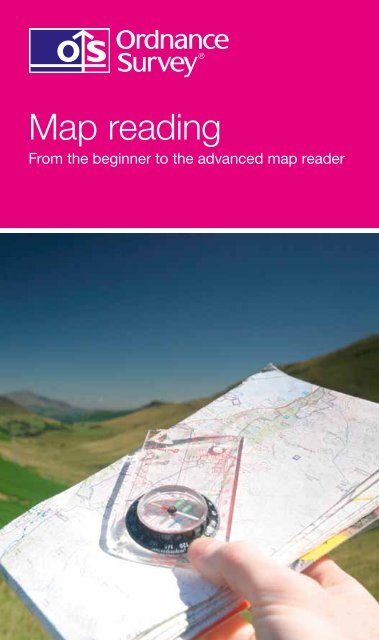
<strong>Map</strong> reading<br />
From the beginner to the advanced map reader<br />
1
Contents<br />
What is a map? 3<br />
Understanding your map needs 3<br />
<strong>Map</strong> symbols explained 4<br />
<strong>Map</strong> scale: What it means 5<br />
Understanding your map 1. The basics 6<br />
Understanding your map 2. Grid lines explained 7<br />
Grid references 7<br />
4-figure map references 7<br />
6-figure map references 8<br />
National Grid lines 8<br />
Understanding your map 3. <strong>Reading</strong> contours and relief 9<br />
Understanding your map 4. Orienting your map 11<br />
Understanding your map 5. Using your compass 12<br />
Adjustments for magnetic variation 12<br />
Using land features 13<br />
Techniques to pinpoint your location 14<br />
Pinpointing your location 1. Transit lines 15<br />
Pinpointing your location 2. Back bearings 16<br />
Pinpointing your location 3. Resection 17<br />
Pinpointing your location 4. Aspect of slope 18<br />
Feature interpretation 19<br />
Contouring 20<br />
Measuring the distance travelled 1. On the ground 21<br />
Measuring the distance travelled 2. Naismith’s rule 21<br />
Can’t find your next location? Walking on a bearing 22<br />
Still can’t find your next location? 23<br />
Navigating at night or in bad weather 23<br />
2
What is a map?<br />
A map is simply a drawing or picture<br />
of a landscape or location. <strong>Map</strong>s<br />
usually show the landscape as it<br />
would be seen from above, looking<br />
directly down.<br />
As well as showing the landscape<br />
of an area, maps will often show<br />
other features such as roads, rivers,<br />
buildings, trees and lakes.<br />
A map can allow you to accurately<br />
plan a journey, giving a good idea of<br />
landmarks and features you will pass<br />
along the route, as well as how far<br />
you will be travelling.<br />
Understanding your<br />
map needs<br />
There are many different types of<br />
maps. The type of map you would<br />
choose depends on why you need<br />
it. If you were trying to find a certain<br />
street or building in your home town<br />
you would need a map that showed<br />
you all the smaller streets, maybe<br />
even footpaths in and around town.<br />
If you were trekking across a<br />
mountain range you might need a<br />
map that shows a bigger area of<br />
land and tells you the heights and<br />
steepness of the mountains.<br />
If you were a pilot flying from London<br />
to Edinburgh you might need a map<br />
that has the whole of the country on<br />
a single page, with only the locations<br />
of towns and cities on it. Whichever<br />
type you choose, there are a few<br />
basic features usually found on any<br />
map, which will be explained in this<br />
leaflet.<br />
3
<strong>Map</strong> symbols explained<br />
Rather than containing descriptions, maps have symbols to show where<br />
certain things are. Symbols are used so maps don’t have to be covered in<br />
writing, as this would make them very confusing.<br />
<strong>Ordnance</strong> <strong>Survey</strong> uses different shapes, colours and symbols to show all<br />
the roads, buildings, rivers and other features of a landscape. Symbols are<br />
designed to be simple, often looking like the features they represent. This<br />
means things can be quickly and easily recognised as you look at a map.<br />
The symbols here<br />
are actually used on<br />
<strong>Ordnance</strong> <strong>Survey</strong> maps.<br />
Write down what you<br />
think they represent:<br />
1 ..................................... 2 ..................................... 3 .....................................<br />
Use the blank boxes<br />
below to draw<br />
pictures of how you<br />
think the symbols for<br />
the following things<br />
appear on a map:<br />
a. Horse riding b. Garden<br />
c. Place of worship d. Lighthouse e. Nature trail<br />
Here’s where you find out how you did…<br />
The answers to the first three questions are a telephone call box, a campsite<br />
and a caravan site.<br />
To find out how close your drawings are to actual <strong>Ordnance</strong> <strong>Survey</strong> symbols<br />
you can look at the key on an <strong>Ordnance</strong> <strong>Survey</strong> map.<br />
<strong>Map</strong>s will usually have a key or a legend. This is a section that will explain<br />
what each and every symbol on the map represents. If you find something on<br />
the map you don’t understand or recognise, the key or legend will help you to<br />
identify what it is.<br />
4
<strong>Map</strong> scale: What it means<br />
To create an accurate picture of a landscape on paper everything has to be<br />
made much, much smaller. This is done by ‘scaling down’ the actual size of<br />
the land.<br />
The map below shows Great Britain. The size of the island has been ‘scaled<br />
down’ so it will fit on this sheet of paper. The map is too small to contain a lot<br />
of detail and doesn’t have many names on it, as there isn’t much room.<br />
Scale: 1:6 000 000<br />
5
Understanding your map 1. The basics<br />
There are some basic features that most maps will include:<br />
• Roads tend to be marked in different colours depending on the type<br />
of road depicted. Roads on a map range from thick blue lines, showing<br />
motorways, to dashed lines, indicating an unfenced minor road.<br />
• Footpaths are marked on <strong>Ordnance</strong> <strong>Survey</strong> maps in various colours. On a<br />
1:25 000 scale OS Explorer <strong>Map</strong> the public rights of way are marked in green<br />
and on a 1:50 000 scale OS Landranger <strong>Map</strong> they are marked in magenta.<br />
There are various types of public rights of way and public access, so please<br />
check the map key for full information. It is important to be aware that<br />
footpaths that are shown in black are not necessarily public rights of way.<br />
• Woods are shown in green with a coniferous or non-coniferous tree shape<br />
printed over the top.<br />
• Buildings are marked by small black squares. However, some particular<br />
buildings have their own special symbols, such as churches and windmills.<br />
Any of these buildings can be useful landmarks, helping you to check your<br />
position on the map.<br />
• Rivers and streams are shown as blue lines. The width of the line is<br />
representative of the watercourse width (if the width of a river is more<br />
than 8 metres it is shown as two blue lines with a light blue area between).<br />
Rivers and streams can be extremely useful in determining your position<br />
on a map.<br />
• Scale tells you how much the land has been scaled down to fit on the<br />
paper. If the scale of a map is 1:50 000 then everything on the map will be<br />
50 000 times smaller than it is in reality.<br />
• Your <strong>Ordnance</strong> <strong>Survey</strong> map will also contain other features and information<br />
that will be explained, along with the features above, in the key of the map.<br />
6
Understanding your map 2. Grid lines explained<br />
<strong>Ordnance</strong> <strong>Survey</strong> maps are covered in a series of faint blue lines that make<br />
up a grid. The lines have numbers accompanying them that allow you to<br />
accurately pinpoint your location on a map. Once you have located where you<br />
are, the grid system makes it simple to give others (such as mountain rescue)<br />
an accurate description of your location. This description, which will be a<br />
series of numbers, is known as a grid reference.<br />
Grid references<br />
Before you begin to look at grid<br />
references it is important to be aware<br />
that all the numbers going across the<br />
face of the map, for example, left to<br />
right, are called eastings (this is because<br />
they are heading eastward), and<br />
similarly, all the numbers going up the<br />
face of the map from bottom to top are<br />
called northings (again because they are<br />
heading in a northward direction).<br />
There are two main types of grid reference:<br />
• 4-figure – for example, 1945, this indicates a single kilometre square on an<br />
<strong>Ordnance</strong> <strong>Survey</strong> map.<br />
• 6-figure – for example, 192454, shows a point within a square.<br />
4-figure map references<br />
When giving a 4-figure grid reference<br />
you should always give the eastings<br />
number first and the northings number<br />
second, very much like when giving<br />
the reading of a graph in school – you<br />
must go along the corridor/hallway<br />
(horizontal) and then up the stairs<br />
(vertical).<br />
For example, the number 2 in the<br />
diagram opposite is 19 across and 45<br />
up and therefore the 4-figure grid reference is 1945.<br />
The numbered squares on the diagram above would have the following<br />
4-figure grid references:<br />
1 = 18 45 2 = 19 45<br />
3 = 18 44 4 = 19 44<br />
7
6-figure map references<br />
Having worked out the basic 4-figure<br />
grid reference, for example, square 3<br />
below, imagine this square is further<br />
divided up into tenths. Using the<br />
example opposite, the grey box is in<br />
the square 1844. More accurately it is<br />
7 tenths across and 8 tenths up within<br />
the grid square 1844 and therefore has<br />
the 6-figure map reference 187448.<br />
The shapes on the diagram opposite<br />
would have the following 6-figure grid references:<br />
= 187448 = 185443<br />
National Grid lines<br />
As well as numbered grid lines,<br />
<strong>Ordnance</strong> <strong>Survey</strong> maps have<br />
codes made of two letters.<br />
These two letter codes can<br />
be found printed in faint blue<br />
capitals on <strong>Ordnance</strong> <strong>Survey</strong><br />
maps. The whole of Great<br />
Britain is divided into squares<br />
of 100 km and each square is<br />
given two letters. There will be<br />
a diagram within your map’s<br />
key showing you which areas<br />
of your map fall into different<br />
squares of the National Grid.<br />
When you quote your six-digit<br />
grid reference you should put<br />
the two letters of the area you<br />
are in before the numbers.<br />
This means that there is no<br />
doubt or confusion about your<br />
location. For example, you<br />
may be at grid reference<br />
509 582 in south-west<br />
Scotland. The complete grid<br />
reference you should quote<br />
would be NX 509 582 (without the letters the numeric reference would be<br />
repeated in every 100 km square).<br />
8
Understanding your map 3. <strong>Reading</strong> contours and relief<br />
Understanding the shape of the land by looking at a map is a very useful skill<br />
and can be essential if you’re going to be walking in mountainous terrain. The<br />
height and shape of the land is shown on a map using ‘contour lines’. These<br />
lines appear as thin orange or brown lines with numbers on them. The number<br />
tells you the height above sea level of that line.<br />
A contour line is drawn between points of the same height, so any single contour<br />
line will be at the same height all the way along its length. The height difference<br />
between separate contour lines is normally 5 metres, but it will be 10 metres in very<br />
hilly or mountainous areas. The map key will tell you the contour interval used.<br />
The picture shown illustrates how a landscape can be converted into contour<br />
lines on a map. An easy way to understand and visualise contour lines is to<br />
think of them as high tide lines that would be left by the sea. As the water level<br />
drops it would leave a line every 10 metres on the landscape. These marks<br />
would be contour lines.<br />
Being able to visualise the shape of the landscape by looking at the contour lines<br />
of a map is a very useful skill that can be developed with practice. It will allow you<br />
to choose the best route for your journey. When reading contour lines on a map<br />
it’s helpful to remember the numbering on them reads uphill. It might be useful to<br />
imagine that to read contour line numbers you have to be stood at the bottom of<br />
the hill looking up it, otherwise the numbers would be upside down.<br />
Other useful things to look out for when reading contour lines are rivers, which<br />
usually flow into valleys, or areas with very few contour lines, which will be flat.<br />
9
The picture below shows how contour lines can be used on maps to<br />
describe different landscapes. Even though all the lines look similar at<br />
first, they are describing very different landscape features. The closer<br />
together the contour lines, the steeper the slope of the hill. If a hill is<br />
very steep the contour lines might even merge into each other.<br />
A spur is a ‘V’-shaped hill that juts out. A simple way to tell a valley from<br />
a spur when looking at contour lines is to remember that if the ‘V’ points<br />
uphill it’s a valley, if it points downhill it’s a spur.<br />
10
Understanding your map 4. Orienting your map<br />
Now you have the skills and knowledge to read and understand a map, the<br />
next step is to learn how to orientate your map to the land so that you can use<br />
it to navigate. One of the best ways to orientate your map is with a compass.<br />
The picture below shows a compass, explaining its various features.<br />
1 The base plate<br />
The mounting of the compass, with a ruler for measuring scale.<br />
2 The compass housing<br />
Contains the magnetic needle and has the points of the compass printed<br />
on a circular, rotating bezel.<br />
3 The compass needle<br />
Floats on liquid so it can rotate freely, the red end should always point to<br />
magnetic north.<br />
4 Orienting lines<br />
Fixed within the compass housing and designed to be aligned with the<br />
eastings on a map. On some compasses half the lines are coloured red to<br />
indicate north.<br />
5 Orienting arrow<br />
Fixed within the compass housing, aligned to north on the housing.<br />
6 The index line<br />
Fixed within the outer edge of the compass housing as an extension of<br />
the direction of travel arrow. It marks the bearing you set by rotating the<br />
compass housing.<br />
7 The direction of travel arrow<br />
Shows the direction that you want to travel along or the bearing you are<br />
taking. It is fixed parallel to the sides of the base plate.<br />
8 Compass scale<br />
Displayed along the edge of the base plate so you can measure distances<br />
on maps.<br />
11
Understanding your map 5. Using your compass<br />
Decide on the route of your<br />
walk and identify your starting<br />
point on the map. Place<br />
your compass on the map.<br />
Make sure the ‘direction of<br />
travel arrow’ is pointing in the<br />
direction of your route across<br />
the map. The easiest way to<br />
line the arrow is to place the<br />
side of the base plate so it<br />
crosses your starting point<br />
and the next destination of<br />
your journey.<br />
Carefully holding the compass<br />
base plate still, turn the<br />
compass housing so the<br />
orientating lines match up<br />
with the eastings (the vertical,<br />
north-south lines) on your map.<br />
To orientate your map with<br />
features on the ground, rotate<br />
your body, map and compass together so that the compass needle settles<br />
in line with the orientating arrow. To fully orientate your map you will need to<br />
make some adjustments for magnetic variation.<br />
Adjustments for magnetic variation<br />
One thing to remember is that your compass does not point to the true north<br />
– except by coincidence in some areas. The compass needle is attracted by<br />
magnetic force, which varies in different parts of the world and is constantly<br />
changing. The magnetic variation throughout Great Britain currently ranges<br />
from 2º to 6º. The amount of variation changes every year, so check your<br />
<strong>Ordnance</strong> <strong>Survey</strong> map to work out the most current value.<br />
You can properly orientate the map by carefully turning the compass housing<br />
4º anti-clockwise (for example, depending on where you are in Great Britain) and<br />
then turning your body again to realign the magnetic needle with the orientating<br />
arrow. Your map is now oriented to the north.<br />
A word of caution<br />
Compass readings are also affected by the presence of iron and steel objects,<br />
so be sure to look out for – and stay away from – pocket knives, belt buckles,<br />
railroad tracks and so forth when using your compass.<br />
12
Using land features<br />
As an alternative to using a compass to orientate your map, you can use your<br />
eyesight. This method will only work if you are in an area with visible prominent<br />
features or landmarks.<br />
First, locate yourself next to a feature or landmark and place your finger on<br />
the map at the point where you are standing. Then begin to rotate the map so<br />
that other features and landmarks on the map begin to line up with the actual<br />
ones you can see. The map is now orientated with the land, although not as<br />
accurately as it would be using a compass.<br />
And finally...<br />
OK, so now you can read a map. But before you put on your boots and pack<br />
your rucksack, take the time to read through the following handy tips and<br />
safety points to ensure you get the most from your adventures.<br />
1. Pre-plan your route<br />
Before you set out, take the time to plot your route and mark it on your map.<br />
This will ensure your eyes are immediately drawn to the correct part of the<br />
map. If it’s your first expedition with a map and compass, start with a short<br />
route in an area you’re familiar with.<br />
2. Make sure you have the right equipment<br />
• A map of the area you are exploring, and map case will help to protect your<br />
map from bad weather.<br />
• A compass with a base plate and a circular, rotating housing.<br />
• A pencil, in case you decide to plan and orientate a new route.<br />
• A watch, to make sure that you can keep track of time.<br />
• And enough food and water to see you through your journey.<br />
• Check the weather forecast in advance so you have appropriate clothing<br />
with you.<br />
3. Tell someone where you’re going<br />
Always remember to tell either a family member or a friend where you’re going<br />
and when you expect to be back.<br />
4. Abide by the Countryside Code<br />
• Be safe – plan ahead and follow any signs.<br />
• Leave gates and property as you find them.<br />
• Protect plants and animals, and take your litter home.<br />
• Keep your dog under close control.<br />
• Consider other people.<br />
13
This part of the booklet will introduce you to some advanced map-reading<br />
techniques that can be useful when navigating. These techniques are<br />
largely used when you are off the beaten track in mountainous or difficult<br />
terrain, where excellent navigation skills are essential. Before reading this<br />
part you should have a good understanding of how to use a compass and<br />
map to navigate.<br />
Techniques to pinpoint your location<br />
There are several techniques to help pinpoint your location on a map.<br />
Pinpointing your location is useful to make sure you’re moving in the right<br />
direction or can help you to relocate if you are lost. These techniques can<br />
be used very effectively once you’ve learned to interpret the features of<br />
a map. Some methods will rely on your eyesight while others use your<br />
compass.<br />
14
Pinpointing your location 1. Transit lines<br />
When you know two or more features on a map will line up with one another<br />
along your journey you can form a transit line. As you walk along a track<br />
(which appears on the map) there will only be a single point where two<br />
features appear in a direct line with each other.<br />
Draw a line on the map that crosses through both features and continues<br />
across the track you’re walking on. When you see the two features on the<br />
landscape line up as you walk along the track, you’ll be at the point where the<br />
line on your map crosses the track (as shown here).<br />
It’s also possible to create transit lines using linear features such as walls,<br />
fences or straight streams, even if the features won’t line up as they did above.<br />
By drawing lines on a map, extending the existing lines of linear features, you<br />
can create several transit lines that will help you pinpoint your location (as<br />
shown below).<br />
Forest<br />
Wall<br />
15<br />
Sight line through a<br />
wood boundary and<br />
a far-off church<br />
Track<br />
Track
Pinpointing your location 2. Back bearings<br />
An alternative to using transit lines, and relying on sight, is to use a compass<br />
to locate your position.<br />
If you are on a known track with an identifiable feature in sight (which also<br />
appears on your map) you can take a bearing in the direction of the feature<br />
and use it to calculate your location. Looking at your compass, detect the<br />
direction the feature is from your current location. With the direction of travel<br />
arrow pointing at the feature, turn the compass housing so the orienting arrow<br />
sits under the red half of the compass needle.<br />
This bearing is a magnetic bearing rather than a grid bearing, which your map<br />
uses. You need to deduct magnetic variation from the compass reading to<br />
convert it. The magnetic variation is currently 2º to 6º throughout Great Britain<br />
(this amount changes annually, so check your <strong>Ordnance</strong> <strong>Survey</strong> map to work<br />
out the most current value). Revolve the compass housing 4º clockwise (for<br />
example) to deduct magnetic variation, and place the compass on your map.<br />
Line the orienting lines up with the eastings (the grid lines running north–south)<br />
on your map. Now carefully slide the compass across the map so one of the<br />
edges of the base plate crosses the feature you spotted on the landscape on<br />
the map. If possible, draw a line along the base plate. Where the line crosses<br />
the track you are on is your approximate current location.<br />
Where the line<br />
crosses the track<br />
you are on is your<br />
approximate current<br />
location.<br />
16<br />
Track
Pinpointing your location 3. Resection<br />
A resection is similar to a back bearing but can be used if you are in the<br />
middle of open countryside or on an unknown track.<br />
You need to begin by taking the bearings of three features in sight, which are<br />
also on your map (if there are no man-made features use natural features such<br />
as the crests of hills).<br />
The three features should be spread out, ideally with 120º between each (for<br />
example, one in front of you, one if you look over your right shoulder and the<br />
other over your left shoulder). It is possible to use two features, but this will<br />
severely affect the accuracy of your pinpointing.<br />
Repeat the steps you took to obtain a single back bearing for all three features<br />
you can see. You should now have three lines drawn on your map, creating<br />
a small triangle where they cross one another. Inside the triangle is your<br />
approximate current location.<br />
Three back bearings cross<br />
to create a triangle – this is<br />
your approximate location<br />
17
Pinpointing your location 4. Aspect of slope<br />
If you are lost, slopes can often provide vital clues to help pinpoint your<br />
location. You will need to know which km square on the map’s grid you are<br />
in. Stand facing directly down a slope, imagining you are at 90º to the contour<br />
lines of the slope. Using your compass, take a reading of the direction the<br />
hill is sloping in and make a note of the reading. This reading is known as the<br />
‘slope aspect’.<br />
Looking at the km square on your map, try to find a slope that faces in the<br />
same direction as the reading you’ve just taken. This will help you to establish<br />
an approximate location. Taking back bearings will also help. To improve<br />
accuracy, walk to another nearby slope, take another reading and then look<br />
for this on your map. If you come across a distinguishing feature, such as a<br />
spur or valley, measure its slope aspect and look for it on the map. This will<br />
help you narrow down or even pinpoint your location. Measuring the aspect of<br />
slope is particularly useful if you are lost and find yourself in a bowl or on the<br />
end of a spur or ridge.<br />
18
Feature interpretation<br />
In remote and difficult terrain man-made features can often be rare. It’s also<br />
possible a man-made feature, such as a log cabin, can be added or removed<br />
from the landscape. Since natural features don’t change as quickly or easily as<br />
their man-made counterparts, being able to use them to navigate is essential.<br />
Interpreting the shape of the land on a map using contour lines is an extremely<br />
useful navigational tool. Looking at the lines and creating a mental picture of<br />
the landscape will allow you to plan a journey effectively. Orange or brown<br />
contour lines on maps join points of equal height above sea level together, and<br />
are usually measured in 5- or 10-metre height intervals.<br />
One of the easiest ways to convert contour lines into a mental picture is to<br />
imagine the lines as high tide marks left by the sea. As the water level drops it<br />
leaves a line every 5 or 10 metres on the landscape, forming the contour lines.<br />
It’s worth bearing in mind that smaller features may be missed by contour<br />
lines. If a feature is 9 metres high on the land it may not appear on a map with<br />
contour lines at 10 metre intervals. This can be surprising when you see the<br />
actual landscape and it contains features you haven’t imagined since they<br />
don’t appear on your map.<br />
When interpreting contour lines you can use symbols and features around them<br />
to get a better understanding of how the landscape will appear in reality. In<br />
particular, you should look for the symbols for cliffs, outcrops, scree and streams,<br />
as they will give you a valuable insight into the formation of a landscape.<br />
When calculating the distance of your journey on a map you need to<br />
remember the actual distance you are going to travel along the ground will<br />
be further than the map implies. The actual distance you travel up and down<br />
slopes will be more than the horizontal distances shown on your map.<br />
Actual distance walked (500 m)<br />
Linear distance on map (400 m)<br />
19<br />
Height gained<br />
(300 m)
Contouring<br />
When planning your route on a map it pays to remember that the straightest<br />
line between your starting point and destination may not be the easiest,<br />
quickest or safest. Examine the map of the area you are walking in<br />
very carefully before planning a route. If you are going to be walking in<br />
mountainous or rough terrain it is often a good idea to plan a route following<br />
contour lines. This is called ‘contouring’.<br />
Contouring can allow you to avoid walking over the top of large hills and<br />
mountains, potentially saving you time and energy. When planning the route<br />
you should consider the distance of the journey, the weather conditions, the<br />
amount of equipment being carried and the fitness levels of the walkers before<br />
deciding whether to tackle the slopes or to contour around them.<br />
Many leisure walkers will avoid contouring in favour of climbing slopes<br />
for a great view or sense of achievement. In harsh conditions, where<br />
speed and efficiency are essential, contouring is often the best option.<br />
20
Measuring the distance travelled 1. On the ground<br />
You now know the direction you need to be heading in, but it would be<br />
expecting too much from both your equipment and yourself to be able to<br />
reach your target spot on. So you must be able to tell when you have missed<br />
your target location and have gone too far. As much as possible you need to<br />
track your position on the ground while you are walking. This can be done<br />
using features both on the map and on the ground.<br />
The first step is to use your map to measure the distance to your next<br />
checkpoint. If you haven’t got a ruler, use the millimetre scale on your<br />
compass. On a map with a scale of 1:25 000 each millimetre is worth 25<br />
metres, or on a 1:50 000 scale map each is worth 50 metres, and so on.<br />
You then need to measure your distance on the ground. There are two<br />
ways of doing this:<br />
Pacing – To pace successfully you need to know in advance how many<br />
double paces you can take for every 100 metres. Double pacing is better<br />
than single as it reduces the level of counting. It is estimated that a person<br />
of average height will take 65 double paces every 100 metres, but it is vital<br />
you work it out to your own pace count. Please do this by walking normally.<br />
Remember slopes or poor conditions underfoot will require an adjustment and<br />
steep slopes will shorten your stride dramatically.<br />
Timing – If you know, or can at least guess, how fast you are walking you can<br />
work out how long it is going to take you to walk from your starting point to<br />
your next target location. At 4 km/hr, which is an ‘average’ speed, it will take<br />
you 1.5 minutes to cover each 100 metres, so a leg of 700 metres should take<br />
you 10.5 minutes to walk. Again, as with pacing, this will be affected by slopes,<br />
poor underfoot conditions and other factors, so you will have to adjust your<br />
time accordingly.<br />
Measuring the distance travelled 2. Naismith’s rule<br />
As previously mentioned, measuring the time you take to travel a certain<br />
distance is all well and good if you are travelling on a flat landscape. However,<br />
in reality this won’t be the case. With this in mind, a Scottish climber called<br />
Naismith created a simple but effective formula that took into account the<br />
changes in height while calculating speed over the ground – 5 km/hr plus ½<br />
hour for every 300 metres of ascent.<br />
For convenience, this formula is often expressed in terms of extra time<br />
required to climb a given number of contour lines – for example, it takes<br />
an additional minute to climb one 10-metre contour line or an additional 5<br />
minutes for each thick contour line. On a descending slope it is assumed that<br />
you will be walking faster on shallow slopes but possibly a lot slower on steep<br />
descents – it is therefore taken that this will even out over the course of a<br />
day’s walk.<br />
21
Can’t find your next location? Walking on a bearing<br />
As you walk on a bearing, errors will undoubtedly creep into the actual<br />
direction you are travelling and the distance you have measured. For example,<br />
when walking across a slope on a compass bearing you will tend to stray<br />
off slightly downhill. Also, your pacing may become inaccurate as a result of<br />
difficult terrain.<br />
To help counteract this, choose closer checkpoints, preferably between<br />
1 000 m and 500 m – but this will ultimately depend on the terrain you are<br />
crossing. Also, try lining up a distant object on your bearing and walk towards<br />
it with your eyes constantly on the object and not on your map and compass –<br />
this will help to prevent veering off course.<br />
There are a couple of methods you can use when walking on a bearing<br />
to help guarantee you reach your chosen checkpoint.<br />
Aiming off – If your<br />
checkpoint is on a<br />
linear feature such as<br />
a stream or a track,<br />
by simply aiming off<br />
slightly to one side of<br />
the checkpoint, you<br />
can guarantee which<br />
direction you need to<br />
head to reach your<br />
checkpoint upon<br />
hitting the linear<br />
feature.<br />
Attack points – To<br />
locate difficult features<br />
simply find another<br />
definite, prominent<br />
feature nearby and<br />
make your way to the<br />
centre of it. Once there<br />
use pacing to find the<br />
original feature you are<br />
looking for – as shown<br />
in the diagram.<br />
Aim off and<br />
then turn<br />
right when<br />
you hit the<br />
stream.<br />
Well<br />
Stream<br />
Use centre of the forest<br />
as an attack point to then<br />
approach the well on a<br />
new bearing and pacing.<br />
22<br />
Direct path<br />
Attack point<br />
If you used the<br />
direct path you<br />
may end up<br />
either left or right<br />
of the bridge due<br />
to minor errors.<br />
Which way<br />
would you turn in<br />
poor visibility?<br />
Forest<br />
Current<br />
location
Still can’t find your next location?<br />
If, after following one of the previous measuring methods, you arrive at an area<br />
but cannot see your next chosen checkpoint – often due to poor visibility –<br />
refer back to your map and look for any distinguishing features or clues. If you<br />
cannot see what you are looking for, you will have to do a systematic search of the<br />
area to locate your next point. There are two types of search you can undertake:<br />
Spiral search – This is a good method<br />
to use if you are alone and have limited<br />
visibility. From your current position, use<br />
your compass and walk north to ¾ of your<br />
visibility (X1). Stop and use your compass,<br />
turn 90° to the right and walk twice this<br />
distance (X2) (you will have to pace accurately).<br />
Stop again and turn right through another 90° and<br />
walk three times this distance (X3). Keep repeating this process with longer<br />
and longer legs until you find your checkpoint or object.<br />
Sweep search – A drawback of the sweep search is that it is difficult to carry<br />
out alone, but can be easily undertaken by a party of walkers. Using the<br />
sweep method is relatively simple. Space everyone out so that you are all still<br />
within visible contact and sweep backwards and forwards across the area to<br />
be searched until your checkpoint or object is located.<br />
Note: To work out the limit of visibility distance, ask someone to pace away<br />
from you. Stop them when it becomes difficult to see them – this is your<br />
distance. If you are unable to do this, guess the distance, making sure you<br />
underestimate rather than overestimate it.<br />
Navigating at night or in bad weather<br />
Navigating in fair conditions should present no great problems to an advanced<br />
walker. Poor conditions don’t require new techniques, just a more skilful and<br />
determined use of those you already possess. Nevertheless, it is important to<br />
draw attention to certain aspects that require special consideration that would<br />
prepare you for such conditions:<br />
• Your route plan should note possible escape paths along your route, have<br />
a record of compass bearings, distances and estimated times.<br />
• Check through your equipment before you set off to make sure everything<br />
is in working order.<br />
• Make sure you have easy access to essential equipment when you<br />
pack your rucksack.<br />
• Use a map case to protect your map from bad weather or use an<br />
OS Explorer <strong>Map</strong> – Active.<br />
Remember, advanced planning can help ease stress if you find yourself<br />
in a difficult situation.<br />
23<br />
All areas on search are visible at some point.
1 2<br />
3 4 5<br />
1. Your passport to town and country<br />
2. The durable all-weather leisure planning map<br />
3. The essential map for outdoor activities<br />
4. For people who love extremes<br />
5. For touring and local route planning<br />
Contact details<br />
www.ordnancesurvey.co.uk<br />
customerservices@ordnancesurvey.co.uk<br />
General enquiries: +44 (0)8456 05 05 05<br />
Dedicated Welsh Language HelpLine: 08456 05 05 04<br />
Textphone (deaf and hard of hearing users only please): +44 (0)23 8005 6146<br />
Customer Service Centre, <strong>Ordnance</strong> <strong>Survey</strong>,<br />
Adanac Drive, SOUTHAMPTON, SO16 0AS.<br />
<strong>Ordnance</strong> <strong>Survey</strong>, the OS Symbol, Explorer, Landranger and OS are<br />
registered trademarks of <strong>Ordnance</strong> <strong>Survey</strong>, the national mapping agency<br />
of Great Britain.<br />
<strong>Ordnance</strong> <strong>Survey</strong> © Crown copyright<br />
D08520_01 0411<br />
Image on front cover: © Topdog Images/Alamy<br />
24