Agendus for Palm OS - Iambic
Agendus for Palm OS - Iambic
Agendus for Palm OS - Iambic

You also want an ePaper? Increase the reach of your titles
YUMPU automatically turns print PDFs into web optimized ePapers that Google loves.
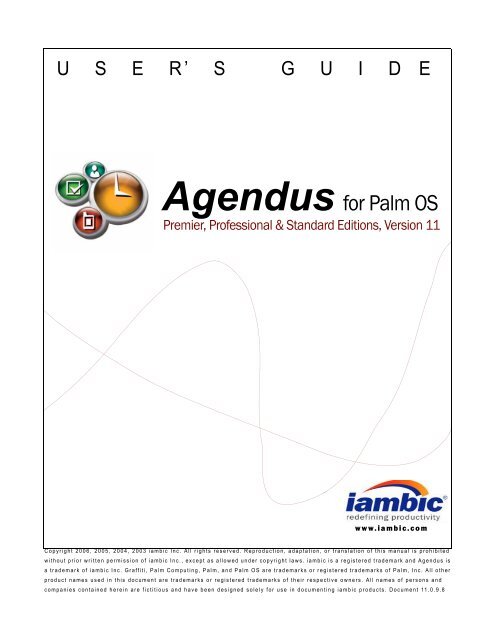
U S E R’ S G U I D E<br />
<strong>Agendus</strong> <strong>for</strong> <strong>Palm</strong> <strong>OS</strong><br />
Premier, Professional & Standard Editions, Version 11<br />
www.iambic.com<br />
Copyright 2006, 2005, 2004, 2003 iambic Inc. All rights reserved. Reproduction, adaptation, or translation of this manual is prohibited<br />
without prior written permission of iambic Inc., except as allowed under copyright laws. iambic is a registered trademark and <strong>Agendus</strong> is<br />
a trademark of iambic Inc. Graffiti, <strong>Palm</strong> Computing, <strong>Palm</strong>, and <strong>Palm</strong> <strong>OS</strong> are trademarks or registered trademarks of <strong>Palm</strong>, Inc. All other<br />
product names used in this document are trademarks or registered trademarks of their respective owners. All names of persons and<br />
companies contained herein are fictitious and have been designed solely <strong>for</strong> use in documenting iambic products. Document 11.0.9.8
<strong>Agendus</strong> <strong>for</strong> <strong>Palm</strong> <strong>OS</strong>, Version 11<br />
TABLE OF CONTENTS<br />
Introduction . . . . . . . . . . . . . . . . . . . . . . . . . . . . . . . . . . . 6<br />
<strong>Agendus</strong> Overview . . . . . . . . . . . . . . . . . . . . . . . . . . . . . . . . . . . . . . . . . . 6<br />
About the Different Versions of <strong>Agendus</strong> . . . . . . . . . . . . . . . . . . . . . . . . . 6<br />
Take Control of Your Schedule . . . . . . . . . . . . . . . . . . . . . . . . . . . . . . . . . 8<br />
Take Advantage of your <strong>Palm</strong> Device. . . . . . . . . . . . . . . . . . . . . . . . . . . . 9<br />
Treo Support. . . . . . . . . . . . . . . . . . . . . . . . . . . . . . . . . . . . . . . . . . . . . . . 9<br />
Supported Screen Resolutions. . . . . . . . . . . . . . . . . . . . . . . . . . . . . . . . . 9<br />
What’s New in Version 11 . . . . . . . . . . . . . . . . . . . . . . . . . . . . . . . . . . . . 10<br />
<strong>Agendus</strong> Integration with <strong>Palm</strong> Applications . . . . . . . . . . . . . . . . . . . . . 11<br />
About iambic. . . . . . . . . . . . . . . . . . . . . . . . . . . . . . . . . . . . . . . . . . . . . . 11<br />
Installing <strong>Agendus</strong> . . . . . . . . . . . . . . . . . . . . . . . . . . . . 12<br />
System Requirements . . . . . . . . . . . . . . . . . . . . . . . . . . . . . . . . . . . . . . 12<br />
Upgrading from Earlier Versions of <strong>Agendus</strong> . . . . . . . . . . . . . . . . . . . . . 12<br />
Installing <strong>Agendus</strong> <strong>for</strong> <strong>Palm</strong> <strong>OS</strong> . . . . . . . . . . . . . . . . . . . . . . . . . . . . . . . 13<br />
Installing Images (Optional) . . . . . . . . . . . . . . . . . . . . . . . . . . . . . . . . . . 15<br />
Entering Demo and Activation Codes. . . . . . . . . . . . . . . . . . . . . . . . . . . 16<br />
Over-the-Air Activation . . . . . . . . . . . . . . . . . . . . . . . . . . . . . . . . . . . . . . 16<br />
Manually Entering Demo or Activation Codes . . . . . . . . . . . . . . . . . . . . 17<br />
Getting Started with <strong>Agendus</strong>. . . . . . . . . . . . . . . . . . . 18<br />
Navigating <strong>Agendus</strong> . . . . . . . . . . . . . . . . . . . . . . . . . . . . . . . . . . . . . . . . 18<br />
Using the Scroll buttons . . . . . . . . . . . . . . . . . . . . . . . . . . . . . . . . . . . . . 21<br />
Using the 5-Way Navigator . . . . . . . . . . . . . . . . . . . . . . . . . . . . . . . . . . 21<br />
1
<strong>Agendus</strong> <strong>for</strong> <strong>Palm</strong> <strong>OS</strong>, Version 11<br />
Navigating with Menus . . . . . . . . . . . . . . . . . . . . . . . . . . . . . . . . . . . . . . 24<br />
Calendar Views . . . . . . . . . . . . . . . . . . . . . . . . . . . . . . . 24<br />
Overview. . . . . . . . . . . . . . . . . . . . . . . . . . . . . . . . . . . . . . . . . . . . . . . . . 24<br />
Day Modes: Today, List, and Split. . . . . . . . . . . . . . . . . . . . . . . . . . . . . . 25<br />
Week Views: List, Grid and Block. . . . . . . . . . . . . . . . . . . . . . . . . . . . . . 26<br />
Month Views: Standard, Clocks, Icons, and Expanded . . . . . . . . . . . . . 27<br />
Quarter Views: Compact, Expanded . . . . . . . . . . . . . . . . . . . . . . . . . . . 28<br />
List Views: List, Trip and Recent Meetings. . . . . . . . . . . . . . . . . . . . . . . 30<br />
Task Views . . . . . . . . . . . . . . . . . . . . . . . . . . . . . . . . . . . . . . . . . . . . . . . 31<br />
Task Views: List, Hierarchy, and Matrix . . . . . . . . . . . . . . . . . . . . . . . . . 31<br />
Task List Mode . . . . . . . . . . . . . . . . . . . . . . . . . . . . . . . . . . . . . . . . . . . . 32<br />
Task Hierarchy Mode . . . . . . . . . . . . . . . . . . . . . . . . . . . . . . . . . . . . . . . 33<br />
Task Matrix Mode (<strong>Agendus</strong> Pro Only). . . . . . . . . . . . . . . . . . . . . . . . . . 35<br />
Agenda Walkthrough . . . . . . . . . . . . . . . . . . . . . . . . . . . . . . . . . . . . . . . 36<br />
Memo View . . . . . . . . . . . . . . . . . . . . . . . . . . . . . . . . . . 38<br />
Memo View. . . . . . . . . . . . . . . . . . . . . . . . . . . . . . . . . . . . . . . . . . . . . . . 38<br />
Contact Views . . . . . . . . . . . . . . . . . . . . . . . . . . . . . . . . 39<br />
Contact Views: Compact and Expanded . . . . . . . . . . . . . . . . . . . . . . . . 39<br />
Contact History . . . . . . . . . . . . . . . . . . . . . . . . . . . . . . . . . . . . . . . . . . . . 43<br />
Contact Networking (<strong>Agendus</strong> Pro Only) . . . . . . . . . . . . . . . . . . . . . . . . 45<br />
Display Settings and Filters . . . . . . . . . . . . . . . . . . . . . 47<br />
Display Settings and Filters - View Options . . . . . . . . . . . . . . . . . . . . . . 47<br />
Options <strong>for</strong> Most Calendar Views . . . . . . . . . . . . . . . . . . . . . . . . . . . . . 48<br />
Setting the Today Mode Options . . . . . . . . . . . . . . . . . . . . . . . . . . . . . . 49<br />
Setting the Trip Mode Options . . . . . . . . . . . . . . . . . . . . . . . . . . . . . . . . 49<br />
2
<strong>Agendus</strong> <strong>for</strong> <strong>Palm</strong> <strong>OS</strong>, Version 11<br />
Filter Settings and Display Options <strong>for</strong> the Task Views . . . . . . . . . . . . . 50<br />
Contact View Options . . . . . . . . . . . . . . . . . . . . . . . . . . . . . . . . . . . . . . . 50<br />
Saving Filter and Display Options . . . . . . . . . . . . . . . . . . . . . . . . . . . . . 51<br />
Adding and Editing Entries . . . . . . . . . . . . . . . . . . . . . 52<br />
Creating New Meetings and Annual Events . . . . . . . . . . . . . . . . . . . . . . 52<br />
Creating New Tasks and Calls . . . . . . . . . . . . . . . . . . . . . . . . . . . . . . . . 63<br />
Using Templates . . . . . . . . . . . . . . . . . . . . . . . . . . . . . . . . . . . . . . . . . . . 69<br />
Scheduling Follow-Ups. . . . . . . . . . . . . . . . . . . . . . . . . . . . . . . . . . . . . . 71<br />
Converting Tasks, Calls, and Meetings . . . . . . . . . . . . . . . . . . . . . . . . . 72<br />
Creating a Log Entry <strong>for</strong> a Task, Call, or Meeting. . . . . . . . . . . . . . . . . . 72<br />
Daily Journal. . . . . . . . . . . . . . . . . . . . . . . . . . . . . . . . . . . . . . . . . . . . . . 73<br />
Agenda Journal . . . . . . . . . . . . . . . . . . . . . . . . . . . . . . . . . . . . . . . . . . . 74<br />
Creating a New Contact . . . . . . . . . . . . . . . . . . . . . . . . . . . . . . . . . . . . . 75<br />
Verifying Addresses . . . . . . . . . . . . . . . . . . . . . . . . . . . . . . . . . . . . . . . . 76<br />
Creating New Memos . . . . . . . . . . . . . . . . . . . . . . . . . . . . . . . . . . . . . . . 77<br />
Creating New Emails and SMS Messages (<strong>Agendus</strong> Pro Only) . . . . . . 78<br />
Over-the-Air Services . . . . . . . . . . . . . . . . . . . . . . . . . . 79<br />
Overview. . . . . . . . . . . . . . . . . . . . . . . . . . . . . . . . . . . . . . . . . . . . . . . . . 79<br />
Using Power Search (<strong>Agendus</strong> Pro Only) . . . . . . . . . . . . . . . . . . . . . . . 79<br />
Power Search Quick Select (<strong>Agendus</strong> Pro Only) . . . . . . . . . . . . . . . . . . 81<br />
Setting up Weather Forecasts (<strong>Agendus</strong> Pro only) . . . . . . . . . . . . . . . . 82<br />
Verify Contact Addresses (<strong>Agendus</strong> Pro only) . . . . . . . . . . . . . . . . . . . . 84<br />
Mapping Contact Addresses (<strong>Agendus</strong> Pro only). . . . . . . . . . . . . . . . . . 85<br />
Driving Directions (<strong>Agendus</strong> Pro only) . . . . . . . . . . . . . . . . . . . . . . . . . . 86<br />
Quote of the Day . . . . . . . . . . . . . . . . . . . . . . . . . . . . . . . . . . . . . . . . . . 87<br />
This Day in History (<strong>Agendus</strong> Pro Only). . . . . . . . . . . . . . . . . . . . . . . . . 88<br />
Check <strong>for</strong> <strong>Agendus</strong> Updates. . . . . . . . . . . . . . . . . . . . . . . . . . . . . . . . . . 89<br />
3
<strong>Agendus</strong> <strong>for</strong> <strong>Palm</strong> <strong>OS</strong>, Version 11<br />
Working with <strong>Agendus</strong> . . . . . . . . . . . . . . . . . . . . . . . . . 90<br />
Creating Trips (<strong>Agendus</strong> Pro Only) . . . . . . . . . . . . . . . . . . . . . . . . . . . . 90<br />
Free-Time Finder (<strong>Agendus</strong> Pro Only) . . . . . . . . . . . . . . . . . . . . . . . . . . 93<br />
Using Vivid Agenda to Assign Colors and Icons. . . . . . . . . . . . . . . . . . . 94<br />
Using Power Search (<strong>Agendus</strong> Pro Only) . . . . . . . . . . . . . . . . . . . . . . . 95<br />
Setting up <strong>Agendus</strong>Quotes in Memo Pad . . . . . . . . . . . . . . . . . . . . . . . 96<br />
Improving <strong>Agendus</strong> Per<strong>for</strong>mance . . . . . . . . . . . . . . . . . . . . . . . . . . . . . . 97<br />
Beaming . . . . . . . . . . . . . . . . . . . . . . . . . . . . . . . . . . . . . . . . . . . . . . . . . 98<br />
Setting <strong>Agendus</strong> Preferences . . . . . . . . . . . . . . . . . . . 99<br />
Alarm Preferences . . . . . . . . . . . . . . . . . . . . . . . . . . . . . . . . . . . . . . . . . 99<br />
Contact Preferences. . . . . . . . . . . . . . . . . . . . . . . . . . . . . . . . . . . . . . . 100<br />
Meeting Preferences . . . . . . . . . . . . . . . . . . . . . . . . . . . . . . . . . . . . . . 101<br />
Memo Preferences . . . . . . . . . . . . . . . . . . . . . . . . . . . . . . . . . . . . . . . . 101<br />
Task and Call Preferences . . . . . . . . . . . . . . . . . . . . . . . . . . . . . . . . . . 102<br />
Preferences <strong>for</strong> Day Views . . . . . . . . . . . . . . . . . . . . . . . . . . . . . . . . . . 104<br />
Preferences <strong>for</strong> Week Views . . . . . . . . . . . . . . . . . . . . . . . . . . . . . . . . 104<br />
Preferences <strong>for</strong> Month and Quarter Views . . . . . . . . . . . . . . . . . . . . . . 105<br />
Miscellaneous Preferences . . . . . . . . . . . . . . . . . . . . . . . . . . . . . . . . . 105<br />
Assigning Buttons to <strong>Agendus</strong> . . . . . . . . . . . . . . . . . . . . . . . . . . . . . . . 106<br />
Setting Wallpaper and Background Colors. . . . . . . . . . . . . . . . . . . . . . 107<br />
Color & Icon Preferences . . . . . . . . . . . . . . . . . . . . . . . . . . . . . . . . . . . 109<br />
Using, Editing and Moving Icons . . . . . . . . . . . . . . . . . . . . . . . . . . . . . 110<br />
Setting Helper Programs . . . . . . . . . . . . . . . . . . . . . . . . . . . . . . . . . . . 111<br />
Setting Automatic Updates . . . . . . . . . . . . . . . . . . . . . . . . . . . . . . . . . . 112<br />
Connection Preferences . . . . . . . . . . . . . . . . . . . . . . . . . . . . . . . . . . . . 112<br />
Using Text Shortcuts. . . . . . . . . . . . . . . . . . . . . . . . . . . . . . . . . . . . . . . 113<br />
4
<strong>Agendus</strong> <strong>for</strong> <strong>Palm</strong> <strong>OS</strong>, Version 11<br />
Meeting Attendees Module (Premier Only) . . . . . . . . 114<br />
Managing Meetings with the Attendees Module. . . . . . . . . . . . . . . . . . 114<br />
On the Receiving End. . . . . . . . . . . . . . . . . . . . . . . . . . . . . . . . . . . . . . 115<br />
Troubleshooting and Support . . . . . . . . . . . . . . . . . . 117<br />
Frequently Asked Questions . . . . . . . . . . . . . . . . . . . . . . . . . . . . . . . . 113<br />
Service and Technical Support . . . . . . . . . . . . . . . . . . . . . . . . . . . . . . . 120<br />
IAMBIC SOFTWARE LICENSE . . . . . . . . . . . . . . . . . . 121<br />
Index. . . . . . . . . . . . . . . . . . . . . . . . . . . . . . . . . . . . . . . 122<br />
5
<strong>Agendus</strong> <strong>for</strong> <strong>Palm</strong> <strong>OS</strong>, Version 11<br />
<strong>Agendus</strong> Overview<br />
INTRODUCTION<br />
This guide describes iambic <strong>Agendus</strong> <strong>for</strong> <strong>Palm</strong> <strong>OS</strong>, version 11, <strong>for</strong> the <strong>Palm</strong> Computing<br />
Plat<strong>for</strong>m ® . This software is designed to make it easier <strong>for</strong> you to schedule and manage<br />
your time. <strong>Agendus</strong> complements the native <strong>Palm</strong> <strong>OS</strong> applications, providing you with<br />
an efficient and simple way to view and organize your busy schedule. Whether you are<br />
a professional, business person, or just someone who needs more control of your time,<br />
we hope you find <strong>Agendus</strong> to be the ideal tool.<br />
About the Different Versions of <strong>Agendus</strong><br />
<strong>Agendus</strong> is available in three editions, Standard, Professional and Premier. <strong>Agendus</strong><br />
Pro includes all of the features from the standard edition and adds several advanced<br />
features:<br />
• Power Search allows you to choose a date range and select which areas to<br />
search: meetings, calls, tasks, contacts, or memos; plus search the internet and<br />
the 411 directory.<br />
• Add multiple attendees to a meeting.<br />
• Have meetings and tasks “roll-over” to keep them on your calendar until they<br />
are completed.<br />
• Auto-silent mode turns off alarms during scheduled meetings.<br />
• One Tap “Add to Journal” ability.<br />
• Free-Time-Finder<br />
• Over-the-air services allow you to register <strong>Agendus</strong>, retrieve weather <strong>for</strong>ecasts,<br />
quotes, maps, driving directions, and program updates directly from<br />
your handheld device via a wired or wireless network connection.<br />
• Email and SMS capability <strong>for</strong> sending and receiving email and SMS messages<br />
via hotsync or directly on the device (requires a compatible <strong>Palm</strong> device,<br />
<strong>Palm</strong> <strong>OS</strong> email client, such as <strong>Agendus</strong>Mail, and a network connection).<br />
• Email and SMS integration including the ability to schedule follow-up calls,<br />
meetings, or tasks on received messages; add senders to the contact list; see<br />
messages listed in contact histories; and save VCAL and VCARD items<br />
received via e-mail as new entries in the calendar or contact list.<br />
• Additional calendar and task views and functions, including the new trip view,<br />
task matrix, and task charting.<br />
<strong>Agendus</strong> Overview 6
<strong>Agendus</strong> <strong>for</strong> <strong>Palm</strong> <strong>OS</strong>, Version 11<br />
To upgrade to <strong>Agendus</strong> Professional please visit www.iambic.com/agenduspro/<br />
palmos/.<br />
<strong>Agendus</strong> Premier includes all of the features of <strong>Agendus</strong> Professional and <strong>Agendus</strong><br />
Mail SMS Edition, plus:<br />
• <strong>Agendus</strong> Meeting Attendees Module, an exceptionally handy utility that sets<br />
up meetings over the air on internet enabled devices.<br />
There<strong>for</strong>e, any feature described in this manual as “Pro-Edition Only” is also available<br />
in the Premier Edition, but not in the Standard Edition and features listed as “Premier<br />
Only” are not available in the other versions of <strong>Agendus</strong> at all.<br />
To upgrade to <strong>Agendus</strong> Premier please visit www.iambic.com/agenduspremier/<br />
palmos/.<br />
<strong>Agendus</strong> Overview 7
<strong>Agendus</strong> <strong>for</strong> <strong>Palm</strong> <strong>OS</strong>, Version 11<br />
Take Control of Your Schedule<br />
You can now easily view more of your schedule on your handheld device. All of your<br />
scheduled phone calls, meetings and tasks are shown together in the different calendar<br />
views. Change between Calendar, Task, Memo, and Contact views with a single tap.<br />
Make the in<strong>for</strong>mation easier to read at a glance by having <strong>Agendus</strong> add colors and icons<br />
to specific items, whole categories, or to items that use specified key words.<br />
<strong>Agendus</strong><br />
toolbar<br />
Use the <strong>Agendus</strong> toolbar to quickly switch<br />
between views or create new records<br />
Tap on an item to view details or edit<br />
the item without switching views<br />
<strong>Agendus</strong> version 11 includes all of these benefits:<br />
• Never miss an important commitment again: With <strong>Agendus</strong>, your meetings<br />
and tasks are displayed together, so there is no need to switch between<br />
different views to review all of your important commitments.<br />
• Works with the standard <strong>Palm</strong> applications: <strong>Agendus</strong> uses the same databases<br />
as the standard <strong>Palm</strong> <strong>OS</strong> Contacts, Calendar, Tasks, and Memo Pad.<br />
Every contact, event, or memo created in <strong>Agendus</strong> will appear in the appropriate<br />
application, and contacts or events from those applications will appear<br />
in <strong>Agendus</strong>.<br />
• Email integration (Professional Edition only): Email capabilities are tightly<br />
integrated into the Professional edition, so you can check, send, read, create,<br />
file, and delete email in your email application without ever leaving <strong>Agendus</strong>.<br />
Additionally you can see your emails in the contact history screen, add email<br />
senders to your contact list, import vcard contact in<strong>for</strong>mation and vcal events<br />
from attachments right into <strong>Agendus</strong>.<br />
Take Control of Your Schedule 8
<strong>Agendus</strong> <strong>for</strong> <strong>Palm</strong> <strong>OS</strong>, Version 11<br />
Take Advantage of your <strong>Palm</strong> Device<br />
Treo Support<br />
<strong>Agendus</strong> makes full use of your <strong>Palm</strong> device. If you have a Treo or other smartphone,<br />
then you can dial your contacts from within <strong>Agendus</strong>. If your device has a color screen,<br />
then <strong>Agendus</strong> will offer options <strong>for</strong> adding highlight colors to your appointments.<br />
In most cases, <strong>Agendus</strong> will only display menu items, buttons, and options if they are<br />
supported by your device.<br />
In addition to the DPad capabilities listed on page 21, <strong>Agendus</strong> can take advantage of<br />
other Treo capabilities, such as dialing contacts, assigning ringtones to contacts (Treo<br />
6xx Series and 700p only), sending email or SMS messages directly from <strong>Agendus</strong>,<br />
adding calls to contact histories, post-call management options such as scheduling<br />
follow-ups from phone calls.<br />
Supported Screen Resolutions<br />
In addition to the standard resolution of 160 by 160 pixels, <strong>Agendus</strong> can display in high<br />
resolution (320 x 320 pixels) on devices that support it. <strong>Agendus</strong> also supports devices<br />
with high-resolution portrait (320 x 480 pixels) and landscape (480 x 320 pixels)<br />
displays.<br />
Devices that support high resolution include all Sony Clie models and all <strong>Palm</strong> <strong>OS</strong> 5<br />
high-density capable devices.<br />
Standard resolution High resolution<br />
Landscape mode<br />
Portrait mode<br />
Tip: Choosing smaller fonts will<br />
also allow you to see more of<br />
your schedule<br />
Take Advantage of your <strong>Palm</strong> Device 9
<strong>Agendus</strong> <strong>for</strong> <strong>Palm</strong> <strong>OS</strong>, Version 11<br />
What’s New in Version 11<br />
If you are upgrading from an earlier version of <strong>Agendus</strong>, you will see that we have<br />
made many changes in version 11, including incorporating many requests we have<br />
received from our customers.<br />
Along with many smaller changes to improve the user interface and make <strong>Agendus</strong><br />
easier to use, we have added some new features to make <strong>Agendus</strong> more powerful and<br />
allow you to take even better control of your schedule.<br />
Here are some of the key new features in version 11:<br />
Today View Collapsing Slots: Now you can view up to six upcoming calendar, task,<br />
call and alarm events in one easy to use dynamic page.<br />
Extended Task View Hierarchy Mode: Expanded to cover and support Outliner &<br />
Mini Project Tracking plus Percentage of Completion.<br />
Enhanced Contact Networking (Pro-Edition Only): Now you can use drag & drop<br />
capabilities to easily network and arrange relationships of contacts.<br />
Meetings: Now supports completion, cancellation and rescheduling.<br />
Contact Networking Smart Build Ability (Pro-Edition Only): Automatic assignment<br />
of contact relationships is now a breeze, either with name correlations or by past<br />
events.<br />
Calendar: New Recent Meetings Mode with filtering based on Date & Status.<br />
View Memory Functionality: Browse through different, recently used views.<br />
Agenda Walkthrough: Quickly set up topics to cover during a meeting, task or call.<br />
View Memory Functionality: Browse through different, recently used views.<br />
Time Zone Support (Pro-Edition Only): <strong>Agendus</strong> Pro now allows you to use Time<br />
Zones across its components. (Requires <strong>Palm</strong><strong>OS</strong> 5 or later; see p.53 <strong>for</strong> details.)<br />
Agenda Journal (Pro-Edition Only): Log meetings, tasks, and calls in a daily journal<br />
with support <strong>for</strong> custom icons, items walkthroughs and completion status.<br />
Attention Manager Alarms: Now alarms are fully integrated with Attention Manager.<br />
Anonymous Call Support: Available on smartphones, this allows you to block caller<br />
ID when placing phone calls.<br />
Expanded Power-Search (Pro-Edition Only): Now you can use your Over-the-Air<br />
connection to search the internet, or use flexible tools <strong>for</strong> lingual translation, word definitions,<br />
shopping or news, which is as easy as tapping any text in a card view.<br />
Meeting Attendees Module (Premier Edition Only): Instantly connect with coworkers<br />
and associates, schedule meetings and confirm/deny meeting invitations.<br />
What’s New in Version 11 10
<strong>Agendus</strong> <strong>for</strong> <strong>Palm</strong> <strong>OS</strong>, Version 11<br />
<strong>Agendus</strong> Integration with <strong>Palm</strong> Applications<br />
About iambic<br />
<strong>Agendus</strong> uses the same data files as the native <strong>Palm</strong> <strong>OS</strong> Calendar, Task List, Contact<br />
List, and Memo Pad. The <strong>Agendus</strong> calendar views will show all scheduled commitments,<br />
including meetings and tasks, entered in the <strong>Palm</strong> <strong>OS</strong> Calendar and Task applications,<br />
as well as items scheduled using <strong>Agendus</strong>. All items created in <strong>Agendus</strong> will<br />
also appear in the appropriate <strong>Palm</strong> application, and all items from these <strong>Palm</strong> applications<br />
will appear in <strong>Agendus</strong>.<br />
Note: Since the <strong>Palm</strong> <strong>OS</strong> does not have a separate application <strong>for</strong> scheduling phone<br />
calls, <strong>Agendus</strong> saves calls as a category of task named “Calls.” All phone calls created<br />
using <strong>Agendus</strong> are stored as tasks and put in the “calls” category in the <strong>Palm</strong><br />
application.<br />
Important: Because <strong>Agendus</strong> uses the built-in handheld device databases to store<br />
data, it will not interfere with any third-party desktop contact managers or synchronization<br />
conduits. If you are using Time Matters, Act! <strong>Palm</strong> Link, Companion Link, or Intellisync,<br />
you should set the <strong>Agendus</strong> storage <strong>for</strong>mat so it will sync properly with your<br />
software. See page 100.<br />
Note: Birthdays assigned in the contact list will only appear in the Calendar of compatible<br />
devices, such as the Tungsten T5, T3, or Tungsten E.<br />
Desktop<br />
Applications<br />
<strong>Agendus</strong> <strong>for</strong><br />
Windows<br />
MS Outlook<br />
<strong>Palm</strong><br />
Desktop<br />
Conduits<br />
Intellisync<br />
PocketMirror<br />
Other Conduits<br />
<strong>Palm</strong> Desktop Conduit<br />
<strong>Palm</strong><br />
Databases<br />
Contacts<br />
Calendar<br />
Tasks<br />
Memo Pad<br />
<strong>Palm</strong> <strong>OS</strong><br />
Applications<br />
<strong>Agendus</strong> <strong>for</strong><br />
<strong>Palm</strong> <strong>OS</strong><br />
iambic strives to make the best business tools possible <strong>for</strong> <strong>Palm</strong> <strong>OS</strong> devices. We<br />
welcome your suggestions and comments. You can submit feature requests via<br />
www.iambic.com/support. If you enjoy the program, then by all means please tell your<br />
friends and associates; better yet, beam them a demo!<br />
<strong>Agendus</strong> Integration with <strong>Palm</strong> Applications 11
<strong>Agendus</strong> <strong>for</strong> <strong>Palm</strong> <strong>OS</strong>, Version 11<br />
System Requirements<br />
INSTALLING AGENDUS<br />
• <strong>Agendus</strong> Standard edition requires a handheld device with <strong>Palm</strong> <strong>OS</strong> 4.0 or<br />
higher and 2.5 MB of available memory (only uses 1.5 MB after installation).<br />
• <strong>Agendus</strong> Professional edition requires a handheld device with <strong>Palm</strong> <strong>OS</strong> 4.0 or<br />
higher and 3.0 MB of available memory (only uses 1.6 MB after installation).<br />
There are additional requirements depending on which features you would like to use.<br />
• Photos: Picture support on meetings, tasks, and memos requires <strong>Palm</strong> <strong>OS</strong> 5 or<br />
higher.<br />
• Email (<strong>Agendus</strong> Pro only): Emailing capabilities require a <strong>Palm</strong> <strong>OS</strong> email<br />
client, such as <strong>Agendus</strong>Mail, SnapperMail, or VersaMail. Please see the documentation<br />
<strong>for</strong> your email client <strong>for</strong> additional device requirements.<br />
• SMS Messaging (<strong>Agendus</strong> Pro only): Requires <strong>Palm</strong> <strong>OS</strong> 4.1 or higher with<br />
appropriate telephony support (most <strong>Palm</strong>One handhelds and smartphones,<br />
including Treo 650 and 700p).<br />
• Over-the-Air Services (<strong>Agendus</strong> Pro only): <strong>Agendus</strong> Pro’s over-the-air<br />
services, including registration, contact mapping, weather services, and<br />
quotes of the day, requires a network-enabled device with Internet access.<br />
Devices include smartphones (such as the Treo), Bluetooth- or 802.11enabled<br />
devices with an available access point, and devices connected to a<br />
phone by a wireless or wired connection.<br />
Upgrading from Earlier Versions of <strong>Agendus</strong><br />
<strong>Agendus</strong> version 11 is available at a discounted price <strong>for</strong> owners of earlier versions of<br />
<strong>Agendus</strong> or ActionNames Datebook. Please visit www.iambic.com/upgrade/ <strong>for</strong><br />
complete in<strong>for</strong>mation and upgrade options.<br />
Install <strong>Agendus</strong> 11 over your existing version of <strong>Agendus</strong>, unless you are using version<br />
3.0 or earlier, in which case you’ll want to uninstall the older version be<strong>for</strong>e installing<br />
this new version.<br />
System Requirements 12
<strong>Agendus</strong> <strong>for</strong> <strong>Palm</strong> <strong>OS</strong>, Version 11<br />
Installing <strong>Agendus</strong> <strong>for</strong> <strong>Palm</strong> <strong>OS</strong><br />
The <strong>Agendus</strong> PRC Installer includes all of the basic handheld components <strong>for</strong> running<br />
<strong>Agendus</strong>. For the Professional edition, this includes the TinyChart application <strong>for</strong><br />
graphing tasks.<br />
1. Using Windows Explorer or the Macintosh Finder, navigate to the folder<br />
where you downloaded the <strong>Agendus</strong> PRC installation file (<strong>for</strong> the Englishlanguage<br />
versions, the files are <strong>Agendus</strong>Pro_OTA_EN.prc <strong>for</strong> <strong>Agendus</strong> Pro<br />
and <strong>Agendus</strong>_OTA_EN.prc <strong>for</strong> <strong>Agendus</strong> Standard edition.).<br />
2. Double click on the <strong>Agendus</strong> PRC file to open the palmOne Quick Install tool<br />
with <strong>Agendus</strong> added to the install list.<br />
Tap to select your user name<br />
3. Select your user name from the User list.<br />
4. Exit the installer.<br />
5. Hotsync your <strong>Palm</strong> device.<br />
6. After synchronization, your <strong>Palm</strong> device will prompt you to start the <strong>Agendus</strong><br />
installation. Follow the on-screen instructions to finish installing <strong>Agendus</strong>.<br />
Note: <strong>Agendus</strong> comes with a set of icons. If you are upgrading from a previous<br />
version and you have created your own icons, then when prompted, do<br />
not install the new icon set.<br />
Installing <strong>Agendus</strong> <strong>for</strong> <strong>Palm</strong> <strong>OS</strong> 13
<strong>Agendus</strong> <strong>for</strong> <strong>Palm</strong> <strong>OS</strong>, Version 11<br />
After the hotsync, the <strong>Agendus</strong><br />
icon will appear in your<br />
device’s application list<br />
Application Picker<br />
Note: When you first install <strong>Agendus</strong>, you will be able to run it <strong>for</strong> three days without a<br />
demo or activation code. See page 16 <strong>for</strong> in<strong>for</strong>mation on obtaining and entering these<br />
codes.<br />
7. Tungsten T3 and Tungsten E Photo Library Files (Optional): <strong>Palm</strong>One<br />
has created photo library files which will allow you to copy JPEG and GIF<br />
image files to your <strong>Palm</strong> device’s memory (RAM), saving space on your<br />
memory card. You can then use these photos as wallpaper or assign them to<br />
contacts or tasks.<br />
Note: These files are <strong>for</strong> Tungsten T3 and Tungsten E devices only. Newer<br />
devices have this capability built in, and older devices are not compatible.<br />
The photo library files can be downloaded from iambic’s web site at<br />
www.iambic.com/download/goodies/. You will need to install three files to<br />
your handheld:<br />
• <strong>Palm</strong>PhotoLib.prc<br />
• <strong>Palm</strong>PhotoConvert.prc<br />
• <strong>Palm</strong>PhotoLib_enUS.prc (or other appropriate language file)<br />
8. If you downloaded any additional files, hotsync your <strong>Palm</strong> device.<br />
Installing <strong>Agendus</strong> <strong>for</strong> <strong>Palm</strong> <strong>OS</strong> 14
<strong>Agendus</strong> <strong>for</strong> <strong>Palm</strong> <strong>OS</strong>, Version 11<br />
Installing Images (Optional)<br />
<strong>Agendus</strong> supports the use of images as background “wallpapers” and as attachments to<br />
meetings, tasks, memos, and contacts. You can copy images from your desktop<br />
computer to your handheld to use in <strong>Agendus</strong>. Acceptable file types are described on<br />
page 107.<br />
To install wallpaper images on your handheld device:<br />
1. Start the palmOne Quick Install Tool.<br />
2. Click Add.<br />
3. Open the folder with the image files.<br />
4. Click on the appropriate file you would like to install and click Open to add it<br />
to the <strong>Palm</strong> install queue.<br />
5. In the Quick Install tool, make sure that the file is set to the right destination.<br />
Click and drag a filename to either the handheld or the expansion card to<br />
change it’s destination:<br />
• For most devices, install GIF and JPEG files to the expansion card.<br />
• For many recent <strong>Palm</strong> devices, you can install GIF and JPEG files to the<br />
handheld or to an expansion card.<br />
6. If you would like to install more than one image, click Add and repeat steps 3<br />
through 5.<br />
7. In the Quick Install tool, click Done.<br />
8. Hotsync your <strong>Palm</strong> device.<br />
Installing <strong>Agendus</strong> <strong>for</strong> <strong>Palm</strong> <strong>OS</strong> 15
<strong>Agendus</strong> <strong>for</strong> <strong>Palm</strong> <strong>OS</strong>, Version 11<br />
Entering Demo and Activation Codes<br />
Over-the-Air Activation<br />
When you first install <strong>Agendus</strong>, you will be able to run it <strong>for</strong> three days be<strong>for</strong>e you will<br />
need to enter a demo or activation code. A demo code extends the trial period and an<br />
activation code permanently unlocks <strong>Agendus</strong> on your handheld device.<br />
If you have purchased <strong>Agendus</strong> from iambic or one of its on-line partners, and your<br />
device is network enabled, you can use over-the-air activation to unlock <strong>Agendus</strong>.<br />
If your device is not network enabled, or you want to enter a demo code, you can<br />
manually enter the code.<br />
If you have purchased <strong>Agendus</strong> from iambic or one of its on-line partners and your<br />
device is network enabled, you can use over-the-air activation to unlock <strong>Agendus</strong>.<br />
Note: These instructions assume that your device is already configured to use the<br />
network using the device’s Preferences | Network settings.<br />
1. Start <strong>Agendus</strong>.<br />
2. Click on the <strong>Palm</strong> device’s Menu button to view the menu bar.<br />
3. From the Options menu, select Activate <strong>Agendus</strong> to open the Activation<br />
screen. This is where you will find your Device ID.<br />
Tap the Menu button to access the <strong>Agendus</strong><br />
menu bar. The menu button is located to the left of<br />
the graffiti field at the bottom of your <strong>Palm</strong> device<br />
Type or write your<br />
email address<br />
4. Tap Activate button to open the Network Activation screen.<br />
5. Enter the email address you used when purchasing <strong>Agendus</strong> and tap Activate.<br />
Entering Demo and Activation Codes 16
<strong>Agendus</strong> <strong>for</strong> <strong>Palm</strong> <strong>OS</strong>, Version 11<br />
Manually Entering Demo or Activation Codes<br />
If you downloaded a trial version from iambic, a demo code should have been included<br />
in the email with the download instructions. If you do not have a demo code, please<br />
visit www.iambic.com and go to the web page <strong>for</strong> the edition you have downloaded,<br />
Professional or Standard. On that page click the Free Trial button and follow the onscreen<br />
instructions. Then follow the steps below to enter the code.<br />
If you have purchased directly from iambic, <strong>Palm</strong>Gear, Handango or another online<br />
partner, and you do not have a network-enabled device, you can register by visiting<br />
www.iambic.com/myiambic. You will need the Device ID shown on the Activation<br />
screen of <strong>Agendus</strong> to generate an activation code specific to your <strong>Palm</strong> device.<br />
To enter a demo code or activate <strong>Agendus</strong>:<br />
1. Start <strong>Agendus</strong>.<br />
2. Click on the <strong>Palm</strong> device’s Menu button to view the menu bar.<br />
3. From the Options menu, select Activate <strong>Agendus</strong> to open the Activation<br />
screen. This is where you will find your Device ID.<br />
Tap the Menu button to access the <strong>Agendus</strong><br />
menu bar. The menu button is located to the left of<br />
the graffiti field at the bottom of your <strong>Palm</strong> device<br />
You will need your device ID to<br />
register <strong>Agendus</strong><br />
4. Tap Enter Code to open the Software Activation box.<br />
5. Enter your activation or demo code in this box and tap Enter.<br />
Entering Demo and Activation Codes 17
<strong>Agendus</strong> <strong>for</strong> <strong>Palm</strong> <strong>OS</strong>, Version 11<br />
Navigating <strong>Agendus</strong><br />
GETTING STARTED WITH AGENDUS<br />
When you start <strong>Agendus</strong>, it will open to one of the main screens, or “views.” The<br />
example below shows one of the Calendar views, specifically the Week-List mode.<br />
From any view, most of the common features in <strong>Agendus</strong> can be reached within a few<br />
taps on the <strong>Agendus</strong> toolbar or on the main screen. In the example below, you could<br />
tap on an item to view the item details, or tap and hold on an item to per<strong>for</strong>m an action,<br />
like scheduling a follow-up to a meeting or dialing the assigned contact.<br />
Tap one of the View buttons (Calendar, Task, Memo, or Contact) to switch to the last<br />
used mode <strong>for</strong> that view; tap the same button again to pop up a list of available modes.<br />
Tap the Menu button<br />
to view the <strong>Agendus</strong><br />
menu bar<br />
Assign buttons so they<br />
can launch <strong>Agendus</strong><br />
Use the scroll buttons or<br />
directional pad to scroll<br />
through the different views<br />
<strong>Agendus</strong> Toolbar<br />
Change the date range<br />
Tap on an item to view its<br />
details or edit it<br />
Tap and hold on an item<br />
to view a menu of options<br />
Create a new meeting, task, memo, contact, or email<br />
Tap on a view button on the toolbar to switch to that view.<br />
Tap the same button again to change modes:<br />
Calendar<br />
Day - 3 modes<br />
Week - 5 modes<br />
Month - 4 modes<br />
Quarter - 3 modes*<br />
List - 3 modes*<br />
Show the display and font options<br />
Go to today’s date (calendar views)<br />
Task - 3 modes*<br />
Memo<br />
Contact - 3 modes<br />
Email*<br />
* <strong>Agendus</strong> Standard only supports one mode <strong>for</strong> the Quarter view and List view<br />
and two modes <strong>for</strong> the Task and Contacts views. Email requires a compatible<br />
email program and is only available in <strong>Agendus</strong> Pro.<br />
Navigating <strong>Agendus</strong> 18
<strong>Agendus</strong> <strong>for</strong> <strong>Palm</strong> <strong>OS</strong>, Version 11<br />
There are four main views: Calendar views combine meetings, calls, and tasks; the<br />
Task views show only tasks and phone calls; a Memo view; and a Contact view <strong>for</strong><br />
looking up names and addresses.<br />
Change the mode of the current view by tapping on the same view button and then<br />
selecting a mode from the list that pops up. The Calendar view is probably the most<br />
flexible, with a variety of single-day, week, month, quarter, and list modes. Tapping the<br />
View Options button will allow you to customize the view even more by selecting<br />
to include or exclude items, showing more lines of text, displaying photos, etc.<br />
<strong>Agendus</strong> will remember your recently used views, which you can<br />
page backwards and <strong>for</strong>wards between using web browser<br />
styled, green left and right arrows located at the bottom of the<br />
screen in each view mode. Simply tap an arrow to page between<br />
the last few views you’ve used.<br />
In every view, <strong>Agendus</strong> uses icons to tell you more about the displayed items.<br />
<strong>Agendus</strong> uses several icons in addition to the<br />
icons you can assign to meetings, tasks or calls:<br />
Birthday* (from contact info)<br />
Anniversary* (from contact info)<br />
Multiple meeting attendees**<br />
Roll-over activity**<br />
Alarm set <strong>for</strong> this item<br />
Repeating meeting or task<br />
Attached note<br />
(tap icon to open note)<br />
Matrix setting**<br />
Past-Due task (appears with due date)<br />
Photo attached to item<br />
* These icons can be changed (see page 109)<br />
**<strong>Agendus</strong> Pro only<br />
You can change key elements of listed items without changing to a different view. For<br />
example, change a task’s priority by tapping on the item’s priority number, mark an<br />
item as complete by tapping on its check box, or edit an item’s attached note by tapping<br />
on its note icon.<br />
Navigating <strong>Agendus</strong> 19
<strong>Agendus</strong> <strong>for</strong> <strong>Palm</strong> <strong>OS</strong>, Version 11<br />
<strong>Agendus</strong> has many features to make common tasks even easier:<br />
• Smart “New” button: The New button has two parts. Tap on the arrow<br />
•<br />
to pop-up a list of new items you can create; tap on the icon on the button to<br />
instantly create a new item based on the current view.<br />
Web-Style Hyperlinks: <strong>Agendus</strong> recognizes web-site addresses, email<br />
addresses, and phone numbers and turns them into hyperlinks. Tap on a hyperlink<br />
to open a browser, start a new email, or open the dialer.<br />
• Tap-and-Hold shortcut menus: In any view you can tap and hold the stylus<br />
on a meeting, call, task or contact to get a context-sensitive shortcut menu of<br />
actions that can be per<strong>for</strong>med on that item.<br />
For devices with directional pads, such as the Tungsten and Treo, holding the<br />
center button down on a selected item will open the shortcut menu.<br />
Tap and hold on a meeting, call, task or contact<br />
to open a shortcut menu of actions <strong>for</strong> that item<br />
<strong>Agendus</strong> recognizes web-site addresses, email<br />
addresses, and phone numbers, so you can<br />
browse, email, or dial with a single tap<br />
Note: The items listed<br />
depend on the item<br />
tapped and the capabilities<br />
of your <strong>Palm</strong> device.<br />
For example, dialing is<br />
only available <strong>for</strong> dialing-enabled<br />
devices<br />
• Templates: Save common meeting settings (times, attendees, locations) as<br />
templates so you won’t have to enter them every time you create a new similar<br />
meeting (page 69).<br />
• Default colors and icons by category: Set a default highlight color and icon<br />
<strong>for</strong> different categories of meetings, tasks, calls, and memos; set default highlight<br />
colors <strong>for</strong> contact categories (page 109).<br />
• Default colors and icons by keywords: Use Vivid Agenda to set default<br />
text colors and icons based on keywords in meetings, tasks, calls, and memos<br />
(page 94).<br />
• Hard buttons: Assign the buttons on your <strong>Palm</strong> device to start <strong>Agendus</strong> and<br />
open it in the last view or in a specific view (page 106).<br />
Navigating <strong>Agendus</strong> 20
<strong>Agendus</strong> <strong>for</strong> <strong>Palm</strong> <strong>OS</strong>, Version 11<br />
Using the Scroll buttons<br />
You can use the scroll buttons on your <strong>Palm</strong> device to scroll through your calendar. For<br />
example, if you are in the list view, press down on the scroll button to view commitments<br />
that don’t fit on the screen. When you have scrolled to the top or bottom of a<br />
view, press up or down to change to the previous or next date range.<br />
Using the 5-Way Navigator<br />
Current date range<br />
If the current view shows a scroll bar, then the<br />
scroll buttons will scroll up or down in that view<br />
When you reach the top or bottom of a view, or if<br />
there are no scroll bars, then the scroll buttons<br />
will change the view to show the previous or next<br />
date range<br />
Scroll buttons<br />
<strong>Agendus</strong> includes enhanced support <strong>for</strong> devices such as the Tungsten and Treo that are<br />
equipped with 5-way navigator pads. Each pad has five options: Up, Down, Left, Right,<br />
and Select (Select is the center button). Enhancements include new navigator-friendly<br />
time pickers and support <strong>for</strong> the highlight ring found on newer devices.<br />
5-Way Navigator<br />
The functionality of the navigator depends on the device you are using and the screen<br />
you are viewing. The navigator has the most functionality in devices that support navigator<br />
highlighting.<br />
Using the Scroll buttons 21
<strong>Agendus</strong> <strong>for</strong> <strong>Palm</strong> <strong>OS</strong>, Version 11<br />
For devices that do not support highlighting, the navigator’s main function is scrolling<br />
through your data, with the Left and Right buttons changing the date range.<br />
In devices that support highlighting, you can use the navigator to access more of the<br />
screen, including the <strong>Agendus</strong> toolbar. When the highlight is on the data portion of the<br />
screen, you can change the date range by pressing Left or Right; pressing Select will<br />
usually (depending on which screen you are using) highlight a single displayed record.<br />
With a single record selected, pressing Right will open a context-sensitive shortcut<br />
menu <strong>for</strong> the item (this is the same menu that opens if you tap and hold on the item).<br />
For all devices with the 5-way navigator, pressing the Right button will open a Quick<br />
Find control where you can use the navigator to enter letters <strong>for</strong> the contact you want<br />
to view.<br />
On devices that support highlights,<br />
press Right after selecting a record<br />
to open the shortcut menu<br />
On some devices, as you click<br />
buttons on the 5-way navigator,<br />
the highlight will move around<br />
the screen<br />
In the Contact view, press Right to<br />
open a navigator-friendly Quick Find<br />
Using the 5-Way Navigator 22
<strong>Agendus</strong> <strong>for</strong> <strong>Palm</strong> <strong>OS</strong>, Version 11<br />
Navigating with Menus<br />
Many <strong>Agendus</strong> features and functions can be accessed in a variety of ways: tap a<br />
toolbar button, select it from a menu, or select it from a tap-and- hold shortcut menu.<br />
There are also several functions in <strong>Agendus</strong> that can only be accomplished with a drop<br />
down menu or the shortcut menu.<br />
There are different sets of menus and menu items depending on which view and which<br />
mode you are viewing, and depending on the type of device you are using.<br />
Open the menu bar by tapping the <strong>Palm</strong> device’s menu button or by tapping the<br />
highlighted area at the top of the screen. Tap a menu heading to view the drop-down<br />
menu.<br />
Menu bar<br />
Tap the Menu button<br />
to view the menu bar<br />
Tap a menu heading to<br />
view the menu<br />
After you open the drop-down menu, select the specific <strong>Agendus</strong> function by tapping<br />
the menu choice<br />
Note: Save time by using shortcut commands instead of menus, particularly <strong>for</strong> editing<br />
commands like cut, copy, and paste. Shortcut commands are graffiti commands<br />
that are shortcuts to menu items. The commands are displayed next to their associated<br />
menu items.<br />
Navigating with Menus 23
<strong>Agendus</strong> <strong>for</strong> <strong>Palm</strong> <strong>OS</strong>, Version 11<br />
Overview<br />
CALENDAR VIEWS<br />
In <strong>Agendus</strong>, the Calendar views combine meetings (including annual events), tasks,<br />
and phone calls in the same screen. There are five categories of Calendar views, Day,<br />
Week, Month, Quarter, and List, and each category has several modes.<br />
To switch to the last-used Calendar view, tap the Calendar button in the <strong>Agendus</strong><br />
toolbar. Click the Calendar button again to pop up a menu of available modes.<br />
Calendar views<br />
Day<br />
Week<br />
Month<br />
Quarter<br />
List<br />
Tap a row heading to<br />
switch to the last-used<br />
mode <strong>for</strong> that category<br />
Tap on an item to view details or edit the item.<br />
Tap an underlined<br />
contact name to view<br />
the contact’s details<br />
Tap the calendar button to open<br />
a menu of available modes<br />
The current mode<br />
is highlighted<br />
Tapping most places on<br />
the details page or tapping<br />
the Edit button will open<br />
the meeting <strong>for</strong> editing<br />
Use Power Search from<br />
any card view by tapping the<br />
magnifying glass icon.<br />
Overview 24
<strong>Agendus</strong> <strong>for</strong> <strong>Palm</strong> <strong>OS</strong>, Version 11<br />
Day Modes: Today, List, and Split<br />
<strong>Agendus</strong> Calendar view supports three Day modes:<br />
• Today: Quickly see what is scheduled <strong>for</strong> the rest of today, including<br />
upcoming alarms, tasks, meetings and calls. Meetings that have already transpired<br />
are not displayed in this view. <strong>Agendus</strong> Pro also has the capability of<br />
showing the day’s weather <strong>for</strong>ecast, summaries of email and SMS messages,<br />
and retrieving “Quotes of the Day” and historical facts “This Day in History”.<br />
1. Each type of selection is displayed in its own collapsing slot. To expand<br />
or compress the slot, tap the slots category icon. A small green arrow will<br />
change direction from up to down to indicate the current mode. An<br />
upward pointing arrow indicates an open slot, whereas a downward pointing<br />
arrow a collapsed slot. Tap View Options in this view to choose<br />
which items to display and what order to display them. (See page 49 <strong>for</strong><br />
more in<strong>for</strong>mation on setting options <strong>for</strong> this mode.)<br />
2. You can navigate the slots using your directional pad, if your <strong>Palm</strong> device<br />
is equipped with one. To do so, using your directional pad tap up or down<br />
until you reach the desired slot, then press-and-hold the center button until<br />
the sub slot is hi lighted. Page through the sub-slots until you reach the<br />
one you desire, then tap the center button to open it in a card view.<br />
• Split: Meetings are shown on the top portion of the screen and tasks and<br />
calls are on the bottom portion. The bottom portion lists overdue items first,<br />
then calls in priority order, then tasks in priority order.<br />
• List: Past-due calls and tasks are shown first, followed by today’s commitments,<br />
followed by undated and future commitments. Past-due commitments<br />
(if there are any) will be recognizable by an exclamation point and date<br />
appearing be<strong>for</strong>e the contact name.<br />
To select one of the Day views:<br />
1. Tap on the Calendar button to switch to the last-used Calendar view.<br />
2. Tap on the Calendar button again to pop up the list of modes.<br />
3. Tap on the Day mode you want to view: Today, Split, or List.<br />
Day Modes: Today, List, and Split 25
<strong>Agendus</strong> <strong>for</strong> <strong>Palm</strong> <strong>OS</strong>, Version 11<br />
Today<br />
Change modes<br />
Go to current day<br />
(Split and List modes)<br />
Split<br />
Show filter and display options<br />
Week Views: List, Grid and Block<br />
<strong>Agendus</strong> Calendar view supports five Week modes:<br />
• List: Chronological list of the days of the week showing meetings, tasks,<br />
and calls. Only days with commitments are included in the list.<br />
• Grid (5), Grid (7), and Grid (14): Grid views showing all<br />
•<br />
meetings and tasks over a period of 5 days, 7 days, or 14 days. (To use Grid<br />
(5) to display a standard 5-day work week, Monday through Friday, you can<br />
set your handheld’s preferences to start weeks on Mondays.)<br />
Block: Graphic display of meetings <strong>for</strong> the selected week. Untimed<br />
meetings are reflected as dots below the dates. Tap on a block to pop up the<br />
meeting details; tap on the Edit button in the pop up to open the meeting or<br />
tap on the pop up to close it. Tasks and calls are not reflected in this view.<br />
To select one of the Week views:<br />
Tap to change the day<br />
1. Tap on the Calendar button to switch to the last-used Calendar view.<br />
2. Tap on the Calendar button again to pop up the list of modes.<br />
3. Tap on the Week mode you want to view: List, Grid, or Block.<br />
Week Views: List, Grid and Block 26<br />
List<br />
Tap and hold on an item to open a<br />
menu of actions <strong>for</strong> the item<br />
Split mode: Tap and drag the divider<br />
or tap the arrows to change the split
<strong>Agendus</strong> <strong>for</strong> <strong>Palm</strong> <strong>OS</strong>, Version 11<br />
List<br />
Change modes<br />
Go to current week<br />
Grid (7)<br />
Show filter and display options<br />
List and Grid modes: Tap an item to view or edit<br />
details; Tap and hold <strong>for</strong> a shortcut menu<br />
Block mode: Tap a block to pop up details; tap Edit<br />
button in pop-up to edit it or tap pop up to close it<br />
All modes: Tap a date to switch to Day view<br />
Tap to change the week<br />
Note: In the Week List view, past-due tasks and calls appear in a Past Due section at<br />
the top of the list, and undated commitments appear in a separate “No Date” section.<br />
In the Grid modes, past-due and undated tasks appear on today’s date. If you have<br />
checked the weather <strong>for</strong>ecast, a weather icon will show up next to dates included in<br />
the <strong>for</strong>ecast while in Grid modes.<br />
Month Views: Standard, Clocks, Icons, and Expanded<br />
<strong>Agendus</strong> Calendar view supports four Month modes:<br />
• Standard: Displays indicators on each day corresponding to different<br />
meeting types: untimed meetings are depicted with a diamond, timed<br />
meetings in the morning will have a block indicator near the top of the box,<br />
and later meetings will have a block indicator near the bottom of the box.<br />
Multi-day events will be indicated by differently colored banners.<br />
• Clocks: Shows two clocks <strong>for</strong> each day with a dated meeting or task. The<br />
first clock represents the morning and the second clock represents the afternoon.<br />
Darkened segments of the clocks indicate scheduled meetings.<br />
• Icons: Shows icons on the days that have meetings or tasks with associated<br />
icons. <strong>Agendus</strong> can display up to five large or twelve small icons on each<br />
day, depending on your screen size. If there are more events scheduled <strong>for</strong> one<br />
day with icons that can be shown, a green plus sign (+) will appear on that day<br />
to indicate that there are too many icons to display at once. Tap the options<br />
button to choose small icon view or choose to turn off weather icons if<br />
you need to save space.<br />
Month Views: Standard, Clocks, Icons, and Expanded 27<br />
Block<br />
Tap and drag items to move them<br />
Untimed events<br />
are reflected as<br />
dots under dates<br />
Add highlight colors by<br />
category (page 109)<br />
Tip: Set the starting day of the week<br />
<strong>for</strong> Grid (5) using preferences
<strong>Agendus</strong> <strong>for</strong> <strong>Palm</strong> <strong>OS</strong>, Version 11<br />
• Expanded: Similar to icon mode, but this view shows details <strong>for</strong> a<br />
selected day: tap on a day to select it. This mode also has color-coded gauges<br />
along the right edges of the day boxes indicating the amount of committed<br />
time <strong>for</strong> that day: the gauge goes from a short green bar to a medium yellow<br />
bar to a long red bar.<br />
To select one of the Month views:<br />
1. Tap on the Calendar button in the toolbar to switch to the last-used Calendar<br />
view.<br />
2. Tap on the Calendar button again to pop up the list of modes.<br />
3. Tap on the Month mode you want to view.<br />
Standard<br />
Clocks<br />
(The left clock is AM and<br />
the right clock is PM)<br />
Change modes<br />
Go to current month<br />
Show filter and display options<br />
Quarter Views: Compact, Expanded<br />
<strong>Agendus</strong> Calendar view supports three Quarter modes:<br />
• Compact: Shows several months at a glance (three on standard displays<br />
and five on displays that support portrait or landscape mode). The space <strong>for</strong><br />
another month is used to show details <strong>for</strong> the selected day: tap on a day to<br />
select it.<br />
• Expanded: Similar to the compact view, but the selected day’s details run<br />
the whole width of the screen.<br />
• Year: Shows 12 months at once. Tap on a date to switch to the Day mode<br />
Quarter Views: Compact, Expanded 28<br />
Icons<br />
Tap to change the month<br />
Expanded<br />
Tip: Set weeks to start on Sundays<br />
or Mondays by setting your <strong>Palm</strong><br />
Device’s Preferences<br />
Standard, Clocks, and Icons modes: Tap on a day to see the Day view <strong>for</strong> that day, tap<br />
and hold on a day to set a color <strong>for</strong> the day<br />
Expanded mode: Tap on a day to pop-up details <strong>for</strong> the day
<strong>Agendus</strong> <strong>for</strong> <strong>Palm</strong> <strong>OS</strong>, Version 11<br />
<strong>for</strong> that day. The circled date indicates the last date viewed in one of the other<br />
Calendar modes.<br />
To select one of the quarter views:<br />
1. Tap on the Calendar button to switch to the last-used Calendar view.<br />
2. Tap on the Calendar button again to pop up the list of modes.<br />
3. Tap on the Quarter mode you want to view.<br />
4. Tap on a month’s name to bring it up in month view.<br />
Compact<br />
Change modes<br />
Expanded<br />
Go to current day and quarter<br />
Show filter and display options<br />
Tap on a day to view details <strong>for</strong> the day; tap on<br />
the day header to switch to Day mode or tap an<br />
item to view details<br />
Tap to change the quarter<br />
Quarter Views: Compact, Expanded 29<br />
Year<br />
Tap to bring up in month view
<strong>Agendus</strong> <strong>for</strong> <strong>Palm</strong> <strong>OS</strong>, Version 11<br />
List Views: List, Trip and Recent Meetings<br />
<strong>Agendus</strong> Standard Edition supports a single List mode. The Professional Edition<br />
supports a second mode <strong>for</strong> listing saved trips:<br />
• List: Shows all meetings, calls, and tasks <strong>for</strong> a selected date range.<br />
• Trip (<strong>Agendus</strong> Pro only): Lists all saved trips. See “Creating Trips<br />
(<strong>Agendus</strong> Pro Only)” on page 90 <strong>for</strong> more in<strong>for</strong>mation.<br />
• Recent Meetings: Shows all meetings scheduled in a set time period of 30,<br />
60 or 90 days, including cancelled or completed meetings. Meetings are<br />
displayed with their respective times and check boxes to note completion. You<br />
can tap a meeting in this view to view, modify, or use extended options, such<br />
as calling the meeting coordinator. Tap the options gadget to set preferences<br />
<strong>for</strong> this view, including what types of meetings (Uncompleted, Completed, or<br />
Cancelled) to display.<br />
To switch to one of the List views:<br />
1. Tap on the Calendar button in the toolbar to switch to a Calendar view.<br />
2. Tap on the Calendar button again to pop up the list of modes.<br />
3. Tap on the List mode you want to view.<br />
List<br />
Tap on an item to view details<br />
Tap on a day header to see<br />
the Day mode <strong>for</strong> that day<br />
Tap and hold on a list or trip<br />
item to pop up a shortcut<br />
Change modes<br />
Show filter and display<br />
Tap to set the date<br />
range <strong>for</strong> the list view<br />
NEW Recent Meetings Mode<br />
Tap on a trip to view details or to<br />
edit and add new items to the trip<br />
List Views: List, Trip and Recent Meetings 30<br />
Trip
<strong>Agendus</strong> <strong>for</strong> <strong>Palm</strong> <strong>OS</strong>, Version 11<br />
Task Views: List, Hierarchy, and Matrix<br />
TASK VIEWS<br />
The task views show only your tasks and calls. In the task views you can edit the tasks<br />
in the view, without opening the task schedule slip. (For high-resolution devices, this<br />
edit-in-place feature will not be available if you change the font to one of the high-resolution<br />
fonts.) <strong>Agendus</strong> Standard Edition supports two task modes, and the Professional<br />
Edition supports three modes:<br />
• List: Lists all tasks and calls in the selected time period. The order the<br />
tasks are listed depends on the sort order set in the task preferences<br />
(page 102). Group the list based on category, due date, priority, matrix, or<br />
contact.<br />
• Hierarchy: The Hierarchy mode allows you to “nest” tasks, so you can<br />
define one or more tasks as being parts of a larger task.<br />
• Matrix (<strong>Agendus</strong> Pro only): The Matrix mode displays your tasks in a<br />
2 x 2 grid based on the assigned importance and urgency of each item.<br />
To select one of the task views:<br />
1. Tap on the Task button in the toolbar to switch to the last-used task view.<br />
2. Tap on the Task button again to pop up the list of modes and tap on the mode<br />
you want to view: List, Hierarchy, or Matrix.<br />
Task Views: List, Hierarchy, and Matrix 31
<strong>Agendus</strong> <strong>for</strong> <strong>Palm</strong> <strong>OS</strong>, Version 11<br />
Task List Mode<br />
List<br />
Hierarchy<br />
Change modes<br />
Group the list<br />
(by category, contact, etc.)<br />
Tap here and start typing or writing<br />
to find a task with that text<br />
The List mode of the Task view allows you to view a simple list of tasks and calls, or<br />
group the list by category or other criteria. You can easily show or hide items within<br />
each group, and you can create a graph to gain a better visual understanding of your<br />
tasks and calls. (The graphing feature is available in <strong>Agendus</strong> Pro only.)<br />
To select the Task List view:<br />
Filter by category<br />
or date range<br />
Matrix (<strong>Agendus</strong> Pro only)<br />
Show filter and display options<br />
1. Tap on the Task button in the toolbar to switch to the last-used Task view.<br />
2. Tap on the Task button again and select List .<br />
Tap on a task to edit it in place; tap and hold on<br />
a non-selected task to open the task<br />
List (No Group)<br />
Tap to expand or hide<br />
items within a group<br />
Tap to group by category, due date, priority, matrix<br />
setting, or contact name, or to turn off grouping<br />
List (Grouped by Category)<br />
View a chart<br />
Task Views: List, Hierarchy, and Matrix 32
<strong>Agendus</strong> <strong>for</strong> <strong>Palm</strong> <strong>OS</strong>, Version 11<br />
Task Hierarchy Mode<br />
Charting Tasks (<strong>Agendus</strong> Pro Only)<br />
From the Task List view, you can create a chart of your tasks using the current grouping<br />
with a single tap.<br />
Return to the<br />
Task view<br />
Change the chart type Add or remove axis labels Show or hide the legend<br />
Note: The task list must be grouped in order to use the chart feature.<br />
The Hierarchy mode of the Task view allows you to “nest” up to six levels of tasks, so<br />
you can define one or more tasks as being parts of a larger task. This is similar to the<br />
expanding folders used in both the MS Windows and Apple operating systems<br />
To select the Task Hierarchy view:<br />
1. Tap on the Task button in the toolbar to switch to the last-used Task view.<br />
2. Tap on the Task button again and select Hierarchy .<br />
Tap on a task to edit it in<br />
place; tap and hold on a<br />
non-selected task to open<br />
the task details<br />
Tap on a - to hide<br />
the nested items<br />
Tap to view a chart of the current grouping<br />
<strong>Agendus</strong> supports many<br />
different chart types<br />
Tap an item and then use<br />
these buttons to change<br />
its place in the hierarchy<br />
Tap on a + to see the<br />
nested items<br />
3. To move an item up or down in the list, or to move under or out from the item<br />
above it, tap the item and then tap the arrows at the top of the screen.<br />
4. To create a new main task, first highlight the task to precede it in the list, then<br />
click the left-most task tree icon. Enter the task in<strong>for</strong>mation, and the task<br />
Task Views: List, Hierarchy, and Matrix 33
<strong>Agendus</strong> <strong>for</strong> <strong>Palm</strong> <strong>OS</strong>, Version 11<br />
will appear directly below the one you hi lighted, which you can them move<br />
to anywhere in the chain using the directional arrows.<br />
5. Creating a new sub-task is just as easy: Select the main task <strong>for</strong> which you<br />
intend to create the sub-task, and tap the right-most tree icon. The task<br />
you enter will appear as a sub-task <strong>for</strong> the primary task you highlighted. You<br />
can create sub-tasks of sub-tasks creating additional levels of hierarchy, to<br />
streamline your work more efficiently.<br />
6. Tapping the small circle (shown with a + or - symbol) next to a task tree will<br />
collapse or expand it. Use this to reduce clutter on your screen while working<br />
on projects.<br />
7. Tasks will show you a completion status if there are any sub-tasks <strong>for</strong> them in<br />
hierarchal mode. The percentage complete indicates how many sub-tasks are<br />
done, which can be seen even if the primary task is collapsed.<br />
Task Views: List, Hierarchy, and Matrix 34
<strong>Agendus</strong> <strong>for</strong> <strong>Palm</strong> <strong>OS</strong>, Version 11<br />
Task Matrix Mode (<strong>Agendus</strong> Pro Only)<br />
The Matrix mode of the Task view allows you to view your tasks and calls based on<br />
their assigned urgency and importance. These matrix settings can be used instead of, or<br />
in combination with priorities to help organize tasks.<br />
To select the Task Matrix view:<br />
1. Tap on the Task button in the toolbar to switch to the last-used Task view.<br />
2. Tap on the Task button again and select Matrix .<br />
Important<br />
Not Important<br />
Urgent Not Urgent<br />
Quadrant A:<br />
crises<br />
pressing problems<br />
deadline-driven projects<br />
Quadrant C:<br />
interruptions<br />
some calls<br />
some reports<br />
some meetings<br />
popular<br />
Quadrant B:<br />
prevention activities<br />
capability improvements<br />
relationship building<br />
recognizing new opportunities<br />
planning<br />
recreation<br />
Quadrant D:<br />
trivia<br />
some mail<br />
some calls<br />
time wasters<br />
pleasant activities<br />
Examples of types of tasks and their ideal matrix settings<br />
Matrix Mode:<br />
Tap on a task to open it<br />
Tap and drag an item<br />
to move it to a different<br />
quadrant in the matrix.<br />
Of course there are appropriate tasks to fit in every quadrant, but the goal should be to<br />
have most items in quadrant B and as few items as possible in quadrants A, C, and D.<br />
• Recording important items be<strong>for</strong>e they get urgent (quadrant B) gives you<br />
better perspective and allows you to have better control over your time, and<br />
limits the number of crises you have to face.<br />
• Too many tasks in quadrant A leads to stress and burnout from crisis management<br />
and running around putting out fires.<br />
• Too many tasks in quadrant C leads to chronic short-term focus and loss of<br />
control.<br />
• If you have too many tasks in quadrant D, then you can see that your time is<br />
being taken up by too many unimportant items.<br />
To change a matrix setting <strong>for</strong> an item, tap on the item to open the item details and then<br />
tap on the details page to open the schedule slip <strong>for</strong> the item. (See page 64.)<br />
Task Views: List, Hierarchy, and Matrix 35<br />
a
<strong>Agendus</strong> <strong>for</strong> <strong>Palm</strong> <strong>OS</strong>, Version 11<br />
Agenda Walkthrough<br />
AGENDA WALKTHROUGH<br />
Keep your stuff together and make sure you are always prepared and ready <strong>for</strong> action<br />
with the new Agenda Walkthrough function in <strong>Agendus</strong> Pro.<br />
Agenda Walkthrough creates check lists of the things you need to do, either <strong>for</strong> or<br />
during a meeting or task. You can create check boxes next to entries you make using<br />
the Notes feature while you record a new meeting or task.<br />
To do so, first make sure you have card view enabled by going into <strong>Agendus</strong> Preferences,<br />
under the Miscellaneous pull down, and ticking the “Enable Card Views” check<br />
box, if it is not already turned on.<br />
To create a new walkthrough, make either a new meeting or task, and be<strong>for</strong>e saving it,<br />
tap the Notes icon in the lower right corner of your screen.<br />
In the Notes screen, enter the description(s) of the tasks you need to do, each preceded<br />
by either a plus sign (+) or minus sign (-). No space is required between the +/- sign and<br />
your entry. A plus sign will create a check box next to the task that is already ticked,<br />
whereas a minus sign creates an empty check box. Continue to make as many entries<br />
as you need by placing them individually on lines in your memo.<br />
Check boxes appear next to<br />
your entries.<br />
A sample entry would be: +Pack Shirts<br />
Use a + or - be<strong>for</strong>e your entry to create check boxes.<br />
A + makes an already ticked check box, and a - makes<br />
an empty check box.<br />
Agenda Walkthrough 36
<strong>Agendus</strong> <strong>for</strong> <strong>Palm</strong> <strong>OS</strong>, Version 11<br />
Now, when you open that entry in card view, a list with the tasks appears with check<br />
boxes to their left.<br />
To open a task in card view, go into the Task Matrix mode, and select the day that the<br />
task is scheduled on. Tap on the selected task, and it will open in card view with the<br />
check list you created in memos.<br />
For meetings, go into any Calendar view and tap on the appropriate day that your<br />
meeting is scheduled on. A screen showing all the scheduled meetings <strong>for</strong> that day will<br />
appear. Tap on the meeting you created the walkthrough check list <strong>for</strong>, and it will open<br />
in card view.<br />
To remove items from the checklist entirely, tap the edit button from a card view, and<br />
then tap the Memos icon . Delete the desired task from your memo and click Done.<br />
Use this feature to create lists of materials needed <strong>for</strong> meetings, items to pack <strong>for</strong> a trip,<br />
shopping lists, or <strong>for</strong> whatever it is that you need a check list.<br />
Note: Use the word “shopping” in a meeting name to generate a shopping<br />
cart icon in your calendar.)<br />
Agenda Walkthrough 37
<strong>Agendus</strong> <strong>for</strong> <strong>Palm</strong> <strong>OS</strong>, Version 11<br />
Memo View<br />
MEMO VIEW<br />
<strong>Agendus</strong> extends the power of the native <strong>Palm</strong> memo pad by extending the memo<br />
display options and allowing you to assign photos, contacts, or icons to your memos.<br />
Sort the memo list by contact name or first lines of memos, or manually arrange memos<br />
by tapping and dragging them into position. (See page 101.)<br />
Tap the View Options button to turn the photo display on or off, to display one line<br />
of each memo or up to four lines, to change wallpaper, or to change the font.<br />
For more in<strong>for</strong>mation on creating or editing memos, see page 77.<br />
To switch to the Memo view, tap on the Memo button in the toolbar<br />
Memo View<br />
Change to Memo view<br />
Show filter and display options<br />
Tap on a memo to edit text or to<br />
assign a contact, icon, or photo<br />
Tap to view by category<br />
Tap and hold on a memo to pop<br />
up a shortcut menu<br />
Memo View 38
<strong>Agendus</strong> <strong>for</strong> <strong>Palm</strong> <strong>OS</strong>, Version 11<br />
Contact Views: Compact and Expanded<br />
CONTACT VIEWS<br />
The Contact view shares the same database as the native Contact list in your <strong>Palm</strong><br />
device.<br />
<strong>Agendus</strong> supports three modes <strong>for</strong> the Contact view:<br />
• Compact: Lists one contact per line, and one other field (number,<br />
company, city, etc.) per contact. If you choose to display a number, you can<br />
see or select other numbers <strong>for</strong> a contact by tapping on the displayed number.<br />
• Expanded: Displays all of the contact numbers <strong>for</strong> each contact.<br />
• Networking: Displays how your contacts relate to each other.<br />
To select one of the contact views:<br />
1. Tap on the Contact button in the toolbar to switch to the last-used contact<br />
view.<br />
2. Tap on the Contact button again to pop up the list of modes.<br />
3. Tap on the mode you want to view.<br />
Contact Views: Compact and Expanded 39
<strong>Agendus</strong> <strong>for</strong> <strong>Palm</strong> <strong>OS</strong>, Version 11<br />
Compact<br />
4. To view a contact’s full details, tap on the contact’s name.<br />
Contact Details<br />
Select which field to list<br />
Change modes<br />
Group the contact list<br />
(by company, state, etc.)<br />
Enter text here to only display contacts<br />
with the search text in the first, last, or<br />
company name field<br />
Show filter and display options<br />
Tap to pop up the full list<br />
of the contact’s numbers<br />
Expanded<br />
Choose a category<br />
Sort the list by last name, first name, or<br />
company by selecting Menu | Options |<br />
Preferences | Contacts<br />
Tap on a name to see the contact details<br />
Tap and hold a contact name to pop up a<br />
list of options, including contact history<br />
Tip: If you are using <strong>Agendus</strong> Pro, tapping and holding on a contact name,<br />
will give you options to map the contact’s address or get driving directions.<br />
These options require an installed Web browser and an available Internet<br />
connection.<br />
Open the Contact History<br />
Weather (<strong>Agendus</strong> Pro only)<br />
Map (contact must have a mailing address;<br />
requires Mapopolis or web browser, <strong>Agendus</strong><br />
Pro only)<br />
Select a grouping<br />
or turn off the<br />
group feature<br />
Tap an arrow<br />
to show or<br />
hide a group<br />
Contact list grouped by company<br />
Tap underlined text to<br />
dial, email, or browse<br />
Note: Pictures assigned in <strong>Agendus</strong> will not appear on the <strong>Palm</strong> desktop or in the<br />
native <strong>Palm</strong> address book. Birthdays will only appear in the date book of compatible<br />
Contact Views: Compact and Expanded 40
<strong>Agendus</strong> <strong>for</strong> <strong>Palm</strong> <strong>OS</strong>, Version 11<br />
devices, such as the Tungsten T3 or Tungsten E, <strong>Palm</strong> Treo 600, 650, 700p,<br />
LifeDrive, or other recent models.<br />
Lookup Functionality with the Directional Pad<br />
While in the contact view you can use the directional pad (DPad) to quickly find a<br />
particular contact. Press the DPad to the right to bring up the DPad lookup tool, then<br />
up or down to scroll through the letters. After finding a letter, press right again to enter<br />
a second letter. Repeat this until you find the name you are looking <strong>for</strong>, then press DPad<br />
select to highlight the name in the list, and press it again to open the contact details.<br />
Contact Views: Compact and Expanded 41
<strong>Agendus</strong> <strong>for</strong> <strong>Palm</strong> <strong>OS</strong>, Version 11<br />
Dialing<br />
In <strong>Agendus</strong> you can tap and hold on a contact or meeting to open a shortcut menu with<br />
an option to dial the contact. From within a contact details screen, you can tap a phone<br />
number to open the dialer.<br />
Note: Dialing in <strong>Agendus</strong> requires a Treo, VisorPhone, Kyocera smartphone, <strong>Palm</strong><br />
<strong>OS</strong> 4.1 device or <strong>Palm</strong> <strong>OS</strong> 4.0 or earlier with phone services. To dial via IR or Bluetooth<br />
a compatible mobile phone is also needed. Phone services are part of Mobile<br />
Internet Kit.<br />
Tap and hold a contact or<br />
meeting and select Dial from<br />
the shortcut menu or tap the<br />
phone number in contact<br />
details. Use the magnifying<br />
glass to per<strong>for</strong>m a Power<br />
Search operation.<br />
Select the number or edit the<br />
number to be dialed<br />
You can also enable one-tap dialing, where tapping on a phone number in the Contact<br />
view will open the dialer. To enable tap-to-dial, open the Contact view, tap the View<br />
Options button , and select Enable Tap to Dial from the pop-up menu.<br />
With tap to dial enabled, tapping on a<br />
phone number in the Contact view<br />
will prompt you to dial the number<br />
Select Enable Direct Dialing from the pop-up menu to disable the Dial Number “OK/<br />
Cancel” prompt that appears when you tap a contact’s number to make a call. This<br />
allows you to dial a contact with just one tap.<br />
Contact Views: Compact and Expanded 42
<strong>Agendus</strong> <strong>for</strong> <strong>Palm</strong> <strong>OS</strong>, Version 11<br />
Contact History<br />
Contact history is built from the calls, tasks, meetings, and memos where this person is<br />
designated as the primary contact (<strong>for</strong> repeating meetings, only the last instance of the<br />
meeting will be shown). If you are using <strong>Agendus</strong>Mail, the history will also include<br />
email and SMS messages to this contact; if you are using a smartphone with a compatible<br />
call log, such as a Treo or Visorphone, then incoming and outgoing calls will also<br />
be included.<br />
Note: If you have installed iambic’s SalesWarrior, then opportunities with this contact<br />
will also be listed. SalesWarrior, sold separately, helps you track sales prospects and<br />
opportunities. Please visit www.iambic.com/saleswarrior <strong>for</strong> more in<strong>for</strong>mation.<br />
To access a contact history, tap and hold on a contact name in most <strong>Agendus</strong> views to<br />
pop up a shortcut menu, and then select Contact History. If you are in the Contact<br />
Details screen, you can tap the Contact History button .<br />
Event types are<br />
indicated by icons<br />
Total time of all<br />
meetings and calls<br />
Add a filter to<br />
all event types<br />
Access Contact History by tapping<br />
and holding on a contact name or<br />
from the Contact Details<br />
Tap Show in the contact history to show or<br />
hide event types or change the sort order<br />
Note: Show Emails only appears if the<br />
contact has an email address & an email<br />
client is installed<br />
Show Mobile Phone Calls will be available<br />
if your are using a Treo or Visorphone<br />
Contact History 43
<strong>Agendus</strong> <strong>for</strong> <strong>Palm</strong> <strong>OS</strong>, Version 11<br />
Exporting the Contact History<br />
You can export a contact history as a text file that can be imported into a spreadsheet<br />
or other program.<br />
1. Open the contact history you want to export.<br />
2. Select Menu | Options | Export to open the export screen.<br />
3. Set the file type to memo pad.<br />
4. Enter a title <strong>for</strong> the memo.<br />
5. Select a <strong>for</strong>mat <strong>for</strong> the memo.<br />
Tip: Comma delimited <strong>for</strong>mat inserts commas between the fields in the export<br />
file, and is commonly used <strong>for</strong> moving data into database applications. The<br />
tab-delimited <strong>for</strong>mat will insert a tab between the fields and is a more common<br />
<strong>for</strong>mat <strong>for</strong> spreadsheets.<br />
6. Tap Export.<br />
7. See the documentation <strong>for</strong> your destination program <strong>for</strong> in<strong>for</strong>mation on<br />
importing the file.<br />
Note: Depending on where you are going to use the data, you may need to<br />
hotsync your device, and copy and paste the memo into a text file on your<br />
desktop computer.<br />
Contact History 44
<strong>Agendus</strong> <strong>for</strong> <strong>Palm</strong> <strong>OS</strong>, Version 11<br />
Contact Networking (<strong>Agendus</strong> Pro Only)<br />
Now managing inter-relations between contacts is easier than ever with Contact<br />
Networking, a new feature in <strong>Agendus</strong> Pro. To access Contact Networking, switch to<br />
Contacts view and tap the Contacts icon, bringing up the Contacts Views pop-up menu.<br />
Tap the Networking mode icon.<br />
There are two ways create a link between two or more contacts. The first method is<br />
simply to, using the style, drag one contact’s name onto another. This will place the<br />
second contact directly under and to the right of the original contact, and will put a<br />
chain link icon with the relationship type next to the sub-contact’s name.<br />
The second method is to open a contact’s in<strong>for</strong>mation in a card by tapping the contact<br />
name, and then tapping the Edit button to make changed. In Edit mod, find the chain<br />
link icon in the lower right corder, and tap it. This opens up The Linked Contacts panel.<br />
From within the Linked Contacts panel, tap Add, which will open up the New Link<br />
panel. In this new panel, you can find a contact by typing their name in the field<br />
provided, or select them from a list of recently used contacts. You can change the<br />
nomenclature used to display contact data by tapping the green box just below the<br />
contact icon, selecting which order their names are displayed (First, Last, Company)<br />
from a pull down menu.<br />
As you enter a contact’s name, <strong>Agendus</strong> will attempt to use the letters you type to find<br />
the nearest matching name in your contacts database. If the name you are entering is<br />
not in your contacts list, <strong>Agendus</strong> will prompt you to add it.<br />
Once you have established which contact you wish to add, select the relationship type<br />
from the pull down menu, which presents a list of commonly used Relationships. This<br />
list is editable to you custom needs.<br />
Note: Relationships can be either directional, or non-directional. An example of a<br />
directional relationship is “Assistant”, as one person in the relationship is assisting the<br />
other. <strong>Agendus</strong> will add “of” to the description of an assistant that you enter. For example,<br />
if you enter John as an assistant to Mary, then John’s contact card will show:<br />
“John, assistant of: Mary”.<br />
When you are done, tap OK, and the contacts are linked.<br />
Networking Smart Build (<strong>Agendus</strong> Pro Only)<br />
<strong>Agendus</strong> Pro can attempt to automate this task <strong>for</strong> you by examining contacts you add<br />
based on their last name or company name. To do this, go to the Linked Contacts panel<br />
and tap the Find Contacts button.<br />
The Find Contacts panel that appears gives you four selectable check boxes to use to<br />
search your contacts <strong>for</strong> related in<strong>for</strong>mation. These are:<br />
• Meetings Attended<br />
• Common Last Name<br />
Contact Networking (<strong>Agendus</strong> Pro Only) 45
<strong>Agendus</strong> <strong>for</strong> <strong>Palm</strong> <strong>OS</strong>, Version 11<br />
• Common Company Name<br />
• Extended Contact Network<br />
Select whichever options you feel are appropriate, then<br />
tap Find. <strong>Agendus</strong> Pro will search through its internal<br />
database and list contacts that seem to be related, giving<br />
you a full list of them along with pull down menus <strong>for</strong><br />
each showing how <strong>Agendus</strong> thinks they are related. You<br />
can change these relation options by using the pull down<br />
menus.<br />
Each contact will have a check box next to it, which is<br />
turned on by default. To add relations <strong>for</strong> only selected<br />
contacts, deselect the check boxes <strong>for</strong> the contacts you do<br />
not wish to link by tapping the check box which turns it<br />
off.<br />
Once you have set the relationships you wish to add, tap the Add button and they will<br />
be merged with your contacts database.<br />
If you later wish to unlink a contact, open the contact by tapping it, and tap Edit. In the<br />
Edit panel, tap the Link icon, which brings up the inked Contacts panel. Tap the<br />
contact relation you wish to remove from the list of relationships displayed, and tap the<br />
Trash Can to delete it.<br />
Select Contact Networking<br />
Mode from the Contacts<br />
menu to begin.<br />
Enter the contact name, details,<br />
and a short description, or<br />
change the order contact info<br />
is displayed in here.<br />
Use the Find Contacts feature to<br />
generate links based on similar<br />
names or criteria.<br />
Contact relationships are displayed<br />
next to the contact name.<br />
Create a link and select a relationship type<br />
Contact Networking (<strong>Agendus</strong> Pro Only) 46
<strong>Agendus</strong> <strong>for</strong> <strong>Palm</strong> <strong>OS</strong>, Version 11<br />
DISPLAY SETTINGS AND FILTERS<br />
Display Settings and Filters - View Options<br />
Setting filters and display options allows you to screen out unwanted in<strong>for</strong>mation,<br />
hiding it without deleting it, so you can concentrate on the in<strong>for</strong>mation you need right<br />
now. Filters apply to entire records, <strong>for</strong> example showing only tasks with a particular<br />
priority; display options affect what is displayed <strong>for</strong> each record, <strong>for</strong> example showing<br />
photos or task priority numbers.<br />
Most of these controls are contained in the View Options menus and screens, although<br />
some are set in <strong>Agendus</strong> Preferences (see “Setting <strong>Agendus</strong> Preferences” on page 99).<br />
Set these options on a view-by-view basis: the options <strong>for</strong> the Week views can be<br />
different from the options <strong>for</strong> the Day views. Options <strong>for</strong> most of the calendar views<br />
can be set from within the same screen, just tap to select the view you want to change:<br />
the Today mode, Task views, and Contact views have different options and can only be<br />
edited from within those views. For these exceptions please see the sections below.<br />
In most views, tap to<br />
open a pop-up menu with<br />
common display options<br />
Select an item to toggle it on or off<br />
<strong>for</strong> all modes of the current view<br />
Tap to view all<br />
of the options<br />
Saved sets of<br />
options are<br />
listed here<br />
Display Settings and Filters - View Options 47
<strong>Agendus</strong> <strong>for</strong> <strong>Palm</strong> <strong>OS</strong>, Version 11<br />
Options <strong>for</strong> Most Calendar Views<br />
From any of the Calendar views (day, week, month, quarter, or list), tap the View<br />
Options button and select View Options from the pop-up menu. (For Trip mode<br />
options, see page 49; <strong>for</strong> Today mode options, see page 49.)<br />
There are four tabbed sections to the calendar options: events, tasks, settings, and font.<br />
Tap to select the calendar<br />
mode you want filtered<br />
Filter by Events (meetings, birthdays,<br />
and anniversaries) or Tasks<br />
(tasks and calls)<br />
Select each category you<br />
want to view or select All<br />
Only show tasks with a certain<br />
priority or a selected icon<br />
Turn off filters<br />
View up to 4 lines <strong>for</strong> each record.<br />
(disable to view more records)<br />
Select a wallpaper <strong>for</strong> this view<br />
(see page 107 <strong>for</strong> more in<strong>for</strong>ma-<br />
Outline fonts to make them<br />
easier to see over wallpaper<br />
(wallpaper must be showing)<br />
Select a font size and style<br />
Note: If you filter by category and by icon, then only those records in the selected categories<br />
that also use the selected icon will be displayed. (i.e. it is an exclusive filter:<br />
show only meetings with the category and the icon, not meetings with the category or<br />
the icon).<br />
Note: Wallpaper is not available in the Day split view or the Week block view. Displaying<br />
wallpaper in views other than the Today view requires <strong>Palm</strong> <strong>OS</strong> 5.0 or higher.<br />
Note: <strong>Palm</strong> devices with high-density (most <strong>Palm</strong> <strong>OS</strong> 5 and higher devices) or highresolution<br />
(all Sony Clie models) displays will have 8 font choices. Other <strong>Palm</strong> devices<br />
will only show four font choices.<br />
Options <strong>for</strong> Most Calendar Views 48
<strong>Agendus</strong> <strong>for</strong> <strong>Palm</strong> <strong>OS</strong>, Version 11<br />
Setting the Today Mode Options<br />
From the Today mode of the Calendar view, tap the View Options button and select<br />
View Options from the pop-up menu.<br />
Setting the Trip Mode Options<br />
Select a font size and style<br />
Check items you want displayed<br />
in the Today view<br />
Enable Quote of the Day<br />
Change the order by tapping an item<br />
and then tapping the Move arrows<br />
View up to 4 lines <strong>for</strong> each record.<br />
Disable to view more records.<br />
See page 107 to choose a wallpaper<br />
Outline fonts to make them easier to see over<br />
wallpaper (wallpaper must be showing)<br />
The options <strong>for</strong> the Trip mode expand on the options <strong>for</strong> most of the Calendar modes.<br />
Additions include filters <strong>for</strong> special trip events, including Ground Transportation,<br />
Flights, and Lodging.<br />
From the Trip mode of the Calendar view, tap the View Options button and select<br />
View Options from the pop-up menu.<br />
Trip options include special<br />
filters <strong>for</strong> special trip events<br />
Enable weather <strong>for</strong>ecasts (<strong>Agendus</strong> Pro only)<br />
Tap the tabs to set different<br />
options <strong>for</strong> the Trip mode<br />
Setting the Today Mode Options 49
<strong>Agendus</strong> <strong>for</strong> <strong>Palm</strong> <strong>OS</strong>, Version 11<br />
Filter Settings and Display Options <strong>for</strong> the Task Views<br />
From one of the Task views, tap the View Options button and tap View Options from<br />
the pop-up menu.<br />
Only show tasks<br />
and calls with the<br />
selected priorities<br />
Show or hide elements<br />
<strong>for</strong> all displayed tasks<br />
Contact View Options<br />
Tap Settings to set filters<br />
<strong>for</strong> the Task view<br />
In the Contact view options you can change the font size, show or hide the tabs at the<br />
top of the Contact view, and show or hide contact photos.<br />
From the Contact view, tap the View Options button and select View Options from<br />
the pop-up menu.<br />
Show or hide tabs at the top of<br />
the Contact view<br />
Show associated photos<br />
with contact info<br />
Tap Options to set how you<br />
want in<strong>for</strong>mation displayed in<br />
Task views<br />
Select a font size and style<br />
Select a font size and style<br />
Note: <strong>Palm</strong> devices with high-density (most <strong>Palm</strong> <strong>OS</strong> 5 and higher devices) or highresolution<br />
(all Sony Clie models) displays will have eight font choices. Other <strong>Palm</strong><br />
devices will only show four font choices.<br />
Filter Settings and Display Options <strong>for</strong> the Task Views 50
<strong>Agendus</strong> <strong>for</strong> <strong>Palm</strong> <strong>OS</strong>, Version 11<br />
Saving Filter and Display Options<br />
Save filter and display criteria <strong>for</strong> most Calendar views and Task views to easily apply<br />
the same options again at a later date.<br />
1. From one of the Calendar or Task views, tap the View Options button and<br />
select View Options from the pop-up menu.<br />
2. Select the filters and display options you want to save.<br />
3. Tap the Save button.<br />
4. Enter a name <strong>for</strong> the options.<br />
5. Select to apply the saved options to all views or to specified views.<br />
6. Tap OK.<br />
The saved sets of options are listed in the View Options pop-up menu.<br />
Saved sets of<br />
options are<br />
listed here<br />
Enter a new name <strong>for</strong><br />
the saved options<br />
Apply the options to all views<br />
or to specific views<br />
Previously saved options<br />
are listed here<br />
Saving Filter and Display Options 51
<strong>Agendus</strong> <strong>for</strong> <strong>Palm</strong> <strong>OS</strong>, Version 11<br />
ADDING AND EDITING ENTRIES<br />
Creating New Meetings and Annual Events<br />
Meetings, Events, Tasks, and Calls are all created through <strong>Agendus</strong> using the schedule<br />
slip. The type of record you create will affect some of the options in the schedule slip.<br />
Meetings are typically date-specific appointments to get together or do a certain thing<br />
on a particular day. Annual events are saved as meetings that repeat annually. Although<br />
meetings usually have an associated start time and duration, they can also be set with<br />
no time; <strong>for</strong> example you may add a holiday by setting it up as a meeting with no set<br />
time.<br />
1. Click the arrow side of the New button and select one of the following<br />
from the pop-up menu:<br />
• Select Meeting from the pop-up to open a meeting schedule slip.<br />
• Select Annual Event to create a meeting that repeats yearly.<br />
• Select Weekly Meeting to create a meeting that repeats every week.<br />
• Select Meeting from Template if you previously saved a meeting as a<br />
template and want to base the new meeting on that template (see<br />
page 69.)<br />
Other meetings show<br />
up in blue in the time<br />
bar so you can prevent<br />
scheduling conflicts<br />
Assign a primary<br />
contact<br />
Sort the<br />
contact list<br />
Attach a note<br />
Delete the meeting<br />
Set an alarm<br />
Dial the primary contact<br />
Map the primary contact<br />
View the details <strong>for</strong><br />
the primary contact<br />
Use the tabs to edit different<br />
attributes of the meeting<br />
2. Enter the date, time, primary contact, meeting description, and other attributes<br />
into the schedule slip. (See “Editing Meetings” on page 53.)<br />
Tip: If you have not started writing in the name <strong>for</strong> the primary contact, the<br />
Creating New Meetings and Annual Events 52
<strong>Agendus</strong> <strong>for</strong> <strong>Palm</strong> <strong>OS</strong>, Version 11<br />
Editing Meetings<br />
contact list menu will show recently used contact names. As you start<br />
writing or typing a name onto the contact line, <strong>Agendus</strong> will try to fill in the correct<br />
name. Opening the contact list at this point will show all names that match<br />
the letters you have entered so far.<br />
3. If this meeting is similar to other meetings you will need to add, you can save<br />
it as a template. Select Menu | Options | Save As Template. Enter a name <strong>for</strong><br />
the template and tap OK. (See “Using Templates” on page 69.)<br />
4. Once you have entered all the in<strong>for</strong>mation <strong>for</strong> the meeting, including setting<br />
any alarms or adding a note , tap OK in the schedule slip to save the<br />
meeting and return to the previous view.<br />
Add or edit meetings using the <strong>Agendus</strong> meeting schedule slip. The schedule slip <strong>for</strong><br />
meetings is similar to the schedule slip <strong>for</strong> tasks and Calls, but has some differences<br />
specific to meetings.<br />
To open a schedule slip, first tap on a meeting<br />
In the meeting schedule slip, there are seven tabbed pages: details, options, trip,<br />
attendees, photo, voice memo, and drawing. Tap a tab to switch between the pages. The<br />
general areas above and below the pages do not change.<br />
Meeting Schedule Slip - General Settings<br />
The general settings stay the same<br />
in every tab of the schedule slip<br />
Category Tap on the category box in the upper-right corner of the screen to<br />
select a category <strong>for</strong> the meeting. You will also be able to edit categories<br />
and add new ones.<br />
The number next to the category name indicates how many meetings<br />
are in this category.<br />
You can use categories as a filter, so that only records in a specific category<br />
are displayed, or have <strong>Agendus</strong> automatically assign colors or<br />
icons based on categories (page 109).<br />
Categories <strong>for</strong> meetings, tasks, and contacts are all independent.<br />
Creating New Meetings and Annual Events 53
<strong>Agendus</strong> <strong>for</strong> <strong>Palm</strong> <strong>OS</strong>, Version 11<br />
Meeting Schedule Slip - General Settings<br />
Date Tap on the date box to open the date picker.<br />
Time Tap on the time box to open the time picker. In the time picker you can<br />
also specify “no time” or “all day.”. If you have <strong>Agendus</strong> Pro and are<br />
running <strong>Palm</strong><strong>OS</strong> 5 or later, you can now set your Time Zone here,<br />
which is fluid throughout <strong>Agendus</strong>. You can change your current Time<br />
Zone whenever you need to, and <strong>Agendus</strong> Pro will automatically<br />
update your scheduled meetings, calls, and tasks with the new time<br />
provided by the change. You can also set the time and duration using<br />
the time bar.<br />
Time Bar The time bar graphically displays the time and duration of the meeting<br />
using a green bar. Other meetings <strong>for</strong> the day are displayed in blue.<br />
Tap and drag on the green bar to move the meeting time. Tap and drag<br />
on the time bar outside of the green bar to set a new time and duration.<br />
Repeat Tap the repeat box to set up a recurring meeting. Meetings can repeat<br />
every set number of days, weeks, months, or years, through a specified<br />
end date. For example, you could have the meeting repeat every friday<br />
or on the third Tuesday of every month.<br />
Icon Tap the icon box to select from installed icons.<br />
Open other<br />
installed icon sets<br />
Recently used icons<br />
Icons are used in several of the <strong>Agendus</strong> views to help you visually<br />
identify records.<br />
Automatically assign icons by category using preferences (page 109)<br />
or by keyword using the Vivid Agenda feature (page 94).<br />
Creating New Meetings and Annual Events 54
<strong>Agendus</strong> <strong>for</strong> <strong>Palm</strong> <strong>OS</strong>, Version 11<br />
Meeting Schedule Slip - General Settings<br />
Note Open a page where you can write a memo attached to this meeting. In<br />
the calendar views, meetings with notes will appear with a note icon:<br />
tap the note icon to view or edit the note.<br />
Delete Meeting Delete the current meeting.<br />
Set Alarm Enable or disable a meeting alarm, set the amount of time be<strong>for</strong>e the<br />
meeting starts to sound the alarm, and set the sound effect <strong>for</strong> the<br />
alarm.<br />
Enable the alarm to view<br />
the alarm settings<br />
Dial Call the primary contact. (requires Smartphone or Bluetooth connection<br />
to phone or tone dialer application).<br />
Map Open a browser with a map to the primary contact’s address.<br />
This feature requires in Internet connection. Choose your preferred<br />
mapping service provider through preferences (page 111).<br />
Creating New Meetings and Annual Events 55
<strong>Agendus</strong> <strong>for</strong> <strong>Palm</strong> <strong>OS</strong>, Version 11<br />
.<br />
Meeting Schedule Slip - Details<br />
The first two lines are <strong>for</strong><br />
the contact name. <strong>Agendus</strong><br />
will attempt to autofill<br />
the name <strong>for</strong> you if it<br />
has been used recently.<br />
Write or type a description<br />
<strong>for</strong> the meeting<br />
Primary Contact On the first line of the details page, enter a primary contact. As you<br />
start writing or typing letters, <strong>Agendus</strong> will try to match your entry<br />
with your contact list. Keep entering letters until the correct contact is<br />
displayed, or tap the contact Quick List button to view matching<br />
entries.<br />
For new contacts, finish entering the name and then tap the Contact<br />
Details button: you will be prompted to add the new name to your contact<br />
list.<br />
Long contact names will wrap to the second line.<br />
Enter other contacts <strong>for</strong> the meeting on the Attendees page.<br />
Quick List As you enter letters into the Primary Contact line, <strong>Agendus</strong> will filter<br />
this list to show only matching contacts.<br />
If you have not entered any letters, only recently selected contacts will<br />
be displayed in this list.<br />
Sort Change how contact names are listed (first name, last name, company<br />
name) by tapping the Sort button.<br />
Contact Details Once you have entered a primary contact, click the Contact Details<br />
button to view the details <strong>for</strong> the primary contact. If <strong>Agendus</strong> does not<br />
recognize the contact name, you will be prompted to add the name to<br />
your contact list.<br />
Description On the third line and below, enter a description of the meeting.<br />
Creating New Meetings and Annual Events 56
<strong>Agendus</strong> <strong>for</strong> <strong>Palm</strong> <strong>OS</strong>, Version 11<br />
Meeting Schedule Slip - Options<br />
Private Private meetings can be masked or hidden from the <strong>Agendus</strong> views<br />
using the security settings in your palm device.<br />
Color Apply a text color to the meeting description.<br />
Roll-Over<br />
(<strong>Agendus</strong> Pro)<br />
Effect<br />
(<strong>Agendus</strong> Pro)<br />
Set a meeting to “roll over” to have <strong>Agendus</strong> automatically keep<br />
rescheduling a meeting <strong>for</strong> the same time on the next day. This allows<br />
the meeting to stay on the calendar in case it gets postponed. When the<br />
meeting occurs, open the meeting’s schedule slip and turn off this<br />
option.<br />
When this option is enabled, you can set the roll over to continue<br />
indefinitely or set an end date.<br />
This option is only available <strong>for</strong> <strong>Agendus</strong> Pro.<br />
Apply effects to the text of the meeting. You can apply an underline,<br />
strike through, or double strikethrough. This effect will apply to the<br />
primary contact and meeting description in the calendar views.<br />
This option is only available <strong>for</strong> <strong>Agendus</strong> Pro.<br />
Status Use the pull down menu to change the status of a meeting to: ‘Uncompleted”,<br />
“Cancelled” or “Completed”<br />
Creating New Meetings and Annual Events 57
<strong>Agendus</strong> <strong>for</strong> <strong>Palm</strong> <strong>OS</strong>, Version 11<br />
Meeting Schedule Slip - Trip (<strong>Agendus</strong> Pro Only)<br />
Location Enter a location <strong>for</strong> the meeting.<br />
Enter a location on this line. As you write or type, <strong>Agendus</strong> will try to<br />
finish the name of the location based on previous locations you have<br />
entered <strong>for</strong> other meetings. If you are trying to enter a different name,<br />
keep writing.<br />
You can also tap on the Location button to view a list of previous<br />
locations.<br />
Trip If this meeting is part of a trip, select the trip name from this list. If you<br />
have not already created the trip in <strong>Agendus</strong>, leave this field blank and<br />
then edit the meeting later after you have created the appropriate trip<br />
(page 90).<br />
Creating New Meetings and Annual Events 58
<strong>Agendus</strong> <strong>for</strong> <strong>Palm</strong> <strong>OS</strong>, Version 11<br />
Meeting Schedule Slip - Attendees<br />
Edit Attendees<br />
(<strong>Agendus</strong> Pro)<br />
Tap the Edit Attendees button to view a contact list with check boxes<br />
next to the contact names. Checked contacts will appear in the Attendees<br />
list. Start typing or writing a name in the Look Up area to quickly<br />
find that name.<br />
Note: The attendees list is stored in a hidden area of the meeting note.<br />
If you look at the meeting in the native <strong>Palm</strong> Date Book, you will see<br />
an attached note. You will not see a note in <strong>Agendus</strong> unless you add a<br />
note to the meeting.<br />
This option is only available <strong>for</strong> <strong>Agendus</strong> Pro.<br />
Note: Meeting Attendees are now stored in the native<br />
<strong>Agendus</strong> calendar database.<br />
Creating New Meetings and Annual Events 59
<strong>Agendus</strong> <strong>for</strong> <strong>Palm</strong> <strong>OS</strong>, Version 11<br />
Meeting Schedule Slip - Photo<br />
Location<br />
Tap to open the<br />
photo picker<br />
Current folder<br />
Photo Tap on the image on the photo page to open the photo picker, where<br />
you can select any GIF or JPEG picture stored on your device.<br />
In the photo picker, browse through locations on your device.<br />
Location: Images may be stored in RAM, on a memory expansion card<br />
(such as a memory stick), or in Photos. The Photos location is available<br />
on most recent-model <strong>Palm</strong> devices.<br />
Current Folder: Once you have selected the location, you will see the<br />
folders stored in that location. Tap on a folder to open it. Tap on the<br />
folder to view the parent folder.<br />
Name: Tap on next to Name to sort the files by name. Tap again to<br />
reverse the order.<br />
Attribute: You can view the file size, dimension in pixels, or date of<br />
files by tapping on the attribute list. Tap on next to the attribute to<br />
sort the list by attribute.<br />
Tap on a displayed file name to preview it, and tap OK to add it to the<br />
task in<strong>for</strong>mation. Tap on None in the file list if you want to un-assign a<br />
photo from a task.<br />
If you do not assign a photo in the schedule slip, <strong>Agendus</strong> will use the<br />
photo assigned to the meeting’s primary contact.<br />
To display photos, the Show Photos option must be on in the selected<br />
view (page 47).<br />
Note: Assigning photos requires a device with <strong>Palm</strong> <strong>OS</strong> 5.0 or later.<br />
Crop Crop photos when you only want to use a part of the image.<br />
After selecting an image, tap the Crop button to open a window showing<br />
the image. Tap and drag over the image to select a portion of the<br />
image. to select to display only a piece of the image. When you are satisfied,<br />
tap OK.<br />
Delete Tap Delete to remove the selected image from your device.<br />
Note: This cannot be undone. If you just want to remove this image<br />
from the meeting, tap None in the file list.<br />
Creating New Meetings and Annual Events 60
<strong>Agendus</strong> <strong>for</strong> <strong>Palm</strong> <strong>OS</strong>, Version 11<br />
Meeting Schedule Slip - Voice Recording<br />
Time Bar When there is no voice recording, the time bar represents the total<br />
recording time available at the current quality. When a voice recording<br />
exists, the time bar reflects the duration of the recording.<br />
Quality Set the quality of the recording. Lower quality will allow more or<br />
longer recordings and save memory; higher quality will give better<br />
sounding playback.<br />
Technical specifications: High=8-bit 44 kHz, Medium=8-bit 22 kHz,<br />
Low=8-bit 11 kHz.<br />
Record Tap to start recording.<br />
Pause During a recording, the Record button will change to a pause button,<br />
allowing you to temporarily stop and then continue a recording.<br />
Stop Stop recording or playback.<br />
The controls will<br />
change once you<br />
make a recording<br />
Set a lower quality to save memory<br />
Play Play the saved voice recording. This button only appears when there is<br />
a saved recording.<br />
Volume Adjust the playback volume. This button only appears when there is a<br />
saved recording.<br />
Delete Delete the current voice recording. This button only appears when<br />
there is a saved recording.<br />
Creating New Meetings and Annual Events 61
<strong>Agendus</strong> <strong>for</strong> <strong>Palm</strong> <strong>OS</strong>, Version 11<br />
Meeting Schedule Slip - Drawing<br />
Drawing Pad Write or draw directly in the drawing pad area.<br />
In the photo picker, you can browse through locations and folders on<br />
your device.<br />
Color Tap to open a palette of available colors.<br />
Tool Tap to select a variety of drawing tools, including a pen (freehand),<br />
straight line, shapes, and an eraser.<br />
Tool Size<br />
& Shape<br />
Drawing pad<br />
Erase entire drawing<br />
Tap to select the size and style of the selected tool.<br />
Erase Tap to erase the current drawing. To erase part of a drawing, select the<br />
eraser from the tool menu.<br />
Creating New Meetings and Annual Events 62<br />
Color<br />
Tool<br />
Tool size & shape<br />
Scroll drawing pad
<strong>Agendus</strong> <strong>for</strong> <strong>Palm</strong> <strong>OS</strong>, Version 11<br />
Creating New Tasks and Calls<br />
Tasks and calls are tasks that need to get done. They may have deadlines or dates you<br />
want to see them completed, but they usually don’t need to be done at a specific time.<br />
Calls are a special category of task, so you can’t assign a category to a call.<br />
Creating new tasks and Calls is very similar to creating a new meeting. They just use a<br />
slightly different version of the schedule slip.<br />
1. Click the down arrow on the New button and select one of the following<br />
from the pop-up menu to open the task schedule slip:<br />
• Select Call to create a task to call or email someone.<br />
• Select Task to create a new task.<br />
• Select Call from Template to create a new call based on a call template<br />
you have previously saved.<br />
• Select Task from Template to create a new task based on a task template<br />
you have previously saved.<br />
Assign a primary<br />
contact<br />
Sort the<br />
contact list<br />
Tap to insert a<br />
number <strong>for</strong> the<br />
primary contact<br />
(Calls Only)<br />
Attach a note<br />
Delete the meeting<br />
Set an alarm<br />
Dial the primary contact<br />
Map the primary contact<br />
View the details <strong>for</strong><br />
the primary contact.<br />
Use the tabs to edit different<br />
attributes of the task/call.<br />
2. Enter the date, time, primary contact, task description, and other attributes<br />
into the schedule slip. (See “Editing Tasks and Calls” on page 64.)<br />
Tip: If you have not started writing in the name <strong>for</strong> the primary contact, the<br />
contact list menu will show recently used contact names. As you start<br />
writing or typing a name onto the contact line, <strong>Agendus</strong> will try to fill in the correct<br />
name. Opening the contact list at this point will show all names that match<br />
the letters you have entered so far.<br />
3. If this task is similar to other tasks you want to enter, you can save it as a template.<br />
Select Menu | Options | Save As Template. Enter a name <strong>for</strong> the template<br />
and tap OK. (See “Using Templates” on page 69.)<br />
4. After entering the in<strong>for</strong>mation <strong>for</strong> the meeting, including setting any alarms<br />
or adding a note , tap OK in the schedule slip to save the task.<br />
Creating New Tasks and Calls 63
<strong>Agendus</strong> <strong>for</strong> <strong>Palm</strong> <strong>OS</strong>, Version 11<br />
Editing Tasks and Calls<br />
Add or edit tasks and calls using the <strong>Agendus</strong> task schedule slip. The schedule slip <strong>for</strong><br />
tasks is similar to the schedule slip <strong>for</strong> meetings.<br />
To view the schedule slip <strong>for</strong> a saved task from one of the Task views, tap on another<br />
task, then tap and hold on the task and then tap Open from the menu that pops up.<br />
In the task schedule slip, there are six tabbed pages: details, options, trip, photo, voice<br />
memo, and drawing. Tap a tab to switch between the pages. The general areas above<br />
and below the pages do not change.<br />
Task Schedule Slip - General Settings<br />
Category<br />
(tasks only)<br />
Same as the Meeting Schedule Slip (page 53).<br />
Category lists <strong>for</strong> meetings, tasks, and contacts are all independent.<br />
To set a default category <strong>for</strong> new tasks, see page 101.<br />
Date Tap on the date box to open the date picker and assign a due date.<br />
<strong>Agendus</strong> can assign a default due date or change this to the completion<br />
date when you mark off a task as completed (page 101).<br />
Priority Tap to set a priority <strong>for</strong> the task.<br />
<strong>Agendus</strong> can filter tasks by priority (page 47).<br />
You can set a default priority <strong>for</strong> new tasks (page 101).<br />
Matrix<br />
(<strong>Agendus</strong> Pro)<br />
Tap here to add one of the<br />
contact’s phone numbers to<br />
the description (Calls only)<br />
Tap on the matrix box to select the importance and urgency of this<br />
task. See page 35 <strong>for</strong> more on using matrix settings.<br />
<strong>Agendus</strong> can assign a default setting (page 101).<br />
Creating New Tasks and Calls 64
<strong>Agendus</strong> <strong>for</strong> <strong>Palm</strong> <strong>OS</strong>, Version 11<br />
Task Schedule Slip - General Settings<br />
Repeat Tap the repeat box to set up a task as either a repeat or a redo.<br />
Repeat: Tasks can repeat every set number of days, weeks, months, or<br />
years, through a specified end date. For example, you could have the<br />
task repeat on the 15th of every month or on the same date every year.<br />
Redo: Set a task as a redo if you only want it to repeat after it has been<br />
completed. For example, you may want to set a task <strong>for</strong> oil changes to<br />
“redo” every 90 days.<br />
Complete Check this box if the task is complete.<br />
Completed tasks will be displayed with a strikethrough (strikethrough)<br />
to indicate they are completed.<br />
Set <strong>Agendus</strong> to display or hide completed tasks and calls through the<br />
task Settings preferences (page 102).<br />
Set Alarm Set a day and time <strong>for</strong> the alarm and set the sound effect <strong>for</strong> the alarm.<br />
Icon<br />
Note<br />
Delete Task<br />
Dial<br />
Same as the Meeting Schedule Slip (page 53).<br />
Creating New Tasks and Calls 65
<strong>Agendus</strong> <strong>for</strong> <strong>Palm</strong> <strong>OS</strong>, Version 11<br />
Task Schedule Slip - Details<br />
Primary Contact<br />
Quick List<br />
Sort<br />
Contact Details<br />
Phone Numbers<br />
(Calls Only) and<br />
Description<br />
Task Schedule Slip - Options<br />
Same as on the Details page of the Meeting Schedule Slip (page 56).<br />
On the third line and below you can enter a description of the task.<br />
If you are creating or editing a call, you can click the Phone Number<br />
button to select and insert a contact number <strong>for</strong> the selected contact<br />
into the description area.<br />
Advance Set how many days prior to the task date you want the task to appear in<br />
the Day views.<br />
To set a default advance period <strong>for</strong> new tasks, see page 101.<br />
Private<br />
Color<br />
Roll-Over<br />
Same as the Meeting slip (page 57).<br />
Tap the phone icon to insert a<br />
contact’s phone numbers into<br />
the description<br />
Creating New Tasks and Calls 66
<strong>Agendus</strong> <strong>for</strong> <strong>Palm</strong> <strong>OS</strong>, Version 11<br />
Task Schedule Slip Settings - Trip<br />
Location Same as the Meeting Schedule Slip (page 58).<br />
Trip Same as the Meeting Schedule Slip (page 58).<br />
If you have not already created the trip in <strong>Agendus</strong>, leave this field<br />
blank and then edit the task later after you have created the appropriate<br />
trip (page 90).<br />
Task Schedule Slip - Photo<br />
Location<br />
Tap to open the<br />
photo picker<br />
Current folder<br />
Photo Same as the Meeting slip (page 57).<br />
To display photos, the Show Photos option must be on in the selected<br />
view (page 47).<br />
Note: Assigning photos requires a device with <strong>Palm</strong> <strong>OS</strong> 5.0 or later.<br />
Creating New Tasks and Calls 67
<strong>Agendus</strong> <strong>for</strong> <strong>Palm</strong> <strong>OS</strong>, Version 11<br />
Task Schedule Slip - Voice Recording<br />
Time Bar<br />
Quality<br />
Record<br />
Stop<br />
Play<br />
Volume<br />
Delete<br />
Task Schedule Slip - Drawing<br />
Drawing Pad<br />
Color<br />
Tool<br />
Tool Size<br />
& Shape<br />
Erase<br />
Set a lower quality<br />
to save memory<br />
Start recording<br />
Same as the Meeting slip (page 61).<br />
The buttons that are displayed will change depending on if there is<br />
already a voice recording.<br />
Note: A microphone icon will appear next to this task in<br />
all views.<br />
Drawing pad<br />
Erase entire drawing<br />
Same as the Meeting slip (page 62).<br />
Note: A drawing “doodle” icon will appear next to this task<br />
in all views.<br />
Creating New Tasks and Calls 68<br />
Color<br />
Tool<br />
Tool size & shape<br />
Scroll drawing pad
<strong>Agendus</strong> <strong>for</strong> <strong>Palm</strong> <strong>OS</strong>, Version 11<br />
Using Templates<br />
To Create a Template:<br />
Using templates is an easy way to quickly create a new meeting, task, or call that is<br />
similar to others you have created.<br />
1. Open a meeting, task, or call that you would like to use as a template, or create<br />
a new item and set the attributes you would like to save in the template.<br />
2. Tap the Menu button and select Options | Save as Template to open the<br />
Template name box.<br />
3. Enter a name <strong>for</strong> the template and tap OK.<br />
4. Tap OK or Cancel to save or exit the meeting you had opened.<br />
To Create a New Record from a Template<br />
1. Tap on the down arrow in the New button and select to create a new<br />
meeting, call, or task from a template to open the Choose Template list.<br />
2. Select the template name from the list and tap OK.<br />
3. All of the attributes from the template will be copied into a new record except<br />
<strong>for</strong> the original’s date.<br />
Using Templates 69
<strong>Agendus</strong> <strong>for</strong> <strong>Palm</strong> <strong>OS</strong>, Version 11<br />
To Edit or Delete a Template<br />
1. Tap on the New button and select to create a new meeting, call, or task<br />
from a template to open the Choose Template list.<br />
2. Select the template name from the list.<br />
3. Tap the Edit button to rename your template, or tap the Delete button and<br />
tap OK to delete the template and return to the template list.<br />
4. Tap Cancel to close the template list.<br />
Using Templates 70
<strong>Agendus</strong> <strong>for</strong> <strong>Palm</strong> <strong>OS</strong>, Version 11<br />
Scheduling Follow-Ups<br />
Quickly schedule a follow up to any meeting, call, or task.<br />
1. Open the item, tap the Menu button and from the menu select Options |<br />
Schedule Follow Up or, in most calendar views, tap and hold on the item and<br />
select Schedule Follow Up from the shortcut menu.<br />
2. In the Schedule Follow-Up box, select to schedule the follow-up as a meeting,<br />
Call, or task and tap OK. This will open up a new schedule slip <strong>for</strong> the selected<br />
type with the primary contact and a description already entered.<br />
3. Finish filling out the new schedule slip and tap OK.<br />
Tap the Free Time Finder button to access the Free Time Finder panel, and locate when<br />
you are available to schedule a follow-up.<br />
Following Up from an Alarm<br />
If you have set an alarm <strong>for</strong> a meeting, task, or call, <strong>Agendus</strong> will open a reminder when<br />
the alarm goes off. This function is fully integrated with the built-in Attention Manager<br />
in <strong>Palm</strong><strong>OS</strong> (one of the built in PIMs) and will collaborate with all of your <strong>Palm</strong><strong>OS</strong><br />
alarms in one simple display.<br />
New: Auto-complete your task and<br />
end your alarm in one tap with this<br />
gadget!<br />
• To turn off the alarm, tap the green check mark.<br />
• To open the schedule slip <strong>for</strong> the meeting or task, tap the blue arrow.<br />
Scheduling Follow-Ups 71
<strong>Agendus</strong> <strong>for</strong> <strong>Palm</strong> <strong>OS</strong>, Version 11<br />
• To turn off the alarm, and auto-complete the task it was set <strong>for</strong>, tap the green<br />
check mark inside a red box.<br />
• To have the alarm remind you again, set a snooze time and tap the yellow<br />
circular arrow.<br />
• To dial the primary contact, or to send an email or SMS message to the<br />
primary contact, tap Follow-up and select your desired action.<br />
Note: These follow-up options are only available in <strong>Agendus</strong> Pro and will only<br />
be available if they are supported by your <strong>Palm</strong> device and if you have set<br />
their communication settings in <strong>Agendus</strong> preferences (see page 111).<br />
Converting Tasks, Calls, and Meetings<br />
It is easy to change the type of a meeting or task, although you will lose any in<strong>for</strong>mation<br />
that is not supported in the new type. For example, if you change a meeting to a task,<br />
you will keep the date and primary contact, but lose the time and attendee list, since<br />
those items aren’t supported by tasks.<br />
1. Open the schedule slip <strong>for</strong> the meeting or task (from most calendar views, tap<br />
on the item to open it).<br />
2. Tap the Menu button and select Options | Convert To (Meeting, Call, or<br />
Task) to open the Convert confirmation box.<br />
3. Tap OK to complete the conversion.<br />
Creating a Log Entry <strong>for</strong> a Task, Call, or Meeting<br />
You can create a log of meetings, tasks, and calls with your contacts. Log entries are<br />
stored in the notes <strong>for</strong> the primary contacts of the items.<br />
To log an item, open the schedule slip and select Menu | Record | Log Item, or tap and<br />
hold on the item and select Log from the shortcut menu.<br />
To view the log, go to one of the contact views and tap on the note icon <strong>for</strong> the<br />
contact, or open the contact details, tap Edit, and tap on the Note button .<br />
Converting Tasks, Calls, and Meetings 72
<strong>Agendus</strong> <strong>for</strong> <strong>Palm</strong> <strong>OS</strong>, Version 11<br />
Using the Daily Journal<br />
DAILY JOURNAL<br />
Keep track of your notes and thoughts in a personal log <strong>for</strong>mat with the new Agenda<br />
Daily Journal feature in <strong>Agendus</strong> Pro. Daily Journal keeps notes attached to specific<br />
dates in your Calendar which you access by tapping on a specific date in any Calendar<br />
view.Creating New Journal Entries<br />
Journal entries are simply notes to yourself which appear as untimed meetings under<br />
the name “Daily Journal” in the calendar views. They are handy <strong>for</strong> creating notes or<br />
memos on the fly, without having to reference or attach them to specific contacts.<br />
<strong>Agendus</strong> automatically selects the current day as the date <strong>for</strong> the journal entry.<br />
1. Click the New button and select Journal Entry from the pop-up menu.<br />
This will open a meeting note with the current time already inserted.<br />
Tap Done to close and save the entry<br />
Journal entries created on the same day<br />
are stored in the same Daily Journal<br />
2. Start writing or typing to enter your journal entry.<br />
3. Once you have finished entering your note, tap Done to return to your previous<br />
view.<br />
4. If you want to add an icon, category, or text color <strong>for</strong> the journal, open the<br />
schedule slip <strong>for</strong> the journal by tapping on the Daily Journal item in one of the<br />
calendar views. (See “Editing Journal Entries,” below.)<br />
5. If you add another journal entry later the same day, it will open the same<br />
meeting note with the time inserted on a new line.<br />
Using the Daily Journal 73
<strong>Agendus</strong> <strong>for</strong> <strong>Palm</strong> <strong>OS</strong>, Version 11<br />
Editing Journal Entries<br />
<strong>Agendus</strong> saves journal entries as notes to meetings named “Daily Journal.” To add to<br />
the Daily Journal, just tap the Daily Journal’s Note icon . To open up the meeting<br />
commitment itself, tap the Daily Journal field.<br />
Type your journal notes in the field provided, and then tap Done.You can continue to<br />
add journal entries, all of which show the time the are created next to them <strong>for</strong> easy<br />
management and recognition.<br />
Once you have journal entries saved, you can access them by going into any calendar<br />
view and tapping on the current day, or any day with journal entries that you wish to<br />
view. Once the day view is on-screen, you will see a new item marked with a<br />
“diamond” labeled Daily Journal followed by the date it was created (e.g. Daily Journal<br />
7/4/06).<br />
To view entries <strong>for</strong> that day, tap on Daily Journal from within the day view, and a new<br />
screen will appear with all your notes. Each journal entry will appear on a line preceded<br />
by its respective time of creation. To delete entries, de-selecting the check box next to<br />
them and click Done.<br />
Agenda Journal Quick-Add (Pro-Edition Only)<br />
Tap to add to<br />
the journal<br />
Tap to view the meeting<br />
slip <strong>for</strong> the journal<br />
where you can set<br />
icons or text colors<br />
If you are using <strong>Agendus</strong> Pro, you can now tap-and-hold any<br />
item in a calendar 1-day view, task view, or memos view to<br />
bring up a contextual menu with the new option Add to<br />
Journal. Select this to immediately add the item to your<br />
Daily Journal along with the current time.<br />
For a faster way to add entries to your Journal, you can also tap the add button in<br />
any card view, or access the pull-down menus with the menu button on your <strong>Palm</strong><br />
device and select Add to Journal.<br />
Tip: Daily Journal entries will by synchronized to the <strong>Palm</strong> Desktop. To edit or change<br />
journal entries on the <strong>Palm</strong> Desktop, open the <strong>Palm</strong> Desktop and double-click on the<br />
Daily Journal entry. Next, click the Edit button to open the entry and in the Edit Event<br />
dialog box click the Note Editor icon. Edit the entry and then click OK. Any changes<br />
made on the desktop will be synchronized to <strong>Agendus</strong> on the <strong>Palm</strong> device.<br />
Using the Daily Journal 74
<strong>Agendus</strong> <strong>for</strong> <strong>Palm</strong> <strong>OS</strong>, Version 11<br />
Creating a New Contact<br />
<strong>Agendus</strong> integrates directly with your native <strong>Palm</strong> Address book. You will see all the<br />
names from your <strong>Palm</strong> Address Book in the <strong>Agendus</strong> Contact list, and you can add new<br />
contacts using <strong>Agendus</strong>.<br />
1. Click the New button and select Contact from the pop-up menu to open<br />
a blank Contact entry.<br />
Tap to select the<br />
type of contact<br />
number<br />
Select the contact’s primary phone<br />
number, assign a ring tone (Treo<br />
600), or make the contact private<br />
2. Enter the details <strong>for</strong> the contact.<br />
To insert a photo <strong>for</strong> this contact, tap on the photo icon in the upper right corner<br />
of the screen (requires <strong>Palm</strong> <strong>OS</strong> 5.0 or later). For more in<strong>for</strong>mation on the<br />
photo picker, see page 67.<br />
If you are entering your own in<strong>for</strong>mation, you can make this entry your electronic<br />
business card <strong>for</strong> easier beaming of your in<strong>for</strong>mation to other <strong>Palm</strong><br />
devices; to make this entry your business card, select Menu | Record | Select<br />
Business Card.<br />
Note: If you use the contact’s birthday or anniversary field, then those dates<br />
will show up in the calendar views. (In the calendar views, use the View<br />
Options button to enable or disable this feature.) Set the default icons <strong>for</strong><br />
these special days through <strong>Agendus</strong> Preferences (page 109).<br />
3. Click Done to return to the Contact view.<br />
Select a category<br />
Tap to pick a photo <strong>for</strong> the contact<br />
(requires <strong>Palm</strong> <strong>OS</strong> 5.0 or later)<br />
Use your keypad or graffiti to enter<br />
the contact’s in<strong>for</strong>mation<br />
Attach a note<br />
Delete the contact<br />
Add data fields<br />
Add or edit linked contacts<br />
Lookup address<br />
Note: The contact’s photo will not appear with the contact in<strong>for</strong>mation when using the<br />
<strong>Palm</strong> Address Book or <strong>Palm</strong> desktop, though photos added using the native <strong>Palm</strong><strong>OS</strong><br />
Contacts PIM (such as on the Treo series) will appear in <strong>Agendus</strong>; the birthday will<br />
appear in the Date Book of compatible <strong>Palm</strong> devices.<br />
Creating a New Contact 75
<strong>Agendus</strong> <strong>for</strong> <strong>Palm</strong> <strong>OS</strong>, Version 11<br />
Verifying Addresses<br />
Editing Contacts<br />
While you are editing contact in<strong>for</strong>mation, you can have <strong>Agendus</strong> check the Internet to<br />
find or verify a contact’s address.<br />
1. While editing a contact, tap the Address Lookup button.<br />
Tap to find or verify<br />
the address<br />
2. Select to search <strong>for</strong> the contact’s personal or company address.<br />
3. Tap Search.<br />
4. In the search results, scroll through the results to find the correct address.<br />
Add the selected address<br />
to the contact info<br />
5. Tap on an entry to select it.<br />
6. To add the selected entry to the contact in<strong>for</strong>mation, tap Add.<br />
Search <strong>for</strong> the contact<br />
name or the contact’s<br />
company<br />
Start the search<br />
Scroll through the<br />
search results<br />
Dial the selected contact<br />
Map the selected contact<br />
From the contact details screen, you can add a note to a contact or delete the contact by<br />
tapping the Menu button.<br />
To edit the contact’s in<strong>for</strong>mation or add a picture, open the contact details and then tap<br />
the Edit button.<br />
Creating a New Contact 76
<strong>Agendus</strong> <strong>for</strong> <strong>Palm</strong> <strong>OS</strong>, Version 11<br />
Creating New Memos<br />
<strong>Agendus</strong> integrates directly with your native <strong>Palm</strong> Memo Pad. All of your existing<br />
memos will be available through the Memo view, and you can add new memos.<br />
<strong>Agendus</strong> expands the functionality of memos by allowing you to assign contacts,<br />
photos, highlight colors, and icons to your memos.<br />
1. Click the New button and select Memo from the pop-up menu to open a<br />
blank memo.<br />
Delete the memo<br />
Set an alarm<br />
Dial the primary contact<br />
Map the primary contact<br />
On the Memo tab, write<br />
the text <strong>for</strong> the memo<br />
On the Details tab, assign a primary<br />
contact, icon, highlight color, or photo<br />
Make a freehand drawing<br />
Attach a voice memo<br />
2. Enter the memo text on the Memo page, and assign other attributes to the<br />
memo on the other pages. These attributes work the same as they do <strong>for</strong> the<br />
Meeting Schedule Slip.<br />
3. When you are finished, tap Done.<br />
Creating New Memos 77
<strong>Agendus</strong> <strong>for</strong> <strong>Palm</strong> <strong>OS</strong>, Version 11<br />
Creating New Emails and SMS Messages (<strong>Agendus</strong> Pro<br />
Only)<br />
<strong>Agendus</strong> Pro integrates with most <strong>Palm</strong> <strong>OS</strong> email and SMS (text-messaging) clients,<br />
including <strong>Agendus</strong>Mail, VersaMail, and SnapperMail. (A client is the application you<br />
use <strong>for</strong> organizing, reading, and writing messages.) <strong>Agendus</strong>Mail, available at<br />
www.iambic.com, can be used to send both emails and SMS messages.<br />
To assign email and SMS clients, go to Menu | Options | Preferences | Programs. (See<br />
page 111.)<br />
Once you have assigned your client, you can write a new email or message by tapping<br />
the New button and selecting Email or SMS from the pop-up menu.<br />
You can also tap the Mail button in the <strong>Agendus</strong> toolbar to open your email client<br />
within <strong>Agendus</strong>.<br />
Please see the documentation <strong>for</strong> your email client <strong>for</strong> in<strong>for</strong>mation on writing, sending,<br />
receiving, organizing, or syncing your email messages.<br />
Creating New Emails and SMS Messages (<strong>Agendus</strong> Pro Only) 78
<strong>Agendus</strong> <strong>for</strong> <strong>Palm</strong> <strong>OS</strong>, Version 11<br />
Overview<br />
OVER-THE-AIR SERVICES<br />
<strong>Agendus</strong> Professional Edition takes advantage of your device’s Internet connection<br />
through a variety of over-the-air services. Some services, such as retrieving weather<br />
<strong>for</strong>ecasts, contact addresses, quotes of the day, and historical facts, will pull the data<br />
into <strong>Agendus</strong> and integrate it into the <strong>Agendus</strong> views. For other services, including<br />
address mapping, driving direction, and <strong>Agendus</strong> program updates, <strong>Agendus</strong> makes it<br />
easy to pass in<strong>for</strong>mation to your selected browser with only a few taps.<br />
You can select which browser and Internet services to use through preferences<br />
(page 111). You can also set preferences to schedule <strong>Agendus</strong> to regularly update<br />
retrieved data (page 112).<br />
Using Power Search (<strong>Agendus</strong> Pro Only)<br />
<strong>Agendus</strong> Professional Edition now includes an exceptionally flexible and powerful<br />
internet search tool, “Power Search”, which puts the most common internet search tools<br />
right at your fingertips.<br />
1. You may access Power Search from any card view, or from the pull-down<br />
menus. To access from a card view, tap the magnifying glass icon in the<br />
lower-right corner. This brings up a pup-up menu in which you select the P.S.<br />
mode you wish to use.<br />
2. To access P.S. from the menu system, tap the menu button, either on your<br />
graffiti pad or keyboard, and select Tools, under which the three P.S. methods<br />
are displayed. Simply choose the one you wish to use from the following<br />
options:<br />
Power Search Local, which utilizes <strong>Agendus</strong>’ internal databases to find in<strong>for</strong>mation<br />
on your <strong>Palm</strong> device. To search your <strong>Palm</strong>’s internal info, select this menu item, and a<br />
new dialog box appears with a search term field and six check boxes that determine<br />
which databases you are perusing.<br />
Overview 79
<strong>Agendus</strong> <strong>for</strong> <strong>Palm</strong> <strong>OS</strong>, Version 11<br />
1. You can search through Meetings, Calls,<br />
Tasks, Contacts, Memos and Notes using<br />
this tool, selecting whichever are applicable<br />
to your query, with individual options<br />
in a set of pull down menus <strong>for</strong> Meetings,<br />
Tasks, Contacts, and Memos determining<br />
whether you want to search through all of<br />
them, or only personal or business related<br />
entries.<br />
2. Below the check boxes are pull down<br />
selections to narrow your search by date<br />
criteria (e. g. showing only entries less<br />
than 14 days old) or by icons you have set, the latter making it exceptionally<br />
fast and easy to narrow down your search parameters.<br />
Power Search Internet, which presents you with an extremely versatile web search<br />
tool covering web sites, word definitions, online stores, linguistic translation and news<br />
items.<br />
To search, first tap the appropriate box <strong>for</strong> the type of search you are per<strong>for</strong>ming:<br />
• Web: Tap the Web box, and select<br />
the web search engine you wish to<br />
use from the choices in the pull down<br />
menu. Google.com is the default,<br />
with additional options <strong>for</strong> Google<br />
Local, Google Mobile, and Yahoo<br />
Search. Enter the search parameter<br />
string in the Find field, then tap the<br />
Search button. Your <strong>Palm</strong> will<br />
connect to the internet automatically<br />
and per<strong>for</strong>m the search using your<br />
default web browser, or whichever<br />
web browser you set in <strong>Agendus</strong> preferences.<br />
• Def: Tap this box to search Wikipedia or Reference.com’s Dictionary,<br />
Thesaurus or Encyclopedia <strong>for</strong> reference material. You can look up<br />
word definitions quickly and easily, or search <strong>for</strong> historical in<strong>for</strong>mation<br />
on Plato in one tap.<br />
• Shop: Need to pick up a new memory stick <strong>for</strong> your digital camera, or a<br />
wall charger <strong>for</strong> your Treo? Tap the shop box, and browse through the<br />
nearly infinite inventory of Amazon, CNET, eBay, Froogle, Mobile<br />
Software, or Price Grabber in mere seconds with only two taps. The pull<br />
down menu selects which store you are searching, and makes online<br />
shopping a snap, no matter where you are in the world.<br />
• Trans: Speaking of locale, with the handy Trans function you can alleviate<br />
the stress of lingual barriers on your next trip abroad with<br />
<strong>Agendus</strong>’ Power Search translator, converting: English to Spanish,<br />
French, or German or the opposite, counterpart translations to English.<br />
Tap the Trans box, and enter the word or phrase you need to translate,<br />
Using Power Search (<strong>Agendus</strong> Pro Only) 80
<strong>Agendus</strong> <strong>for</strong> <strong>Palm</strong> <strong>OS</strong>, Version 11<br />
set the language option in the pull down menu, and <strong>Agendus</strong> will poll<br />
Skweezer’s online translation software to give you exactly the words<br />
you need to get you point across painlessly, and make your overseas<br />
rendezvous more complacent.<br />
• News: Search through five popular internet New sites, CNET, CNN,<br />
Google News, MSNBC, and Yahoo (News or Sports). Tap the News box<br />
to get the latest, up-to-date headlines and in<strong>for</strong>mation you need to keep<br />
on track with your busy schedule.<br />
Power Search 411, an amazingly useful tool guaranteed to save you money on making<br />
calls to 411 Directory Assistance. To use 411 Search, first select from the pull down<br />
menu either Person (Residential) or Business, determining the kind of telephone<br />
listings to search through, then enter in as much in<strong>for</strong>mation as you can serve up.<br />
1. For Person searches, enter the name, city<br />
and state of the person you are looking <strong>for</strong><br />
in the fields provided. The more in<strong>for</strong>mation<br />
you have, the easier it will be to find<br />
exactly who you are looking <strong>for</strong>, though<br />
PS 411 will work with as little as the name,<br />
first or last. After you have entered the<br />
data, tap Search and Power Search 411<br />
will attempt to find your contact using any<br />
of the in<strong>for</strong>mation you provided and will<br />
display the closest matches to your query<br />
in a card list <strong>for</strong>mat.<br />
2. Business searches work much the same way, but instead of entering a First<br />
and Last name, just pug in the name of the business in question and away you<br />
go.<br />
3. Once you have the listing you want displayed, simply select it by tapping the<br />
card, and either dial it by tapping the dial pad button, add it to your contacts<br />
list directly by tapping on the Add button, or get driving directions by tapping<br />
the directions button .<br />
Note: Whatever mode you are in, the two other modes are just one tap away. Just<br />
look <strong>for</strong> the two icons in the lower-right corner of every Power Search screen. They<br />
represent the two other modes you can use. A magnifying glass over a PDA represents<br />
P.S. Local, whereas a magnifying glass over a globe, or over the numbers 411<br />
(in red) represent P.S. Web and P.S. 411 respectively.<br />
Power Search Quick Select (<strong>Agendus</strong> Pro Only)<br />
Want a shortcut to Power Search? You can use all of the amazing Power Search<br />
features from any card view by tapping on text that is highlighted in blue. Now when<br />
you tap on text in a card view a pop-up menu will appear with options <strong>for</strong> Web Search,<br />
Reference, Shop, Translate, News, Power Search Local ad Power Search 411.<br />
Power Search Quick Select (<strong>Agendus</strong> Pro Only) 81
<strong>Agendus</strong> <strong>for</strong> <strong>Palm</strong> <strong>OS</strong>, Version 11<br />
Select the option you need to use and <strong>Agendus</strong> Pro will bring up the appropriate Power<br />
Search screen where you can fine-tune your search settings, if necessary, begin your<br />
search.<br />
You can switch to and fro between any power search mode using the buttons in the<br />
lower-right corner of any P.S. screen. These buttons represent the three P.S. modes, and<br />
come in handy <strong>for</strong> a quick-change of usage.<br />
Setting Up Weather Forecasts (<strong>Agendus</strong> Pro Only)<br />
In the Today mode of the Calendar view, you can use <strong>Agendus</strong> Pro’s over-the-air<br />
services to retrieve and display the day’s weather <strong>for</strong>ecast <strong>for</strong> your location. <strong>Agendus</strong><br />
will also retrieve the 9-day <strong>for</strong>ecast and display appropriate weather icons <strong>for</strong> the next<br />
few days in some of the other views (Week Grids, Month and Quarter Expanded, and<br />
List).<br />
Note: <strong>Agendus</strong> Over-the-Air Services require an Internet connection.<br />
To retrieve the weather <strong>for</strong>ecast:<br />
1. Go to the Calendar view Today mode.<br />
2. Tap on the area next to the weather icon where it says “Tap <strong>for</strong> Forecast.”<br />
If you do not see this section, you will need to turn it on using the Today mode<br />
options (see page 49).<br />
3. In the <strong>for</strong>ecast box, tap Location.<br />
Swap views using these buttons.<br />
Setting Up Weather Forecasts (<strong>Agendus</strong> Pro Only) 82
<strong>Agendus</strong> <strong>for</strong> <strong>Palm</strong> <strong>OS</strong>, Version 11<br />
Tap to set or change<br />
your location<br />
4. Enter your location. For locations within the United States, you can just enter<br />
your ZIP code. For other countries, enter your city name and country name,<br />
separated with a comma. Make sure to choose either the Celsius or Fahrenheit<br />
scale in the location box when entering your selection.<br />
5. Tap OK.<br />
6. Tap Update to retrieve the weather <strong>for</strong>ecast. <strong>Agendus</strong> Pro now supports multiple<br />
lines of text in the weather display box.<br />
Tap to retrieve the weather<br />
<strong>for</strong>ecast <strong>for</strong> the set location<br />
Enter your location<br />
7. Tap Done to return to the Today mode. The <strong>for</strong>ecast icons will also be available<br />
in the Week Grid views and in the Month Expanded and Icon views <strong>for</strong><br />
the <strong>for</strong>ecasted days.<br />
Setting Up Weather Forecasts (<strong>Agendus</strong> Pro Only) 83
<strong>Agendus</strong> <strong>for</strong> <strong>Palm</strong> <strong>OS</strong>, Version 11<br />
Today mode<br />
Note: You can schedule <strong>Agendus</strong> to automatically update data <strong>for</strong> over-the-air services.<br />
See page 112.<br />
Verify Contact Addresses (<strong>Agendus</strong> Pro only)<br />
Use <strong>Agendus</strong> to check or search <strong>for</strong> contact addresses over the Internet. See “Verifying<br />
Addresses” on page 76 <strong>for</strong> more in<strong>for</strong>mation.<br />
Tap to find or verify<br />
an address<br />
The full-day <strong>for</strong>ecast is displayed in the Today mode<br />
Forecast icons <strong>for</strong> the 9-day period are<br />
displayed in some of the other views<br />
Week Grid mode<br />
Month Expanded mode<br />
Add the selected address<br />
to the contact info<br />
Note: <strong>Agendus</strong> Over-the-Air Services require an Internet connection.<br />
Verify Contact Addresses (<strong>Agendus</strong> Pro only) 84
<strong>Agendus</strong> <strong>for</strong> <strong>Palm</strong> <strong>OS</strong>, Version 11<br />
Mapping Contact Addresses (<strong>Agendus</strong> Pro only)<br />
<strong>Agendus</strong> makes it easy to request maps of contact addresses from an Internet mapping<br />
provider by tapping the Map button available in contact details and in meeting, task, and<br />
memo schedule slips (this will map the primary contact’s address). A Map Address<br />
option is available in pop-up menus when you tap and hold on contacts or on meetings,<br />
tasks, and memos with assigned primary contacts (the contact must have a saved<br />
address).<br />
Contact mapping is available from tap-and-hold<br />
menus, contact details, and schedule slips<br />
Note: Specify your preferred mapping service in preferences (page 111).<br />
Note: <strong>Agendus</strong> Over-the-Air Services require an Internet connection.<br />
Mapping Contact Addresses (<strong>Agendus</strong> Pro only) 85
<strong>Agendus</strong> <strong>for</strong> <strong>Palm</strong> <strong>OS</strong>, Version 11<br />
Driving Directions (<strong>Agendus</strong> Pro only)<br />
<strong>Agendus</strong> makes it easy to request driving directions from an Internet mapping provider.<br />
1. Go to the Contact view.<br />
2. Tap and hold on a contact name to view the contact pop-menu.<br />
3. Select Driving Directions from the pop-up menu. (The contact in<strong>for</strong>mation<br />
must include an address in order to see this option.)<br />
Tap and hold on a contact to<br />
view the contact menu Select contact addresses<br />
or enter addresses<br />
Note: <strong>Agendus</strong> Over-the-Air Services require an Internet connection.<br />
4. For directions to or from a contact’s address, tap Select a Contact to open a<br />
pop-up menu of recent contacts. If the contact is not in the list, tap Select a<br />
Contact in the pop-up menu. You can also write in addresses in this screen.<br />
5. Tap Get Directions to open a browser that will retrieve the driving directions.<br />
Note: Specify your preferred mapping service in preferences (page 111).<br />
Driving Directions (<strong>Agendus</strong> Pro only) 86
<strong>Agendus</strong> <strong>for</strong> <strong>Palm</strong> <strong>OS</strong>, Version 11<br />
Quote of the Day<br />
In the Today mode of the Calendar view, you can select to view the “quote of the day.”<br />
These quotes can be pulled up from a specially <strong>for</strong>matted memo (see page 96) or, with<br />
<strong>Agendus</strong> Pro, retrieved from the iambic quote server using over-the-air services.<br />
To set up quote of the day using over-the-air services:<br />
1. Go to the Calendar view Today mode.<br />
2. Tap on the area next to the Quote icon to open the Quote of the Day box.<br />
If you do not see the quote of the day section, you will need to turn it on using<br />
the Today mode options (see page 49).<br />
3. Tap the Source button.<br />
Once configured, tap Next to<br />
scroll through the quotes<br />
The quote server is only<br />
available <strong>for</strong> <strong>Agendus</strong> Pro<br />
4. Select your sources <strong>for</strong> quotes. If you are using <strong>Agendus</strong> Standard, you can<br />
only select Memo Pad. For <strong>Agendus</strong> Pro, you can also choose to retrieve<br />
quotes from the iambic quote server. The server should be set to ota.iambic.com<br />
If you select to have both sources, the device will first try to connect<br />
to the quote server.<br />
Note: <strong>Agendus</strong> Over-the-Air Services require an Internet connection.<br />
5. Tap OK.<br />
6. Tap Done to return to the Today mode.<br />
7. You may need to tap on the area next to the quote icon to retrieve the first<br />
quote. If you are using the Memo pad as a source, you will need to set up an<br />
<strong>Agendus</strong>Quotes memo be<strong>for</strong>e you can view any quotes.<br />
Note: You can schedule <strong>Agendus</strong> to automatically update data <strong>for</strong> over-the-air services.<br />
See page 112.<br />
Quote of the Day 87
<strong>Agendus</strong> <strong>for</strong> <strong>Palm</strong> <strong>OS</strong>, Version 11<br />
This Day in History (<strong>Agendus</strong> Pro Only)<br />
In the Today mode of the Calendar view, you can select to view a historical facts from<br />
the same date in history. This feature requires an Internet connection, since these facts<br />
are called up from an iambic server.<br />
To set up “This Day in History”:<br />
1. Go to the Calendar view Today mode.<br />
2. Scroll down so you can see the “This day in History” icon .<br />
If you do not see this section, you may need to turn on this feature using the<br />
Today mode options (see page 49).<br />
3. If no fact is displayed, or if you want to view additional facts, tap on the area<br />
next to the icon to open the This Day in History box.<br />
Note: <strong>Agendus</strong> Over-the-Air Services require an Internet connection.<br />
4. Tap Done to return to the Today mode.<br />
Tap Next to view<br />
additional facts<br />
Note: You can schedule <strong>Agendus</strong> to automatically update data <strong>for</strong> over-the-air services.<br />
See page 112.<br />
This Day in History (<strong>Agendus</strong> Pro Only) 88
<strong>Agendus</strong> <strong>for</strong> <strong>Palm</strong> <strong>OS</strong>, Version 11<br />
Check <strong>for</strong> <strong>Agendus</strong> Updates<br />
Have <strong>Agendus</strong> check to see if there are any program updates.<br />
1. From any of the views, select Menu | Options | Check <strong>for</strong> Updates.<br />
2. Tap the Check Now button.<br />
Tap Check Now to check<br />
<strong>for</strong> <strong>Agendus</strong> updates<br />
Tap Download Now to download<br />
available updates<br />
(requires an installed browser)<br />
Note: <strong>Agendus</strong> Over-the-Air Services require an Internet connection.<br />
3. If updates are available and you have a browser installed on your handheld<br />
device, you can download the update by tapping Download Now.<br />
Check <strong>for</strong> <strong>Agendus</strong> Updates 89
<strong>Agendus</strong> <strong>for</strong> <strong>Palm</strong> <strong>OS</strong>, Version 11<br />
Creating Trips (<strong>Agendus</strong> Pro Only)<br />
WORKING WITH AGENDUS<br />
Trips allow you to group and view events and tasks related to specific business trips or<br />
vacations. Trips also support special items <strong>for</strong> tracking flights, ground transportation,<br />
and lodging.<br />
1. To create a new trip, in one of the views, select Menu | Record | New Trip.<br />
2. Fill in the trip in<strong>for</strong>mation.<br />
3. If desired, select an icon by ticking the icon<br />
check box and choosing the icon you desire from<br />
the pull-down menu.<br />
4. You can save this trip as a template by ticking the<br />
box that looks like an airplane in the lowerright<br />
corner of your screen, and entering a template<br />
name when prompted.<br />
5. You can view the current weather <strong>for</strong><br />
your destination by tapping the weather<br />
icon in the upper-right corner. This<br />
brings up the weather <strong>for</strong>ecast screen. Enter<br />
your destination city here to search <strong>for</strong> its<br />
weather-related in<strong>for</strong>mation.<br />
6. To view your trip, go to any calendar<br />
view and tap on the calendar icon. Select<br />
Trip View .This will bring up the trips<br />
list <strong>for</strong> the selected date(s).<br />
7. To add<br />
items and in<strong>for</strong>mation to your trip, tap it to<br />
select it which opens up the trip editing screen.<br />
Tap the Add Item button and select from the list<br />
of choices a Flight, Train, Bus, Rental Car,<br />
Owned Car, Lodging, Meeting, Call, Task, or<br />
Memo.<br />
• Flight: Add this item to schedule a flight<br />
itinerary. Enter your departure and arrival<br />
times, the airline you are flying with,<br />
Creating Trips (<strong>Agendus</strong> Pro Only) 90
<strong>Agendus</strong> <strong>for</strong> <strong>Palm</strong> <strong>OS</strong>, Version 11<br />
your flight number, gate number, and reference code, then click {Done}.<br />
• Train: For railway transit, instead enter the Railway name, Train<br />
number, Fare rate, and reference code.<br />
• Bus: For bus transit, enter the bus line, route number, fare rate and reference<br />
code.<br />
• Rental Car: For a rented vehicle, enter the rental vendor, vehicle<br />
(make, model, year), daily price and reference code.<br />
• Own Car: If you are driving your own vehicle, enter your vehicle in<strong>for</strong>mation,<br />
average MPG, estimated total trip mileage and estimated total<br />
gallons of fuel you plan to use.<br />
• Lodging: Enter where you plan to rest your head with the Lodging item.<br />
Fill in the check in and check out dates and times, the hotel vendor<br />
name, the street address of where you are staying, the hotel’s phone<br />
number & website, your daily room rate, and reference code. You can<br />
use the icons next to the address, city, phone, and website fields to get a<br />
map, local weather, dial the hotel, or visit their website respectively.<br />
• You can create a memo <strong>for</strong> each entry you make, along with Agenda<br />
Walkthroughs if desired by tapping the memo icon on each selection<br />
screen. You can also delete any item by tapping the trash can icon<br />
in its card view.<br />
8. An icon <strong>for</strong> each type of entry you add will be displayed in your itinerary.<br />
9. Creating new meetings, tasks, or calls will start a new schedule slip with this<br />
trip already entered.<br />
10. If you added an icon to your trip, it will appear in the Calendar Icon Mode <strong>for</strong><br />
each day of your trip.<br />
11. Creating a new item <strong>for</strong> a flight, ground transportation, or lodging will open<br />
one of the following screens:<br />
<strong>Agendus</strong> stores lists of airline<br />
and vendor names <strong>for</strong><br />
easy recall<br />
12. When you finish creating a new item, <strong>Agendus</strong> will show you the trip details.<br />
Creating Trips (<strong>Agendus</strong> Pro Only) 91
<strong>Agendus</strong> <strong>for</strong> <strong>Palm</strong> <strong>OS</strong>, Version 11<br />
13. Tap on an item to view or edit the item details, or tap on Edit to add new items<br />
to the trip.<br />
Note: For existing meetings, tasks, and calls, when you edit those items you<br />
can assign them to saved trips through the Trip tab of the schedule slip.<br />
Creating Trips (<strong>Agendus</strong> Pro Only) 92
<strong>Agendus</strong> <strong>for</strong> <strong>Palm</strong> <strong>OS</strong>, Version 11<br />
Free-Time Finder<br />
<strong>Agendus</strong> makes it easy to search <strong>for</strong> an available block of time with the free-time<br />
finder.<br />
1. From one of the views, select Menu | Tools | Free Time Finder.<br />
Start the search<br />
Set advanced search criteria<br />
Set how much unscheduled time you are<br />
looking <strong>for</strong> and other search criteria<br />
2. Enter your search criteria, including how large an open block of time you<br />
need and what days of the week to search. To exclude a certain time of day or<br />
set other options, tap Advanced.<br />
3. Tap Find to view the search results.<br />
Tap to change the month<br />
Only dates that meet your criteria will<br />
be marked; tap to view available times<br />
4. You can use your directional pad if your <strong>Palm</strong> device is equipped with one to<br />
page through the search results.<br />
5. Tap on one of the marked days to open a menu of matching times on that day<br />
and select one of those times to open a new meeting schedule slip <strong>for</strong> that day.<br />
Tap Cancel in the search results to return to the free-time finder to set new criteria.<br />
Free-Time Finder 93
<strong>Agendus</strong> <strong>for</strong> <strong>Palm</strong> <strong>OS</strong>, Version 11<br />
Using Vivid Agenda to Assign Colors and Icons<br />
Use Vivid Agenda to assign text colors and icons to new meetings, tasks, and memos<br />
based on keywords used in their descriptions.<br />
1. From one of the views, select Menu | Options | Vivid Agenda to open up the<br />
Vivid Agenda Rules.<br />
2. To create a new set of rules, tap New to open the Edit Rule screen; to edit an<br />
existing rule in the list, tap on the rule and then tap Edit.<br />
3. Enter the keywords you want to use.<br />
4. Tap Assign Icon and select an icon from the pop-up list.<br />
5. Tap Color and select a text color from the pop-up list.<br />
6. Tap Apply to apply the rules to existing and future meetings, tasks, and<br />
memos, or tap OK to only apply the rules to new or edited items.<br />
Note: Applying Vivid Agenda rules to existing records will only affect items with no<br />
icon assigned and default text colors.<br />
Using Vivid Agenda to Assign Colors and Icons 94
<strong>Agendus</strong> <strong>for</strong> <strong>Palm</strong> <strong>OS</strong>, Version 11<br />
Changing the Order of Vivid Agenda Rules<br />
You can change the order that rules are listed. If two or more rules use some of the same<br />
keywords, Vivid Agenda will use the rule that is higher in the list.<br />
1. If you are not already in Vivid Agenda, select Menu | Options | Vivid Agenda.<br />
2. Tap on the rule you would like to move.<br />
3. Tap the up or down Move arrows to change its position.<br />
4. Tap Done.<br />
Using Power Search Local<br />
As outlined in the Over-The-Air Services section, <strong>Agendus</strong> Pro’s Power Search can<br />
find content stored in your internal databases such as contacts, memos, meetings and<br />
other records.<br />
1. To access Power Search Local, either tap the Search icon or from any view<br />
select: Menu | Tools | Power Search Local<br />
Tap Search to begin, or Switch Modes<br />
Enter the text you want to find<br />
Select types of records and categories<br />
Choose a date range<br />
Tap to open the<br />
schedule slip<br />
Icons indicate<br />
the type of<br />
record found<br />
2. Enter your search criteria, including the text you wish to find, which types of<br />
records to search, and a date range.<br />
Using Power Search Local 95
<strong>Agendus</strong> <strong>for</strong> <strong>Palm</strong> <strong>OS</strong>, Version 11<br />
3. Tap Find to view the search results.<br />
4. Tap on one of the matches to open the schedule slip <strong>for</strong> that item, or tap Done<br />
to close the search results.<br />
Setting up <strong>Agendus</strong>Quotes in Memo Pad<br />
Editing Quotes<br />
The Quote of the Day feature (page 87) can pull quotes from a special memo in the<br />
memo pad and display them in the Today view.<br />
To set up the Quote of the Day memo:<br />
1. Tap the Memo button to switch to the Memo view.<br />
2. Tap on the New button and select Memo.<br />
3. Format the memo as follows:<br />
• The first line should say <strong>Agendus</strong>Quotes<br />
• Each following line should have a quote number, followed by a space,<br />
followed by the quotation, followed by a space, followed by the author.<br />
The quotation and the author must be in quotes.<br />
• Each quote should start on a new line.<br />
4. Tap Done.<br />
If enabled, quotes are<br />
displayed in the Today view<br />
Note: To view the quotes, Quote of the Day must be enabled in the Today View<br />
options. See page 104.<br />
You can edit the quotes stored in the <strong>Agendus</strong>Quotes memo at any time. Go to the<br />
Memo view and tap on the <strong>Agendus</strong>Quotes memo to open it <strong>for</strong> editing.<br />
Setting up <strong>Agendus</strong>Quotes in Memo Pad 96
<strong>Agendus</strong> <strong>for</strong> <strong>Palm</strong> <strong>OS</strong>, Version 11<br />
Improving <strong>Agendus</strong> Per<strong>for</strong>mance<br />
Purge<br />
As you add more and more meetings, tasks, and contacts, you may notice <strong>Agendus</strong> start<br />
to slow down. If this happens, there are two options which will help speed up <strong>Agendus</strong>:<br />
changing the sort order and purging old appointments.<br />
Changing the sort order allows <strong>Agendus</strong> to keep the native <strong>Palm</strong> databases in the<br />
optimal order <strong>for</strong> use with <strong>Agendus</strong>, so <strong>Agendus</strong> will be able to pull up your data faster.<br />
Although this data will still be available in other applications on your <strong>Palm</strong>, it may not<br />
look like it usually does. You can change the sort order <strong>for</strong> tasks (tasks and calls) or<br />
contacts.<br />
Purging old meetings and tasks deletes them from the <strong>Palm</strong> database, so there is less<br />
in<strong>for</strong>mation <strong>for</strong> <strong>Agendus</strong> to organize. You can elect to save this in<strong>for</strong>mation in an<br />
archive in the <strong>Palm</strong> Desktop. For more on purging data, see below.<br />
To improve <strong>Agendus</strong> per<strong>for</strong>mance, select Menu | Options | Per<strong>for</strong>mance.<br />
Delete photos from old meetings or contacts<br />
that have been removed.<br />
The purge function lets you do some housekeeping by deleting data you no longer need.<br />
When you purge from <strong>Agendus</strong> application you can choose to delete old meetings or<br />
completed tasks.<br />
Note: You can elect to archive purged data to the <strong>Palm</strong> Desktop.<br />
The Purge function available in <strong>Agendus</strong> is equivalent to selecting purge in the <strong>Palm</strong><br />
Date Book to delete meetings/appointments older then a certain date and then opening<br />
the task list and selecting purge to delete completed tasks.<br />
To purge old data from your <strong>Palm</strong> databases, select Menu | Tools | Purge Items, or tap<br />
the Purge Items button in the Per<strong>for</strong>mance window.<br />
Improving <strong>Agendus</strong> Per<strong>for</strong>mance 97
<strong>Agendus</strong> <strong>for</strong> <strong>Palm</strong> <strong>OS</strong>, Version 11<br />
Beaming<br />
The purge function does not distinguish between commitments scheduled in <strong>Agendus</strong><br />
and those scheduled using the <strong>Palm</strong> device’s built-in applications. Purging from either<br />
<strong>Agendus</strong> or the individual date and task applications will delete the same data.<br />
Set which items you wish to purge from your device and tap Purge.<br />
Important: There is no undo <strong>for</strong> a purge.<br />
Purge all meetings be<strong>for</strong>e the selected<br />
date; <strong>for</strong> repeating meetings, only<br />
deletes the earlier instances<br />
Tap to set the date<br />
Purge completed undated tasks<br />
You can beam contacts, calls, tasks, meetings, and selected views from <strong>Agendus</strong>. The<br />
receiving device does not need to have <strong>Agendus</strong> installed.<br />
Open the item you wish to beam, and select Menu | Record | Beam.<br />
After beaming, the person who receives a call or task will first see it in the native <strong>Palm</strong><br />
device task list. A beamed <strong>Agendus</strong> meeting will first appear in the native <strong>Palm</strong> device<br />
Date Book. Beamed addresses will appear in the <strong>Palm</strong> Address Book. If the receiving<br />
device also has <strong>Agendus</strong> installed, then just switch the device to <strong>Agendus</strong> and the<br />
beamed in<strong>for</strong>mation will be there.<br />
If you select to beam a view, then all of the individual meetings, calls, and tasks in the<br />
view will be beamed. Open the view you wish to beam, and select Menu | Tools | Beam<br />
View.<br />
If you select to beam the business card, then the contact in<strong>for</strong>mation designated as a<br />
business card will be beamed (see “Creating a New Contact” on page 75). Select<br />
Menu | Tools | Beam Business Card.<br />
Note: If you have pictures associated with a call, task, or contact, the pictures will not<br />
be included when you beam.<br />
Note: Icons will beam with their commitments only if both the person beaming and the<br />
person receiving have the same icon data sets. For example, if both people have<br />
installed the <strong>Agendus</strong> icons, then any commitments created with any of these icons<br />
will be beamed along with the item.<br />
Beaming 98
<strong>Agendus</strong> <strong>for</strong> <strong>Palm</strong> <strong>OS</strong>, Version 11<br />
Alarm Preferences<br />
SETTING AGENDUS PREFERENCES<br />
Use alarm preferences to create “snooze” settings <strong>for</strong> your alarms: set how many times<br />
the alarm should sound <strong>for</strong> each meeting or task and set the time between each alarm.<br />
You can also select which alarm sounds to use.<br />
Select Menu | Options | Preferences | Alarms.<br />
Create default “snooze” settings<br />
Select a different sound <strong>for</strong><br />
different commitments<br />
Alarm Preferences 99
<strong>Agendus</strong> <strong>for</strong> <strong>Palm</strong> <strong>OS</strong>, Version 11<br />
Contact Preferences<br />
Contact preferences in <strong>Agendus</strong> include setting the display and sort order of your<br />
contact list (by first name, last name, or company name) and setting a default category<br />
<strong>for</strong> new contacts.<br />
If you are using third-party software, such as Time Matters, ACT!, CompanionLink, or<br />
Intellisync, this is also where you set the storage <strong>for</strong>mat of your <strong>Agendus</strong> data so that<br />
when you edit records or create new records, the data will sync with your desktop software.<br />
Select Menu | Options | Preferences | Contacts.<br />
How Storage Formats Affect Displays<br />
Selecting a specific Storage Format also determines how tasks, calls and meetings<br />
created in <strong>Agendus</strong> will appear in the native <strong>Palm</strong> task and Datebook applications (<strong>for</strong><br />
example, it will determine whether the contact name will appear in brackets or not).<br />
The different Storage Formats are as follows:<br />
Select how contact names<br />
are displayed and sorted<br />
Store new and edited commitments in the<br />
required <strong>for</strong>mat <strong>for</strong> synchronizing with Time<br />
Matters, ACT!, CompanionLink, or Intellisync<br />
Set a default category<br />
<strong>for</strong> new contacts<br />
Storage Format <strong>Palm</strong> Description Field <strong>Palm</strong> Notes Field<br />
<strong>Agendus</strong> DESCRIPTION [contact] N/A<br />
ACT!<strong>Palm</strong>Pilot Link DESCRIPTION [contact] N/A<br />
Time Matters 3 [contact] DESCRIPTION N/A<br />
CompanionLink DESCRIPTION<br />
Link: First Last<br />
Company: Co.<br />
Phone: 555-1212<br />
Intellisync/Time Matters 4 DESCRIPTION Contact name: Name<br />
Contact Company: Company<br />
Contact Preferences 100<br />
N/A
<strong>Agendus</strong> <strong>for</strong> <strong>Palm</strong> <strong>OS</strong>, Version 11<br />
Meeting Preferences<br />
Set the default values <strong>for</strong> new meetings and choose the scale <strong>for</strong> the time slider on the<br />
meeting schedule slip. Changing these settings will not affect any meetings already<br />
created.<br />
Memo Preferences<br />
Select Menu | Options | Preferences | Meetings.<br />
Set the default category <strong>for</strong> new memos and set the order memos are displayed in the<br />
List view.<br />
Select Menu | Options | Preferences | Memos.<br />
Defaults apply to all new meetings<br />
and events<br />
Note: Set default icons <strong>for</strong> categories<br />
in Preferences | Colors & Icons<br />
Set how precisely you can use the time<br />
slider in the meeting schedule slip<br />
Turn off device sounds during scheduled<br />
meetings<br />
Sort memos alphabetically by heading text<br />
or assigned contact names, or set this to<br />
manual to tap and drag memos in your<br />
desired order<br />
The default category applies to all<br />
new memos<br />
Meeting Preferences 101
<strong>Agendus</strong> <strong>for</strong> <strong>Palm</strong> <strong>OS</strong>, Version 11<br />
Task and Call Preferences<br />
Default Settings <strong>for</strong> New Tasks<br />
Set the default values <strong>for</strong> new tasks and calls. Changing these settings will not affect<br />
any tasks or calls already created.<br />
Select Menu | Options | Preferences | Tasks and tap the Default tab.<br />
Display Settings <strong>for</strong> Tasks and Calls<br />
Defaults apply to new tasks and calls<br />
Note: The default category will not be<br />
used <strong>for</strong> calls, since calls are already a<br />
special category of tasks<br />
Note: Set default icons <strong>for</strong> categories<br />
in Preferences | Colors & Icons<br />
Set how far in advance of the task or call’s<br />
date you want it to appear in the Day views<br />
Set display preferences <strong>for</strong> tasks and calls. These display preferences will be applied to<br />
all views.<br />
Select Menu | Options | Preferences | Tasks and tap the Show tab.<br />
Show or hide priority numbers or the<br />
matrix fields when displaying tasks<br />
Hiding completed or undated items removes<br />
them from the calendar and task views, but<br />
does not delete them<br />
Task and Call Preferences 102
<strong>Agendus</strong> <strong>for</strong> <strong>Palm</strong> <strong>OS</strong>, Version 11<br />
Setting Actions <strong>for</strong> Completed Tasks<br />
Sorting Tasks and Calls<br />
Set <strong>Agendus</strong> to per<strong>for</strong>m actions when you mark a task as completed.<br />
Select Menu | Options | Preferences | Tasks and tap the Complete tab.<br />
Set the order tasks and calls are displayed.<br />
Insert the date you check off a task into the<br />
task’s date field<br />
Add the task in<strong>for</strong>mation to the note field of<br />
the task’s contact when the task is completed<br />
For repeating tasks, you can choose to complete<br />
all remaining occurrences when you<br />
complete one occurrence<br />
Select Menu | Options | Preferences | Tasks and tap the Sort tab.<br />
Tap on a field and then tap one of the<br />
Move arrows to change the sort order<br />
Task and Call Preferences 103
<strong>Agendus</strong> <strong>for</strong> <strong>Palm</strong> <strong>OS</strong>, Version 11<br />
Preferences <strong>for</strong> Day Views<br />
Set display preferences <strong>for</strong> upper-half of the split mode of the Day mode.<br />
In the uncompressed view, the upper-half of the split view shows an hour-by-hour<br />
schedule of the day, with meetings filled in where appropriate. The display preferences<br />
include options to make this easier to read and to compress this view to display more<br />
appointments.<br />
Select Menu | Options | Preferences | Agenda Views.<br />
Preferences <strong>for</strong> Week Views<br />
In the List mode of the Week view, you can choose to display headings <strong>for</strong> each day in<br />
the list. If headers are displayed, you can tap on a header in the week view to switch the<br />
display to the Day mode <strong>for</strong> that day.<br />
Select Menu | Options | Preferences | Week Views.<br />
Set the time period to display in the uncompressed mode<br />
(meetings outside of this time period will also be displayed)<br />
Time bars help indicate the duration of a meeting<br />
Allows more time to fit in the view, but still<br />
shows unscheduled time<br />
Only show appointment starting times<br />
(appointments with no set time will also be displayed)<br />
Add alternating row colors<br />
Enable or disable the day headers<br />
in the list mode of the week view<br />
Day Headers<br />
Preferences <strong>for</strong> Day Views 104
<strong>Agendus</strong> <strong>for</strong> <strong>Palm</strong> <strong>OS</strong>, Version 11<br />
Preferences <strong>for</strong> Month and Quarter Views<br />
These preferences affect both the month and quarter views. The “Event Color” setting<br />
is the color that the meeting indicator will be in the quarter view.<br />
Select Menu | Options | Preferences | Month Views.<br />
Additional filters are available by clicking the View Options button in the month or<br />
quarter view.<br />
Miscellaneous Preferences<br />
Show or hide meetings in the<br />
month and quarter views<br />
Use the Miscellaneous screen of preferences to set how <strong>Agendus</strong> will launch. For<br />
<strong>Agendus</strong> Pro users, this is where you will set or change your dialing, Email, and SMS<br />
messaging settings.<br />
Go to Menu | Options | Preferences | Miscellaneous.<br />
For devices with high-resolution screens, you<br />
can display compact views of adjacent<br />
months when in portrait or landscape mode<br />
Set the highlight color <strong>for</strong> annual events<br />
Enable card views or object hyperlinking to use<br />
features like Power Search with one tap.<br />
Set the recording quality and destination <strong>for</strong><br />
voice memos, and destination <strong>for</strong> drawings.<br />
Lower quality recording time allows <strong>for</strong> more<br />
voice memos to fit in your <strong>Palm</strong>’s limited internal<br />
memory, or set to high quality if you’re using a<br />
large expansion card.<br />
Preferences <strong>for</strong> Month and Quarter Views 105
<strong>Agendus</strong> <strong>for</strong> <strong>Palm</strong> <strong>OS</strong>, Version 11<br />
Assigning Buttons to <strong>Agendus</strong><br />
Set and customize the way <strong>Agendus</strong> responds to any or all of the <strong>Palm</strong> device’s hard<br />
buttons.<br />
To define how the button actions, go to Menu | Options | Preferences | Buttons.<br />
Assign buttons to <strong>Agendus</strong> actions<br />
Note: Treo users will see only two button choices instead of four.<br />
Specify which view to<br />
open when starting<br />
<strong>Agendus</strong> by tapping<br />
on the <strong>Agendus</strong> icon<br />
Tap a button and then<br />
select the action you<br />
would like it to per<strong>for</strong>m:<br />
Cycle Views: cycle<br />
through selected views<br />
Go to View: Go to a specific<br />
view<br />
Create New: Open the<br />
New menu<br />
Choose Auto to go to<br />
the last-used mode <strong>for</strong><br />
the selected view<br />
Assigning Buttons to <strong>Agendus</strong> 106
<strong>Agendus</strong> <strong>for</strong> <strong>Palm</strong> <strong>OS</strong>, Version 11<br />
Setting Wallpaper and Background Colors<br />
You can select images in GIF (non-interlaced) or JPEG (non-progressive) <strong>for</strong>mat to use<br />
as background wallpapers that display in most <strong>Agendus</strong> views. You can also set a background<br />
color.<br />
To add or change a background graphic or color, select Menu | Options | Wallpaper to<br />
open the wallpaper photo picker. This is similar to the standard photo picker shown on<br />
page 67, but includes several additional features.<br />
Select the file location<br />
(RAM or expansion<br />
card) and folder<br />
Turn off wallpaper<br />
Select an image file<br />
Set the display properties:<br />
Center<br />
TIle<br />
Stretch*<br />
If you select both an image and a color, the image will be displayed in front of the color.<br />
If your image is not the same size as your screen, you will see the background color<br />
around the edges of the image.<br />
To make text show up better over dark wallpaper, you can set text to display with a<br />
white outline by pressing the View Options button in one of the calendar views (see<br />
page 48).<br />
Note: Wallpaper is never available in the Calendar split view or the Week block view.<br />
You can select to hide the wallpaper in other views, or select different wallpaper <strong>for</strong> a<br />
specific view, using the View Options tool . (See “Display Settings and Filters -<br />
View Options” on page 47.) Displaying wallpaper in views other than the Today view<br />
requires <strong>Palm</strong> <strong>OS</strong> 5.0 or higher.<br />
Note: JPEG support requires <strong>Palm</strong> <strong>OS</strong> 5.0 or later.<br />
Tap the photo here to<br />
enlarge it in a new view.<br />
Brighten* the image to<br />
improve contrast with text<br />
0% 30% 60%<br />
Crop the image<br />
Choose a background<br />
color<br />
* Available <strong>for</strong> GIF only<br />
Setting Wallpaper and Background Colors 107
<strong>Agendus</strong> <strong>for</strong> <strong>Palm</strong> <strong>OS</strong>, Version 11<br />
Wallpaper File Format and Resolution<br />
Depending on the <strong>Palm</strong> device you are using, the resolution and screen area will vary.<br />
For the best image quality we recommend using the following image sizes and <strong>for</strong>mats<br />
<strong>for</strong> full-screen centered wallpaper.<br />
Please note that GIF images need to be in the non-interlaced GIF <strong>for</strong>mat and <strong>for</strong> best<br />
results set the palette option to ‘Mac <strong>OS</strong>’ and set the dithering to ‘Diffusion 60-75%’.<br />
<strong>Palm</strong> Device<br />
<strong>Palm</strong> IIIc, M505, Zire 21, and all other normal-resolution<br />
square-screen models<br />
Copying a Wallpaper Image to a <strong>Palm</strong> Device<br />
To put an image file onto the memory card of your device, use the <strong>Palm</strong> Quick Install<br />
Tool on your computer.<br />
1. Run the <strong>Palm</strong> install tool on your computer.<br />
2. Click Add to view the Open box.<br />
3. In the Open box, set “Files of type” to “All Files (*.*).”<br />
4. Browse to the image file and click on it to select it. Valid image files can be in<br />
GIF (non-interlaced), JPEG (non-progressive), or PDB <strong>for</strong>mat.<br />
Note: PDB is a native <strong>Palm</strong> <strong>OS</strong> <strong>for</strong>mat. You can convert GIF images to PDB<br />
using iambic’s wallpaper converter, available at http://www.iambic.com/download/goodies/.<br />
5. Click Open to add the file to the install list.<br />
6. Click Done in the install tool.<br />
7. Hotsync your <strong>Palm</strong> device.<br />
Image<br />
Dimensions<br />
160 W x 130 H GIF<br />
Image Format<br />
Treo 600 160 W x 130 H GIF, JPEG<br />
<strong>Palm</strong> Tungsten C, E, T, T2, Zire 31, 71, 72, Treo 650, and<br />
all other high-resolution square-screen models<br />
320 W x 260 H GIF, JPEG<br />
Sony NR series 320 W x 390 H GIF<br />
Sony NX series 320 W x 390 H GIF, JPEG<br />
Sony UX series 450 W x 260 H GIF, JPEG<br />
<strong>Palm</strong> LifeDrive, Tungsten T3, and Tunsten T5 if used in<br />
landscape mode<br />
<strong>Palm</strong> LifeDrive, Tungsten T3, and Tungsten T5 if used in<br />
portrait mode<br />
450 W x 260 H GIF, JPEG<br />
320 W x 390 H GIF, JPEG<br />
Setting Wallpaper and Background Colors 108
<strong>Agendus</strong> <strong>for</strong> <strong>Palm</strong> <strong>OS</strong>, Version 11<br />
Color & Icon Preferences<br />
<strong>Agendus</strong> has the same general capabilities and functions on both color and non-color<br />
<strong>Palm</strong> devices, though on the color models you can use color to make different types of<br />
data stand out. For example, in Day views contact names are in blue text to distinguish<br />
them from descriptions.<br />
Color and icon preferences allow you to set text colors <strong>for</strong> contact names and overdue<br />
tasks in the Calendar and Task views, set default highlight colors and icons based on<br />
categories <strong>for</strong> meetings, tasks, and memos, set default highlight colors <strong>for</strong> contacts<br />
based on categories, and set the icons <strong>for</strong> contact birthdays and anniversaries.<br />
Go to Menu | Options | Preferences | Colors & Icons.<br />
Set a highlight color* and default<br />
icon <strong>for</strong> different categories of<br />
meetings, tasks, contacts*, and<br />
memos<br />
Set the text color <strong>for</strong> contacts and<br />
overdue tasks in the calendar views<br />
Select meetings, tasks, contacts, memos, or special<br />
days (contact birthdays and anniversaries)<br />
* Highlight colors are not displayed in split view.<br />
Contact categories do not support icons.<br />
Note: Changing the default icon <strong>for</strong> a category will not change the icons <strong>for</strong> any existing<br />
meetings, tasks, calls, or memos; default icons are only applied to new items.<br />
The <strong>Agendus</strong> installer installs one icon set. You can edit these icons, create your own,<br />
or use other icon sets. See “Contact View Options” on page 50.<br />
Color & Icon Preferences 109
<strong>Agendus</strong> <strong>for</strong> <strong>Palm</strong> <strong>OS</strong>, Version 11<br />
Using, Editing and Moving Icons<br />
Editing Icons<br />
One icon set is installed with <strong>Agendus</strong>. You can use these icons or add additional icon<br />
sets. Additional icon sets are available <strong>for</strong> sale from www.iambic.com and other<br />
vendors. <strong>Agendus</strong> also includes a built-in icon editor, so you can edit or create your<br />
own personalized icons.<br />
To add an icon to a meeting, task, or memo, open the schedule slip and tap on the icon<br />
button.<br />
Tip: You can assign default icons by category (page 109) or by keywords (page 94).<br />
Note: To use multiple icon sets, the sets must all use unique set names. If you edit<br />
icons in an icon set and then install another icon set with the same name, your custom<br />
icons will be overwritten.<br />
<strong>Agendus</strong> supports double-density icons, as used by high-density <strong>Palm</strong> <strong>OS</strong> 5 and later<br />
devices with higher screen resolutions. Double-density icons can be more detailed<br />
without taking up any more screen space.<br />
To view the installed icons, select Menu | Tools | Icon Editor, or from a schedule slip,<br />
tap on the icon list and select More Icons.<br />
Tap to select an installed icon set<br />
Tap and drag an icon onto the<br />
set picker to copy it to another<br />
icon set<br />
Edit the selected icon’s image<br />
Create a new icon from scratch<br />
Duplicate the selected icon<br />
Delete the selected icon<br />
Assign an icon to a meeting or task by tapping<br />
the icon button in the schedule slip<br />
Tap More Icons to view other<br />
icon sets you have installed<br />
Recently used icons<br />
Tap an icon to select it<br />
and close the menu<br />
Using, Editing and Moving Icons 110
<strong>Agendus</strong> <strong>for</strong> <strong>Palm</strong> <strong>OS</strong>, Version 11<br />
Tip: If you see an icon similar to what you want, you can select that icon, duplicate it,<br />
and then edit the duplicate. (Duplicates will appear at the bottom of the icon list.)<br />
To edit an icon, tap on the icon and then tap the Edit button to open the Edit screen.<br />
Use the pen to change<br />
one pixel at a time<br />
Select a portion of the icon<br />
(tap and drag to move selection)<br />
Erase the icon<br />
Pick a color from the icon<br />
Fill in an area with color<br />
Pick a new pen or fill color<br />
Setting Helper Programs<br />
Use the Programs preferences to set which programs and web content providers<br />
<strong>Agendus</strong> should use when providing extended services, such as dialing, email, and<br />
driving directions. (<strong>Agendus</strong> Standard Edition only includes the dialing option.)<br />
Go to Menu | Options | Preferences | Programs.<br />
Make one color of<br />
the icon appear<br />
transparent<br />
Double-density<br />
icons allow icons to<br />
be more detailed<br />
Only settings <strong>for</strong> features supported by your<br />
<strong>Palm</strong> device will be displayed; <strong>for</strong> an application<br />
to be listed, it must be installed on your device as<br />
a registered helper application<br />
Note: The items listed in the Dial, Browser, Email, and SMS menus are those applications<br />
installed on your <strong>Palm</strong> device that register themselves as helper applications in<br />
the <strong>Palm</strong> <strong>OS</strong>. If you have an installed application that is not listed in these menus, it<br />
may not be registered with the <strong>Palm</strong> <strong>OS</strong>. For example, Clie Mail does not register itself<br />
as a helper application and will not be listed.<br />
Setting Helper Programs 111
<strong>Agendus</strong> <strong>for</strong> <strong>Palm</strong> <strong>OS</strong>, Version 11<br />
Setting Automatic Updates<br />
Schedule <strong>Agendus</strong> to automatically update data <strong>for</strong> over-the-air services, including<br />
weather <strong>for</strong>ecasts, “quote of the day,” and “this day in history.” You can choose to have<br />
<strong>Agendus</strong> do auto-updates “Once a Day” by hour intervals of 12, 6, or 4, or by your own<br />
custom settings. Custom settings allow you to select a specific time of day to update,<br />
and which days to per<strong>for</strong>m the updates on as well as a time interval. Tick the “Confirm<br />
be<strong>for</strong>e updating” box if you want a requester to appear confirming with you that it is<br />
OK to per<strong>for</strong>m an auto-update.<br />
Go to Menu | Options | Preferences | Auto Update.<br />
Connection Preferences<br />
Use the Connection preferences to have <strong>Agendus</strong> automatically disconnect after<br />
updating or to change the connection time-out setting.<br />
Go to Menu | Options | Preferences | Connection.<br />
Use custom <strong>for</strong> more control over the<br />
update frequency<br />
Set <strong>Agendus</strong> to disconnect from<br />
your network after updating or<br />
when exiting <strong>Agendus</strong><br />
If your device has trouble connecting<br />
to your network, you may want to<br />
increase the time-out setting<br />
Setting Automatic Updates 112
<strong>Agendus</strong> <strong>for</strong> <strong>Palm</strong> <strong>OS</strong>, Version 11<br />
Using Text Shortcuts<br />
If you find yourself using the same phrases and word combinations over and over<br />
again, as frequently happens when you schedule business appointments, you may want<br />
to set up a text shortcut <strong>for</strong> commonly used phrases. To do this, go to the <strong>Palm</strong> device’s<br />
application screen, select the Prefs application, and choose Shortcuts from the top<br />
right corner drop-down list. Use the New button to add a new shortcut. Pick a series of<br />
letters that you will remember to represent the phrase.<br />
Select Prefs from the<br />
<strong>Palm</strong> application screen<br />
Tap New to create<br />
a new shortcut<br />
Select Shortcuts<br />
You can use your shortcuts in an <strong>Agendus</strong> slip. To invoke a shortcut, make the shortcut<br />
symbol in the graffiti box, then enter the series of shortcut letters. The handheld<br />
device will recognize the shortcut and replace the shortcut letters with the assigned<br />
word or phrase.<br />
For example if you find yourself using the phrase “status report,” you may want to<br />
make the shortcut <strong>for</strong> that “sr.”<br />
Note: The <strong>Palm</strong> device will use the first recognized shortcut in the list. For example, if<br />
you have a two-letter shortcut that begins with the letter “mo” listed above a three-letter<br />
shortcut that begins with the letters “mot,” then the three-letter shortcut will never<br />
be executed because the two-letter shortcut always executes be<strong>for</strong>e you have a<br />
chance to enter the third letter.<br />
Using Text Shortcuts 113
<strong>Agendus</strong> <strong>for</strong> <strong>Palm</strong> <strong>OS</strong>, Version 11<br />
MEETING ATTENDEES MODULE (PREMIER)<br />
Managing Meetings with the Attendees Module<br />
Now with the <strong>Agendus</strong> Premier package managing meeting attendees is a snap with the<br />
new Meeting Attendees Module, a simple to use enhancement that shifts the burden of<br />
calling up your associates to confirm their ability to make your next office meeting to<br />
an easy to use SMS based interface. Never again will you have to worry about who is<br />
going to make it or spend hours waiting <strong>for</strong> call-backs from your associates. Just create<br />
a meeting, select attendees and send out invitations, allowing <strong>Agendus</strong> to do the dirty<br />
work <strong>for</strong> you.<br />
To begin using <strong>Agendus</strong> Attendees, first create a new meeting and tap the attendees<br />
icon . Then, tap the Edit Attendees button and select, using the check boxes to the<br />
left, the names of the people you plan to notify, then tap Done.<br />
Create a meeting and tap the<br />
attendees button, then tap<br />
Edit Attendees.<br />
Select the desired attendees<br />
from your contacts list when<br />
prompted by ticking the boxes.<br />
A list of those whom you have<br />
selected appears giving you<br />
options on whom to invite.<br />
The people you’ve chosen appear in a list <strong>for</strong>mat with green check boxes next to their<br />
names in the attendees field. To send out meeting notification messages, select the<br />
people you with to invite by tapping the dot immediately to the left of their name, which<br />
will change from a bullet to a check mark, and tap the mail icon .<br />
If you wish to invite everyone on your list at once, you can also tap the check mark<br />
icon to select them all, and tap the mail icon to send the notifications. The dot button,<br />
likewise, de-selects everyone on your list.<br />
Managing Meetings with the Attendees Module 114
<strong>Agendus</strong> <strong>for</strong> <strong>Palm</strong> <strong>OS</strong>, Version 11<br />
On the Receiving End<br />
Select whom you would like to<br />
invite by tapping the dot next to<br />
their name in the list, which turns<br />
into a check mark to denote the<br />
selection, then tap the Mail icon<br />
to send the invitation.<br />
Select the invitation type by<br />
ticking the desired check box,<br />
then click Send SMS.<br />
Once you tap the mail button, you will be prompted with a screen in which you select<br />
from three options: invite, confirm, or cancel.<br />
Invite sends a meeting invitation SMS to each person on the list, while confirm simply<br />
confirms your presence at the meeting in question. Cancel sends out a meeting cancellation<br />
notice to your attendees list.<br />
Once your message is out, the people you have notified will receive a requester in their<br />
SMS mailbox showing the meeting name, date and time. if you invited people to a<br />
meeting, this requester will allow them to confirm their appearance at said meeting, or<br />
decline the invitation. A confirmation call will notify the list of attendees that you plan<br />
to make it, and a cancellation simple sends out a mass SMS that tells everyone that the<br />
meeting has been terminated.<br />
Attendees that choose to make the meeting will automatically have their status changed<br />
from Unknown to Attending, or in the event they cannot make it to Declined.<br />
If you aren’t the one sending out the invitation, but<br />
instead are getting it, you will from time-to-time receive<br />
the above notifications. If you are not using <strong>Agendus</strong><br />
Premiere you won’t be able to tap Accept or Decline,<br />
but you will get the SMS showing the meeting details<br />
and you can send a reply message to confirm or decline<br />
instead. <strong>Agendus</strong> will alert you if the meeting is scheduled<br />
during a time where which you have already dedicated<br />
to another task, or if your schedule is free.<br />
Note: These SMS notifications will be readable by anyone<br />
with SMS capabilities, even on non-Treo or non-<br />
<strong>Palm</strong> devices, including regular cell phones. Users on<br />
You will receive notification when<br />
a party you have invited confirms<br />
or declines the engagement.<br />
You will receive an SMS message<br />
when a new invitation arrives<br />
prompting you to Accept or<br />
Decline your ability to attend.<br />
Managing Meetings with the Attendees Module 115
<strong>Agendus</strong> <strong>for</strong> <strong>Palm</strong> <strong>OS</strong>, Version 11<br />
these devices Users without <strong>Agendus</strong> Premier will only be able to respond to your<br />
SMS message, and thus cannot use the Accept/Decline functions. In such case, you<br />
will have to tick the appropriate check box next to their name in the meeting attendees<br />
list to indicate their status by hand, and may need to notify appropriate parties of their<br />
inability to attend.<br />
Note: This feature links into the Free Time Finder; see page xx <strong>for</strong> details.<br />
116
<strong>Agendus</strong> <strong>for</strong> <strong>Palm</strong> <strong>OS</strong>, Version 11<br />
Frequently Asked Questions<br />
TROUBLESHOOTING AND SUPPORT<br />
Please check out the <strong>Agendus</strong> FAQ located on our website at www.iambic.com/<br />
support/<strong>for</strong> a complete and updated listing of questions and answers concerning the<br />
software.<br />
1. How do I access the other views?<br />
Tap on one of the view buttons in the <strong>Agendus</strong> toolbar to switch between<br />
Calendar, Task, Memo, and Contact views. Once in the view, you can change<br />
the mode of the view (week, month, list, compact, etc.) by tapping on the same<br />
button again and selecting the mode from the pop-up list. For example, switch<br />
to the last-used Calendar view by tapping the Calendar button . Tap the<br />
Calendar button again to see the list of available modes <strong>for</strong> the Calendar view.<br />
2. How do I see the icons in the month view?<br />
Tap on the Calendar button to switch to the Calendar view. Tap the<br />
Calendar button again to pop up the list of modes and tap the Month-Icon<br />
button to switch to icon mode.<br />
3. I don’t have a memory card or my <strong>Palm</strong> device doesn’t have a memory<br />
card slot; can I still use the wallpaper feature?<br />
Yes. The enhanced photo options in version 11 will allow you to use wallpaper<br />
on <strong>Palm</strong> devices with <strong>Palm</strong> <strong>OS</strong> 5.0 or later.<br />
4. What is ADVANCE on tasks <strong>for</strong>?<br />
This sets how far in advance of task dates you want to be able to see tasks in<br />
the Day views.<br />
You can set a default value <strong>for</strong> this that will be applied on all new tasks by<br />
going to Menu | Options | Preferences | Tasks and tapping the Defaults tab.<br />
5. I am not able to synchronize my <strong>Agendus</strong>.prc file to my handheld device.<br />
Check the amount of space in Memory that you have left on your handheld<br />
device. you need to have at least as much space available on your device as the<br />
size of the PRC file you are trying to install. For the <strong>Agendus</strong> PRC installer,<br />
you will need additional space to actually install <strong>Agendus</strong>. (See “System<br />
Frequently Asked Questions 117
<strong>Agendus</strong> <strong>for</strong> <strong>Palm</strong> <strong>OS</strong>, Version 11<br />
Requirements” on page 12). Also make sure the handheld device user name is<br />
correct when you queue the.prc file using the install tool.<br />
6. How can I quickly access a Contact Name from a long list of Contact<br />
Names?<br />
In Contact views and Task views, and when adding multiple attendees to a<br />
meeting (<strong>Agendus</strong> Pro only), <strong>Agendus</strong> supports Quick Find. Tap next to the<br />
Quick Find icon and start writing or typing the name; <strong>Agendus</strong> will filter<br />
your contact list so it only shows contacts with matching first, last, or company<br />
names.<br />
In a schedule slip, <strong>Agendus</strong> supports Quick Fill when assigning a primary<br />
contact. On the first line of the details page, start writing the contact’s name<br />
and <strong>Agendus</strong> will try to fill in the name <strong>for</strong> you. Keep writing or typing the<br />
name until the correct name is shown, or tap the Contact List button to<br />
view a list of matching names. Quick Fill will only search <strong>for</strong> names that match<br />
the first sort field; tap the Sort button to change the sort fields.<br />
Tap here and then use graffiti or your keyboard<br />
to start writing or typing the contact’s name<br />
7. How do I start <strong>Agendus</strong> with the datebook button?<br />
Start <strong>Agendus</strong> then tap Menu | Options | Preferences | Launch & Buttons and<br />
select which button you want <strong>Agendus</strong> to respond to and what view or action<br />
you want this to have in <strong>Agendus</strong>. (See “Assigning Buttons to <strong>Agendus</strong>” on<br />
page 106.)<br />
8. Where do I find <strong>Agendus</strong> <strong>for</strong> Windows?<br />
The desktop version of <strong>Agendus</strong> is available at www.iambic.com.<br />
9. When do alarms sound on untimed meetings?<br />
They do not sound: the alarm notification will appear on the screen when the<br />
<strong>Palm</strong> is first turned on <strong>for</strong> the day that this untimed meeting is scheduled. This<br />
is consistent with what the native <strong>Palm</strong> datebook does <strong>for</strong> notification of alarms<br />
on untimed meetings.<br />
Frequently Asked Questions 118
<strong>Agendus</strong> <strong>for</strong> <strong>Palm</strong> <strong>OS</strong>, Version 11<br />
10. How can I view completed tasks or calls?<br />
Start <strong>Agendus</strong> then tap Menu | Options | Preferences | Tasks. Tap the<br />
Complete tab and make sure “Show Completed Items” is checked, then tap<br />
OK. Your completed tasks will now show up in the task and selected calendar<br />
views. The text <strong>for</strong> the completed tasks will have a strikethrough to show it has<br />
been completed.<br />
11. How can I remove a program from my <strong>Palm</strong>?<br />
Go to the applications list then tap Menu | Delete then select the application that<br />
you want to remove.<br />
12. How many categories can I have?<br />
You can have up to 15 categories each <strong>for</strong> meetings, tasks, and contacts.<br />
13. How do I set the color <strong>for</strong> meetings shown in the week block mode?<br />
The color shown <strong>for</strong> each meeting in this view is the color <strong>for</strong> the category that<br />
was assigned to that meeting.<br />
14. How can I find out what the latest version of <strong>Agendus</strong> is?<br />
Visit www.iambic.com/support/productline.asp.<br />
15. How can I find out what version of <strong>Agendus</strong> I am using?<br />
In <strong>Agendus</strong> tap Menu | Options | About.<br />
16. How can I make the fonts bigger in <strong>Agendus</strong>?<br />
In most views there is a View Options button in the lower right corner; tap<br />
that button and select View Options from the pop up menu. In the View<br />
Options box, tap the Fonts tab and choose a larger font.<br />
17. How can I revert back to my older version of <strong>Agendus</strong>?<br />
If <strong>for</strong> some reason after installing version 11 you prefer to use your previous<br />
version, here are the steps you’ll need to take<br />
1. Delete <strong>Agendus</strong> 11<br />
2. Hotsync<br />
3. On your desktop, double-click on the PRC file <strong>for</strong> your earlier version of<br />
<strong>Agendus</strong>: this will queue it <strong>for</strong> installation.<br />
4. Double-click on the icon set you want to use to queue it <strong>for</strong> installation.<br />
5. Hotsync.<br />
6. Launch <strong>Agendus</strong> and re-enter your previous version’s unlock code.<br />
7. If you are reverting back to version 6 or earlier, you will need to re-link<br />
Frequently Asked Questions 119
<strong>Agendus</strong> <strong>for</strong> <strong>Palm</strong> <strong>OS</strong>, Version 11<br />
your icons with your meetings, calls and tasks.<br />
Service and Technical Support<br />
To obtain support visit www.iambic.com/support.<br />
Service and Technical Support 120
<strong>Agendus</strong> <strong>for</strong> <strong>Palm</strong> <strong>OS</strong>, Version 11<br />
IAMBIC SOFTWARE LICENSE<br />
PLEASE READ THIS LICENSE CAREFULLY BEFORE USING THE SOFT-<br />
WARE. BY USING THE SOFTWARE, YOU ARE AGREEING TO BE BOUND BY<br />
THE TERMS OF THIS LICENSE. IF YOU DO NOT AGREE TO THE TERMS OF<br />
THIS LICENSE, PROMPTLY RETURN THE PRODUCT TO THE PLACE WHERE<br />
YOU OBTAINED IT AND YOUR MONEY WILL BE REFUNDED.<br />
1. License. The application, demonstration, system and other software accompanying this License, whether on<br />
disk, in read only memory, or on any other media (the “Software”), the related documentation and fonts are<br />
licensed to you by iambic, Inc. You own the media on which the Software and fonts are recorded but iambic<br />
Software and/or iambic Software Licensor(s) retain title to the Software, related documentation and fonts. This<br />
License allows you to use the Software and fonts on a single handheld computer Product (which, <strong>for</strong> purposes of<br />
this License, shall mean a <strong>Palm</strong> <strong>OS</strong> based handheld), and make one copy of the Software and fonts in machinereadable<br />
<strong>for</strong>m <strong>for</strong> backup purposes only. You must reproduce on such copy the iambic Software copyright notice<br />
and any other proprietary legends that were on the original copy of the Software and fonts. You may also transfer<br />
all your license rights in the Software and fonts, the backup copy of the Software and fonts, the related documentation<br />
and a copy of this License to another party, provided the other party reads and agrees to accept the terms and<br />
conditions of this License.<br />
2. Restrictions. The Software contains copyrighted material, trade secrets and other proprietary material and in<br />
order to protect them you may not de-compile, reverse engineer, disassemble or otherwise reduce the Software to a<br />
human-readable <strong>for</strong>m. You may not modify, network, rent, lease, loan, distribute or create derivative works based<br />
upon the Software in whole or in part. You may not electronically transmit the Software from one device to another<br />
over a network.<br />
3. Termination. This License is effective until terminated. You may terminate this License at any time by<br />
destroying the Software and related documentation and fonts. This License will terminate immediately without<br />
notice from iambic Software if you fail to comply with any provision of this License. Upon termination you must<br />
destroy the Software, related documentation and fonts.<br />
4. Export Law Assurances. You agree and certify that neither the Software nor any other technical data received<br />
from iambic Software, nor the direct product thereof, will be exported outside the United States except as authorized<br />
and as permitted by the laws and regulations of the United States. If the Software has been rightfully obtained<br />
by you outside the United States, you agree that you will not re-export the Software nor any other technical data<br />
received from iambic Software, nor the direct product thereof, except as permitted by the laws and regulations of<br />
the United States and the laws and regulations of the jurisdiction in which you obtained the Software.<br />
5. Government End Users. If you are acquiring the Software and fonts on behalf of any unit or agency of the<br />
United States Government, the following provisions apply. The Government agrees:<br />
(i) if the Software and fonts are supplied to the Department of Defense (DoD), the Software and fonts are classified<br />
as “Commercial Computer Software” and the Government is acquiring only “restricted rights” in the Software,<br />
its documentation and fonts as that term is defined in Clause 252.227-7013(c)(1) of the DFARS; and<br />
(ii) if the Software and fonts are supplied to any unit or agency of the United States Government other than<br />
DoD, the Government’s rights in the Software, its documentation and fonts will be as defined in Clause 52.227-<br />
19(c)(2) of the FAR or, in the case of NASA, in Clause 18-52.227-86(d) of the NASA Supplement to the FAR.<br />
6. Disclaimer of Warranty on Software. You expressly acknowledge and agree that use of the Software and fonts is<br />
at your sole risk. The Software, related documentation and fonts are provided “AS IS” and without warranty of any<br />
kind and iambic Software and iambic Software’s Licensor(s) (<strong>for</strong> the purposes of provisions 6 and 7, iambic<br />
Software and iambic Software’s Licensor(s) shall be collectively referred to as “iambic Software EXPRESSLY<br />
DISCLAIM ALL WARRANTIES, EXPRESS OR IMPLIED, INCLUDING, BUT NOT LIMITED TO, THE<br />
IMPLIED WARRANTIES OF MERCHANTABILITY AND FITNESS FOR A PARTICULAR PURP<strong>OS</strong>E. IAMBIC<br />
SOFTWARE DOES NOT WARRANT THAT THE FUNCTIONS CONTAINED IN THE SOFTWARE WILL MEET<br />
YOUR REQUIREMENTS, OR THAT THE OPERATION OF THE SOFTWARE WILL BE UNINTERRUPTED OR<br />
ERROR-FREE, OR THAT DEFECTS IN THE SOFTWARE AND THE FONTS WILL BE CORRECTED.<br />
FURTHERMORE, IAMBIC SOFTWARE DOES NOT WARRANT OR MAKE ANY REPRESENTATIONS<br />
REGARDING THE USE OR THE RESULT OF THE USE OF THE SOFTWARE AND FONTS OR RELATED<br />
DOCUMENTATION IN TERMS OF THEIR CORRECTNESS, ACCURACY, RELIABILITY, OR OTHERWISE.<br />
NO ORAL OR WRITTEN INFORMATION OR ADVICE GIVEN BY IAMBIC SOFTWARE OR AN IAMBIC<br />
SOFTWARE AUTHORIZED REPRESENTATIVE SHALL CREATE A WARRANTY OR ANYWAY INCREASE<br />
THE SCOPE OF THIS WARRANTY. SHOULD THE SOFTWARE PROVE DEFECTIVE, YOU (AND NOT<br />
Service and Technical Support 121
<strong>Agendus</strong> <strong>for</strong> <strong>Palm</strong> <strong>OS</strong>, Version 11<br />
IAMBIC SOFTWARE OR AN IAMBIC SOFTWARE AUTHORIZED REPRESENTATIVE) ASSUME THE<br />
ENTIRE C<strong>OS</strong>T OF ALL NECESSARY SERVICING, REPAIR OR CORRECTION. SOME JURISDICTIONS DO<br />
NOT ALLOW THE EXCLUSION OF IMPLIED WARRANTIES, SO THE ABOVE EXCLUSION MAY NOT<br />
APPLY TO YOU.<br />
7. Limitation of Liability. UNDER NO CIRCUMSTANCES INCLUDING NEGLIGENCE, SHALL IAMBIC<br />
SOFTWARE BE LIABLE FOR ANY INCIDENTAL, SPECIAL OR CONSEQUENTIAL DAMAGES THAT<br />
RESULT FROM THE USE OR INABILITY TO USE THE SOFTWARE OR RELATED DOCUMENTATION,<br />
EVEN IF IAMBIC SOFTWARE OR AN IAMBIC SOFTWARE AUTHORIZED REPRESENTATIVE HAS BEEN<br />
ADVISED OF THE P<strong>OS</strong>SIBILITY OF SUCH DAMAGES. SOME JURISDICTIONS DO NOT ALLOW THE LIMI-<br />
TATION OR EXCLUSION OF LIABILITY FOR INCIDENTAL OR CONSEQUENTIAL DAMAGES SO THE<br />
ABOVE LIMITATION OR EXCLUSION MAY NOT APPLY TO YOU. In no event shall iambic Software’s total<br />
liability to you <strong>for</strong> all damages, losses, and causes of action (whether in contract, tort (including negligence) or<br />
otherwise) exceed the amount paid by you <strong>for</strong> the Software and fonts.<br />
8. Controlling Law and Severability. This License shall be governed by and construed in accordance with the laws<br />
of the United States and the State of Cali<strong>for</strong>nia, as applied to agreements entered into and to be per<strong>for</strong>med entirely<br />
within Cali<strong>for</strong>nia between Cali<strong>for</strong>nia residents. If <strong>for</strong> any reason a court of competent jurisdiction finds any provision<br />
of this License, or portion thereof, to be unen<strong>for</strong>ceable, that provision of the License shall be en<strong>for</strong>ced to the<br />
maximum extent permissible so as to effect the intent of the parties, and the remainder of this License shall<br />
continue in full <strong>for</strong>ce and effect.<br />
9. Complete Agreement. This License constitutes the entire agreement between the parties with respect to the use<br />
of the Software, related documentation and fonts, and supersedes all prior or contemporaneous understandings or<br />
agreements, written or oral, regarding such subject matter. No amendment to or modification of this License will be<br />
binding unless in writing and signed by a duly authorized representative of iambic Software.<br />
Service and Technical Support 122