PD7755 User Manual Web.pdf - Westwell
PD7755 User Manual Web.pdf - Westwell
PD7755 User Manual Web.pdf - Westwell

You also want an ePaper? Increase the reach of your titles
YUMPU automatically turns print PDFs into web optimized ePapers that Google loves.
SAFETY PRECAUTION<br />
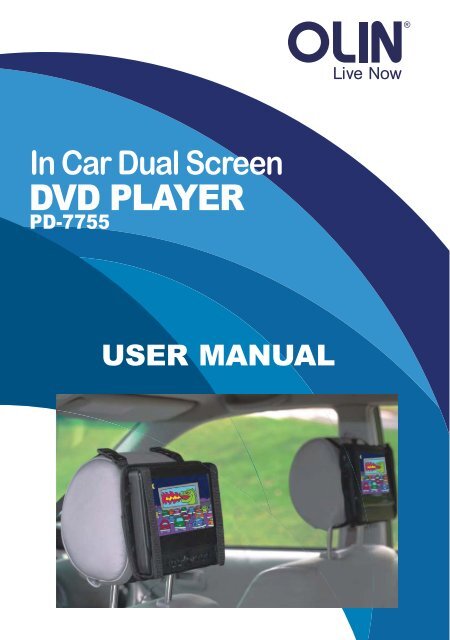
Thank you for choosing our portable DVD player. It includes a 7” wide screen and a DVD<br />
player. The unit applies the latest state of art electronics and is designed for use at home,<br />
in hotels and in offices etc for relaxation. The compact size makes carrying easier as<br />
well as installation. Please read the manual carefully prior to use and keep it well for later<br />
consultation.<br />
Hi-voltage, Don't Open it<br />
Remind user to be careful to<br />
avoid electric shock<br />
Warning: To reduce the risk of fire or electric shock, do not expose this apparatus to rain<br />
or moisture.<br />
1) Please read the instruction manual carefully and follow all the requirements of safe<br />
operation to operate the device.<br />
2) Do not use this unit near water. Do not place over the unit any container with liquid<br />
inside.<br />
3) Do not install near any heat sources such as radiators, heat registers, stoves, or other<br />
apparatus (including amplifiers) that produce heat.<br />
4) Unplug this unit during lightning storms or when unused for long time.<br />
5) About Cleaning: Unplug the system, use only wet cloth to clean. Do not use liquid<br />
detergent or aerosol.<br />
6) Only use accessories specified by the manufacturer.<br />
7) Refer all servicing to qualified service personnel, servicing is required when the unit<br />
has been damaged in any way, such as power supply cord or plug is damaged, liquid<br />
has been spilled or objects have fallen into the unit, exposed to moisture, does not<br />
operate normally. Don't try to repair the machine by yourself because of the danger of<br />
high voltage and electric shock.<br />
8) Do not use irregular shaped discs such as heart or star-shaped discs as they may<br />
Cause the unit to malfunction.<br />
9) Please ensure enough clearance around the receiver for good ventilation. Any<br />
objects and the appliance should be at least 10 cm apart.<br />
10) The ventilation should not be impeded by covering the ventilation openings with<br />
items, such as newspapers, table-cloths, curtains, etc<br />
11) No naked flame source, such as lighted candles, should be placed on the apparatus<br />
12) Attention should be drawn to the environmental aspects of battery disposal.<br />
13) CAUTION : Danger of explosion if battery is incorrectly replaced. Replace only with<br />
the same or equivalent type.<br />
14) The disconnect devices shall remain readily operable.<br />
15) Only used with the provided adaptor model no.: FM090010-C.<br />
1
2<br />
MOUNTING BAG<br />
TROUBLESHOOTING<br />
TABLE OF CONTENTS<br />
SAFETY PRECAUTION<br />
TABLE OF CONTENTS<br />
PACKAGE CONTENTS/MAIN FEATURES<br />
Package contents<br />
Main Features<br />
ABOUT OPTICAL DISCS<br />
Disc Requirements<br />
Disc Care and Maintenance<br />
MAIN UNIT<br />
SLAVE SCREEN<br />
SYSTEM CONNECTION<br />
Powering and installation<br />
Connecting to the Slave screen<br />
Audio and Video Signal Output<br />
REMOTE CONTROL<br />
The Use of Remote Control<br />
BASIC OPERATION<br />
Fast forward and fast backward<br />
Repeat playing<br />
Repeat playing of favorite scene<br />
Angle<br />
Zoom In/ Out<br />
PLAYING JPG /MP3 FILE<br />
Playing JPG file<br />
Playing MP3 files<br />
SYSTEM SETUP<br />
General Setup Page<br />
Video Setup Page<br />
Password Setup Page<br />
Preference Page<br />
SPECIFICATION<br />
BATTERY<br />
Rechargeable Battery Use<br />
Precautions related to Battery Recharge<br />
Using and maintaining rechargeable battery supply<br />
1<br />
2<br />
3<br />
3<br />
3<br />
4<br />
4<br />
4<br />
5<br />
6<br />
7<br />
7<br />
8<br />
9<br />
10<br />
11<br />
12<br />
13<br />
13<br />
14<br />
14<br />
15<br />
16<br />
16<br />
16<br />
17<br />
17<br />
18<br />
18<br />
18<br />
20<br />
21<br />
21<br />
21<br />
21<br />
22<br />
23<br />
Olin_Portable_DVD_Player_PD-7755_<strong>User</strong>_<strong>Manual</strong>_V2
Package contents<br />
Main Features<br />
PACKAGE CONTENTS/MAIN FEATURES<br />
Please make sure the following items are included in the package. If any<br />
item is missing, contact your dealer.<br />
7 '' Slave screen & DVD Player<br />
Remote Control with battery<br />
Audio/Video Cable<br />
AC/DC Power Adapter<br />
Cigarette Lighter Adapter<br />
<strong>User</strong> <strong>Manual</strong><br />
Headphone<br />
DC+Audio/Video Cable<br />
Mounting Bag<br />
Quick guide<br />
Warranty card<br />
High brightness color 7” LCD screen<br />
Compatible with disc of DVD, VCD, MP3, CD, JPEG, etc.<br />
Built-in stereo speakers<br />
Built-in rechargeable Lithium polymer battery<br />
Support PAL or NTSC system<br />
Support English OSD, speed forward/backward, repeat function<br />
Zoom in/out function<br />
1<br />
1<br />
1<br />
1<br />
1<br />
1<br />
2<br />
1<br />
2<br />
1<br />
1<br />
3
4<br />
ABOUT OPTICAL DISCS
ON OFF<br />
1 2<br />
3 4 5 6 7 8<br />
MAIN UNIT<br />
1.Open Knob<br />
Switch the knob to unlock the disc cover<br />
2.Power ON/OFF Switch<br />
Switch the DVD player on/off<br />
3.SETUP Button<br />
Press SETUP to display the system<br />
setup menu<br />
4.MODE Button<br />
Press MODE to select the source<br />
between DVD and Media<br />
5.Navigation Buttons<br />
6.OK Button<br />
Press OK to confirm selection<br />
7.PLAY/PAUSE Button<br />
Press Play/Pause to start/hold playback<br />
910111213 14 15<br />
CLOSE<br />
16<br />
8.STOP Button<br />
Press STOP to stop playback<br />
9.DC IN 9V<br />
Connect to the power outlet<br />
10.DC OUT<br />
Connect to Slave screen DC IN<br />
11.AV OUT<br />
Output audio/ video Signals<br />
12.Headphone Jack<br />
13.Volume Knob<br />
Turn the volume up/ down<br />
14.SD Card Slot<br />
15.USB Port<br />
16.Bracket<br />
5
6<br />
ON OFF<br />
1<br />
6<br />
SLAVE SCREEN<br />
2 3 4 5<br />
1.Power ON/OFF<br />
Switch the Slave screen on/off<br />
2.Volume Knob<br />
Turn the volume up/down<br />
3.Headphone Jack<br />
4.AV IN<br />
Input audio/ video signals<br />
5.DC IN 9V<br />
Connect to the DVD player DC OUT or the power outlet<br />
6.Slave screen<br />
CLOSE
Powering and installation<br />
SYSTEM CONNECTION<br />
Plug one end of the AC/DC power adaptor into the DC IN 9V jack on the right of the<br />
main unit, then plug the other end into the AC power receptacle. Please refer to the<br />
following illustration<br />
If using car cigarette lighter adaptor to connect to the power:<br />
Plug one end of the cigarette lighter adaptor into the DC IN 9V jack on the unit, plug<br />
the other end into the car cigarette lighter socket. See illustration below.<br />
Notice:<br />
Car cigarette lighter adaptor can't be used to recharge the battery.<br />
Warning:<br />
This model and its enclosed car adaptor are only compatible with 9~12V vehicles.<br />
It is not compatible with 24v vehicles.<br />
Please note:<br />
Do not connect the unit to the car via car adaptor before the engine has been started.<br />
Disconnect the car adaptor when it is not in use.<br />
7
Connecting to the Slave screen<br />
SYSTEM CONNECTION<br />
The Main Unit can be connected to the Slave screen.<br />
Connect the Main Unit to power outlet via AC/DC adaptor or cigarette lighter adaptor.<br />
Then connect Main Unit's DC Out jack to Slave screen's DC IN 9V jack with a DC/ AV<br />
cable.<br />
Also use the DC/AV cable to connect Main Unit's AV OUT to Slave screen’s AV IN .<br />
Please refer to the illustration below.<br />
ON OFF<br />
Note:The Slave screen is designed to run off power from the car charger only. The<br />
AC/DC wall adapter is for charging the main screen only.<br />
8
Audio and Video Signal Output<br />
SYSTEM CONNECTION<br />
The Main Unit can transmit audio and video signals to the external receiver,<br />
such as a TV or an amplifier.<br />
VIDEO IN<br />
TV<br />
SUBWOOFER<br />
AV CABLE<br />
Center speaker<br />
AMPLIFIER<br />
Left front speaker Right front speaker<br />
Left rear speaker Right rear speaker<br />
Notice:There is no 5.1 channel in the unit, however, after connecting to APM it is available to<br />
output audio in 5.1 channel<br />
1. Refer the owner's manual of the external receiver as well<br />
2. Make sure all necessary connections have been properly made before connect<br />
the power.<br />
3.If the player will not be used for a long period of time, disconnect the power and<br />
remove the battery from the remote control<br />
AUDIO IN<br />
These cables are<br />
not included in package<br />
9
1. Numeric buttons<br />
2. TITLE ( To display title information)<br />
3. AUDIO (To select audio language)<br />
4. SETUP (To go to or exit setup menu)<br />
5. Previous/Next button (To go to<br />
previous/next chapter or scene during<br />
playing)<br />
6. Fast forward/backward button (To<br />
scan forward/backward at 2, 4, 8, 16,<br />
or 32 times )<br />
7.OSD ( To display disc information<br />
during playing ,such as elapsed and<br />
remaining time)<br />
8. Play/Pause<br />
9. Stop ( press once to stop playback, then<br />
press to resume playback from the<br />
point where you stopped; press stop<br />
button twice to stop playback completely)<br />
10. MODE (To select the source)<br />
10<br />
1<br />
2<br />
3<br />
4<br />
5<br />
6<br />
7<br />
8<br />
9<br />
REMOTE CONTROL<br />
10<br />
11<br />
12<br />
13<br />
14<br />
15<br />
16<br />
20<br />
17<br />
18<br />
19<br />
11. ZOOM(To zoom in/out the image during<br />
the playback)<br />
12. Menu (To enter or exit menu root)<br />
13. Subtitle (To select subtitle language<br />
when playing DVD disc)<br />
14. Angle (To change viewing angle when<br />
playing disc with multi-angle)<br />
15. A-B (Repeat a specific portion from<br />
point A to B, press it again to cancel<br />
repeat playing)<br />
16. Repeat (To repeat playing title,<br />
chapter or track)<br />
17. Return (To return to the main menu)<br />
18. MUTE(To turn to mute)<br />
19. VOL +/- (To adjust the volume)<br />
20: Enter ( To confirm)
The Use of Remote Control<br />
Please put the battery into the remote control as per below illustration<br />
1<br />
CR2025 CR2025<br />
When using remote control, make sure the infrared window is pointed to infrared<br />
receiving window of the main unit. The distance between machine and remote control<br />
must be within 3 metres. Please refer to the following illustration<br />
Notice<br />
30<br />
0<br />
30<br />
0<br />
Warning: Keep the battery from children.<br />
1. Avoid placing the unit in a damp environment or where there is a risk it may fall.<br />
2. Avoid placing the unit in an area where the infrared remote receiving window is<br />
in direct sunlight.<br />
REMOTE CONTROL<br />
3.Please use a new battery to replace old one if the remote control doesn't work.<br />
4.Remove the battery from the remote if it will not be used for a long period of time.<br />
2<br />
11
DVD SVCD VCD CD MP3<br />
BASIC OPERATION<br />
Playing disc of DVD, SVCD, VCD, CD, Mp3,<br />
1. After connecting power to the Main Unit, turn on the unit by sliding the<br />
ON/OFF switch to ON, the source menu will be displayed on the screen:<br />
Press to enter DVD mode or Media mode and press OK button to confirm.<br />
When selecting “Media”, ensure to insert USB or SD/MMC card properly<br />
2. Open the disc door and insert a disc into the door with the label side facing<br />
up.<br />
3. Close the disc door. The unit will load the disc and start playing.<br />
4. Press once to stop playback; then press to resume playback from<br />
the point where you stoped; press twice to stop playback completely .<br />
5. During playback, press to pause; press it again to resume playback.<br />
6. When the playing is finished, please turn off the power by sliding ON/OFF<br />
switch to OFF.<br />
7. For some DVD disc with Title or Chapter menu, press “ MENU” button to<br />
enter menu page, and use cursor buttons to select. Press ENTER to confirm.<br />
Play/Pause<br />
DVD<br />
MEDIA<br />
Note: Please do not disconnect USB devices or plug out SD/MMC cards<br />
while they are working with the unit. Functional failure may occur in<br />
case of wrong operations.<br />
12<br />
Cursor button<br />
Title Menu<br />
ENTER
Fast forward and fast backward<br />
DVD SVCD VCD CD<br />
When playing disc of DVD, SVCD, VCD, CD, the unit can search forward or backward.<br />
1. Press , the unit will search forward. Press it repeatedly ,the unit will play at 2, 4, 8, 16,<br />
32 times of speed.<br />
32X<br />
32X<br />
DVD MP3 SVCD VCD CD<br />
2X 4X<br />
16X<br />
2. Press , the unit will search backward. Press it repeatedly ,<br />
the unit will play at 2, 4, 8, 16, 32 times of speed.<br />
Repeat playing<br />
BASIC OPERATION<br />
8X<br />
2X 4X<br />
16X<br />
Note: Audio will be muted during fast forward and fast backward.<br />
8X<br />
Search forward<br />
Search backward<br />
When playing disc of DVD, SVCD, VCD, CD, user can repeat playing onechapter, title<br />
or all the whole disc.<br />
For DVD disc, press “repeat” button, user can repeat playing one Chapter; press it<br />
again to repeat playing Title; press it the third time to repeat playing the whole disc.<br />
Chapter Title All<br />
For MP3 disc, press “repeat” to repeat playing present file; press it again to repeat<br />
playing the folder; press it the third time to cancel repeat playing.<br />
Repeat one Repeat folder<br />
Repeat off<br />
Repeat off<br />
13
Repeat playing of favorite scene<br />
When playing disc of DVD, SVCD, VCD, CD, Mp3, user can repeatedly play a specific<br />
section.<br />
During playback, press “A-B” button at a point A, then press<br />
this button again in point B, the unit will automatically repeat<br />
A<br />
playing the part between A-B<br />
Press it the third time, the unit will return to normal playback.<br />
Angle<br />
Number<br />
During playing DVD disc with multi-angle, press “Angle”<br />
button, the followings will be displayed on screen:<br />
Press number buttons to select the angle you desire<br />
To return to normal playing, please press “Angle” .<br />
The unit will play the disc in the default angle.<br />
Notice<br />
The function is available only for discs with multi-angle.<br />
14<br />
DVD<br />
SVCD<br />
VCD<br />
CD<br />
BASIC OPERATION<br />
MP3<br />
A-B<br />
Angle<br />
AB<br />
1 /4<br />
2 /4<br />
3 /4<br />
4 /4
Zoom In/ Out<br />
DVD SVCD VCD<br />
REMOTE CONTROL<br />
During playback, press “Zoom ” button, the image will be<br />
enlarged; press it again the image will be enlarged again;<br />
press it fourth time, the image will zoom out, press it<br />
repeatedly and the image will return to normal status.<br />
Zoom in/out<br />
When the magnification level is greater than 1X, use the Navigation buttons to pan<br />
around the magnified picture.<br />
Note: The picture quality may decrease as the zoom level (magnification) increase.<br />
2X<br />
3X<br />
4X<br />
1 /2X<br />
1 /3X<br />
1 /4X<br />
15
Playing JPG file<br />
1. Place a JPG disc into the tray, the unit will start reading and play.<br />
2. Press “MENU” to browse JPG files.<br />
3. Press to select a JPG file and press “ OK ” button to confirm.<br />
Note: you can press MENU to return to the folder list. Press or “ OK ” to preview<br />
the file selected<br />
4. To rotate the picturecounter-clockwise, press “ “; Press “ “ to rotate the picture<br />
clockwise<br />
5. Press OSD button when viewing pictures, you can select different refresh mode as<br />
follows:<br />
. wipe top: from top to bottom<br />
. wipe bottom: from bottom to top<br />
. wipe left: from left side to right side<br />
. wipe right: from right side to left side<br />
. digonal wipe left top: from left top to right bottom<br />
. digonal wipe right top: from right top to left bottom<br />
. digonal wipe left bottom: from left bottom to right top<br />
. digonal wipe right bottom: from right bottom to left top<br />
. extend from center H: from horizontal center to both sides<br />
. extend from center V: from vertical center to both sides<br />
. compress to center H: from top and bottom to center.<br />
. compress to center V: from right and left to center.<br />
. window H: from four window's top side to bottom side.<br />
. window V: from four window's left side to right side.<br />
.<br />
wipe from edge to center: from 4 edges to center.<br />
6. During viewing files, “ “ may appear when pressing "Angle” or "Subtitle" or "Audio"<br />
or "A-B" or "Title" etc; in this situation these options are unavailable to operate.<br />
7. When viewing JPG files, press " " , pictures will be displayed in thumbnail mode,<br />
press or “OK" button to select one picture to view<br />
Playing MP3 files<br />
PLAYING JPG /MP3 FILE<br />
1.Place MP3 disc into the disc door or insert USB disk, SD card to USB port or SD card slot.<br />
Press “ / ” or “OK” button to choose a MP3 file; Press “ ” or “ OK ” button to play the<br />
file selected.<br />
16<br />
00 36 03 43<br />
Dir 001<br />
\Ctyy\<br />
Mp3<br />
......<br />
TRACK01<br />
Mp3 TRACK02<br />
Mp3 TRACK03<br />
Mp3 TRACK04<br />
Mp3 TRACK05
--General Setup Page--<br />
TV Display Wide<br />
Angle Mark ON<br />
TV Type PAL<br />
Screen Saver ON<br />
OSD Lang ENG<br />
Go to General Setup Page<br />
General Setup Page<br />
--General Setup Page--<br />
TV Display Wide<br />
Angle Mark ON<br />
TV Type PAL<br />
Screen Saver ON<br />
OSD Lang ENG<br />
Set TV Display Mode<br />
--General Setup Page--<br />
TV Display Wide<br />
Angle Mark ON<br />
TV Type PAL<br />
Screen Saver ON<br />
OSD Lang ENG<br />
Set Angle Mark<br />
--General Setup Page--<br />
TV Display Wide<br />
Angle Mark ON<br />
TV Type PAL<br />
Screen Saver ON<br />
OSD Lang ENG<br />
Set TV Standrd<br />
--General Setup Page--<br />
TV Display Wide<br />
Angle Mark ON<br />
TV Type PAL<br />
Screen Saver ON<br />
OSD Lang ENG<br />
Set Screen Saver<br />
Normal/PS<br />
Normal/LB<br />
Wide<br />
On<br />
Off<br />
PAL<br />
NTSC<br />
On<br />
Off<br />
SYSTEM SETUP<br />
Press”Setup”button,the main menu will be displayed on the<br />
screen In the General Setup Page, Press button to highlight<br />
this item.<br />
Press OK button to access.<br />
Press button to exit.<br />
Press SETUP to go back to normal playback.<br />
TV display:<br />
Enter this option,user can set screen display format<br />
(Nomal/PS,Nomal/LB,Wide)<br />
The default is "Wide"<br />
Note<br />
The function depends on the display ratio with which the<br />
DVD disc is recorded.<br />
Please choose “Wide(16:9)"when using a16:9 wide screen<br />
TV set<br />
Angle Mark:<br />
Enter this option to set angle mark during playback.<br />
Optional setting: ON, OFF<br />
The default is: ON<br />
TV Type:<br />
Enter this option to select DVD video out signal type. Set this<br />
to correspond with your TV's Video System type. PAL is the<br />
standard used in Australia.<br />
The default is PAL.<br />
Screen Saver<br />
Enter this option to active/turnoff the screen saver function.<br />
The screensaver prevents burn in damage to the player's<br />
screen.<br />
The default is ON.<br />
17
--General Setup Page--<br />
TV Display Wide<br />
Angle Mark ON<br />
TV Type PAL<br />
Screen Saver ON<br />
OSD Lang ENG<br />
Video Setup Page<br />
--Video Setup Page--<br />
Panel Quality<br />
Go to Video Setup Page<br />
English<br />
Password Setup Page<br />
--Password Setup Page--<br />
Password<br />
Go To Password Setup Page<br />
Preference Page<br />
18<br />
Set OSD Language<br />
--Preference Page--<br />
Audio ENG English<br />
Subtitle OFF<br />
Disc Menu ENG<br />
Parental<br />
Default<br />
Preference Audio Language<br />
SYSTEM SETUP<br />
OSD Language:<br />
In the option user can set OSD menu language English.<br />
The default:English<br />
Enter this option, user can adjust picture quality of video<br />
output. There are items available to be adjusted:<br />
Brightness, Contrast, Hue and Saturation.<br />
For all these items the default is 00<br />
The factory set password is"8888",please remember the<br />
renewed password. In case of forgetting it, please press<br />
default password"8888"<br />
Audio:<br />
Enter this option, user can select your preferred audio<br />
language for DVDs.<br />
The default is English<br />
Note<br />
The audio language depends on the material on each disc.<br />
<strong>User</strong> can also change the audio language during playback<br />
by pressing the Audio button.
--Preference Page--<br />
Audio ENG<br />
Subtitle OFF English<br />
Disc Menu ENG Off<br />
Parental<br />
Default<br />
Preferred Subtitle Language<br />
--Preference Page--<br />
Audio ENG English<br />
Subtitle OFF<br />
Disc Menu ENG<br />
Parental<br />
Default<br />
Preferred Menu Language<br />
--Preference Page--<br />
Audio ENG<br />
Subtitle OFF<br />
Disc Menu ENG<br />
Paretal<br />
Default<br />
Set Parental Control<br />
--Preference Page--<br />
Load Factory Setting<br />
1 KID SAFE<br />
2 G<br />
3 PG<br />
4 PG 13<br />
5 PGR<br />
6 R<br />
7 NC 17<br />
8 ADULT<br />
Audio ENG<br />
Subtitle OFF<br />
Disc Menu ENG<br />
Parental<br />
Default Reset<br />
SYSTEM SETUP<br />
Subtitle<br />
Select your preferred language to show the subtitles<br />
on the screen.<br />
The default is OFF<br />
The subtitle languages depend on the<br />
information available on each disc,You can also change the<br />
subtitle language during playback by press the SUBTITLE<br />
button.<br />
Disc Menu<br />
This function allows you to choose the menu language<br />
stored on the disc.<br />
The default is English.<br />
Note: the disc menu languages depend on the<br />
information available on the disc.<br />
Parental:<br />
Enter this option to set the parental control level to some<br />
unsuitable disc scenes being watched by the children.<br />
Optional parental control levels: KID SAFE, G, PG, PG 13, PGR,<br />
R, Nc17, ADULT.<br />
The default of this option is ADULT.<br />
Default:<br />
Set all settings to factory default state.<br />
Note: The Parental level setting will not be reset by this<br />
operation.<br />
19
20<br />
Power Supply<br />
Power Consumption<br />
Signal System<br />
Video Output<br />
Audio Output<br />
Headphone Terminal<br />
Frequency Response<br />
Signal/Noise(Audio)<br />
Dynamic Range<br />
Panel Size<br />
Laser Wavelength<br />
Operating Conditions<br />
Rechargeable Battery<br />
Dimensions<br />
Weight<br />
SPECIFICATION<br />
DC 9-12V<br />
< 10W<br />
PAL/NTSC<br />
1 Vp-p/ 75ohm, unbalanced, 3.5mm mini Jack *1<br />
1.4Vrms / 10Kohm, 3.5mm mini Jack *1<br />
3.5mm stereo mini jack *1<br />
20 Hz - 20KHz<br />
<<br />
<<br />
80dB<br />
85dB<br />
7 inch (16:9)<br />
650nm/ 795nm<br />
Temperature: 0~40°C Status: Horizontal<br />
Lithium Polymer<br />
Main Unit:212x167x40mm Slave screen:212x166.5x25mm<br />
Main Unit: 0.7kg Slave screen:0.36kg<br />
Support device SD/MMC/Full Speed USB2.0<br />
Device capacity Up to 8GB SD/8GB MMC/8GB USB<br />
Remark This model is compatible with 9~12V vehicles
Rechargeable Battery Use<br />
BATTERY<br />
The unit utilizes long-life Li polymer battery for portable power supply. The battery has<br />
no "Memory Effect" and thus can be recharged safely regardless of whether the battery<br />
is fully or partially discharged. It's enough to recharge no longer than 6H each time, fully<br />
recharged battery can last about 2 hours.<br />
The unit will access to Standby mode automatically when the battery is low.<br />
If the battery does not work to your expectation, please consult the service centre. Do<br />
not attempt to replace or repair the battery by yourself unless you are qualified service<br />
personnel.<br />
Please note:<br />
Battery will not be chareged during playback. This is designed to prolong the battery life<br />
and protect it from being overcharged.<br />
Precautions related to Battery Recharge<br />
The battery can be only recharged when turning power to OFF state, and keep continuous<br />
power supply, the red light will be on, and the light will turn Green when it's fully charged.<br />
Using and maintaining rechargeable battery supply<br />
1. The normal working temperature is: 0°C ~40°C ;<br />
2. Always unplug AC/DC power supply for the unit when not in use;<br />
3. It is normal for the unit to produce heat during playback, however, the unit should not<br />
be used for extended periods or left unattended.<br />
4. Avoid having the unit collide with any objects, and place away from all possible heat<br />
sources or damp areas.<br />
21
22<br />
MOUNTING BAG
TROUBLESHOOTING<br />
The icon appears on screen<br />
Ensure there is no restriction on the disc's software<br />
Ensure the feature is supported by the disc<br />
Ensure the feature is available at the moment<br />
Ensure requested ttitle or chapter is not out of range<br />
The player can not advance through a movie<br />
You can't advance through the opening credits and warning information that appears at the beginning of<br />
movies because the disc is programmed to prohibit that action.<br />
No forward or backward scan<br />
Some discs have sections that prohibit rapid scanning or chapter skip;<br />
If you try to skip through the warning information and credits at the beginning of a movie, you won't be able to.<br />
This part of the movie is often programmed to prohibit skipping through it.<br />
23
If at any time in the future you should need to dispose of this<br />
product please note that waste electrical products should not<br />
be disposed of with household waste. Please recycle where<br />
facilities exist. Check with your Local Authority or retailer for<br />
recycling advice.(Waste Electrical and Electronic equipment<br />
Directive)<br />
Owing to continuous improvement, no prior notice will be given regarding changes on above<br />
feature and spec.<br />
Copyright<br />
This manual contains information protected by copyright law.<br />
No part of this document may be used or reproduced in any form or by any means, or<br />
stored in a database/retrieval system without prior written permission from us.<br />
The information of this manual is based on the current version of the product.<br />
We reserve the right to alter the content without prior notice.<br />
All brand names in this manual are the property of their respective owners.<br />
24