Silver Efex Pro - User Guide - Nik Software
Silver Efex Pro - User Guide - Nik Software
Silver Efex Pro - User Guide - Nik Software

Create successful ePaper yourself
Turn your PDF publications into a flip-book with our unique Google optimized e-Paper software.
<strong>User</strong> <strong>Guide</strong>
Chapter 1<br />
Introduction<br />
Introduction to <strong>Silver</strong> <strong>Efex</strong> <strong>Pro</strong> and the <strong>User</strong> <strong>Guide</strong><br />
© 2007 Kimberly Loeper
Chapter 1 : Introduction<br />
© 2007 Laurie Shupp<br />
Introduction<br />
Welcome to <strong>Silver</strong> <strong>Efex</strong> <strong>Pro</strong>, the most powerful tool for creating<br />
dynamic black and white images. <strong>Silver</strong> <strong>Efex</strong> <strong>Pro</strong> offers the<br />
traditional tools of the darkroom while utilizing the flexibility and<br />
precision offered with digital photography.<br />
By combining unique algorithms, patented U Point technology, and<br />
a full range of black and white specific tools, <strong>Silver</strong> <strong>Efex</strong> <strong>Pro</strong> provides<br />
the power and precision for creating stunning digital black and white<br />
photographs.<br />
<strong>Silver</strong> <strong>Efex</strong> <strong>Pro</strong> <strong>User</strong> <strong>Guide</strong><br />
What’s in the <strong>User</strong> <strong>Guide</strong><br />
In addition to providing installation instructions, the <strong>User</strong> <strong>Guide</strong><br />
shows you how to access and apply the filter’s effect to your images.<br />
The typographical conventions used in this manual are:<br />
• <strong>Silver</strong> <strong>Efex</strong> <strong>Pro</strong> processes and user interface components appear<br />
in Initial Caps, with first instances in Bold Caps. (In contextappropriate<br />
cases, later instances also appear in Bold Caps.)<br />
• Specific control inputs appear in Bold Italic. Control inputs can<br />
be menu items, buttons, or sliders. Where first instances coincide<br />
with specific control inputs, the term appears in Bold Italic.<br />
3
Chapter 2<br />
Installation<br />
Installing and Accessing <strong>Silver</strong> <strong>Efex</strong> <strong>Pro</strong> <br />
© 2008 Sean Dyroff
Chapter 2 : Installation<br />
Installation<br />
<strong>Silver</strong> <strong>Efex</strong> <strong>Pro</strong> is a plug-in for Adobe ® Photoshop ® and other<br />
Photoshop plug-in compatible applications, Adobe Photoshop<br />
Lightroom ® and Apple ® Aperture . The installer provided with<br />
<strong>Silver</strong> <strong>Efex</strong> <strong>Pro</strong> automatically attempts to locate a copy of Adobe<br />
Photoshop or Adobe Photoshop Elements, Adobe Photoshop<br />
Lightroom or Apple Aperture.<br />
Installing <strong>Silver</strong> <strong>Efex</strong> <strong>Pro</strong> and the Selective Tool<br />
Before you install <strong>Silver</strong> <strong>Efex</strong> <strong>Pro</strong>, please close all applications<br />
including Adobe Photoshop, Adobe Photoshop Lightroom, Apple<br />
Aperture or other image editing applications that will serve as host<br />
for <strong>Silver</strong> <strong>Efex</strong> <strong>Pro</strong>. Please do not open any other applications during<br />
the installation process.<br />
To begin installation:<br />
Double-click on the installation file provided either on your <strong>Silver</strong><br />
<strong>Efex</strong> <strong>Pro</strong> CD or downloaded from the <strong>Nik</strong> <strong>Software</strong> web site. A window<br />
appears displaying the <strong>Silver</strong> <strong>Efex</strong> <strong>Pro</strong> Setup Wizard.<br />
Double-click<br />
The installer walks you through the procedure.<br />
the Installer<br />
After you have read the Read Me file and accepted the End <strong>User</strong><br />
License Agreement, the installer prompts you for the plug-in location<br />
of your image editing application.<br />
<strong>Silver</strong> <strong>Efex</strong> <strong>Pro</strong> <strong>User</strong> <strong>Guide</strong><br />
The installer attempts to locate the most recent installation<br />
of Adobe Photoshop or Adobe Photoshop Elements, and if<br />
successful, displays the recommended folder. When installing into<br />
Adobe Photoshop Lightroom or Apple Aperture, the installer will<br />
automatically install into the appropriate location.<br />
<strong>Silver</strong> <strong>Efex</strong> <strong>Pro</strong><br />
Setup<br />
If the installer is unable to locate Adobe Photoshop or<br />
Adobe Photoshop Elements, or if you are using an image editor<br />
other than Adobe Photoshop, you must specify the appropriate<br />
installation path.<br />
For Adobe Photoshop or Adobe Photoshop Elements, this location is<br />
the Plug-Ins folder located under the application’s main folder. For<br />
example:<br />
Adobe Photoshop<br />
Windows – C:\<strong>Pro</strong>gram Files\Adobe\Adobe Photoshop\Plug-Ins<br />
Macintosh – Macintosh HD : Applications : Adobe Photoshop : Plug-Ins<br />
5
Chapter 2 : Installation<br />
Adobe Photoshop Elements<br />
Windows – C:\<strong>Pro</strong>gram Files\Adobe\Adobe Photoshop Elements\<br />
Plug-Ins<br />
Macintosh – Macintosh HD : Applications : Adobe Photoshop<br />
Elements : Plug-Ins<br />
Click Browse… to open the Browse for Folder window, and then<br />
navigate to the appropriate folder.<br />
Note: For guidance on the location of Plug-Ins in applications other<br />
than Adobe Photoshop or Adobe Photoshop Elements, please refer<br />
to your application’s user manual.<br />
After selecting the appropriate folder location, click Install. When<br />
the installation is complete, the final page of the installer appears.<br />
If you want <strong>Silver</strong> <strong>Efex</strong> <strong>Pro</strong> to be automatically added to Lightroom’s<br />
list of External Editors, leave the Add as External Editor for Lightroom<br />
box checked. The Add as External Editor for Lightroom option is only<br />
available if Lightroom is detected during installation. Instructions<br />
are provided within this chapter to manually add <strong>Silver</strong> <strong>Efex</strong> <strong>Pro</strong> as<br />
an external editor for Lightroom. (Please see .)<br />
If you want the Selective Tool to open each time Adobe Photoshop<br />
or Adobe Photoshop Elements launches, leave the Open the <strong>Nik</strong><br />
Selective Tool automatically box checked. The Selective Tool lets<br />
you apply <strong>Silver</strong> <strong>Efex</strong> <strong>Pro</strong> by automating the layer systems in Adobe<br />
Photoshop or Adobe Photoshop Elements. (Please see Selective Tool.)<br />
Uncheck this box to prevent the Selective Tool from opening each<br />
time Adobe Photoshop or Adobe Photoshop Elements launches. You<br />
can change this option within the Selective Tool settings interface.<br />
(Please see Selective Tool Settings.)<br />
<strong>Silver</strong> <strong>Efex</strong> <strong>Pro</strong> <strong>User</strong> <strong>Guide</strong><br />
Note: The Selective Tool is available only with Adobe Photoshop<br />
and Adobe Photoshop Elements serving as host for <strong>Silver</strong> <strong>Efex</strong> <strong>Pro</strong>.<br />
Click Finish to complete the installation process.<br />
Accessing <strong>Silver</strong> <strong>Efex</strong> <strong>Pro</strong> and the Selective Tool<br />
in Adobe Photoshop<br />
After completing the installation, launch your image<br />
editing application.<br />
In Adobe Photoshop and Adobe Photoshop Elements, <strong>Silver</strong> <strong>Efex</strong> <strong>Pro</strong><br />
is accessed from the Filter menu. To begin using <strong>Silver</strong> <strong>Efex</strong> <strong>Pro</strong> in<br />
Photoshop or Photoshop Elements:<br />
To begin using <strong>Silver</strong> <strong>Efex</strong> <strong>Pro</strong>:<br />
1. Open the image that you would like to enhance.<br />
2. Click the Filter menu.<br />
3. Roll over the <strong>Nik</strong> <strong>Software</strong> sub-menu. A popup menu appears.<br />
4. Select <strong>Silver</strong> <strong>Efex</strong> <strong>Pro</strong> from the popup.<br />
The <strong>Silver</strong> <strong>Efex</strong> <strong>Pro</strong> interface appears, displaying the image specified<br />
in step 1 above.<br />
You can access the Selective Tool by navigating to one of the<br />
following locations:<br />
Adobe Photoshop<br />
File > Automate<br />
Adobe Photoshop Elements<br />
File > Automation Tools<br />
6
Chapter 2 : Installation<br />
Accessing <strong>Silver</strong> <strong>Efex</strong> <strong>Pro</strong> in Apple Aperture<br />
In Apple Aperture, <strong>Silver</strong> <strong>Efex</strong> <strong>Pro</strong> is accessed from the Images menu.<br />
To begin using <strong>Silver</strong> <strong>Efex</strong> <strong>Pro</strong> in Apple Aperture:<br />
1. Highlight the image(s) that you wish to enhance with<br />
<strong>Silver</strong> <strong>Efex</strong> <strong>Pro</strong>.<br />
2. Click the Images menu.<br />
3. Roll over the Edit With sub-menu. A popup menu appears.<br />
4. Select <strong>Silver</strong> <strong>Efex</strong> <strong>Pro</strong>… from the popup.<br />
The <strong>Silver</strong> <strong>Efex</strong> <strong>Pro</strong> interface appears, displaying the image(s)<br />
specified in step 1 above.<br />
Adding <strong>Silver</strong> <strong>Efex</strong> <strong>Pro</strong> to Lightroom as an External<br />
Editor<br />
If Lightroom is found during the installation of <strong>Silver</strong> <strong>Efex</strong> <strong>Pro</strong> for<br />
Lightroom, <strong>Silver</strong> <strong>Efex</strong> <strong>Pro</strong> can automatically be added as an external<br />
editor. <strong>Silver</strong> <strong>Efex</strong> <strong>Pro</strong> can also be manually added as an external<br />
editor providing easy access to edit your photos in <strong>Silver</strong> <strong>Efex</strong> <strong>Pro</strong>.<br />
Follow the steps below to manually add <strong>Silver</strong> <strong>Efex</strong> <strong>Pro</strong> as an external<br />
editor.<br />
1. Open the Preferences in Lightroom.<br />
2. Click the External Editing tab.<br />
3. In the Additional External Editor section select a desired File<br />
Format, Color Space, Bit Depth, Resolution, and Compression.<br />
Note: <strong>Silver</strong> <strong>Efex</strong> <strong>Pro</strong> is only compatible with TIFF files (8 or 16-bit,<br />
with no compression or LZW compression).<br />
<strong>Silver</strong> <strong>Efex</strong> <strong>Pro</strong> <strong>User</strong> <strong>Guide</strong><br />
4. Click on Choose to select an application. Navigate to the<br />
location of <strong>Silver</strong> <strong>Efex</strong> <strong>Pro</strong>.<br />
On Windows, the default installation location for <strong>Silver</strong> <strong>Efex</strong><br />
<strong>Pro</strong> will be:<br />
C:\<strong>Pro</strong>gram Files\<strong>Nik</strong> <strong>Software</strong>\<strong>Silver</strong> <strong>Efex</strong> <strong>Pro</strong> for Lightroom\<br />
On Macintosh, the default installation location for <strong>Silver</strong> <strong>Efex</strong><br />
<strong>Pro</strong> will be:<br />
Macintosh HD : Applications : <strong>Nik</strong> <strong>Software</strong> : <strong>Silver</strong> <strong>Efex</strong> <strong>Pro</strong> for<br />
Lightroom<br />
5. Select the <strong>Silver</strong> <strong>Efex</strong> <strong>Pro</strong> file and click Choose.<br />
6. Under the Preset drop-down menu, select Save Current<br />
Settings as New Preset… and name the preset.<br />
<strong>Silver</strong> <strong>Efex</strong> <strong>Pro</strong> can then be easily accessed under the Photo menu as<br />
a preset external editor.<br />
Accessing <strong>Silver</strong> <strong>Efex</strong> <strong>Pro</strong> in Lightroom<br />
Once <strong>Silver</strong> <strong>Efex</strong> <strong>Pro</strong> is added to Lightroom as an external editor,<br />
<strong>Silver</strong> <strong>Efex</strong> <strong>Pro</strong> is accessed from the Photo menu.<br />
To begin using <strong>Silver</strong> <strong>Efex</strong> <strong>Pro</strong> in Lightroom:<br />
1. Highlight the image(s) that you wish to enhance with <strong>Silver</strong><br />
<strong>Efex</strong> <strong>Pro</strong>.<br />
2. Click the Photo menu.<br />
3. Roll over the Edit In sub-menu. A popup menu appears.<br />
7
Chapter 2 : Installation<br />
4. Select <strong>Silver</strong> <strong>Efex</strong> <strong>Pro</strong> from the popup.<br />
5. After selecting <strong>Silver</strong> <strong>Efex</strong> <strong>Pro</strong>, select whether to Edit Original,<br />
Edit a Copy, or Edit Copy with Lightroom Adjustments.<br />
Note: If Edit a Copy with Lightoom Adjustments is selected, the<br />
Copy File Options must be determined as well. Select the File<br />
Format, Color Space, Bit Depth, Resolution and Compression for<br />
the new file to be edited in <strong>Silver</strong> <strong>Efex</strong> <strong>Pro</strong>*.<br />
*<strong>Silver</strong> <strong>Efex</strong> <strong>Pro</strong> is only compatible with TIFF and JPEG files (8 or 16bit<br />
with no compression or LZW compression).<br />
6. Click Edit and the <strong>Silver</strong> <strong>Efex</strong> <strong>Pro</strong> interface appears, displaying<br />
the image(s) specified in Step 1 above.<br />
<strong>Silver</strong> <strong>Efex</strong> <strong>Pro</strong> <strong>User</strong> <strong>Guide</strong><br />
8
Chapter 3<br />
Workflow<br />
Workflow and Tips for Enhancing Images<br />
© 2008 Tim Mathiesen
Chapter 3 : Workflow<br />
Workflow<br />
The order of steps involved in enhancing an image varies, depending<br />
on the image. In general, there are only a few guidelines to consider:<br />
- Apply noise reduction, such as with <strong>Nik</strong> <strong>Software</strong> Dfine® 2.0, as<br />
early as possible in the process.<br />
- Apply RAW Presharpening, if desired, with <strong>Nik</strong> <strong>Software</strong><br />
Sharpener <strong>Pro</strong> 3.0’s RAW Presharpener filter.<br />
- Apply light and color enhancements with <strong>Nik</strong> <strong>Software</strong><br />
Viveza (global, then local), and end with enhancements<br />
using <strong>Nik</strong> <strong>Software</strong> Color <strong>Efex</strong> <strong>Pro</strong> 3.0 or <strong>Nik</strong> <strong>Software</strong><br />
<strong>Silver</strong> <strong>Efex</strong> <strong>Pro</strong>.<br />
- Apply output and creative sharpening with <strong>Nik</strong> <strong>Software</strong><br />
Sharpener <strong>Pro</strong> 3.0’s Output Sharpener filter.<br />
Note: <strong>Silver</strong> <strong>Efex</strong> <strong>Pro</strong> cannot process images in the grayscale color mode.<br />
Workflow Diagram<br />
Apply Noise Reduction<br />
with Dfine 2.0<br />
Apply RAW Presharpening<br />
with Sharpener <strong>Pro</strong> 3.0<br />
Control Color and<br />
Light with Viveza<br />
Apply Enhancements<br />
with Color <strong>Efex</strong> <strong>Pro</strong> 3.0<br />
OR<br />
Convert to black and white<br />
with <strong>Silver</strong> <strong>Efex</strong> <strong>Pro</strong><br />
<strong>Silver</strong> <strong>Efex</strong> <strong>Pro</strong> <strong>User</strong> <strong>Guide</strong><br />
© 2007 Matt Bagwell<br />
Apply Output Sharpening<br />
with Sharpener <strong>Pro</strong> 3.0<br />
10
Chapter 3 : Workflow<br />
<strong>Silver</strong> <strong>Efex</strong> <strong>Pro</strong> Workflow<br />
Start by exploring the Style Browser and select a potential style to<br />
apply to the image. Then adjust the overall brightness, contrast,<br />
and structure of the image. Apply any specific brightness, contrast,<br />
and structure enhancements to local areas or objects using control<br />
points. Finally, stylize your image with the Film Types and Stylizing<br />
sections. In other words, move from the general to the specific, and<br />
then finish with a stylization to create a mood or feeling.<br />
For best results in <strong>Silver</strong> <strong>Efex</strong> <strong>Pro</strong>, perform the tasks below in<br />
the given order:<br />
1. Explore the Style Browser and if you like, choose a style to<br />
apply to your image.<br />
2. Adjust the overall image brightness, contrast, and structure<br />
within the image.<br />
3. Add control points to objects in the image that you would like<br />
to selectively control brightness, contrast, and structure.<br />
4. Select a color filter to adjust the base tonal conversion<br />
and contrast.<br />
5. Explore and apply a film type preset if desired.<br />
6. Browse and apply a stylization to your image if desired.<br />
7. Review the image in the Loupe.<br />
8. Apply the filter’s effect by clicking OK (Photoshop)<br />
or Save (Aperture/Lightroom).<br />
1<br />
Adobe ® Photoshop ® Interface<br />
<strong>Silver</strong> <strong>Efex</strong> <strong>Pro</strong> <strong>User</strong> <strong>Guide</strong><br />
2008 © Josh Haftel<br />
2<br />
3<br />
4<br />
5<br />
6<br />
7<br />
8<br />
11
Chapter 3 : Workflow<br />
Using <strong>Silver</strong> <strong>Efex</strong> <strong>Pro</strong> as a Smart Filter<br />
(Adobe Photoshop Only)<br />
When working within Adobe Photoshop CS3 and CS4, <strong>Silver</strong> <strong>Efex</strong> <strong>Pro</strong><br />
can be applied as a Smart Filter. Smart Filters enable you to adjust<br />
the filter’s settings even after the filter interface has been closed.<br />
If saving the file as a PSD or TIFF, you can even adjust the filter<br />
settings after the image and Photoshop have been closed, enabling<br />
a non-destructive workflow.<br />
When working as a Smart Filter, the Brush button is disabled, and<br />
the filter will be applied to the active layer (even if the After Clicking<br />
OK setting is set to the Separate Layer option).<br />
Note: <strong>Silver</strong> <strong>Efex</strong> <strong>Pro</strong> can only work as a Smart Filter feature with<br />
Adobe Photoshop CS3 and CS4 as the host.<br />
To use <strong>Silver</strong> <strong>Efex</strong> <strong>Pro</strong> as a Smart Filter:<br />
1. Select the layer in the Layers Palette to apply <strong>Silver</strong> <strong>Efex</strong> <strong>Pro</strong> to.<br />
2. Click the Filter menu.<br />
3. Select Convert for Smart Filters.<br />
4. Select the Filter menu again.<br />
5. Roll over the <strong>Nik</strong> <strong>Software</strong> sub-menu. A popup menu appears.<br />
6. Select <strong>Silver</strong> <strong>Efex</strong> <strong>Pro</strong>.<br />
Note: Perform any rotations or transforms to the image prior to<br />
applying <strong>Silver</strong> <strong>Efex</strong> <strong>Pro</strong> as a Smart Filter. Applying a rotation or<br />
transformation after applying <strong>Silver</strong> <strong>Efex</strong> <strong>Pro</strong> as a Smart Filter can<br />
result in a different filter effect.<br />
<strong>Silver</strong> <strong>Efex</strong> <strong>Pro</strong> <strong>User</strong> <strong>Guide</strong><br />
<strong>Silver</strong> <strong>Efex</strong> <strong>Pro</strong> can be applied to multiple images when working in<br />
Lightroom and Aperture.<br />
Multiple Image Controls (Lightroom)<br />
To apply <strong>Silver</strong> <strong>Efex</strong> <strong>Pro</strong> to multiple images when working in<br />
Lightroom, follow the steps below:<br />
1. Highlight the images you wish to enhance. Hold the Shift key<br />
to select a sequence of images or the Control/Command key<br />
to select individual images.<br />
2. Click on the Photo menu.<br />
3. Roll over the Edit In sub-menu option. A popup will appear.<br />
4. Select <strong>Silver</strong> <strong>Efex</strong> <strong>Pro</strong> from the popup.<br />
Multiple Image Controls (Aperture)<br />
To apply <strong>Silver</strong> <strong>Efex</strong> <strong>Pro</strong> to multiple images when working in<br />
Aperture, follow the steps below:<br />
1. Highlight the images you wish to enhance. Hold the Shift key<br />
to select a sequence of images or the Command key to select<br />
individual images.<br />
2. Click on the Images menu.<br />
3. Roll over the Edit With sub-menu option. A popup will appear.<br />
4. Select <strong>Silver</strong> <strong>Efex</strong> <strong>Pro</strong>… from the popup.<br />
When using <strong>Silver</strong> <strong>Efex</strong> <strong>Pro</strong> with multiple images, three new<br />
image controls are available. The new image controls available<br />
are Previous, Next and Save All. Please see in the Filter Interface<br />
chapter for more information.<br />
12
Chapter 4<br />
U Point ® Technology<br />
The Power Behind <strong>Silver</strong> <strong>Efex</strong> <strong>Pro</strong> <br />
© 2008 Victor Ha
Chapter 4 : U Point ® Technology<br />
U Point ® Technology<br />
<strong>Silver</strong> <strong>Efex</strong> <strong>Pro</strong> is powered by U Point image editing technology.<br />
U Point technology enables you to modify sections of a photograph<br />
directly or control where an enhancement is being applied<br />
selectively all without having to go through the time-consuming<br />
process of making a mask normally required in other<br />
software applications.<br />
U Point technology provides precise and direct selective control,<br />
providing powerful yet simple photographic manipulation.<br />
The U Point powered control points found within <strong>Silver</strong> <strong>Efex</strong><br />
<strong>Pro</strong> enable you to work with your images and selectively adjust<br />
brightness, contrast, and structure without the need for complicated<br />
selections or masks.<br />
<strong>Silver</strong> <strong>Efex</strong> <strong>Pro</strong> <strong>User</strong> <strong>Guide</strong><br />
Control points work by identifying an object based on a number of<br />
criteria. When you place your first control point, U Point technology<br />
identifies the unique elements of the object on which you place a<br />
control point, including its position, color, saturation, and texture.<br />
By identifying these elements, and in conjunction with the Size<br />
slider, the control point can determine the boundaries of the object<br />
in order to affect only that object and objects with like elements.<br />
With every control point that you apply to the image comes greater<br />
control over specific objects in the image. The additional control<br />
points ensure that the adjustments you make are being applied to<br />
the current object only, and placing a control point on an object<br />
with default settings prevents other control points from<br />
affecting that object.<br />
Through a unique mixing function, the effects of the control points<br />
are applied throughout the image so as to create a natural-looking,<br />
seamless result.<br />
For more information on U Point technology and how it works,<br />
please go to www.upoint.com.<br />
14
Chapter 5<br />
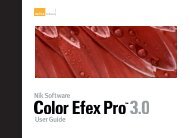
<strong>Silver</strong> <strong>Efex</strong> <strong>Pro</strong> Interface<br />
Overview of the <strong>Silver</strong> <strong>Efex</strong> <strong>Pro</strong> Interface<br />
© 2008 Cherie Steinberg-Cote
Chapter 5 : <strong>Silver</strong> <strong>Efex</strong> <strong>Pro</strong> Interface<br />
Filter Display<br />
Modes<br />
Style Browser<br />
View Tools<br />
Adobe Photoshop Interface<br />
Select, Zoom, and Pan Tools<br />
<strong>Silver</strong> <strong>Efex</strong> <strong>Pro</strong> <strong>User</strong> <strong>Guide</strong><br />
© 2008 Sean Dyroff<br />
Enhancement Controls<br />
Navigator Loupe<br />
Resize Corner<br />
16
Chapter 5 : <strong>Silver</strong> <strong>Efex</strong> <strong>Pro</strong> Interface<br />
Filter Display Modes<br />
<strong>Silver</strong> <strong>Efex</strong> <strong>Pro</strong> offers two modes for viewing the interface<br />
with the active image:<br />
Image Only<br />
Only the Image Preview and the filter controls are displayed.<br />
IMAGE ONLy SHORTCUTS<br />
Alt (Windows)/ Option (Macintosh) + 1<br />
Image + Style Browser<br />
A palette opens next to the Image Preview area and displays the Style<br />
Browser which contains preset styles that can be applied to the image<br />
with a single click. The Style Browser will display thumbnail previews of<br />
the current image with each style applied to it.<br />
IMAGE + STyLE BROWSER SHORTCUTS<br />
Alt (Windows)/ Option (Macintosh) + 2<br />
While working in the Image + Style Browser mode, you will see<br />
Style Tabs.<br />
Style Tabs<br />
The styles in <strong>Silver</strong> <strong>Efex</strong> <strong>Pro</strong> are organized into two different tabs for<br />
easy viewing and use.<br />
All Tab<br />
The All tab contains every style available inside <strong>Silver</strong> <strong>Efex</strong> <strong>Pro</strong>,<br />
including predefined styles as well as any custom styles.<br />
Favorites Tab<br />
<strong>Silver</strong> <strong>Efex</strong> <strong>Pro</strong> <strong>User</strong> <strong>Guide</strong><br />
The Favorites tab will contain any style marked as a favorite. Custom<br />
styles you create will automatically be added to the Favorites tab.<br />
You can add a favorite by clicking on the star next to the name of the<br />
desired style. To remove a style from the Favorites tab, click the star<br />
next to the name of the style again.<br />
Preview Modes<br />
<strong>Silver</strong> <strong>Efex</strong> <strong>Pro</strong> offers three modes for previewing the filter effect<br />
on the active image:<br />
Single Image Preview<br />
The image is displayed with the filter’s effect applied across the Image<br />
Preview area. To see the effect before and after, toggle Preview on and<br />
off with the Preview checkbox.<br />
Split Preview<br />
The image is displayed with a red line running either vertically or<br />
horizontally through it. The portion to the left or above the red line<br />
shows the image prior to applying the filter; the portion to the right or<br />
below the red line shows the image after the filter has been applied.<br />
You can move the image with the Pan Tool or click and drag the red<br />
line to observe the effect on the image’s detail, when zoomed to either<br />
100% or 300%.<br />
• Click the Rotate Preview button to alternate between<br />
vertical and horizontal split.<br />
17
Chapter 5 : <strong>Silver</strong> <strong>Efex</strong> <strong>Pro</strong> Interface<br />
Side-by-side Preview<br />
Two separate previews appear. The portion on the left or on top shows<br />
the image prior to applying the filter; the portion on the right or at<br />
bottom shows the image after the filter has been applied.<br />
The previews are linked for zooming and panning. This lets you see the<br />
before- and after-images as a whole, or at the fine-detail level.<br />
Preview<br />
• Click the Rotate Preview button to alternate between<br />
vertical and horizontal layout.<br />
Preview lets you toggle on and off a preview of the filter effect<br />
applied to the active image.<br />
• Click the Preview checkbox to alternate between displaying and<br />
hiding the effects.<br />
Select Tool<br />
The Select Tool lets you select and interact with control points.<br />
SELECT SHORTCUTS<br />
Press the A key to switch to this tool.<br />
Ctrl (Windows) / Command (Macintosh) to temporarily switch<br />
to this tool.<br />
Zoom Tool<br />
<strong>Silver</strong> <strong>Efex</strong> <strong>Pro</strong> <strong>User</strong> <strong>Guide</strong><br />
The Zoom Tool lets you zoom in and out of the active image. Select<br />
this tool, and then click on the area of the image that you want to<br />
magnify. To zoom out, press and hold the Alt (Windows) or Option<br />
(Macintosh) key and click on the image.<br />
<strong>Silver</strong> <strong>Efex</strong> <strong>Pro</strong> offers three zoom states:<br />
• Zoom to Fit to see the entire image within the Image Preview<br />
and automatically adjust the zoom factor as you change the size<br />
of the interface.<br />
• 100% to show the actual pixel details.<br />
• 300% to zoom even further into the image and view<br />
fine pixel detail.<br />
ZOOM SHORTCUTS<br />
Press the Z key to switch to this tool.<br />
Ctrl (Windows) / Command (Macintosh) + Spacebar to temporarily<br />
switch to this tool<br />
Ctrl (Windows) / Command (Macintosh) + ‘+’ to zoom in one level<br />
Ctrl (Windows) / Command (Macintosh) + ‘-’ to zoom out one level<br />
Ctrl (Windows) / Command (Macintosh) + 0 to Zoom to Fit<br />
Ctrl (Windows) / Command (Macintosh) + Alt (Windows) / Option<br />
(Macintosh) + 0 to zoom to 100%<br />
18
Chapter 5 : <strong>Silver</strong> <strong>Efex</strong> <strong>Pro</strong> Interface<br />
Pan Tool<br />
The Pan Tool lets you reposition the image while zoomed into the<br />
100% or 300% views. When the Loupe tool is enabled, the mouse<br />
pointer becomes a Pan Tool to let you reposition the content of the<br />
Loupe tool.<br />
PAN SHORTCUTS<br />
Press the H key to switch to this tool.<br />
Hold Spacebar to temporarily switch to this tool.<br />
Background Color Selector<br />
The Background Color Selector tool lets you change the color of the<br />
background surrounding the image. The three choices are light gray,<br />
medium gray, and dark gray.<br />
Image Preview<br />
The Image Preview area displays the active image and related<br />
information beneath the image.<br />
Image<br />
The active image is displayed with the view, preview mode,<br />
background and zoom amount you have configured. This area has<br />
three zoom states: zoom to fit, 100%, and 300%, controlled with<br />
the Zoom Tool or with keyboard shortcuts.<br />
(Please see Zoom Tool above.)<br />
Image Info<br />
The filename appears below the image. This is visible in the zoom to<br />
fit state. If Exif data is available, additional image information will<br />
be displayed under the filename.<br />
Enhancement Controls<br />
<strong>Silver</strong> <strong>Efex</strong> <strong>Pro</strong> <strong>User</strong> <strong>Guide</strong><br />
<strong>Silver</strong> <strong>Efex</strong> <strong>Pro</strong> offers a wide range of controls for creating powerful<br />
black and white images. The Enhancement Controls found on the<br />
right-hand side of <strong>Silver</strong> <strong>Efex</strong> <strong>Pro</strong> include controls for the global<br />
and selective tonality of the image. The Enhancement Controls<br />
also provide tools for emulating traditional black and white film<br />
types and stylizing your image with traditional toners and vignette<br />
controls. (For more information, please see the Enhancement<br />
Controls Chapter)<br />
Navigator Loupe<br />
The Navigator Loupe ensures that the<br />
appropriate information is displayed depending<br />
on the state of the Image Preview. In the zoom<br />
to fit view, the Loupe mode displays details<br />
under the mouse pointer at 100%, and image<br />
detail information after the filter is applied.<br />
When zoomed to 100% or 300%, the Navigator<br />
mode is displayed, giving you a bird’s eye view of where you are<br />
currently in the image. The view switches automatically between<br />
Navigator and Loupe for efficient workflow.<br />
Loupe Mode<br />
With the Image Preview in the zoom to fit state, the Navigator<br />
switches to Loupe mode.<br />
This ensures that you can always see the image detail at 100% while<br />
reviewing the filter’s effect where you position your mouse in the Preview.<br />
19
Chapter 5 : <strong>Silver</strong> <strong>Efex</strong> <strong>Pro</strong> Interface<br />
To lock in place the area displayed in the Loupe, click the pushpin<br />
icon in the lower-left corner of the Loupe, then click on the area of<br />
the image you want to keep inside the Loupe. To unlock the area,<br />
click the pushpin icon again. Alternately, right-click (Windows) or<br />
Control-click (Macintosh) to toggle the lock in place function.<br />
To pan within the Loupe display, click and drag the image.<br />
Navigator Mode<br />
When you switch from the zoom to fit state to 100% or 300%, the<br />
Navigator Loupe switches to the Navigator mode and a red rectangle<br />
indicates the area of the image currently displayed in the Image<br />
Preview. Click on the area of the image in the Navigator that you<br />
would like to display in the Image Preview.<br />
Zone System Map<br />
At the bottom of the Navigator Loupe there is a Zone System Map.<br />
The Zone System Map is designed to help you understand the tonal<br />
relationship of different areas in your photograph.<br />
A gradient map is shown with 11 distinct zones representing the full<br />
possible tonal range in your image. To see which parts of your image<br />
are in each zone, click on the zone in the Zone System Map and that<br />
zone will be highlighted in the image. Also, when you roll your cursor<br />
over a zone in the Zone System Map the corresponding areas will be<br />
highlighted in the Image Preview.<br />
The Zone System Map can work in coordination with the<br />
Enhancement Controls and control points to fine tune the entire tonal<br />
relationship of the image and specific objects in your image that you<br />
want at a particular zone.<br />
Filter controls<br />
<strong>Silver</strong> <strong>Efex</strong> <strong>Pro</strong> <strong>User</strong> <strong>Guide</strong><br />
Use the filter controls to apply or discard filter effects.<br />
The Brush and OK/Save buttons process and apply the specified<br />
filter’s effect to the active image. The Cancel button discards any<br />
settings specified in the current session, and closes <strong>Silver</strong> <strong>Efex</strong> <strong>Pro</strong><br />
without changing the image.<br />
Brush (Adobe Photoshop Only)<br />
Click Brush to apply the filter’s effect to a separate layer and<br />
then selectively paint the effect in, using the Selective Tool to<br />
automatically create and modify a layer mask.<br />
(Please see Selective Tool.)<br />
Cancel<br />
Click Cancel to prevent any effect from being applied to the image,<br />
close the current <strong>Silver</strong> <strong>Efex</strong> <strong>Pro</strong> session, and return to your image<br />
editing application.<br />
CANCEL SHORTCUT<br />
Press the Esc key to cancel.<br />
20
Chapter 5 : <strong>Silver</strong> <strong>Efex</strong> <strong>Pro</strong> Interface<br />
OK (Adobe Photoshop) / Save (Lightroom & Aperture)<br />
Click OK/Save to apply the specified filter to the image, close the<br />
current <strong>Silver</strong> <strong>Efex</strong> <strong>Pro</strong> session, and return to your image editing<br />
application. <strong>Silver</strong> <strong>Efex</strong> <strong>Pro</strong> also gives you the option of applying the<br />
filter to a separate layer or to the current layer in Adobe Photoshop<br />
or Photoshop Elements. (Please see Filter Interface Settings.)<br />
OK/SAVE SHORTCUT:<br />
Press Enter (Windows) / Return (Macintosh) key to apply the filter.<br />
Multiple Image Controls (Lightroom & Aperture)<br />
When using <strong>Silver</strong> <strong>Efex</strong> <strong>Pro</strong> with multiple images, three new image<br />
controls are available. The new image controls available are<br />
Previous, Next, and Save All.<br />
Previous<br />
The Previous button will go to the image previously enhanced within<br />
the current <strong>Silver</strong> <strong>Efex</strong> <strong>Pro</strong> session.<br />
Next<br />
The Next button will proceed to the next selected image in the<br />
current <strong>Silver</strong> <strong>Efex</strong> <strong>Pro</strong> session.<br />
Save All<br />
Click Save All to apply <strong>Silver</strong> <strong>Efex</strong> <strong>Pro</strong> to the images, and close the<br />
current <strong>Silver</strong> <strong>Efex</strong> <strong>Pro</strong> session, and return to Apple Aperture.<br />
SAVE ALL SHORTCUT:<br />
Press the Enter (Windows) / Return (Macintosh) key to apply <strong>Silver</strong><br />
<strong>Efex</strong> <strong>Pro</strong> to the selected images in the current <strong>Silver</strong> <strong>Efex</strong> <strong>Pro</strong> session.<br />
<strong>Silver</strong> <strong>Efex</strong> <strong>Pro</strong> <strong>User</strong> <strong>Guide</strong><br />
21
Chapter 6<br />
Style Browser<br />
Applying & Creating Styles in the Style Browser<br />
© 2004 Nadia Salameh
Chapter 6 : Style Browser<br />
Style Browser Modes<br />
The Style Browser provides an overview of all of the available styles within<br />
<strong>Silver</strong> <strong>Efex</strong> <strong>Pro</strong>, with thumbnails showing each style’s effect on the active<br />
image. The Style Browser is separated into two tabs, the All tab and the<br />
Favorites tab.<br />
All<br />
In the All tab, all available styles are displayed in a single column.<br />
Favorites<br />
The Favorites tab will only contain styles that you create or select as favorites.<br />
To add a style to the Favorites tab, click on the star next to the name of the<br />
style, it will be highlighted in red when selected as a favorite. To remove a<br />
style from the Favorites tab, click on the star again to deselect it.<br />
Add Style<br />
<strong>Silver</strong> <strong>Efex</strong> <strong>Pro</strong> lets you create your own styles which will save any settings<br />
from the Tonality, Color Filter, Film Type, and Stylizing controls. That style can<br />
then be applied to any image with one click.<br />
There are two ways to add a custom style to the Style Browser, either with the<br />
Add Style button at the bottom of the Style Browser or with the Add Style icon<br />
in the Style Browser list.<br />
To add a style, click the Add Style button or the Add<br />
Style icon and then type in a name for the style. The<br />
style will automatically be added to the Favorites tab<br />
and placed at the bottom of both the All tab and the<br />
Favorites tab.<br />
Add Style Icon Style Browser<br />
<strong>Silver</strong> <strong>Efex</strong> <strong>Pro</strong> <strong>User</strong> <strong>Guide</strong><br />
23
Chapter 6 : Style Browser<br />
Delete<br />
You may remove styles that were added<br />
using the Delete button. To remove a<br />
custom style, mouse over the style in<br />
the Style Browser and click the Delete<br />
button. This will remove the style from<br />
the Style Browser and cannot be undone.<br />
Export<br />
Styles can be exported as individual files<br />
and shared amongst friends. To export<br />
a style, simply rollover the desired style<br />
in the Style Browser and click on Export.<br />
Exporting a Style will save the style as<br />
a .sep file, and <strong>Silver</strong> <strong>Efex</strong> <strong>Pro</strong> will ask<br />
you for the destination folder. Select the<br />
destination, click Save, and then share it with friends.<br />
Update<br />
A style can also be updated with the<br />
current settings in the Enhancement<br />
Controls, replacing the old style. Adjust<br />
the Enhancement Controls and roll over<br />
the style you wish to update, and then<br />
click the Update button.<br />
You can also change the name of a style by double-clicking on the<br />
name in the style Browser and entering a new name.<br />
Import<br />
<strong>Silver</strong> <strong>Efex</strong> <strong>Pro</strong> <strong>User</strong> <strong>Guide</strong><br />
To import a style, click on the Import button and follow these steps:<br />
1. Click on the Import button.<br />
2. Browse for the style file and select Open.<br />
3. A new style will be added to the Style Browser.<br />
Note: Imported styles will be automatically added to the Favorites tab.<br />
24
Chapter 7<br />
Enhancement Controls<br />
Create the Perfect Black and White Image<br />
© 2008 Don Mahr
Chapter 7 : Enhancement Controls<br />
Tonality Controls<br />
The Tonality Controls section enables you to control brightness,<br />
contrast, and structure globally throughout the image. Additionally,<br />
access to control points to selectively control the brightness,<br />
contrast, and structure of objects can also be found within the<br />
Tonality Controls section.<br />
Brightness - Controls the overall lightness of the image.<br />
Contrast - Controls the overall contrast of the image.<br />
Structure - Controls the overall structure within the image.<br />
Increasing this slider emphasizes fine details throughout the image<br />
while decreasing this slider reduces the appearance of fine details<br />
for smoother surfaces.<br />
Add Control Point<br />
Clicking on this button will enable you to place a control point on<br />
your image and selectively control the tonality and structure of an<br />
object or area. Control points are based on U Point ® technology<br />
which lets you identify and isolate objects within a photograph<br />
by placing a control point on the object or area to be affected. By<br />
analyzing color, tonality, detail and location, U Point determines<br />
where to apply certain effects, according to the photographer’s<br />
needs. (For more information on U Point technology, please visit<br />
www.upoint.com.)<br />
All control points within the active image communicate with<br />
each other, providing continuity of control over multiple objects<br />
throughout the image.<br />
Each control point has four sliders:<br />
Size - Controls the size or reach of<br />
the control point. Click and drag this<br />
control to enlarge or reduce the control<br />
point’s reach.<br />
Brightness - Controls of the brightness<br />
of the selected object or area.<br />
<strong>Silver</strong> <strong>Efex</strong> <strong>Pro</strong> <strong>User</strong> <strong>Guide</strong><br />
Contrast - Controls the contrast of the selected object or area.<br />
Structure - Controls of the structure of the selected object or area.<br />
ADD NEW CONTROL POINT SHORTCUT<br />
Ctrl (Windows) / Command (Macintosh) + Shift + A<br />
Shadows & Highlights<br />
The <strong>Pro</strong>tect Shadows/<strong>Pro</strong>tect Highlights controls help you protect<br />
image details at both ends of the tonal range. The controls take<br />
advantage of the TrueLight function in <strong>Silver</strong> <strong>Efex</strong> <strong>Pro</strong> and modify<br />
the filter’s effect to preserve image details.<br />
When collapsed, this section displays one slider for protecting<br />
shadows and one for protecting highlights. As you click and drag<br />
either slider to the right or left to increase or decrease protection,<br />
notice the change in the details in the image.<br />
When expanded, this section displays not only the sliders, but also a<br />
histogram representing the full tonal range of the active image after<br />
the current enhancement has been applied. The histogram changes<br />
in real time as you adjust the filter controls and <strong>Pro</strong>tect Shadows/<br />
<strong>Pro</strong>tect Highlights sliders.<br />
26
Chapter 7 : Enhancement Controls<br />
The colored areas at both ends of the histogram help identify<br />
potential problems. The top and bottom 2.5% of tonal values<br />
(representing Shadows without Detail on the left and Highlights<br />
without Detail on the right) appear in red. The next 2.5% of the<br />
shadows and highlights (indicating Shadows with Detail on the left<br />
and Highlights with Detail on the right) appear in green.<br />
Next to each of the four colored areas (Shadows without Detail,<br />
Shadows with Detail, Highlights without Detail, Highlights with<br />
Detail) are numerical call-outs displaying the percentage of<br />
pixels from the active image in each of those four areas after the<br />
enhancement has been applied.<br />
<strong>Pro</strong>tect Shadows/<strong>Pro</strong>tect Highlights helps you keep your image<br />
details from falling into these areas. For best results, keep the<br />
greater part of the image between the green areas (Shadows with<br />
Detail and Highlights with Detail) of the histogram. Portions of the<br />
image in Shadows without Detail will likely print pure black; those in<br />
Highlights without Detail will likely print as paper white.<br />
Click and drag the <strong>Pro</strong>tect Shadows slider to the right to adjust<br />
the filter’s effect and prevent details from being moved into the<br />
Shadows without Detail area.<br />
Click and drag the <strong>Pro</strong>tect Highlights slider to the right to adjust the<br />
filter’s effect and prevent details from being “blown out” or being<br />
moved into the Highlights without Detail area.<br />
Note: In general, it is best to maintain the histogram in the region<br />
between Shadows without Details and Highlights without Details<br />
sections. Nevertheless, many good images have values in those<br />
areas of the histogram (e.g., highlight on a chrome bumper).<br />
Control Points<br />
<strong>Silver</strong> <strong>Efex</strong> <strong>Pro</strong> <strong>User</strong> <strong>Guide</strong><br />
The Control Points section will<br />
display a list of the control points<br />
used in an image. It will also<br />
provide an option to toggle on<br />
and off each individual control<br />
point’s effect and each control point’s selection. Use the checkbox<br />
on the control point list title to turn on and off all of the control<br />
points’ effects and use the reset button to remove all of the control<br />
points from the image.<br />
Duplicate<br />
The Duplicate button will duplicate the currently selected control points.<br />
DUPLICATE SHORTCUTS:<br />
Ctrl (Windows) / Command (Macintosh) + D to duplicate in place<br />
Alt (Windows) / Option (Macintosh) + Click and drag to duplicate and<br />
move a control point<br />
Delete<br />
To remove a control point, click the Select tool, and then click on the<br />
control point to be removed. Then either click the Delete button or<br />
press the Delete key on your keyboard.<br />
27
Chapter 7 : Enhancement Controls<br />
Color Filter<br />
The Color Filter section selects the color of<br />
the simulated filter, either with a preset filter<br />
color or with a filter color selected on the Hue<br />
slider in the Color Filter Details section. Use<br />
the Checkbox to turn on and off the Color Filter<br />
section’s effect and the Reset button to<br />
reset all of the controls in the section to the default.<br />
There are 6 preset Color Filters for quick easy selections. The 6 presets are<br />
Neutral, which has no color filter applied, and Red, Orange, Yellow, Green,<br />
and Blue for quick color filtration.<br />
Color Filter Details<br />
The Color Filter Details sub-section provides more advanced controls<br />
for selecting the hue of the color filtration and the strength of the color<br />
filtration, using the Hue and Strength sliders.<br />
Hue - Adjusts the color of the simulated filter and controls the relationship<br />
of colors in the image. This lightens objects of that color in the image and<br />
darkens objects of the complementary color.<br />
Strength - Slide to the left for less contrast between colors, to the right for<br />
more contrast between colors.<br />
Film Types<br />
<strong>Silver</strong> <strong>Efex</strong> <strong>Pro</strong> <strong>User</strong> <strong>Guide</strong><br />
The Film Types section contains 18 simulated<br />
black and white film types with controls for<br />
the grain, color sensitivity, and tone curve of<br />
each film. Use the Checkbox to turn on and off<br />
the Film Types section’s effect and the Reset<br />
button to reset all of the controls in the section to the default.<br />
Film Type - From the pull-down menu, select a type of film from<br />
any of the pre-defined film types.<br />
Grain<br />
By expanding the Grain sub-section, you<br />
have control over the amount of grain applied<br />
throughout the image. You are provided with<br />
the following controls:<br />
Grain per pixel - Adjusts the grain applied to the image. Slide to the left to<br />
have more visible grain and to the right to have finer grain.<br />
Hard/Soft - Adjusts the separation and visibility between the grain.<br />
Color Sensitivity<br />
Expand the Color Sensitivity sub-section<br />
to control the tonality of different colors<br />
throughout the image. You are provided<br />
with the following controls:<br />
Red through Violet – sliders control how<br />
bright or dark an object of that color appears.<br />
Slide to the left to make objects of that color<br />
darker, to the right to make them brighter.<br />
28
Chapter 7 : Enhancement Controls<br />
Tone Curve<br />
Expand the Tone Curve sub-section to control<br />
the tone curve for the image. Click to add<br />
anchor points to the curve to specify the<br />
brightness, contrast, and relationship of tonal<br />
values in the image.<br />
To remove an anchor point from the curve,<br />
select the point and drag it off of the<br />
Curve area.<br />
Stylizing<br />
The Stylizing section provides different<br />
stylizing techniques that can be applied to<br />
the image. The Stylizing section allows you to<br />
apply a toner to the image, apply a vignette to the image, or burn the edges<br />
of the image to stylize your black and white image. Use the Checkbox to<br />
turn on and off the stylizing effects and the Reset button to reset all of the<br />
controls in the section to the default.<br />
Toning<br />
The Toning section provides the ability<br />
to simulate different paper toners from a<br />
traditional darkroom as well as create your<br />
own custom toned image. There are a number<br />
of preset toning options and you can use<br />
the controls to fine tune the results for your<br />
perfectly toned image.<br />
Preset - From the pull-down menu, select<br />
a type of toning from one of the<br />
pre-defined toners.<br />
<strong>Silver</strong> <strong>Efex</strong> <strong>Pro</strong> <strong>User</strong> <strong>Guide</strong><br />
Strength - Sets the overall strength of the toning applied to the image.<br />
Increasing the Strength slider will set the highest Toning slider equal to the<br />
overall strength. Decreasing the Strength slider will relatively decrease the<br />
<strong>Silver</strong> Toning and Paper Toning.<br />
<strong>Silver</strong> Hue - Selects the toning color to be applied to the silver densities.<br />
<strong>Silver</strong> Toning - Sets the strength of the toning applied to the<br />
silver densities.<br />
Balance - Determines the balance of the toning color combination,<br />
when set to 0% the <strong>Silver</strong> Hue and the Paper Hue blend at the midtones.<br />
Moving the Balance to the left will increase the toning effect applied to<br />
the silver densities and moving the Balance to the right will increase the<br />
toning effect applied to the paper tones.<br />
Paper Hue - Select the toning color to be applied to the paper tones<br />
of the image.<br />
Paper Toning - Set the strength of the toning<br />
applied to the paper tones.<br />
Vignette<br />
The Vignette section will apply a vignette<br />
effect to the image. Control the vignette<br />
effect by adjusting the Amount, Size, and Shape Control sliders and place<br />
the center<br />
of the vignette on the image with the<br />
Place Center button.<br />
Amount - Control the amount of the Vignette applied to the image.<br />
Moving this slider all the way to the left will apply a completely black<br />
29
Chapter 7 : Enhancement Controls<br />
vignette. Moving this slider all the way to the right will apply a<br />
completely white vignette.<br />
Size - Adjusts the area of the image covered by the vignette.<br />
Shape Control - Controls the overall shape of the vignette between circular<br />
and rectangular.<br />
Place Center - Positions the center of the<br />
image. This is useful if the subject is not in the<br />
center of the frame. Click this button and then<br />
place the center where desired.<br />
Burn Edges<br />
The Burn Edges section will burn the image from any side. Use the Burn<br />
Edges to control the overall darkness at the edges of an image and blend<br />
the effects together naturally. Control the effect with Side Selector, and the<br />
Strength, Size, and Transition sliders.<br />
Side Selector - Pick which side of the image to darken. To affect different<br />
sides, pick the first side and adjust the sliders, then pick the next side from<br />
the Side Selector and adjust the new sliders available.<br />
Strength - Controls the amount by which the selected side is darkened.<br />
Size - Controls the size of the effect applied to selected side.<br />
Transition - Controls the size of the blend between the darkening effect<br />
and the original image details.<br />
<strong>Silver</strong> <strong>Efex</strong> <strong>Pro</strong> <strong>User</strong> <strong>Guide</strong><br />
30
Chapter 8<br />
Selective Tool<br />
Applying the Filter’s Effect Selectively<br />
© 2008 Don Gale
Chapter 8 : Selective Tool<br />
Selective Tool<br />
The Selective Tool automates the<br />
creation of layers and layer masks<br />
within Adobe Photoshop and Adobe<br />
Photoshop Elements while applying<br />
<strong>Silver</strong> <strong>Efex</strong> <strong>Pro</strong>. The Selective Tool can<br />
be used to selectively apply the<br />
filter’s effect. Use this tool to create a<br />
layer mask with which to selectively<br />
control where the <strong>Silver</strong> <strong>Efex</strong> <strong>Pro</strong> effect<br />
is applied using Photoshop’s brush,<br />
lasso, marquee, and gradient tools.<br />
If Dfine ® 2.0, Viveza , Color <strong>Efex</strong><br />
<strong>Pro</strong> 3.0 or Sharpener <strong>Pro</strong> 3.0 is<br />
already installed; the <strong>Silver</strong> <strong>Efex</strong> <strong>Pro</strong> installer will update the existing<br />
Selective Tool, enabling you to access all of these plug-ins from the<br />
same Selective Tool.<br />
The Selective Tool can be used with pressure-sensitive tablets such<br />
as the Wacom ® Pen Tablet to apply the <strong>Silver</strong> <strong>Efex</strong> <strong>Pro</strong> filter with<br />
pressure-sensitivity.<br />
Note: The Selective Tool is available only with Adobe Photoshop<br />
and Adobe Photoshop Elements serving as host for <strong>Silver</strong> <strong>Efex</strong> <strong>Pro</strong>.<br />
Note: The Selective Tool cannot be used when creating a<br />
Photoshop Action. In order to create a Photoshop Action, please<br />
select <strong>Silver</strong> <strong>Efex</strong> <strong>Pro</strong> from the Filters menu.<br />
Interaction with <strong>Silver</strong> <strong>Efex</strong> <strong>Pro</strong><br />
<strong>Silver</strong> <strong>Efex</strong> <strong>Pro</strong> <strong>User</strong> <strong>Guide</strong><br />
Click on the <strong>Silver</strong> <strong>Efex</strong> <strong>Pro</strong> button within the <strong>Silver</strong> <strong>Efex</strong> <strong>Pro</strong> section<br />
of the Selective Tool window to launch the filter.<br />
If you click the Brush button in the <strong>Silver</strong> <strong>Efex</strong> <strong>Pro</strong> filter interface,<br />
whether you launched that filter from the Selective Tool or from<br />
Photoshop or Photoshop Elements’ Filters menu, the Selective<br />
Tool appears. The filter will be applied to a copy of the image on a<br />
separate layer, the new layer will be named after the filter you are<br />
using, and you can selectively apply the filter’s effect using the<br />
Paint, Erase, Fill, and Clear buttons described later in this chapter.<br />
Selection Tools<br />
The Selective Tool contains four tools for applying the selected <strong>Silver</strong><br />
<strong>Efex</strong> <strong>Pro</strong> filter.<br />
Paint<br />
Click the Paint button to selectively paint the current filter’s effect<br />
into the active image. Ensure that your Paint Brush mode is set to<br />
Normal and that Opacity is set to 100%. You can control the degree<br />
to which the effect is added to the image by varying the opacity of<br />
the brush.<br />
Erase<br />
Click the Erase button to selectively remove the current filter’s effect<br />
from the active image. Ensure that your Paint Brush mode is set to<br />
Normal and that Opacity is set to 100%. You can control the degree<br />
to which the effect is removed from the image by varying the opacity<br />
of the brush.<br />
32
Chapter 8 : Selective Tool<br />
Fill<br />
Click the Fill button to apply the filter’s effect to the entire image.<br />
This tool is especially useful if you want to apply the filter’s effect to<br />
all but a small area. Click Fill, then click Erase to remove the effect<br />
from the area to remain unaffected.<br />
Clear<br />
Click the Clear button to remove the filter’s effect from the entire<br />
image. This is helpful if you made a mistake with the Paint tool and<br />
want to start over.<br />
Apply / Discard<br />
Click Apply to apply the current filter’s effect to the image. Click<br />
Discard to prevent the effect from being applied.<br />
<strong>Silver</strong> <strong>Efex</strong> <strong>Pro</strong> <strong>User</strong> <strong>Guide</strong><br />
33
Chapter 9<br />
Filter Interface Settings<br />
Controlling the Default Behavior of the Filter Interface<br />
© 2008 Laurie Shupp
Chapter 9 : Filter Interface Settings<br />
Filter Interface Settings<br />
Click on Settings in the <strong>Silver</strong> <strong>Efex</strong> <strong>Pro</strong> Filter Interface to configure<br />
the default look and functionality, and to specify how <strong>Silver</strong> <strong>Efex</strong> <strong>Pro</strong><br />
affects images.<br />
Default Zoom<br />
Filter<br />
Settings<br />
Default Zoom lets you specify the zoom state to be applied when the<br />
interface is launched. (Please see Zoom Tool.)<br />
100%<br />
Opens images at 100% zoom.<br />
Zoom to Fit<br />
Adobe Photoshop Dialog Settings<br />
Ensures that the entire image is visible within the filter interface.<br />
Use Last Setting<br />
<strong>Silver</strong> <strong>Efex</strong> <strong>Pro</strong> <strong>User</strong> <strong>Guide</strong><br />
Opens images in the last zoom state used in the previous<br />
<strong>Silver</strong> <strong>Efex</strong> <strong>Pro</strong> session.<br />
Default Preview<br />
Default Preview lets you specify how images are displayed upon<br />
opening <strong>Silver</strong> <strong>Efex</strong> <strong>Pro</strong>. (Please see Preview Modes in Chapter 5.)<br />
Single Image Preview<br />
Sets Single Image View as default.<br />
Split Preview<br />
Sets Split preview as default.<br />
Side-by-side Preview<br />
Sets Side-by-side preview as default.<br />
Use Last Setting<br />
Opens images in the last preview state used in the previous<br />
<strong>Silver</strong> <strong>Efex</strong> <strong>Pro</strong> session.<br />
Default Appearance<br />
Default Appearance sets the brightness of the area surrounding<br />
the image in the Preview.<br />
• Light Gray<br />
• Medium Gray<br />
• Dark Gray<br />
35
Chapter 9 : Filter Interface Settings<br />
After Clicking OK (Adobe Photoshop Only)<br />
This option lets you specify how <strong>Silver</strong> <strong>Efex</strong> <strong>Pro</strong> filters are applied.<br />
Note: This option is valid only with Adobe Photoshop and Adobe<br />
Photoshop Elements serving as host for <strong>Silver</strong> <strong>Efex</strong> <strong>Pro</strong>.<br />
Apply the Filtered Effect to the Current Layer<br />
This option applies the effect to the layer that was active when <strong>Silver</strong><br />
<strong>Efex</strong> <strong>Pro</strong> was launched.<br />
Apply the Filtered Effect to a Separate Layer<br />
Choose this option to always apply the filter effects of <strong>Silver</strong> <strong>Efex</strong><br />
<strong>Pro</strong> to a separate layer. Use this option and save the final image in a<br />
layered format to ensure the preservation of original image details.<br />
Note: Enabling this option increases file size and may increase<br />
processing time.<br />
Note: When batch processing with <strong>Silver</strong> <strong>Efex</strong> <strong>Pro</strong>, the filter effect<br />
is not applied to a separate layer. To apply <strong>Silver</strong> <strong>Efex</strong> <strong>Pro</strong> to a<br />
separate layer while recording the action, duplicate the layer prior<br />
to applying <strong>Silver</strong> <strong>Efex</strong> <strong>Pro</strong>. This ensures that the batch process<br />
includes a new filtered layer for each image.<br />
Reset<br />
Click Reset to restore <strong>Silver</strong> <strong>Efex</strong> <strong>Pro</strong> filter settings to their<br />
default values.<br />
<strong>Silver</strong> <strong>Efex</strong> <strong>Pro</strong> <strong>User</strong> <strong>Guide</strong><br />
36
Chapter 10<br />
Selective Tool Settings<br />
Controlling the Default Behavior of the Selective Tool<br />
© 2008 Paul Michael Kane
Chapter 10 : Selective Tool Settings<br />
Selective Tool Settings (Adobe Photoshop Only)<br />
Click the Settings button at the bottom of the Selective Tool<br />
interface to specify how the Selective Tool interacts with Adobe<br />
Photoshop or Adobe Photoshop Elements and active images.<br />
Adobe Photoshop Dialog Settings<br />
When Photoshop Launches<br />
Filter<br />
Settings<br />
This option lets you specify whether the Selective Tool opens when<br />
Adobe Photoshop or Adobe Photoshop elements is launched.<br />
Choose between:<br />
• Automatically Open the Selective Tool<br />
• Do Not Open the Selective Tool<br />
Apply filter to:<br />
<strong>Silver</strong> <strong>Efex</strong> <strong>Pro</strong> <strong>User</strong> <strong>Guide</strong><br />
Advanced users can specify how the Selective Tool applies filters in<br />
<strong>Silver</strong> <strong>Efex</strong> <strong>Pro</strong>.<br />
Image Composite<br />
Select this option to create a new layer and perform a stamp-visible<br />
command into the new layer to ensure that the filter is applied to<br />
the entire image and not only to the active layer. (This is the default<br />
behavior in <strong>Silver</strong> <strong>Efex</strong> <strong>Pro</strong>. This is also how the Selective Tool<br />
operates in all other <strong>Nik</strong> <strong>Software</strong> products.)<br />
Active Layer<br />
Select this option to duplicate the layer active when you selected<br />
the <strong>Silver</strong> <strong>Efex</strong> <strong>Pro</strong> filter, and apply the filter to that layer only.<br />
After clicking Apply<br />
This option lets you specify whether the Selective Tool maintains<br />
<strong>Silver</strong> <strong>Efex</strong> <strong>Pro</strong> filter effects as a separate layer or merges layers<br />
when you click Apply.<br />
Merge the Filtered Effect to the Current Layer<br />
This option merges the filtered image with your original image into<br />
one layer. Enabling this option helps keep file sizes to a minimum.<br />
Apply the Filtered Effect to a Separate Layer<br />
This option ensures that the filtered effect is limited to a separate<br />
layer. By enabling this setting and saving the active image in a<br />
layered file, you preserve original image information and can remove<br />
the filter’s effect at any time. Please keep in mind, however, that<br />
enabling this option may increase file sizes.<br />
38
Chapter 11<br />
Contact and Support<br />
Getting Additional Support<br />
© 2008 Victor Ha
Chapter 11: Contact and Support<br />
United States<br />
Contact <strong>Nik</strong> <strong>Software</strong>, Inc. by phone at (619) 725-3150<br />
Monday - Friday from 8:30 AM - 5:00 PM (PST) or via email at<br />
service@niksoftware.com<br />
<strong>Nik</strong> <strong>Software</strong>, Inc.<br />
7588 Metropolitan Drive<br />
San Diego, CA 92108, USA<br />
Phone (619) 725-3150<br />
Fax (619) 725-3151<br />
infous@niksoftware.com<br />
www.niksoftware.com<br />
Germany<br />
In Europe, contact <strong>Nik</strong> <strong>Software</strong>, GmbH at +49-40-47-11-35-0<br />
Monday - Friday from 9:00 AM - 5:00 PM (CET) or via email at<br />
serviceeu@niksoftware.com.<br />
<strong>Nik</strong> <strong>Software</strong>, GmbH<br />
Hammerbrookstraße 93<br />
D-20097 Hamburg, Germany<br />
Phone +49-40-47-11-35-0<br />
Fax +49-40-47-11-35-35<br />
infoeu@niksoftware.com<br />
www.niksoftware.com<br />
<strong>Silver</strong> <strong>Efex</strong> <strong>Pro</strong> <strong>User</strong> <strong>Guide</strong><br />
For more information on <strong>Nik</strong> <strong>Software</strong> products go to<br />
www.niksoftware.com or www.upoint.com.<br />
© 2008 <strong>Nik</strong> <strong>Software</strong>, Inc.<br />
<strong>Pro</strong>tected by one or more US Pats. 6,728,421; 6,865,300;<br />
7,031,547; and other patents pending.<br />
U Point and Dfine are registered trademarks of <strong>Nik</strong> <strong>Software</strong>, Inc.<br />
Viveza, Color <strong>Efex</strong> <strong>Pro</strong>, <strong>Silver</strong> <strong>Efex</strong> <strong>Pro</strong>, TrueLight and<br />
<strong>Nik</strong> Sharpener <strong>Pro</strong> are trademarks of <strong>Nik</strong> <strong>Software</strong>, Inc. All<br />
other trade names mentioned in this manual are trademarks<br />
or registered trademarks of their respective holders.<br />
40