
Create successful ePaper yourself
Turn your PDF publications into a flip-book with our unique Google optimized e-Paper software.
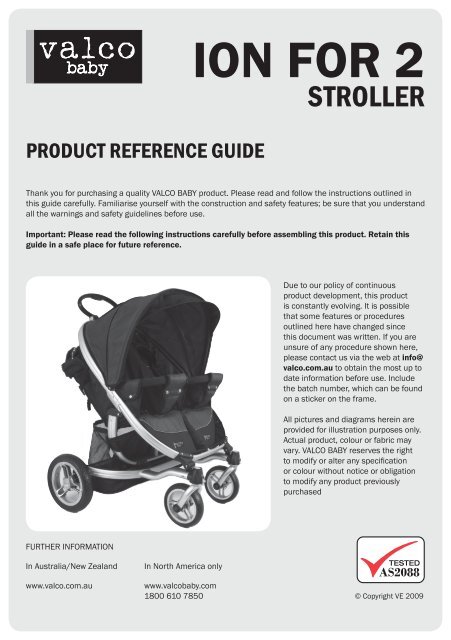
valco<br />
baby<br />
PRODUCT REFERENCE GUIDE<br />
STROLLER<br />
Thank you for purchasing a quality VALCO BABY product. Please read and follow the instructions outlined in<br />
this guide carefully. Familiarise yourself with the construction and safety features; be sure that you understand<br />
all the warnings and safety guidelines before use.<br />
Important: Please read the following instructions carefully before assembling this product. Retain this<br />
guide in a safe place for future reference.<br />
FURTHER INFORMATION<br />
In Australia/New Zealand<br />
www.valco.com.au<br />
In North America only<br />
www.valcobaby.com<br />
1800 610 7850<br />
ION FOR 2<br />
Due to our policy of continuous<br />
product development, this product<br />
is constantly evolving. It is possible<br />
that some features or procedures<br />
outlined here have changed since<br />
this document was written. If you are<br />
unsure of any procedure shown here,<br />
please contact us via the web at info@<br />
valco.com.au to obtain the most up to<br />
date information before use. Include<br />
the batch number, which can be found<br />
on a sticker on the frame.<br />
All pictures and diagrams herein are<br />
provided for illustration purposes only.<br />
Actual product, colour or fabric may<br />
vary. VALCO BABY reserves the right<br />
to modify or alter any specification<br />
or colour without notice or obligation<br />
to modify any product previously<br />
purchased<br />
© Copyright VE 2009
2<br />
A<br />
B<br />
C<br />
D<br />
4<br />
ION FOR 2 AssEMBLY<br />
Remove the stroller from the carton and<br />
dispose of all packaging thoughtfully.<br />
FIGURE A<br />
1. Lift your stroller handle upward. You will<br />
feel the stroller chassis opening.<br />
FIGURE B<br />
2. Continue unfolding the chassis until you<br />
hear the chassis click open in the locked<br />
position.<br />
INsERTING REAR AxLE<br />
FIGURE C<br />
1. Align the plastic housings of the silver<br />
brake section with the open tubes of the<br />
rear of the stroller chassis.<br />
2. Insert the housings over the open tubes<br />
until the brake section locks securely into<br />
place. IMPORTANT: Test that the brake<br />
section is securely engaged onto the<br />
stroller frame by pulling on it firmly.<br />
INsERTING BUMPER BAR<br />
FIGURE D<br />
1. Align the plastic housings of the bumper<br />
bar with the housing on the sides of the<br />
stroller chassis.<br />
2. slide the bumper bar into the housing<br />
along the housing tracks until it locks into<br />
place.<br />
3. Repeat procedure for the second bar on<br />
the other side of the stroller.<br />
4. Pull the sides of the seat fabric, and the<br />
crotch strap over the bumper bar and<br />
snap into position.<br />
5. To remove the bumper bar, unsnap the<br />
crotch strap and the seat sides from the<br />
bumper bar.<br />
6. Lift both bumper bar latches found<br />
on the underside of the each side<br />
of the bumper bar housing, while<br />
simultaneously lifting the bumper bar to<br />
slide it free.
E<br />
F<br />
G<br />
INsERTING REAR wHEELs<br />
FIGURE E<br />
1. simultaneously press on the spring<br />
loaded axle button and insert it<br />
through the central hub of the rear<br />
wheel. Repeat this process for the<br />
other rear wheel.<br />
FIGURE F<br />
2. Pressing the axle button again, insert<br />
the axle end into the side of the brake<br />
housing as far as it will go. Release<br />
the axle button and pull slightly on the<br />
wheel to ensure that it has securely<br />
engaged.<br />
INsERTING THE FRONT<br />
wHEELs<br />
FIGURE G<br />
1. Grasping the front wheel by the shaft,<br />
align the shaft with the hole in the<br />
underside of the swivel housing.<br />
2. Insert the shaft into the housing<br />
as far as it can go until it engages<br />
securely.<br />
3. Repeat the procedure for the other<br />
front wheel.<br />
IMPORTANT: Pull the wheel<br />
downward to test that it has securely<br />
engaged in the housing.
H<br />
I<br />
J<br />
sECURING THE FRONT<br />
wHEELs<br />
FIGURE H<br />
1. Your front wheels can be set to swivel<br />
freely (360º) or can be fixed in place<br />
for use over rough or sandy surfaces.<br />
2. To fix the front wheel in the non<br />
swivel position, turn the wheel so that<br />
the two notches on both housings line<br />
up. Press down firmly on the swivel<br />
lock until it locks into place.<br />
3. To unlock simply lift the locking tab<br />
until it locks in the open position.<br />
ADJUsTING THE HANDLE<br />
FIGURE I<br />
1. Your handle has been ergonomically<br />
designed to provide a truly<br />
comfortable ride for parents and<br />
guardians of all heights.<br />
2. To adjust your handle, simultaneously<br />
press the two release buttons on<br />
either side of the handle, moving it to<br />
the desired position.<br />
UsING YOUR BRAKE<br />
sYsTEM<br />
FIGURE J<br />
1. To engage the brake press down on<br />
the central red brake pedal, at the tab<br />
that is closest to you.<br />
2. To disengage, simply reverse the<br />
process.
Lock<br />
Strap<br />
Tether<br />
Strap<br />
K<br />
L<br />
M<br />
TETHER sTRAP<br />
FIGURE K<br />
1. Your stroller has been equipped with<br />
a safety tether strap. This strap has<br />
been designed to always keep your<br />
stroller within constant reach.<br />
NOTE: The tether strap doubles as<br />
your locking strap (Figure O).<br />
IMPORTANT: AlwAys slIP The lOOP<br />
IN The sTRAP secuRely OveR yOuR<br />
wRIsT wheNeveR A chIld Is IN<br />
yOuR sTROlleR.<br />
FOLDING YOUR sTROLLER<br />
FIGURE L<br />
1. Push hood back against the frame.<br />
2. To fold your stroller, turn the release<br />
key clockwise and push the handle<br />
forward releasing the stroller frame<br />
slightly.<br />
FIGURE M<br />
1. Lift the secondary locking latch clear<br />
of the plastic frame catch. This latch<br />
is spring loaded and you may need to<br />
hold it open as you push the handle<br />
forward.<br />
2. Push the handle forward.
PRESS<br />
DOWN<br />
PUSH<br />
6<br />
HOLD<br />
DOWN<br />
N<br />
O<br />
P<br />
INsERTING REAR AxLE<br />
FIGURE N<br />
4. Continue to fold the frame forward.<br />
Make sure that the lock strap is<br />
threaded through handlebars<br />
FIGURE O<br />
6. To lock the frame, the keyhole of the<br />
lock strap should be engaged over<br />
the locking pin found on the frame<br />
chassis behind the front wheel. Click<br />
securely into place.<br />
hINT: AdJusT The hANdle 180°<br />
BAcKwARd TO cReATe The<br />
sMAllesT FOld<br />
UsING YOUR HARNEss<br />
FIGURE P<br />
Your stroller is fitted with our unique<br />
new multi point safety harness system.<br />
Your child MUsT always be harnessed<br />
while in the stroller<br />
TO OPEN YOUR HARNEss<br />
1. Press down on the Buckle Prongs.<br />
2. simultaneously push the release<br />
button in the centre of the buckle<br />
3. Pull the buckles from the Buckle<br />
Housing<br />
NOTe: ThIs PROcess MAy Be<br />
dIFFIculT As yOuR BucKle sysTeM<br />
hAs BeeN desIGNed TO MeeT veRy<br />
sTRINGeNT sAFeTy sTANdARds<br />
ANd eNsuRe ThAT A chIld cANNOT<br />
ReleAse The hARNess uNAIded.
RELEASE<br />
HOLD<br />
CLICK<br />
Q<br />
R<br />
s<br />
UsING YOUR HARNEss<br />
FIGURE Q<br />
TO sECURE YOUR CHILD IN THE<br />
HARNEss.<br />
1. Overlap buckles so that they fit<br />
together to form one complete buckle.<br />
FIGURE R AND Q<br />
1. Insert the completed buckle into<br />
the Buckle Housing until it engages<br />
securely in place.<br />
2. Carefully adjust the harness straps to<br />
snugly fit your child by adjusting the<br />
sliders located on all shoulder straps,<br />
waist straps and the crotch strap.<br />
3. Your harness can be adjusted fro<br />
even more comfort for smaller or<br />
larger children (at the to of the<br />
seat back and front of the seat) by<br />
threading/removing the crotch or<br />
shoulder straps through the webbing<br />
sewn into the seat. You will need to<br />
detach the waist straps at the sides<br />
of the stroller in order to do so. ( To<br />
detach the waist straps: with a pincer<br />
movement, depress the centre buckle<br />
button and pull the strap fee from the<br />
housing.)
WARNING<br />
• FOLLOW THE MANUFACTURER’S INSTRUCTIONS.<br />
• PUT ON ALL THE BRAKES WHENEVER YOU PARK THE PRAM/STROLLER.<br />
• DO NOT LEAVE CHILDREN UNATTENDED.<br />
• DO NOT CARRY <strong>EX</strong>TRA CHILDREN OR BAGS ON THIS PRAM/STROLLER.<br />
• MAKE SURE CHILDREN ARE CLEAR OF ANY MOVING PARTS IF YOU ADJUST THE PRAM/STROLLER. OTHERWISE THEY MAY<br />
BE INJURED.<br />
Remember, your child’s safety is your responsibility...<br />
• NEVER USE ON StAIRS OR ESCALAtORS.<br />
• AlwAys use the tether strAp when the stroller is in use.<br />
• the CorreCt use AnD MAintenAnCe oF this VehiCle Are essentiAl.<br />
• Be sure thAt All ClAMps AnD BuCkles Are seCurely FixeD AnD in plACe BeFore use<br />
• when in the stroller, your ChilD Must AlwAys weAr the sAFety hArness, CorreCtly FitteD AnD ADjusteD, At<br />
All tiMes.<br />
• the MAxiMuM weight oF the ChilD For whiCh this stroller wAs intenDeD is 18 kgs.<br />
• CAn Be useD FroM A newBorn BABy onwArDs. A CoCoon, speCiAlly DesigneD to Be useD with A stroller, is<br />
reCoMMenDeD when Any Fully reClining stroller is useD with A newBorn.<br />
• neVer run with A newBorn BABy in Any prAM or stroller until the ChilD CAn sit up unAssisteD<br />
(ApproxiMAtely 6 Months).<br />
• CheCk All pArts BeFore use For BreAkAge or FAtigue. DisContinue use iMMeDiAtely iF Any pArt is FounD to Be<br />
DAMAgeD or Broken.<br />
• MAxiMuM loAD oF BAskets: 3.5kgs.<br />
• Do not CArry ADDitionAl ChilDren. this stroller is MAnuFACtureD For the use with one ChilD only<br />
• AlwAys Be AwAre oF the risks proViDeD By Fire AnD other signiFiCAnt sourCes oF heAt suCh As rADiAtors,<br />
etC. whiCh MAy Be in the iMMeDiAte ViCinity oF your stroller.<br />
• it MAy Be unsAFe to use Any ACCessories other thAn VAlCo BABy ApproVeD ones.<br />
• this proDuCt is intenDeD For DoMestiC use only. it is not intenDeD For CoMMerCiAl use.<br />
should the chassis become wet, dry off promptly before storing. If this pram is used near the ocean or salted<br />
roads, spray the chassis and seat frame with water and dry. we recommend a rust inhibiting product should<br />
be used to prevent rust and fatigue on metal parts.<br />
we recommend that you wipe down axles and lubricate the wheels every 3 months. sand and dirt can grind<br />
down axles, if you live near the beach or in a dusty environment you must wipe down the axles and wheels<br />
then lubricate them monthly.<br />
AxLEs ARE BEsT LUBRICATED wITH GREAsE OR PETROLEUM JELLY. MOVING PARTs ARE BEsT LUBRICATED<br />
wITH sILICONE BAsED PRODUCTs. DO NOT UsE OIL BAsED PRODUCTs.<br />
valco<br />
baby<br />
In Australia/New Zealand<br />
www.valco.com.au<br />
In North America only<br />
www.valcobaby.com<br />
1 800 610 7850