Configuration of Internet Mail - MTNL Mumbai
Configuration of Internet Mail - MTNL Mumbai
Configuration of Internet Mail - MTNL Mumbai

You also want an ePaper? Increase the reach of your titles
YUMPU automatically turns print PDFs into web optimized ePapers that Google loves.
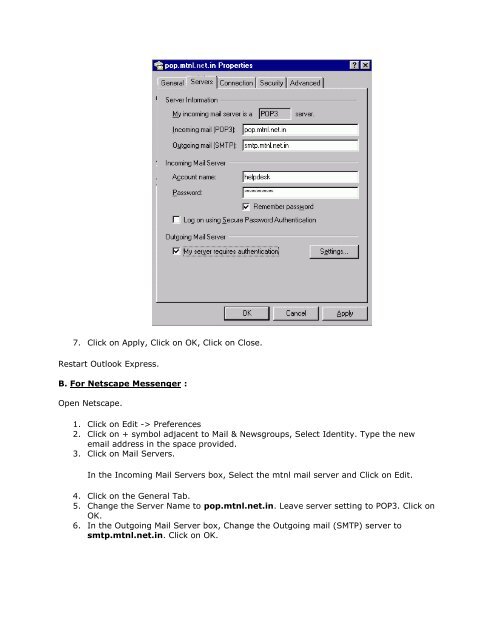
7. Click on Apply, Click on OK, Click on Close.<br />
Restart Outlook Express.<br />
B. For Netscape Messenger :<br />
Open Netscape.<br />
1. Click on Edit -> Preferences<br />
2. Click on + symbol adjacent to <strong>Mail</strong> & Newsgroups, Select Identity. Type the new<br />
email address in the space provided.<br />
3. Click on <strong>Mail</strong> Servers.<br />
In the Incoming <strong>Mail</strong> Servers box, Select the mtnl mail server and Click on Edit.<br />
4. Click on the General Tab.<br />
5. Change the Server Name to pop.mtnl.net.in. Leave server setting to POP3. Click on<br />
OK.<br />
6. In the Outgoing <strong>Mail</strong> Server box, Change the Outgoing mail (SMTP) server to<br />
smtp.mtnl.net.in. Click on OK.