37531922 - 10/2004 - heidenhain
37531922 - 10/2004 - heidenhain
37531922 - 10/2004 - heidenhain

You also want an ePaper? Increase the reach of your titles
YUMPU automatically turns print PDFs into web optimized ePapers that Google loves.
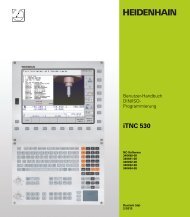
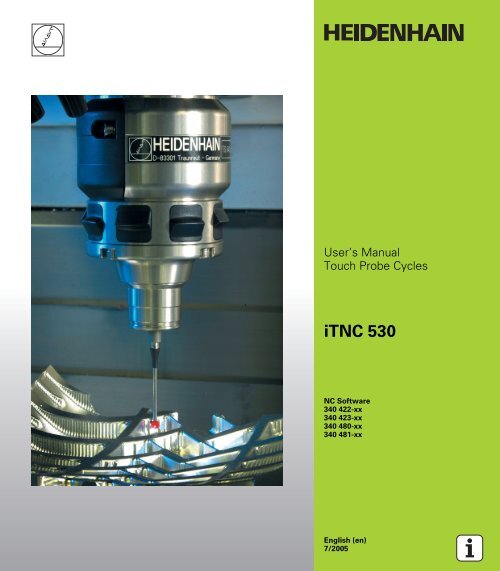
User’s Manual<br />
Touch Probe Cycles<br />
iTNC 530<br />
NC Software<br />
340 422-xx<br />
340 423-xx<br />
340 480-xx<br />
340 481-xx<br />
English (en)<br />
7/2005
TNC Model, Software and Features<br />
This manual describes functions and features provided by TNCs as of<br />
the following NC software numbers.<br />
TNC model NC software number<br />
iTNC 530 340 422-11<br />
iTNC 530 E 340 423-11<br />
iTNC 530 340 480-11<br />
iTNC 530 E 340 481-11<br />
iTNC 530 programming station 374 150-11<br />
The suffix E indicates the export version of the TNC. The export<br />
version of the TNC has the following limitations:<br />
Linear movement is possible in no more than 4 axes simultaneously.<br />
The machine tool builder adapts the useable features of the TNC to his<br />
machine by setting machine parameters. Some of the functions<br />
described in this manual may not be among the features provided by<br />
your machine tool.<br />
TNC functions that may not be available on your machine include:<br />
Tool measurement with the TT<br />
Please contact your machine tool builder to become familiar with the<br />
features of your machine.<br />
Many machine manufacturers, as well as HEIDENHAIN, offer<br />
programming courses for the TNCs. We recommend these courses as<br />
an effective way of improving your programming skill and sharing<br />
information and ideas with other TNC users.<br />
User’s Manual:<br />
All TNC functions that have no connection with touch<br />
probes are described in the User's Manual of the<br />
iTNC 530. Please contact HEIDENHAIN if you need a copy<br />
of this User’s Manual.<br />
Location of use<br />
The TNC complies with the limits for a Class A device in accordance<br />
with the specifications in EN 55022, and is intended for use primarily<br />
in industrially-zoned areas.<br />
HEIDENHAIN iTNC 530 3
Functions new since the predecessor versions<br />
340 420-xx and 340 421-xx<br />
Saving the active basic rotation in the preset table (see “Saving the<br />
basic rotation in the preset table” on page 31).<br />
Writing measured values in a preset table (see “Writing the<br />
measured values from touch probe cycles in the preset table” on<br />
page 25).<br />
New Cycle 419 for setting an individual datum in any axis (see<br />
“DATUM IN ONE AXIS (touch probe cycle 419, ISO: G419)” on page<br />
87).<br />
Cycle 3 was expanded to allow the user to enter a retraction path MB<br />
and select the coordinates in which the measurement results are to<br />
be saved (see “MEASURING (touch probe cycle 3)” on page 131).<br />
Cycle 403 optionally sets a rotary axis in the preset table or active<br />
datum table to 0. In addition, an angle can be entered for alignment<br />
(see “BASIC ROTATION compensation via rotary axis (touch probe<br />
cycle 403, ISO: G403)” on page 50).<br />
Cycle 9 automatically calibrates for length (see “CALIBRATE TS<br />
LENGTH (touch probe cycle 9)” on page 130).<br />
The datum setting cycles 4<strong>10</strong>, 411, 412, 413, 414, 415, 416 and 418<br />
have been expanded to allow the datum to be optionally set in the<br />
touch probe axis (see “DATUM FROM INSIDE OF RECTANGLE<br />
(touch probe cycle 4<strong>10</strong>, ISO: G4<strong>10</strong>)” on page 61).<br />
New manual touch probe functions: Datum setting in center line<br />
(see “Center line as datum” on page 35).<br />
Touch probe functions for the TNC can also be used in combination<br />
with mechanical probes or dial gauges (see “Using the Touch Probe<br />
Functions with Mechanical Probes or Dial Gauges” on page 40).<br />
4
Functions changed since the predecessor<br />
versions 340 420-xx and 340 421-xx<br />
New input parameter for saving the determined datum in cycles for<br />
automatic datum setting (see “Save calculated datum” on page 60).<br />
Before programming, note the following:<br />
The function for the preset table was introduced with the<br />
release of the NC software versions 340 422-01 and<br />
340 423-01, as well as 340 480-01 and 340 481-01. Please<br />
pay attention to the resulting changes in connection with<br />
the touch probe cycles for datum setting.<br />
Writing measured values in a datum table (see “Writing the<br />
measured values from touch probe cycles in datum tables” on page<br />
24).<br />
Cycle 403 expanded by the possibility to zero the rotary axis after<br />
alignment (see “BASIC ROTATION compensation via rotary axis<br />
(touch probe cycle 403, ISO: G403)” on page 50).<br />
Cycles 400, 401 and 402 expanded by the possibility to write the<br />
determined basic rotation in the preset table (see “BASIC<br />
ROTATION (touch probe cycle 400, ISO: G400)” on page 43), (see<br />
“BASIC ROTATION from two holes (touch probe cycle 401, ISO:<br />
G401)” on page 45) and (see “BASIC ROTATION over two studs<br />
(touch probe cycle 402, ISO: G402)” on page 47).<br />
Datum setting with manual probing cycles has been changed. The<br />
datum must now be set by soft key instead of by the ENT key (see<br />
“To set the datum in any axis (see figure at right)” on page 32).<br />
HEIDENHAIN iTNC 530 5
New/changed descriptions in this manual<br />
A description of required input data for automatic tool calibration has<br />
been included in the tool table (see “Entries in the tool table<br />
TOOL.T” on page 138).<br />
6
Contents<br />
Introduction 1<br />
Touch Probe Cycles in the Manual and<br />
Electronic Handwheel Modes 2<br />
Touch Probe Cycles for Automatic<br />
Workpiece Inspection 3<br />
Touch Probe Cycles for Automatic Tool<br />
Measurement 4<br />
HEIDENHAIN iTNC 530 7
1 Introduction ..... 13<br />
1.1 General Information on Touch Probe Cycles ..... 14<br />
Function ..... 14<br />
Touch probe cycles in the Manual and Electronic Handwheel modes ..... 15<br />
Touch probe cycles for automatic operation ..... 15<br />
1.2 Before You Start Working with Touch Probe Cycles! ..... 17<br />
Maximum traverse to touch point: MP6130 ..... 17<br />
Safety clearance to touch point: MP6140 ..... 17<br />
Orient the infrared touch probe to the programmed probe direction: MP6165 ..... 17<br />
Multiple measurement: MP6170 ..... 17<br />
Confidence interval for multiple measurement: MP6171 ..... 17<br />
Touch trigger probe, probing feed rate: MP6120 ..... 18<br />
Touch trigger probe, rapid traverse for pre-positioning: MP6150 ..... 18<br />
Running touch probe cycles ..... 19<br />
HEIDENHAIN iTNC 530 9<br />
Contents
Contents<br />
2 Touch Probe Cycles in the Manual and Electronic Handwheel Modes ..... 21<br />
2.1 Introduction ..... 22<br />
Overview ..... 22<br />
Selecting probe cycles ..... 22<br />
Recording measured values from the touch probe cycles ..... 23<br />
Writing the measured values from touch probe cycles in datum tables ..... 24<br />
Writing the measured values from touch probe cycles in the preset table ..... 25<br />
2.2 Calibrating a Touch Trigger Probe ..... 26<br />
Introduction ..... 26<br />
Calibrating the effective length ..... 26<br />
Calibrating the effective radius and compensating center misalignment ..... 27<br />
Displaying calibration values ..... 28<br />
Managing more than one block of calibrating data ..... 29<br />
2.3 Compensating Workpiece Misalignment ..... 30<br />
Introduction ..... 30<br />
Measuring the basic rotation ..... 30<br />
Saving the basic rotation in the preset table ..... 31<br />
Displaying a basic rotation ..... 31<br />
Cancel a basic rotation ..... 31<br />
2.4 Setting the Datum with a 3-D Touch Probe ..... 32<br />
Introduction ..... 32<br />
To set the datum in any axis (see figure at right) ..... 32<br />
Corner as datum—using points that were already probed for a basic rotation (see figure at right) ..... 33<br />
Corner as datum—without using points that were already probed for a basic rotation ..... 33<br />
Circle center as datum ..... 34<br />
Center line as datum ..... 35<br />
Setting datum points using holes/cylindrical studs ..... 36<br />
2.5 Measuring Workpieces with a 3-D Touch Probe ..... 37<br />
Introduction ..... 37<br />
To find the coordinate of a position on an aligned workpiece: ..... 37<br />
Finding the coordinates of a corner in the working plane ..... 37<br />
Measuring workpiece dimensions ..... 38<br />
To find the angle between the angle reference axis and a side of the workpiece ..... 39<br />
2.6 Using the Touch Probe Functions with Mechanical Probes or Dial Gauges ..... 40<br />
Introduction ..... 40<br />
<strong>10</strong> Contents
3 Touch Probe Cycles for Automatic Workpiece Inspection ..... 41<br />
3.1 Measuring Workpiece Misalignment ..... 42<br />
Overview ..... 42<br />
Characteristics common to all touch probe cycles for measuring workpiece misalignment ..... 42<br />
BASIC ROTATION (touch probe cycle 400,<br />
ISO: G400) ..... 43<br />
BASIC ROTATION from two holes (touch probe cycle 401, ISO: G401) ..... 45<br />
BASIC ROTATION over two studs (touch probe cycle 402, ISO: G402) ..... 47<br />
BASIC ROTATION compensation via rotary axis (touch probe cycle 403, ISO: G403) ..... 50<br />
BASIC ROTATION (touch probe cycle 404, ISO: G404) ..... 53<br />
Compensating workpiece misalignment by rotating the C axis (touch probe cycle 405, ISO: G405) ..... 54<br />
3.2 Automatic Datum Determination ..... 58<br />
Overview ..... 58<br />
Characteristics common to all touch probe cycles for datum setting ..... 59<br />
DATUM FROM INSIDE OF RECTANGLE (touch probe cycle 4<strong>10</strong>, ISO: G4<strong>10</strong>) ..... 61<br />
DATUM FROM OUTSIDE OF RECTANGLE (touch probe cycle 411, ISO: G411) ..... 64<br />
DATUM FROM INSIDE OF CIRCLE (touch probe cycle 412, ISO: G412) ..... 67<br />
DATUM FROM OUTSIDE OF CIRCLE (touch probe cycle 413, ISO: G413) ..... 70<br />
DATUM FROM OUTSIDE OF CORNER (touch probe cycle 414, ISO: G414) ..... 73<br />
DATUM FROM INSIDE OF CORNER (touch probe cycle 415, ISO: G415) ..... 76<br />
DATUM CIRCLE CENTER (touch probe cycle 416, ISO: G416) ..... 79<br />
DATUM IN TOUCH PROBE AXIS (touch probe cycle 417, ISO: G417) ..... 82<br />
DATUM AT CENTER BETWEEN 4 HOLES (touch probe cycle 418, ISO: G418) ..... 84<br />
DATUM IN ONE AXIS (touch probe cycle 419, ISO: G419) ..... 87<br />
HEIDENHAIN iTNC 530 11<br />
Contents
Contents<br />
3.3 Automatic Workpiece Measurement ..... 93<br />
Overview ..... 93<br />
Recording the results of measurement ..... 94<br />
Measurement results in Q parameters ..... 95<br />
Classification of results ..... 95<br />
Tolerance monitoring ..... 95<br />
Tool monitoring ..... 96<br />
Reference system for measurement results ..... 96<br />
REFERENCE PLANE (touch probe cycle 0, ISO: G55) ..... 97<br />
DATUM PLANE (touch probe cycle 1) ..... 98<br />
MEASURE ANGLE (touch probe cycle 420, ISO: G420) ..... 99<br />
MEASURE HOLE (touch probe cycle 421, ISO: G421) ..... <strong>10</strong>1<br />
MEASURE CIRCLE OUTSIDE (touch probe cycle 422, ISO: G422) ..... <strong>10</strong>4<br />
MEASURE RECTANGLE FROM INSIDE (touch probe cycle 423, ISO: G423) ..... <strong>10</strong>7<br />
MEASURE RECTANGLE FROM OUTSIDE (touch probe cycle 424, ISO: G424) ..... 1<strong>10</strong><br />
MEASURE INSIDE WIDTH (touch probe cycle 425, ISO: G425) ..... 113<br />
MEASURE RIDGE WIDTH (touch probe cycle 426, ISO: G426) ..... 115<br />
MEASURE COORDINATE (touch probe cycle 427, ISO: G427) ..... 117<br />
MEASURE BOLT HOLE CIRCLE (touch probe cycle 430, ISO: G430) ..... 119<br />
MEASURE PLANE (touch probe cycle 431, ISO: G431) ..... 122<br />
3.4 Special Cycles ..... 128<br />
Overview ..... 128<br />
CALIBRATE TS (touch probe cycle 2) ..... 129<br />
CALIBRATE TS LENGTH (touch probe cycle 9) ..... 130<br />
MEASURING (touch probe cycle 3) ..... 131<br />
MEASURE AXIS OFFSET (touch probe cycle 440, ISO: G440) ..... 132<br />
4 Touch Probe Cycles for Automatic Tool Measurement ..... 135<br />
4.1 Tool Measurement with the TT Tool Touch Probe ..... 136<br />
Overview ..... 136<br />
Setting the machine parameters ..... 136<br />
Entries in the tool table TOOL.T ..... 138<br />
Display the results of measurement ..... 139<br />
4.2 Available Cycles ..... 140<br />
Overview ..... 140<br />
Differences between Cycles 31 to 33 and Cycles 481 to 483 ..... 140<br />
Calibrating the TT (touch probe cycle 30 or 480, ISO: G480) ..... 141<br />
Measuring the tool length (touch probe cycle 31 or 481, ISO: G481) ..... 142<br />
Measuring the tool radius (touch probe cycle 32 or 482, ISO: G482) ..... 144<br />
Measuring the tool radius (touch probe cycle 33 or 483, ISO: G483) ..... 146<br />
12 Contents
Introduction
1.1 General Information on Touch Probe Cycles<br />
1.1 General Information on Touch<br />
Probe Cycles<br />
Function<br />
The TNC must be specially prepared by the machine tool<br />
builder for the use of a 3-D touch probe.<br />
If you are carrying out measurements during program run,<br />
be sure that the tool data (length, radius) can be used from<br />
the calibrated data or from the last TOOL CALL block<br />
(selected with MP7411).<br />
Whenever the TNC runs a touch probe cycle, the 3-D touch probe<br />
approaches the workpiece in one linear axis. This is also true during an<br />
active basic rotation or with a tilted working plane. The machine tool<br />
builder determines the probing feed rate in a machine parameter (see<br />
“Before You Start Working with Touch Probe Cycles” later in this<br />
chapter).<br />
When the probe stylus contacts the workpiece,<br />
the 3-D touch probe transmits a signal to the TNC: the coordinates<br />
of the probed position are stored,<br />
the touch probe stops moving, and<br />
returns to its starting position at rapid traverse.<br />
If the stylus is not deflected within a distance defined in MP 6130, the<br />
TNC displays an error message.<br />
14 1 Introduction<br />
Y<br />
Z<br />
F MAX<br />
F<br />
X
Touch probe cycles in the Manual and Electronic<br />
Handwheel modes<br />
In the Manual and Electronic Handwheel operating modes, the TNC<br />
provides touch probe cycles that allow you to:<br />
Calibrate the touch probe<br />
Compensate workpiece misalignment<br />
Datum setting<br />
Touch probe cycles for automatic operation<br />
Besides the touch probe cycles, which you can use in the Manual and<br />
Electronic handwheel operating modes, several cycles are available<br />
for a wide variety of applications in automatic operation:<br />
Calibrating the touch probe (Chapter 3)<br />
Compensating workpiece misalignment (Chapter 3)<br />
Setting datums (Chapter 3)<br />
Automatic workpiece inspection (Chapter 3)<br />
Automatic workpiece measurement (Chapter 4)<br />
You can program the touch probe cycles in the Programming and<br />
Editing operating mode via the TOUCH PROBE key. Like the most<br />
recent fixed cycles, touch probe cycles use Q parameters with<br />
numbers of 400 and above as transfer parameters. Parameters with<br />
specific functions that are required in several cycles always have the<br />
same number: For example, Q260 is always assigned the clearance<br />
height, Q261 the measuring height, etc.<br />
To simplify programming, the TNC shows an illustration during cycle<br />
definition. In the illustration, the parameter that needs to be entered is<br />
highlighted (see figure at right).<br />
HEIDENHAIN iTNC 530 15<br />
1.1 General Information on Touch Probe Cycles
1.1 General Information on Touch Probe Cycles<br />
Defining the touch probe cycle in the Programming and Editing<br />
operation mode<br />
The soft-key row shows all available touch probe<br />
functions divided into groups.<br />
Select the desired probe cycle, for example datum<br />
setting. Digitizing cycles and cycles for automatic tool<br />
measurement are available only if your machine has<br />
been prepared for them.<br />
Select a cycle, e.g. datum setting at pocket. The TNC<br />
initiates the programming dialog and asks all required<br />
input values. At the same time a graphic of the input<br />
parameters is displayed in the right screen window.<br />
The parameter that is asked for in the dialog prompt<br />
is highlighted.<br />
Enter all parameters requested by the TNC and<br />
conclude each entry with the ENT key.<br />
The TNC ends the dialog when all required data has<br />
been entered.<br />
Group of measuring cycles Soft key<br />
Cycles for automatic measurement and compensation<br />
of workpiece misalignment<br />
Cycles for automatic datum setting<br />
Cycles for automatic workpiece inspection<br />
Automatic calibration cycle<br />
Cycles for automatic tool measurement (enabled by<br />
the machine tool builder)<br />
Example: NC blocks<br />
5 TCH PROBE 4<strong>10</strong> DATUM INSIDE RECTAN.<br />
Q321=+50 ;CENTER IN 1ST AXIS<br />
Q322=+50 ;CENTER IN 2ND AXIS<br />
Q323=60 ;1ST SIDE LENGTH<br />
Q324=20 ;2ND SIDE LENGTH<br />
Q261=-5 ;MEASURING HEIGHT<br />
Q320=0 ;SET-UP CLEARANCE<br />
Q260=+20 ;CLEARANCE HEIGHT<br />
Q301=0 ;TRAVERSE TO CLEARANCE HEIGHT<br />
Q305=<strong>10</strong> ;NO. IN TABLE<br />
Q331=+0 ;DATUM<br />
Q332=+0 ;DATUM<br />
Q303=+1 ;MEAS. VALUE TRANSFER<br />
16 1 Introduction
1.2 Before You Start Working with<br />
Touch Probe Cycles!<br />
To make it possible to cover the widest possible range of applications,<br />
machine parameters enable you to determine the behavior common<br />
to all touch probe cycles:<br />
Maximum traverse to touch point: MP6130<br />
If the stylus is not deflected within the path defined in MP6130, the<br />
TNC outputs an error message.<br />
Safety clearance to touch point: MP6140<br />
In MP6140 you define how far from the defined (or calculated) touch<br />
point the TNC is to pre-position the touch probe. The smaller the value<br />
you enter, the more exactly must you define the touch point position.<br />
In many touch probe cycles you can also define a setup clearance in<br />
addition that is added to Machine Parameter 6140.<br />
Orient the infrared touch probe to the<br />
programmed probe direction: MP6165<br />
To increase measuring accuracy, you can use MP 6165 = 1 to have an<br />
infrared touch probe oriented in the programmed probe direction<br />
before every probe process. In this way the stylus is always deflected<br />
in the same direction.<br />
Multiple measurement: MP6170<br />
To increase measuring certainty, the TNC can run each probing<br />
process up to three times in sequence. If the measured position<br />
values differ too greatly, the TNC outputs an error message (the limit<br />
value is defined in MP6171). With multiple measurement it is possible<br />
to detect random errors, e.g., from contamination.<br />
If the measured values lie within the confidence interval, the TNC<br />
saves the mean value of the measured positions.<br />
Confidence interval for multiple measurement:<br />
MP6171<br />
In MP6171 you store the value by which the results may differ when<br />
you make multiple measurements. If the difference in the measured<br />
values exceeds the value in MP6171, the TNC outputs an error<br />
message.<br />
HEIDENHAIN iTNC 530 17<br />
1.2 Before You Start Working with Touch Probe Cycles!
1.2 Before You Start Working with Touch Probe Cycles!<br />
Touch trigger probe, probing feed rate: MP6120<br />
In MP6120 you define the feed rate at which the TNC is to probe the<br />
workpiece.<br />
Touch trigger probe, rapid traverse for prepositioning:<br />
MP6150<br />
In MP6150 you define the feed rate at which the TNC pre-positions the<br />
touch probe, or positions it between measuring points.<br />
18 1 Introduction
Running touch probe cycles<br />
All touch probe cycles are DEF active. This means that the TNC runs<br />
the cycle automatically as soon as the TNC executes the cycle<br />
definition in the program run.<br />
Make sure that at the beginning of the cycle the<br />
compensation data (length, radius) from the calibrated<br />
data or from the last TOOL CALL block are active<br />
(selection via MP7411, see the User's Manual of the<br />
iTNC 530, “General User Parameters”).<br />
You can also run the touch probe cycles 4<strong>10</strong> to 419 during<br />
an active basic rotation. Make sure, however, that the<br />
basic rotation angle does not change when you use Cycle<br />
7 DATUM SHIFT with datum tables after the measuring<br />
cycle.<br />
Touch probe cycles with a number greater than 400 position the touch<br />
probe according to a positioning logic:<br />
If the current coordinate of the south pole of the stylus is less than<br />
the coordinate of the clearance height (defined in the cycle), the TNC<br />
retracts the touch probe in the probe axis to the clearance height<br />
and then positions it in the working plane to the first starting<br />
position.<br />
If the current coordinate of the south pole of the stylus is greater<br />
than the coordinate of the clearance height, the TNC first positions<br />
the probe in the working plane to the first starting position and then<br />
moves it immediately to the measuring height in the touch probe<br />
axis.<br />
HEIDENHAIN iTNC 530 19<br />
1.2 Before You Start Working with Touch Probe Cycles!
Touch Probe Cycles in the<br />
Manual and<br />
Electronic Handwheel Modes
2.1 Introduction<br />
2.1 Introduction<br />
Overview<br />
The following touch probe cycles are available in the Manual mode:<br />
Function Soft key<br />
Calibrate the effective length<br />
Calibrate the effective radius<br />
Measure a basic rotation using a line<br />
Datum setting in any axis<br />
Set the datum at a corner<br />
Set the datum at a circle center<br />
Measure a basic rotation using two holes/cylindrical<br />
studs<br />
Set the datum using four holes/cylindrical studs<br />
Set the circle center using three holes/cylindrical studs<br />
Selecting probe cycles<br />
Select the Manual Operation or Electronic Handwheel mode of<br />
operation.<br />
To choose the touch probe functions, press the<br />
TOUCH PROBE soft key. The TNC displays additional<br />
soft keys—see table above.<br />
To select the probe cycle, press the appropriate soft<br />
key, for example PROBING ROT, and the TNC<br />
displays the associated menu.<br />
22 2 Touch Probe Cycles in the Manual and Electronic Handwheel Modes
Recording measured values from the touch<br />
probe cycles<br />
The TNC must be specially prepared by the machine tool<br />
builder for use of this function. The machine tool manual<br />
provides further information.<br />
After executing any selected touch probe cycle, the TNC displays the<br />
PRINT soft key. If you press this soft key, the TNC will record the<br />
current values determined in the active touch probe cycle. You can<br />
then use the PRINT function in the menu for setting the data interface<br />
(see the User's Manual Chapter 12, “MOD Functions, Setting the<br />
Data Interfaces”) to define whether the TNC is to<br />
print the measuring result,<br />
store the measuring results on the TNC’s hard disk, or<br />
store the measuring results on a PC.<br />
If you store the measuring results, the TNC creates the ASCII file<br />
%TCHPRNT.A. Unless you define a specific path and interface in the<br />
interface configuration menu, the TNC will store the %TCHPRNT file<br />
in the main directory TNC:\.<br />
When you press the PRINT soft key, the %TCHPRNT.A<br />
file must not be<br />
active in the Programming and Editing mode of operation.<br />
The TNC will otherwise display an error message.<br />
The TNC stores the measured data in the %TCHPRNT.A<br />
file only. If you execute several touch probe cycles in<br />
succession and want to store the resulting measured data,<br />
you must make a backup of the contents stored in<br />
%TCHPRNT.A between the individual cycles by copying<br />
or renaming the file.<br />
Format and contents of the %TCHPRNT file are preset by<br />
the machine tool builder.<br />
HEIDENHAIN iTNC 530 23<br />
2.1 Introduction
2.1 Introduction<br />
Writing the measured values from touch probe<br />
cycles in datum tables<br />
This function is active only if you have datum tables active<br />
on your TNC (bit 3 in machine parameter 7224.0 =0).<br />
Use this function if you want to save measured values in<br />
the workpiece coordinate system. If you want to save<br />
measured values in the machine-based coordinate system<br />
(REF coordinates), press the ENTER IN PRESET TABLE<br />
soft key (see “Writing the measured values from touch<br />
probe cycles in the preset table” on page 25).<br />
With the ENTER IN DATUM TABLE soft key, the TNC can write the<br />
values measured during a touch probe cycle in a datum table:<br />
Note that during an active datum shift the TNC always<br />
bases the probed value on the active preset (or on the<br />
datum most recently set in the Manual operating mode),<br />
although the datum shift is included in the position display.<br />
Select any probe function.<br />
Enter the desired coordinates of the datum in the appropriate input<br />
fields (depends on the touch probe cycle being run).<br />
Enter the datum number in the Number in table= input box.<br />
Enter the name of the datum table (complete path) in the Datum<br />
table input box.<br />
Press the ENTER IN DATUM TABLE soft key. The TNC saves the<br />
datum in the indicated datum table under the entered number.<br />
24 2 Touch Probe Cycles in the Manual and Electronic Handwheel Modes
Writing the measured values from touch probe<br />
cycles in the preset table<br />
Use this function if you want to save measured values in<br />
the machine-based coordinate system (REF coordinates).<br />
If you want to save measured values in the workpiece<br />
coordinate system, press the ENTER IN DATUM TABLE<br />
soft key (see “Writing the measured values from touch<br />
probe cycles in datum tables” on page 24).<br />
With the ENTER IN PRESET TABLE soft key, the TNC can write the<br />
values measured during a probe cycle in the preset table. The<br />
measured values are then stored referenced to the machine-based<br />
coordinate system (REF coordinates). The preset table has the name<br />
PRESET.PR, and is saved in the directory TNC:\.<br />
Note that during an active datum shift the TNC always<br />
bases the probed value on the active preset (or on the<br />
datum most recently set in the Manual operating mode),<br />
although the datum shift is included in the position display.<br />
Select any probe function.<br />
Enter the desired coordinates of the datum in the appropriate input<br />
fields (depends on the touch probe cycle being run).<br />
Enter the preset number in the Number in table: input box.<br />
Press the ENTER IN PRESET TABLE soft key. The TNC saves the<br />
datum in the preset table under the entered number.<br />
HEIDENHAIN iTNC 530 25<br />
2.1 Introduction
2.2 Calibrating a Touch Trigger Probe<br />
2.2 Calibrating a Touch Trigger<br />
Probe<br />
Introduction<br />
The touch probe must be calibrated in the following cases:<br />
Commissioning<br />
Stylus breakage<br />
Stylus exchange<br />
Change in the probe feed rate<br />
Irregularities caused, for example, when the machine heats up<br />
During calibration, the TNC finds the “effective” length of the stylus<br />
and the “effective” radius of the ball tip. To calibrate the touch probe,<br />
clamp a ring gauge of known height and known internal radius to the<br />
machine table.<br />
Calibrating the effective length<br />
The effective length of the touch probe is always<br />
referenced to the tool datum. The machine tool builder<br />
usually defines the spindle tip as the tool datum.<br />
Set the datum in the spindle axis such that for the machine tool table<br />
Z=0.<br />
To select the calibration function for the touch probe<br />
length, press the TOUCH PROBE and CAL. L soft<br />
keys. The TNC then displays a menu window with<br />
four input fields.<br />
Enter the tool axis (with the axis key).<br />
Datum: Enter the height of the ring gauge.<br />
The menu items Effective ball radius and Effective<br />
length do not require input.<br />
Move the touch probe to a position just above the ring<br />
gauge.<br />
To change the traverse direction (if necessary) press a<br />
soft key or an arrow key.<br />
To probe the upper surface of the ring gauge, press<br />
the machine START button.<br />
26 2 Touch Probe Cycles in the Manual and Electronic Handwheel Modes<br />
5<br />
Y<br />
Z<br />
X
Calibrating the effective radius and<br />
compensating center misalignment<br />
After the touch probe is inserted, it normally needs to be aligned<br />
exactly with the spindle axis. The misalignment is measured with this<br />
calibration function and compensated electronically.<br />
For this operation the TNC rotates the 3-D touch probe by 180°. The<br />
rotation is initiated by a miscellaneous function that is set by the<br />
machine tool builder in machine parameter 6160.<br />
The center misalignment is measured after the effective ball tip radius<br />
is calibrated.<br />
In the Manual Operation mode, position the ball tip in the bore of the<br />
ring gauge.<br />
To select the calibration function for the ball-tip radius<br />
and the touch probe center misalignment, press the<br />
CAL. R soft key.<br />
Select the tool axis and enter the radius of the ring<br />
gauge.<br />
To probe the workpiece, press the machine START<br />
button four times. The touch probe contacts a<br />
position on the bore in each axis direction and<br />
calculates the effective ball-tip radius.<br />
If you want to terminate the calibration function at this<br />
point, press the END soft key.<br />
In order to be able to determine ball-tip center<br />
misalignment, the TNC needs to be specially prepared by<br />
the machine manufacturer. The machine tool manual<br />
provides further information.<br />
If you want to determine the ball-tip center<br />
misalignment, press the180° soft key. The TNC<br />
rotates the touch probe by 180°.<br />
To probe the workpiece, press the machine START<br />
button four times. The touch probe contacts a<br />
position on the bore in each axis direction and<br />
calculates the ball-tip center misalignment.<br />
HEIDENHAIN iTNC 530 27<br />
Y<br />
Z<br />
<strong>10</strong><br />
X<br />
2.2 Calibrating a Touch Trigger Probe
2.2 Calibrating a Touch Trigger Probe<br />
Displaying calibration values<br />
The TNC stores the effective length and radius, as well as the center<br />
misalignment, for use when the touch probe is needed again. You can<br />
display the values on the screen with the soft keys CAL. L and CAL. R.<br />
Storing calibration values in the TOOL.T tool table<br />
This function is only available if bit 0 in Machine Parameter<br />
7411 = 1 is set (activate touch probe data with TOOL CALL),<br />
and tool table TOOL.T is active (Machine Parameter 7260<br />
not equal to 0).<br />
If you conduct measurements during program run, the compensation<br />
data for the touch probe can be activated from the tool table via a TOOL<br />
CALL. To store the calibration data in the TOOL.T tool table, enter the<br />
tool number in the calibration menu (confirm with ENT) and then press<br />
the ENTER R IN TOOL TABLE or the ENTER L IN TOOL TABLE soft<br />
key.<br />
28 2 Touch Probe Cycles in the Manual and Electronic Handwheel Modes
Managing more than one block of calibrating<br />
data<br />
If you use several touch probes or measuring contacts arranged in a<br />
cross shape on your machine, you must also use several sets of<br />
calibration data, if required.<br />
To be able to use more than one block of calibration data, you must set<br />
bit one in Machine Parameter 7411. Although the calibration data<br />
(length, radius, center misalignment, and spindle angle) are calculated<br />
in the calibration menu, you must always save them in the tool table<br />
TOOL.T under a tool number that can be selected in the calibration<br />
menu (see also User's Manual, section 5.2, “Tool Data”).<br />
Execute the calibration function (as described previously).<br />
Enter the tool number in the corresponding input box.<br />
Enter the calculated calibration data in the tool table by pressing the<br />
ENTER-R IN TOOL TABLE or ENTER L IN TOOL TABLE soft key.<br />
If you use the touch probe afterwards, you must first<br />
activate the corresponding tool number with a tool call<br />
before executing a touch probe cycle, regardless of<br />
whether you wish to run the touch probe cycle in<br />
automatic mode or manual mode.<br />
You can view and edit the calibration data in the calibration<br />
menu, but you must make sure to write the changes back<br />
into the tool table by pressing the ENTER R IN TOOL<br />
TABLE or ENTER L IN TOOL TABLE soft key. The TNC<br />
does not write the calibration values into the table<br />
automatically!<br />
HEIDENHAIN iTNC 530 29<br />
2.2 Calibrating a Touch Trigger Probe
2.3 Compensating Workpiece Misalignment<br />
2.3 Compensating Workpiece<br />
Misalignment<br />
Introduction<br />
The TNC electronically compensates workpiece misalignment by<br />
computing a “basic rotation.”<br />
For this purpose, the TNC sets the rotation angle to the desired angle<br />
with respect to the reference axis in the working plane. See figure at<br />
right.<br />
Select the probe direction perpendicular to the angle<br />
reference axis when measuring workpiece misalignment.<br />
To ensure that the basic rotation is calculated correctly<br />
during program run, program both coordinates of the<br />
working plane in the first positioning block.<br />
Measuring the basic rotation<br />
Select the probing function by pressing the PROBING<br />
ROT soft key.<br />
Position the ball tip at a starting position near the first<br />
touch point.<br />
Select the probe direction perpendicular to the angle<br />
reference axis: Select the axis by soft key.<br />
To probe the workpiece, press the machine START<br />
button.<br />
Position the ball tip at a starting position near the<br />
second touch point.<br />
To probe the workpiece, press the machine START<br />
button. The TNC determines the basic rotation and<br />
displays the angle after the dialog Rotation angle =<br />
30 2 Touch Probe Cycles in the Manual and Electronic Handwheel Modes<br />
Y<br />
PA<br />
X<br />
Y<br />
A B<br />
X
Saving the basic rotation in the preset table<br />
After the probing process, enter in the input field Number in table:<br />
the preset number in which the TNC is to save the active basic<br />
rotation<br />
Press the ENTRY IN PRESET TABLE soft key to save the basic<br />
rotation in the preset table.<br />
Displaying a basic rotation<br />
The angle of the basic rotation appears after ROTATION ANGLE<br />
whenever PROBING ROT is selected. The TNC also displays the<br />
rotation angle in the additional status display (STATUS POS.).<br />
In the status display a symbol is shown for a basic rotation whenever<br />
the TNC is moving the axes according to a basic rotation.<br />
Cancel a basic rotation<br />
Select the probing function by pressing the PROBING ROT soft key.<br />
Enter a rotation angle of zero and confirm with the ENT key.<br />
To terminate the probe function, press the END key.<br />
HEIDENHAIN iTNC 530 31<br />
2.3 Compensating Workpiece Misalignment
2.4 Setting the Datum with a 3-D Touch Probe<br />
2.4 Setting the Datum with a 3-D<br />
Touch Probe<br />
Introduction<br />
The following functions are available for setting the datum on an<br />
aligned workpiece:<br />
Datum setting in any axis with PROBING POS<br />
Defining a corner as datum with PROBING P<br />
Setting the datum at a circle center with PROBING CC<br />
Setting a center line as the datum with PROBING<br />
Note that during an active datum shift the TNC always<br />
bases the probed value on the active preset (or on the<br />
datum most recently set in the Manual operating mode),<br />
although the datum shift is included in the position display.<br />
To set the datum in any axis (see figure at right)<br />
Select the probing function by pressing the<br />
PROBING POS soft key.<br />
Move the touch probe to a starting position near the<br />
touch point.<br />
Select the probe axis and direction in which you wish<br />
to set the datum, such as Z in direction Z–. Selection<br />
is made via soft keys.<br />
To probe the workpiece, press the machine START<br />
button.<br />
Datum: Enter the nominal coordinate and confirm your<br />
entry with SET DATUM, or write the value to a table<br />
(see “Writing the measured values from touch probe<br />
cycles in datum tables” on page 24, or see “Writing<br />
the measured values from touch probe cycles in the<br />
preset table” on page 25).<br />
To terminate the probe function, press the END key.<br />
32 2 Touch Probe Cycles in the Manual and Electronic Handwheel Modes<br />
Y<br />
Z<br />
X
Corner as datum—using points that were<br />
already probed for a basic rotation (see figure at<br />
right)<br />
To select the probe function, press PROBING P.<br />
Touch points of basic rotation ?: Press ENT to<br />
transfer the touch point coordinates.<br />
Position the touch probe at a starting position near the<br />
first touch point of the side that was not probed for<br />
basic rotation.<br />
Select the probe direction with a soft key.<br />
To probe the workpiece, press the machine START<br />
button.<br />
Position the touch probe near the second touch point<br />
on the same side.<br />
To probe the workpiece, press the machine START<br />
button.<br />
Datum: Enter both coordinates of the datum in the<br />
menu window, confirm with the SET DATUM soft<br />
key, or write the values to a table (see “Writing the<br />
measured values from touch probe cycles in datum<br />
tables” on page 24, or see “Writing the measured<br />
values from touch probe cycles in the preset table”<br />
on page 25).<br />
To terminate the probe function, press the END key.<br />
Corner as datum—without using points that<br />
were already probed for a basic rotation<br />
To select the probe function, press PROBING P.<br />
Touch points of basic rotation?: Press NO ENT to ignore the<br />
previous touch points. (The dialog question only appears if a basic<br />
rotation was made previously.)<br />
Probe both workpiece sides twice.<br />
Datum: Enter the coordinates of the datum and confirm your entry<br />
with the SET DATUM soft key, or write the values to a table (see<br />
“Writing the measured values from touch probe cycles in datum<br />
tables” on page 24, or see “Writing the measured values from touch<br />
probe cycles in the preset table” on page 25).<br />
To terminate the probe function, press the END key.<br />
HEIDENHAIN iTNC 530 33<br />
Y=?<br />
Y<br />
P<br />
X=?<br />
X<br />
Y<br />
P<br />
X<br />
2.4 Setting the Datum with a 3-D Touch Probe
2.4 Setting the Datum with a 3-D Touch Probe<br />
Circle center as datum<br />
With this function, you can set the datum at the center of bore holes,<br />
circular pockets, cylinders, studs, circular islands, etc.<br />
Inside circle<br />
The TNC automatically probes the inside wall in all four coordinate axis<br />
directions.<br />
For incomplete circles (circular arcs) you can choose the appropriate<br />
probing direction.<br />
Position the touch probe approximately in the center of the circle.<br />
To select the probe function, press PROBING CC.<br />
Outside circle<br />
To probe the workpiece, press the machine START<br />
button four times. The touch probe touches four<br />
points on the inside of the circle.<br />
If you are probing to find the stylus center (only<br />
available on machines with spindle orientation,<br />
depending on MP6160), press the 180° soft key and<br />
probe another four points on the inside of the circle.<br />
If you are not probing to find the stylus center, press<br />
the END key.<br />
Datum: In the menu window, enter both coordinates<br />
of the circle center, confirm with the SET DATUM<br />
soft key, or write the values to a table (see “Writing<br />
the measured values from touch probe cycles in<br />
datum tables” on page 24, or see “Writing the<br />
measured values from touch probe cycles in the<br />
preset table” on page 25).<br />
To terminate the probe function, press the END key.<br />
Position the touch probe at the starting position for the first touch<br />
point outside of the circle.<br />
Select the probe direction with a soft key.<br />
To probe the workpiece, press the machine START button.<br />
Repeat the probing process for the remaining three points. See<br />
figure at lower right.<br />
Datum: Enter the coordinates of the datum and confirm your entry<br />
with the SET DATUM soft key, or write the values to a table (see<br />
“Writing the measured values from touch probe cycles in datum<br />
tables” on page 24, or see “Writing the measured values from touch<br />
probe cycles in the preset table” on page 25).<br />
To terminate the probe function, press the END key.<br />
After the probing procedure is completed, the TNC displays the<br />
coordinates of the circle center and the circle radius PR.<br />
34 2 Touch Probe Cycles in the Manual and Electronic Handwheel Modes<br />
Y<br />
Y<br />
X+<br />
X–<br />
Y+<br />
Y+<br />
Y–<br />
X+<br />
Y–<br />
X–<br />
X<br />
X
Center line as datum<br />
To select the probe function, press PROBING.<br />
Position the ball tip at a starting position near the first<br />
touch point.<br />
Select the probing direction with a soft key.<br />
To probe the workpiece, press the machine START<br />
button.<br />
Position the ball tip at a starting position near the<br />
second touch point.<br />
To probe the workpiece, press the machine START<br />
button.<br />
Datum: Enter the coordinate of the datum in the menu<br />
window, confirm with the SET DATUM soft key, or<br />
write the value to a table (see “Writing the measured<br />
values from touch probe cycles in datum tables” on<br />
page 24, or see “Writing the measured values from<br />
touch probe cycles in the preset table” on page 25).<br />
To terminate the probe function, press the END key.<br />
HEIDENHAIN iTNC 530 35<br />
Y<br />
Y<br />
X+<br />
X–<br />
X+<br />
X–<br />
X<br />
X<br />
2.4 Setting the Datum with a 3-D Touch Probe
2.4 Setting the Datum with a 3-D Touch Probe<br />
Setting datum points using holes/cylindrical<br />
studs<br />
A second soft-key row provides soft keys for using holes or cylindrical<br />
studs to set datums.<br />
Define whether a hole or stud is to be probed<br />
The default setting is for probing holes.<br />
Select the probing functions with the TOUCH PROBE,<br />
shift the soft-key row.<br />
Select the probing function: For example, press the<br />
PROBING ROT soft key.<br />
Circular studs are to be probed. Define by soft key.<br />
Holes are to be probed. Define by soft key.<br />
Probing holes<br />
Pre-position the touch probe approximately in the center of the hole.<br />
After you have pressed the external START key, the TNC automatically<br />
probes four points on the wall of the hole.<br />
Move the touch probe to the next hole and have the TNC repeat the<br />
probing procedure until all the holes have been probed to set datums.<br />
Probing cylindrical studs<br />
Position the ball tip at a starting position near the first touch point of<br />
the stud. Select the probing direction by soft key and press the<br />
machine START button to start probing. Perform the above procedure<br />
four times.<br />
Overview<br />
Cycle Soft key<br />
Basic rotation using 2 holes:<br />
The TNC measures the angle between the line<br />
connecting the centers of two holes and a nominal<br />
position (angle reference axis).<br />
Datum using 4 holes:<br />
The TNC calculates the intersection of the line<br />
connecting the first two probed holes with the line<br />
connecting the last two probed holes. You need to<br />
probe diagonally opposite holes one after another (as<br />
shown on the soft key), as otherwise the datum<br />
calculated by the TNC will be incorrect.<br />
Circle center using 3 holes:<br />
The TNC calculates a circle that intersects the centers<br />
of all three holes, and finds the center.<br />
36 2 Touch Probe Cycles in the Manual and Electronic Handwheel Modes
2.5 Measuring Workpieces with a<br />
3-D Touch Probe<br />
Introduction<br />
You can also use the touch probe in the Manual and Electronic<br />
Handwheel operating modes to make simple measurements on the<br />
workpiece. Numerous programmable probing cycles are available for<br />
more complex measuring tasks (see “Automatic Workpiece<br />
Measurement” on page 93). With a 3-D touch probe you can<br />
determine:<br />
position coordinates, and from them,<br />
dimensions and angles on the workpiece.<br />
To find the coordinate of a position on an aligned<br />
workpiece:<br />
Select the probing function by pressing the PROBING<br />
POS soft key.<br />
Move the touch probe to a starting position near the<br />
touch point.<br />
Select the probe direction and axis of the coordinate.<br />
Use the corresponding soft keys for selection.<br />
To probe the workpiece, press the machine START<br />
button.<br />
The TNC shows the coordinates of the touch point as datum.<br />
Finding the coordinates of a corner in the<br />
working plane<br />
Find the coordinates of the corner point: see “Corner as datum—<br />
without using points that were already probed for a basic rotation,”<br />
page 33. The TNC displays the coordinates of the probed corner as<br />
datum.<br />
HEIDENHAIN iTNC 530 37<br />
2.5 Measuring Workpieces with a 3-D Touch Probe
2.5 Measuring Workpieces with a 3-D Touch Probe<br />
Measuring workpiece dimensions<br />
Select the probing function by pressing the PROBING<br />
POS soft key.<br />
Position the touch probe at a starting position near the<br />
first touch point A.<br />
Select the probing direction with a soft key.<br />
To probe the workpiece, press the machine START<br />
button.<br />
If you will need the current datum later, write down<br />
the value that appears in the datum display.<br />
Datum: Enter “0”.<br />
To terminate the dialog, press the END key.<br />
Select the probing function by pressing the PROBING<br />
POS soft key.<br />
Position the touch probe at a starting position near the<br />
second touch point B<br />
Select the probe direction with the soft keys: Same<br />
axis but from the opposite direction.<br />
To probe the workpiece, press the machine START<br />
button.<br />
The value displayed as datum is the distance between the two points<br />
on the coordinate axis.<br />
To return to the datum that was active before the length<br />
measurement:<br />
Select the probing function by pressing the PROBING POS soft key.<br />
Probe the first touch point again.<br />
Set the datum to the value that you wrote down previously.<br />
To terminate the dialog, press the END key.<br />
Measuring angles<br />
You can use the 3-D touch probe to measure angles in the working<br />
plane. You can measure<br />
the angle between the angle reference axis and a workpiece side, or<br />
the angle between two sides.<br />
The measured angle is displayed as a value of maximum 90°.<br />
38 2 Touch Probe Cycles in the Manual and Electronic Handwheel Modes<br />
Y<br />
Z<br />
B<br />
l<br />
A<br />
X
To find the angle between the angle reference<br />
axis and a side of the workpiece<br />
Select the probing function by pressing the PROBING<br />
ROT soft key.<br />
Rotation angle: If you will need the current basic<br />
rotation later, write down the value that appears<br />
under Rotation angle.<br />
Make a basic rotation with the side of the workpiece<br />
(see “Compensating Workpiece Misalignment” on<br />
page 30).<br />
Press the PROBING ROT soft key to display the angle<br />
between the angle reference axis and the side of the<br />
workpiece as the rotation angle.<br />
Cancel the basic rotation, or restore the previous basic<br />
rotation.<br />
This is done by setting the rotation angle to the value<br />
that you wrote down previously.<br />
To measure the angle between two workpiece sides:<br />
Select the probing function by pressing the PROBING ROT soft key.<br />
Rotation angle: If you will need the current basic rotation later, write<br />
down the value that appears under Rotation angle.<br />
Make a basic rotation with the side of the workpiece (see<br />
“Compensating Workpiece Misalignment” on page 30).<br />
Probe the second side as for a basic rotation, but do not set the<br />
rotation angle to zero!<br />
Press the PROBING ROT soft key to display the angle PA between<br />
the two sides as the rotation angle.<br />
Cancel the basic rotation, or restore the previous basic rotation by<br />
setting the rotation angle to the value that you wrote down<br />
previously.<br />
HEIDENHAIN iTNC 530 39<br />
<strong>10</strong>0<br />
Y<br />
–<strong>10</strong><br />
Z<br />
PA<br />
α?<br />
L?<br />
α?<br />
<strong>10</strong>0<br />
X<br />
2.5 Measuring Workpieces with a 3-D Touch Probe
2.6 Using the Touch Probe Functions with Mechanical Probes or Dial Gauges<br />
2.6 Using the Touch Probe<br />
Functions with Mechanical<br />
Probes or Dial Gauges<br />
Introduction<br />
If you do not have an electronic 3-D touch probe on your machine, you<br />
can also use all the previously described manual touch probe functions<br />
(exception: calibration function) with mechanical probes or by simply<br />
touching the workpiece with the tool.<br />
In place of the electronic signal generated automatically by a 3-D touch<br />
probe during probing, you can manually initiate the trigger signal for<br />
capturing the probing position by pressing a key. Proceed as follows:<br />
Select any touch probe function by soft key.<br />
Move the mechanical probe to the first position to be<br />
captured by the TNC.<br />
Confirm the position: Press the actual-positioncapture<br />
key for the TNC to save the current position.<br />
Move the mechanical probe to the next position to be<br />
captured by the TNC.<br />
Confirm the position: Press the actual-positioncapture<br />
key for the TNC to save the current position.<br />
If required, move to additional positions and capture<br />
as described previously.<br />
Datum: In the menu window, enter the coordinates of<br />
the new datum, confirm with the SET DATUM soft<br />
key, or write the values to a table (see “Writing the<br />
measured values from touch probe cycles in datum<br />
tables” on page 24, or see “Writing the measured<br />
values from touch probe cycles in the preset table”<br />
on page 25).<br />
To terminate the probe function, press the END key.<br />
40 2 Touch Probe Cycles in the Manual and Electronic Handwheel Modes
Touch Probe Cycles for<br />
Automatic<br />
Workpiece Inspection<br />
HEIDENHAIN iTNC 530 41
3.1 Measuring Workpiece Misalignment<br />
3.1 Measuring Workpiece<br />
Misalignment<br />
Overview<br />
The TNC provides five cycles that enable you to measure and<br />
compensate workpiece misalignment. In addition, you can reset a<br />
basic rotation with Cycle 404.<br />
Cycle Soft key<br />
400 BASIC ROTATION Automatic measurement<br />
using two points. Compensation via basic<br />
rotation.<br />
401 ROT OF 2 HOLES Automatic measurement<br />
using two holes. Compensation via basic<br />
rotation.<br />
402 ROT OF 2 STUDS Automatic measurement<br />
using two studs. Compensation via basic<br />
rotation.<br />
403 ROT IN ROTARY AXIS Automatic<br />
measurement using two points. Compensation<br />
via basic rotation.<br />
405 ROT IN C AXIS Automatic alignment of an<br />
angular offset between a hole center and the<br />
positive Y axis. Compensation via table rotation.<br />
404 SET BASIC ROTATION Setting any basic<br />
rotation.<br />
Characteristics common to all touch probe<br />
cycles for measuring workpiece misalignment<br />
For Cycles 400, 401 and 402 you can define through parameter Q307<br />
Default setting for basic rotation whether the measurement<br />
result is to be corrected by a known angle α (see figure at right). This<br />
enables you to measure the basic rotation against any straight line 1<br />
of the workpiece and to establish the reference to the actual 0°<br />
direction 2 .<br />
1 2<br />
42 3 Touch Probe Cycles for Automatic Workpiece Inspection
BASIC ROTATION (touch probe cycle 400,<br />
ISO: G400)<br />
Touch probe cycle 400 determines a workpiece misalignment by<br />
measuring two points, which must lie on a straight surface. With the<br />
basic rotation function the TNC compensates the measured value (see<br />
also “Compensating Workpiece Misalignment” on page 30).<br />
1 Following the positioning logic, the TNC positions the touch probe<br />
at rapid traverse (value from MP6150 or MP6361) (see “Running<br />
touch probe cycles” on page 19) to the programmed starting point<br />
1. The TNC offsets the touch probe by the safety clearance in the<br />
direction opposite the defined traverse direction.<br />
2 Then the touch probe moves to the entered measuring height and<br />
probes the first touch point at the probing feed rate (MP6120 or<br />
MP6360).<br />
3 Then the touch probe moves to the next starting position 2 and<br />
probes the second position.<br />
4 The TNC returns the touch probe to the clearance height and<br />
performs the basic rotation.<br />
Before programming, note the following:<br />
Before a cycle definition you must have programmed a<br />
tool call to define the touch probe axis.<br />
The TNC will reset an active basic rotation at the beginning<br />
of the cycle.<br />
HEIDENHAIN iTNC 530 43<br />
1<br />
2<br />
3.1 Measuring Workpiece Misalignment
3.1 Measuring Workpiece Misalignment<br />
First measuring point in the 1st axis Q263<br />
(absolute): Coordinate of the first touch point in the<br />
reference axis of the working plane.<br />
First measuring point in the 2nd axis Q264<br />
(absolute): Coordinate of the first touch point in the<br />
minor axis of the working plane.<br />
Second measuring point in the 1st axis Q265<br />
(absolute): Coordinate of the second touch point in<br />
the reference axis of the working plane.<br />
Second measuring point in the 2nd axis Q266<br />
(absolute): Coordinate of the second touch point in<br />
the minor axis of the working plane.<br />
Measuring axis Q272: Axis in the working plane in<br />
which the measurement is to be made:<br />
1: Reference axis = measuring axis<br />
2: Minor axis = measuring axis<br />
Traverse direction 1 Q267: Direction in which the<br />
probe is to approach the workpiece:<br />
–1: Negative traverse direction<br />
+1: Positive traverse direction<br />
Measuring height in the touch probe axis Q261<br />
(absolute): Coordinate of the ball tip center (= touch<br />
point) in the touch probe axis in which the<br />
measurement is to be made.<br />
Setup clearance Q320 (incremental): Additional<br />
distance between measuring point and ball tip. Q320<br />
is added to MP6140.<br />
Clearance height Q260 (absolute): Coordinate in the<br />
touch probe axis at which no collision between tool<br />
and workpiece (fixtures) can occur.<br />
Traversing to clearance height Q301: Definition of<br />
how the touch probe is to move between the<br />
measuring points:<br />
0: Move at measuring height between measuring<br />
points<br />
1: Move at clearance height between measuring<br />
points<br />
Default setting for basic rotation Q307<br />
(absolute): If the misalignment is to be measured<br />
against a straight line other than the reference axis,<br />
enter the angle of this reference line. The TNC will<br />
then calculate the difference between the value<br />
measured and the angle of the reference line for the<br />
basic rotation.<br />
Preset number in table Q305: Enter the preset<br />
number in the table in which the TNC is to save the<br />
determined basic rotation. If you enter Q305=0, the<br />
TNC automatically places the determined basic<br />
rotation in the ROT menu of the Manual mode of<br />
operation.<br />
Y<br />
Q272=2<br />
Example: NC blocks<br />
X<br />
Q272=1<br />
5 TCH PROBE 400 BASIC ROTATION<br />
Q263=+<strong>10</strong> ;1ST POINT 1ST AXIS<br />
Q264=+3.5 ;1ST POINT 2ND AXIS<br />
Q265=+25 ;2ND POINT 1ST AXIS<br />
Q266=+2 ;2ND POINT 2ND AXIS<br />
Q272=2 ;MEASURING AXIS<br />
Q267=+1 ;TRAVERSE DIRECTION<br />
Q261=-5 ;MEASURING HEIGHT<br />
Q320=0 ;SET-UP CLEARANCE<br />
Q260=+20 ;CLEARANCE HEIGHT<br />
Q301=0 ;TRAVERSE TO CLEAR HEIGHT<br />
Q307=0 ;PRESET BASIC ROTATION<br />
Q305=0 ;NO. IN TABLE<br />
44 3 Touch Probe Cycles for Automatic Workpiece Inspection<br />
Q266<br />
Q264<br />
Q263<br />
Q265<br />
+<br />
Q267<br />
– +<br />
–<br />
MP6140<br />
+<br />
Q320
BASIC ROTATION from two holes (touch probe<br />
cycle 401, ISO: G401)<br />
The touch probe cycle 401 measures the centers of two holes. Then<br />
the TNC calculates the angle between the reference axis in the<br />
working plane and the line connecting the two hole centers. With the<br />
basic rotation function, the TNC compensates the calculated value<br />
(see also “Compensating Workpiece Misalignment” on page 30).<br />
1 Following the positioning logic, the TNC positions the touch probe<br />
at rapid traverse (value from MP6150 or MP6361) (see “Running<br />
touch probe cycles” on page 19) to the point entered as center of<br />
the first hole 1.<br />
2 Then the probe moves to the entered measuring height and<br />
probes four points to find the first hole center.<br />
3 The touch probe returns to the clearance height and then to the<br />
position entered as center of the second hole 2.<br />
4 The TNC moves the touch probe to the entered measuring height<br />
and probes four points to find the second hole center.<br />
5 Then the TNC returns the touch probe to the clearance height and<br />
performs the basic rotation.<br />
Before programming, note the following:<br />
Before a cycle definition you must have programmed a<br />
tool call to define the touch probe axis.<br />
The TNC will reset an active basic rotation at the beginning<br />
of the cycle.<br />
HEIDENHAIN iTNC 530 45<br />
1<br />
2<br />
3.1 Measuring Workpiece Misalignment
3.1 Measuring Workpiece Misalignment<br />
First hole: Center in 1st axis Q268 (absolute):<br />
Center of the first hole in the reference axis of the<br />
working plane.<br />
First hole: Center in 2nd axis Q269 (absolute):<br />
Center of the first hole in the minor axis of the<br />
working plane.<br />
Second hole: Center in 1st axis Q270 (absolute):<br />
Center of the second hole in the reference axis of the<br />
working plane.<br />
Second hole: Center in 2nd axis Q271 (absolute):<br />
Center of the second hole in the minor axis of the<br />
working plane.<br />
Measuring height in the touch probe axis Q261<br />
(absolute): Coordinate of the ball tip center (= touch<br />
point) in the touch probe axis in which the<br />
measurement is to be made.<br />
Clearance height Q260 (absolute): Coordinate in the<br />
touch probe axis at which no collision between tool<br />
and workpiece (fixtures) can occur.<br />
Default setting for basic rotation Q307<br />
(absolute): If the misalignment is to be measured<br />
against a straight line other than the reference axis,<br />
enter the angle of this reference line. The TNC will<br />
then calculate the difference between the value<br />
measured and the angle of the reference line for the<br />
basic rotation.<br />
Preset number in table Q305: Enter the preset<br />
number in the table in which the TNC is to save the<br />
determined basic rotation. If you enter Q305=0, the<br />
TNC automatically places the determined basic<br />
rotation in the ROT menu of the Manual mode of<br />
operation.<br />
Example: NC blocks<br />
5 TCH PROBE 401 ROT OF 2 HOLES<br />
Q268=-37 ;1ST CENTER 1ST AXIS<br />
Q269=+12 ;1ST CENTER 2ND AXIS<br />
Q270=+75 ;2ND CENTER 1ST AXIS<br />
Q271=+20 ;2ND CENTER 2ND AXIS<br />
Q261=-5 ;MEASURING HEIGHT<br />
Q260=+20 ;CLEARANCE HEIGHT<br />
Q307=0 ;PRESET BASIC ROTATION<br />
Q305=0 ;NO. IN TABLE<br />
46 3 Touch Probe Cycles for Automatic Workpiece Inspection
BASIC ROTATION over two studs (touch probe<br />
cycle 402, ISO: G402)<br />
The touch probe cycle 402 measures the centers of two studs. Then<br />
the TNC calculates the angle between the reference axis in the<br />
working plane and the line connecting the two stud centers. With the<br />
basic rotation function the TNC compensates the calculated value (see<br />
also “Compensating Workpiece Misalignment” on page 30).<br />
1 Following the positioning logic, the TNC positions the touch probe<br />
at rapid traverse (value from MP6150 or MP6361) (see “Running<br />
touch probe cycles” on page 19) to the starting point for probing<br />
the first stud 1.<br />
2 Then the probe moves to the entered Measuring height 1 and<br />
probes four points to find the center of the first stud. The touch<br />
probe moves on a circular arc between the touch points, each of<br />
which is offset by 90°.<br />
3 The touch probe returns to the clearance height and then to the<br />
starting point for probing 5 the second stud.<br />
4 The TNC moves the touch probe to the entered Measuring<br />
height 2 and probes four points to find the center of the second<br />
stud.<br />
5 Then the TNC returns the touch probe to the clearance height and<br />
performs the basic rotation.<br />
Before programming, note the following:<br />
Before a cycle definition you must have programmed a<br />
tool call to define the touch probe axis.<br />
The TNC will reset an active basic rotation at the beginning<br />
of the cycle.<br />
HEIDENHAIN iTNC 530 47<br />
Y<br />
1<br />
5<br />
X<br />
3.1 Measuring Workpiece Misalignment
3.1 Measuring Workpiece Misalignment<br />
First stud: Center in 1st axis (absolute): Center<br />
of the first stud in the reference axis of the working<br />
plane.<br />
First stud: Center in 2nd axis Q269 (absolute):<br />
Center of the first stud in the minor axis of the<br />
working plane.<br />
Diameter of stud 1 Q313: Approximate diameter of<br />
the 1st stud. Enter a value that is more likely to be too<br />
large than too small.<br />
Measuring height 1 in the probe axis Q261<br />
(absolute): Coordinate of the ball tip center (= touch<br />
point in the touch probe axis) at which stud 1 is to be<br />
measured.<br />
Second stud: Center in 1st axis Q270 (absolute):<br />
Center of the second stud in the reference axis of the<br />
working plane.<br />
Second stud: Center in 2nd axis Q271 (absolute):<br />
Center of the second stud in the minor axis of the<br />
working plane.<br />
Diameter of stud 2 Q314: Approximate diameter of<br />
the 2nd stud. Enter a value that is more likely to be<br />
too large than too small.<br />
Measuring height 2 in the probe axis Q315<br />
(absolute): Coordinate of the ball tip center (= touch<br />
point in the touch probe axis) at which stud 2 is to be<br />
measured.<br />
Setup clearance Q320 (incremental): Additional<br />
distance between measuring point and ball tip. Q320<br />
is added to MP6140.<br />
Clearance height Q260 (absolute): Coordinate in the<br />
touch probe axis at which no collision between tool<br />
and workpiece (fixtures) can occur.<br />
48 3 Touch Probe Cycles for Automatic Workpiece Inspection<br />
Q271<br />
Q269<br />
Y<br />
Z<br />
Q313<br />
Q268 Q270<br />
Q261<br />
MP6140<br />
+<br />
Q320<br />
Q315<br />
Q314<br />
X<br />
Q260<br />
X
Traversing to clearance height Q301: Definition of<br />
how the touch probe is to move between the<br />
measuring points:<br />
0: Move at measuring height between measuring<br />
points<br />
1: Move at clearance height between measuring<br />
points<br />
Default setting for basic rotation Q307<br />
(absolute): If the misalignment is to be measured<br />
against a straight line other than the reference axis,<br />
enter the angle of this reference line. The TNC will<br />
then calculate the difference between the value<br />
measured and the angle of the reference line for the<br />
basic rotation.<br />
Preset number in table Q305: Enter the preset<br />
number in the table in which the TNC is to save the<br />
determined basic rotation. If you enter Q305=0, the<br />
TNC automatically places the determined basic<br />
rotation in the ROT menu of the Manual mode of<br />
operation.<br />
Example: NC blocks<br />
5 TCH PROBE 402 ROT OF 2 STUDS<br />
Q268=-37 ;1ST CENTER 1ST AXIS<br />
Q269=+12 ;1ST CENTER 2ND AXIS<br />
Q313=60 ;DIAMETER OF STUD 1<br />
Q261=-5 ;MEASURING HEIGHT 1<br />
Q270=+75 ;2ND CENTER 1ST AXIS<br />
Q271=+20 ;2ND CENTER 2ND AXIS<br />
Q314=60 ;DIAMETER STUD 2<br />
Q315=-5 ;MEASURING HEIGHT 2<br />
Q320=0 ;SET-UP CLEARANCE<br />
Q260=+20 ;CLEARANCE HEIGHT<br />
Q301=0 ;TRAVERSE TO CLEAR HEIGHT<br />
Q307=0 ;PRESET BASIC ROTATION<br />
Q305=0 ;NO. IN TABLE<br />
HEIDENHAIN iTNC 530 49<br />
3.1 Measuring Workpiece Misalignment
3.1 Measuring Workpiece Misalignment<br />
BASIC ROTATION compensation via rotary axis<br />
(touch probe cycle 403, ISO: G403)<br />
Touch probe cycle 403 determines a workpiece misalignment by<br />
measuring two points, which must lie on a straight surface. The TNC<br />
compensates the misalignment by rotating the A, B or C axis. The<br />
workpiece can be clamped in any position on the rotary table.<br />
1 Following the positioning logic, the TNC positions the touch probe<br />
at rapid traverse (value from MP6150 or MP6361) (see “Running<br />
touch probe cycles” on page 19) to the programmed starting point<br />
1. The TNC offsets the touch probe by the safety clearance in the<br />
direction opposite the defined traverse direction.<br />
2 Then the touch probe moves to the entered measuring height and<br />
probes the first touch point at the probing feed rate (MP6120 or<br />
MP6360).<br />
3 Then the touch probe moves to the next starting position 2 and<br />
probes the second position.<br />
4 The TNC returns the touch probe to the clearance height and<br />
moves the rotary axis, which was defined in the cycle, by the<br />
measured value. Optionally you can have the display set to 0 after<br />
alignment.<br />
Before programming, note the following:<br />
Before a cycle definition you must have programmed a<br />
tool call to define the touch probe axis.<br />
The TNC stores the measured angle in parameter Q150.<br />
50 3 Touch Probe Cycles for Automatic Workpiece Inspection<br />
1<br />
2
First measuring point in the 1st axis Q263<br />
(absolute): Coordinate of the first touch point in the<br />
reference axis of the working plane.<br />
First measuring point in the 2nd axis Q264<br />
(absolute): Coordinate of the first touch point in the<br />
minor axis of the working plane.<br />
Second measuring point in the 1st axis Q265<br />
(absolute): Coordinate of the second touch point in<br />
the reference axis of the working plane.<br />
Second measuring point in the 2nd axis Q266<br />
(absolute): Coordinate of the second touch point in<br />
the minor axis of the working plane.<br />
Measuring axis Q272: Axis in which the<br />
measurement is to be made:<br />
1: Reference axis = measuring axis<br />
2: Minor axis = measuring axis<br />
3: Touch probe axis = measuring axis<br />
Traverse direction 1 Q267: Direction in which the<br />
probe is to approach the workpiece:<br />
–1: Negative traverse direction<br />
+1: Positive traverse direction<br />
Measuring height in the touch probe axis Q261<br />
(absolute): Coordinate of the ball tip center (= touch<br />
point) in the touch probe axis in which the<br />
measurement is to be made.<br />
Setup clearance Q320 (incremental): Additional<br />
distance between measuring point and ball tip. Q320<br />
is added to MP6140.<br />
Clearance height Q260 (absolute): Coordinate in the<br />
touch probe axis at which no collision between tool<br />
and workpiece (fixtures) can occur.<br />
Y<br />
Q272=2<br />
X<br />
Q272=1<br />
HEIDENHAIN iTNC 530 51<br />
Q266<br />
Q264<br />
A<br />
B<br />
C<br />
Q263<br />
Q265<br />
+<br />
– +<br />
–<br />
Q267<br />
MP6140<br />
+<br />
Q320<br />
3.1 Measuring Workpiece Misalignment
3.1 Measuring Workpiece Misalignment<br />
Traversing to clearance height Q301: Definition of<br />
how the touch probe is to move between the<br />
measuring points:<br />
0: Move at measuring height between measuring<br />
points<br />
1: Move at clearance height between measuring<br />
points<br />
Axis for compensation motion Q312: Assignment of<br />
the rotary axis in which the TNC is to compensate the<br />
measured misalignment:<br />
4: Compensate misalignment with rotary axis A<br />
5: Compensate misalignment with rotary axis B<br />
6: Compensate misalignment with rotary axis C<br />
Set to zero after alignment Q337: Definition of<br />
whether the TNC should set the display of the aligned<br />
rotary axis to zero:<br />
0: Do not reset the display of the rotary axis to 0 after<br />
alignment<br />
1: Reset the display of the rotary axis to 0 after<br />
alignment<br />
Number in table Q305: Enter the number in the<br />
preset table/datum table in which the TNC is to set<br />
the rotary axis to zero. Only effective if Q337 is set<br />
to 1.<br />
Measured-value transfer (0,1) Q303: Specify if the<br />
determined basic rotation is to be saved in the datum<br />
table or in the preset table:<br />
0: Write the measured basic rotation as a datum shift<br />
in the active datum table. The reference system is the<br />
active workpiece coordinate system.<br />
1: Write the measured basic rotation into the preset<br />
table. The reference system is the machine<br />
coordinate system (REF system).<br />
Reference angle? (0=ref. axis) Q380: Angle with<br />
which the TNC is to align the probed straight line.<br />
Only effective if the rotary axis C is selected<br />
(Q312 = 6).<br />
Example: NC blocks<br />
5 TCH PROBE 403 ROT IN C-AXIS<br />
Q263=+0 ;1ST POINT 1ST AXIS<br />
Q264=+0 ;1ST POINT 2ND AXIS<br />
Q265=+20 ;2ND POINT 1ST AXIS<br />
Q266=+30 ;2ND POINT 2ND AXIS<br />
Q272=1 ;MEASURING AXIS<br />
Q267=-1 ;TRAVERSE DIRECTION<br />
Q261=-5 ;MEASURING HEIGHT<br />
Q320=0 ;SET-UP CLEARANCE<br />
Q260=+20 ;CLEARANCE HEIGHT<br />
Q301=0 ;TRAVERSE TO CLEAR HEIGHT<br />
Q312=6 ;COMPENSATION AXIS<br />
Q337=0 ;SET TO ZERO<br />
Q305=1 ;NO. IN TABLE<br />
Q303=+1 ;MEAS. VALUE TRANSFER<br />
Q380=+90 ;REFERENCE ANGLE<br />
52 3 Touch Probe Cycles for Automatic Workpiece Inspection
BASIC ROTATION (touch probe cycle 404,<br />
ISO: G404)<br />
With touch probe cycle 404, you can set any basic rotation<br />
automatically during program run. This cycle is intended primarily for<br />
resetting a previous basic rotation.<br />
Preset value for basic rotation: Angular value at<br />
which the basic rotation is to be set.<br />
Example: NC blocks<br />
5 TCH PROBE 404 BASIC ROTATION<br />
307=+0 ;PRESET BASIC ROTATION<br />
HEIDENHAIN iTNC 530 53<br />
3.1 Measuring Workpiece Misalignment
3.1 Measuring Workpiece Misalignment<br />
Compensating workpiece misalignment by<br />
rotating the C axis (touch probe cycle 405,<br />
ISO: G405)<br />
With touch probe cycle 405, you can measure<br />
the angular offset between the positive Y axis of the active<br />
coordinate system and the center of a hole, or<br />
the angular offset between the nominal position and the actual<br />
position of a hole center.<br />
The TNC compensates the misalignment by rotating the C axis. The<br />
workpiece can be clamped in any position on the rotary table, but the<br />
Y coordinate of the hole must be positive. If you measure the angular<br />
misalignment of the hole with touch probe axis Y (horizontal position<br />
of the hole), it may be necessary to execute the cycle more than once<br />
because the measuring strategy causes an inaccuracy of approx. 1%<br />
of the misalignment.<br />
1 Following the positioning logic, the TNC positions the touch probe<br />
at rapid traverse (value from MP6150 or MP6361) (see “Running<br />
touch probe cycles” on page 19) to the programmed starting point<br />
1. The TNC calculates the probe starting points from the data in the<br />
cycle and the safety clearance from MP6140.<br />
2 Then the touch probe moves to the entered measuring height and<br />
probes the first touch point at the probing feed rate (MP6120 or<br />
MP6360). The TNC derives the probing direction automatically<br />
from the programmed starting angle.<br />
3 Then the touch probe moves in a circular arc either at measuring<br />
height or at clearance height to the next starting point 2 and probes<br />
the second touch point.<br />
4 The TNC positions the probe to starting point 3 and then to starting<br />
point 4 to probe the third and fourth touch points and positions the<br />
touch probe on the hole centers measured.<br />
5 Finally the TNC returns the touch probe to the clearance height and<br />
aligns the workpiece by rotating the table. The TNC rotates the<br />
rotary table so that the hole center after compensation lies in the<br />
direction of the positive Y axis, or on the nominal position of the<br />
hole center—both with a vertical and horizontal touch probe axis.<br />
The measured angular misalignment is also available in parameter<br />
Q150.<br />
Before programming, note the following:<br />
To prevent a collision between the touch probe and the<br />
workpiece, enter a low estimate for the nominal diameter<br />
of the pocket (or hole).<br />
If the dimensions of the pocket and the safety clearance<br />
do not permit pre-positioning in the proximity of the touch<br />
points, the TNC always starts probing from the center of<br />
the pocket. In this case the touch probe does not return to<br />
the clearance height between the four measuring points.<br />
Before a cycle definition you must have programmed a<br />
tool call to define the touch probe axis.<br />
54 3 Touch Probe Cycles for Automatic Workpiece Inspection<br />
3<br />
2<br />
4<br />
1
Center in 1st axis Q321 (absolute value): Center of<br />
the hole in the reference axis of the working plane.<br />
Center in 2nd axis Q322 (absolute value): Center of<br />
the hole in the minor axis of the working plane. If you<br />
program Q322 = 0, the TNC aligns the hole center to<br />
the positive Y axis. If you program Q322 not equal to<br />
0, then the TNC aligns the hole center to the nominal<br />
position (angle of the hole center).<br />
Nominal diameter Q262: Approximate diameter of the<br />
circular pocket (or hole). Enter a value that is more<br />
likely to be too small than too large.<br />
Starting angle Q325 (absolute): Angle between the<br />
reference axis of the working plane and the first touch<br />
point.<br />
Stepping angle Q247 (incremental): Angle between<br />
two measuring points. The algebraic sign of the<br />
stepping angle determines the direction of rotation<br />
(negative = clockwise) in which the touch probe<br />
moves to the next measuring point. If you wish to<br />
probe a circular arc instead of a complete circle, then<br />
program the stepping angle to be less than 90°.<br />
The smaller the angle, the less accurately the TNC can<br />
calculate the circle center. Minimum input value: 5°.<br />
HEIDENHAIN iTNC 530 55<br />
Q322<br />
Y<br />
Q247<br />
Q321<br />
Q325<br />
Q262<br />
X<br />
3.1 Measuring Workpiece Misalignment
3.1 Measuring Workpiece Misalignment<br />
Measuring height in the touch probe axis Q261<br />
(absolute): Coordinate of the ball tip center (= touch<br />
point) in the touch probe axis in which the<br />
measurement is to be made.<br />
Setup clearance Q320 (incremental): Additional<br />
distance between measuring point and ball tip. Q320<br />
is added to MP6140.<br />
Clearance height Q260 (absolute): Coordinate in the<br />
touch probe axis at which no collision between tool<br />
and workpiece (fixtures) can occur.<br />
Traversing to clearance height Q301: Definition of<br />
how the touch probe is to move between the<br />
measuring points:<br />
0: Move at measuring height between measuring<br />
points<br />
1: Move at clearance height between measuring<br />
points<br />
Set to zero after alignment Q337: Definition of<br />
whether the TNC should set the display of the C axis<br />
to zero, or write the angular misalignment in column<br />
C of the datum table:<br />
0: Set display of C to 0<br />
>0: Write the angular misalignment, including<br />
algebraic sign, in the datum table. Line number =<br />
value of Q337. If a C-axis shift is registered in the<br />
datum table, the TNC adds the measured angular<br />
misalignment.<br />
Example: NC blocks<br />
5 TCH PROBE 405 ROT IN C-AXIS<br />
Q321=+50 ;CENTER IN 1ST AXIS<br />
Q322=+50 ;CENTER IN 2ND AXIS<br />
Q262=<strong>10</strong> ;NOMINAL DIAMETER<br />
Q325=+0 ;STARTING ANGLE<br />
Q247=90 ;STEPPING ANGLE<br />
Q261=-5 ;MEASURING HEIGHT<br />
Q320=0 ;SET-UP CLEARANCE<br />
Q260=+20 ;CLEARANCE HEIGHT<br />
Q301=0 ;TRAVERSE TO CLEAR HEIGHT<br />
Q337=0 ;SET TO ZERO<br />
56 3 Touch Probe Cycles for Automatic Workpiece Inspection<br />
Z<br />
MP6140<br />
+<br />
Q320<br />
Q261<br />
Q260<br />
X
Example: Determining a basic rotation from two holes<br />
0 BEGIN PGM CYC401 MM<br />
1 TOOL CALL 0 Z<br />
2 TCH PROBE 401 ROT OF 2 HOLES<br />
Q268=+25 ;1ST CENTER 1ST AXIS Center of the 1st hole: X coordinate<br />
Q269=+15 ;1ST CENTER 2ND AXIS Center of the 1st hole: Y coordinate<br />
Q270=+80 ;2ND CENTER 1ST AXIS Center of the 2nd hole: X coordinate<br />
Q271=+35 ;2ND CENTER 2ND AXIS Center of the 2nd hole: Y coordinate<br />
35<br />
15<br />
Q261=-5 ;MEASURING HEIGHT Coordinate in the touch probe axis in which the measurement is<br />
made<br />
Q260=+20 ;CLEARANCE HEIGHT Height in the touch probe axis at which the probe can traverse<br />
without collision<br />
Q307=+0 ;PRESET BASIC ROTATION Angle of the reference line<br />
3 CALL PGM 35K47 Part program call<br />
4 END PGM CYC401 MM<br />
Y<br />
HEIDENHAIN iTNC 530 57<br />
25<br />
80<br />
X<br />
Y<br />
Z<br />
3.1 Measuring Workpiece Misalignment
3.2 Automatic Datum Determination<br />
3.2 Automatic Datum<br />
Determination<br />
Overview<br />
The TNC offers ten cycles for determining datums automatically, and<br />
for handling them as follows:<br />
Setting the determined values directly as display values<br />
Entering the determined values in the preset table<br />
Entering the determined values in a datum table<br />
Cycle Soft key<br />
4<strong>10</strong> DATUM INSIDE RECTAN. Measuring the<br />
inside length and width of a rectangle, and<br />
defining the center as datum<br />
411 DATUM OUTSIDE RECTAN. Measuring the<br />
outside length and width of a rectangle, and<br />
defining the center as datum<br />
412 DATUM INSIDE CIRCLE Measuring any four<br />
points on the inside of a circle, and defining the<br />
center as datum<br />
413 DATUM OUTSIDE CIRCLE Measuring any<br />
four points on the outside of a circle, and defining<br />
the center as datum<br />
414 DATUM OUTSIDE CORNER Measuring two<br />
lines from the outside of the angle, and defining<br />
the intersection as datum<br />
415 DATUM INSIDE CORNER Measuring two<br />
lines from within the angle, and defining the<br />
intersection as datum<br />
416 DATUM CIRCLE CENTER (2nd soft-key<br />
level) Measuring any three holes on a bolt hole<br />
circle, and defining the bolt-hole center as datum<br />
417 DATUM IN TS AXIS (2nd soft-key level)<br />
Measuring any position in the touch probe axis<br />
and defining it as datum<br />
418 DATUM FROM 4 HOLES (2nd soft-key level)<br />
Measuring 4 holes crosswise and defining the<br />
intersection of the lines between them as datum<br />
419 DATUM IN ONE AXIS (2nd soft-key level)<br />
Measuring any position in any axis and defining it<br />
as datum<br />
58 3 Touch Probe Cycles for Automatic Workpiece Inspection
Characteristics common to all touch probe<br />
cycles for datum setting<br />
You can also run the touch probe cycles 4<strong>10</strong> to 419 during<br />
an active rotation (basic rotation or Cycle <strong>10</strong>).<br />
Datum point and touch probe axis<br />
From the touch probe axis that you have defined in the measuring<br />
program the TNC determines the working plane for the datum:<br />
Active touch probe axis Datum setting in<br />
Z or W X and Y<br />
Y or V Z and X<br />
X or U Y and Z<br />
HEIDENHAIN iTNC 530 59<br />
3.2 Automatic Datum Determination
3.2 Automatic Datum Determination<br />
Save calculated datum<br />
In all cycles for datum setting you can use the input parameters Q303<br />
and Q305 to define how the TNC is to save the calculated datum:<br />
Q305 = 0, Q303 = any value<br />
The TNC sets the calculated datum in the display. The new datum is<br />
active immediately.<br />
Q305 not equal to 0, Q303 = –1<br />
This combination can only occur if you<br />
read in programs containing Cycles 4<strong>10</strong> to 418 created<br />
on a TNC 4xx<br />
read in programs containing Cycles 4<strong>10</strong> to 418 created<br />
with an older software version on an iTNC 530<br />
did not yourself define the measured-value transfer with<br />
parameter Q303 in the cycle definition<br />
In these cases the TNC outputs an error message, since<br />
the complete handling of REF-referenced datum tables<br />
has changed. You must define a measured-value transfer<br />
yourself with parameter Q303.<br />
Q305 not equal to 0, Q303 = 0<br />
The TNC writes the calculated datum in the active datum table. The<br />
reference system is the active workpiece coordinate system. The<br />
value of parameter Q305 determines the datum number. Activate<br />
datum with Cycle 7 in the part program.<br />
Q305 not equal to 0, Q303 = 1<br />
The TNC writes the calculated datum in the preset table. The<br />
reference system is the machine coordinate system (REF<br />
coordinates). The value of parameter Q305 determines the preset<br />
number. Activate preset with Cycle 247 in the part program.<br />
60 3 Touch Probe Cycles for Automatic Workpiece Inspection
DATUM FROM INSIDE OF RECTANGLE<br />
(touch probe cycle 4<strong>10</strong>, ISO: G4<strong>10</strong>)<br />
Touch probe cycle 4<strong>10</strong> finds the center of a rectangular pocket and<br />
defines its center as datum. If desired, the TNC can also enter the<br />
coordinates into a datum table or the preset table.<br />
1 Following the positioning logic, the TNC positions the touch probe<br />
at rapid traverse (value from MP6150 or MP6361) (see “Running<br />
touch probe cycles” on page 19) to the programmed starting point<br />
1. The TNC calculates the probe starting points from the data in the<br />
cycle and the safety clearance from MP6140.<br />
2 Then the touch probe moves to the entered measuring height and<br />
probes the first touch point at the probing feed rate (MP6120 or<br />
MP6360).<br />
3 Then the touch probe moves either paraxially at measuring height<br />
or at clearance height to the next starting point 2 and probes the<br />
second touch point.<br />
4 The TNC positions the probe to starting point 3 and then to starting<br />
point 4 to probe the third and fourth touch points.<br />
5 Finally the TNC returns the touch probe to the clearance height and<br />
processes the determined datum depending on the cycle<br />
parameters Q303 and Q305 (see “Save calculated datum” on page<br />
60).<br />
6 If desired, the TNC subsequently measures the datum in the touch<br />
probe axis in a separate probing.<br />
Before programming, note the following:<br />
To prevent a collision between touch probe and<br />
workpiece, enter low estimates for the lengths of the 1st<br />
and 2nd sides.<br />
If the dimensions of the pocket and the safety clearance<br />
do not permit pre-positioning in the proximity of the touch<br />
points, the TNC always starts probing from the center of<br />
the pocket. In this case the touch probe does not return to<br />
the clearance height between the four measuring points.<br />
Before a cycle definition you must have programmed a<br />
tool call to define the touch probe axis.<br />
HEIDENHAIN iTNC 530 61<br />
1<br />
4<br />
2<br />
3<br />
3.2 Automatic Datum Determination
3.2 Automatic Datum Determination<br />
Center in 1st axis Q321 (absolute value): Center of<br />
the pocket in the reference axis of the working plane.<br />
Center in 2nd axis Q322 (absolute value): Center of<br />
the pocket in the minor axis of the working plane.<br />
First side length Q323 (incremental value): Pocket<br />
length, parallel to the reference axis of the working<br />
plane.<br />
Second side length Q324 (incremental value): Pocket<br />
length, parallel to the minor axis of the working plane.<br />
Measuring height in the touch probe axis Q261<br />
(absolute): Coordinate of the ball tip center (= touch<br />
point) in the touch probe axis in which the<br />
measurement is to be made.<br />
Setup clearance Q320 (incremental): Additional<br />
distance between measuring point and ball tip. Q320<br />
is added to MP6140.<br />
Clearance height Q260 (absolute): Coordinate in the<br />
touch probe axis at which no collision between tool<br />
and workpiece (fixtures) can occur.<br />
Traversing to clearance height Q301: Definition of<br />
how the touch probe is to move between the<br />
measuring points:<br />
0: Move at measuring height between measuring<br />
points<br />
1: Move at clearance height between measuring<br />
points<br />
Datum number in table Q305: Enter the number in the<br />
datum/preset table in which the TNC is to save the<br />
coordinates of the pocket center. If you enter<br />
Q305=0, the TNC automatically sets the display so<br />
that the new datum is at the center of the pocket.<br />
New datum for reference axis Q331 (absolute):<br />
Coordinate in the reference axis at which the TNC<br />
should set the pocket center. Basic setting = 0<br />
New datum for minor axis Q332 (absolute):<br />
Coordinate in the minor axis at which the TNC should<br />
set the pocket center. Basic setting = 0<br />
62 3 Touch Probe Cycles for Automatic Workpiece Inspection<br />
Q322<br />
Y<br />
Q323<br />
Q321<br />
MP6140<br />
+<br />
Q320<br />
Q324<br />
X
Measured-value transfer (0,1) Q303: Specify<br />
whether the determined datum is to be saved in the<br />
datum table or in the preset table:<br />
–1: Do not use. Is entered by the TNC when old<br />
programs are read in (see “Save calculated datum”<br />
on page 60).<br />
0: Write determined datum in the active datum table.<br />
The reference system is the active workpiece<br />
coordinate system.<br />
1: Write determined datum in the preset table. The<br />
reference system is the machine coordinate system<br />
(REF system).<br />
Probe in TS axis Q381: Specify whether the TNC<br />
should also set the datum in the touch probe axis:<br />
0: Do not set datum in the touch probe axis<br />
1: Set datum in the touch probe axis<br />
Probe in TS axis: Coor. 1st axis Q382 (absolute):<br />
Coordinate of the probe point in the reference axis of<br />
the working plane at which point the datum is to be<br />
set in the touch probe axis. Only effective if Q381 = 1.<br />
Probe in TS axis: Coor. 2nd axis Q383 (absolute):<br />
Coordinate of the probe point in the minor axis of the<br />
working plane at which point the datum is to be set in<br />
the touch probe axis. Only effective if Q381 = 1.<br />
Probe in TS axis: Coor. 3rd axis Q384 (absolute):<br />
Coordinate of the probe point in the touch probe axis,<br />
at which point the datum is to be set in the touch<br />
probe axis. Only effective if Q381 = 1.<br />
New datum for touch probe axis Q333 (absolute):<br />
Coordinate in the touch probe axis at which the TNC<br />
should set the datum. Basic setting = 0<br />
Example: NC blocks<br />
5 TCH PROBE 4<strong>10</strong> DATUM INSIDE RECTAN.<br />
Q321=+50 ;CENTER IN 1ST AXIS<br />
Q322=+50 ;CENTER IN 2ND AXIS<br />
Q323=60 ;1ST SIDE LENGTH<br />
Q324=20 ;2ND SIDE-LENGTH<br />
Q261=-5 ;MEASURING HEIGHT<br />
Q320=0 ;SET-UP CLEARANCE<br />
Q260=+20 ;CLEARANCE HEIGHT<br />
Q301=0 ;TRAVERSE TO CLEAR HEIGHT<br />
Q305=<strong>10</strong> ;NO. IN TABLE<br />
Q331=+0 ;DATUM<br />
Q332=+0 ;DATUM<br />
Q303=+1 ;MEAS. VALUE TRANSFER<br />
Q381=1 ;PROBE IN TS AXIS<br />
Q382=+85 ;1ST CO. FOR TS AXIS<br />
Q382=+50 ;2ND CO. FOR TS AXIS<br />
Q384=+0 ;3RD CO. FOR TS AXIS<br />
Q333=+1 ;DATUM<br />
HEIDENHAIN iTNC 530 63<br />
3.2 Automatic Datum Determination
3.2 Automatic Datum Determination<br />
DATUM FROM OUTSIDE OF RECTANGLE<br />
(touch probe cycle 411, ISO: G411)<br />
Touch probe cycle 411 finds the center of a rectangular stud and<br />
defines its center as datum. If desired, the TNC can also enter the<br />
coordinates into a datum table or the preset table.<br />
1 Following the positioning logic, the TNC positions the touch probe<br />
at rapid traverse (value from MP6150 or MP6361) (see “Running<br />
touch probe cycles” on page 19) to the programmed starting point<br />
1. The TNC calculates the probe starting points from the data in the<br />
cycle and the safety clearance from MP6140.<br />
2 Then the touch probe moves to the entered measuring height and<br />
probes the first touch point at the probing feed rate (MP6120 or<br />
MP6360).<br />
3 Then the touch probe moves either paraxially at measuring height<br />
or at clearance height to the next starting point 2 and probes the<br />
second touch point.<br />
4 The TNC positions the probe to starting point 3 and then to starting<br />
point 4 to probe the third and fourth touch points.<br />
5 Finally the TNC returns the touch probe to the clearance height and<br />
processes the determined datum depending on the cycle<br />
parameters Q303 and Q305 (see “Save calculated datum” on page<br />
60).<br />
6 If desired, the TNC subsequently measures the datum in the touch<br />
probe axis in a separate probing.<br />
Before programming, note the following:<br />
To prevent a collision between the touch probe and<br />
workpiece, enter high estimates for the lengths of the 1st<br />
and 2nd sides.<br />
Before a cycle definition you must have programmed a<br />
tool call to define the touch probe axis.<br />
1 3<br />
64 3 Touch Probe Cycles for Automatic Workpiece Inspection<br />
4<br />
2
Center in 1st axis Q321 (absolute value): Center of<br />
the stud in the reference axis of the working plane.<br />
Center in 2nd axis Q322 (absolute value): Center of<br />
the stud in the minor axis of the working plane.<br />
1st side length Q323 (incremental value): Stud<br />
length, parallel to the reference axis of the working<br />
plane.<br />
2nd side length Q324 (incremental value): Stud<br />
length, parallel to the minor axis of the working plane.<br />
Measuring height in the touch probe axis Q261<br />
(absolute): Coordinate of the ball tip center (= touch<br />
point) in the touch probe axis in which the<br />
measurement is to be made.<br />
Setup clearance Q320 (incremental): Additional<br />
distance between measuring point and ball tip. Q320<br />
is added to MP6140.<br />
Clearance height Q260 (absolute): Coordinate in the<br />
touch probe axis at which no collision between tool<br />
and workpiece (fixtures) can occur.<br />
Traversing to clearance height Q301: Definition of<br />
how the touch probe is to move between the<br />
measuring points:<br />
0: Move at measuring height between measuring<br />
points<br />
1: Move at clearance height between measuring<br />
points<br />
Datum number in table Q305: Enter the datum<br />
number in the table in which the TNC is to save the<br />
coordinates of the pocket center. If you enter<br />
Q305=0, the TNC automatically sets the display so<br />
that the new datum is on the stud center.<br />
New datum for reference axis Q331 (absolute):<br />
Coordinate in the reference axis at which the TNC<br />
should set the stud center. Basic setting = 0<br />
New datum for minor axis Q332 (absolute):<br />
Coordinate in the minor axis at which the TNC should<br />
set the stud center. Basic setting = 0<br />
HEIDENHAIN iTNC 530 65<br />
3.2 Automatic Datum Determination
3.2 Automatic Datum Determination<br />
Measured-value transfer (0,1) Q303: Specify<br />
whether the determined datum is to be saved in the<br />
datum table or in the preset table:<br />
–1: Do not use. Is entered by the TNC when old<br />
programs are read in (see “Save calculated datum”<br />
on page 60).<br />
0: Write determined datum in the active datum table.<br />
The reference system is the active workpiece<br />
coordinate system.<br />
1: Write determined datum in the preset table. The<br />
reference system is the machine coordinate system<br />
(REF system).<br />
Probe in TS axis Q381: Specify whether the TNC<br />
should also set the datum in the touch probe axis:<br />
0: Do not set datum in the touch probe axis<br />
1: Set datum in the touch probe axis<br />
Probe in TS axis: Coor. 1st axis Q382 (absolute):<br />
Coordinate of the probe point in the reference axis of<br />
the working plane at which point the datum is to be<br />
set in the touch probe axis. Only effective if Q381 = 1.<br />
Probe in TS axis: Coor. 2nd axis Q383 (absolute):<br />
Coordinate of the probe point in the minor axis of the<br />
working plane at which point the datum is to be set in<br />
the touch probe axis. Only effective if Q381 = 1.<br />
Probe in TS axis: Coor. 3rd axis Q384 (absolute):<br />
Coordinate of the probe point in the touch probe axis,<br />
at which point the datum is to be set in the touch<br />
probe axis. Only effective if Q381 = 1.<br />
New datum for touch probe axis Q333 (absolute):<br />
Coordinate in the touch probe axis at which the TNC<br />
should set the datum. Basic setting = 0<br />
Example: NC blocks<br />
5 TCH PROBE 411 DATUM OUTS. RECTAN.<br />
Q321=+50 ;CENTER IN 1ST AXIS<br />
Q322=+50 ;CENTER IN 2ND AXIS<br />
Q323=60 ;1ST SIDE LENGTH<br />
Q324=20 ;2ND SIDE-LENGTH<br />
Q261=-5 ;MEASURING HEIGHT<br />
Q320=0 ;SET-UP CLEARANCE<br />
Q260=+20 ;CLEARANCE HEIGHT<br />
Q301=0 ;TRAVERSE TO CLEAR HEIGHT<br />
Q305=0 ;NO. IN TABLE<br />
Q331=+0 ;DATUM<br />
Q332=+0 ;DATUM<br />
Q303=+1 ;MEAS. VALUE TRANSFER<br />
Q381=1 ;PROBE IN TS AXIS<br />
Q382=+85 ;1ST CO. FOR TS AXIS<br />
Q382=+50 ;2ND CO. FOR TS AXIS<br />
Q384=+0 ;3RD CO. FOR TS AXIS<br />
Q333=+1 ;DATUM<br />
66 3 Touch Probe Cycles for Automatic Workpiece Inspection
DATUM FROM INSIDE OF CIRCLE (touch probe<br />
cycle 412, ISO: G412)<br />
Touch probe cycle 412 finds the center of a circular pocket (or of a<br />
hole) and defines its center as datum. If desired, the TNC can also<br />
enter the coordinates into a datum table or the preset table.<br />
1 Following the positioning logic, the TNC positions the touch probe<br />
at rapid traverse (value from MP6150 or MP6361) (see “Running<br />
touch probe cycles” on page 19) to the programmed starting point<br />
1. The TNC calculates the probe starting points from the data in the<br />
cycle and the safety clearance from MP6140.<br />
2 Then the touch probe moves to the entered measuring height and<br />
probes the first touch point at the probing feed rate (MP6120 or<br />
MP6360). The TNC derives the probing direction automatically<br />
from the programmed starting angle.<br />
3 Then the touch probe moves in a circular arc either at measuring<br />
height or at clearance height to the next starting point 2 and probes<br />
the second touch point.<br />
4 The TNC positions the probe to starting point 3 and then to starting<br />
point 4 to probe the third and fourth touch points.<br />
5 Finally the TNC returns the touch probe to the clearance height and<br />
processes the determined datum depending on the cycle<br />
parameters Q303 and Q305 (see “Save calculated datum” on page<br />
60).<br />
6 If desired, the TNC subsequently measures the datum in the touch<br />
probe axis in a separate probing.<br />
Before programming, note the following:<br />
To prevent a collision between the touch probe and the<br />
workpiece, enter a low estimate for the nominal diameter<br />
of the pocket (or hole).<br />
If the dimensions of the pocket and the safety clearance<br />
do not permit pre-positioning in the proximity of the touch<br />
points, the TNC always starts probing from the center of<br />
the pocket. In this case the touch probe does not return to<br />
the clearance height between the four measuring points.<br />
Before a cycle definition you must have programmed a<br />
tool call to define the touch probe axis.<br />
HEIDENHAIN iTNC 530 67<br />
3<br />
1<br />
2<br />
4<br />
3.2 Automatic Datum Determination
3.2 Automatic Datum Determination<br />
Center in 1st axis Q321 (absolute value): Center of<br />
the pocket in the reference axis of the working plane.<br />
Center in 2nd axis Q322 (absolute value): Center of<br />
the pocket in the minor axis of the working plane. If<br />
you program Q322 = 0, the TNC aligns the hole center<br />
to the positive Y axis. If you program Q322 not equal<br />
to 0, then the TNC aligns the hole center to the<br />
nominal position.<br />
Nominal diameter Q262: Approximate diameter of the<br />
circular pocket (or hole). Enter a value that is more<br />
likely to be too small than too large.<br />
Starting angle Q325 (absolute): Angle between the<br />
reference axis of the working plane and the first touch<br />
point.<br />
Stepping angle Q247 (incremental): Angle between<br />
two measuring points. The algebraic sign of the<br />
stepping angle determines the direction of rotation<br />
(negative = clockwise) in which the touch probe<br />
moves to the next measuring point. If you wish to<br />
probe a circular arc instead of a complete circle, then<br />
program the stepping angle to be less than 90°.<br />
The smaller the angle, the less accurately the TNC can<br />
calculate the datum. Minimum input value: 5°<br />
Measuring height in the touch probe axis Q261<br />
(absolute): Coordinate of the ball tip center (= touch<br />
point) in the touch probe axis in which the<br />
measurement is to be made.<br />
Setup clearance Q320 (incremental): Additional<br />
distance between measuring point and ball tip. Q320<br />
is added to MP6140.<br />
Clearance height Q260 (absolute): Coordinate in the<br />
touch probe axis at which no collision between tool<br />
and workpiece (fixtures) can occur.<br />
Traversing to clearance height Q301: Definition of<br />
how the touch probe is to move between the<br />
measuring points:<br />
0: Move at measuring height between measuring<br />
points<br />
1: Move at clearance height between measuring points<br />
Datum number in table Q305: Enter the number in the<br />
datum or preset table in which the TNC is to save the<br />
coordinates of the pocket center. If you enter Q305=0,<br />
the TNC automatically sets the display so that the new<br />
datum is on the pocket center.<br />
68 3 Touch Probe Cycles for Automatic Workpiece Inspection<br />
Q322<br />
Y<br />
Z<br />
Q247<br />
Q321<br />
MP6140<br />
+<br />
Q320<br />
Q325<br />
Q261<br />
Q262<br />
X<br />
Q260<br />
X
New datum for reference axis Q331 (absolute):<br />
Coordinate in the reference axis at which the TNC<br />
should set the pocket center. Basic setting = 0<br />
New datum for minor axis Q332 (absolute):<br />
Coordinate in the minor axis at which the TNC should<br />
set the pocket center. Basic setting = 0<br />
Measured-value transfer (0,1) Q303: Specify<br />
whether the determined datum is to be saved in the<br />
datum table or in the preset table:<br />
–1: Do not use. Is entered by the TNC when old<br />
programs are read in (see “Save calculated datum”<br />
on page 60).<br />
0: Write determined datum in the active datum table.<br />
The reference system is the active workpiece<br />
coordinate system.<br />
1: Write determined datum in the preset table. The<br />
reference system is the machine coordinate system<br />
(REF system).<br />
Probe in TS axis Q381: Specify whether the TNC<br />
should also set the datum in the touch probe axis:<br />
0: Do not set datum in the touch probe axis<br />
1: Set datum in the touch probe axis<br />
Probe in TS axis: Coor. 1st axis Q382 (absolute):<br />
Coordinate of the probe point in the reference axis of<br />
the working plane at which point the datum is to be<br />
set in the touch probe axis. Only effective if Q381 = 1.<br />
Probe in TS axis: Coor. 2nd axis Q383 (absolute):<br />
Coordinate of the probe point in the minor axis of the<br />
working plane at which point the datum is to be set in<br />
the touch probe axis. Only effective if Q381 = 1.<br />
Probe in TS axis: Coor. 3rd axis Q384 (absolute):<br />
Coordinate of the probe point in the touch probe axis,<br />
at which point the datum is to be set in the touch<br />
probe axis. Only effective if Q381 = 1.<br />
New datum for touch probe axis Q333 (absolute):<br />
Coordinate in the touch probe axis at which the TNC<br />
should set the datum. Basic setting = 0<br />
Example: NC blocks<br />
5 TCH PROBE 412 DATUM INSIDE CIRCLE<br />
Q321=+50 ;CENTER IN 1ST AXIS<br />
Q322=+50 ;CENTER IN 2ND AXIS<br />
Q262=65 ;NOMINAL DIAMETER<br />
Q325=+0 ;STARTING ANGLE<br />
Q247=90 ;STEPPING ANGLE<br />
Q261=-5 ;MEASURING HEIGHT<br />
Q320=0 ;SET-UP CLEARANCE<br />
Q260=+20 ;CLEARANCE HEIGHT<br />
Q301=0 ;TRAVERSE TO CLEAR HEIGHT<br />
Q305=12 ;NO. IN TABLE<br />
Q331=+0 ;DATUM<br />
Q332=+0 ;DATUM<br />
Q303=+1 ;MEAS. VALUE TRANSFER<br />
Q381=1 ;PROBE IN TS AXIS<br />
Q382=+85 ;1ST CO. FOR TS AXIS<br />
Q382=+50 ;2ND CO. FOR TS AXIS<br />
Q384=+0 ;3RD CO. FOR TS AXIS<br />
Q333=+1 ;DATUM<br />
HEIDENHAIN iTNC 530 69<br />
3.2 Automatic Datum Determination
3.2 Automatic Datum Determination<br />
DATUM FROM OUTSIDE OF CIRCLE<br />
(touch probe cycle 413, ISO: G413)<br />
Touch probe cycle 413 finds the center of a circular stud and defines<br />
it as datum. If desired, the TNC can also enter the coordinates into a<br />
datum table or the preset table.<br />
1 Following the positioning logic, the TNC positions the touch probe<br />
at rapid traverse (value from MP6150 or MP6361) (see “Running<br />
touch probe cycles” on page 19) to the programmed starting point<br />
1. The TNC calculates the probe starting points from the data in the<br />
cycle and the safety clearance from MP6140.<br />
2 Then the touch probe moves to the entered measuring height and<br />
probes the first touch point at the probing feed rate (MP6120 or<br />
MP6360). The TNC derives the probing direction automatically<br />
from the programmed starting angle.<br />
3 Then the touch probe moves in a circular arc either at measuring<br />
height or at clearance height to the next starting point 2 and probes<br />
the second touch point.<br />
4 The TNC positions the probe to starting point 3 and then to starting<br />
point 4 to probe the third and fourth touch points.<br />
5 Finally the TNC returns the touch probe to the clearance height and<br />
processes the determined datum depending on the cycle<br />
parameters Q303 and Q305 (see “Save calculated datum” on page<br />
60).<br />
6 If desired, the TNC subsequently measures the datum in the touch<br />
probe axis in a separate probing.<br />
Before programming, note the following:<br />
To prevent a collision between the touch probe and the<br />
workpiece, enter a high estimate for the nominal diameter<br />
of the pocket (or hole).<br />
Before a cycle definition you must have programmed a<br />
tool call to define the touch probe axis.<br />
70 3 Touch Probe Cycles for Automatic Workpiece Inspection<br />
3<br />
2<br />
4<br />
1
Center in 1st axis Q321 (absolute value): Center of<br />
the stud in the reference axis of the working plane.<br />
Center in 2nd axis Q322 (absolute value): Center of<br />
the stud in the minor axis of the working plane. If you<br />
program Q322 = 0, the TNC aligns the hole center to<br />
the positive Y axis. If you program Q322 not equal to<br />
0, then the TNC aligns the hole center to the nominal<br />
position.<br />
Nominal diameter Q262: Approximate diameter of the<br />
stud. Enter a value that is more likely to be too large<br />
than too small.<br />
Starting angle Q325 (absolute): Angle between the<br />
reference axis of the working plane and the first touch<br />
point.<br />
Stepping angle Q247 (incremental): Angle between<br />
two measuring points. The algebraic sign of the<br />
stepping angle determines the direction of rotation<br />
(negative = clockwise) in which the touch probe<br />
moves to the next measuring point. If you wish to<br />
probe a circular arc instead of a complete circle, then<br />
program the stepping angle to be less than 90°.<br />
The smaller the angle, the less accurately the TNC can<br />
calculate the datum. Minimum input value: 5°.<br />
Measuring height in the touch probe axis Q261<br />
(absolute): Coordinate of the ball tip center (= touch<br />
point) in the touch probe axis in which the<br />
measurement is to be made.<br />
Setup clearance Q320 (incremental): Additional<br />
distance between measuring point and ball tip. Q320<br />
is added to MP6140.<br />
Clearance height Q260 (absolute): Coordinate in the<br />
touch probe axis at which no collision between tool<br />
and workpiece (fixtures) can occur.<br />
Traversing to clearance height Q301: Definition of<br />
how the touch probe is to move between the<br />
measuring points:<br />
0: Move at measuring height between measuring<br />
points<br />
1: Move at clearance height between measuring points<br />
Datum number in table Q305: Enter the datum<br />
number in the table in which the TNC is to save the<br />
coordinates of the pocket center. If you enter<br />
Q305=0, the TNC automatically sets the display so<br />
that the new datum is on the stud center.<br />
HEIDENHAIN iTNC 530 71<br />
Q322<br />
Y<br />
Q247<br />
Q321<br />
Q325<br />
Q262<br />
X<br />
3.2 Automatic Datum Determination
3.2 Automatic Datum Determination<br />
New datum for reference axis Q331 (absolute):<br />
Coordinate in the reference axis at which the TNC<br />
should set the stud center. Basic setting = 0<br />
New datum for minor axis Q332 (absolute):<br />
Coordinate in the minor axis at which the TNC should<br />
set the stud center. Basic setting = 0<br />
Measured-value transfer (0,1) Q303: Specify<br />
whether the determined datum is to be saved in the<br />
datum table or in the preset table:<br />
–1: Do not use. Is entered by the TNC when old<br />
programs are read in (see “Save calculated datum”<br />
on page 60).<br />
0: Write determined datum in the active datum table.<br />
The reference system is the active workpiece<br />
coordinate system.<br />
1: Write determined datum in the preset table. The<br />
reference system is the machine coordinate system<br />
(REF system).<br />
Probe in TS axis Q381: Specify whether the TNC<br />
should also set the datum in the touch probe axis:<br />
0: Do not set datum in the touch probe axis<br />
1: Set datum in the touch probe axis<br />
Probe in TS axis: Coor. 1st axis Q382 (absolute):<br />
Coordinate of the probe point in the reference axis of<br />
the working plane at which point the datum is to be<br />
set in the touch probe axis. Only effective if Q381 = 1.<br />
Probe in TS axis: Coor. 2nd axis Q383 (absolute):<br />
Coordinate of the probe point in the minor axis of the<br />
working plane at which point the datum is to be set in<br />
the touch probe axis. Only effective if Q381 = 1.<br />
Probe in TS axis: Coor. 3rd axis Q384 (absolute):<br />
Coordinate of the probe point in the touch probe axis,<br />
at which point the datum is to be set in the touch<br />
probe axis. Only effective if Q381 = 1.<br />
New datum for touch probe axis Q333 (absolute):<br />
Coordinate in the touch probe axis at which the TNC<br />
should set the datum. Basic setting = 0<br />
Example: NC blocks<br />
5 TCH PROBE 413 DATUM OUTSIDE CIRCLE<br />
Q321=+50 ;CENTER IN 1ST AXIS<br />
Q322=+50 ;CENTER IN 2ND AXIS<br />
Q262=65 ;NOMINAL DIAMETER<br />
Q325=+0 ;STARTING ANGLE<br />
Q247=90 ;STEPPING ANGLE<br />
Q261=-5 ;MEASURING HEIGHT<br />
Q320=0 ;SET-UP CLEARANCE<br />
Q260=+20 ;CLEARANCE HEIGHT<br />
Q301=0 ;TRAVERSE TO CLEAR HEIGHT<br />
Q305=15 ;NO. IN TABLE<br />
Q331=+0 ;DATUM<br />
Q332=+0 ;DATUM<br />
Q303=+1 ;MEAS. VALUE TRANSFER<br />
Q381=1 ;PROBE IN TS AXIS<br />
Q382=+85 ;1ST CO. FOR TS AXIS<br />
Q382=+50 ;2ND CO. FOR TS AXIS<br />
Q384=+0 ;3RD CO. FOR TS AXIS<br />
Q333=+1 ;DATUM<br />
72 3 Touch Probe Cycles for Automatic Workpiece Inspection
DATUM FROM OUTSIDE OF CORNER<br />
(touch probe cycle 414, ISO: G414)<br />
Touch probe cycle 414 finds the intersection of two lines and defines<br />
it as the datum. If desired, the TNC can also enter the intersection into<br />
a datum table or preset table.<br />
1 Following the positioning logic, the TNC positions the touch probe<br />
at rapid traverse (value from MP6150 or MP6361) (see “Running<br />
touch probe cycles” on page 19) to the first touch point 1 (see<br />
figure at upper right). The TNC offsets the touch probe by the<br />
safety clearance in the direction opposite the respective traverse<br />
direction.<br />
2 Then the touch probe moves to the entered measuring height and<br />
probes the first touch point at the probing feed rate (MP6120 or<br />
MP6360). The TNC derives the probing direction automatically<br />
from the programmed 3rd measuring point.<br />
The TNC always measures the first line in the direction of<br />
the minor axis of the working plane.<br />
3 Then the touch probe moves to the next starting position 2 and<br />
from there probes the second position.<br />
4 The TNC positions the probe to starting point 3 and then to starting<br />
point 4 to probe the third and fourth touch points.<br />
5 Finally the TNC returns the touch probe to the clearance height and<br />
processes the determined datum depending on the cycle<br />
parameters Q303 and Q305 (see “Save calculated datum” on page<br />
60).<br />
6 If desired, the TNC subsequently measures the datum in the touch<br />
probe axis in a separate probing.<br />
Before programming, note the following:<br />
By defining the positions of the measuring points 1 and 3<br />
you also determine the corner at which the TNC sets the<br />
datum (see figure at right and table at lower right).<br />
Before a cycle definition you must have programmed a<br />
tool call to define the touch probe axis.<br />
Corner X coordinate Y coordinate<br />
A Point 1 greater than<br />
point 3<br />
Point 1 less than point 3<br />
B Point 1 less than point 3 Point 1 less than point 3<br />
C Point 1 less than point 3 Point 1 greater than point 3<br />
D Point 1 greater than<br />
point 3<br />
Point 1 greater than point 3<br />
1 2<br />
HEIDENHAIN iTNC 530 73<br />
3<br />
1<br />
2<br />
4<br />
3<br />
2 2<br />
1<br />
3 3<br />
1<br />
1<br />
2<br />
3<br />
3.2 Automatic Datum Determination
3.2 Automatic Datum Determination<br />
First measuring point in the 1st axis Q263<br />
(absolute): Coordinate of the first touch point in the<br />
reference axis of the working plane.<br />
First measuring point in the 2nd axis Q264<br />
(absolute): Coordinate of the first touch point in the<br />
minor axis of the working plane.<br />
Spacing in 1st axis Q326 (incremental): Distance<br />
between the first and second measuring points in the<br />
reference axis of the working plane.<br />
3rd measuring point in 1st axis Q296 (absolute):<br />
Coordinate of the third touch point in the reference<br />
axis of the working plane.<br />
3rd measuring point in 2nd axis Q297 (absolute):<br />
Coordinate of the third touch point in the minor axis of<br />
the working plane.<br />
Spacing in 2nd axis Q327 (incremental): Distance<br />
between third and fourth measuring points in the<br />
minor axis of the working plane.<br />
Measuring height in the touch probe axis Q261<br />
(absolute): Coordinate of the ball tip center (= touch<br />
point) in the touch probe axis in which the<br />
measurement is to be made.<br />
Setup clearance Q320 (incremental): Additional<br />
distance between measuring point and ball tip. Q320<br />
is added to MP6140.<br />
Clearance height Q260 (absolute): Coordinate in the<br />
touch probe axis at which no collision between tool<br />
and workpiece (fixtures) can occur.<br />
Traversing to clearance height Q301: Definition of<br />
how the touch probe is to move between the<br />
measuring points:<br />
0: Move at measuring height between measuring<br />
points<br />
1: Move at clearance height between measuring<br />
points<br />
Execute basic rotation Q304: Definition of whether<br />
the TNC should compensate workpiece misalignment<br />
with a basic rotation:<br />
0: No basic rotation<br />
1: Basic rotation<br />
74 3 Touch Probe Cycles for Automatic Workpiece Inspection<br />
Q327<br />
Q297<br />
Y<br />
Q296<br />
MP6140<br />
+<br />
Q320<br />
Q263<br />
Q326<br />
Q264<br />
X
Datum number in table Q305: Enter the datum<br />
number in the datum or preset table in which the TNC<br />
is to save the coordinates of the corner. If you enter<br />
Q305=0, the TNC automatically sets the display so<br />
that the new datum is on the corner.<br />
New datum for reference axis Q331 (absolute):<br />
Coordinate in the reference axis at which the TNC<br />
should set the corner. Basic setting = 0<br />
New datum for minor axis Q332 (absolute):<br />
Coordinate in the minor axis at which the TNC should<br />
set the calculated corner. Basic setting = 0<br />
Measured-value transfer (0,1) Q303: Specify<br />
whether the determined datum is to be saved in the<br />
datum table or in the preset table:<br />
–1: Do not use. Is entered by the TNC when old<br />
programs are read in (see “Save calculated datum”<br />
on page 60).<br />
0: Write determined datum in the active datum table.<br />
The reference system is the active workpiece<br />
coordinate system.<br />
1: Write determined datum in the preset table. The<br />
reference system is the machine coordinate system<br />
(REF system).<br />
Probe in TS axis Q381: Specify whether the TNC<br />
should also set the datum in the touch probe axis:<br />
0: Do not set datum in the touch probe axis<br />
1: Set datum in the touch probe axis<br />
Probe in TS axis: Coor. 1st axis Q382 (absolute):<br />
Coordinate of the probe point in the reference axis of<br />
the working plane at which point the datum is to be<br />
set in the touch probe axis. Only effective if Q381 = 1.<br />
Probe in TS axis: Coor. 2nd axis Q383 (absolute):<br />
Coordinate of the probe point in the minor axis of the<br />
working plane at which point the datum is to be set in<br />
the touch probe axis. Only effective if Q381 = 1.<br />
Probe in TS axis: Coor. 3rd axis Q384 (absolute):<br />
Coordinate of the probe point in the touch probe axis,<br />
at which point the datum is to be set in the touch<br />
probe axis. Only effective if Q381 = 1.<br />
New datum for touch probe axis Q333 (absolute):<br />
Coordinate in the touch probe axis at which the TNC<br />
should set the datum. Basic setting = 0<br />
Example: NC blocks<br />
5 TCH PROBE 414 DATUM OUTSIDE CORNER<br />
Q263=+37 ;1ST POINT 1ST AXIS<br />
Q264=+7 ;1ST POINT 2ND AXIS<br />
Q326=50 ;SPACING IN 1ST AXIS<br />
Q296=+95 ;3RD POINT 1ST AXIS<br />
Q297=+25 ;3RD POINT 2ND AXIS<br />
Q327=45 ;SPACING IN 2ND AXIS<br />
Q261=-5 ;MEASURING HEIGHT<br />
Q320=0 ;SET-UP CLEARANCE<br />
Q260=+20 ;CLEARANCE HEIGHT<br />
Q301=0 ;TRAVERSE TO CLEAR HEIGHT<br />
Q304=0 ;BASIC ROTATION<br />
Q305=7 ;NO. IN TABLE<br />
Q331=+0 ;DATUM<br />
Q332=+0 ;DATUM<br />
Q303=+1 ;MEAS. VALUE TRANSFER<br />
Q381=1 ;PROBE IN TS AXIS<br />
Q382=+85 ;1ST CO. FOR TS AXIS<br />
Q382=+50 ;2ND CO. FOR TS AXIS<br />
Q384=+0 ;3RD CO. FOR TS AXIS<br />
Q333=+1 ;DATUM<br />
HEIDENHAIN iTNC 530 75<br />
3.2 Automatic Datum Determination
3.2 Automatic Datum Determination<br />
DATUM FROM INSIDE OF CORNER<br />
(touch probe cycle 415, ISO: G415)<br />
Touch probe cycle 415 finds the intersection of two lines and defines<br />
it as the datum. If desired, the TNC can also enter the intersection into<br />
a datum table or preset table.<br />
1 Following the positioning logic, the TNC positions the touch probe<br />
at rapid traverse (value from MP6150 or MP6361) (see “Running<br />
touch probe cycles” on page 19) to the first touch point 1 (see<br />
figure at upper right) that you have defined in the cycle. The TNC<br />
offsets the touch probe by the safety clearance in the direction<br />
opposite the respective traverse direction.<br />
2 Then the touch probe moves to the entered measuring height and<br />
probes the first touch point at the probing feed rate (MP6120 or<br />
MP6360). The probing direction is derived from the number by<br />
which you identify the corner.<br />
The TNC always measures the first line in the direction of<br />
the minor axis of the working plane.<br />
3 Then the touch probe moves to the next starting position 2 and<br />
from there probes the second position.<br />
4 The TNC positions the probe to starting point 3 and then to starting<br />
point 4 to probe the third and fourth touch points.<br />
5 Finally the TNC returns the touch probe to the clearance height and<br />
processes the determined datum depending on the cycle<br />
parameters Q303 and Q305 (see “Save calculated datum” on page<br />
60).<br />
6 If desired, the TNC subsequently measures the datum in the touch<br />
probe axis in a separate probing.<br />
Before programming, note the following:<br />
Before a cycle definition you must have programmed a<br />
tool call to define the touch probe axis.<br />
76 3 Touch Probe Cycles for Automatic Workpiece Inspection<br />
4<br />
3<br />
1 2
First measuring point in the 1st axis Q263<br />
(absolute): Coordinate of the first touch point in the<br />
reference axis of the working plane.<br />
First measuring point in the 2nd axis Q264<br />
(absolute): Coordinate of the first touch point in the<br />
minor axis of the working plane.<br />
Spacing in 1st axis Q326 (incremental): Distance<br />
between the first and second measuring points in the<br />
reference axis of the working plane.<br />
Spacing in 2nd axis Q327 (incremental): Distance<br />
between third and fourth measuring points in the<br />
minor axis of the working plane.<br />
Corner Q308: Number identifying the corner which<br />
the TNC is to set as datum.<br />
Measuring height in the touch probe axis Q261<br />
(absolute): Coordinate of the ball tip center (= touch<br />
point) in the touch probe axis in which the<br />
measurement is to be made.<br />
Setup clearance Q320 (incremental): Additional<br />
distance between measuring point and ball tip. Q320<br />
is added to MP6140.<br />
Clearance height Q260 (absolute): Coordinate in the<br />
touch probe axis at which no collision between tool<br />
and workpiece (fixtures) can occur.<br />
Traversing to clearance height Q301: Definition of<br />
how the touch probe is to move between the<br />
measuring points:<br />
0: Move at measuring height between measuring<br />
points<br />
1: Move at clearance height between measuring<br />
points<br />
Execute basic rotation Q304: Definition of whether<br />
the TNC should compensate workpiece misalignment<br />
with a basic rotation:<br />
0: No basic rotation<br />
1: Basic rotation<br />
HEIDENHAIN iTNC 530 77<br />
Q327<br />
Q264<br />
Y<br />
Q263<br />
MP6140<br />
+<br />
Q320<br />
Q308=4<br />
Q308=1 Q308=2<br />
Q326<br />
Q308=3<br />
X<br />
3.2 Automatic Datum Determination
3.2 Automatic Datum Determination<br />
Datum number in table Q305: Enter the datum<br />
number in the datum or preset table in which the TNC<br />
is to save the coordinates of the corner. If you enter<br />
Q305=0, the TNC automatically sets the display so<br />
that the new datum is on the corner.<br />
New datum for reference axis Q331 (absolute):<br />
Coordinate in the reference axis at which the TNC<br />
should set the corner. Basic setting = 0<br />
New datum for minor axis Q332 (absolute):<br />
Coordinate in the minor axis at which the TNC should<br />
set the calculated corner. Basic setting = 0<br />
Measured-value transfer (0,1) Q303: Specify<br />
whether the determined datum is to be saved in the<br />
datum table or in the preset table:<br />
–1: Do not use. Is entered by the TNC when old<br />
programs are read in (see “Save calculated datum”<br />
on page 60).<br />
0: Write determined datum in the active datum table.<br />
The reference system is the active workpiece<br />
coordinate system.<br />
1: Write determined datum in the preset table. The<br />
reference system is the machine coordinate system<br />
(REF system).<br />
Probe in TS axis Q381: Specify whether the TNC<br />
should also set the datum in the touch probe axis:<br />
0: Do not set datum in the touch probe axis<br />
1: Set datum in the touch probe axis<br />
Probe in TS axis: Coor. 1st axis Q382 (absolute):<br />
Coordinate of the probe point in the reference axis of<br />
the working plane at which point the datum is to be<br />
set in the touch probe axis. Only effective if Q381 = 1.<br />
Probe in TS axis: Coor. 2nd axis Q383 (absolute):<br />
Coordinate of the probe point in the minor axis of the<br />
working plane at which point the datum is to be set in<br />
the touch probe axis. Only effective if Q381 = 1.<br />
Probe in TS axis: Coor. 3rd axis Q384 (absolute):<br />
Coordinate of the probe point in the touch probe axis,<br />
at which point the datum is to be set in the touch<br />
probe axis. Only effective if Q381 = 1.<br />
New datum for touch probe axis Q333 (absolute):<br />
Coordinate in the touch probe axis at which the TNC<br />
should set the datum. Basic setting = 0<br />
Example: NC blocks<br />
5 TCH PROBE 415 DATUM OUTSIDE CORNER<br />
Q263=+37 ;1ST POINT 1ST AXIS<br />
Q264=+7 ;1ST POINT 2ND AXIS<br />
Q326=50 ;SPACING IN 1ST AXIS<br />
Q327=45 ;SPACING IN 2ND AXIS<br />
Q308=3 ;CORNER<br />
Q261=-5 ;MEASURING HEIGHT<br />
Q320=0 ;SET-UP CLEARANCE<br />
Q260=+20 ;CLEARANCE HEIGHT<br />
Q301=0 ;TRAVERSE TO CLEAR HEIGHT<br />
Q304=0 ;BASIC ROTATION<br />
Q305=8 ;NO. IN TABLE<br />
Q331=+0 ;DATUM<br />
Q332=+0 ;DATUM<br />
Q303=+1 ;MEAS. VALUE TRANSFER<br />
Q381=1 ;PROBE IN TS AXIS<br />
Q382=+85 ;1ST CO. FOR TS AXIS<br />
Q382=+50 ;2ND CO. FOR TS AXIS<br />
Q384=+0 ;3RD CO. FOR TS AXIS<br />
Q333=+1 ;DATUM<br />
78 3 Touch Probe Cycles for Automatic Workpiece Inspection
DATUM CIRCLE CENTER (touch probe cycle 416,<br />
ISO: G416)<br />
Touch probe cycle 416 finds the center of a bolt hole circle and defines<br />
its center as datum. If desired, the TNC can also enter the coordinates<br />
into a datum table or the preset table.<br />
1 Following the positioning logic, the TNC positions the touch probe<br />
at rapid traverse (value from MP6150 or MP6361) (see “Running<br />
touch probe cycles” on page 19) to the point entered as center of<br />
the first hole 1.<br />
2 Then the probe moves to the entered measuring height and<br />
probes four points to find the first hole center.<br />
3 The touch probe returns to the clearance height and then to the<br />
position entered as center of the second hole 2.<br />
4 The TNC moves the touch probe to the entered measuring height<br />
and probes four points to find the second hole center.<br />
5 The touch probe returns to the clearance height and then to the<br />
position entered as center of the third hole 3.<br />
6 The TNC moves the touch probe to the entered measuring height<br />
and probes four points to find the third hole center.<br />
7 Finally the TNC returns the touch probe to the clearance height and<br />
processes the determined datum depending on the cycle<br />
parameters Q303 and Q305 (see “Save calculated datum” on page<br />
60).<br />
8 If desired, the TNC subsequently measures the datum in the touch<br />
probe axis in a separate probing.<br />
Before programming, note the following:<br />
Before a cycle definition you must have programmed a<br />
tool call to define the touch probe axis.<br />
HEIDENHAIN iTNC 530 79<br />
2<br />
1<br />
3<br />
3.2 Automatic Datum Determination
3.2 Automatic Datum Determination<br />
Center of 1st axis Q273 (absolute): Bolt hole circle<br />
center (nominal value) in the reference axis of the<br />
working plane.<br />
Center in 2nd axis Q274 (absolute): Bolt hole circle<br />
center (nominal value) in the minor axis of the working<br />
plane.<br />
Nominal diameter Q262: Enter the approximate bolt<br />
hole circle diameter. The smaller the hole diameter,<br />
the more exact the nominal diameter must be.<br />
Angle of 1st hole Q291 (absolute): Polar coordinate<br />
angle of the first hole center in the working plane.<br />
Angle of 2nd hole Q292 (absolute): Polar coordinate<br />
angle of the second hole center in the working plane.<br />
Angle of 3rd hole Q293 (absolute): Polar coordinate<br />
angle of the third hole center in the working plane.<br />
Measuring height in the touch probe axis Q261<br />
(absolute): Coordinate of the ball tip center (= touch<br />
point) in the touch probe axis in which the<br />
measurement is to be made.<br />
Clearance height Q260 (absolute): Coordinate in the<br />
touch probe axis at which no collision between tool<br />
and workpiece (fixtures) can occur.<br />
Datum number in table Q305: Enter the number in the<br />
datum or preset table in which the TNC is to save the<br />
coordinates of the bolt-hole circle center. If you enter<br />
Q305=0, the TNC automatically sets the display so<br />
that the new datum is on the bolt hole center.<br />
New datum for reference axis Q331 (absolute):<br />
Coordinate in the reference axis at which the TNC<br />
should set the bolt-hole center.<br />
Basic setting = 0<br />
New datum for minor axis Q332 (absolute):<br />
Coordinate in the minor axis at which the TNC should<br />
set the bolt-hole center.<br />
Basic setting = 0<br />
80 3 Touch Probe Cycles for Automatic Workpiece Inspection
Measured-value transfer (0,1) Q303: Specify<br />
whether the determined datum is to be saved in the<br />
datum table or in the preset table:<br />
–1: Do not use. Is entered by the TNC when old<br />
programs are read in (see “Save calculated datum”<br />
on page 60).<br />
0: Write determined datum in the active datum table.<br />
The reference system is the active workpiece<br />
coordinate system.<br />
1: Write determined datum in the preset table. The<br />
reference system is the machine coordinate system<br />
(REF system).<br />
Probe in TS axis Q381: Specify whether the TNC<br />
should also set the datum in the touch probe axis:<br />
0: Do not set datum in the touch probe axis<br />
1: Set datum in the touch probe axis<br />
Probe in TS axis: Coor. 1st axis Q382 (absolute):<br />
Coordinate of the probe point in the reference axis of<br />
the working plane at which point the datum is to be<br />
set in the touch probe axis. Only effective if Q381 = 1.<br />
Probe in TS axis: Coor. 2nd axis Q383 (absolute):<br />
Coordinate of the probe point in the minor axis of the<br />
working plane at which point the datum is to be set in<br />
the touch probe axis. Only effective if Q381 = 1.<br />
Probe in TS axis: Coor. 3rd axis Q384 (absolute):<br />
Coordinate of the probe point in the touch probe axis,<br />
at which point the datum is to be set in the touch<br />
probe axis. Only effective if Q381 = 1.<br />
New datum for touch probe axis Q333 (absolute):<br />
Coordinate in the touch probe axis at which the TNC<br />
should set the datum. Basic setting = 0<br />
Example: NC blocks<br />
5 TCH PROBE 416 DATUM CIRCLE CENTER<br />
Q273=+50 ;CENTER IN 1ST AXIS<br />
Q274=+50 ;CENTER IN 2ND AXIS<br />
Q262=90 ;NOMINAL DIAMETER<br />
Q291=+35 ;ANGLE OF 1ST HOLE<br />
Q292=+70 ;ANGLE OF 2ND HOLE<br />
Q293=+2<strong>10</strong> ;ANGLE OF 3RD HOLE<br />
Q261=-5 ;MEASURING HEIGHT<br />
Q260=+20 ;CLEARANCE HEIGHT<br />
Q305=12 ;NO. IN TABLE<br />
Q331=+0 ;DATUM<br />
Q332=+0 ;DATUM<br />
Q303=+1 ;MEAS. VALUE TRANSFER<br />
Q381=1 ;PROBE IN TS AXIS<br />
Q382=+85 ;1ST CO. FOR TS AXIS<br />
Q382=+50 ;2ND CO. FOR TS AXIS<br />
Q384=+0 ;3RD CO. FOR TS AXIS<br />
Q333=+1 ;DATUM<br />
HEIDENHAIN iTNC 530 81<br />
3.2 Automatic Datum Determination
3.2 Automatic Datum Determination<br />
DATUM IN TOUCH PROBE AXIS<br />
(touch probe cycle 417, ISO: G417)<br />
Touch probe cycle 417 measures any coordinate in the touch probe<br />
axis and defines it as datum. If desired, the TNC can also enter the<br />
measured coordinate in a datum table or preset table.<br />
1 Following the positioning logic, the TNC positions the touch probe<br />
at rapid traverse (value from MP6150 or MP6361) (see “Running<br />
touch probe cycles” on page 19) to the programmed starting point<br />
1. The TNC offsets the touch probe by the safety clearance in the<br />
positive direction of the touch probe axis.<br />
2 Then the touch probe moves in its own axis to the coordinate<br />
entered as starting point 1 and measures the actual position with<br />
a simple probing movement.<br />
3 Finally the TNC returns the touch probe to the clearance height and<br />
processes the determined datum depending on the cycle<br />
parameters Q303 and Q305 (see “Save calculated datum” on page<br />
60).<br />
Before programming, note the following:<br />
Before a cycle definition you must have programmed a<br />
tool call to define the touch probe axis. The TNC then sets<br />
the datum in this axis.<br />
First measuring point in the 1st axis Q263<br />
(absolute): Coordinate of the first touch point in the<br />
reference axis of the working plane.<br />
First measuring point in the 2nd axis Q264<br />
(absolute): Coordinate of the first touch point in the<br />
minor axis of the working plane.<br />
First measuring point in the 3rd axis Q294<br />
(absolute): Coordinate of the first touch point in the<br />
touch probe axis.<br />
Setup clearance Q320 (incremental): Additional<br />
distance between measuring point and ball tip. Q320<br />
is added to MP6140.<br />
Clearance height Q260 (absolute): Coordinate in the<br />
touch probe axis at which no collision between tool<br />
and workpiece (fixtures) can occur.<br />
82 3 Touch Probe Cycles for Automatic Workpiece Inspection<br />
MP6140<br />
+<br />
Q320<br />
Q294<br />
Z<br />
1<br />
1<br />
Q260<br />
X
Datum number in table Q305: Enter the number in the<br />
datum or preset table in which the TNC is to save the<br />
coordinate. If you enter Q305=0, the TNC<br />
automatically sets the display so that the new datum<br />
is on the probed surface.<br />
New datum for touch probe axis Q333 (absolute):<br />
Coordinate in the touch probe axis at which the TNC<br />
should set the datum. Basic setting = 0<br />
Measured-value transfer (0,1) Q303: Specify<br />
whether the determined datum is to be saved in the<br />
datum table or in the preset table:<br />
–1: Do not use. Is entered by the TNC when old<br />
programs are read in (see “Save calculated datum”<br />
on page 60).<br />
0: Write determined datum in the active datum table.<br />
The reference system is the active workpiece<br />
coordinate system.<br />
1: Write determined datum in the preset table. The<br />
reference system is the machine coordinate system<br />
(REF system).<br />
Example: NC blocks<br />
5 TCH PROBE 417 DATUM IN TS AXIS<br />
Q263=+25 ;1ST POINT 1ST AXIS<br />
Q264=+25 ;1ST POINT 2ND AXIS<br />
Q294=+25 ;1ST POINT 3RD AXIS<br />
Q320=0 ;SET-UP CLEARANCE<br />
Q260=+50 ;CLEARANCE HEIGHT<br />
Q305=0 ;NO. IN TABLE<br />
Q333=+0 ;DATUM<br />
Q303=+1 ;MEAS. VALUE TRANSFER<br />
HEIDENHAIN iTNC 530 83<br />
3.2 Automatic Datum Determination
3.2 Automatic Datum Determination<br />
DATUM AT CENTER BETWEEN 4 HOLES<br />
(touch probe cycle 418, ISO: G418)<br />
Touch probe cycle 418 calculates the intersection of the lines<br />
connecting opposite corners of a rectangle defined by four hole<br />
centers. If desired, the TNC can also enter the intersection into a<br />
datum table or preset table.<br />
1 Following the positioning logic, the TNC positions the touch probe<br />
at rapid traverse (value from MP6150 or MP6361) (see “Running<br />
touch probe cycles” on page 19) to the center of the first hole 1.<br />
2 Then the probe moves to the entered measuring height and<br />
probes four points to find the first hole center.<br />
3 The touch probe returns to the clearance height and then to the<br />
position entered as center of the second hole 2.<br />
4 The TNC moves the touch probe to the entered measuring height<br />
and probes four points to find the second hole center.<br />
5 The TNC repeats steps 3 and 4 for holes 3 and 4.<br />
6 Finally the TNC returns the touch probe to the clearance height and<br />
processes the determined datum depending on the cycle<br />
parameters Q303 and Q305 (see “Save calculated datum” on page<br />
60). The TNC calculates the datum as the intersection of the lines<br />
connecting the centers of holes 1 and 3, and 2 and 4.<br />
7 If desired, the TNC subsequently measures the datum in the touch<br />
probe axis in a separate probing.<br />
Before programming, note the following:<br />
Before a cycle definition you must have programmed a<br />
tool call to define the touch probe axis.<br />
84 3 Touch Probe Cycles for Automatic Workpiece Inspection<br />
Y<br />
4 3<br />
1<br />
2<br />
X
First center in 1st axis Q268 (absolute): Center of<br />
the 1st hole in the reference axis of the working plane.<br />
First center in 2nd axis Q269 (absolute): Center of<br />
the 1st hole in the minor axis of the working plane.<br />
Second center in 1st axis Q270 (absolute): Center of<br />
the 2nd hole in the reference axis of the working<br />
plane.<br />
Second center in 2nd axis Q271 (absolute): Center of<br />
the 2nd hole in the minor axis of the working plane.<br />
Third center in 1st axis Q316 (absolute): Center of<br />
the 3rd hole in the reference axis of the working plane.<br />
Third center in 2nd axis Q317 (absolute): Center of<br />
the 3rd hole in the minor axis of the working plane.<br />
Fourth center in 1st axis Q318 (absolute): Center of<br />
the 4th hole in the reference axis of the working plane.<br />
Fourth center in 2nd axis Q319 (absolute): Center<br />
of the 4th hole in the minor axis of the working plane.<br />
Measuring height in the touch probe axis Q261<br />
(absolute): Coordinate of the ball tip center (= touch<br />
point) in the touch probe axis in which the<br />
measurement is to be made.<br />
Clearance height Q260 (absolute): Coordinate in the<br />
touch probe axis at which no collision between tool<br />
and workpiece (fixtures) can occur.<br />
HEIDENHAIN iTNC 530 85<br />
Q319<br />
Q269<br />
Y<br />
Z<br />
Q318 Q316<br />
Q268 Q270<br />
Q261<br />
Q317<br />
Q271<br />
X<br />
Q260<br />
X<br />
3.2 Automatic Datum Determination
3.2 Automatic Datum Determination<br />
Datum number in table Q305: Enter the number in the<br />
datum or preset table in which the TNC is to save the<br />
coordinates of the line intersection. If you enter<br />
Q305=0, the TNC automatically sets the display so<br />
that the new datum is at the intersection of the<br />
connecting lines.<br />
New datum for reference axis Q331 (absolute):<br />
Coordinate in the reference axis at which the TNC<br />
should set the intersection of the connecting lines.<br />
Basic setting = 0<br />
New datum for minor axis Q332 (absolute):<br />
Coordinate in the minor axis at which the TNC should<br />
set the intersection of the connecting lines. Basic<br />
setting = 0<br />
Measured-value transfer (0,1) Q303: Specify<br />
whether the determined datum is to be saved in the<br />
datum table or in the preset table:<br />
–1: Do not use. Is entered by the TNC when old<br />
programs are read in (see “Save calculated datum”<br />
on page 60).<br />
0: Write determined datum in the active datum table.<br />
The reference system is the active workpiece<br />
coordinate system.<br />
1: Write determined datum in the preset table. The<br />
reference system is the machine coordinate system<br />
(REF system).<br />
Probe in TS axis Q381: Specify whether the TNC<br />
should also set the datum in the touch probe axis:<br />
0: Do not set datum in the touch probe axis<br />
1: Set datum in the touch probe axis<br />
Probe in TS axis: Coor. 1st axis Q382 (absolute):<br />
Coordinate of the probe point in the reference axis of<br />
the working plane at which point the datum is to be<br />
set in the touch probe axis. Only effective if Q381 = 1.<br />
Probe in TS axis: Coor. 2nd axis Q383 (absolute):<br />
Coordinate of the probe point in the minor axis of the<br />
working plane at which point the datum is to be set in<br />
the touch probe axis. Only effective if Q381 = 1.<br />
Probe in TS axis: Coor. 3rd axis Q384 (absolute):<br />
Coordinate of the probe point in the touch probe axis,<br />
at which point the datum is to be set in the touch<br />
probe axis. Only effective if Q381 = 1.<br />
New datum for touch probe axis Q333 (absolute):<br />
Coordinate in the touch probe axis at which the TNC<br />
should set the datum. Basic setting = 0<br />
Example: NC blocks<br />
5 TCH PROBE 418 DATUM FROM 4 HOLES<br />
Q268=+20 ;1ST CENTER 1ST AXIS<br />
Q269=+25 ;1ST CENTER 2ND AXIS<br />
Q270=+150 ;2ND CENTER 1ST AXIS<br />
Q271=+25 ;2ND CENTER 2ND AXIS<br />
Q316=+150 ;3RD CENTER 1ST AXIS<br />
Q317=+85 ;3RD CENTER 2ND AXIS<br />
Q318=+22 ;4TH CENTER 1ST AXIS<br />
Q319=+80 ;4TH CENTER 2ND AXIS<br />
Q261=-5 ;MEASURING HEIGHT<br />
Q260=+<strong>10</strong> ;CLEARANCE HEIGHT<br />
Q305=12 ;NO. IN TABLE<br />
Q331=+0 ;DATUM<br />
Q332=+0 ;DATUM<br />
Q303=+1 ;MEAS. VALUE TRANSFER<br />
Q381=1 ;PROBE IN TS AXIS<br />
Q382=+85 ;1ST CO. FOR TS AXIS<br />
Q382=+50 ;2ND CO. FOR TS AXIS<br />
Q384=+0 ;3RD CO. FOR TS AXIS<br />
Q333=+0 ;DATUM<br />
86 3 Touch Probe Cycles for Automatic Workpiece Inspection
DATUM IN ONE AXIS (touch probe cycle 419,<br />
ISO: G419)<br />
Touch probe cycle 419 measures any coordinate in any axis and<br />
defines it as datum. If desired, the TNC can also enter the measured<br />
coordinate in a datum table or preset table.<br />
1 Following the positioning logic, the TNC positions the touch probe<br />
at rapid traverse (value from MP6150 or MP6361) (see “Running<br />
touch probe cycles” on page 19) to the programmed starting point<br />
1. The TNC offsets the touch probe by the safety clearance in the<br />
direction opposite the programmed probing direction.<br />
2 Then the touch probe moves to the programmed measuring height<br />
and measures the actual position with a simple probing<br />
movement.<br />
3 Finally the TNC returns the touch probe to the clearance height and<br />
processes the determined datum depending on the cycle<br />
parameters Q303 and Q305 (see “Save calculated datum” on page<br />
60).<br />
Before programming, note the following:<br />
Before a cycle definition you must have programmed a<br />
tool call to define the touch probe axis.<br />
First measuring point in the 1st axis Q263<br />
(absolute): Coordinate of the first touch point in the<br />
reference axis of the working plane.<br />
First measuring point in the 2nd axis Q264<br />
(absolute): Coordinate of the first touch point in the<br />
minor axis of the working plane.<br />
Measuring height in the touch probe axis Q261<br />
(absolute): Coordinate of the ball tip center (= touch<br />
point) in the touch probe axis in which the<br />
measurement is to be made.<br />
Setup clearance Q320 (incremental): Additional<br />
distance between measuring point and ball tip. Q320<br />
is added to MP6140.<br />
Clearance height Q260 (absolute): Coordinate in the<br />
touch probe axis at which no collision between tool<br />
and workpiece (fixtures) can occur.<br />
Y<br />
Q272=2<br />
X<br />
Q272=1<br />
HEIDENHAIN iTNC 530 87<br />
Q264<br />
1<br />
Q263<br />
1<br />
MP6140 + Q320<br />
+<br />
Q267<br />
– +<br />
–<br />
3.2 Automatic Datum Determination
3.2 Automatic Datum Determination<br />
Active touch probe<br />
axis: Q272 = 3<br />
Measuring axis (1...3: 1=reference axis) Q272:<br />
Axis in which the measurement is to be made:<br />
1: Reference axis = measuring axis<br />
2: Minor axis = measuring axis<br />
3: Touch probe axis = measuring axis<br />
Axis assignment<br />
Corresponding<br />
reference axis:<br />
Q272 = 1<br />
Z X Y<br />
Y Z X<br />
X Y Z<br />
Corresponding<br />
minor axis: Q272 = 2<br />
Traverse direction Q267: Direction in which the<br />
probe is to approach the workpiece:<br />
-1: Negative traverse direction<br />
+1: Positive traverse direction<br />
Datum number in table Q305: Enter the number in the<br />
datum or preset table in which the TNC is to save the<br />
coordinate. If you enter Q305=0, the TNC<br />
automatically sets the display so that the new datum<br />
is on the probed surface.<br />
New datum Q333 (absolute): Coordinate at which the<br />
TNC should set the datum. Basic setting = 0<br />
Measured-value transfer (0,1) Q303: Specify<br />
whether the determined datum is to be saved in the<br />
datum table or in the preset table:<br />
–1: Do not use. see “Save calculated datum,” page<br />
60.<br />
0: Write determined datum in the active datum table.<br />
The reference system is the active workpiece<br />
coordinate system.<br />
1: Write determined datum in the preset table. The<br />
reference system is the machine coordinate system<br />
(REF system).<br />
Example: NC blocks<br />
5 TCH PROBE 419 DATUM IN ONE AXIS<br />
Q263=+25 ;1ST POINT 1ST AXIS<br />
Q264=+25 ;1ST POINT 2ND AXIS<br />
Q261=+25 ;MEASURING HEIGHT<br />
Q320=0 ;SET-UP CLEARANCE<br />
Q260=+50 ;CLEARANCE HEIGHT<br />
Q272=+1 ;MEASURING AXIS<br />
Q267=+1 ;TRAVERSE DIRECTION<br />
Q305=0 ;NO. IN TABLE<br />
Q333=+0 ;DATUM<br />
Q303=+1 ;MEAS. VALUE TRANSFER<br />
88 3 Touch Probe Cycles for Automatic Workpiece Inspection
Example: Datum setting in center of a circular segment and on top surface of<br />
workpiece<br />
0 BEGIN PGM CYC413 MM<br />
1 TOOL CALL 0 Z Call tool 0 to define the touch probe axis<br />
HEIDENHAIN iTNC 530 89<br />
3.2 Automatic Datum Determination
3.2 Automatic Datum Determination<br />
2 TCH PROBE 413 DATUM OUTSIDE CIRCLE<br />
Q321=+25 ;CENTER IN 1ST AXIS Center of circle: X coordinate<br />
Q322=+25 ;CENTER IN 2ND AXIS Center of circle: Y coordinate<br />
Q262=30 ;NOMINAL DIAMETER Diameter of circle<br />
Q325=+90 ;STARTING ANGLE Polar coordinate angle for 1st touch point<br />
Q247=+45 ;STEPPING ANGLE Stepping angle for calculating the starting points 2 to 4<br />
Q261=-5 ;MEASURING HEIGHT Coordinate in the touch probe axis in which the measurement is<br />
made<br />
Q320=2 ;SET-UP CLEARANCE Safety clearance in addition to MP6140<br />
Q260=+<strong>10</strong> ;CLEARANCE HEIGHT Height in the touch probe axis at which the probe can traverse<br />
without collision<br />
Q301=0 ;TRAVERSE TO CLEAR HEIGHT Do not move to clearance height between measuring points<br />
Q305=0 ;NO. IN TABLE Set display<br />
Q331=+0 ;DATUM Set the display in X to 0<br />
Q332=+<strong>10</strong> ;DATUM Set the display in Y to <strong>10</strong><br />
Q303=+0 ;MEAS. VALUE TRANSFER Without function, since display is to be set<br />
Q381=1 ;PROBE IN TS AXIS Also set datum in the touch probe axis<br />
Q382=+25 ;1ST CO. FOR TS AXIS X coordinate of touch point<br />
Q382=+25 ;2ND CO. FOR TS AXIS Y coordinate of touch point<br />
Q384=+25 ;3RD CO. FOR TS AXIS Z coordinate of touch point<br />
Q333=+0 ;DATUM Set the display in Z to 0<br />
3 CALL PGM 35K47<br />
4 END PGM CYC413 MM<br />
Part program call<br />
90 3 Touch Probe Cycles for Automatic Workpiece Inspection
Example: Datum setting on top surface of workpiece and in center of a bolt hole circle<br />
The measured bolt hole center shall be written in<br />
the preset table so that it may be used at a later<br />
time.<br />
0 BEGIN PGM CYC416 MM<br />
1 TOOL CALL 0 Z Call tool 0 to define the touch probe axis<br />
2 TCH PROBE 417 DATUM IN TS AXIS Cycle definition for datum setting in the touch probe axis<br />
Q263=+7.5 ;1ST POINT 1ST AXIS Touch point: X coordinate<br />
Q264=+7.5 ;1ST POINT 2ND AXIS Touch point: Y coordinate<br />
Q294=+25 ;1ST POINT 3RD AXIS Touch point: Z coordinate<br />
Q320=0 ;SET-UP CLEARANCE Safety clearance in addition to MP6140<br />
Q260=+50 ;CLEARANCE HEIGHT Height in the touch probe axis at which the probe can traverse<br />
without collision<br />
Q305=1 ;NO. IN TABLE Write Z coordinate in line 1<br />
Q333=+0 ;DATUM Set touch-probe axis to 0<br />
Q303=+1 ;MEAS. VALUE TRANSFER In the preset table PRESET.PR, save the calculated datum<br />
referenced to the machine-based coordinate system (REF system)<br />
HEIDENHAIN iTNC 530 91<br />
2<br />
1<br />
3<br />
3.2 Automatic Datum Determination
3.2 Automatic Datum Determination<br />
3 TCH PROBE 416 DATUM CIRCLE CENTER<br />
Q273=+35 ;CENTER 1ST AXIS Center of the bolt hole circle: X coordinate<br />
Q274=+35 ;CENTER IN 2ND AXIS Center of the bolt hole circle: Y coordinate<br />
Q262=50 ;NOMINAL DIAMETER Diameter of the bolt hole circle<br />
Q291=+90 ;ANGLE OF 1ST HOLE Polar coordinate angle for 1st hole center 1<br />
Q292=+180 ;ANGLE OF 2ND HOLE Polar coordinate angle for 2nd hole center 2<br />
Q293=+270 ;ANGLE OF 3RD HOLE Polar coordinate angle for 3rd hole center 3<br />
Q261=+15 ;MEASURING HEIGHT Coordinate in the touch probe axis in which the measurement is<br />
made<br />
Q260=+<strong>10</strong> ;CLEARANCE HEIGHT Height in the touch probe axis at which the probe can traverse<br />
without collision<br />
Q305=1 ;NO. IN TABLE<br />
Q331=+0 ;DATUM<br />
Q332=+0 ;DATUM<br />
Enter center of bolt hole circle (X and Y) in line 1<br />
Q303=+1 ;MEAS. VALUE TRANSFER In the preset table PRESET.PR, save the calculated datum<br />
referenced to the machine-based coordinate system (REF system)<br />
Q381=0 ;PROBE IN TS AXIS Do not set a datum in the touch probe axis<br />
Q382=+0 ;1ST CO. FOR TS AXIS No function<br />
Q383=+0 ;2ND CO. FOR TS AXIS No function<br />
Q384=+0 ;3RD CO. FOR TS AXIS No function<br />
Q333=+0 ;DATUM No function<br />
4 CYCL DEF 247 DATUM SETTING<br />
Q339=1 ;DATUM NUMBER<br />
Activate new preset with Cycle 247<br />
5 CALL PGM 35KL7<br />
6 END PGM CYC416 MM<br />
Part program call<br />
92 3 Touch Probe Cycles for Automatic Workpiece Inspection
3.3 Automatic Workpiece<br />
Measurement<br />
Overview<br />
The TNC offers twelve cycles for measuring workpieces<br />
automatically.<br />
Cycle Soft key<br />
0 REFERENCE PLANE Measuring a coordinate in a<br />
selectable axis<br />
1 POLAR DATUM PLANE Measuring a point in a<br />
probing direction<br />
420 MEASURE ANGLE Measuring an angle in the<br />
working plane<br />
421 MEASURE HOLE Measuring the position and<br />
diameter of a hole<br />
422 MEAS. CIRCLE OUTSIDE Measuring the position<br />
and diameter of a circular stud<br />
423 MEAS. RECTAN. INSIDE Measuring the position,<br />
length and width of a rectangular pocket<br />
424 MEAS. RECTAN. OUTSIDE Measuring the<br />
position, length and width of a rectangular stud<br />
425 MEASURE INSIDE WIDTH (2nd soft-key level)<br />
Measuring slot width<br />
426 MEASURE RIDGE WIDTH (2nd soft-key level)<br />
Measuring the width of a ridge<br />
427 MEASURE COORDINATE (2nd soft-key level)<br />
Measuring any coordinate in a selectable axis<br />
430 MEAS. BOLT HOLE CIRC. (2nd soft-key level)<br />
Measuring position and diameter of a bolt hole circle<br />
431 MEASURE PLANE (2nd soft-key level) Measuring<br />
the A and B axis angles of a plane<br />
HEIDENHAIN iTNC 530 93<br />
3.3 Automatic Workpiece Measurement
3.3 Automatic Workpiece Measurement<br />
Recording the results of measurement<br />
For all cycles in which you automatically measure workpieces (with<br />
the exception of Cycles 0 and 1), the TNC records the results. As<br />
standard procedure the TNC saves the measuring log as an ASCII file<br />
in the directory from which you run the measuring program. As an<br />
alternative you can also send the measuring log directly to a printer or<br />
transfer it to a PC. To do this, set the print function (in the interface<br />
configuration menu) to RS232:\ (see also the User's Manual under<br />
"MOD Functions, Setting Up the Data Interface").<br />
All measured values listed in the log file are referenced to<br />
the datum that is active during the respective cycle you are<br />
running. In addition, the coordinate system may have been<br />
rotated in the plane or the plane may have been tilted by<br />
using 3D-ROT. In this case, the TNC converts the<br />
measuring results to the respective active coordinate<br />
system.<br />
Use the HEIDENHAIN data transfer software TNCremo if<br />
you wish to output the measuring log via the data<br />
interface.<br />
Example: Measuring log for touch probe cycle 423:<br />
*** Measuring Log for Probing Cycle 421 Hole Measuring ***<br />
Date: 29-11-1997<br />
Time: 6:55:04<br />
Measuring program: TNC:\GEH35712\CHECK1.H<br />
--------------------------------------------------------------------------------------------------------------<br />
Nominal values: Center in reference axis: 50.0000<br />
Center in minor axis: 65.0000<br />
Diameter: 12.0000<br />
--------------------------------------------------------------------------------------------------------------<br />
Given limit values: Maximum limit for center in reference axis:<br />
50.<strong>10</strong>00 Minimum limit for center in reference axis: 49.9000<br />
Maximum limit for center in minor axis: 65.<strong>10</strong>00<br />
Minimum limit for center in minor axis: 64.9000<br />
Maximum dimension for hole: 12.0450<br />
Minimum dimension for hole 12.0000<br />
*******************************************************<br />
Actual values: Center in reference axis: 50.08<strong>10</strong><br />
Center in minor axis: 64.9530<br />
Diameter: 12.0259<br />
--------------------------------------------------------------------------------------------------------------<br />
Deviations: Center in reference axis: 0.08<strong>10</strong><br />
Center in minor axis: -0.0470<br />
Diameter: 0.0259<br />
*******************************************************<br />
Further measuring results: Measuring height: -5.0000<br />
***************** End of measuring log *****************<br />
94 3 Touch Probe Cycles for Automatic Workpiece Inspection
Measurement results in Q parameters<br />
The TNC saves the measurement results of the respective touch<br />
probe cycle in the globally effective Q parameters Q150 to Q160.<br />
Deviations from the nominal value are saved in the parameters Q161<br />
to Q166. Note the table of result parameters that are listed with every<br />
cycle description.<br />
During cycle definition the TNC also shows the result parameters for<br />
the respective cycle in a help graphic (see figure at upper right). The<br />
highlighted result parameter belongs to that input parameter.<br />
Classification of results<br />
For some cycles you can inquire the status of measuring results<br />
through the globally effective Q parameters Q180 to Q182:<br />
Class of results Parameter value<br />
Measurement results are within tolerance Q180 = 1<br />
Rework is required Q181 = 1<br />
Scrap Q182 = 1<br />
The TNC sets the rework or scrap marker as soon as one of the<br />
measuring values falls outside of tolerance. To determine which of the<br />
measuring results lies outside of tolerance, check the measuring log,<br />
or compare the respective measuring results (Q150 to Q160) with<br />
their limit values.<br />
The TNC also sets the status marker if you have defined<br />
no tolerance values or largest/smallest dimensions.<br />
Tolerance monitoring<br />
For most of the cycles for workpiece inspection you can have the TNC<br />
perform tolerance monitoring. This requires that you define the<br />
necessary limit values during cycle definition. If you do not wish to<br />
monitor for tolerances, simply leave the 0 (the default value) in the<br />
monitoring parameters.<br />
HEIDENHAIN iTNC 530 95<br />
3.3 Automatic Workpiece Measurement
3.3 Automatic Workpiece Measurement<br />
Tool monitoring<br />
For some cycles for workpiece inspection you can have the TNC<br />
perform tool monitoring. The TNC then monitors whether<br />
The tool radius should be compensated because of the deviations<br />
from the nominal value (values in Q16x).<br />
The deviations from the nominal value (values in Q16x) are greater<br />
than the tool breakage tolerance.<br />
Tool compensation<br />
This function works only:<br />
If the tool table is active.<br />
If tool monitoring is switched on in the cycle (enter Q330<br />
not equal to 0).<br />
The TNC always compensates the tool radius in the DR column of the<br />
tool table, even if the measured deviation lies within the given<br />
tolerance. You can inquire whether re-working is necessary via<br />
Parameter Q181 in the NC program (Q181=1: must be reworked).<br />
For Cycle 427:<br />
If an axis of the active working plane is defined as measuring axis<br />
(Q272 = 1 or 2), the TNC compensates the tool radius as described<br />
above. From the defined traversing direction (Q267) the TNC<br />
determines the direction of compensation.<br />
If the touch probe axis is defined as measuring axis (Q272 = 3), the<br />
TNC compensates the tool length.<br />
Tool breakage monitoring<br />
This function works only:<br />
If the tool table is active.<br />
If tool monitoring is switched on in the cycle (enter Q330<br />
not equal to 0).<br />
If the breakage tolerance RBREAK for the tool number<br />
entered in the table is greater than 0 (see also the User's<br />
Manual, section 5.2 “Tool Data”).<br />
The TNC will output an error message and stop program run if the<br />
measured deviation is greater than the breakage tolerance of the tool.<br />
At the same time the tool will be deactivated in the tool table (column<br />
TL = L).<br />
Reference system for measurement results<br />
The TNC transfers all the measurement results to the result<br />
parameters and the protocol file in the active coordinate system, or as<br />
the case may be, the displaced coordinate system.<br />
96 3 Touch Probe Cycles for Automatic Workpiece Inspection
REFERENCE PLANE (touch probe cycle 0,<br />
ISO: G55)<br />
1 The touch probe moves at rapid traverse (value from MP6150 or<br />
MP6361) to the starting position 1 programmed in the cycle.<br />
2 Then the touch probe approaches the workpiece at the feed rate<br />
assigned in MP6120 or MP6360. The probing direction is to be<br />
defined in the cycle.<br />
3 After the TNC has saved the position, the probe retracts to the<br />
starting point and saves the measured coordinate in a Q<br />
parameter. The TNC also stores the coordinates of the touch probe<br />
position at the time of the triggering signal in the parameters Q115<br />
to Q119. For the values in these parameters the TNC does not<br />
account for the stylus length and radius.<br />
Before programming, note the following:<br />
Pre-position the touch probe in order to avoid a collision<br />
when the programmed pre-positioning point is<br />
approached.<br />
Parameter number for result: Enter the number of<br />
the Q parameter to which you want to assign the<br />
coordinate.<br />
Probing axis/Probing direction: Enter the probing<br />
axis with the axis selection keys or ASCII keyboard<br />
and the algebraic sign for the probing direction.<br />
Confirm your entry with the ENT key.<br />
Position value: Use the axis selection keys or the<br />
ASCII keyboard to enter all coordinates of the nominal<br />
pre-positioning point values for the touch probe.<br />
To conclude the input, press the ENT key.<br />
Example: NC blocks<br />
67 TCH PROBE 0.0 REF. PLANE Q5 X-<br />
68 TCH PROBE 0.1 X+5 Y+0 Z-5<br />
HEIDENHAIN iTNC 530 97<br />
1<br />
3.3 Automatic Workpiece Measurement
3.3 Automatic Workpiece Measurement<br />
DATUM PLANE (touch probe cycle 1)<br />
Touch probe cycle 1 measures any position on the workpiece in any<br />
direction.<br />
1 The touch probe moves at rapid traverse (value from MP6150 or<br />
MP6361) to the starting position 1 programmed in the cycle.<br />
2 Then the touch probe approaches the workpiece at the feed rate<br />
assigned in MP6120 or MP6360. During probing the TNC moves<br />
simultaneously in 2 axes (depending on the probing angle). The<br />
scanning direction is defined by the polar angle entered in the<br />
cycle.<br />
3 After the TNC has saved the position, the probe returns to the<br />
starting point. The TNC also stores the coordinates of the touch<br />
probe position at the time of the triggering signal in parameters<br />
Q115 to Q119.<br />
Before programming, note the following:<br />
Pre-position the touch probe in order to avoid a collision<br />
when the programmed pre-positioning point is<br />
approached.<br />
Probing axis: Enter the probing axis with the axis<br />
selection keys or ASCII keyboard. Confirm your entry<br />
with the ENT key.<br />
Probing angle: Angle, measured from the probing<br />
axis, at which the touch probe is to move.<br />
Position value: Use the axis selection keys or the<br />
ASCII keyboard to enter all coordinates of the nominal<br />
pre-positioning point values for the touch probe.<br />
To conclude the input, press the ENT key.<br />
98 3 Touch Probe Cycles for Automatic Workpiece Inspection<br />
Y<br />
Example: NC blocks<br />
67 TCH PROBE 1.0 POLAR DATUM PLANE<br />
68 TCH PROBE 1.1 X ANGLE: +30<br />
69 TCH PROBE 1.2 X+5 Y+0 Z-5<br />
1<br />
X
MEASURE ANGLE (touch probe cycle 420,<br />
ISO: G420)<br />
Touch probe cycle 420 measures the angle that any straight surface<br />
on the workpiece describes with respect to the reference axis of the<br />
working plane.<br />
1 Following the positioning logic, the TNC positions the touch probe<br />
at rapid traverse (value from MP6150 or MP6361) (see “Running<br />
touch probe cycles” on page 19) to the programmed starting point<br />
1. The TNC offsets the touch probe by the safety clearance in the<br />
direction opposite the defined traverse direction.<br />
2 Then the touch probe moves to the entered measuring height and<br />
probes the first touch point at the probing feed rate (MP6120 or<br />
MP6360).<br />
3 Then the touch probe moves to the next starting position 2 and<br />
probes the second position.<br />
4 The TNC returns the touch probe to the clearance height and saves<br />
the measured angle in the following Q parameter:<br />
Parameter number Meaning<br />
Q150 The measured angle is referenced to the<br />
reference axis of the machining plane.<br />
Before programming, note the following:<br />
Before a cycle definition you must have programmed a<br />
tool call to define the touch probe axis.<br />
First measuring point in the 1st axis Q263<br />
(absolute): Coordinate of the first touch point in the<br />
reference axis of the working plane.<br />
First measuring point in the 2nd axis Q264<br />
(absolute): Coordinate of the first touch point in the<br />
minor axis of the working plane.<br />
Second measuring point in the 1st axis Q265<br />
(absolute): Coordinate of the second touch point in<br />
the reference axis of the working plane.<br />
Second measuring point in the 2nd axis Q266<br />
(absolute): Coordinate of the second touch point in<br />
the minor axis of the working plane<br />
Measuring axis Q272: Axis in which the<br />
measurement is to be made:<br />
1: Reference axis = measuring axis<br />
2: Minor axis = measuring axis<br />
3: Touch probe axis = measuring axis<br />
If touch probe axis = measuring axis, then:<br />
Set Q263 equal to Q265 if the angle about the A axis is to<br />
be measured; Set Q263 not equal to Q265 if the angle is<br />
to be measured about the B axis.<br />
Y<br />
Q272=2<br />
HEIDENHAIN iTNC 530 99<br />
Q266<br />
Q264<br />
Q263<br />
1<br />
Q265<br />
2<br />
+<br />
Q267<br />
– +<br />
–<br />
MP6140<br />
+<br />
Q320<br />
X<br />
Q272=1<br />
3.3 Automatic Workpiece Measurement
3.3 Automatic Workpiece Measurement<br />
Traverse direction 1 Q267: Direction in which the<br />
probe is to approach the workpiece:<br />
–1: Negative traverse direction<br />
+1: Positive traverse direction<br />
Measuring height in the touch probe axis Q261<br />
(absolute): Coordinate of the ball tip center (= touch<br />
point) in the touch probe axis in which the<br />
measurement is to be made.<br />
Setup clearance Q320 (incremental): Additional<br />
distance between measuring point and ball tip. Q320<br />
is added to MP6140.<br />
Clearance height Q260 (absolute): Coordinate in the<br />
touch probe axis at which no collision between tool<br />
and workpiece (fixtures) can occur.<br />
Traversing to clearance height Q301: Definition of<br />
how the touch probe is to move between the<br />
measuring points:<br />
0: Move at measuring height between measuring<br />
points<br />
1: Move at clearance height between measuring<br />
points<br />
Measuring log Q281: Definition of whether the TNC is<br />
to create a measuring log:<br />
0: No measuring log<br />
1: Create measuring log: With the standard setting<br />
the TNC saves the log file TCHPR420.TXT in the<br />
directory in which your measuring program is also<br />
stored.<br />
Example: NC blocks<br />
5 TCH PROBE 420 MEASURE ANGLE<br />
Q263=+<strong>10</strong> ;1ST POINT 1ST AXIS<br />
Q264=+<strong>10</strong> ;1ST POINT 2ND AXIS<br />
Q265=+15 ;2ND POINT 1ST AXIS<br />
Q266=+95 ;2ND POINT 2ND AXIS<br />
Q272=1 ;MEASURING AXIS<br />
Q267=-1 ;TRAVERSE DIRECTION<br />
Q261=-5 ;MEASURING HEIGHT<br />
Q320=0 ;SET-UP CLEARANCE<br />
Q260=+<strong>10</strong> ;CLEARANCE HEIGHT<br />
Q301=1 ;TRAVERSE TO CLEAR HEIGHT<br />
Q281=1 ;MEASURING LOG<br />
<strong>10</strong>0 3 Touch Probe Cycles for Automatic Workpiece Inspection
MEASURE HOLE (touch probe cycle 421,<br />
ISO: G421)<br />
Touch probe cycle 421 measures the center and diameter of a hole (or<br />
circular pocket). If you define the corresponding tolerance values in<br />
the cycle, the TNC makes a nominal-to-actual value comparison and<br />
saves the deviation values in system parameters.<br />
1 Following the positioning logic, the TNC positions the touch probe<br />
at rapid traverse (value from MP6150 or MP6361) (see “Running<br />
touch probe cycles” on page 19) to the programmed starting point<br />
1. The TNC calculates the probe starting points from the data in the<br />
cycle and the safety clearance from MP6140.<br />
2 Then the touch probe moves to the entered measuring height and<br />
probes the first touch point at the probing feed rate (MP6120 or<br />
MP6360). The TNC derives the probing direction automatically<br />
from the programmed starting angle.<br />
3 Then the touch probe moves in a circular arc either at measuring<br />
height or at clearance height to the next starting point 2 and probes<br />
the second touch point.<br />
4 The TNC positions the probe to starting point 3 and then to starting<br />
point 4 to probe the third and fourth touch points.<br />
5 Finally the TNC returns the touch probe to the clearance height and<br />
saves the actual values and the deviations in the following Q<br />
parameters.<br />
Parameter number Meaning<br />
Q151 Actual value of center in reference axis<br />
Q152 Actual value of center in minor axis<br />
Q153 Actual value of diameter<br />
Q161 Deviation from center of reference axis<br />
Q162 Deviation from center of minor axis<br />
Q163 Deviation from diameter<br />
Before programming, note the following:<br />
Before a cycle definition you must have programmed a<br />
tool call to define the touch probe axis.<br />
HEIDENHAIN iTNC 530 <strong>10</strong>1<br />
3<br />
4<br />
2<br />
1<br />
3.3 Automatic Workpiece Measurement
3.3 Automatic Workpiece Measurement<br />
Center in 1st axis Q273 (absolute value): Center of<br />
the hole in the reference axis of the working plane.<br />
Center in 2nd axis Q274 (absolute value): Center of<br />
the hole in the minor axis of the working plane.<br />
Nominal diameter Q262: Enter the diameter of the<br />
hole.<br />
Starting angle Q325 (absolute): Angle between the<br />
reference axis of the working plane and the first touch<br />
point.<br />
Stepping angle Q247 (incremental): Angle between<br />
two measuring points. The algebraic sign of the<br />
stepping angle determines the direction of rotation<br />
(negative = clockwise). If you wish to probe a circular<br />
arc instead of a complete circle, then program the<br />
stepping angle to be less than 90°.<br />
The smaller the angle, the less accurately the TNC can<br />
calculate the hole dimensions. Minimum input value: 5°.<br />
Measuring height in the touch probe axis Q261<br />
(absolute): Coordinate of the ball tip center (= touch<br />
point) in the touch probe axis in which the<br />
measurement is to be made.<br />
Setup clearance Q320 (incremental): Additional<br />
distance between measuring point and ball tip. Q320<br />
is added to MP6140.<br />
Clearance height Q260 (absolute): Coordinate in the<br />
touch probe axis at which no collision between tool<br />
and workpiece (fixtures) can occur.<br />
Traversing to clearance height Q301: Definition of<br />
how the touch probe is to move between the<br />
measuring points:<br />
0: Move at measuring height between measuring<br />
points<br />
1: Move at clearance height between measuring<br />
points<br />
Maximum dimension of size for hole Q275:<br />
Maximum permissible dimension for the hole (circular<br />
pocket).<br />
Minimum dimension for hole Q276: Minimum<br />
permissible dimension for the hole (circular pocket).<br />
Tolerance value for center 1st axis Q279:<br />
Permissible position deviation in the reference axis of<br />
the working plane.<br />
Tolerance value for center 2nd axis Q280:<br />
Permissible position deviation in the minor axis of the<br />
working plane.<br />
<strong>10</strong>2 3 Touch Probe Cycles for Automatic Workpiece Inspection<br />
Y<br />
Q274 ±Q280<br />
Q247<br />
MP6140<br />
+<br />
Q320<br />
Q273 ±Q279<br />
Q325<br />
Q276<br />
Q262<br />
Q275<br />
X
Measuring log Q281: Definition of whether the TNC is<br />
to create a measuring log:<br />
0: No measuring log<br />
1: Create measuring log: With the standard setting<br />
the TNC saves the log file TCHPR421.TXT in the<br />
directory in which your measuring program is also<br />
stored.<br />
PGM stop if tolerance error Q309: Definition of<br />
whether in the event of a violation of tolerance limits<br />
the TNC is to interrupt the program run and output an<br />
error message:<br />
0: Do not interrupt program run, no error message<br />
1: Interrupt the program run, output an error message<br />
Tool number for monitoring Q330: Definition of<br />
whether the TNC is to monitor the tool (see “Tool<br />
monitoring” on page 96)<br />
0: Monitoring not active<br />
>0: Tool number in the tool table TOOL.T<br />
Example: NC blocks<br />
5 TCH PROBE 421 MEASURE HOLE<br />
Q273=+50 ;CENTER IN 1ST AXIS<br />
Q274=+50 ;CENTER IN 2ND AXIS<br />
Q262=75 ;NOMINAL DIAMETER<br />
Q325=+0 ;STARTING ANGLE<br />
Q247=+60 ;STEPPING ANGLE<br />
Q261=-5 ;MEASURING HEIGHT<br />
Q320=0 ;SET-UP CLEARANCE<br />
Q260=+20 ;CLEARANCE HEIGHT<br />
Q301=1 ;TRAVERSE TO CLEAR HEIGHT<br />
Q275=75.12 ;MAXIMUM DIMENSION<br />
Q276=74.95 ;MINIMUM DIMENSION<br />
Q279=0.1 ;TOLERANCE 1ST CENTER<br />
Q280=0.1 ;TOLERANCE 2ND CENTER<br />
Q281=1 ;MEASURING LOG<br />
Q309=0 ;PGM-STOP IF ERROR<br />
Q330=0 ;TOOL NUMBER<br />
HEIDENHAIN iTNC 530 <strong>10</strong>3<br />
3.3 Automatic Workpiece Measurement
3.3 Automatic Workpiece Measurement<br />
MEASURE CIRCLE OUTSIDE<br />
(touch probe cycle 422, ISO: G422)<br />
Touch probe cycle 422 measures the center and diameter of a circular<br />
stud. If you define the corresponding tolerance values in the cycle, the<br />
TNC makes a nominal-to-actual value comparison and saves the<br />
deviation values in system parameters.<br />
1 Following the positioning logic, the TNC positions the touch probe<br />
at rapid traverse (value from MP6150 or MP6361) (see “Running<br />
touch probe cycles” on page 19) to the programmed starting point<br />
1. The TNC calculates the probe starting points from the data in the<br />
cycle and the safety clearance from MP6140.<br />
2 Then the touch probe moves to the entered measuring height and<br />
probes the first touch point at the probing feed rate (MP6120 or<br />
MP6360). The TNC derives the probing direction automatically<br />
from the programmed starting angle.<br />
3 Then the touch probe moves in a circular arc either at measuring<br />
height or at clearance height to the next starting point 2 and probes<br />
the second touch point.<br />
4 The TNC positions the probe to starting point 3 and then to starting<br />
point 4 to probe the third and fourth touch points.<br />
5 Finally the TNC returns the touch probe to the clearance height and<br />
saves the actual values and the deviations in the following Q<br />
parameters.<br />
Parameter number Meaning<br />
Q151 Actual value of center in reference axis<br />
Q152 Actual value of center in minor axis<br />
Q153 Actual value of diameter<br />
Q161 Deviation from center of reference axis<br />
Q162 Deviation from center of minor axis<br />
Q163 Deviation from diameter<br />
Before programming, note the following:<br />
Before a cycle definition you must have programmed a<br />
tool call to define the touch probe axis.<br />
<strong>10</strong>4 3 Touch Probe Cycles for Automatic Workpiece Inspection<br />
3<br />
2<br />
4<br />
1
Center in 1st axis Q273 (absolute value): Center of<br />
the stud in the reference axis of the working plane.<br />
Center in 2nd axis Q274 (absolute value): Center of<br />
the stud in the minor axis of the working plane.<br />
Nominal diameter Q262: Enter the diameter of the<br />
stud.<br />
Starting angle Q325 (absolute): Angle between the<br />
reference axis of the working plane and the first touch<br />
point.<br />
Stepping angle Q247 (incremental): Angle between<br />
two measuring points. The algebraic sign of the<br />
stepping angle determines the direction of rotation<br />
(negative = clockwise). If you wish to probe a circular<br />
arc instead of a complete circle, then program the<br />
stepping angle to be less than 90°.<br />
The smaller the angle, the less accurately the TNC can<br />
calculate the dimensions of the stud. Minimum input<br />
value: 5°<br />
Measuring height in the touch probe axis Q261<br />
(absolute): Coordinate of the ball tip center (= touch<br />
point) in the touch probe axis in which the<br />
measurement is to be made.<br />
Setup clearance Q320 (incremental): Additional<br />
distance between measuring point and ball tip. Q320<br />
is added to MP6140.<br />
Clearance height Q260 (absolute): Coordinate in the<br />
touch probe axis at which no collision between tool<br />
and workpiece (fixtures) can occur.<br />
Traversing to clearance height Q301: Definition of<br />
how the touch probe is to move between the<br />
measuring points:<br />
0: Move at measuring height between measuring<br />
points<br />
1: Move at clearance height between measuring<br />
points<br />
Maximum dimension of size for stud Q277:<br />
Maximum permissible dimension for the stud.<br />
Minimum dimension of size for the stud Q278:<br />
Minimum permissible dimension for the stud.<br />
Tolerance value for center 1st axis Q279:<br />
Permissible position deviation in the reference axis of<br />
the working plane.<br />
Tolerance value for center 2nd axis Q280:<br />
Permissible position deviation in the minor axis of the<br />
working plane<br />
HEIDENHAIN iTNC 530 <strong>10</strong>5<br />
Y<br />
Q274 ±Q280<br />
MP6140<br />
+<br />
Q320<br />
Q247<br />
Q273 ±Q279<br />
Q325<br />
Q278<br />
Q262<br />
Q277<br />
X<br />
3.3 Automatic Workpiece Measurement
3.3 Automatic Workpiece Measurement<br />
Measuring log Q281: Definition of whether the TNC is<br />
to create a measuring log:<br />
0: No measuring log<br />
1: Create measuring log: With the standard setting<br />
the TNC saves the log file TCHPR422.TXT in the<br />
directory in which your measuring program is also<br />
stored.<br />
PGM stop if tolerance error Q309: Definition of<br />
whether in the event of a violation of tolerance limits<br />
the TNC is to interrupt the program run and output an<br />
error message:<br />
0: Do not interrupt program run, no error message<br />
1: Interrupt the program run, output an error message<br />
Tool number for monitoring Q330: Definition of<br />
whether the TNC is to monitor the tool (see “Tool<br />
monitoring” on page 96):<br />
0: Monitoring not active<br />
>0: Tool number in the tool table TOOL.T<br />
Example: NC blocks<br />
5 TCH PROBE 422 MEAS. CIRCLE OUTSIDE<br />
Q273=+20 ;CENTER IN 1ST AXIS<br />
Q274=+30 ;CENTER IN 2ND AXIS<br />
Q262=35 ;NOMINAL DIAMETER<br />
Q325=+90 ;STARTING ANGLE<br />
Q247=+30 ;STEPPING ANGLE<br />
Q261=-5 ;MEASURING HEIGHT<br />
Q320=0 ;SET-UP CLEARANCE<br />
Q260=+<strong>10</strong> ;CLEARANCE HEIGHT<br />
Q301=0 ;TRAVERSE TO CLEAR HEIGHT<br />
Q277=35.15 ;MAXIMUM DIMENSION<br />
Q278=34.9 ;MINIMUM DIMENSION<br />
Q279=0.05 ;TOLERANCE 1ST CENTER<br />
Q280=0.05 ;TOLERANCE 2ND CENTER<br />
Q281=1 ;MEASURING LOG<br />
Q309=0 ;PGM-STOP IF ERROR<br />
Q330=0 ;TOOL NUMBER<br />
<strong>10</strong>6 3 Touch Probe Cycles for Automatic Workpiece Inspection
MEASURE RECTANGLE FROM INSIDE<br />
(touch probe cycle 423, ISO: G423)<br />
Touch probe cycle 423 finds the center, length and width of a<br />
rectangular pocket. If you define the corresponding tolerance values in<br />
the cycle, the TNC makes a nominal-to-actual value comparison and<br />
saves the deviation values in system parameters.<br />
1 Following the positioning logic, the TNC positions the touch probe<br />
at rapid traverse (value from MP6150 or MP6361) (see “Running<br />
touch probe cycles” on page 19) to the programmed starting point<br />
1. The TNC calculates the probe starting points from the data in the<br />
cycle and the safety clearance from MP6140.<br />
2 Then the touch probe moves to the entered measuring height and<br />
probes the first touch point at the probing feed rate (MP6120 or<br />
MP6360).<br />
3 Then the touch probe moves either paraxially at measuring height<br />
or at clearance height to the next starting point 2 and probes the<br />
second touch point.<br />
4 The TNC positions the probe to starting point 3 and then to starting<br />
point 4 to probe the third and fourth touch points.<br />
5 Finally the TNC returns the touch probe to the clearance height and<br />
saves the actual values and the deviations in the following Q<br />
parameters.<br />
Parameter number Meaning<br />
Q151 Actual value of center in reference axis<br />
Q152 Actual value of center in minor axis<br />
Q154 Actual value of length in the reference<br />
axis<br />
Q155 Actual value of length in the minor axis<br />
Q161 Deviation from center of reference axis<br />
Q162 Deviation from center of minor axis<br />
Q164 Deviation of length in reference axis<br />
Q165 Deviation of length in minor axis<br />
Before programming, note the following:<br />
Before a cycle definition you must have programmed a<br />
tool call to define the touch probe axis.<br />
If the dimensions of the pocket and the safety clearance<br />
do not permit pre-positioning in the proximity of the touch<br />
points, the TNC always starts probing from the center of<br />
the pocket. In this case the touch probe does not return to<br />
the clearance height between the four measuring points.<br />
HEIDENHAIN iTNC 530 <strong>10</strong>7<br />
1<br />
4<br />
2<br />
3<br />
3.3 Automatic Workpiece Measurement
3.3 Automatic Workpiece Measurement<br />
Center in 1st axis Q273 (absolute value): Center of<br />
the pocket in the reference axis of the working plane.<br />
Center in 2nd axis Q274 (absolute value): Center of<br />
the pocket in the minor axis of the working plane.<br />
First side length Q282: Pocket length, parallel to<br />
the reference axis of the working plane.<br />
Second side length Q283: Pocket length, parallel to<br />
the minor axis of the working plane.<br />
Measuring height in the touch probe axis Q261<br />
(absolute): Coordinate of the ball tip center (= touch<br />
point) in the touch probe axis in which the<br />
measurement is to be made.<br />
Setup clearance Q320 (incremental): Additional<br />
distance between measuring point and ball tip. Q320<br />
is added to MP6140.<br />
Clearance height Q260 (absolute): Coordinate in the<br />
touch probe axis at which no collision between tool<br />
and workpiece (fixtures) can occur.<br />
Traversing to clearance height Q301: Definition of<br />
how the touch probe is to move between the<br />
measuring points:<br />
0: Move at measuring height between measuring<br />
points<br />
1: Move at clearance height between measuring<br />
points<br />
Max. size limit 1st side length Q284: Maximum<br />
permissible length of the pocket.<br />
Min. size limit 1st side length Q285: Minimum<br />
permissible length of the pocket.<br />
Max. size limit 2nd side length Q286: Maximum<br />
permissible width of the pocket.<br />
Min. size limit 2nd side length Q287: Minimum<br />
permissible width of the pocket.<br />
Tolerance value for center 1st axis Q279:<br />
Permissible position deviation in the reference axis of<br />
the working plane.<br />
Tolerance value for center 2nd axis Q280:<br />
Permissible position deviation in the minor axis of the<br />
working plane.<br />
<strong>10</strong>8 3 Touch Probe Cycles for Automatic Workpiece Inspection<br />
Y<br />
Q274 ±Q280<br />
Z<br />
Q284<br />
Q282<br />
Q285<br />
Q273 ±Q279<br />
MP6140<br />
+<br />
Q320<br />
Q261<br />
Q260<br />
Q287<br />
Q283<br />
Q286<br />
X<br />
X
Measuring log Q281: Definition of whether the TNC is<br />
to create a measuring log:<br />
0: No measuring log<br />
1: Create measuring log: With the standard setting<br />
the TNC saves the log file TCHPR423.TXT in the<br />
directory in which your measuring program is also<br />
stored.<br />
PGM stop if tolerance error Q309: Definition of<br />
whether in the event of a violation of tolerance limits<br />
the TNC is to interrupt the program run and output an<br />
error message:<br />
0: Do not interrupt program run, no error message<br />
1: Interrupt the program run, output an error message<br />
Tool number for monitoring Q330: Definition of<br />
whether the TNC is to monitor the tool (see “Tool<br />
monitoring” on page 96)<br />
0: Monitoring not active<br />
>0: Tool number in the tool table TOOL.T<br />
Example: NC blocks<br />
5 TCH PROBE 423 MEAS. RECTAN. INSIDE<br />
Q273=+50 ;CENTER IN 1ST AXIS<br />
Q274=+50 ;CENTER IN 2ND AXIS<br />
Q282=80 ;1ST SIDE LENGTH<br />
Q283=60 ;2ND SIDE LENGTH<br />
Q261=-5 ;MEASURING HEIGHT<br />
Q320=0 ;SET-UP CLEARANCE<br />
Q260=+<strong>10</strong> ;CLEARANCE HEIGHT<br />
Q301=1 ;TRAVERSE TO CLEAR HEIGHT<br />
Q284=0 ;MAX. LIMIT 1ST SIDE<br />
Q285=0 ;MIN. LIMIT 1ST SIDE<br />
Q286=0 ;MAX. LIMIT 2ND SIDE<br />
Q287=0 ;MIN. LIMIT 2ND SIDE<br />
Q279=0 ;TOLERANCE 1ST CENTER<br />
Q280=0 ;TOLERANCE 2ND CENTER<br />
Q281=1 ;MEASURING LOG<br />
Q309=0 ;PGM-STOP IF ERROR<br />
Q330=0 ;TOOL NUMBER<br />
HEIDENHAIN iTNC 530 <strong>10</strong>9<br />
3.3 Automatic Workpiece Measurement
3.3 Automatic Workpiece Measurement<br />
MEASURE RECTANGLE FROM OUTSIDE<br />
(touch probe cycle 424, ISO: G424)<br />
Touch probe cycle 424 finds the center, length and width of a<br />
rectangular stud. If you define the corresponding tolerance values in<br />
the cycle, the TNC makes a nominal-to-actual value comparison and<br />
saves the deviation values in system parameters.<br />
1 Following the positioning logic, the TNC positions the touch probe<br />
at rapid traverse (value from MP6150 or MP6361) (see “Running<br />
touch probe cycles” on page 19) to the programmed starting point<br />
1. The TNC calculates the probe starting points from the data in the<br />
cycle and the safety clearance from MP6140.<br />
2 Then the touch probe moves to the entered measuring height and<br />
probes the first touch point at the probing feed rate (MP6120 or<br />
MP6360).<br />
3 Then the touch probe moves either paraxially at measuring height<br />
or at clearance height to the next starting point 2 and probes the<br />
second touch point.<br />
4 The TNC positions the probe to starting point 3 and then to starting<br />
point 4 to probe the third and fourth touch points.<br />
5 Finally the TNC returns the touch probe to the clearance height and<br />
saves the actual values and the deviations in the following Q<br />
parameters.<br />
Parameter number Meaning<br />
Q151 Actual value of center in reference axis<br />
Q152 Actual value of center in minor axis<br />
Q154 Actual value of length in the reference<br />
axis<br />
Q155 Actual value of length in the minor axis<br />
Q161 Deviation from center of reference axis<br />
Q162 Deviation from center of minor axis<br />
Q164 Deviation of length in reference axis<br />
Q165 Deviation of length in minor axis<br />
Before programming, note the following:<br />
Before a cycle definition you must have programmed a<br />
tool call to define the touch probe axis.<br />
1<strong>10</strong> 3 Touch Probe Cycles for Automatic Workpiece Inspection<br />
1<br />
4<br />
2<br />
3
Center in 1st axis Q273 (absolute value): Center of<br />
the stud in the reference axis of the working plane.<br />
Center in 2nd axis Q274 (absolute value): Center of<br />
the stud in the minor axis of the working plane.<br />
First side length Q282: Stud length, parallel to the<br />
reference axis of the working plane.<br />
Second side length Q283: Stud length, parallel to the<br />
minor axis of the working plane.<br />
Measuring height in the touch probe axis Q261<br />
(absolute): Coordinate of the ball tip center (= touch<br />
point) in the touch probe axis in which the<br />
measurement is to be made.<br />
Setup clearance Q320 (incremental): Additional<br />
distance between measuring point and ball tip. Q320<br />
is added to MP6140.<br />
Clearance height Q260 (absolute): Coordinate in the<br />
touch probe axis at which no collision between tool<br />
and workpiece (fixtures) can occur.<br />
Traversing to clearance height Q301: Definition of<br />
how the touch probe is to move between the<br />
measuring points:<br />
0: Move at measuring height between measuring<br />
points<br />
1: Move at clearance height between measuring<br />
points<br />
Max. size limit 1st side length Q284: Maximum<br />
permissible length of the stud.<br />
Min. size limit 1st side length Q285: Minimum<br />
permissible length of the stud.<br />
Max. size limit 2nd side length Q286: Maximum<br />
permissible width of the stud.<br />
Min. size limit 2nd side length Q287: Minimum<br />
permissible width of the stud.<br />
Tolerance value for center 1st axis Q279:<br />
Permissible position deviation in the reference axis of<br />
the working plane.<br />
Tolerance value for center 2nd axis Q280:<br />
Permissible position deviation in the minor axis of the<br />
working plane.<br />
HEIDENHAIN iTNC 530 111<br />
Y<br />
Q274 ±Q280<br />
Z<br />
Q284<br />
Q282<br />
Q285<br />
Q273 ±Q279<br />
Q261<br />
MP6140<br />
+<br />
Q320<br />
Q287<br />
Q260<br />
Q283<br />
Q286<br />
X<br />
X<br />
3.3 Automatic Workpiece Measurement
3.3 Automatic Workpiece Measurement<br />
Measuring log Q281: Definition of whether the TNC is<br />
to create a measuring log:<br />
0: No measuring log<br />
1: Create measuring log: With the standard setting<br />
the TNC saves the log file TCHPR424.TXT in the<br />
directory in which your measuring program is also<br />
stored.<br />
PGM stop if tolerance error Q309: Definition of<br />
whether in the event of a violation of tolerance limits<br />
the TNC is to interrupt the program run and output an<br />
error message:<br />
0: Do not interrupt program run, no error message<br />
1: Interrupt the program run, output an error message<br />
Tool number for monitoring Q330: Definition of<br />
whether the TNC is to monitor the tool (see “Tool<br />
monitoring” on page 96):<br />
0: Monitoring not active<br />
>0: Tool number in the tool table TOOL.T<br />
Example: NC blocks<br />
5 TCH PROBE 424 MEAS. RECTAN. OUTS.<br />
Q273=+50 ;CENTER IN 1ST AXIS<br />
Q274=+50 ;CENTER IN 2ND AXIS<br />
Q282=75 ;1ST SIDE LENGTH<br />
Q283=35 ;2ND SIDE LENGTH<br />
Q261=-5 ;MEASURING HEIGHT<br />
Q320=0 ;SET-UP CLEARANCE<br />
Q260=+20 ;CLEARANCE HEIGHT<br />
Q301=0 ;TRAVERSE TO CLEAR HEIGHT<br />
Q284=75.1 ;MAX. LIMIT 1ST SIDE<br />
Q285=74.9 ;MIN. LIMIT 1ST SIDE<br />
Q286=35 ;MAX. LIMIT 2ND SIDE<br />
Q287=34.95;MIN. LIMIT 2ND SIDE<br />
Q279=0.1 ;TOLERANCE 1ST CENTER<br />
Q280=0.1 ;TOLERANCE 2ND CENTER<br />
Q281=1 ;MEASURING LOG<br />
Q309=0 ;PGM-STOP IF ERROR<br />
Q330=0 ;TOOL NUMBER<br />
112 3 Touch Probe Cycles for Automatic Workpiece Inspection
MEASURE INSIDE WIDTH (touch probe<br />
cycle 425, ISO: G425)<br />
Touch probe cycle 425 measures the position and width of a slot (or<br />
pocket). If you define the corresponding tolerance values in the cycle,<br />
the TNC makes a nominal-to-actual value comparison and saves the<br />
deviation value in a system parameter.<br />
1 Following the positioning logic, the TNC positions the touch probe<br />
at rapid traverse (value from MP6150 or MP6361) (see “Running<br />
touch probe cycles” on page 19) to the programmed starting point<br />
1. The TNC calculates the probe starting points from the data in the<br />
cycle and the safety clearance from MP6140.<br />
2 Then the touch probe moves to the entered measuring height and<br />
probes the first touch point at the probing feed rate (MP6120 or<br />
MP6360). The first probing is always in the positive direction of the<br />
programmed axis.<br />
3 If you enter an offset for the second measurement, the TNC then<br />
moves the touch probe paraxially to the next starting point 2 and<br />
probes the second touch point. If you do not enter an offset, the<br />
TNC measures the width in the exact opposite direction.<br />
4 Finally the TNC returns the touch probe to the clearance height and<br />
saves the actual values and the deviation value in the following Q<br />
parameters.<br />
Parameter number Meaning<br />
Q156 Actual value of measured length<br />
Q157 Actual value of the centerline<br />
Q166 Deviation of the measured length<br />
Before programming, note the following:<br />
Before a cycle definition you must have programmed a<br />
tool call to define the touch probe axis.<br />
HEIDENHAIN iTNC 530 113<br />
2<br />
1<br />
3.3 Automatic Workpiece Measurement
3.3 Automatic Workpiece Measurement<br />
Starting point in 1st axis Q328 (absolute): Starting<br />
point for probing in the reference axis of the working<br />
plane.<br />
Starting point in 2nd axis Q329 (absolute): Starting<br />
point for probing in the minor axis of the working<br />
plane.<br />
Offset for 2nd measurement Q3<strong>10</strong> (incremental):<br />
Distance by which the touch probe is displaced<br />
before the second measurement. If you enter 0, the<br />
TNC does not displace the touch probe.<br />
Measuring axis Q272: Axis in the working plane in<br />
which the measurement is to be made:<br />
1:Reference axis = measuring axis<br />
2: Minor axis = measuring axis<br />
Measuring height in the touch probe axis Q261<br />
(absolute): Coordinate of the ball tip center (= touch<br />
point) in the touch probe axis in which the<br />
measurement is to be made.<br />
Clearance height Q260 (absolute): Coordinate in the<br />
touch probe axis at which no collision between tool<br />
and workpiece (fixtures) can occur.<br />
Nominal length Q311: Nominal value of the length to<br />
be measured.<br />
Maximum dimension Q288: Maximum permissible<br />
length.<br />
Minimum dimension Q289: Minimum permissible<br />
length.<br />
Measuring log Q281: Definition of whether the TNC is<br />
to create a measuring log:<br />
0: No measuring log<br />
1: Create measuring log: With the standard setting<br />
the TNC saves the log file TCHPR425.TXT in the<br />
directory in which your measuring program is also<br />
stored.<br />
PGM stop if tolerance error Q309: Definition of<br />
whether in the event of a violation of tolerance limits<br />
the TNC is to interrupt the program run and output an<br />
error message:<br />
0: Do not interrupt program run, no error message<br />
1: Interrupt the program run, output an error message<br />
Tool number for monitoring Q330: Definition of<br />
whether the TNC is to monitor the tool (see “Tool<br />
monitoring” on page 96):<br />
0: Monitoring not active<br />
>0: Tool number in the tool table TOOL.T<br />
Y<br />
Q272=2<br />
Example: NC blocks<br />
5 TCH PROBE 425 MEASURE INSIDE WIDTH<br />
Q328=+75 ;STARTNG PNT 1ST AXIS<br />
Q329=–12.5 ;STARTNG PNT 2ND AXIS<br />
Q3<strong>10</strong>=+0 ;OFFS. 2ND MEASUREMNT<br />
Q272=1 ;MEASURING AXIS<br />
Q261=-5 ;MEASURING HEIGHT<br />
Q260=+<strong>10</strong> ;CLEARANCE HEIGHT<br />
Q311=25 ;NOMINAL LENGTH<br />
Q288=25.05 ;MAXIMUM DIMENSION<br />
Q289=25 ;MINIMUM DIMENSION<br />
Q281=1 ;MEASURING LOG<br />
Q309=0 ;PGM-STOP IF ERROR<br />
Q330=0 ;TOOL NUMBER<br />
114 3 Touch Probe Cycles for Automatic Workpiece Inspection<br />
Q329<br />
Q288<br />
Q311<br />
Q289<br />
Q328<br />
Q3<strong>10</strong><br />
X<br />
Q272=1
MEASURE RIDGE WIDTH (touch probe cycle 426,<br />
ISO: G426)<br />
Touch probe cycle 426 measures the position and width of a ridge. If<br />
you define the corresponding tolerance values in the cycle, the TNC<br />
makes a nominal-to-actual value comparison and saves the deviation<br />
value in system parameters.<br />
1 Following the positioning logic, the TNC positions the touch probe<br />
at rapid traverse (value from MP6150 or MP6361) (see “Running<br />
touch probe cycles” on page 19) to the programmed starting point<br />
1. The TNC calculates the probe starting points from the data in the<br />
cycle and the safety clearance from MP6140.<br />
2 Then the touch probe moves to the entered measuring height and<br />
probes the first touch point at the probing feed rate (MP6120 or<br />
MP6360). The first probing is always in the negative direction of<br />
the programmed axis.<br />
3 Then the touch probe moves at clearance height to the next<br />
starting position and probes the second touch point.<br />
4 Finally the TNC returns the touch probe to the clearance height and<br />
saves the actual values and the deviation value in the following Q<br />
parameters.<br />
Parameter number Meaning<br />
Q156 Actual value of measured length<br />
Q157 Actual value of the centerline<br />
Q166 Deviation of the measured length<br />
Before programming, note the following:<br />
Before a cycle definition you must have programmed a<br />
tool call to define the touch probe axis.<br />
First measuring point in the 1st axis Q263<br />
(absolute): Coordinate of the first touch point in the<br />
reference axis of the working plane.<br />
First measuring point in the 2nd axis Q264<br />
(absolute): Coordinate of the first touch point in the<br />
minor axis of the working plane.<br />
Second measuring point in the 1st axis Q265<br />
(absolute): Coordinate of the second touch point in<br />
the reference axis of the working plane.<br />
Second measuring point in the 2nd axis Q266<br />
(absolute): Coordinate of the second touch point in<br />
the minor axis of the working plane.<br />
HEIDENHAIN iTNC 530 115<br />
2<br />
1<br />
3.3 Automatic Workpiece Measurement
3.3 Automatic Workpiece Measurement<br />
Measuring axis Q272: Axis in the working plane in<br />
which the measurement is to be made:<br />
1: Reference axis = measuring axis<br />
2: Minor axis = measuring axis<br />
Measuring height in the touch probe axis Q261<br />
(absolute): Coordinate of the ball tip center (= touch<br />
point) in the touch probe axis in which the<br />
measurement is to be made.<br />
Setup clearance Q320 (incremental): Additional<br />
distance between measuring point and ball tip. Q320<br />
is added to MP6140.<br />
Clearance height Q260 (absolute): Coordinate in the<br />
touch probe axis at which no collision between tool<br />
and workpiece (fixtures) can occur.<br />
Nominal length Q311: Nominal value of the length to<br />
be measured.<br />
Maximum dimension Q288: Maximum permissible<br />
length.<br />
Minimum dimension Q289: Minimum permissible<br />
length.<br />
Measuring log Q281: Definition of whether the TNC is<br />
to create a measuring log:<br />
0: No measuring log<br />
1: Create measuring log: With the standard setting<br />
the TNC saves the log file TCHPR426.TXT in the<br />
directory in which your measuring program is also<br />
stored.<br />
PGM stop if tolerance error Q309: Definition of<br />
whether in the event of a violation of tolerance limits<br />
the TNC is to interrupt the program run and output an<br />
error message:<br />
0: Do not interrupt program run, no error message<br />
1: Interrupt the program run, output an error message<br />
Tool number for monitoring Q330: Definition of<br />
whether the TNC is to monitor the tool (see “Tool<br />
monitoring” on page 96)<br />
0: Monitoring not active<br />
>0: Tool number in the tool table TOOL.T<br />
Example: NC blocks<br />
5 TCH PROBE 426 MEASURE RIDGE WIDTH<br />
Q263=+50 ;1ST POINT 1ST AXIS<br />
Q264=+25 ;1ST POINT 2ND AXIS<br />
Q265=+50 ;2ND POINT 1ST AXIS<br />
Q266=+85 ;2ND POINT 2ND AXIS<br />
Q272=2 ;MEASURING AXIS<br />
Q261=-5 ;MEASURING HEIGHT<br />
Q320=0 ;SET-UP CLEARANCE<br />
Q260=+20 ;CLEARANCE HEIGHT<br />
Q311=45 ;NOMINAL LENGTH<br />
Q288=45 ;MAXIMUM DIMENSION<br />
Q289=44.95;MINIMUM DIMENSION<br />
Q281=1 ;MEASURING LOG<br />
Q309=0 ;PGM-STOP IF ERROR<br />
Q330=0 ;TOOL NUMBER<br />
116 3 Touch Probe Cycles for Automatic Workpiece Inspection
MEASURE COORDINATE (touch probe cycle 427,<br />
ISO: G427)<br />
Touch probe cycle 427 finds a coordinate in a selectable axis and saves<br />
the value in a system parameter. If you define the corresponding<br />
tolerance values in the cycle, the TNC makes a nominal-to-actual value<br />
comparison and saves the deviation value in system parameters.<br />
1 Following the positioning logic, the TNC positions the touch probe<br />
at rapid traverse (value from MP6150 or MP6361) (see “Running<br />
touch probe cycles” on page 19) to the programmed starting point<br />
1. The TNC offsets the touch probe by the safety clearance in the<br />
direction opposite the defined traverse direction.<br />
2 Then the TNC positions the touch probe to the entered touch point<br />
1 in the working plane and measures the actual value in the<br />
selected axis.<br />
3 Finally the TNC returns the touch probe to the clearance height and<br />
saves the measured coordinate in the following Q parameter.<br />
Parameter number Meaning<br />
Q160 Measured coordinate<br />
Before programming, note the following:<br />
Before a cycle definition you must have programmed a<br />
tool call to define the touch probe axis.<br />
HEIDENHAIN iTNC 530 117<br />
1<br />
3.3 Automatic Workpiece Measurement
3.3 Automatic Workpiece Measurement<br />
First measuring point in the 1st axis Q263<br />
(absolute): Coordinate of the first touch point in the<br />
reference axis of the working plane.<br />
First measuring point in the 2nd axis Q264<br />
(absolute): Coordinate of the first touch point in the<br />
minor axis of the working plane.<br />
Measuring height in the touch probe axis Q261<br />
(absolute): Coordinate of the ball tip center (= touch<br />
point) in the touch probe axis in which the<br />
measurement is to be made.<br />
Setup clearance Q320 (incremental): Additional<br />
distance between measuring point and ball tip. Q320<br />
is added to MP6140.<br />
Measuring axis (1..3: 1=reference axis) Q272:<br />
Axis in which the measurement is to be made:<br />
1: Reference axis = measuring axis<br />
2: Minor axis = measuring axis<br />
3: Touch probe axis = measuring axis<br />
Traverse direction 1 Q267: Direction in which the<br />
probe is to approach the workpiece:<br />
–1: Negative traverse direction<br />
+1: Positive traverse direction<br />
Clearance height Q260 (absolute): Coordinate in the<br />
touch probe axis at which no collision between tool<br />
and workpiece (fixtures) can occur.<br />
Measuring log Q281: Definition of whether the TNC is<br />
to create a measuring log:<br />
0: No measuring log<br />
1: Create measuring log: With the standard setting<br />
the TNC saves the log file TCHPR427.TXT in the<br />
directory in which your measuring program is also<br />
stored.<br />
Maximum dimension Q288: Maximum permissible<br />
measured value.<br />
minimum dimension Q289: Minimum permissible<br />
measured value.<br />
PGM stop if tolerance error Q309: Definition of<br />
whether in the event of a violation of tolerance limits<br />
the TNC is to interrupt the program run and output an<br />
error message:<br />
0: Do not interrupt program run, no error message<br />
1: Interrupt the program run, output an error message<br />
Tool number for monitoring Q330: Definition of<br />
whether the TNC is to monitor the tool (see “Tool<br />
monitoring” on page 96):<br />
0: Monitoring not active<br />
>0: Tool number in the tool table TOOL.T<br />
Y<br />
Q272=2<br />
Example: NC blocks<br />
5 TCH PROBE 427 MEASURE COORDINATE<br />
Q263=+35 ;1ST POINT 1ST AXIS<br />
Q264=+45 ;1ST POINT 2ND AXIS<br />
Q261=+5 ;MEASURING HEIGHT<br />
Q320=0 ;SET-UP CLEARANCE<br />
Q272=3 ;MEASURING AXIS<br />
Q267=-1 ;TRAVERSE DIRECTION<br />
Q260=+20 ;CLEARANCE HEIGHT<br />
Q281=1 ;MEASURING LOG<br />
Q288=5.1 ;MAXIMUM DIMENSION<br />
Q289=4.95 ;MINIMUM DIMENSION<br />
Q309=0 ;PGM-STOP IF ERROR<br />
Q330=0 ;TOOL NUMBER<br />
X<br />
Q272=1<br />
118 3 Touch Probe Cycles for Automatic Workpiece Inspection<br />
Q264<br />
Q263<br />
MP6140 + Q320<br />
+<br />
Q267<br />
– +<br />
–
MEASURE BOLT HOLE CIRCLE<br />
(touch probe cycle 430, ISO: G430)<br />
Touch probe cycle 430 finds the center and diameter of a bolt hole<br />
circle by probing three holes. If you define the corresponding tolerance<br />
values in the cycle, the TNC makes a nominal-to-actual value<br />
comparison and saves the deviation value in system parameters.<br />
1 Following the positioning logic, the TNC positions the touch probe<br />
at rapid traverse (value from MP6150 or MP6361) (see “Running<br />
touch probe cycles” on page 19) to the point entered as center of<br />
the first hole 1.<br />
2 Then the probe moves to the entered measuring height and<br />
probes four points to find the first hole center.<br />
3 The touch probe returns to the clearance height and then to the<br />
position entered as center of the second hole 2.<br />
4 The TNC moves the touch probe to the entered measuring height<br />
and probes four points to find the second hole center.<br />
5 The touch probe returns to the clearance height and then to the<br />
position entered as center of the third hole 3.<br />
6 The TNC moves the touch probe to the entered measuring height<br />
and probes four points to find the third hole center.<br />
7 Finally the TNC returns the touch probe to the clearance height and<br />
saves the actual values and the deviations in the following Q<br />
parameters.<br />
Parameter number Meaning<br />
Q151 Actual value of center in reference axis<br />
Q152 Actual value of center in minor axis<br />
Q153 Actual value of bolt hole circle diameter<br />
Q161 Deviation from center of reference axis<br />
Q162 Deviation from center of minor axis<br />
Q163 Deviation of bolt hole circle diameter<br />
Before programming, note the following:<br />
Before a cycle definition you must have programmed a<br />
tool call to define the touch probe axis.<br />
HEIDENHAIN iTNC 530 119<br />
2<br />
1<br />
3<br />
3.3 Automatic Workpiece Measurement
3.3 Automatic Workpiece Measurement<br />
Center of 1st axis Q273 (absolute): Bolt hole circle<br />
center (nominal value) in the reference axis of the<br />
working plane.<br />
Center in 2nd axis Q274 (absolute): Bolt hole circle<br />
center (nominal value) in the minor axis of the working<br />
plane.<br />
Nominal diameter Q262: Enter the bolt hole circle<br />
diameter.<br />
Angle of 1st hole Q291 (absolute): Polar coordinate<br />
angle of the first hole center in the working plane.<br />
Angle of 2nd hole Q292 (absolute): Polar coordinate<br />
angle of the second hole center in the working plane.<br />
Angle of 3rd hole Q293 (absolute): Polar coordinate<br />
angle of the third hole center in the working plane.<br />
Measuring height in the touch probe axis Q261<br />
(absolute): Coordinate of the ball tip center (= touch<br />
point) in the touch probe axis in which the<br />
measurement is to be made.<br />
Clearance height Q260 (absolute): Coordinate in the<br />
touch probe axis at which no collision between tool<br />
and workpiece (fixtures) can occur.<br />
Maximum dimension Q288: Maximum permissible<br />
diameter of bolt hole circle.<br />
Minimum dimension Q289: Minimum permissible<br />
diameter of bolt hole circle.<br />
Tolerance value for center 1st axis Q279:<br />
Permissible position deviation in the reference axis of<br />
the working plane.<br />
Tolerance value for center 2nd axis Q280:<br />
Permissible position deviation in the minor axis of the<br />
working plane.<br />
120 3 Touch Probe Cycles for Automatic Workpiece Inspection
Measuring log Q281: Definition of whether the TNC is<br />
to create a measuring log:<br />
0: No measuring log<br />
1: Create measuring log: With the standard setting<br />
the TNC saves the log file TCHPR430.TXT in the<br />
directory in which your measuring program is also<br />
stored.<br />
PGM stop if tolerance error Q309: Definition of<br />
whether in the event of a violation of tolerance limits<br />
the TNC is to interrupt the program run and output an<br />
error message:<br />
0: Do not interrupt program run, no error message<br />
1: Interrupt the program run, output an error message<br />
Tool number for monitoring Q330: Definition of<br />
whether the TNC is to monitor for tool breakage.(see<br />
“Tool monitoring” on page 96):<br />
0: Monitoring not active<br />
>0: Tool number in the tool table TOOL.T<br />
Note: Only tool breakage monitoring active, no automatic<br />
tool compensation.<br />
Example: NC blocks<br />
5 TCH PROBE 430 MEAS. BOLT HOLE CIRC<br />
Q273=+50 ;CENTER IN 1ST AXIS<br />
Q274=+50 ;CENTER IN 2ND AXIS<br />
Q262=80 ;NOMINAL DIAMETER<br />
Q291=+0 ;ANGLE OF 1ST HOLE<br />
Q292=+90 ;ANGLE OF 2ND HOLE<br />
Q293=+180 ;ANGLE OF 3RD HOLE<br />
Q261=-5 ;MEASURING HEIGHT<br />
Q260=+<strong>10</strong> ;CLEARANCE HEIGHT<br />
Q288=80.1 ;MAXIMUM DIMENSION<br />
Q289=79.9 ;MINIMUM DIMENSION<br />
Q279=0.15 ;TOLERANCE 1ST CENTER<br />
Q280=0.15 ;TOLERANCE 2ND CENTER<br />
Q281=1 ;MEASURING LOG<br />
Q309=0 ;PGM-STOP IF ERROR<br />
Q330=0 ;TOOL NUMBER<br />
HEIDENHAIN iTNC 530 121<br />
3.3 Automatic Workpiece Measurement
3.3 Automatic Workpiece Measurement<br />
MEASURE PLANE (touch probe cycle 431,<br />
ISO: G431)<br />
Touch probe cycle 431 finds the angle of a plane by measuring three<br />
points. It saves the measured values in system parameters.<br />
1 Following the positioning logic (see “Running touch probe cycles”<br />
on page 19), the TNC positions the touch probe at rapid traverse<br />
(value from MP6150 or MP6361) to the programmed starting point<br />
1 and measures the first touch point of the plane. The TNC offsets<br />
the touch probe by the safety clearance in the direction opposite<br />
to the direction of probing.<br />
2 The touch probe returns to the clearance height and then moves in<br />
the working plane to starting point 2 and measures the actual value<br />
of the second touch point of the plane.<br />
3 The touch probe returns to the clearance height and then moves in<br />
the working plane to starting point 3 and measures the actual value<br />
of the third touch point of the plane.<br />
4 Finally the TNC returns the touch probe to the clearance height and<br />
saves the measured angle values in the following Q parameters.<br />
Parameter number Meaning<br />
Q158 Angle of the A axis<br />
Q159 Angle of the B axis<br />
Q170 Spatial angle A<br />
Q171 Spatial angle B<br />
Q172 Spatial angle C<br />
Before programming, note the following:<br />
Before a cycle definition you must have programmed a<br />
tool call to define the touch probe axis.<br />
For the TNC to be able to calculate the angular values, the<br />
three measuring points must not be positioned on one<br />
straight line.<br />
The spatial angles that are needed for tilting the working<br />
plane are saved in parameters Q170 – Q172. With the first<br />
two measuring points you also specify the direction of the<br />
reference axis when tilting the working plane.<br />
122 3 Touch Probe Cycles for Automatic Workpiece Inspection<br />
1<br />
2<br />
3
First measuring point in the first axis Q263<br />
(absolute): Coordinate of the first touch point in the<br />
reference axis of the working plane.<br />
First measuring point in the 2nd axis Q264<br />
(absolute): Coordinate of the first touch point in the<br />
minor axis of the working plane.<br />
First measuring point in the 3rd axis Q294<br />
(absolute): Coordinate of the first touch point in the<br />
touch probe axis.<br />
Second measuring point in the 1st axis Q265<br />
(absolute): Coordinate of the second touch point in<br />
the reference axis of the working plane.<br />
Second measuring point in the 2nd axis Q266<br />
(absolute): Coordinate of the second touch point in<br />
the minor axis of the working plane.<br />
Second measuring point in the 3rd axis Q295<br />
(absolute): Coordinate of the second touch point in<br />
the touch probe axis.<br />
Third measuring point in 1st axis Q296 (absolute):<br />
Coordinate of the third touch point in the reference<br />
axis of the working plane.<br />
Third measuring point in 2nd axis Q297 (absolute):<br />
Coordinate of the third touch point in the minor axis of<br />
the working plane.<br />
Third measuring point in the 3rd axis Q298<br />
(absolute): Coordinate of the third touch point in the<br />
touch probe axis.<br />
Setup clearance Q320 (incremental): Additional<br />
distance between measuring point and ball tip. Q320<br />
is added to MP6140.<br />
Clearance height Q260 (absolute): Coordinate in the<br />
touch probe axis at which no collision between tool<br />
and workpiece (fixtures) can occur.<br />
Measuring log Q281: Definition of whether the TNC is<br />
to create a measuring log:<br />
0: No measuring log<br />
1: Create measuring log: With the standard setting<br />
the TNC saves the log file TCHPR431.TXT in the<br />
directory in which your measuring program is also<br />
stored.<br />
Example: NC blocks<br />
5 TCH PROBE 431 MEASURE PLANE<br />
Q263=+20 ;1ST POINT 1ST AXIS<br />
Q264=+20 ;1ST POINT 2ND AXIS<br />
Q294=-<strong>10</strong> ;1ST POINT 3RD AXIS<br />
Q265=+50 ;2ND POINT 1ST AXIS<br />
Q266=+80 ;2ND POINT 2ND AXIS<br />
Q295=+0 ;2ND POINT 3RD AXIS<br />
Q296=+90 ;3RD POINT 1ST AXIS<br />
Q297=+35 ;3RD POINT 2ND AXIS<br />
Q298=+12 ;3RD POINT 3RD AXIS<br />
Q320=0 ;SET-UP CLEARANCE<br />
Q260=+5 ;CLEARANCE HEIGHT<br />
Q281=1 ;MEASURING LOG<br />
HEIDENHAIN iTNC 530 123<br />
Q295<br />
Q298<br />
Q294<br />
Z<br />
Q260<br />
MP6140<br />
+<br />
Q320<br />
X<br />
3.3 Automatic Workpiece Measurement
3.3 Automatic Workpiece Measurement<br />
Example: Measuring and reworking a rectangular stud<br />
Program sequence:<br />
- Roughing with 0.5 mm finishing allowance<br />
- Measuring<br />
- Rectangular stud finishing in accordance with the<br />
measured values<br />
0 BEGIN PGM BEAMS MM<br />
1 TOOL CALL 0 Z Prepare tool call<br />
2 L Z+<strong>10</strong>0 R0 F MAX Retract the tool<br />
3 FN 0: Q1 =+81 Pocket length in X (roughing dimension)<br />
4 FN 0: Q2 =+61 Pocket length in Y (roughing dimension)<br />
5 CALL LBL 1 Call subprogram for machining<br />
6 L Z+<strong>10</strong>0 R0 F MAX M6 Retract the tool, change the tool<br />
7 TOOL CALL 99 Z Call the touch probe<br />
8 TCH PROBE 424 MEAS. RECTAN. OUTS. Measure the rough-milled rectangle<br />
Q273=+50 ;CENTER IN 1ST AXIS<br />
Q274=+50 ;CENTER IN 2ND AXIS<br />
Q282=80 ;1ST SIDE LENGTH Nominal length in X (final dimension)<br />
Q283=60 ;2ND SIDE LENGTH Nominal length in Y (final dimension)<br />
Q261=-5 ;MEASURING HEIGHT<br />
Q320=0 ;SET-UP CLEARANCE<br />
Q260=+30 ;CLEARANCE HEIGHT<br />
Q301=0 ;TRAVERSE TO CLEAR HEIGHT<br />
Q284=0 ;MAX. LIMIT 1ST SIDE Input values for tolerance checking not required<br />
Q285=0 ;MIN. LIMIT 1ST SIDE<br />
Q286=0 ;MAX. LIMIT 2ND SIDE<br />
50<br />
Y<br />
124 3 Touch Probe Cycles for Automatic Workpiece Inspection<br />
80<br />
50<br />
60<br />
X<br />
Y<br />
<strong>10</strong><br />
Z
Q287=0 ;MIN. LIMIT 2ND SIDE<br />
Q279=0 ;TOLERANCE 1ST CENTER<br />
Q280=0 ;TOLERANCE 2ND CENTER<br />
Q281=0 ;MEASURING LOG No measuring log transmission<br />
Q309=0 ;PGM-STOP IF ERROR Do not output an error message<br />
Q330=0 ;TOOL NUMBER No tool monitoring<br />
9 FN 2: Q1 =+Q1 - +Q164 Calculate length in X including the measured deviation<br />
<strong>10</strong> FN 2: Q2 =+Q2 - +Q165 Calculate length in Y including the measured deviation<br />
11 L Z+<strong>10</strong>0 R0 F MAX M6 Retract the touch probe, change the tool<br />
12 TOOL CALL 1 Z S5000 Tool call for finishing<br />
13 CALL LBL 1 Call subprogram for machining<br />
14 L Z+<strong>10</strong>0 R0 F MAX M2 Retract in the tool axis, end program<br />
15 LBL 1 Subprogram with fixed cycle for rectangular studs<br />
16 CYCL DEF 213 STUD FINISHING<br />
Q200=20 ;SET-UP CLEARANCE<br />
Q201=-<strong>10</strong> ;DEPTH<br />
Q206=150 ;FEED RATE FOR PLUNGING<br />
Q202=5 ;PLUNGING DEPTH<br />
Q207=500 ;FEED RATE FOR MILLING<br />
Q203=+<strong>10</strong> ;SURFACE COORDINATE<br />
Q204=20 ;2ND SET-UP CLEARANCE<br />
Q216=+50 ;CENTER IN 1ST AXIS<br />
Q217=+50 ;CENTER IN 2ND AXIS<br />
Q218=Q1 ;1ST SIDE LENGTH Length in X variable for roughing and milling<br />
Q219=Q2 ;2ND SIDE LENGTH Length in Y variable for roughing and milling<br />
Q220=0 ;CORNER RADIUS<br />
Q221=0 ;ALLOWANCE IN 1ST AXS<br />
17 CYCL CALL M3 Call the cycle<br />
18 LBL 0 End of subprogram<br />
19 END PGM BEAMS MM<br />
HEIDENHAIN iTNC 530 125<br />
3.3 Automatic Workpiece Measurement
3.3 Automatic Workpiece Measurement<br />
Example: Measuring a rectangular pocket and recording the results<br />
0 BEGIN PGM BSMEAS MM<br />
1 TOOL CALL 1 Z Tool call for touch probe<br />
2 L Z+<strong>10</strong>0 R0 F MAX Retract the touch probe<br />
3 TCH PROBE 423 MEAS. RECTAN. INSIDE<br />
Q273=+50 ;CENTER IN 1ST AXIS<br />
Q274=+40 ;CENTER IN 2ND AXIS<br />
Q282=90 ;1ST SIDE LENGTH Nominal length in X<br />
Q283=70 ;2ND SIDE LENGTH Nominal length in Y<br />
Q261=-5 ;MEASURING HEIGHT<br />
Q320=0 ;SET-UP CLEARANCE<br />
Q260=+20 ;CLEARANCE HEIGHT<br />
Q301=0 ;TRAVERSE TO CLEAR HEIGHT<br />
Q284=90.15;MAX. LIMIT 1ST SIDE Maximum limit in X<br />
Q285=89.95;MIN. LIMIT 1ST SIDE Minimum limit in X<br />
Q286=70.1 ;MAX. LIMIT 2ND SIDE Maximum limit in Y<br />
Q287=69.9 ;MIN. LIMIT 2ND SIDE Minimum limit in Y<br />
Q279=0.15 ;TOLERANCE 1ST CENTER Permissible position deviation in X<br />
Q280=0.1 ;TOLERANCE 2ND CENTER Permissible position deviation in Y<br />
Q281=1 ;MEASURING LOG Transmit the measuring log<br />
Q309=0 ;PGM-STOP IF ERROR Do not display an error message in case of a tolerance violation<br />
Q330=0 ;TOOL NUMBER No tool monitoring<br />
126 3 Touch Probe Cycles for Automatic Workpiece Inspection
4 L Z+<strong>10</strong>0 R0 F MAX M2 Retract in the tool axis, end program<br />
5 END PGM BSMEAS MM<br />
Measuring log (file TCPR423.TXT)<br />
--------------------------------------------------------------------------------------------------------<br />
****************** MEASURING LOG FOR PROBING CYCLE 423: RECTANGULAR POCKET MEASURING *******************<br />
DATE: 29-09-1997<br />
TIME: 8:21:33<br />
MEASURING PROGRAM: TNC:\BSMESS\BSMES.H<br />
----------------------------------------------------------------------------------------------------<br />
NOML. VALUES: CENTER IN REF. AXIS: 50.0000<br />
CENTER IN MINOR AXIS: 40.0000<br />
SIDE LENGTH IN REF. AXIS: 90.0000<br />
SIDE LENGTH IN MINOR AXIS: 70.0000<br />
----------------------------------------------------------------------------------------------------<br />
GIVEN LIMIT VALUES: MAX. FOR CENTER IN REF. AXIS : 50.1500<br />
MIN. FOR CENTER IN REF. AXIS : 49.8500<br />
MAX. FOR CENTER IN MINOR AXIS : 40.<strong>10</strong>00<br />
MIN. FOR CENTER IN MINOR AXIS : 39.9000<br />
MAX. IN REFERENCE AXIS: 90.1500<br />
MINIMUM DIMENSION IN REFERENCE AXIS: 89.9500<br />
MAXIMUM SIDE LENGTH IN MINOR AXIS: 70.<strong>10</strong>00<br />
MINIMUM SIDE LENGTH IN MINOR AXIS: 69.9500<br />
********************************************************************************************************<br />
ACTUAL VALUES: CENTER IN REF. AXIS: 50.0905<br />
CENTER IN MINOR AXIS: 39.9347<br />
SIDE LENGTH IN REF. AXIS: 90.1200<br />
SIDE LENGTH IN MINOR AXIS: 69.9920<br />
--------------------------------------------------------------------------------------------------------<br />
DEVIATIONS: CENTER IN REF. AXIS: 0.0905<br />
CENTER IN MINOR AXIS: -0.0653<br />
SIDE LENGTH IN REF. AXIS: 0.1200<br />
SIDE LENGTH IN MINOR AXIS: –0.0080<br />
********************************************************************************************************<br />
FURTHER MEASURING RESULTS: MEASURING HEIGHT: –5.0000<br />
***************************************** END OF MEASURING LOG *****************************************<br />
HEIDENHAIN iTNC 530 127<br />
3.3 Automatic Workpiece Measurement
3.4 Special Cycles<br />
3.4 Special Cycles<br />
Overview<br />
The TNC provides four cycles for the following special purposes:<br />
Cycle Soft key<br />
2 CALIBRATE TS: Radius calibration of the touch<br />
trigger probe<br />
9 CALIBRATE TS LENGTH: Length calibration of<br />
the touch trigger probe<br />
3 MEASURING Cycle for defining OEM cycles<br />
440 MEASURING AXIS SHIFT<br />
128 3 Touch Probe Cycles for Automatic Workpiece Inspection
CALIBRATE TS (touch probe cycle 2)<br />
Touch probe cycle 2 automatically calibrates a touch trigger probe<br />
using a ring gauge or a precision stud as calibration standard.<br />
Before you begin calibrating, you must define in Machine<br />
Parameters 6180.0 to 6180.2 the center of the calibrating<br />
workpiece in the working space of the machine (REF<br />
coordinates).<br />
If you are working with several traverse ranges you can<br />
save a separate set of coordinates for the center of each<br />
calibrating workpiece (MP6181.1 to 6181.2 and MP6182.1<br />
to 6182.2).<br />
1 The touch probe moves at rapid traverse (value from MP6150) to<br />
the clearance height (but only if current position is below the<br />
clearance height).<br />
2 Then the TNC positions the touch probe in the working plane to the<br />
center of the ring gauge (calibration from inside) or in its proximity<br />
(calibration from outside).<br />
3 The touch probe then moves to the measuring depth (result of<br />
Machine Parameters 618x.2 and 6185.x) and probes the ring<br />
gauge successively in X+, Y+, X- and Y-.<br />
4 Finally, the TNC moves the touch probe to the clearance height<br />
and writes the effective radius of the ball tip to the calibration data.<br />
Clearance height (absolute): Coordinate in the touch<br />
probe axis at which the touch probe cannot collide<br />
with the calibration workpiece or any fixtures.<br />
Radius of ring gauge: Radius of the calibrating<br />
workpiece.<br />
Inside calib. =0/outs. calib.=1: Definition of<br />
whether the TNC is to calibrate from inside or outside:<br />
0: Calibrate from inside<br />
1: Calibrate from outside<br />
Example: NC blocks<br />
5 TCH PROBE 2.0 CALIBRATE TS<br />
6 TCH PROBE 2.1 HEIGHT: +50 R+25.003<br />
DIRECTION: 0<br />
HEIDENHAIN iTNC 530 129<br />
3.4 Special Cycles
3.4 Special Cycles<br />
CALIBRATE TS LENGTH (touch probe cycle 9)<br />
Touch probe cycle 9 automatically calibrates the length of a touch<br />
trigger probe at a point that you determine.<br />
1 Pre-position the touch probe so that the coordinate defined in the<br />
cycle can be accessed without collision<br />
2 The TNC moves the touch probe in the direction of the negative<br />
tool axis until a trigger signal is released.<br />
3 Finally, the TNC moves the touch probe back to the starting point<br />
of the probing process and writes the effective touch probe length<br />
into the calibration data.<br />
Coordinate of datum (absolute): Exact coordinate of<br />
the point that is to be probed.<br />
Reference system? (0=ACT/1=REF): Specify the<br />
coordinate system on which the entered datum is to<br />
be based:<br />
0: Entered datum is based on the active workpiece<br />
coordinate system (ACT system)<br />
1: Entered datum is based on the active machine<br />
coordinate system (REF system)<br />
Example: NC blocks<br />
5 L X-235 Y+356 R0 FMAX<br />
6 TCH PROBE 9.0 CALIBRATE TS LENGTH<br />
7 TCH PROBE 9.1 DATUM+50<br />
REFERENCE SYSTEM 0<br />
130 3 Touch Probe Cycles for Automatic Workpiece Inspection
MEASURING (touch probe cycle 3)<br />
Touch probe cycle 3 measures any position on the workpiece in a<br />
selectable direction. Unlike other measuring cycles, Cycle 3 enables<br />
you to enter the measuring path and feed rate directly. Also the touch<br />
probe retracts by a definable value after determining the measured<br />
value.<br />
1 The touch probe moves from the current position at the entered<br />
feed rate in the defined probing direction. The probing direction<br />
must be defined in the cycle as a polar angle.<br />
2 After the TNC has saved the position, the touch probe stops. The<br />
TNC saves the X, Y, Z coordinates of the probe-tip center in three<br />
successive Q parameters. You define the number of the first<br />
parameter in the cycle.<br />
3 Finally, the TNC moves the touch probe back by that value against<br />
the probing direction that you defined in the parameter MB.<br />
Before programming, note the following:<br />
With function FN17: SYSWRITE ID 990 NR 6 you can set<br />
whether the cycle runs through the probe input X12 or<br />
X13.<br />
Enter the maximum retraction path MB to be just large<br />
enough to prevent a collision.<br />
If the TNC could not determine a valid touch point, the<br />
fourth result parameter will have the value –1.<br />
Parameter number for result: Enter the number of<br />
the Q parameter to which you want the TNC to assign<br />
the first coordinate (X).<br />
Probe axis: Enter the reference axis of the working<br />
plane (X for tool axis Z, Z for tool axis Y, and Y for tool<br />
axis X), and confirm with ENT.<br />
Probing angle: Angle, measured from the probing<br />
axis, at which the touch probe is to move. Confirm<br />
with ENT.<br />
Maximum measuring path: Enter the maximum<br />
distance from the starting point by which the touch<br />
probe may move. Confirm with ENT.<br />
Feed rate: Enter the measuring feed rate in mm/min.<br />
Maximum retraction path: Traverse path in the<br />
direction opposite the probing direction, after the<br />
stylus was deflected.<br />
REFERENCE SYSTEM (0=ACT/1=REF): Specify whether<br />
the result of measurement is to be saved in the actual<br />
coordinate system (ACT), or with respect to the<br />
machine coordinate system (REF).<br />
To conclude the input, press the ENT key.<br />
Example: NC blocks<br />
5 TCH PROBE 3.0 MEASURING<br />
6 TCH PROBE 3.1 Q1<br />
7 TCH PROBE 3.2 X ANGLE: +15<br />
8 TCH PROBE 3.3 DIST +<strong>10</strong> F<strong>10</strong>0 MB:1<br />
REFERENCE SYSTEM:0<br />
HEIDENHAIN iTNC 530 131<br />
3.4 Special Cycles
3.4 Special Cycles<br />
MEASURE AXIS OFFSET (touch probe cycle 440,<br />
ISO: G440)<br />
Touch probe cycle 440 measures the axis shifts of the machine. Make<br />
sure that the cylindrical calibrating tool used in connection with the<br />
TT 130 has the correct dimensions.<br />
Prerequisites:<br />
Before running cycle 440 for the first time, you must have<br />
calibrated the tool touch probe with tool-touch-probe cycle<br />
30.<br />
Ensure that the tool data of the calibrating tool has been<br />
entered in the tool table TOOL.T.<br />
Before running the cycle, you must activate the calibrating<br />
tool with TOOL CALL.<br />
Ensure that the TT tool touch probe is connected to input<br />
X13 of the logic unit and is ready to function (machine<br />
parameter 65xx).<br />
1 The TNC positions the calibrating tool in rapid traverse (value from<br />
MP6550) in the vicinity of the TT following the positioning logic<br />
(refer to Chapter 1.2).<br />
2 At first the TNC makes a measurement in the touch probe axis.<br />
The calibrating tool is offset by the value you have defined in the<br />
tool table TOOL.T under TT: R-OFFS (standard = tool radius). The<br />
TNC always performs the measurement in the touch probe axis.<br />
3 Then the TNC makes the measurement in the working plane. You<br />
define via parameter Q364 in which axis and in which direction of<br />
the working plane the measurement is to be made.<br />
4 If you make a calibration, the TNC saves the calibration data.<br />
Whenever you make a measurement, the TNC compares the<br />
measured values to the calibration data and writes the deviations<br />
to the following Q parameters:<br />
Parameter number Meaning<br />
Q185 Deviation from calibration value in X<br />
Q186 Deviation from calibration value in Y<br />
Q187 Deviation from calibration value in Z<br />
You can use this value for compensating the deviation through an<br />
incremental datum shift (cycle 7).<br />
5 Finally, the calibrating tool returns to the clearance height.<br />
132 3 Touch Probe Cycles for Automatic Workpiece Inspection
Before programming, note the following:<br />
Before you perform a measurement, you must have made<br />
at least one calibration, otherwise the TNC will output an<br />
error message. If you are working with several traverse<br />
ranges, you have to make a calibration for each of them.<br />
Each time you run cycle 440, the TNC resets the result<br />
parameters Q185 to Q187.<br />
If you want to set a limit for the axis shift in the machine<br />
axes, enter the desired limits in the tool table TOOL.T<br />
under LTOL for the spindle axis and under RTOL for the<br />
working plane. If the limits are exceeded, the TNC outputs<br />
a corresponding error message after the control<br />
measurement.<br />
After the cycle is completed, the TNC restores the spindle<br />
settings that were active before the cycle (M3/M4).<br />
Direction: 0=Calibrate, 1=Measuring?: Definition<br />
of whether you want to calibrate or make a control<br />
measurement:<br />
0: Calibrating<br />
1: Measuring<br />
Probing directions: Definition of probing direction(s)<br />
in the working plane:<br />
0: Measuring only in the positive direction of the<br />
reference axis<br />
1: Measuring only in the positive direction of the<br />
minor axis<br />
2: Measuring only in the negative direction of the<br />
reference axis<br />
3: Measuring only in the negative direction of the<br />
minor axis<br />
4: Measuring in the positive directions of the<br />
reference axis and the minor axis<br />
5: Measuring in the positive direction of the reference<br />
axis and in the negative direction of the minor axis<br />
6: Measuring in the negative direction of the<br />
reference axis and in the positive direction of the<br />
minor axis<br />
7: Measuring in the negative directions of the<br />
reference axis and the minor axis<br />
The TNC calculates incorrect values if the probing<br />
direction(s) for calibrating and measuring do not<br />
correspond.<br />
Setup clearance (incremental): Additional distance<br />
between measuring point and probe contact. Q320 is<br />
added to MP6540.<br />
Clearance height (absolute): Coordinate in the touch<br />
probe axis at which no collision between tool and<br />
workpiece (fixtures) can occur (referenced to the<br />
active datum).<br />
Example: NC blocks<br />
5 TCH PROBE 440 MEASURE AXIS SHIFT<br />
Q363=1 ;DIRECTION<br />
Q364=0 ;PROBING DIRECTIONS<br />
Q320=2 ;SET-UP CLEARANCE<br />
Q260=+50 ;CLEARANCE HEIGHT<br />
HEIDENHAIN iTNC 530 133<br />
3.4 Special Cycles
Touch Probe Cycles for<br />
Automatic Tool Measurement
4.1 Tool Measurement with the TT Tool Touch Probe<br />
4.1 Tool Measurement with the TT<br />
Tool Touch Probe<br />
Overview<br />
The TNC and the machine tool must be set up by the<br />
machine tool builder for use of the TT touch probe.<br />
Some cycles and functions may not be provided on your<br />
machine tool. Refer to your machine manual.<br />
In conjunction with the TNC’s tool measurement cycles, the tool touch<br />
probe enables you to measure tools automatically. The compensation<br />
values for tool length and radius can be stored in the central tool file<br />
TOOL.T and are accounted for at the end of the touch probe cycle. The<br />
following types of tool measurement are provided:<br />
Tool measurement while the tool is at standstill.<br />
Tool measurement while the tool is rotating.<br />
Measuring individual teeth.<br />
Setting the machine parameters<br />
The TNC uses the feed rate for probing defined in MP6520<br />
when measuring a tool at standstill.<br />
When measuring a rotating tool, the TNC automatically calculates the<br />
spindle speed and feed rate for probing.<br />
The spindle speed is calculated as follows:<br />
n = MP6570 / (r 0.0063) where<br />
n Spindle speed (rpm)<br />
MP6570 Maximum permissible cutting speed in m/min<br />
r Active tool radius in mm<br />
The feed rate for probing is calculated from:<br />
v = meas. tolerance n where<br />
v Feed rate for probing in mm/min<br />
Measuring Measuring tolerance [mm], depending on MP6507<br />
tolerance<br />
n Speed in rpm<br />
136 4 Touch Probe Cycles for Automatic Tool Measurement
MP6507 determines the calculation of the probing feed rate:<br />
MP6507=0:<br />
The measuring tolerance remains constant regardless of the tool<br />
radius. With very large tools, however, the feed rate for probing is<br />
reduced to zero. The smaller you set the maximum permissible<br />
rotational speed (MP6570) and the permissible tolerance (MP65<strong>10</strong>),<br />
the sooner you will encounter this effect.<br />
MP6507=1:<br />
The measuring tolerance is adjusted relative to the size of the tool<br />
radius. This ensures a sufficient feed rate for probing even with large<br />
tool radii. The TNC adjusts the measuring tolerance according to the<br />
following table:<br />
Tool radius Measuring tolerance<br />
Up to 30 mm MP65<strong>10</strong><br />
30 to 60 mm 2 MP65<strong>10</strong><br />
60 to 90 mm 3 MP65<strong>10</strong><br />
90 to 120 mm 4 MP65<strong>10</strong><br />
MP6507=2:<br />
The feed rate for probing remains constant, the error of measurement,<br />
however, rises linearly with the increase in tool radius:<br />
Measuring tolerance = (r MP65<strong>10</strong>)/ 5 mm) where<br />
r Active tool radius in mm<br />
MP65<strong>10</strong> Maximum permissible error of measurement<br />
HEIDENHAIN iTNC 530 137<br />
4.1 Tool Measurement with the TT Tool Touch Probe
4.1 Tool Measurement with the TT Tool Touch Probe<br />
Entries in the tool table TOOL.T<br />
Abbr. Input Dialog<br />
CUT Number of teeth (20 teeth maximum) Number of teeth?<br />
LTOL Permissible deviation from tool length L for wear detection. If the<br />
entered value is exceeded, the TNC locks the tool (statusL). Input<br />
range: 0 to 0.9999 mm<br />
RTOL Permissible deviation from tool radius R for wear detection. If the<br />
entered value is exceeded, the TNC locks the tool (statusL). Input<br />
range: 0 to 0.9999 mm<br />
Input examples for common tool types<br />
Wear tolerance: length?<br />
Wear tolerance: radius?<br />
DIRECT. Cutting direction of the tool for measuring the tool during rotation Cutting direction (M3 = –)?<br />
TT:R-OFFS For tool length measurement: Tool offset between stylus center<br />
and tool center. Preset value: Tool radius R (NO ENT means R).<br />
TT:L-OFFS Tool radius measurement: Tool offset in addition to MP6530<br />
between upper surface of stylus and lower surface of tool.<br />
Default: 0<br />
LBREAK Permissible deviation from tool length L for breakage detection. If<br />
the entered value is exceeded, the TNC locks the tool (statusL).<br />
Input range: 0 to 0.9999 mm<br />
RBREAK Permissible deviation from tool radius R for breakage detection. If<br />
the entered value is exceeded, the TNC locks the tool (status L).<br />
Input range: 0 to 0.9999 mm<br />
Tool offset: radius?<br />
Tool offset: length?<br />
Breakage tolerance: length?<br />
Breakage tolerance: radius?<br />
Tool type CUT TT:R-OFFS TT:L-OFFS<br />
Drill – (no function) 0 (no offset required because<br />
tool tip is to be measured)<br />
End mill with diameter of<br />
19mm<br />
4 (4 teeth) 0 (no offset required because<br />
tool diameter is smaller than<br />
the contact plate diameter of<br />
the TT)<br />
4 (4 teeth) R (offset required because<br />
tool diameter is larger than<br />
the contact plate diameter of<br />
the TT)<br />
Toroid cutter 4 (4 teeth) 0 (no offset required because<br />
the south pole of the ball is to<br />
be measured)<br />
0 (no additional offset<br />
required for radius<br />
calibration; offset from<br />
MP6530 is used.)<br />
0 (no additional offset<br />
required for radius<br />
calibration; offset from<br />
MP6530 is used.)<br />
5 (always define the tool<br />
radius as the offset so that<br />
the diameter is not<br />
measured in the radius)<br />
138 4 Touch Probe Cycles for Automatic Tool Measurement
Display the results of measurement<br />
You can display the results of tool measurement in the additional<br />
status display by pressing the STATUS TOOL PROBE soft key (in the<br />
machine operating modes). The TNC then shows the program blocks<br />
in the left and the measuring results in the right screen window. The<br />
measuring results that exceed the permissible wear tolerance are<br />
marked in the status display with an asterisk “*”; the results that<br />
exceed the permissible breakage tolerance are marked with the<br />
character B.<br />
HEIDENHAIN iTNC 530 139<br />
4.1 Tool Measurement with the TT Tool Touch Probe
4.2 Available Cycles<br />
4.2 Available Cycles<br />
Overview<br />
You can program the cycles for tool measurement in the Programming<br />
and Editing mode of operation via the TOUCH PROBE key. The<br />
following cycles are available:<br />
Cycle Old format New format<br />
Calibrating the TT<br />
Measuring the tool length<br />
Measuring the tool radius<br />
Measuring tool length and<br />
radius<br />
The measuring cycles can be used only when the central<br />
tool file TOOL.T is active.<br />
Before working with the measuring cycles, you must first<br />
enter all the required data into the central tool file and call<br />
the tool to be measured with TOOL CALL.<br />
You can also measure tools in a tilted working plane.<br />
Differences between Cycles 31 to 33 and<br />
Cycles 481 to 483<br />
The features and the operating sequences are absolutely identical.<br />
There are only two differences between Cycles 31 to 33 and<br />
Cycles 481 to 483:<br />
Cycles 481 to 483 are also available in TNCs for ISO programming<br />
under G481 to G483.<br />
Instead of a selectable parameter for the status of the<br />
measurement, the new cycles use the fixed parameter Q199.<br />
140 4 Touch Probe Cycles for Automatic Tool Measurement
Calibrating the TT (touch probe cycle 30 or 480,<br />
ISO: G480)<br />
The functioning of the calibration cycle is dependent on<br />
MP 6500. Refer to your Machine Manual.<br />
Before calibrating the touch probe, you must enter the<br />
exact length and radius of the calibrating tool into the tool<br />
table TOOL.T.<br />
The position of the TT within the machine working space<br />
must be defined by setting the machine parameters<br />
6580.0 to 6580.2.<br />
If you change the setting of any of the machine<br />
parameters 6580.0 to 6580.2, you must recalibrate the TT.<br />
The TT 120 is calibrated automatically with the measuring cycle TCH<br />
PROBE 30 or TCH PROBE 480 (see also “Differences between Cycles<br />
31 to 33 and Cycles 481 to 483” on page 140). The calibration process<br />
is automatic. The TNC also measures the center misalignment of the<br />
calibrating tool automatically by rotating the spindle by 180° after the<br />
first half of the calibration cycle.<br />
The calibrating tool must be a precisely cylindrical part, for example a<br />
cylinder pin. The resulting calibration values are stored in the TNC<br />
memory and are accounted for during subsequent tool measurement.<br />
Clearance height: Enter the position in the spindle<br />
axis at which there is no danger of collision with the<br />
workpiece or fixtures. The clearance height is<br />
referenced to the active workpiece datum. If you<br />
enter such a small clearance height that the tool tip<br />
would lie below the level of the probe contact, the<br />
TNC automatically positions the tool above the level<br />
of the probe contact (safety zone from MP6540).<br />
Example: NC blocks in old format<br />
6 TOOL CALL 1 Z<br />
7 TCH PROBE 30.0 TT CALIBRATE<br />
8 TCH PROBE 30.1 HEIGHT: +90<br />
Example: NC blocks in new format<br />
6 TOOL CALL 1 Z<br />
7 TCH PROBE 480 TT CALIBRATE<br />
Q260=+<strong>10</strong>0 ;CLEARANCE HEIGHT<br />
HEIDENHAIN iTNC 530 141<br />
4.2 Available Cycles
4.2 Available Cycles<br />
Measuring the tool length (touch probe cycle 31<br />
or 481, ISO: G481)<br />
Before measuring a tool for the first time, enter the<br />
following data on the tool into the tool table TOOL.T: the<br />
approximate radius, the approximate length, the number<br />
of teeth, and the cutting direction.<br />
To measure the tool length, program the cycle TCH PROBE 31or<br />
TCH PROBE 480 (see also “Differences between Cycles 31 to 33 and<br />
Cycles 481 to 483” on page 140). Depending on the input parameters,<br />
you can measure the length of a tool by one of the following methods:<br />
If the tool diameter is larger than the diameter of the measuring<br />
surface of the TT, you can measure the tool while it is rotating.<br />
If the tool diameter is smaller than the diameter of the measuring<br />
surface of the TT, or if you are measuring the length of a drill or<br />
spherical cutter, you can measure the tool while it is at standstill.<br />
If the tool diameter is larger than the diameter of the measuring<br />
surface of the TT, you can measure the individual teeth of the tool<br />
while it is at standstill.<br />
Measuring cycle for measuring a tool during rotation<br />
The TNC determines the longest tooth of a rotating tool by positioning<br />
the tool to be measured at an offset to the center of the touch probe<br />
system and then moving it toward the measuring surface until it<br />
contacts the surface. The offset is programmed in the tool table under<br />
Tool offset: Radius (TT: R-OFFS).<br />
Measuring cycle for measuring a tool during standstill (e.g. for<br />
drills)<br />
The TNC positions the tool to be measured over the center of the<br />
measuring surface. It then moves the tool toward the measuring<br />
surface of the TT (without rotation of the spindle) until the tool<br />
contacts the surface. To activate this function, enter zero for the Tool<br />
offset: Radius (TT: R-OFFS) in the tool table.<br />
Measuring cycle for measuring individual teeth<br />
The TNC pre-positions the tool to be measured to a position at the side<br />
of the touch probe head. The distance from the tip of the tool to the<br />
upper edge of the touch probe head is defined in MP6530. You can<br />
enter an additional offset with Tool offset: Length (TT: L-OFFS) in the<br />
tool table. The TNC probes the tool radially during rotation to<br />
determine the starting angle for measuring the individual teeth. It then<br />
measures the length of each tooth by changing the corresponding<br />
angle of spindle orientation. To activate this function, program TCH<br />
PROBE 31 = 1 for CUTTER MEASUREMENT.<br />
142 4 Touch Probe Cycles for Automatic Tool Measurement
Define cycle<br />
Measure tool=0 / Check tool=1: Select whether the<br />
tool is to be measured for the first time or whether a<br />
tool that has already been measured is to be<br />
inspected. If the tool is being measured for the first<br />
time, the TNC overwrites the tool length L in the<br />
central tool file TOOL.T by the delta value DL = 0. If<br />
you wish to inspect a tool, the TNC compares the<br />
measured length with the tool length L that is stored<br />
in TOOL.T. It then calculates the positive or negative<br />
deviation from the stored value and enters it into<br />
TOOL.T as the delta value DL. The deviation can also<br />
be used for Q parameter Q115. If the delta value is<br />
greater than the permissible tool length tolerance for<br />
wear or break detection, the TNC will lock the tool<br />
(status L in TOOL.T).<br />
Parameter number for result?: Parameter number in<br />
which the TNC stores the status of the<br />
measurement:<br />
0.0: Tool is within the tolerance.<br />
1.0: Tool is worn (LTOL exceeded).<br />
2.0: Tool is broken (LBREAK exceeded). If you do not<br />
wish to use the result of measurement within the<br />
program, answer the dialog prompt with NO ENT.<br />
Clearance height: Enter the position in the spindle<br />
axis at which there is no danger of collision with the<br />
workpiece or fixtures. The clearance height is<br />
referenced to the active workpiece datum. If you<br />
enter such a small clearance height that the tool tip<br />
would lie below the level of the probe contact, the<br />
TNC automatically positions the tool above the level<br />
of the probe contact (safety zone from MP6540).<br />
Cutter measurement? 0=No / 1=Yes: Choose whether<br />
or not the TNC is to measure the individual teeth.<br />
Example: Measuring a rotating tool for the first<br />
time; old format<br />
6 TOOL CALL 12 Z<br />
7 TCH PROBE 31.0 TOOL LENGTH<br />
8 TCH PROBE 31.1 CHECK: 0<br />
9 TCH PROBE 31.2 HEIGHT: +120<br />
<strong>10</strong> TCH PROBE 31.3 PROBING THE TEETH: 0<br />
Example: Inspecting a tool and measuring the<br />
individual teeth and saving the status in Q5; old<br />
format<br />
6 TOOL CALL 12 Z<br />
7 TCH PROBE 31.0 TOOL LENGTH<br />
8 TCH PROBE 31.1 CHECK: 1 Q5<br />
9 TCH PROBE 31.2 HEIGHT: +120<br />
<strong>10</strong> TCH PROBE 31.3 PROBING THE TEETH: 1<br />
Example: NC blocks in new format<br />
6 TOOL CALL 12 Z<br />
7 TCH PROBE 481 TOOL LENGTH<br />
Q340=1 ;CHECK<br />
Q260=+<strong>10</strong>0 ;CLEARANCE HEIGHT<br />
Q341=1 ;PROBING THE TEETH<br />
HEIDENHAIN iTNC 530 143<br />
4.2 Available Cycles
4.2 Available Cycles<br />
Measuring the tool radius (touch probe cycle 32<br />
or 482, ISO: G482)<br />
Before measuring a tool for the first time, enter the<br />
following data on the tool into the tool table TOOL.T: the<br />
approximate radius, the approximate length, the number<br />
of teeth, and the cutting direction.<br />
To measure the tool radius, program the cycle TCH PROBE 32 or<br />
TCH PROBE 482 (see also “Differences between Cycles 31 to 33 and<br />
Cycles 481 to 483” on page 140). Depending on the input parameters,<br />
you can measure the radius of a tool by:<br />
Measuring the tool while it is rotating.<br />
Measuring the tool while it is rotating and subsequently measuring<br />
the individual teeth.<br />
Cylindrical tools with diamond surfaces can be measured<br />
with stationary spindle. To do so, define the number of<br />
teeth (CUT) with 0 and adjust the machine parameter<br />
6500. Refer to your machine manual.<br />
Sequence of measurement<br />
The TNC pre-positions the tool to be measured to a position at the side<br />
of the touch probe head. The distance from the tip of the milling tool<br />
to the upper edge of the touch probe head is defined in MP6530. The<br />
TNC probes the tool radially while it is rotating. If you have<br />
programmed a subsequent measurement of individual teeth, the TNC<br />
measures the radius of each tooth with the aid of oriented spindle<br />
stops.<br />
144 4 Touch Probe Cycles for Automatic Tool Measurement
Define cycle<br />
Measure tool=0 / Check tool=1: Select whether the<br />
tool is to be measured for the first time or whether a<br />
tool that has already been measured is to be<br />
inspected. If the tool is being measured for the first<br />
time, the TNC overwrites the tool radius R in the<br />
central tool file TOOL.T by the delta value DR = 0. If<br />
you wish to inspect a tool, the TNC compares the<br />
measured radius with the tool radius R that is stored<br />
in TOOL.T. It then calculates the positive or negative<br />
deviation from the stored value and enters it into<br />
TOOL.T as the delta value DR. The deviation can also<br />
be used for Q parameter Q116. If the delta value is<br />
greater than the permissible tool radius tolerance for<br />
wear or break detection, the TNC will lock the tool<br />
(status L in TOOL.T).<br />
Parameter number for result?: Parameter number in<br />
which the TNC stores the status of the<br />
measurement:<br />
0.0: Tool is within the tolerance.<br />
1.0: Tool is worn (RTOL exceeded).<br />
2.0: Tool is broken (RBREAK exceeded). If you do not<br />
wish to use the result of measurement within the<br />
program, answer the dialog prompt with NO ENT.<br />
Clearance height: Enter the position in the spindle<br />
axis at which there is no danger of collision with the<br />
workpiece or fixtures. The clearance height is<br />
referenced to the active workpiece datum. If you<br />
enter such a small clearance height that the tool tip<br />
would lie below the level of the probe contact, the<br />
TNC automatically positions the tool above the level<br />
of the probe contact (safety zone from MP6540).<br />
Cutter measurement 0=No / 1=Yes: Choose whether<br />
or not the TNC is to measure the individual teeth.<br />
Example: Measuring a rotating tool for the first<br />
time; old format<br />
6 TOOL CALL 12 Z<br />
7 TCH PROBE 32.0 TOOL RADIUS<br />
8 TCH PROBE 32.1 CHECK: 0<br />
9 TCH PROBE 32.2 HEIGHT: +120<br />
<strong>10</strong> TCH PROBE 32.3 PROBING THE TEETH: 0<br />
Example: Inspecting a tool and measuring the<br />
individual teeth and saving the status in Q5; old<br />
format<br />
6 TOOL CALL 12 Z<br />
7 TCH PROBE 32.0 TOOL RADIUS<br />
8 TCH PROBE 32.1 CHECK: 1 Q5<br />
9 TCH PROBE 32.2 HEIGHT: +120<br />
<strong>10</strong> TCH PROBE 32.3 PROBING THE TEETH: 1<br />
Example: NC blocks in new format<br />
6 TOOL CALL 12 Z<br />
7 TCH PROBE 482 TOOL RADIUS<br />
Q340=1 ;CHECK<br />
Q260=+<strong>10</strong>0 ;CLEARANCE HEIGHT<br />
Q341=1 ;PROBING THE TEETH<br />
HEIDENHAIN iTNC 530 145<br />
4.2 Available Cycles
4.2 Available Cycles<br />
Measuring the tool radius (touch probe cycle 33<br />
or 483, ISO: G483)<br />
Before measuring a tool for the first time, enter the<br />
following data on the tool into the tool table TOOL.T: the<br />
approximate radius, the approximate length, the number<br />
of teeth, and the cutting direction.<br />
To measure both the length and radius of a tool, program the<br />
measuring cycles TCH PROBE 33 or TCH PROBE 482 (see also<br />
“Differences between Cycles 31 to 33 and Cycles 481 to 483” on<br />
page 140). This cycle is particularly suitable for the first measurement<br />
of tools, as it saves time when compared with individual<br />
measurement of length and radius. In input parameters you can select<br />
the desired type of measurement:<br />
Measuring the tool while it is rotating.<br />
Measuring the tool while it is rotating and subsequently measuring<br />
the individual teeth.<br />
Cylindrical tools with diamond surfaces can be measured<br />
with stationary spindle. To do so, define the number of<br />
teeth (CUT) with 0 and adjust the machine parameter<br />
6500. Refer to your machine manual.<br />
Sequence of measurement<br />
The TNC measures the tool in a fixed programmed sequence. First it<br />
measures the tool radius, then the tool length. The sequence of<br />
measurement is the same as for measuring cycles 31 and 32.<br />
146 4 Touch Probe Cycles for Automatic Tool Measurement
Define cycle<br />
Measure tool=0 / Check tool=1: Select whether the<br />
tool is to be measured for the first time or whether a<br />
tool that has already been measured is to be<br />
inspected. If the tool is being measured for the first<br />
time, the TNC overwrites the tool radius R and the<br />
tool length L in the central tool file TOOL.T by the<br />
delta values DR = 0 and DL = 0. If you wish to inspect<br />
a tool, the TNC compares the measured data with the<br />
tool data stored in TOOL.T. The TNC calculates the<br />
deviations and enters them as positive or negative<br />
delta values DR and DL in TOOL.T. The deviations are<br />
also available in the Q parameters Q115 and Q116. If<br />
the delta values are greater than the permissible tool<br />
tolerances for wear or break detection, the TNC will<br />
lock the tool (status L in TOOL.T).<br />
Parameter number for result?: Parameter number in<br />
which the TNC stores the status of the<br />
measurement:<br />
0.0: Tool is within the tolerance.<br />
1.0: Tool is worn (LTOL or/and RTOL exceeded).<br />
2.0: Tool is broken (LBREAK and/or RBREAK exceeded).<br />
If you do not wish to use the result of measurement<br />
within the program, answer the dialog prompt with<br />
the NO ENT key.<br />
Clearance height: Enter the position in the spindle<br />
axis at which there is no danger of collision with the<br />
workpiece or fixtures. The clearance height is<br />
referenced to the active workpiece datum. If you<br />
enter such a small clearance height that the tool tip<br />
would lie below the level of the probe contact, the<br />
TNC automatically positions the tool above the level<br />
of the probe contact (safety zone from MP6540).<br />
Cutter measurement 0=No / 1=Yes: Choose whether<br />
or not the TNC is to measure the individual teeth.<br />
Example: Measuring a rotating tool for the first<br />
time; old format<br />
6 TOOL CALL 12 Z<br />
7 TCH PROBE 33.0 MEASURE TOOL<br />
8 TCH PROBE 33.1 CHECK: 0<br />
9 TCH PROBE 33.2 HEIGHT: +120<br />
<strong>10</strong> TCH PROBE 33.3 PROBING THE TEETH: 0<br />
Example: Inspecting a tool and measuring the<br />
individual teeth and saving the status in Q5; old<br />
format<br />
6 TOOL CALL 12 Z<br />
7 TCH PROBE 33.0 MEASURE TOOL<br />
8 TCH PROBE 33.1 CHECK: 1 Q5<br />
9 TCH PROBE 33.2 HEIGHT: +120<br />
<strong>10</strong> TCH PROBE 33.3 PROBING THE TEETH: 1<br />
Example: NC blocks in new format<br />
6 TOOL CALL 12 Z<br />
7 TCH PROBE 483 MEASURE TOOL<br />
Q340=1 ;CHECK<br />
Q260=+<strong>10</strong>0 ;CLEARANCE HEIGHT<br />
Q341=1 ;PROBING THE TEETH<br />
HEIDENHAIN iTNC 530 147<br />
4.2 Available Cycles
Symbole<br />
3-D touch probes ... 14<br />
Calibrating<br />
Triggering ... 26, 129, 130<br />
Managing different calibration<br />
data ... 29<br />
Saving calibration values in<br />
TOOL.T ... 28<br />
A<br />
Angle of a plane, measuring ... 122<br />
Angle, measuring in a plane ... 122<br />
Automatic datum setting ... 58<br />
Center of 4 holes ... 84<br />
Center of bolt hole circle ... 79<br />
Center of circular pocket (or<br />
hole) ... 67<br />
Center of circular stud ... 70<br />
Center of rectangular pocket ... 61<br />
Center of rectangular stud ... 64<br />
In any axis ... 87<br />
In the touch probe axis ... 82<br />
Inside corner ... 76<br />
Outside corner ... 73<br />
Automatic tool measurement ... 138<br />
B<br />
Basic rotation<br />
Measuring during program run ... 42<br />
Measuring in the Manual Operation<br />
mode ... 30<br />
Setting ... 53<br />
Bolt hole circle, measuring ... 119<br />
C<br />
Circle, measuring from inside ... <strong>10</strong>1<br />
Circle, measuring from outside ... <strong>10</strong>4<br />
Classification of results ... 95<br />
Compensating workpiece misalignment<br />
By measuring two points of a<br />
line ... 30, 43<br />
Over two holes ... 36, 45<br />
Over two studs ... 36, 47<br />
Via rotary axis ... 50, 54<br />
Confidence interval ... 17<br />
Coordinate, measuring a single ... 117<br />
D<br />
Datum<br />
Save in a datum table ... 60<br />
Save in the preset table ... 60<br />
Datum setting, manual<br />
Center line as datum ... 35<br />
Circle center as datum ... 34<br />
Corner as datum ... 33<br />
In any axis ... 32<br />
Using holes/studs ... 36<br />
Datum table<br />
Confirming probed values ... 24<br />
F<br />
For automatic tool measurement, see<br />
tool measurement<br />
H<br />
Hole, measuring ... <strong>10</strong>1<br />
M<br />
Machine parameters for 3-D touch<br />
probes ... 17<br />
Measurement results in Q<br />
parameters ... 95<br />
Measuring angles ... 99<br />
Multiple measurement ... 17<br />
P<br />
Positioning logic ... 19<br />
Preset table ... 60<br />
Confirming probed values ... 25<br />
Probing cycles<br />
Manual operation mode ... 22<br />
Probing cycles.<br />
Touch probe cycles for automatic<br />
operation ... 16<br />
Probing feed rate ... 18<br />
R<br />
Recording the results of<br />
measurement ... 94<br />
Rectangular pocket, measuring ... 1<strong>10</strong><br />
Rectangular stud, measuring ... <strong>10</strong>7<br />
Result parameters ... 95<br />
Ridge, measuring from outside ... 115<br />
S<br />
Slot width, measuring ... 113<br />
T<br />
Thermal expansion, measuring ... 132<br />
Tolerance monitoring ... 95<br />
Tool compensation ... 96<br />
Tool measurement ... 138<br />
Calibrating the TT ... 141<br />
Displaying the measuring<br />
results ... 139<br />
Machine parameters ... 136<br />
Measuring tool length and<br />
radius ... 146<br />
Overview ... 140<br />
Tool length ... 142<br />
Tool radius ... 144<br />
Tool monitoring ... 96<br />
Touch probe functions, use with<br />
mechanical probes or dial<br />
gauges ... 40<br />
W<br />
Width, measuring from inside ... 113<br />
Width, measuring from outside ... 115<br />
Workpiece measurement ... 37, 93<br />
Writing probed values in datum<br />
tables ... 24<br />
Writing probed values in the preset<br />
table ... 25<br />
HEIDENHAIN iTNC 530 149<br />
Index
DR. JOHANNES HEIDENHAIN GmbH<br />
Dr.-Johannes-Heidenhain-Straße 5<br />
83301 Traunreut, Germany<br />
{ +49 (8669) 31-0<br />
| +49 (8669) 5061<br />
e-mail: info@<strong>heidenhain</strong>.de<br />
Technical support | +49 (8669) 31-<strong>10</strong> 00<br />
e-mail: service@<strong>heidenhain</strong>.de<br />
Measuring systems { +49 (8669) 31-3<strong>10</strong>4<br />
e-mail: service.ms-support@<strong>heidenhain</strong>.de<br />
TNC support { +49 (8669) 31-3<strong>10</strong>1<br />
e-mail: service.nc-support@<strong>heidenhain</strong>.de<br />
NC programming { +49 (8669) 31-3<strong>10</strong>3<br />
e-mail: service.nc-pgm@<strong>heidenhain</strong>.de<br />
PLC programming { +49 (8669) 31-3<strong>10</strong>2<br />
e-mail: service.plc@<strong>heidenhain</strong>.de<br />
Lathe controls { +49 (711) 952803-0<br />
e-mail: service.hsf@<strong>heidenhain</strong>.de<br />
www.<strong>heidenhain</strong>.de<br />
3-D Touch Probe Systems from HEIDENHAIN<br />
help you to reduce non-cutting time:<br />
For example in<br />
workpiece alignment<br />
datum setting<br />
workpiece measurement<br />
digitizing 3-D surfaces<br />
with the workpiece touch probes<br />
TS 220 with cable<br />
TS 640 with infrared transmission<br />
tool measurement<br />
wear monitoring<br />
tool breakage monitoring<br />
with the tool touch probe<br />
TT 130<br />
Ve 02<br />
375 319-30 · SW11 · <strong>10</strong> · 7/2005 · F&W · Printed in Germany · Subject to change without notice