CD-ROM Drive Unit - Ibm
CD-ROM Drive Unit - Ibm
CD-ROM Drive Unit - Ibm

Create successful ePaper yourself
Turn your PDF publications into a flip-book with our unique Google optimized e-Paper software.
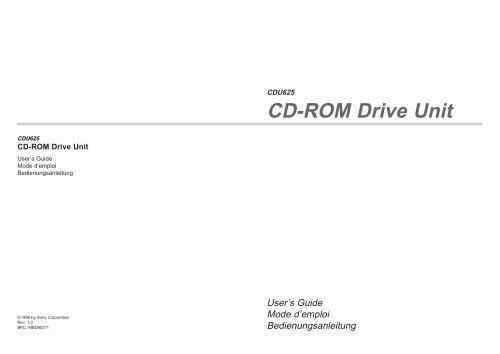
<strong>CD</strong>U625<br />
<strong>CD</strong>-<strong>ROM</strong> <strong>Drive</strong> <strong>Unit</strong><br />
User’s Guide<br />
Mode d’emploi<br />
Bedienungsanleitung<br />
©1998 by Sony Corporation<br />
Rev. 1.0<br />
BKC: MBD90211<br />
<strong>CD</strong>U625<br />
<strong>CD</strong>-<strong>ROM</strong> <strong>Drive</strong> <strong>Unit</strong><br />
User’s Guide<br />
Mode d’emploi<br />
Bedienungsanleitung
Owner’s Record<br />
The model and serial numbers are located on the top side of the drive. Record these numbers<br />
in the spaces provided below. Refer to them whenever you call upon your sales representative<br />
regarding this product.<br />
Model No. __________________ Serial No. ___________________<br />
2<br />
WARNING<br />
To prevent fire or shock hazard, do not expose the unit<br />
to rain or moisture.<br />
To avoid electrical shock, do not open the cabinet.<br />
Refer servicing to qualified personnel only.<br />
This unit uses <strong>CD</strong>-<strong>ROM</strong> discs with the following mark.<br />
When you use this unit as a <strong>CD</strong> player, use compact discs<br />
with the following mark.<br />
CAUTION INVISIBLE LASER RADIATION WHEN OPEN. DO NOT<br />
STARE INTO BEAM OR VIEW DIRECTLY WITH<br />
OPTICAL INSTRUMENTS.<br />
VORSICHT UNSICHTBARE LASERSTRAHLUNG, WENN ABDECKUNG<br />
GEÖFFNET. NICHT IN DEN STRAHL BLICKEN, AUCH<br />
NICHT MIT OPTISCHEN INSTRUMENTEN.<br />
ADVARSEL USYNLIG LASERSTRÅLING VED ÅBNING SE IKKE IND I<br />
STRÅLEN-HELLER IKKE MED OPTISKE INSTRUMENTER.<br />
ADVARSEL USYNLIG LASERSTRÅLING NÅR DEKSEL ÅPNES. STIRR<br />
IKKE INN I STRÅLEN ELLER SE DIREKTE MED OPTISKE<br />
INSTRUMENTER.<br />
VARNING OSYNLIG LASERSTRÅLNING NÄR DENNA DEL ÄR<br />
ÖPPNAD. STIRRA EJ IN I STRÅLEN OCH BETRAKTA EJ<br />
STRALEN MED OPTISKA INSTRUMENT.<br />
VARO! AVATTAESSA OLET ALTTIINA NÄKYMÄTTÖMÄLLE<br />
LASERSÄTEILYLLE. ÄLÄ TUIJOTA SÄTEESEEN ÄLÄKÄ<br />
KATSO SITÄ OPTISEN LAITTEEN LÄPI.<br />
This Label is located on<br />
the top of the drive.<br />
Dieser Aufkleber<br />
befindet sich an der<br />
Oberseite des Gehäuses.<br />
INFORMATION<br />
You are cautioned that any changes or modifications not expressly approved in this manual<br />
could void your warranty covering this equipment.<br />
Note: This equipment has been tested and found to comply with the limits for a Class B<br />
digital device, pursuant to Part 15 of the FCC Rules. These limits are designed to provide<br />
reasonable protection against harmful interference in a residential installation.<br />
This equipment generates, uses, and can radiate radio frequency energy and, if not installed<br />
and used in accordance with the instructions, may cause harmful interference to radio<br />
communications. However, there is no guarantee that interference will not occur in a<br />
particular installation. If this equipment does cause harmful interference to radio or television<br />
reception, which can be determined by turning the equipment off and on, the user is<br />
encouraged to try to correct the interference by one or more of the following measures:<br />
– Reorient or relocate the receiving antenna.<br />
– Increase the separation between the equipment and receiver.<br />
– Connect the equipment into an outlet on a circuit different from that to which the receiver<br />
is connected.<br />
– Consult the dealer or an experienced radio/TV technician for help.<br />
CLASS 1<br />
LASER PRODUCT<br />
LASER KLASSE 1<br />
PRODUKT<br />
LUOKAN 1 LASERLAITE<br />
KLASS 1 LASER APPARAT<br />
Trademarks<br />
This <strong>CD</strong>-<strong>ROM</strong> <strong>Drive</strong> <strong>Unit</strong> is classified as a<br />
CLASS 1 LASER PRODUCT.<br />
The CLASS 1 LASER PRODUCT label is<br />
located on the top of the drive.<br />
Bei diesem <strong>CD</strong>-<strong>ROM</strong>-Laufwerk <strong>CD</strong>U625<br />
handelt es sich um ein Laser-Produkt der<br />
Klasse 1. Ein entsprechender Aufkleber mit<br />
der Beschriftung LASER KLASSE 1<br />
PRODUKT befindet sich auf der Oberseite<br />
des Geräts.<br />
● MS-DOS is a registered trademark of Microsoft Corporation.<br />
● IBM PC, PC/XT, and PC/AT are registered trademarks of International Business Machines<br />
Corporation.<br />
● HP Vectra is a registered trademark of the Hewlett-Packard Company.<br />
● Molex is a registered trademark of Molex, Inc.<br />
● AMP is a registered trademark of AMP, Inc.<br />
● JAE is a registered trademark of Japan Aviation Electronics Industry, Ltd.<br />
3<br />
English
Contents<br />
4<br />
Introduction 5<br />
Features..........................................................................................................5<br />
Software Requirements for MS-DOS 6.x........................................................6<br />
Example of System Setup ..............................................................................6<br />
Location of Controls 7<br />
Front Panel .....................................................................................................7<br />
Rear Panel......................................................................................................7<br />
Precautions 8<br />
Hardware Installation 9<br />
Installing the <strong>Drive</strong> <strong>Unit</strong> into the Computer.....................................................9<br />
Getting started ................................................................................................9<br />
Step 1: Opening the Computer.......................................................................9<br />
Step 2: SCSI Configuration ..........................................................................10<br />
Step 3: Finding the Connector ......................................................................11<br />
Step 4: Choosing the Configuration..............................................................11<br />
Step 5: Setting the Jumpers .........................................................................12<br />
Step 6: Connecting the <strong>Drive</strong>........................................................................14<br />
Step 7: Mounting the drive............................................................................15<br />
Step 8: Connecting the Power Cable ...........................................................15<br />
Step 9: Installation Review ...........................................................................16<br />
Step 10: Closing the Computer ....................................................................17<br />
Installing the Software <strong>Drive</strong>r 18<br />
MS-DOS 6.x..................................................................................................18<br />
Windows ® 95/NT ...........................................................................................18<br />
Operating the <strong>Drive</strong> 19<br />
Starting the <strong>Drive</strong>..........................................................................................19<br />
Ejecting the Disc...........................................................................................21<br />
Troubleshooting 22<br />
Checklist .......................................................................................................22<br />
Additional Installation Cases.........................................................................23<br />
Service Contacts in Europe ..........................................................................23<br />
Specifications 24<br />
Introduction<br />
Features<br />
The <strong>CD</strong>U625 is an internal <strong>CD</strong>-<strong>ROM</strong> (Compact Disc Read-Only Memory)<br />
drive unit designed for use with an IBM PC, HP Vectra, or compatible<br />
computer. It can read as much as 650 Mbytes of digital data stored in a<br />
single <strong>CD</strong>-<strong>ROM</strong> disc.<br />
The <strong>CD</strong>U625 has the following features:<br />
General<br />
● 5 1/4 inch half-height drive form factor.<br />
● Embedded Fast-SCSI bus interface (SCSI-2).<br />
● Selectable active termination by jumper setting.<br />
● 256-kbyte buffer memory.<br />
● Audio <strong>CD</strong> like drawer loading of a disc without using a caddy.<br />
● Power loading and power eject of a disc. The disc can also be ejected<br />
manually.<br />
● Housed in an airtight frame casing.<br />
● Equipped with a parity on/off switch.<br />
Supported disc formats<br />
● Reads data in <strong>CD</strong>-<strong>ROM</strong>, <strong>CD</strong>-<strong>ROM</strong> XA, <strong>CD</strong>-I and <strong>CD</strong>-I Ready standard<br />
formats.<br />
● Reads data in <strong>CD</strong>-BRIDGE format including PHOTO-<strong>CD</strong>.<br />
● Reads standard <strong>CD</strong>-Digital Audio encoded discs.<br />
● Reads VIDEO-<strong>CD</strong> and <strong>CD</strong> EXTRA (<strong>CD</strong>-PLUS) discs.<br />
● Reads <strong>CD</strong>-ReWritable discs.<br />
Performance<br />
● Supports standard, quadruple and 12X-24X speed operations with real<br />
time error correction.<br />
● Fast access time ensuring reliable high-speed data access.<br />
Audio<br />
● Outputs 16-bit digital audio data over the SCSI interface.<br />
● Equipped with audio line output and headphones jack for audio <strong>CD</strong><br />
playback.<br />
Note:<br />
The <strong>CD</strong>U625 is not equipped with an ADPCM audio circuitry required to<br />
support <strong>CD</strong>-<strong>ROM</strong> XA and <strong>CD</strong>-I compatible audio modes. In addition, the<br />
unit does not support the <strong>CD</strong>-I graphic decoding function; it has to be<br />
provided by the system.<br />
Introduction 5
Software Requirements for MS-DOS 6.x<br />
To access data on <strong>CD</strong>-<strong>ROM</strong> discs, the appropriate device driver and<br />
MS<strong>CD</strong>EX (supplied with the host adapter) must be installed in your<br />
computer. See the manual that comes with the host adapter for details.<br />
Example of System Setup<br />
6 Introduction<br />
To use the <strong>CD</strong>-<strong>ROM</strong> drive unit, the following components are required:<br />
● Computer (IBM PC, PC/XT, PC/AT, HP Vectra, or equivalent)<br />
● SCSI host adapter<br />
● Floppy disk drive<br />
● Interface cable (50 to 50 pin flat cable)<br />
● Software (Device driver, Utilities)<br />
Location of Controls<br />
Front Panel<br />
Headphone<br />
Jack<br />
Rear Panel<br />
The front panel controls are described in the illustration below.<br />
The rear panel controls and connectors are described in the illustration<br />
below.<br />
AUDIO OUT<br />
R GND L 0 1 2<br />
Audio Output<br />
Connector<br />
Headphone<br />
Volume<br />
Control<br />
Busy<br />
Indicator<br />
PARITY<br />
SCSI ID<br />
TERMINATION<br />
PREVENT/ALLOW<br />
TEST MODE<br />
Jumper Block<br />
for SCSI Bus<br />
(See page 12 for details)<br />
Disc<br />
Drawer<br />
INTERFACE CONNECTOR<br />
Emergency<br />
Eject Hole<br />
Pin 1<br />
SCSI Bus<br />
Interface Connector<br />
Eject<br />
Button<br />
DC INPUT<br />
5V±5% GND 12V±10%<br />
Power-in<br />
Connector<br />
Location of Controls 7
Precautions<br />
■ Installation<br />
■ Operation<br />
■ Transportation<br />
Precautions 8<br />
● Avoid placing the drive in a location subject to:<br />
– high humidity<br />
– high temperature<br />
– excessive dust<br />
– mechanical vibration<br />
– direct sunlight<br />
● The drive can be used in either a horizontal or vertical position.<br />
● Do not force the power cable. It is keyed to protect the drive.<br />
● Do not move the drive when it is in use. Doing so may cause data error<br />
and damage the optical pick-up.<br />
● Avoid exposing the drive to sudden changes in temperature as<br />
condensation may form on the lens inside the drive. Should the<br />
surrounding temperature suddenly rise while the drive is turned on, stop<br />
using the drive and leave the power on at least one hour before<br />
operating it or turning it off. Operating the drive immediately after a<br />
sudden increase in temperature may result in a malfunction.<br />
● Close the disc drawer before moving the drive.<br />
● Keep the original packing materials. When you need to ship the drive to<br />
another location, repacking it in its original container will help you<br />
transport it safely.<br />
Hardware Installation<br />
Installing the <strong>Drive</strong> <strong>Unit</strong> into the Computer<br />
Getting Started<br />
As you go through this section, you may wish to refer to your computer’s<br />
manual for a more detailed description of how to install internal drives.<br />
Be sure to have the SCSI host adapter installed into your computer<br />
before attempting to install the drive.<br />
● Prepare the necessary parts and tools that have not been supplied:<br />
– Screwdriver<br />
– Two mounting rails if your computer has mounting tracks.<br />
● Unplug the computer and disconnect the cables attached to the<br />
back for your own safety. Do not turn on the power of the computer<br />
before completing the entire installation process.<br />
Step 1: Opening the Computer<br />
1 If your computer has its rear side covered by a plastic panel attached<br />
with plastic hook pad, pull it off.<br />
2 Remove the cover mounting screws.<br />
3 Remove the cover of the computer.<br />
Hardware Installation 9
Step 2: SCSI Configuration<br />
10 Hardware Installation<br />
Locate the SCSI cable in your computer. One end of the cable is connected<br />
to the SCSI host adapter card as shown below.<br />
The width of the SCSI cable should be 50 pin.<br />
SCSI Host Adapter Card<br />
49<br />
50<br />
1<br />
Note:<br />
Carefully locate the 50 pin SCSI cable. The following types of cables may<br />
be installed in your computer.<br />
Find this<br />
flat cable!<br />
➧<br />
SCSI Cable<br />
SCSI<br />
Device<br />
50 Pin<br />
Width<br />
SCSI<br />
Device<br />
IDE Cable<br />
Red Edge<br />
40 Pin<br />
Width<br />
SCSI<br />
Device<br />
Floppy Disk<br />
<strong>Drive</strong> Cable<br />
34 Pin<br />
Width<br />
Note:<br />
There may already be internal/external SCSI devices (like HDD, Scanner,<br />
<strong>CD</strong>-<strong>ROM</strong>) connected to the SCSI bus cable.<br />
In this case you have to determine the SCSI ID# of each SCSI device.<br />
This information will be required in Step 5 “Setting the Jumpers”.<br />
Refer to appropriate SCSI device manual to find out the already used<br />
SCSI ID# (0 ... 6).<br />
In some cases, the SCSI host adapter is implemented on the computer’s<br />
motherboard.<br />
Step 3: Finding the Connector<br />
The SCSI cable should have one or more connectors on the end opposite to<br />
SCSI host adapter card, as shown below. Trace the SCSI cable and find the<br />
connector not in use. We recommend using the SCSI connector which is<br />
located at the end of the SCSI cable.<br />
Note:<br />
If the SCSI cable inside your computer does not have a SCSI connector<br />
free, please refer to “Additional Installation Cases” of chapter<br />
“Troubleshooting” on page 22.<br />
Step 4: Choosing the Configuration<br />
■ SCSI ID selection<br />
■ Termination<br />
SCSI host adapter connector<br />
Pin 1 (red)<br />
Opposite End<br />
● If you have not found any other SCSI device already connected to the<br />
SCSI bus, we recommend not changing the jumper position on the rear<br />
of the drive. In this case you can forward the installation process<br />
refering to Step 6 “Connecting the drive”.<br />
● If you found one or more SCSI devices already connected to the SCSI<br />
bus, you have to check whether the default SCSI ID# 3 (<strong>CD</strong>-<strong>ROM</strong><br />
drive) was already assigned.<br />
If SCSI ID# 3 has been already assigned to an other SCSI device, you<br />
need to change the SCSI ID# of your <strong>CD</strong>-<strong>ROM</strong> drive to a free one.<br />
Do this by using the jumper part (ID Select) on the rear panel of the drive.<br />
● If you connect the <strong>CD</strong>-<strong>ROM</strong> drive to the end of the SCSI cable, leave<br />
the termination of the drive activated.<br />
● If the <strong>CD</strong>-<strong>ROM</strong> drive is not the last device at the SCSI cable, disable the<br />
termination of the drive by removing the jumper and make sure that the<br />
last device at the SCSI bus has a proper termination installed or activated.<br />
Note:<br />
Be aware that only the last device at the SCSI bus needs to be terminated.<br />
Hardware Installation 11
Step 5: Setting the Jumpers<br />
12 Hardware Installation<br />
Set the jumpers on the rear panel of the drive unit in accordance with the<br />
configuration of your computer system.<br />
The jumpers are preset, as illustrated below, at the factory.<br />
PARITY<br />
ID SELECT<br />
0 1 2<br />
TERMINATION<br />
PREVENT/ ALLOW<br />
TEST MODE<br />
The recommended jumper for use is AMP Shunts (14227-1), JAE Short<br />
Socket (PS-2SH4-1) or equivalent.<br />
The following table shows the function of each pair of jumper pins.<br />
Jumper Function<br />
PARITY ON Enables the SCSI bus parity check function.<br />
ID SELECT<br />
OFF Disables the SCSI bus parity check function.<br />
Assigns the drive’s SCSI ID. Select an ID number<br />
which is not used by other SCSI devices connected<br />
to the bus. ID numbers and corresponding jumper<br />
pin settings are as follows:<br />
Notes:<br />
ID number<br />
0<br />
1<br />
2<br />
3<br />
4<br />
5<br />
6<br />
7<br />
0 1<br />
OFF<br />
ON<br />
OFF<br />
ON<br />
OFF<br />
ON<br />
OFF<br />
ON<br />
Jumper pin settings<br />
OFF<br />
OFF<br />
ON<br />
ON<br />
OFF<br />
OFF<br />
ON<br />
ON<br />
2<br />
OFF<br />
OFF<br />
OFF<br />
OFF<br />
ON<br />
ON<br />
ON<br />
ON<br />
TERM OFF Active terminator OFF<br />
ON Active terminator ON<br />
PREVENT/ ON The disc drawer can be opened by<br />
ALLOW<br />
pressing the eject button or by a software<br />
command.<br />
OFF The disc drawer cannot be opened either<br />
by the eject button or a software<br />
command.<br />
TEST MODE ON Enables TEST MODE<br />
OFF Enables Normal Operation<br />
Factory Settings<br />
● The upper row of pins are ground.<br />
● Remove the jumper to set to OFF and install the jumper to set to ON.<br />
● ID SELECT, PREVENT/ALLOW, and TEST MODE are<br />
recognized only when the power is turned on or SCSI bus is reset.<br />
● TEST MODE is reserved for factory use only. Do not put a jumper on<br />
TEST MODE pins. Doing so may cause an unexpected result.<br />
Hardware Installation 13
Step 6: Connecting the <strong>Drive</strong><br />
Audio Out<br />
Connector<br />
14 Hardware Installation<br />
Attach one end of the flat cable (SCSI cable) to the connector on the<br />
rear of the <strong>CD</strong>-<strong>ROM</strong> drive.<br />
<strong>CD</strong>U625 <strong>Drive</strong> <strong>Unit</strong><br />
Note<br />
The red edge (Pin 1) of the flat cable should be positioned next to the<br />
power supply connector. It is important that this cable be connected<br />
firmly and correctly.<br />
SCSI Interface Card<br />
If your computer has a Sound Card, connect the audio cable (not<br />
supplied) to the AUDIO OUT connector at the rear of the <strong>CD</strong>-<strong>ROM</strong> drive.<br />
Sound Card<br />
Interface Connector<br />
Audio<br />
Cable<br />
Red Wire<br />
Flat Cable<br />
Pin 1<br />
Audio Cable<br />
Power Supply Connector<br />
Red Edge<br />
<strong>CD</strong>-<strong>ROM</strong> <strong>Drive</strong><br />
<strong>CD</strong>-<strong>ROM</strong> <strong>Drive</strong><br />
SCSI<br />
Flat Cable<br />
Step 7: Mounting the <strong>Drive</strong><br />
Route the flat cable and audio cable through the drive bay from the front<br />
of the computer and insert the <strong>CD</strong>-<strong>ROM</strong> drive into the bay as shown.<br />
Secure the <strong>CD</strong>-<strong>ROM</strong> drive to the frame by using the prepared screws.<br />
Mounting Screws<br />
Note:<br />
If you cannot secure the <strong>CD</strong>-<strong>ROM</strong> drive to the drive bay, you may need to<br />
install slide rails (not included) to the <strong>CD</strong>-<strong>ROM</strong> drive. Refer to your<br />
computer user’s guide for additional information.<br />
Step 8: Connecting the Power Cable<br />
Locate an available power supply cable inside your computer and connect<br />
it to the power supply connector on the rear of the <strong>CD</strong>-<strong>ROM</strong> drive as shown.<br />
Power Supply<br />
Connector<br />
Audio Cable<br />
DC INPUT<br />
5V 5% GND 12V 10%<br />
Note:<br />
The power supply connector is designed to fit only in one way. Do not<br />
attempt to force the cable in upside down, otherwise the <strong>CD</strong>-<strong>ROM</strong> drive<br />
will be damaged and the product warranty void.<br />
+ -<br />
+ -<br />
Flat Cable<br />
Power Supply Cable<br />
Hardware Installation 15
Step 9: Installation Review<br />
Now we recommend to review the hardware installation process once<br />
more. Please check briefly the following steps:<br />
● All connectors have to be connected properly.<br />
● Every SCSI device has its unique SCSI ID number.<br />
● The last SCSI device at the SCSI bus has proper termination installed<br />
Notes<br />
16 Hardware Installation<br />
or activated.<br />
<strong>CD</strong>U625 <strong>Drive</strong><br />
Audio Cable<br />
(Not included)<br />
Sound Card<br />
(Not included)<br />
Speakers<br />
(Not included)<br />
49<br />
50<br />
AUDIO OUT<br />
R GND L 0 1 2<br />
1<br />
PARITY<br />
SCSI ID<br />
TERMINATION<br />
PREVENT/ALLOW<br />
TEST MODE<br />
SCSI<br />
Cable<br />
(Not included)<br />
INTERFACE CONNECTOR<br />
49<br />
50<br />
DC INPUT<br />
5V±5% GND 12V±10%<br />
1<br />
2<br />
SCSI Card<br />
(Not included)<br />
Red Edge<br />
● The red edge of the flat cable must be closest to pin number 1 of the<br />
interface card connector.<br />
● The following illustration is a sample system configuration of the<br />
<strong>CD</strong>U625 <strong>CD</strong>-<strong>ROM</strong> drive installation with a SCSI card.<br />
Power<br />
Supply<br />
Cable<br />
Red Edge<br />
Step 10: Closing the Computer<br />
Replace the cover on the computer, be careful to reinstall all screws that<br />
were removed.<br />
Now you have completed the hardware installation procedure.<br />
Hardware Installation 17
Installing the Software <strong>Drive</strong>r<br />
MS-DOS 6.x<br />
Windows ® 95/NT<br />
18 Installing the Software <strong>Drive</strong>r<br />
The MS<strong>CD</strong>EX (or equivalent) and a device driver for the <strong>CD</strong>-<strong>ROM</strong><br />
drive are supplied with the host adapter. Install both the MS<strong>CD</strong>EX<br />
(or equivalent) and the device driver in order to use the <strong>CD</strong>-<strong>ROM</strong> drive.<br />
Refer to the manual supplied with the host adapter for instructions.<br />
The installation under Windows is very easy. Just make sure Windows has<br />
detected your SCSI host adapter. In this case the <strong>CD</strong>-<strong>ROM</strong> drive is<br />
automatically detected and the software driver will be installed by the<br />
operating system.<br />
Note:<br />
For questions regarding the installation of the SCSI host adapter, see the<br />
manual supplied with this device.<br />
Operating the <strong>Drive</strong><br />
Starting the <strong>Drive</strong><br />
This section describes how to start the drive and eject a disc.<br />
1 Turn on the power of your computer.<br />
2 Press the eject button.<br />
The drawer comes out automatically.<br />
3 Place a disc in the drawer with its label side up.<br />
Place a disc with<br />
its label side up.<br />
Press the eject button.<br />
Operating the <strong>Drive</strong> 19
20 Operating the <strong>Drive</strong><br />
Note:<br />
When the drive is set up in vertical position, use the appropriate disc locks<br />
to prevent your disc from falling.<br />
Disc locks<br />
4 Gently push the drawer or press the eject button to close the drawer.<br />
The drive may begin reading the Table of Contents (TOC) data when it<br />
accepts the disc. The busy indicator lights up in amber while the drive<br />
is reading the TOC.<br />
For subsequent drive operations, follow the instructions provided with<br />
the application software you are using.<br />
Note:<br />
The busy indicator stays lit in amber if:<br />
– the disc is not properly placed on the loading tray<br />
– a malfunction occurs.<br />
In either case, eject the disc and place it in the loading tray again making<br />
sure that it sits properly in the tray. If doing this does not solve the<br />
problem and the busy indicator still remains lit in amber, consult your<br />
dealer or qualified service personnel.<br />
Caution: Do not forcibly close the disc drawer. Applying excessive force<br />
may damage the loading mechanism. The tray’s mechanism is designed to<br />
operate with a “feather touch”.<br />
Ejecting the Disc<br />
To eject the disc, press the eject button on the front panel. The drawer<br />
comes out automatically.<br />
Press the eject button.<br />
Note:<br />
The eject button does not work if it is disabled by:<br />
- the software you are using<br />
- the PREVENT/ALLOW jumper<br />
■ Opening the drawer manually in an emergency<br />
You can open the drawer manually when it fails to come out by means of<br />
the eject button or software commands. To do this, follow the procedure<br />
below:<br />
1 Turn off the power of your computer.<br />
2 Insert a pointed object, such as a paper clip, into the emergency eject<br />
hole and push.<br />
Insert a pointed object to<br />
the emergency eject<br />
hole. (Push not<br />
too vehement!)<br />
Approx. 40 mm<br />
After removing a disc from the drive unit, consult your dealer or qualified<br />
service personnel.<br />
Operating the <strong>Drive</strong> 21
Troubleshooting<br />
Checklist<br />
22 Troubleshooting<br />
If you encounter problems installing or operating the <strong>CD</strong>-<strong>ROM</strong> drive,<br />
please review the following.<br />
Verify the following:<br />
● The installation procedures described in this manual have been properly<br />
followed.<br />
● The items contained in the “Checklist” below have been confirmed.<br />
● Go to the section “Additional Installation Cases” on page 23 and refer<br />
to the appropriate case.<br />
Verify the following:<br />
● The power cable is connected properly to the <strong>CD</strong>-<strong>ROM</strong> drive.<br />
For details see chapter “Hardware Installation”, step 8 on page 15.<br />
If properly connected, you are able to open and close the tray of the<br />
<strong>CD</strong>-<strong>ROM</strong> drive by pushing the Eject button (Make sure that<br />
PREVENT/ALLOW jumper is enabled).<br />
● The SCSI cable connector is connected properly to the drive and to the<br />
host adapter. Check the position of pin 1 at each side of the cable.<br />
See step 6 on page 14.<br />
● The SCSI ID# of the <strong>CD</strong>-<strong>ROM</strong> drive is unique to the SCSI bus.<br />
Compare all other SCSI devices (internal/external) on the SCSI bus.<br />
For details see chapter “Hardware Installation”, step 2 to step 5 in this<br />
manual.<br />
● Check all other jumpers at the rear of your <strong>CD</strong>-<strong>ROM</strong> drive.<br />
We recommend using the default settings for<br />
DEVICE TYPE jumper present<br />
PREVENT/ALLOW jumper present<br />
TEST MODE jumper not present<br />
The jumpers are preset at the factory, as below illustrated (default ID = 3).<br />
PARITY<br />
ID SELECT<br />
0 1 2<br />
TERMINATION<br />
PREVENT/ ALLOW<br />
TEST MODE<br />
● The termination at the SCSI bus has been properly installed or<br />
activated. Both ends of the SCSI bus need to be terminated.<br />
For details refer to step 4, Termination, on page 11.<br />
If you still have problems running or installing your <strong>CD</strong>-<strong>ROM</strong> drive,<br />
please contact our hotline or your local computer dealer.<br />
Additional Installation Cases<br />
■ No free SCSI connector present<br />
If other SCSI devices occupy all connectors at the SCSI bus cable, either<br />
remove a device before installing the <strong>CD</strong>-<strong>ROM</strong> or use another SCSI cable<br />
with an additional connector. To purchase this cable, contact your local<br />
computer dealer.<br />
Service Contacts in Europe<br />
If you require further support or service please contact your local technical<br />
support professionals.<br />
For Europe (German or English) please contact the hotline at:<br />
Tel.: +49 (0) 2389 - 951047<br />
(Monday – Thursday, 8:00 am – 4:30 pm / Friday, 8:30 am – 2:00 pm)<br />
Fax: +49 (0) 2389 - 2921<br />
BBS: +49 (0) 221 - 9561167<br />
All this information and more can be downloaded from the internet.<br />
Simply access the following address:<br />
http://www.sony-cp.com<br />
Troubleshooting 23
Specifications<br />
■ General<br />
■ <strong>Drive</strong> performance<br />
■ Reliability<br />
■ Audio<br />
24 Specifications<br />
Host interface SCSI-2<br />
Disc<br />
Acceptable discs <strong>CD</strong>-Digital Audio<br />
<strong>CD</strong> EXTRA<br />
<strong>CD</strong>-<strong>ROM</strong> mode-1 data<br />
<strong>CD</strong>-<strong>ROM</strong> mode-2 data<br />
<strong>CD</strong>-<strong>ROM</strong> XA (readable)<br />
Audio-combined <strong>CD</strong>-<strong>ROM</strong><br />
<strong>CD</strong>-I (readable)<br />
<strong>CD</strong>-I Ready (readable)<br />
<strong>CD</strong> BRIDGE<br />
PHOTO <strong>CD</strong> (single and multisession)<br />
VIDEO-<strong>CD</strong><br />
<strong>CD</strong>-ReWritable (readable)<br />
Disc diameter 12 cm or 8 cm<br />
Data transfer rate<br />
Sustained rate 150 kbytes/s (1X CLV mode)<br />
600 kbytes/s (4X CLV mode)<br />
1800 – 3600 kbytes/s (12X – 24X P-CAV mode)<br />
Burst rate 5 Mbytes/s (asynchronous)<br />
20 Mbytes/s (synchronous)<br />
Random access time 90 ms (typical/12X –24X P-CAV mode)<br />
Read error rate (includes retry, with a standard disc)<br />
L-EC on 1 block /10 l2 bits<br />
L-EC off 1 block /10 9 bits<br />
Output level<br />
Line out 0.75 V at 47 kΩ<br />
Headphone 0.55 V at 32 Ω<br />
■ Environmental conditions<br />
■ Dimensions and Mass<br />
■ Power requirement<br />
■ Connectors<br />
■ Laser<br />
Operating<br />
Temperature 5 °C to 50 °C (41 °F to 122 °F)<br />
Humidity 10 % to 90 % (Max wet bulb 29 °C)<br />
Atmosphere Non-condensing<br />
Non-operating/Storage<br />
Temperature –30 °C to 50 °C (–22 °F to 122 °F)<br />
Humidity 10 % to 90 %<br />
Atmosphere Non-condensing<br />
Dimensions Approx. 146 x 41.4 x 208 mm (w/h/d)<br />
Mass Approx. 0.88 kg<br />
Voltage +5 V DC ± 5 % and +12 V DC ± 10 %<br />
Ripple +5 V DC: ≤ 100 mVpp<br />
+12 V DC: ≤ 200 mVpp<br />
Current +5 V DC: 1000 mA (typical)<br />
+12 V DC: 1800 mA (typical)<br />
(with DC INPUT connector) AMP 179376-1 or equivalent<br />
AUDIO OUT connector Molex 70066C or G, 700400C or G<br />
and 70430C or G, or equivalent<br />
Type Semiconductor laser GaAlAs<br />
Wave length 780 nm<br />
Specifications 25
■ Dimension diagram<br />
148 (57/8)<br />
42.3<br />
(111/16)<br />
8 M3 mounting holes<br />
(4 on each side)<br />
26 Specifications<br />
Important:<br />
The overhang of the screws should not exceed 6.0 mm from the surface of<br />
the side panels or the bottom plate.<br />
5<br />
( 7 /32)<br />
4 M3 mounting holes<br />
( 1 /32)<br />
( 1 /32)<br />
++<br />
0.5 0.4<br />
(17/8) (31/8) 47.5<br />
79.25<br />
203 (8)<br />
139.7<br />
(51/2)<br />
Design and specifications are subject to change without notice.<br />
+<br />
+<br />
( 13/32)<br />
10<br />
21.9( 7 /8)<br />
41.4<br />
(111/16)<br />
146(5 3/4)