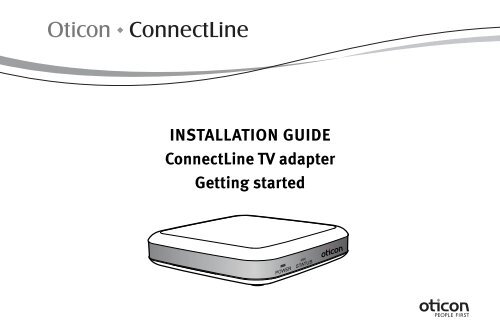
INSTALLATION GUIDE ConnectLine TV adapter Getting ... - Oticon
INSTALLATION GUIDE ConnectLine TV adapter Getting ... - Oticon
INSTALLATION GUIDE ConnectLine TV adapter Getting ... - Oticon

Create successful ePaper yourself
Turn your PDF publications into a flip-book with our unique Google optimized e-Paper software.
<strong>INSTALLATION</strong> <strong>GUIDE</strong><br />
<strong>ConnectLine</strong> <strong>TV</strong> <strong>adapter</strong><br />
<strong>Getting</strong> started
READ THIS FIRST<br />
PURPOSE OF THIS <strong>GUIDE</strong><br />
Before your hearing instruments can receive the <strong>TV</strong> sound, the <strong>adapter</strong> must<br />
be connected to the <strong>TV</strong> and a power outlet.<br />
This is an easy step-by-step guide through the installation of the <strong>TV</strong> <strong>adapter</strong>.<br />
All needed parts for the installation are included in the package.<br />
The connection parts are packed in numbered boxes from 1 to 3.<br />
The numbers refer to each step in the installation.<br />
2 3
<strong>TV</strong> connection<br />
<strong>TV</strong> ADAPTER OVERVIEW<br />
Back<br />
B C A<br />
Mic. connection<br />
(not used)<br />
Power connection<br />
POWER INDICATOR<br />
Light Meaning<br />
Solid Power on<br />
Off Power off<br />
4 5<br />
Front<br />
STATUS INDICATOR<br />
Light Meaning<br />
Solid Connected to<br />
Streamer and<br />
streaming<br />
<strong>TV</strong> sound<br />
Off Stand-by<br />
Flashing Pairing
CONNECTING TO POWER<br />
Start by connecting the <strong>TV</strong> <strong>adapter</strong> to a power outlet.<br />
Use the Power <strong>adapter</strong> from box no. 1.<br />
- Plug the power <strong>adapter</strong> into the wall socket or another power source.<br />
- Plug the power cord into the power connection marked A.<br />
- Check that power is turned on and there is a solid green light in the Power indicator on<br />
the front of the <strong>TV</strong> <strong>adapter</strong>.<br />
6 7
CONNECTING TO <strong>TV</strong><br />
Connect the <strong>TV</strong> <strong>adapter</strong> to the <strong>TV</strong>. Use the <strong>TV</strong> cord from box no. 2.<br />
- Connect the black plug on the <strong>TV</strong> cord to the connector marked B.<br />
- Connect the red and white connectors to the “AUDIO OUT” terminals on the <strong>TV</strong>.<br />
(typically marked “L - R” “AUDIO OUT” and found on the <strong>TV</strong> back or bottom panel).<br />
<strong>TV</strong> cord<br />
8 9<br />
B
If the <strong>TV</strong> has is no “L - R” RCA Phono “OUTPUT”, an <strong>adapter</strong> should be used<br />
for connecting the <strong>TV</strong> cord. Proceed to next page.<br />
Otherwise go to page 16 for PAIRING.<br />
11
OPTIONAL ADAPTERS FOR CONNECTING TO <strong>TV</strong> OPTION 1: SCART CONNECTION<br />
The <strong>adapter</strong> are found in box no. 3.<br />
(If installation completed in step 2, box no. 3 is not used!)<br />
SCART CONNECTION using the SCART <strong>adapter</strong>.<br />
- Connect the Audio cord to the red and white terminals on the SCART <strong>adapter</strong> and plug it<br />
into the <strong>TV</strong>’s SCART connection.<br />
If you have a DVD or a Sat box connected to the SCART, you should use option 2 instead<br />
(Headphone connection, next page).<br />
SCART <strong>adapter</strong><br />
<strong>TV</strong> cord<br />
12 13
OPTIONAL ADAPTERS FOR CONNECTING TO <strong>TV</strong> OPTION 2: HEADPHONE CONNECTION<br />
HEADPHONE CONNECTION using the Jack <strong>adapter</strong>.<br />
- Connect the <strong>TV</strong> cord to the jack <strong>adapter</strong> and plug it into the <strong>TV</strong>’s headphone output.<br />
The headphone output may be found on the side or front of the <strong>TV</strong>.<br />
Notice: The <strong>TV</strong> speakers may be muted when connecting to the headphone output.<br />
Sound will only come via <strong>TV</strong> <strong>adapter</strong>.<br />
14 15<br />
Jack <strong>adapter</strong><br />
<strong>TV</strong> cord
PREPARE STREAMER FOR <strong>TV</strong> LISTENING PAIRING<br />
The very fi rst time your Streamer is used with the <strong>TV</strong> <strong>adapter</strong>, the two devices must<br />
be paired together.<br />
PAIRING:<br />
1. When pairing, the devices must be placed close together. Place the Streamer<br />
right next to the <strong>TV</strong> <strong>adapter</strong> (less than 30 cm /1 ft between devices).<br />
2. Press and hold the Streamer Connect button for 5 seconds until the blue light<br />
starts fl ashing rapidly.<br />
3. The two devices establish a connection to each other. Wait one minute.<br />
4. After one minute the <strong>TV</strong> <strong>adapter</strong> is connected to Streamer and pairing is<br />
complete. The orange STATUS indicator on the <strong>TV</strong> <strong>adapter</strong> lights up.<br />
Pairing is done only once and will normally not have to be repeated.<br />
STATUS<br />
Turns on<br />
when ready!<br />
<strong>TV</strong> <strong>adapter</strong><br />
16 17<br />
Less than<br />
30 cm/1 ft<br />
Streamer<br />
Unlocked<br />
Press 5 sec
USING THE STREAMER AND SUPPORT<br />
Place the <strong>TV</strong> <strong>adapter</strong> in a suitable spot close to the <strong>TV</strong>. For using the Streamer with the <strong>TV</strong><br />
<strong>adapter</strong>, refer to the user guide.<br />
Turn off the <strong>TV</strong> <strong>adapter</strong><br />
The <strong>TV</strong> <strong>adapter</strong> uses very little power so it is not necessary to turn it off .<br />
<strong>TV</strong> sound range<br />
<strong>TV</strong> <strong>adapter</strong> has a range of about 10 meters depending on furnitures and placement.<br />
Connection with SCART <strong>adapter</strong><br />
If you connect the <strong>TV</strong> <strong>adapter</strong> with the SCART <strong>adapter</strong> you will only hear audio from the <strong>TV</strong><br />
tuner with <strong>TV</strong> <strong>adapter</strong>. Audio from other sources such as DVD or VCR will not be played in<br />
the hearing instruments. This is a limitation of the SCART connector.<br />
For further support or tips you can check the <strong>ConnectLine</strong> information on<br />
www.oticon.com/connectline<br />
18
PRODUCT APPROVAL PRECAUTIONS AND MARKINGS<br />
This device complies with Part 15 of the FCC Rules.<br />
Operation is subject to the following two conditions: (1) this device may not cause interference, and (2) this<br />
device must accept any interference, including interference that may cause undesired operation of the device.<br />
Changes or modifi cations not expressly approved by the party responsible for compliance could void the user’s<br />
authority to operate the equipment.<br />
To comply with FCC RF exposure requirements, the device and the antenna for this device must be installed to<br />
ensure a minimum separation distance of 20 cm or more from a person’s body. Other operating confi gurations<br />
should be avoided.<br />
NOTE: This equipment has been tested and found to comply with the limits for a Class B digital device, pursuant<br />
to Part 15 of the FCC Rules. These limits are designed to provide reasonable protection against harmful<br />
interference in a residential installation. This equipment generates, uses and can radiate radio frequency energy<br />
and, if not installed and used in accordance with the instructions, may cause harmful interference to radio<br />
communications. However, there is no guarantee that interference will not occur in a particular installation.<br />
If this equipment does cause harmful interference to radio or television reception, which can be determined by<br />
turning the equipment off and on, the user is encouraged to try to correct the interference by one or more of the<br />
following measures:<br />
- Reorient or relocate the receiving antenna.<br />
- Increase the separation between the equipment and receiver.<br />
- Connect the equipment into an outlet on a circuit diff erent from that to which the receiver is connected.<br />
- Consult the dealer or an experienced radio/<strong>TV</strong> technician for help.<br />
<strong>Oticon</strong> hereby declares that this <strong>TV</strong> <strong>adapter</strong>, <strong>TV</strong> 75-01 is in compliance with the essential requirements<br />
and other relevant provisions of Directive 1999/5/EC.<br />
Declaration of conformity is available at:<br />
<strong>Oticon</strong> A/S<br />
Kongebakken 9<br />
DK-2765 Smørum<br />
Denmark<br />
www.oticon.com<br />
0678<br />
Waste from electronic<br />
equipment must be<br />
handled according to<br />
local regulations.<br />
Use the following switch mode power supply with your <strong>TV</strong> <strong>adapter</strong>: Fuhua, Model No. UE10W-050020SPC,<br />
Input: 100-240V AC 150mA 50-60Hz, Output: 5V DC 200mA
The <strong>TV</strong> <strong>adapter</strong> is not a toy and therefore should be kept out of the reach of children and anyone else who<br />
might swallow parts or otherwise cause injury to themselves. Special attention should be paid to the smaller<br />
components in order to prevent children from swallowing them and choking.<br />
If a part is swallowed, see a doctor immediately.<br />
WARNINGS<br />
The safety of the use of the <strong>TV</strong> <strong>adapter</strong> with an auxiliary input cable is determined by external signal source.<br />
When the input cable is connected to mains operated equipment, this equipment must comply with IEC-<br />
60065, IEC-60601 or equivalent safety standards.<br />
The <strong>TV</strong> <strong>adapter</strong> is designed to comply with the most stringent Standards of International Electromagnetic<br />
Compatibility. However, the <strong>TV</strong> <strong>adapter</strong> might cause interference with other medical devices. Please contact<br />
relevant personnel to obtain a permission before using the <strong>TV</strong> <strong>adapter</strong> in hospitals or similar venues.
908 69 010 00 / 02.09