Lesson 69 Performing Common First Aid Procedures
Lesson 69 Performing Common First Aid Procedures
Lesson 69 Performing Common First Aid Procedures

Create successful ePaper yourself
Turn your PDF publications into a flip-book with our unique Google optimized e-Paper software.
<strong>69</strong><br />
What You’ll Learn<br />
1. Describe the contents of first<br />
aid kits and where they should<br />
be kept. (p. 709)<br />
2. Distinguish between actual<br />
and implied consent. (p. 710)<br />
3. Explain how to follow<br />
universal precautions. (p. 711)<br />
4. Explain first aid procedures for<br />
sudden illnesses and burns.<br />
(pp. 712–715)<br />
5. Explain first aid procedures for<br />
injuries to muscles, bones, and<br />
joints. (p. 716)<br />
6. Describe first aid procedures<br />
for cold temperature-related<br />
and heat-related illnesses.<br />
(p. 718)<br />
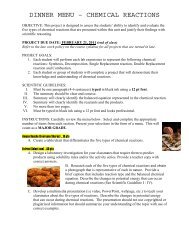
Why It’s Important<br />
When you know first aid<br />
procedures, you can respond<br />
quickly to a situation that calls for<br />
first aid. You will not panic if<br />
someone is injured or ill.<br />
k Key Terms<br />
• first aid<br />
• actual consent<br />
• implied consent<br />
• universal precautions<br />
• burn<br />
• splint<br />
• fracture<br />
• dislocation<br />
• hypothermia<br />
• heatstroke<br />
708 UNIT 11 • Injury Prevention and Personal Safety<br />
Amy Wiley/Wales/Index Stock Imagery<br />
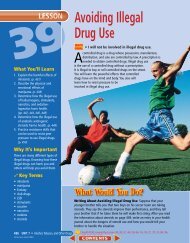
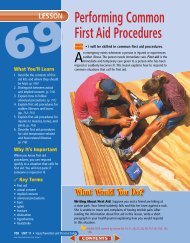
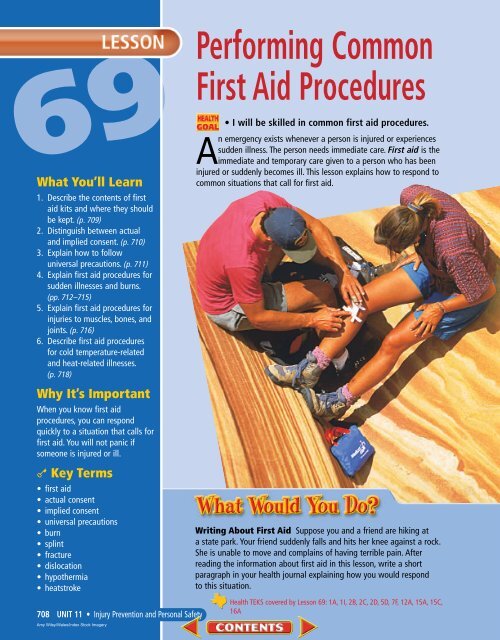
<strong>Performing</strong> <strong>Common</strong><br />
<strong>First</strong> <strong>Aid</strong> <strong>Procedures</strong><br />
• I will be skilled in common first aid procedures.<br />
An emergency exists whenever a person is injured or experiences<br />
sudden illness. The person needs immediate care. <strong>First</strong> aid is the<br />
immediate and temporary care given to a person who has been<br />
injured or suddenly becomes ill. This lesson explains how to respond to<br />
common situations that call for first aid.<br />
Writing About <strong>First</strong> <strong>Aid</strong> Suppose you and a friend are hiking at<br />
a state park. Your friend suddenly falls and hits her knee against a rock.<br />
She is unable to move and complains of having terrible pain. After<br />
reading the information about first aid in this lesson, write a short<br />
paragraph in your health journal explaining how you would respond<br />
to this situation.<br />
Health TEKS covered by <strong>Lesson</strong> <strong>69</strong>: 1A, 1I, 2B, 2C, 2D, 5D, 7F, 12A, 15A, 15C,<br />
16A
It is important to keep first aid kits at home and in the family<br />
car. Carry a first aid kit when you participate in outdoor<br />
activities, such as camping and hiking. When you are away from<br />
home, ask where first aid kits are kept. You can purchase a first aid kit<br />
from a drugstore or the local chapter of the American Red Cross.<br />
What to Know About<br />
<strong>First</strong> <strong>Aid</strong> Kits<br />
Purchasing kits You also can purchase<br />
items and assemble a first aid kit<br />
yourself. In the kit, keep items needed<br />
to follow universal precautions, which<br />
are discussed on page 711. Add any<br />
special medicines you or family members<br />
need. Check the first aid kit<br />
often for items with expiration dates<br />
that have expired. Be certain that<br />
flashlight batteries work.<br />
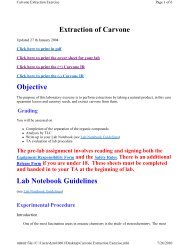
Kit items Many items are essential in<br />
a first aid kit. A cold pack is necessary<br />
to aid in reducing swelling of an<br />
injured body part. Activated charcoal<br />
is used to absorb toxins in case of<br />
ingestion of a poisonous substance.<br />
Keep antiseptic ointment and antiseptic<br />
hand cleaner on hand to kill germs<br />
on the skin. Wounds should be covered<br />
with adhesive bandages. Gauze pads<br />
and a roller bandage or<br />
adhesive tape also are used for<br />
covering open wounds. Scissors are<br />
used to cut the gauze. Triangular<br />
bandages are used for wrapping covered<br />
wounds as well as giving support<br />
to or immobilizing an arm.<br />
Other useful items in a first aid kit<br />
include plastic bags and disposable<br />
gloves to protect against infection<br />
when exposed to bodily fluids from a<br />
victim. A small flashlight and extra<br />
batteries are necessary to provide<br />
light in case you are working to assist<br />
a victim in the dark. Also included in<br />
the first aid kit should be tweezers,<br />
which are used to remove splinters or<br />
other foreign objects from the skin. A<br />
blanket is included to help keep the<br />
body warm and prevent loss of body<br />
temperature.<br />
Make the<br />
Connection<br />
Health Information<br />
For more information<br />
on accessing valid<br />
health information,<br />
products, and services,<br />
see page 17 in<br />
<strong>Lesson</strong> 2.<br />
A first aid kit<br />
contains many<br />
essential items.<br />
tx.healthmh.com/first_aid_kits LESSON <strong>69</strong> • <strong>Performing</strong> <strong>Common</strong> <strong>First</strong> <strong>Aid</strong> <strong>Procedures</strong> 709<br />
(tt)Photodisc/Getty ImagesPhotodisc/Getty Images, David Crow, Photodisc/Getty Images, (b)Matt Meadows
Knowing first aid can<br />
assist you in helping<br />
someone who is injured.<br />
710 UNIT 11 • Injury Prevention and Personal Safety<br />
(tt)Photodisc/Getty Images, (b)John Evans<br />
You must have consent to give first aid. Consent means permission. There are two types<br />
of consent: actual and implied. There also are laws that protect people who give first<br />
aid in good faith.<br />
What to Know About Consent to<br />
Give <strong>First</strong> <strong>Aid</strong><br />
Actual consent Oral or written permission<br />
from a mentally competent<br />
adult to give first aid is called actual<br />
consent. Tell the victim who you are,<br />
what you plan to do, and the first aid<br />
training that you have had. If the<br />
person gives you permission, this is<br />
actual consent.<br />
A parent or guardian must give<br />
actual consent if the victim is a child<br />
or is not mentally competent. A supervising<br />
adult with legal permission<br />
from parents to care for the child also<br />
can give actual consent. Do not give<br />
first aid if the victim is a child or is not<br />
mentally competent when a parent or<br />
guardian or supervising adult with<br />
legal permission to care for the child<br />
says “no.”<br />
Implied consent Assuming the victim<br />
would grant permission to give<br />
first aid if he or she was capable is<br />
implied consent. Implied consent<br />
is given when the victim is a mentally<br />
competent adult who is unconscious;<br />
or a child or an adult who is<br />
not mentally competent, when no<br />
adult who can grant actual consent<br />
is present.<br />
Good Samaritan Laws<br />
Many states have Good Samaritan<br />
laws, which are laws that protect<br />
people who give first aid in good faith<br />
and without gross negligence or misconduct.<br />
Good Samaritan laws cannot<br />
provide complete legal protection.<br />
Anyone giving first aid should be<br />
properly trained and should apply<br />
the correct procedures and skills.
You must protect your health when giving first aid to another person.<br />
A victim’s bodily fluids might contain harmful pathogens. For<br />
example, blood and certain other bodily fluids might contain<br />
HIV or HBV. HIV is found in blood, semen, vaginal secretions, and urine. A<br />
person who is infected with HIV might develop AIDS. HBV also is found in<br />
blood. A person who is infected with HBV might develop hepatitis B. You still can<br />
help a victim without putting yourself at risk of infection with these pathogens.<br />
What to Know About Universal<br />
Precautions<br />
Universal precautions Follow universal<br />
precautions in any situation in<br />
which you might have contact with<br />
blood and other bodily fluids. Universal<br />
precautions are steps taken<br />
to prevent the spread of disease by<br />
treating all human blood and bodily<br />
fluids as if they contained HIV, HBV,<br />
and other pathogens when providing<br />
first aid or health care.<br />
TABLE <strong>69</strong>.1 Universal Precautions<br />
Precaution and Explanation<br />
Wear disposable latex gloves. Your hands and fingers may have tiny cuts or openings you cannot see.<br />
Pathogens in a victim’s blood or other bodily fluids may enter your bloodstream through these tiny cuts or<br />
openings. Latex gloves are made of a special rubber through which many pathogens cannot pass under normal<br />
conditions. Do not wear the same gloves more than once. Cover any cuts, scrapes, or rashes on your body with a<br />
plastic wrap or sterile dressing. Avoid touching objects that have had contact with the victim’s blood.<br />
Wash your hands. Use waterless, antiseptic hand cleanser after removing gloves. This provides extra<br />
protection. Do not eat or drink anything while giving first aid. Wash hands after giving first aid and before<br />
eating or drinking. This will prevent pathogens from entering your body. Do not touch your mouth, eyes, or<br />
nose while caring for a victim.<br />
Use a face mask. Use a face mask or a shield with a one-way valve when performing first aid for<br />
breathing emergencies. You may have tiny cuts or openings in your lips or mouth. There may be blood in the<br />
saliva or vomit in the victim’s mouth. The victim may be bleeding from the mouth or nose. The face mask<br />
protects you from the victim’s blood. Follow the instructions provided with the face mask. Do not use the<br />
face mask to give first aid to more than one victim without sterilizing it.<br />
tx.healthmh.com/universal_precautions LESSON <strong>69</strong> • <strong>Performing</strong> <strong>Common</strong> <strong>First</strong> <strong>Aid</strong> <strong>Procedures</strong> 711<br />
(tt)Morton & White Photographic, Photodisc/Getty Images, Aaron Haupt, (t)Photodisc/Getty Images, (c)Matt Meadows, (b)Aaron Haupt
Mini-Review<br />
1. When should first<br />
aid be given?<br />
2. What is actual<br />
consent?<br />
712 UNIT 11 • Injury Prevention and Personal Safety<br />
Laura Sifferlin<br />
An illness that occurs without warning signals is called a sudden illness. Signs of<br />
sudden illness may include dizziness and confusion, weakness, changes in skin color,<br />
nausea, vomiting, and diarrhea. Seizures, paralysis, slurred speech, difficulty seeing,<br />
and severe pain also may indicate sudden illness.<br />
<strong>First</strong> <strong>Aid</strong> for Sudden Illness<br />
What to do for sudden illness Call the<br />
local emergency number and obtain<br />
medical care immediately. Give first<br />
aid if the illness poses a threat to the<br />
victim’s life. Try to keep the victim<br />
calm. Help the victim rest comfortably.<br />
Cover the victim with a blanket<br />
if he or she is chilled. Prevent the victim<br />
from getting overheated. Monitor<br />
the victim for changes in consciousness.<br />
Do not give an unconscious victim<br />
anything to eat or drink.<br />
What to do for fainting Put the victim<br />
on his or her back and elevate<br />
the victim’s legs 8–12 inches above the<br />
level of the heart. Do not elevate the<br />
legs if you suspect a head, neck or<br />
back injury. Loosen tight clothing. Do<br />
not splash water on the victim, slap<br />
the victim’s face, or use smelling salts.<br />
What to do for vomiting Turn the victim<br />
on his or her side. Allow the victim<br />
to complete the vomiting process.<br />
The victim may be given small sips of<br />
clear liquids, such as water or broth.<br />
Increase the amount of fluids if they<br />
can be tolerated without vomiting.<br />
Have the victim relax until strength<br />
is regained. If vomiting continues,<br />
seek medical care.<br />
What to do for seizures Place something<br />
under the victim’s head to cushion<br />
the head from injury. Remove any<br />
nearby objects that might injure the<br />
victim. Loosen the clothing around<br />
the victim’s neck. Do not restrain the<br />
victim. Do not place anything in the<br />
victim’s mouth or between the teeth.<br />
Look for a medic alert tag that would<br />
indicate a chronic illness. If you think<br />
the victim may have been poisoned,<br />
try to identify the source and call the<br />
poison control center. If the seizure is<br />
related to a high fever, lower the body<br />
temperature with cool compresses.<br />
Observe the victim until he or she is<br />
fully awake.<br />
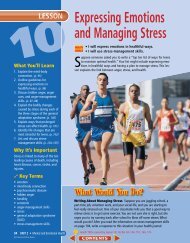
One way to assist the victim of a sudden illness is to<br />
keep the person as comfortable as possible.<br />
tx.healthmh.com/illnesses
Teens Talk About Health<br />
Nathan Washatka<br />
Getting <strong>First</strong> <strong>Aid</strong> Training<br />
When people ask Nathan Washatka, “Why take a first<br />
aid course?” he’s got an answer for them. “I think<br />
the question should be ‘why not?’” he explained.<br />
Before he took the course, Nathan said he knew what he called<br />
the “common sense” stuff to do, “like putting a bandage on a<br />
cut.” But after completing the course, he felt confident he’d be<br />
ready for most kinds of emergencies. He would soon find out.<br />
Into the pool The first aid course Nathan took was<br />
aimed at lifeguards, his summer job. It included general<br />
first aid techniques, as well as cardiopulmonary resuscitation<br />
(CPR). The class, sponsored by the local Red Cross,<br />
met for four hours a day, on Saturdays and Sundays, for<br />
one month. The class included both class time and time<br />
practicing techniques in the pool. Class learning featured<br />
the use of artificial “victims,” life-size mechanical dolls<br />
who need CPR and other emergency first aid. “I was one<br />
of the younger people in the course,” Nathan said.<br />
“Some were college kids, while others were adults taking<br />
refresher courses to maintain their certification.”<br />
Crunch time As it turned out, within a few weeks of completing<br />
the course, Nathan got the chance to put his first<br />
aid skills to the test. “This little girl fell and bumped her<br />
head in the wading pool. She got this enormous bruise on<br />
her forehead—the largest bruise I’ve ever seen.” Nathan<br />
knew from his course that applying ice to the bruise was<br />
the right treatment. Later that same summer, Nathan’s<br />
class training allowed him to help another child in need.<br />
Nathan described a time when he had to put what he knew about<br />
first aid to the test. Describe a situation when you were under<br />
pressure to perform in a serious situation. How did you handle it?<br />
“ Knowing you’d be able<br />
to help save someone’s life<br />
is the greatest feeling in<br />
the world. ”<br />
“This little boy cut his head open against a jagged brick<br />
wall,” he explained. “It was scary because there was blood<br />
everywhere. He came up to me crying.” Again, Nathan<br />
knew what to do—apply pressure to the wound, bandage<br />
it, and apply ice. Nathan also kept a cool head himself.<br />
“The hardest part,” he said, “was dealing with all the people<br />
around, trying to tell me what to do. But I<br />
was confident from my class that I was<br />
doing the right thing.”<br />
The greatest feeling In the<br />
future, Nathan would like to<br />
attend medical school. “Saving<br />
people, fixing broken bodies,<br />
sounds like a cool profession,” he<br />
said. Does Nathan recommend taking<br />
a first aid course? “Definitely!” he<br />
answered. “A lot of high schoolers<br />
complain that they can’t see the application<br />
of the classes they take. But this is<br />
something you walk away from<br />
knowing you’ve definitely<br />
learned something practical.<br />
Knowing you’d be<br />
able to help save<br />
someone’s life is the<br />
greatest feeling in<br />
the world.”<br />
LESSON <strong>69</strong> • <strong>Performing</strong> <strong>Common</strong> <strong>First</strong> <strong>Aid</strong> <strong>Procedures</strong> 713<br />
Aaron Haupt
Make the<br />
Connection<br />
Sunburn For more<br />
information about how<br />
repeated sunburns can<br />
increase the risk for<br />
skin cancer, see page<br />
535 in <strong>Lesson</strong> 49.<br />
12A (covered on page<br />
714): Identify situations<br />
requiring professional<br />
health services...such as<br />
primary, preventative, and<br />
emergency care.<br />
Quick Quiz:<br />
What kinds of burns<br />
require professional<br />
emergency care?<br />
714 UNIT 11 • Injury Prevention and Personal Safety<br />
James N. Westwater<br />
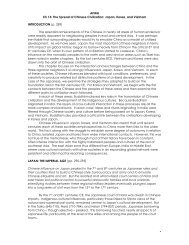
An injury caused by heat, electricity, chemicals, or radiation is a burn. The seriousness<br />
of a burn depends on the cause of the burn, the length of time the victim was<br />
exposed to the source of the burn, the location of the burn on the body, the depth of<br />
the burn, the size of the burn, and the victim’s age and health condition.<br />
What to Know About <strong>First</strong> <strong>Aid</strong><br />
for Burns<br />
Burns are usually described as firstdegree<br />
burns, second-degree burns,<br />
or third-degree burns. These descriptions<br />
help explain the seriousness of<br />
the burn.<br />
What to do for first-degree burns A<br />
burn that affects the top layer of skin<br />
is a first-degree burn. Most sunburns<br />
are first-degree burns. The<br />
skin becomes red and dry. The area<br />
may swell and be painful to touch.<br />
<strong>First</strong>-degree burns usually heal in six<br />
days without permanent scarring.<br />
<strong>First</strong> aid for a first-degree burn<br />
1. Stop the burning. Get the victim<br />
out of the Sun. Remove the victim<br />
from the source of the burn.<br />
2. Cool the burned area with cool, running<br />
tap water or water from a garden<br />
hose, or have the victim get into<br />
the bath or shower.<br />
3. Use sheets or towels soaked in cold<br />
water to cool a burn on the face or<br />
other areas that cannot be soaked.<br />
Keep adding cool water.<br />
4. Wear latex gloves. Loosely cover<br />
the area with dry, sterile bandages.<br />
What to do for second-degree burns<br />
A burn that involves the top layers of<br />
skin is a second-degree burn. The<br />
skin becomes red. Blisters form and<br />
may open and discharge clear fluid.<br />
The skin appears wet and blotchy.<br />
Second-degree burns usually heal in<br />
two to four weeks. Slight scarring<br />
may occur.<br />
<strong>First</strong> aid for a second-degree burn<br />
1. Call the local emergency number<br />
and obtain medical care immediately<br />
if the burns are larger than<br />
2–3 inches, or on the face or hands.<br />
2. Stop the burning. Remove the victim<br />
from the source of the burn.<br />
3. Cool the burned area with cool<br />
water or cool cloths.<br />
4. Do not break blisters or remove<br />
tissue.<br />
5. Loosely cover the area with dry,<br />
sterile bandages.<br />
6. Elevate the burned area above<br />
heart level.<br />
7. Loosely cover the victim with<br />
clean, dry sheets if burns cover<br />
large parts of the body. This helps<br />
prevent infection and reduces<br />
pain. Treat the victim for shock<br />
(explained in <strong>Lesson</strong> 70).
What to do for third-degree burns A<br />
burn that involves all layers of skin<br />
and some underlying tissues is a<br />
third-degree burn. A third-degree<br />
burn may affect fat tissue, muscle tissue,<br />
bones, and nerves. The skin<br />
becomes darker and appears charred.<br />
The underlying tissues may appear<br />
white. A third-degree burn is painless<br />
if nerve endings are destroyed. It<br />
also can be very painful. Thirddegree<br />
burns may take months or<br />
years to treat. Permanent scarring<br />
often occurs. Some victims require<br />
skin grafting and plastic surgery.<br />
<strong>First</strong> aid for a third-degree burn<br />
1. Remove the victim from the source<br />
of the burn and obtain medical<br />
care immediately.<br />
2. Treat the victim for shock.<br />
3. Determine if the victim is breathing.<br />
Give rescue breathing if<br />
necessary.<br />
4. Do not remove clothing stuck to<br />
the burn. Do not break blisters or<br />
remove tissue.<br />
5. Do not apply anything cold to the<br />
burn.<br />
6. Loosely cover the area with dry,<br />
sterile bandages or clean cloth.<br />
What to do for electrical burns A<br />
burn that occurs when electricity<br />
travels through the body is an electrical<br />
burn. The cause may be lightning<br />
or contact with faulty electrical<br />
equipment or a power line. The seriousness<br />
of an electrical burn depends<br />
on the strength of the electrical current<br />
and the path the current takes<br />
through the body. There may be<br />
wounds where the electrical current<br />
enters and leaves the body.<br />
tx.healthmh.com/burns<br />
<strong>First</strong> aid for an electrical burn<br />
1. Call the local emergency number<br />
and obtain medical care immediately.<br />
All electrical burns must be<br />
examined by a doctor. They may<br />
appear minor, but may be very deep.<br />
2. Do not go near the victim until the<br />
source of electricity is turned off.<br />
3. Treat the victim for shock.<br />
4. Do not move the victim.<br />
5. Loosely cover the area with dry,<br />
sterile bandages.<br />
6. Do not use cool water or compresses,<br />
as the victim may be in shock.<br />
What to do for chemical burns A burn<br />
that occurs when chemicals in a laboratory<br />
or in products get on the skin<br />
or into the eyes or body is a chemical<br />
burn. The burn continues as long as<br />
there is contact with the chemical.<br />
<strong>First</strong> aid for a chemical burn<br />
1. Remove the victim from the chemical<br />
causing the burn. If the chemical<br />
is dry or solid, brush it off the<br />
skin with a cloth. Have the victim<br />
remove any clothing with the<br />
chemical on it.<br />
2. If the exposure is serious, call the<br />
local emergency number and<br />
obtain medical care immediately.<br />
3. Flush the skin or eyes with cool,<br />
low-pressure running water for<br />
15–30 minutes. Take special precautions<br />
if only one eye is<br />
involved. Have the victim turn the<br />
head and run the water from the<br />
nose away from the eye. This<br />
keeps water with the chemical in<br />
it from running into the other eye.<br />
4. Loosely cover the area with dry,<br />
sterile bandages.<br />
Burns Never remove<br />
clothing or anything<br />
else that is sticking to<br />
a severe burn.<br />
LESSON <strong>69</strong> • <strong>Performing</strong> <strong>Common</strong> <strong>First</strong> <strong>Aid</strong> <strong>Procedures</strong> 715
<strong>First</strong> <strong>Aid</strong> Perform<br />
only the first aid skills<br />
you have been trained<br />
to give. Do not<br />
perform skills beyond<br />
your knowledge, such<br />
as those you may<br />
have seen on a<br />
television show.<br />
A splint is used to<br />
immobilize a body part.<br />
716 UNIT 11 • Injury Prevention and Personal Safety<br />
Photodisc/Getty Images<br />
There are 206 bones in the body and more than 600 muscles.<br />
A joint is the point where two bones meet. Ligaments are the fibers that connect<br />
bones together. Tendons are tough tissue fibers that connect muscles to bones. Injuries<br />
involving muscles, bones, and joints are common in teens. The most common injuries are<br />
fractures, dislocations, sprains, and strains.<br />
What to Know About <strong>First</strong> <strong>Aid</strong> for<br />
Muscle, Bone, and Joint Injuries<br />
How to use splints Material or a<br />
device used to protect and immobilize<br />
a body part is a splint. A splint<br />
should only be used when you need to<br />
move a victim without emergency<br />
help and need to keep an injured<br />
body part immobile, and only if it<br />
does not hurt the victim. A folded<br />
blanket, towel, sheet, or bandage<br />
might be used as a soft splint.<br />
Rolled-up newspapers, sticks, or<br />
boards may be used as a rigid splint.<br />
Emergency medical personnel may<br />
use a board as a splint.<br />
<strong>First</strong> aid when using a splint<br />
1. Call the local emergency number<br />
for a life-threatening injury.<br />
2. Attempt to splint the injury in the<br />
position you find it to immobilize<br />
the injured part. A splint for an<br />
injured bone must include the<br />
joints above and below the injured<br />
bone. A splint for an injured joint<br />
must include the bones above and<br />
below the injured joint.<br />
3. Check circulation to ensure that<br />
the splint is not too tight.<br />
What to do for fractures A break or a<br />
crack in a bone is a fracture. A fracture<br />
in which there is a break in the skin is<br />
an open fracture. A fracture in which<br />
there is no break in the skin is a closed<br />
fracture. A fracture can be very serious<br />
if a break in a bone damages an<br />
artery or interferes with breathing. The
signs of a fracture include pain,<br />
swelling, loss of movement, and deformity.<br />
Signs of a fracture of the skull<br />
include bleeding from the head or ears,<br />
drowsiness, and headache.<br />
<strong>First</strong> aid for fractures<br />
1. Call the local emergency number<br />
and obtain medical care immediately.<br />
2. Treat for bleeding and shock.<br />
3. Keep the injured part from moving.<br />
Use a splint when appropriate.<br />
4. Keep a victim with a head injury<br />
immobile.<br />
5. Apply ice to the injured area to<br />
prevent swelling.<br />
6. Follow universal precautions while<br />
controlling bleeding.<br />
What to do for dislocations The<br />
movement of a bone from its joint is a<br />
dislocation. Dislocations often are<br />
accompanied by stretched ligaments.<br />
The signs of a dislocation are pain,<br />
swelling upon movement, loss of<br />
movement, and deformity.<br />
<strong>First</strong> aid for a dislocation<br />
1. Call the local emergency number<br />
and obtain medical care immediately.<br />
2. Splint above and below the dislocated<br />
joint in the position it was<br />
found. Apply cold compresses.<br />
What to do for sprains An injury to<br />
the ligaments, tendons, and soft tissue<br />
around a joint caused by undue<br />
stretching is a sprain. The most<br />
common sprain occurs to the ankle.<br />
Sprains also may affect the knee,<br />
wrist, finger, shoulder, or spine. The<br />
signs of a sprain include pain that<br />
increases with movement or weight<br />
bearing, tenderness, and swelling.<br />
tx.healthmh.com/injuries<br />
<strong>First</strong> aid for sprains<br />
1. Follow the RICE<br />
treatment.<br />
2. The victim should<br />
not be allowed to<br />
walk if there is a<br />
leg injury.<br />
3. Immobilize the area and get<br />
prompt medical help if a fracture<br />
is suspected.<br />
What to do for strains An overstretching<br />
of muscles and/or tendons is a<br />
strain. A strain is commonly referred<br />
to as a pulled muscle. A strain is usually<br />
not as serious as a sprain. One of<br />
the most common strains involves the<br />
muscles of the back. Signs of strain<br />
include pain, swelling, stiffness, and<br />
firmness to the area.<br />
<strong>First</strong> aid for strains<br />
1. Follow the RICE treatment.<br />
2. Get prompt medical help for a<br />
severe strain.<br />
The RICE Treatment<br />
The RICE treatment is described below.<br />
• Rest: Rest the injured part<br />
for 24 to 72 hours. More rest<br />
is required for severe injuries.<br />
Do not exercise the injured<br />
area until healing is complete.<br />
• Ice: Apply cold water, a cold<br />
compress, or an ice pack for<br />
20 minutes as soon as possible<br />
after the injury occurs.<br />
Apply several times a day for<br />
one to three days. Wrap ice in<br />
a cloth before placing on the<br />
skin. Applying cold reduces<br />
pain, swelling, inflammation,<br />
and tissue damage.<br />
One step in the<br />
RICE treatment is<br />
to apply an ice<br />
pack to an injury<br />
as soon as<br />
possible after the<br />
injury occurs.<br />
• Compression: Wrap the<br />
injury with a bandage to limit<br />
swelling. Swelling causes<br />
more pain and slows healing.<br />
The bandage should not be<br />
compressed so tight that it<br />
restricts blood flow. Remove<br />
the wrap periodically and<br />
check the area.<br />
• Elevation: Raise the injured<br />
body part above heart level<br />
to reduce swelling and to<br />
help drain blood and fluid<br />
from the area.<br />
LESSON <strong>69</strong> • <strong>Performing</strong> <strong>Common</strong> <strong>First</strong> <strong>Aid</strong> <strong>Procedures</strong> 717<br />
Richard Hutchings/PhotoEdit
Avoid frostbite<br />
by dressing<br />
appropriately in<br />
cold weather.<br />
718 UNIT 11 • Injury Prevention and Personal Safety<br />
(tt)Debbie Dean, Photodisc/Getty Images, (b)Roy Ooms/Masterfile<br />
Cold temperature-related illnesses are conditions that result<br />
from exposure to low temperatures. The most common cold<br />
temperature-related emergencies are frostbite and hypothermia.<br />
<strong>First</strong> <strong>Aid</strong> for Cold Temperature-<br />
Related Illnesses<br />
What to do for frostbite The<br />
freezing of body parts, often the<br />
tissues of the extremities, is called<br />
frostbite. Frostbite may involve the<br />
fingers, toes, ears, and nose. People<br />
exposed to subfreezing temperatures<br />
or snow are at risk for developing<br />
frostbite.<br />
Signs of frostbite include numbness<br />
in the affected area, a waxy, discolored<br />
appearance to the skin, and<br />
skin that is cold to the touch.<br />
<strong>First</strong> aid for frostbite For mild frostbite,<br />
rewarm the affected area in<br />
lukewarm water. For severe frostbite,<br />
call the local emergency number and<br />
obtain medical care immediately.<br />
Do not attempt rewarming if a medical<br />
facility is near. Take the following<br />
steps if medical help is not available.<br />
1. Remove any clothing or jewelry<br />
that interferes with circulation.<br />
Handle the affected area gently.<br />
2. Soak the affected body part in<br />
water that has a temperature<br />
between 100°F and 105°F. Test the<br />
water by having someone who has<br />
not been exposed to the cold, place<br />
his or her hand in the water.<br />
Water that is too warm for that<br />
person’s hand is too warm to use<br />
on the victim. Warming usually<br />
takes 25 to 40 minutes, until the<br />
tissues are soft.<br />
3. Apply warm, moist cloths to warm<br />
the ears, nose, or face.<br />
4. Do not rub the affected body part.<br />
5. Do not allow a victim to walk on<br />
frostbitten toes or feet, even after<br />
rewarming the area.<br />
6. Place dry, sterile gauze between<br />
the toes and fingers to absorb<br />
moisture and avoid having them<br />
stick together.
What to do for hypothermia A reduction<br />
of the body temperature so that<br />
it is lower than normal is called<br />
hypothermia. Hypothermia results<br />
from overexposure to cool temperatures,<br />
cold water, moisture, and wind.<br />
The outside temperature can be as<br />
high as 50°F, and a person can still<br />
suffer from hypothermia. Those most<br />
likely to suffer from hypothermia<br />
when exposed to extreme cold are<br />
older adults, people who are ill, children,<br />
people who are hungry or tired,<br />
and people who consume alcohol in<br />
excess.<br />
Most cases of hypothermia are<br />
mild. The victim will shiver and feel<br />
cold. The pulse rate slows down and<br />
becomes irregular as the body temperature<br />
drops. A drop in body temperature<br />
affects the brain and spinal<br />
cord causing the victim to experience<br />
symptoms such as loss of coordination,<br />
slurred speech, and confusion.<br />
Eventually, a victim can become<br />
unconscious. A victim can die if<br />
hypothermia is not treated.<br />
<strong>First</strong> aid for hypothermia<br />
1. Call the local emergency number<br />
and obtain medical care immediately.<br />
2. Try to raise the body temperature<br />
by getting the victim into a warm<br />
environment.<br />
3. Handle the victim gently.<br />
4. Remove any wet clothing, and<br />
replace it with dry clothing.<br />
5. Place something warm above and<br />
below the victim, such as blankets.<br />
6. Cover the victim’s head.<br />
7. Give the victim warm, sweet liquids<br />
to drink. Never give alcohol to<br />
a victim of hypothermia.<br />
tx.healthmh.com/illnesses<br />
A victim of hypothermia needs to quickly get to a warm environment.<br />
<strong>First</strong> aid for moderate hypothermia<br />
(body temperature from 84°F to 94°F)<br />
1. Warm the victim. Use an electric<br />
blanket, a sleeping bag, or several<br />
blankets to wrap the victim. A person<br />
with normal body temperature<br />
can lay next to the victim to<br />
lend body heat.<br />
2. Place the victim in a tub of water<br />
with a temperature no greater<br />
than 105°F if available.<br />
3. Place hot packs around the victim’s<br />
head, neck, chest, back, and groin.<br />
Be careful not to burn the victim.<br />
<strong>First</strong> aid for severe hypothermia (body<br />
temperature below 84°F)<br />
1. Do not rewarm a victim who can<br />
be transported to a medical facility<br />
within 12 hours.<br />
2. Calm the victim.<br />
3. Avoid unnecessary movement of<br />
the victim.<br />
4. Maintain an airway.<br />
5. Keep the victim lying down.<br />
6. Do not give CPR to the victim<br />
unless there is no pulse. Continue<br />
CPR until the victim is transported<br />
to a medical facility.<br />
Frostbite You should<br />
not rub toes or hands<br />
to try to warm them<br />
up if you think there<br />
is frostbite.<br />
Mini-Review<br />
1. How should a<br />
fracture be<br />
treated?<br />
2. How should<br />
frostbite be<br />
treated?<br />
LESSON <strong>69</strong> • <strong>Performing</strong> <strong>Common</strong> <strong>First</strong> <strong>Aid</strong> <strong>Procedures</strong> 719<br />
Aaron Haupt Photography
<strong>First</strong> aid for heat<br />
cramps includes<br />
resting and drinking<br />
cool water.<br />
What to do for heat cramps Painful<br />
muscle spasms in the legs and arms<br />
due to excessive fluid loss through<br />
sweating are called heat cramps.<br />
<strong>First</strong> aid for heat cramps<br />
1. Have the victim rest in a cool,<br />
shaded area and give him or her<br />
cool water to drink.<br />
2. Stretch the muscle gently.<br />
What to do for heat exhaustion<br />
Extreme tiredness due to the body’s<br />
inability to regulate its temperature<br />
is called heat exhaustion. Heat<br />
exhaustion can be life-threatening.<br />
A victim of heat exhaustion will<br />
have a body temperature that is<br />
below normal. Other signs of<br />
heat exhaustion include cool,<br />
moist, pale, or red skin; nausea;<br />
headache; dizziness;<br />
fast pulse; and weakness.<br />
720 UNIT 11 • Injury Prevention and Personal Safety<br />
Ric Frazier/FoodPix/Getty Images<br />
Conditions that result from exposure to temperatures that are higher than normal are<br />
called heat-related illnesses. Heat cramps, heat exhaustion, and heat stroke are the<br />
most common heat-related illnesses.<br />
<strong>First</strong> <strong>Aid</strong> for Heat-Related Illnesses<br />
<strong>First</strong> aid for heat<br />
exhaustion<br />
1. Have the victim<br />
lie down in a<br />
cool place, elevate<br />
the feet,<br />
and drink cool<br />
water.<br />
2. Observe the victim for signs of<br />
heatstroke.<br />
3. If the victim does not recover in<br />
half an hour, or gets worse, call<br />
the local emergency number and<br />
obtain medical care.<br />
What to do for heatstroke (sunstroke)<br />
An overheating of the body that<br />
is life-threatening is heatstroke.<br />
Sweating ceases so that the body<br />
cannot regulate its temperature.<br />
The victim has a high body temperature<br />
and rapid pulse and respiration<br />
rate. The skin becomes hot and<br />
dry. A victim feels weak, dizzy, and<br />
has a headache. A victim may be<br />
unconscious.<br />
<strong>First</strong> aid for heatstroke<br />
1. Call the local emergency number<br />
and obtain medical care.<br />
2. Remove the victim’s heavy clothing;<br />
wrap the victim in cool, wet<br />
towels or sheets; place ice packs<br />
near the neck, armpits, and groin;<br />
and have victim rest in a cool place.<br />
Give sips of water only if the victim<br />
is conscious and can swallow.<br />
3. Continue cooling the victim until a<br />
body temperature of 102°F is<br />
reached.
<strong>69</strong><br />
STUDY<br />
GUIDE<br />
actual consent<br />
burn<br />
dislocation<br />
first aid<br />
fracture<br />
Good Samaritan laws<br />
heat cramps<br />
heatstroke<br />
hypothermia<br />
implied consent<br />
splint<br />
universal precautions<br />
k Key Terms Review<br />
Complete the fill-in-the-blank statements with the lesson Key Terms on the left. Do not write in this book.<br />
1. _____<br />
is oral or written permission from a<br />
mentally competent adult to give first aid.<br />
2. _____ is assuming the victim would grant<br />
permission to give first aid if capable.<br />
3. _____ are steps taken to prevent the<br />
spread of disease by treating all human<br />
blood and body fluids as if they contained<br />
HIV, HBV, and other pathogens.<br />
4. A(n) _____ is a break or crack in a bone.<br />
5. A(n) _____ is the movement of a bone<br />
from its joint.<br />
Recalling the Facts<br />
11. What is frostbite?<br />
12. Identify first aid situations that require professional<br />
health services.<br />
13. Describe treatment for a first degree burn.<br />
14. What first aid should you give for a sprain?<br />
Critical Thinking<br />
19. Why is it important to obtain consent from<br />
a conscious victim before giving first aid?<br />
20. Explain the importance of using universal<br />
precautions when giving first aid.<br />
21. What injury would you suspect if there is<br />
pain, swelling upon movement, and deformity<br />
of the injured body part?<br />
22. What would you do if you were on a riverrafting<br />
trip with someone who has deep<br />
blue lips and is shivering uncontrollably?<br />
Activities<br />
Responsible Decision Making<br />
27. Analyze A friend suggests making a<br />
prank call to 911, saying that you could<br />
report that your neighbor’s house is on fire.<br />
Then you could hide and watch the fire<br />
trucks arrive. Write a response to this situation.<br />
Analyze how your behavior would<br />
affect your health or the health of others.<br />
Refer to the Responsible Decision-Making<br />
Model on page 61 for help.<br />
Visit tx.healthmh.com/study_guide for more review questions.<br />
6. A(n) _____ is a material or device used to<br />
protect and immobilize a body part.<br />
7. A(n) _____ is an injury caused by heat,<br />
electricity, chemicals, or radiation.<br />
8. _____ is immediate and temporary care<br />
given to a person who has been injured or<br />
suddenly becomes ill.<br />
9. An overheating of the body that is lifethreatening<br />
is _____.<br />
10. A reduction of body temperature so that it<br />
is lower than normal is _____.<br />
15. What is a third-degree burn?<br />
16. Explain the RICE treatment for injuries.<br />
17. What causes hypothermia?<br />
18. Explain the difference between actual and<br />
implied consent.<br />
Real-Life Applications<br />
23. What would you do if your friend fainted?<br />
24. Explain what you would need to do before<br />
moving a victim with a broken leg.<br />
25. Explain if you will need actual or implied<br />
consent to give first aid to a conscious child<br />
when there is no adult around.<br />
26. Explain how you may prevent harm to<br />
yourself when you encounter a person who<br />
has received an electrical burn.<br />
Sharpen Your Life Skills<br />
28. Advocate for Health Make a list of<br />
emergency telephone numbers, such as the<br />
Poison Control Center, your physician, the fire<br />
department, the police department, and any<br />
other important emergency telephone numbers.<br />
Place these numbers by the telephones<br />
in your home. Make wallet-sized copies of<br />
these numbers so that you and your family<br />
can carry them with you at all times.<br />
LESSON <strong>69</strong> • Study Guide 721<br />
Aaron Haupt