

TWR-S12G240 Quick Start Guide - Freescale Semiconductor
TWR-S12G240 Quick Start Guide - Freescale Semiconductor
TWR-S12G240 Quick Start Guide - Freescale Semiconductor

You also want an ePaper? Increase the reach of your titles
YUMPU automatically turns print PDFs into web optimized ePapers that Google loves.
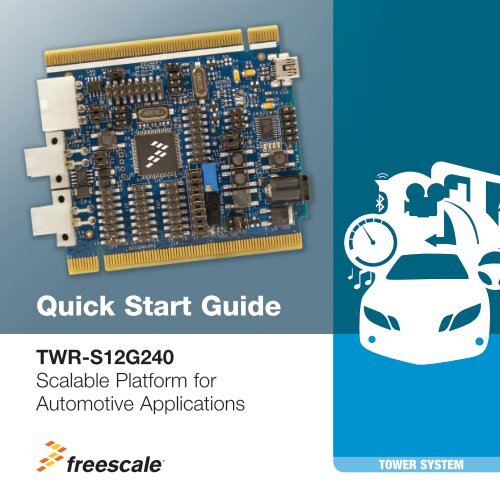
<strong>Quick</strong> <strong>Start</strong> <strong>Guide</strong><br />
<strong>TWR</strong>-<strong>S12G240</strong><br />
Scalable Platform for<br />
Automotive Applications<br />
AUTO—INFOTAINMENT<br />
TOWER SYSTEM
<strong>Quick</strong> <strong>Start</strong> <strong>Guide</strong><br />
Get to Know the <strong>TWR</strong>-<strong>S12G240</strong><br />
Primary<br />
Connector<br />
External BDM<br />
Connector<br />
CAN Connector<br />
LIN Connectors<br />
Secondary<br />
Connector<br />
<strong>TWR</strong>-<strong>S12G240</strong><br />
<strong>Freescale</strong> Tower System<br />
The <strong>TWR</strong>-<strong>S12G240</strong> module is a single board computer as well<br />
as part of the <strong>Freescale</strong> Tower System, a modular development<br />
platform that enables rapid prototyping and tool re-use through<br />
reconfigurable hardware. Elevate your design to the next level and<br />
begin constructing your Tower System today.<br />
On-Board<br />
OSBDM<br />
Serial Port<br />
(DB9 converter<br />
cable included)<br />
LEDs<br />
Push Buttons<br />
Potentiometer<br />
Optional External<br />
Power Supply
<strong>TWR</strong>-<strong>S12G240</strong> Features<br />
• <strong>S12G240</strong> series microcontroller (100-pin LQFP)<br />
• On-board JTAG connection via open source<br />
OSBDM circuit using the MC9S08JM60<br />
microcontroller<br />
See pemicro.com/osbdm for source code<br />
• High-speed CAN interface<br />
• LIN interface<br />
• Potentiometer with LP filter<br />
• LED indicators<br />
• RS-232 serial communication interface<br />
• Support for USB Multilink Interface BDM
<strong>Quick</strong> <strong>Start</strong> <strong>Guide</strong><br />
Step-by-Step Installation Instructions<br />
In this quick start guide, you will learn how to set up the <strong>TWR</strong>-<strong>S12G240</strong> board<br />
and run the default exercise.<br />
4<br />
Install Software<br />
and Tools<br />
1 2<br />
Install CodeWarrior Development<br />
Studio for S12 V5.1 or later<br />
A 30-day evaluation license of<br />
CodeWarrior is included on the<br />
DVD for your convenience.<br />
For updates, please visit<br />
freescale.com/<strong>TWR</strong>-<strong>S12G240</strong>.<br />
Connect the<br />
USB Cable<br />
Connect one end of the USB<br />
cable to the PC and the other end<br />
to the mini-B connector on the<br />
<strong>TWR</strong>-<strong>S12G240</strong> board. Allow the<br />
PC to automatically configure<br />
the USB drivers if needed.
Using the<br />
Example Project<br />
3 4<br />
The pre-loaded example project<br />
utilizes the <strong>TWR</strong>-<strong>S12G240</strong>’s<br />
potentiometer, push button<br />
switches and LEDs. Once the<br />
board is plugged in you can<br />
adjust the potentiometer and<br />
the bank of four LEDs should<br />
illuminate/de-illuminate in<br />
response. Each LED will toggle<br />
when the corresponding push<br />
button is pressed.<br />
TOWER SYSTEM<br />
Learn More About<br />
the <strong>S12G240</strong><br />
Read the release notes and<br />
documentation on the DVD and at<br />
freescale.com/<strong>S12G240</strong>.<br />
• The Processor Expert graphical<br />
initialization software included in<br />
your CodeWarrior installation will<br />
help reduce your time to market<br />
• CodeWarrior for S12 with<br />
examples<br />
5
6<br />
<strong>Quick</strong> <strong>Start</strong> <strong>Guide</strong><br />
<strong>TWR</strong>-<strong>S12G240</strong> Jumper Options<br />
The following is a list of all jumper options. The default installed jumper settings are<br />
shown in white text within the blue boxes.<br />
Jumper Option Setting Description<br />
J1<br />
USB to BDM<br />
Interface<br />
1-2 Drives IRQ/TPMCLK to ground<br />
J2 CAN Enable 1-2 Enables CAN<br />
J7 CANH - L<br />
J13<br />
UART/LIN<br />
TRANSCEIVER<br />
J15 LIN INTERFACE<br />
1-2 SPLIT termination to CAN-L line<br />
3-4 SPLIT termination to CAN-H line<br />
1-3 Connects PS1/TXD0 PS0 to TXD_LIN of LIN tranceiver<br />
3-5 Connects PS1/TXD0 PS0 to T1in of RS-232 tranceiver<br />
2-4 Connects PS0/RXD0 PS1 to RXD_LIN pf LIN tranceiver<br />
4-6<br />
1-2<br />
Connects PS0/RXD0 PS1 to R1 out of RS-232<br />
tranceiver<br />
Drives LIN V+ to J12 and J19 pin 3 plugs. Supply to<br />
other nodes<br />
3-4 LIN tranceiver set as Master node
(continued from previous page)<br />
Jumper Option Setting Description<br />
J18<br />
J23<br />
USER SWs and<br />
LED Selection<br />
POWER<br />
Selection<br />
1-2 Connect PAD4 pin to SW5<br />
3-4 Connect PAD5 pin to SW4<br />
5-6 Connect PAD6 pin to SW3<br />
7-8 Connect PAD7 pin to SW2<br />
9-10 Connect PAD0 to R23 potentiometer<br />
11-12 Connect PT4 pin to D3 LED<br />
13-14 Connect PT5 pin to D4 LED<br />
15-16 Connect PT6 pin to D5 LED<br />
17-18 Connect PT7 pin to D6 LED<br />
1-2<br />
3-4<br />
TOWER SYSTEM<br />
Selects the board to be powered from the 3.3V elevator<br />
card rail<br />
Selects the board to be powered from the 5V USB<br />
connector<br />
5-6 External source selected as power source<br />
7
<strong>Quick</strong> <strong>Start</strong> <strong>Guide</strong><br />
Visit freescale.com/<strong>TWR</strong>-<strong>S12G240</strong> for information<br />
on the <strong>TWR</strong>-<strong>S12G240</strong>, including:<br />
• <strong>TWR</strong>-<strong>S12G240</strong> quick start guide<br />
• <strong>TWR</strong>-<strong>S12G240</strong> board schematics<br />
For more information, visit freescale.com/Tower<br />
Join the online Tower community at towergeeks.org<br />
<strong>Freescale</strong>, the <strong>Freescale</strong> logo and CodeWarrior are trademarks or<br />
registered trademarks of <strong>Freescale</strong> <strong>Semiconductor</strong>, Inc. Reg. U.S. Pat.<br />
& Tm. Off. Processor Expert is a trademark of <strong>Freescale</strong> <strong>Semiconductor</strong>,<br />
Inc. All other product or service names are the property of their respective<br />
owners. © 2011 <strong>Freescale</strong> <strong>Semiconductor</strong>, Inc.<br />
Doc Number: <strong>TWR</strong><strong>S12G240</strong>QSG REV 0<br />
Agile Number: 926-78583 REV A


