2010 Infiniti EX35 Quick Reference Guide - Infiniti Owner Portal
2010 Infiniti EX35 Quick Reference Guide - Infiniti Owner Portal
2010 Infiniti EX35 Quick Reference Guide - Infiniti Owner Portal

Create successful ePaper yourself
Turn your PDF publications into a flip-book with our unique Google optimized e-Paper software.
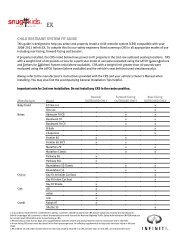
<strong>2010</strong> <strong>Infiniti</strong> <strong>EX35</strong><br />
<strong>Quick</strong> <strong>Reference</strong> <strong>Guide</strong>
QUICK REFERENCE GUIDE<br />
Introduction<br />
This easy-to-use <strong>Quick</strong> <strong>Reference</strong> <strong>Guide</strong> will help you to more fully appreciate your<br />
vehicle’s superior features, unique functions and advanced technology.<br />
■ The <strong>Quick</strong> <strong>Reference</strong> <strong>Guide</strong> is intended to provide you with a user-friendly learning<br />
experience to quickly acquaint you with your new INFINITI vehicle.<br />
■ Refer to the <strong>Quick</strong> <strong>Reference</strong> <strong>Guide</strong> to learn how to personalize your vehicle’s<br />
controls and equipment to maximize your driving comfort and convenience.<br />
However, this guide is not intended to replace your vehicle <strong>Owner</strong>’s Manual. For<br />
comprehensive vehicle safety information and product details, please refer to your<br />
<strong>Owner</strong>’s Manual. It will help you to better understand the operation and proper<br />
maintenance of your new INFINITI vehicle.<br />
Both INFINITI and your INFINITI dealer are dedicated to serving all your automotive<br />
needs. Your complete satisfaction is our primary concern. It is suggested that you read<br />
this <strong>Quick</strong> <strong>Reference</strong> <strong>Guide</strong> and your vehicle <strong>Owner</strong>’s Manual thoroughly before contacting<br />
your INFINITI dealer with related questions.
contents<br />
Getting Started<br />
INFINITI Intelligent Key TM System<br />
In-Dash Intelligent Key Port, Lock/Unlock Operation Door Handle Request Switches,<br />
Lockout Protection, Push Button Ignition Switch, INFINITI Intelligent Key TM, Opening the Windows<br />
Deactivating/Activating the Horn Alert Feature<br />
Automatic Door Locks<br />
Child Safety Rear Door Locks<br />
Seat Adjustments<br />
To Adjust Driver’s and Passenger’s Seats, Power Rear Seats, Manual Folding Rear Seats<br />
Auto-Dimming Inside (Rearview) Mirror<br />
Instrument Panel Layout<br />
Front Passenger Air Bag Status Light<br />
Vehicle Control Center<br />
INFINITI Controller, Information Display Screen, Buttons Surrounding the INFINITI Controller<br />
Driving Controls<br />
Steering Wheel Controls – Cruise Control/Intelligent Cruise Control<br />
(Full-Speed Range)<br />
Steering Wheel Controls – Audio & Bluetooth ® Hands-free Phone Systems (if so equipped)<br />
Vehicle Dynamic Control<br />
Forward Collision Warning & Lane Departure Warning (if so equipped)<br />
Lane Departure Prevention (LDP) System (if so equipped)<br />
Distance Control Assist (if so equipped)<br />
Intelligent Brake Assist (if so equipped)<br />
All-Wheel Drive (AWD) (if so equipped)<br />
Snow Mode On/Off Switch<br />
Rearview Monitor (if so equipped)<br />
Around View Monitor (if so equipped)<br />
Sonar System<br />
Comfort<br />
Heater and Air Conditioner (Dual Zone Automatic Temperature Control)<br />
Heated Front Seats (if so equipped)<br />
Media Center<br />
Audio System<br />
AM/FM/SAT Radio with Compact Disc, How to Customize Radio Presets,<br />
How to Customize Tone Settings, Music Box TM , USB<br />
Bluetooth ® Streaming Audio<br />
Bluetooth ® Hands-free Phone System With Navigation (if so equipped)<br />
Bluetooth ® Hands-free Phone System Without Navigation (if so equipped)<br />
Navigation<br />
INFINITI Navigation System<br />
Switching the Map View, Storing Your Home (and Other Addresses) in Your Address Book,<br />
Store Current Location, Setting a Street Address as a Destination, Moving Around Within a Map,<br />
Setting a Place as a Destination, Zagat ® Restaurant <strong>Guide</strong>, XM NavWeather ®<br />
Convenience<br />
INFINITI Voice Recognition System<br />
Speaking Phone Numbers, Voice Recognition User <strong>Guide</strong>, Making a Phone Call, Receiving and<br />
Ending a Phone Call, Programming a Destination – Street Address, Alternate Command Mode<br />
Automatic Drive Positioner Memory System (if so equipped)<br />
Entry/Exit, Seat Synchronization Function<br />
Opening the Fuel-Filler Door<br />
Opening/Closing the Lift Gate<br />
Lift Gate Release Lever<br />
12-Volt Power Outlet and Auxiliary Input Jacks<br />
Seat-Mounted Retractable Coat Hanger (if so equipped)<br />
Sun Visor Adjustment<br />
Vehicle Information Display<br />
Welcome Lighting<br />
Adaptive Front Lighting System (if so equipped)<br />
HomeLink ® Universal Transceiver (if so equipped)<br />
Important Customer Information – Aluminum-Alloy Wheels<br />
Page<br />
................2<br />
................3<br />
................4<br />
................4<br />
................4<br />
................5<br />
................6<br />
................7<br />
................8<br />
..............11<br />
..............12<br />
..............14<br />
..............14<br />
..............15<br />
..............16<br />
..............16<br />
..............16<br />
..............16<br />
..............17<br />
..............17<br />
..............18<br />
..............19<br />
..............21<br />
..............22<br />
..............26<br />
..............27<br />
..............29<br />
..............32<br />
..............36<br />
..............39<br />
..............40<br />
..............41<br />
..............41<br />
..............41<br />
..............42<br />
..............42<br />
..............42<br />
..............42<br />
..............42<br />
..............43<br />
GETTING STARTED<br />
DRIVING CONTROLS COMFORT MEDIA CENTER NAVIGATION CONVENIENCE
2<br />
INFINITI Intelligent Key TM System<br />
The INFINITI Intelligent Key TM system allows you to lock and unlock<br />
all doors (including the fuel-filler door), open the lift gate and open the<br />
windows, without removing the Intelligent Key from your pocket or bag.<br />
While inside the vehicle, it lets you start and stop the engine via push–<br />
button ignition, and - if so equipped - it can signal the seat, steering wheel<br />
and outside (side view) mirrors to adjust to your personalized memory settings.<br />
Two Intelligent Keys are provided with your INFINITI vehicle. Several vehicle features<br />
can be tied to a specific Intelligent Key.<br />
In-Dash Intelligent Key Port<br />
To start the vehicle if the Intelligent Key battery becomes<br />
discharged; insert the Intelligent Key into the In-Dash Port.<br />
Push the Intelligent Key completely into the port until you feel<br />
it “engage.”<br />
Notes:<br />
The Intelligent Key port does not charge the Intelligent Key battery. Remove the Intelligent Key from the Intelligent Key<br />
port after the ignition switch is pushed to the OFF position. If you leave the Intelligent Key in the port when the ignition<br />
switch is toggled to LOCK (OFF) and the driver’s door is opened:<br />
■ The amber indicator on both sides of the port will flash.<br />
■ A repetitive beep tone will sound.<br />
■ The Intelligent Key Removal indicator will illuminate on the dot matrix display between<br />
the tachometer and speedometer.<br />
Lock/Unlock Operation –<br />
Door Handle Request Switches<br />
To Lock the Doors: Push any door handle request switch once.<br />
To Unlock the Doors: Push any door handle request switch once.<br />
The corresponding door will unlock. Push the door handle request<br />
switch again within 5 seconds to unlock all other doors.<br />
Lockout Protection<br />
A rapid beep tone will sound and the doors will not lock if you attempt to exit the vehicle<br />
and lock the doors while the Intelligent Key is inside the vehicle.<br />
Push Button Ignition Switch<br />
To Start and Stop the Engine:<br />
For Automatic Transmission Vehicles<br />
1 Put the transmission in P (PARK).<br />
2 Push the ignition switch while depressing the brake.<br />
To stop the engine, put the transmission in P (PARK) and push the ignition<br />
switch. The ignition switch LOCK (OFF) mode will illuminate.
To Change Ignition Switch Modes:<br />
(With the engine stopped and foot off brake)<br />
In LOCK (OFF) mode, push the ignition switch:<br />
■ One time to change to ACC (Accessory) mode.<br />
■ Two times to change to ON mode.<br />
■ Three times to return to LOCK (OFF) mode.<br />
INFINITI Intelligent Key TM<br />
LOCK Button<br />
Press once to lock all doors, the<br />
lift gate, and the fuel-filler door.<br />
PANIC ALARM Button<br />
Press and hold down for more<br />
than 1 second to sound the horn<br />
and flash the headlights. Press<br />
any button on the Intelligent Key<br />
to stop the panic alarm.<br />
getting started<br />
Opening the Windows<br />
Press and hold down the button for at least 3 seconds, and continue pressing until the<br />
windows are completely open. Release the button to stop the windows from opening.<br />
Deactivating/Activating the Horn Alert Feature<br />
Your vehicle is set to sound the horn when locking the vehicle.<br />
UNLOCK Button<br />
Press once to unlock driver’s<br />
door, lift-gate and the fuel-filler<br />
lid. Press again within 1 minute<br />
to unlock all other doors. Press<br />
and hold down to open the<br />
windows.<br />
Key Ring Clip<br />
To Deactivate: Press and hold down the and buttons together for at least 2 seconds.<br />
The hazard indicators will flash three times to confirm the operation is complete.<br />
To Activate: Press and hold down the and buttons together for at least 2 seconds.<br />
The hazard indicators will flash once and the horn will chirp once to confirm the<br />
operation is complete.<br />
3<br />
GETTING STARTED<br />
DRIVING CONTROLS COMFORT MEDIA CENTER NAVIGATION CONVENIENCE
4<br />
Automatic Door Locks<br />
■ When enabled, the Automatic Door Lock system will automatically lock all doors<br />
when the vehicle speed reaches 15 MPH.<br />
■ When enabled, the Automatic Door Lock system will automatically unlock all doors<br />
when the ignition switch is pushed to LOCK (OFF) mode.<br />
To Turn ON/OFF the Automatic Door Lock Feature:<br />
1 Close all doors.<br />
2 Push the ignition switch to ON mode.<br />
3 Within 20 seconds, push and hold the power door lock switch<br />
to the position for more than 5 seconds.<br />
4 When this feature is activated, the hazard indicator lights will flash twice. When<br />
deactivated, the hazard indicator lights will flash once.<br />
To Turn ON/OFF the Automatic Door Unlock Feature:<br />
1 Close all doors.<br />
2 Push the ignition switch to ON mode.<br />
3 Within 20 seconds, push and hold the power door lock switch to the<br />
more than 5 seconds.<br />
position for<br />
4 When this feature is activated, the hazard indicator lights will flash twice. When<br />
deactivated, the hazard indicator lights will flash once.<br />
Note: The ignition switch must be turned OFF and ON again between each setting change.<br />
Child Safety Rear Door Locks<br />
■ The child safety lock levers are located on the inside edge of<br />
the rear doors.<br />
■ When the lever is moved to the LOCK position, the door can<br />
be opened only from the outside. If you cannot open a rear<br />
door from the inside, check the child safety rear door lock lever.<br />
Seat Adjustments<br />
To Adjust Power Seats:<br />
Forward and Backward – Move the switch forward or<br />
backward to slide the seat forward or backward.<br />
Seat Lifter – Press the front or rear side of the switch up<br />
or down to adjust the angle and height of the seat cushion.<br />
Seat Back Reclining – Press the top of the switch forward or backward to<br />
adjust the seatback to the desired angle.
To Adjust Lumbar Support:<br />
Lumbar Support – Press the front or rear side of the switch forward or<br />
backward to adjust lower back support.<br />
Power Rear Seats (if so equipped):<br />
The rear seats can be folded down for maximum cargo hauling/<br />
extra storage space.<br />
1 Press and hold the front side DOWN of the rear<br />
1 1<br />
2 2<br />
seat switch on the right or left side of the luggage<br />
compartment. The corresponding rear seatback<br />
will fold down automatically.<br />
2 To return the seat to an upright position:<br />
■ Press and hold the rear side UP portion of the<br />
corresponding switch.<br />
■ Or, push and hold a rear seatback return switch<br />
located on the center console. The corresponding<br />
rear seatback will be returned to its upright<br />
position automatically.<br />
Note: A beep will sound once and the rear seatback will rise up.<br />
A beep will sound twice when the seatback is fully returned to the<br />
upright position.<br />
Manual Folding Rear Seats (if so equipped):<br />
Pull the lever located on the outside of the seatback.<br />
The corresponding seatback will fold.<br />
To return the seatback to an upright position lift the seatback<br />
manually until it securely locks in position.<br />
Auto-Dimming Inside (Rearview) Mirror<br />
getting started<br />
The anti-glare feature automatically changes reflection depending on the headlight intensity<br />
of the vehicle behind you. This feature is automatically ON when the vehicle is started.<br />
To turn this feature OFF: Press the button on the mirror. The green indicator light will<br />
go out when the feature is turned OFF. Press the button to turn the feature back ON.<br />
5<br />
GETTING STARTED<br />
DRIVING CONTROLS COMFORT MEDIA CENTER NAVIGATION CONVENIENCE
Behind steering<br />
wheel on dash<br />
6<br />
7<br />
11 12<br />
14<br />
15 10<br />
Behind steering<br />
wheel on dash<br />
5<br />
2<br />
1<br />
13 16<br />
Instrument Panel Layout<br />
1 Headlight, Fog Light and Turn Signal Switch<br />
2 Steering Wheel Controls – Audio, Bluetooth ®<br />
3 Cruise Control Buttons<br />
4 Intelligent Cruise Control (Full-Speed Range) Buttons – if so equipped<br />
5 Instrument Brightness Control Buttons<br />
6 Trip Computer Buttons<br />
7 Trip/Reset Switch for Twin Trip Odometer<br />
8 Windshield Wipers and Washer Switch<br />
9 Push Button Ignition Switch<br />
10 Vehicle Dynamic Control (VDC) OFF Button<br />
11 Forward Collision Warning (FCW) & Lane Departure Warning (LDW) Button –<br />
if so equipped<br />
Behind steering<br />
wheel on Column<br />
12 Intelligent Brake Assist (IBA) OFF Switch – if so equipped<br />
13 Steering Wheel Power Tilt/Telescopic Control – if so equipped<br />
14 Intelligent Key Port<br />
15 Hood Release Lever<br />
16 Manual Telescopic Steering Wheel Lock Lever – if so equipped<br />
17 Hazard Warning Lights Button<br />
18 Distance Control Assist (DCA) & Lane Departure Prevention (LDP) Button – if so equipped<br />
19 5-Speed Automatic Transmission Shift Lever with Manual Shift Mode<br />
and Drive Sport Mode<br />
20 Heated Front Seat Switches – if so equipped<br />
21 SNOW Mode ON/OFF Switch<br />
22 Rear Seat Power Return Switches<br />
18<br />
6<br />
8<br />
Behind steering<br />
wheel on dash<br />
3 4<br />
9<br />
19<br />
17<br />
20<br />
21<br />
22
5<br />
6<br />
15<br />
11<br />
7<br />
12<br />
14<br />
20 22<br />
21 22 20<br />
10<br />
getting started<br />
5 Instrument Brightness<br />
Control Buttons<br />
6 Trip Computer Buttons<br />
7 Trip/Reset Button for<br />
Twin Trip Odometer<br />
10 Vehicle Dynamic Control (VDC)<br />
OFF Button<br />
11 Forward Collision Warning (FCW) &<br />
Lane Departure Warning (LDW) Button<br />
(if so equipped)<br />
12 Intelligent Brake Assist (IBA) OFF Switch<br />
(if so equipped)<br />
14 Intelligent Key Port<br />
15 Hood Release Lever<br />
20 Heated Front Seat Dials<br />
(if so equipped)<br />
21 SNOW Mode ON/OFF Switch<br />
22 Rear Seat Power Return Switches<br />
(if so equipped)<br />
Front Passenger Air Bag Status Light<br />
This vehicle is equipped with the INFINITI Advanced Air Bag<br />
System. Under some conditions, depending on pressure<br />
detected on the front-passenger’s seat and how the seat<br />
belt is used, the front passenger air bag is designed to<br />
automatically turn OFF. When the front passenger air bag is<br />
OFF, the front passenger air bag status light will illuminate.*<br />
For example:<br />
■ When the system detects that the front-passenger’s seat is occupied by a small adult,<br />
child or child restraint as outlined in the <strong>Owner</strong>’s Manual, the front passenger air bag<br />
status light will illuminate to indicate that the front passenger air bag is OFF<br />
and will not inflate in a crash.<br />
■ When the front-passenger’s seat is occupied and the passenger meets the conditions<br />
outlined in the <strong>Owner</strong>’s Manual, the front passenger air bag status light will<br />
not illuminate to indicate that the front passenger air bag is operational.<br />
* When the system detects that the front-passenger’s seat is unoccupied, the passenger air bag status light will not<br />
illuminate even though the front passenger air bag is OFF.<br />
7<br />
GETTING STARTED<br />
DRIVING CONTROLS COMFORT MEDIA CENTER NAVIGATION CONVENIENCE
8<br />
Vehicle Control Center<br />
The following buttons and controls are used together to operate most functions displayed on<br />
the Information Display Screen:<br />
■ INFINITI Controller<br />
■ Buttons and controls surrounding the INFINITI Controller<br />
■ Audio System Controls – refer to page 22<br />
■ Heater and Air Conditioning Controls – refer to page 19<br />
■ Touch Screen Operation (for Navigation-equipped vehicles ONLY)<br />
Refer to your <strong>2010</strong> INFINITI Navigation System <strong>Owner</strong>’s Manual for more details about Touch Screen operations.<br />
INFINITI Controller<br />
Buttons located on the INFINITI Controller serve various<br />
purposes for navigating around the Information Display<br />
Screen and choosing options. As you use the vehicle<br />
controls, you will find the control combination that best<br />
suits your needs.<br />
1 Center Dial<br />
Turn the Center Dial to navigate UP, DOWN, and<br />
ACROSS the Information Display Screen, highlight<br />
items for additional information and to make changes<br />
to settings.<br />
2 Main Directional Buttons<br />
Four Main Directional buttons (marked with arrows) on the face of the INFINITI<br />
Controller can also be used to perform the same functions as the Center Dial.<br />
3 Additional Directional Buttons (for vehicles with the INFINITI Navigation system)<br />
Four additional buttons (marked with small dashes) are located between the Main<br />
Directional buttons. When using the Navigation system for instance, these buttons can<br />
be used in different ways to make “fine-tuned” movements around the Navigation<br />
Map screen.<br />
4 ENTER Button<br />
When you use the Center Dial or Main Directional buttons to highlight a menu item, the<br />
text will be highlighted. Press the ENTER button to select the highlighted item.<br />
5 BACK Button<br />
Press to return to the previous function shown on the Information Display Screen and<br />
to delete characters when using the on-screen keyboard.<br />
6 VOICE Button (for vehicles with the INFINITI Navigation system)<br />
Press to repeat the Navigation instruction. Refer to the Navigation section of this guide<br />
(beginning on page 32) for more detailed Navigation system information.<br />
5<br />
3<br />
BACK<br />
2<br />
4<br />
1<br />
6
Information Display Screen<br />
Refer to the <strong>2010</strong> INFINITI Navigation System<br />
<strong>Owner</strong>’s Manual for more details about this feature.<br />
Vehicle functions are viewed in menus<br />
on the Information Display Screen.<br />
As menu items are highlighted/selected,<br />
additional information may display on<br />
the screen. The “touch screen” feature<br />
allows you to perform the same<br />
operations controlled by the INFINITI<br />
controller simply by touching menu items on the screen.<br />
RADIO AM•FM<br />
AUX<br />
getting started<br />
DEST Button (for vehicles with the INFINITI Navigation system)<br />
Press to set a destination in the Navigation system. Refer to the Navigation<br />
section of this guide (beginning on page 32) for more detailed Navigation<br />
system information.<br />
RADIO AM•FM Button (for vehicles without the INFINITI Navigation system)<br />
Press to change radio bands: AM -> FM1 -> FM2 -> XM1 -> XM2 -> XM3 -> AM, etc.<br />
(requires an active XM ® satellite radio subscription)<br />
AM•FM•SAT Button (for vehicles with the INFINITI Navigation system)<br />
Press to change radio bands: AM -> FM1 -> FM2 -> XM1 -> XM2 -> XM3 -> AM, etc.<br />
(requires an active XM ® satellite radio subscription)<br />
ROUTE Button (for vehicles with the INFINITI Navigation system)<br />
Press to display Route related information and settings. Refer to the Navigation<br />
section of this guide (beginning on page 32) for more detailed Navigation<br />
system information.<br />
AUX Button (for vehicles without the INFINITI Navigation system)<br />
While an external device such as a portable DVD or iPod ® player is being used<br />
to play movies in the vehicle (by connecting to the auxiliary jacks, located in the<br />
center console), press this button to switch the movie to the Information<br />
Display Screen. When Setting is selected on the AUX screen, the display mode<br />
can be set to Normal, Wide or Cinema.<br />
MAP Button (for vehicles with the INFINITI Navigation system)<br />
Press to display the Map screen.<br />
DISC Button (for vehicles without the INFINITI Navigation system)<br />
Press to activate and display the following modes:<br />
■ iPod ® (if so equipped and if a compatible device is connected)<br />
■ Audio CD or CD with MP3/WMA/AAC in the in-dash CD player (if a disc is loaded<br />
in the CD player)<br />
■ USB Memory (if a compatible device is connected)<br />
*XM NavWeather ® and XM NavTraffic ® is only available on vehicles equipped with optional XM ® satellite<br />
subscription service.<br />
9<br />
GETTING STARTED<br />
DRIVING CONTROLS COMFORT MEDIA CENTER NAVIGATION CONVENIENCE
10<br />
CAMERA<br />
DISC/AUX Button (for vehicles with the INFINITI Navigation system)<br />
Press to activate and display the following modes:<br />
■ Audio CD or CD with MP3/WMA/AAC in the in-dash CD player (if a disc is loaded<br />
in the CD player)<br />
■ DVD (if so equipped)<br />
■ AUX (if an external device is connected)<br />
■ iPod ® (if a compatible device is connected)<br />
■ Music Box (if songs are stored)<br />
■ USB Memory (if a compatible device is connected)<br />
■ Bluetooth ® Streaming Audio (if a compatible device is connected)<br />
Note: To view movies on the vehicle’s Information Display Screen, the transmission must be in P (PARK)<br />
with the parking brake applied, and the ignition switch in ACC or ON mode. Press the DISC AUX button on<br />
the instrument panel to display the movie.<br />
STATUS Button (for vehicles with the INFINITI Navigation system)<br />
Press repeatedly to display the status of audio, climate control, fuel consumption<br />
and navigation system functions (if so equipped).<br />
Note: If you are listening to a Satellite Radio channel, when you press the STATUS button you will be able to<br />
view information about the music playing, including; SAT Channel name/music genre, artist and song title.<br />
INFO Button<br />
Press to view specific vehicle and system information.<br />
SETTING Button<br />
Press to display the Settings menu.<br />
CAMERA Button (for vehicles with the Around View Monitor system) – if so equipped<br />
Press to operate the Around View Monitor and change views displayed on the<br />
right side of the screen.<br />
ZOOM OUT Button (for vehicles with the INFINITI Navigation system)<br />
Press to increase the Map view, showing more area.<br />
ZOOM IN Button (for vehicles with the INFINITI Navigation system)<br />
Press to decrease the Map view, showing greater detail.<br />
DAY/NIGHT/OFF/BRIGHTNESS Button<br />
■ Press to switch the Information Display Screen between day view and night view.<br />
■ While the adjustment bars appear on the screen, adjust the Information<br />
Display Screen brightness UP or DOWN by turning the INFINITI Controller<br />
Center Dial or pressing the brightness UP (+) or brightness DOWN (–) buttons.<br />
■ Press and hold down to turn OFF the display entirely. To resume display,<br />
press again.
driving controls<br />
Steering Wheel Controls<br />
Cruise Control/Intelligent Cruise Control (Full-Speed Range)<br />
Cruise Control<br />
1 CANCEL Button<br />
2 ACCEL/RES•COAST/SET Switch<br />
3 ON/OFF Button<br />
To Set Conventional Fixed-Speed Cruise:<br />
1 Press the ON/OFF button. The CRUISE indicator light<br />
(located on the dot matrix display between the<br />
speedometer and tachometer) will illuminate.<br />
3<br />
2 Accelerate to the desired speed.<br />
3 Push DOWN on the COAST/SET switch and release. The CRUISE SET indicator light<br />
will illuminate. Cruise Control will be set to the desired speed.<br />
Intelligent Cruise Control (Full-Speed Range)<br />
(if so equipped)<br />
1 CANCEL Button<br />
2 ACCEL/RES•COAST/SET Switch<br />
3 ON/OFF Button<br />
4 Following Distance Button<br />
The Intelligent Cruise Control system can be set to one of two<br />
cruise modes:<br />
■ Vehicle-to-vehicle distance-control cruise.<br />
■ Conventional fixed-speed cruise control.<br />
To Set Vehicle-to-Vehicle Distance-Control Cruise:<br />
1 Press the ON/OFF button for less than 1.5 seconds. The CRUISE<br />
indicator light , the set distance and set vehicle speed indicator<br />
lights (located on the dot matrix display between the speedometer<br />
and tachometer) will illuminate in STANDBY mode.<br />
2 Accelerate to the desired speed.<br />
3 Push DOWN on the COAST/SET switch and release. The CRUISE<br />
SET indicator light will illuminate. Cruise Control will be set<br />
to the desired speed.<br />
4 Press the Following Distance button repeatedly to change the set<br />
distance to the vehicle ahead between long , middle and<br />
short .<br />
■ When a vehicle IS NOT detected ahead of you in the travel lane,<br />
the set speed will be maintained.<br />
■ When a vehicle IS detected ahead of you in the travel lane, the<br />
set speed will adjust to maintain the set distance.<br />
1<br />
2<br />
1<br />
2<br />
3<br />
4<br />
11<br />
GETTING STARTED DRIVING CONTROLS<br />
COMFORT MEDIA CENTER NAVIGATION CONVENIENCE
12<br />
Steering Wheel Controls Audio And<br />
Bluetooth ® Hands-free Phone Systems (if so equipped)<br />
For Vehicles with the INFINITI Navigation System<br />
1 SOURCE Select Button<br />
Press the SOURCE Select Button to change between:<br />
■ Radio bands AM, FM and SAT*<br />
■ Audio CD or CD with MP3/WMA/AAC in the in-dash CD player<br />
■ Music Box (if so equipped and if songs are stored)<br />
■ USB/iPod ® (if so equipped and when connected)<br />
■ Bluetooth ® Streaming Audio (if so equipped and when<br />
connected)<br />
■ AUX (if an external device is connected)<br />
2 SCREEN NAVIGATION and ENTER Switch<br />
Push the ENTER switch UP or DOWN to navigate UP, DOWN and ACROSS the Information<br />
Display Screen. When the desired item is highlighted on the screen, press ENTER to select.<br />
For Radio:<br />
■ Push the ENTER switch UP or DOWN for less than 1.5 seconds to page through<br />
the radio preset stations on the bank (A, B, or C) currently selected.<br />
■ Push the ENTER switch UP or DOWN for more than 1.5 seconds to seek the<br />
previous/next radio station on the band (AM, FM) or music channel (SAT, if<br />
Satellite Radio is activated) currently selected.<br />
For Audio CD and CD with MP3/WMA/AAC:<br />
■ Push the ENTER switch UP or DOWN for less than 1.5 seconds to return to the<br />
beginning of the current track/folder/file or skip to the next track/folder/file. Push<br />
several times to skip BACKWARD or FORWARD through multiple tracks/folders/files.<br />
■ Push the ENTER switch UP or DOWN for more than 1.5 seconds to the<br />
previous/next CD in the 6-Disc CD Changer (if so equipped) or to the next folder<br />
on a CD/CompactFlash ® card (with MP3/WMA).<br />
For Music Box TM (if so equipped):<br />
■ Push the ENTER switch UP or DOWN for less than 1.5 seconds to return to the<br />
beginning of the current track or skip to the next track.<br />
■ Push the ENTER switch UP or DOWN for more than 1.5 seconds to change to<br />
the previous/next playlist.<br />
For iPod ® (if so equipped):<br />
■ Push the ENTER switch UP or DOWN for less than 1.5 seconds to skip to the<br />
previous/next track.<br />
■ Push the ENTER switch UP or DOWN for more than 1.5 seconds to rewind/fast<br />
forward search.<br />
For USB Memory:<br />
■ Push the ENTER switch UP or DOWN for less than 1.5 seconds to skip to<br />
the previous/next track.<br />
■ Push the ENTER switch UP or DOWN for more than 1.5 seconds skip to the<br />
next folder number.<br />
For Bluetooth ® Streaming Audio:<br />
■ Push the ENTER switch UP or DOWN for less than 1.5 seconds to skip to the<br />
previous/next track.<br />
2<br />
3<br />
1<br />
4<br />
5
driving controls<br />
3 VOLUME CONTROL Switch<br />
Push the – or + side of the VOLUME CONTROL switch to decrease or increase the<br />
volume of the audio source currently playing.<br />
4 BACK Button<br />
Press the BACK button to return to the previous function shown on the Information<br />
Display Screen, to cancel a function if it is not complete and to delete characters<br />
when using the on-screen keyboard.<br />
5 TALK Switch/PHONE Switch:<br />
■ Push the TALK button to activate the INFINITI Voice Recognition system.<br />
■ If a Bluetooth ® -enabled cellular phone has been connected to the vehicle and is<br />
selected, push the PHONE button to initiate, answer or hang up a call.<br />
For Vehicles without the INFINITI Navigation System<br />
1 SOURCE Button<br />
■ Radio bands AM, FM and SAT* (if so equipped)<br />
1<br />
■ An Audio CD or CD with MP3/WMA/AAC in the<br />
in-dash CD player<br />
2<br />
■ AUX (if an external device is connected)<br />
3<br />
2 TUNING Switch<br />
Use the Tuning Switch as follows:<br />
For Radio:<br />
■ Push the switch UP or DOWN for less than 1.5 seconds to page through the<br />
radio preset stations on the bank (A, B, or C) currently selected.<br />
■ Push the switch UP or DOWN for more than 1.5 seconds to seek the<br />
previous/next radio station on the band currently selected AM, FM or previous/<br />
next XM ® category (SAT, if Satellite Radio is activated).<br />
For Audio CD and CD with MP3/WMA/AAC:<br />
■ Push the switch UP or DOWN for less than 1.5 seconds to return to the<br />
beginning of the current track/folder/file or skip to the next track/folder/file.<br />
Push several times to skip BACKWARD or FORWARD through multiple tracks/<br />
folders/files.<br />
■ Push the switch UP or DOWN for more than 1.5 seconds to change to the<br />
previous/next CD (for 6-Disc CD changers [if so equipped]) or the next folder on<br />
the CD with MP3/WMA/AAC.<br />
For iPod ® :<br />
■ Push the switch UP or DOWN for less than 1.5 seconds to skip to the previous<br />
/next track.<br />
■ Push the switch UP or DOWN for more than 1.5 seconds to skip to the next or<br />
previous index.<br />
For USB Memory:<br />
■ Push the switch UP or DOWN for less than 1.5 seconds to skip to the previous<br />
/next track.<br />
■ Push the switch UP or DOWN for more than 1.5 seconds skip to the next<br />
folder number.<br />
13<br />
GETTING STARTED DRIVING CONTROLS<br />
COMFORT MEDIA CENTER NAVIGATION CONVENIENCE
14<br />
3 VOLUME CONTROL Switch<br />
Push the – or + side of the VOLUME CONTROL switch to decrease or increase<br />
the volume of the source currently playing.<br />
4 TALK/PHONE & PHONE END Buttons (if so equipped)<br />
■ Push the TALK/PHONE button to activate the INFINITI Voice Recognition<br />
system or to turn off voice guidance.<br />
■ If a Bluetooth ® -enabled cellular phone has been paired to the vehicle and is<br />
selected, push the TALK/PHONE button to answer and initiate (via Voice<br />
Recognition) phone calls.<br />
■ Push the PHONE END button to end phone calls or to cancel an INFINITI<br />
Voice recognition session.<br />
Notes: *Requires an active XM ® satellite radio subscription.<br />
Vehicle Dynamic Control<br />
The Vehicle Dynamic Control (VDC) system monitors driver inputs and vehicle motion. Under<br />
certain conditions, it controls braking and engine output to help the driver in handling the<br />
vehicle. VDC does not prevent accidents due to careless or dangerous driving techniques.<br />
Always be mindful of vehicle speed and driving conditions. VDC may need to be temporarily<br />
shut off if you are trying to free a vehicle stuck in snow or mud.<br />
■ Push the Vehicle Dynamic Control (VDC) OFF switch to deactivate the VDC system.<br />
The light will illuminate in the instrument panel gauge area.<br />
■ Push the Vehicle dynamic control (VDC) OFF switch again to activate the VDC system.<br />
The light will turn off in the instrument panel gauge area.<br />
■ The VDC system is active while the vehicle is running until the switch is pushed to turn off.<br />
Forward Collision Warning & Lane Departure Warning<br />
(if so equipped)<br />
The Forward Collision Warning (FCW) system generates a warning indicator<br />
and sounds an audible warning when it judges that your vehicle is<br />
getting close to a vehicle ahead in the travel lane.<br />
■ When ON, this system will function only at vehicle speeds over 10 MPH.<br />
The Lane Departure Warning (LDW) system generates visual and<br />
audible warnings indicating that your vehicle is about to unintentionally move out of its<br />
travel lane.<br />
■ When ON, this system will function only while driving at speeds over 45 MPH and when<br />
lane markers are clearly visible on the road.<br />
■ If the system detects an unintentional lane departure, the Lane Departure Warning<br />
indicator light (located in the tachometer) will illuminate orange, blink and a<br />
repetitive tone will sound.<br />
■ The LDW indicator light and repetitive warning tone will not activate when the turn<br />
signal is operated and the vehicle changes travel lanes in the direction of the signal.<br />
FCW and LDW operate in one of two modes:<br />
■ AUTOMATIC MODE<br />
■ MANUAL (OFF) MODE
driving controls<br />
Automatic Mode<br />
The FCW and LDW systems are automatically ON when you start the vehicle. The indicator<br />
light on the FCW/LDW button will illuminate indicating the system is ON.<br />
To Turn OFF FCW and LDW for One Drive ONLY:<br />
Press the FCW/LDW button. The indicator light on the button will go out.<br />
Manual (OFF) Mode<br />
For your convenience, you may choose to manually override the FCW and LDW systems<br />
so that they do not turn ON when you start the vehicle. In MANUAL (OFF) mode, there will<br />
be no visible or audible warnings when your vehicle is about to move out of its travel lane<br />
and/or is getting close to a vehicle ahead in the travel lane.<br />
To Change from AUTOMATIC MODE to MANUAL (OFF) MODE:<br />
1 Push the ignition switch to ON mode.<br />
2 Verify the FCW/LDW button indicator light is illuminated after the 3-second self check.<br />
3 Press the FCW/LDW button to turn OFF the system. The indicator light on the button will go out.<br />
4 Press and hold down the FCW/LDW button for approximately 4 seconds until a repetitive<br />
chime sounds.<br />
To Change from MANUAL (OFF) MODE to AUTOMATIC MODE:<br />
1 Push the ignition switch to ON mode.<br />
2 Verify the FCW/LDW button indicator light is not illuminated after the 3-second self check.<br />
3 Press and hold down the FCW/LDW button for approximately 4 seconds until a repetitive<br />
chime sounds.<br />
4 Press the FCW/LDW button to turn ON the system. The indicator light on the button<br />
will illuminate.<br />
Lane Departure Prevention (LDP) System<br />
(if so equipped)<br />
When the Lane Departure Prevention (LDP) system is ON and the feature senses unintentional<br />
drift from your traveling lane, it will:<br />
■ Generate visual and audible warnings. The Lane Departure Warning indicator light<br />
(located inside the tachometer) will turn orange and blink and a repetitive tone will sound.<br />
■ Automatically apply selected brakes for a short period of time to help ease your vehicle<br />
back between the lines.<br />
Note:<br />
■ LDP warning and brake assist will not activate when the turn signal is operated and the vehicle changes travel lanes<br />
in the direction of the turn signal.<br />
■ The Lane Departure Warning and Lane Departure Prevention systems operate above approximately 45 mph, and<br />
only when lane markings are clearly visible on the road. They will not prevent loss of control.<br />
To Turn ON/OFF LDP System:<br />
1 Press the LDP button on the steering wheel. The LDP system indicator<br />
light will illuminate green when Lane Departure Prevention (LDP) is ON.<br />
2 Press the LDP button again to turn OFF the system. The LDP indicator<br />
light will go out.<br />
Note:<br />
■ You can operate the Lane Departure Prevention feature while Lane Departure Warning is in Manual (OFF) mode.<br />
■ Press the LDP button, the Distance Control Assist system will also turn on or off simultaneously.<br />
■ The Lane Departure Prevention system can be individually set to on or off on the display. Refer to your vehicle<br />
<strong>Owner</strong>’s Manual.<br />
15<br />
GETTING STARTED DRIVING CONTROLS<br />
COMFORT MEDIA CENTER NAVIGATION CONVENIENCE
16<br />
Distance Control Assist<br />
(if so equipped)<br />
The Distance Control Assist (DCA) System senses your vehicle’s relative speed and distance<br />
between it and the vehicle ahead in your traveling lane. When DCA is ON, the system can provide<br />
accelerator pedal feedback (prompting the driver to remove his/her foot from the pedal)<br />
and apply automatic brake control (if his/her foot is removed from the accelerator pedal)<br />
to decelerate the vehicle and help the driver with maintaining a safe following distance.<br />
To Turn ON/OFF DCA:<br />
1 Press the DCA button on the steering wheel. The DCA system indicator light will illuminate<br />
(located on the dot matrix display between the tachometer and speedometer)<br />
when Distance Control Assist (DCA) is ON.<br />
2 Press the DCA button again to turn OFF the system. The DCA indicator light will go out.<br />
Note:<br />
■ This system is an aid in which only a portion of braking system capacity is used, and it should not be relied on to stop<br />
the vehicle or keep the vehicle stationary. It is the driver’s responsibility to always maintain vehicle braking control.<br />
■ Press the DCA button, the Lane Departure Prevention system will also turn on or off simultaneously.<br />
■ The Distance Control Assist system can be individually set to on or off on the display. Refer to your vehicle <strong>Owner</strong>’s<br />
Manual.<br />
Intelligent Brake Assist<br />
(if so equipped)<br />
The Intelligent Brake Assist (IBA) system generates visual and audible warnings when<br />
it detects that there is a risk of collision with the vehicle ahead in the traveling lane. IBA<br />
will automatically turn ON when the vehicle is started. IBA functions when your vehicle<br />
is driven at speeds of approximately 10 MPH and above and when the vehicle’s distance<br />
sensor detects your vehicle speed is approximately 10 MPH faster than that of the vehicle<br />
ahead in the travel lane. The vehicle ahead detection indicator light in the speedometer<br />
blinks and a warning chime sounds to alert the driver to take avoidance action immediately.<br />
The system measures the distance to the vehicle ahead and applies the brakes when it<br />
judges that a collision cannot be prevented to help reduce collision speed.<br />
To Turn OFF IBA:<br />
Press and hold the IBA button for more than 1 second after starting the vehicle. The<br />
indicator light (located between the tachometer and the speedometer) will illuminate.<br />
All-Wheel Drive (AWD)<br />
(if so equipped)<br />
The All-Wheel Drive (AWD) System enhances all-weather performance by supplying driving<br />
power to the front wheels (in addition to the rear wheels) in various traction conditions.<br />
Snow Mode On/Off Switch<br />
Driver-selectable “Snow Mode” helps improve low speed traction for<br />
slick weather conditions.<br />
■ Push the SNOW switch ON for slick road conditions. By reducing<br />
throttle sensitivity, drivability is enhanced. The indicator light on<br />
the switch will illuminate when Snow Mode is ON.<br />
■ Push the switch OFF for automatic AWD operation.
Rearview Monitor<br />
(if so equipped)<br />
When the transmission is in R (REVERSE),<br />
the center Display Screen will automatically<br />
change to view the area behind the vehicle.<br />
Approximate Distance to Objects:<br />
Green = 7 - 10 feet<br />
Yellow = 3 feet<br />
Red = 1.5 feet<br />
driving controls<br />
Around View Monitor (AVM)<br />
(if so equipped)<br />
The Around View Monitor (AVM) system is intended to help reduce the number of blind<br />
spots for the driver when parking the vehicle. This system provides you with an overhead<br />
360° view of other cars and objects but should be used only as a secondary means to<br />
check areas surrounding the vehicle. Different views from around the vehicle can be shown<br />
on the Information Display Screen. The Around View Monitor display consists of the left<br />
and the right screens.<br />
Operating the Around View Monitor<br />
With the ignition switch in ON mode, press the CAMERA button or move the shift lever to<br />
R (REVERSE).<br />
When the shift lever is moved to R (REVERSE),<br />
the Rear View will display on the left side of the<br />
screen. When the shift lever is moved out of<br />
R (REVERSE), the Front View will display.<br />
Note: Front View will not operate when the vehicle is traveling<br />
above 6 mph.<br />
Right Side of the Screen<br />
When the shift lever is moved to R (REVERSE), the Bird-Eye View will display on the right<br />
side of the screen.<br />
To Switch Views Displayed on the Right Side of the Screen:<br />
With the Around View Monitor ON:<br />
■ Press the CAMERA button to switch to the<br />
Front-Side View. Press the CAMERA button<br />
again to switch back to the previous screen.<br />
(While in reverse) Press CAMERA button<br />
to switch to the Front-Side View. Press the<br />
CAMERA button again to switch Bird-eye View.<br />
OR<br />
■ Select a button below on the Information Display Screen to change view.<br />
TOP (Bird-eye View), SIDE (Front-Side View) or Wide (Rear-Wide View (in reverse))<br />
then press ENTER.<br />
17<br />
GETTING STARTED DRIVING CONTROLS<br />
COMFORT MEDIA CENTER NAVIGATION CONVENIENCE
18<br />
Customizing the Around View Monitor Settings<br />
Predictive Course Lines, Camera View Priority,<br />
Color/Brightness Combination, Blind-Spot Reminder<br />
and Sensor Beep:<br />
1 With the transmission in P (PARK), apply the<br />
parking brake and push the ignition switch to<br />
ACC or ON mode. Do not start the vehicle.<br />
2 Press the SETTING button.<br />
3 Highlight Others, then press ENTER.<br />
4 Highlight Camera, then press ENTER.<br />
5 Highlight the desired function, make the desired adjustments, then press ENTER.<br />
Sonar System<br />
When a corner of the vehicle moves close to an object and this feature is turned ON, an<br />
indicator will display on the Front-Side View and Bird-eye View of the Information Display<br />
Screen and a tone will sound to warn the driver. As the vehicle moves closer to an object,<br />
the indicator color and blinking rate will change and the volume of the tone will increase.<br />
Corner Sonar Sensitivity<br />
Adjust the sensitivity level of the corner sonar on the Information Display screen, press (–)<br />
for lower or (+) for higher, then press ENTER.<br />
To Turn OFF the Warning Tone:<br />
With the Around View Monitor ON, push the SETTING button and select Sonar beep then<br />
press ENTER.<br />
OR<br />
Go to the Settings menu for Around View Monitor and select Sonar Beep then press ENTER.<br />
Notes:<br />
■ The Around View Monitor System cannot be adjusted while driving the vehicle.<br />
■ To exit the Around View Monitor screen, press any button surrounding the INFINITI Controller other than the<br />
CAMERA button.<br />
■ Guiding lines and the Bird-Eye View may be affected by the number of vehicle occupants, fuel level, vehicle<br />
position, road condition and road grade.<br />
■ Objects that are above the cameras cannot be displayed. In the Bird-Eye View, tall objects near the edge of the<br />
vehicle, such as a curb may be misaligned or not displayed at the seam of the views.<br />
■ Do not use the Around View Monitor while the outside (sideview) mirrors are folded inward.<br />
■ Keep the sonar sensors (located on the front and rear bumper fascia) free from snow, ice and accumulations of dirt.
Heater and Air Conditioner<br />
Dual Zone Automatic Temperature Control<br />
(if so equipped)<br />
To Turn ON/OFF the Temperature Controls:<br />
■ Push the AUTO knob to turn ON the system.<br />
■ Press the OFF button to turn OFF the system.<br />
Note: The Climate Control system will activate using the settings last selected.<br />
comfort<br />
The AUTO mode setting can be used year round. It allows the system to<br />
self adjust to maintain a selected temperature (automatic cooling and/or<br />
dehumidified heating). Air flow distribution and fan speed are also controlled<br />
automatically.<br />
AUTO Mode vs. DUAL Mode<br />
■ AUTO mode allows the driver to control temperature for self and<br />
front passenger.<br />
■ DUAL mode allows the driver and front-passenger control of their own<br />
cabin temperatures.<br />
Push or rotate the DUAL knob to turn ON DUAL mode. An indicator light near<br />
the DUAL knob will illuminate and the word “Dual” will display on the Information<br />
Display Screen. Push the DUAL knob again to turn OFF DUAL mode.<br />
To Change Temperature Settings:<br />
■ In AUTO mode, rotate the AUTO knob to increase or decrease the<br />
temperature and set it to the desired level. For normal automatic<br />
climate control operation, adjust the temperature to about 75˚F.<br />
■ In DUAL mode, rotate the DUAL knob to adjust the front-passenger<br />
temperature setting and rotate the AUTO knob to adjust the<br />
driver’s temperature setting.<br />
To Control Fan Speed:<br />
1 Press the Fan Speed Control buttons, + or – to manually adjust<br />
fan speed UP or DOWN. The fan speed indicator symbol on the Information<br />
Display screen will change as fan speed is increased/decreased. The<br />
mode will change from AUTO to MANUAL mode (“AUTO” no longer<br />
appears on the screen).<br />
2 Press the AUTO knob to return to automatic control of fan speed.<br />
19<br />
GETTING STARTED DRIVING CONTROLS COMFORT<br />
MEDIA CENTER NAVIGATION CONVENIENCE
20<br />
To Turn ON the Air Conditioning:<br />
Press the A/C button. The indicator light on the button will illuminate.<br />
To Turn ON the Heat:<br />
1 Press the A/C button until “A/C OFF” is displayed on the Information<br />
Display Screen and the indicator light on the A/C button turns OFF.<br />
2 Rotate the AUTO knob (in AUTO mode) or the AUTO knob and DUAL knob<br />
(in DUAL mode) to increase or decrease cabin temperature.<br />
Note: For optimum system operation, DO NOT set the inside cabin temperature lower than the outside<br />
air temperature.<br />
To Choose Fresh or Recirculated Air:<br />
Press the Fresh Air/Air Recirculation (Intake Air Control) button to select between:<br />
■ Fresh (outside) air for cooling/heating/defrosting. The indicator light<br />
under the button icon will illuminate when fresh air is selected.<br />
■ Recirculated (inside) air for maximum A/C cooling performance and to<br />
prevent unwanted outside odors from entering the vehicle. The indicator<br />
light under the button icon will illuminate when recirculated air is selected.<br />
Notes:<br />
■ On vehicles equipped with the Automatic Temperature Control system, the recirculated air mode<br />
cannot be activated when the system is set to A/C and the Front Defroster is ON.<br />
■ Extended use of recirculated air may cause the inside of the windows to fog up.<br />
■ While in AUTO mode, intake air is also controlled automatically. To manually control intake air<br />
while in AUTO mode, press the Intake Air Control button. To return to automatic control mode,<br />
press and hold down the Intake Air Control button for approximately 2 seconds. Both indicator<br />
lights on the button will flash twice. Intake air will once again be automatically controlled.<br />
To Manually Change Air Flow:<br />
Press the MODE button repeatedly to select air flow location.<br />
Air flows from center and side vents.<br />
Air flows from center, side and foot vents.<br />
Air flows mainly from foot outlets.<br />
Air flows from the front defroster and foot outlets.<br />
Note: The air flow indicator symbols will illuminate on the Information Display screen.<br />
To Turn ON/OFF the Front Defroster:<br />
1 Press the Front Window Defroster button to turn it ON. The indicator<br />
light on the button will illuminate.<br />
Notes:<br />
■ Pressing the Front Window Defroster button provides the best possible defrost action. This is the<br />
preferred method for quickly defrosting the window (rather than choosing the front defroster and<br />
foot outlets in Manual Air Flow control mode, which is less efficient).<br />
■ When you press this button, you may hear a click noise from the engine area. This is normal. The<br />
Air Conditioner compressor is being activated. With the A/C ON, moisture is pulled from the air, helping<br />
to defrost the inside of the windows more quickly.<br />
2 Rotate the AUTO knob to set the desired temperature.<br />
3 Press the + Fan Speed Control button + to set fan speed to maximum.<br />
4 Press the Front Window Defroster button again to turn it OFF, or press the<br />
AUTO knob to return to AUTO mode.
Heated Front Seats<br />
(if so equipped)<br />
To Turn ON/OFF the Rear Defroster:<br />
1 Press the Rear Window Defroster button<br />
light on the button will illuminate.<br />
comfort<br />
to turn it ON. The indicator<br />
2 Press the button again to turn it OFF. Or, it will turn OFF automatically after<br />
approximately 15 minutes.<br />
To Turn ON/OFF or to Adjust the Driver’s or Front-Passenger’s<br />
Heated Seats:<br />
■ For high heat, turn the dial to the right. For low heat,<br />
turn the dial to the left. The indicator light will illuminate.<br />
■ To turn OFF the heater, turn the dial all the way to the left. The indicator light on<br />
the control dial will go out when the heater is OFF.<br />
21<br />
GETTING STARTED DRIVING CONTROLS COMFORT<br />
MEDIA CENTER NAVIGATION CONVENIENCE
22<br />
AUDIO SYSTEM<br />
AM•FM•SAT Radio with<br />
Compact Disc (CD) Player<br />
Note: No satellite radio reception<br />
is available and no SAT-related<br />
information will be displayed<br />
when the RADIO AM·FM Button/<br />
AM•FM·SAT Button is pressed<br />
unless an XM ® satellite radio<br />
service subscription is active.<br />
RADIO AM•FM<br />
AUX<br />
RADIO AM•FM Button (for vehicles without the INFINITI Navigation system)<br />
Press to change radio bands: AM -> FM1 -> FM2 -> XM1 -> XM2 -> XM3 -> AM, etc.<br />
(requires an active XM ® satellite radio subscription)<br />
AM•FM•SAT Button (for vehicles with the INFINITI Navigation system)<br />
Press to change radio bands: AM -> FM1 -> FM2 -> XM1 -> XM2 -> XM3 -> AM, etc.<br />
(requires an active XM ® satellite radio subscription)<br />
AUX Button (for vehicles without the INFINITI Navigation system)<br />
While an external device such as a portable DVD player is being used to play<br />
movies in the vehicle (by connecting to the auxiliary jacks, located in the center<br />
console), press this button to switch the movie to the Information Display Screen.<br />
Note: The vehicle must be stopped and the parking brake set. Individual settings for playback can be<br />
made by selecting Settings on the Information Display Screen.<br />
DISC Button (for vehicles without the INFINITI Navigation system)<br />
Press to activate and display the following modes:<br />
■ iPod ® (if so equipped and if a compatible device is connected)<br />
■ Audio CD or CD with MP3/WMA/AAC in the in-dash CD player (if a disc is<br />
loaded in the CD player)<br />
■ USB Memory<br />
DISC•AUX Button (for vehicles with the INFINITI Navigation system)<br />
Press to activate, display and play:<br />
■ Audio CD or CD with MP3/WMA/AAC in the in-dash CD player (if a disc is<br />
loaded in the CD player)<br />
■ DVD (if so equipped)<br />
■ AUX (if an external device is connected)<br />
■ iPod ® (if a compatible device is connected)<br />
■ Music Box (if songs are stored)<br />
■ USB Memory<br />
■ Bluetooth ® Streaming Audio (if a compatible device is connected)<br />
Note: To view movies on the vehicle’s Information Display Screen, the transmission must be in P (PARK)<br />
with the parking brake applied, and the ignition switch in ACC or ON mode. Press the DISC AUX button<br />
on the instrument panel to display the movie.<br />
STATUS Button<br />
Press to display different views of vehicle systems information on the<br />
Information Display Screen for example:<br />
■ Audio<br />
Note: If you are listening to a Satellite Radio channel, when you press the STATUS button you will be able to view<br />
information about the music playing, including; SAT Channel name/music genre, artist and song title.
7<br />
1<br />
■ Audio and Heater/Air Conditioning information<br />
■ Audio and Fuel Consumption<br />
media center<br />
■ Audio and Navigation information (if equipped with the INFINITI Navigation system<br />
and if a destination has been set)<br />
1 VOL (VOLUME)/PUSH ON·OFF Knob<br />
■ Push 1 to turn the audio system ON/OFF.<br />
■ Turn 1 to adjust volume level.<br />
2 SCAN Button<br />
For Radio:<br />
Press to scan within a band (AM, FM, SAT). The scan stops at each station<br />
for 5 seconds. When you find a station that you want to listen to, press<br />
the button again to stop at that station.<br />
3 RDM/RPT Button<br />
Press the RDM/RPT button multiple times to change the play pattern as<br />
shown to the right.<br />
1 DISC<br />
RPT<br />
2<br />
3 5<br />
6<br />
8<br />
4<br />
9<br />
23<br />
GETTING STARTED DRIVING CONTROLS COMFORT MEDIA CENTER<br />
NAVIGATION CONVENIENCE
24<br />
RADIO AM•FM<br />
4 SEEK•CAT Button<br />
Press and release –<br />
■ For AM/FM: Seeks BACKWARD, stopping at the previous<br />
broadcasting station.<br />
■ For SAT: Push to tune to the previous XM ® Satellite radio category.<br />
■ For Audio CD, CD/with MP3/WMA/AAC, USB, Music Box TM and<br />
Bluetooth ® Streaming Audio: The track currently playing will replay<br />
from the beginning.<br />
Press and hold down for more than 1.5 seconds –<br />
■ For Audio CD, CD/with MP3/WMA/AAC, USB, Music Box TM and Bluetooth ®<br />
Streaming Audio: Rewinds through the track currently playing.<br />
5 TRACK Button<br />
Press and release –<br />
■ For AM/FM: Tracks FORWARD, stopping at the next broadcasting<br />
station.<br />
■ For SAT: Push to tune to the first channel of the next XM ® Satellite<br />
radio category.<br />
■ For Audio CD, CD/with MP3/WMA/AAC, USB, Music Box TM and<br />
Bluetooth ® Streaming Audio: Skips to the next track.<br />
Press and hold down for more than 1.5 seconds –<br />
■ For Audio CD, CD/with MP3/WMA/AAC, USB, Music Box TM and<br />
Bluetooth ® Streaming Audio: Fast-forwards through the track<br />
currently playing.<br />
6 Station Preset Buttons (1-6)<br />
Press to select preset radio stations.<br />
7 CD Eject Button<br />
■ Press the button to eject the CD.<br />
8 CD Insert Slot<br />
■ Insert a CD into the slot to load it into the player.<br />
9 TUNE/FOLDER·PUSH/AUDIO Knob<br />
■ Rotate to manually tune radio stations UP or DOWN (e.g. tune from<br />
105.1 to 105.3).<br />
■ Rotate to select different Music Box TM songs by artist, category, etc., or<br />
to select MP3/WMA/AAC folders if a CD with MP3/WMA/AAC is in the<br />
CD player.<br />
■ Push to display, then turn to adjust: Bass, Treble, Balance and Fade.<br />
Note: When an iPod ® is connected and a track is playing, turn the TUNE/FOLDER•PUSH/AUDIO knob to<br />
adjust Bass, Treble, Balance and Fade.<br />
How to Customize Radio Presets<br />
With the SCAN button, you can program up to 18 radio stations (AM, FM and SAT*)<br />
into three separate preset memory banks – six stations for each PRESET bank.<br />
1 Press the SCAN button to select bank A, B or C.<br />
Note: PRESET A, B or C will illuminate on the Information Display screen to show which bank<br />
is activated.<br />
2 Press the RADIO AM•FM button/AM•FM•SAT button to select the AM, FM<br />
or SAT* radio band.
media center<br />
3 Tune to the desired station using the SEEK•CAT or TRACK buttons or the<br />
TUNE/FOLDER•PUSH/AUDIO knob.<br />
4 Press and hold down the desired Station Preset/Disc Select button<br />
(1 through 6) until you hear a beep sound.<br />
5 Repeat the above steps to program up to 18 stations.<br />
Note: AM, FM and SAT* stations can be mixed within any of the A, B or C preset banks. *Only available<br />
if an XM ® satellite radio service subscription is active.<br />
How to Customize Tone Settings<br />
Bass, Treble, Balance, Fade, Speed Sensitive Volume,<br />
Precision Phased Audio and Driver’s Audio Stage<br />
(if so equipped)<br />
1 Press the SETTING button .<br />
2 Select the “Audio” Key.<br />
3 Select the feature to be adjusted using the touch<br />
screen or INFINITI Controller.<br />
Music Box <br />
(for vehicles with the INFINITI Navigation system)<br />
The Music Box Hard Drive audio system can record and store songs from a CD being<br />
played from the in-dash CD player. Refer to Audio System, beginning on page 22, and<br />
Steering Wheel Controls, beginning on page 11, to view audio system button functions<br />
applicable to Music Box operation.<br />
To Record a CD to the Hard Drive:<br />
1 Operate the audio system to play a CD.<br />
2 Select the “Start Rec” or “Rec” Key.<br />
To Automatically Record Songs to the Hard Drive:<br />
If the “Automatic Recording” function is turned ON, recording starts when a CD is inserted<br />
and playing in the CD player.<br />
1 Press the DISC•AUX button until the Music Box mode displays on the Information<br />
Display Screen.<br />
2 Select the “Menu” Key.<br />
3 Select the “Music Box Setting Info.”<br />
4 Select the “Music Box Settings” Key.<br />
5 Select the “Automatic Recording” Key.<br />
To Play Recorded Songs :<br />
Activate the Music Box system by using one of the following methods:<br />
1 Push the Source select switch on the steering wheel.<br />
2 Push the DISC•AUX or DISC button until the Music Box mode displays on the Information<br />
Display screen.<br />
3 Give the “Music Box Play” voice command using the INFINITI Voice Recognition system.<br />
25<br />
GETTING STARTED DRIVING CONTROLS COMFORT MEDIA CENTER<br />
NAVIGATION CONVENIENCE
26<br />
To Stop Playback:<br />
The Music Box system stops playing when:<br />
1 Another mode (radio, CD, USB or AUX) is selected.<br />
2 The audio system is turned OFF.<br />
3 The ignition switch is pushed to the LOCK (OFF) mode.<br />
4 The SEEK•CAT or TRACK button is pushed for more than 1.5 seconds while a track is<br />
being played. When the button is released, the track will return to normal play speed.<br />
5 The SEEK•CAT or TRACK button is pushed for less than 1.5 seconds while a track is<br />
being played, (the next track or the beginning of the current track will be played).<br />
Missing Song Information:<br />
If the track, artist and album information is not displayed while using the Music Box TM ,<br />
they may be available through an update. Visit www.<strong>Infiniti</strong>USA.com/music-update for<br />
complete instructions.<br />
USB Memory Operation<br />
■ The USB input jack is located in the center console. Remove the protective cover<br />
from the USB jack, then insert the USB device into the jack. When a compatible<br />
storage device is plugged into the jack, such as an iPod ® , compatible audio files on<br />
the storage device can be played through the vehicle’s audio system.<br />
■ Press the DISC•AUX button to switch to the USB memory mode. Depending on how<br />
the audio files are encoded, information about the audio files (Folder, Song, Artist,<br />
Track Number and Number of Total Tracks in the Folder) being played will be shown<br />
on the display screen of the vehicle.<br />
Playing an iPod ®<br />
Connect the cable that is supplied with your iPod ® to the USB jack, and then attach the<br />
other end of the cable to your iPod ® . If compatible, the battery of your iPod ® will charge<br />
during the connection to the vehicle.<br />
The interface for iPod ® operation shown on the vehicle’s display screen is similar to the iPod ®<br />
interface. The iPod ® can only be operated by the vehicle audio controls while connected.<br />
Notes:<br />
■ The iPod ® can be operated only through the vehicle audio system and steering wheel controls while the iPod ® is<br />
connected to the vehicle.<br />
■ The battery of your iPod ® will charge when the connection is active and the ignition switch is in ON or ACC mode.<br />
■ You can view videos on the Information Display screen by disconnecting the interface system cable and connecting<br />
an A/V cable from your iPod ® to the auxiliary input jacks located inside the center console. The transmission must<br />
be in P (PARK) with the parking brake engaged to view images on the Information Display screen.<br />
Bluetooth ® Streaming Audio (for vehicles with INFINITI Navigation system)<br />
Your INFINITI is equipped with Bluetooth ® Streaming Audio. If you have a compatible<br />
Bluetooth ® device with streaming audio you can set up a wireless connection between your<br />
Bluetooth ® device and the in-vehicle audio system. This connection allows you to listen to<br />
the audio from the Bluetooth ® device using your vehicle speakers.<br />
Connecting Procedure<br />
1 Push the button and select the “Bluetooth” key.<br />
2 Select the “Connect Bluetooth” key.
3 A confirmation screen will be displayed. Select “No.”<br />
4 Choose a PIN code and select the “OK” key.<br />
Bluetooth ® Hands-free Phone System with Navigation<br />
(if so equipped)<br />
media center<br />
5 The standby message screen will appear. Enter the PIN code into the Bluetooth ® audio<br />
device. When the connecting is completed, the screen will return to the Bluetooth ®<br />
setup display.<br />
With an overhead microphone and sound transmitted through the audio system speakers,<br />
the Bluetooth ® Hands-free Phone System utilizes Bluetooth ® wireless technology, a touchscreen<br />
and voice recognition to provide hands-free cellular phone communication.<br />
System Operation Tips<br />
■ Close all windows. Surrounding noises may interfere with system operation and performance.<br />
■ Press the button on the steering wheel to activate voice recognition.<br />
■ Wait for the “Would you like to access Phone, Navigation, Information, Audio or Help?”<br />
prompt and the listening tone before speaking.<br />
■ Begin speaking a command within 1.5 seconds of the listening tone.<br />
■ To cancel a voice recognition session, press and hold the button for 2 seconds.<br />
■ To increase or decrease the volume of the voice prompts, push the + or – (volume) control<br />
switch on the steering wheel or turn the VOL (volume) knob on the audio system while the<br />
system is responding.<br />
■ Speak in a clear and natural voice without pausing between words.<br />
■ The “Help” command will bring up the voice recognition command list.<br />
■ Please refer to the cellular phone manufacturer’s <strong>Owner</strong>’s Manual for detailed information<br />
regarding your Bluetooth ® phone.<br />
■ For recommended phones and detailed instructions, please visit<br />
www.<strong>Infiniti</strong>USA.com/bluetooth.<br />
Connecting Your Phone<br />
Before using the hands-free feature, you need to set up, or<br />
connect, the system to recognize your compatible cellular<br />
phone(s). Five compatible Bluetooth ® -enabled phones<br />
can be connected. After setup, the system automatically<br />
connects with a connected phone when the ignition is in<br />
the ACC or ON position, as long as the phone is on and in<br />
the vehicle.<br />
Connecting Procedure<br />
NOTE: The vehicle must be stationary when connecting the phone.<br />
1 Press the SETTING button and select the “Bluetooth” key.<br />
2 Select the “Connect Bluetooth” key and a pop up box will appear.<br />
3 Read the information and select “Yes.”<br />
27<br />
GETTING STARTED DRIVING CONTROLS COMFORT MEDIA CENTER<br />
NAVIGATION CONVENIENCE
28<br />
4 Initiate connecting from the phone.<br />
■ The connecting procedure for cellular phones varies according to each cellular phone<br />
model. For detailed connecting instructions and compatible phones, please visit<br />
www.<strong>Infiniti</strong>USA.com/bluetooth.<br />
■ The PIN code will appear on the screen (1234 is the default).<br />
5 When the connecting is complete, the screen will return to the Bluetooth ® screen.<br />
Setting Up Your Phonebook - Adding New Entries<br />
Up to 40 phone numbers can be stored in the phonebook.<br />
NOTE: The vehicle must be stationary when adding new entries.<br />
1 Press the SETTING button and select the “Phone” key,<br />
then select the “Vehicle Phonebook” key.<br />
2 Select the “Add New” key at the top of the display.<br />
There are different methods to input a phone number.<br />
Select one of the following options:<br />
■ “Copy from Call History” to save a number from<br />
the Outgoing, Incoming or Missed Calls lists.<br />
■ “Copy from the Handset” to save a number that has<br />
been downloaded from your handset to the vehicle.<br />
■ “Enter Number by Keypad” to input the number<br />
and name manually.<br />
Many phones will support an automatic download of the cellular phone’s phonebook. This<br />
process may take up to 5 minutes depending on the size of your phonebook. Once the<br />
phonebook is downloaded, selecting “Handset Phonebook” will allow you to access your<br />
downloaded phonebook (up to 1,000 entries) instead of using the “Vehicle Phonebook” key.<br />
Making a Phone Call<br />
To make a call, follow the procedures below:<br />
1 Press the button on the steering wheel. The<br />
“Phone” screen will appear on the display.<br />
2 Select “Vehicle Phonebook,” “Call History” or<br />
“Handset Phonebook.”<br />
3 Select the registered person’s name from the list. Dialing will start.<br />
Receiving/Ending a Phone Call<br />
■ There are no voice commands for receiving or ending<br />
a phone call.<br />
■ To accept the call, press the button on the steering<br />
wheel or select the “Answer” key. To reject the call,<br />
select the “Reject Call” key. To hang-up, press the<br />
button or select the “Hang-Up” key.<br />
■ Pressing the button during a connected phone call will allow you to send digits and<br />
special characters. After speaking the desired digits, press the ENTER button to send<br />
the recognized information.
Bluetooth ® System for Vehicles without Navigation<br />
(if so equipped)<br />
media center<br />
How To Say Numbers<br />
The system provides two commands for entering and dialing a phone number: “DIAL” and<br />
“INTERNATIONAL CALL.” The “DIAL” command is used for domestic phone numbers up to<br />
10-digits in length, starting with the area code. The “INTERNATIONAL CALL” command is used<br />
when more than 10-digits need to be dialed or when special characters are required, such as: *,<br />
# or +. When using these two commands, please follow the phone digit speaking rules below:<br />
■ Only single digits 0 (zero) to 9 (nine) can be spoken.<br />
■ When saying the phone number 800-662-6200, the system will accept “eight hundred”<br />
in addition to “eight zero zero” or “eight oh oh.” 500, 700 and 900 are also supported.<br />
■ The long-distance calling prefix “1” is not required when making a call.<br />
“Dial” Command Only<br />
■ You can say all the digits of a 7- or 10-digit phone number at one time.<br />
■ For a 10-digit number, saying the phone number in groups of 3, 3 and 4 digits may<br />
improve recognition for some speakers. To use this group dialing method, say only the<br />
first 3 digits of the phone number. After the system recognizes the number, it will<br />
request the next 3 digits and finally the last 4 digits.<br />
■ If a phone number is incorrectly recognized, you can try entering the phone number<br />
again using the 3-3-4 group dialing procedure by saying, “CHANGE NUMBER.”<br />
"International Call" Command Only<br />
■ You can say the entire phone number at once or in groups of any digit length.<br />
■ For *, # and +, say “star,” “pound” or “plus,” respectively.<br />
With an overhead microphone and sound transmitted through the audio system speakers,<br />
the Bluetooth ® Hands-free Phone System utilizes Bluetooth ® wireless technology and voice<br />
recognition to provide hands-free cellular phone communication.<br />
System Operating Tips<br />
■ Close all windows. Surrounding noises may interfere with system operation and<br />
performance.<br />
■ Press the button on the steering wheel to activate voice recognition.<br />
■ Wait for the tone before speaking.<br />
■ Begin speaking a command within 5 seconds of the tone.<br />
■ Speak in a clear and natural voice without pausing between words.<br />
■ To go back to the previous command, say “Go back” or “Correction.”<br />
■ To cancel a voice recognition session, simply wait 5 seconds, say “Cancel” or “Quit,”<br />
or press the button.<br />
■ To increase or decrease the volume of the voice prompts, push the VOL (volume) control<br />
switch + or – on the steering wheel or turn the POWER/VOLUME knob on the audio<br />
system while the system is responding.<br />
■ If the Voice Recognition system does not recognize your voice commands, train the system<br />
using the Speaker Adaptation Mode. See your <strong>Owner</strong>’s Manual for detailed information.<br />
29<br />
GETTING STARTED DRIVING CONTROLS COMFORT MEDIA CENTER<br />
NAVIGATION CONVENIENCE
30<br />
■ Some commands are not available while the vehicle is in motion.<br />
■ The “Help” command can be used in any menu to hear a list of available commands.<br />
■ Please refer to the cellular phone manufacturer’s <strong>Owner</strong>’s Manual for detailed information<br />
regarding your Bluetooth ® phone.<br />
■ For recommended phones and detailed instructions, please visit<br />
www.<strong>Infiniti</strong>USA.com/bluetooth.<br />
Connecting Your Phone<br />
To use the hands-free feature, you need to set up, or connect, the system to recognize your<br />
cellular phone(s). Five compatible Bluetooth ® -enabled phones can be connected. After<br />
setup, the system automatically connects with a connected phone when the ignition is in the<br />
ACC or ON position, as long as the phone is on and in the vehicle.<br />
NOTE: Some cellular phones require the user to enable the automatic reconnection feature. Please refer to the cellular phone<br />
manufacturer’s <strong>Owner</strong>’s Manual for Bluetooth ® setup information.<br />
Connecting Procedure<br />
NOTE: The vehicle must be stationary when connecting the phone.<br />
1 Press the<br />
commands.<br />
button on the steering wheel. The system announces the available<br />
2 Say “Connect Phone.”<br />
3 The system acknowledges the previous command and announces the next set of available<br />
commands. Say “Add phone.”<br />
4 Initiate connecting from the phone.<br />
■ The connecting procedure varies according to each cellular phone model. For detailed<br />
connecting instructions and a list of compatible phones, please visit<br />
www.<strong>Infiniti</strong>USA.com/bluetooth.<br />
■ When prompted for a Passkey code, enter “1234” from the handset. (The Passkey<br />
code is assigned by NISSAN and cannot be changed.)<br />
5 Say a name for the phone when the system asks you to provide one. You can give the<br />
phone a name of your choice.<br />
Making a Phone Call<br />
1 Press the button.<br />
2 After the tone, do one of the following:<br />
■ Say “Call.” After the system responds, say the name of the person in the phonebook.<br />
■ Say “Call Phone Number.” After waiting for the tone, say [number]. For example, say<br />
“Call Phone Number.” After waiting for the tone, say “123-456-7891.”<br />
■ Say “Redial” to redial the previous phone number.<br />
■ Say “Call Phone Number.” After the system responds, say “Special Number” to dial<br />
more than 10 digits or special characters.<br />
■ You can say all the digits of a 7- or 10-digit phone number at one time.<br />
■ For a 10-digit number, saying the phone number in groups of 3, 3 and 4 digits may<br />
improve recognition for some speakers. To use this group dialing method, say only<br />
the first 3 digits of the phone number. After the system recognizes the number, it will<br />
request the next 3 digits and finally the last 4 digits.
media center<br />
■ If a phone number is incorrectly recognized, you can try entering the phone number<br />
again using the 3–3–4 group dialing procedure by saying “Correction.”<br />
■ When you have finished speaking the phone number wait for the system to repeat<br />
it back to you, then say “Dial.”<br />
Receiving/Ending a Phone Call<br />
When you receive a phone call, a ring tone sounds through the audio system.<br />
■ To accept the call, press the button. To reject the call, press the button.<br />
■ To hang up the phone at the end of a call or to disconnect during call placement,<br />
press the button.<br />
How To Say Numbers<br />
INFINITI voice recognition permits numbers to be spoken in a variety of ways.<br />
■ Say “zero” or “oh” for “0.” Example: 1-800-662-6200 – Say “one eight zero zero six<br />
six two six two oh oh.”<br />
■ Say “pound” for “#.” Say “star” for “*” (available when using the “Call Phone Number”<br />
then “Special Number” command and the “Send” command during a call).<br />
■ Say “plus” for “+” (available only when using the “Call Phone Number” then “Special<br />
Number” command).<br />
■ Say “pause” for a 2-second pause.<br />
Using Your Phonebook<br />
When a compatible phone is connected to the system, the phonebook is automatically<br />
downloaded. This allows you to access your phonebook from the Bluetooth ® system to call<br />
contacts by name. Up to 1,000 phone numbers will be transferred. To access your phonebook:<br />
1 Press the button and wait for the tone.<br />
2 Say “Phonebook.”<br />
3 Wait for the tone, then say [a name] or say “List names.” The name must be said exactly<br />
as it is entered in your phonebook for the system to recognize it. For example, say<br />
“Phonebook” then after the system responds, say “Michelle.”<br />
The phonebook can transfer multiple numbers for each entry. If you select a name with<br />
multiple numbers, the system will ask you which number you want to dial.<br />
The system allows for up to 40 voice tags to be recorded. You can record a voice tag for<br />
phonebook entries that the system has difficulty recognizing or to directly dial an entry with<br />
multiple numbers. To record a voice tag:<br />
1 Press the button and wait for the tone.<br />
2 Say “Phonebook.”<br />
3 Wait for the tone, then say [a name] or say “List names.” Select the name for which you<br />
want to record a voice tag.<br />
4 Say “Record Name.”<br />
31<br />
GETTING STARTED DRIVING CONTROLS COMFORT MEDIA CENTER<br />
NAVIGATION CONVENIENCE
32<br />
2<br />
3<br />
INFINITI Navigation System<br />
(if so equipped)<br />
5<br />
6<br />
4<br />
11<br />
10<br />
7<br />
8 12<br />
Refer to the <strong>2010</strong> INFINITI Navigation System <strong>Owner</strong>’s Manual for complete Navigation system operation instructions.<br />
Note: The Navigation Mapping information currently installed in your vehicle is downloaded to the vehicle’s hard drive.<br />
To order updated map data, contact the INFINTI NAVIGATION HELP DESK.<br />
1 Information Display Screen – Displays Navigation menus and Map.<br />
2 ZOOM OUT Button – Increases the Map view, showing more area.<br />
3 ZOOM IN Button – Decreases the Map view, showing greater detail.<br />
4 DEST (Destination) Button – Displays the Address Book and alternative<br />
ways to program a destination (e.g. Street Address, Previous Destinations,<br />
Points of Interest and other destination programming methods).<br />
5 ROUTE Button – Displays route guidance control functions.<br />
6 MAP Button – Displays the Navigation Map.<br />
7 ENTER Button – Press to select menu items highlighted on the Information<br />
Display Screen.<br />
8 Center Dial – Turn the dial to navigate UP, DOWN and ACROSS the Information<br />
Display Screen. When a Map is displayed, turn the dial to ZOOM OUT and<br />
ZOOM IN.<br />
9 Main Directional Buttons – Press to navigate UP, DOWN and ACROSS the<br />
Information Display Screen.<br />
10 Additional Directional Buttons – Depending on which map is displayed<br />
(Plan View or Birdview ), use these buttons to make “fine tuned” movements<br />
around the Information Display Screen.<br />
11 BACK Button – Press to return to the previous function shown on the Information<br />
Display Screen and to delete characters when using the on-screen keyboard.<br />
12 VOICE Button – Press to repeat a Navigation instruction.<br />
13 STATUS Button – Press to display the status of the audio, climate control<br />
system, fuel consumption and Navigation system (if so equipped).<br />
14 SETTING Button – Press to set Navigation preferences.<br />
+<br />
15 INCREASE BRIGHTNESS Button – Press to increase the Information Display<br />
Screen brightness.<br />
9<br />
1<br />
13<br />
14<br />
15<br />
16<br />
17
—<br />
16 DAY/NIGHT/OFF/BRIGHTNESS Button –<br />
navigation<br />
■ Press to switch the Information Display Screen between day view and<br />
night view. Within approximately 5 seconds of pressing, you can adjust<br />
the Information Display Screen brightness UP or DOWN by turning<br />
the INFINITI Controller Center Dial or pressing the LEFT/RIGHT Main<br />
Directional buttons.<br />
■ Press and hold down to turn the display OFF entirely. To resume display,<br />
press again.<br />
17 DECREASE BRIGHTNESS Button – Press to decrease the Information<br />
Display Screen brightness.<br />
Switching The Map View<br />
1 Press the MAP button. The current<br />
location map screen is displayed.<br />
2 Select the “Map Menu” key.<br />
3 Select the “Map View” key.<br />
4 Select the “Change View” key.<br />
5 Select either one of the “2D” keys or one of<br />
the “Birdview” keys to select the map view.<br />
Press the MAP button or select the “Back”<br />
key to accept the changes.<br />
Storing Your Home (and Other Addresses)<br />
In Your Address Book<br />
1 Press the DEST button.<br />
2 Select the “Home (Add New)” key. If you have<br />
already stored your home this key may not appear.<br />
3 When you select the “Home (Add New)” key,<br />
a confirmation message is displayed. Touch<br />
the “Yes” key.<br />
4 Select the “Street Address” key. A character<br />
input screen is displayed.<br />
5 Enter the street number of your home, then<br />
select the “OK” key.<br />
6 Enter your street name, select the “List” key.<br />
Select a destination from the displayed list.<br />
The map screen is displayed.<br />
7 Your home location is displayed at the center<br />
of the map. Press the ENTER button to<br />
confirm the location on the map.<br />
8 A confirmation message is displayed, and the<br />
system sets your home as the destination.<br />
Select the “OK” key.<br />
9 Press the MAP button to return to the current<br />
location map screen.<br />
33<br />
GETTING STARTED DRIVING CONTROLS COMFORT MEDIA CENTER NAVIGATION<br />
CONVENIENCE
34<br />
Store Current Location<br />
You can store the current physical location of your<br />
vehicle in your Address Book.<br />
1 While the map screen is displayed, Press ENTER.<br />
2 Highlight Store Location, then press ENTER.<br />
A confirmation message will appear,<br />
confirming that the location has been stored to<br />
your Address Book. The location will need stored<br />
in the first available position in your Address<br />
Book and an icon representing the stored location is displayed in the map.<br />
3 Press the MAP button or select the “Back” key to return to the Map screen.<br />
Setting A Street Address As A Destination<br />
1 Press the DEST button.<br />
2 Select the “Street Address” key. A character<br />
input screen is displayed.<br />
3 Enter the house number; when finished select<br />
the “OK” key. If you do not know the house<br />
number, select the “No House #” key.<br />
4 Enter the name of the street. After finishing<br />
the entry, select the “List” key. A list of<br />
possible street addresses is displayed.<br />
5 Select the correct address of the destination<br />
from the list. You might need to select the<br />
“Up” or “Down” key to find the preferred<br />
street address key.<br />
6 The selected destination will be briefly<br />
displayed before showing the entire route. Touch the “Start” key after confirming the<br />
displayed route is acceptable. The voice guidance will begin shortly.<br />
Moving Around Within A Map<br />
You can manually move across the map to view the surrounding area or to view a preferred location.<br />
1 Touch the screen in the direction that you want to move across the map. Once you begin<br />
moving on the map, the cross pointer appears.<br />
2 Press the MAP button or touch the “Back” key to return to the current location map<br />
screen. The cross pointer disappears.<br />
Setting A Place As A Destination<br />
1 Press the DEST button.<br />
2 Select the “Places” key.
3 Select the preferred nearby category from<br />
the list.<br />
4 Select the preferred destination from the<br />
list. The position of the selected location is<br />
displayed on the right side of the screen.<br />
NOTE: A maximum of 100 facilities can be displayed on the list screen.<br />
If the suggested route is already set, by selecting the “Show Along<br />
Route” key, the system displays only the facilities located along the route.<br />
5 The selected destination will be briefly<br />
displayed before showing the entire route.<br />
Select the “Start” key after confirming the<br />
displayed route is acceptable. The voice<br />
guidance will begin shortly.<br />
navigation<br />
Zagat ® Restaurant <strong>Guide</strong><br />
ZAGAT ® Restaurant <strong>Guide</strong> allows you to search<br />
restaurants registered in the ZAGAT ® database. The<br />
restaurants can be sorted by rating regarding food,<br />
decor, cost, service, etc. To search using ZAGAT ® :<br />
1 Press the DEST button.<br />
2 Select the “Places” key.<br />
3 Select the “Zagat” key.<br />
4 Select the desired state. Change the region before step 2 if needed.<br />
5 Select a neighborhood closest to your preferred destination.<br />
6 Select a restaurant to narrow down the cuisine type or select the “Choose name” key.<br />
7 Select an order to sort the list.<br />
8 Select a restaurant from the list.<br />
9 After confirming the route, select the “Start” key to begin the route guidance.<br />
XM NavWeather ® Information<br />
An XM ® satellite radio subscription with XM NavWeather ® has to be activated in order for<br />
your vehicle to access XM NavWeather ® Information.<br />
35<br />
GETTING STARTED DRIVING CONTROLS COMFORT MEDIA CENTER NAVIGATION<br />
CONVENIENCE
36<br />
INFINITI Voice Recognition System<br />
(for vehicles with the INFINITI Navigation system)<br />
The voice recognition system allows hands-free operation of certain vehicle functions using<br />
voice commands. Available commands are announced by the system and shown on the<br />
vehicle’s Information Display Screen. Simply follow the instructional prompts given by the<br />
system to complete the desired operation.<br />
In Standard Mode (the default setting), the following<br />
systems can be operated using Voice Recognition<br />
commands:<br />
■ Phone<br />
■ Navigation<br />
■ Information<br />
■ Audio<br />
■ Help<br />
When the Alternate Command Mode is activated, advanced operation and an expanded list<br />
of commands are available. Refer to “Alternate Command Mode” later in this section for<br />
more information about this feature.<br />
To Operate the Voice Recognition System:<br />
1 Press the TALK button located on the steering wheel. The system will respond,<br />
“Would you like to access Phone, Navigation, Information, Audio or Help?” and the<br />
vehicle’s Information Display Screen will change to a list of available commands to<br />
speak.<br />
2 After the tone, say one of the command choices. The system will then proceed to the<br />
next step. Continue listening to the prompts and responding with the requested<br />
information until the operation is completed.<br />
If you want to repeat a step or if the system incorrectly recognized your command, press<br />
the BACK button on the steering wheel or on the INFINITI Controller.<br />
If the system does not recognize your command, repeat the command. Avoid talking<br />
extremely loud or slowly; the system may not recognize the command.<br />
System Operating Tips<br />
■ The interior of the vehicle should be as quiet as possible. Close the windows to eliminate<br />
the surrounding noises.<br />
■ Wait until the tone sounds before speaking a command.<br />
■ Speak in a natural conversational voice with minimal pauses between words.<br />
■ To give commands quickly, press the switch to interrupt the voice guidance.<br />
■ When speaking an address or a phone number to dial, it is possible to transfer from<br />
voice recognition to the button control by pressing the “Manual Controls” key on the<br />
screen when it is displayed.
convenience<br />
Speaking Phone Numbers<br />
The system provides two commands for entering and dialing a phone number: “DIAL” and<br />
“INTERNATIONAL CALL.” The “DIAL” command is used for domestic phone numbers up to 10<br />
digits in length starting with the area code. The “INTERNATIONAL CALL” command is used<br />
when more than 10 digits need to be dialed or when special characters are required such as *,<br />
#, or +. When using these two commands, please follow the phone digit speaking rules below:<br />
■ Only single digits 0 (zero) to 9 (nine) can be spoken.<br />
■ Speak digits at a normal pace. Speaking too slowly reduces recognition accuracy.<br />
■ When saying the phone number 800-662-6200, the system will accept “eight zero zero”<br />
or “eight oh oh.” 500, 700, and 900 are also supported. The 3-3-4 digit grouping is<br />
recommended for improved recognition.<br />
■ The long-distance dialing prefix “1” is not required when making a call.<br />
■ For *, # and +, say “Star,” “Pound,” or “Plus,” respectively.<br />
Voice Recognition User <strong>Guide</strong><br />
A simplified User <strong>Guide</strong> containing basic instructions<br />
for using the Voice Recognition system is<br />
available for reference.<br />
1 Press the INFO button.<br />
2 Highlight Others, then press ENTER.<br />
3 Highlight Voice Recognition, then press ENTER.<br />
4 Highlight User <strong>Guide</strong>, then press ENTER.<br />
5 Highlight the desired topic, the press ENTER. The tutorial will begin.<br />
Voice Command Usage – Phone System<br />
Making a Phone Call<br />
1 Press the TALK button on the steering<br />
wheel. The system will respond, “Would you<br />
like to access Phone, Navigation, Informtion,<br />
Audio or Help?” and the vehicle’s<br />
Information Display Screen will change to<br />
a list of available commands to speak.<br />
2 After the tone, say “Phone.” The system will<br />
display the available phone commands and<br />
say “Please say Dial Number, Vehicle Phonebook, Handset Phonebook, Call History or<br />
International Call.”<br />
3 After the tone, do one of the following:<br />
■ Say “Dial Number” to dial a 7- or 10- digit phone number only. Follow the prompts to<br />
begin saying the phone number, starting with the area code. After the phone<br />
number has been recognized, say “Dial.” If incorrect, say “Change Number.”<br />
■ Say “Vehicle Phonebook” to say a number from the displayed list or the voice tag of<br />
one of up to 40 phone numbers you have stored in the vehicle.<br />
■ Say “Handset Phonebook” to say the name of one of up to 1,000 contacts<br />
downloaded from your phone handset. (Note: The order of contact information<br />
(first name, last name) transferred depends on the phone manufacturer. The name<br />
must be spoken as shown in the Handset Phonebook list.)<br />
■ Say “International Call” to dial a phone number that has more than 10 digits.<br />
37<br />
GETTING STARTED DRIVING CONTROLS COMFORT MEDIA CENTER NAVIGATION<br />
CONVENIENCE
38<br />
Receiving a Phone Call<br />
■ There are no voice commands for receiving<br />
or ending a phone call.<br />
■ To accept the call, push the switch on the<br />
steering wheel or select the “Answer” key<br />
on the display. To reject the call, touch the<br />
“Reject Call” key. To hang-up, push the<br />
switch or select the “Hang-Up” key.<br />
■ Pushing the switch during a connected<br />
phone call will allow you to send digits and<br />
special characters. After speaking the<br />
desired digits, press the ENTER button to<br />
send the recognized information.<br />
Voice Command Usage – Navigation System<br />
Programming a Destination – Street Address<br />
1 Press the TALK button on the steering<br />
wheel. The system will respond, “Would<br />
you like to access Phone, Navigation,<br />
Information, Audio or Help?” and the<br />
vehicle’s Information Display Screen will<br />
change to a list of available commands to<br />
speak.<br />
2 After the tone, say “Navigation.” The<br />
system will respond, “Please say Home,<br />
Address, Places, Address Book or Previous<br />
Destinations.”<br />
3 After the tone, say “Address.”<br />
4 The system will prompt you for additional<br />
information, such as the name of the state,<br />
city, street, and house number. Follow the<br />
prompts to complete the desired operation.<br />
Notes:<br />
■ To improve accuracy of street names, say the entire street name including Boulevard, Way, North, South, Road, etc.<br />
■ If you do not know the house number when asked, say “No House Number,” and the system will route you to a<br />
default location on the street.<br />
■ If a list of choices appears, please say the number from the displayed list.
Alternate Command Mode<br />
For advanced operation, you can change to an<br />
Alternate Command Mode that expands the available<br />
list of commands. When this mode is active,<br />
all the Phone, Navigation, Information, Audio and<br />
Help commands can also be spoken after pushing<br />
the switch without first having to say the type of<br />
command (e.g., Phone).<br />
To Turn ON Alternate Command Mode:<br />
1 Press the SETTING button.<br />
2 Select the “Others” Key.<br />
3 Select the “Voice Recognition” Key.<br />
4 Select the “Alternate Command Mode” Key.<br />
convenience<br />
When the Alternate Command Mode is ON, perform the Speaker Adaptation procedure to train<br />
the system to your voice. Refer to the <strong>2010</strong> INFINITI Navigation System <strong>Owner</strong>’s Manual for<br />
detailed information on Speaker Adaptation and use of the Alternate Command Mode.<br />
Automatic Drive Positioner Memory System –<br />
Driver’s Seat, Steering & Outside Mirrors<br />
(if so equipped)<br />
When programmed, the Automatic Drive Positioner can<br />
adjust the driver’s seat, steering column and outside mirrors<br />
to two memorized positions.<br />
To Set Customized Seat, Steering and Mirror Position Memory:<br />
1 Push the ignition switch to ON mode. Keep the transmission in P (PARK).<br />
2 Adjust the seat, steering wheel and outside mirrors to the desired positions.<br />
3 Press the SET button. The indicator lights on both Memory buttons 1 and 2 will illuminate.<br />
4 Within 5 seconds, press Memory button 1 or 2 and hold down for at least 1 second.<br />
The indicator light on the Memory button you select will illuminate for approximately<br />
5 seconds. Seat/steering/mirror memory is now set to your preference.<br />
5 Link the seat/steering/mirror memory to your INFINITI Intelligent Key.<br />
While the indicator light on the Memory button is illuminated (see step 4, above),<br />
press the UNLOCK button on your Intelligent Key. The indicator light on the Memory<br />
button chosen will blink ON and OFF approximately ten times. The memory is now<br />
matched to the Intelligent Key. You may set the second seat/steering/mirror memory<br />
positions to your other Intelligent Key by repeating the steps above.<br />
Note: After step 5 is performed one time to link the seat/steering/mirror memory to your Intelligent Key, you DO NOT<br />
need to perform this step again if new seat/steering/mirror memory positions are saved in the future. New memory<br />
positions are automatically linked to your Intelligent Key after step 5 is performed one time.<br />
39<br />
GETTING STARTED DRIVING CONTROLS COMFORT MEDIA CENTER NAVIGATION<br />
CONVENIENCE
40<br />
Entry/Exit Function<br />
With the transmission in the P (PARK) position, the Memory system can automatically<br />
move the driver’s seat BACKWARD and the steering wheel UP to make entering and exiting<br />
the vehicle easier (Entry/Exit function).<br />
To Turn ON/OFF Entry/Exit functions<br />
1 With the ignition switch in ON mode, press ENTER.<br />
2 Select Comfort & Conv.<br />
To turn ON/OFF the Entry/Exit functions individually, highlight Lift Steering Wheel on Exit<br />
or Slide Driver’s Seat Back on Exit, then press ENTER.<br />
To Cancel or Activate Entry/Exit function<br />
With the shift lever in the P (PARK) position and the ignition switch in the LOCK (OFF)<br />
mode, hold the SET button down for more than 10 seconds. The indicator light on the<br />
Memory buttons will blink twice to indicate ON, and once to indicate OFF.<br />
Seat Synchronization Function<br />
When the driver’s seat is moved to a new position, the steering column and outside<br />
mirrors can be set to automatically adjust or “synchronize,” along with the seat position.<br />
Notes:<br />
■ Synchronization of the steering column and mirrors is set to OFF as the DEFAULT position in your vehicle at time<br />
of delivery.<br />
■ If the outside mirrors or the steering wheel reaches its operating limit of range, seat synchronization will suspend<br />
operation. Operation can be restored by driving or by pressing the Memory button (if programmed).<br />
To Turn ON or OFF Seat Synchronization: Hold the SET button down for more than 10<br />
seconds with the ignition switch in LOCK (OFF) mode. The indicator light on the Memory<br />
buttons will blink twice to indicate ON and once to indicate OFF.<br />
To Turn OFF Seat Synchronization Functions Using the Information Display Screen:<br />
1 Push the ignition switch to ON mode.<br />
2 Put the shift lever in the P (PARK) position.<br />
3 Press the SETTING button.<br />
4 Highlight Comfort & Conv. and then press ENTER.<br />
5 Highlight Lift Steering Wheel On Exit and turn OFF, the indicator will not illuminate<br />
when the feature is turned OFF. Then press ENTER.<br />
6 Highlight Slide Driver’s Seat Back On Exit, then turn it OFF. Then press ENTER.<br />
Opening the Fuel-Filler Door<br />
1 Unlock the doors with the INFINITI Intelligent Key, the Door<br />
Handle Request switch, Power Door Lock switch or the<br />
Mechanical Key.<br />
2 Push in on the left-hand side of the fuel-filler door to open.<br />
Note: You MUST use one of the methods noted above in step 1 to unlock the fuel-filler<br />
door. If the driver or front-passenger uses the inside door lock knob to unlock and exit the<br />
vehicle, the fuel-filler door will remain LOCKED and will not open.
Opening/Closing the Lift Gate<br />
1 Push the UNLOCK button on the INFINITI<br />
Intelligent Key once and the driver’s door and<br />
fuel-filler door will unlock.<br />
2 Push the UNLOCK button on the Intelligent<br />
Key again within 60 seconds and all doors,<br />
including the lift gate, will unlock.<br />
convenience<br />
■ To open the lift gate, press the Lift Gate<br />
Request switch. Then press the Opener<br />
switch (located under the lift gate finisher above the rear license plate) and pull<br />
up to open the lift gate.<br />
■ To close, lower and push the lift gate down securely.<br />
Lift Gate Release Lever<br />
If you cannot open the lift gate using the Lift Gate Release switch due to a discharged battery:<br />
1 Remove the cover inside the lift gate.<br />
2 Pull up on the lift gate release lever to open the lift gate.<br />
For Vehicle Valet Hand-Off<br />
1 Remove the Mechanical Key from the INFINITI<br />
Intelligent Key TM and use it to lock the glove box.<br />
2 Hand the Intelligent Key to the valet. Keep the<br />
Mechanical Key on your person.<br />
3 When you retrieve your vehicle and Intelligent Key from<br />
the valet, unlock the glove box with the Mechanical Key<br />
and reinsert the Mechanical Key into the Intelligent Key.<br />
12-Volt Power Outlet and Auxiliary Input Jacks<br />
A 12-volt power outlet is located within the center console. This outlet can be used for<br />
accessories that do not exceed a 12-volt or 120W (10A) power draw. There are also auxiliary<br />
input jacks located within the center console. NTSC compatible devices, such as: video<br />
games, camcorders and portable video players can be connected to the auxiliary jacks.<br />
The auxiliary jacks are color coded for identification purposes.<br />
■ Yellow – video input<br />
■ White – left channel audio input<br />
■ Red – right channel audio input<br />
Seat-Mounted Retractable Coat Hanger<br />
(if so equipped)<br />
The driver’s seat is equipped with a head restraint<br />
mounted retractable coat hanger. Pull the hanger out<br />
until it locks in place.<br />
41<br />
GETTING STARTED DRIVING CONTROLS COMFORT MEDIA CENTER NAVIGATION<br />
CONVENIENCE
42<br />
Sun Visor Adjustment<br />
To adjust the visor to block glare, slide the visor in or out on the mounting arm as needed.<br />
Vehicle Information Display<br />
Press the INFO button to access the following vehicle information:<br />
■ Fuel Economy<br />
■ Maintenance<br />
■ Traffic Info. (vehicles with the INFINITI Navigation system)<br />
■ Where Am I? (vehicles with the INFINITI Navigation system)<br />
■ GPS Satellite Info. (vehicles with the INFINITI Navigation system)<br />
■ Voice Recognition (vehicles with the INFINITI Navigation system)<br />
■ Navigation Version (vehicles with the INFINITI Navigation system)<br />
Welcome Lighting<br />
When this feature is activated an exterior light and the interior<br />
lights will illuminate automatically as you approach the vehicle<br />
with the INFINITI Intelligent Key TM on your person.<br />
To Turn ON/OFF the Welcome Light Function:<br />
1 Push the ignition switch to ON mode from the OFF (LOCK) mode.<br />
2 Open the driver’s door.<br />
3 Within 20 seconds of placing the ignition switch in the ON mode, press and hold down<br />
the Driver’s Door Handle Request switch for longer than 5 seconds.<br />
4 A chime will sound confirming the operation is complete.<br />
Note: The welcome light function is set to deactivate automatically if it is not operated within a duration of 14 days.<br />
Adaptive Front Lighting System (AFS)<br />
(if so equipped)<br />
As you turn LEFT or RIGHT, or drive along winding roads, the Adaptive Front Lighting system<br />
(AFS) moves your lowbeams LEFT or RIGHT, according to your vehicle’s steering pattern and<br />
speed. The lowbeams swivel to increase visibility ahead of you and on the sides of the road.<br />
Note: When the vehicle is stopped or traveling below 16 mph, the left headlight WILL NOT SWIVEL when you turn the<br />
steering wheel to the LEFT.<br />
Homelink ® Universal Transceiver<br />
(if so equipped)<br />
This feature can memorize up to three unique signals to operate remote devices<br />
such as garage door openers. Refer to your vehicle <strong>Owner</strong>’s Manual for<br />
programming information.
Important Customer Information<br />
convenience<br />
Aluminum- Alloy Wheels<br />
Your vehicle is equipped with aluminum-alloy wheels that should be cleaned regularly with<br />
a sponge dampened in a mild soap solution, especially during winter months in areas where<br />
road salt is used. Salt could discolor the wheels if not removed. To help prevent damage to<br />
your high-end aluminum-alloy wheels.<br />
■ Do not use a cleaner that uses strong acid or alkali contents to clean the wheels.<br />
■ Do not apply wheel cleaners to the wheels when they are hot. The wheel temperature<br />
should be the same as the ambient temperature.<br />
■ Rinse the wheel to completely remove the cleaner within 15 minutes of applying<br />
the cleaner.<br />
43<br />
GETTING STARTED DRIVING CONTROLS COMFORT MEDIA CENTER NAVIGATION<br />
CONVENIENCE
Memo
Memo
Printing: March <strong>2010</strong> (02) / QR0E 0J50U1 / Printed in USA<br />
All illustrations, photographs and specifications in this guide are based on the latest product<br />
information; some vehicle parts cannot be shown in certain photographs. Some vehicles are<br />
shown with optional equipment. See actual vehicles for complete accuracy. <strong>Infiniti</strong> Division of<br />
Nissan North America, Inc. reserves the right to make changes at any time, without notice, in<br />
prices, colors, materials, equipment, specifications and models, and to discontinue models or<br />
equipment. Availability and delivery time for particular models and equipment combinations<br />
may vary. For information on availability, additional options or accessories, contact your <strong>Infiniti</strong><br />
dealer. All specifications, options and accessories shown in this guide apply to the 49 continental<br />
states. Specifications, options and accessories may differ in Hawaii, U.S. territories and other<br />
countries. INFINITI, the <strong>Infiniti</strong> logo, and INFINITI model names are Nissan trademarks.